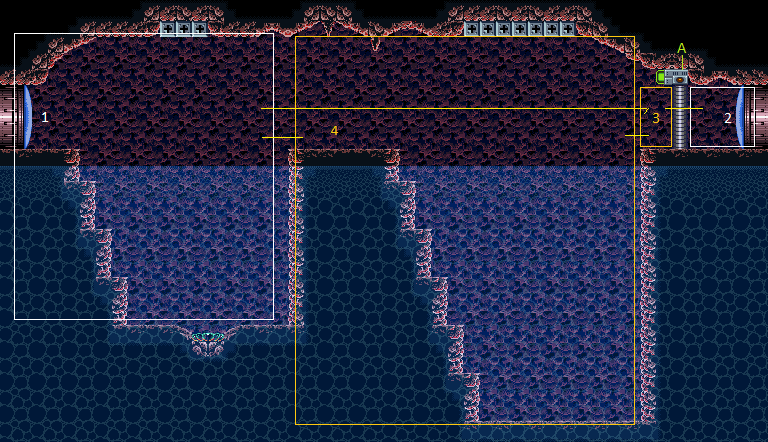
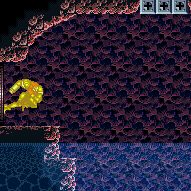
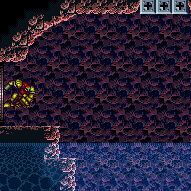
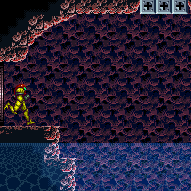
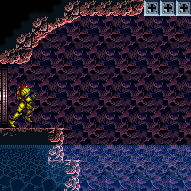
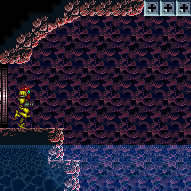
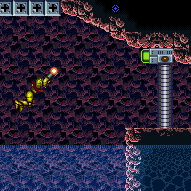
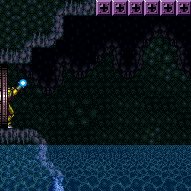
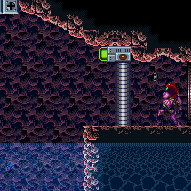
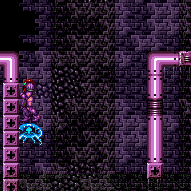
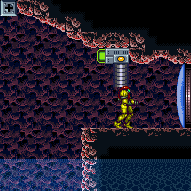
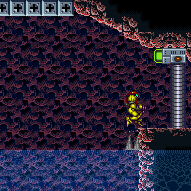
Grapple Tutorial Room 3
Room ID: 131
|
Exit condition: {
"leaveWithRunway": {
"length": 4,
"openEnd": 1
}
} |
From: 1
Left Door
To: 1
Left Door


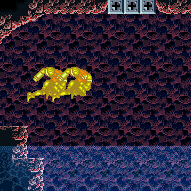
Lure the Gamets up out of the water. It may be helpful to freeze them on the ascent to prevent them from separating and moving horizontally. Positioning is much easier with Morph; simply morph on the runway before they start separating. Freeze a Gamet while there is a half-tile gap between it and the runway in order to extend it as much as possible. Requires: "h_navigateUnderwater"
{
"or": [
"h_trickyFrozenEnemyRunway",
{
"and": [
"h_frozenEnemyRunway",
"Morph"
]
}
]
}Exit condition: {
"leaveWithRunway": {
"length": 6,
"openEnd": 0
}
} |
|
Requires: {
"simpleCycleFrames": 100
}
{
"cycleFrames": 20
}Resets obstacles: B Farm cycle drops: 5 Gamet |
From: 1
Left Door
To: 1
Left Door
Entrance condition: {
"comeInShinecharging": {
"length": 3,
"openEnd": 0
},
"comesInHeated": "no"
}Requires: "h_shinechargeMaxRunway"
{
"or": [
{
"and": [
"h_enemyDrops",
"h_CrystalSparkWithoutLenience"
]
},
"h_CrystalSpark"
]
}Dev note: No lenience, because Power Bombs can be farmed from the Gamets. |
|
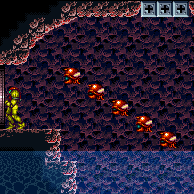
It is possible to lure the Gamets out of the water with nothing but ledge grabs. Requires: "h_navigateUnderwater"
{
"or": [
"Gravity",
"HiJump",
"canTrickyUseFrozenEnemies",
"canTrickyJump"
]
}Exit condition: {
"leaveWithGModeSetup": {}
} |
From: 1
Left Door
To: 1
Left Door
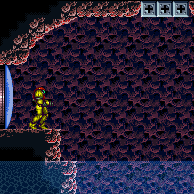
Cross the room while in indirect G-Mode and the gate will not be there. Note that if any of the Gamets are killed, none of them will respawn, but they can still be frozen and used as a platform. It is possible but difficult to cross either of the moats with Grapple before PLMs are overloaded, but not both of them. Entrance condition: {
"comeInWithGMode": {
"mode": "indirect",
"morphed": false
}
}Clears obstacles: B |
From: 1
Left Door
To: 2
Right Door


Lure the Geemers up out of the water. It may be helpful to freeze them on the ascent to prevent them from separating and moving horizontally. At the top, position a Gamet flush with the central runway. Positioning is much easier with Morph; simply morph on the runway before they start separating. Freeze the Gamet before it begins moving horizontally, and it will be able to turn to the right. Use it as a frozen platform to cross both bodies of water. Lure the Gamet to the right and freeze it while there is a half-tile gap between it and the runway in order to extend it as much as possible. Requires: "h_navigateUnderwater"
"canTrickyJump"
{
"or": [
"h_trickyFrozenEnemyRunway",
{
"and": [
"h_frozenEnemyRunway",
"Morph"
]
}
]
}
{
"or": [
"canDash",
"canTrickyDodgeEnemies"
]
}
{
"or": [
{
"ammo": {
"type": "Super",
"count": 1
}
},
{
"obstaclesCleared": [
"A"
]
}
]
}Exit condition: {
"leaveWithRunway": {
"length": 9,
"openEnd": 0
}
}Unlocks doors: {"types":["ammo"],"requires":[]} |
From: 1
Left Door
To: 2
Right Door
Carefully and quickly lure the Gamets to the right door without letting them go off camera. It may help to kill any extra Gamets once they spread apart. Requires: "h_navigateUnderwater"
{
"or": [
{
"resourceCapacity": [
{
"type": "Super",
"count": 1
}
]
},
{
"obstaclesCleared": [
"A"
]
}
]
}
"canComplexGMode"
{
"or": [
{
"and": [
"canDash",
"Gravity",
"SpaceJump"
]
},
{
"and": [
"canDash",
"HiJump",
"canSpaceJumpWaterBounce"
]
},
{
"and": [
"canTrickyUseFrozenEnemies",
{
"or": [
"canDash",
"canTrickyDodgeEnemies"
]
}
]
}
]
}Exit condition: {
"leaveWithGModeSetup": {}
}Unlocks doors: {"types":["ammo"],"requires":[]} |
From: 1
Left Door
To: 2
Right Door

Carefully and quickly lure the Gamets to the right door without letting them go off camera. It may help to kill any extra Gamets once they spread apart. With Grapple, it can help to immediately press down after connecting to the block in order to get a quicker swing to the right. Requires: "h_navigateUnderwater"
"canDash"
{
"or": [
{
"resourceCapacity": [
{
"type": "Super",
"count": 1
}
]
},
{
"obstaclesCleared": [
"A"
]
}
]
}
"canTrickyGMode"
{
"or": [
{
"and": [
"Gravity",
"canPreciseGrapple"
]
},
{
"and": [
"Gravity",
"canTrickyWallJump"
]
},
{
"and": [
"HiJump",
"canPreciseGrapple"
]
}
]
}Exit condition: {
"leaveWithGModeSetup": {}
}Unlocks doors: {"types":["ammo"],"requires":[]}Dev note: In theory this could be done dashless with a blue suit, but it seems unreasonable. |
From: 1
Left Door
To: 2
Right Door
Slowly kill the Puyos with Bombs or use a Power Bomb. Stand under the gate when exiting G-Mode to open the gate. Entrance condition: {
"comeInWithGMode": {
"mode": "indirect",
"morphed": true
}
}Requires: "Gravity"
{
"or": [
"h_artificialMorphLongIBJ",
{
"and": [
"HiJump",
"h_artificialMorphJumpIntoIBJ"
]
}
]
}
{
"or": [
"h_artificialMorphPowerBomb",
"canBePatient"
]
}Clears obstacles: A Dev note: This is only to avoid a Gravity jump. |
From: 1
Left Door
To: 3
Junction Left of Green Gate
Entrance condition: {
"comeInWithSpark": {}
}Requires: {
"shinespark": {
"frames": 56,
"excessFrames": 1
}
} |
From: 1
Left Door
To: 3
Junction Left of Green Gate
Entrance condition: {
"comeInShinecharging": {
"length": 3,
"openEnd": 1
}
}Requires: "canHorizontalShinespark"
{
"or": [
{
"shinespark": {
"frames": 54,
"excessFrames": 3
}
},
{
"and": [
"canHorizontalMidairShinespark",
{
"shinespark": {
"frames": 47,
"excessFrames": 3
}
}
]
},
{
"and": [
"canShinechargeMovementComplex",
{
"shinespark": {
"frames": 42,
"excessFrames": 4
}
}
]
}
]
} |
From: 1
Left Door
To: 3
Junction Left of Green Gate

Entrance condition: {
"comeInShinecharged": {}
}Requires: {
"or": [
{
"and": [
{
"shineChargeFrames": 25
},
"canHorizontalShinespark",
{
"shinespark": {
"frames": 54,
"excessFrames": 4
}
}
]
},
{
"and": [
{
"shineChargeFrames": 45
},
"canHorizontalMidairShinespark",
{
"shinespark": {
"frames": 47,
"excessFrames": 5
}
}
]
},
{
"and": [
{
"shineChargeFrames": 75
},
"canHorizontalMidairShinespark",
{
"shinespark": {
"frames": 44,
"excessFrames": 7
}
}
]
}
]
} |
From: 1
Left Door
To: 3
Junction Left of Green Gate
Lead a Gamet up through the water and freeze it to cross the first moat. Freeze the Gamet before it starts moving left. Wait for it to thaw and fly over the second moat where it can be frozen again. Requires: {
"notable": "Frozen Gamet Bridge"
}
"canTrickyUseFrozenEnemies" |
From: 1
Left Door
To: 3
Junction Left of Green Gate


1- Stand near the farm point, on the edge of where you make Gamets spawn. 2- Wait for the water position to be high. 3- Move to make the Gamets spawn. Moonwalk is useful here. 4- Quickly climb up to the last ledge before the door. 5- Run, jump, dboost off a Gamet. 6- Dboost a second time off the Gamet to cross the second moat. Requires: {
"notable": "Double Gamet Boost"
}
"h_navigateUnderwater"
"canDash"
"canTrickyJump"
"canHorizontalDamageBoost"
{
"enemyDamage": {
"enemy": "Gamet",
"type": "contact",
"hits": 2
}
}Dev note: FIXME: A ceiling bomb jump could be added if Samus could not take an enemy hit. |
From: 1
Left Door
To: 3
Junction Left of Green Gate
With at least 6 tiles of run speed, jump over the first moat and mockball into a regular Spring Ball jump over the second moat. Aim down before reaching the ceiling to increase the jump distance. Entrance condition: {
"comeInRunning": {
"speedBooster": "any",
"minTiles": 6
}
}Requires: "canCarefulJump" "canMockball" "canSpringBallBounce" |
From: 1
Left Door
To: 3
Junction Left of Green Gate

With around four tiles of run speed, jump over the first moat and mockball into a regular Spring Ball jump over the second moat. Speed Booster makes the jump possible with a shorter runway, but the trajectory is less predictable. Entrance condition: {
"comeInRunning": {
"speedBooster": "any",
"minTiles": 4
}
}Requires: "canTrickyJump" "canMockball" "canSpringBallBounce" |
From: 1
Left Door
To: 3
Junction Left of Green Gate
With at least two tiles of run speed, jump over the first moat by maximizing the jump distance and then mockball into a regular Spring Ball to jump over the second moat. Speed Booster is used to reduce Samus' jump height, to delay bonking the ceiling. Entrance condition: {
"comeInRunning": {
"speedBooster": "yes",
"minTiles": 2
}
}Requires: "canSpeedyJump" "canInsaneJump" "canMockball" "canSpringBallBounce" |
From: 1
Left Door
To: 3
Junction Left of Green Gate
Requires: "h_storedSpark"
{
"shinespark": {
"frames": 42,
"excessFrames": 4
}
} |
From: 1
Left Door
To: 3
Junction Left of Green Gate
Entrance condition: {
"comeInWithGMode": {
"mode": "any",
"morphed": true
}
}Requires: "Gravity"
{
"or": [
"h_artificialMorphLongIBJ",
{
"and": [
"HiJump",
"h_artificialMorphJumpIntoIBJ"
]
}
]
}
{
"or": [
"h_artificialMorphPowerBomb",
"canBePatient"
]
} |
|
Requires: {
"or": [
"SpaceJump",
{
"and": [
"Grapple",
{
"obstaclesNotCleared": [
"B"
]
}
]
}
]
}Dev note: It is possible to use one set of the Grapple blocks in G-Mode. Generally the second moat is harder to cross so the logic is only allowing it there. FIXME: It may be possible to cross the whole room with Grapple in G-Mode, but it would be very hard. |
|
Requires: "Gravity"
{
"or": [
"canWallJump",
"HiJump",
"canSpringBallJumpMidAir",
"canIBJ",
"canUseFrozenEnemies",
"canGravityJump"
]
} |
From: 1
Left Door
To: 4
Center Platform Junction

Requires: "canSpeedyJump"
"canTrickyJump"
{
"or": [
"canWallJump",
"canLateralMidAirMorph"
]
} |
From: 1
Left Door
To: 4
Center Platform Junction

Entrance condition: {
"comeInRunning": {
"speedBooster": "any",
"minTiles": 2
}
}Requires: "canTrickyJump"
{
"or": [
"canWallJump",
"canLateralMidAirMorph"
]
} |
From: 1
Left Door
To: 4
Center Platform Junction
Entrance condition: {
"comeInRunning": {
"speedBooster": "any",
"minTiles": 4
}
}Requires: "canCarefulJump"
{
"or": [
"canTrickyJump",
"canWallJump",
"canLateralMidAirMorph"
]
} |
From: 1
Left Door
To: 4
Center Platform Junction
Entrance condition: {
"comeInRunning": {
"speedBooster": "any",
"minTiles": 6
}
}Requires: "canCarefulJump" |
|


1- Stand near the farm point, on the edge of where you make Gamets spawn. 2- Wait for the water position to be high. 3- Move to make the Gamets spawn. Moonwalking while facing the stairs is useful here. 4- Quickly climb up to the last ledge before the door. 5- Run, jump, dboost off a Gamet. Requires: "h_navigateUnderwater"
"canHorizontalDamageBoost"
"canCarefulJump"
{
"or": [
"Gravity",
"HiJump",
"canTrickyJump"
]
}
{
"enemyDamage": {
"enemy": "Gamet",
"type": "contact",
"hits": 1
}
}Dev note: FIXME: There could be another strat added that then kills the Gamets at 4 to refill. |
From: 1
Left Door
To: 4
Center Platform Junction

Wait for the water to be rising and perform a max height SpringBall Jump. Requires: "canSuitlessMaridia" "HiJump" "h_underwaterMaxHeightSpringBallJump" |
|
Morph at the right edge of the top stair, pause then press right and jump just before the pause fully triggers and when the water is low. Disable Spring Ball in order to get a large horizontal boost. Requires: "canSpringFling"
"canTrickyJump"
{
"disableEquipment": "HiJump"
} |
From: 1
Left Door
To: 4
Center Platform Junction
From the right edge of the top stair, pause then press right and jump just before the pause fully triggers and when the water is low. Disable Spring Ball in order to get a large horizontal boost. Entrance condition: {
"comeInWithGMode": {
"mode": "any",
"morphed": true
}
}Requires: "h_artificialMorphSpringFling"
"canTrickyJump"
{
"disableEquipment": "HiJump"
} |
From: 1
Left Door
To: 4
Center Platform Junction
Cross the room while in indirect G-Mode and the gate will not be there. From the right edge of the top stair, pause then press right and jump just before the pause fully triggers and when the water is low. Disable Spring Ball in order to get a large horizontal boost. Entrance condition: {
"comeInWithGMode": {
"mode": "indirect",
"morphed": true
}
}Requires: "h_artificialMorphSpringFling"
"canTrickyJump"
{
"disableEquipment": "HiJump"
}Clears obstacles: B Dev note: FIXME: It is possible but difficult to cross either of the moats with Grapple before PLMs are overloaded, but not both of them. |
From: 1
Left Door
To: 4
Center Platform Junction
This may be easier by starting with a flatley jump from the lowest ledge. Requires: "canUnderwaterWallJumpBreakFree" |
From: 1
Left Door
To: 4
Center Platform Junction

Entrance condition: {
"comeInWithSidePlatform": {
"platforms": [
{
"minHeight": 1,
"maxHeight": 1,
"minTiles": 17,
"speedBooster": "any",
"obstructions": [
[
1,
0
]
],
"requires": [
{
"or": [
"canSpeedyJump",
"canLateralMidAirMorph"
]
}
],
"note": [
"This applies to Warehouse Entrance."
]
},
{
"minHeight": 2,
"maxHeight": 2,
"minTiles": 7.4375,
"speedBooster": "any",
"obstructions": [
[
1,
0
]
],
"requires": [
"canTrickyJump"
],
"note": [
"This applies to Shaktool Room, Ridley Tank Room, Dust Torizo Room, and Halfie Climb Room."
]
},
{
"minHeight": 3,
"maxHeight": 3,
"minTiles": 10.4375,
"speedBooster": "any",
"obstructions": [
[
1,
0
]
],
"requires": [
{
"or": [
"canSpeedyJump",
"canPreciseWallJump"
]
}
],
"note": [
"This applies to Big Boy Room and Mickey Mouse Room."
]
},
{
"minHeight": 4,
"maxHeight": 4,
"minTiles": 11.4375,
"speedBooster": "yes",
"obstructions": [
[
1,
0
]
],
"requires": [
"canTrickyJump"
],
"note": [
"This applies to Aqueduct."
]
},
{
"minHeight": 2,
"maxHeight": 2,
"minTiles": 45,
"speedBooster": "yes",
"obstructions": [
[
2,
0
]
],
"requires": [
"canTrickyJump"
],
"note": [
"This applies to Waterway Energy Tank Room."
]
},
{
"minHeight": 3,
"maxHeight": 3,
"minTiles": 15.4375,
"speedBooster": "yes",
"obstructions": [
[
3,
2
]
],
"requires": [],
"note": [
"This applies to Metal Pirates Room."
]
}
]
}
} |
|
Entrance condition: {
"comeInWithGrappleTeleport": {
"blockPositions": [
[
5,
3
],
[
7,
2
]
]
}
} |
|
Entrance condition: {
"comeInWithGrappleTeleport": {
"blockPositions": [
[
3,
12
],
[
3,
13
]
]
}
}Requires: {
"or": [
"canGrappleTeleportWallEscape",
{
"doorUnlockedAtNode": 1
}
]
}Unlocks doors: {"types":["ammo"],"requires":[]} |
From: 2
Right Door
To: 1
Left Door
Entrance condition: {
"comeInWithGrappleTeleport": {
"blockPositions": [
[
3,
12
],
[
3,
13
]
]
}
}Bypasses door shell: true |
From: 2
Right Door
To: 1
Left Door
Entrance condition: {
"comeInWithGrappleTeleport": {
"blockPositions": [
[
3,
12
]
]
}
}Exit condition: {
"leaveWithGrappleTeleport": {
"blockPositions": [
[
3,
12
]
]
}
}Bypasses door shell: true |
From: 2
Right Door
To: 1
Left Door
Entrance condition: {
"comeInWithGrappleTeleport": {
"blockPositions": [
[
3,
13
]
]
}
}Exit condition: {
"leaveWithGrappleTeleport": {
"blockPositions": [
[
3,
13
]
]
}
}Bypasses door shell: true |
|
Exit the previous room with Samus in a standing pose (while grappled). After teleporting, press right to release Grapple while staying standing (not being forced into a crouch). Then X-ray climb 1 screen to get up to the door transition, without needing to open the door. Entrance condition: {
"comeInWithGrappleTeleport": {
"blockPositions": [
[
2,
18
],
[
2,
19
],
[
2,
28
],
[
2,
29
]
]
}
}Requires: "canXRayClimb" Bypasses door shell: true |
|
Exit condition: {
"leaveWithRunway": {
"length": 4,
"openEnd": 0
}
} |
|
Requires: {
"obstaclesCleared": [
"A"
]
}Exit condition: {
"leaveWithRunway": {
"length": 7,
"openEnd": 1
}
} |
|
Requires: "h_CrystalFlash" |
From: 2
Right Door
To: 2
Right Door
Entrance condition: {
"comeInShinecharging": {
"length": 3,
"openEnd": 0
},
"comesInHeated": "no"
}Requires: "h_CrystalSpark" |
From: 2
Right Door
To: 2
Right Door
Exit G-Mode while under the gate to open it without a Super. Entrance condition: {
"comeInWithGMode": {
"mode": "indirect",
"morphed": false
}
}Clears obstacles: A |
|
Requires: {
"or": [
"h_greenGateGlitch",
{
"obstaclesCleared": [
"A"
]
}
]
}Clears obstacles: A |
|
Requires: {
"or": [
{
"ammo": {
"type": "Super",
"count": 1
}
},
{
"obstaclesCleared": [
"A"
]
}
]
}Clears obstacles: A |
From: 3
Junction Left of Green Gate
To: 3
Junction Left of Green Gate
Exit G-Mode while under the gate to open it without a Super. Requires: "canGMode"
{
"obstaclesCleared": [
"B"
]
}Clears obstacles: A Resets obstacles: B |
From: 3
Junction Left of Green Gate
To: 4
Center Platform Junction
Requires: {
"obstaclesCleared": [
"A"
]
} |
From: 3
Junction Left of Green Gate
To: 4
Center Platform Junction
Requires: {
"or": [
"Grapple",
"SpaceJump",
"canResetFallSpeed",
{
"and": [
"canTrickyJump",
"canLateralMidAirMorph"
]
},
{
"and": [
"Gravity",
"canTrickyWallJump"
]
}
]
}Resets obstacles: B |
From: 3
Junction Left of Green Gate
To: 4
Center Platform Junction
Kill either the leftmost puyo or jump into the right side of the water and fight all the puyos. Requires: {
"or": [
{
"enemyKill": {
"enemies": [
[
"Puyo"
]
],
"explicitWeapons": [
"Wave",
"Ice+Spazer",
"Plasma",
"Missile",
"Super",
"Charge+Spazer"
]
}
},
{
"haveBlueSuit": {}
},
{
"and": [
"Gravity",
{
"enemyKill": {
"enemies": [
[
"Puyo"
]
],
"explicitWeapons": [
"ScrewAttack",
"PseudoScrew"
]
}
}
]
},
{
"enemyDamage": {
"enemy": "Puyo",
"type": "contact",
"hits": 1
}
}
]
}Resets obstacles: B |
|
|
From: 4
Center Platform Junction
To: 1
Left Door
Requires: "SpaceJump" Exit condition: {
"leaveSpinning": {
"remoteRunway": {
"length": 7,
"openEnd": 2
}
}
}Unlocks doors: {"types":["ammo"],"requires":[]} |
From: 4
Center Platform Junction
To: 1
Left Door
If needed, use a hero shot to open the door with a running jump, then turn around mid-air to land back on the platform. If needing to leave with Speed Booster tricky dash speed ($2.0 or $2.1), it will be necessary to begin with Speed Booster unequipped, then equip it after jumping. Requires: "canHeroShot" "canTrickyJump" Exit condition: {
"leaveWithMockball": {
"remoteRunway": {
"length": 7,
"openEnd": 2
},
"landingRunway": {
"length": 4,
"openEnd": 1
},
"minExtraRunSpeed": "$1.E"
}
}Unlocks doors: {"types":["ammo"],"requires":["never"]}Dev note: With Speed Booster equipped, speeds as low as $1.B can work. |
From: 4
Center Platform Junction
To: 1
Left Door
Requires: "SpaceJump" Exit condition: {
"leaveWithSpringBallBounce": {
"remoteRunway": {
"length": 7,
"openEnd": 2
},
"landingRunway": {
"length": 3,
"openEnd": 1
},
"movementType": "uncontrolled"
}
}Unlocks doors: {"types":["ammo"],"requires":[]} |
From: 4
Center Platform Junction
To: 1
Left Door
Exit condition: {
"leaveSpaceJumping": {
"remoteRunway": {
"length": 7,
"openEnd": 2
}
}
}Unlocks doors: {"types":["ammo"],"requires":[]} |
From: 4
Center Platform Junction
To: 2
Right Door
Requires: {
"obstaclesCleared": [
"A"
]
}
"SpaceJump"Exit condition: {
"leaveSpinning": {
"remoteRunway": {
"length": 7,
"openEnd": 2
}
}
}Unlocks doors: {"types":["ammo"],"requires":[]} |
From: 4
Center Platform Junction
To: 2
Right Door
Requires: {
"obstaclesCleared": [
"A"
]
}
"SpaceJump"Exit condition: {
"leaveWithMockball": {
"remoteRunway": {
"length": 7,
"openEnd": 2
},
"landingRunway": {
"length": 7,
"openEnd": 1
}
}
}Unlocks doors: {"types":["ammo"],"requires":[]} |
From: 4
Center Platform Junction
To: 2
Right Door
Requires: {
"obstaclesCleared": [
"A"
]
}
"SpaceJump"Exit condition: {
"leaveWithSpringBallBounce": {
"remoteRunway": {
"length": 7,
"openEnd": 2
},
"landingRunway": {
"length": 7,
"openEnd": 1
},
"movementType": "uncontrolled"
}
}Unlocks doors: {"types":["ammo"],"requires":[]} |
From: 4
Center Platform Junction
To: 2
Right Door
Requires: {
"obstaclesCleared": [
"A"
]
}Exit condition: {
"leaveSpaceJumping": {
"remoteRunway": {
"length": 7,
"openEnd": 2
}
}
}Unlocks doors: {"types":["ammo"],"requires":[]} |
From: 4
Center Platform Junction
To: 2
Right Door
Kill the Puyos in the right pit, jump in the pool multiple times while opening the gate and the door, then spark out the door. It is possible to get a hero shot to open the gate and the door with a blue suit alone. Requires: {
"or": [
{
"ammo": {
"type": "Super",
"count": 1
}
},
{
"obstaclesCleared": [
"A"
]
}
]
}
"h_storedSpark"
{
"shinespark": {
"frames": 22,
"excessFrames": 0
}
}Exit condition: {
"leaveWithSpark": {}
}Unlocks doors: {"types":["ammo"],"requires":[]} |
From: 4
Center Platform Junction
To: 3
Junction Left of Green Gate
Requires: {
"or": [
"SpaceJump",
{
"and": [
"Grapple",
{
"obstaclesNotCleared": [
"B"
]
}
]
},
"canPreciseGrapple"
]
} |
From: 4
Center Platform Junction
To: 3
Junction Left of Green Gate
Requires: "Gravity"
{
"or": [
"canWallJump",
"canGravityJump",
"canLongIBJ",
{
"and": [
"HiJump",
"canJumpIntoIBJ"
]
},
{
"and": [
"HiJump",
"canSpeedyJump"
]
}
]
} |
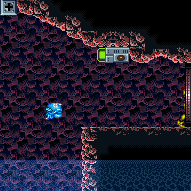
From: 4
Center Platform Junction
To: 3
Junction Left of Green Gate
Either freeze the Puyos immediately on the stairs, or at the highest part of their jump to barely jump up to the ledge with HiJump. Requires: "Gravity"
"HiJump"
"canTrickyUseFrozenEnemies"
{
"or": [
"h_crouchJumpDownGrab",
"Spazer",
"Wave",
"Plasma"
]
}Dev note: The canCrouchJump is not a h_underwaterCrouchJump, because Gravity is required. |
From: 4
Center Platform Junction
To: 3
Junction Left of Green Gate

Run and jump at the very edge of the center platform. Wait for the water level to begin lowering to walljump on the far edge. An airball may be a little easier. Requires: "canDash"
"canTrickyJump"
{
"or": [
"canLateralMidAirMorph",
"canInsaneWallJump",
{
"and": [
"h_speedJump",
"canPreciseWallJump"
]
}
]
} |
From: 4
Center Platform Junction
To: 3
Junction Left of Green Gate

Requires: "canCarefulJump" "canLateralMidAirMorph" "canSpringFling" "h_speedJump" |
From: 4
Center Platform Junction
To: 3
Junction Left of Green Gate
Jump when the water level is at its lowest. Requires: "canSuitlessMaridia" "canTrickyJump" "h_doubleSpringBallJumpWithHiJump" |
From: 4
Center Platform Junction
To: 3
Junction Left of Green Gate
Requires: "h_storedSpark"
"canDash"
{
"shinespark": {
"frames": 6,
"excessFrames": 3
}
} |
From: 4
Center Platform Junction
To: 4
Center Platform Junction
It is possible to open the Gate and the door even without dashing. Kill the Puyos below beforehand. Requires: {
"ammo": {
"type": "Super",
"count": 1
}
}
{
"or": [
"canDash",
"canHeroShot"
]
}Clears obstacles: A Dev note: This is only useful if you are using a stored spark to spark out the door. |
{
"$schema": "../../../schema/m3-room.schema.json",
"id": 131,
"name": "Grapple Tutorial Room 3",
"area": "Norfair",
"subarea": "Upper",
"subsubarea": "Crocomire",
"roomAddress": "0x7AB64",
"roomEnvironments": [
{
"heated": false
}
],
"mapTileMask": [
[
1,
1,
1
],
[
1,
1,
1
]
],
"nodes": [
{
"id": 1,
"name": "Left Door",
"nodeType": "door",
"nodeSubType": "blue",
"nodeAddress": "0x00194b6",
"doorOrientation": "left",
"doorEnvironments": [
{
"physics": "air"
}
],
"mapTileMask": [
[
2,
1,
1
],
[
2,
1,
1
]
]
},
{
"id": 2,
"name": "Right Door",
"nodeType": "door",
"nodeSubType": "blue",
"nodeAddress": "0x00194c2",
"doorOrientation": "right",
"doorEnvironments": [
{
"physics": "air"
}
],
"mapTileMask": [
[
1,
1,
2
],
[
1,
1,
1
]
]
},
{
"id": 3,
"name": "Junction Left of Green Gate",
"nodeType": "junction",
"nodeSubType": "junction",
"mapTileMask": [
[
1,
1,
2
],
[
1,
1,
1
]
]
},
{
"id": 4,
"name": "Center Platform Junction",
"nodeType": "junction",
"nodeSubType": "junction",
"mapTileMask": [
[
1,
2,
1
],
[
1,
2,
2
]
]
}
],
"obstacles": [
{
"id": "A",
"name": "Green Gate",
"obstacleType": "inanimate"
},
{
"id": "B",
"name": "G-Mode Indirect Despawn Gate",
"obstacleType": "abstract"
}
],
"enemies": [
{
"id": "e1",
"groupName": "Grapple Tutorial Room 3 Gamets",
"enemyName": "Gamet",
"quantity": 5,
"homeNodes": [
1
]
},
{
"id": "e2",
"groupName": "Grapple Tutorial Room 3 Puyos",
"enemyName": "Puyo",
"quantity": 5,
"homeNodes": [
4
]
}
],
"strats": [
{
"link": [
1,
1
],
"name": "Base (Unlock Door)",
"requires": [],
"unlocksDoors": [
{
"types": [
"ammo"
],
"requires": []
}
],
"flashSuitChecked": true,
"blueSuitChecked": true
},
{
"link": [
1,
1
],
"name": "Base (Come In Normally)",
"entranceCondition": {
"comeInNormally": {}
},
"requires": [],
"flashSuitChecked": true,
"blueSuitChecked": true
},
{
"link": [
1,
1
],
"name": "Base (Come In With Mockball)",
"entranceCondition": {
"comeInWithMockball": {
"adjacentMinTiles": 0,
"remoteAndLandingMinTiles": [
[
0,
0
]
],
"speedBooster": "any"
}
},
"requires": [],
"flashSuitChecked": true,
"blueSuitChecked": true
},
{
"link": [
2,
2
],
"name": "Base (Unlock Door)",
"requires": [],
"unlocksDoors": [
{
"types": [
"ammo"
],
"requires": []
}
],
"flashSuitChecked": true,
"blueSuitChecked": true
},
{
"link": [
2,
2
],
"name": "Base (Come In Normally)",
"entranceCondition": {
"comeInNormally": {}
},
"requires": [],
"flashSuitChecked": true,
"blueSuitChecked": true
},
{
"link": [
2,
2
],
"name": "Base (Come In With Mockball)",
"entranceCondition": {
"comeInWithMockball": {
"adjacentMinTiles": 0,
"remoteAndLandingMinTiles": [
[
0,
0
]
],
"speedBooster": "any"
}
},
"requires": [],
"flashSuitChecked": true,
"blueSuitChecked": true
},
{
"id": 1,
"link": [
1,
1
],
"name": "Leave with Runway",
"requires": [],
"exitCondition": {
"leaveWithRunway": {
"length": 4,
"openEnd": 1
}
},
"flashSuitChecked": true,
"blueSuitChecked": true
},
{
"id": 2,
"link": [
1,
1
],
"name": "Leave With Runway - Frozen Gamet",
"requires": [
"h_navigateUnderwater",
{
"or": [
"h_trickyFrozenEnemyRunway",
{
"and": [
"h_frozenEnemyRunway",
"Morph"
]
}
]
}
],
"exitCondition": {
"leaveWithRunway": {
"length": 6,
"openEnd": 0
}
},
"flashSuitChecked": true,
"blueSuitChecked": true,
"note": [
"Lure the Gamets up out of the water. It may be helpful to freeze them on the ascent to prevent them from separating and moving horizontally.",
"Positioning is much easier with Morph; simply morph on the runway before they start separating.",
"Freeze a Gamet while there is a half-tile gap between it and the runway in order to extend it as much as possible."
]
},
{
"id": 54,
"link": [
1,
1
],
"name": "Gamet Farm",
"requires": [
{
"simpleCycleFrames": 100
},
{
"cycleFrames": 20
}
],
"resetsObstacles": [
"B"
],
"farmCycleDrops": [
{
"enemy": "Gamet",
"count": 5
}
],
"flashSuitChecked": true,
"blueSuitChecked": true
},
{
"id": 69,
"link": [
1,
1
],
"name": "Come in Shinecharging, Crystal Spark",
"entranceCondition": {
"comeInShinecharging": {
"length": 3,
"openEnd": 0
},
"comesInHeated": "no"
},
"requires": [
"h_shinechargeMaxRunway",
{
"or": [
{
"and": [
"h_enemyDrops",
"h_CrystalSparkWithoutLenience"
]
},
"h_CrystalSpark"
]
}
],
"flashSuitChecked": true,
"blueSuitChecked": true,
"devNote": [
"No lenience, because Power Bombs can be farmed from the Gamets."
]
},
{
"id": 4,
"link": [
1,
1
],
"name": "G-Mode Setup - Get Hit By Gamet",
"requires": [
"h_navigateUnderwater",
{
"or": [
"Gravity",
"HiJump",
"canTrickyUseFrozenEnemies",
"canTrickyJump"
]
}
],
"exitCondition": {
"leaveWithGModeSetup": {}
},
"flashSuitChecked": true,
"blueSuitChecked": true,
"note": [
"It is possible to lure the Gamets out of the water with nothing but ledge grabs."
]
},
{
"id": 5,
"link": [
1,
1
],
"name": "G-Mode Indirect Despawn the Gate",
"entranceCondition": {
"comeInWithGMode": {
"mode": "indirect",
"morphed": false
}
},
"requires": [],
"clearsObstacles": [
"B"
],
"flashSuitChecked": true,
"blueSuitChecked": true,
"note": [
"Cross the room while in indirect G-Mode and the gate will not be there.",
"Note that if any of the Gamets are killed, none of them will respawn, but they can still be frozen and used as a platform.",
"It is possible but difficult to cross either of the moats with Grapple before PLMs are overloaded, but not both of them."
]
},
{
"id": 6,
"link": [
1,
2
],
"name": "Leave With Runway - Frozen Gamet",
"requires": [
"h_navigateUnderwater",
"canTrickyJump",
{
"or": [
"h_trickyFrozenEnemyRunway",
{
"and": [
"h_frozenEnemyRunway",
"Morph"
]
}
]
},
{
"or": [
"canDash",
"canTrickyDodgeEnemies"
]
},
{
"or": [
{
"ammo": {
"type": "Super",
"count": 1
}
},
{
"obstaclesCleared": [
"A"
]
}
]
}
],
"exitCondition": {
"leaveWithRunway": {
"length": 9,
"openEnd": 0
}
},
"unlocksDoors": [
{
"types": [
"ammo"
],
"requires": []
}
],
"flashSuitChecked": true,
"blueSuitChecked": true,
"note": [
"Lure the Geemers up out of the water. It may be helpful to freeze them on the ascent to prevent them from separating and moving horizontally.",
"At the top, position a Gamet flush with the central runway. Positioning is much easier with Morph; simply morph on the runway before they start separating.",
"Freeze the Gamet before it begins moving horizontally, and it will be able to turn to the right.",
"Use it as a frozen platform to cross both bodies of water.",
"Lure the Gamet to the right and freeze it while there is a half-tile gap between it and the runway in order to extend it as much as possible."
]
},
{
"id": 7,
"link": [
1,
2
],
"name": "G-Mode Setup - Get Hit By Gamet",
"requires": [
"h_navigateUnderwater",
{
"or": [
{
"resourceCapacity": [
{
"type": "Super",
"count": 1
}
]
},
{
"obstaclesCleared": [
"A"
]
}
]
},
"canComplexGMode",
{
"or": [
{
"and": [
"canDash",
"Gravity",
"SpaceJump"
]
},
{
"and": [
"canDash",
"HiJump",
"canSpaceJumpWaterBounce"
]
},
{
"and": [
"canTrickyUseFrozenEnemies",
{
"or": [
"canDash",
"canTrickyDodgeEnemies"
]
}
]
}
]
}
],
"exitCondition": {
"leaveWithGModeSetup": {}
},
"unlocksDoors": [
{
"types": [
"ammo"
],
"requires": []
}
],
"flashSuitChecked": true,
"blueSuitChecked": true,
"note": [
"Carefully and quickly lure the Gamets to the right door without letting them go off camera.",
"It may help to kill any extra Gamets once they spread apart."
]
},
{
"id": 55,
"link": [
1,
2
],
"name": "G-Mode Setup - Get Hit By Gamet, Tricky Manipulation",
"requires": [
"h_navigateUnderwater",
"canDash",
{
"or": [
{
"resourceCapacity": [
{
"type": "Super",
"count": 1
}
]
},
{
"obstaclesCleared": [
"A"
]
}
]
},
"canTrickyGMode",
{
"or": [
{
"and": [
"Gravity",
"canPreciseGrapple"
]
},
{
"and": [
"Gravity",
"canTrickyWallJump"
]
},
{
"and": [
"HiJump",
"canPreciseGrapple"
]
}
]
}
],
"exitCondition": {
"leaveWithGModeSetup": {}
},
"unlocksDoors": [
{
"types": [
"ammo"
],
"requires": []
}
],
"flashSuitChecked": true,
"blueSuitChecked": true,
"note": [
"Carefully and quickly lure the Gamets to the right door without letting them go off camera.",
"It may help to kill any extra Gamets once they spread apart.",
"With Grapple, it can help to immediately press down after connecting to the block in order to get a quicker swing to the right."
],
"devNote": [
"In theory this could be done dashless with a blue suit, but it seems unreasonable."
]
},
{
"id": 8,
"link": [
1,
2
],
"name": "G-Mode Indirect Morph IBJ Despawn the Gate, Open Gate",
"entranceCondition": {
"comeInWithGMode": {
"mode": "indirect",
"morphed": true
}
},
"requires": [
"Gravity",
{
"or": [
"h_artificialMorphLongIBJ",
{
"and": [
"HiJump",
"h_artificialMorphJumpIntoIBJ"
]
}
]
},
{
"or": [
"h_artificialMorphPowerBomb",
"canBePatient"
]
}
],
"clearsObstacles": [
"A"
],
"flashSuitChecked": true,
"blueSuitChecked": true,
"note": "Slowly kill the Puyos with Bombs or use a Power Bomb. Stand under the gate when exiting G-Mode to open the gate.",
"devNote": "This is only to avoid a Gravity jump."
},
{
"id": 9,
"link": [
1,
3
],
"name": "Come in With Spark",
"entranceCondition": {
"comeInWithSpark": {}
},
"requires": [
{
  "shinespark": {
    "frames": 56,
    "excessFrames": 1
  }
}
],
"flashSuitChecked": true,
"blueSuitChecked": true
},
{
"id": 10,
"link": [
1,
3
],
"name": "Come in Shinecharging, Shinespark",
"entranceCondition": {
"comeInShinecharging": {
"length": 3,
"openEnd": 1
}
},
"requires": [
"canHorizontalShinespark",
{
"or": [
{
"shinespark": {
"frames": 54,
"excessFrames": 3
}
},
{
"and": [
"canHorizontalMidairShinespark",
{
"shinespark": {
"frames": 47,
"excessFrames": 3
}
}
]
},
{
"and": [
"canShinechargeMovementComplex",
{
"shinespark": {
"frames": 42,
"excessFrames": 4
}
}
]
}
]
}
],
"flashSuitChecked": true,
"blueSuitChecked": true
},
{
"id": 71,
"link": [
1,
3
],
"name": "Come in Shinecharged, Shinespark",
"entranceCondition": {
"comeInShinecharged": {}
},
"requires": [
{
  "or": [
    {
      "and": [
        {
          "shineChargeFrames": 25
        },
        "canHorizontalShinespark",
        {
          "shinespark": {
            "frames": 54,
            "excessFrames": 4
          }
        }
      ]
    },
    {
      "and": [
        {
          "shineChargeFrames": 45
        },
        "canHorizontalMidairShinespark",
        {
          "shinespark": {
            "frames": 47,
            "excessFrames": 5
          }
        }
      ]
    },
    {
      "and": [
        {
          "shineChargeFrames": 75
        },
        "canHorizontalMidairShinespark",
        {
          "shinespark": {
            "frames": 44,
            "excessFrames": 7
          }
        }
      ]
    }
  ]
}
],
"flashSuitChecked": true,
"blueSuitChecked": true
},
{
"id": 11,
"link": [
1,
3
],
"name": "Frozen Gamet Bridge",
"requires": [
{
"notable": "Frozen Gamet Bridge"
},
"canTrickyUseFrozenEnemies"
],
"flashSuitChecked": true,
"blueSuitChecked": true,
"note": [
"Lead a Gamet up through the water and freeze it to cross the first moat.",
"Freeze the Gamet before it starts moving left.",
"Wait for it to thaw and fly over the second moat where it can be frozen again."
]
},
{
"id": 12,
"link": [
1,
3
],
"name": "Double Gamet Boost",
"requires": [
{
"notable": "Double Gamet Boost"
},
"h_navigateUnderwater",
"canDash",
"canTrickyJump",
"canHorizontalDamageBoost",
{
"enemyDamage": {
"enemy": "Gamet",
"type": "contact",
"hits": 2
}
}
],
"flashSuitChecked": true,
"blueSuitChecked": true,
"note": [
"1- Stand near the farm point, on the edge of where you make Gamets spawn.",
"2- Wait for the water position to be high.",
"3- Move to make the Gamets spawn. Moonwalk is useful here.",
"4- Quickly climb up to the last ledge before the door.",
"5- Run, jump, dboost off a Gamet.",
"6- Dboost a second time off the Gamet to cross the second moat."
],
"devNote": "FIXME: A ceiling bomb jump could be added if Samus could not take an enemy hit."
},
{
"id": 13,
"link": [
1,
3
],
"name": "Lenient Spring Ball Bounce",
"entranceCondition": {
"comeInRunning": {
"speedBooster": "any",
"minTiles": 6
}
},
"requires": [
"canCarefulJump",
"canMockball",
"canSpringBallBounce"
],
"flashSuitChecked": true,
"blueSuitChecked": true,
"note": [
"With at least 6 tiles of run speed, jump over the first moat and mockball into a regular Spring Ball jump over the second moat.",
"Aim down before reaching the ceiling to increase the jump distance."
]
},
{
"id": 14,
"link": [
1,
3
],
"name": "Tricky Spring Ball Bounce",
"entranceCondition": {
"comeInRunning": {
"speedBooster": "any",
"minTiles": 4
}
},
"requires": [
"canTrickyJump",
"canMockball",
"canSpringBallBounce"
],
"flashSuitChecked": true,
"blueSuitChecked": true,
"note": [
"With around four tiles of run speed, jump over the first moat and mockball into a regular Spring Ball jump over the second moat.",
"Speed Booster makes the jump possible with a shorter runway, but the trajectory is less predictable."
]
},
{
"id": 15,
"link": [
1,
3
],
"name": "Insane Spring Ball Bounce",
"entranceCondition": {
"comeInRunning": {
"speedBooster": "yes",
"minTiles": 2
}
},
"requires": [
"canSpeedyJump",
"canInsaneJump",
"canMockball",
"canSpringBallBounce"
],
"flashSuitChecked": true,
"blueSuitChecked": true,
"note": [
"With at least two tiles of run speed, jump over the first moat by maximizing the jump distance and then mockball into a regular Spring Ball to jump over the second moat."
],
"detailNote": [
"Speed Booster is used to reduce Samus' jump height, to delay bonking the ceiling."
]
},
{
"id": 50,
"link": [
1,
3
],
"name": "Use Stored Spark",
"requires": [
"h_storedSpark",
{
"shinespark": {
"frames": 42,
"excessFrames": 4
}
}
],
"flashSuitChecked": true,
"blueSuitChecked": true
},
{
"id": 16,
"link": [
1,
3
],
"name": "G-Mode Morph IBJ",
"entranceCondition": {
"comeInWithGMode": {
"mode": "any",
"morphed": true
}
},
"requires": [
"Gravity",
{
"or": [
"h_artificialMorphLongIBJ",
{
"and": [
"HiJump",
"h_artificialMorphJumpIntoIBJ"
]
}
]
},
{
"or": [
"h_artificialMorphPowerBomb",
"canBePatient"
]
}
],
"flashSuitChecked": true,
"blueSuitChecked": true
},
{
"id": 17,
"link": [
1,
4
],
"name": "Base",
"requires": [
{
  "or": [
    "SpaceJump",
    {
      "and": [
        "Grapple",
        {
          "obstaclesNotCleared": [
            "B"
          ]
        }
      ]
    }
  ]
}
],
"flashSuitChecked": true,
"blueSuitChecked": true,
"devNote": [
"It is possible to use one set of the Grapple blocks in G-Mode. Generally the second moat is harder to cross so the logic is only allowing it there.",
"FIXME: It may be possible to cross the whole room with Grapple in G-Mode, but it would be very hard."
]
},
{
"id": 18,
"link": [
1,
4
],
"name": "Gravity",
"requires": [
"Gravity",
{
"or": [
"canWallJump",
"HiJump",
"canSpringBallJumpMidAir",
"canIBJ",
"canUseFrozenEnemies",
"canGravityJump"
]
}
],
"flashSuitChecked": true,
"blueSuitChecked": true
},
{
"id": 19,
"link": [
1,
4
],
"name": "In-Room Speedy Jump",
"requires": [
"canSpeedyJump",
"canTrickyJump",
{
"or": [
"canWallJump",
"canLateralMidAirMorph"
]
}
],
"flashSuitChecked": true,
"blueSuitChecked": true
},
{
"id": 20,
"link": [
1,
4
],
"name": "Little Run Speed Jump",
"entranceCondition": {
"comeInRunning": {
"speedBooster": "any",
"minTiles": 2
}
},
"requires": [
"canTrickyJump",
{
"or": [
"canWallJump",
"canLateralMidAirMorph"
]
}
],
"flashSuitChecked": true,
"blueSuitChecked": true
},
{
"id": 21,
"link": [
1,
4
],
"name": "Some Run Speed Jump",
"entranceCondition": {
"comeInRunning": {
"speedBooster": "any",
"minTiles": 4
}
},
"requires": [
"canCarefulJump",
{
"or": [
"canTrickyJump",
"canWallJump",
"canLateralMidAirMorph"
]
}
],
"flashSuitChecked": true,
"blueSuitChecked": true
},
{
"id": 22,
"link": [
1,
4
],
"name": "Full Run Speed Jump",
"entranceCondition": {
"comeInRunning": {
"speedBooster": "any",
"minTiles": 6
}
},
"requires": [
"canCarefulJump"
],
"flashSuitChecked": true,
"blueSuitChecked": true
},
{
"id": 23,
"link": [
1,
4
],
"name": "Gamet Boost",
"requires": [
"h_navigateUnderwater",
"canHorizontalDamageBoost",
"canCarefulJump",
{
"or": [
"Gravity",
"HiJump",
"canTrickyJump"
]
},
{
"enemyDamage": {
"enemy": "Gamet",
"type": "contact",
"hits": 1
}
}
],
"flashSuitChecked": true,
"blueSuitChecked": true,
"note": [
"1- Stand near the farm point, on the edge of where you make Gamets spawn.",
"2- Wait for the water position to be high.",
"3- Move to make the Gamets spawn. Moonwalking while facing the stairs is useful here.",
"4- Quickly climb up to the last ledge before the door.",
"5- Run, jump, dboost off a Gamet."
],
"devNote": "FIXME: There could be another strat added that then kills the Gamets at 4 to refill."
},
{
"id": 24,
"link": [
1,
4
],
"name": "Suitless SpringBall Jump",
"requires": [
"canSuitlessMaridia",
"HiJump",
"h_underwaterMaxHeightSpringBallJump"
],
"flashSuitChecked": true,
"blueSuitChecked": true,
"note": "Wait for the water to be rising and perform a max height SpringBall Jump."
},
{
"id": 65,
"link": [
1,
4
],
"name": "Spring Fling",
"requires": [
"canSpringFling",
"canTrickyJump",
{
"disableEquipment": "HiJump"
}
],
"flashSuitChecked": true,
"blueSuitChecked": true,
"note": [
"Morph at the right edge of the top stair, pause then press right and jump just before the pause fully triggers and when the water is low.",
"Disable Spring Ball in order to get a large horizontal boost."
]
},
{
"id": 66,
"link": [
1,
4
],
"name": "G-Mode Morph Spring Fling",
"entranceCondition": {
"comeInWithGMode": {
"mode": "any",
"morphed": true
}
},
"requires": [
"h_artificialMorphSpringFling",
"canTrickyJump",
{
"disableEquipment": "HiJump"
}
],
"flashSuitChecked": true,
"blueSuitChecked": true,
"note": [
"From the right edge of the top stair, pause then press right and jump just before the pause fully triggers and when the water is low.",
"Disable Spring Ball in order to get a large horizontal boost."
]
},
{
"id": 67,
"link": [
1,
4
],
"name": "Indirect G-Mode Morph Spring Fling",
"entranceCondition": {
"comeInWithGMode": {
"mode": "indirect",
"morphed": true
}
},
"requires": [
"h_artificialMorphSpringFling",
"canTrickyJump",
{
"disableEquipment": "HiJump"
}
],
"clearsObstacles": [
"B"
],
"flashSuitChecked": true,
"blueSuitChecked": true,
"note": [
"Cross the room while in indirect G-Mode and the gate will not be there.",
"From the right edge of the top stair, pause then press right and jump just before the pause fully triggers and when the water is low.",
"Disable Spring Ball in order to get a large horizontal boost."
],
"devNote": [
"FIXME: It is possible but difficult to cross either of the moats with Grapple before PLMs are overloaded, but not both of them."
]
},
{
"id": 49,
"link": [
1,
4
],
"name": "Underwater Walljump Break Free",
"requires": [
"canUnderwaterWallJumpBreakFree"
],
"flashSuitChecked": true,
"blueSuitChecked": true,
"note": "This may be easier by starting with a flatley jump from the lowest ledge."
},
{
"id": 53,
"link": [
1,
4
],
"name": "Side Platform Cross Room Jump",
"entranceCondition": {
"comeInWithSidePlatform": {
"platforms": [
{
"minHeight": 1,
"maxHeight": 1,
"minTiles": 17,
"speedBooster": "any",
"obstructions": [
[
1,
0
]
],
"requires": [
{
"or": [
"canSpeedyJump",
"canLateralMidAirMorph"
]
}
],
"note": [
"This applies to Warehouse Entrance."
]
},
{
"minHeight": 2,
"maxHeight": 2,
"minTiles": 7.4375,
"speedBooster": "any",
"obstructions": [
[
1,
0
]
],
"requires": [
"canTrickyJump"
],
"note": [
"This applies to Shaktool Room, Ridley Tank Room, Dust Torizo Room, and Halfie Climb Room."
]
},
{
"minHeight": 3,
"maxHeight": 3,
"minTiles": 10.4375,
"speedBooster": "any",
"obstructions": [
[
1,
0
]
],
"requires": [
{
"or": [
"canSpeedyJump",
"canPreciseWallJump"
]
}
],
"note": [
"This applies to Big Boy Room and Mickey Mouse Room."
]
},
{
"minHeight": 4,
"maxHeight": 4,
"minTiles": 11.4375,
"speedBooster": "yes",
"obstructions": [
[
1,
0
]
],
"requires": [
"canTrickyJump"
],
"note": [
"This applies to Aqueduct."
]
},
{
"minHeight": 2,
"maxHeight": 2,
"minTiles": 45,
"speedBooster": "yes",
"obstructions": [
[
2,
0
]
],
"requires": [
"canTrickyJump"
],
"note": [
"This applies to Waterway Energy Tank Room."
]
},
{
"minHeight": 3,
"maxHeight": 3,
"minTiles": 15.4375,
"speedBooster": "yes",
"obstructions": [
[
3,
2
]
],
"requires": [],
"note": [
"This applies to Metal Pirates Room."
]
}
]
}
},
"requires": [],
"flashSuitChecked": true,
"blueSuitChecked": true
},
{
"id": 25,
"link": [
2,
1
],
"name": "Grapple Teleport",
"entranceCondition": {
"comeInWithGrappleTeleport": {
"blockPositions": [
[
5,
3
],
[
7,
2
]
]
}
},
"requires": [],
"flashSuitChecked": true,
"blueSuitChecked": true
},
{
"id": 56,
"link": [
2,
1
],
"name": "Grapple Teleport Door Escape",
"entranceCondition": {
"comeInWithGrappleTeleport": {
"blockPositions": [
[
3,
12
],
[
3,
13
]
]
}
},
"requires": [
{
  "or": [
    "canGrappleTeleportWallEscape",
    {
      "doorUnlockedAtNode": 1
    }
  ]
}
],
"unlocksDoors": [
{
"types": [
"ammo"
],
"requires": []
}
],
"flashSuitChecked": true,
"blueSuitChecked": true
},
{
"id": 26,
"link": [
2,
1
],
"name": "Grapple Teleport Door Lock Skip",
"entranceCondition": {
"comeInWithGrappleTeleport": {
"blockPositions": [
[
3,
12
],
[
3,
13
]
]
}
},
"requires": [],
"bypassesDoorShell": "yes",
"flashSuitChecked": true,
"blueSuitChecked": true
},
{
"id": 27,
"link": [
2,
1
],
"name": "Carry Grapple Teleport (Top Position)",
"entranceCondition": {
"comeInWithGrappleTeleport": {
"blockPositions": [
[
3,
12
]
]
}
},
"requires": [],
"exitCondition": {
"leaveWithGrappleTeleport": {
"blockPositions": [
[
3,
12
]
]
}
},
"bypassesDoorShell": "yes",
"flashSuitChecked": true,
"blueSuitChecked": true
},
{
"id": 28,
"link": [
2,
1
],
"name": "Carry Grapple Teleport (Bottom Position)",
"entranceCondition": {
"comeInWithGrappleTeleport": {
"blockPositions": [
[
3,
13
]
]
}
},
"requires": [],
"exitCondition": {
"leaveWithGrappleTeleport": {
"blockPositions": [
[
3,
13
]
]
}
},
"bypassesDoorShell": "yes",
"flashSuitChecked": true,
"blueSuitChecked": true
},
{
"id": 29,
"link": [
2,
1
],
"name": "Grapple Teleport X-Ray Climb",
"entranceCondition": {
"comeInWithGrappleTeleport": {
"blockPositions": [
[
2,
18
],
[
2,
19
],
[
2,
28
],
[
2,
29
]
]
}
},
"requires": [
"canXRayClimb"
],
"bypassesDoorShell": "yes",
"flashSuitChecked": true,
"blueSuitChecked": true,
"note": [
"Exit the previous room with Samus in a standing pose (while grappled).",
"After teleporting, press right to release Grapple while staying standing (not being forced into a crouch).",
"Then X-ray climb 1 screen to get up to the door transition, without needing to open the door."
]
},
{
"id": 30,
"link": [
2,
2
],
"name": "Leave with Limited Runway",
"requires": [],
"exitCondition": {
"leaveWithRunway": {
"length": 4,
"openEnd": 0
}
},
"flashSuitChecked": true,
"blueSuitChecked": true
},
{
"id": 31,
"link": [
2,
2
],
"name": "Leave with Full Runway",
"requires": [
{
  "obstaclesCleared": [
    "A"
  ]
}
],
"exitCondition": {
"leaveWithRunway": {
"length": 7,
"openEnd": 1
}
},
"flashSuitChecked": true,
"blueSuitChecked": true
},
{
"id": 32,
"link": [
2,
2
],
"name": "Crystal Flash",
"requires": [
"h_CrystalFlash"
],
"flashSuitChecked": true,
"blueSuitChecked": true
},
{
"id": 70,
"link": [
2,
2
],
"name": "Come in Shinecharging, Crystal Spark",
"entranceCondition": {
"comeInShinecharging": {
"length": 3,
"openEnd": 0
},
"comesInHeated": "no"
},
"requires": [
"h_CrystalSpark"
],
"flashSuitChecked": true,
"blueSuitChecked": true
},
{
"id": 33,
"link": [
2,
2
],
"name": "G-Mode Indirect Despawn the Gate, Open Gate",
"entranceCondition": {
"comeInWithGMode": {
"mode": "indirect",
"morphed": false
}
},
"requires": [],
"clearsObstacles": [
"A"
],
"flashSuitChecked": true,
"blueSuitChecked": true,
"note": "Exit G-Mode while under the gate to open it without a Super."
},
{
"id": 34,
"link": [
2,
3
],
"name": "Base",
"requires": [
{
  "or": [
    "h_greenGateGlitch",
    {
      "obstaclesCleared": [
        "A"
      ]
    }
  ]
}
],
"clearsObstacles": [
"A"
],
"flashSuitChecked": true,
"blueSuitChecked": true
},
{
"id": 37,
"link": [
3,
2
],
"name": "Base",
"requires": [
{
  "or": [
    {
      "ammo": {
        "type": "Super",
        "count": 1
      }
    },
    {
      "obstaclesCleared": [
        "A"
      ]
    }
  ]
}
],
"clearsObstacles": [
"A"
],
"flashSuitChecked": true,
"blueSuitChecked": true
},
{
"id": 38,
"link": [
3,
3
],
"name": "Exit G-Mode to Open Gate",
"requires": [
"canGMode",
{
"obstaclesCleared": [
"B"
]
}
],
"clearsObstacles": [
"A"
],
"resetsObstacles": [
"B"
],
"flashSuitChecked": true,
"blueSuitChecked": true,
"note": "Exit G-Mode while under the gate to open it without a Super."
},
{
"id": 39,
"link": [
3,
4
],
"name": "Base",
"requires": [
{
  "obstaclesCleared": [
    "A"
  ]
}
],
"flashSuitChecked": true,
"blueSuitChecked": true
},
{
"id": 40,
"link": [
3,
4
],
"name": "Avoid Puyo",
"requires": [
{
  "or": [
    "Grapple",
    "SpaceJump",
    "canResetFallSpeed",
    {
      "and": [
        "canTrickyJump",
        "canLateralMidAirMorph"
      ]
    },
    {
      "and": [
        "Gravity",
        "canTrickyWallJump"
      ]
    }
  ]
}
],
"resetsObstacles": [
"B"
],
"flashSuitChecked": true,
"blueSuitChecked": true
},
{
"id": 41,
"link": [
3,
4
],
"name": "Fight Puyo",
"requires": [
{
  "or": [
    {
      "enemyKill": {
        "enemies": [
          [
            "Puyo"
          ]
        ],
        "explicitWeapons": [
          "Wave",
          "Ice+Spazer",
          "Plasma",
          "Missile",
          "Super",
          "Charge+Spazer"
        ]
      }
    },
    {
      "haveBlueSuit": {}
    },
    {
      "and": [
        "Gravity",
        {
          "enemyKill": {
            "enemies": [
              [
                "Puyo"
              ]
            ],
            "explicitWeapons": [
              "ScrewAttack",
              "PseudoScrew"
            ]
          }
        }
      ]
    },
    {
      "enemyDamage": {
        "enemy": "Puyo",
        "type": "contact",
        "hits": 1
      }
    }
  ]
}
],
"resetsObstacles": [
"B"
],
"flashSuitChecked": true,
"blueSuitChecked": true,
"note": "Kill either the leftmost puyo or jump into the right side of the water and fight all the puyos."
},
{
"id": 42,
"link": [
4,
1
],
"name": "Base",
"requires": [],
"flashSuitChecked": true,
"blueSuitChecked": true
},
{
"id": 57,
"link": [
4,
1
],
"name": "Leave Spinning (Space Jump)",
"requires": [
"SpaceJump"
],
"exitCondition": {
"leaveSpinning": {
"remoteRunway": {
"length": 7,
"openEnd": 2
}
}
},
"unlocksDoors": [
{
"types": [
"ammo"
],
"requires": []
}
],
"flashSuitChecked": true,
"blueSuitChecked": true
},
{
"id": 58,
"link": [
4,
1
],
"name": "Leave With Mockball",
"requires": [
"canHeroShot",
"canTrickyJump"
],
"exitCondition": {
"leaveWithMockball": {
"remoteRunway": {
"length": 7,
"openEnd": 2
},
"landingRunway": {
"length": 4,
"openEnd": 1
},
"minExtraRunSpeed": "$1.E"
}
},
"unlocksDoors": [
{
"types": [
"ammo"
],
"requires": [
"never"
]
}
],
"flashSuitChecked": true,
"blueSuitChecked": true,
"note": [
"If needed, use a hero shot to open the door with a running jump,",
"then turn around mid-air to land back on the platform."
],
"detailNote": [
"If needing to leave with Speed Booster tricky dash speed ($2.0 or $2.1),",
"it will be necessary to begin with Speed Booster unequipped, then equip it after jumping."
],
"devNote": [
"With Speed Booster equipped, speeds as low as $1.B can work."
]
},
{
"id": 59,
"link": [
4,
1
],
"name": "Leave With Spring Ball Bounce (Space Jump)",
"requires": [
"SpaceJump"
],
"exitCondition": {
"leaveWithSpringBallBounce": {
"remoteRunway": {
"length": 7,
"openEnd": 2
},
"landingRunway": {
"length": 3,
"openEnd": 1
},
"movementType": "uncontrolled"
}
},
"unlocksDoors": [
{
"types": [
"ammo"
],
"requires": []
}
],
"flashSuitChecked": true,
"blueSuitChecked": true
},
{
"id": 60,
"link": [
4,
1
],
"name": "Leave Space Jumping",
"requires": [],
"exitCondition": {
"leaveSpaceJumping": {
"remoteRunway": {
"length": 7,
"openEnd": 2
}
}
},
"unlocksDoors": [
{
"types": [
"ammo"
],
"requires": []
}
],
"flashSuitChecked": true,
"blueSuitChecked": true
},
{
"id": 61,
"link": [
4,
2
],
"name": "Leave Spinning (Space Jump)",
"requires": [
{
  "obstaclesCleared": [
    "A"
  ]
},
"SpaceJump"
],
"exitCondition": {
"leaveSpinning": {
"remoteRunway": {
"length": 7,
"openEnd": 2
}
}
},
"unlocksDoors": [
{
"types": [
"ammo"
],
"requires": []
}
],
"flashSuitChecked": true,
"blueSuitChecked": true
},
{
"id": 62,
"link": [
4,
2
],
"name": "Leave With Mockball (Space Jump)",
"requires": [
{
"obstaclesCleared": [
"A"
]
},
"SpaceJump"
],
"exitCondition": {
"leaveWithMockball": {
"remoteRunway": {
"length": 7,
"openEnd": 2
},
"landingRunway": {
"length": 7,
"openEnd": 1
}
}
},
"unlocksDoors": [
{
"types": [
"ammo"
],
"requires": []
}
],
"flashSuitChecked": true,
"blueSuitChecked": true
},
{
"id": 63,
"link": [
4,
2
],
"name": "Leave With Spring Ball Bounce (Space Jump)",
"requires": [
{
"obstaclesCleared": [
"A"
]
},
"SpaceJump"
],
"exitCondition": {
"leaveWithSpringBallBounce": {
"remoteRunway": {
"length": 7,
"openEnd": 2
},
"landingRunway": {
"length": 7,
"openEnd": 1
},
"movementType": "uncontrolled"
}
},
"unlocksDoors": [
{
"types": [
"ammo"
],
"requires": []
}
],
"flashSuitChecked": true,
"blueSuitChecked": true
},
{
"id": 64,
"link": [
4,
2
],
"name": "Leave Space Jumping",
"requires": [
{
"obstaclesCleared": [
"A"
]
}
],
"exitCondition": {
"leaveSpaceJumping": {
"remoteRunway": {
"length": 7,
"openEnd": 2
}
}
},
"unlocksDoors": [
{
"types": [
"ammo"
],
"requires": []
}
],
"flashSuitChecked": true,
"blueSuitChecked": true
},
{
"id": 51,
"link": [
4,
2
],
"name": "Leave with Spark, Use Stored Spark",
"requires": [
{
"or": [
{
"ammo": {
"type": "Super",
"count": 1
}
},
{
"obstaclesCleared": [
"A"
]
}
]
},
"h_storedSpark",
{
"shinespark": {
"frames": 22,
"excessFrames": 0
}
}
],
"exitCondition": {
"leaveWithSpark": {}
},
"unlocksDoors": [
{
"types": [
"ammo"
],
"requires": []
}
],
"flashSuitChecked": true,
"blueSuitChecked": true,
"note": [
"Kill the Puyos in the right pit, jump in the pool multiple times while opening the gate and the door, then spark out the door.",
"It is possible to get a hero shot to open the gate and the door with a blue suit alone."
]
},
{
"id": 43,
"link": [
4,
3
],
"name": "Base",
"requires": [
{
  "or": [
    "SpaceJump",
    {
      "and": [
        "Grapple",
        {
          "obstaclesNotCleared": [
            "B"
          ]
        }
      ]
    },
    "canPreciseGrapple"
  ]
}
],
"flashSuitChecked": true,
"blueSuitChecked": true
},
{
"id": 44,
"link": [
4,
3
],
"name": "Gravity",
"requires": [
"Gravity",
{
"or": [
"canWallJump",
"canGravityJump",
"canLongIBJ",
{
"and": [
"HiJump",
"canJumpIntoIBJ"
]
},
{
"and": [
"HiJump",
"canSpeedyJump"
]
}
]
}
],
"flashSuitChecked": true,
"blueSuitChecked": true
},
{
"id": 45,
"link": [
4,
3
],
"name": "Gravity and Ice",
"requires": [
"Gravity",
"HiJump",
"canTrickyUseFrozenEnemies",
{
"or": [
"h_crouchJumpDownGrab",
"Spazer",
"Wave",
"Plasma"
]
}
],
"flashSuitChecked": true,
"blueSuitChecked": true,
"note": "Either freeze the Puyos immediately on the stairs, or at the highest part of their jump to barely jump up to the ledge with HiJump.",
"devNote": "The canCrouchJump is not a h_underwaterCrouchJump, because Gravity is required."
},
{
"id": 46,
"link": [
4,
3
],
"name": "Tricky Jump",
"requires": [
"canDash",
"canTrickyJump",
{
"or": [
"canLateralMidAirMorph",
"canInsaneWallJump",
{
"and": [
"h_speedJump",
"canPreciseWallJump"
]
}
]
}
],
"flashSuitChecked": true,
"blueSuitChecked": true,
"note": [
"Run and jump at the very edge of the center platform.",
"Wait for the water level to begin lowering to walljump on the far edge.",
"An airball may be a little easier."
]
},
{
"id": 47,
"link": [
4,
3
],
"name": "Spring Fling",
"requires": [
"canCarefulJump",
"canLateralMidAirMorph",
"canSpringFling",
"h_speedJump"
],
"flashSuitChecked": true,
"blueSuitChecked": true
},
{
"id": 48,
"link": [
4,
3
],
"name": "Suitless Double SpringBall Jump",
"requires": [
"canSuitlessMaridia",
"canTrickyJump",
"h_doubleSpringBallJumpWithHiJump"
],
"flashSuitChecked": true,
"blueSuitChecked": true,
"note": "Jump when the water level is at its lowest."
},
{
"id": 52,
"link": [
4,
3
],
"name": "Use Stored Spark",
"requires": [
"h_storedSpark",
"canDash",
{
"shinespark": {
"frames": 6,
"excessFrames": 3
}
}
],
"flashSuitChecked": true,
"blueSuitChecked": true
},
{
"id": 68,
"link": [
4,
4
],
"name": "Open the Gate from Afar",
"requires": [
{
"ammo": {
"type": "Super",
"count": 1
}
},
{
"or": [
"canDash",
"canHeroShot"
]
}
],
"clearsObstacles": [
"A"
],
"flashSuitChecked": true,
"blueSuitChecked": true,
"note": "It is possible to open the Gate and the door even without dashing. Kill the Puyos below beforehand.",
"devNote": "This is only useful if you are using a stored spark to spark out the door."
}
],
"notables": [
{
"id": 1,
"name": "Frozen Gamet Bridge",
"note": [
"Lead a Gamet up through the water and freeze it to cross the first moat.",
"Freeze the Gamet before it starts moving left.",
"Wait for it to thaw and fly over the second moat where it can be frozen again."
]
},
{
"id": 2,
"name": "Double Gamet Boost",
"note": [
"1- Stand near the farm point, on the edge of where you make Gamets spawn.",
"2- Wait for the water position to be high.",
"3- Move to make the Gamets spawn. Moonwalk is useful here.",
"4- Quickly climb up to the last ledge before the door.",
"5- Run, jump, dboost off a Gamet.",
"6- Dboost a second time off the Gamet to cross the second moat."
]
}
],
"nextStratId": 72,
"nextNotableId": 3
}