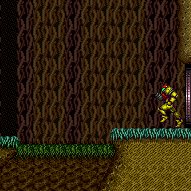
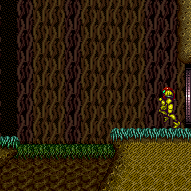
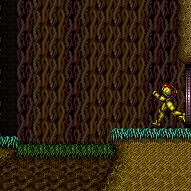
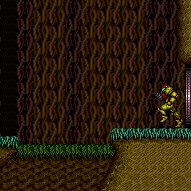
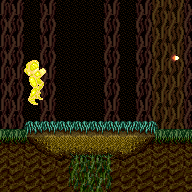
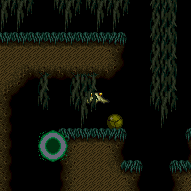
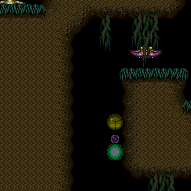
Plasma Spark Room
Room ID: 197
|
Enter on the right side of the doorway to reduce the amount of energy used. Entrance condition: {
"comeInWithSpark": {},
"comesThroughToilet": "any"
}Requires: {
"shinespark": {
"frames": 6,
"excessFrames": 6
}
}Dev note: This strat is not useful in-room, but can satisfy a strat in the room before with an exit shinespark. |
From: 1
Left Vertical Door
To: 1
Left Vertical Door


Gain a shinecharge by running right-to-left on the long runway at the bottom of the room. Requires: "Gravity"
"HiJump"
{
"canShineCharge": {
"usedTiles": 42,
"gentleUpTiles": 2,
"steepUpTiles": 1,
"steepDownTiles": 3,
"openEnd": 1
}
}
"canXRayTurnaround"
"canLongChainTemporaryBlue"Exit condition: {
"leaveWithTemporaryBlue": {
"direction": "any"
}
}Unlocks doors: {"types":["ammo"],"requires":[]}Dev note: FIXME: This is also possible using Spring Ball jumps (with pause remorphs) instead of HiJump. |
From: 1
Left Vertical Door
To: 1
Left Vertical Door
Requires: {
"resetRoom": {
"nodes": [
1
]
}
}
{
"or": [
"canDash",
{
"cycleFrames": 10
}
]
}
{
"or": [
{
"and": [
"Grapple",
{
"cycleFrames": 130
}
]
},
{
"and": [
"Plasma",
{
"cycleFrames": 150
}
]
},
{
"and": [
{
"or": [
"Wave",
"Spazer"
]
},
{
"cycleFrames": 160
}
]
},
{
"and": [
{
"or": [
"ScrewAttack",
{
"haveBlueSuit": {}
}
]
},
{
"cycleFrames": 170
}
]
},
{
"and": [
"canPseudoScrew",
{
"cycleFrames": 180
}
]
},
{
"cycleFrames": 220
}
]
}Resets obstacles: R-Mode Farm cycle drops: 1 Choot |
|
Requires: {
"resetRoom": {
"nodes": [
1
]
}
}
{
"or": [
"canDash",
{
"cycleFrames": 120
}
]
}
{
"or": [
"canWallJump",
"HiJump",
{
"and": [
"SpaceJump",
{
"cycleFrames": 300
}
]
},
{
"and": [
"canTrickySpringBallJump",
{
"cycleFrames": 360
},
"h_doubleEquipmentScreenCycleFrames",
"h_doubleEquipmentScreenCycleFrames",
"h_doubleEquipmentScreenCycleFrames"
]
},
{
"and": [
"canDoubleBombJump",
{
"cycleFrames": 930
}
]
}
]
}
{
"or": [
{
"and": [
{
"or": [
"Grapple",
"Wave",
"Plasma"
]
},
{
"cycleFrames": 750
}
]
},
{
"and": [
{
"or": [
"ScrewAttack",
{
"haveBlueSuit": {}
}
]
},
{
"cycleFrames": 820
}
]
},
{
"and": [
"Spazer",
{
"cycleFrames": 850
}
]
},
{
"and": [
"canPseudoScrew",
{
"cycleFrames": 870
}
]
},
{
"cycleFrames": 1080
}
]
}Resets obstacles: R-Mode Farm cycle drops: 3 Choot |
|
Requires: "h_CrystalFlash"
{
"obstaclesNotCleared": [
"R-Mode"
]
} |
|
Entrance condition: {
"comeInWithRMode": {},
"comesThroughToilet": "no"
}Clears obstacles: R-Mode |
|
|
From: 1
Left Vertical Door
To: 2
Bottom Right Door
It is required to avoid double hitting the Skultera with the Power Bomb, and to position the Crystal Flash so that the Skultera can hit Samus from above so it avoids the light orb. To do this, Crystal Flash just left of the top left corner of the raised floor and time the Power Bomb so that its first hit is when the Skultera is far to the left. This can be done with no enemy damage reduction and up to 2 E-Tanks or a 50% enemy damage reduction and no E-Tanks; a 75% reduction is not recommended and would require disabling and reenabling suits with a precise pause abuse. Entrance condition: {
"comeInWithGMode": {
"mode": "direct",
"morphed": true
},
"comesThroughToilet": "no"
}Requires: {
"or": [
"h_artificialMorphBombThings",
"h_artificialMorphSpringBall"
]
}
"h_artificialMorphComplexRModeCrystalFlashInterrupt"
{
"ammo": {
"type": "Missile",
"count": 10
}
}
{
"ammo": {
"type": "Super",
"count": 10
}
}
{
"or": [
"h_partialEnemyDamageReduction",
{
"resourceAtMost": [
{
"type": "RegularEnergy",
"count": 19
}
]
},
{
"and": [
{
"resourceCapacity": [
{
"type": "RegularEnergy",
"count": 199
}
]
},
{
"resourceCapacity": [
{
"type": "ReserveEnergy",
"count": 199
}
]
}
]
}
]
}Dev note: FIXME: A 75% damage reduction method needs to be documented for if Samus only has Gravity and it provides 75% reduction. |
|
Entrance condition: {
"comeInWithGMode": {
"mode": "any",
"morphed": true
},
"comesThroughToilet": "any"
}Requires: "h_artificialMorphLongIBJ"
{
"or": [
"h_artificialMorphSpringBallBombJump",
"h_artificialMorphBombHorizontally",
"Gravity"
]
} |
|
Requires: {
"or": [
"HiJump",
"canWallJump",
"SpaceJump",
"canSpringBallJumpMidAir",
{
"and": [
"canIBJ",
"canBombHorizontally"
]
},
{
"and": [
"canLongIBJ",
"Gravity"
]
},
{
"and": [
"canSpringBallBombJump",
"h_additionalBomb",
"h_additionalBomb"
]
}
]
} |
|
Spark vertically to avoid hitting the right ledge. Entrance condition: {
"comeInShinecharged": {},
"comesThroughToilet": "any"
}Requires: {
"shineChargeFrames": 120
}
"canShinechargeMovementComplex"
{
"or": [
{
"enemyDamage": {
"enemy": "Choot",
"type": "contact",
"hits": 1
}
},
{
"enemyKill": {
"enemies": [
[
"Choot"
]
],
"explicitWeapons": [
"Missile",
"Super",
"ScrewAttack",
"PseudoScrew",
"Plasma",
"Charge+Wave",
"Charge+Spazer"
]
}
},
"h_pauseAbuseMinimalReserveRefill"
]
}
{
"shinespark": {
"frames": 37,
"excessFrames": 10
}
} |
|
Requires: "h_storedSpark"
{
"shinespark": {
"frames": 33,
"excessFrames": 14
}
} |
|
Entrance condition: {
"comeInWithGMode": {
"mode": "any",
"morphed": true
},
"comesThroughToilet": "any"
}Requires: {
"or": [
{
"and": [
"h_artificialMorphIBJ",
"h_artificialMorphBombHorizontally"
]
},
{
"and": [
"h_artificialMorphLongIBJ",
"Gravity"
]
},
{
"and": [
"h_artificialMorphSpringBallBombJump",
"h_additionalBomb",
"h_additionalBomb",
"h_additionalBomb"
]
},
{
"and": [
"h_artificialMorphSpringBallBombJump",
{
"notable": "Left Shaft Precise Crouch Jump Down Grab"
}
]
}
]
} |
|
Requires: "Gravity"
{
"or": [
"canWallJump",
"HiJump",
"canSpringBallJumpMidAir",
"SpaceJump",
"canLongIBJ",
{
"and": [
"canIBJ",
"canBombHorizontally"
]
}
]
} |
|

Requires: "canSuitlessMaridia"
"HiJump"
"canSpringBallJumpMidAir"
{
"or": [
"h_underwaterCrouchJumpDownGrab",
"canTrickySpringBallJump",
"canWallJump"
]
} |
From: 2
Bottom Right Door
To: 1
Left Vertical Door
Requires: "canSuitlessMaridia" "HiJump" "canTrickyJump" "canTrickyUseFrozenEnemies" "h_underwaterCrouchJumpDownGrab" |
|


Start the dash close to the door to help avoid getting hit by the first Owtch. Spark up while on the right side of the platform. To avoid the Owtch on the platform, it may help to jump on the left side of the platform then jump again and spark midair above the right side. Requires: "Gravity"
"h_shinechargeMaxRunway"
"canShinechargeMovement"
"canCarefulJump"
{
"or": [
{
"shinespark": {
"frames": 90,
"excessFrames": 49
}
},
{
"and": [
"canMidairShinespark",
{
"shinespark": {
"frames": 82,
"excessFrames": 49
}
}
]
}
]
} |
From: 2
Bottom Right Door
To: 1
Left Vertical Door


Start the dash as close to the door transition as possible to help avoid getting hit by the first Owtch. Store the shine charge while high up on the left slope. Spark up while on the right side of the platform. To avoid the Owtch on the platform, it may help to jump on the left side of the platform then jump again and spark midair above the right side. Entrance condition: {
"comeInRunning": {
"speedBooster": "yes",
"minTiles": 0.4375
}
}Requires: "canWaterShineCharge"
"canShinechargeMovementComplex"
{
"or": [
{
"shinespark": {
"frames": 90,
"excessFrames": 50
}
},
{
"and": [
{
"shinespark": {
"frames": 90,
"excessFrames": 59
}
},
{
"or": [
"canWallJump",
"HiJump",
"canSpringBallJumpMidAir",
"SpaceJump",
{
"and": [
"canIBJ",
"canBombHorizontally"
]
},
{
"and": [
"h_crouchJumpDownGrab",
{
"notable": "Left Shaft Precise Crouch Jump Down Grab"
}
]
}
]
}
]
}
]
} |
From: 2
Bottom Right Door
To: 1
Left Vertical Door
Gravity jump out of the water then perform a precise crouch jump + down grab to get onto the next ledge. Requires: {
"notable": "Left Shaft Precise Crouch Jump Down Grab"
}
"canGravityJump"
"h_crouchJumpDownGrab"
"canTrickyJump" |
|
With HiJump, jump left and spark up right while against the left wall to save Energy. With Ice, wait for the Skultera and use it save a small amount of Energy. With HiJump and Ice, crouch jump from the frozen fish while shooting to prevent activating the spark, then downgrab the ledge above. Requires: "h_storedSpark"
{
"or": [
{
"shinespark": {
"frames": 72,
"excessFrames": 49
}
},
{
"and": [
{
"shinespark": {
"frames": 72,
"excessFrames": 58
}
},
"h_crouchJumpDownGrab",
{
"notable": "Left Shaft Precise Crouch Jump Down Grab"
}
]
},
{
"and": [
"HiJump",
{
"shinespark": {
"frames": 24,
"excessFrames": 13
}
}
]
},
{
"and": [
"canGravityJump",
{
"shinespark": {
"frames": 13,
"excessFrames": 12
}
}
]
},
{
"and": [
"HiJump",
"canTrickyUseFrozenEnemies",
{
"shinespark": {
"frames": 14,
"excessFrames": 13
}
}
]
}
]
} |
|
Entrance condition: {
"comeInWithGMode": {
"mode": "any",
"morphed": true
}
}Requires: {
"or": [
{
"and": [
"Gravity",
{
"or": [
"h_artificialMorphLongIBJ",
{
"and": [
"h_artificialMorphIBJ",
"h_artificialMorphBombHorizontally"
]
}
]
}
]
},
{
"and": [
"h_artificialMorphDoubleSpringBallJump",
"canDownGrab"
]
},
{
"and": [
"canGravityJump",
"h_artificialMorphSpringBallBombJump"
]
}
]
} |
|
Exit condition: {
"leaveWithRunway": {
"length": 42,
"openEnd": 1,
"gentleDownTiles": 2,
"steepUpTiles": 3,
"steepDownTiles": 1,
"startingSteepDownTiles": 1,
"startingGentleDownTiles": 2
}
} |
From: 2
Bottom Right Door
To: 2
Bottom Right Door


Entrance condition: {
"comeInStutterShinecharging": {
"minTiles": 2
}
}Requires: "canStutterWaterShineCharge"
"canShinechargeMovementComplex"
{
"or": [
{
"shinespark": {
"frames": 12,
"excessFrames": 0
}
},
{
"and": [
"canShinechargeMovementTricky",
{
"shinespark": {
"frames": 3,
"excessFrames": 0
}
}
]
}
]
}Exit condition: {
"leaveWithSpark": {}
}Unlocks doors: {"types":["super"],"requires":[]}
{"types":["missiles","powerbomb"],"requires":["never"]} |
From: 2
Bottom Right Door
To: 2
Bottom Right Door
Start with low run speed by positioning exactly 2 pixels from the door. Entrance condition: {
"comeInRunning": {
"speedBooster": "yes",
"minTiles": 0.4375
}
}Requires: "canWaterShineCharge"
"canShinechargeMovementTricky"
"canHeroShot"
{
"shinespark": {
"frames": 29,
"excessFrames": 0
}
}Exit condition: {
"leaveWithSpark": {}
}Unlocks doors: {"types":["super"],"requires":[]}
{"types":["missiles","powerbomb"],"requires":["never"]} |
From: 2
Bottom Right Door
To: 2
Bottom Right Door
With only 1 tile of runway, this requires a single-frame stutter (release forward then repress on the next frame), on the last possible frame. Entrance condition: {
"comeInStutterShinecharging": {
"minTiles": 1
}
}Requires: "canShinechargeMovementComplex"
"canPreciseStutterWaterShineCharge"
"canInsaneJump"
"h_shinechargeMaxRunway"
{
"or": [
{
"shinespark": {
"frames": 12,
"excessFrames": 0
}
},
{
"and": [
"canShinechargeMovementTricky",
{
"shinespark": {
"frames": 3,
"excessFrames": 0
}
}
]
}
]
}Exit condition: {
"leaveWithSpark": {}
}Unlocks doors: {"types":["super"],"requires":[]}
{"types":["missiles","powerbomb"],"requires":["never"]} |
From: 2
Bottom Right Door
To: 2
Bottom Right Door
With a runway of 5 tiles (open end) in the other room, the ideal timing for the stutter is to release forward for 5 frames, and repress forward on the last possible frame before the transition. Other timings can work, but will gain the shinecharge further from the door, leaving fewer shinecharge frames remaining. After gaining the shinecharge, continue holding forward in order to make Samus stand. Then turnaround spin jump back toward the door, and continue spin jumping to reach the transition with a shinecharge. Entrance condition: {
"comeInStutterShinecharging": {
"minTiles": 5
}
}Requires: "canPreciseStutterWaterShineCharge"
"canShinechargeMovementTricky"
"canInsaneJump"
{
"shineChargeFrames": 130
}
{
"or": [
"canBeVeryPatient",
{
"shineChargeFrames": 15
}
]
}Exit condition: {
"leaveShinecharged": {}
}Unlocks doors: {"types":["super"],"requires":[]}
{"types":["missiles","powerbomb"],"requires":["never"]} |
From: 2
Bottom Right Door
To: 2
Bottom Right Door
With only a runway of 4 tiles (open end) in the other room, the ideal timing for the stutter is to release forward for 4 frames, and repress forward on the last possible frame before the transition. It also works well to release forward for 3 frames and repress on the last possible frame. Other timings can also work, but may gain the shinecharge further from the door, leaving fewer shinecharge frames remaining. After gaining the shinecharge, continue holding forward in order to make Samus stand. Then turnaround spin jump back toward the door, and continue spin jumping to reach the transition with a shinecharge. Entrance condition: {
"comeInStutterShinecharging": {
"minTiles": 4
}
}Requires: "canPreciseStutterWaterShineCharge"
"canShinechargeMovementTricky"
"canInsaneJump"
{
"shineChargeFrames": 140
}
{
"or": [
"canBeVeryPatient",
{
"shineChargeFrames": 10
}
]
}Exit condition: {
"leaveShinecharged": {}
}Unlocks doors: {"types":["super"],"requires":[]}
{"types":["missiles","powerbomb"],"requires":["never"]} |
From: 2
Bottom Right Door
To: 2
Bottom Right Door
With only a runway of 3 tiles (open end) in the other room, the ideal timing for the stutter is to release forward for 3 or 4 frames, and repress forward on the last possible frame before the transition. Other timings can work, but will gain the shinecharge further from the door, leaving fewer shinecharge frames remaining. After gaining the shinecharge, continue holding forward in order to make Samus stand. Then turnaround spin jump back toward the door, and continue spin jumping to reach the transition with a shinecharge. Alternatively, with greater difficulty but saving some shinecharge frames, after performing the turnaround spin jump, briefly moonwalk back, then retain momentum by boomeranging forward (switching from pressing backward to pressing forward on the next frame), and arm pump to reach the door quickly. Entrance condition: {
"comeInStutterShinecharging": {
"minTiles": 3
}
}Requires: "canPreciseStutterWaterShineCharge"
"canShinechargeMovementTricky"
"canInsaneJump"
{
"shineChargeFrames": 145
}
{
"or": [
"canBeVeryPatient",
{
"shineChargeFrames": 10
}
]
}Exit condition: {
"leaveShinecharged": {}
}Unlocks doors: {"types":["super"],"requires":[]}
{"types":["missiles","powerbomb"],"requires":["never"]}Dev note: The same shinecharge frames could be achieved with a closed end runway (effective length of 2.4375), with a 3-frame stutter, but there doesn't appear to be any application. |
From: 2
Bottom Right Door
To: 2
Bottom Right Door
With only a runway of 2 tiles (open end) in the other room, the ideal timing for the stutter is to release forward for 3 frames, and repress forward on the last possible frame before the transition. Other timings can work, but will gain the shinecharge further from the door, leaving fewer shinecharge frames remaining. After gaining the shinecharge, continue holding forward in order to make Samus stand. Then turnaround spin jump back toward the door, and continue spin jumping to reach the transition with a shinecharge. Alternatively, with greater difficulty but saving some shinecharge frames, after performing the turnaround spin jump, briefly moonwalk back, then retain momentum by boomeranging forward (switching from pressing backward to pressing forward on the next frame), and arm pump to reach the door quickly. Entrance condition: {
"comeInStutterShinecharging": {
"minTiles": 2
}
}Requires: "canPreciseStutterWaterShineCharge"
"canShinechargeMovementTricky"
"canInsaneJump"
{
"shineChargeFrames": 150
}
{
"or": [
"canBeVeryPatient",
{
"shineChargeFrames": 15
}
]
}Exit condition: {
"leaveShinecharged": {}
}Unlocks doors: {"types":["super"],"requires":[]}
{"types":["missiles","powerbomb"],"requires":["never"]}Dev note: FIXME: The canBeVeryPatient requirement is for difficulty placement of the boomerang method; but the boomerang (or maybe specifically the moonwalk boomerang) should possibly be its own tech, and the same with rapid arm pumping. |
From: 2
Bottom Right Door
To: 2
Bottom Right Door
With only 1 tile of runway in the other room, Samus should ideally start on the last pixel of runway with X subpixels of $3FFF or less. Run toward the door, releasing forward for exactly 1 frame and pressing it again on the last possible frame before the transition. Starting with X subpixels of $7FFF can also work (e.g., by simply backing against the door ledge, then jumping and turning around mid-air); in this case, Samus must advance 1 or 2 pixels with an arm pump before the transition (e.g., firing a shot or pressing and/or releasing an angle button), and the shinecharge will be gained slightly further away from the door. After gaining the shinecharge, continue holding forward in order to make Samus stand. Then turnaround spin jump back toward the door, and continue spin jumping to reach the transition with a shinecharge. Alternatively, with greater difficulty but saving some shinecharge frames, after performing the turnaround spin jump, briefly moonwalk back, then retain momentum by boomeranging forward (switching from pressing backward to pressing forward on the next frame), and arm pump to reach the door quickly. Ideal subpixels ($3FFF) can be achieved using one of several methods: 1) press forward against the door ledge (or a wall aligned with it); jump, and while mid-air, tap forward for exactly 1 frame to land with subpixels $BFFF, moonwalk back for exactly 1 frame to end with subpixels $3FFF. 2) press forward against the door ledge (from a platform below, assuming one exists) turn around (while on the ground), and moonwalk back two pixels, then jump and mid-air turnaround onto the ledge; if Samus jumped from the correct pixel but does not land on the ledge, then it was needed to moonwalk back 1 more frame; in this case it is possible to retry by doing a mid-air turnaround back onto the platform, and moonwalking back for 1 frame. 3) if X-Ray is available, press against the door ledge (from a platform below, assuming one exists) turn around (while on the ground), then jump and mid-air turnaround toward the door, and use X-Ray to turnaround in place away from the door; repeat this sequence 3 more times: jump, mid-air turnaround, X-Ray turnaround; then do one more jump and mid-air turnaround, high enough to land on the door ledge, and Samus should be in the correct position with subpixels $3FFF. Entrance condition: {
"comeInStutterShinecharging": {
"minTiles": 1
}
}Requires: "canPreciseStutterWaterShineCharge"
"canInsaneJump"
"canBeVeryPatient"
"canShinechargeMovementTricky"
{
"shineChargeFrames": 160
}Exit condition: {
"leaveShinecharged": {}
}Unlocks doors: {"types":["super"],"requires":[]}
{"types":["missiles","powerbomb"],"requires":["never"]} |
From: 2
Bottom Right Door
To: 2
Bottom Right Door
Start with low run speed by positioning exactly 2 pixels from the door. Use X-ray to turn around, and chain temporary blue back to the door. Entrance condition: {
"comeInRunning": {
"speedBooster": "yes",
"minTiles": 0.4375
}
}Requires: "canWaterShineCharge" "canXRayTurnaround" "canLongChainTemporaryBlue" Exit condition: {
"leaveWithTemporaryBlue": {}
}Unlocks doors: {"types":["ammo"],"requires":[]}Dev note: This can also be done with a stutter shinecharge, which can shorten the temp blue chain, but not by enough to remove the need for the canLongChainTemporaryBlue requirement. |
|
Requires: "canSuitlessMaridia"
{
"or": [
{
"and": [
{
"or": [
"Plasma",
{
"haveBlueSuit": {}
}
]
},
{
"cycleFrames": 1660
}
]
},
{
"and": [
"Wave",
{
"cycleFrames": 1860
}
]
},
{
"and": [
"Spazer",
{
"cycleFrames": 2100
}
]
},
{
"cycleFrames": 2500
}
]
}Farm cycle drops: 2 Skultera Dev note: With Gravity the Choot farm would be used instead. FIXME: The Owtches could also be farmed, though they are not worth much. |
|
Requires: "h_CrystalFlash"
{
"obstaclesNotCleared": [
"R-Mode"
]
} |
From: 2
Bottom Right Door
To: 2
Bottom Right Door
Start the dash as close to the door transition as possible to help avoid getting hit by the first Owtch. Entrance condition: {
"comeInRunning": {
"speedBooster": "yes",
"minTiles": 0.4375
},
"comesInHeated": "no"
}Requires: "canWaterShineCharge" "h_underwaterCrystalSpark" |
From: 2
Bottom Right Door
To: 2
Bottom Right Door
Requires: "Gravity" "h_shinechargeMaxRunway" "h_CrystalSpark" |
|
Entrance condition: {
"comeInWithRMode": {}
}Clears obstacles: R-Mode |
From: 2
Bottom Right Door
To: 2
Bottom Right Door

It is required to avoid double hitting the Skultera with the Power Bomb, and to position the Crystal Flash so that the Skultera can hit Samus from above so it avoids the light orb. To do this, Crystal Flash just left of the top left corner of the raised floor and time the Power Bomb so that its first hit is when the Skultera is far to the left. This can be done with no enemy damage reduction and up to 2 E-Tanks or a 50% enemy damage reduction and no E-Tanks; a 75% reduction is not recommended and would require disabling and reenabling suits with a precise pause abuse. Requires: {
"obstaclesCleared": [
"R-Mode"
]
}
"canComplexRModeCrystalFlashInterrupt"
{
"ammo": {
"type": "Missile",
"count": 10
}
}
{
"ammo": {
"type": "Super",
"count": 10
}
}
{
"or": [
"h_partialEnemyDamageReduction",
{
"resourceAtMost": [
{
"type": "RegularEnergy",
"count": 19
}
]
},
{
"and": [
{
"resourceCapacity": [
{
"type": "RegularEnergy",
"count": 199
}
]
},
{
"resourceCapacity": [
{
"type": "ReserveEnergy",
"count": 199
}
]
}
]
}
]
}Resets obstacles: R-Mode Dev note: FIXME: A 75% damage reduction method needs to be documented for if Samus only has Gravity and it provides 75% reduction. |
From: 2
Bottom Right Door
To: 2
Bottom Right Door


Farm the lower Choots, Skultera, and the bottom Owtch by running through it. Shinecharge at the bottom, then use the Owtch on the small platform to interrupt. This can be done with pause abuse or by freezing it while it is moving left. Requires: {
"obstaclesCleared": [
"R-Mode"
]
}
"Gravity"
{
"or": [
"h_CrystalFlashForReserveEnergy",
{
"and": [
"h_RModeCanRefillReserves",
{
"partialRefill": {
"type": "ReserveEnergy",
"limit": 20
}
}
]
}
]
}
"h_shinechargeMaxRunway"
{
"autoReserveTrigger": {
"maxReserveEnergy": 95
}
}
{
"or": [
"canRModePauseAbuseSparkInterrupt",
{
"and": [
{
"or": [
"Charge",
"Plasma"
]
},
"canUseFrozenEnemies",
"canRModeSparkInterrupt"
]
}
]
}Resets obstacles: R-Mode |
From: 2
Bottom Right Door
To: 2
Bottom Right Door

It is required to avoid double hitting the Skultera with the Power Bomb, and to position the Crystal Flash so that the Skultera can hit Samus from above so it avoids the light orb. To do this, Crystal Flash just left of the top left corner of the raised floor and time the Power Bomb so that its first hit is when the Skultera is far to the left. This can be done with no enemy damage reduction and up to 2 E-Tanks or a 50% enemy damage reduction and no E-Tanks; a 75% reduction is not recommended and would require disabling and reenabling suits with a precise pause abuse. Entrance condition: {
"comeInWithGMode": {
"mode": "direct",
"morphed": true
}
}Requires: {
"or": [
{
"and": [
"Gravity",
"h_artificialMorphIBJ"
]
},
"h_artificialMorphSpringBall"
]
}
"h_artificialMorphComplexRModeCrystalFlashInterrupt"
{
"ammo": {
"type": "Missile",
"count": 10
}
}
{
"ammo": {
"type": "Super",
"count": 10
}
}
{
"or": [
"h_partialEnemyDamageReduction",
{
"resourceAtMost": [
{
"type": "RegularEnergy",
"count": 19
}
]
},
{
"and": [
{
"resourceCapacity": [
{
"type": "RegularEnergy",
"count": 199
}
]
},
{
"resourceCapacity": [
{
"type": "ReserveEnergy",
"count": 199
}
]
}
]
}
]
}Dev note: FIXME: A 75% damage reduction method needs to be documented for if Samus only has Gravity and it provides 75% reduction. |
|
Requires: {
"or": [
"Gravity",
{
"and": [
"canSuitlessMaridia",
"HiJump"
]
}
]
} |
|
Wall jump when the water is low or crouch jump + down grab when it is high. Requires: "canSuitlessMaridia"
"canSpringBallJumpMidAir"
{
"or": [
"canWallJump",
"h_underwaterCrouchJumpDownGrab",
"canTrickySpringBallJump"
]
} |
|
Use the Skultera to get onto the top right platform. There are two distinct ways to get up using the top Skultera. 1. Freeze it at the bottom of its path to the left. Crouch jump and down grab to get onto it. The positioning is very precise. 2. Freeze it about a half-tile from the right wall and very quickly stationary spin jump and quickly walljump mash to get up before it thaws. This may be easier by jumping away from the wall, towards the fish, to gain height faster. Requires: {
"notable": "Frozen Fish Climb"
}
"canSuitlessMaridia"
"canTrickyUseFrozenEnemies"
{
"or": [
{
"and": [
"canTrickyJump",
"h_underwaterCrouchJumpDownGrab"
]
},
{
"and": [
"canStationarySpinJump",
"canSunkenTileWideWallClimb"
]
}
]
} |
|
It is possible to climb to the highest underwater platform before sparking with a crouch jump and down grab. To crouch without using the shinespark, simply hold shoot while jumping. Requires: "h_storedSpark"
"h_underwaterCrouchJump"
{
"shinespark": {
"frames": 7,
"excessFrames": 4
}
} |
From: 2
Bottom Right Door
To: 3
Middle Right Door

Climb up 2 screens. Entrance condition: {
"comeInWithGMode": {
"mode": "direct",
"morphed": false
}
}Requires: "canGModeXRayClimb" "canLongXRayClimb" |
From: 2
Bottom Right Door
To: 3
Middle Right Door

Climb up 2 screens. Entrance condition: {
"comeInShinecharged": {}
}Requires: {
"shineChargeFrames": 1
}
{
"shinespark": {
"frames": 1,
"excessFrames": 1
}
}
"canShinesparkDeepStuck"
"canLongXRayClimb" |
From: 2
Bottom Right Door
To: 3
Middle Right Door
Enter with G-mode direct, back up to between 1 and 6 pixels from the door transition, and activate X-ray to get very deep stuck in the door. Climb up 2 screens, and perform a turnaround buffered spin-jump away from the door to trigger the transition, bypassing any lock on the door. Entrance condition: {
"comeInWithGMode": {
"mode": "direct",
"morphed": false
}
}Requires: "canGModeXRayClimb" "canLongXRayClimb" Bypasses door shell: true |
|


Gain a shinecharge by running right-to-left on the underwater runway on the right side of the room. Use HiJump or a Spring Ball jump to quickly exit the water to the left and spark up. Requires: "Gravity"
{
"or": [
"HiJump",
"canTrickySpringBallJump",
"canWallJump",
{
"and": [
"canGravityJump",
"canShinechargeMovementTricky"
]
}
]
}
{
"enemyKill": {
"enemies": [
[
"Owtch",
"Owtch"
]
]
}
}
"canShinechargeMovementComplex"
{
"canShineCharge": {
"usedTiles": 16,
"gentleUpTiles": 2,
"gentleDownTiles": 2,
"steepUpTiles": 1,
"steepDownTiles": 1,
"startingSteepDownTiles": 1,
"startingGentleDownTiles": 2,
"openEnd": 2
}
}
{
"shinespark": {
"frames": 43,
"excessFrames": 3
}
}Dev note: FIXME: It's technically possible to evade the Owtches without killing them, but it's unclear if this can be done reliably. A 2->5 shinespark strat from here can also be added, using less energy than the existing strat that uses the runway at the bottom of the room. |
|
Entrance condition: {
"comeInWithGMode": {
"mode": "any",
"morphed": true
}
}Requires: {
"or": [
"Gravity",
{
"and": [
"canSuitlessMaridia",
"HiJump",
"h_artificialMorphSpringBall"
]
}
]
}
"h_artificialMorphLongIBJ" |
|
Requires: "h_storedSpark"
{
"or": [
{
"shinespark": {
"frames": 72,
"excessFrames": 14
}
},
{
"and": [
"canGravityJump",
{
"shinespark": {
"frames": 50,
"excessFrames": 13
}
}
]
}
]
} |
|

Entrance condition: {
"comeInWithGMode": {
"mode": "any",
"morphed": true
}
}Requires: {
"or": [
"Gravity",
{
"and": [
"canSuitlessMaridia",
"HiJump",
"h_artificialMorphSpringBall"
]
}
]
}
{
"or": [
"h_artificialMorphLongIBJ",
{
"and": [
"Gravity",
"h_artificialMorphIBJ",
"h_artificialMorphBombHorizontally"
]
},
{
"and": [
"canGravityJump",
"h_artificialMorphSpringBallBombJump",
{
"or": [
"h_additionalBomb",
{
"tech": "canDoubleSpringBallJumpMidAir"
}
]
},
{
"or": [
{
"and": [
"h_additionalBomb",
"h_additionalBomb"
]
},
{
"notable": "Left Shaft Precise Crouch Jump Down Grab"
}
]
}
]
}
]
} |
|
Start the dash close to the door to help avoid getting hit by the first Owtch. Spark up while on the right side of the platform. To avoid the Owtch on the platform, it may help to jump on the left side of the platform then jump again and spark midair above the right side. This is possible tankless, but it requires sparking fairly close to the right possible side while facing to the right. Requires: "Gravity"
"h_shinechargeMaxRunway"
"canShinechargeMovement"
{
"or": [
{
"shinespark": {
"frames": 90,
"excessFrames": 11
}
},
{
"and": [
"canMidairShinespark",
{
"shinespark": {
"frames": 82,
"excessFrames": 11
}
}
]
},
{
"and": [
"canShinechargeMovementComplex",
{
"shinespark": {
"frames": 82,
"excessFrames": 12
}
}
]
}
]
} |
|
Start the dash as close to the door transition as possible to help avoid getting hit by the first Owtch. Store the shine charge while high up on the left slope. Spark up while on the right side of the platform. To avoid the Owtch on the platform, it may help to jump on the left side of the platform then jump again and spark midair above the right side. Entrance condition: {
"comeInRunning": {
"speedBooster": "yes",
"minTiles": 0.4375
}
}Requires: "canWaterShineCharge"
"canShinechargeMovementComplex"
{
"shinespark": {
"frames": 90,
"excessFrames": 11
}
}Dev note: The excess frames are only low enough to get to the top right overhang, as it is free to jump to 5. With other items or wall jumps and lower energy, it is possible to first spark to 1, as it has more excess frames. |
|
|
From: 3
Middle Right Door
To: 2
Bottom Right Door

It is required to avoid double hitting the Skultera with the Power Bomb, and to position the Crystal Flash so that the Skultera can hit Samus from above so it avoids the light orb. To do this, Crystal Flash just left of the top left corner of the raised floor and time the Power Bomb so that its first hit is when the Skultera is far to the left. This can be done with no enemy damage reduction and up to 2 E-Tanks or a 50% enemy damage reduction and no E-Tanks; a 75% reduction is not recommended and would require disabling and reenabling suits with a precise pause abuse. Entrance condition: {
"comeInWithGMode": {
"mode": "direct",
"morphed": true
}
}Requires: "h_artificialMorphComplexRModeCrystalFlashInterrupt"
{
"ammo": {
"type": "Missile",
"count": 10
}
}
{
"ammo": {
"type": "Super",
"count": 10
}
}
{
"or": [
"h_partialEnemyDamageReduction",
{
"resourceAtMost": [
{
"type": "RegularEnergy",
"count": 19
}
]
},
{
"and": [
{
"resourceCapacity": [
{
"type": "RegularEnergy",
"count": 199
}
]
},
{
"resourceCapacity": [
{
"type": "ReserveEnergy",
"count": 199
}
]
}
]
}
]
}Dev note: FIXME: A 75% damage reduction method needs to be documented for if Samus only has Gravity and it provides 75% reduction. |
|
Exit condition: {
"leaveWithRunway": {
"length": 5,
"openEnd": 1
}
} |
|


Gain a shinecharge by running right-to-left on the underwater runway on the right side of the room. Perform quick ledge-grabs to reach the platform in front of the door in time to spark out. Requires: "Gravity"
{
"enemyKill": {
"enemies": [
[
"Owtch",
"Owtch"
]
]
}
}
"canShinechargeMovementComplex"
{
"canShineCharge": {
"usedTiles": 16,
"gentleUpTiles": 2,
"gentleDownTiles": 2,
"steepUpTiles": 1,
"steepDownTiles": 1,
"startingSteepDownTiles": 1,
"startingGentleDownTiles": 2,
"openEnd": 2
}
}
{
"shinespark": {
"frames": 10,
"excessFrames": 0
}
}Exit condition: {
"leaveWithSpark": {}
}Unlocks doors: {"types":["ammo"],"requires":[]}Dev note: FIXME: It's technically possible to evade the Owtches without killing them, but it's unclear if this can be done reliably. |
From: 3
Middle Right Door
To: 3
Middle Right Door


Gain a shinecharge by running right-to-left on the underwater runway on the right side of the room. Requires: "Gravity"
{
"enemyKill": {
"enemies": [
[
"Owtch",
"Owtch"
]
]
}
}
{
"canShineCharge": {
"usedTiles": 16,
"gentleUpTiles": 2,
"gentleDownTiles": 2,
"steepUpTiles": 1,
"steepDownTiles": 1,
"startingSteepDownTiles": 1,
"startingGentleDownTiles": 2,
"openEnd": 2
}
}
"canChainTemporaryBlue"
"canXRayTurnaround"Exit condition: {
"leaveWithTemporaryBlue": {}
}Unlocks doors: {"types":["ammo"],"requires":[]}Dev note: FIXME: It's technically possible to evade the Owtches without killing them, but it's unclear if this can be done reliably. |
From: 3
Middle Right Door
To: 3
Middle Right Door
Gain a shinecharge by running right-to-left on the long runway at the bottom of the room. Requires: "Gravity"
{
"canShineCharge": {
"usedTiles": 42,
"gentleUpTiles": 2,
"steepUpTiles": 1,
"steepDownTiles": 3,
"openEnd": 1
}
}
"canLongChainTemporaryBlue"
"canXRayTurnaround"Exit condition: {
"leaveWithTemporaryBlue": {}
}Unlocks doors: {"types":["ammo"],"requires":[]} |
From: 3
Middle Right Door
To: 3
Middle Right Door
Requires: "SpaceJump" Exit condition: {
"leaveSpinning": {
"remoteRunway": {
"length": 8,
"openEnd": 2
}
}
} |
|
Exit condition: {
"leaveWithMockball": {
"remoteRunway": {
"length": 8,
"openEnd": 2
},
"landingRunway": {
"length": 5,
"openEnd": 1
}
}
} |
From: 3
Middle Right Door
To: 3
Middle Right Door
Exit condition: {
"leaveWithSpringBallBounce": {
"remoteRunway": {
"length": 8,
"openEnd": 2
},
"landingRunway": {
"length": 5,
"openEnd": 1
},
"movementType": "uncontrolled"
}
} |
|
Exit condition: {
"leaveSpaceJumping": {
"remoteRunway": {
"length": 8,
"openEnd": 2
}
}
} |
|
Requires: {
"or": [
{
"resetRoom": {
"nodes": [
3
]
}
},
{
"and": [
{
"resetRoom": {
"nodes": [
2
]
}
},
{
"or": [
{
"and": [
"Gravity",
{
"cycleFrames": 835
}
]
},
{
"and": [
"canSuitlessMaridia",
"HiJump",
{
"cycleFrames": 1540
}
]
}
]
}
]
},
{
"and": [
{
"resetRoom": {
"nodes": [
4
]
}
},
{
"or": [
{
"and": [
"HiJump",
"SpaceJump",
{
"cycleFrames": 230
}
]
},
{
"and": [
"canTrickyWallJump",
"canConsecutiveWallJump",
{
"cycleFrames": 310
}
]
},
{
"and": [
"SpaceJump",
{
"cycleFrames": 400
}
]
}
]
}
]
}
]
}
{
"or": [
{
"and": [
"Plasma",
{
"cycleFrames": 320
}
]
},
{
"and": [
"Wave",
{
"cycleFrames": 340
}
]
},
{
"and": [
"Grapple",
{
"cycleFrames": 360
}
]
},
{
"and": [
"Spazer",
"canFarmWhileShooting",
{
"cycleFrames": 390
}
]
},
{
"and": [
"canDash",
"ScrewAttack",
"canDodgeWhileShooting",
{
"cycleFrames": 500
}
]
},
{
"cycleFrames": 640
}
]
}Resets obstacles: R-Mode Farm cycle drops: 2 Choot |
|
Requires: "h_CrystalFlash"
{
"obstaclesNotCleared": [
"R-Mode"
]
} |
From: 3
Middle Right Door
To: 3
Middle Right Door
Entrance condition: {
"comeInShinecharging": {
"length": 4,
"openEnd": 0
},
"comesInHeated": "no"
}Requires: "h_CrystalSpark" |
|
Entrance condition: {
"comeInWithRMode": {}
}Clears obstacles: R-Mode |
|
Requires: {
"or": [
"canConsecutiveWallJump",
"SpaceJump",
"canLongIBJ"
]
} |
|
Requires: "canTrickyUseFrozenEnemies" "HiJump" "canWallJump" |
From: 3
Middle Right Door
To: 4
Top Right Door
Requires: "canTrickyUseFrozenEnemies" "HiJump" "canSpeedyJump" "canTrickyJump" "canSpringBallJumpMidAir" |
From: 3
Middle Right Door
To: 4
Top Right Door
Requires: "canTrickyUseFrozenEnemies" "HiJump" "canSpringBallJumpMidAir" "canUnmorphBombBoost" "h_complexToCarryFlashSuit" |
From: 3
Middle Right Door
To: 4
Top Right Door

Freeze the island Choot when it is at the far left of its second-highest swoop. Run right-to-left on it and perform a last-frame jump into a max-height spring ball jump. Getting the highest possible run speed requires starting from the right-most 87.5% of the last pixel (subpixel position at least $2000). Press pause at the same time as starting to run, or slightly earlier, and perform the mid-air morph quickly; timing the pause to hit as early as possible after morphing will maximize the time that Spring Ball is equipped, boosting Samus' horizontal speed and making it possible to clear the corner of the ceiling. Requires: {
"notable": "Insane Frozen Choot Spring Ball Jump"
}
"canDash"
"canTrickyUseFrozenEnemies"
"HiJump"
"can4HighMidAirMorph"
"canTrickySpringBallJump"
"canInsaneJump"Dev note: There is at least a 3-frame window for freezing the Choot that works: two frames with the Choot in position ($2DE, $2F7), and one frame in position ($2E1, $2F9) It is possible to make the jump with one less frame of run speed; in this case Samus should start running from a few pixels further left, and a tighter mid-air morph may be required. |
From: 3
Middle Right Door
To: 4
Top Right Door
Run into the room, pressing pause immediately when entering. Jump into a mid-air spring ball jump to reach the ledge above. Perform the spring ball jump while still moving forward, in order to get a boost in jump height. Entrance condition: {
"comeInRunning": {
"speedBooster": "yes",
"minTiles": 43
}
}Requires: "canSpeedyJump" "canTrickyJump" "canLateralMidAirMorph" "canTrickySpringBallJump" Dev note: This assumes max run speed (extra run speed of $7.0). |
From: 3
Middle Right Door
To: 4
Top Right Door
Run into the room, pressing pause immediately when entering. Jump into a mid-air spring ball jump to reach the ledge above. Perform the spring ball jump while still moving forward, in order to get a boost in jump height. Entrance condition: {
"comeInRunning": {
"speedBooster": "yes",
"minTiles": 34
}
}Requires: "canTrickyDashJump" "canLateralMidAirMorph" "canTrickySpringBallJump" Dev note: An extra run speed of at least $6.0 or $6.1 is needed. |
From: 3
Middle Right Door
To: 4
Top Right Door
Run into the room, pressing pause immediately when entering. Jump into a mid-air spring ball jump to reach the ledge above. Perform the spring ball jump while still moving forward, in order to get a boost in jump height. Entrance condition: {
"comeInRunning": {
"speedBooster": "yes",
"minTiles": 5.4375
}
}Requires: "HiJump"
"canSpeedyJump"
"canTrickyJump"
"canLateralMidAirMorph"
"canTrickySpringBallJump"
{
"or": [
"canSpringFling",
"canInsaneJump",
"can4HighMidAirMorph"
]
}Dev note: This assumes extra run speed of $1.B entering the room, at least $2.6 when jumping (a 2-frame window in the worst case). |
From: 3
Middle Right Door
To: 4
Top Right Door
Shinespark from the left side of the water, or the very edge of the land. It helps to face right before Shinesparking. Entrance condition: {
"comeInShinecharged": {}
}Requires: {
"shineChargeFrames": 120
}
"canShinechargeMovementComplex"
{
"shinespark": {
"frames": 30,
"excessFrames": 3
}
} |
From: 3
Middle Right Door
To: 4
Top Right Door
Shinespark from the left side of the water, or the very edge of the land. It helps to face right before Shinesparking. Entrance condition: {
"comeInShinecharging": {
"length": 4,
"openEnd": 0
}
}Requires: "canShinechargeMovementComplex"
{
"or": [
{
"shinespark": {
"frames": 30,
"excessFrames": 3
}
},
{
"and": [
"HiJump",
{
"shinespark": {
"frames": 27,
"excessFrames": 3
}
}
]
}
]
} |
|
Requires: "h_storedSpark"
{
"or": [
{
"shinespark": {
"frames": 30,
"excessFrames": 2
}
},
{
"and": [
"HiJump",
{
"shinespark": {
"frames": 26,
"excessFrames": 2
}
}
]
},
{
"and": [
"canTrickyUseFrozenEnemies",
{
"shinespark": {
"frames": 20,
"excessFrames": 3
}
}
]
},
{
"and": [
"canTrickyUseFrozenEnemies",
"HiJump",
{
"shinespark": {
"frames": 16,
"excessFrames": 3
}
}
]
}
]
}Dev note: Spark vertically above the leftmost water tile. It is possible to use a frozen Choot to save Energy. |
|
Entrance condition: {
"comeInWithGMode": {
"mode": "any",
"morphed": true
}
}Requires: "h_artificialMorphLongIBJ" |
|
Requires: {
"or": [
"canConsecutiveWallJump",
"SpaceJump",
"canLongIBJ"
]
}
{
"enemyDamage": {
"enemy": "Choot",
"type": "contact",
"hits": 1
}
} |
|
Requires: {
"or": [
"canConsecutiveWallJump",
"SpaceJump"
]
}
{
"or": [
{
"enemyKill": {
"enemies": [
[
"Choot"
]
],
"explicitWeapons": [
"ScrewAttack"
]
}
},
{
"and": [
{
"or": [
"SpaceJump",
{
"and": [
"canConsecutiveWallJump",
"canWallJumpWithCharge"
]
}
]
},
{
"enemyKill": {
"enemies": [
[
"Choot"
]
],
"explicitWeapons": [
"PseudoScrew"
]
}
}
]
}
]
} |
|
Shoot the Choot either before landing or from the safety of the ledge edge. If bomb jumping, there is a timing for rolling under the Choot. Requires: {
"or": [
"canConsecutiveWallJump",
"SpaceJump",
"canLongIBJ"
]
}
{
"or": [
"canTrickyJump",
{
"and": [
"canCarefulJump",
{
"enemyKill": {
"enemies": [
[
"Choot"
]
],
"explicitWeapons": [
"Missile",
"Super"
]
}
}
]
}
]
} |
|
To avoid damage, the Choot can be killed and then Samus can climb back up again. Requires: {
"or": [
"canConsecutiveWallJump",
"SpaceJump",
"canLongIBJ"
]
}
{
"or": [
{
"enemyKill": {
"enemies": [
[
"Choot"
]
],
"explicitWeapons": [
"Wave",
"Spazer",
"PowerBomb"
]
}
},
{
"and": [
"canBeVeryPatient",
{
"enemyKill": {
"enemies": [
[
"Choot"
]
]
}
}
]
}
]
}Dev note: Missile kill strats could fit here with a reclimb or by landing on the ledge, with the same requirements. |
From: 3
Middle Right Door
To: 5
Top Junction

Run into the room, pressing pause immediately when entering. Jump into a mid-air spring ball jump to reach the top ledge above; perform the spring ball jump while still moving forward, in order to get a boost in jump height. Entrance condition: {
"comeInRunning": {
"speedBooster": "yes",
"minTiles": 21
}
}Requires: "HiJump" "canSpeedyJump" "canTrickyJump" "canTrickySpringBallJump" Dev note: This assumes extra run speed of $4.6 entering the room, at least $4.D when jumping (a 2-frame window in the worst case). |
|
Shinespark from the tile to the right of the Choot. It helps to face right before shinesparking. Entrance condition: {
"comeInShinecharged": {}
}Requires: {
"shineChargeFrames": 145
}
"canShinechargeMovementComplex"
"canTrickyJump"
{
"shinespark": {
"frames": 49,
"excessFrames": 1
}
} |
From: 3
Middle Right Door
To: 5
Top Junction
Shinespark from the tile to the right of the Choot. It helps to face right before shinesparking. Entrance condition: {
"comeInShinecharging": {
"length": 4,
"openEnd": 0
}
}Requires: "canShinechargeMovementComplex"
"canTrickyJump"
{
"shinespark": {
"frames": 49,
"excessFrames": 1
}
} |
|
Requires: {
"useFlashSuit": {}
}
{
"or": [
{
"shinespark": {
"frames": 41,
"excessFrames": 2
}
},
{
"and": [
"HiJump",
{
"shinespark": {
"frames": 37,
"excessFrames": 1
}
}
]
},
{
"and": [
"canTrickyUseFrozenEnemies",
{
"shinespark": {
"frames": 30,
"excessFrames": 1
}
}
]
},
{
"and": [
"canTrickyUseFrozenEnemies",
"HiJump",
{
"shinespark": {
"frames": 27,
"excessFrames": 2
}
}
]
}
]
}Dev note: It is possible to use a frozen Choot to save Energy. |
|

Entrance condition: {
"comeInWithGMode": {
"mode": "any",
"morphed": true
}
}Requires: {
"or": [
"h_artificialMorphLongIBJ",
{
"and": [
"Gravity",
"h_artificialMorphIBJ",
"h_artificialMorphBombHorizontally"
]
},
{
"and": [
"canGravityJump",
"h_artificialMorphSpringBallBombJump",
{
"or": [
"h_additionalBomb",
{
"tech": "canDoubleSpringBallJumpMidAir"
}
]
},
{
"or": [
{
"and": [
"h_additionalBomb",
"h_additionalBomb"
]
},
{
"notable": "Left Shaft Precise Crouch Jump Down Grab"
}
]
}
]
}
]
} |
From: 3
Middle Right Door
To: 6
Hidden Fake Kassiuz Room Junction
Climb up 2 screens plus 2 tiles, to enter a normally inaccessible area behind the top right door, containing a copy of the bottom half of Kassiuz Room. There is a blue door on the other side of the top right door. Opening it and touching the transition behind it will lead to the same room as the bottom right door of the room; however, Samus will be placed a screen to the left of the door, which will usually be out-of-bounds. Entrance condition: {
"comeInWithDoorStuckSetup": {}
}Requires: {
"notable": "X-Ray Climb Into Fake Kassiuz Room"
}
"canLongXRayClimb"Dev note: FIXME: This strat and node 6 currently have no logical purpose, but there might be cases where the player could X-Ray climb to somewhere useful after passing through this wrong-facing transition. |
From: 4
Top Right Door
To: 2
Bottom Right Door

It is required to avoid double hitting the Skultera with the Power Bomb, and to position the Crystal Flash so that the Skultera can hit Samus from above so it avoids the light orb. To do this, Crystal Flash just left of the top left corner of the raised floor and time the Power Bomb so that its first hit is when the Skultera is far to the left. This can be done with no enemy damage reduction and up to 2 E-Tanks or a 50% enemy damage reduction and no E-Tanks; a 75% reduction is not recommended and would require disabling and reenabling suits with a precise pause abuse. Entrance condition: {
"comeInWithGMode": {
"mode": "direct",
"morphed": true
}
}Requires: "h_artificialMorphComplexRModeCrystalFlashInterrupt"
{
"ammo": {
"type": "Missile",
"count": 10
}
}
{
"ammo": {
"type": "Super",
"count": 10
}
}
{
"or": [
"h_partialEnemyDamageReduction",
{
"resourceAtMost": [
{
"type": "RegularEnergy",
"count": 19
}
]
},
{
"and": [
{
"resourceCapacity": [
{
"type": "RegularEnergy",
"count": 199
}
]
},
{
"resourceCapacity": [
{
"type": "ReserveEnergy",
"count": 199
}
]
}
]
}
]
}Dev note: FIXME: A 75% damage reduction method needs to be documented for if Samus only has Gravity and it provides 75% reduction. |
|
|
From: 4
Top Right Door
To: 3
Middle Right Door
Entrance condition: {
"comeInShinecharging": {
"length": 6,
"openEnd": 1
}
}Requires: "canShinechargeMovementTricky"
{
"shinespark": {
"frames": 31,
"excessFrames": 0
}
}Exit condition: {
"leaveWithSpark": {}
}Unlocks doors: {"types":["super"],"requires":[]}
{"types":["missiles","powerbomb"],"requires":["never"]} |
From: 4
Top Right Door
To: 3
Middle Right Door
Entrance condition: {
"comeInShinecharged": {}
}Requires: "canShinechargeMovementTricky"
"canHeroShot"
{
"shineChargeFrames": 150
}
{
"shinespark": {
"frames": 31,
"excessFrames": 0
}
}Exit condition: {
"leaveWithSpark": {}
}Unlocks doors: {"types":["super"],"requires":[]}
{"types":["missiles","powerbomb"],"requires":["never"]} |
|
Exit condition: {
"leaveWithRunway": {
"length": 7,
"openEnd": 1
}
} |
|
Requires: "h_CrystalFlash"
{
"obstaclesNotCleared": [
"R-Mode"
]
} |
From: 4
Top Right Door
To: 4
Top Right Door
Entrance condition: {
"comeInShinecharging": {
"length": 6,
"openEnd": 0
},
"comesInHeated": "no"
}Requires: "h_CrystalSpark" |
|
Entrance condition: {
"comeInWithRMode": {}
}Clears obstacles: R-Mode |
From: 4
Top Right Door
To: 5
Top Junction
Bomb horizontally, then use spring ball to jump around the overhang. Either quickly kill the Choot or land on the left pixel to avoid a hit. Using a Power Bomb will kill the Choot just before it swings left another time and will make the landing area a bit larger. Requires: "HiJump"
"canSpringBallBombJump"
{
"tech": "canBombHorizontally"
}
"canTrickyJump" |
|
Jump on the last possible frame, and get around the ledge while remaining in spin. If at least 23 runway tiles are available, then a momentum conserving turnaround can be used to make the jump more lenient. Entrance condition: {
"comeInRunning": {
"speedBooster": "yes",
"minTiles": 21
}
}Requires: "canSpeedyJump" "canInsaneJump" Dev note: An extra run speed of at least $5.2 is needed, avoiding the spike at $6.0 and $6.1 (corresponding to 34 tiles). For a momentum conserving turnaround to help, it needs at least $5.6 speed. |
From: 4
Top Right Door
To: 5
Top Junction
Come in rolling with high speed, and use Spring Ball to jump around the ledge. Entrance condition: {
"comeInWithMockball": {
"speedBooster": "yes",
"adjacentMinTiles": 20,
"remoteAndLandingMinTiles": [
[
18.4375,
0
]
]
}
}Requires: "canTrickyDashJump" "h_useSpringBall" Dev note: An extra run speed of $4.0 and $4.1 works; speeds of at least $4.5 also work. |
|
Climb less than 1 screen. Entrance condition: {
"comeInWithDoorStuckSetup": {}
}Requires: "canXRayClimb" |
From: 4
Top Right Door
To: 5
Top Junction


A diagonal spark may take damage from the Choot It helps to face right before Shinesparking. Entrance condition: {
"comeInShinecharged": {}
}Requires: {
"shineChargeFrames": 45
}
"canShinechargeMovementComplex"
{
"shinespark": {
"frames": 13,
"excessFrames": 1
}
} |
From: 4
Top Right Door
To: 5
Top Junction
A diagonal spark may take damage from the Choot It helps to face right before Shinesparking. Entrance condition: {
"comeInShinecharging": {
"length": 6,
"openEnd": 0
}
}Requires: "canShinechargeMovementComplex"
{
"shinespark": {
"frames": 13,
"excessFrames": 1
}
} |
|
Requires: "h_storedSpark"
{
"shinespark": {
"frames": 12,
"excessFrames": 1
}
} |
|
IBJ from below or bomb horizontally, then use Spring Ball with HiJump to jump around the overhang while avoiding the upper Choot. Entrance condition: {
"comeInWithGMode": {
"mode": "any",
"morphed": true
}
}Requires: {
"or": [
"h_artificialMorphLongIBJ",
{
"and": [
"HiJump",
"h_artificialMorphSpringBallBombJump",
{
"tech": "canBombHorizontally"
},
"canTrickyJump"
]
}
]
} |
|
|
|
|
|
Requires: "canPreciseWallJump" |
From: 5
Top Junction
To: 4
Top Right Door
Roll off the above ledge and use both the vertical speed resets from first (un)equipping SpringBall and then by unmorphing in order to reach the door. Pause shortly after rolling off the ledge, after falling for 1 tile. The timing is very precise. A downback helps by shrinking Samus' hitbox. Requires: {
"notable": "Spring Fling into Top Right Door"
}
"canInsaneJump"
"canSpringFling"
"canResetFallSpeed"
"canDownBack" |
|
Requires: "h_storedSpark"
{
"shinespark": {
"frames": 2,
"excessFrames": 1
}
} |
From: 5
Top Junction
To: 4
Top Right Door
Requires: "canHeroShot"
"h_storedSpark"
{
"shinespark": {
"frames": 17,
"excessFrames": 0
}
}Exit condition: {
"leaveWithSpark": {}
}Unlocks doors: {"types":["super","powerbomb"],"requires":[]}
{"types":["missiles"],"requires":["never"]} |
{
"$schema": "../../../schema/m3-room.schema.json",
"id": 197,
"name": "Plasma Spark Room",
"area": "Maridia",
"subarea": "Inner",
"subsubarea": "Yellow",
"roomAddress": "0x7D340",
"roomEnvironments": [
{
"heated": false
}
],
"mapTileMask": [
[
0,
1,
1,
0
],
[
0,
1,
1,
0
],
[
1,
1,
1,
1
],
[
0,
1,
1,
1
],
[
0,
1,
1,
1
],
[
0,
1,
1,
1
]
],
"nodes": [
{
"id": 1,
"name": "Left Vertical Door",
"nodeType": "door",
"nodeSubType": "green",
"nodeAddress": "0x001a5ac",
"doorOrientation": "down",
"doorEnvironments": [
{
"physics": "air"
}
],
"mapTileMask": [
[
0,
2,
1,
0
],
[
0,
2,
1,
0
],
[
2,
2,
1,
1
],
[
0,
2,
1,
1
],
[
0,
1,
1,
1
],
[
0,
1,
1,
1
]
],
"devNote": "FIXME Check if G-Mode can be set up through the Toilet."
},
{
"id": 2,
"name": "Bottom Right Door",
"nodeType": "door",
"nodeSubType": "blue",
"nodeAddress": "0x001a5a0",
"doorOrientation": "right",
"doorEnvironments": [
{
"physics": "water"
}
],
"mapTileMask": [
[
0,
1,
1,
0
],
[
0,
1,
1,
0
],
[
1,
1,
1,
1
],
[
0,
1,
1,
1
],
[
0,
2,
2,
2
],
[
0,
2,
2,
2
]
]
},
{
"id": 3,
"name": "Middle Right Door",
"nodeType": "door",
"nodeSubType": "blue",
"nodeAddress": "0x001a5c4",
"doorOrientation": "right",
"doorEnvironments": [
{
"physics": "air"
}
],
"mapTileMask": [
[
0,
1,
1,
0
],
[
0,
1,
1,
0
],
[
1,
1,
2,
2
],
[
0,
1,
2,
2
],
[
0,
1,
1,
1
],
[
0,
1,
1,
1
]
]
},
{
"id": 4,
"name": "Top Right Door",
"nodeType": "door",
"nodeSubType": "gray",
"nodeAddress": "0x001a5b8",
"doorOrientation": "right",
"doorEnvironments": [
{
"physics": "air"
}
],
"locks": [
{
"name": "Plasma Spark Room Gray Lock (to Kassiuz Room)",
"lockType": "gameFlag",
"unlockStrats": [
{
"name": "Base",
"requires": [
"f_DefeatedDraygon"
],
"flashSuitChecked": true,
"blueSuitChecked": true
}
]
}
],
"mapTileMask": [
[
0,
1,
1,
0
],
[
0,
1,
2,
0
],
[
1,
1,
1,
1
],
[
0,
1,
1,
1
],
[
0,
1,
1,
1
],
[
0,
1,
1,
1
]
]
},
{
"id": 5,
"name": "Top Junction",
"nodeType": "junction",
"nodeSubType": "junction",
"mapTileMask": [
[
0,
1,
2,
0
],
[
0,
1,
1,
0
],
[
1,
1,
1,
1
],
[
0,
1,
1,
1
],
[
0,
1,
1,
1
],
[
0,
1,
1,
1
]
]
},
{
"id": 6,
"name": "Hidden Fake Kassiuz Room Junction",
"nodeType": "junction",
"nodeSubType": "junction",
"mapTileMask": [
[
0,
1,
1,
0
],
[
0,
1,
2,
0
],
[
1,
1,
1,
1
],
[
0,
1,
1,
1
],
[
0,
1,
1,
1
],
[
0,
1,
1,
1
]
]
}
],
"obstacles": [
{
"id": "R-Mode",
"name": "Entered with R-Mode",
"obstacleType": "abstract"
}
],
"enemies": [
{
"id": "e1",
"groupName": "Plasma Spark Room Left Choot",
"enemyName": "Choot",
"quantity": 1,
"homeNodes": [
1
]
},
{
"id": "e2",
"groupName": "Plasma Spark Room Bottom Choots",
"enemyName": "Choot",
"quantity": 2,
"homeNodes": [
3
]
},
{
"id": "e3",
"groupName": "Plasma Spark Room Top Choots",
"enemyName": "Choot",
"quantity": 2,
"homeNodes": [
5
]
},
{
"id": "e4",
"groupName": "Plasma Spark Room Owtches",
"enemyName": "Owtch",
"quantity": 4,
"homeNodes": [
2
]
},
{
"id": "e5",
"groupName": "Plasma Spark Room Top Skulteras",
"enemyName": "Skultera",
"quantity": 2,
"homeNodes": [
2
]
}
],
"strats": [
{
"link": [
1,
1
],
"name": "Base (Unlock Door)",
"requires": [],
"unlocksDoors": [
{
"types": [
"ammo"
],
"requires": []
}
],
"flashSuitChecked": true,
"blueSuitChecked": true
},
{
"link": [
1,
1
],
"name": "Base (Come In Normally)",
"entranceCondition": {
"comeInNormally": {}
},
"requires": [],
"flashSuitChecked": true,
"blueSuitChecked": true
},
{
"link": [
1,
1
],
"name": "Base (Come In With Grapple Jump)",
"entranceCondition": {
"comeInWithGrappleJump": {
"position": "any"
}
},
"requires": [],
"flashSuitChecked": true,
"blueSuitChecked": true
},
{
"link": [
2,
2
],
"name": "Base (Unlock Door)",
"requires": [],
"unlocksDoors": [
{
"types": [
"ammo"
],
"requires": []
}
],
"flashSuitChecked": true,
"blueSuitChecked": true
},
{
"link": [
2,
2
],
"name": "Base (Come In Normally)",
"entranceCondition": {
"comeInNormally": {}
},
"requires": [],
"flashSuitChecked": true,
"blueSuitChecked": true
},
{
"link": [
2,
2
],
"name": "Base (Come In With Mockball)",
"entranceCondition": {
"comeInWithMockball": {
"adjacentMinTiles": 0,
"remoteAndLandingMinTiles": [
[
0,
0
]
],
"speedBooster": "any"
}
},
"requires": [],
"flashSuitChecked": true,
"blueSuitChecked": true
},
{
"link": [
3,
3
],
"name": "Base (Unlock Door)",
"requires": [],
"unlocksDoors": [
{
"types": [
"ammo"
],
"requires": []
}
],
"flashSuitChecked": true,
"blueSuitChecked": true
},
{
"link": [
3,
3
],
"name": "Base (Come In Normally)",
"entranceCondition": {
"comeInNormally": {}
},
"requires": [],
"flashSuitChecked": true,
"blueSuitChecked": true
},
{
"link": [
3,
3
],
"name": "Base (Come In With Mockball)",
"entranceCondition": {
"comeInWithMockball": {
"adjacentMinTiles": 0,
"remoteAndLandingMinTiles": [
[
0,
0
]
],
"speedBooster": "any"
}
},
"requires": [],
"flashSuitChecked": true,
"blueSuitChecked": true
},
{
"link": [
4,
4
],
"name": "Base (Unlock Door)",
"requires": [],
"unlocksDoors": [
{
"types": [
"ammo"
],
"requires": []
}
],
"flashSuitChecked": true,
"blueSuitChecked": true
},
{
"link": [
4,
4
],
"name": "Base (Come In Normally)",
"entranceCondition": {
"comeInNormally": {}
},
"requires": [],
"flashSuitChecked": true,
"blueSuitChecked": true
},
{
"link": [
4,
4
],
"name": "Base (Come In With Mockball)",
"entranceCondition": {
"comeInWithMockball": {
"adjacentMinTiles": 0,
"remoteAndLandingMinTiles": [
[
0,
0
]
],
"speedBooster": "any"
}
},
"requires": [],
"flashSuitChecked": true,
"blueSuitChecked": true
},
{
"id": 2,
"link": [
1,
1
],
"name": "Shinespark",
"entranceCondition": {
"comeInWithSpark": {},
"comesThroughToilet": "any"
},
"requires": [
{
  "shinespark": {
    "frames": 6,
    "excessFrames": 6
  }
}
],
"flashSuitChecked": true,
"blueSuitChecked": true,
"note": "Enter on the right side of the doorway to reduce the amount of energy used.",
"devNote": "This strat is not useful in-room, but can satisfy a strat in the room before with an exit shinespark."
},
{
"id": 76,
"link": [
1,
1
],
"name": "Leave With Temporary Blue (Long Chain)",
"requires": [
"Gravity",
"HiJump",
{
"canShineCharge": {
"usedTiles": 42,
"gentleUpTiles": 2,
"steepUpTiles": 1,
"steepDownTiles": 3,
"openEnd": 1
}
},
"canXRayTurnaround",
"canLongChainTemporaryBlue"
],
"exitCondition": {
"leaveWithTemporaryBlue": {
"direction": "any"
}
},
"unlocksDoors": [
{
"types": [
"ammo"
],
"requires": []
}
],
"flashSuitChecked": true,
"blueSuitChecked": true,
"note": [
"Gain a shinecharge by running right-to-left on the long runway at the bottom of the room."
],
"devNote": [
"FIXME: This is also possible using Spring Ball jumps (with pause remorphs) instead of HiJump."
]
},
{
"id": 94,
"link": [
1,
1
],
"name": "Choot Farm (Single Choot)",
"requires": [
{
"resetRoom": {
"nodes": [
1
]
}
},
{
"or": [
"canDash",
{
"cycleFrames": 10
}
]
},
{
"or": [
{
"and": [
"Grapple",
{
"cycleFrames": 130
}
]
},
{
"and": [
"Plasma",
{
"cycleFrames": 150
}
]
},
{
"and": [
{
"or": [
"Wave",
"Spazer"
]
},
{
"cycleFrames": 160
}
]
},
{
"and": [
{
"or": [
"ScrewAttack",
{
"haveBlueSuit": {}
}
]
},
{
"cycleFrames": 170
}
]
},
{
"and": [
"canPseudoScrew",
{
"cycleFrames": 180
}
]
},
{
"cycleFrames": 220
}
]
}
],
"resetsObstacles": [
"R-Mode"
],
"farmCycleDrops": [
{
"enemy": "Choot",
"count": 1
}
],
"flashSuitChecked": true,
"blueSuitChecked": true
},
{
"id": 95,
"link": [
1,
1
],
"name": "Choot Farm (3 Choots)",
"requires": [
{
"resetRoom": {
"nodes": [
1
]
}
},
{
"or": [
"canDash",
{
"cycleFrames": 120
}
]
},
{
"or": [
"canWallJump",
"HiJump",
{
"and": [
"SpaceJump",
{
"cycleFrames": 300
}
]
},
{
"and": [
"canTrickySpringBallJump",
{
"cycleFrames": 360
},
"h_doubleEquipmentScreenCycleFrames",
"h_doubleEquipmentScreenCycleFrames",
"h_doubleEquipmentScreenCycleFrames"
]
},
{
"and": [
"canDoubleBombJump",
{
"cycleFrames": 930
}
]
}
]
},
{
"or": [
{
"and": [
{
"or": [
"Grapple",
"Wave",
"Plasma"
]
},
{
"cycleFrames": 750
}
]
},
{
"and": [
{
"or": [
"ScrewAttack",
{
"haveBlueSuit": {}
}
]
},
{
"cycleFrames": 820
}
]
},
{
"and": [
"Spazer",
{
"cycleFrames": 850
}
]
},
{
"and": [
"canPseudoScrew",
{
"cycleFrames": 870
}
]
},
{
"cycleFrames": 1080
}
]
}
],
"resetsObstacles": [
"R-Mode"
],
"farmCycleDrops": [
{
"enemy": "Choot",
"count": 3
}
],
"flashSuitChecked": true,
"blueSuitChecked": true
},
{
"id": 3,
"link": [
1,
1
],
"name": "Crystal Flash",
"requires": [
"h_CrystalFlash",
{
"obstaclesNotCleared": [
"R-Mode"
]
}
],
"flashSuitChecked": true,
"blueSuitChecked": true
},
{
"id": 97,
"link": [
1,
1
],
"name": "R-Mode Entry",
"entranceCondition": {
"comeInWithRMode": {},
"comesThroughToilet": "no"
},
"requires": [],
"clearsObstacles": [
"R-Mode"
],
"flashSuitChecked": true,
"blueSuitChecked": true
},
{
"id": 4,
"link": [
1,
2
],
"name": "Base",
"requires": [],
"flashSuitChecked": true,
"blueSuitChecked": true
},
{
"id": 98,
"link": [
1,
2
],
"name": "Direct G-Mode Morph, Crystal Flash Interrupt",
"entranceCondition": {
"comeInWithGMode": {
"mode": "direct",
"morphed": true
},
"comesThroughToilet": "no"
},
"requires": [
{
"or": [
"h_artificialMorphBombThings",
"h_artificialMorphSpringBall"
]
},
"h_artificialMorphComplexRModeCrystalFlashInterrupt",
{
"ammo": {
"type": "Missile",
"count": 10
}
},
{
"ammo": {
"type": "Super",
"count": 10
}
},
{
"or": [
"h_partialEnemyDamageReduction",
{
"resourceAtMost": [
{
"type": "RegularEnergy",
"count": 19
}
]
},
{
"and": [
{
"resourceCapacity": [
{
"type": "RegularEnergy",
"count": 199
}
]
},
{
"resourceCapacity": [
{
"type": "ReserveEnergy",
"count": 199
}
]
}
]
}
]
}
],
"flashSuitChecked": true,
"blueSuitChecked": true,
"note": [
"It is required to avoid double hitting the Skultera with the Power Bomb,",
"and to position the Crystal Flash so that the Skultera can hit Samus from above so it avoids the light orb.",
"To do this, Crystal Flash just left of the top left corner of the raised floor and time the Power Bomb so that its first hit is when the Skultera is far to the left."
],
"detailNote": [
"This can be done with no enemy damage reduction and up to 2 E-Tanks or a 50% enemy damage reduction and no E-Tanks;",
"a 75% reduction is not recommended and would require disabling and reenabling suits with a precise pause abuse."
],
"devNote": [
"FIXME: A 75% damage reduction method needs to be documented for if Samus only has Gravity and it provides 75% reduction."
]
},
{
"id": 5,
"link": [
1,
4
],
"name": "G-Mode Morph",
"entranceCondition": {
"comeInWithGMode": {
"mode": "any",
"morphed": true
},
"comesThroughToilet": "any"
},
"requires": [
"h_artificialMorphLongIBJ",
{
"or": [
"h_artificialMorphSpringBallBombJump",
"h_artificialMorphBombHorizontally",
"Gravity"
]
}
],
"flashSuitChecked": true,
"blueSuitChecked": true
},
{
"id": 6,
"link": [
1,
5
],
"name": "Base",
"requires": [
{
  "or": [
    "HiJump",
    "canWallJump",
    "SpaceJump",
    "canSpringBallJumpMidAir",
    {
      "and": [
        "canIBJ",
        "canBombHorizontally"
      ]
    },
    {
      "and": [
        "canLongIBJ",
        "Gravity"
      ]
    },
    {
      "and": [
        "canSpringBallBombJump",
        "h_additionalBomb",
        "h_additionalBomb"
      ]
    }
  ]
}
],
"flashSuitChecked": true,
"blueSuitChecked": true
},
{
"id": 7,
"link": [
1,
5
],
"name": "Shinespark",
"entranceCondition": {
"comeInShinecharged": {},
"comesThroughToilet": "any"
},
"requires": [
{
"shineChargeFrames": 120
},
"canShinechargeMovementComplex",
{
"or": [
{
"enemyDamage": {
"enemy": "Choot",
"type": "contact",
"hits": 1
}
},
{
"enemyKill": {
"enemies": [
[
"Choot"
]
],
"explicitWeapons": [
"Missile",
"Super",
"ScrewAttack",
"PseudoScrew",
"Plasma",
"Charge+Wave",
"Charge+Spazer"
]
}
},
"h_pauseAbuseMinimalReserveRefill"
]
},
{
"shinespark": {
"frames": 37,
"excessFrames": 10
}
}
],
"flashSuitChecked": true,
"blueSuitChecked": true,
"note": "Spark vertically to avoid hitting the right ledge."
},
{
"id": 67,
"link": [
1,
5
],
"name": "Use Stored Spark",
"requires": [
"h_storedSpark",
{
"shinespark": {
"frames": 33,
"excessFrames": 14
}
}
],
"flashSuitChecked": true,
"blueSuitChecked": true
},
{
"id": 8,
"link": [
1,
5
],
"name": "G-Mode Morph",
"entranceCondition": {
"comeInWithGMode": {
"mode": "any",
"morphed": true
},
"comesThroughToilet": "any"
},
"requires": [
{
  "or": [
    {
      "and": [
        "h_artificialMorphIBJ",
        "h_artificialMorphBombHorizontally"
      ]
    },
    {
      "and": [
        "h_artificialMorphLongIBJ",
        "Gravity"
      ]
    },
    {
      "and": [
        "h_artificialMorphSpringBallBombJump",
        "h_additionalBomb",
        "h_additionalBomb",
        "h_additionalBomb"
      ]
    },
    {
      "and": [
        "h_artificialMorphSpringBallBombJump",
        {
          "notable": "Left Shaft Precise Crouch Jump Down Grab"
        }
      ]
    }
  ]
}
],
"flashSuitChecked": true,
"blueSuitChecked": true
},
{
"id": 9,
"link": [
2,
1
],
"name": "Base",
"requires": [
"Gravity",
{
"or": [
"canWallJump",
"HiJump",
"canSpringBallJumpMidAir",
"SpaceJump",
"canLongIBJ",
{
"and": [
"canIBJ",
"canBombHorizontally"
]
}
]
}
],
"flashSuitChecked": true,
"blueSuitChecked": true
},
{
"id": 10,
"link": [
2,
1
],
"name": "Suitless Spring Ball",
"requires": [
"canSuitlessMaridia",
"HiJump",
"canSpringBallJumpMidAir",
{
"or": [
"h_underwaterCrouchJumpDownGrab",
"canTrickySpringBallJump",
"canWallJump"
]
}
],
"flashSuitChecked": true,
"blueSuitChecked": true
},
{
"id": 11,
"link": [
2,
1
],
"name": "Suitless Frozen Skultera",
"requires": [
"canSuitlessMaridia",
"HiJump",
"canTrickyJump",
"canTrickyUseFrozenEnemies",
"h_underwaterCrouchJumpDownGrab"
],
"flashSuitChecked": true,
"blueSuitChecked": true
},
{
"id": 12,
"link": [
2,
1
],
"name": "Shinespark",
"requires": [
"Gravity",
"h_shinechargeMaxRunway",
"canShinechargeMovement",
"canCarefulJump",
{
"or": [
{
"shinespark": {
"frames": 90,
"excessFrames": 49
}
},
{
"and": [
"canMidairShinespark",
{
"shinespark": {
"frames": 82,
"excessFrames": 49
}
}
]
}
]
}
],
"flashSuitChecked": true,
"blueSuitChecked": true,
"note": [
"Start the dash close to the door to help avoid getting hit by the first Owtch.",
"Spark up while on the right side of the platform. To avoid the Owtch on the platform, it may help to jump on the left side of the platform then jump again and spark midair above the right side."
]
},
{
"id": 13,
"link": [
2,
1
],
"name": "Suitless Shinespark",
"entranceCondition": {
"comeInRunning": {
"speedBooster": "yes",
"minTiles": 0.4375
}
},
"requires": [
"canWaterShineCharge",
"canShinechargeMovementComplex",
{
"or": [
{
"shinespark": {
"frames": 90,
"excessFrames": 50
}
},
{
"and": [
{
"shinespark": {
"frames": 90,
"excessFrames": 59
}
},
{
"or": [
"canWallJump",
"HiJump",
"canSpringBallJumpMidAir",
"SpaceJump",
{
"and": [
"canIBJ",
"canBombHorizontally"
]
},
{
"and": [
"h_crouchJumpDownGrab",
{
"notable": "Left Shaft Precise Crouch Jump Down Grab"
}
]
}
]
}
]
}
]
}
],
"flashSuitChecked": true,
"blueSuitChecked": true,
"note": [
"Start the dash as close to the door transition as possible to help avoid getting hit by the first Owtch. Store the shine charge while high up on the left slope.",
"Spark up while on the right side of the platform. To avoid the Owtch on the platform, it may help to jump on the left side of the platform then jump again and spark midair above the right side."
]
},
{
"id": 84,
"link": [
2,
1
],
"name": "Gravity Jump, Precise Crouch Jump Down Grab",
"requires": [
{
"notable": "Left Shaft Precise Crouch Jump Down Grab"
},
"canGravityJump",
"h_crouchJumpDownGrab",
"canTrickyJump"
],
"flashSuitChecked": true,
"blueSuitChecked": true,
"note": "Gravity jump out of the water then perform a precise crouch jump + down grab to get onto the next ledge."
},
{
"id": 68,
"link": [
2,
1
],
"name": "Use Stored Spark",
"requires": [
"h_storedSpark",
{
"or": [
{
"shinespark": {
"frames": 72,
"excessFrames": 49
}
},
{
"and": [
{
"shinespark": {
"frames": 72,
"excessFrames": 58
}
},
"h_crouchJumpDownGrab",
{
"notable": "Left Shaft Precise Crouch Jump Down Grab"
}
]
},
{
"and": [
"HiJump",
{
"shinespark": {
"frames": 24,
"excessFrames": 13
}
}
]
},
{
"and": [
"canGravityJump",
{
"shinespark": {
"frames": 13,
"excessFrames": 12
}
}
]
},
{
"and": [
"HiJump",
"canTrickyUseFrozenEnemies",
{
"shinespark": {
"frames": 14,
"excessFrames": 13
}
}
]
}
]
}
],
"flashSuitChecked": true,
"blueSuitChecked": true,
"note": [
"With HiJump, jump left and spark up right while against the left wall to save Energy.",
"With Ice, wait for the Skultera and use it save a small amount of Energy.",
"With HiJump and Ice, crouch jump from the frozen fish while shooting to prevent activating the spark, then downgrab the ledge above."
]
},
{
"id": 14,
"link": [
2,
1
],
"name": "G-Mode Morph",
"entranceCondition": {
"comeInWithGMode": {
"mode": "any",
"morphed": true
}
},
"requires": [
{
  "or": [
    {
      "and": [
        "Gravity",
        {
          "or": [
            "h_artificialMorphLongIBJ",
            {
              "and": [
                "h_artificialMorphIBJ",
                "h_artificialMorphBombHorizontally"
              ]
            }
          ]
        }
      ]
    },
    {
      "and": [
        "h_artificialMorphDoubleSpringBallJump",
        "canDownGrab"
      ]
    },
    {
      "and": [
        "canGravityJump",
        "h_artificialMorphSpringBallBombJump"
      ]
    }
  ]
}
],
"flashSuitChecked": true,
"blueSuitChecked": true
},
{
"id": 15,
"link": [
2,
2
],
"name": "Leave with Runway",
"requires": [],
"exitCondition": {
"leaveWithRunway": {
"length": 42,
"openEnd": 1,
"gentleDownTiles": 2,
"steepUpTiles": 3,
"steepDownTiles": 1,
"startingSteepDownTiles": 1,
"startingGentleDownTiles": 2
}
},
"flashSuitChecked": true,
"blueSuitChecked": true
},
{
"id": 85,
"link": [
2,
2
],
"name": "Stutter Shinecharge, Leave With Spark",
"entranceCondition": {
"comeInStutterShinecharging": {
"minTiles": 2
}
},
"requires": [
"canStutterWaterShineCharge",
"canShinechargeMovementComplex",
{
"or": [
{
"shinespark": {
"frames": 12,
"excessFrames": 0
}
},
{
"and": [
"canShinechargeMovementTricky",
{
"shinespark": {
"frames": 3,
"excessFrames": 0
}
}
]
}
]
}
],
"exitCondition": {
"leaveWithSpark": {}
},
"unlocksDoors": [
{
"types": [
"super"
],
"requires": []
},
{
"types": [
"missiles",
"powerbomb"
],
"requires": [
"never"
]
}
],
"flashSuitChecked": true,
"blueSuitChecked": true
},
{
"id": 86,
"link": [
2,
2
],
"name": "Water Shinecharge, Hero Shot Leave With Spark",
"entranceCondition": {
"comeInRunning": {
"speedBooster": "yes",
"minTiles": 0.4375
}
},
"requires": [
"canWaterShineCharge",
"canShinechargeMovementTricky",
"canHeroShot",
{
"shinespark": {
"frames": 29,
"excessFrames": 0
}
}
],
"exitCondition": {
"leaveWithSpark": {}
},
"unlocksDoors": [
{
"types": [
"super"
],
"requires": []
},
{
"types": [
"missiles",
"powerbomb"
],
"requires": [
"never"
]
}
],
"flashSuitChecked": true,
"blueSuitChecked": true,
"note": [
"Start with low run speed by positioning exactly 2 pixels from the door."
]
},
{
"id": 87,
"link": [
2,
2
],
"name": "Very Precise Stutter Shinecharge, Leave With Spark",
"entranceCondition": {
"comeInStutterShinecharging": {
"minTiles": 1
}
},
"requires": [
"canShinechargeMovementComplex",
"canPreciseStutterWaterShineCharge",
"canInsaneJump",
"h_shinechargeMaxRunway",
{
"or": [
{
"shinespark": {
"frames": 12,
"excessFrames": 0
}
},
{
"and": [
"canShinechargeMovementTricky",
{
"shinespark": {
"frames": 3,
"excessFrames": 0
}
}
]
}
]
}
],
"exitCondition": {
"leaveWithSpark": {}
},
"unlocksDoors": [
{
"types": [
"super"
],
"requires": []
},
{
"types": [
"missiles",
"powerbomb"
],
"requires": [
"never"
]
}
],
"flashSuitChecked": true,
"blueSuitChecked": true,
"note": [
"With only 1 tile of runway, this requires a single-frame stutter (release forward then repress on the next frame), on the last possible frame."
]
},
{
"id": 88,
"link": [
2,
2
],
"name": "Precise Stutter Shinecharge, Leave Shinecharged (5-tile runway)",
"entranceCondition": {
"comeInStutterShinecharging": {
"minTiles": 5
}
},
"requires": [
"canPreciseStutterWaterShineCharge",
"canShinechargeMovementTricky",
"canInsaneJump",
{
"shineChargeFrames": 130
},
{
"or": [
"canBeVeryPatient",
{
"shineChargeFrames": 15
}
]
}
],
"exitCondition": {
"leaveShinecharged": {}
},
"unlocksDoors": [
{
"types": [
"super"
],
"requires": []
},
{
"types": [
"missiles",
"powerbomb"
],
"requires": [
"never"
]
}
],
"flashSuitChecked": true,
"blueSuitChecked": true,
"note": [
"With a runway of 5 tiles (open end) in the other room,",
"the ideal timing for the stutter is to release forward for 5 frames, and repress forward on the last possible frame before the transition.",
"Other timings can work, but will gain the shinecharge further from the door, leaving fewer shinecharge frames remaining.",
"After gaining the shinecharge, continue holding forward in order to make Samus stand.",
"Then turnaround spin jump back toward the door, and continue spin jumping to reach the transition with a shinecharge."
]
},
{
"id": 89,
"link": [
2,
2
],
"name": "Precise Stutter Shinecharge, Leave Shinecharged (4-tile runway)",
"entranceCondition": {
"comeInStutterShinecharging": {
"minTiles": 4
}
},
"requires": [
"canPreciseStutterWaterShineCharge",
"canShinechargeMovementTricky",
"canInsaneJump",
{
"shineChargeFrames": 140
},
{
"or": [
"canBeVeryPatient",
{
"shineChargeFrames": 10
}
]
}
],
"exitCondition": {
"leaveShinecharged": {}
},
"unlocksDoors": [
{
"types": [
"super"
],
"requires": []
},
{
"types": [
"missiles",
"powerbomb"
],
"requires": [
"never"
]
}
],
"flashSuitChecked": true,
"blueSuitChecked": true,
"note": [
"With only a runway of 4 tiles (open end) in the other room,",
"the ideal timing for the stutter is to release forward for 4 frames, and repress forward on the last possible frame before the transition.",
"It also works well to release forward for 3 frames and repress on the last possible frame.",
"Other timings can also work, but may gain the shinecharge further from the door, leaving fewer shinecharge frames remaining.",
"After gaining the shinecharge, continue holding forward in order to make Samus stand.",
"Then turnaround spin jump back toward the door, and continue spin jumping to reach the transition with a shinecharge."
]
},
{
"id": 90,
"link": [
2,
2
],
"name": "Precise Stutter Shinecharge, Leave Shinecharged (3-tile runway)",
"entranceCondition": {
"comeInStutterShinecharging": {
"minTiles": 3
}
},
"requires": [
"canPreciseStutterWaterShineCharge",
"canShinechargeMovementTricky",
"canInsaneJump",
{
"shineChargeFrames": 145
},
{
"or": [
"canBeVeryPatient",
{
"shineChargeFrames": 10
}
]
}
],
"exitCondition": {
"leaveShinecharged": {}
},
"unlocksDoors": [
{
"types": [
"super"
],
"requires": []
},
{
"types": [
"missiles",
"powerbomb"
],
"requires": [
"never"
]
}
],
"flashSuitChecked": true,
"blueSuitChecked": true,
"note": [
"With only a runway of 3 tiles (open end) in the other room,",
"the ideal timing for the stutter is to release forward for 3 or 4 frames, and repress forward on the last possible frame before the transition.",
"Other timings can work, but will gain the shinecharge further from the door, leaving fewer shinecharge frames remaining.",
"After gaining the shinecharge, continue holding forward in order to make Samus stand.",
"Then turnaround spin jump back toward the door, and continue spin jumping to reach the transition with a shinecharge.",
"Alternatively, with greater difficulty but saving some shinecharge frames,",
"after performing the turnaround spin jump, briefly moonwalk back, then retain momentum by boomeranging forward",
"(switching from pressing backward to pressing forward on the next frame),",
"and arm pump to reach the door quickly."
],
"devNote": [
"The same shinecharge frames could be achieved with a closed end runway (effective length of 2.4375),",
"with a 3-frame stutter, but there doesn't appear to be any application."
]
},
{
"id": 91,
"link": [
2,
2
],
"name": "Precise Stutter Shinecharge, Leave Shinecharged (2-tile runway)",
"entranceCondition": {
"comeInStutterShinecharging": {
"minTiles": 2
}
},
"requires": [
"canPreciseStutterWaterShineCharge",
"canShinechargeMovementTricky",
"canInsaneJump",
{
"shineChargeFrames": 150
},
{
"or": [
"canBeVeryPatient",
{
"shineChargeFrames": 15
}
]
}
],
"exitCondition": {
"leaveShinecharged": {}
},
"unlocksDoors": [
{
"types": [
"super"
],
"requires": []
},
{
"types": [
"missiles",
"powerbomb"
],
"requires": [
"never"
]
}
],
"flashSuitChecked": true,
"blueSuitChecked": true,
"note": [
"With only a runway of 2 tiles (open end) in the other room,",
"the ideal timing for the stutter is to release forward for 3 frames, and repress forward on the last possible frame before the transition.",
"Other timings can work, but will gain the shinecharge further from the door, leaving fewer shinecharge frames remaining.",
"After gaining the shinecharge, continue holding forward in order to make Samus stand.",
"Then turnaround spin jump back toward the door, and continue spin jumping to reach the transition with a shinecharge.",
"Alternatively, with greater difficulty but saving some shinecharge frames,",
"after performing the turnaround spin jump, briefly moonwalk back, then retain momentum by boomeranging forward",
"(switching from pressing backward to pressing forward on the next frame),",
"and arm pump to reach the door quickly."
],
"devNote": [
"FIXME: The canBeVeryPatient requirement is for difficulty placement of the boomerang method;",
"but the boomerang (or maybe specifically the moonwalk boomerang) should possibly be its own tech,",
"and the same with rapid arm pumping."
]
},
{
"id": 92,
"link": [
2,
2
],
"name": "Precise Stutter Shinecharge, Leave Shinecharged (1-tile runway)",
"entranceCondition": {
"comeInStutterShinecharging": {
"minTiles": 1
}
},
"requires": [
"canPreciseStutterWaterShineCharge",
"canInsaneJump",
"canBeVeryPatient",
"canShinechargeMovementTricky",
{
"shineChargeFrames": 160
}
],
"exitCondition": {
"leaveShinecharged": {}
},
"unlocksDoors": [
{
"types": [
"super"
],
"requires": []
},
{
"types": [
"missiles",
"powerbomb"
],
"requires": [
"never"
]
}
],
"flashSuitChecked": true,
"blueSuitChecked": true,
"note": [
"With only 1 tile of runway in the other room, Samus should ideally start on the last pixel of runway with X subpixels of $3FFF or less.",
"Run toward the door, releasing forward for exactly 1 frame and pressing it again on the last possible frame before the transition.",
"Starting with X subpixels of $7FFF can also work (e.g., by simply backing against the door ledge, then jumping and turning around mid-air);",
"in this case, Samus must advance 1 or 2 pixels with an arm pump before the transition (e.g., firing a shot or pressing and/or releasing an angle button),",
"and the shinecharge will be gained slightly further away from the door.",
"After gaining the shinecharge, continue holding forward in order to make Samus stand.",
"Then turnaround spin jump back toward the door, and continue spin jumping to reach the transition with a shinecharge.",
"Alternatively, with greater difficulty but saving some shinecharge frames,",
"after performing the turnaround spin jump, briefly moonwalk back, then retain momentum by boomeranging forward",
"(switching from pressing backward to pressing forward on the next frame),",
"and arm pump to reach the door quickly."
],
"detailNote": [
"Ideal subpixels ($3FFF) can be achieved using one of several methods:",
"1) press forward against the door ledge (or a wall aligned with it);",
"jump, and while mid-air, tap forward for exactly 1 frame to land with subpixels $BFFF,",
"moonwalk back for exactly 1 frame to end with subpixels $3FFF.",
"2) press forward against the door ledge (from a platform below, assuming one exists)",
"turn around (while on the ground), and moonwalk back two pixels,",
"then jump and mid-air turnaround onto the ledge;",
"if Samus jumped from the correct pixel but does not land on the ledge, then it was needed to moonwalk back 1 more frame;",
"in this case it is possible to retry by doing a mid-air turnaround back onto the platform, and moonwalking back for 1 frame.",
"3) if X-Ray is available, press against the door ledge (from a platform below, assuming one exists)",
"turn around (while on the ground), then jump and mid-air turnaround toward the door,",
"and use X-Ray to turnaround in place away from the door;",
"repeat this sequence 3 more times: jump, mid-air turnaround, X-Ray turnaround;",
"then do one more jump and mid-air turnaround, high enough to land on the door ledge,",
"and Samus should be in the correct position with subpixels $3FFF."
]
},
{
"id": 93,
"link": [
2,
2
],
"name": "Water Shinecharge, Leave With Temporary Blue",
"entranceCondition": {
"comeInRunning": {
"speedBooster": "yes",
"minTiles": 0.4375
}
},
"requires": [
"canWaterShineCharge",
"canXRayTurnaround",
"canLongChainTemporaryBlue"
],
"exitCondition": {
"leaveWithTemporaryBlue": {}
},
"unlocksDoors": [
{
"types": [
"ammo"
],
"requires": []
}
],
"flashSuitChecked": true,
"blueSuitChecked": true,
"note": [
"Start with low run speed by positioning exactly 2 pixels from the door.",
"Use X-ray to turn around, and chain temporary blue back to the door."
],
"devNote": [
"This can also be done with a stutter shinecharge, which can shorten the temp blue chain,",
"but not by enough to remove the need for the canLongChainTemporaryBlue requirement."
]
},
{
"id": 96,
"link": [
2,
2
],
"name": "Skultera Farm",
"requires": [
"canSuitlessMaridia",
{
"or": [
{
"and": [
{
"or": [
"Plasma",
{
"haveBlueSuit": {}
}
]
},
{
"cycleFrames": 1660
}
]
},
{
"and": [
"Wave",
{
"cycleFrames": 1860
}
]
},
{
"and": [
"Spazer",
{
"cycleFrames": 2100
}
]
},
{
"cycleFrames": 2500
}
]
}
],
"farmCycleDrops": [
{
"enemy": "Skultera",
"count": 2
}
],
"flashSuitChecked": true,
"blueSuitChecked": true,
"devNote": [
"With Gravity the Choot farm would be used instead.",
"FIXME: The Owtches could also be farmed, though they are not worth much."
]
},
{
"id": 16,
"link": [
2,
2
],
"name": "Crystal Flash",
"requires": [
"h_CrystalFlash",
{
"obstaclesNotCleared": [
"R-Mode"
]
}
],
"flashSuitChecked": true,
"blueSuitChecked": true
},
{
"id": 108,
"link": [
2,
2
],
"name": "Water Shinecharge, Crystal Spark",
"entranceCondition": {
"comeInRunning": {
"speedBooster": "yes",
"minTiles": 0.4375
},
"comesInHeated": "no"
},
"requires": [
"canWaterShineCharge",
"h_underwaterCrystalSpark"
],
"flashSuitChecked": true,
"blueSuitChecked": true,
"note": "Start the dash as close to the door transition as possible to help avoid getting hit by the first Owtch."
},
{
"id": 109,
"link": [
2,
2
],
"name": "In-Room Crystal Spark, Gravity",
"requires": [
"Gravity",
"h_shinechargeMaxRunway",
"h_CrystalSpark"
],
"flashSuitChecked": true,
"blueSuitChecked": true
},
{
"id": 99,
"link": [
2,
2
],
"name": "R-Mode Entry",
"entranceCondition": {
"comeInWithRMode": {}
},
"requires": [],
"clearsObstacles": [
"R-Mode"
],
"flashSuitChecked": true,
"blueSuitChecked": true
},
{
"id": 100,
"link": [
2,
2
],
"name": "R-Mode Crystal Flash Interrupt",
"requires": [
{
"obstaclesCleared": [
"R-Mode"
]
},
"canComplexRModeCrystalFlashInterrupt",
{
"ammo": {
"type": "Missile",
"count": 10
}
},
{
"ammo": {
"type": "Super",
"count": 10
}
},
{
"or": [
"h_partialEnemyDamageReduction",
{
"resourceAtMost": [
{
"type": "RegularEnergy",
"count": 19
}
]
},
{
"and": [
{
"resourceCapacity": [
{
"type": "RegularEnergy",
"count": 199
}
]
},
{
"resourceCapacity": [
{
"type": "ReserveEnergy",
"count": 199
}
]
}
]
}
]
}
],
"resetsObstacles": [
"R-Mode"
],
"flashSuitChecked": true,
"blueSuitChecked": true,
"note": [
"It is required to avoid double hitting the Skultera with the Power Bomb,",
"and to position the Crystal Flash so that the Skultera can hit Samus from above so it avoids the light orb.",
"To do this, Crystal Flash just left of the top left corner of the raised floor and time the Power Bomb so that its first hit is when the Skultera is far to the left."
],
"detailNote": [
"This can be done with no enemy damage reduction and up to 2 E-Tanks or a 50% enemy damage reduction and no E-Tanks;",
"a 75% reduction is not recommended and would require disabling and reenabling suits with a precise pause abuse."
],
"devNote": [
"FIXME: A 75% damage reduction method needs to be documented for if Samus only has Gravity and it provides 75% reduction."
]
},
{
"id": 106,
"link": [
2,
2
],
"name": "R-Mode Spark Interrupt",
"requires": [
{
"obstaclesCleared": [
"R-Mode"
]
},
"Gravity",
{
"or": [
"h_CrystalFlashForReserveEnergy",
{
"and": [
"h_RModeCanRefillReserves",
{
"partialRefill": {
"type": "ReserveEnergy",
"limit": 20
}
}
]
}
]
},
"h_shinechargeMaxRunway",
{
"autoReserveTrigger": {
"maxReserveEnergy": 95
}
},
{
"or": [
"canRModePauseAbuseSparkInterrupt",
{
"and": [
{
"or": [
"Charge",
"Plasma"
]
},
"canUseFrozenEnemies",
"canRModeSparkInterrupt"
]
}
]
}
],
"resetsObstacles": [
"R-Mode"
],
"flashSuitChecked": true,
"blueSuitChecked": true,
"note": [
"Farm the lower Choots, Skultera, and the bottom Owtch by running through it.",
"Shinecharge at the bottom, then use the Owtch on the small platform to interrupt.",
"This can be done with pause abuse or by freezing it while it is moving left."
]
},
{
"id": 101,
"link": [
2,
2
],
"name": "Direct G-Mode Morph, Crystal Flash Interrupt",
"entranceCondition": {
"comeInWithGMode": {
"mode": "direct",
"morphed": true
}
},
"requires": [
{
"or": [
{
"and": [
"Gravity",
"h_artificialMorphIBJ"
]
},
"h_artificialMorphSpringBall"
]
},
"h_artificialMorphComplexRModeCrystalFlashInterrupt",
{
"ammo": {
"type": "Missile",
"count": 10
}
},
{
"ammo": {
"type": "Super",
"count": 10
}
},
{
"or": [
"h_partialEnemyDamageReduction",
{
"resourceAtMost": [
{
"type": "RegularEnergy",
"count": 19
}
]
},
{
"and": [
{
"resourceCapacity": [
{
"type": "RegularEnergy",
"count": 199
}
]
},
{
"resourceCapacity": [
{
"type": "ReserveEnergy",
"count": 199
}
]
}
]
}
]
}
],
"flashSuitChecked": true,
"blueSuitChecked": true,
"note": [
"It is required to avoid double hitting the Skultera with the Power Bomb,",
"and to position the Crystal Flash so that the Skultera can hit Samus from above so it avoids the light orb.",
"To do this, Crystal Flash just left of the top left corner of the raised floor and time the Power Bomb so that its first hit is when the Skultera is far to the left."
],
"detailNote": [
"This can be done with no enemy damage reduction and up to 2 E-Tanks or a 50% enemy damage reduction and no E-Tanks;",
"a 75% reduction is not recommended and would require disabling and reenabling suits with a precise pause abuse."
],
"devNote": [
"FIXME: A 75% damage reduction method needs to be documented for if Samus only has Gravity and it provides 75% reduction."
]
},
{
"id": 17,
"link": [
2,
3
],
"name": "Base",
"requires": [
{
  "or": [
    "Gravity",
    {
      "and": [
        "canSuitlessMaridia",
        "HiJump"
      ]
    }
  ]
}
],
"flashSuitChecked": true,
"blueSuitChecked": true
},
{
"id": 18,
"link": [
2,
3
],
"name": "Suitless Spring Ball",
"requires": [
"canSuitlessMaridia",
"canSpringBallJumpMidAir",
{
"or": [
"canWallJump",
"h_underwaterCrouchJumpDownGrab",
"canTrickySpringBallJump"
]
}
],
"flashSuitChecked": true,
"blueSuitChecked": true,
"note": "Wall jump when the water is low or crouch jump + down grab when it is high."
},
{
"id": 19,
"link": [
2,
3
],
"name": "Frozen Fish Climb",
"requires": [
{
"notable": "Frozen Fish Climb"
},
"canSuitlessMaridia",
"canTrickyUseFrozenEnemies",
{
"or": [
{
"and": [
"canTrickyJump",
"h_underwaterCrouchJumpDownGrab"
]
},
{
"and": [
"canStationarySpinJump",
"canSunkenTileWideWallClimb"
]
}
]
}
],
"flashSuitChecked": true,
"blueSuitChecked": true,
"note": [
"Use the Skultera to get onto the top right platform. There are two distinct ways to get up using the top Skultera.",
"1. Freeze it at the bottom of its path to the left. Crouch jump and down grab to get onto it. The positioning is very precise.",
"2. Freeze it about a half-tile from the right wall and very quickly stationary spin jump and quickly walljump mash to get up before it thaws.",
"This may be easier by jumping away from the wall, towards the fish, to gain height faster."
]
},
{
"id": 69,
"link": [
2,
3
],
"name": "Use Stored Spark",
"requires": [
"h_storedSpark",
"h_underwaterCrouchJump",
{
"shinespark": {
"frames": 7,
"excessFrames": 4
}
}
],
"flashSuitChecked": true,
"blueSuitChecked": true,
"note": [
"It is possible to climb to the highest underwater platform before sparking with a crouch jump and down grab.",
"To crouch without using the shinespark, simply hold shoot while jumping."
]
},
{
"id": 20,
"link": [
2,
3
],
"name": "G-Mode Deep Stuck X-Ray Climb",
"entranceCondition": {
"comeInWithGMode": {
"mode": "direct",
"morphed": false
}
},
"requires": [
"canGModeXRayClimb",
"canLongXRayClimb"
],
"flashSuitChecked": true,
"blueSuitChecked": true,
"note": "Climb up 2 screens."
},
{
"id": 21,
"link": [
2,
3
],
"name": "Shinespark Deep Stuck X-Ray Climb",
"entranceCondition": {
"comeInShinecharged": {}
},
"requires": [
{
"shineChargeFrames": 1
},
{
"shinespark": {
"frames": 1,
"excessFrames": 1
}
},
"canShinesparkDeepStuck",
"canLongXRayClimb"
],
"flashSuitChecked": true,
"blueSuitChecked": true,
"note": "Climb up 2 screens."
},
{
"id": 22,
"link": [
2,
3
],
"name": "Very Deep Stuck X-Ray Climb",
"entranceCondition": {
"comeInWithGMode": {
"mode": "direct",
"morphed": false
}
},
"requires": [
"canGModeXRayClimb",
"canLongXRayClimb"
],
"bypassesDoorShell": "yes",
"flashSuitChecked": true,
"blueSuitChecked": true,
"note": [
"Enter with G-mode direct, back up to between 1 and 6 pixels from the door transition, and activate X-ray to get very deep stuck in the door.",
"Climb up 2 screens, and perform a turnaround buffered spin-jump away from the door to trigger the transition, bypassing any lock on the door."
]
},
{
"id": 23,
"link": [
2,
4
],
"name": "Shinespark",
"requires": [
"Gravity",
{
"or": [
"HiJump",
"canTrickySpringBallJump",
"canWallJump",
{
"and": [
"canGravityJump",
"canShinechargeMovementTricky"
]
}
]
},
{
"enemyKill": {
"enemies": [
[
"Owtch",
"Owtch"
]
]
}
},
"canShinechargeMovementComplex",
{
"canShineCharge": {
"usedTiles": 16,
"gentleUpTiles": 2,
"gentleDownTiles": 2,
"steepUpTiles": 1,
"steepDownTiles": 1,
"startingSteepDownTiles": 1,
"startingGentleDownTiles": 2,
"openEnd": 2
}
},
{
"shinespark": {
"frames": 43,
"excessFrames": 3
}
}
],
"flashSuitChecked": true,
"blueSuitChecked": true,
"note": [
"Gain a shinecharge by running right-to-left on the underwater runway on the right side of the room.",
"Use HiJump or a Spring Ball jump to quickly exit the water to the left and spark up."
],
"devNote": [
"FIXME: It's technically possible to evade the Owtches without killing them, but it's unclear if this can be done reliably.",
"A 2->5 shinespark strat from here can also be added,",
"using less energy than the existing strat that uses the runway at the bottom of the room."
]
},
{
"id": 24,
"link": [
2,
4
],
"name": "G-Mode Morph",
"entranceCondition": {
"comeInWithGMode": {
"mode": "any",
"morphed": true
}
},
"requires": [
{
"or": [
"Gravity",
{
"and": [
"canSuitlessMaridia",
"HiJump",
"h_artificialMorphSpringBall"
]
}
]
},
"h_artificialMorphLongIBJ"
],
"flashSuitChecked": true,
"blueSuitChecked": true
},
{
"id": 70,
"link": [
2,
5
],
"name": "Use Stored Spark",
"requires": [
"h_storedSpark",
{
"or": [
{
"shinespark": {
"frames": 72,
"excessFrames": 14
}
},
{
"and": [
"canGravityJump",
{
"shinespark": {
"frames": 50,
"excessFrames": 13
}
}
]
}
]
}
],
"flashSuitChecked": true,
"blueSuitChecked": true
},
{
"id": 25,
"link": [
2,
5
],
"name": "G-Mode Morph",
"entranceCondition": {
"comeInWithGMode": {
"mode": "any",
"morphed": true
}
},
"requires": [
{
"or": [
"Gravity",
{
"and": [
"canSuitlessMaridia",
"HiJump",
"h_artificialMorphSpringBall"
]
}
]
},
{
"or": [
"h_artificialMorphLongIBJ",
{
"and": [
"Gravity",
"h_artificialMorphIBJ",
"h_artificialMorphBombHorizontally"
]
},
{
"and": [
"canGravityJump",
"h_artificialMorphSpringBallBombJump",
{
"or": [
"h_additionalBomb",
{
"tech": "canDoubleSpringBallJumpMidAir"
}
]
},
{
"or": [
{
"and": [
"h_additionalBomb",
"h_additionalBomb"
]
},
{
"notable": "Left Shaft Precise Crouch Jump Down Grab"
}
]
}
]
}
]
}
],
"flashSuitChecked": true,
"blueSuitChecked": true
},
{
"id": 26,
"link": [
2,
5
],
"name": "Shinespark",
"requires": [
"Gravity",
"h_shinechargeMaxRunway",
"canShinechargeMovement",
{
"or": [
{
"shinespark": {
"frames": 90,
"excessFrames": 11
}
},
{
"and": [
"canMidairShinespark",
{
"shinespark": {
"frames": 82,
"excessFrames": 11
}
}
]
},
{
"and": [
"canShinechargeMovementComplex",
{
"shinespark": {
"frames": 82,
"excessFrames": 12
}
}
]
}
]
}
],
"flashSuitChecked": true,
"blueSuitChecked": true,
"note": [
"Start the dash close to the door to help avoid getting hit by the first Owtch.",
"Spark up while on the right side of the platform. To avoid the Owtch on the platform, it may help to jump on the left side of the platform then jump again and spark midair above the right side.",
"This is possible tankless, but it requires sparking fairly close to the right possible side while facing to the right."
]
},
{
"id": 27,
"link": [
2,
5
],
"name": "Suitless Shinespark",
"entranceCondition": {
"comeInRunning": {
"speedBooster": "yes",
"minTiles": 0.4375
}
},
"requires": [
"canWaterShineCharge",
"canShinechargeMovementComplex",
{
"shinespark": {
"frames": 90,
"excessFrames": 11
}
}
],
"flashSuitChecked": true,
"blueSuitChecked": true,
"note": [
"Start the dash as close to the door transition as possible to help avoid getting hit by the first Owtch. Store the shine charge while high up on the left slope.",
"Spark up while on the right side of the platform. To avoid the Owtch on the platform, it may help to jump on the left side of the platform then jump again and spark midair above the right side."
],
"devNote": [
"The excess frames are only low enough to get to the top right overhang, as it is free to jump to 5.",
"With other items or wall jumps and lower energy, it is possible to first spark to 1, as it has more excess frames."
]
},
{
"id": 28,
"link": [
3,
2
],
"name": "Base",
"requires": [],
"flashSuitChecked": true,
"blueSuitChecked": true
},
{
"id": 102,
"link": [
3,
2
],
"name": "Direct G-Mode Morph, Crystal Flash Interrupt",
"entranceCondition": {
"comeInWithGMode": {
"mode": "direct",
"morphed": true
}
},
"requires": [
"h_artificialMorphComplexRModeCrystalFlashInterrupt",
{
"ammo": {
"type": "Missile",
"count": 10
}
},
{
"ammo": {
"type": "Super",
"count": 10
}
},
{
"or": [
"h_partialEnemyDamageReduction",
{
"resourceAtMost": [
{
"type": "RegularEnergy",
"count": 19
}
]
},
{
"and": [
{
"resourceCapacity": [
{
"type": "RegularEnergy",
"count": 199
}
]
},
{
"resourceCapacity": [
{
"type": "ReserveEnergy",
"count": 199
}
]
}
]
}
]
}
],
"flashSuitChecked": true,
"blueSuitChecked": true,
"note": [
"It is required to avoid double hitting the Skultera with the Power Bomb,",
"and to position the Crystal Flash so that the Skultera can hit Samus from above so it avoids the light orb.",
"To do this, Crystal Flash just left of the top left corner of the raised floor and time the Power Bomb so that its first hit is when the Skultera is far to the left."
],
"detailNote": [
"This can be done with no enemy damage reduction and up to 2 E-Tanks or a 50% enemy damage reduction and no E-Tanks;",
"a 75% reduction is not recommended and would require disabling and reenabling suits with a precise pause abuse."
],
"devNote": [
"FIXME: A 75% damage reduction method needs to be documented for if Samus only has Gravity and it provides 75% reduction."
]
},
{
"id": 29,
"link": [
3,
3
],
"name": "Leave with Runway",
"requires": [],
"exitCondition": {
"leaveWithRunway": {
"length": 5,
"openEnd": 1
}
},
"flashSuitChecked": true,
"blueSuitChecked": true
},
{
"id": 30,
"link": [
3,
3
],
"name": "Leave with Spark",
"requires": [
"Gravity",
{
"enemyKill": {
"enemies": [
[
"Owtch",
"Owtch"
]
]
}
},
"canShinechargeMovementComplex",
{
"canShineCharge": {
"usedTiles": 16,
"gentleUpTiles": 2,
"gentleDownTiles": 2,
"steepUpTiles": 1,
"steepDownTiles": 1,
"startingSteepDownTiles": 1,
"startingGentleDownTiles": 2,
"openEnd": 2
}
},
{
"shinespark": {
"frames": 10,
"excessFrames": 0
}
}
],
"exitCondition": {
"leaveWithSpark": {}
},
"unlocksDoors": [
{
"types": [
"ammo"
],
"requires": []
}
],
"flashSuitChecked": true,
"blueSuitChecked": true,
"note": [
"Gain a shinecharge by running right-to-left on the underwater runway on the right side of the room.",
"Perform quick ledge-grabs to reach the platform in front of the door in time to spark out."
],
"devNote": "FIXME: It's technically possible to evade the Owtches without killing them, but it's unclear if this can be done reliably."
},
{
"id": 31,
"link": [
3,
3
],
"name": "Leave With Temporary Blue (Kill Owtches)",
"requires": [
"Gravity",
{
"enemyKill": {
"enemies": [
[
"Owtch",
"Owtch"
]
]
}
},
{
"canShineCharge": {
"usedTiles": 16,
"gentleUpTiles": 2,
"gentleDownTiles": 2,
"steepUpTiles": 1,
"steepDownTiles": 1,
"startingSteepDownTiles": 1,
"startingGentleDownTiles": 2,
"openEnd": 2
}
},
"canChainTemporaryBlue",
"canXRayTurnaround"
],
"exitCondition": {
"leaveWithTemporaryBlue": {}
},
"unlocksDoors": [
{
"types": [
"ammo"
],
"requires": []
}
],
"flashSuitChecked": true,
"blueSuitChecked": true,
"note": [
"Gain a shinecharge by running right-to-left on the underwater runway on the right side of the room."
],
"devNote": "FIXME: It's technically possible to evade the Owtches without killing them, but it's unclear if this can be done reliably."
},
{
"id": 77,
"link": [
3,
3
],
"name": "Leave With Temporary Blue (Long Chain)",
"requires": [
"Gravity",
{
"canShineCharge": {
"usedTiles": 42,
"gentleUpTiles": 2,
"steepUpTiles": 1,
"steepDownTiles": 3,
"openEnd": 1
}
},
"canLongChainTemporaryBlue",
"canXRayTurnaround"
],
"exitCondition": {
"leaveWithTemporaryBlue": {}
},
"unlocksDoors": [
{
"types": [
"ammo"
],
"requires": []
}
],
"flashSuitChecked": true,
"blueSuitChecked": true,
"note": [
"Gain a shinecharge by running right-to-left on the long runway at the bottom of the room."
]
},
{
"id": 32,
"link": [
3,
3
],
"name": "Leave Spinning (Space Jump)",
"requires": [
"SpaceJump"
],
"exitCondition": {
"leaveSpinning": {
"remoteRunway": {
"length": 8,
"openEnd": 2
}
}
},
"flashSuitChecked": true,
"blueSuitChecked": true
},
{
"id": 33,
"link": [
3,
3
],
"name": "Leave With Mockball",
"requires": [],
"exitCondition": {
"leaveWithMockball": {
"remoteRunway": {
"length": 8,
"openEnd": 2
},
"landingRunway": {
"length": 5,
"openEnd": 1
}
}
},
"flashSuitChecked": true,
"blueSuitChecked": true
},
{
"id": 34,
"link": [
3,
3
],
"name": "Leave With Spring Ball Bounce",
"requires": [],
"exitCondition": {
"leaveWithSpringBallBounce": {
"remoteRunway": {
"length": 8,
"openEnd": 2
},
"landingRunway": {
"length": 5,
"openEnd": 1
},
"movementType": "uncontrolled"
}
},
"flashSuitChecked": true,
"blueSuitChecked": true
},
{
"id": 35,
"link": [
3,
3
],
"name": "Leave Space Jumping",
"requires": [],
"exitCondition": {
"leaveSpaceJumping": {
"remoteRunway": {
"length": 8,
"openEnd": 2
}
}
},
"flashSuitChecked": true,
"blueSuitChecked": true
},
{
"id": 36,
"link": [
3,
3
],
"name": "Choot Farm",
"requires": [
{
"or": [
{
"resetRoom": {
"nodes": [
3
]
}
},
{
"and": [
{
"resetRoom": {
"nodes": [
2
]
}
},
{
"or": [
{
"and": [
"Gravity",
{
"cycleFrames": 835
}
]
},
{
"and": [
"canSuitlessMaridia",
"HiJump",
{
"cycleFrames": 1540
}
]
}
]
}
]
},
{
"and": [
{
"resetRoom": {
"nodes": [
4
]
}
},
{
"or": [
{
"and": [
"HiJump",
"SpaceJump",
{
"cycleFrames": 230
}
]
},
{
"and": [
"canTrickyWallJump",
"canConsecutiveWallJump",
{
"cycleFrames": 310
}
]
},
{
"and": [
"SpaceJump",
{
"cycleFrames": 400
}
]
}
]
}
]
}
]
},
{
"or": [
{
"and": [
"Plasma",
{
"cycleFrames": 320
}
]
},
{
"and": [
"Wave",
{
"cycleFrames": 340
}
]
},
{
"and": [
"Grapple",
{
"cycleFrames": 360
}
]
},
{
"and": [
"Spazer",
"canFarmWhileShooting",
{
"cycleFrames": 390
}
]
},
{
"and": [
"canDash",
"ScrewAttack",
"canDodgeWhileShooting",
{
"cycleFrames": 500
}
]
},
{
"cycleFrames": 640
}
]
}
],
"resetsObstacles": [
"R-Mode"
],
"farmCycleDrops": [
{
"enemy": "Choot",
"count": 2
}
],
"flashSuitChecked": true,
"blueSuitChecked": true
},
{
"id": 37,
"link": [
3,
3
],
"name": "Crystal Flash",
"requires": [
"h_CrystalFlash",
{
"obstaclesNotCleared": [
"R-Mode"
]
}
],
"flashSuitChecked": true,
"blueSuitChecked": true
},
{
"id": 110,
"link": [
3,
3
],
"name": "Come in Shinecharging, Crystal Spark",
"entranceCondition": {
"comeInShinecharging": {
"length": 4,
"openEnd": 0
},
"comesInHeated": "no"
},
"requires": [
"h_CrystalSpark"
],
"flashSuitChecked": true,
"blueSuitChecked": true
},
{
"id": 103,
"link": [
3,
3
],
"name": "R-Mode Entry",
"entranceCondition": {
"comeInWithRMode": {}
},
"requires": [],
"clearsObstacles": [
"R-Mode"
],
"flashSuitChecked": true,
"blueSuitChecked": true
},
{
"id": 38,
"link": [
3,
4
],
"name": "Base",
"requires": [
{
  "or": [
    "canConsecutiveWallJump",
    "SpaceJump",
    "canLongIBJ"
  ]
}
],
"flashSuitChecked": true,
"blueSuitChecked": true
},
{
"id": 39,
"link": [
3,
4
],
"name": "Frozen Choot Wall Jump",
"requires": [
"canTrickyUseFrozenEnemies",
"HiJump",
"canWallJump"
],
"flashSuitChecked": true,
"blueSuitChecked": true
},
{
"id": 40,
"link": [
3,
4
],
"name": "Frozen Choot Speedy Spring Ball Jump",
"requires": [
"canTrickyUseFrozenEnemies",
"HiJump",
"canSpeedyJump",
"canTrickyJump",
"canSpringBallJumpMidAir"
],
"flashSuitChecked": true,
"blueSuitChecked": true
},
{
"id": 41,
"link": [
3,
4
],
"name": "Frozen Choot Spring Ball Jump Unmorph Bomb Boost",
"requires": [
"canTrickyUseFrozenEnemies",
"HiJump",
"canSpringBallJumpMidAir",
"canUnmorphBombBoost",
"h_complexToCarryFlashSuit"
],
"flashSuitChecked": true,
"blueSuitChecked": true
},
{
"id": 79,
"link": [
3,
4
],
"name": "Insane Frozen Choot Spring Ball Jump",
"requires": [
{
"notable": "Insane Frozen Choot Spring Ball Jump"
},
"canDash",
"canTrickyUseFrozenEnemies",
"HiJump",
"can4HighMidAirMorph",
"canTrickySpringBallJump",
"canInsaneJump"
],
"wallJumpAvoid": true,
"flashSuitChecked": true,
"blueSuitChecked": true,
"note": [
"Freeze the island Choot when it is at the far left of its second-highest swoop.",
"Run right-to-left on it and perform a last-frame jump into a max-height spring ball jump.",
"Getting the highest possible run speed requires starting from the right-most 87.5% of the last pixel (subpixel position at least $2000).",
"Press pause at the same time as starting to run, or slightly earlier, and perform the mid-air morph quickly;",
"timing the pause to hit as early as possible after morphing will maximize the time that Spring Ball is equipped,",
"boosting Samus' horizontal speed and making it possible to clear the corner of the ceiling."
],
"devNote": [
"There is at least a 3-frame window for freezing the Choot that works:",
"two frames with the Choot in position ($2DE, $2F7), and one frame in position ($2E1, $2F9)",
"It is possible to make the jump with one less frame of run speed; in this case Samus should start running from a few pixels further left, and a tighter mid-air morph may be required."
]
},
{
"id": 42,
"link": [
3,
4
],
"name": "Speedy Jump Spring Ball Jump",
"entranceCondition": {
"comeInRunning": {
"speedBooster": "yes",
"minTiles": 43
}
},
"requires": [
"canSpeedyJump",
"canTrickyJump",
"canLateralMidAirMorph",
"canTrickySpringBallJump"
],
"flashSuitChecked": true,
"blueSuitChecked": true,
"note": [
"Run into the room, pressing pause immediately when entering.",
"Jump into a mid-air spring ball jump to reach the ledge above.",
"Perform the spring ball jump while still moving forward, in order to get a boost in jump height."
],
"devNote": [
"This assumes max run speed (extra run speed of $7.0)."
]
},
{
"id": 43,
"link": [
3,
4
],
"name": "Tricky Speedy Jump Spring Ball Jump",
"entranceCondition": {
"comeInRunning": {
"speedBooster": "yes",
"minTiles": 34
}
},
"requires": [
"canTrickyDashJump",
"canLateralMidAirMorph",
"canTrickySpringBallJump"
],
"flashSuitChecked": true,
"blueSuitChecked": true,
"note": [
"Run into the room, pressing pause immediately when entering.",
"Jump into a mid-air spring ball jump to reach the ledge above.",
"Perform the spring ball jump while still moving forward, in order to get a boost in jump height."
],
"devNote": [
"An extra run speed of at least $6.0 or $6.1 is needed."
]
},
{
"id": 44,
"link": [
3,
4
],
"name": "Speedy HiJump Spring Ball Jump",
"entranceCondition": {
"comeInRunning": {
"speedBooster": "yes",
"minTiles": 5.4375
}
},
"requires": [
"HiJump",
"canSpeedyJump",
"canTrickyJump",
"canLateralMidAirMorph",
"canTrickySpringBallJump",
{
"or": [
"canSpringFling",
"canInsaneJump",
"can4HighMidAirMorph"
]
}
],
"flashSuitChecked": true,
"blueSuitChecked": true,
"note": [
"Run into the room, pressing pause immediately when entering.",
"Jump into a mid-air spring ball jump to reach the ledge above.",
"Perform the spring ball jump while still moving forward, in order to get a boost in jump height."
],
"devNote": [
"This assumes extra run speed of $1.B entering the room, at least $2.6 when jumping (a 2-frame window in the worst case)."
]
},
{
"id": 45,
"link": [
3,
4
],
"name": "Come in Shinecharged, Shinespark",
"entranceCondition": {
"comeInShinecharged": {}
},
"requires": [
{
"shineChargeFrames": 120
},
"canShinechargeMovementComplex",
{
"shinespark": {
"frames": 30,
"excessFrames": 3
}
}
],
"flashSuitChecked": true,
"blueSuitChecked": true,
"note": [
"Shinespark from the left side of the water, or the very edge of the land.",
"It helps to face right before Shinesparking."
]
},
{
"id": 83,
"link": [
3,
4
],
"name": "Come in Shinecharging, Shinespark",
"entranceCondition": {
"comeInShinecharging": {
"length": 4,
"openEnd": 0
}
},
"requires": [
"canShinechargeMovementComplex",
{
"or": [
{
"shinespark": {
"frames": 30,
"excessFrames": 3
}
},
{
"and": [
"HiJump",
{
"shinespark": {
"frames": 27,
"excessFrames": 3
}
}
]
}
]
}
],
"flashSuitChecked": true,
"blueSuitChecked": true,
"note": [
"Shinespark from the left side of the water, or the very edge of the land.",
"It helps to face right before Shinesparking."
]
},
{
"id": 71,
"link": [
3,
4
],
"name": "Use Stored Spark",
"requires": [
"h_storedSpark",
{
"or": [
{
"shinespark": {
"frames": 30,
"excessFrames": 2
}
},
{
"and": [
"HiJump",
{
"shinespark": {
"frames": 26,
"excessFrames": 2
}
}
]
},
{
"and": [
"canTrickyUseFrozenEnemies",
{
"shinespark": {
"frames": 20,
"excessFrames": 3
}
}
]
},
{
"and": [
"canTrickyUseFrozenEnemies",
"HiJump",
{
"shinespark": {
"frames": 16,
"excessFrames": 3
}
}
]
}
]
}
],
"flashSuitChecked": true,
"blueSuitChecked": true,
"devNote": "Spark vertically above the leftmost water tile. It is possible to use a frozen Choot to save Energy."
},
{
"id": 46,
"link": [
3,
4
],
"name": "G-Mode Morph",
"entranceCondition": {
"comeInWithGMode": {
"mode": "any",
"morphed": true
}
},
"requires": [
"h_artificialMorphLongIBJ"
],
"flashSuitChecked": true,
"blueSuitChecked": true
},
{
"id": 47,
"link": [
3,
5
],
"name": "Base",
"requires": [
{
"or": [
"canConsecutiveWallJump",
"SpaceJump",
"canLongIBJ"
]
},
{
"enemyDamage": {
"enemy": "Choot",
"type": "contact",
"hits": 1
}
}
],
"flashSuitChecked": true,
"blueSuitChecked": true
},
{
"id": 48,
"link": [
3,
5
],
"name": "Screw Kill",
"requires": [
{
"or": [
"canConsecutiveWallJump",
"SpaceJump"
]
},
{
"or": [
{
"enemyKill": {
"enemies": [
[
"Choot"
]
],
"explicitWeapons": [
"ScrewAttack"
]
}
},
{
"and": [
{
"or": [
"SpaceJump",
{
"and": [
"canConsecutiveWallJump",
"canWallJumpWithCharge"
]
}
]
},
{
"enemyKill": {
"enemies": [
[
"Choot"
]
],
"explicitWeapons": [
"PseudoScrew"
]
}
}
]
}
]
}
],
"flashSuitChecked": true,
"blueSuitChecked": true
},
{
"id": 49,
"link": [
3,
5
],
"name": "Carefully Kill Choot",
"requires": [
{
"or": [
"canConsecutiveWallJump",
"SpaceJump",
"canLongIBJ"
]
},
{
"or": [
"canTrickyJump",
{
"and": [
"canCarefulJump",
{
"enemyKill": {
"enemies": [
[
"Choot"
]
],
"explicitWeapons": [
"Missile",
"Super"
]
}
}
]
}
]
}
],
"flashSuitChecked": true,
"blueSuitChecked": true,
"note": [
"Shoot the Choot either before landing or from the safety of the ledge edge.",
"If bomb jumping, there is a timing for rolling under the Choot."
]
},
{
"id": 50,
"link": [
3,
5
],
"name": "Kill Choot and Reclimb",
"requires": [
{
"or": [
"canConsecutiveWallJump",
"SpaceJump",
"canLongIBJ"
]
},
{
"or": [
{
"enemyKill": {
"enemies": [
[
"Choot"
]
],
"explicitWeapons": [
"Wave",
"Spazer",
"PowerBomb"
]
}
},
{
"and": [
"canBeVeryPatient",
{
"enemyKill": {
"enemies": [
[
"Choot"
]
]
}
}
]
}
]
}
],
"flashSuitChecked": true,
"blueSuitChecked": true,
"note": "To avoid damage, the Choot can be killed and then Samus can climb back up again.",
"devNote": "Missile kill strats could fit here with a reclimb or by landing on the ledge, with the same requirements."
},
{
"id": 51,
"link": [
3,
5
],
"name": "Speedy HiJump Spring Ball Jump",
"entranceCondition": {
"comeInRunning": {
"speedBooster": "yes",
"minTiles": 21
}
},
"requires": [
"HiJump",
"canSpeedyJump",
"canTrickyJump",
"canTrickySpringBallJump"
],
"flashSuitChecked": true,
"blueSuitChecked": true,
"note": [
"Run into the room, pressing pause immediately when entering.",
"Jump into a mid-air spring ball jump to reach the top ledge above;",
"perform the spring ball jump while still moving forward, in order to get a boost in jump height."
],
"devNote": [
"This assumes extra run speed of $4.6 entering the room, at least $4.D when jumping (a 2-frame window in the worst case)."
]
},
{
"id": 52,
"link": [
3,
5
],
"name": "Shinespark",
"entranceCondition": {
"comeInShinecharged": {}
},
"requires": [
{
"shineChargeFrames": 145
},
"canShinechargeMovementComplex",
"canTrickyJump",
{
"shinespark": {
"frames": 49,
"excessFrames": 1
}
}
],
"flashSuitChecked": true,
"blueSuitChecked": true,
"note": [
"Shinespark from the tile to the right of the Choot.",
"It helps to face right before shinesparking."
]
},
{
"id": 107,
"link": [
3,
5
],
"name": "Come in Shinecharging, Shinespark",
"entranceCondition": {
"comeInShinecharging": {
"length": 4,
"openEnd": 0
}
},
"requires": [
"canShinechargeMovementComplex",
"canTrickyJump",
{
"shinespark": {
"frames": 49,
"excessFrames": 1
}
}
],
"flashSuitChecked": true,
"blueSuitChecked": true,
"note": [
"Shinespark from the tile to the right of the Choot.",
"It helps to face right before shinesparking."
]
},
{
"id": 72,
"link": [
3,
5
],
"name": "Use Stored Spark",
"requires": [
{
"useFlashSuit": {}
},
{
"or": [
{
"shinespark": {
"frames": 41,
"excessFrames": 2
}
},
{
"and": [
"HiJump",
{
"shinespark": {
"frames": 37,
"excessFrames": 1
}
}
]
},
{
"and": [
"canTrickyUseFrozenEnemies",
{
"shinespark": {
"frames": 30,
"excessFrames": 1
}
}
]
},
{
"and": [
"canTrickyUseFrozenEnemies",
"HiJump",
{
"shinespark": {
"frames": 27,
"excessFrames": 2
}
}
]
}
]
}
],
"flashSuitChecked": true,
"blueSuitChecked": true,
"devNote": "It is possible to use a frozen Choot to save Energy."
},
{
"id": 53,
"link": [
3,
5
],
"name": "G-Mode Morph",
"entranceCondition": {
"comeInWithGMode": {
"mode": "any",
"morphed": true
}
},
"requires": [
{
  "or": [
    "h_artificialMorphLongIBJ",
    {
      "and": [
        "Gravity",
        "h_artificialMorphIBJ",
        "h_artificialMorphBombHorizontally"
      ]
    },
    {
      "and": [
        "canGravityJump",
        "h_artificialMorphSpringBallBombJump",
        {
          "or": [
            "h_additionalBomb",
            {
              "tech": "canDoubleSpringBallJumpMidAir"
            }
          ]
        },
        {
          "or": [
            {
              "and": [
                "h_additionalBomb",
                "h_additionalBomb"
              ]
            },
            {
              "notable": "Left Shaft Precise Crouch Jump Down Grab"
            }
          ]
        }
      ]
    }
  ]
}
],
"flashSuitChecked": true,
"blueSuitChecked": true
},
{
"id": 54,
"link": [
3,
6
],
"name": "X-Ray Climb Into Fake Kassiuz Room",
"entranceCondition": {
"comeInWithDoorStuckSetup": {}
},
"requires": [
{
"notable": "X-Ray Climb Into Fake Kassiuz Room"
},
"canLongXRayClimb"
],
"flashSuitChecked": true,
"blueSuitChecked": true,
"note": [
"Climb up 2 screens plus 2 tiles, to enter a normally inaccessible area behind the top right door, containing a copy of the bottom half of Kassiuz Room.",
"There is a blue door on the other side of the top right door.",
"Opening it and touching the transition behind it will lead to the same room as the bottom right door of the room;",
"however, Samus will be placed a screen to the left of the door, which will usually be out-of-bounds."
],
"devNote": [
"FIXME: This strat and node 6 currently have no logical purpose,",
"but there might be cases where the player could X-Ray climb to somewhere useful after passing through this wrong-facing transition."
]
},
{
"id": 104,
"link": [
4,
2
],
"name": "Direct G-Mode Morph, Crystal Flash Interrupt",
"entranceCondition": {
"comeInWithGMode": {
"mode": "direct",
"morphed": true
}
},
"requires": [
"h_artificialMorphComplexRModeCrystalFlashInterrupt",
{
"ammo": {
"type": "Missile",
"count": 10
}
},
{
"ammo": {
"type": "Super",
"count": 10
}
},
{
"or": [
"h_partialEnemyDamageReduction",
{
"resourceAtMost": [
{
"type": "RegularEnergy",
"count": 19
}
]
},
{
"and": [
{
"resourceCapacity": [
{
"type": "RegularEnergy",
"count": 199
}
]
},
{
"resourceCapacity": [
{
"type": "ReserveEnergy",
"count": 199
}
]
}
]
}
]
}
],
"flashSuitChecked": true,
"blueSuitChecked": true,
"note": [
"It is required to avoid double hitting the Skultera with the Power Bomb,",
"and to position the Crystal Flash so that the Skultera can hit Samus from above so it avoids the light orb.",
"To do this, Crystal Flash just left of the top left corner of the raised floor and time the Power Bomb so that its first hit is when the Skultera is far to the left."
],
"detailNote": [
"This can be done with no enemy damage reduction and up to 2 E-Tanks or a 50% enemy damage reduction and no E-Tanks;",
"a 75% reduction is not recommended and would require disabling and reenabling suits with a precise pause abuse."
],
"devNote": [
"FIXME: A 75% damage reduction method needs to be documented for if Samus only has Gravity and it provides 75% reduction."
]
},
{
"id": 55,
"link": [
4,
3
],
"name": "Base",
"requires": [],
"flashSuitChecked": true,
"blueSuitChecked": true
},
{
"id": 80,
"link": [
4,
3
],
"name": "Come In Shinecharging, Leave With Spark",
"entranceCondition": {
"comeInShinecharging": {
"length": 6,
"openEnd": 1
}
},
"requires": [
"canShinechargeMovementTricky",
{
"shinespark": {
"frames": 31,
"excessFrames": 0
}
}
],
"exitCondition": {
"leaveWithSpark": {}
},
"unlocksDoors": [
{
"types": [
"super"
],
"requires": []
},
{
"types": [
"missiles",
"powerbomb"
],
"requires": [
"never"
]
}
],
"flashSuitChecked": true,
"blueSuitChecked": true
},
{
"id": 81,
"link": [
4,
3
],
"name": "Come In Shinecharged, Leave With Spark",
"entranceCondition": {
"comeInShinecharged": {}
},
"requires": [
"canShinechargeMovementTricky",
"canHeroShot",
{
"shineChargeFrames": 150
},
{
"shinespark": {
"frames": 31,
"excessFrames": 0
}
}
],
"exitCondition": {
"leaveWithSpark": {}
},
"unlocksDoors": [
{
"types": [
"super"
],
"requires": []
},
{
"types": [
"missiles",
"powerbomb"
],
"requires": [
"never"
]
}
],
"flashSuitChecked": true,
"blueSuitChecked": true
},
{
"id": 56,
"link": [
4,
4
],
"name": "Leave with Runway",
"requires": [],
"exitCondition": {
"leaveWithRunway": {
"length": 7,
"openEnd": 1
}
},
"flashSuitChecked": true,
"blueSuitChecked": true
},
{
"id": 57,
"link": [
4,
4
],
"name": "Crystal Flash",
"requires": [
"h_CrystalFlash",
{
"obstaclesNotCleared": [
"R-Mode"
]
}
],
"flashSuitChecked": true,
"blueSuitChecked": true
},
{
"id": 111,
"link": [
4,
4
],
"name": "Come in Shinecharging, Crystal Spark",
"entranceCondition": {
"comeInShinecharging": {
"length": 6,
"openEnd": 0
},
"comesInHeated": "no"
},
"requires": [
"h_CrystalSpark"
],
"flashSuitChecked": true,
"blueSuitChecked": true
},
{
"id": 105,
"link": [
4,
4
],
"name": "R-Mode Entry",
"entranceCondition": {
"comeInWithRMode": {}
},
"requires": [],
"clearsObstacles": [
"R-Mode"
],
"flashSuitChecked": true,
"blueSuitChecked": true
},
{
"id": 78,
"link": [
4,
5
],
"name": "HiJump Bomb Boost Spring Ball Jump",
"requires": [
"HiJump",
"canSpringBallBombJump",
{
"tech": "canBombHorizontally"
},
"canTrickyJump"
],
"flashSuitChecked": true,
"blueSuitChecked": true,
"note": [
"Bomb horizontally, then use spring ball to jump around the overhang.",
"Either quickly kill the Choot or land on the left pixel to avoid a hit.",
"Using a Power Bomb will kill the Choot just before it swings left another time and will make the landing area a bit larger."
]
},
{
"id": 58,
"link": [
4,
5
],
"name": "Speedy Jump",
"entranceCondition": {
"comeInRunning": {
"speedBooster": "yes",
"minTiles": 21
}
},
"requires": [
"canSpeedyJump",
"canInsaneJump"
],
"flashSuitChecked": true,
"blueSuitChecked": true,
"note": [
"Jump on the last possible frame, and get around the ledge while remaining in spin.",
"If at least 23 runway tiles are available, then a momentum conserving turnaround can be used to make the jump more lenient."
],
"devNote": [
"An extra run speed of at least $5.2 is needed, avoiding the spike at $6.0 and $6.1 (corresponding to 34 tiles).",
"For a momentum conserving turnaround to help, it needs at least $5.6 speed."
]
},
{
"id": 59,
"link": [
4,
5
],
"name": "Spring Ball (Come in With Mockball)",
"entranceCondition": {
"comeInWithMockball": {
"speedBooster": "yes",
"adjacentMinTiles": 20,
"remoteAndLandingMinTiles": [
[
18.4375,
0
]
]
}
},
"requires": [
"canTrickyDashJump",
"h_useSpringBall"
],
"flashSuitChecked": true,
"blueSuitChecked": true,
"note": [
"Come in rolling with high speed, and use Spring Ball to jump around the ledge."
],
"devNote": [
"An extra run speed of $4.0 and $4.1 works; speeds of at least $4.5 also work."
]
},
{
"id": 60,
"link": [
4,
5
],
"name": "X-Ray Climb",
"entranceCondition": {
"comeInWithDoorStuckSetup": {}
},
"requires": [
"canXRayClimb"
],
"flashSuitChecked": true,
"blueSuitChecked": true,
"note": "Climb less than 1 screen."
},
{
"id": 61,
"link": [
4,
5
],
"name": "Come in Shinecharged, Shinespark",
"entranceCondition": {
"comeInShinecharged": {}
},
"requires": [
{
"shineChargeFrames": 45
},
"canShinechargeMovementComplex",
{
"shinespark": {
"frames": 13,
"excessFrames": 1
}
}
],
"flashSuitChecked": true,
"blueSuitChecked": true,
"note": [
"A diagonal spark may take damage from the Choot",
"It helps to face right before Shinesparking."
]
},
{
"id": 82,
"link": [
4,
5
],
"name": "Come in Shinecharging, Shinespark",
"entranceCondition": {
"comeInShinecharging": {
"length": 6,
"openEnd": 0
}
},
"requires": [
"canShinechargeMovementComplex",
{
"shinespark": {
"frames": 13,
"excessFrames": 1
}
}
],
"flashSuitChecked": true,
"blueSuitChecked": true,
"note": [
"A diagonal spark may take damage from the Choot",
"It helps to face right before Shinesparking."
]
},
{
"id": 73,
"link": [
4,
5
],
"name": "Use Stored Spark",
"requires": [
"h_storedSpark",
{
"shinespark": {
"frames": 12,
"excessFrames": 1
}
}
],
"flashSuitChecked": true,
"blueSuitChecked": true
},
{
"id": 62,
"link": [
4,
5
],
"name": "G-Mode Morph",
"entranceCondition": {
"comeInWithGMode": {
"mode": "any",
"morphed": true
}
},
"requires": [
{
  "or": [
    "h_artificialMorphLongIBJ",
    {
      "and": [
        "HiJump",
        "h_artificialMorphSpringBallBombJump",
        {
          "tech": "canBombHorizontally"
        },
        "canTrickyJump"
      ]
    }
  ]
}
],
"flashSuitChecked": true,
"blueSuitChecked": true,
"note": "IBJ from below or bomb horizontally, then use Spring Ball with HiJump to jump around the overhang while avoiding the upper Choot."
},
{
"id": 63,
"link": [
5,
1
],
"name": "Base",
"requires": [],
"flashSuitChecked": true,
"blueSuitChecked": true
},
{
"id": 64,
"link": [
5,
3
],
"name": "Base",
"requires": [],
"flashSuitChecked": true,
"blueSuitChecked": true
},
{
"id": 65,
"link": [
5,
4
],
"name": "Base",
"requires": [
"canPreciseWallJump"
],
"flashSuitChecked": true,
"blueSuitChecked": true
},
{
"id": 66,
"link": [
5,
4
],
"name": "Spring Fling into Top Right Door",
"requires": [
{
"notable": "Spring Fling into Top Right Door"
},
"canInsaneJump",
"canSpringFling",
"canResetFallSpeed",
"canDownBack"
],
"wallJumpAvoid": true,
"flashSuitChecked": true,
"blueSuitChecked": true,
"note": [
"Roll off the above ledge and use both the vertical speed resets from first (un)equipping SpringBall and then by unmorphing in order to reach the door.",
"Pause shortly after rolling off the ledge, after falling for 1 tile. The timing is very precise.",
"A downback helps by shrinking Samus' hitbox."
]
},
{
"id": 74,
"link": [
5,
4
],
"name": "Use Stored Spark",
"requires": [
"h_storedSpark",
{
"shinespark": {
"frames": 2,
"excessFrames": 1
}
}
],
"flashSuitChecked": true,
"blueSuitChecked": true
},
{
"id": 75,
"link": [
5,
4
],
"name": "Use Stored Spark, Leave With Spark",
"requires": [
"canHeroShot",
"h_storedSpark",
{
"shinespark": {
"frames": 17,
"excessFrames": 0
}
}
],
"exitCondition": {
"leaveWithSpark": {}
},
"unlocksDoors": [
{
"types": [
"super",
"powerbomb"
],
"requires": []
},
{
"types": [
"missiles"
],
"requires": [
"never"
]
}
],
"flashSuitChecked": true,
"blueSuitChecked": true
}
],
"notables": [
{
"id": 1,
"name": "Frozen Fish Climb",
"note": [
"Use the Skultera to get onto the top right platform. There are two distinct ways to get up using the top Skultera.",
"1. Freeze it at the bottom of its path to the left. Crouch jump and down grab to get onto it. The positioning is very precise.",
"2. Freeze it about a half-tile from the right wall and very quickly stationary spin jump and quickly walljump mash to get up before it thaws.",
"This may be easier by jumping away from the wall, towards the fish, to gain height faster."
]
},
{
"id": 2,
"name": "X-Ray Climb Into Fake Kassiuz Room",
"note": [
"Climb up 2 screens plus 2 tiles, to enter a normally inaccessible area behind the top right door, containing a copy of the bottom half of Kassiuz Room.",
"There is a blue door on the other side of the top right door; you will not be able to see it as you will be off-camera, but shoot it open and touch the transition behind it.",
"It will lead to the same place as the bottom right door of the room."
]
},
{
"id": 3,
"name": "Spring Fling into Top Right Door",
"wallJumpAvoid": true,
"note": [
"Roll off the above ledge and use both the vertical speed resets from first (un)equipping SpringBall and then by unmorphing in order to reach the door.",
"Pause shortly after rolling off the ledge, after falling for 1 tile. The timing is very precise.",
"A downback helps by shrinking Samus' hitbox."
]
},
{
"id": 4,
"name": "Insane Frozen Choot Spring Ball Jump",
"wallJumpAvoid": true,
"note": [
"Freeze the island Choot when it is at the far left of its second-highest swoop.",
"Run right-to-left on it and perform a last-frame jump into a max-height spring ball jump."
]
},
{
"id": 5,
"name": "Left Shaft Precise Crouch Jump Down Grab",
"wallJumpAvoid": true,
"note": [
"Starting from the edge of the platforms that stick out, crouch jump and down grab to get to the next one.",
"Going up from the left runway does not work, as that starts one tile further to the left."
]
}
],
"nextStratId": 112,
"nextNotableId": 6
}