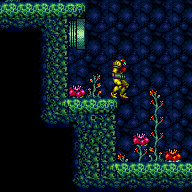
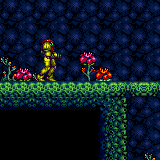
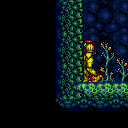
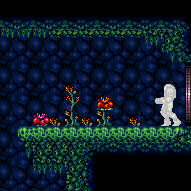
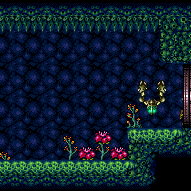
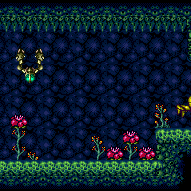
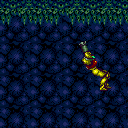
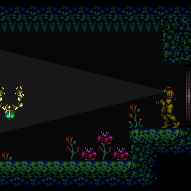
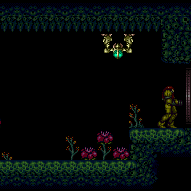
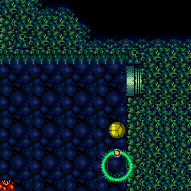
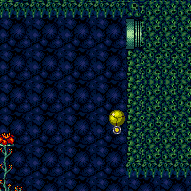
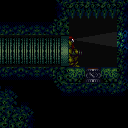
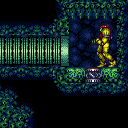
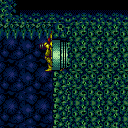
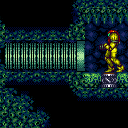
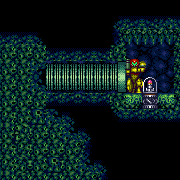
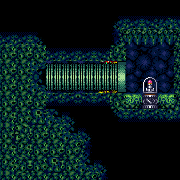
Green Hill Zone
Room ID: 54
|
Exit condition: {
"leaveWithRunway": {
"length": 3,
"openEnd": 1
}
} |
|
Clears obstacles: B |
|
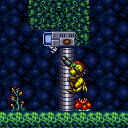
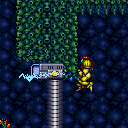
Use the runway below the bug pipe to gain a shinecharge and reach the door with shinecharge frames remaining. Requires: {
"canShineCharge": {
"usedTiles": 17,
"openEnd": 1
}
}
"canShinechargeMovementTricky"
{
"or": [
{
"and": [
"HiJump",
{
"shineChargeFrames": 130
}
]
},
{
"and": [
"canWallJump",
{
"shineChargeFrames": 170
}
]
},
{
"shineChargeFrames": 175
}
]
}Exit condition: {
"leaveShinecharged": {}
}Dev note: One tile of runway is considered unusable in order to have space to quickly jump up onto the bomb blocks above. It could also be possible to break the bomb blocks, potentially increasing the framesRemaining slightly. |
From: 1
Top Left Door
To: 1
Top Left Door
Use the short runway below the door to gain a shinecharge and reach the door with shinecharge frames remaining. Requires: {
"canShineCharge": {
"usedTiles": 14,
"openEnd": 1
}
}
{
"or": [
{
"canShineCharge": {
"usedTiles": 14,
"openEnd": 0
}
},
{
"shineChargeFrames": 15
}
]
}
"canShinechargeMovementTricky"
{
"or": [
{
"and": [
"HiJump",
{
"shineChargeFrames": 75
}
]
},
{
"shineChargeFrames": 80
}
]
}Exit condition: {
"leaveShinecharged": {}
} |
|
Requires: "HiJump" "canPreciseSpaceJump" Exit condition: {
"leaveSpinning": {
"remoteRunway": {
"length": 14,
"openEnd": 1
},
"maxExtraRunSpeed": "$2.0",
"blue": "yes"
}
}Dev note: TODO: Instead of using blue speed, the bomb blocks could also be broken in a different way (or gone around) but it's not clear if there's any application. |
|
Requires: {
"canShineCharge": {
"usedTiles": 17,
"openEnd": 1
}
}
"canChainTemporaryBlue"Exit condition: {
"leaveWithTemporaryBlue": {}
} |
|
Requires: {
"cycleFrames": 130
}Farm cycle drops: 1 Geega Dev note: We use `cycleFrames` here rather than `simpleCycleFrames` because it is non-trivial to avoid Geega damage while farming. |
|
Requires: "canFarmWhileShooting"
{
"cycleFrames": 160
}Farm cycle drops: 2 Geega Dev note: We use `cycleFrames` here rather than `simpleCycleFrames` because it is non-trivial to avoid Geega damage while farming. |
From: 1
Top Left Door
To: 1
Top Left Door
Fall past the first bug, wait for the second to spawn before rolling off the ledge. Get into the tube with an IBJ, bomb boost Spring Ball jump, or HiJump Spring Fling. Touch the item then roll out of the tube before exiting G-mode to remote acquire the item. Entrance condition: {
"comeInWithGMode": {
"mode": "direct",
"morphed": true
}
}Requires: "canRemoteAcquire"
{
"or": [
"h_artificialMorphLongIBJ",
"h_artificialMorphSpringBallBombJump",
{
"and": [
"HiJump",
"h_artificialMorphSpringFling"
]
}
]
}Collects items: 4 |
|
Requires: {
"or": [
"SpaceJump",
"canIBJ",
"HiJump",
"canSpringBallJumpMidAir",
{
"and": [
"canSpeedyJump",
"canWallJump"
]
}
]
} |
|
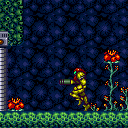
Wall jump on the top half of the Geega pipe, then on the overhang. Requires: {
"notable": "Wall Jump to Top Right Door"
}
"canPreciseWallJump" |
|
Requires: "canUseFrozenEnemies" |
|


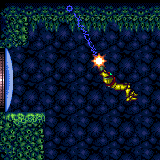
Requires: "canMidairShinespark"
{
"canShineCharge": {
"usedTiles": 18,
"openEnd": 1
}
}
{
"shinespark": {
"frames": 9,
"excessFrames": 5
}
} |
|


Entrance condition: {
"comeInWithSpark": {}
}Requires: {
"shinespark": {
"frames": 42,
"excessFrames": 14
}
} |
|

Requires an adjacent runway of at least 26 tiles. Jump either immediately before the transition or immediately after. Entrance condition: {
"comeInJumping": {
"speedBooster": "yes",
"minTiles": 26
}
}Requires: "canTrickyJump" |
|

Jump after the transition on the last possible frame. Aim down when close to the platform (while continuing to hold jump), in order to reduce Samus' hitbox. Entrance condition: {
"comeInJumping": {
"speedBooster": "yes",
"minTiles": 20
}
}Requires: "canInsaneJump" "canDownGrab" |
|

Entrance condition: {
"comeInRunning": {
"speedBooster": "yes",
"minTiles": 17
}
}Requires: "h_speedJump" "canTrickyJump" "canLateralMidAirMorph" |
|

Entrance condition: {
"comeInRunning": {
"speedBooster": "yes",
"minTiles": 15
}
}Requires: "h_speedJump" "canInsaneJump" "canMomentumConservingMorph" Dev note: This is technically possible with 14 tiles but it might require too much precision. |
From: 1
Top Left Door
To: 2
Top Right Door
Entrance condition: {
"comeInWithSidePlatform": {
"platforms": [
{
"minHeight": 2,
"maxHeight": 2,
"minTiles": 27.4375,
"speedBooster": "yes",
"obstructions": [
[
1,
0
]
],
"requires": [
"canLateralMidAirMorph"
],
"note": [
"This applies to Dust Torizo Room and Halfie Climb Room."
],
"detailNote": [
"This has a 2-frame window for the jump."
]
},
{
"minHeight": 2,
"maxHeight": 2,
"minTiles": 45,
"speedBooster": "yes",
"obstructions": [
[
2,
0
]
],
"requires": [
"canMomentumConservingMorph"
],
"note": [
"This applies to Waterway Energy Tank Room."
],
"detailNote": [
"This has a 4-frame window for the jump,",
"and between a 1-frame and 5-frame window for the morph (before the transition),",
"with later jumps giving the larger window for the morph."
]
},
{
"minHeight": 2,
"maxHeight": 2,
"minTiles": 45,
"speedBooster": "yes",
"obstructions": [
[
3,
0
]
],
"requires": [
"canMomentumConservingMorph"
],
"note": [
"This applies to Statues Hallway."
],
"detailNote": [
"This has a 4-frame window for the jump,",
"and between a 2-frame and 4-frame window for the morph (before the transition),",
"with later jumps giving the larger window for the morph."
]
},
{
"minHeight": 3,
"maxHeight": 3,
"minTiles": 38,
"speedBooster": "yes",
"obstructions": [
[
3,
0
]
],
"requires": [
"canMomentumConservingMorph"
],
"note": [
"This applies to Flyway."
],
"detailNote": [
"With ideal positioning, this has a 5-frame window for the jump,",
"and between a 1-frame and 3-frame window for the morph (before the transition),",
"with later jumps giving the larger window for the morph."
]
},
{
"minHeight": 2,
"maxHeight": 2,
"minTiles": 45,
"speedBooster": "yes",
"obstructions": [
[
4,
0
]
],
"requires": [
"canInsaneJump",
"canMomentumConservingMorph",
"canInsaneMidAirMorph"
],
"note": [
"This applies to Baby Kraid Room."
],
"detailNote": [
"With ideal positioning (turn around from the runway start, and perform a single arm pump while running),",
"this has a 2-frame window for the jump,",
"and either a 1-frame or 2-frame window for the morph (before the transition),",
"with a last-frame jump giving the larger window for the morph."
]
},
{
"minHeight": 3,
"maxHeight": 3,
"minTiles": 39.4375,
"speedBooster": "yes",
"obstructions": [
[
3,
2
]
],
"requires": [],
"note": [
"This applies to Metal Pirates Room."
],
"detailNote": [
"This has a 3-frame window for the jump."
]
}
]
}
} |
|
Requires: "h_storedSpark"
{
"shinespark": {
"frames": 9,
"excessFrames": 5
}
} |
|

Kill or Spring Ball over the first bug. Once on the pipe, bomb boost horizontally to the left then Spring Ball jump up to the door. With Bombs alone, IBJ far enough to the left to avoid spawning the bug; if it spawns, roll under it or let it swoop down and then roll to the left and it will eventually swoop back up over Samus. Entrance condition: {
"comeInWithGMode": {
"mode": "any",
"morphed": true
}
}Requires: {
"or": [
{
"and": [
"h_artificialMorphIBJ",
"canTrickyDodgeEnemies",
"h_artificialMorphBombHorizontally"
]
},
{
"and": [
"h_artificialMorphIBJ",
"h_artificialMorphPowerBomb"
]
},
"h_artificialMorphSpringBallBombJump"
]
} |
From: 1
Top Left Door
To: 2
Top Right Door

Roll under the first bug, wait for the second to spawn before rolling off the ledge. IBJ, bomb boost spring ball jump, or HiJump Spring Fling into the pipe. While in G-mode, touch the item, roll out of the pipe, then get to the top right door before exiting G-mode and obtaining the item. With Bombs alone, it may help to kill the top respawning bug before descending to make it easier to get back up. Alternatively, on the way back up, IBJ directly below the pipe until the bug spawns, then quickly boost horizontally and move to the left. Get as far right as possible without another bug spawning, IBJ then boost horizontally at the top. Entrance condition: {
"comeInWithGMode": {
"mode": "direct",
"morphed": true
}
}Requires: "canRemoteAcquire"
{
"or": [
{
"and": [
"h_artificialMorphIBJ",
"canComplexGMode",
"canInsaneJump"
]
},
{
"and": [
"h_artificialMorphIBJ",
"h_artificialMorphPowerBomb"
]
},
{
"and": [
"h_artificialMorphSpringBallBombJump",
"h_additionalBomb",
"h_additionalBomb"
]
}
]
}Collects items: 4 |
From: 1
Top Left Door
To: 2
Top Right Door
Kill the first bug by rolling into it as it swoops down at Samus. Wait for the next pipe's bug to spawn before rolling off. IBJ into the pipe, touch the item, roll out of the pipe, then get to the top right door before exiting G-mode and obtaining the item. Kill the lower bug by bombing underneath the pipe and placing a bomb at the peak of the boost. Note that Samus is vulnerable to damage while being boosted from a bomb. Entrance condition: {
"comeInWithGMode": {
"mode": "any",
"morphed": true
}
}Requires: "h_blueSuitGMode" "canRemoteAcquire" "h_artificialMorphIBJ" "canTrickyDodgeEnemies" Collects items: 4 Dev note: With other item combinations, another strat will be used instead. |
|
|
|


Open the gate and clear the Small Sidehoppers for a runway. Use respawning Geegas for energy. Entrance condition: {
"comeInWithRMode": {}
}Requires: {
"refill": [
"Energy"
]
}
{
"canShineCharge": {
"usedTiles": 30,
"openEnd": 0
}
}
{
"autoReserveTrigger": {}
}
"canRModeSparkInterrupt"Clears obstacles: B |
From: 1
Top Left Door
To: 3
Bottom Right Door
Requires: {
"canShineCharge": {
"usedTiles": 30,
"openEnd": 0
}
}
"canShinechargeMovement"
{
"shineChargeFrames": 60
}Exit condition: {
"leaveShinecharged": {}
}Unlocks doors: {"types":["ammo"],"requires":[]} |
|
Exit condition: {
"leaveSpinning": {
"remoteRunway": {
"length": 27,
"openEnd": 1
}
}
}Unlocks doors: {"types":["ammo"],"requires":[]} |
From: 1
Top Left Door
To: 3
Bottom Right Door
Exit condition: {
"leaveWithMockball": {
"remoteRunway": {
"length": 25,
"openEnd": 1
},
"landingRunway": {
"length": 4,
"openEnd": 1
}
}
}Unlocks doors: {"types":["ammo"],"requires":[]} |
From: 1
Top Left Door
To: 3
Bottom Right Door
Exit condition: {
"leaveWithSpringBallBounce": {
"remoteRunway": {
"length": 24,
"openEnd": 0
},
"landingRunway": {
"length": 4,
"openEnd": 1
},
"movementType": "uncontrolled"
}
}Unlocks doors: {"types":["ammo"],"requires":[]} |
From: 1
Top Left Door
To: 3
Bottom Right Door
Exit condition: {
"leaveSpaceJumping": {
"remoteRunway": {
"length": 21,
"openEnd": 1
}
}
}Unlocks doors: {"types":["ammo"],"requires":[]} |
From: 1
Top Left Door
To: 3
Bottom Right Door
Requires: {
"canShineCharge": {
"usedTiles": 29,
"openEnd": 0
}
}
"canChainTemporaryBlue"Exit condition: {
"leaveWithTemporaryBlue": {}
}Unlocks doors: {"types":["ammo"],"requires":[]} |
From: 1
Top Left Door
To: 3
Bottom Right Door
Exit condition: {
"leaveWithSidePlatform": {
"height": 2,
"runway": {
"length": 30,
"openEnd": 0
},
"obstruction": [
4,
0
]
}
}Unlocks doors: {"types":["ammo"],"requires":[]} |
From: 1
Top Left Door
To: 4
Item (Through the Pipe)


Spark flush against the right wall (diagonal helps) then quickly down grab or down back after to barely get into the pipe. Requires: "Morph"
"canDownGrab"
"canShinechargeMovementComplex"
{
"canShineCharge": {
"usedTiles": 18,
"openEnd": 1
}
}
{
"shinespark": {
"frames": 5,
"excessFrames": 2
}
}Dev note: This only gets one pixel into the pipe, so a wiggle isn't possible without doing the down back. Assumes sparking from the ground, since there is an accessible farm before and after this strat. |
|
Roll under the first bug, wait for the second to spawn before rolling off the ledge. IBJ, bomb boost spring ball jump, or HiJump Spring Fling into the pipe. Entrance condition: {
"comeInWithGMode": {
"mode": "any",
"morphed": true
}
}Requires: {
"or": [
"h_artificialMorphLongIBJ",
"h_artificialMorphSpringBallBombJump",
{
"and": [
"HiJump",
"h_artificialMorphSpringFling"
]
}
]
} |
|
Requires: {
"or": [
"HiJump",
"SpaceJump",
"canLongIBJ",
"canJumpIntoIBJ",
"canWallJump",
"canUseFrozenEnemies",
"canSpringBallJumpMidAir"
]
} |
|
Requires: "h_speedJump" "canTrickyJump" "canLateralMidAirMorph" "can4HighMidAirMorph" |
From: 1
Top Left Door
To: 5
Junction The Left End of Morph Tube
Spark flush against the right wall (diagonal helps) then quickly down back to barely get into the pipe. Requires: "canDownBack"
"canShinechargeMovementComplex"
{
"canShineCharge": {
"usedTiles": 18,
"openEnd": 1
}
}
{
"shinespark": {
"frames": 5,
"excessFrames": 2
}
}Dev note: Assumes sparking from the ground, since there is an accessible farm before and after this strat. |
From: 1
Top Left Door
To: 5
Junction The Left End of Morph Tube
Requires: "h_storedSpark"
"canDownBack"
{
"shinespark": {
"frames": 5,
"excessFrames": 2
}
} |
|
|
From: 2
Top Right Door
To: 1
Top Left Door


Entrance condition: {
"comeInWithGrappleTeleport": {
"blockPositions": [
[
3,
12
],
[
3,
13
]
]
}
}Bypasses door shell: true |
From: 2
Top Right Door
To: 1
Top Left Door
Entrance condition: {
"comeInWithGrappleTeleport": {
"blockPositions": [
[
3,
12
]
]
}
}Exit condition: {
"leaveWithGrappleTeleport": {
"blockPositions": [
[
3,
12
]
]
}
}Bypasses door shell: true |
From: 2
Top Right Door
To: 1
Top Left Door
Entrance condition: {
"comeInWithGrappleTeleport": {
"blockPositions": [
[
3,
13
]
]
}
}Exit condition: {
"leaveWithGrappleTeleport": {
"blockPositions": [
[
3,
13
]
]
}
}Bypasses door shell: true |
From: 2
Top Right Door
To: 1
Top Left Door
Exit the previous room with Samus in a standing pose (while grappled). After teleporting, press right to release Grapple while staying standing (not being forced into a crouch). Then X-ray climb 1 screen to get up to the door transition, without needing to open the door. Samus will not be visible during the climb. Entrance condition: {
"comeInWithGrappleTeleport": {
"blockPositions": [
[
2,
18
],
[
2,
19
],
[
2,
28
],
[
2,
29
]
]
}
}Requires: "canXRayClimb" Bypasses door shell: true |
From: 2
Top Right Door
To: 1
Top Left Door
Exit the previous room with Samus in a standing pose (while grappled). After teleporting, press right to release Grapple while staying standing (not being forced into a crouch). Then X-ray climb 2 screens to get up to the door transition, without needing to open the door. Samus will not be visible during the climb. Entrance condition: {
"comeInWithGrappleTeleport": {
"blockPositions": [
[
2,
34
]
]
}
}Requires: "canLongXRayClimb" Bypasses door shell: true |
From: 2
Top Right Door
To: 1
Top Left Door
Fall past the first bug, wait for the second to spawn before rolling off the ledge. Get into the tube with an IBJ, bomb boost Spring Ball jump, or HiJump Spring Fling. Touch the item then roll out of the tube before exiting G-mode to remote acquire the item. Entrance condition: {
"comeInWithGMode": {
"mode": "direct",
"morphed": true
}
}Requires: "canRemoteAcquire"
{
"or": [
"h_artificialMorphLongIBJ",
"h_artificialMorphSpringBallBombJump",
{
"and": [
"HiJump",
"h_artificialMorphSpringFling"
]
}
]
}Collects items: 4 |
|
Exit condition: {
"leaveWithRunway": {
"length": 11,
"openEnd": 1
}
} |
From: 2
Top Right Door
To: 2
Top Right Door

Use the runway below the bug pipe to gain a shinecharge. Use Hi-Jump to reach the door with shinecharge frames remaining. Requires: "HiJump"
{
"canShineCharge": {
"usedTiles": 17,
"openEnd": 1
}
}
"canShinechargeMovementComplex"
{
"shineChargeFrames": 150
}Exit condition: {
"leaveShinecharged": {}
}Dev note: One tile of runway is considered unusable in order to have space to quickly jump up onto the bomb blocks above. It could also be possible to break the bomb blocks, but this doesn't seem very worth considering. |
|


Use the runway below the bug pipe to gain a shinecharge. Then walljump off the bomb blocks and the bug pipe to approach the door and spark out. Requires: "canPreciseWallJump"
{
"canShineCharge": {
"usedTiles": 17,
"openEnd": 1
}
}
"canShinechargeMovementTricky"
{
"shinespark": {
"frames": 19,
"excessFrames": 0
}
}Exit condition: {
"leaveWithSpark": {}
}Dev note: One tile of runway is considered unusable in order to have space to quickly jump up to the bomb blocks above. It could also be possible to break the bomb blocks, but this doesn't seem very worth considering. |
From: 2
Top Right Door
To: 2
Top Right Door
Use the runway below the door to gain a shinecharge and leave with shinecharge frames remaining. Requires: {
"canShineCharge": {
"usedTiles": 14,
"openEnd": 1
}
}
"canShinechargeMovementComplex"
{
"or": [
{
"and": [
"HiJump",
{
"shineChargeFrames": 135
}
]
},
{
"and": [
"canTrickyDashJump",
"canWallJump",
"canShinechargeMovementTricky",
{
"shineChargeFrames": 155
}
]
}
]
}Exit condition: {
"leaveShinecharged": {}
} |
|
Requires: {
"canShineCharge": {
"usedTiles": 17,
"openEnd": 1
}
}
"canChainTemporaryBlue"
"canXRayTurnaround"
{
"or": [
"canSpringBallJumpMidAir",
{
"and": [
"HiJump",
"canTrickyUseFrozenEnemies"
]
}
]
}Exit condition: {
"leaveWithTemporaryBlue": {}
} |
|
Requires: "h_CrystalFlash" |
From: 2
Top Right Door
To: 2
Top Right Door
Entrance condition: {
"comeInShinecharging": {
"length": 10,
"openEnd": 0
},
"comesInHeated": "no"
}Requires: "h_CrystalSpark" |
From: 2
Top Right Door
To: 2
Top Right Door


Roll under the first bug, wait for the second to spawn before rolling off the ledge. IBJ, bomb boost spring ball jump, or HiJump Spring Fling into the pipe. While in G-mode, touch the item, roll out of the pipe, then get to the top right door before exiting G-mode and obtaining the item. With Bombs alone, it may help to kill the top respawning bug before descending to make it easier to get back up. Alternatively, on the way back up, IBJ directly below the pipe until the bug spawns, then quickly boost horizontally and move to the left. Get as far right as possible without another bug spawning, IBJ then boost horizontally at the top. Entrance condition: {
"comeInWithGMode": {
"mode": "direct",
"morphed": true
}
}Requires: "canRemoteAcquire"
{
"or": [
{
"and": [
"h_artificialMorphIBJ",
"canComplexGMode",
"canInsaneJump"
]
},
{
"and": [
"h_artificialMorphIBJ",
"h_artificialMorphPowerBomb"
]
},
{
"and": [
"h_artificialMorphSpringBallBombJump",
"h_additionalBomb",
"h_additionalBomb"
]
}
]
}Collects items: 4 |
From: 2
Top Right Door
To: 2
Top Right Door
Kill the first bug by rolling into it as it swoops down at Samus. Wait for the next pipe's bug to spawn before rolling off. IBJ into the pipe, touch the item, roll out of the pipe, then get to the top right door before exiting G-mode and obtaining the item. Kill the lower bug by bombing underneath the pipe and placing a bomb at the peak of the boost. Note that Samus is vulnerable to damage while being boosted from a bomb. Entrance condition: {
"comeInWithGMode": {
"mode": "any",
"morphed": true
}
}Requires: "h_blueSuitGMode" "canRemoteAcquire" "h_artificialMorphIBJ" "canTrickyDodgeEnemies" Collects items: 4 Dev note: With other item combinations, another strat will be used instead. |
|


Open the gate and clear the Small Sidehoppers for a runway. Use respawning Geegas for energy. Entrance condition: {
"comeInWithRMode": {}
}Requires: {
"refill": [
"Energy"
]
}
{
"canShineCharge": {
"usedTiles": 30,
"openEnd": 0
}
}
{
"autoReserveTrigger": {}
}
"canRModeSparkInterrupt"Clears obstacles: B |
|
Fall past the first bug, wait for the second to spawn before rolling off the ledge. IBJ, bomb boost spring ball jump, or HiJump Spring Fling into the pipe. Entrance condition: {
"comeInWithGMode": {
"mode": "any",
"morphed": true
}
}Requires: {
"or": [
"h_artificialMorphLongIBJ",
"h_artificialMorphSpringBallBombJump",
{
"and": [
"HiJump",
"h_artificialMorphSpringFling"
]
}
]
} |
|
Requires: {
"or": [
"Wave",
{
"obstaclesCleared": [
"B"
]
}
]
}Clears obstacles: B |
|
Requires: "h_blueGateGlitch" Clears obstacles: B |
|
Build up some run speed and then extend the Grapple Beam through the Blue Gate, while jumping, to open it from the wrong side. Requires: {
"notable": "Grapple Gate Glitch"
}
"canPreciseGrapple"
"h_speedJump"
"canTrickyJump"Clears obstacles: B |
From: 3
Bottom Right Door
To: 1
Top Left Door
Entrance condition: {
"comeInWithGMode": {
"mode": "indirect",
"morphed": false
}
} |
|
In direct G-mode, overload PLMs by shooting the gate then position Samus a few pixels away from the gate to where upward diagonal shots go through it. Crouch then shoot diagonally and quickly exit G-mode (3-7 frames later) to open the gate on G-mode exit. Entrance condition: {
"comeInWithGMode": {
"mode": "direct",
"morphed": false
}
}Requires: "canComplexGMode" |
|
Entrance condition: {
"comeInWithGrappleTeleport": {
"blockPositions": [
[
5,
3
],
[
7,
2
]
]
}
} |
From: 3
Bottom Right Door
To: 1
Top Left Door
Entrance condition: {
"comeInWithGrappleTeleport": {
"blockPositions": [
[
3,
12
],
[
3,
13
]
]
}
}Requires: {
"or": [
"canGrappleTeleportWallEscape",
{
"doorUnlockedAtNode": 1
}
]
}Unlocks doors: {"types":["ammo"],"requires":[]} |
From: 3
Bottom Right Door
To: 1
Top Left Door
Entrance condition: {
"comeInWithGrappleTeleport": {
"blockPositions": [
[
3,
12
],
[
3,
13
]
]
}
}Bypasses door shell: true |
From: 3
Bottom Right Door
To: 1
Top Left Door
Entrance condition: {
"comeInWithGrappleTeleport": {
"blockPositions": [
[
3,
12
]
]
}
}Exit condition: {
"leaveWithGrappleTeleport": {
"blockPositions": [
[
3,
12
]
]
}
}Bypasses door shell: true |
From: 3
Bottom Right Door
To: 1
Top Left Door
Entrance condition: {
"comeInWithGrappleTeleport": {
"blockPositions": [
[
3,
13
]
]
}
}Exit condition: {
"leaveWithGrappleTeleport": {
"blockPositions": [
[
3,
13
]
]
}
}Bypasses door shell: true |
From: 3
Bottom Right Door
To: 1
Top Left Door


Exit the previous room with Samus in a standing pose (while grappled). After teleporting, press right to release Grapple while staying standing (not being forced into a crouch). Then X-ray climb 1 screen to get up to the door transition, without needing to open the door. Samus will not be visible during the climb. Entrance condition: {
"comeInWithGrappleTeleport": {
"blockPositions": [
[
2,
18
],
[
2,
19
],
[
2,
28
],
[
2,
29
]
]
}
}Requires: "canXRayClimb" Bypasses door shell: true |
From: 3
Bottom Right Door
To: 1
Top Left Door
Exit the previous room with Samus in a standing pose (while grappled). After teleporting, press right to release Grapple while staying standing (not being forced into a crouch). Then X-ray climb 2 screens to get up to the door transition, without needing to open the door. Samus will not be visible during the climb. Entrance condition: {
"comeInWithGrappleTeleport": {
"blockPositions": [
[
2,
34
]
]
}
}Requires: "canLongXRayClimb" Bypasses door shell: true |
From: 3
Bottom Right Door
To: 2
Top Right Door
Use a Power Bombs to kill the first three hoppers, or carefully roll under the third one. The next hopper can be killed safely with many Bombs by staying on the top left of the raised ground; stay near the left edge of it without overhanging - otherwise it can hit Samus. Alternatively, lure and spring ball jump past it. Placing a Bomb next to a bug pipe can kill a bug inside of it. After killing a bug from a pipe, they will stop respawning there. The last hopper can be carefully killed with Bombs, killed with a Power Bomb, or dodged and lured off the edge. Getting past the last bug pipe can be the trickiest. This is easiest with an IBJ directly below the pipe until the bug spawns, then quickly boost horizontally and move to the left. Get as far right as possible without another bug spawning, IBJ then boost horizontally at the top. Entrance condition: {
"comeInWithGMode": {
"mode": "indirect",
"morphed": true
}
}Requires: {
"or": [
"canTrickyDodgeEnemies",
{
"ammo": {
"type": "PowerBomb",
"count": 2
}
},
{
"haveBlueSuit": {}
}
]
}
{
"or": [
{
"and": [
"h_artificialMorphIBJ",
{
"ammo": {
"type": "PowerBomb",
"count": 2
}
}
]
},
{
"and": [
"h_artificialMorphIBJ",
"canComplexGMode",
"canInsaneJump"
]
},
{
"and": [
"h_artificialMorphSpringBallBombJump",
"h_additionalBomb"
]
}
]
} |
From: 3
Bottom Right Door
To: 2
Top Right Door
After teleporting, extend the Grapple, and swing back and forth to fix the camera and then to gain momentum. A precisely timed release of Grapple will allow Samus to fling onto the ledge on the right. Entrance condition: {
"comeInWithGrappleTeleport": {
"blockPositions": [
[
7,
2
]
]
}
}Requires: {
"notable": "Grapple Teleport Fling to Right (from Moat)"
}
"canInsaneJump" |
From: 3
Bottom Right Door
To: 2
Top Right Door
After teleporting, swing back and forth to fix the camera. Swing to the right by soft-bouncing against the door followed by fully extending the Grapple Beam. Release grapple low, but not too low, to get enough momentum while also leaving enough space to gain more height with a grapple jump to reach the ledge. Holding jump just before releasing Grapple may help prevent losing momentum. Entrance condition: {
"comeInWithGrappleTeleport": {
"blockPositions": [
[
5,
3
]
]
}
}Requires: {
"notable": "Grapple Teleport into Grapple Jump (from Red Brinstar Firefleas)"
}
"canTrickyGrappleJump"
"canInsaneJump" |
|


Open the gate (Wave Beam or gate glitch) and clear the Small Sidehoppers for a runway. Use respawning Geegas for energy. Entrance condition: {
"comeInWithRMode": {}
}Requires: {
"or": [
"Wave",
"h_blueGateGlitch",
{
"and": [
{
"notable": "Grapple Gate Glitch"
},
"canPreciseGrapple",
"h_speedJump",
"canTrickyJump"
]
}
]
}
{
"refill": [
"Energy"
]
}
{
"canShineCharge": {
"usedTiles": 30,
"openEnd": 0
}
}
{
"autoReserveTrigger": {}
}
"canRModeSparkInterrupt"Clears obstacles: B |
|
Exit condition: {
"leaveWithRunway": {
"length": 4,
"openEnd": 1
}
} |
|

Requires: {
"canShineCharge": {
"usedTiles": 22,
"openEnd": 0
}
}
"canShinechargeMovement"
{
"shineChargeFrames": 40
}Exit condition: {
"leaveShinecharged": {}
} |
|
Exit condition: {
"leaveSpinning": {
"remoteRunway": {
"length": 19,
"openEnd": 1
}
}
} |
|


Exit condition: {
"leaveWithMockball": {
"remoteRunway": {
"length": 17,
"openEnd": 1
},
"landingRunway": {
"length": 4,
"openEnd": 1
}
}
} |
From: 3
Bottom Right Door
To: 3
Bottom Right Door
Exit condition: {
"leaveWithSpringBallBounce": {
"remoteRunway": {
"length": 16,
"openEnd": 0
},
"landingRunway": {
"length": 4,
"openEnd": 1
},
"movementType": "uncontrolled"
}
} |
|


Exit condition: {
"leaveSpaceJumping": {
"remoteRunway": {
"length": 14,
"openEnd": 1
}
}
} |
From: 3
Bottom Right Door
To: 3
Bottom Right Door

Requires: {
"canShineCharge": {
"usedTiles": 21,
"openEnd": 0
}
}
"canChainTemporaryBlue"Exit condition: {
"leaveWithTemporaryBlue": {}
} |
|
Requires: {
"resetRoom": {
"nodes": [
3
]
}
}
{
"or": [
{
"and": [
"Plasma",
{
"cycleFrames": 240
}
]
},
{
"and": [
{
"or": [
"Spazer",
"Wave",
"ScrewAttack"
]
},
{
"cycleFrames": 300
}
]
},
{
"and": [
"canDodgeWhileShooting",
{
"cycleFrames": 390
}
]
}
]
}Resets obstacles: B Farm cycle drops: 3 Sm. Sidehopper |
|
Requires: "h_CrystalFlash" |
|
Requires: {
"or": [
{
"canShineCharge": {
"usedTiles": 22,
"openEnd": 0
}
},
{
"and": [
{
"obstaclesCleared": [
"B"
]
},
{
"canShineCharge": {
"usedTiles": 30,
"openEnd": 0
}
}
]
}
]
}
"h_CrystalSpark"Dev note: FIXME: This door's runway is long enough to add a version that uses it while entering, but the hopper needs to be dealt with. |
From: 3
Bottom Right Door
To: 3
Bottom Right Door
Exit condition: {
"leaveWithGModeSetup": {}
} |
|
Requires: {
"enemyDamage": {
"enemy": "Sm. Sidehopper",
"type": "contact",
"hits": 1
}
} |
From: 3
Bottom Right Door
To: 4
Item (Through the Pipe)
Use a Power Bombs to kill the first three hoppers, or carefully roll under the third one. The next hopper can be killed safely with many Bombs by staying on the top left of the raised ground; stay near the left edge of it without overhanging - otherwise it can hit Samus. Alternatively, lure and spring ball jump past it. Placing a Bomb next to a bug pipe can kill a bug inside of it. After killing a bug from a pipe, they will stop respawning there. The last hopper can be carefully killed with Bombs, killed with a Power Bomb, or dodged and lured off the edge. IBJ, bomb boost spring ball jump, or HiJump Spring Fling up to the pipe. Entrance condition: {
"comeInWithGMode": {
"mode": "indirect",
"morphed": true
}
}Requires: {
"or": [
"canTrickyDodgeEnemies",
{
"ammo": {
"type": "PowerBomb",
"count": 2
}
}
]
}
{
"or": [
{
"and": [
"h_artificialMorphIBJ",
{
"or": [
"canComplexGMode",
"h_artificialMorphPowerBomb"
]
}
]
},
"h_artificialMorphSpringBallBombJump",
{
"and": [
"HiJump",
"h_artificialMorphSpringFling"
]
}
]
}Dev note: This cannot be used to obtain the item remotely, as the item only spawns in direct G-mode. |
From: 3
Bottom Right Door
To: 4
Item (Through the Pipe)
Climb the room while safely killing the enemies by rolling into them. With Bombs alone, it is possible to kill the bugs in lower bug spawners by bombing underneath the pipe and placing a bomb at the peak of the boost. Note that Samus is vulnerable to damage while being boosted from a bomb. Entrance condition: {
"comeInWithGMode": {
"mode": "indirect",
"morphed": true
}
}Requires: "h_blueSuitGMode"
{
"or": [
"h_artificialMorphIBJ",
"h_artificialMorphSpringBallBombJump",
{
"and": [
"HiJump",
"h_artificialMorphSpringFling"
]
}
]
}Dev note: With other item combinations, another strat will be used instead. |
From: 4
Item (Through the Pipe)
To: 5
Junction The Left End of Morph Tube
Requires: "Morph" |
From: 4
Item (Through the Pipe)
To: 5
Junction The Left End of Morph Tube
It's a long Wiggle, but you can see the item before going in too far. Requires: {
"notable": "X-Ray Wiggle"
}
"canXRayTurnaround" |
From: 4
Item (Through the Pipe)
To: 5
Junction The Left End of Morph Tube
It's a long Tunnel Crawl, so there's a heavy softlock risk. Requires: {
"notable": "Tunnel Crawl"
}
"canTunnelCrawl" |
|
|
From: 5
Junction The Left End of Morph Tube
To: 4
Item (Through the Pipe)
Requires: "Morph" |
From: 5
Junction The Left End of Morph Tube
To: 4
Item (Through the Pipe)
It takes Morph or a Tunnel Crawl to get back out. Requires: "canTurnaroundAimCancel" |
From: 5
Junction The Left End of Morph Tube
To: 4
Item (Through the Pipe)
It's a long Wiggle, but you can see the item before going in too far. Spin jumping directly into the tube will disable X-Ray, so enter aiming down to standup first. Requires: {
"notable": "X-Ray Wiggle"
}
"canTwoTileSqueeze"
"canXRayTurnaround" |
From: 5
Junction The Left End of Morph Tube
To: 4
Item (Through the Pipe)

It's a long Tunnel Crawl, so there's a heavy softlock risk. Requires: {
"notable": "Tunnel Crawl"
}
"canTunnelCrawl" |
{
"$schema": "../../../schema/m3-room.schema.json",
"id": 54,
"name": "Green Hill Zone",
"area": "Brinstar",
"subarea": "Green",
"roomAddress": "0x79E52",
"roomEnvironments": [
{
"heated": false
}
],
"mapTileMask": [
[
1,
1,
0,
0,
0,
0,
0,
0
],
[
1,
1,
1,
1,
0,
0,
0,
0
],
[
0,
0,
1,
1,
1,
1,
0,
0
],
[
0,
0,
0,
0,
1,
1,
1,
1
]
],
"nodes": [
{
"id": 1,
"name": "Top Left Door",
"nodeType": "door",
"nodeSubType": "blue",
"nodeAddress": "0x0018e7a",
"doorOrientation": "left",
"doorEnvironments": [
{
"physics": "air"
}
],
"mapTileMask": [
[
2,
1,
0,
0,
0,
0,
0,
0
],
[
2,
2,
2,
1,
0,
0,
0,
0
],
[
0,
0,
2,
2,
2,
2,
0,
0
],
[
0,
0,
0,
0,
2,
2,
1,
1
]
]
},
{
"id": 2,
"name": "Top Right Door",
"nodeType": "door",
"nodeSubType": "yellow",
"nodeAddress": "0x0018e86",
"doorOrientation": "right",
"doorEnvironments": [
{
"physics": "air"
}
],
"mapTileMask": [
[
1,
2,
0,
0,
0,
0,
0,
0
],
[
1,
1,
1,
1,
0,
0,
0,
0
],
[
0,
0,
1,
1,
1,
1,
0,
0
],
[
0,
0,
0,
0,
1,
1,
1,
1
]
]
},
{
"id": 3,
"name": "Bottom Right Door",
"nodeType": "door",
"nodeSubType": "blue",
"nodeAddress": "0x0018e92",
"doorOrientation": "right",
"doorEnvironments": [
{
"physics": "air"
}
],
"mapTileMask": [
[
1,
1,
0,
0,
0,
0,
0,
0
],
[
1,
1,
1,
1,
0,
0,
0,
0
],
[
0,
0,
1,
1,
1,
1,
0,
0
],
[
0,
0,
0,
0,
1,
1,
2,
2
]
]
},
{
"id": 4,
"name": "Item (Through the Pipe)",
"nodeType": "item",
"nodeSubType": "visible",
"nodeItem": "Missile",
"nodeAddress": "0x78676",
"mapTileMask": [
[
1,
1,
0,
0,
0,
0,
0,
0
],
[
1,
1,
1,
2,
0,
0,
0,
0
],
[
0,
0,
1,
1,
1,
1,
0,
0
],
[
0,
0,
0,
0,
1,
1,
1,
1
]
],
"devNote": "Z3M3: Pink Brin",
"locks": [
{
"name": "Dummy Item Lock",
"lockType": "gameFlag",
"unlockStrats": [
{
"name": "Base (Collect Item)",
"notable": false,
"requires": [],
"flashSuitChecked": true,
"blueSuitChecked": true
}
]
}
]
},
{
"id": 5,
"name": "Junction The Left End of Morph Tube",
"nodeType": "junction",
"nodeSubType": "junction",
"mapTileMask": [
[
1,
1,
0,
0,
0,
0,
0,
0
],
[
1,
1,
2,
1,
0,
0,
0,
0
],
[
0,
0,
1,
1,
1,
1,
0,
0
],
[
0,
0,
0,
0,
1,
1,
1,
1
]
]
}
],
"obstacles": [
{
"id": "B",
"name": "Blue Gate",
"obstacleType": "inanimate"
}
],
"enemies": [
{
"id": "e1",
"groupName": "Green Hill Zone Top Geega",
"enemyName": "Geega",
"quantity": 1,
"homeNodes": [
1
]
},
{
"id": "e2",
"groupName": "Green Hill Zone Top-Middle Geega",
"enemyName": "Geega",
"quantity": 1,
"homeNodes": [
1
]
},
{
"id": "e3",
"groupName": "Green Hill Zone Middle Geega",
"enemyName": "Geega",
"quantity": 1,
"homeNodes": [
1
]
},
{
"id": "e4",
"groupName": "Green Hill Zone Bottom-Middle Geega",
"enemyName": "Geega",
"quantity": 1,
"homeNodes": [
1
]
},
{
"id": "e5",
"groupName": "Green Hill Zone Bottom Geega",
"enemyName": "Geega",
"quantity": 1,
"homeNodes": [
1
]
},
{
"id": "e6",
"groupName": "Green Hill Zone Left Small Sidehoppers",
"enemyName": "Sm. Sidehopper",
"quantity": 2,
"homeNodes": [
1
]
},
{
"id": "e7",
"groupName": "Green Hill Zone Right Small Sidehoppers",
"enemyName": "Sm. Sidehopper",
"quantity": 3,
"homeNodes": [
3
]
}
],
"strats": [
{
"link": [
1,
1
],
"name": "Base (Unlock Door)",
"requires": [],
"unlocksDoors": [
{
"types": [
"ammo"
],
"requires": []
}
],
"flashSuitChecked": true,
"blueSuitChecked": true
},
{
"link": [
1,
1
],
"name": "Base (Come In Normally)",
"entranceCondition": {
"comeInNormally": {}
},
"requires": [],
"flashSuitChecked": true,
"blueSuitChecked": true
},
{
"link": [
1,
1
],
"name": "Base (Come In With Mockball)",
"entranceCondition": {
"comeInWithMockball": {
"adjacentMinTiles": 0,
"remoteAndLandingMinTiles": [
[
0,
0
]
],
"speedBooster": "any"
}
},
"requires": [],
"flashSuitChecked": true,
"blueSuitChecked": true
},
{
"link": [
2,
2
],
"name": "Base (Unlock Door)",
"requires": [],
"unlocksDoors": [
{
"types": [
"ammo"
],
"requires": []
}
],
"flashSuitChecked": true,
"blueSuitChecked": true
},
{
"link": [
2,
2
],
"name": "Base (Come In Normally)",
"entranceCondition": {
"comeInNormally": {}
},
"requires": [],
"flashSuitChecked": true,
"blueSuitChecked": true
},
{
"link": [
2,
2
],
"name": "Base (Come In With Mockball)",
"entranceCondition": {
"comeInWithMockball": {
"adjacentMinTiles": 0,
"remoteAndLandingMinTiles": [
[
0,
0
]
],
"speedBooster": "any"
}
},
"requires": [],
"flashSuitChecked": true,
"blueSuitChecked": true
},
{
"link": [
3,
3
],
"name": "Base (Unlock Door)",
"requires": [],
"unlocksDoors": [
{
"types": [
"ammo"
],
"requires": []
}
],
"flashSuitChecked": true,
"blueSuitChecked": true
},
{
"link": [
3,
3
],
"name": "Base (Come In Normally)",
"entranceCondition": {
"comeInNormally": {}
},
"requires": [],
"flashSuitChecked": true,
"blueSuitChecked": true
},
{
"link": [
3,
3
],
"name": "Base (Come In With Mockball)",
"entranceCondition": {
"comeInWithMockball": {
"adjacentMinTiles": 0,
"remoteAndLandingMinTiles": [
[
0,
0
]
],
"speedBooster": "any"
}
},
"requires": [],
"flashSuitChecked": true,
"blueSuitChecked": true
},
{
"name": "Base (Collect Item)",
"notable": false,
"requires": [],
"flashSuitChecked": true,
"blueSuitChecked": true,
"link": [
4,
4
],
"collectsItems": [
4
]
},
{
"id": 1,
"link": [
1,
1
],
"name": "Leave With Runway",
"requires": [],
"exitCondition": {
"leaveWithRunway": {
"length": 3,
"openEnd": 1
}
},
"flashSuitChecked": true,
"blueSuitChecked": true
},
{
"id": 79,
"link": [
1,
1
],
"name": "Open Blue Gate",
"requires": [],
"clearsObstacles": [
"B"
],
"flashSuitChecked": true,
"blueSuitChecked": true
},
{
"id": 3,
"link": [
1,
1
],
"name": "Leave Shinecharged (Far Runway)",
"requires": [
{
"canShineCharge": {
"usedTiles": 17,
"openEnd": 1
}
},
"canShinechargeMovementTricky",
{
"or": [
{
"and": [
"HiJump",
{
"shineChargeFrames": 130
}
]
},
{
"and": [
"canWallJump",
{
"shineChargeFrames": 170
}
]
},
{
"shineChargeFrames": 175
}
]
}
],
"exitCondition": {
"leaveShinecharged": {}
},
"flashSuitChecked": true,
"blueSuitChecked": true,
"note": [
"Use the runway below the bug pipe to gain a shinecharge and reach the door with shinecharge frames remaining."
],
"devNote": [
"One tile of runway is considered unusable in order to have space to quickly jump up onto the bomb blocks above.",
"It could also be possible to break the bomb blocks, potentially increasing the framesRemaining slightly."
]
},
{
"id": 88,
"link": [
1,
1
],
"name": "Leave Shinecharged (Close Runway)",
"requires": [
{
"canShineCharge": {
"usedTiles": 14,
"openEnd": 1
}
},
{
"or": [
{
"canShineCharge": {
"usedTiles": 14,
"openEnd": 0
}
},
{
"shineChargeFrames": 15
}
]
},
"canShinechargeMovementTricky",
{
"or": [
{
"and": [
"HiJump",
{
"shineChargeFrames": 75
}
]
},
{
"shineChargeFrames": 80
}
]
}
],
"exitCondition": {
"leaveShinecharged": {}
},
"flashSuitChecked": true,
"blueSuitChecked": true,
"note": [
"Use the short runway below the door to gain a shinecharge and reach the door with shinecharge frames remaining."
]
},
{
"id": 5,
"link": [
1,
1
],
"name": "Leave Blue Spinning",
"requires": [
"HiJump",
"canPreciseSpaceJump"
],
"exitCondition": {
"leaveSpinning": {
"remoteRunway": {
"length": 14,
"openEnd": 1
},
"maxExtraRunSpeed": "$2.0",
"blue": "yes"
}
},
"flashSuitChecked": true,
"blueSuitChecked": true,
"devNote": "TODO: Instead of using blue speed, the bomb blocks could also be broken in a different way (or gone around) but it's not clear if there's any application."
},
{
"id": 6,
"link": [
1,
1
],
"name": "Leave With Temporary Blue",
"requires": [
{
"canShineCharge": {
"usedTiles": 17,
"openEnd": 1
}
},
"canChainTemporaryBlue"
],
"exitCondition": {
"leaveWithTemporaryBlue": {}
},
"flashSuitChecked": true,
"blueSuitChecked": true
},
{
"id": 7,
"link": [
1,
1
],
"name": "Geega Farm",
"requires": [
{
  "cycleFrames": 130
}
],
"farmCycleDrops": [
{
"enemy": "Geega",
"count": 1
}
],
"flashSuitChecked": true,
"blueSuitChecked": true,
"devNote": [
"We use `cycleFrames` here rather than `simpleCycleFrames` because it is non-trivial to avoid Geega damage while farming."
]
},
{
"id": 85,
"link": [
1,
1
],
"name": "Double Geega Farm",
"requires": [
"canFarmWhileShooting",
{
"cycleFrames": 160
}
],
"farmCycleDrops": [
{
"enemy": "Geega",
"count": 2
}
],
"flashSuitChecked": true,
"blueSuitChecked": true,
"devNote": [
"We use `cycleFrames` here rather than `simpleCycleFrames` because it is non-trivial to avoid Geega damage while farming."
]
},
{
"id": 29,
"link": [
1,
1
],
"name": "Direct G-Mode Morph Remote Acquire",
"entranceCondition": {
"comeInWithGMode": {
"mode": "direct",
"morphed": true
}
},
"requires": [
"canRemoteAcquire",
{
"or": [
"h_artificialMorphLongIBJ",
"h_artificialMorphSpringBallBombJump",
{
"and": [
"HiJump",
"h_artificialMorphSpringFling"
]
}
]
}
],
"collectsItems": [
4
],
"flashSuitChecked": true,
"blueSuitChecked": true,
"note": [
"Fall past the first bug, wait for the second to spawn before rolling off the ledge.",
"Get into the tube with an IBJ, bomb boost Spring Ball jump, or HiJump Spring Fling.",
"Touch the item then roll out of the tube before exiting G-mode to remote acquire the item."
]
},
{
"id": 9,
"link": [
1,
2
],
"name": "Base",
"requires": [
{
  "or": [
    "SpaceJump",
    "canIBJ",
    "HiJump",
    "canSpringBallJumpMidAir",
    {
      "and": [
        "canSpeedyJump",
        "canWallJump"
      ]
    }
  ]
}
],
"flashSuitChecked": true,
"blueSuitChecked": true
},
{
"id": 10,
"link": [
1,
2
],
"name": "Wall Jump to Top Right Door",
"requires": [
{
"notable": "Wall Jump to Top Right Door"
},
"canPreciseWallJump"
],
"flashSuitChecked": true,
"blueSuitChecked": true,
"note": "Wall jump on the top half of the Geega pipe, then on the overhang."
},
{
"id": 11,
"link": [
1,
2
],
"name": "Use Frozen Enemy",
"requires": [
"canUseFrozenEnemies"
],
"flashSuitChecked": true,
"blueSuitChecked": true
},
{
"id": 12,
"link": [
1,
2
],
"name": "In-Room Shinespark",
"requires": [
"canMidairShinespark",
{
"canShineCharge": {
"usedTiles": 18,
"openEnd": 1
}
},
{
"shinespark": {
"frames": 9,
"excessFrames": 5
}
}
],
"flashSuitChecked": true,
"blueSuitChecked": true
},
{
"id": 13,
"link": [
1,
2
],
"name": "Shinespark",
"entranceCondition": {
"comeInWithSpark": {}
},
"requires": [
{
  "shinespark": {
    "frames": 42,
    "excessFrames": 14
  }
}
],
"flashSuitChecked": true,
"blueSuitChecked": true
},
{
"id": 14,
"link": [
1,
2
],
"name": "Speed Jump",
"entranceCondition": {
"comeInJumping": {
"speedBooster": "yes",
"minTiles": 26
}
},
"requires": [
"canTrickyJump"
],
"flashSuitChecked": true,
"blueSuitChecked": true,
"note": "Requires an adjacent runway of at least 26 tiles. Jump either immediately before the transition or immediately after."
},
{
"id": 15,
"link": [
1,
2
],
"name": "Insane Speed Jump",
"entranceCondition": {
"comeInJumping": {
"speedBooster": "yes",
"minTiles": 20
}
},
"requires": [
"canInsaneJump",
"canDownGrab"
],
"flashSuitChecked": true,
"blueSuitChecked": true,
"note": [
"Jump after the transition on the last possible frame.",
"Aim down when close to the platform (while continuing to hold jump), in order to reduce Samus' hitbox."
]
},
{
"id": 16,
"link": [
1,
2
],
"name": "Speedy Airball",
"entranceCondition": {
"comeInRunning": {
"speedBooster": "yes",
"minTiles": 17
}
},
"requires": [
"h_speedJump",
"canTrickyJump",
"canLateralMidAirMorph"
],
"flashSuitChecked": true,
"blueSuitChecked": true
},
{
"id": 17,
"link": [
1,
2
],
"name": "Insane Speedy Airball",
"entranceCondition": {
"comeInRunning": {
"speedBooster": "yes",
"minTiles": 15
}
},
"requires": [
"h_speedJump",
"canInsaneJump",
"canMomentumConservingMorph"
],
"flashSuitChecked": true,
"blueSuitChecked": true,
"devNote": "This is technically possible with 14 tiles but it might require too much precision."
},
{
"id": 80,
"link": [
1,
2
],
"name": "Side Platform Cross Room Jump",
"entranceCondition": {
"comeInWithSidePlatform": {
"platforms": [
{
"minHeight": 2,
"maxHeight": 2,
"minTiles": 27.4375,
"speedBooster": "yes",
"obstructions": [
[
1,
0
]
],
"requires": [
"canLateralMidAirMorph"
],
"note": [
"This applies to Dust Torizo Room and Halfie Climb Room."
],
"detailNote": [
"This has a 2-frame window for the jump."
]
},
{
"minHeight": 2,
"maxHeight": 2,
"minTiles": 45,
"speedBooster": "yes",
"obstructions": [
[
2,
0
]
],
"requires": [
"canMomentumConservingMorph"
],
"note": [
"This applies to Waterway Energy Tank Room."
],
"detailNote": [
"This has a 4-frame window for the jump,",
"and between a 1-frame and 5-frame window for the morph (before the transition),",
"with later jumps giving the larger window for the morph."
]
},
{
"minHeight": 2,
"maxHeight": 2,
"minTiles": 45,
"speedBooster": "yes",
"obstructions": [
[
3,
0
]
],
"requires": [
"canMomentumConservingMorph"
],
"note": [
"This applies to Statues Hallway."
],
"detailNote": [
"This has a 4-frame window for the jump,",
"and between a 2-frame and 4-frame window for the morph (before the transition),",
"with later jumps giving the larger window for the morph."
]
},
{
"minHeight": 3,
"maxHeight": 3,
"minTiles": 38,
"speedBooster": "yes",
"obstructions": [
[
3,
0
]
],
"requires": [
"canMomentumConservingMorph"
],
"note": [
"This applies to Flyway."
],
"detailNote": [
"With ideal positioning, this has a 5-frame window for the jump,",
"and between a 1-frame and 3-frame window for the morph (before the transition),",
"with later jumps giving the larger window for the morph."
]
},
{
"minHeight": 2,
"maxHeight": 2,
"minTiles": 45,
"speedBooster": "yes",
"obstructions": [
[
4,
0
]
],
"requires": [
"canInsaneJump",
"canMomentumConservingMorph",
"canInsaneMidAirMorph"
],
"note": [
"This applies to Baby Kraid Room."
],
"detailNote": [
"With ideal positioning (turn around from the runway start, and perform a single arm pump while running),",
"this has a 2-frame window for the jump,",
"and either a 1-frame or 2-frame window for the morph (before the transition),",
"with a last-frame jump giving the larger window for the morph."
]
},
{
"minHeight": 3,
"maxHeight": 3,
"minTiles": 39.4375,
"speedBooster": "yes",
"obstructions": [
[
3,
2
]
],
"requires": [],
"note": [
"This applies to Metal Pirates Room."
],
"detailNote": [
"This has a 3-frame window for the jump."
]
}
]
}
},
"requires": [],
"wallJumpAvoid": true,
"flashSuitChecked": true,
"blueSuitChecked": true
},
{
"id": 18,
"link": [
1,
2
],
"name": "Use Stored Spark",
"requires": [
"h_storedSpark",
{
"shinespark": {
"frames": 9,
"excessFrames": 5
}
}
],
"flashSuitChecked": true,
"blueSuitChecked": true
},
{
"id": 19,
"link": [
1,
2
],
"name": "G-Mode Morph",
"entranceCondition": {
"comeInWithGMode": {
"mode": "any",
"morphed": true
}
},
"requires": [
{
  "or": [
    {
      "and": [
        "h_artificialMorphIBJ",
        "canTrickyDodgeEnemies",
        "h_artificialMorphBombHorizontally"
      ]
    },
    {
      "and": [
        "h_artificialMorphIBJ",
        "h_artificialMorphPowerBomb"
      ]
    },
    "h_artificialMorphSpringBallBombJump"
  ]
}
],
"wallJumpAvoid": true,
"flashSuitChecked": true,
"blueSuitChecked": true,
"note": [
"Kill or Spring Ball over the first bug. Once on the pipe, bomb boost horizontally to the left then Spring Ball jump up to the door.",
"With Bombs alone, IBJ far enough to the left to avoid spawning the bug; if it spawns, roll under it or let it swoop down and then roll to the left and it will eventually swoop back up over Samus."
]
},
{
"id": 69,
"link": [
1,
2
],
"name": "Direct G-Mode Morph Remote Acquire at the Top Right Door",
"entranceCondition": {
"comeInWithGMode": {
"mode": "direct",
"morphed": true
}
},
"requires": [
"canRemoteAcquire",
{
"or": [
{
"and": [
"h_artificialMorphIBJ",
"canComplexGMode",
"canInsaneJump"
]
},
{
"and": [
"h_artificialMorphIBJ",
"h_artificialMorphPowerBomb"
]
},
{
"and": [
"h_artificialMorphSpringBallBombJump",
"h_additionalBomb",
"h_additionalBomb"
]
}
]
}
],
"collectsItems": [
4
],
"wallJumpAvoid": true,
"flashSuitChecked": true,
"blueSuitChecked": true,
"note": [
"Roll under the first bug, wait for the second to spawn before rolling off the ledge. IBJ, bomb boost spring ball jump, or HiJump Spring Fling into the pipe.",
"While in G-mode, touch the item, roll out of the pipe, then get to the top right door before exiting G-mode and obtaining the item.",
"With Bombs alone, it may help to kill the top respawning bug before descending to make it easier to get back up.",
"Alternatively, on the way back up, IBJ directly below the pipe until the bug spawns,",
"then quickly boost horizontally and move to the left. Get as far right as possible without another bug spawning, IBJ then boost horizontally at the top."
]
},
{
"id": 94,
"link": [
1,
2
],
"name": "G-Mode Morph, Remote Acquire at the Top Right Door, with Blue Suit",
"entranceCondition": {
"comeInWithGMode": {
"mode": "any",
"morphed": true
}
},
"requires": [
"h_blueSuitGMode",
"canRemoteAcquire",
"h_artificialMorphIBJ",
"canTrickyDodgeEnemies"
],
"collectsItems": [
4
],
"wallJumpAvoid": true,
"flashSuitChecked": true,
"blueSuitChecked": true,
"note": [
"Kill the first bug by rolling into it as it swoops down at Samus. Wait for the next pipe's bug to spawn before rolling off.",
"IBJ into the pipe, touch the item, roll out of the pipe, then get to the top right door before exiting G-mode and obtaining the item.",
"Kill the lower bug by bombing underneath the pipe and placing a bomb at the peak of the boost.",
"Note that Samus is vulnerable to damage while being boosted from a bomb."
],
"devNote": "With other item combinations, another strat will be used instead."
},
{
"id": 20,
"link": [
1,
3
],
"name": "Base",
"requires": [],
"flashSuitChecked": true,
"blueSuitChecked": true
},
{
"id": 91,
"link": [
1,
3
],
"name": "R-Mode Spark Interrupt",
"entranceCondition": {
"comeInWithRMode": {}
},
"requires": [
{
"refill": [
"Energy"
]
},
{
"canShineCharge": {
"usedTiles": 30,
"openEnd": 0
}
},
{
"autoReserveTrigger": {}
},
"canRModeSparkInterrupt"
],
"clearsObstacles": [
"B"
],
"flashSuitChecked": true,
"blueSuitChecked": true,
"note": [
"Open the gate and clear the Small Sidehoppers for a runway. Use respawning Geegas for energy."
]
},
{
"id": 21,
"link": [
1,
3
],
"name": "Leave Shinecharged (Open Gate)",
"requires": [
{
"canShineCharge": {
"usedTiles": 30,
"openEnd": 0
}
},
"canShinechargeMovement",
{
"shineChargeFrames": 60
}
],
"exitCondition": {
"leaveShinecharged": {}
},
"unlocksDoors": [
{
"types": [
"ammo"
],
"requires": []
}
],
"flashSuitChecked": true,
"blueSuitChecked": true
},
{
"id": 22,
"link": [
1,
3
],
"name": "Leave Spinning (Open Gate)",
"requires": [],
"exitCondition": {
"leaveSpinning": {
"remoteRunway": {
"length": 27,
"openEnd": 1
}
}
},
"unlocksDoors": [
{
"types": [
"ammo"
],
"requires": []
}
],
"flashSuitChecked": true,
"blueSuitChecked": true
},
{
"id": 23,
"link": [
1,
3
],
"name": "Leave With Mockball (Open Gate)",
"requires": [],
"exitCondition": {
"leaveWithMockball": {
"remoteRunway": {
"length": 25,
"openEnd": 1
},
"landingRunway": {
"length": 4,
"openEnd": 1
}
}
},
"unlocksDoors": [
{
"types": [
"ammo"
],
"requires": []
}
],
"flashSuitChecked": true,
"blueSuitChecked": true
},
{
"id": 24,
"link": [
1,
3
],
"name": "Leave With Spring Ball Bounce (Open Gate)",
"requires": [],
"exitCondition": {
"leaveWithSpringBallBounce": {
"remoteRunway": {
"length": 24,
"openEnd": 0
},
"landingRunway": {
"length": 4,
"openEnd": 1
},
"movementType": "uncontrolled"
}
},
"unlocksDoors": [
{
"types": [
"ammo"
],
"requires": []
}
],
"flashSuitChecked": true,
"blueSuitChecked": true
},
{
"id": 25,
"link": [
1,
3
],
"name": "Leave Space Jumping (Open Gate)",
"requires": [],
"exitCondition": {
"leaveSpaceJumping": {
"remoteRunway": {
"length": 21,
"openEnd": 1
}
}
},
"unlocksDoors": [
{
"types": [
"ammo"
],
"requires": []
}
],
"flashSuitChecked": true,
"blueSuitChecked": true
},
{
"id": 26,
"link": [
1,
3
],
"name": "Leave With Temporary Blue (Open Gate)",
"requires": [
{
"canShineCharge": {
"usedTiles": 29,
"openEnd": 0
}
},
"canChainTemporaryBlue"
],
"exitCondition": {
"leaveWithTemporaryBlue": {}
},
"unlocksDoors": [
{
"types": [
"ammo"
],
"requires": []
}
],
"flashSuitChecked": true,
"blueSuitChecked": true
},
{
"id": 81,
"link": [
1,
3
],
"name": "Leave With Side Platform Jump",
"requires": [],
"exitCondition": {
"leaveWithSidePlatform": {
"height": 2,
"runway": {
"length": 30,
"openEnd": 0
},
"obstruction": [
4,
0
]
}
},
"unlocksDoors": [
{
"types": [
"ammo"
],
"requires": []
}
],
"flashSuitChecked": true,
"blueSuitChecked": true
},
{
"id": 27,
"link": [
1,
4
],
"name": "Shinespark Down Grab",
"requires": [
"Morph",
"canDownGrab",
"canShinechargeMovementComplex",
{
"canShineCharge": {
"usedTiles": 18,
"openEnd": 1
}
},
{
"shinespark": {
"frames": 5,
"excessFrames": 2
}
}
],
"flashSuitChecked": true,
"blueSuitChecked": true,
"note": "Spark flush against the right wall (diagonal helps) then quickly down grab or down back after to barely get into the pipe.",
"devNote": [
"This only gets one pixel into the pipe, so a wiggle isn't possible without doing the down back.",
"Assumes sparking from the ground, since there is an accessible farm before and after this strat."
]
},
{
"id": 28,
"link": [
1,
4
],
"name": "G-Mode Morph",
"entranceCondition": {
"comeInWithGMode": {
"mode": "any",
"morphed": true
}
},
"requires": [
{
  "or": [
    "h_artificialMorphLongIBJ",
    "h_artificialMorphSpringBallBombJump",
    {
      "and": [
        "HiJump",
        "h_artificialMorphSpringFling"
      ]
    }
  ]
}
],
"flashSuitChecked": true,
"blueSuitChecked": true,
"note": "Roll under the first bug, wait for the second to spawn before rolling off the ledge. IBJ, bomb boost spring ball jump, or HiJump Spring Fling into the pipe."
},
{
"id": 30,
"link": [
1,
5
],
"name": "Base",
"requires": [
{
  "or": [
    "HiJump",
    "SpaceJump",
    "canLongIBJ",
    "canJumpIntoIBJ",
    "canWallJump",
    "canUseFrozenEnemies",
    "canSpringBallJumpMidAir"
  ]
}
],
"flashSuitChecked": true,
"blueSuitChecked": true
},
{
"id": 31,
"link": [
1,
5
],
"name": "Airball",
"requires": [
"h_speedJump",
"canTrickyJump",
"canLateralMidAirMorph",
"can4HighMidAirMorph"
],
"flashSuitChecked": true,
"blueSuitChecked": true
},
{
"id": 32,
"link": [
1,
5
],
"name": "Shinespark Down Back",
"requires": [
"canDownBack",
"canShinechargeMovementComplex",
{
"canShineCharge": {
"usedTiles": 18,
"openEnd": 1
}
},
{
"shinespark": {
"frames": 5,
"excessFrames": 2
}
}
],
"flashSuitChecked": true,
"blueSuitChecked": true,
"note": "Spark flush against the right wall (diagonal helps) then quickly down back to barely get into the pipe.",
"devNote": "Assumes sparking from the ground, since there is an accessible farm before and after this strat."
},
{
"id": 33,
"link": [
1,
5
],
"name": "Use Stored Spark, Shinespark Down Back",
"requires": [
"h_storedSpark",
"canDownBack",
{
"shinespark": {
"frames": 5,
"excessFrames": 2
}
}
],
"flashSuitChecked": true,
"blueSuitChecked": true
},
{
"id": 34,
"link": [
2,
1
],
"name": "Base",
"requires": [],
"flashSuitChecked": true,
"blueSuitChecked": true
},
{
"id": 35,
"link": [
2,
1
],
"name": "Grapple Teleport Door Lock Skip",
"entranceCondition": {
"comeInWithGrappleTeleport": {
"blockPositions": [
[
3,
12
],
[
3,
13
]
]
}
},
"requires": [],
"bypassesDoorShell": "yes",
"flashSuitChecked": true,
"blueSuitChecked": true
},
{
"id": 36,
"link": [
2,
1
],
"name": "Carry Grapple Teleport (Top Position)",
"entranceCondition": {
"comeInWithGrappleTeleport": {
"blockPositions": [
[
3,
12
]
]
}
},
"requires": [],
"exitCondition": {
"leaveWithGrappleTeleport": {
"blockPositions": [
[
3,
12
]
]
}
},
"bypassesDoorShell": "yes",
"flashSuitChecked": true,
"blueSuitChecked": true
},
{
"id": 37,
"link": [
2,
1
],
"name": "Carry Grapple Teleport (Bottom Position)",
"entranceCondition": {
"comeInWithGrappleTeleport": {
"blockPositions": [
[
3,
13
]
]
}
},
"requires": [],
"exitCondition": {
"leaveWithGrappleTeleport": {
"blockPositions": [
[
3,
13
]
]
}
},
"bypassesDoorShell": "yes",
"flashSuitChecked": true,
"blueSuitChecked": true
},
{
"id": 38,
"link": [
2,
1
],
"name": "Grapple Teleport X-Ray Climb (1 Screen)",
"entranceCondition": {
"comeInWithGrappleTeleport": {
"blockPositions": [
[
2,
18
],
[
2,
19
],
[
2,
28
],
[
2,
29
]
]
}
},
"requires": [
"canXRayClimb"
],
"bypassesDoorShell": "yes",
"flashSuitChecked": true,
"blueSuitChecked": true,
"note": [
"Exit the previous room with Samus in a standing pose (while grappled).",
"After teleporting, press right to release Grapple while staying standing (not being forced into a crouch).",
"Then X-ray climb 1 screen to get up to the door transition, without needing to open the door.",
"Samus will not be visible during the climb."
]
},
{
"id": 86,
"link": [
2,
1
],
"name": "Grapple Teleport X-Ray Climb (2 Screens)",
"entranceCondition": {
"comeInWithGrappleTeleport": {
"blockPositions": [
[
2,
34
]
]
}
},
"requires": [
"canLongXRayClimb"
],
"bypassesDoorShell": "yes",
"flashSuitChecked": true,
"blueSuitChecked": true,
"note": [
"Exit the previous room with Samus in a standing pose (while grappled).",
"After teleporting, press right to release Grapple while staying standing (not being forced into a crouch).",
"Then X-ray climb 2 screens to get up to the door transition, without needing to open the door.",
"Samus will not be visible during the climb."
]
},
{
"id": 45,
"link": [
2,
1
],
"name": "Direct G-Mode Morph Remote Acquire",
"entranceCondition": {
"comeInWithGMode": {
"mode": "direct",
"morphed": true
}
},
"requires": [
"canRemoteAcquire",
{
  "or": [
    "h_artificialMorphLongIBJ",
    "h_artificialMorphSpringBallBombJump",
    {
      "and": [
        "HiJump",
        "h_artificialMorphSpringFling"
      ]
    }
  ]
}
],
"collectsItems": [
4
],
"flashSuitChecked": true,
"blueSuitChecked": true,
"note": [
"Fall past the first bug, wait for the second to spawn before rolling off the ledge.",
"Get into the tube with an IBJ, bomb boost Spring Ball jump, or HiJump Spring Fling.",
"Touch the item then roll out of the tube before exiting G-mode to remote acquire the item."
]
},
{
"id": 39,
"link": [
2,
2
],
"name": "Leave With Runway",
"requires": [],
"exitCondition": {
"leaveWithRunway": {
"length": 11,
"openEnd": 1
}
},
"flashSuitChecked": true,
"blueSuitChecked": true
},
{
"id": 40,
"link": [
2,
2
],
"name": "Leave Shinecharged (Far Runway)",
"requires": [
"HiJump",
{
"canShineCharge": {
"usedTiles": 17,
"openEnd": 1
}
},
"canShinechargeMovementComplex",
{
"shineChargeFrames": 150
}
],
"exitCondition": {
"leaveShinecharged": {}
},
"flashSuitChecked": true,
"blueSuitChecked": true,
"note": [
"Use the runway below the bug pipe to gain a shinecharge.",
"Use Hi-Jump to reach the door with shinecharge frames remaining."
],
"devNote": [
"One tile of runway is considered unusable in order to have space to quickly jump up onto the bomb blocks above.",
"It could also be possible to break the bomb blocks, but this doesn't seem very worth considering."
]
},
{
"id": 41,
"link": [
2,
2
],
"name": "Leave With Spark (Far Runway)",
"requires": [
"canPreciseWallJump",
{
"canShineCharge": {
"usedTiles": 17,
"openEnd": 1
}
},
"canShinechargeMovementTricky",
{
"shinespark": {
"frames": 19,
"excessFrames": 0
}
}
],
"exitCondition": {
"leaveWithSpark": {}
},
"flashSuitChecked": true,
"blueSuitChecked": true,
"note": [
"Use the runway below the bug pipe to gain a shinecharge.",
"Then walljump off the bomb blocks and the bug pipe to approach the door and spark out."
],
"devNote": [
"One tile of runway is considered unusable in order to have space to quickly jump up to the bomb blocks above.",
"It could also be possible to break the bomb blocks, but this doesn't seem very worth considering."
]
},
{
"id": 89,
"link": [
2,
2
],
"name": "Leave Shinecharged (Close Runway)",
"requires": [
{
"canShineCharge": {
"usedTiles": 14,
"openEnd": 1
}
},
"canShinechargeMovementComplex",
{
"or": [
{
"and": [
"HiJump",
{
"shineChargeFrames": 135
}
]
},
{
"and": [
"canTrickyDashJump",
"canWallJump",
"canShinechargeMovementTricky",
{
"shineChargeFrames": 155
}
]
}
]
}
],
"exitCondition": {
"leaveShinecharged": {}
},
"flashSuitChecked": true,
"blueSuitChecked": true,
"note": [
"Use the runway below the door to gain a shinecharge and leave with shinecharge frames remaining."
]
},
{
"id": 42,
"link": [
2,
2
],
"name": "Leave With Temporary Blue",
"requires": [
{
"canShineCharge": {
"usedTiles": 17,
"openEnd": 1
}
},
"canChainTemporaryBlue",
"canXRayTurnaround",
{
"or": [
"canSpringBallJumpMidAir",
{
"and": [
"HiJump",
"canTrickyUseFrozenEnemies"
]
}
]
}
],
"exitCondition": {
"leaveWithTemporaryBlue": {}
},
"flashSuitChecked": true,
"blueSuitChecked": true
},
{
"id": 43,
"link": [
2,
2
],
"name": "Crystal Flash",
"requires": [
"h_CrystalFlash"
],
"flashSuitChecked": true,
"blueSuitChecked": true
},
{
"id": 97,
"link": [
2,
2
],
"name": "Come in Shinecharging, Crystal Spark",
"entranceCondition": {
"comeInShinecharging": {
"length": 10,
"openEnd": 0
},
"comesInHeated": "no"
},
"requires": [
"h_CrystalSpark"
],
"flashSuitChecked": true,
"blueSuitChecked": true
},
{
"id": 82,
"link": [
2,
2
],
"name": "Direct G-Mode Morph Remote Acquire at the Top Right Door",
"entranceCondition": {
"comeInWithGMode": {
"mode": "direct",
"morphed": true
}
},
"requires": [
"canRemoteAcquire",
{
"or": [
{
"and": [
"h_artificialMorphIBJ",
"canComplexGMode",
"canInsaneJump"
]
},
{
"and": [
"h_artificialMorphIBJ",
"h_artificialMorphPowerBomb"
]
},
{
"and": [
"h_artificialMorphSpringBallBombJump",
"h_additionalBomb",
"h_additionalBomb"
]
}
]
}
],
"collectsItems": [
4
],
"wallJumpAvoid": true,
"flashSuitChecked": true,
"blueSuitChecked": true,
"note": [
"Roll under the first bug, wait for the second to spawn before rolling off the ledge. IBJ, bomb boost spring ball jump, or HiJump Spring Fling into the pipe.",
"While in G-mode, touch the item, roll out of the pipe, then get to the top right door before exiting G-mode and obtaining the item.",
"With Bombs alone, it may help to kill the top respawning bug before descending to make it easier to get back up.",
"Alternatively, on the way back up, IBJ directly below the pipe until the bug spawns,",
"then quickly boost horizontally and move to the left. Get as far right as possible without another bug spawning, IBJ then boost horizontally at the top."
]
},
{
"id": 95,
"link": [
2,
2
],
"name": "G-Mode Morph, Remote Acquire at the Top Right Door, with Blue Suit",
"entranceCondition": {
"comeInWithGMode": {
"mode": "any",
"morphed": true
}
},
"requires": [
"h_blueSuitGMode",
"canRemoteAcquire",
"h_artificialMorphIBJ",
"canTrickyDodgeEnemies"
],
"collectsItems": [
4
],
"wallJumpAvoid": true,
"flashSuitChecked": true,
"blueSuitChecked": true,
"note": [
"Kill the first bug by rolling into it as it swoops down at Samus. Wait for the next pipe's bug to spawn before rolling off.",
"IBJ into the pipe, touch the item, roll out of the pipe, then get to the top right door before exiting G-mode and obtaining the item.",
"Kill the lower bug by bombing underneath the pipe and placing a bomb at the peak of the boost.",
"Note that Samus is vulnerable to damage while being boosted from a bomb."
],
"devNote": "With other item combinations, another strat will be used instead."
},
{
"id": 92,
"link": [
2,
3
],
"name": "R-Mode Spark Interrupt",
"entranceCondition": {
"comeInWithRMode": {}
},
"requires": [
{
"refill": [
"Energy"
]
},
{
"canShineCharge": {
"usedTiles": 30,
"openEnd": 0
}
},
{
"autoReserveTrigger": {}
},
"canRModeSparkInterrupt"
],
"clearsObstacles": [
"B"
],
"flashSuitChecked": true,
"blueSuitChecked": true,
"note": [
"Open the gate and clear the Small Sidehoppers for a runway. Use respawning Geegas for energy."
]
},
{
"id": 44,
"link": [
2,
4
],
"name": "G-Mode Morph",
"entranceCondition": {
"comeInWithGMode": {
"mode": "any",
"morphed": true
}
},
"requires": [
{
"or": [
"h_artificialMorphLongIBJ",
"h_artificialMorphSpringBallBombJump",
{
"and": [
"HiJump",
"h_artificialMorphSpringFling"
]
}
]
}
],
"flashSuitChecked": true,
"blueSuitChecked": true,
"note": "Fall past the first bug, wait for the second to spawn before rolling off the ledge. IBJ, bomb boost spring ball jump, or HiJump Spring Fling into the pipe."
},
{
"id": 46,
"link": [
3,
1
],
"name": "Base",
"requires": [
{
  "or": [
    "Wave",
    {
      "obstaclesCleared": [
        "B"
      ]
    }
  ]
}
],
"clearsObstacles": [
"B"
],
"flashSuitChecked": true,
"blueSuitChecked": true
},
{
"id": 47,
"link": [
3,
1
],
"name": "Gate Glitch",
"requires": [
"h_blueGateGlitch"
],
"clearsObstacles": [
"B"
],
"flashSuitChecked": true,
"blueSuitChecked": true
},
{
"id": 48,
"link": [
3,
1
],
"name": "Grapple Gate Glitch",
"requires": [
{
"notable": "Grapple Gate Glitch"
},
"canPreciseGrapple",
"h_speedJump",
"canTrickyJump"
],
"clearsObstacles": [
"B"
],
"flashSuitChecked": true,
"blueSuitChecked": true,
"note": [
"Build up some run speed and then extend the Grapple Beam through the Blue Gate, while jumping, to open it from the wrong side."
]
},
{
"id": 49,
"link": [
3,
1
],
"name": "G-Mode Indirect Despawn Gate",
"entranceCondition": {
"comeInWithGMode": {
"mode": "indirect",
"morphed": false
}
},
"requires": [],
"flashSuitChecked": true,
"blueSuitChecked": true
},
{
"id": 83,
"link": [
3,
1
],
"name": "G-Mode Direct, Open Gate",
"entranceCondition": {
"comeInWithGMode": {
"mode": "direct",
"morphed": false
}
},
"requires": [
"canComplexGMode"
],
"flashSuitChecked": true,
"blueSuitChecked": true,
"note": [
"In direct G-mode, overload PLMs by shooting the gate then position Samus a few pixels away from the gate to where upward diagonal shots go through it.",
"Crouch then shoot diagonally and quickly exit G-mode (3-7 frames later) to open the gate on G-mode exit."
]
},
{
"id": 50,
"link": [
3,
1
],
"name": "Grapple Teleport",
"entranceCondition": {
"comeInWithGrappleTeleport": {
"blockPositions": [
[
5,
3
],
[
7,
2
]
]
}
},
"requires": [],
"flashSuitChecked": true,
"blueSuitChecked": true
},
{
"id": 90,
"link": [
3,
1
],
"name": "Grapple Teleport Door Escape",
"entranceCondition": {
"comeInWithGrappleTeleport": {
"blockPositions": [
[
3,
12
],
[
3,
13
]
]
}
},
"requires": [
{
  "or": [
    "canGrappleTeleportWallEscape",
    {
      "doorUnlockedAtNode": 1
    }
  ]
}
],
"unlocksDoors": [
{
"types": [
"ammo"
],
"requires": []
}
],
"flashSuitChecked": true,
"blueSuitChecked": true
},
{
"id": 51,
"link": [
3,
1
],
"name": "Grapple Teleport Door Lock Skip",
"entranceCondition": {
"comeInWithGrappleTeleport": {
"blockPositions": [
[
3,
12
],
[
3,
13
]
]
}
},
"requires": [],
"bypassesDoorShell": "yes",
"flashSuitChecked": true,
"blueSuitChecked": true
},
{
"id": 52,
"link": [
3,
1
],
"name": "Carry Grapple Teleport (Top Position)",
"entranceCondition": {
"comeInWithGrappleTeleport": {
"blockPositions": [
[
3,
12
]
]
}
},
"requires": [],
"exitCondition": {
"leaveWithGrappleTeleport": {
"blockPositions": [
[
3,
12
]
]
}
},
"bypassesDoorShell": "yes",
"flashSuitChecked": true,
"blueSuitChecked": true
},
{
"id": 53,
"link": [
3,
1
],
"name": "Carry Grapple Teleport (Bottom Position)",
"entranceCondition": {
"comeInWithGrappleTeleport": {
"blockPositions": [
[
3,
13
]
]
}
},
"requires": [],
"exitCondition": {
"leaveWithGrappleTeleport": {
"blockPositions": [
[
3,
13
]
]
}
},
"bypassesDoorShell": "yes",
"flashSuitChecked": true,
"blueSuitChecked": true
},
{
"id": 54,
"link": [
3,
1
],
"name": "Grapple Teleport X-Ray Climb (1 Screen)",
"entranceCondition": {
"comeInWithGrappleTeleport": {
"blockPositions": [
[
2,
18
],
[
2,
19
],
[
2,
28
],
[
2,
29
]
]
}
},
"requires": [
"canXRayClimb"
],
"bypassesDoorShell": "yes",
"flashSuitChecked": true,
"blueSuitChecked": true,
"note": [
"Exit the previous room with Samus in a standing pose (while grappled).",
"After teleporting, press right to release Grapple while staying standing (not being forced into a crouch).",
"Then X-ray climb 1 screen to get up to the door transition, without needing to open the door.",
"Samus will not be visible during the climb."
]
},
{
"id": 87,
"link": [
3,
1
],
"name": "Grapple Teleport X-Ray Climb (2 Screens)",
"entranceCondition": {
"comeInWithGrappleTeleport": {
"blockPositions": [
[
2,
34
]
]
}
},
"requires": [
"canLongXRayClimb"
],
"bypassesDoorShell": "yes",
"flashSuitChecked": true,
"blueSuitChecked": true,
"note": [
"Exit the previous room with Samus in a standing pose (while grappled).",
"After teleporting, press right to release Grapple while staying standing (not being forced into a crouch).",
"Then X-ray climb 2 screens to get up to the door transition, without needing to open the door.",
"Samus will not be visible during the climb."
]
},
{
"id": 55,
"link": [
3,
2
],
"name": "G-Mode Morph Indirect Despawn Gate - To the Top Right Door",
"entranceCondition": {
"comeInWithGMode": {
"mode": "indirect",
"morphed": true
}
},
"requires": [
{
"or": [
"canTrickyDodgeEnemies",
{
"ammo": {
"type": "PowerBomb",
"count": 2
}
},
{
"haveBlueSuit": {}
}
]
},
{
"or": [
{
"and": [
"h_artificialMorphIBJ",
{
"ammo": {
"type": "PowerBomb",
"count": 2
}
}
]
},
{
"and": [
"h_artificialMorphIBJ",
"canComplexGMode",
"canInsaneJump"
]
},
{
"and": [
"h_artificialMorphSpringBallBombJump",
"h_additionalBomb"
]
}
]
}
],
"wallJumpAvoid": true,
"flashSuitChecked": true,
"blueSuitChecked": true,
"note": [
"Use a Power Bombs to kill the first three hoppers, or carefully roll under the third one.",
"The next hopper can be killed safely with many Bombs by staying on the top left of the raised ground;",
"stay near the left edge of it without overhanging - otherwise it can hit Samus. Alternatively, lure and spring ball jump past it.",
"Placing a Bomb next to a bug pipe can kill a bug inside of it. After killing a bug from a pipe, they will stop respawning there.",
"The last hopper can be carefully killed with Bombs, killed with a Power Bomb, or dodged and lured off the edge.",
"Getting past the last bug pipe can be the trickiest. This is easiest with an IBJ directly below the pipe until the bug spawns,",
"then quickly boost horizontally and move to the left. Get as far right as possible without another bug spawning, IBJ then boost horizontally at the top."
]
},
{
"id": 56,
"link": [
3,
2
],
"name": "Grapple Teleport Fling to Right (from Moat)",
"entranceCondition": {
"comeInWithGrappleTeleport": {
"blockPositions": [
[
7,
2
]
]
}
},
"requires": [
{
"notable": "Grapple Teleport Fling to Right (from Moat)"
},
"canInsaneJump"
],
"wallJumpAvoid": true,
"flashSuitChecked": false,
"blueSuitChecked": true,
"note": [
"After teleporting, extend the Grapple, and swing back and forth to fix the camera and then to gain momentum.",
"A precisely timed release of Grapple will allow Samus to fling onto the ledge on the right."
]
},
{
"id": 57,
"link": [
3,
2
],
"name": "Grapple Teleport into Grapple Jump (from Red Brinstar Firefleas)",
"entranceCondition": {
"comeInWithGrappleTeleport": {
"blockPositions": [
[
5,
3
]
]
}
},
"requires": [
{
"notable": "Grapple Teleport into Grapple Jump (from Red Brinstar Firefleas)"
},
"canTrickyGrappleJump",
"canInsaneJump"
],
"wallJumpAvoid": true,
"flashSuitChecked": false,
"blueSuitChecked": true,
"note": [
"After teleporting, swing back and forth to fix the camera.",
"Swing to the right by soft-bouncing against the door followed by fully extending the Grapple Beam.",
"Release grapple low, but not too low, to get enough momentum while also leaving enough space to gain more height with a grapple jump to reach the ledge.",
"Holding jump just before releasing Grapple may help prevent losing momentum."
]
},
{
"id": 93,
"link": [
3,
3
],
"name": "R-Mode Spark Interrupt",
"entranceCondition": {
"comeInWithRMode": {}
},
"requires": [
{
"or": [
"Wave",
"h_blueGateGlitch",
{
"and": [
{
"notable": "Grapple Gate Glitch"
},
"canPreciseGrapple",
"h_speedJump",
"canTrickyJump"
]
}
]
},
{
"refill": [
"Energy"
]
},
{
"canShineCharge": {
"usedTiles": 30,
"openEnd": 0
}
},
{
"autoReserveTrigger": {}
},
"canRModeSparkInterrupt"
],
"clearsObstacles": [
"B"
],
"flashSuitChecked": true,
"blueSuitChecked": true,
"note": [
"Open the gate (Wave Beam or gate glitch) and clear the Small Sidehoppers for a runway. Use respawning Geegas for energy."
]
},
{
"id": 58,
"link": [
3,
3
],
"name": "Leave With Runway",
"requires": [],
"exitCondition": {
"leaveWithRunway": {
"length": 4,
"openEnd": 1
}
},
"flashSuitChecked": true,
"blueSuitChecked": true
},
{
"id": 59,
"link": [
3,
3
],
"name": "Leave Shinecharged",
"requires": [
{
"canShineCharge": {
"usedTiles": 22,
"openEnd": 0
}
},
"canShinechargeMovement",
{
"shineChargeFrames": 40
}
],
"exitCondition": {
"leaveShinecharged": {}
},
"flashSuitChecked": true,
"blueSuitChecked": true
},
{
"id": 60,
"link": [
3,
3
],
"name": "Leave Spinning",
"requires": [],
"exitCondition": {
"leaveSpinning": {
"remoteRunway": {
"length": 19,
"openEnd": 1
}
}
},
"flashSuitChecked": true,
"blueSuitChecked": true
},
{
"id": 61,
"link": [
3,
3
],
"name": "Leave With Mockball",
"requires": [],
"exitCondition": {
"leaveWithMockball": {
"remoteRunway": {
"length": 17,
"openEnd": 1
},
"landingRunway": {
"length": 4,
"openEnd": 1
}
}
},
"flashSuitChecked": true,
"blueSuitChecked": true
},
{
"id": 62,
"link": [
3,
3
],
"name": "Leave With Spring Ball Bounce",
"requires": [],
"exitCondition": {
"leaveWithSpringBallBounce": {
"remoteRunway": {
"length": 16,
"openEnd": 0
},
"landingRunway": {
"length": 4,
"openEnd": 1
},
"movementType": "uncontrolled"
}
},
"flashSuitChecked": true,
"blueSuitChecked": true
},
{
"id": 63,
"link": [
3,
3
],
"name": "Leave Space Jumping",
"requires": [],
"exitCondition": {
"leaveSpaceJumping": {
"remoteRunway": {
"length": 14,
"openEnd": 1
}
}
},
"flashSuitChecked": true,
"blueSuitChecked": true
},
{
"id": 64,
"link": [
3,
3
],
"name": "Leave With Temporary Blue",
"requires": [
{
"canShineCharge": {
"usedTiles": 21,
"openEnd": 0
}
},
"canChainTemporaryBlue"
],
"exitCondition": {
"leaveWithTemporaryBlue": {}
},
"flashSuitChecked": true,
"blueSuitChecked": true
},
{
"id": 84,
"link": [
3,
3
],
"name": "Sidehopper Farm",
"requires": [
{
"resetRoom": {
"nodes": [
3
]
}
},
{
"or": [
{
"and": [
"Plasma",
{
"cycleFrames": 240
}
]
},
{
"and": [
{
"or": [
"Spazer",
"Wave",
"ScrewAttack"
]
},
{
"cycleFrames": 300
}
]
},
{
"and": [
"canDodgeWhileShooting",
{
"cycleFrames": 390
}
]
}
]
}
],
"resetsObstacles": [
"B"
],
"farmCycleDrops": [
{
"enemy": "Sm. Sidehopper",
"count": 3
}
],
"flashSuitChecked": true,
"blueSuitChecked": true
},
{
"id": 65,
"link": [
3,
3
],
"name": "Crystal Flash",
"requires": [
"h_CrystalFlash"
],
"flashSuitChecked": true,
"blueSuitChecked": true
},
{
"id": 98,
"link": [
3,
3
],
"name": "Crystal Spark",
"requires": [
{
"or": [
{
"canShineCharge": {
"usedTiles": 22,
"openEnd": 0
}
},
{
"and": [
{
"obstaclesCleared": [
"B"
]
},
{
"canShineCharge": {
"usedTiles": 30,
"openEnd": 0
}
}
]
}
]
},
"h_CrystalSpark"
],
"flashSuitChecked": true,
"blueSuitChecked": true,
"devNote": "FIXME: This door's runway is long enough to add a version that uses it while entering, but the hopper needs to be dealt with."
},
{
"id": 66,
"link": [
3,
3
],
"name": "G-Mode Setup - Get Hit By Sidehopper",
"requires": [],
"exitCondition": {
"leaveWithGModeSetup": {}
},
"flashSuitChecked": true,
"blueSuitChecked": true
},
{
"id": 67,
"link": [
3,
3
],
"name": "G-Mode Regain Mobility",
"requires": [
{
  "enemyDamage": {
    "enemy": "Sm. Sidehopper",
    "type": "contact",
    "hits": 1
  }
}
],
"gModeRegainMobility": {},
"flashSuitChecked": true,
"blueSuitChecked": true
},
{
"id": 68,
"link": [
3,
4
],
"name": "G-Mode Morph Indirect Despawn Gate - Into the Pipe",
"entranceCondition": {
"comeInWithGMode": {
"mode": "indirect",
"morphed": true
}
},
"requires": [
{
"or": [
"canTrickyDodgeEnemies",
{
"ammo": {
"type": "PowerBomb",
"count": 2
}
}
]
},
{
"or": [
{
"and": [
"h_artificialMorphIBJ",
{
"or": [
"canComplexGMode",
"h_artificialMorphPowerBomb"
]
}
]
},
"h_artificialMorphSpringBallBombJump",
{
"and": [
"HiJump",
"h_artificialMorphSpringFling"
]
}
]
}
],
"flashSuitChecked": true,
"blueSuitChecked": true,
"note": [
"Use a Power Bombs to kill the first three hoppers, or carefully roll under the third one.",
"The next hopper can be killed safely with many Bombs by staying on the top left of the raised ground;",
"stay near the left edge of it without overhanging - otherwise it can hit Samus. Alternatively, lure and spring ball jump past it.",
"Placing a Bomb next to a bug pipe can kill a bug inside of it. After killing a bug from a pipe, they will stop respawning there.",
"The last hopper can be carefully killed with Bombs, killed with a Power Bomb, or dodged and lured off the edge.",
"IBJ, bomb boost spring ball jump, or HiJump Spring Fling up to the pipe."
],
"devNote": "This cannot be used to obtain the item remotely, as the item only spawns in direct G-mode."
},
{
"id": 96,
"link": [
3,
4
],
"name": "G-Mode Morph Indirect Despawn Gate with Blue Suit",
"entranceCondition": {
"comeInWithGMode": {
"mode": "indirect",
"morphed": true
}
},
"requires": [
"h_blueSuitGMode",
{
"or": [
"h_artificialMorphIBJ",
"h_artificialMorphSpringBallBombJump",
{
"and": [
"HiJump",
"h_artificialMorphSpringFling"
]
}
]
}
],
"flashSuitChecked": true,
"blueSuitChecked": true,
"note": [
"Climb the room while safely killing the enemies by rolling into them.",
"With Bombs alone, it is possible to kill the bugs in lower bug spawners by bombing underneath the pipe and placing a bomb at the peak of the boost.",
"Note that Samus is vulnerable to damage while being boosted from a bomb."
],
"devNote": "With other item combinations, another strat will be used instead."
},
{
"id": 70,
"link": [
4,
5
],
"name": "Base",
"requires": [
"Morph"
],
"flashSuitChecked": true,
"blueSuitChecked": true
},
{
"id": 71,
"link": [
4,
5
],
"name": "X-Ray Wiggle (Out)",
"requires": [
{
"notable": "X-Ray Wiggle"
},
"canXRayTurnaround"
],
"flashSuitChecked": true,
"blueSuitChecked": true,
"note": "It's a long Wiggle, but you can see the item before going in too far."
},
{
"id": 72,
"link": [
4,
5
],
"name": "Tunnel Crawl (Out)",
"requires": [
{
"notable": "Tunnel Crawl"
},
"canTunnelCrawl"
],
"flashSuitChecked": true,
"blueSuitChecked": true,
"note": "It's a long Tunnel Crawl, so there's a heavy softlock risk."
},
{
"id": 74,
"link": [
5,
1
],
"name": "Base",
"requires": [],
"flashSuitChecked": true,
"blueSuitChecked": true
},
{
"id": 75,
"link": [
5,
4
],
"name": "Base",
"requires": [
"Morph"
],
"flashSuitChecked": true,
"blueSuitChecked": true
},
{
"id": 76,
"link": [
5,
4
],
"name": "Turnaround Aim Cancel",
"requires": [
"canTurnaroundAimCancel"
],
"flashSuitChecked": true,
"blueSuitChecked": true,
"note": "It takes Morph or a Tunnel Crawl to get back out."
},
{
"id": 77,
"link": [
5,
4
],
"name": "X-Ray Wiggle (In)",
"requires": [
{
"notable": "X-Ray Wiggle"
},
"canTwoTileSqueeze",
"canXRayTurnaround"
],
"flashSuitChecked": true,
"blueSuitChecked": true,
"note": [
"It's a long Wiggle, but you can see the item before going in too far.",
"Spin jumping directly into the tube will disable X-Ray, so enter aiming down to standup first."
]
},
{
"id": 78,
"link": [
5,
4
],
"name": "Tunnel Crawl (In)",
"requires": [
{
"notable": "Tunnel Crawl"
},
"canTunnelCrawl"
],
"flashSuitChecked": true,
"blueSuitChecked": true,
"note": "It's a long Tunnel Crawl, so there's a heavy softlock risk."
}
],
"notables": [
{
"id": 1,
"name": "Tunnel Crawl",
"note": "It's a long Tunnel Crawl, so there's a heavy softlock risk."
},
{
"id": 2,
"name": "X-Ray Wiggle",
"note": [
"It's a long Wiggle, but you can see the item before going in too far.",
"Spin jumping directly into the tube will disable X-Ray, so enter aiming down to standup first."
]
},
{
"id": 3,
"name": "Wall Jump to Top Right Door",
"note": "Wall jump on the top half of the Geega pipe, then on the overhang."
},
{
"id": 4,
"name": "Grapple Gate Glitch",
"note": [
"Build up some run speed and then extend the Grapple Beam through the Blue Gate, while jumping, to open it from the wrong side."
]
},
{
"id": 5,
"name": "Grapple Teleport Fling to Right (from Moat)",
"wallJumpAvoid": true,
"note": [
"After teleporting, extend the Grapple, and swing back and forth to fix the camera and then to gain momentum.",
"A precisely timed release of Grapple will allow Samus to fling onto the ledge on the right."
]
},
{
"id": 6,
"name": "Grapple Teleport into Grapple Jump (from Red Brinstar Firefleas)",
"wallJumpAvoid": true,
"note": [
"After teleporting, swing back and forth to fix the camera.",
"Swing to the right by soft-bouncing against the door followed by fully extending the Grapple Beam.",
"Release grapple low, but not too low, to get enough momentum while also leaving enough space to gain more height with a grapple jump to reach the ledge.",
"Holding jump just before releasing Grapple may help prevent losing momentum."
]
}
],
"nextStratId": 99,
"nextNotableId": 7
}