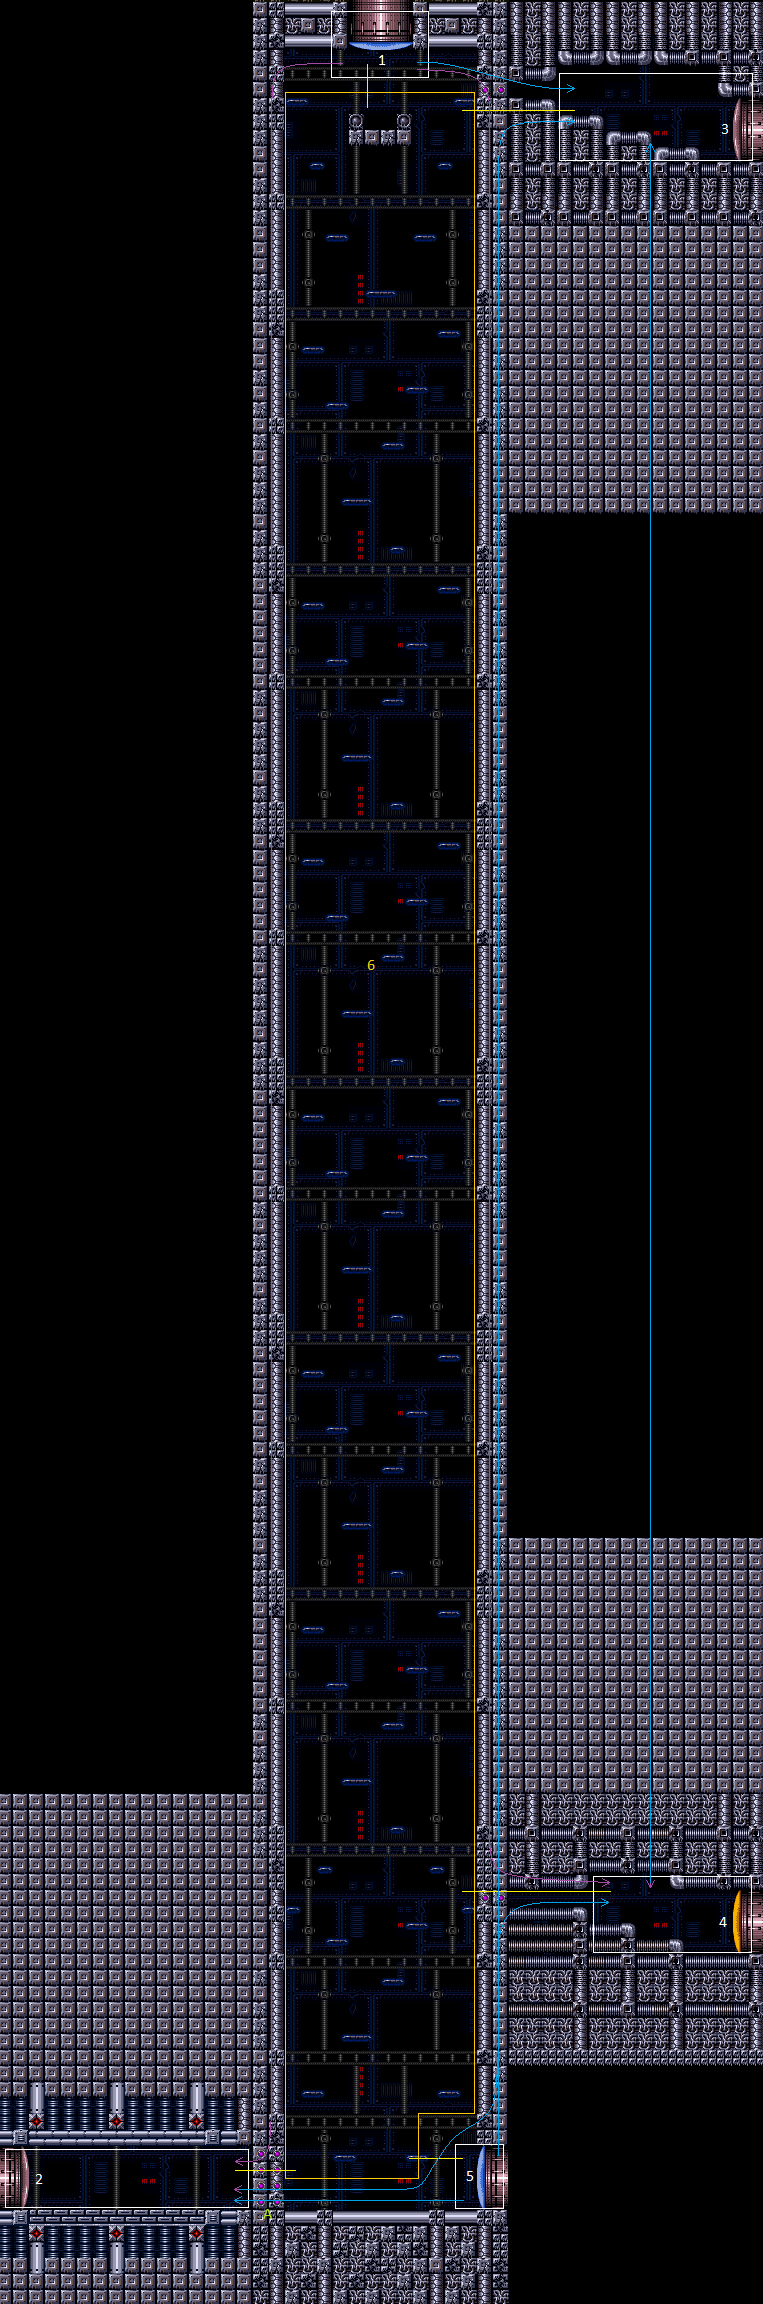
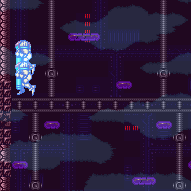
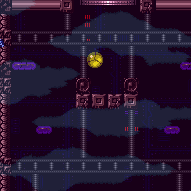
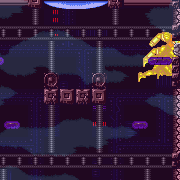
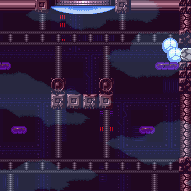
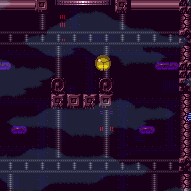
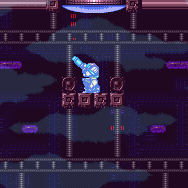
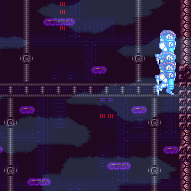
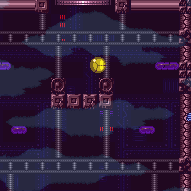
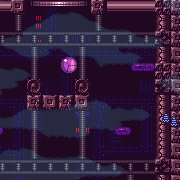
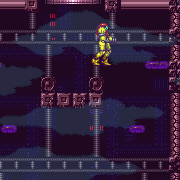
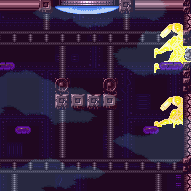
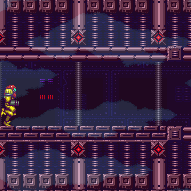
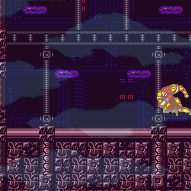
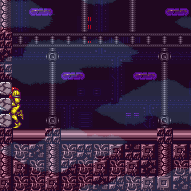
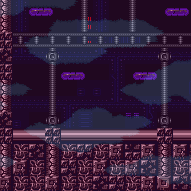
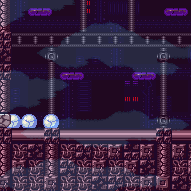
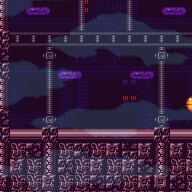
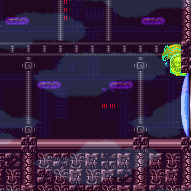
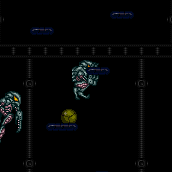
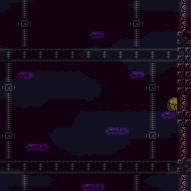
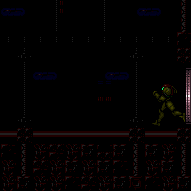
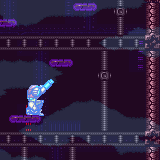
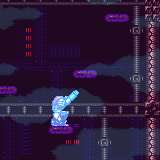
Climb
Room ID: 11
|
Exit condition: {
"leaveWithDoorFrameBelow": {
"height": 2
}
} |
|
Exit condition: {
"leaveWithPlatformBelow": {
"height": 6,
"leftPosition": -2.5,
"rightPosition": -0.5
}
} |
|
Exit condition: {
"leaveWithPlatformBelow": {
"height": 6,
"leftPosition": 0.5,
"rightPosition": 2.5
}
} |
|
Entrance condition: {
"comeInWithGMode": {
"mode": "direct",
"morphed": false
},
"comesThroughToilet": "any"
}Exit condition: {
"leaveWithGMode": {
"morphed": false
}
} |
|
Entrance condition: {
"comeInWithGMode": {
"mode": "direct",
"morphed": true
},
"comesThroughToilet": "any"
}Requires: "h_artificialMorphMovement" Exit condition: {
"leaveWithGMode": {
"morphed": true
}
} |
|
Entrance condition: {
"comeInWithTemporaryBlue": {
"direction": "any"
},
"comesThroughToilet": "any"
}Requires: "canLongChainTemporaryBlue" "canXRayTurnaround" Clears obstacles: A |
|

Overload PLMs using scroll blocks a few tiles in front of the bomb blocks. Entrance condition: {
"comeInWithGMode": {
"mode": "any",
"morphed": false
},
"comesThroughToilet": "any"
} |
|

Diagonal shinespark up the climb to break the bomb blocks to the top right morph tunnel. A consistent place to spark from is the small platform below the bomb block, using a crouch jump and then a diagonal spark (not a crouched diagonal spark). Entrance condition: {
"comeInShinecharged": {},
"comesThroughToilet": "no"
}Requires: {
"shineChargeFrames": 55
}
{
"notable": "Behemoth Shinespark"
}
"canShinechargeMovementComplex"
{
"shinespark": {
"frames": 5
}
}
"Morph" |
From: 1
Top Door
To: 3
Top Right Door
Diagonal shinespark up the climb to break the bomb blocks to the top right morph tunnel. A consistent place to spark from is the small platform below the bomb block, using a crouch jump and then a diagonal spark (not a crouched diagonal spark). Entrance condition: {
"comeInShinecharged": {},
"comesThroughToilet": "yes"
}Requires: {
"shineChargeFrames": 65
}
{
"notable": "Behemoth Shinespark"
}
"canShinechargeMovementComplex"
{
"shinespark": {
"frames": 5
}
}
"Morph" |
|
Breaking the bomb blocks is difficult because there is not enough space above them to get a neutral bounce. It is best to break them by jumping from the top platform (inside the 3-tile-high space), as this provides a 2-frame window for the morph; in comparison, jumping from the platform below requires a frame-perfect morph. If Spring Ball is available, it can be used to increase the window by one frame. Entrance condition: {
"comeInWithTemporaryBlue": {
"direction": "right"
},
"comesThroughToilet": "any"
}Requires: "canChainTemporaryBlue" "canInsaneJump" |
|

Breaking the bomb blocks is difficult because there is not enough space above them to get a neutral bounce. It is best to break them by jumping from the top platform (inside the 3-tile-high space), as this provides a 2-frame window for the morph; in comparison, jumping from the platform below requires a frame-perfect morph. If Spring Ball is available, it can be used to increase the window by one frame. Entrance condition: {
"comeInWithTemporaryBlue": {
"direction": "left"
},
"comesThroughToilet": "any"
}Requires: "canChainTemporaryBlue" "canXRayTurnaround" "canInsaneJump" |
|


Overload PLMs using the scroll block next to the bomb blocks. Entrance condition: {
"comeInWithGMode": {
"mode": "any",
"morphed": true
},
"comesThroughToilet": "any"
}Requires: "h_artificialMorphMovement" Dev note: PBs cannot be used, as they will solidify the bomb blocks. |
|
Entrance condition: {
"comeInWithTemporaryBlue": {
"direction": "right"
},
"comesThroughToilet": "any"
}Requires: "canChainTemporaryBlue" "canInsaneJump" |
|

Entrance condition: {
"comeInWithTemporaryBlue": {
"direction": "left"
},
"comesThroughToilet": "any"
}Requires: "canXRayTurnaround" "canChainTemporaryBlue" "canInsaneJump" |
|

Overload PLMs using the scroll block next to the bomb blocks. Entrance condition: {
"comeInWithGMode": {
"mode": "any",
"morphed": true
},
"comesThroughToilet": "any"
} |
|
Farm wall pirates while leaving one left. Lead it to the bottom of the shaft, get shine charge, then windup in front of it to get shot and interrupted. Entrance condition: {
"comeInWithRMode": {},
"comesThroughToilet": "no"
}Requires: {
"not": "f_ZebesSetAblaze"
}
"h_ZebesIsAwake"
{
"or": [
"h_CrystalFlashForReserveEnergy",
{
"and": [
"h_RModeCanRefillReserves",
{
"resourceMissingAtMost": [
{
"type": "Missile",
"count": 0
}
]
},
{
"partialRefill": {
"type": "ReserveEnergy",
"limit": 20
}
}
]
}
]
}
{
"or": [
{
"and": [
"h_destroyBombWalls",
{
"canShineCharge": {
"usedTiles": 28,
"openEnd": 0
}
}
]
},
{
"and": [
{
"doorUnlockedAtNode": 5
},
{
"canShineCharge": {
"usedTiles": 13,
"openEnd": 0
}
}
]
},
{
"canShineCharge": {
"usedTiles": 12,
"openEnd": 0
}
}
]
}
{
"autoReserveTrigger": {
"maxReserveEnergy": 95
}
}
"canRModeSparkInterrupt"Clears obstacles: A Unlocks doors: {"nodeId":5,"types":["ammo"],"requires":[]} |
|
Requires: {
"or": [
"h_ClimbWithoutLava",
"h_lavaProof",
{
"obstaclesNotCleared": [
"B"
]
}
]
} |
|
Entrance condition: {
"comeInNormally": {}
}Clears obstacles: B Dev note: When Samus enters the room from the bottom left, lava starts to rise. In the escape it is acid instead. |
|
Exit condition: {
"leaveWithRunway": {
"length": 15,
"openEnd": 0
}
} |
|
Requires: {
"obstaclesCleared": [
"A"
]
}
{
"or": [
"h_ClimbWithoutLava",
{
"obstaclesNotCleared": [
"B"
]
}
]
}Exit condition: {
"leaveWithRunway": {
"length": 29,
"openEnd": 0
}
} |
From: 2
Bottom Left Door
To: 2
Bottom Left Door
Requires: {
"obstaclesCleared": [
"A"
]
}
{
"doorUnlockedAtNode": 5
}
{
"or": [
"h_ClimbWithoutLava",
{
"obstaclesNotCleared": [
"B"
]
}
]
}Exit condition: {
"leaveWithRunway": {
"length": 30,
"openEnd": 0
}
}Unlocks doors: {"nodeId":5,"types":["ammo"],"requires":[]} |
|
Requires: "h_CrystalFlash"
{
"or": [
"h_ClimbWithoutLava",
"h_lavaProof",
{
"obstaclesNotCleared": [
"B"
]
}
]
}Clears obstacles: A Dev note: An unprotected lava crystal flash could be added instead, but that would change the strats that come after. |
|
Entrance condition: {
"comeInWithMockball": {
"speedBooster": "any",
"adjacentMinTiles": 0,
"remoteAndLandingMinTiles": [
[
0,
0
]
]
}
}Clears obstacles: B |
From: 2
Bottom Left Door
To: 3
Top Right Door
Starting with a crouch, diagonal shinespark to the top to break the bomb blocks to the morph tunnels on the right. Entrance condition: {
"comeInShinecharging": {
"length": 14,
"openEnd": 0
}
}Requires: {
"notable": "Behemoth Shinespark"
}
"Morph"
{
"shinespark": {
"frames": 147
}
}Clears obstacles: A, B |
|
Overload PLMs using the scroll blocks next to the bomb wall After passing through, you need to go from the bottom to the top of Climb and into the bomb blocks while still in G-mode Morph. Samus will not be visible at all; the only available feedback is audio and position on the map. Entrance condition: {
"comeInWithGMode": {
"mode": "any",
"morphed": true
}
}Requires: {
"notable": "G-Mode Morph Blind Climb to the Top"
}
{
"or": [
"canTrickyGMode",
"Morph"
]
}
"h_artificialMorphMovement"
"canOffScreenMovement"
{
"or": [
"h_ClimbWithoutLava",
{
"and": [
"h_lavaProof",
{
"or": [
"h_artificialMorphSpringBall",
"Morph",
"Gravity"
]
}
]
}
]
}Clears obstacles: B |
From: 2
Bottom Left Door
To: 4
Middle Right Door
Diagonal shinespark up the climb to break the bomb blocks to the morph tunnels on the right. Entrance condition: {
"comeInShinecharging": {
"length": 14,
"openEnd": 0
}
}Requires: {
"notable": "Behemoth Shinespark"
}
"Morph"
{
"shinespark": {
"frames": 147,
"excessFrames": 124
}
}
"h_ClimbWithoutLava"Clears obstacles: A, B |
From: 2
Bottom Left Door
To: 4
Middle Right Door
Diagonal shinespark up the climb to break the bomb blocks to the morph tunnels on the right. Entrance condition: {
"comeInShinecharging": {
"length": 14,
"openEnd": 0
}
}Requires: {
"notable": "Behemoth Shinespark"
}
"Morph"
{
"shinespark": {
"frames": 147,
"excessFrames": 124
}
}
{
"or": [
"h_lavaProof",
"canMoonfall",
{
"lavaFrames": 120
},
{
"and": [
"Gravity",
{
"lavaFrames": 100
}
]
}
]
}Exit condition: {
"leaveNormally": {}
}Unlocks doors: {"types":["super"],"requires":[]}
{"types":["missiles"],"requires":[{"lavaFrames":50}]}
{"types":["powerbomb"],"requires":[{"lavaFrames":110}]} |
Temporary Blue Chain Through Bomb Blocks Without X-Ray (Bottom Left to Bottom, Cross-Room)
(Extreme)
Climb
From: 2
Bottom Left Door
To: 4
Middle Right Door

A Temporary Blue Chain with movement assists to climb up and destroy the bomb blocks blocking the bottom morph tunnel. Entrance condition: {
"comeInShinecharging": {
"length": 14,
"openEnd": 0
}
}Requires: {
"notable": "Temporary Blue Chain Through Bomb Blocks"
}
"canChainTemporaryBlue"
{
"or": [
"HiJump",
"canTrickySpringBallJump"
]
}
"canTrickyJump"
"h_ClimbWithoutLava"Clears obstacles: A, B |
|


Overload PLMs using the scroll blocks next to the bomb wall Navigate to the lower right bomb blocks while still morphed. Samus will be off-camera and not visible, requiring blind movement. Enemies will not hurt Samus since they are non-global and also off-camera. Entrance condition: {
"comeInWithGMode": {
"mode": "any",
"morphed": true
}
}Requires: "h_artificialMorphMovement"
"canOffScreenMovement"
{
"or": [
"h_ClimbWithoutLava",
{
"and": [
"h_lavaProof",
{
"or": [
"h_artificialMorphSpringBall",
"Morph",
"Gravity"
]
}
]
}
]
}Clears obstacles: B |
From: 2
Bottom Left Door
To: 5
Bottom Right Door
With Zebes set ablaze, Climb only spawns two pirates that drop nothing, and the bomb wall is automatically cleared. The rising lava is now acid instead, so Speed Booster works normally with Gravity Suit. Jump up the platforms to get high enough above the rising acid to safely Crystal Flash, then dive back into the acid against either bottom door. Wait in the acid until your energy is low enough and shinecharge. Windup right before energy runs out to interrupt then *immediately* leave to limit acid damage. Entrance condition: {
"comeInWithRMode": {}
}Requires: "Gravity"
"f_ZebesSetAblaze"
{
"or": [
{
"enemyDamage": {
"enemy": "Custom Climb Pirate",
"type": "contact",
"hits": 1
}
},
{
"enemyKill": {
"enemies": [
[
"Custom Climb Pirate",
"Custom Climb Pirate"
]
],
"explicitWeapons": [
"Plasma",
"Super",
"PowerBomb"
]
}
}
]
}
"h_CrystalFlashForReserveEnergy"
{
"acidFrames": 320
}
{
"canShineCharge": {
"usedTiles": 28,
"openEnd": 0
}
}
{
"or": [
{
"and": [
{
"disableEquipment": "ETank"
},
{
"refill": [
"ReserveEnergy"
]
},
{
"autoReserveTrigger": {}
}
]
},
{
"autoReserveTrigger": {
"maxReserveEnergy": 50
}
}
]
}
"canRModeSparkInterrupt"
{
"acidFrames": 80
}
{
"resetRoom": {
"nodes": [
2,
5
]
}
}Clears obstacles: A, B Unlocks doors: {"nodeId":2,"types":["ammo"],"requires":[]}
{"nodeId":5,"types":["ammo"],"requires":[]}Dev note: FIXME: Needs to support Hyper Beam kill also. |
From: 2
Bottom Left Door
To: 5
Bottom Right Door
Entrance condition: {
"comeInWithStoredFallSpeed": {
"fallSpeedInTiles": 1
}
}Requires: {
"or": [
{
"getBlueSpeed": {
"usedTiles": 14,
"openEnd": 0
}
},
{
"and": [
{
"getBlueSpeed": {
"usedTiles": 15,
"openEnd": 0
}
},
{
"doorUnlockedAtNode": 2
}
]
},
{
"haveBlueSuit": {}
}
]
}Exit condition: {
"leaveWithStoredFallSpeed": {
"fallSpeedInTiles": 1
}
}Unlocks doors: {"types":["missiles","super"],"requires":[]}
{"types":["powerbomb"],"requires":["never"]}
{"nodeId":2,"types":["missiles","super"],"requires":[]}
{"nodeId":2,"types":["powerbomb"],"requires":["never"]} |
From: 2
Bottom Left Door
To: 5
Bottom Right Door
Entrance condition: {
"comeInWithStoredFallSpeed": {
"fallSpeedInTiles": 2
}
}Requires: {
"or": [
{
"getBlueSpeed": {
"usedTiles": 14,
"openEnd": 0
}
},
{
"and": [
{
"getBlueSpeed": {
"usedTiles": 15,
"openEnd": 0
}
},
{
"doorUnlockedAtNode": 2
}
]
},
{
"haveBlueSuit": {}
}
]
}Exit condition: {
"leaveWithStoredFallSpeed": {
"fallSpeedInTiles": 2
}
}Unlocks doors: {"types":["missiles","super"],"requires":[]}
{"types":["powerbomb"],"requires":["never"]}
{"nodeId":2,"types":["missiles","super"],"requires":[]}
{"nodeId":2,"types":["powerbomb"],"requires":["never"]} |
From: 2
Bottom Left Door
To: 5
Bottom Right Door


Break the Bomb blocks using Screw Attack in a Moonfall, then escape the tiles with Grapple Beam. Entrance condition: {
"comeInWithStoredFallSpeed": {
"fallSpeedInTiles": 2
}
}Requires: "ScrewAttack" "Grapple" Exit condition: {
"leaveWithStoredFallSpeed": {
"fallSpeedInTiles": 2
}
}Unlocks doors: {"types":["missiles","super"],"requires":[]}
{"types":["powerbomb"],"requires":["never"]} |
|
Farm wall pirates while leaving one of the bottom ones alive. Lead it to the bottom of the shaft, shinecharge, then windup in front of it to get shot and interrupted. Entrance condition: {
"comeInWithRMode": {}
}Requires: "h_ClimbWithoutLava"
{
"or": [
"h_destroyBombWalls",
{
"getBlueSpeed": {
"usedTiles": 14,
"openEnd": 0
}
},
{
"and": [
{
"getBlueSpeed": {
"usedTiles": 15,
"openEnd": 0
}
},
{
"doorUnlockedAtNode": 2
}
]
}
]
}
{
"not": "f_ZebesSetAblaze"
}
"h_ZebesIsAwake"
{
"or": [
"h_CrystalFlashForReserveEnergy",
{
"and": [
"h_RModeCanRefillReserves",
{
"resourceMissingAtMost": [
{
"type": "Missile",
"count": 0
}
]
},
{
"partialRefill": {
"type": "ReserveEnergy",
"limit": 20
}
}
]
}
]
}
{
"canShineCharge": {
"usedTiles": 28,
"openEnd": 0
}
}
{
"autoReserveTrigger": {
"maxReserveEnergy": 95
}
}
"canRModeSparkInterrupt"Clears obstacles: A, B Unlocks doors: {"nodeId":2,"types":["ammo"],"requires":[]}
{"nodeId":5,"types":["ammo"],"requires":[]}Dev note: This door triggers the rising lava, which will prevent gaining a shinecharge. |
|
Requires: {
"or": [
"h_destroyBombWalls",
{
"obstaclesCleared": [
"A"
]
}
]
}Clears obstacles: A |
|

Entrance condition: {
"comeInWithSpark": {}
}Requires: {
"shinespark": {
"frames": 43,
"excessFrames": 17
}
}Clears obstacles: A, B |
|
Entrance condition: {
"comeInGettingBlueSpeed": {
"length": 14,
"openEnd": 0
}
}Clears obstacles: A, B |
|
Requires: {
"or": [
{
"getBlueSpeed": {
"usedTiles": 14,
"openEnd": 0
}
},
{
"and": [
{
"getBlueSpeed": {
"usedTiles": 15,
"openEnd": 0
}
},
{
"doorUnlockedAtNode": 2
}
]
}
]
}Clears obstacles: A |
|
If needed, unmorph while passing through the blocks to break more than just the bottom one. Entrance condition: {
"comeInSpeedballing": {
"runway": {
"length": 14,
"openEnd": 0
}
}
}Clears obstacles: A, B Dev note: If we had a comeInWithSpeedball entrance condition, it should be used instead. This strat is for using a remote runway in the previous room to get the speedball; if the current runway were used then you could just run through with blue speed instead. |
|
Entrance condition: {
"comeInWithBlueSpringBallBounce": {
"movementType": "any"
}
}Clears obstacles: A, B |
|
Entrance condition: {
"comeInBlueSpinning": {
"unusableTiles": 0
}
}Requires: "canTrickyJump" "SpaceJump" Clears obstacles: A, B |
|
Requires: {
"useFlashSuit": {}
}
{
"shinespark": {
"frames": 3,
"excessFrames": 3
}
}Clears obstacles: A |
|
Requires: {
"haveBlueSuit": {}
}Clears obstacles: A |
|
Overload PLMs using the scroll blocks immediately in front of the bomb wall Entrance condition: {
"comeInWithGMode": {
"mode": "any",
"morphed": false
}
}Requires: {
"or": [
"h_ClimbWithoutLava",
"h_lavaProof"
]
}Clears obstacles: B Dev note: This could be possible with the lava, but it would be blind and very tight. |
|
Requires: "f_ZebesSetAblaze" Clears obstacles: A, B Dev note: These are destroyed on entry if Zebes is Ablaze. |
|
Overload PLMs using the scroll block at the top of the stairs immediately in front of the bomb blocks. Reach the bottom and pass through the bomb blocks while still in G-mode. Entrance condition: {
"comeInWithGMode": {
"mode": "any",
"morphed": true
}
}Requires: {
"or": [
"h_artificialMorphSpringBall",
"h_artificialMorphBombs",
{
"and": [
"Morph",
"h_fourTileJumpMorph"
]
}
]
}Dev note: PBs cannot be used, as they will solidify the bomb blocks. |
|
Exit condition: {
"leaveWithRunway": {
"length": 3,
"openEnd": 0
}
} |
|
Requires: "h_CrystalFlash" |
|

Overload PLMs using the scroll block at the top of the stairs immediately in front of the bomb blocks. Fall down to the lower bomb blocks while still in G-mode Morph. Entrance condition: {
"comeInWithGMode": {
"mode": "any",
"morphed": true
}
}Requires: {
"or": [
"h_artificialMorphSpringBall",
"h_artificialMorphBombs",
{
"and": [
"Morph",
"h_fourTileJumpMorph"
]
}
]
}Dev note: PBs cannot be used, as they will solidify the bomb blocks. |
|


Enter the room with a super sink, in order to clip down through several screens and reach the door below. Entrance condition: {
"comeInWithSuperSink": {}
} |
|
Farm wall pirates while leaving one left. Lead it to the bottom of the shaft, get shine charge, then windup in front of it to get shot and interrupted. Entrance condition: {
"comeInWithRMode": {}
}Requires: {
"not": "f_ZebesSetAblaze"
}
"h_ZebesIsAwake"
"h_bombThings"
{
"or": [
"h_CrystalFlashForReserveEnergy",
{
"and": [
"h_RModeCanRefillReserves",
{
"resourceMissingAtMost": [
{
"type": "Missile",
"count": 0
}
]
},
{
"partialRefill": {
"type": "ReserveEnergy",
"limit": 20
}
}
]
}
]
}
{
"or": [
{
"and": [
"h_destroyBombWalls",
{
"canShineCharge": {
"usedTiles": 28,
"openEnd": 0
}
}
]
},
{
"and": [
{
"doorUnlockedAtNode": 5
},
{
"canShineCharge": {
"usedTiles": 13,
"openEnd": 0
}
}
]
},
{
"canShineCharge": {
"usedTiles": 12,
"openEnd": 0
}
}
]
}
{
"autoReserveTrigger": {
"maxReserveEnergy": 95
}
}
"canRModeSparkInterrupt"Clears obstacles: A Unlocks doors: {"nodeId":5,"types":["ammo"],"requires":[]} |
|
Overload PLMs using the scroll block at the top of the stairs next to the bomb blocks. With PLMs still overloaded, Samus can simply Crystal Flash and run through the bomb wall at the bottom to shinecharge. When damaging down, note that Pirates will place invisible, stationary lasers that will damage Samus: these can help with wasting energy, but remaining unused lasers must be kept in mind. Lead a wall pirate to the bottom of the shaft, shinecharge, and windup in front of it to get interrupted by a shot. Entrance condition: {
"comeInWithGMode": {
"mode": "direct",
"morphed": true
}
}Requires: {
"not": "f_ZebesSetAblaze"
}
"h_ZebesIsAwake"
{
"or": [
"h_artificialMorphSpringBall",
"h_artificialMorphBombs",
{
"and": [
"Morph",
"h_fourTileJumpMorph"
]
}
]
}
"h_artificialMorphCrystalFlash"
{
"canShineCharge": {
"usedTiles": 28,
"openEnd": 0
}
}
{
"autoReserveTrigger": {
"maxReserveEnergy": 95
}
}
"canRModeSparkInterrupt"
{
"partialRefill": {
"type": "Energy",
"limit": 50
}
} |
|
Requires: "h_bombThings"
{
"or": [
"h_ClimbWithoutLava",
"h_lavaProof",
{
"obstaclesNotCleared": [
"B"
]
}
]
} |
|
Requires: {
"haveBlueSuit": {}
}
"Morph" |
|
Enter the room with a very specific run speed to jump from the door, and land a speedball perfectly in the tunnel to break the Bomb block. Entrance condition: {
"comeInGettingBlueSpeed": {
"length": 1,
"openEnd": 0,
"minExtraRunSpeed": "$5.2",
"maxExtraRunSpeed": "$5.F"
}
}Requires: {
"notable": "Morph Tunnel SpeedBall"
}
"canInsaneJump"
"canSpeedball"
"canTrickyDashJump"
"canSlowShortCharge"Dev note: There is 1 unusable tile in this runway. Speeds between $6.2 and $6.A can also work but are more difficult. |
From: 3
Top Right Door
To: 6
Main Junction
Entrance condition: {
"comeInShinecharging": {
"length": 1,
"openEnd": 0
}
}Requires: "canInsaneJump" "canLongChainTemporaryBlue" "can4HighMidAirMorph" "canSpringBallBounce" Dev note: There is 1 unusable tile in this runway. |
From: 3
Top Right Door
To: 6
Main Junction
Entrance condition: {
"comeInWithTemporaryBlue": {}
}Requires: "canInsaneJump" "canLongChainTemporaryBlue" "can4HighMidAirMorph" "canSpringBallBounce" |
|

Entrance condition: {
"comeInWithBlueSpringBallBounce": {
"movementType": "controlled",
"maxExtraRunSpeed": "$3.F"
}
}Requires: "canInsaneJump" |
|
Overload PLMs using the scroll block at the top of the stairs next to the bomb blocks. Entrance condition: {
"comeInWithGMode": {
"mode": "any",
"morphed": true
}
}Requires: {
"or": [
"h_artificialMorphSpringBall",
"h_artificialMorphBombs",
{
"and": [
"Morph",
"h_fourTileJumpMorph"
]
}
]
}Dev note: PBs cannot be used, as they will solidify the bomb blocks. |
|

Overload PLMs using the scroll block at the top of the stairs next to the bomb blocks. Fall down and pass through bomb wall at the bottom while still in G-mode. Entrance condition: {
"comeInWithGMode": {
"mode": "any",
"morphed": true
}
}Requires: {
"or": [
"h_artificialMorphSpringBall",
"h_artificialMorphBombs",
{
"and": [
"Morph",
"h_fourTileJumpMorph"
]
}
]
}Dev note: PBs cannot be used, as they will solidify the bomb blocks. |
|
Climb up 7 screens. Entrance condition: {
"comeInWithDoorStuckSetup": {}
}Requires: "canLongXRayClimb" "canBeVeryPatient" |
|
Enter with G-mode direct, back up to between 1 and 6 pixels from the door transition, and activate X-ray to get very deep stuck in the door. Climb up 7 screens, and perform a turnaround buffered spin-jump away from the door to trigger the transition, bypassing any lock on the door. Entrance condition: {
"comeInWithGMode": {
"mode": "direct",
"morphed": false
}
}Requires: "canGModeXRayClimb" "canLongXRayClimb" "canBeVeryPatient" Bypasses door shell: true |
|
Overload PLMs using the scroll block at the top of the stairs next to the bomb blocks. If Morph is not available, careful movement is needed with SpringBall to reach the top without taking a hit from a pirate or its stationary, invisible lasers. Entrance condition: {
"comeInWithGMode": {
"mode": "any",
"morphed": true
}
}Requires: {
"or": [
"h_artificialMorphSpringBall",
"h_artificialMorphBombs",
"h_fourTileJumpMorph"
]
}
{
"or": [
"Morph",
"h_ZebesNotAwake",
{
"and": [
"h_artificialMorphSpringBall",
{
"or": [
"HiJump",
"canTrickyDodgeEnemies"
]
}
]
}
]
} |
|
Overload PLMs using the scroll block at the top of the stairs next to the bomb blocks. A long series of precise bomb jumps and enemy manipulations are required to reach the top without taking a hit. Entrance condition: {
"comeInWithGMode": {
"mode": "any",
"morphed": true
}
}Requires: {
"notable": "G-Mode Morph Insane IBJ to Top"
}
"canTrickyGMode"
"h_artificialMorphIBJ"
"canBeExtremelyPatient" |
|
Overload PLMs using the scroll block at the top of the stairs next to the bomb blocks. Place Power Bombs as high as possible to occasionally kill multiple pirates at a time. Entrance condition: {
"comeInWithGMode": {
"mode": "any",
"morphed": true
}
}Requires: {
"or": [
"h_artificialMorphSpringBall",
"h_artificialMorphIBJ"
]
}
{
"ammo": {
"type": "PowerBomb",
"count": 7
}
} |
|
Requires: {
"or": [
"h_ClimbWithoutLava",
{
"obstaclesNotCleared": [
"B"
]
}
]
}Exit condition: {
"leaveWithRunway": {
"length": 4,
"openEnd": 0
}
}Dev note: It is sometimes possible to beat the lava, but it depends how you get here. |
From: 4
Middle Right Door
To: 4
Middle Right Door
Entrance condition: {
"comeInShinecharging": {
"length": 3,
"openEnd": 0
},
"comesInHeated": "no"
}Requires: "h_CrystalSpark" |
|
Requires: "h_CrystalFlash"
{
"or": [
"h_ClimbWithoutLava",
"h_lavaProof",
{
"obstaclesNotCleared": [
"B"
]
}
]
} |
|
Farm wall pirates while leaving one left. Lead it to the bottom of the shaft, get shine charge, then windup in front of it to get shot and interrupted. Entrance condition: {
"comeInWithRMode": {}
}Requires: {
"not": "f_ZebesSetAblaze"
}
"h_bombThings"
"h_ZebesIsAwake"
{
"or": [
"h_CrystalFlashForReserveEnergy",
{
"and": [
"h_RModeCanRefillReserves",
{
"resourceMissingAtMost": [
{
"type": "Missile",
"count": 0
}
]
},
{
"partialRefill": {
"type": "ReserveEnergy",
"limit": 20
}
}
]
}
]
}
{
"or": [
{
"and": [
"h_destroyBombWalls",
{
"canShineCharge": {
"usedTiles": 28,
"openEnd": 0
}
}
]
},
{
"and": [
{
"doorUnlockedAtNode": 5
},
{
"canShineCharge": {
"usedTiles": 13,
"openEnd": 0
}
}
]
},
{
"canShineCharge": {
"usedTiles": 12,
"openEnd": 0
}
}
]
}
{
"autoReserveTrigger": {
"maxReserveEnergy": 95
}
}
"canRModeSparkInterrupt"Clears obstacles: A Unlocks doors: {"nodeId":5,"types":["ammo"],"requires":[]} |
|
Overload PLMs using the scroll block at the top of the stairs next to the bomb blocks. With PLMs still overloaded, Samus can simply Crystal Flash and run through the bomb wall at the bottom to shinecharge. When damaging down, note that Pirates will place invisible, stationary lasers that will damage Samus: these can help with wasting energy, but remaining unused lasers must be kept in mind. Lead a wall pirate to the bottom of the shaft, shinecharge, and windup in front of it to get interrupted by a shot. Entrance condition: {
"comeInWithGMode": {
"mode": "direct",
"morphed": true
}
}Requires: {
"not": "f_ZebesSetAblaze"
}
"h_ZebesIsAwake"
{
"or": [
"h_artificialMorphSpringBall",
"h_artificialMorphBombs",
{
"and": [
"Morph",
"h_fourTileJumpMorph"
]
}
]
}
"h_artificialMorphCrystalFlash"
{
"canShineCharge": {
"usedTiles": 28,
"openEnd": 0
}
}
{
"autoReserveTrigger": {
"maxReserveEnergy": 95
}
}
"canRModeSparkInterrupt"
{
"partialRefill": {
"type": "Energy",
"limit": 50
}
} |
|
Requires: "h_bombThings"
{
"or": [
"h_ClimbWithoutLava",
"h_lavaProof",
{
"obstaclesNotCleared": [
"B"
]
}
]
} |
|
Requires: {
"haveBlueSuit": {}
}
"Morph"
{
"or": [
"h_ClimbWithoutLava",
"h_lavaProof",
{
"obstaclesNotCleared": [
"B"
]
}
]
} |
|
Enter the room with a very specific run speed to jump from the door, squeeze by the ceiling, and land a speedball perfectly in the tunnel to break the Bomb block. Entrance condition: {
"comeInGettingBlueSpeed": {
"length": 2,
"openEnd": 0,
"minExtraRunSpeed": "$4.4",
"maxExtraRunSpeed": "$4.7"
}
}Requires: {
"notable": "Morph Tunnel SpeedBall"
}
"canSpeedball"
"canTrickyDashJump"
"canSlowShortCharge"
"canInsaneJump"
"canBeExtremelyPatient"Dev note: There is 1 unusable tile in this runway. The canBeExtremelyPatient requirement is for difficulty placement. |
From: 4
Middle Right Door
To: 6
Main Junction
Entrance condition: {
"comeInShinecharging": {
"length": 2,
"openEnd": 0
}
}Requires: "canInsaneJump" "canLongChainTemporaryBlue" "canSpringBallBounce" "can4HighMidAirMorph" Dev note: There is 1 unusable tile in this runway. |
From: 4
Middle Right Door
To: 6
Main Junction
Entrance condition: {
"comeInWithTemporaryBlue": {}
}Requires: "canInsaneJump" "canLongChainTemporaryBlue" "canSpringBallBounce" "can4HighMidAirMorph" |
|

Entrance condition: {
"comeInWithBlueSpringBallBounce": {
"movementType": "controlled",
"maxExtraRunSpeed": "$3.F"
}
}Requires: "canInsaneJump" |
|
Entrance condition: {
"comeInWithGMode": {
"mode": "any",
"morphed": true
}
}Requires: {
"or": [
"h_artificialMorphSpringBall",
"h_artificialMorphBombs",
"h_fourTileJumpMorph"
]
}Dev note: A Power Bomb cannot be used, as it will solidify the bomb block. |
|
Entrance condition: {
"comeInWithSpark": {
"position": "bottom"
}
}Requires: {
"shinespark": {
"frames": 43,
"excessFrames": 17
}
}Clears obstacles: A |
|

Entrance condition: {
"comeInGettingBlueSpeed": {
"length": 12,
"openEnd": 0
}
}Clears obstacles: A |
|
Requires: {
"or": [
{
"getBlueSpeed": {
"usedTiles": 12,
"openEnd": 0
}
},
{
"and": [
{
"getBlueSpeed": {
"usedTiles": 13,
"openEnd": 0
}
},
{
"doorUnlockedAtNode": 5
}
]
}
]
}
{
"or": [
"h_ClimbWithoutLava",
{
"obstaclesNotCleared": [
"B"
]
}
]
}Clears obstacles: A |
|
If needed, unmorph while passing through the blocks to break more than just the bottom one. Entrance condition: {
"comeInSpeedballing": {
"runway": {
"length": 12,
"openEnd": 0
}
}
}Clears obstacles: A Dev note: If we had a comeInWithSpeedball entrance condition, it should be used instead. This strat is for using a remote runway in the previous room to get the speedball; if the current runway were used then you could just run through with blue speed instead. |
From: 5
Bottom Right Door
To: 2
Bottom Left Door

Entrance condition: {
"comeInWithBlueSpringBallBounce": {
"movementType": "controlled"
}
}Clears obstacles: A |
|


Entrance condition: {
"comeInWithTemporaryBlue": {}
}Requires: "canChainTemporaryBlue" Clears obstacles: A |
From: 5
Bottom Right Door
To: 2
Bottom Left Door
Entrance condition: {
"comeInWithStoredFallSpeed": {
"fallSpeedInTiles": 1
}
}Requires: {
"or": [
{
"getBlueSpeed": {
"usedTiles": 12,
"openEnd": 0
}
},
{
"and": [
{
"getBlueSpeed": {
"usedTiles": 13,
"openEnd": 0
}
},
{
"doorUnlockedAtNode": 5
}
]
},
{
"haveBlueSuit": {}
}
]
}Exit condition: {
"leaveWithStoredFallSpeed": {
"fallSpeedInTiles": 1
}
}Unlocks doors: {"types":["missiles","super"],"requires":[]}
{"types":["powerbomb"],"requires":["never"]}
{"nodeId":5,"types":["missiles","super"],"requires":[]}
{"nodeId":5,"types":["powerbomb"],"requires":["never"]} |
From: 5
Bottom Right Door
To: 2
Bottom Left Door
Entrance condition: {
"comeInWithStoredFallSpeed": {
"fallSpeedInTiles": 2
}
}Requires: {
"or": [
{
"getBlueSpeed": {
"usedTiles": 12,
"openEnd": 0
}
},
{
"and": [
{
"getBlueSpeed": {
"usedTiles": 13,
"openEnd": 0
}
},
{
"doorUnlockedAtNode": 5
}
]
},
{
"haveBlueSuit": {}
}
]
}Exit condition: {
"leaveWithStoredFallSpeed": {
"fallSpeedInTiles": 2
}
}Unlocks doors: {"types":["missiles","super"],"requires":[]}
{"types":["powerbomb"],"requires":["never"]}
{"nodeId":5,"types":["missiles","super"],"requires":[]}
{"nodeId":5,"types":["powerbomb"],"requires":["never"]} |
From: 5
Bottom Right Door
To: 2
Bottom Left Door


Break the Bomb blocks using Screw Attack in a Moonfall, then escape the tiles with Grapple Beam. Entrance condition: {
"comeInWithStoredFallSpeed": {
"fallSpeedInTiles": 2
}
}Requires: "ScrewAttack" "Grapple" Exit condition: {
"leaveWithStoredFallSpeed": {
"fallSpeedInTiles": 2
}
}Unlocks doors: {"types":["missiles","super"],"requires":[]}
{"types":["powerbomb"],"requires":["never"]} |
|
Entrance condition: {
"comeInWithGMode": {
"mode": "any",
"morphed": false
}
} |
From: 5
Bottom Right Door
To: 3
Top Right Door
Starting with a crouch, diagonal shinespark to the top to break the bomb blocks to the morph tunnels on the right. Entrance condition: {
"comeInShinecharging": {
"length": 12,
"openEnd": 0
}
}Requires: {
"notable": "Behemoth Shinespark"
}
"Morph"
{
"shinespark": {
"frames": 147
}
}Clears obstacles: A |
From: 5
Bottom Right Door
To: 3
Top Right Door
Climb 8 screens and position Samus to where she is visually standing above the door. For the last X-Ray turnaround, face right then press and hold the X-ray scope input, buffer a jump then perform the X-Ray turnaround. If done correctly Samus will be standing up and facing left, while the jump button is still pressed without a jump occuring. Press right to break the bomb blocks with a spinjump then left to exit the wall. Jump in place to fix the camera as needed. Entrance condition: {
"comeInWithDoorStuckSetup": {}
}Requires: "ScrewAttack" "Morph" "canBeVeryPatient" "canLongXRayClimb" |
|
Overload PLMs using the scroll block next to any of the bomb blocks in the room, allowing passage through the bomb blocks at the top by making them become air. If Morph is not available, careful movement is needed with SpringBall to reach the top without taking a hit from the pirates or their stationary, invisible lasers. Entrance condition: {
"comeInWithGMode": {
"mode": "any",
"morphed": true
}
}Requires: {
"or": [
"Morph",
{
"and": [
"h_artificialMorphSpringBall",
{
"or": [
"HiJump",
"canTrickyDodgeEnemies"
]
}
]
},
{
"and": [
"h_ZebesNotAwake",
"h_artificialMorphMovement"
]
}
]
} |
|
Using a blue suit and IBJ to get from to bottom to the top of Climb without unmorphing. Precise timing and enemy manipulations are required to reach the top without taking a hit, because the pirates will kill Samus if they touch her while midair from a bomb boost. Use the lowest part of the room to manipulate the pirates and overload their stationary, invisible lasers, which takes 18 shots, then climb the center of the room. Let a pirate walk down to see Samus, then when it is jumping back and forth above her, place a bomb when it is in the center of the room and use it to double bomb jump to an upper wide platform. When the pirate jumps again, be moving horizontally when it gets to Samus to kill it. Entrance condition: {
"comeInWithGMode": {
"mode": "any",
"morphed": true
}
}Requires: {
"notable": "G-Mode Morph Blue Suit IBJ to Top"
}
"h_blueSuitGMode"
"canTrickyGMode"
"h_artificialMorphIBJ"
"canBeVeryPatient" |
|
A long series of precise bomb jumps and enemy manipulations are required to reach the top without taking a hit or unmorphing. Overload PLMs using the scroll block next to the bomb blocks at the top, allowing passage through them by making them become air. Entrance condition: {
"comeInWithGMode": {
"mode": "any",
"morphed": true
}
}Requires: {
"notable": "G-Mode Morph Insane IBJ to Top"
}
"canTrickyGMode"
"h_artificialMorphIBJ"
"canBeExtremelyPatient" |
|
Overload PLMs using the scroll block at the top of the stairs next to the bomb blocks. Place PBs as high as possible to occasionally kill multiple pirates at a time. Overload the PLMs at the bottom, if the top bomb block is hit with a PB before PLMs are overloaded, they will remain solid. Entrance condition: {
"comeInWithGMode": {
"mode": "any",
"morphed": true
}
}Requires: {
"or": [
"h_artificialMorphSpringBall",
"h_artificialMorphIBJ"
]
}
{
"ammo": {
"type": "PowerBomb",
"count": 8
}
} |
From: 5
Bottom Right Door
To: 4
Middle Right Door
Diagonal shinespark up the climb to break the bomb blocks to the morph tunnels on the right. Entrance condition: {
"comeInShinecharging": {
"length": 12,
"openEnd": 0
}
}Requires: {
"notable": "Behemoth Shinespark"
}
"Morph"
{
"shinespark": {
"frames": 147,
"excessFrames": 124
}
}Clears obstacles: A |
From: 5
Bottom Right Door
To: 4
Middle Right Door


Use an X-Ray climb to position Samus to where she can break the Bomb block with Screw Attack. This is a 1 screen climb. Entrance condition: {
"comeInWithDoorStuckSetup": {}
}Requires: "ScrewAttack" "Morph" "canXRayClimb" Dev note: This is an alternative to using Moonfall to break the block with Screw Attack. |
|
Overload PLMs using the scroll block next to the bottom right bomb blocks, allowing passage through them by making them become air. If Morph is unavailable, then careful movement will be required to get past the Pirates without taking a hit from them or their stationary, invisible lasers. If using a PB to kill the pirates, overload the PLMs at the bottom. If the top bomb block is hit with a PB before PLMs are overloaded, they will remain solid. Entrance condition: {
"comeInWithGMode": {
"mode": "any",
"morphed": true
}
}Requires: {
"or": [
"Morph",
{
"and": [
"h_artificialMorphSpringBall",
{
"or": [
"HiJump",
"canTrickyDodgeEnemies"
]
}
]
},
{
"and": [
"h_artificialMorphIBJ",
"canTrickyGMode"
]
},
{
"and": [
"h_artificialMorphMovement",
"h_artificialMorphPowerBomb"
]
},
{
"and": [
"h_ZebesNotAwake",
"h_artificialMorphMovement"
]
}
]
} |
From: 5
Bottom Right Door
To: 5
Bottom Right Door
With Zebes set ablaze, Climb only spawns two pirates that drop nothing, and the bomb wall is automatically cleared. The rising lava is now acid instead, so Gravity Suit works normally. Jump up the platforms to get high enough above the rising acid to safely Crystal Flash, then dive back into the acid against either bottom door. Wait in the acid until your energy is low enough and shinecharge. Windup right before energy runs out to interrupt then *immediately* leave to limit acid damage. Entrance condition: {
"comeInWithRMode": {}
}Requires: "Gravity"
"f_ZebesSetAblaze"
"h_CrystalFlashForReserveEnergy"
{
"acidFrames": 320
}
{
"canShineCharge": {
"usedTiles": 28,
"openEnd": 0
}
}
{
"or": [
{
"and": [
{
"disableEquipment": "ETank"
},
{
"refill": [
"ReserveEnergy"
]
},
{
"autoReserveTrigger": {}
}
]
},
{
"autoReserveTrigger": {
"maxReserveEnergy": 50
}
}
]
}
"canRModeSparkInterrupt"
{
"acidFrames": 80
}Clears obstacles: A, B Unlocks doors: {"nodeId":2,"types":["ammo"],"requires":[]}
{"nodeId":5,"types":["ammo"],"requires":[]}Dev note: FIXME: Needs enemyKill requirements for the escape pirates. |
|
Exit condition: {
"leaveWithRunway": {
"length": 13,
"openEnd": 0
}
}Dev note: This is relatively tight when coming in from the bottom left and using a Power Bomb to break the wall. It wouldn't work if the door was Missile or Power Bomb locked. |
|
Requires: {
"obstaclesCleared": [
"A"
]
}
{
"or": [
"h_ClimbWithoutLava",
{
"obstaclesNotCleared": [
"B"
]
}
]
}Exit condition: {
"leaveWithRunway": {
"length": 29,
"openEnd": 0
}
} |
From: 5
Bottom Right Door
To: 5
Bottom Right Door
Requires: {
"obstaclesCleared": [
"A"
]
}
{
"doorUnlockedAtNode": 2
}
{
"or": [
"h_ClimbWithoutLava",
{
"obstaclesNotCleared": [
"B"
]
}
]
}Exit condition: {
"leaveWithRunway": {
"length": 30,
"openEnd": 0
}
}Unlocks doors: {"nodeId":2,"types":["ammo"],"requires":[]} |
|
Farm wall pirates while leaving one left. Lead it to the bottom of the shaft, get shine charge, then windup in front of it to get shot and interrupted. Entrance condition: {
"comeInWithRMode": {}
}Requires: {
"not": "f_ZebesSetAblaze"
}
"h_ZebesIsAwake"
{
"or": [
"h_CrystalFlashForReserveEnergy",
{
"and": [
"h_RModeCanRefillReserves",
{
"resourceMissingAtMost": [
{
"type": "Missile",
"count": 0
}
]
},
{
"partialRefill": {
"type": "ReserveEnergy",
"limit": 20
}
}
]
}
]
}
{
"or": [
{
"and": [
"h_destroyBombWalls",
{
"canShineCharge": {
"usedTiles": 28,
"openEnd": 0
}
}
]
},
{
"and": [
{
"doorUnlockedAtNode": 5
},
{
"canShineCharge": {
"usedTiles": 13,
"openEnd": 0
}
}
]
},
{
"canShineCharge": {
"usedTiles": 12,
"openEnd": 0
}
}
]
}
{
"autoReserveTrigger": {
"maxReserveEnergy": 95
}
}
"canRModeSparkInterrupt"Clears obstacles: A Unlocks doors: {"nodeId":5,"types":["ammo"],"requires":[]} |
|
|
|
|
|


Requires: {
"or": [
"h_destroyBombWalls",
{
"obstaclesCleared": [
"A"
]
}
]
}
{
"or": [
"h_ClimbWithoutLava",
"h_lavaProof",
{
"obstaclesNotCleared": [
"B"
]
}
]
}Clears obstacles: A |
|


Requires: {
"useFlashSuit": {}
}
{
"shinespark": {
"frames": 3,
"excessFrames": 3
}
}Clears obstacles: A |
|
Requires: {
"haveBlueSuit": {}
}Clears obstacles: A |
|
Requires: "f_ZebesSetAblaze"
{
"obstaclesNotCleared": [
"B"
]
}Clears obstacles: A Dev note: These are destroyed on entry if Zebes is Ablaze. |
|
Requires: "h_bombThings" |
|
Requires: {
"haveBlueSuit": {}
}
"Morph" |
|
Starting with a crouch, diagonal shinespark to the top to break the bomb blocks to the morph tunnels on the right. Requires: {
"notable": "Behemoth Shinespark"
}
"Morph"
{
"canShineCharge": {
"usedTiles": 28,
"openEnd": 0
}
}
{
"shinespark": {
"frames": 147
}
}
{
"obstaclesCleared": [
"A"
]
}
{
"or": [
"h_ClimbWithoutLava",
{
"obstaclesNotCleared": [
"B"
]
}
]
} |
|


Manipulate the Pirates to the right wall while climbing the room. Kill all the Pirates while moonfalling down the right side. Then quickly gain a shinecharge, crouch, and perform a diagonal shinespark to the top, collecting the drops along the way. Requires: {
"notable": "Behemoth Shinespark"
}
"h_ZebesIsAwake"
"canTrickyDodgeEnemies"
"canFarmWhileShooting"
"Morph"
"canMoonfall"
{
"or": [
"Plasma",
"ScrewAttack",
"canInsaneJump"
]
}
{
"resourceMissingAtMost": [
{
"type": "Missile",
"count": 0
}
]
}
{
"canShineCharge": {
"usedTiles": 28,
"openEnd": 0
}
}
{
"shinespark": {
"frames": 50,
"excessFrames": 3
}
}
{
"obstaclesCleared": [
"A"
]
}
{
"or": [
"h_ClimbWithoutLava",
{
"obstaclesNotCleared": [
"B"
]
}
]
} |
|


Diagonal shinespark to break the bomb blocks to the morph tunnel on the right. Spark from the highest platform that is only one tile from the right wall (the morph tunnel will be off camera, but can be seen while jumping). From this platform, the shinespark can be done with or without a crouch. Requires: {
"notable": "Behemoth Shinespark"
}
"Morph"
{
"useFlashSuit": {}
}
{
"shinespark": {
"frames": 18,
"excessFrames": 4
}
} |
From: 6
Main Junction
To: 3
Top Right Door
This is a long temporary blue chain with X-Ray turnarounds to climb up and destroy the bomb blocks blocking the top morph tunnel. Breaking the bomb blocks is difficult because there is not enough space above them to get a neutral bounce. It is best to break them by jumping from the top platform (inside the 3-tile-high space), as this provides a 2-frame window for the morph; in comparison, jumping from the platform below requires a frame-perfect morph. If Spring Ball is available, it can be used to increase the window by one frame. Requires: {
"notable": "Temporary Blue Chain Through Bomb Blocks"
}
{
"canShineCharge": {
"usedTiles": 27.5,
"openEnd": 0
}
}
"canLongChainTemporaryBlue"
"canXRayTurnaround"
"canTrickyJump"
"canBePatient"
"canInsaneJump"
{
"obstaclesCleared": [
"A"
]
}
{
"or": [
"h_ClimbWithoutLava",
{
"obstaclesNotCleared": [
"B"
]
}
]
}Dev note: The runway was reduced by 0.5 tiles, as you can't maintain Temporary Blue directly against a wall. |
|
Requires: "h_bombThings" |
|
Requires: {
"haveBlueSuit": {}
}
"Morph" |
|
Diagonal shinespark up the climb to break the bomb blocks to the morph tunnels on the right. A frozen Pirate can be used to stop the spark just above the bottom tunnel. Requires: {
"notable": "Behemoth Shinespark"
}
"Morph"
{
"canShineCharge": {
"usedTiles": 28,
"openEnd": 0
}
}
{
"or": [
{
"shinespark": {
"frames": 147,
"excessFrames": 124
}
},
{
"and": [
"h_ZebesIsAwake",
"canTrickyUseFrozenEnemies",
{
"shinespark": {
"frames": 24,
"excessFrames": 1
}
}
]
}
]
}
{
"obstaclesCleared": [
"A"
]
}
{
"or": [
"h_ClimbWithoutLava",
{
"obstaclesNotCleared": [
"B"
]
}
]
}Dev note: FIXME: if Zebes is awake, it is possible to farm the Pirates in the room after breaking the blocks; this also applies to the other forms of Behemoth spark in this room (as long as the lava is not active). |
|

The bomb blocks can be broken by spinjumping with Screw attack and holding right, if moonfall makes Samus clip through the platform. Use the small blue platform 2nd from the top on the right side. Requires: {
"notable": "Moonfall Block Break"
}
"Morph"
"ScrewAttack"
"canMoonfall"
{
  "or": [
    "h_ClimbWithoutLava",
    "h_lavaProof",
    {
      "obstaclesNotCleared": [
        "B"
      ]
    }
  ]
} |
|


Diagonal shinespark to break the bomb blocks to the morph tunnel on the right. Spark from the lowest platform that is only one tile from the right wall (part of the bottom right door will be on screen). From this platform, the shinespark must be done from a crouch; or, to save some energy, angle-down jump and spark at the peak of the jump (with Hi-Jump unequipped). It is possible to set up a frozen pirate on the right wall to stop the shinespark early. If the positioning is ideal, Samus will bonk the platform at the top-right of the room, saving a bit of energy. With Hi-Jump equipped, this is still possible (and with 1 less energy needed): by sparking after bonking the platform and descending a few pixels (a 3-frame window); or, more easily but requiring slightly more energy, by aiming down and sparking at the maximum height (which will result in clipping through the platform at the top-right of the room if the spark is not interrupted by running low on energy before that point). Requires: {
"notable": "Behemoth Shinespark"
}
"Morph"
{
"useFlashSuit": {}
}
{
"or": [
{
"and": [
{
"disableEquipment": "HiJump"
},
{
"shinespark": {
"frames": 127,
"excessFrames": 124
}
}
]
},
{
"and": [
"HiJump",
{
"shinespark": {
"frames": 130,
"excessFrames": 129
}
}
]
},
{
"and": [
"HiJump",
"canInsaneJump",
{
"shinespark": {
"frames": 126,
"excessFrames": 124
}
}
]
},
{
"and": [
{
"shinespark": {
"frames": 1,
"excessFrames": 1
}
},
"canTrickyUseFrozenEnemies",
"h_ZebesIsAwake"
]
}
]
}
{
"or": [
"h_ClimbWithoutLava",
"h_lavaProof",
{
"obstaclesNotCleared": [
"B"
]
}
]
}Dev note: For the frozen pirate strat, it is assumed that Samus can farm the energy after the spark, resulting in no damaging shinespark frames. FIXME: It is still possible to set up a frozen pirate, even when shinecharging on the floor. |
From: 6
Main Junction
To: 4
Middle Right Door
A Temporary Blue Chain with x-ray turnarounds to climb up and destroy the bomb blocks blocking the bottom morph tunnel. Requires: {
"notable": "Temporary Blue Chain Through Bomb Blocks"
}
{
"canShineCharge": {
"usedTiles": 27.5,
"openEnd": 0
}
}
"canChainTemporaryBlue"
"canXRayTurnaround"
"canTrickyJump"
{
  "obstaclesCleared": [
    "A"
  ]
}
{
  "or": [
    "h_ClimbWithoutLava",
    {
      "obstaclesNotCleared": [
        "B"
      ]
    }
  ]
}Dev note: The runway was reduced by 0.5 tiles, as you can't maintain Temporary Blue directly against a wall. |
Temporary Blue Chain Through Bomb Blocks Without XRay (Bottom Left to Bottom, In-Room)
(Extreme)
Climb
From: 6
Main Junction
To: 4
Middle Right Door
A Temporary Blue Chain with movement assists to climb up and destroy the bomb blocks blocking the bottom morph tunnel. Requires: {
"notable": "Temporary Blue Chain Through Bomb Blocks"
}
{
"or": [
"HiJump",
"canTrickySpringBallJump"
]
}
{
"or": [
{
"canShineCharge": {
"usedTiles": 18,
"openEnd": 0
}
},
{
"and": [
{
"canShineCharge": {
"usedTiles": 19,
"openEnd": 0
}
},
{
"doorUnlockedAtNode": 2
}
]
}
]
}
"canChainTemporaryBlue"
"canTrickyJump"
{
"obstaclesCleared": [
"A"
]
}
{
"or": [
"h_ClimbWithoutLava",
{
"obstaclesNotCleared": [
"B"
]
}
]
}Unlocks doors: {"nodeId":2,"types":["ammo"],"requires":[]} |
|
|
|
Requires: "h_ZebesIsAwake"
{
"or": [
"h_ClimbWithoutLava",
"h_lavaProof",
{
"obstaclesNotCleared": [
"B"
]
}
]
}
{
"or": [
{
"and": [
{
"resetRoom": {
"nodes": [
1
]
}
},
{
"cycleFrames": 2350
}
]
},
{
"and": [
{
"resetRoom": {
"nodes": [
2
]
}
},
{
"or": [
"h_useMorphBombs",
"ScrewAttack"
]
},
{
"cycleFrames": 2270
}
]
},
{
"and": [
{
"resetRoom": {
"nodes": [
3
]
}
},
"h_useMorphBombs",
{
"cycleFrames": 2695
}
]
},
{
"and": [
{
"resetRoom": {
"nodes": [
4
]
}
},
"h_useMorphBombs",
{
"cycleFrames": 2480
}
]
},
{
"and": [
{
"resetRoom": {
"nodes": [
5
]
}
},
{
"cycleFrames": 1905
}
]
}
]
}Resets obstacles: A, B Farm cycle drops: 11 Grey Space Pirate (wall) Dev note: FIXME: Shinesparking can also be a viable option, in case it is patched to not cost energy. |
|
Requires: "h_CrystalFlash"
{
"or": [
"h_ClimbWithoutLava",
"h_lavaProof",
{
"obstaclesNotCleared": [
"B"
]
}
]
}Clears obstacles: A |
|
Requires: {
"obstaclesCleared": [
"A"
]
}
{
"or": [
"h_ClimbWithoutLava",
{
"obstaclesNotCleared": [
"B"
]
}
]
}
{
"or": [
{
"canShineCharge": {
"usedTiles": 28,
"openEnd": 0
}
},
{
"and": [
{
"or": [
{
"doorUnlockedAtNode": 2
},
{
"doorUnlockedAtNode": 5
}
]
},
{
"canShineCharge": {
"usedTiles": 29,
"openEnd": 0
}
}
]
},
{
"and": [
{
"doorUnlockedAtNode": 2
},
{
"doorUnlockedAtNode": 5
},
{
"canShineCharge": {
"usedTiles": 30,
"openEnd": 0
}
}
]
}
]
}
"h_CrystalSpark"Unlocks doors: {"nodeId":2,"types":["ammo"],"requires":[]}
{"nodeId":5,"types":["ammo"],"requires":[]} |
{
"$schema": "../../../schema/m3-room.schema.json",
"id": 11,
"name": "Climb",
"area": "Crateria",
"subarea": "Central",
"roomAddress": "0x796BA",
"roomEnvironments": [
{
"heated": false
}
],
"mapTileMask": [
[
0,
1,
1
],
[
0,
1,
0
],
[
0,
1,
0
],
[
0,
1,
0
],
[
0,
1,
0
],
[
0,
1,
0
],
[
0,
1,
0
],
[
0,
1,
1
],
[
1,
1,
0
]
],
"nodes": [
{
"id": 1,
"name": "Top Door",
"nodeType": "door",
"nodeSubType": "blue",
"nodeAddress": "0x0018b3e",
"doorOrientation": "up",
"doorEnvironments": [
{
"physics": "air"
}
],
"mapTileMask": [
[
0,
2,
1
],
[
0,
1,
0
],
[
0,
1,
0
],
[
0,
1,
0
],
[
0,
1,
0
],
[
0,
1,
0
],
[
0,
1,
0
],
[
0,
1,
1
],
[
1,
1,
0
]
]
},
{
"id": 2,
"name": "Bottom Left Door",
"nodeType": "door",
"nodeSubType": "gray",
"nodeAddress": "0x0018b6e",
"doorOrientation": "left",
"doorEnvironments": [
{
"physics": "air"
}
],
"useImplicitComeInNormally": false,
"useImplicitComeInWithMockball": false,
"locks": [
{
"name": "Climb Tourian Gray Lock (to Tourian Escape)",
"lockType": "permanent",
"unlockStrats": [
{
"name": "Base",
"requires": [
"never"
],
"flashSuitChecked": true,
"blueSuitChecked": true
}
]
}
],
"mapTileMask": [
[
0,
1,
1
],
[
0,
1,
0
],
[
0,
1,
0
],
[
0,
1,
0
],
[
0,
1,
0
],
[
0,
1,
0
],
[
0,
1,
0
],
[
0,
1,
1
],
[
2,
1,
0
]
]
},
{
"id": 3,
"name": "Top Right Door",
"nodeType": "door",
"nodeSubType": "gray",
"nodeAddress": "0x0018b4a",
"doorOrientation": "right",
"doorEnvironments": [
{
"physics": "air"
}
],
"locks": [
{
"name": "Climb Top Right Gray Lock (to Climb Supers Top)",
"lockType": "permanent",
"unlockStrats": [
{
"name": "Base",
"requires": [
"never"
],
"flashSuitChecked": true,
"blueSuitChecked": true
}
]
}
],
"mapTileMask": [
[
0,
1,
2
],
[
0,
1,
0
],
[
0,
1,
0
],
[
0,
1,
0
],
[
0,
1,
0
],
[
0,
1,
0
],
[
0,
1,
0
],
[
0,
1,
1
],
[
1,
1,
0
]
]
},
{
"id": 4,
"name": "Middle Right Door",
"nodeType": "door",
"nodeSubType": "yellow",
"nodeAddress": "0x0018b56",
"doorOrientation": "right",
"doorEnvironments": [
{
"physics": "air"
}
],
"locks": [
{
"name": "Climb Middle Right Escape Lock (to Climb supers Bottom)",
"lockType": "escapeFunnel",
"lock": [
"f_ZebesSetAblaze"
],
"unlockStrats": [
{
"name": "Base",
"requires": [
"never"
],
"flashSuitChecked": true,
"blueSuitChecked": true
}
]
}
],
"mapTileMask": [
[
0,
1,
1
],
[
0,
1,
0
],
[
0,
1,
0
],
[
0,
1,
0
],
[
0,
1,
0
],
[
0,
1,
0
],
[
0,
1,
0
],
[
0,
1,
2
],
[
1,
1,
0
]
]
},
{
"id": 5,
"name": "Bottom Right Door",
"nodeType": "door",
"nodeSubType": "blue",
"nodeAddress": "0x0018b62",
"doorOrientation": "right",
"doorEnvironments": [
{
"physics": "air"
}
],
"locks": [
{
"name": "Climb Bottom Right Escape Lock (to Pit Room)",
"lockType": "escapeFunnel",
"lock": [
"f_ZebesSetAblaze"
],
"unlockStrats": [
{
"name": "Base",
"requires": [
"never"
],
"flashSuitChecked": true,
"blueSuitChecked": true
}
]
}
],
"mapTileMask": [
[
0,
1,
1
],
[
0,
1,
0
],
[
0,
1,
0
],
[
0,
1,
0
],
[
0,
1,
0
],
[
0,
1,
0
],
[
0,
1,
0
],
[
0,
1,
1
],
[
1,
2,
0
]
]
},
{
"id": 6,
"name": "Main Junction",
"nodeType": "junction",
"nodeSubType": "junction",
"mapTileMask": [
[
0,
2,
1
],
[
0,
2,
0
],
[
0,
2,
0
],
[
0,
2,
0
],
[
0,
2,
0
],
[
0,
2,
0
],
[
0,
2,
0
],
[
0,
2,
1
],
[
1,
2,
0
]
]
}
],
"obstacles": [
{
"id": "A",
"name": "Bottom Bomb Blocks",
"obstacleType": "inanimate"
},
{
"id": "B",
"name": "Entered from the Bottom Left Door",
"obstacleType": "abstract"
}
],
"enemies": [
{
"id": "e1",
"groupName": "Climb Pirates",
"enemyName": "Grey Space Pirate (wall)",
"quantity": 11,
"homeNodes": [
5
],
"spawn": [
"f_ZebesAwake"
],
"stopSpawn": [
"f_ZebesSetAblaze"
]
},
{
"id": "e2",
"groupName": "Climb Escape Pirates",
"enemyName": "Custom Climb Pirate",
"quantity": 2,
"homeNodes": [
2
],
"spawn": [
"f_ZebesSetAblaze"
]
}
],
"strats": [
{
"link": [
1,
1
],
"name": "Base (Unlock Door)",
"requires": [],
"unlocksDoors": [
{
"types": [
"ammo"
],
"requires": []
}
],
"flashSuitChecked": true,
"blueSuitChecked": true
},
{
"link": [
1,
1
],
"name": "Base (Come In Normally)",
"entranceCondition": {
"comeInNormally": {}
},
"requires": [],
"flashSuitChecked": true,
"blueSuitChecked": true
},
{
"link": [
2,
2
],
"name": "Base (Unlock Door)",
"requires": [],
"unlocksDoors": [
{
"types": [
"ammo"
],
"requires": []
}
],
"flashSuitChecked": true,
"blueSuitChecked": true
},
{
"link": [
3,
3
],
"name": "Base (Unlock Door)",
"requires": [],
"unlocksDoors": [
{
"types": [
"ammo"
],
"requires": []
}
],
"flashSuitChecked": true,
"blueSuitChecked": true
},
{
"link": [
3,
3
],
"name": "Base (Come In Normally)",
"entranceCondition": {
"comeInNormally": {}
},
"requires": [],
"flashSuitChecked": true,
"blueSuitChecked": true
},
{
"link": [
3,
3
],
"name": "Base (Come In With Mockball)",
"entranceCondition": {
"comeInWithMockball": {
"adjacentMinTiles": 0,
"remoteAndLandingMinTiles": [
[
0,
0
]
],
"speedBooster": "any"
}
},
"requires": [],
"flashSuitChecked": true,
"blueSuitChecked": true
},
{
"link": [
4,
4
],
"name": "Base (Unlock Door)",
"requires": [],
"unlocksDoors": [
{
"types": [
"ammo"
],
"requires": []
}
],
"flashSuitChecked": true,
"blueSuitChecked": true
},
{
"link": [
4,
4
],
"name": "Base (Come In Normally)",
"entranceCondition": {
"comeInNormally": {}
},
"requires": [],
"flashSuitChecked": true,
"blueSuitChecked": true
},
{
"link": [
4,
4
],
"name": "Base (Come In With Mockball)",
"entranceCondition": {
"comeInWithMockball": {
"adjacentMinTiles": 0,
"remoteAndLandingMinTiles": [
[
0,
0
]
],
"speedBooster": "any"
}
},
"requires": [],
"flashSuitChecked": true,
"blueSuitChecked": true
},
{
"link": [
5,
5
],
"name": "Base (Unlock Door)",
"requires": [],
"unlocksDoors": [
{
"types": [
"ammo"
],
"requires": []
}
],
"flashSuitChecked": true,
"blueSuitChecked": true
},
{
"link": [
5,
5
],
"name": "Base (Come In Normally)",
"entranceCondition": {
"comeInNormally": {}
},
"requires": [],
"flashSuitChecked": true,
"blueSuitChecked": true
},
{
"link": [
5,
5
],
"name": "Base (Come In With Mockball)",
"entranceCondition": {
"comeInWithMockball": {
"adjacentMinTiles": 0,
"remoteAndLandingMinTiles": [
[
0,
0
]
],
"speedBooster": "any"
}
},
"requires": [],
"flashSuitChecked": true,
"blueSuitChecked": true
},
{
"id": 1,
"link": [
1,
1
],
"name": "Leave With Door Frame Below",
"requires": [],
"exitCondition": {
"leaveWithDoorFrameBelow": {
"height": 2
}
},
"flashSuitChecked": true,
"blueSuitChecked": true
},
{
"id": 2,
"link": [
1,
1
],
"name": "Leave With Platform Below (Left)",
"requires": [],
"exitCondition": {
"leaveWithPlatformBelow": {
"height": 6,
"leftPosition": -2.5,
"rightPosition": -0.5
}
},
"flashSuitChecked": true,
"blueSuitChecked": true
},
{
"id": 3,
"link": [
1,
1
],
"name": "Leave With Platform Below (Right)",
"requires": [],
"exitCondition": {
"leaveWithPlatformBelow": {
"height": 6,
"leftPosition": 0.5,
"rightPosition": 2.5
}
},
"flashSuitChecked": true,
"blueSuitChecked": true
},
{
"id": 4,
"link": [
1,
1
],
"name": "Carry G-Mode Back Up",
"entranceCondition": {
"comeInWithGMode": {
"mode": "direct",
"morphed": false
},
"comesThroughToilet": "any"
},
"requires": [],
"exitCondition": {
"leaveWithGMode": {
"morphed": false
}
},
"bypassesDoorShell": "free",
"flashSuitChecked": true,
"blueSuitChecked": true
},
{
"id": 5,
"link": [
1,
1
],
"name": "Carry G-Mode Morph Back Up",
"entranceCondition": {
"comeInWithGMode": {
"mode": "direct",
"morphed": true
},
"comesThroughToilet": "any"
},
"requires": [
"h_artificialMorphMovement"
],
"exitCondition": {
"leaveWithGMode": {
"morphed": true
}
},
"bypassesDoorShell": "free",
"flashSuitChecked": true,
"blueSuitChecked": true
},
{
"id": 6,
"link": [
1,
2
],
"name": "Temporary Blue Chain",
"entranceCondition": {
"comeInWithTemporaryBlue": {
"direction": "any"
},
"comesThroughToilet": "any"
},
"requires": [
"canLongChainTemporaryBlue",
"canXRayTurnaround"
],
"clearsObstacles": [
"A"
],
"flashSuitChecked": true,
"blueSuitChecked": true
},
{
"id": 7,
"link": [
1,
2
],
"name": "G-Mode through Bomb Blocks",
"entranceCondition": {
"comeInWithGMode": {
"mode": "any",
"morphed": false
},
"comesThroughToilet": "any"
},
"requires": [],
"flashSuitChecked": true,
"blueSuitChecked": true,
"note": "Overload PLMs using scroll blocks a few tiles in front of the bomb blocks."
},
{
"id": 8,
"link": [
1,
3
],
"name": "Behemoth Shinespark (Top Door)",
"entranceCondition": {
"comeInShinecharged": {},
"comesThroughToilet": "no"
},
"requires": [
{
"shineChargeFrames": 55
},
{
"notable": "Behemoth Shinespark"
},
"canShinechargeMovementComplex",
{
"shinespark": {
"frames": 5
}
},
"Morph"
],
"flashSuitChecked": true,
"blueSuitChecked": true,
"note": [
"Diagonal shinespark up the climb to break the bomb blocks to the top right morph tunnel.",
"A consistent place to spark from is the small platform below the bomb block, using a crouch jump and then a diagonal spark (not a crouched diagonal spark)."
]
},
{
"id": 9,
"link": [
1,
3
],
"name": "Behemoth Shinespark (Top Door, Through Toilet)",
"entranceCondition": {
"comeInShinecharged": {},
"comesThroughToilet": "yes"
},
"requires": [
{
"shineChargeFrames": 65
},
{
"notable": "Behemoth Shinespark"
},
"canShinechargeMovementComplex",
{
"shinespark": {
"frames": 5
}
},
"Morph"
],
"flashSuitChecked": true,
"blueSuitChecked": true,
"note": [
"Diagonal shinespark up the climb to break the bomb blocks to the top right morph tunnel.",
"A consistent place to spark from is the small platform below the bomb block, using a crouch jump and then a diagonal spark (not a crouched diagonal spark)."
]
},
{
"id": 10,
"link": [
1,
3
],
"name": "Temporary Blue Chain",
"entranceCondition": {
"comeInWithTemporaryBlue": {
"direction": "right"
},
"comesThroughToilet": "any"
},
"requires": [
"canChainTemporaryBlue",
"canInsaneJump"
],
"flashSuitChecked": true,
"blueSuitChecked": true,
"note": [
"Breaking the bomb blocks is difficult because there is not enough space above them to get a neutral bounce.",
"It is best to break them by jumping from the top platform (inside the 3-tile-high space), as this provides a 2-frame window for the morph;",
"in comparison, jumping from the platform below requires a frame-perfect morph.",
"If Spring Ball is available, it can be used to increase the window by one frame."
]
},
{
"id": 11,
"link": [
1,
3
],
"name": "Temporary Blue Chain With X-Ray",
"entranceCondition": {
"comeInWithTemporaryBlue": {
"direction": "left"
},
"comesThroughToilet": "any"
},
"requires": [
"canChainTemporaryBlue",
"canXRayTurnaround",
"canInsaneJump"
],
"flashSuitChecked": true,
"blueSuitChecked": true,
"note": [
"Breaking the bomb blocks is difficult because there is not enough space above them to get a neutral bounce.",
"It is best to break them by jumping from the top platform (inside the 3-tile-high space), as this provides a 2-frame window for the morph;",
"in comparison, jumping from the platform below requires a frame-perfect morph.",
"If Spring Ball is available, it can be used to increase the window by one frame."
]
},
{
"id": 12,
"link": [
1,
3
],
"name": "G-Mode Morph through Bomb Blocks",
"entranceCondition": {
"comeInWithGMode": {
"mode": "any",
"morphed": true
},
"comesThroughToilet": "any"
},
"requires": [
"h_artificialMorphMovement"
],
"flashSuitChecked": true,
"blueSuitChecked": true,
"note": "Overload PLMs using the scroll block next to the bomb blocks.",
"devNote": "PBs cannot be used, as they will solidify the bomb blocks."
},
{
"id": 13,
"link": [
1,
4
],
"name": "Temporary Blue Chain",
"entranceCondition": {
"comeInWithTemporaryBlue": {
"direction": "right"
},
"comesThroughToilet": "any"
},
"requires": [
"canChainTemporaryBlue",
"canInsaneJump"
],
"flashSuitChecked": true,
"blueSuitChecked": true
},
{
"id": 14,
"link": [
1,
4
],
"name": "Temporary Blue Chain With X-Ray",
"entranceCondition": {
"comeInWithTemporaryBlue": {
"direction": "left"
},
"comesThroughToilet": "any"
},
"requires": [
"canXRayTurnaround",
"canChainTemporaryBlue",
"canInsaneJump"
],
"flashSuitChecked": true,
"blueSuitChecked": true
},
{
"id": 15,
"link": [
1,
4
],
"name": "G-Mode Morph through Bomb Blocks",
"entranceCondition": {
"comeInWithGMode": {
"mode": "any",
"morphed": true
},
"comesThroughToilet": "any"
},
"requires": [],
"flashSuitChecked": true,
"blueSuitChecked": true,
"note": "Overload PLMs using the scroll block next to the bomb blocks."
},
{
"id": 116,
"link": [
1,
6
],
"name": "R-Mode Spark Interrupt",
"entranceCondition": {
"comeInWithRMode": {},
"comesThroughToilet": "no"
},
"requires": [
{
"not": "f_ZebesSetAblaze"
},
"h_ZebesIsAwake",
{
"or": [
"h_CrystalFlashForReserveEnergy",
{
"and": [
"h_RModeCanRefillReserves",
{
"resourceMissingAtMost": [
{
"type": "Missile",
"count": 0
}
]
},
{
"partialRefill": {
"type": "ReserveEnergy",
"limit": 20
}
}
]
}
]
},
{
"or": [
{
"and": [
"h_destroyBombWalls",
{
"canShineCharge": {
"usedTiles": 28,
"openEnd": 0
}
}
]
},
{
"and": [
{
"doorUnlockedAtNode": 5
},
{
"canShineCharge": {
"usedTiles": 13,
"openEnd": 0
}
}
]
},
{
"canShineCharge": {
"usedTiles": 12,
"openEnd": 0
}
}
]
},
{
"autoReserveTrigger": {
"maxReserveEnergy": 95
}
},
"canRModeSparkInterrupt"
],
"unlocksDoors": [
{
"nodeId": 5,
"types": [
"ammo"
],
"requires": []
}
],
"clearsObstacles": [
"A"
],
"flashSuitChecked": true,
"blueSuitChecked": true,
"note": [
"Farm wall pirates while leaving one left. Lead it to the bottom of the shaft, get shine charge,",
"then windup in front of it to get shot and interrupted."
]
},
{
"id": 16,
"link": [
1,
6
],
"name": "Base",
"requires": [
{
"or": [
"h_ClimbWithoutLava",
"h_lavaProof",
{
"obstaclesNotCleared": [
"B"
]
}
]
}
],
"flashSuitChecked": true,
"blueSuitChecked": true
},
{
"id": 105,
"link": [
2,
2
],
"name": "Base",
"entranceCondition": {
"comeInNormally": {}
},
"requires": [],
"clearsObstacles": [
"B"
],
"flashSuitChecked": true,
"blueSuitChecked": true,
"devNote": "When Samus enters the room from the bottom left, lava starts to rise. In the escape it is acid instead."
},
{
"id": 17,
"link": [
2,
2
],
"name": "Leave with Runway",
"requires": [],
"exitCondition": {
"leaveWithRunway": {
"length": 15,
"openEnd": 0
}
},
"flashSuitChecked": true,
"blueSuitChecked": true
},
{
"id": 18,
"link": [
2,
2
],
"name": "Leave with Extended Runway",
"requires": [
{
"obstaclesCleared": [
"A"
]
},
{
"or": [
"h_ClimbWithoutLava",
{
"obstaclesNotCleared": [
"B"
]
}
]
}
],
"exitCondition": {
"leaveWithRunway": {
"length": 29,
"openEnd": 0
}
},
"flashSuitChecked": true,
"blueSuitChecked": true
},
{
"id": 19,
"link": [
2,
2
],
"name": "Leave with Extended Runway, Open Both Doors",
"requires": [
{
"obstaclesCleared": [
"A"
]
},
{
"doorUnlockedAtNode": 5
},
{
"or": [
"h_ClimbWithoutLava",
{
"obstaclesNotCleared": [
"B"
]
}
]
}
],
"exitCondition": {
"leaveWithRunway": {
"length": 30,
"openEnd": 0
}
},
"unlocksDoors": [
{
"nodeId": 5,
"types": [
"ammo"
],
"requires": []
}
],
"flashSuitChecked": true,
"blueSuitChecked": true
},
{
"id": 20,
"link": [
2,
2
],
"name": "Crystal Flash",
"requires": [
"h_CrystalFlash",
{
"or": [
"h_ClimbWithoutLava",
"h_lavaProof",
{
"obstaclesNotCleared": [
"B"
]
}
]
}
],
"clearsObstacles": [
"A"
],
"flashSuitChecked": true,
"blueSuitChecked": true,
"devNote": "An unprotected lava crystal flash could be added instead, but that would change the strats that come after."
},
{
"id": 106,
"link": [
2,
2
],
"name": "Base, Mockball Entry",
"entranceCondition": {
"comeInWithMockball": {
"speedBooster": "any",
"adjacentMinTiles": 0,
"remoteAndLandingMinTiles": [
[
0,
0
]
]
}
},
"requires": [],
"clearsObstacles": [
"B"
],
"flashSuitChecked": true,
"blueSuitChecked": true
},
{
"id": 23,
"link": [
2,
3
],
"name": "Behemoth Spark Top, Come in Shinecharging",
"entranceCondition": {
"comeInShinecharging": {
"length": 14,
"openEnd": 0
}
},
"requires": [
{
"notable": "Behemoth Shinespark"
},
"Morph",
{
"shinespark": {
"frames": 147
}
}
],
"clearsObstacles": [
"A",
"B"
],
"flashSuitChecked": true,
"blueSuitChecked": true,
"note": "Starting with a crouch, diagonal shinespark to the top to break the bomb blocks to the morph tunnels on the right."
},
{
"id": 24,
"link": [
2,
3
],
"name": "G-Mode Morph Blind Climb to the Top",
"entranceCondition": {
"comeInWithGMode": {
"mode": "any",
"morphed": true
}
},
"requires": [
{
"notable": "G-Mode Morph Blind Climb to the Top"
},
{
"or": [
"canTrickyGMode",
"Morph"
]
},
"h_artificialMorphMovement",
"canOffScreenMovement",
{
"or": [
"h_ClimbWithoutLava",
{
"and": [
"h_lavaProof",
{
"or": [
"h_artificialMorphSpringBall",
"Morph",
"Gravity"
]
}
]
}
]
}
],
"clearsObstacles": [
"B"
],
"flashSuitChecked": true,
"blueSuitChecked": true,
"note": [
"Overload PLMs using the scroll blocks next to the bomb wall",
"After passing through, you need to go from the bottom to the top of Climb and into the bomb blocks while still in G-mode Morph.",
"Samus will not be visible at all; the only available feedback is audio and position on the map."
]
},
{
"id": 25,
"link": [
2,
4
],
"name": "Behemoth Spark Bottom, Come in Shinecharging",
"entranceCondition": {
"comeInShinecharging": {
"length": 14,
"openEnd": 0
}
},
"requires": [
{
"notable": "Behemoth Shinespark"
},
"Morph",
{
"shinespark": {
"frames": 147,
"excessFrames": 124
}
},
"h_ClimbWithoutLava"
],
"clearsObstacles": [
"A",
"B"
],
"flashSuitChecked": true,
"blueSuitChecked": true,
"note": "Diagonal shinespark up the climb to break the bomb blocks to the morph tunnels on the right."
},
{
"id": 26,
"link": [
2,
4
],
"name": "Behemoth Spark Bottom, Come in Shinecharging, Race the Lava",
"entranceCondition": {
"comeInShinecharging": {
"length": 14,
"openEnd": 0
}
},
"requires": [
{
"notable": "Behemoth Shinespark"
},
"Morph",
{
"shinespark": {
"frames": 147,
"excessFrames": 124
}
},
{
"or": [
"h_lavaProof",
"canMoonfall",
{
"lavaFrames": 120
},
{
"and": [
"Gravity",
{
"lavaFrames": 100
}
]
}
]
}
],
"exitCondition": {
"leaveNormally": {}
},
"unlocksDoors": [
{
"types": [
"super"
],
"requires": []
},
{
"types": [
"missiles"
],
"requires": [
{
"lavaFrames": 50
}
]
},
{
"types": [
"powerbomb"
],
"requires": [
{
"lavaFrames": 110
}
]
}
],
"flashSuitChecked": true,
"blueSuitChecked": true,
"note": "Diagonal shinespark up the climb to break the bomb blocks to the morph tunnels on the right."
},
{
"id": 27,
"link": [
2,
4
],
"name": "Temporary Blue Chain Through Bomb Blocks Without X-Ray (Bottom Left to Bottom, Cross-Room)",
"entranceCondition": {
"comeInShinecharging": {
"length": 14,
"openEnd": 0
}
},
"requires": [
{
"notable": "Temporary Blue Chain Through Bomb Blocks"
},
"canChainTemporaryBlue",
{
"or": [
"HiJump",
"canTrickySpringBallJump"
]
},
"canTrickyJump",
"h_ClimbWithoutLava"
],
"clearsObstacles": [
"A",
"B"
],
"flashSuitChecked": true,
"blueSuitChecked": true,
"note": "A Temporary Blue Chain with movement assists to climb up and destroy the bomb blocks blocking the bottom morph tunnel."
},
{
"id": 28,
"link": [
2,
4
],
"name": "G-Mode Morph Blind",
"entranceCondition": {
"comeInWithGMode": {
"mode": "any",
"morphed": true
}
},
"requires": [
"h_artificialMorphMovement",
"canOffScreenMovement",
{
"or": [
"h_ClimbWithoutLava",
{
"and": [
"h_lavaProof",
{
"or": [
"h_artificialMorphSpringBall",
"Morph",
"Gravity"
]
}
]
}
]
}
],
"clearsObstacles": [
"B"
],
"flashSuitChecked": true,
"blueSuitChecked": true,
"note": [
"Overload PLMs using the scroll blocks next to the bomb wall",
"Navigate to the lower right bomb blocks while still morphed.",
"Samus will be off-camera and not visible, requiring blind movement.",
"Enemies will not hurt Samus since they are non-global and also off-camera."
]
},
{
"id": 117,
"link": [
2,
5
],
"name": "Zebes Ablaze, R-Mode Spark Interrupt",
"entranceCondition": {
"comeInWithRMode": {}
},
"requires": [
"Gravity",
"f_ZebesSetAblaze",
{
"or": [
{
"enemyDamage": {
"enemy": "Custom Climb Pirate",
"type": "contact",
"hits": 1
}
},
{
"enemyKill": {
"enemies": [
[
"Custom Climb Pirate",
"Custom Climb Pirate"
]
],
"explicitWeapons": [
"Plasma",
"Super",
"PowerBomb"
]
}
}
]
},
"h_CrystalFlashForReserveEnergy",
{
"acidFrames": 320
},
{
"canShineCharge": {
"usedTiles": 28,
"openEnd": 0
}
},
{
"or": [
{
"and": [
{
"disableEquipment": "ETank"
},
{
"refill": [
"ReserveEnergy"
]
},
{
"autoReserveTrigger": {}
}
]
},
{
"autoReserveTrigger": {
"maxReserveEnergy": 50
}
}
]
},
"canRModeSparkInterrupt",
{
"acidFrames": 80
},
{
"resetRoom": {
"nodes": [
2,
5
]
}
}
],
"unlocksDoors": [
{
"nodeId": 2,
"types": [
"ammo"
],
"requires": []
},
{
"nodeId": 5,
"types": [
"ammo"
],
"requires": []
}
],
"clearsObstacles": [
"A",
"B"
],
"flashSuitChecked": true,
"blueSuitChecked": true,
"note": [
"With Zebes set ablaze, Climb only spawns two pirates that drop nothing, and the bomb",
"wall is automatically cleared. The rising lava is now acid instead, so Speed Booster works normally with Gravity Suit.",
"Jump up the platforms to get high enough above the rising acid to",
"safely Crystal Flash, then dive back into the acid against either bottom door. Wait in the acid",
"until your energy is low enough and shinecharge. Windup right before energy runs out to interrupt",
"then *immediately* leave to limit acid damage."
],
"devNote": [
"FIXME: Needs to support Hyper Beam kill also."
]
},
{
"id": 29,
"link": [
2,
5
],
"name": "Transition with Stored Fall Speed (Blue)",
"entranceCondition": {
"comeInWithStoredFallSpeed": {
"fallSpeedInTiles": 1
}
},
"requires": [
{
  "or": [
    {
      "getBlueSpeed": {
        "usedTiles": 14,
        "openEnd": 0
      }
    },
    {
      "and": [
        {
          "getBlueSpeed": {
            "usedTiles": 15,
            "openEnd": 0
          }
        },
        {
          "doorUnlockedAtNode": 2
        }
      ]
    },
    {
      "haveBlueSuit": {}
    }
  ]
}
],
"exitCondition": {
"leaveWithStoredFallSpeed": {
"fallSpeedInTiles": 1
}
},
"unlocksDoors": [
{
"types": [
"missiles",
"super"
],
"requires": []
},
{
"types": [
"powerbomb"
],
"requires": [
"never"
]
},
{
"nodeId": 2,
"types": [
"missiles",
"super"
],
"requires": []
},
{
"nodeId": 2,
"types": [
"powerbomb"
],
"requires": [
"never"
]
}
],
"flashSuitChecked": true,
"blueSuitChecked": true
},
{
"id": 30,
"link": [
2,
5
],
"name": "Transition with Stored Fall Speed (Blue, more speed)",
"entranceCondition": {
"comeInWithStoredFallSpeed": {
"fallSpeedInTiles": 2
}
},
"requires": [
{
  "or": [
    {
      "getBlueSpeed": {
        "usedTiles": 14,
        "openEnd": 0
      }
    },
    {
      "and": [
        {
          "getBlueSpeed": {
            "usedTiles": 15,
            "openEnd": 0
          }
        },
        {
          "doorUnlockedAtNode": 2
        }
      ]
    },
    {
      "haveBlueSuit": {}
    }
  ]
}
],
"exitCondition": {
"leaveWithStoredFallSpeed": {
"fallSpeedInTiles": 2
}
},
"unlocksDoors": [
{
"types": [
"missiles",
"super"
],
"requires": []
},
{
"types": [
"powerbomb"
],
"requires": [
"never"
]
},
{
"nodeId": 2,
"types": [
"missiles",
"super"
],
"requires": []
},
{
"nodeId": 2,
"types": [
"powerbomb"
],
"requires": [
"never"
]
}
],
"flashSuitChecked": true,
"blueSuitChecked": true
},
{
"id": 31,
"link": [
2,
5
],
"name": "Transition with Stored Fall Speed (Screw Fall)",
"entranceCondition": {
"comeInWithStoredFallSpeed": {
"fallSpeedInTiles": 2
}
},
"requires": [
"ScrewAttack",
"Grapple"
],
"exitCondition": {
"leaveWithStoredFallSpeed": {
"fallSpeedInTiles": 2
}
},
"unlocksDoors": [
{
"types": [
"missiles",
"super"
],
"requires": []
},
{
"types": [
"powerbomb"
],
"requires": [
"never"
]
}
],
"flashSuitChecked": true,
"blueSuitChecked": true,
"note": "Break the Bomb blocks using Screw Attack in a Moonfall, then escape the tiles with Grapple Beam."
},
{
"id": 118,
"link": [
2,
6
],
"name": "R-Mode Spark Interrupt",
"entranceCondition": {
"comeInWithRMode": {}
},
"requires": [
"h_ClimbWithoutLava",
{
"or": [
"h_destroyBombWalls",
{
"getBlueSpeed": {
"usedTiles": 14,
"openEnd": 0
}
},
{
"and": [
{
"getBlueSpeed": {
"usedTiles": 15,
"openEnd": 0
}
},
{
"doorUnlockedAtNode": 2
}
]
}
]
},
{
"not": "f_ZebesSetAblaze"
},
"h_ZebesIsAwake",
{
"or": [
"h_CrystalFlashForReserveEnergy",
{
"and": [
"h_RModeCanRefillReserves",
{
"resourceMissingAtMost": [
{
"type": "Missile",
"count": 0
}
]
},
{
"partialRefill": {
"type": "ReserveEnergy",
"limit": 20
}
}
]
}
]
},
{
"canShineCharge": {
"usedTiles": 28,
"openEnd": 0
}
},
{
"autoReserveTrigger": {
"maxReserveEnergy": 95
}
},
"canRModeSparkInterrupt"
],
"unlocksDoors": [
{
"nodeId": 2,
"types": [
"ammo"
],
"requires": []
},
{
"nodeId": 5,
"types": [
"ammo"
],
"requires": []
}
],
"clearsObstacles": [
"A",
"B"
],
"flashSuitChecked": true,
"blueSuitChecked": true,
"note": [
"Farm wall pirates while leaving one of the bottom ones alive.",
"Lead it to the bottom of the shaft, shinecharge, then windup in front of it to get shot and interrupted."
],
"devNote": [
"This door triggers the rising lava, which will prevent gaining a shinecharge."
]
},
{
"id": 32,
"link": [
2,
6
],
"name": "Base",
"requires": [
{
  "or": [
    "h_destroyBombWalls",
    {
      "obstaclesCleared": [
        "A"
      ]
    }
  ]
}
],
"clearsObstacles": [
"A"
],
"flashSuitChecked": true,
"blueSuitChecked": true
},
{
"id": 33,
"link": [
2,
6
],
"name": "Shinespark",
"entranceCondition": {
"comeInWithSpark": {}
},
"requires": [
{
  "shinespark": {
    "frames": 43,
    "excessFrames": 17
  }
}
],
"clearsObstacles": [
"A",
"B"
],
"flashSuitChecked": true,
"blueSuitChecked": true
},
{
"id": 34,
"link": [
2,
6
],
"name": "Come in Getting Blue Speed",
"entranceCondition": {
"comeInGettingBlueSpeed": {
"length": 14,
"openEnd": 0
}
},
"requires": [],
"clearsObstacles": [
"A",
"B"
],
"flashSuitChecked": true,
"blueSuitChecked": true
},
{
"id": 35,
"link": [
2,
6
],
"name": "In-Room Get Blue Speed",
"requires": [
{
  "or": [
    {
      "getBlueSpeed": {
        "usedTiles": 14,
        "openEnd": 0
      }
    },
    {
      "and": [
        {
          "getBlueSpeed": {
            "usedTiles": 15,
            "openEnd": 0
          }
        },
        {
          "doorUnlockedAtNode": 2
        }
      ]
    }
  ]
}
],
"clearsObstacles": [
"A"
],
"flashSuitChecked": true,
"blueSuitChecked": true
},
{
"id": 36,
"link": [
2,
6
],
"name": "Come In Speedballing",
"entranceCondition": {
"comeInSpeedballing": {
"runway": {
"length": 14,
"openEnd": 0
}
}
},
"requires": [],
"clearsObstacles": [
"A",
"B"
],
"flashSuitChecked": true,
"blueSuitChecked": true,
"note": "If needed, unmorph while passing through the blocks to break more than just the bottom one.",
"devNote": [
"If we had a comeInWithSpeedball entrance condition, it should be used instead.",
"This strat is for using a remote runway in the previous room to get the speedball;",
"if the current runway were used then you could just run through with blue speed instead."
]
},
{
"id": 37,
"link": [
2,
6
],
"name": "Come In With Blue Spring Ball Bounce",
"entranceCondition": {
"comeInWithBlueSpringBallBounce": {
"movementType": "any"
}
},
"requires": [],
"clearsObstacles": [
"A",
"B"
],
"flashSuitChecked": true,
"blueSuitChecked": true
},
{
"id": 38,
"link": [
2,
6
],
"name": "Come In With Blue Space Jump",
"entranceCondition": {
"comeInBlueSpinning": {
"unusableTiles": 0
}
},
"requires": [
"canTrickyJump",
"SpaceJump"
],
"clearsObstacles": [
"A",
"B"
],
"flashSuitChecked": true,
"blueSuitChecked": true
},
{
"id": 39,
"link": [
2,
6
],
"name": "Use Flash Suit",
"requires": [
{
"useFlashSuit": {}
},
{
"shinespark": {
"frames": 3,
"excessFrames": 3
}
}
],
"clearsObstacles": [
"A"
],
"flashSuitChecked": true,
"blueSuitChecked": true
},
{
"id": 109,
"link": [
2,
6
],
"name": "Blue Suit",
"requires": [
{
  "haveBlueSuit": {}
}
],
"clearsObstacles": [
"A"
],
"flashSuitChecked": true,
"blueSuitChecked": true
},
{
"id": 40,
"link": [
2,
6
],
"name": "G-Mode through Bomb Blocks",
"entranceCondition": {
"comeInWithGMode": {
"mode": "any",
"morphed": false
}
},
"requires": [
{
  "or": [
    "h_ClimbWithoutLava",
    "h_lavaProof"
  ]
}
],
"clearsObstacles": [
"B"
],
"flashSuitChecked": true,
"blueSuitChecked": true,
"note": "Overload PLMs using the scroll blocks immediately in front of the bomb wall",
"devNote": "This could be possible with the lava, but it would be blind and very tight."
},
{
"id": 41,
"link": [
2,
6
],
"name": "Zebes Ablaze",
"requires": [
"f_ZebesSetAblaze"
],
"clearsObstacles": [
"A",
"B"
],
"flashSuitChecked": true,
"blueSuitChecked": true,
"devNote": "These are destroyed on entry if Zebes is Ablaze."
},
{
"id": 42,
"link": [
3,
2
],
"name": "G-Mode through Bomb Blocks",
"entranceCondition": {
"comeInWithGMode": {
"mode": "any",
"morphed": true
}
},
"requires": [
{
  "or": [
    "h_artificialMorphSpringBall",
    "h_artificialMorphBombs",
    {
      "and": [
        "Morph",
        "h_fourTileJumpMorph"
      ]
    }
  ]
}
],
"flashSuitChecked": true,
"blueSuitChecked": true,
"note": [
"Overload PLMs using the scroll block at the top of the stairs immediately in front of the bomb blocks.",
"Reach the bottom and pass through the bomb blocks while still in G-mode."
],
"devNote": "PBs cannot be used, as they will solidify the bomb blocks."
},
{
"id": 43,
"link": [
3,
3
],
"name": "Leave with Runway",
"requires": [],
"exitCondition": {
"leaveWithRunway": {
"length": 3,
"openEnd": 0
}
},
"flashSuitChecked": true,
"blueSuitChecked": true
},
{
"id": 44,
"link": [
3,
3
],
"name": "Crystal Flash",
"requires": [
"h_CrystalFlash"
],
"flashSuitChecked": true,
"blueSuitChecked": true
},
{
"id": 45,
"link": [
3,
4
],
"name": "G-Mode Morph through Bomb Blocks",
"entranceCondition": {
"comeInWithGMode": {
"mode": "any",
"morphed": true
}
},
"requires": [
{
  "or": [
    "h_artificialMorphSpringBall",
    "h_artificialMorphBombs",
    {
      "and": [
        "Morph",
        "h_fourTileJumpMorph"
      ]
    }
  ]
}
],
"flashSuitChecked": true,
"blueSuitChecked": true,
"note": [
"Overload PLMs using the scroll block at the top of the stairs immediately in front of the bomb blocks.",
"Fall down to the lower bomb blocks while still in G-mode Morph."
],
"devNote": "PBs cannot be used, as they will solidify the bomb blocks."
},
{
"id": 108,
"link": [
3,
4
],
"name": "Super Sink",
"entranceCondition": {
"comeInWithSuperSink": {}
},
"requires": [],
"flashSuitChecked": true,
"blueSuitChecked": true,
"note": [
"Enter the room with a super sink, in order to clip down through several screens and reach the door below."
]
},
{
"id": 119,
"link": [
3,
6
],
"name": "R-Mode Spark Interrupt",
"entranceCondition": {
"comeInWithRMode": {}
},
"requires": [
{
"not": "f_ZebesSetAblaze"
},
"h_ZebesIsAwake",
"h_bombThings",
{
"or": [
"h_CrystalFlashForReserveEnergy",
{
"and": [
"h_RModeCanRefillReserves",
{
"resourceMissingAtMost": [
{
"type": "Missile",
"count": 0
}
]
},
{
"partialRefill": {
"type": "ReserveEnergy",
"limit": 20
}
}
]
}
]
},
{
"or": [
{
"and": [
"h_destroyBombWalls",
{
"canShineCharge": {
"usedTiles": 28,
"openEnd": 0
}
}
]
},
{
"and": [
{
"doorUnlockedAtNode": 5
},
{
"canShineCharge": {
"usedTiles": 13,
"openEnd": 0
}
}
]
},
{
"canShineCharge": {
"usedTiles": 12,
"openEnd": 0
}
}
]
},
{
"autoReserveTrigger": {
"maxReserveEnergy": 95
}
},
"canRModeSparkInterrupt"
],
"unlocksDoors": [
{
"nodeId": 5,
"types": [
"ammo"
],
"requires": []
}
],
"clearsObstacles": [
"A"
],
"flashSuitChecked": true,
"blueSuitChecked": true,
"note": [
"Farm wall pirates while leaving one left. Lead it to the bottom of the shaft, get shine charge,",
"then windup in front of it to get shot and interrupted."
]
},
{
"id": 123,
"link": [
3,
6
],
"name": "Direct G-Mode Morph Spark Interrupt",
"entranceCondition": {
"comeInWithGMode": {
"mode": "direct",
"morphed": true
}
},
"requires": [
{
"not": "f_ZebesSetAblaze"
},
"h_ZebesIsAwake",
{
  "or": [
    "h_artificialMorphSpringBall",
    "h_artificialMorphBombs",
    {
      "and": [
        "Morph",
        "h_fourTileJumpMorph"
      ]
    }
  ]
},
"h_artificialMorphCrystalFlash",
{
"canShineCharge": {
"usedTiles": 28,
"openEnd": 0
}
},
{
"autoReserveTrigger": {
"maxReserveEnergy": 95
}
},
"canRModeSparkInterrupt",
{
"partialRefill": {
"type": "Energy",
"limit": 50
}
}
],
"flashSuitChecked": true,
"blueSuitChecked": true,
"note": [
"Overload PLMs using the scroll block at the top of the stairs next to the bomb blocks.",
"With PLMs still overloaded, Samus can simply Crystal Flash and run through the bomb wall at the bottom to shinecharge.",
"When damaging down, note that Pirates will place invisible, stationary lasers that will damage Samus: these can help with",
"wasting energy, but remaining unused lasers must be kept in mind.",
"Lead a wall pirate to the bottom of the shaft, shinecharge, and windup in front of it to get interrupted by a shot."
]
},
{
"id": 46,
"link": [
3,
6
],
"name": "Base",
"requires": [
"h_bombThings",
{
"or": [
"h_ClimbWithoutLava",
"h_lavaProof",
{
"obstaclesNotCleared": [
"B"
]
}
]
}
],
"flashSuitChecked": true,
"blueSuitChecked": true
},
{
"id": 110,
"link": [
3,
6
],
"name": "Blue Suit",
"requires": [
{
"haveBlueSuit": {}
},
"Morph"
],
"flashSuitChecked": true,
"blueSuitChecked": true
},
{
"id": 47,
"link": [
3,
6
],
"name": "Morph Tunnel SpeedBall (Top Right)",
"entranceCondition": {
"comeInGettingBlueSpeed": {
"length": 1,
"openEnd": 0,
"minExtraRunSpeed": "$5.2",
"maxExtraRunSpeed": "$5.F"
}
},
"requires": [
{
"notable": "Morph Tunnel SpeedBall"
},
"canInsaneJump",
"canSpeedball",
"canTrickyDashJump",
"canSlowShortCharge"
],
"flashSuitChecked": true,
"blueSuitChecked": true,
"note": "Enter the room with a very specific run speed to jump from the door, and land a speedball perfectly in the tunnel to break the Bomb block.",
"devNote": [
"There is 1 unusable tile in this runway.",
"Speeds between $6.2 and $6.A can also work but are more difficult."
]
},
{
"id": 48,
"link": [
3,
6
],
"name": "Temporary Blue Spring Ball (Come in Shinecharging)",
"entranceCondition": {
"comeInShinecharging": {
"length": 1,
"openEnd": 0
}
},
"requires": [
"canInsaneJump",
"canLongChainTemporaryBlue",
"can4HighMidAirMorph",
"canSpringBallBounce"
],
"flashSuitChecked": true,
"blueSuitChecked": true,
"devNote": "There is 1 unusable tile in this runway."
},
{
"id": 49,
"link": [
3,
6
],
"name": "Temporary Blue Spring Ball (Come in With Temporary Blue)",
"entranceCondition": {
"comeInWithTemporaryBlue": {}
},
"requires": [
"canInsaneJump",
"canLongChainTemporaryBlue",
"can4HighMidAirMorph",
"canSpringBallBounce"
],
"flashSuitChecked": true,
"blueSuitChecked": true
},
{
"id": 50,
"link": [
3,
6
],
"name": "Blue Spring Ball Bounce",
"entranceCondition": {
"comeInWithBlueSpringBallBounce": {
"movementType": "controlled",
"maxExtraRunSpeed": "$3.F"
}
},
"requires": [
"canInsaneJump"
],
"flashSuitChecked": true,
"blueSuitChecked": true
},
{
"id": 51,
"link": [
3,
6
],
"name": "G-Mode Morph through Bomb Blocks",
"entranceCondition": {
"comeInWithGMode": {
"mode": "any",
"morphed": true
}
},
"requires": [
{
  "or": [
    "h_artificialMorphSpringBall",
    "h_artificialMorphBombs",
    {
      "and": [
        "Morph",
        "h_fourTileJumpMorph"
      ]
    }
  ]
}
],
"flashSuitChecked": true,
"blueSuitChecked": true,
"note": "Overload PLMs using the scroll block at the top of the stairs next to the bomb blocks.",
"devNote": "PBs cannot be used, as they will solidify the bomb blocks."
},
{
"id": 52,
"link": [
4,
2
],
"name": "G-Mode Morph through Bomb Blocks",
"entranceCondition": {
"comeInWithGMode": {
"mode": "any",
"morphed": true
}
},
"requires": [
{
"or": [
"h_artificialMorphSpringBall",
"h_artificialMorphBombs",
{
"and": [
"Morph",
"h_fourTileJumpMorph"
]
}
]
}
],
"flashSuitChecked": true,
"blueSuitChecked": true,
"note": [
"Overload PLMs using the scroll block at the top of the stairs next to the bomb blocks.",
"Fall down and pass through bomb wall at the bottom while still in G-mode."
],
"devNote": "PBs cannot be used, as they will solidify the bomb blocks."
},
{
"id": 53,
"link": [
4,
3
],
"name": "Right-Side X-Ray Climb",
"entranceCondition": {
"comeInWithDoorStuckSetup": {}
},
"requires": [
"canLongXRayClimb",
"canBeVeryPatient"
],
"flashSuitChecked": true,
"blueSuitChecked": true,
"note": "Climb up 7 screens."
},
{
"id": 54,
"link": [
4,
3
],
"name": "Very Deep Stuck X-Ray Climb",
"entranceCondition": {
"comeInWithGMode": {
"mode": "direct",
"morphed": false
}
},
"requires": [
"canGModeXRayClimb",
"canLongXRayClimb",
"canBeVeryPatient"
],
"bypassesDoorShell": "yes",
"flashSuitChecked": true,
"blueSuitChecked": true,
"note": [
"Enter with G-mode direct, back up to between 1 and 6 pixels from the door transition, and activate X-ray to get very deep stuck in the door.",
"Climb up 7 screens, and perform a turnaround buffered spin-jump away from the door to trigger the transition, bypassing any lock on the door."
]
},
{
"id": 55,
"link": [
4,
3
],
"name": "G-Mode Morph",
"entranceCondition": {
"comeInWithGMode": {
"mode": "any",
"morphed": true
}
},
"requires": [
{
"or": [
"h_artificialMorphSpringBall",
"h_artificialMorphBombs",
"h_fourTileJumpMorph"
]
},
{
"or": [
"Morph",
"h_ZebesNotAwake",
{
"and": [
"h_artificialMorphSpringBall",
{
"or": [
"HiJump",
"canTrickyDodgeEnemies"
]
}
]
}
]
}
],
"flashSuitChecked": true,
"blueSuitChecked": true,
"note": [
"Overload PLMs using the scroll block at the top of the stairs next to the bomb blocks.",
"If Morph is not available, careful movement is needed with SpringBall to reach the top without taking a hit from a pirate or its stationary, invisible lasers."
]
},
{
"id": 56,
"link": [
4,
3
],
"name": "G-Mode Morph Insane IBJ to Top",
"entranceCondition": {
"comeInWithGMode": {
"mode": "any",
"morphed": true
}
},
"requires": [
{
"notable": "G-Mode Morph Insane IBJ to Top"
},
"canTrickyGMode",
"h_artificialMorphIBJ",
"canBeExtremelyPatient"
],
"flashSuitChecked": true,
"blueSuitChecked": true,
"note": [
"Overload PLMs using the scroll block at the top of the stairs next to the bomb blocks.",
"A long series of precise bomb jumps and enemy manipulations are required to reach the top without taking a hit."
]
},
{
"id": 57,
"link": [
4,
3
],
"name": "G-Mode Morph with Power Bombs",
"entranceCondition": {
"comeInWithGMode": {
"mode": "any",
"morphed": true
}
},
"requires": [
{
"or": [
"h_artificialMorphSpringBall",
"h_artificialMorphIBJ"
]
},
{
"ammo": {
"type": "PowerBomb",
"count": 7
}
}
],
"flashSuitChecked": true,
"blueSuitChecked": true,
"note": [
"Overload PLMs using the scroll block at the top of the stairs next to the bomb blocks.",
"Place Power Bombs as high as possible to occasionally kill multiple pirates at a time."
]
},
{
"id": 58,
"link": [
4,
4
],
"name": "Leave with Runway",
"requires": [
{
  "or": [
    "h_ClimbWithoutLava",
    {
      "obstaclesNotCleared": [
        "B"
      ]
    }
  ]
}
],
"exitCondition": {
"leaveWithRunway": {
"length": 4,
"openEnd": 0
}
},
"flashSuitChecked": true,
"blueSuitChecked": true,
"devNote": "It is sometimes possible to beat the lava, but it depends how you get here."
},
{
"id": 125,
"link": [
4,
4
],
"name": "Come in Shinecharging, Crystal Spark",
"entranceCondition": {
"comeInShinecharging": {
"length": 3,
"openEnd": 0
},
"comesInHeated": "no"
},
"requires": [
"h_CrystalSpark"
],
"flashSuitChecked": true,
"blueSuitChecked": true
},
{
"id": 59,
"link": [
4,
4
],
"name": "Crystal Flash",
"requires": [
"h_CrystalFlash",
{
"or": [
"h_ClimbWithoutLava",
"h_lavaProof",
{
"obstaclesNotCleared": [
"B"
]
}
]
}
],
"flashSuitChecked": true,
"blueSuitChecked": true
},
{
"id": 120,
"link": [
4,
6
],
"name": "R-Mode Spark Interrupt",
"entranceCondition": {
"comeInWithRMode": {}
},
"requires": [
{
"not": "f_ZebesSetAblaze"
},
"h_bombThings",
"h_ZebesIsAwake",
{
"or": [
"h_CrystalFlashForReserveEnergy",
{
"and": [
"h_RModeCanRefillReserves",
{
"resourceMissingAtMost": [
{
"type": "Missile",
"count": 0
}
]
},
{
"partialRefill": {
"type": "ReserveEnergy",
"limit": 20
}
}
]
}
]
},
{
"or": [
{
"and": [
"h_destroyBombWalls",
{
"canShineCharge": {
"usedTiles": 28,
"openEnd": 0
}
}
]
},
{
"and": [
{
"doorUnlockedAtNode": 5
},
{
"canShineCharge": {
"usedTiles": 13,
"openEnd": 0
}
}
]
},
{
"canShineCharge": {
"usedTiles": 12,
"openEnd": 0
}
}
]
},
{
"autoReserveTrigger": {
"maxReserveEnergy": 95
}
},
"canRModeSparkInterrupt"
],
"unlocksDoors": [
{
"nodeId": 5,
"types": [
"ammo"
],
"requires": []
}
],
"clearsObstacles": [
"A"
],
"flashSuitChecked": true,
"blueSuitChecked": true,
"note": [
"Farm wall pirates while leaving one left. Lead it to the bottom of the shaft, get shine charge,",
"then windup in front of it to get shot and interrupted."
]
},
{
"id": 124,
"link": [
4,
6
],
"name": "Direct G-Mode Morph Spark Interrupt",
"entranceCondition": {
"comeInWithGMode": {
"mode": "direct",
"morphed": true
}
},
"requires": [
{
"not": "f_ZebesSetAblaze"
},
"h_ZebesIsAwake",
{
"or": [
"h_artificialMorphSpringBall",
"h_artificialMorphBombs",
{
"and": [
"Morph",
"h_fourTileJumpMorph"
]
}
]
},
"h_artificialMorphCrystalFlash",
{
"canShineCharge": {
"usedTiles": 28,
"openEnd": 0
}
},
{
"autoReserveTrigger": {
"maxReserveEnergy": 95
}
},
"canRModeSparkInterrupt",
{
"partialRefill": {
"type": "Energy",
"limit": 50
}
}
],
"flashSuitChecked": true,
"blueSuitChecked": true,
"note": [
"Overload PLMs using the scroll block at the top of the stairs next to the bomb blocks.",
"With PLMs still overloaded, Samus can simply Crystal Flash and run through the bomb wall at the bottom to shinecharge.",
"When damaging down, note that Pirates will place invisible, stationary lasers that will damage Samus: these can help with",
"wasting energy, but remaining unused lasers must be kept in mind.",
"Lead a wall pirate to the bottom of the shaft, shinecharge, and windup in front of it to get interrupted by a shot."
]
},
{
"id": 60,
"link": [
4,
6
],
"name": "Base",
"requires": [
"h_bombThings",
{
"or": [
"h_ClimbWithoutLava",
"h_lavaProof",
{
"obstaclesNotCleared": [
"B"
]
}
]
}
],
"flashSuitChecked": true,
"blueSuitChecked": true
},
{
"id": 111,
"link": [
4,
6
],
"name": "Blue Suit",
"requires": [
{
"haveBlueSuit": {}
},
"Morph",
{
"or": [
"h_ClimbWithoutLava",
"h_lavaProof",
{
"obstaclesNotCleared": [
"B"
]
}
]
}
],
"flashSuitChecked": true,
"blueSuitChecked": true
},
{
"id": 61,
"link": [
4,
6
],
"name": "Morph Tunnel SpeedBall (Lower Right)",
"entranceCondition": {
"comeInGettingBlueSpeed": {
"length": 2,
"openEnd": 0,
"minExtraRunSpeed": "$4.4",
"maxExtraRunSpeed": "$4.7"
}
},
"requires": [
{
"notable": "Morph Tunnel SpeedBall"
},
"canSpeedball",
"canTrickyDashJump",
"canSlowShortCharge",
"canInsaneJump",
"canBeExtremelyPatient"
],
"flashSuitChecked": true,
"blueSuitChecked": true,
"note": "Enter the room with a very specific run speed to jump from the door, squeeze by the ceiling, and land a speedball perfectly in the tunnel to break the Bomb block.",
"devNote": [
"There is 1 unusable tile in this runway.",
"The canBeExtremelyPatient requirement is for difficulty placement."
]
},
{
"id": 62,
"link": [
4,
6
],
"name": "Temporary Blue Spring Ball (Come in Shinecharging)",
"entranceCondition": {
"comeInShinecharging": {
"length": 2,
"openEnd": 0
}
},
"requires": [
"canInsaneJump",
"canLongChainTemporaryBlue",
"canSpringBallBounce",
"can4HighMidAirMorph"
],
"flashSuitChecked": true,
"blueSuitChecked": true,
"devNote": "There is 1 unusable tile in this runway."
},
{
"id": 63,
"link": [
4,
6
],
"name": "Temporary Blue Spring Ball (Come in With Temporary Blue)",
"entranceCondition": {
"comeInWithTemporaryBlue": {}
},
"requires": [
"canInsaneJump",
"canLongChainTemporaryBlue",
"canSpringBallBounce",
"can4HighMidAirMorph"
],
"flashSuitChecked": true,
"blueSuitChecked": true
},
{
"id": 64,
"link": [
4,
6
],
"name": "Blue Spring Ball Bounce",
"entranceCondition": {
"comeInWithBlueSpringBallBounce": {
"movementType": "controlled",
"maxExtraRunSpeed": "$3.F"
}
},
"requires": [
"canInsaneJump"
],
"flashSuitChecked": true,
"blueSuitChecked": true
},
{
"id": 65,
"link": [
4,
6
],
"name": "G-Mode Morph through Bomb Blocks",
"entranceCondition": {
"comeInWithGMode": {
"mode": "any",
"morphed": true
}
},
"requires": [
{
  "or": [
    "h_artificialMorphSpringBall",
    "h_artificialMorphBombs",
    "h_fourTileJumpMorph"
  ]
}
],
"flashSuitChecked": true,
"blueSuitChecked": true,
"devNote": "A Power Bomb cannot be used, as it will solidify the bomb block."
},
{
"id": 66,
"link": [
5,
2
],
"name": "Shinespark",
"entranceCondition": {
"comeInWithSpark": {
"position": "bottom"
}
},
"requires": [
{
  "shinespark": {
    "frames": 43,
    "excessFrames": 17
  }
}
],
"clearsObstacles": [
"A"
],
"flashSuitChecked": true,
"blueSuitChecked": true
},
{
"id": 67,
"link": [
5,
2
],
"name": "Come in Getting Blue Speed",
"entranceCondition": {
"comeInGettingBlueSpeed": {
"length": 12,
"openEnd": 0
}
},
"requires": [],
"clearsObstacles": [
"A"
],
"flashSuitChecked": true,
"blueSuitChecked": true
},
{
"id": 68,
"link": [
5,
2
],
"name": "In-Room Shinecharge",
"requires": [
{
"or": [
{
"getBlueSpeed": {
"usedTiles": 12,
"openEnd": 0
}
},
{
"and": [
{
"getBlueSpeed": {
"usedTiles": 13,
"openEnd": 0
}
},
{
"doorUnlockedAtNode": 5
}
]
}
]
},
{
"or": [
"h_ClimbWithoutLava",
{
"obstaclesNotCleared": [
"B"
]
}
]
}
],
"clearsObstacles": [
"A"
],
"flashSuitChecked": true,
"blueSuitChecked": true
},
{
"id": 69,
"link": [
5,
2
],
"name": "Come In Speedballing",
"entranceCondition": {
"comeInSpeedballing": {
"runway": {
"length": 12,
"openEnd": 0
}
}
},
"requires": [],
"clearsObstacles": [
"A"
],
"flashSuitChecked": true,
"blueSuitChecked": true,
"note": "If needed, unmorph while passing through the blocks to break more than just the bottom one.",
"devNote": [
"If we had a comeInWithSpeedball entrance condition, it should be used instead.",
"This strat is for using a remote runway in the previous room to get the speedball;",
"if the current runway were used then you could just run through with blue speed instead."
]
},
{
"id": 70,
"link": [
5,
2
],
"name": "Come In With Blue Spring Ball Bounce",
"entranceCondition": {
"comeInWithBlueSpringBallBounce": {
"movementType": "controlled"
}
},
"requires": [],
"clearsObstacles": [
"A"
],
"flashSuitChecked": true,
"blueSuitChecked": true
},
{
"id": 71,
"link": [
5,
2
],
"name": "Temporary Blue",
"entranceCondition": {
"comeInWithTemporaryBlue": {}
},
"requires": [
"canChainTemporaryBlue"
],
"clearsObstacles": [
"A"
],
"flashSuitChecked": true,
"blueSuitChecked": true
},
{
"id": 72,
"link": [
5,
2
],
"name": "Transition with Stored Fall Speed (Blue)",
"entranceCondition": {
"comeInWithStoredFallSpeed": {
"fallSpeedInTiles": 1
}
},
"requires": [
{
  "or": [
    {
      "getBlueSpeed": {
        "usedTiles": 12,
        "openEnd": 0
      }
    },
    {
      "and": [
        {
          "getBlueSpeed": {
            "usedTiles": 13,
            "openEnd": 0
          }
        },
        {
          "doorUnlockedAtNode": 5
        }
      ]
    },
    {
      "haveBlueSuit": {}
    }
  ]
}
],
"exitCondition": {
"leaveWithStoredFallSpeed": {
"fallSpeedInTiles": 1
}
},
"unlocksDoors": [
{
"types": [
"missiles",
"super"
],
"requires": []
},
{
"types": [
"powerbomb"
],
"requires": [
"never"
]
},
{
"nodeId": 5,
"types": [
"missiles",
"super"
],
"requires": []
},
{
"nodeId": 5,
"types": [
"powerbomb"
],
"requires": [
"never"
]
}
],
"flashSuitChecked": true,
"blueSuitChecked": true
},
{
"id": 73,
"link": [
5,
2
],
"name": "Transition with Stored Fall Speed (Blue, more speed)",
"entranceCondition": {
"comeInWithStoredFallSpeed": {
"fallSpeedInTiles": 2
}
},
"requires": [
{
  "or": [
    {
      "getBlueSpeed": {
        "usedTiles": 12,
        "openEnd": 0
      }
    },
    {
      "and": [
        {
          "getBlueSpeed": {
            "usedTiles": 13,
            "openEnd": 0
          }
        },
        {
          "doorUnlockedAtNode": 5
        }
      ]
    },
    {
      "haveBlueSuit": {}
    }
  ]
}
],
"exitCondition": {
"leaveWithStoredFallSpeed": {
"fallSpeedInTiles": 2
}
},
"unlocksDoors": [
{
"types": [
"missiles",
"super"
],
"requires": []
},
{
"types": [
"powerbomb"
],
"requires": [
"never"
]
},
{
"nodeId": 5,
"types": [
"missiles",
"super"
],
"requires": []
},
{
"nodeId": 5,
"types": [
"powerbomb"
],
"requires": [
"never"
]
}
],
"flashSuitChecked": true,
"blueSuitChecked": true
},
{
"id": 74,
"link": [
5,
2
],
"name": "Transition with Stored Fall Speed (Screw Fall)",
"entranceCondition": {
"comeInWithStoredFallSpeed": {
"fallSpeedInTiles": 2
}
},
"requires": [
"ScrewAttack",
"Grapple"
],
"exitCondition": {
"leaveWithStoredFallSpeed": {
"fallSpeedInTiles": 2
}
},
"unlocksDoors": [
{
"types": [
"missiles",
"super"
],
"requires": []
},
{
"types": [
"powerbomb"
],
"requires": [
"never"
]
}
],
"flashSuitChecked": true,
"blueSuitChecked": true,
"note": "Break the Bomb blocks using Screw Attack in a Moonfall, then escape the tiles with Grapple Beam."
},
{
"id": 75,
"link": [
5,
2
],
"name": "G-Mode through Bomb Blocks",
"entranceCondition": {
"comeInWithGMode": {
"mode": "any",
"morphed": false
}
},
"requires": [],
"flashSuitChecked": true,
"blueSuitChecked": true
},
{
"id": 76,
"link": [
5,
3
],
"name": "Behemoth Spark Top, Come in Shinecharging",
"entranceCondition": {
"comeInShinecharging": {
"length": 12,
"openEnd": 0
}
},
"requires": [
{
"notable": "Behemoth Shinespark"
},
"Morph",
{
"shinespark": {
"frames": 147
}
}
],
"clearsObstacles": [
"A"
],
"flashSuitChecked": true,
"blueSuitChecked": true,
"note": "Starting with a crouch, diagonal shinespark to the top to break the bomb blocks to the morph tunnels on the right."
},
{
"id": 77,
"link": [
5,
3
],
"name": "X-Ray Climb to Break Bomb Block with Screw Attack",
"entranceCondition": {
"comeInWithDoorStuckSetup": {}
},
"requires": [
"ScrewAttack",
"Morph",
"canBeVeryPatient",
"canLongXRayClimb"
],
"flashSuitChecked": true,
"blueSuitChecked": true,
"note": [
"Climb 8 screens and position Samus to where she is visually standing above the door.",
"For the last X-Ray turnaround, face right then press and hold the X-ray scope input, buffer a jump then perform the X-Ray turnaround.",
"If done correctly Samus will be standing up and facing left, while the jump button is still pressed without a jump occuring.",
"Press right to break the bomb blocks with a spinjump then left to exit the wall. Jump in place to fix the camera as needed."
]
},
{
"id": 78,
"link": [
5,
3
],
"name": "G-Mode Morph",
"entranceCondition": {
"comeInWithGMode": {
"mode": "any",
"morphed": true
}
},
"requires": [
{
  "or": [
    "Morph",
    {
      "and": [
        "h_artificialMorphSpringBall",
        {
          "or": [
            "HiJump",
            "canTrickyDodgeEnemies"
          ]
        }
      ]
    },
    {
      "and": [
        "h_ZebesNotAwake",
        "h_artificialMorphMovement"
      ]
    }
  ]
}
],
"flashSuitChecked": true,
"blueSuitChecked": true,
"note": [
"Overload PLMs using the scroll block next to any of the bomb blocks in the room, allowing passage through the bomb blocks at the top by making them become air.",
"If Morph is not available, careful movement is needed with SpringBall to reach the top without taking a hit from the pirates or their stationary, invisible lasers."
]
},
{
"id": 126,
"link": [
5,
3
],
"name": "G-Mode Morph Blue Suit IBJ to Top",
"entranceCondition": {
"comeInWithGMode": {
"mode": "any",
"morphed": true
}
},
"requires": [
{
"notable": "G-Mode Morph Blue Suit IBJ to Top"
},
"h_blueSuitGMode",
"canTrickyGMode",
"h_artificialMorphIBJ",
"canBeVeryPatient"
],
"flashSuitChecked": true,
"blueSuitChecked": true,
"note": [
"Using a blue suit and IBJ to get from to bottom to the top of Climb without unmorphing.",
"Precise timing and enemy manipulations are required to reach the top without taking a hit, because the pirates will kill Samus if they touch her while midair from a bomb boost.",
"Use the lowest part of the room to manipulate the pirates and overload their stationary, invisible lasers, which takes 18 shots, then climb the center of the room.",
"Let a pirate walk down to see Samus, then when it is jumping back and forth above her, place a bomb when it is in the center of the room and use it to double bomb jump to an upper wide platform.",
"When the pirate jumps again, be moving horizontally when it gets to Samus to kill it."
]
},
{
"id": 79,
"link": [
5,
3
],
"name": "G-Mode Morph Insane IBJ to Top",
"entranceCondition": {
"comeInWithGMode": {
"mode": "any",
"morphed": true
}
},
"requires": [
{
"notable": "G-Mode Morph Insane IBJ to Top"
},
"canTrickyGMode",
"h_artificialMorphIBJ",
"canBeExtremelyPatient"
],
"flashSuitChecked": true,
"blueSuitChecked": true,
"note": [
"A long series of precise bomb jumps and enemy manipulations are required to reach the top without taking a hit or unmorphing.",
"Overload PLMs using the scroll block next to the bomb blocks at the top, allowing passage through them by making them become air."
]
},
{
"id": 80,
"link": [
5,
3
],
"name": "G-Mode Morph with Power Bombs",
"entranceCondition": {
"comeInWithGMode": {
"mode": "any",
"morphed": true
}
},
"requires": [
{
"or": [
"h_artificialMorphSpringBall",
"h_artificialMorphIBJ"
]
},
{
"ammo": {
"type": "PowerBomb",
"count": 8
}
}
],
"flashSuitChecked": true,
"blueSuitChecked": true,
"note": [
"Overload PLMs using the scroll block at the top of the stairs next to the bomb blocks.",
"Place PBs as high as possible to occasionally kill multiple pirates at a time.",
"Overload the PLMs at the bottom, if the top bomb block is hit with a PB before PLMs are overloaded, they will remain solid."
]
},
{
"id": 81,
"link": [
5,
4
],
"name": "Behemoth Spark Bottom, Come in Shinecharging",
"entranceCondition": {
"comeInShinecharging": {
"length": 12,
"openEnd": 0
}
},
"requires": [
{
"notable": "Behemoth Shinespark"
},
"Morph",
{
"shinespark": {
"frames": 147,
"excessFrames": 124
}
}
],
"clearsObstacles": [
"A"
],
"flashSuitChecked": true,
"blueSuitChecked": true,
"note": "Diagonal shinespark up the climb to break the bomb blocks to the morph tunnels on the right."
},
{
"id": 82,
"link": [
5,
4
],
"name": "X-Ray Climb to Break Bomb Block with Screw Attack",
"entranceCondition": {
"comeInWithDoorStuckSetup": {}
},
"requires": [
"ScrewAttack",
"Morph",
"canXRayClimb"
],
"flashSuitChecked": true,
"blueSuitChecked": true,
"note": [
"Use an X-Ray climb to position Samus to where she can break the Bomb block with Screw Attack.",
"This is a 1 screen climb."
],
"devNote": "This is an alternative to using Moonfall to break the block with Screw Attack."
},
{
"id": 83,
"link": [
5,
4
],
"name": "G-Mode Morph",
"entranceCondition": {
"comeInWithGMode": {
"mode": "any",
"morphed": true
}
},
"requires": [
{
  "or": [
    "Morph",
    {
      "and": [
        "h_artificialMorphSpringBall",
        {
          "or": [
            "HiJump",
            "canTrickyDodgeEnemies"
          ]
        }
      ]
    },
    {
      "and": [
        "h_artificialMorphIBJ",
        "canTrickyGMode"
      ]
    },
    {
      "and": [
        "h_artificialMorphMovement",
        "h_artificialMorphPowerBomb"
      ]
    },
    {
      "and": [
        "h_ZebesNotAwake",
        "h_artificialMorphMovement"
      ]
    }
  ]
}
],
"flashSuitChecked": true,
"blueSuitChecked": true,
"note": [
"Overload PLMs using the scroll block next to the bottom right bomb blocks, allowing passage through them by making them become air.",
"If Morph is unavailable, then careful movement will be required to get past the Pirates without taking a hit from them or their stationary, invisible lasers.",
"If using a PB to kill the pirates, overload the PLMs at the bottom. If the top bomb block is hit with a PB before PLMs are overloaded, they will remain solid."
]
},
{
"id": 121,
"link": [
5,
5
],
"name": "Zebes Ablaze, R-Mode Spark Interrupt",
"entranceCondition": {
"comeInWithRMode": {}
},
"requires": [
"Gravity",
"f_ZebesSetAblaze",
"h_CrystalFlashForReserveEnergy",
{
"acidFrames": 320
},
{
"canShineCharge": {
"usedTiles": 28,
"openEnd": 0
}
},
{
"or": [
{
"and": [
{
"disableEquipment": "ETank"
},
{
"refill": [
"ReserveEnergy"
]
},
{
"autoReserveTrigger": {}
}
]
},
{
"autoReserveTrigger": {
"maxReserveEnergy": 50
}
}
]
},
"canRModeSparkInterrupt",
{
"acidFrames": 80
}
],
"unlocksDoors": [
{
"nodeId": 2,
"types": [
"ammo"
],
"requires": []
},
{
"nodeId": 5,
"types": [
"ammo"
],
"requires": []
}
],
"clearsObstacles": [
"A",
"B"
],
"flashSuitChecked": true,
"blueSuitChecked": true,
"note": [
"With Zebes set ablaze, Climb only spawns two pirates that drop nothing, and the bomb",
"wall is automatically cleared. The rising lava is now acid instead, so Gravity Suit works normally.",
"Jump up the platforms to get high enough above the rising acid to",
"safely Crystal Flash, then dive back into the acid against either bottom door. Wait in the acid",
"until your energy is low enough and shinecharge. Windup right before energy runs out to interrupt",
"then *immediately* leave to limit acid damage."
],
"devNote": [
"FIXME: Needs enemyKill requirements for the escape pirates."
]
},
{
"id": 84,
"link": [
5,
5
],
"name": "Leave with Runway",
"requires": [],
"exitCondition": {
"leaveWithRunway": {
"length": 13,
"openEnd": 0
}
},
"flashSuitChecked": true,
"blueSuitChecked": true,
"devNote": [
"This is relatively tight when coming in from the bottom left and using a Power Bomb to break the wall.",
"It wouldn't work if the door was Missile or Power Bomb locked."
]
},
{
"id": 85,
"link": [
5,
5
],
"name": "Leave with Extended Runway",
"requires": [
{
"obstaclesCleared": [
"A"
]
},
{
"or": [
"h_ClimbWithoutLava",
{
"obstaclesNotCleared": [
"B"
]
}
]
}
],
"exitCondition": {
"leaveWithRunway": {
"length": 29,
"openEnd": 0
}
},
"flashSuitChecked": true,
"blueSuitChecked": true
},
{
"id": 86,
"link": [
5,
5
],
"name": "Leave with Extended Runway, Open Both Doors",
"requires": [
{
"obstaclesCleared": [
"A"
]
},
{
"doorUnlockedAtNode": 2
},
{
"or": [
"h_ClimbWithoutLava",
{
"obstaclesNotCleared": [
"B"
]
}
]
}
],
"exitCondition": {
"leaveWithRunway": {
"length": 30,
"openEnd": 0
}
},
"unlocksDoors": [
{
"nodeId": 2,
"types": [
"ammo"
],
"requires": []
}
],
"flashSuitChecked": true,
"blueSuitChecked": true
},
{
"id": 122,
"link": [
5,
6
],
"name": "R-Mode Spark Interrupt",
"entranceCondition": {
"comeInWithRMode": {}
},
"requires": [
{
"not": "f_ZebesSetAblaze"
},
"h_ZebesIsAwake",
{
"or": [
"h_CrystalFlashForReserveEnergy",
{
"and": [
"h_RModeCanRefillReserves",
{
"resourceMissingAtMost": [
{
"type": "Missile",
"count": 0
}
]
},
{
"partialRefill": {
"type": "ReserveEnergy",
"limit": 20
}
}
]
}
]
},
{
"or": [
{
"and": [
"h_destroyBombWalls",
{
"canShineCharge": {
"usedTiles": 28,
"openEnd": 0
}
}
]
},
{
"and": [
{
"doorUnlockedAtNode": 5
},
{
"canShineCharge": {
"usedTiles": 13,
"openEnd": 0
}
}
]
},
{
"canShineCharge": {
"usedTiles": 12,
"openEnd": 0
}
}
]
},
{
"autoReserveTrigger": {
"maxReserveEnergy": 95
}
},
"canRModeSparkInterrupt"
],
"unlocksDoors": [
{
"nodeId": 5,
"types": [
"ammo"
],
"requires": []
}
],
"clearsObstacles": [
"A"
],
"flashSuitChecked": true,
"blueSuitChecked": true,
"note": [
"Farm wall pirates while leaving one left. Lead it to the bottom of the shaft, get shine charge,",
"then windup in front of it to get shot and interrupted."
]
},
{
"id": 87,
"link": [
5,
6
],
"name": "Base",
"requires": [],
"flashSuitChecked": true,
"blueSuitChecked": true
},
{
"id": 88,
"link": [
6,
1
],
"name": "Base",
"requires": [],
"flashSuitChecked": true,
"blueSuitChecked": true
},
{
"id": 89,
"link": [
6,
2
],
"name": "Base",
"requires": [
{
"or": [
"h_destroyBombWalls",
{
"obstaclesCleared": [
"A"
]
}
]
},
{
"or": [
"h_ClimbWithoutLava",
"h_lavaProof",
{
"obstaclesNotCleared": [
"B"
]
}
]
}
],
"clearsObstacles": [
"A"
],
"flashSuitChecked": true,
"blueSuitChecked": true
},
{
"id": 90,
"link": [
6,
2
],
"name": "Use Flash Suit",
"requires": [
{
"useFlashSuit": {}
},
{
"shinespark": {
"frames": 3,
"excessFrames": 3
}
}
],
"clearsObstacles": [
"A"
],
"flashSuitChecked": true,
"blueSuitChecked": true
},
{
"id": 112,
"link": [
6,
2
],
"name": "Blue Suit",
"requires": [
{
  "haveBlueSuit": {}
}
],
"clearsObstacles": [
"A"
],
"flashSuitChecked": true,
"blueSuitChecked": true
},
{
"id": 91,
"link": [
6,
2
],
"name": "Zebes Ablaze",
"requires": [
"f_ZebesSetAblaze",
{
"obstaclesNotCleared": [
"B"
]
}
],
"clearsObstacles": [
"A"
],
"flashSuitChecked": true,
"blueSuitChecked": true,
"devNote": "These are destroyed on entry if Zebes is Ablaze."
},
{
"id": 92,
"link": [
6,
3
],
"name": "Base",
"requires": [
"h_bombThings"
],
"flashSuitChecked": true,
"blueSuitChecked": true
},
{
"id": 113,
"link": [
6,
3
],
"name": "Blue Suit",
"requires": [
{
"haveBlueSuit": {}
},
"Morph"
],
"flashSuitChecked": true,
"blueSuitChecked": true
},
{
"id": 93,
"link": [
6,
3
],
"name": "Behemoth Spark Top",
"requires": [
{
"notable": "Behemoth Shinespark"
},
"Morph",
{
"canShineCharge": {
"usedTiles": 28,
"openEnd": 0
}
},
{
"shinespark": {
"frames": 147
}
},
{
"obstaclesCleared": [
"A"
]
},
{
"or": [
"h_ClimbWithoutLava",
{
"obstaclesNotCleared": [
"B"
]
}
]
}
],
"flashSuitChecked": true,
"blueSuitChecked": true,
"note": "Starting with a crouch, diagonal shinespark to the top to break the bomb blocks to the morph tunnels on the right."
},
{
"id": 107,
"link": [
6,
3
],
"name": "Behemoth Spark while Farming",
"requires": [
{
"notable": "Behemoth Shinespark"
},
"h_ZebesIsAwake",
"canTrickyDodgeEnemies",
"canFarmWhileShooting",
"Morph",
"canMoonfall",
{
"or": [
"Plasma",
"ScrewAttack",
"canInsaneJump"
]
},
{
"resourceMissingAtMost": [
{
"type": "Missile",
"count": 0
}
]
},
{
"canShineCharge": {
"usedTiles": 28,
"openEnd": 0
}
},
{
"shinespark": {
"frames": 50,
"excessFrames": 3
}
},
{
"obstaclesCleared": [
"A"
]
},
{
"or": [
"h_ClimbWithoutLava",
{
"obstaclesNotCleared": [
"B"
]
}
]
}
],
"flashSuitChecked": true,
"blueSuitChecked": true,
"note": [
"Manipulate the Pirates to the right wall while climbing the room.",
"Kill all the Pirates while moonfalling down the right side.",
"Then quickly gain a shinecharge, crouch, and perform a diagonal shinespark to the top,",
"collecting the drops along the way."
]
},
{
"id": 94,
"link": [
6,
3
],
"name": "Behemoth Spark Top, Use Flash Suit",
"requires": [
{
"notable": "Behemoth Shinespark"
},
"Morph",
{
"useFlashSuit": {}
},
{
"shinespark": {
"frames": 18,
"excessFrames": 4
}
}
],
"flashSuitChecked": true,
"blueSuitChecked": true,
"note": [
"Diagonal shinespark to break the bomb blocks to the morph tunnel on the right.",
"Spark from the highest platform that is only one tile from the right wall (the morph tunnel will be off camera, but can be seen while jumping).",
"From this platform, the shinespark can be done with or without a crouch."
]
},
{
"id": 95,
"link": [
6,
3
],
"name": "Temporary Blue Chain Through Bomb Blocks to Top",
"requires": [
{
"notable": "Temporary Blue Chain Through Bomb Blocks"
},
{
"canShineCharge": {
"usedTiles": 27.5,
"openEnd": 0
}
},
"canLongChainTemporaryBlue",
"canXRayTurnaround",
"canTrickyJump",
"canBePatient",
"canInsaneJump",
{
"obstaclesCleared": [
"A"
]
},
{
"or": [
"h_ClimbWithoutLava",
{
"obstaclesNotCleared": [
"B"
]
}
]
}
],
"flashSuitChecked": true,
"blueSuitChecked": true,
"note": [
"This is a long temporary blue chain with X-Ray turnarounds to climb up and destroy the bomb blocks blocking the top morph tunnel.",
"Breaking the bomb blocks is difficult because there is not enough space above them to get a neutral bounce.",
"It is best to break them by jumping from the top platform (inside the 3-tile-high space), as this provides a 2-frame window for the morph;",
"in comparison, jumping from the platform below requires a frame-perfect morph.",
"If Spring Ball is available, it can be used to increase the window by one frame."
],
"devNote": "The runway was reduced by 0.5 tiles, as you can't maintain Temporary Blue directly against a wall."
},
{
"id": 96,
"link": [
6,
4
],
"name": "Base",
"requires": [
"h_bombThings"
],
"flashSuitChecked": true,
"blueSuitChecked": true
},
{
"id": 114,
"link": [
6,
4
],
"name": "Blue Suit",
"requires": [
{
"haveBlueSuit": {}
},
"Morph"
],
"flashSuitChecked": true,
"blueSuitChecked": true
},
{
"id": 97,
"link": [
6,
4
],
"name": "Behemoth Spark Bottom",
"requires": [
{
"notable": "Behemoth Shinespark"
},
"Morph",
{
"canShineCharge": {
"usedTiles": 28,
"openEnd": 0
}
},
{
"or": [
{
"shinespark": {
"frames": 147,
"excessFrames": 124
}
},
{
"and": [
"h_ZebesIsAwake",
"canTrickyUseFrozenEnemies",
{
"shinespark": {
"frames": 24,
"excessFrames": 1
}
}
]
}
]
},
{
"obstaclesCleared": [
"A"
]
},
{
"or": [
"h_ClimbWithoutLava",
{
"obstaclesNotCleared": [
"B"
]
}
]
}
],
"flashSuitChecked": true,
"blueSuitChecked": true,
"note": [
"Diagonal shinespark up the climb to break the bomb blocks to the morph tunnels on the right.",
"A frozen Pirate can be used to stop the spark just above the bottom tunnel."
],
"devNote": [
"FIXME: if Zebes is awake, it is possible to farm the Pirates in the room after breaking the blocks;",
"this also applies to the other forms of Behemoth spark in this room (as long as the lava is not active)."
]
},
{
"id": 98,
"link": [
6,
4
],
"name": "Moonfall Block Break",
"requires": [
{
"notable": "Moonfall Block Break"
},
"Morph",
"ScrewAttack",
"canMoonfall",
{
"or": [
"h_ClimbWithoutLava",
"h_lavaProof",
{
"obstaclesNotCleared": [
"B"
]
}
]
}
],
"flashSuitChecked": true,
"blueSuitChecked": true,
"note": [
"The bomb blocks can be broken by spinjumping with Screw attack and holding right, if moonfall makes Samus clip through the platform.",
"Use the small blue platform 2nd from the top on the right side."
]
},
{
"id": 99,
"link": [
6,
4
],
"name": "Behemoth Spark Bottom, Use Flash Suit",
"requires": [
{
"notable": "Behemoth Shinespark"
},
"Morph",
{
"useFlashSuit": {}
},
{
"or": [
{
"and": [
{
"disableEquipment": "HiJump"
},
{
"shinespark": {
"frames": 127,
"excessFrames": 124
}
}
]
},
{
"and": [
"HiJump",
{
"shinespark": {
"frames": 130,
"excessFrames": 129
}
}
]
},
{
"and": [
"HiJump",
"canInsaneJump",
{
"shinespark": {
"frames": 126,
"excessFrames": 124
}
}
]
},
{
"and": [
{
"shinespark": {
"frames": 1,
"excessFrames": 1
}
},
"canTrickyUseFrozenEnemies",
"h_ZebesIsAwake"
]
}
]
},
{
"or": [
"h_ClimbWithoutLava",
"h_lavaProof",
{
"obstaclesNotCleared": [
"B"
]
}
]
}
],
"flashSuitChecked": true,
"blueSuitChecked": true,
"note": [
"Diagonal shinespark to break the bomb blocks to the morph tunnel on the right.",
"Spark from the lowest platform that is only one tile from the right wall (part of the bottom right door will be on screen).",
"From this platform, the shinespark must be done from a crouch;",
"or, to save some energy, angle-down jump and spark at the peak of the jump (with Hi-Jump unequipped).",
"It is possible to set up a frozen pirate on the right wall to stop the shinespark early."
],
"detailNote": [
"If the positioning is ideal, Samus will bonk the platform at the top-right of the room, saving a bit of energy.",
"With Hi-Jump equipped, this is still possible (and with 1 less energy needed):",
"by sparking after bonking the platform and descending a few pixels (a 3-frame window);",
"or, more easily but requiring slightly more energy, by aiming down and sparking at the maximum height",
"(which will result in clipping through the platform at the top-right of the room",
"if the spark is not interrupted by running low on energy before that point)."
],
"devNote": [
"For the frozen pirate strat, it is assumed that Samus can farm the energy after the spark, resulting in no damaging shinespark frames.",
"FIXME: It is still possible to set up a frozen pirate, even when shinecharging on the floor."
]
},
{
"id": 100,
"link": [
6,
4
],
"name": "Temporary Blue Chain Through Bomb Blocks (Bottom Left to Bottom)",
"requires": [
{
"notable": "Temporary Blue Chain Through Bomb Blocks"
},
{
"canShineCharge": {
"usedTiles": 27.5,
"openEnd": 0
}
},
"canChainTemporaryBlue",
"canXRayTurnaround",
"canTrickyJump",
{
"obstaclesCleared": [
"A"
]
},
{
"or": [
"h_ClimbWithoutLava",
{
"obstaclesNotCleared": [
"B"
]
}
]
}
],
"flashSuitChecked": true,
"blueSuitChecked": true,
"note": "A Temporary Blue Chain with x-ray turnarounds to climb up and destroy the bomb blocks blocking the bottom morph tunnel.",
"devNote": "The runway was reduced by 0.5 tiles, as you can't maintain Temporary Blue directly against a wall."
},
{
"id": 101,
"link": [
6,
4
],
"name": "Temporary Blue Chain Through Bomb Blocks Without XRay (Bottom Left to Bottom, In-Room)",
"requires": [
{
"notable": "Temporary Blue Chain Through Bomb Blocks"
},
{
"or": [
"HiJump",
"canTrickySpringBallJump"
]
},
{
"or": [
{
"canShineCharge": {
"usedTiles": 18,
"openEnd": 0
}
},
{
"and": [
{
"canShineCharge": {
"usedTiles": 19,
"openEnd": 0
}
},
{
"doorUnlockedAtNode": 2
}
]
}
]
},
"canChainTemporaryBlue",
"canTrickyJump",
{
"obstaclesCleared": [
"A"
]
},
{
"or": [
"h_ClimbWithoutLava",
{
"obstaclesNotCleared": [
"B"
]
}
]
}
],
"unlocksDoors": [
{
"nodeId": 2,
"types": [
"ammo"
],
"requires": []
}
],
"flashSuitChecked": true,
"blueSuitChecked": true,
"note": "A Temporary Blue Chain with movement assists to climb up and destroy the bomb blocks blocking the bottom morph tunnel."
},
{
"id": 102,
"link": [
6,
5
],
"name": "Base",
"requires": [],
"flashSuitChecked": true,
"blueSuitChecked": true
},
{
"id": 103,
"link": [
6,
6
],
"name": "Space Pirate Farm",
"requires": [
"h_ZebesIsAwake",
{
"or": [
"h_ClimbWithoutLava",
"h_lavaProof",
{
"obstaclesNotCleared": [
"B"
]
}
]
},
{
"or": [
{
"and": [
{
"resetRoom": {
"nodes": [
1
]
}
},
{
"cycleFrames": 2350
}
]
},
{
"and": [
{
"resetRoom": {
"nodes": [
2
]
}
},
{
"or": [
"h_useMorphBombs",
"ScrewAttack"
]
},
{
"cycleFrames": 2270
}
]
},
{
"and": [
{
"resetRoom": {
"nodes": [
3
]
}
},
"h_useMorphBombs",
{
"cycleFrames": 2695
}
]
},
{
"and": [
{
"resetRoom": {
"nodes": [
4
]
}
},
"h_useMorphBombs",
{
"cycleFrames": 2480
}
]
},
{
"and": [
{
"resetRoom": {
"nodes": [
5
]
}
},
{
"cycleFrames": 1905
}
]
}
]
}
],
"resetsObstacles": [
"A",
"B"
],
"farmCycleDrops": [
{
"enemy": "Grey Space Pirate (wall)",
"count": 11
}
],
"flashSuitChecked": true,
"blueSuitChecked": true,
"devNote": [
"FIXME: Shinesparking can also be a viable option, in case it is patched to not cost energy."
]
},
{
"id": 104,
"link": [
6,
6
],
"name": "Crystal Flash",
"requires": [
"h_CrystalFlash",
{
"or": [
"h_ClimbWithoutLava",
"h_lavaProof",
{
"obstaclesNotCleared": [
"B"
]
}
]
}
],
"clearsObstacles": [
"A"
],
"flashSuitChecked": true,
"blueSuitChecked": true
},
{
"id": 115,
"link": [
6,
6
],
"name": "Crystal Spark",
"requires": [
{
"obstaclesCleared": [
"A"
]
},
{
"or": [
"h_ClimbWithoutLava",
{
"obstaclesNotCleared": [
"B"
]
}
]
},
{
"or": [
{
"canShineCharge": {
"usedTiles": 28,
"openEnd": 0
}
},
{
"and": [
{
"or": [
{
"doorUnlockedAtNode": 2
},
{
"doorUnlockedAtNode": 5
}
]
},
{
"canShineCharge": {
"usedTiles": 29,
"openEnd": 0
}
}
]
},
{
"and": [
{
"doorUnlockedAtNode": 2
},
{
"doorUnlockedAtNode": 5
},
{
"canShineCharge": {
"usedTiles": 30,
"openEnd": 0
}
}
]
}
]
},
"h_CrystalSpark"
],
"unlocksDoors": [
{
"nodeId": 2,
"types": [
"ammo"
],
"requires": []
},
{
"nodeId": 5,
"types": [
"ammo"
],
"requires": []
}
],
"flashSuitChecked": true,
"blueSuitChecked": true
}
],
"notables": [
{
"id": 1,
"name": "Behemoth Shinespark",
"note": "Diagonal shinespark up the climb to break the bomb blocks to the morph tunnels on the right. For the top block, spark from a crouch."
},
{
"id": 2,
"name": "G-Mode Morph Insane IBJ to Top",
"note": "Using IBJ to get from to bottom to the top of Climb without unmorphing. Precise timing and enemy manipulations are required to reach the top without taking a hit."
},
{
"id": 3,
"name": "Temporary Blue Chain Through Bomb Blocks",
"note": "A long Temporary Blue chain with x-ray turnarounds to climb up and destroy the bomb blocks blocking the morph tunnels."
},
{
"id": 4,
"name": "Morph Tunnel SpeedBall",
"note": "Enter the room with a very specific run speed to jump from the door, avoid the ceiling, and land a speedball perfectly in the tunnel to break the Bomb block."
},
{
"id": 5,
"name": "G-Mode Morph Blind Climb to the Top",
"note": [
"Overload PLMs using the scroll blocks next to the bomb wall",
"After passing through, you need to go from the bottom to the top of Climb and into the bomb blocks while still in G-mode Morph.",
"Samus will not be visible at all; the only available feedback is audio and position on the map."
]
},
{
"id": 6,
"name": "Moonfall Block Break",
"note": [
"The bomb blocks can be broken by spinjumping with Screw attack and holding right, if moonfall makes Samus clip through the platform.",
"Use the small blue platform 2nd from the top on the right side."
]
},
{
"id": 7,
"name": "G-Mode Morph Blue Suit IBJ to Top",
"note": [
"Using a blue suit and IBJ to get from to bottom to the top of Climb without unmorphing.",
"Precise timing and enemy manipulations are required to reach the top without taking a hit, because the pirates will kill Samus if they touch her while midair from a bomb boost.",
"Use the lowest part of the room to manipulate the pirates and overload their stationary, invisible lasers, which takes 18 shots, then climb the center of the room.",
"Let a pirate walk down to see Samus, then when it is jumping back and forth above her, place a bomb when it is in the center of the room and use it to double bomb jump to an upper wide platform.",
"When the pirate jumps again, be moving horizontally when it gets to Samus to kill it."
]
}
],
"nextStratId": 127,
"nextNotableId": 8
}