canCrouchJump (Medium)

The ability to crouch before jumping to reach higher ledges. Commonly paired with a down-grab or a mid-air Spring Ball jump.
Strats ()
|
Notable: true 
Diagonal shinespark up the climb to break the bomb blocks to the top right morph tunnel. A consistent place to spark from is the small platform below the bomb block, using a crouch jump and then a diagonal spark (not a crouched diagonal spark). Entrance condition: {
"comeInShinecharged": {
"framesRequired": 55
},
"comesThroughToilet": "no"
}
Requires: "canShinechargeMovementComplex"
{
"or": [
"canCrouchJump",
"canMidairShinespark"
]
}
{
"shinespark": {
"frames": 5
}
}
|
|
From: 1
Top Door
To: 3
Top Right Door
Notable: true
Diagonal shinespark up the climb to break the bomb blocks to the top right morph tunnel. A consistent place to spark from is the small platform below the bomb block, using a crouch jump and then a diagonal spark (not a crouched diagonal spark). Entrance condition: {
"comeInShinecharged": {
"framesRequired": 65
},
"comesThroughToilet": "yes"
}
Requires: "canShinechargeMovementComplex"
{
"or": [
"canCrouchJump",
"canMidairShinespark"
]
}
{
"shinespark": {
"frames": 5
}
}
|
|
From: 5
Alcatraz Door
To: 8
Central Junction
Notable: true 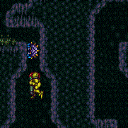
Wait 3 minutes for a global Geemer to waddle over, or shoot a Super 20 to 30 seconds after entering the room to knock it off the ceiling and save a lot of time. Damage down until Samus is one Geemer hit away from running out of energy, and set reserves to manual. Crouch jump at a very precise time and mid-air morph to contact the Geemer at the peak of the jump, pressing pause to be in the fade-out while getting hit and reaching 0 energy. Set reserves to auto, unpause, and hold left. While reserves are auto-refilling, Samus' i-frames will run out, allowing Samus to be hit by the Geemer again and be boosted high enough to reach the ledge. The screen will be black, which can be fixed by pausing and unpausing again. Requires: "h_ZebesIsAwake"
"HiJump"
"Morph"
{
"or": [
"canBeVeryPatient",
{
"ammo": {
"type": "Super",
"count": 1
}
}
]
}
"canCrouchJump"
"canInsaneJump"
"canPauseAbuse"
"canNeutralDamageBoost"
{
"autoReserveTrigger": {
"minReserveEnergy": 85
}
}
{
"enemyDamage": {
"enemy": "Geemer (blue)",
"type": "contact",
"hits": 1
}
}
|
|
Requires: {
"or": [
"canCarefulJump",
"canUseFrozenEnemies",
"SpaceJump",
{
"and": [
"Gravity",
{
"or": [
"HiJump",
"canWalljump",
"h_canCrouchJumpDownGrab",
"h_canIBJ",
"canSpringBallJumpMidAir"
]
}
]
}
]
}
|
|
From: 3
Junction (Left side Pit)
To: 1
Left Door
Notable: true 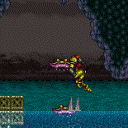
Find the Choot that is closest to the surface of the water, crouch jump under it and damage boost onto the dry platform to the left. Requires: "canSuitlessMaridia"
"canHorizontalDamageBoost"
"canCrouchJump"
{
"enemyDamage": {
"enemy": "Choot",
"hits": 1,
"type": "contact"
}
}
|
|
From: 4
Junction (Right side Pit)
To: 3
Junction (Left side Pit)
Notable: true 
Crouch jump down grab to get over the first two pillars. Crouch jump damage boost on the Skultera then down grab to get over the third. Requires: "canSuitlessMaridia"
"canNeutralDamageBoost"
"h_canCrouchJumpDownGrab"
{
"enemyDamage": {
"enemy": "Skultera",
"hits": 1,
"type": "contact"
}
}
|
|
Crouch jump down grab when the water is high. Requires: "h_canCrouchJumpDownGrab" |
|
Requires waiting until the last moment before SpringBall jumping. Requires: {
"doorUnlockedAtNode": 2
}
{
"or": [
"h_canCrouchJumpDownGrab",
"canWalljump"
]
}
"canSpringBallBombJump"
"h_canBombThings"
|
|
From: 1
Bottom Left Door
To: 3
Hidden Ceiling Item
Reveal the item and then setup to jump into an IBJ. As Samus starts falling, unmorph to extend Samus' hitbox high enough to reach the item after bouncing on the bomb. Requires: "canCrouchJump" "canMidAirMorph" "canJumpIntoIBJ" "canUnmorphBombBoost" |
|
Requires: "h_canCrouchJumpDownGrab" |
|
From: 1
Left Door
To: 1
Left Door
Notable: true 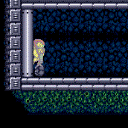
Gain a shinecharge on the long, lower platform in the screen above, then carry it left and down. Use crumble quick drops, land on the floor at the bottom, spin jump left into the doorway, and activate the spark. The required movement here is very precise, as the 180 shinecharge frames is only barely enough. Requires: {
"obstaclesNotCleared": [
"A"
]
}
"h_canCrouchJumpDownGrab"
{
"canShineCharge": {
"usedTiles": 17,
"openEnd": 0
}
}
"canShinechargeMovementTricky"
"canQuickCrumbleEscape"
{
"shinespark": {
"frames": 1
}
}
Exit condition: {
"leaveWithSpark": {}
}
|
|
From: 2
Right Door
To: 2
Right Door
Use the runway on the screen above to gain a shinecharge near the edge of the runway, sliding off quickly. Requires: {
"or": [
"canWalljump",
"HiJump",
"h_canFly",
"canSpringBallJumpMidAir",
"h_canCrouchJumpDownGrab"
]
}
{
"canShineCharge": {
"usedTiles": 25,
"openEnd": 1
}
}
"canShinechargeMovementComplex"
Exit condition: {
"leaveShinecharged": {
"framesRemaining": 70
}
}
|
|
Use the runway on the screen above to gain a shinecharge near the edge of the runway. Requires: {
"or": [
"canWalljump",
"HiJump",
"h_canFly",
"canSpringBallJumpMidAir",
"h_canCrouchJumpDownGrab"
]
}
{
"canShineCharge": {
"usedTiles": 25,
"openEnd": 1
}
}
Exit condition: {
"leaveShinecharged": {
"framesRemaining": 40
}
}
|
|
Requires: "h_canCrouchJumpDownGrab" Clears obstacles: A |
|
From: 2
Right Door
To: 3
Top Junction
Notable: true 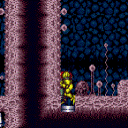
Start the elevator ride by using Screw Attack or Pseudo Screw in the hole. Kago the elevator to fall back in and hit the elevator again. This is much easier while the elevator is still rising, but can still be done with Morph afterwards. Unless HiJump is owned, this will need to be done once more to get high enough to get to the blue gate. Requires: "canKago"
{
"or": [
"ScrewAttack",
"canPseudoScrew"
]
}
{
"or": [
{
"and": [
"HiJump",
{
"or": [
"canCrouchJump",
"canDownGrab"
]
}
]
},
"canTrickyJump",
"Morph"
]
}
Clears obstacles: B |
|
From: 1
Top Left Door
To: 1
Top Left Door
It takes around 3 minutes to get the Zero to this door. Let the Zero climb the right wall and jump on top of it in Morph Ball form to bounce up to the Cacatac platform. The Zero only moves on camera and the camera scrolls when exiting the morph tunnel. Let the Zero lead through the morph tunnel or wait for the it to get very close to Samus before touching the scroll block at the exit. Requires: "canBeVeryPatient"
"Morph"
"canNeutralDamageBoost"
"canTrickyJump"
"h_canCrouchJumpDownGrab"
{
"enemyDamage": {
"enemy": "Zero",
"type": "contact",
"hits": 1
}
}
Exit condition: {
"leaveWithGModeSetup": {}
}
|
|
From: 2
Middle Left Door
To: 2
Middle Left Door
It takes around 4 minutes to get the Zero to this door. Let the Zero climb the right wall and jump on top of it in Morph Ball form to bounce up to the Cacatac platform. The Zero only moves on camera and the camera scrolls when exiting the morph tunnel. Let the Zero lead through the morph tunnel or wait for the it to get very close to Samus before touching the scroll block at the exit. Requires: "canBeVeryPatient"
"Morph"
"canNeutralDamageBoost"
"canTrickyJump"
"h_canCrouchJumpDownGrab"
{
"enemyDamage": {
"enemy": "Zero",
"type": "contact",
"hits": 1
}
}
Exit condition: {
"leaveWithGModeSetup": {}
}
|
|
Let the Caterpillar climb the right wall and jump on top of it in Morph Ball form to bounce up to the Cacatac platform. Requires: "Morph"
"canNeutralDamageBoost"
"canTrickyJump"
"canCrouchJump"
{
"enemyDamage": {
"enemy": "Zero",
"type": "contact",
"hits": 1
}
}
|
|
From: 2
Middle Left Door
To: 5
Top Right Door (Through Morph Tunnel)
Entrance condition: {
"comeInWithGMode": {
"mode": "indirect",
"morphed": true
}
}
Requires: {
"or": [
"h_canArtificialMorphIBJ",
{
"and": [
"h_canArtificialMorphSpringBallBombJump",
"h_additionalBomb"
]
},
{
"and": [
"h_canArtificialMorphSpringBall",
"HiJump"
]
},
{
"and": [
"Morph",
{
  "or": [
    "HiJump",
    "canWalljump",
    "h_canFly",
    "canSpringBallJumpMidAir",
    {
      "and": [
        "canTrickyDashJump",
        "h_canCrouchJumpDownGrab"
      ]
    }
  ]
}
]
}
]
}
|
|
Entrance condition: {
"comeInWithGMode": {
"mode": "any",
"morphed": false
}
}
Requires: {
"or": [
"HiJump",
"canWalljump",
"h_canFly",
"canSpringBallJumpMidAir",
{
"and": [
"canTrickyDashJump",
"h_canCrouchJumpDownGrab"
]
}
]
}
Exit condition: {
"leaveWithGMode": {
"morphed": false
}
}
|
|
Requires: "h_canCrouchJumpDownGrab" |
|
From: 4
Bottom Right Door
To: 4
Bottom Right Door
Let the Caterpillar climb the right wall and jump on top of it in Morph Ball form to bounce up to the Cacatac platform. Requires: "Morph"
"canNeutralDamageBoost"
"canTrickyJump"
"canCrouchJump"
{
"enemyDamage": {
"enemy": "Zero",
"type": "contact",
"hits": 1
}
}
Exit condition: {
"leaveWithGModeSetup": {}
}
|
|
From: 4
Bottom Right Door
To: 5
Top Right Door (Through Morph Tunnel)
Entrance condition: {
"comeInWithGMode": {
"mode": "indirect",
"morphed": true
}
}
Requires: {
"or": [
"h_canArtificialMorphIBJ",
"h_canArtificialMorphSpringBallBombJump",
{
"and": [
"h_canArtificialMorphSpringBall",
"HiJump"
]
},
{
"and": [
"Morph",
{
  "or": [
    "HiJump",
    "canWalljump",
    "h_canFly",
    "canSpringBallJumpMidAir",
    "h_canCrouchJumpDownGrab"
  ]
}
]
}
]
}
|
|
Entrance condition: {
"comeInWithGMode": {
"mode": "any",
"morphed": false
}
}
Requires: {
"or": [
"HiJump",
"canWalljump",
"h_canFly",
"canSpringBallJumpMidAir",
"h_canCrouchJumpDownGrab"
]
}
Exit condition: {
"leaveWithGMode": {
"morphed": false
}
}
|
|
From: 5
Top Right Door (Through Morph Tunnel)
To: 5
Top Right Door (Through Morph Tunnel)
It takes around 2 minutes to get the Zero to this door. Let the Zero climb the right wall and jump on top of it in Morph Ball form to bounce up to the Cacatac platform. Requires: "canBePatient"
{
"or": [
{
"ammo": {
"type": "Super",
"count": 1
}
},
{
"obstaclesCleared": [
"A"
]
}
]
}
"Morph"
"canNeutralDamageBoost"
"canTrickyJump"
"h_canCrouchJumpDownGrab"
{
"enemyDamage": {
"enemy": "Zero",
"type": "contact",
"hits": 1
}
}
Exit condition: {
"leaveWithGModeSetup": {}
}
|
|
From: 2
Right Door
To: 3
Safe Block in the Middle of the Room
Requires: {
"or": [
"h_canTrickySpringwall",
{
"and": [
"h_canMaxHeightSpringBallJump",
"canNeutralDamageBoost"
]
}
]
}
{
"spikeHits": 1
}
|
|
Using a crouch jump, get the Beetom attach to Samus. Quickly freeze it before it deals damage, if Samus is at very low energy. Requires: "canTrickyUseFrozenEnemies"
"h_canCrouchJumpDownGrab"
{
"obstaclesNotCleared": [
"A"
]
}
|
|
Getting up during Phase 2 can be done by jumping on Kraid's projectile platforms or a well timed crouch jump + down grab. Requires: "Charge"
{
"or": [
"Wave",
"Spazer",
"Plasma",
"canBePatient"
]
}
{
"or": [
"HiJump",
"canWalljump",
"SpaceJump",
"canSpringBallJumpMidAir",
{
"and": [
"canDodgeWhileShooting",
{
"or": [
"canCarefulJump",
"h_canCrouchJumpDownGrab"
]
}
]
}
]
}
Clears obstacles: f_DefeatedKraid |
|
Only 2 Missiles are needed to get Kraid to stand up, after which they are farmable. Getting up during Phase 2 can be done by jumping on Kraid's projectile platforms or a well timed crouch jump + down grab. Requires: {
"ammo": {
"type": "Missile",
"count": 2
}
}
{
"or": [
"HiJump",
"canWalljump",
"SpaceJump",
"canSpringBallJumpMidAir",
{
"and": [
"canDodgeWhileShooting",
{
"or": [
"canCarefulJump",
"h_canCrouchJumpDownGrab"
]
}
]
}
]
}
Clears obstacles: f_DefeatedKraid |
|
4 supers are required to kill Kraid. Only 1 is needed to get him to stand up, after which they are farmable, even though the drop rate is low. Getting up during Phase 2 can be done by jumping on Kraid's projectile platforms or a well timed crouch jump + down grab. Requires: {
"or": [
{
"ammo": {
"type": "Super",
"count": 5
}
},
{
"and": [
{
"ammo": {
"type": "Super",
"count": 4
}
},
"canDodgeWhileShooting"
]
},
{
"and": [
{
"ammo": {
"type": "Super",
"count": 3
}
},
"canDodgeWhileShooting",
"canBePatient"
]
},
{
"and": [
{
"ammo": {
"type": "Super",
"count": 1
}
},
"canDodgeWhileShooting",
"canBeVeryPatient"
]
}
]
}
{
"or": [
"HiJump",
"canWalljump",
"SpaceJump",
"canSpringBallJumpMidAir",
{
"and": [
"canDodgeWhileShooting",
{
"or": [
"canCarefulJump",
"h_canCrouchJumpDownGrab"
]
}
]
}
]
}
Clears obstacles: f_DefeatedKraid |
|
From: 2
Bottom Right Door
To: 5
Kihunter Junction
This crouch jump down grab is a little tighter than most. The Kihunters can be killed from below but there is a chance one will drop down the hole. Watch them before breaking the shot block. Requires: "h_canCrouchJumpDownGrab" Clears obstacles: C, D |
|
Requires: "canUseFrozenEnemies"
{
"or": [
"canTrickyUseFrozenEnemies",
"canWalljump",
"HiJump",
"canSpringBallJumpMidAir",
"h_canCrouchJumpDownGrab"
]
}
|
|
From: 2
Left Shaft - Bottom Right Door
To: 3
Left Shaft - Middle Right Door
Requires: {
"or": [
"canWalljump",
"HiJump",
"SpaceJump",
"h_canCrouchJumpDownGrab"
]
}
{
"heatFrames": 280
}
|
|
From: 2
Left Shaft - Bottom Right Door
To: 3
Left Shaft - Middle Right Door
Requires: {
"or": [
"canWalljump",
"HiJump",
"SpaceJump",
"h_canCrouchJumpDownGrab"
]
}
{
"heatFrames": 260
}
Exit condition: {
"leaveWithRunway": {
"length": 4,
"openEnd": 1
}
}
|
|
From: 3
Left Shaft - Middle Right Door
To: 4
Left Shaft - Top Right Door
Requires: {
"or": [
"canWalljump",
"HiJump",
"SpaceJump",
"h_canCrouchJumpDownGrab"
]
}
{
"heatFrames": 310
}
|
|
From: 3
Left Shaft - Middle Right Door
To: 4
Left Shaft - Top Right Door
Requires: {
"or": [
"canWalljump",
"HiJump",
"SpaceJump",
"h_canCrouchJumpDownGrab"
]
}
{
"heatFrames": 290
}
Exit condition: {
"leaveWithRunway": {
"length": 4,
"openEnd": 1
}
}
|
|
Requires: {
"or": [
"canWalljump",
"HiJump",
"SpaceJump",
"h_canCrouchJumpDownGrab"
]
}
{
"heatFrames": 200
}
|
|
Requires: {
"or": [
"canWalljump",
"HiJump",
"SpaceJump",
"h_canCrouchJumpDownGrab"
]
}
{
"heatFrames": 100
}
|
|
From: 6
Left Shaft - Top Junction
To: 1
Left Shaft - Top Left Door
Requires: {
"or": [
"canWalljump",
"HiJump",
"h_canCrouchJumpDownGrab"
]
}
{
"heatFrames": 60
}
Exit condition: {
"leaveWithRunway": {
"length": 8,
"openEnd": 1
}
}
|
|
From: 6
Left Shaft - Top Junction
To: 6
Left Shaft - Top Junction
Requires: "h_heatProof"
{
"or": [
"canDodgeWhileShooting",
"ScrewAttack",
"Wave",
"Ice",
"Spazer",
"Plasma"
]
}
{
"or": [
"canWalljump",
"HiJump",
"h_canCrouchJumpDownGrab"
]
}
{
"resetRoom": {
"nodes": [
1,
2,
3,
4
],
"mustStayPut": false
}
}
{
"refill": [
"Missile",
"PowerBomb"
]
}
|
|
Spin-jump across both sets of lava, trying to minimize the time spent in lava. To get onto the first pillar, either use a wall jump off the pillar, or use the Tripper briefly as a platform by crouch jumping or down grabbing onto it. Requires: "canSuitlessLavaDive"
{
"heatFrames": 750
}
{
"lavaFrames": 120
}
{
"or": [
"canWalljump",
{
"and": [
{
"or": [
"canCrouchJump",
"canDownGrab"
]
},
{
"heatFrames": 110
},
{
"lavaFrames": 20
}
]
}
]
}
|
|
Spin-jump across both sets of lava, trying to minimize the time spent in lava. To get onto the first pillar, either use a wall jump off the pillar, or use the Tripper briefly as a platform by crouch jumping or down grabbing onto it. Requires: "canSuitlessLavaDive"
{
"heatFrames": 700
}
{
"lavaFrames": 130
}
{
"or": [
"canWalljump",
{
"and": [
{
"or": [
"canCrouchJump",
"canDownGrab"
]
},
{
"heatFrames": 220
},
{
"lavaFrames": 70
}
]
}
]
}
|
|
From: 5
Bottom Floating Platform Junction
To: 4
Top Floating Platform Junction
Requires: "h_canCrouchJumpDownGrab"
{
"heatFrames": 125
}
|
|
Notable: true 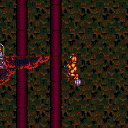
Uses a bomb boost at the end of a mid-air SpringBall jump. Also requires a crouchjump and downgrab to complete the maneuver. Requires: "canSpringBallJumpMidAir"
"canUnmorphBombBoost"
"h_canCrouchJumpDownGrab"
{
"heatFrames": 800
}
|
|
Notable: true Crouch jump and let the Sova move into Samus from the right, to get a upward boost, then hold left to boost horizontally to the ledge. Then crouch jump from the slope on the left, and morph into a neutral damage boost. Requires: "Morph"
"canCrouchJump"
"canTrickyJump"
"canNeutralDamageBoost"
"canHorizontalDamageBoost"
{
"enemyDamage": {
"enemy": "Sova",
"type": "contact",
"hits": 2
}
}
|
|
From: 7
Junction Below Power Bomb Blocks
To: 2
Middle Left Door
Notable: true 
Place a Power Bomb to break the Power Bomb blocks and the bomb blocks, without killing the global Sova. Wait 30-50 seconds for the Sova to get into position. Crouch jump, morph, and hold right against the wall, hitting the Sova from below while near the peak of Samus's jump. Continue holding right to pass through the Sova and onto the ledge above. Requires: "h_canUsePowerBombs"
"canCrouchJump"
"canCarefulJump"
"canNeutralDamageBoost"
{
"enemyDamage": {
"enemy": "Sova",
"hits": 1,
"type": "contact"
}
}
Clears obstacles: A, B, C |
|
From: 4
Junction Below Morph Tunnel
To: 2
Middle Right Door
Wait for the Sova to leave the tunnel and jump morph into them to bounce up into the hole. Requires: "canCrouchJump"
"Morph"
"canNeutralDamageBoost"
{
"enemyDamage": {
"enemy": "Sova",
"type": "contact",
"hits": 1
}
}
{
"heatFrames": 420
}
|
|
Requires: {
"or": [
"HiJump",
"canWalljump",
"h_canCrouchJumpDownGrab",
"canSpringBallJumpMidAir"
]
}
|
|
From: 1
Left Door
To: 4
Center Platform Junction
Wait for the water to be rising and perform a max height SpringBall Jump. Requires: "canSuitlessMaridia" "HiJump" "h_canMaxHeightSpringBallJump" |
|
From: 4
Center Platform Junction
To: 3
Junction Left of Green Gate
Either freeze the Puyos immediately on the stairs, or at the highest part of their jump to barely jump up to the ledge with HiJump. Requires: "Gravity"
"HiJump"
"canTrickyUseFrozenEnemies"
{
"or": [
"h_canCrouchJumpDownGrab",
"Spazer",
"Wave",
"Plasma"
]
}
|
|
From: 5
Main Junction
To: 1
Top Left Door
Notable: true 
Use the moving platform (Kamer) to elevate the Gamets. Requires: "canTrickyJump"
{
"or": [
"h_canCrouchJumpDownGrab",
"canWalljump"
]
}
"canHorizontalDamageBoost"
{
"enemyDamage": {
"enemy": "Gamet",
"type": "contact",
"hits": 1
}
}
|
|
From: 5
Main Junction
To: 4
Top Right Door
Crouch jump then down grab starting from the moving platform. A very fast crouch jump is necessary in order to not have lowered the platform too low. Requires: "h_canCrouchJumpDownGrab" "canTrickyJump" |
|
From: 2
Middle Right Door
To: 3
Top Right Door
Enter with G-mode direct, back up to between 1 and 6 pixels from the door transition, and activate X-ray to get very deep stuck in the door. Climb up 1 screen, and perform a turnaround buffered spin-jump away from the door to trigger the transition, bypassing any lock on the door. Entrance condition: {
"comeInWithGMode": {
"mode": "direct",
"morphed": false
}
}
Requires: "h_heatProof"
{
"or": [
"canWalljump",
"h_canCrouchJumpDownGrab",
"HiJump",
"h_canFly",
"canArtificialMorph"
]
}
"canXRayClimb"
Bypasses door shell: true |
|
From: 3
Top Right Door
To: 2
Middle Right Door
After teleporting, as Samus swings to the right, begin holding down to extend Grapple just as Samus is slightly right of vertical. Samus should swing back left and get stuck on the floor one tile to the right of the Grapple attachment point. Release Grapple and Samus will clip through the floor. Entrance condition: {
"comeInWithGrappleTeleport": {
"blockPositions": [
[
5,
3
]
]
}
}
Requires: {
"heatFrames": 250
}
{
"or": [
"canWalljump",
"h_canCrouchJumpDownGrab"
]
}
|
|
Moonfall to clip through the Bomb blocks Break spin with Shot or Angle Aim to avoid clipping all the way to the bottom of the room. Entrance condition: {
"comeInWithStoredFallSpeed": {
"fallSpeedInTiles": 1
}
}
Requires: "canPrepareForNextRoom"
"canMoonfall"
{
"or": [
"canWalljump",
"h_canCrouchJumpDownGrab"
]
}
{
"heatFrames": 170
}
|
|
From: 5
Below Left Door Junction
To: 1
Left Door
Notable: true 
Perform a gravity jump followed by a springball jump to reach the left side door. The gravity jump timing is very precise. Requires: "h_canNavigateHeatRooms"
"HiJump"
"canTrickyJump"
"canGravityJump"
"h_canCrouchJumpDownGrab"
"canSpringBallJumpMidAir"
{
"heatFrames": 600
}
{
"acidFrames": 600
}
|
|
From: 5
Below Left Door Junction
To: 1
Left Door
Notable: true
Acid allows for more time than water to perform Spring Ball jumps. This gives just barely enough time to fit in three spring ball jumps. Requires: "h_heatProof"
"canSuitlessLavaDive"
"canCrouchJump"
"h_canDoubleSpringBallJumpWithHiJump"
"canTrickyJump"
{
"acidFrames": 330
}
{
"acidFrames": 1000
}
|
|
Requires: "h_canNavigateHeatRooms"
"canUseFrozenEnemies"
"h_canCrouchJumpDownGrab"
{
"heatFrames": 700
}
{
"or": [
{
"and": [
"h_canUsePowerBombs",
{
"heatFrames": 50
}
]
},
{
"obstaclesCleared": [
"A"
]
}
]
}
Clears obstacles: A |
|
From: 5
Firefleas Bottom Left Platform Junction
To: 7
Fireflea Statue's Claw Junction
Set up to Damage boost off the highest Fireflea at the apex of your jump, next to the Ridley claw. It's precise, and can only be attempted once. Morphing can make the boost a little easier. Requires: "HiJump"
"canHorizontalDamageBoost"
"canTrickyJump"
"canCrouchJump"
{
"enemyDamage": {
"enemy": "Fireflea",
"hits": 1,
"type": "contact"
}
}
|
|
Requires: {
"obstaclesCleared": [
"B"
]
}
{
"heatFrames": 160
}
{
"or": [
"h_canCrouchJumpDownGrab",
"canWalljump",
"canSpringBallJumpMidAir",
"HiJump",
{
"and": [
"SpaceJump",
{
"heatFrames": 20
}
]
},
{
"and": [
"h_canSpringBallBombJump",
{
"heatFrames": 50
}
]
},
{
"and": [
"h_canJumpIntoIBJ",
{
"heatFrames": 60
}
]
}
]
}
|
|
From: 9
Junction Below Crumble Blocks, Set Up to Clip
To: 2
Top Right Door
Notable: true 
Ice Clip through the crumble blocks using a Multiviola from the bottom of the room and then Crumble Jump to clip through the bomb blocks. The ice clip can be setup by standing in a corner and firing forward when the Multiviola hits Samus, if it is moving downwards towards Samus. The Crumble Jump is done by aiming down (not immediately) after jumping, then changing Samus' hitbox once above the crumble blocks, and jumping again. Requires: "h_heatProof"
"canPreciseCeilingClip"
"canTrickyUseFrozenEnemies"
"canPartialFloorClip"
"canTrickyJump"
"canCrumbleJump"
{
"enemyDamage": {
"enemy": "Multiviola",
"type": "contact",
"hits": 1
}
}
{
"or": [
"h_canCrouchJumpDownGrab",
"canWalljump",
"canSpringBallJumpMidAir",
"HiJump",
"SpaceJump",
"h_canJumpIntoIBJ"
]
}
|
|
From: 9
Junction Below Crumble Blocks, Set Up to Clip
To: 2
Top Right Door
Notable: true
Freeze the Multiviola on the left side, just below the solid block. XRay standup and jump to clip up, then jump again to get on top of the bomb blocks. Requires: "h_heatProof"
"h_canXRayCeilingClip"
"canTrickyUseFrozenEnemies"
{
"or": [
"h_canCrouchJumpDownGrab",
"canWalljump",
"canSpringBallJumpMidAir",
"HiJump",
"SpaceJump",
"h_canJumpIntoIBJ"
]
}
|
|
From: 4
Junction Above Bomb Block
To: 1
Top Left Door
Wait for the Kihunters to move away from where Samus will jump up. This may mean Hitboxing through the middle KiHunter multiple times. Requires: "h_canNavigateHeatRooms"
"Plasma"
"canHitbox"
{
"or": [
"h_canCrouchJumpDownGrab",
"canWalljump",
"HiJump",
"SpaceJump"
]
}
"canTrickyJump"
{
"heatFrames": 600
}
Clears obstacles: A |
|
From: 4
Junction Above Bomb Block
To: 1
Top Left Door
Firing upwards has a good chance of hitting multiple Kihunters. And charge shot double hits will instantly kill a Kihunter. Requires: "h_canNavigateHeatRooms"
"Ice"
"Wave"
"Plasma"
{
"or": [
"Charge",
{
"heatFrames": 240
}
]
}
{
"or": [
"h_canCrouchJumpDownGrab",
"canWalljump",
"HiJump",
{
"and": [
"canSpringBallJumpMidAir",
{
"heatFrames": 120
}
]
},
"SpaceJump",
{
"and": [
"h_canIBJ",
"h_heatProof"
]
},
{
"and": [
"h_canSpringBallBombJump",
"h_additionalBomb",
"h_additionalBomb",
{
"heatFrames": 250
}
]
}
]
}
{
"heatFrames": 550
}
Clears obstacles: A |
|
From: 4
Junction Above Bomb Block
To: 1
Top Left Door
Fire up from below and try not to jump too high as that will out the camera in a bad position. Requires: "h_canNavigateHeatRooms"
"Ice"
"Wave"
"Spazer"
{
"or": [
"Charge",
"canCarefulJump",
"h_heatProof"
]
}
{
"or": [
"h_canCrouchJumpDownGrab",
"canWalljump",
"HiJump",
{
"and": [
"canSpringBallJumpMidAir",
{
"heatFrames": 120
}
]
},
"SpaceJump",
{
"and": [
"h_canIBJ",
"h_heatProof"
]
},
{
"and": [
"h_canSpringBallBombJump",
"h_additionalBomb",
"h_additionalBomb",
{
"heatFrames": 250
}
]
}
]
}
{
"heatFrames": 1520
}
Clears obstacles: A |
|
From: 4
Junction Above Bomb Block
To: 1
Top Left Door
Requires: "h_canNavigateHeatRooms"
{
"obstaclesCleared": [
"A"
]
}
{
"or": [
"h_canCrouchJumpDownGrab",
"canWalljump",
"HiJump",
{
"and": [
"canSpringBallJumpMidAir",
{
"heatFrames": 120
}
]
},
"SpaceJump",
{
"and": [
"h_canIBJ",
{
"heatFrames": 1820
}
]
},
{
"and": [
"h_canSpringBallBombJump",
"h_additionalBomb",
"h_additionalBomb",
{
"heatFrames": 250
}
]
}
]
}
{
"heatFrames": 390
}
|
|
Fire up from below and try not to jump too high as that will put the camera in a bad position. Requires: "h_canNavigateHeatRooms"
"Plasma"
{
"or": [
"canCarefulJump",
{
"heatFrames": 100
}
]
}
{
"or": [
"h_canCrouchJumpDownGrab",
"canWalljump",
"HiJump",
{
"and": [
"canSpringBallJumpMidAir",
{
"heatFrames": 120
}
]
},
"SpaceJump",
{
"and": [
"h_canIBJ",
"h_heatProof"
]
},
{
"and": [
"h_canSpringBallBombJump",
"h_additionalBomb",
"h_additionalBomb",
{
"heatFrames": 250
}
]
}
]
}
{
"heatFrames": 1360
}
Clears obstacles: A |
|
Requires: "h_canNavigateHeatRooms"
"ScrewAttack"
{
"or": [
"canWalljump",
{
"and": [
"h_canCrouchJumpDownGrab",
{
"heatFrames": 120
},
{
"or": [
"canCarefulJump",
{
"enemyDamage": {
"enemy": "Kihunter (red)",
"type": "contact",
"hits": 1
}
}
]
}
]
},
"HiJump",
{
"and": [
"canSpringBallJumpMidAir",
{
"heatFrames": 120
},
{
"enemyDamage": {
"enemy": "Kihunter (red)",
"type": "contact",
"hits": 2
}
}
]
},
"SpaceJump",
{
"and": [
"h_canIBJ",
"h_heatProof",
{
"enemyDamage": {
"enemy": "Kihunter (red)",
"type": "contact",
"hits": 2
}
}
]
}
]
}
{
"heatFrames": 500
}
Clears obstacles: A |
|
From: 4
Junction Above Bomb Block
To: 1
Top Left Door
Shoot them from below. It is possible for the KiHunters to fall through the gaps in the side, but is unlikely. Jumping may lower the camera position making it harder to shoot the KiHunters. But once it is lowered, jump to make them active and vulnerable to damage. Requires: "h_heatProof"
"canBePatient"
{
"enemyKill": {
"enemies": [
[
"Kihunter (red)",
"Kihunter (red)",
"Kihunter (red)"
]
]
}
}
{
"or": [
"h_canCrouchJumpDownGrab",
"canWalljump",
"HiJump",
"canSpringBallJumpMidAir",
"SpaceJump",
"h_canIBJ",
{
"and": [
"h_canSpringBallBombJump",
"h_additionalBomb",
"h_additionalBomb"
]
}
]
}
Clears obstacles: A |
|
Fire up from below and try not to jump too high as that will put the camera in a bad position. Requires: "h_canNavigateHeatRooms"
{
"enemyKill": {
"enemies": [
[
"Kihunter (red)",
"Kihunter (red)",
"Kihunter (red)"
]
],
"explicitWeapons": [
"Super"
]
}
}
{
"or": [
"canCarefulJump",
{
"heatFrames": 210
}
]
}
{
"or": [
"h_canCrouchJumpDownGrab",
"canWalljump",
"HiJump",
{
"and": [
"canSpringBallJumpMidAir",
{
"heatFrames": 120
}
]
},
"SpaceJump",
{
"and": [
"h_canIBJ",
"h_heatProof"
]
},
{
"and": [
"h_canSpringBallBombJump",
"h_additionalBomb",
"h_additionalBomb",
{
"heatFrames": 250
}
]
}
]
}
{
"heatFrames": 1300
}
Clears obstacles: A |
|
From: 4
Junction Above Bomb Block
To: 1
Top Left Door
Requires: "h_canNavigateHeatRooms"
{
"or": [
"h_canCrouchJumpDownGrab",
"canWalljump",
"HiJump",
{
"and": [
"canSpringBallJumpMidAir",
{
"heatFrames": 300
},
{
"enemyDamage": {
"enemy": "Kihunter (red)",
"type": "contact",
"hits": 1
}
}
]
},
{
"and": [
"h_canJumpIntoIBJ",
{
"heatFrames": 300
}
]
},
"SpaceJump"
]
}
{
"heatFrames": 570
}
{
"enemyDamage": {
"enemy": "Kihunter (red)",
"type": "contact",
"hits": 3
}
}
Clears obstacles: A |
|
From: 4
Junction Above Bomb Block
To: 1
Top Left Door
Requires: "h_canNavigateHeatRooms"
"Wave"
"Plasma"
{
"or": [
"h_canCrouchJumpDownGrab",
"canWalljump",
"HiJump",
{
"and": [
"canSpringBallJumpMidAir",
{
"heatFrames": 120
}
]
},
"SpaceJump",
{
"and": [
"h_canIBJ",
"h_heatProof"
]
},
{
"and": [
"h_canSpringBallBombJump",
"h_additionalBomb",
"h_additionalBomb",
{
"heatFrames": 250
}
]
}
]
}
{
"heatFrames": 940
}
Clears obstacles: A |
|
Requires: "canUseEnemies"
{
"or": [
{
"and": [
"canWalljump",
{
"heatFrames": 390
}
]
},
{
"and": [
"canConsecutiveWalljump",
"canCarefulJump",
{
"heatFrames": 330
}
]
},
{
"and": [
"HiJump",
{
"heatFrames": 490
}
]
},
{
"and": [
"h_canCrouchJumpDownGrab",
{
"heatFrames": 610
}
]
}
]
}
|
|
Notable: true 
Position the Bull with beam shots before jumping into it. Requires: "canSuitlessMaridia"
"HiJump"
"canUseEnemies"
"canNeutralDamageBoost"
"canCrouchJump"
"Morph"
{
"enemyDamage": {
"enemy": "Bull",
"hits": 1,
"type": "contact"
}
}
|
|
Requires: {
"or": [
"canWalljump",
"HiJump",
"h_canFly",
"SpeedBooster",
"h_canCrouchJumpDownGrab",
"canSpringBallJumpMidAir",
"h_canSpringBallBombJump",
"canUseFrozenEnemies"
]
}
|
|
Stand on a frozen crab, then freeze a second one on the edge of the hole above. Use a crouch jump and/or down grab to get onto the crab above. Requires: "canMidAirMorph"
"canSuitlessMaridia"
"canTrickyUseFrozenEnemies"
"HiJump"
{
"or": [
"canCrouchJump",
"canDownGrab"
]
}
|
|
From: 2
Bottom Left Door
To: 5
G-Mode Morph Junction (Top Half)
Entrance condition: {
"comeInWithGMode": {
"mode": "any",
"morphed": false
}
}
Requires: "Morph"
"h_canNavigateUnderwater"
{
"or": [
"canGravityJump",
{
"and": [
"Gravity",
"HiJump",
{
"or": [
"canSpringBallJumpMidAir",
"canWalljump"
]
}
]
},
{
"and": [
"canTrickyUseFrozenEnemies",
"HiJump",
"h_canCrouchJumpDownGrab"
]
},
{
"and": [
{
"ammo": {
"type": "Super",
"count": 1
}
},
"canTrickyUseFrozenEnemies",
"canOffScreenMovement"
]
},
{
"and": [
"canTrickyJump",
"canSpringBallJumpMidAir",
"canTrickyUseFrozenEnemies",
"canOffScreenMovement"
]
}
]
}
|
|
From: 3
Bottom Right Door
To: 5
G-Mode Morph Junction (Top Half)
Entrance condition: {
"comeInWithGMode": {
"mode": "any",
"morphed": false
}
}
Requires: "Morph"
"h_canNavigateUnderwater"
{
"or": [
"canGravityJump",
{
"and": [
"Gravity",
"HiJump",
{
"or": [
"canSpringBallJumpMidAir",
"canWalljump"
]
}
]
},
{
"and": [
"canTrickyUseFrozenEnemies",
"HiJump",
"h_canCrouchJumpDownGrab"
]
},
{
"and": [
{
"ammo": {
"type": "Super",
"count": 1
}
},
"canTrickyUseFrozenEnemies",
"canOffScreenMovement"
]
},
{
"and": [
"canTrickyJump",
"canSpringBallJumpMidAir",
"canTrickyUseFrozenEnemies",
"canOffScreenMovement"
]
}
]
}
|
|
From: 2
Bottom Right Door
To: 6
Middle Junction Near Top Left Pirate
Start the dash as close to the door transition as possible in order to have a larger window for storing the shinecharge. With low energy, shinespark diagonally to the middle ledge on the left. Entrance condition: {
"comeInRunning": {
"speedBooster": true,
"minTiles": 0.4375
}
}
Requires: "canWaterShineCharge"
{
"or": [
{
"shinespark": {
"frames": 43,
"excessFrames": 26
}
},
{
"and": [
"canMidairShinespark",
{
"shinespark": {
"frames": 38,
"excessFrames": 25
}
}
]
}
]
}
{
"or": [
{
"enemyDamage": {
"enemy": "Pink Space Pirate (standing)",
"type": "contact",
"hits": 1
}
},
{
"enemyKill": {
"enemies": [
[
"Pink Space Pirate (standing)"
]
],
"explicitWeapons": [
"Plasma"
]
}
}
]
}
{
"or": [
"h_canCrouchJumpDownGrab",
"canSpringBallJumpMidAir",
{
"and": [
"Ice",
"Plasma"
]
}
]
}
|
|
From: 1
Bottom Door
To: 3
Middle Right Door
Crouch jump up through the left side of the door transition. Angle up and shoot the fish twice on the way up, then aim down and shoot three more times as needed until it is frozen. Land on the fish, wait until it is flashing, then jump and freeze it again further to left as needed, until you can spin jump to the left to reach the platforms. Entrance condition: {
"comeInWithPlatformBelow": {
"maxHeight": 7,
"maxLeftPosition": 2,
"minRightPosition": -2
},
"comesThroughToilet": "any"
}
Requires: "canCrossRoomJumpIntoWater"
"canCrouchJump"
"canTrickyUseFrozenEnemies"
{
"or": [
"Wave",
"Spazer",
"Plasma"
]
}
|
|
Crouch jump up through the door with HiJump equipped, aligning with the left side of the door frame. Stay to the right of the fish as you go up. Entrance condition: {
"comeInWithPlatformBelow": {
"maxHeight": 8.5,
"maxLeftPosition": -1,
"minRightPosition": -1
},
"comesThroughToilet": "any"
}
Requires: "canCrossRoomJumpIntoWater" "canCrouchJump" "HiJump" |
|
From: 1
Bottom Door
To: 3
Middle Right Door
Run and spin jump to the left through the transition with as much horiziontal speed as possible, without bonking the door frame. Hold left through the transition to avoid the fish and land on the platform to the left. With limited runway, this may require a very precise jump. Then reach the platform above either using a crouch-jump down-grab or by freezing the fish. Entrance condition: {
"comeInWithPlatformBelow": {
"maxHeight": 6,
"maxLeftPosition": -0.5,
"minRightPosition": 2.5
},
"comesThroughToilet": "yes"
}
Requires: "canCrossRoomJumpIntoWater"
"canInsaneJump"
{
"or": [
"h_canCrouchJumpDownGrab",
"canUseFrozenEnemies"
]
}
|
|
Spin jump to the left through the transition. Bonking the left side of the door frame works but is not required. Hold left through the transition to avoid the fish and land on the platform to the left. Then reach the platform above either using a crouch-jump down-grab or by freezing the fish. Entrance condition: {
"comeInWithPlatformBelow": {
"maxHeight": 6,
"maxLeftPosition": 2,
"minRightPosition": -2
},
"comesThroughToilet": "no"
}
Requires: "canCrossRoomJumpIntoWater"
{
"or": [
"h_canCrouchJumpDownGrab",
"canUseFrozenEnemies"
]
}
|
|
Standing on the platform in the room below, crouch jump and perform a spring ball jump mid-air just before reaching the transition. Entrance condition: {
"comeInWithPlatformBelow": {
"maxHeight": 10,
"maxLeftPosition": -1,
"minRightPosition": -1
},
"comesThroughToilet": "any"
}
Requires: "canCrossRoomJumpIntoWater" "canCrouchJump" "canTrickySpringBallJump" |
|
From: 1
Bottom Door
To: 3
Middle Right Door
Run and spin jump to the left through the transition with as much horiziontal speed as possible, without bonking the door frame. Hold left through the transition to avoid the fish and land on the platform to the left. Then reach the platform above either using a crouch-jump down-grab or by freezing the fish. Entrance condition: {
"comeInWithPlatformBelow": {
"maxHeight": 6,
"maxLeftPosition": -0.5,
"minRightPosition": 4.5
},
"comesThroughToilet": "yes"
}
Requires: "canCrossRoomJumpIntoWater"
"canTrickyJump"
{
"or": [
"h_canCrouchJumpDownGrab",
"canUseFrozenEnemies"
]
}
|
|
From: 2
Bottom Right Door
To: 3
Middle Right Door
Only requires a runway of one tile in the adjacent room. Bomb boost through the doorway, then use spring ball to get to the bottom left ledge. To avoid hitting the Skultera, place the bomb a few pixels from the doorway. One way to setup the positioning of the bomb is to place it, unmorph, rotate, and remorph Entrance condition: {
"comeInWithBombBoost": {}
}
Requires: "canSpringBallBombJump"
"canCrossRoomJumpIntoWater"
{
"or": [
"Gravity",
"HiJump",
"canSpringBallJumpMidAir",
"h_canCrouchJumpDownGrab"
]
}
|
|
From: 4
Top Right Door
To: 6
Speed Blocked Item
Notable: true 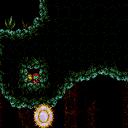
Overloading the PLMs can be done with as few as 2 PBs if they are placed precisely. Place them two ledges above the item - to the left of the morph tunnel item. It is important that they are placed on either of the flat tiles, not the sloped tile on the right. Afterwards, freeze a crab on the edge of the speed blocks, such that Samus can jump inside and stand on the crab. Exit G-Mode and rotate to obtain the item, then kill the crab with Wave Beam to fall back down. Entrance condition: {
"comeInWithGMode": {
"mode": "direct",
"morphed": true
}
}
Requires: {
"or": [
"Gravity",
{
"and": [
"canSuitlessMaridia",
"canCrouchJump"
]
}
]
}
"canTrickyUseFrozenEnemies"
"Wave"
"h_canArtificialMorphPowerBomb"
"h_canArtificialMorphPowerBomb"
|
|
Requires: "Gravity"
{
"or": [
"HiJump",
"canWalljump",
"h_canFly",
"canSpringBallJumpMidAir",
"h_canCrouchJumpDownGrab",
"canGravityJump"
]
}
|
|
From: 9
Junction Below Speed Blocks
To: 4
Top Right Door
Be sure not to get the first downward moving crab on screen until Samus is in position to quickly and accurately shoot and freeze it. This is much tighter with spring ball relative to HiJump. Performing a max height spring ball jump from the frozen crab can get Samus to the next ledge. Getting to the ledge with the fish is particularly precise. Either stand at the very edge of the platform and perform a very precise max heigh spring ball jump, or stand against the left wall and and perform a slightly less tight stationary lateral morph into spring ball jump. Requires: "canSuitlessMaridia"
"canTrickyUseFrozenEnemies"
"canTrickySpringBallJump"
"canDodgeWhileShooting"
{
"or": [
"canInsaneJump",
{
"and": [
"Spazer",
"Wave"
]
},
"h_canMaxHeightSpringBallJump",
"Plasma"
]
}
{
"or": [
"h_canMaxHeightSpringBallJump",
"canStationaryLateralMidAirMorph"
]
}
|
|
From: 9
Junction Below Speed Blocks
To: 4
Top Right Door
The first crab, coming down, is a bit tricky to freeze fast enough without any other beams or a missile. Prevent it from coming on screen until Samus is in position to hit it accurately. The global crab coming up can be used as a backup if the speed blocks are not broken. Requires: "canSuitlessMaridia"
"HiJump"
"canTrickyUseFrozenEnemies"
{
"or": [
"h_canCrouchJumpDownGrab",
{
"obstaclesNotCleared": [
"A"
]
}
]
}
|
|
Requires: "h_canNavigateUnderwater"
{
"or": [
"Gravity",
{
"obstaclesNotCleared": [
"A"
]
},
{
"enemyDamage": {
"enemy": "Kame (Tatori)",
"type": "contact",
"hits": 1
}
}
]
}
{
"or": [
"Gravity",
"HiJump",
"canSpringBallJumpMidAir",
"h_canCrouchJumpDownGrab",
"canUseEnemies"
]
}
|
|
Requires: "canSuitlessMaridia"
"canCarefulJump"
{
"or": [
"HiJump",
"Morph"
]
}
{
"or": [
"HiJump",
"canSpringBallJumpMidAir",
"h_canCrouchJumpDownGrab",
"canUseEnemies"
]
}
|
|
Time a pause before jumping to give a significant momentum boost in order to reach the Grapple Block. Requires: "h_canMaxHeightSpringBallJump" "canSpringFling" Clears obstacles: B |
|
From: 1
Top Left Door
To: 9
Spawn At Junction Below Top Door
Notable: true .png)
.gif)
Crouch on the lowest stair, then shinespark horizontally to bonk at the top corner of the grapple block. Down grab to get onto it. Entrance condition: {
"comeInShinecharged": {
"framesRequired": 110
}
}
Requires: "canSuitlessMaridia"
"h_canCrouchJumpDownGrab"
"canHorizontalShinespark"
{
"shinespark": {
"frames": 56,
"excessFrames": 0
}
}
|
|
Near the bottom left door, there are three pathways upwards: one directly above the door and two to the right. Between the right pathways, is a crab moving to the right. Shooting a super against the wall will make it fall off and move left. Climb the crab up the left wall. Watch out for the crab above that is heading into the morph tunnel. Jump to the right platform before the upward crab goes into the tunnel. Lure the crab out of the hole by running to the right of the hill then back left or use moonwalk to scroll the camera. Near the end is particularly tricky. When the crab is on the underside of the metal blocks, freeze it and use it as a stepping platform. To do this, crouch jump and while moving upwards, hold left against the crab to get extra vertical movement. Down grabbing at the top is helpful. Requires: "canSuitlessMaridia"
"canCrazyCrabClimb"
"canTrickyJump"
"h_canCrouchJumpDownGrab"
"canCameraManip"
{
"ammo": {
"type": "Super",
"count": 1
}
}
|
|
From: 2
Bottom Left Door
To: 7
Lower Hills Junction
Notable: true 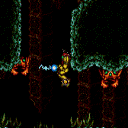
Position 2 Scisors so that they can each be used for a Bomb-Grapple-Jump, back to back. This gives a total of 3 jumps to climb from the bottom of Everest up to one of the lower peaks. In the likely event of failure, the room will need to be reset and the crabs repositioned for the next attempt. Requires: "h_canNavigateUnderwater" "canBombGrappleJump" "h_canCrouchJumpDownGrab" |
|
From: 2
Bottom Left Door
To: 7
Lower Hills Junction
Stand on higher ground on the right side and face left. Crouch jump and immediately press left (almost simultaneously) to avoid bonking the ceiling. Requires: "Gravity" "h_canCrouchJumpDownGrab" "canTrickyJump" |
|
From: 2
Bottom Left Door
To: 8
Higher Hill Junction
Standing on the platform in the room below, crouch jump and perform a spring ball jump mid-air just before reaching the transition. Entrance condition: {
"comeInWithPlatformBelow": {
"minHeight": 10,
"maxHeight": 10,
"maxLeftPosition": 2,
"minRightPosition": -2
},
"comesThroughToilet": "any"
}
Requires: "canCrossRoomJumpIntoWater" "canCrouchJump" "canSpringBallJumpMidAir" |
|
Requires: "canSuitlessMaridia"
{
"or": [
"HiJump",
{
"and": [
"canTrickySpringBallJump",
{
"or": [
"canCrouchJump",
"canSpringFling",
"canStationaryLateralMidAirMorph"
]
}
]
}
]
}
|
|
From: 10
Upper Right Ledge Junction
To: 4
Top Right Door
Crouch at the edge of the overhang. Jump and just after the peak of the jump, grapple to the grapple blocks. This strat is finicky, and failure doesn't usually allow a second try (assuming the Powamp is not there). This is possible to do without a crouch jump, but it is much harder. Requires: "canSuitlessMaridia"
"canPreciseGrapple"
{
"or": [
"canCrouchJump",
"canTrickyJump"
]
}
|
|
From: 2
Bottom Door
To: 3
Bottom Right Ledge
Standing on the platform in the room below, crouch jump up through the door transition, then down-grab onto the platform. Entrance condition: {
"comeInWithPlatformBelow": {
"minHeight": 7,
"maxHeight": 7,
"maxLeftPosition": 1,
"minRightPosition": -1.5
},
"comesThroughToilet": "any"
}
Requires: "canCrossRoomJumpIntoWater" "h_canCrouchJumpDownGrab" |
|
From: 2
Bottom Door
To: 3
Bottom Right Ledge
Standing on the platform in the room below, jump up through the door. Either a crouch jump or a down grab (or both) must be used to make it onto the ledge. Entrance condition: {
"comeInWithPlatformBelow": {
"minHeight": 10,
"maxHeight": 10,
"maxLeftPosition": 1,
"minRightPosition": 0
},
"comesThroughToilet": "any"
}
Requires: "canCrossRoomJumpIntoWater"
"HiJump"
{
"or": [
"canCrouchJump",
"canDownGrab"
]
}
|
|
From: 2
Bottom Left Door
To: 7
Top Right Left Item
Notable: true 
PLMs can be overloaded in direct G-Mode with a single Power Bomb if both items are still there and 2 PBs if only one item is. There is a row of tiles that works, just above and to the left of the right door. The row is one tile higher than the horizontal pipe that is part of the door frame, spanning from the left to one tile away from the right wall. Entrance condition: {
"comeInWithGMode": {
"mode": "direct",
"morphed": true
}
}
Requires: {
"or": [
{
"itemNotCollectedAtNode": 7
},
{
"itemNotCollectedAtNode": 8
}
]
}
"h_canArtificialMorphSpringBall"
"h_canArtificialMorphPowerBomb"
"h_canArtificialMorphPowerBomb"
"h_canNavigateUnderwater"
"canSnailClimb"
{
"or": [
"Gravity",
{
"and": [
"HiJump",
{
"or": [
"canCrouchJump",
"canDownGrab"
]
}
]
}
]
}
|
|
From: 2
Bottom Left Door
To: 7
Top Right Left Item
Notable: true
PLMs can be overloaded in direct G-Mode with a single Power Bomb if both items are still there and 2 PBs if only one item is. There is a row of tiles that works, just above and to the left of the right door. The row is one tile higher than the horizontal pipe that is part of the door frame, spanning from the left to one tile away from the right wall. Entrance condition: {
"comeInWithGMode": {
"mode": "direct",
"morphed": false
}
}
Requires: {
"or": [
{
"itemNotCollectedAtNode": 7
},
{
"itemNotCollectedAtNode": 8
}
]
}
"h_canUsePowerBombs"
"h_canUsePowerBombs"
"h_canNavigateUnderwater"
"canSnailClimb"
{
  "or": [
    "Gravity",
    "h_canMaxHeightSpringBallJump",
    {
      "and": [
        "HiJump",
        {
          "or": [
            "canCrouchJump",
            "canDownGrab"
          ]
        }
      ]
    }
  ]
}
|
|
From: 5
Right Door
To: 7
Top Right Left Item
Notable: true
PLMs can be overloaded in direct G-Mode with a single Power Bomb if both items are still there and 2 PBs if only one item is. There is a row of tiles that works, just above and to the left of the right door. The row is one tile higher than the horizontal pipe that is part of the door frame, spanning from the left to one tile away from the right wall. Entrance condition: {
"comeInWithGMode": {
"mode": "direct",
"morphed": true
}
}
Requires: {
"or": [
{
"itemNotCollectedAtNode": 7
},
{
"itemNotCollectedAtNode": 8
}
]
}
"h_canArtificialMorphSpringBall"
"h_canArtificialMorphPowerBomb"
"h_canArtificialMorphPowerBomb"
"h_canNavigateUnderwater"
"canSnailClimb"
{
"or": [
"Gravity",
{
"and": [
"HiJump",
{
"or": [
"canCrouchJump",
"canDownGrab"
]
}
]
}
]
}
|
|
From: 5
Right Door
To: 7
Top Right Left Item
Notable: true
PLMs can be overloaded in direct G-Mode with a single Power Bomb if both items are still there and 2 PBs if only one item is. There is a row of tiles that works, just above and to the left of the right door. The row is one tile higher than the horizontal pipe that is part of the door frame, spanning from the left to one tile away from the right wall. Entrance condition: {
"comeInWithGMode": {
"mode": "direct",
"morphed": false
}
}
Requires: {
"or": [
{
"itemNotCollectedAtNode": 7
},
{
"itemNotCollectedAtNode": 8
}
]
}
"h_canUsePowerBombs"
"h_canUsePowerBombs"
"h_canNavigateUnderwater"
"canSnailClimb"
{
"or": [
"Gravity",
"h_canMaxHeightSpringBallJump",
{
"and": [
"HiJump",
{
"or": [
"canCrouchJump",
"canDownGrab"
]
}
]
}
]
}
|
|
From: 6
Top Door
To: 7
Top Right Left Item
Notable: true
PLMs can be overloaded in direct G-Mode with a single Power Bomb if both items are still there and 2 PBs if only one item is. There is a row of tiles that works, just above and to the left of the right door. The row is one tile higher than the horizontal pipe that is part of the door frame, spanning from the left to one tile away from the right wall. Entrance condition: {
"comeInWithGMode": {
"mode": "direct",
"morphed": true
},
"comesThroughToilet": "no"
}
Requires: {
"or": [
{
"itemNotCollectedAtNode": 7
},
{
"itemNotCollectedAtNode": 8
}
]
}
"h_canArtificialMorphSpringBall"
"h_canArtificialMorphPowerBomb"
"h_canArtificialMorphPowerBomb"
"h_canNavigateUnderwater"
"canSnailClimb"
{
"or": [
"Gravity",
{
"and": [
"HiJump",
{
"or": [
"canCrouchJump",
"canDownGrab"
]
}
]
}
]
}
|
|
From: 6
Top Door
To: 7
Top Right Left Item
Notable: true
PLMs can be overloaded in direct G-Mode with a single Power Bomb if both items are still there and 2 PBs if only one item is. There is a row of tiles that works, just above and to the left of the right door. The row is one tile higher than the horizontal pipe that is part of the door frame, spanning from the left to one tile away from the right wall. Entrance condition: {
"comeInWithGMode": {
"mode": "direct",
"morphed": false
},
"comesThroughToilet": "no"
}
Requires: {
"or": [
{
"itemNotCollectedAtNode": 7
},
{
"itemNotCollectedAtNode": 8
}
]
}
"h_canUsePowerBombs"
"h_canUsePowerBombs"
"h_canNavigateUnderwater"
"canSnailClimb"
{
"or": [
"Gravity",
"h_canMaxHeightSpringBallJump",
{
"and": [
"HiJump",
{
"or": [
"canCrouchJump",
"canDownGrab"
]
}
]
}
]
}
|
|
Crouch on rightmost pixel of the ledge to the left of the door, jump then move over quickly without spin jumping. Requires: "canCrouchJump" "canTrickyJump" |
|
From: 11
G-Mode Overloaded PLMs Junction (By Bottom Left Door)
To: 7
Top Right Left Item
After PLMs are overloaded, use a snail to help climb to the top right items. Requires: "canSnailClimb"
{
"or": [
"Gravity",
"h_canMaxHeightSpringBallJump",
{
"and": [
"HiJump",
{
"or": [
"canCrouchJump",
"canDownGrab"
]
}
]
}
]
}
|
|
From: 1
Left Door
To: 5
Item
Notable: true 
Lure a Puyo close to the sand and use it to Bomb-Grapple-Jump up to the Morph Ball maze. It helps to predict the jump pattern of the enemy. Requires: "canSuitlessMaridia" "canBombGrappleJump" "canCrouchJump" |
|
From: 4
Right Door
To: 6
Junction Right of Morph Passage
Use the respawning Zoas to double jump up to the Morph Ball maze. Requires: "canSuitlessMaridia" "h_canCrouchJumpDownGrab" "canBombGrappleJump" |
|
From: 1
Bottom Left Door
To: 2
Right Door
Find the crumble blocks and crystal flash mid-air, just below them. They are on the far right of the ceiling of the bottom right pathway. Hold down as the CF ends to break the non-respawning crumble blocks. This is for the much harder version, without Gravity and Bombs. Requires: "h_canJumpIntoCrystalFlashClip"
"canSuitlessMaridia"
{
"or": [
"HiJump",
"canSpringBallJumpMidAir",
{
"and": [
"h_canCrouchJumpDownGrab",
"canCarefulJump"
]
},
"canUseFrozenEnemies"
]
}
|
|
From: 2
Right Door
To: 1
Bottom Left Door
Notable: true 
Crouch under the crumble blocks while aiming upward, using both angle buttons then freeze the Mochtroid while it is on Samus. Jump onto the Mochtroid by quickly pressing down after jumping, when on it, press up to stand then jump through the ceiling. With no jump assists, use a frozen Mochtroid as a platform to get to the ledge above the door. Requires: "h_canNavigateUnderwater"
"canCeilingClip"
"canUseFrozenEnemies"
{
"or": [
{
"and": [
"h_canCrouchJumpDownGrab",
"canTrickyJump"
]
},
"HiJump",
"Gravity",
"canSpringBallJumpMidAir"
]
}
|
|
From: 2
Right Door
To: 1
Bottom Left Door
Find the crumble blocks and crystal flash mid-air, just below them. They are on the far left of the ceiling of the middle left pathway. Hold down as the CF ends to break the non-respawning crumble blocks. This is for the much harder version, without Gravity and Bombs. Requires: "h_canJumpIntoCrystalFlashClip"
"canSuitlessMaridia"
{
"or": [
{
"and": [
"h_canCrouchJumpDownGrab",
"canTrickyJump"
]
},
"HiJump",
"Gravity",
"canSpringBallJumpMidAir"
]
}
|
|
Requires: "h_canNavigateUnderwater"
{
"or": [
{
"and": [
"h_canCrouchJumpDownGrab",
"canTrickyJump"
]
},
"HiJump",
"Gravity",
"canSpringBallJumpMidAir"
]
}
Exit condition: {
"leaveWithGModeSetup": {
"knockback": false
}
}
|
|
Notable: true Stay out of the water, and by extension the sand, of Colosseum by using the spikes as platforms. Morphing before landing on the spikes helps to be able to control the knockback. The final spike jump (which would be the most difficult) is avoided by doing a crouch jump into spring ball jump into IBJ to reach the left door. Perform the spring ball jump near max height. Place the first bomb between about 4 and 6 frames after the spring ball jump; ideally it should be just above the water line. Press pause between about 5 and 10 frames after placing the bomb, to disable Spring Ball (a 'spring fling', to reset fall speed). Place the second bomb soon after regaining control, while the game is fading back in. Requires: "HiJump"
"canPreciseWalljump"
"canIframeSpikeJump"
{
"spikeHits": 2
}
"canNeutralDamageBoost"
{
"or": [
"canHorizontalDamageBoost",
{
"spikeHits": 1
}
]
}
"h_canMaxHeightSpringBallJump"
{
"or": [
"canSpringFling",
"canInsaneJump"
]
}
"canBombJumpWaterEscape"
"h_canJumpIntoIBJ"
|
|
Entrance condition: {
"comeInShinecharged": {
"framesRequired": 60
}
}
Requires: "h_canNavigateUnderwater"
{
"shinespark": {
"frames": 40,
"excessFrames": 6
}
}
{
"or": [
"canCrouchJump",
"Gravity",
"HiJump",
"canSpringBallJumpMidAir",
{
"and": [
"canTrickyUseFrozenEnemies",
{
"ammo": {
"type": "Super",
"count": 1
}
}
]
}
]
}
|
|
Notable: true 
Freeze a crab multiple times to climb the upper Crab Shaft. It may be easier to climb the left shaft by knocking the crab off the wall, or by bringing up a crab from the lower area. Requires: "h_canNavigateUnderwater"
"canTrickyUseFrozenEnemies"
"canCarefulJump"
{
"or": [
"canCrouchJump",
"Gravity",
"HiJump",
"canSpringBallJumpMidAir",
{
"ammo": {
"type": "Super",
"count": 1
}
}
]
}
|
|
Requires around 19 tiles in the adjacent room. Entrance condition: {
"comeInJumping": {
"speedBooster": true,
"minTiles": 19
}
}
Requires: "canCrossRoomJumpIntoWater"
"canMomentumConservingTurnaround"
{
"or": [
"canCrouchJump",
"Gravity",
"HiJump",
"canSpringBallJumpMidAir",
{
"and": [
"canTrickyUseFrozenEnemies",
{
"ammo": {
"type": "Super",
"count": 1
}
}
]
}
]
}
|
|
Requires running a very precise distance of 12 tiles in the adjacent room. Entrance condition: {
"comeInJumping": {
"speedBooster": true,
"minTiles": 12
}
}
Requires: "canCrossRoomJumpIntoWater"
"canMomentumConservingTurnaround"
"canTrickyDashJump"
"canDownGrab"
{
"or": [
"canCrouchJump",
"Gravity",
"HiJump",
"canSpringBallJumpMidAir",
{
"and": [
"canTrickyUseFrozenEnemies",
{
"ammo": {
"type": "Super",
"count": 1
}
}
]
}
]
}
|
|
After storing the shinecharge, spin jump back to the left and spark aligned against the right side of the left shaft. At the top of the room, hold right in order to land on the platform below the door. Entrance condition: {
"comeInRunning": {
"speedBooster": true,
"minTiles": 2
}
}
Requires: "canStutterWaterShineCharge"
"canShinechargeMovementComplex"
{
"canShineCharge": {
"usedTiles": 33,
"openEnd": 2
}
}
{
"shinespark": {
"frames": 40,
"excessFrames": 6
}
}
{
"or": [
"canCrouchJump",
"Gravity",
"HiJump",
"canSpringBallJumpMidAir",
{
"and": [
"canTrickyUseFrozenEnemies",
{
"ammo": {
"type": "Super",
"count": 1
}
}
]
}
]
}
|
|
Notable: true
Freeze a crab below the opening, and another one at the ceiling on the lip of the entrance. Stand on a frozen crab and crouch jump to the one on the ceiling. When against the top crab, press into it to be pushed up onto it. Requires: "canSuitlessMaridia" "canTrickyUseFrozenEnemies" "canCrouchJump" |
|
Requires: "canSuitlessMaridia"
"HiJump"
{
"or": [
"h_canCrouchJumpDownGrab",
"canSpringBallJumpMidAir",
"canUseFrozenEnemies"
]
}
|
|
Requires: "canSuitlessMaridia"
"canSpringBallJumpMidAir"
{
"or": [
"h_canMaxHeightSpringBallJump",
"HiJump",
"canUseFrozenEnemies"
]
}
|
|
From: 2
Right Door
To: 3
Top Door
Entrance condition: {
"comeInWithGrappleTeleport": {
"blockPositions": [
[
5,
3
]
]
}
}
Requires: "canCrouchJump" |
|
Requires: "h_canCrystalFlash" "canCrouchJump" |
|
From: 2
Right Door
To: 4
Top Right Ledge Junction
There is just enough distance for a MidAir SpringBall jump to reach without HiJump. Requires: "Gravity"
"canSpringBallJumpMidAir"
{
"or": [
"HiJump",
{
"and": [
"h_canMaxHeightSpringBallJump",
"canSpringFling"
]
}
]
}
|
|
From: 2
Right Door
To: 4
Top Right Ledge Junction
SpringBall jump just as Samus exits the water to reach the distant ledge. To get enough horizontal distance, either use a Stationary Lateral Mid-Air Morph with a crouch jump for extra height, or spin jump out before morphing. Or SpringBall jump part of the way over and land on a Bomb explosion to cross the rest of the distance. Requires: "canSuitlessMaridia"
"HiJump"
"h_canMaxHeightSpringBallJump"
"canTrickyJump"
{
"or": [
"canStationaryLateralMidAirMorph",
{
"and": [
"canJumpIntoIBJ",
"h_canBombHorizontally"
]
}
]
}
|
|
Cacatac Alley HiJumpless Double SpringBall Jump and Bomb-Grapple-Jump (Beyond)
East Cactus Alley Room
From: 5
Bottom Middle Junction
To: 4
Top Right Ledge Junction
Notable: true 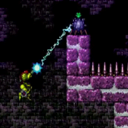
1) Crouch jump and then SpringBall jump. 2) Bomb-Grapple-Jump using the distant Cacatac who is above the water. 3) SpringBall jump again just as Samus exits the water. Requires: "canBombGrappleJump" "canDoubleSpringBallJumpMidAir" "h_canMaxHeightSpringBallJump" |
|
From: 6
East Cactus Alley Junction (Right of Morph Tunnel)
To: 5
Bottom Middle Junction
Requires: "canSuitlessMaridia"
{
"or": [
{
"spikeHits": 1
},
"canSpringBallJumpMidAir",
{
"and": [
"HiJump",
{
"or": [
"canWalljump",
"h_canCrouchJumpDownGrab",
"canSpaceJumpWaterEscape"
]
}
]
},
{
"and": [
"h_canIBJ",
"canBombJumpWaterEscape"
]
}
]
}
{
"or": [
{
"spikeHits": 1
},
"HiJump"
]
}
|
|
From: 1
Top Sand Entrance
To: 3
Top Left Item
Notable: true 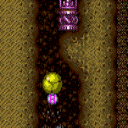

Reach the left side item using a single bomb explosion barely reach it. Use HiJump to reach the water line and then use a Bomb Jump Water Escape motion to Bomb jump out of the water. Do not Morph until fully out of the water to place the Bomb with the correct height. And do not place the Bomb at the max possible height, but a little lower where it will bounce Samus higher. Requires: "canSuitlessMaridia" "HiJump" "canPlayInSand" "h_canCrouchJumpDownGrab" "canBombJumpWaterEscape" |
|
It's possible to get out of the sand suitless and without HiJump after falling from the chute, by hugging the left side and moving quickly. Requires: "canSuitlessMaridia"
"canPlayInSand"
{
"or": [
{
"and": [
"h_canMaxHeightSpringBallJump",
{
"or": [
"canWalljump",
"can4HighMidAirMorph",
"h_canJumpIntoIBJ"
]
}
]
}
]
}
|
|
Requires: "canSuitlessMaridia"
"HiJump"
{
"or": [
"canPlayInSand",
{
"and": [
"canPrepareForNextRoom",
"h_canUseSpringBall"
]
}
]
}
{
"or": [
{
"and": [
{
"or": [
"canWalljump",
"canSpaceJumpWaterEscape"
]
},
{
"or": [
"h_canCrouchJumpDownGrab",
"canSunkenTileWideWallClimb"
]
}
]
},
"canSpringBallJumpMidAir",
{
"and": [
"h_canCrouchJumpDownGrab",
"canBombJumpWaterEscape",
"h_canIBJ"
]
}
]
}
|
|
From: 1
Top Left Door
To: 1
Top Left Door
Position near the edge of the ledge, crouch jump out into a mid-air morph, and press left against the wall. Unmorph while approaching the peak of the jump (an 8-frame window), then use Grapple immediately (a 2-frame window) to get stuck standing a pixel or two inside the first Grapple block above the door. Then jump (to force crouch), angle down, and grapple. Samus will enter a 'glitched grapple hanging' state where Samus' graphics will appear corrupted while swinging with Grapple. Swing down, and hold left while approaching the door to trigger the transition. To avoid heavy lag, hold down through the entire swing. Continue holding Grapple through the door transition to initiate a teleport in the next room. If needing to stand up in the next room (e.g. for an X-Ray climb), then enter the transition while swinging slowly, e.g. after coming to a stop directly below the block. If needing to transition at horiziontal position 21 (as far right as possible), then additionally roll from pressing left to pressing diagonally up-left just before the transition. The game may lag heavily if Samus enters a retracted position; if this happens, hold down to extend Grapple again. Requires: "Gravity" "canCrouchJump" "canUnmorphGrappleHang" Exit condition: {
"leaveWithGrappleTeleport": {
"blockPositions": [
[
2,
18
]
]
}
}
|
|
SpringBall jump just as Samus exits the water to reach the distant ledge. A Crouch jump makes the SpringBall jump easier, but at the cost of some horizontal movement. Requires: "canSuitlessMaridia" "HiJump" "canTrickyJump" "h_canMaxHeightSpringBallJump" "canStationaryLateralMidAirMorph" |
|
From: 2
Bottom Left Door
To: 2
Bottom Left Door
Align against the wall, then crouch jump into a mid-air morph. Unmorph while approaching the peak of the jump (an 8-frame window), then use Grapple immediately (a 2-frame window) to get stuck standing a pixel or two inside the first Grapple block above the door. Then jump (to force crouch), angle down, and grapple. Samus will enter a 'glitched grapple hanging' state where Samus' graphics will appear corrupted while swinging with Grapple. Swing down, and hold left while approaching the door to trigger the transition. To avoid heavy lag, hold down through the entire swing. Continue holding Grapple through the door transition to initiate a teleport in the next room. If needing to stand up in the next room (e.g. for an X-Ray climb), then enter the transition while swinging slowly, e.g. after coming to a stop directly below the block. If needing to transition at horiziontal position 21 (as far right as possible), then additionally roll from pressing left to pressing diagonally up-left just before the transition. The game may lag heavily if Samus enters a retracted position; if this happens, hold down to extend Grapple again. Requires: "Gravity" "canCrouchJump" "canUnmorphGrappleHang" Exit condition: {
"leaveWithGrappleTeleport": {
"blockPositions": [
[
2,
34
]
]
}
}
|
|
Requires: "Gravity"
{
"or": [
"h_canCrouchJumpDownGrab",
"canUseFrozenEnemies",
"canGravityJump",
"canWalljump",
"HiJump",
"canSpringBallJumpMidAir",
"h_canFly",
"h_canSpringBallBombJump"
]
}
|
|
From: 1
Bottom Left Door
To: 2
Top Right Door
Requires: "canSuitlessMaridia" "canUseFrozenEnemies" "canTrickySpringBallJump" "canCrouchJump" |
|
From: 1
Top Sand Entrance
To: 7
Below Morph Tunnel Junction
Get to the left side of the room while avoiding the hole in the ground, jump up through the Morph tunnel. Jump up to the ledge with either Gravity, HiJump and a Crouch Jump Down Grab, or a maximum height Spring Ball Jump. Entrance condition: {
"comeInWithGMode": {
"mode": "any",
"morphed": false
},
"comesThroughToilet": "any"
}
Requires: "Morph"
{
"or": [
"Gravity",
{
"and": [
"canSuitlessMaridia",
"HiJump",
"h_canCrouchJumpDownGrab"
]
},
{
"and": [
"canSuitlessMaridia",
"h_canMaxHeightSpringBallJump"
]
}
]
}
|
|
From: 1
Top Sand Entrance
To: 7
Below Morph Tunnel Junction
HiJump with a good jump from the sand can reach the Solid Rock Maze region. Use the sandfall if Samus gets stuck in the sand. Bouncing on the sand as springball can reach the above maze by altering Samus' fall height, like by bouncing under the solid ledge before trying to jump up. Requires: "canSuitlessMaridia"
{
"or": [
"canPrepareForNextRoom",
"canPlayInSand"
]
}
"HiJump"
"h_canMaxHeightSpringBallJump"
|
|
Escape by wall jumping when the water is low or using a crouch jump and down grab when it's high. Requires: "canSuitlessMaridia"
"canCarefulJump"
{
"or": [
"canWalljump",
"h_canCrouchJumpDownGrab",
"canTrickySpringBallJump"
]
}
{
"doorUnlockedAtNode": 1
}
|
|
Escape by wall jumping when the water is low or using a crouch jump and down grab when it's high. Requires: "canSuitlessMaridia"
{
"ammo": {
"type": "Super",
"count": 1
}
}
{
"or": [
"canWalljump",
"h_canCrouchJumpDownGrab",
"canTrickySpringBallJump"
]
}
{
"doorUnlockedAtNode": 1
}
|
|
Escape by wall jumping when the water is low or using a crouch jump and down grab when it's high. Requires: "canSuitlessMaridia"
"canCarefulJump"
{
"or": [
"canWalljump",
"h_canCrouchJumpDownGrab",
"canTrickySpringBallJump"
]
}
{
"doorUnlockedAtNode": 3
}
|
|
From: 5
Junction Below Right Door
To: 3
Right Door
Escape by wall jumping when the water is low or using a crouch jump and down grab when it's high. Requires: "canSuitlessMaridia"
{
"ammo": {
"type": "Super",
"count": 1
}
}
{
"or": [
"canWalljump",
"h_canCrouchJumpDownGrab",
"canTrickySpringBallJump"
]
}
{
"doorUnlockedAtNode": 3
}
|
|
From: 1
Left Door
To: 2
Right Door
It is possible to get out of the sand with nothing. While holding down, crouch jump then press forward diagonal to clip into the wall enough to jump out. Requires: "canSuitlessMaridia" "h_canCrouchJumpDownGrab" "canEscapeSand" |
|
From: 2
Right Door
To: 1
Left Door
It is possible to get out of the sand with nothing. While holding down, crouch jump then press forward diagonal to clip into the wall enough to jump out. Requires: "canSuitlessMaridia" "h_canCrouchJumpDownGrab" "canEscapeSand" |
|
Requires: {
"or": [
"HiJump",
"h_canFly",
"canWalljump",
"h_canCrouchJumpDownGrab",
"canSpringBallJumpMidAir"
]
}
|
|
From: 2
Bottom Right Door
To: 1
Left Vertical Door
Requires: "canSuitlessMaridia" "HiJump" "canCarefulJump" "canTrickyUseFrozenEnemies" "h_canCrouchJumpDownGrab" |
|
Requires: "canSuitlessMaridia"
"HiJump"
"canSpringBallJumpMidAir"
{
"or": [
"h_canCrouchJumpDownGrab",
"canTrickySpringBallJump",
"canWalljump"
]
}
|
|
From: 2
Bottom Right Door
To: 3
Middle Right Door
Notable: true 
Use the Skultera to get onto the top right platform. There are two distinct ways to get up using the top Skultera. 1. Freeze it at the bottom of its path to the left. Crouch jump and down grab to get onto it. The positioning is very precise. 2. Freeze it about a half-tile from the right wall and very quickly stationary spin jump and quickly walljump mash to get up before it thaws. This may be easier by jumping away from the wall, towards the fish, to gain height faster. Requires: "canSuitlessMaridia"
"canTrickyUseFrozenEnemies"
{
"or": [
{
"and": [
"canTrickyJump",
"h_canCrouchJumpDownGrab"
]
},
{
"and": [
"canStationarySpinJump",
"canSunkenTileWideWallClimb"
]
}
]
}
|
|
Requires: "Gravity"
{
"or": [
"HiJump",
"canWalljump",
"h_canFly",
"SpeedBooster",
"h_canCrouchJumpDownGrab",
"canSpringBallJumpMidAir",
"canGravityJump"
]
}
|
|
From: 2
Bottom Door
To: 4
Water Level Junction
Standing on the platform in the room below, crouch jump up and press right against the door frame through the transition. Entrance condition: {
"comeInWithPlatformBelow": {
"minHeight": 10,
"maxHeight": 10,
"maxLeftPosition": 1,
"minRightPosition": 2
},
"comesThroughToilet": "no"
}
Requires: "canCrossRoomJumpIntoWater" "HiJump" "canCrouchJump" |
|
From: 2
Bottom Door
To: 4
Water Level Junction
Standing on the platform in the room below, jump up (crouch jump makes it easier) and press right against the door frame through the transition. After the transition, perform a spring ball jump mid-air to reach the ledge. Entrance condition: {
"comeInWithPlatformBelow": {
"minHeight": 7,
"maxHeight": 7,
"maxLeftPosition": 1,
"minRightPosition": 1
},
"comesThroughToilet": "no"
}
Requires: "canCrossRoomJumpIntoWater"
"canTrickySpringBallJump"
{
"or": [
"canCrouchJump",
"canTrickyJump"
]
}
|
|
From: 2
Bottom Door
To: 4
Water Level Junction
The fish can safely be damaged from the door until they are ready to be used as platforms. Requires: "h_canNavigateUnderwater"
"canUseFrozenEnemies"
{
"or": [
"canTrickyUseFrozenEnemies",
"HiJump",
"canSpringBallJumpMidAir",
"Gravity",
"h_canCrouchJumpDownGrab"
]
}
|
|
From: 4
Water Level Junction
To: 1
Left Door
Crouch jump + down grab only works as a way out of the water on the right side. Requires: "canSuitlessMaridia" "h_canCrouchJumpDownGrab" "canTrickyJump" |
|
Getting out with only Gravity and no wall jump requires a tight crouch jump and down grab while above the water: Position very close to the edge, and press forward immediately after crouch jumping (almost simultaneously). Requires: "Gravity" "canTrickyJump" "h_canCrouchJumpDownGrab" |
|
Requires: "canSuitlessMaridia"
"HiJump"
{
"or": [
"canWalljump",
"h_canCrouchJumpDownGrab"
]
}
|
|
This is a max height springball jump. Requires: "canSuitlessMaridia" "h_canMaxHeightSpringBallJump" |
|
From: 1
Left Door
To: 3
Junction Below Right Door
It is recommended to shoot the ceiling block immediately upon room entry to bring one of the Puyos down so that it will not be a problem later. Requires: "canSuitlessMaridia"
"h_canMaxHeightSpringBallJump"
{
"or": [
"can4HighMidAirMorph",
"canStationaryLateralMidAirMorph",
{
"and": [
"canNeutralDamageBoost",
{
"enemyDamage": {
"enemy": "Puyo",
"type": "contact",
"hits": 2
}
}
]
}
]
}
|
|
Requires: "canSuitlessMaridia"
"HiJump"
{
"or": [
"canSpringBallJumpMidAir",
"h_canCrouchJumpDownGrab",
"canUseFrozenEnemies"
]
}
|
|
Involves breaking the top left Puyo free and then freezing it while it falls. Walk to the end of the door platform and wait for the above puyo to land on the shot block. It will float there until its next jump, where it will slowly descend. Requires: "canSuitlessMaridia"
"canTrickyUseFrozenEnemies"
{
"or": [
"h_canCrouchJumpDownGrab",
"canTwoTileSqueeze",
"Morph"
]
}
|
|
From: 4
Junction Below Sand Entrance
To: 2
Right Door
Notable: true .png)
.gif)
From the sand fall, quickly get onto the left platform to prevent the right side Evir from lowering too far. Jump on the sand to the right while freezing the Evir as high as possible. Refreeze the Evir so it is a slightly higher platform than the right pillar. Perform a spring ball jump with a stationary lateral mid-air morph from the left side of the current platform to get onto the Evir. Use a running jump off of the Evir. As a backup, it may be possible to make the Evir rise again by hitting it with a PB - place the PB in the air to avoid double hitting and killing it. Requires: "canSuitlessMaridia" "canTrickyUseFrozenEnemies" "canPlayInSand" "h_canMaxHeightSpringBallJump" "canStationaryLateralMidAirMorph" |
|
Requires: "canSuitlessMaridia"
{
"or": [
{
"and": [
"HiJump",
{
"or": [
"canDownGrab",
"canSpringBallJumpMidAir",
"canConsecutiveWalljump"
]
}
]
},
"h_canMaxHeightSpringBallJump"
]
}
|
|
From: 5
Junction Above Grapple Block
To: 2
East Leg Right Door
Notable: true Wait the water tide to reach its peak, then crouch jump into a spring ball jump into an IBJ. Perform the spring ball jump near max height. Place the first bomb between about 4 and 6 frames after the spring ball jump; ideally it should be just above the water line. Press pause between about 5 and 10 frames after placing the bomb, to disable Spring Ball (a 'spring fling', to reset fall speed). Place the second bomb soon after regaining control, while the game is fading back in. When close to the top, perform a spring ball jump to reach the ledge; release jump as soon as Samus is high enough to clear the ledge, in order to avoid taking a Menu hit. Requires: "HiJump" "h_canMaxHeightSpringBallJump" "canSpringFling" "canBombJumpWaterEscape" "canDoubleBombJump" "h_canJumpIntoIBJ" |
|
Entrance condition: {
"comeInWithGMode": {
"mode": "any",
"morphed": false
}
}
Requires: "h_canNavigateUnderwater"
{
"or": [
"canCarefulJump",
"h_canCrouchJumpDownGrab",
"HiJump",
"Gravity",
"canSpringBallJumpMidAir"
]
}
{
"or": [
"canCarefulJump",
{
"enemyDamage": {
"enemy": "Evir",
"type": "particle",
"hits": 1
}
}
]
}
|
|
Entrance condition: {
"comeInWithGMode": {
"mode": "any",
"morphed": false
},
"comesThroughToilet": "any"
}
Requires: "h_canNavigateUnderwater"
{
"or": [
"canCarefulJump",
"h_canCrouchJumpDownGrab",
"HiJump",
"Gravity",
"canSpringBallJumpMidAir"
]
}
{
"or": [
"canCarefulJump",
{
"enemyDamage": {
"enemy": "Evir",
"type": "particle",
"hits": 1
}
}
]
}
|
|
From: 4
Below Sand Entrance
To: 2
Right Door
Notable: true 
Perform multiple stationary lateral mid-air morphs, while avoiding the Evir projectiles, to cross the room. It is necessary to start the jumps from the far side of the platforms in order to gain more horizontal momentum before entering the sand falls. Falling into the sand will often result in a soft lock. Requires: "canSuitlessMaridia"
"canPlayInSand"
"h_canMaxHeightSpringBallJump"
"canStationaryLateralMidAirMorph"
{
"or": [
{
"enemyKill": {
"enemies": [
[
"Evir"
]
],
"explicitWeapons": [
"Super",
"Missile",
"PowerBombPeriphery",
"Plasma"
]
}
},
{
"enemyDamage": {
"enemy": "Evir",
"type": "particle",
"hits": 1
}
}
]
}
|
|
From: 4
Below Sand Entrance
To: 5
Left Pillar Junction
Notable: true
Perform multiple stationary lateral mid-air morphs, while avoiding the Evir projectiles, to cross the room. It is necessary to start the jumps from the far side of the platforms in order to gain more horizontal momentum before entering the sand falls. Falling into the sand will often result in a soft lock. Requires: "canSuitlessMaridia"
"canPlayInSand"
"h_canMaxHeightSpringBallJump"
{
"or": [
{
"enemyKill": {
"enemies": [
[
"Evir"
]
],
"explicitWeapons": [
"Super",
"Missile",
"PowerBombPeriphery",
"Plasma"
]
}
},
{
"enemyDamage": {
"enemy": "Evir",
"type": "particle",
"hits": 1
}
}
]
}
|
|
From: 4
Below Sand Entrance
To: 5
Left Pillar Junction
Notable: true .png)
.gif)
Use the projectile from a fully submerged Evir to boost Samus into the sandfall, providing just enough height to make the first and hardest jump. Time the projectile to hit Samus when at the maximum height from a jump. The hit must be on the right side of Samus and with no inputs held, but also hold forward during the damage knockback to move through the sandfall. Getting a good jump while on the right side of the next floating block can get Samus to the leftmost block. With a clean jump off of the sand, Samus can then get onto the final vertical pillar. Requires: "canSuitlessMaridia"
"canPlayInSand"
"canInsaneJump"
"canCrouchJump"
"canNeutralDamageBoost"
{
"enemyDamage": {
"enemy": "Evir",
"type": "particle",
"hits": 1
}
}
|
|
Fall into the sand and roll all the way to the left, through an invisible tile and under the door platform. Shoot upwards to break part of the platform, then perform a crouch jump and down grab or a tile-wide wall jump climb to escape. Requires: "canSuitlessMaridia"
"Morph"
{
"or": [
"canSunkenTileWideWallClimb",
"h_canCrouchJumpDownGrab"
]
}
|
|
From: 5
Left Pillar Junction
To: 4
Below Sand Entrance
Notable: true
Perform multiple stationary lateral mid-air morphs, while avoiding the Evir projectiles, to cross the room. It is necessary to start the jumps from the far side of the platforms in order to gain more horizontal momentum before entering the sand falls. Falling into the sand will often result in a soft lock. Requires: "canSuitlessMaridia" "canPlayInSand" "h_canMaxHeightSpringBallJump" "canStationaryLateralMidAirMorph" |
|
Requires: {
"or": [
"HiJump",
"SpaceJump",
"canWalljump",
"h_canCrouchJumpDownGrab",
"h_canJumpIntoIBJ",
"canSpringBallJumpMidAir"
]
}
{
"or": [
"canCarefulJump",
"ScrewAttack",
{
"enemyDamage": {
"enemy": "Tourian Space Pirate (all)",
"type": "contact",
"hits": 1
}
}
]
}
Clears obstacles: A |