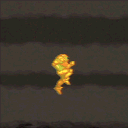
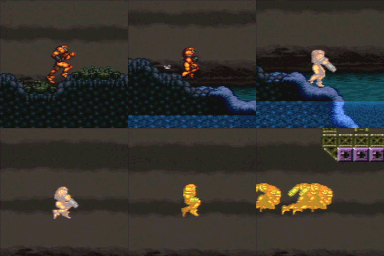
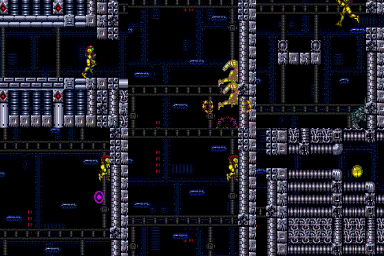
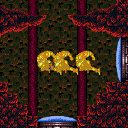
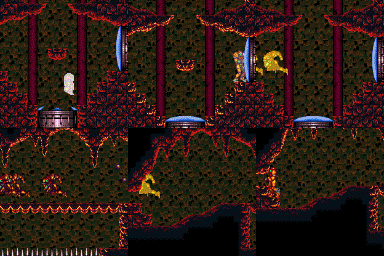
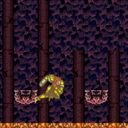
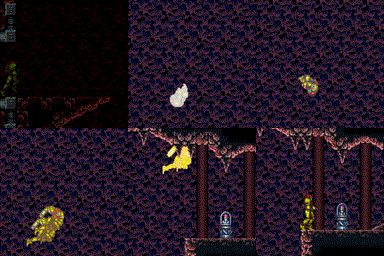
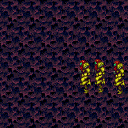
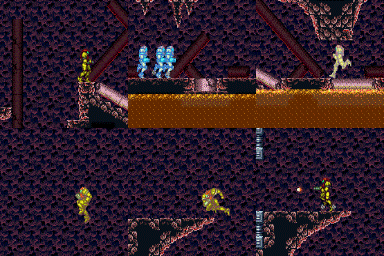
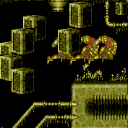
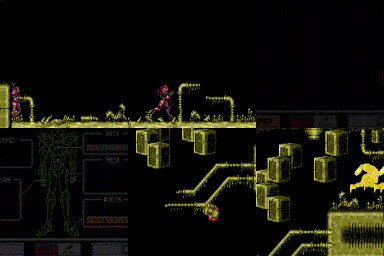
canMidairShinespark (Hard)
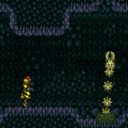
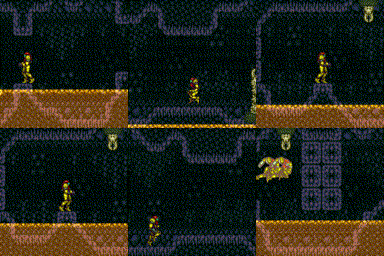
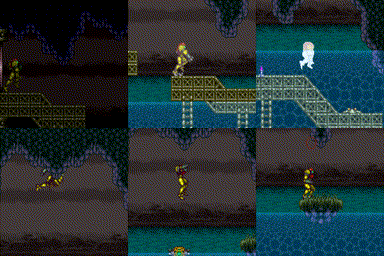
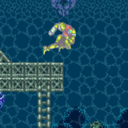
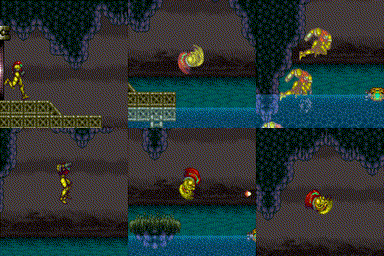
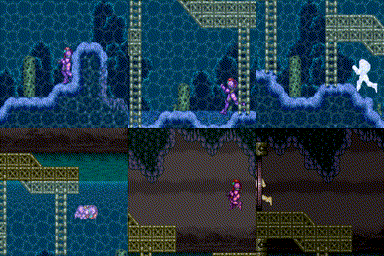
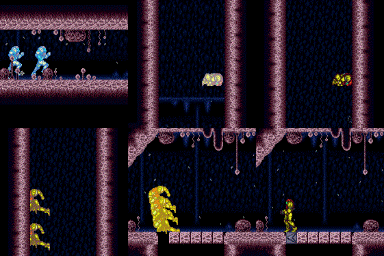
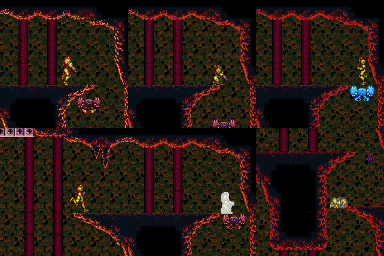
The ability to jump and shinespark mid-air: vertically, horizontally, or diagonally. Mid-air horizontal sparks are the most tricky. They can be performed by spin jumping, breaking spin, initiating the shinespark without holding jump, then pressing jump and forward. One of the easiest methods is to hold forward the entire time, spin jump, release jump at the desired height, tap either up or the diagonal up angle button, then tap or press jump again (while up/angle is no longer pressed). The timing of the jump after the up/angle is fairly lenient and doesn't need to be rushed. Note that mid-air shinesparks can't be performed from a fall, only from a jump.
Dependencies: canShinespark, canHorizontalShinespark
Strats ()
|
Notable: true Diagonal shinespark up the climb to break the bomb blocks to the top right morph tunnel. A consistent place to spark from is the small platform below the bomb block, using a crouch jump and then a diagonal spark (not a crouched diagonal spark). Entrance condition: {
"comeInShinecharged": {
"framesRequired": 55
},
"comesThroughToilet": "no"
}
Requires: "canShinechargeMovementComplex"
{
"or": [
"canCrouchJump",
"canMidairShinespark"
]
}
{
"shinespark": {
"frames": 5
}
}
|
|
From: 1
Top Door
To: 3
Top Right Door
Notable: true Diagonal shinespark up the climb to break the bomb blocks to the top right morph tunnel. A consistent place to spark from is the small platform below the bomb block, using a crouch jump and then a diagonal spark (not a crouched diagonal spark). Entrance condition: {
"comeInShinecharged": {
"framesRequired": 65
},
"comesThroughToilet": "yes"
}
Requires: "canShinechargeMovementComplex"
{
"or": [
"canCrouchJump",
"canMidairShinespark"
]
}
{
"shinespark": {
"frames": 5
}
}
|
|
From: 1
Top Left Door
To: 4
Top Junction (Right of Spikes)
Entrance condition: {
"comeInShinecharging": {
"length": 3,
"openEnd": 1
}
}
Requires: "canHorizontalShinespark"
{
"or": [
{
"shinespark": {
"frames": 56,
"excessFrames": 6
}
},
{
"and": [
"canShinechargeMovement",
"canMidairShinespark",
{
"shinespark": {
"frames": 41,
"excessFrames": 4
}
}
]
}
]
}
|
|
Shinespark through the top of the door to reach the breakable blocks. Entrance condition: {
"comeInWithSpark": {}
}
Requires: "canMidairShinespark"
{
"shinespark": {
"frames": 154,
"excessFrames": 107
}
}
Clears obstacles: A |
|
Store the spark on the right side of the ledge. Run left and do a big jump towards the gauntlet door and then midair spark at the right time. The lines in the background make for a good way to measure height. Requires: "canMidairShinespark"
"canShinechargeMovementComplex"
{
"canShineCharge": {
"usedTiles": 19,
"steepUpTiles": 2,
"steepDownTiles": 1,
"openEnd": 2
}
}
{
"or": [
{
"shinespark": {
"frames": 95,
"excessFrames": 33
}
},
{
"and": [
"canShinechargeMovementTricky",
{
"shinespark": {
"frames": 87,
"excessFrames": 33
}
}
]
}
]
}
Clears obstacles: A |
|
From: 4
Bottom Right Door
To: 1
Top Left Door
Store the spark on the right side of the ledge. Run left and do a big jump towards the gauntlet door and then midair spark at the right time. The lines in the background make for a good way to measure height. Requires: {
"obstaclesCleared": [
"C"
]
}
"canMidairShinespark"
"canShinechargeMovementComplex"
{
"canShineCharge": {
"usedTiles": 19,
"steepUpTiles": 2,
"steepDownTiles": 1,
"openEnd": 2
}
}
{
"or": [
{
"shinespark": {
"frames": 96
}
},
{
"and": [
"canShinechargeMovementTricky",
{
"shinespark": {
"frames": 88
}
}
]
}
]
}
Exit condition: {
"leaveWithSpark": {
"position": "top"
}
}
|
|
From: 1
Left Door
To: 4
Middle Junction (Left of Morph Tunnel)
Enter through the top of the door to reach all the way to the shot block wall. Entrance condition: {
"comeInWithSpark": {}
}
Requires: "canMidairShinespark"
{
"shinespark": {
"frames": 90,
"excessFrames": 17
}
}
Clears obstacles: A, B |
|
From: 1
Left Door
To: 4
Middle Junction (Left of Morph Tunnel)
Charge the Shinespark just before getting to the bug, then Midair Shinespark to make it all the way to the shot blocks. Entrance condition: {
"comeInShinecharging": {
"length": 5,
"openEnd": 0,
"steepUpTiles": 0,
"steepDownTiles": 1
}
}
Requires: "canMidairShinespark"
"canShinechargeMovement"
{
"shinespark": {
"frames": 77,
"excessFrames": 17
}
}
Clears obstacles: A, B |
|
From: 1
Left Door
To: 4
Middle Junction (Left of Morph Tunnel)
To use the full runway, kill the Zebbo with Wave, then Midair Shinespark to make it all the way to the shot blocks. Entrance condition: {
"comeInShinecharging": {
"length": 14,
"openEnd": 0,
"steepUpTiles": 1,
"steepDownTiles": 1
}
}
Requires: "Wave"
{
"acidFrames": 11
}
{
"or": [
"Gravity",
{
"acidFrames": 5
}
]
}
"canMidairShinespark"
"canShinechargeMovement"
{
  "shinespark": {
    "frames": 77,
    "excessFrames": 17
  }
}
Clears obstacles: A, B |
|
It is possible to run through the Yapping Maw while it is attacking a different direction. But that likely requires acid damage and isn't entirely reliable. Requires: {
"obstaclesCleared": [
"A"
]
}
"canMidairShinespark"
"canShinechargeMovement"
{
"shinespark": {
"frames": 45
}
}
{
"canShineCharge": {
"usedTiles": 18,
"openEnd": 1,
"startingDownTiles": 0,
"steepDownTiles": 1,
"steepUpTiles": 2
}
}
Exit condition: {
"leaveWithSpark": {
"position": "top"
}
}
|
|
Requires: {
"obstaclesCleared": [
"A"
]
}
"canMidairShinespark"
{
"enemyKill": {
"enemies": [
[
"Yapping Maw"
]
]
}
}
{
"shinespark": {
"frames": 45
}
}
{
"canShineCharge": {
"usedTiles": 21,
"openEnd": 0,
"startingDownTiles": 1,
"steepDownTiles": 2,
"steepUpTiles": 2
}
}
Exit condition: {
"leaveWithSpark": {
"position": "top"
}
}
|
|
Freeze the Yapping Maw while it is in the air, extended. Requires: {
"obstaclesCleared": [
"A"
]
}
"canMidairShinespark"
"canUseFrozenEnemies"
{
"shinespark": {
"frames": 45
}
}
{
"canShineCharge": {
"usedTiles": 21,
"openEnd": 0,
"startingDownTiles": 1,
"steepDownTiles": 2,
"steepUpTiles": 2
}
}
Exit condition: {
"leaveWithSpark": {
"position": "top"
}
}
|
|
Shinespark below the top block or Samus will crash into a solid wall. Entrance condition: {
"comeInShinecharged": {
"framesRequired": 50
}
}
Requires: "canShinechargeMovement"
"canMidairShinespark"
{
"shinespark": {
"frames": 85,
"excessFrames": 20
}
}
|
|
Wait for the acid to clear before moving to shinespark on the other side of the bomb blocks. Entrance condition: {
"comeInShinecharging": {
"length": 6,
"openEnd": 1,
"steepUpTiles": 1,
"steepDownTiles": 1
}
}
Requires: "canMidairShinespark"
"canShinechargeMovement"
{
"shinespark": {
"frames": 80,
"excessFrames": 13
}
}
|
|
From: 2
Right Door
To: 2
Right Door
Notable: true Jump towards the yapping maw before it is on screen so it moves up. Quickly move it off camera so it will be `frozen` in place. Shortcharge like normal. If the Yapping Maw is returning to its hole, it will usually not grab Samus. Requires: {
"obstaclesCleared": [
"A"
]
}
"canMidairShinespark"
"canCameraManip"
{
"shinespark": {
"frames": 45
}
}
{
"canShineCharge": {
"usedTiles": 22,
"openEnd": 0,
"startingDownTiles": 2,
"steepDownTiles": 3,
"steepUpTiles": 2
}
}
Exit condition: {
"leaveWithSpark": {
"position": "top"
}
}
|
|
From: 2
Right Door
To: 2
Right Door
Requires: {
"obstaclesCleared": [
"A"
]
}
"canMidairShinespark"
{
"shinespark": {
"frames": 45
}
}
{
"canShineCharge": {
"usedTiles": 18,
"openEnd": 1,
"startingDownTiles": 2,
"steepDownTiles": 3,
"steepUpTiles": 1
}
}
Exit condition: {
"leaveWithSpark": {
"position": "top"
}
}
|
|
Requires: {
"obstaclesCleared": [
"A"
]
}
"canMidairShinespark"
{
"enemyKill": {
"enemies": [
[
"Yapping Maw"
]
]
}
}
{
"shinespark": {
"frames": 45
}
}
{
"canShineCharge": {
"usedTiles": 22,
"openEnd": 0,
"startingDownTiles": 2,
"steepDownTiles": 3,
"steepUpTiles": 2
}
}
Exit condition: {
"leaveWithSpark": {
"position": "top"
}
}
|
|
Fire a Plasma shot while running into the room, jump and activate the shinespark wind-up mid-air. Wait to spark right until just as the Plasma shot goes off screen. Entrance condition: {
"comeInShinecharged": {
"framesRequired": 40
}
}
Requires: "Plasma"
"canHeroShot"
"canShinechargeMovementTricky"
"canMidairShinespark"
{
"shinespark": {
"frames": 37
}
}
Exit condition: {
"leaveWithSpark": {
"position": "bottom"
}
}
|
|
Notable: true Enter the room while building a shinespark and use it on the lowest part of the ramp to diagonally spark up and out of the water. Use very low jump height space jumps to carry momentum to the far side of the submerged ramp. Both Choots must be killed. Using Screw Attack: stay a little bit high in the water so that it remains active for the second Choot. Using Plasma or ammo: kill the first Choot while running down the middle platform, and the second while gliding above it after spacejumping through the water. Then shinespark up and use SpaceJump to reach the door. Entrance condition: {
"comeInShinecharging": {
"length": 6,
"openEnd": 1,
"steepDownTiles": 1
}
}
Requires: {
"or": [
"ScrewAttack",
"canPseudoScrew",
"Plasma",
{
"ammo": {
"type": "Missile",
"count": 1
}
},
{
"ammo": {
"type": "Super",
"count": 1
}
}
]
}
{
"or": [
"ScrewAttack",
"Plasma",
{
"ammo": {
"type": "Missile",
"count": 1
}
},
{
"ammo": {
"type": "Super",
"count": 1
}
}
]
}
{
"shinespark": {
"frames": 14,
"excessFrames": 5
}
}
"canShinechargeMovementComplex"
"SpaceJump"
"canTrickyJump"
"canMidairShinespark"
|
|
From: 1
Left Door
To: 2
Right Door
Notable: true Enter the room while building a shinespark and use it on the lowest part of the ramp to diagonally spark up and out of the water. Use very low jump height space jumps to carry momentum to the far side of the submerged ramp. Freeze the first Choot from the middle platform. Either SpaceJump just right so as to pass above the second Choot, or freeze it as it touches Samus to pass through without losing speed. Then shinespark up and use SpaceJump to reach the door. Entrance condition: {
"comeInShinecharging": {
"length": 6,
"openEnd": 1,
"steepDownTiles": 1
}
}
Requires: "Ice"
"Wave"
"Spazer"
"canDodgeWhileShooting"
{
"shinespark": {
"frames": 14,
"excessFrames": 5
}
}
"canShinechargeMovementComplex"
"canMidairShinespark"
"SpaceJump"
"canTrickyJump"
|
|
Enter the room while building a shinespark and use it on the lowest part of the ramp to cross the room and reach a raised ledge on the right side wall. From there, use SpaceJump to escape the water. Carry the shinespark to the bottom of the ramp by delaying the first Choot with two Power Beam shots, killing it, or bounceballing through it. The Choot can be shot diagonally from the middle platform, and again by running off that platform and aiming down to float above it. Entrance condition: {
"comeInShinecharging": {
"length": 6,
"openEnd": 1,
"steepDownTiles": 1
}
}
Requires: "canShinechargeMovementComplex"
"canCarefulJump"
{
"or": [
{
"and": [
"canMidairShinespark",
"canDodgeWhileShooting"
]
},
{
"and": [
{
"enemyDamage": {
"enemy": "Choot",
"type": "contact",
"hits": 1
}
},
"canNeutralDamageBoost",
"canBounceBall"
]
},
{
"and": [
"canMockball",
{
"or": [
"canPseudoScrew",
"ScrewAttack",
"Plasma",
"Wave",
{
"ammo": {
"type": "Missile",
"count": 1
}
},
{
"ammo": {
"type": "Super",
"count": 1
}
}
]
}
]
}
]
}
"canHorizontalShinespark"
{
"shinespark": {
"frames": 123,
"excessFrames": 5
}
}
"canSpaceJumpWaterBounce"
{
"or": [
{
"and": [
"HiJump",
"canSpaceJumpWaterEscape"
]
},
{
"and": [
"canTrickyJump",
"canDownGrab"
]
},
"canWalljump"
]
}
|
|
From: 3
Junction (Left side Pit)
To: 1
Left Door
Notable: true Requires: "canShinechargeMovementComplex"
"canMidairShinespark"
"Gravity"
{
"canShineCharge": {
"usedTiles": 20,
"openEnd": 0,
"steepUpTiles": 2,
"steepDownTiles": 4,
"startingDownTiles": 1
}
}
{
"shinespark": {
"frames": 23
}
}
Exit condition: {
"leaveWithSpark": {}
}
|
|
From: 1
Lower Section - Bottom Left Door
To: 5
Lower Section - Bottom Right Door
Entrance condition: {
"comeInShinecharging": {
"length": 23,
"openEnd": 1,
"steepUpTiles": 1,
"steepDownTiles": 6
}
}
Requires: "canHorizontalShinespark"
{
"or": [
{
"shinespark": {
"frames": 131,
"excessFrames": 35
}
},
{
"and": [
"canShinechargeMovement",
"canMidairShinespark",
{
"shinespark": {
"frames": 106,
"excessFrames": 35
}
}
]
}
]
}
|
|
From: 5
Lower Section - Bottom Right Door
To: 4
Lower Section - Top Right Door
Jump to the submerged platform, then jump again. Requires: "Gravity"
"canShinechargeMovement"
"canMidairShinespark"
{
"canShineCharge": {
"usedTiles": 33,
"openEnd": 2
}
}
{
"shinespark": {
"frames": 35,
"excessFrames": 10
}
}
|
|
From: 13
Bottom Junction
To: 5
Lower Section - Bottom Right Door
Requires: "canHorizontalShinespark"
{
"or": [
{
"canShineCharge": {
"usedTiles": 23,
"openEnd": 1,
"steepUpTiles": 6,
"steepDownTiles": 1
}
},
{
"and": [
{
"canShineCharge": {
"usedTiles": 24,
"openEnd": 1,
"steepUpTiles": 6,
"steepDownTiles": 1
}
},
{
"doorUnlockedAtNode": 1
}
]
}
]
}
{
"or": [
{
"shinespark": {
"frames": 131
}
},
{
"and": [
"canShinechargeMovement",
"canMidairShinespark",
{
"shinespark": {
"frames": 106
}
}
]
}
]
}
|
|
From: 13
Bottom Junction
To: 5
Lower Section - Bottom Right Door
Open the right door before sparking to spark out of it. Requires: {
"or": [
"canCarefulJump",
"Grapple",
"Wave",
"SpaceJump"
]
}
{
"or": [
{
"canShineCharge": {
"usedTiles": 23,
"openEnd": 1,
"steepUpTiles": 6,
"steepDownTiles": 1
}
},
{
"and": [
{
"canShineCharge": {
"usedTiles": 24,
"openEnd": 1,
"steepUpTiles": 6,
"steepDownTiles": 1
}
},
{
"doorUnlockedAtNode": 1
}
]
}
]
}
{
"or": [
{
"shinespark": {
"frames": 131
}
},
{
"and": [
"canShinechargeMovement",
"canMidairShinespark",
{
"shinespark": {
"frames": 106
}
}
]
}
]
}
Exit condition: {
"leaveWithSpark": {}
}
|
|
From: 10
Right Etecoon Shaft - Bottom Left Door
To: 14
Right Etecoon Shaft - Wall Jump Climb Checkpoint Junction
This is a diagonal shinespark into the underside of the left side middle ledge, minimizing energy usage. Needs HJB to bonk at the right place without walljumping. Entrance condition: {
"comeInShinecharged": {
"framesRequired": 60
}
}
Requires: "HiJump"
"canShinechargeMovement"
"canMidairShinespark"
{
"shinespark": {
"frames": 20,
"excessFrames": 11
}
}
|
|
From: 2
Bottom Left Door
To: 3
Right Door
Notable: true Quickly wall jump up the right wall and shinespark up to barely get above the speed blocks without any tanks. Requires: "canFastWalljumpClimb"
"canShinechargeMovementComplex"
"canMidairShinespark"
{
"canShineCharge": {
"usedTiles": 33,
"openEnd": 2
}
}
{
"shinespark": {
"frames": 73,
"excessFrames": 3
}
}
|
|
Requires: "HiJump"
"canFastWalljumpClimb"
"canShinechargeMovementComplex"
"canMidairShinespark"
{
"canShineCharge": {
"usedTiles": 33,
"openEnd": 2
}
}
{
"shinespark": {
"frames": 67,
"excessFrames": 3
}
}
|
|
Diagonal spark left to save health. Requires: "canShinechargeMovement"
"HiJump"
"canMidairShinespark"
{
"canShineCharge": {
"usedTiles": 33,
"openEnd": 2
}
}
{
"shinespark": {
"frames": 85,
"excessFrames": 3
}
}
|
|
From: 2
Right Door
To: 3
Top Junction
Entrance condition: {
"comeInShinecharging": {
"length": 5,
"openEnd": 1
}
}
Requires: {
"or": [
{
"shinespark": {
"frames": 22,
"excessFrames": 4
}
},
{
"and": [
"canMidairShinespark",
{
"shinespark": {
"frames": 15,
"excessFrames": 3
}
}
]
},
{
"and": [
"canMidairShinespark",
"HiJump",
{
"shinespark": {
"frames": 12,
"excessFrames": 4
}
}
]
}
]
}
Clears obstacles: B |
|
Charge a spark on the dry platform, and jump into a mid-air spark across the room and through the door. Requires: {
"canShineCharge": {
"usedTiles": 32,
"openEnd": 1
}
}
"canMidairShinespark"
{
"shinespark": {
"frames": 75
}
}
Exit condition: {
"leaveWithSpark": {}
}
|
|
From: 3
Dry Platform Junction
To: 1
Right Door
Charge a spark going left, then build speed and jump far to the right into a mid-air spark across the room and through the door. Requires: {
"canShineCharge": {
"usedTiles": 32,
"openEnd": 1
}
}
"canShinechargeMovement"
"canCarefulJump"
"canMidairShinespark"
{
"shinespark": {
"frames": 62
}
}
Exit condition: {
"leaveWithSpark": {}
}
|
|
From: 1
Left Door
To: 2
Right Door
Entrance condition: {
"comeInShinecharging": {
"length": 6,
"openEnd": 1
}
}
Requires: "canHorizontalShinespark"
{
"or": [
{
"shinespark": {
"frames": 142,
"excessFrames": 60
}
},
{
"and": [
"canShinechargeMovement",
"canMidairShinespark",
{
"shinespark": {
"frames": 134,
"excessFrames": 60
}
}
]
}
]
}
|
|
From: 2
Right Door
To: 1
Left Door
Use the really small runway in the pit in the middle of the room. The door must be already opened. Requires: {
"obstaclesCleared": [
"A"
]
}
"canMidairShinespark"
"canShinechargeMovementComplex"
{
"canShineCharge": {
"usedTiles": 13,
"openEnd": 0
}
}
{
"shinespark": {
"frames": 107
}
}
Exit condition: {
"leaveWithSpark": {}
}
|
|
Jump from the runway near the right door to bounce onto spikes for X-Mode. Store a spark in X-Mode and use that to shinepark across the room. Bumping a solid tile before activating X-Mode will remove dash state, preventing shinecharging. The left door must have been opened previously, in order to shinespark through it. Requires: {
"obstaclesCleared": [
"A"
]
}
"canMidairShinespark"
"h_canXMode"
{
"spikeHits": 1
}
{
"canShineCharge": {
"usedTiles": 33,
"openEnd": 2
}
}
{
"or": [
{
"shinespark": {
"frames": 146
}
},
{
"and": [
"SpaceJump",
{
"shinespark": {
"frames": 50
}
}
]
}
]
}
Exit condition: {
"leaveWithSpark": {}
}
|
|
Use the really small runway in the pit in the middle of the room. Requires: "canMidairShinespark"
"canShinechargeMovementComplex"
{
"canShineCharge": {
"usedTiles": 13,
"openEnd": 0
}
}
{
"shinespark": {
"frames": 107,
"excessFrames": 6
}
}
|
|
Jump from the runway near the right door to bounce onto spikes for X-Mode. Store a spark in X-Mode and use that to shinepark across the room. Bumping a solid tile before activating X-Mode will remove dash state, preventing shinecharging. Requires: "canMidairShinespark"
"h_canXMode"
{
"spikeHits": 2
}
{
"canShineCharge": {
"usedTiles": 33,
"openEnd": 2
}
}
{
"shinespark": {
"frames": 146,
"excessFrames": 6
}
}
|
|
From: 2
Right Door
To: 2
Right Door
Requires opening the door, then going to the pit in the middle of the room to use the really small runway. Requires: "canShinechargeMovementComplex"
"canMidairShinespark"
{
"canShineCharge": {
"usedTiles": 13,
"openEnd": 0
}
}
{
"shinespark": {
"frames": 50
}
}
Exit condition: {
"leaveWithSpark": {}
}
|
|
Entrance condition: {
"comeInShinecharging": {
"length": 10,
"openEnd": 1
}
}
Requires: {
"or": [
{
"shinespark": {
"frames": 68,
"excessFrames": 29
}
},
{
"and": [
"canMidairShinespark",
{
"shinespark": {
"frames": 60,
"excessFrames": 28
}
}
]
}
]
}
"canUseFrozenEnemies"
|
|
From: 1
Top Left Door
To: 5
Top Right Door
Entrance condition: {
"comeInShinecharged": {
"framesRequired": 50
}
}
Requires: "canMidairShinespark"
{
"shinespark": {
"frames": 60,
"excessFrames": 28
}
}
"canUseFrozenEnemies"
|
|
Run and jump, fire a shot mid-air, and activate the shinespark wind-up. Wait until the shot is at a specific position before sparking. Sparking too late will cause the shot to despawn before reaching the door. Sparking too early will cause Samus to bonk the door as it will not yet be open. A beam shot, Missile, or Super can be used. Entrance condition: {
"comeInShinecharged": {
"framesRequired": 40
}
}
Requires: "canShinechargeMovementTricky"
"canHeroShot"
"canMidairShinespark"
{
"shinespark": {
"frames": 38
}
}
Exit condition: {
"leaveWithSpark": {
"position": "top"
}
}
|
|
Shoot diagonally to clear the Skree and shot block before jumping and sparking diagonally mid-air to the above area. Entrance condition: {
"comeInShinecharging": {
"length": 2,
"openEnd": 0
}
}
Requires: "canShinechargeMovementComplex"
"canMidairShinespark"
{
"heatFrames": 300
}
{
"shinespark": {
"frames": 14,
"excessFrames": 3
}
}
|
|
From: 1
Bottom Left Door
To: 2
Top Right Door
Shoot diagonally to clear the Skree and shot block before jumping and sparking diagonally mid-air to the above area. Entrance condition: {
"comeInShinecharged": {
"framesRequired": 80
}
}
Requires: "canShinechargeMovementComplex"
"canMidairShinespark"
{
"heatFrames": 270
}
{
"shinespark": {
"frames": 13,
"excessFrames": 3
}
}
|
|
From: 2
Left Side - Top Middle Door
To: 1
Left Side - Top Door
Entrance condition: {
"comeInShinecharged": {
"framesRequired": 22
}
}
Requires: "canShinechargeMovement"
"canMidairShinespark"
{
"shinespark": {
"frames": 19
}
}
|
|
From: 6
Middle Right Door
To: 1
Left Side - Top Door
Entrance condition: {
"comeInShinecharged": {
"framesRequired": 115
}
}
Requires: "canMidairShinespark"
"canShinechargeMovementComplex"
{
"shinespark": {
"frames": 30,
"excessFrames": 6
}
}
|
|
From: 6
Middle Right Door
To: 1
Left Side - Top Door
Entrance condition: {
"comeInShinecharging": {
"length": 4,
"openEnd": 0
}
}
Requires: "canMidairShinespark"
"canShinechargeMovementComplex"
{
"shinespark": {
"frames": 30,
"excessFrames": 6
}
}
|
|
From: 6
Middle Right Door
To: 7
Top Right Door
Entrance condition: {
"comeInShinecharged": {
"framesRequired": 120
}
}
Requires: "canMidairShinespark"
"canShinechargeMovementComplex"
{
"shinespark": {
"frames": 15
}
}
Exit condition: {
"leaveWithSpark": {}
}
|
|
From: 6
Middle Right Door
To: 7
Top Right Door
Entrance condition: {
"comeInShinecharged": {
"framesRequired": 80
}
}
Requires: "HiJump"
"canMidairShinespark"
"canShinechargeMovementComplex"
{
"shinespark": {
"frames": 11
}
}
Exit condition: {
"leaveWithSpark": {}
}
|
|
From: 7
Top Right Door
To: 1
Left Side - Top Door
Dealing with spikes is up to luck. It is possible to shoot the Cacatac while jumping towards it. Entrance condition: {
"comeInShinecharged": {
"framesRequired": 100
}
}
Requires: "canShinechargeMovementComplex"
"canMidairShinespark"
"canCarefulJump"
{
"shinespark": {
"frames": 30,
"excessFrames": 6
}
}
|
|
From: 7
Top Right Door
To: 1
Left Side - Top Door
Dealing with spikes is up to luck. It is possible to shoot the Cacatac while jumping towards it. Entrance condition: {
"comeInShinecharging": {
"length": 2.5,
"openEnd": 1
}
}
Requires: "canShinechargeMovementComplex"
"canMidairShinespark"
"canCarefulJump"
{
"shinespark": {
"frames": 30,
"excessFrames": 6
}
}
|
|
From: 7
Top Right Door
To: 1
Left Side - Top Door
Kill the Cacatac and quickly jump over to its platform. Shoot towards the top-left door to open it, then follow the shot by jumping over the pit before initiating the shinespark. Entrance condition: {
"comeInShinecharging": {
"length": 2.5,
"openEnd": 1
}
}
Requires: "canShinechargeMovementComplex"
"canMidairShinespark"
"canTrickyJump"
"canHeroShot"
{
"shinespark": {
"frames": 25
}
}
{
"or": [
{
"and": [
"Wave",
"Spazer"
]
},
"Plasma",
{
"ammo": {
"type": "Missile",
"count": 2
}
},
{
"ammo": {
"type": "Super",
"count": 2
}
}
]
}
|
|
Requires: {
"canShineCharge": {
"usedTiles": 28,
"gentleUpTiles": 3,
"gentleDownTiles": 3,
"openEnd": 0
}
}
{
"or": [
{
"shinespark": {
"frames": 27,
"excessFrames": 4
}
},
{
"and": [
"canMidairShinespark",
{
"shinespark": {
"frames": 17,
"excessFrames": 4
}
}
]
}
]
}
{
"heatFrames": 380
}
|
|
A short hop from the door can bounce on the crumbles. Just be careful of being pushed back onto the crumble blocks by the spikes. Requires: "h_canXMode"
"h_XModeSpikeHit"
"h_XModeSpikeHit"
"canTrickyJump"
"canMidairShinespark"
{
"canShineCharge": {
"usedTiles": 33,
"openEnd": 2
}
}
{
"heatFrames": 400
}
{
"shinespark": {
"frames": 12,
"excessFrames": 4
}
}
|
|
A short hop from the ledge can bounce on the crumbles and into the spikes. Just be careful of being pushed back onto the crumble blocks by the spikes. Requires: "h_canXMode"
"h_XModeSpikeHit"
"h_XModeSpikeHit"
"canTrickyJump"
"canIframeSpikeJump"
"canMidairShinespark"
{
"canShineCharge": {
"usedTiles": 33,
"openEnd": 2
}
}
{
"heatFrames": 480
}
{
"shinespark": {
"frames": 11,
"excessFrames": 4
}
}
|
|
Fire a shot on the way up to clear the shot block. Perform a mockball but unmorph after exiting the Morph hole and Kill the Geruta while falling, if possible. Fire a shot to open the door, then jump forward and Shinespark out. Entrance condition: {
"comeInShinecharging": {
"length": 3,
"openEnd": 0
}
}
Requires: "canShinechargeMovementTricky"
"canMidairShinespark"
"canMockball"
{
"or": [
{
"enemyKill": {
"enemies": [
[
"Geruta"
]
],
"explicitWeapons": [
"Missile",
"Super",
"Wave",
"Spazer",
"Plasma"
]
}
},
{
"enemyDamage": {
"enemy": "Geruta",
"type": "contact",
"hits": 1
}
}
]
}
{
"heatFrames": 200
}
{
"shinespark": {
"frames": 16,
"excessFrames": 0
}
}
Exit condition: {
"leaveWithSpark": {}
}
|
|
Entrance condition: {
"comeInWithSpark": {}
}
Requires: "canMidairShinespark"
{
"shinespark": {
"frames": 38,
"excessFrames": 1
}
}
{
"heatFrames": 160
}
|
|
Spark in line with the top of the door. Sparking too low or too high will crash early. Entrance condition: {
"comeInShinecharged": {
"framesRequired": 13
}
}
Requires: "canMidairShinespark"
{
"heatFrames": 205
}
{
"shinespark": {
"frames": 92,
"excessFrames": 5
}
}
|
|
Spark in line with the top of the door. Sparking too low or too high will crash early. Entrance condition: {
"comeInWithSpark": {
"position": "top"
}
}
Requires: "canMidairShinespark"
{
"heatFrames": 195
}
{
"shinespark": {
"frames": 95,
"excessFrames": 5
}
}
|
|
Spark in line with the top of the door. Sparking too low or too high will crash early. Entrance condition: {
"comeInShinecharging": {
"length": 3,
"openEnd": 1
}
}
Requires: "canMidairShinespark"
{
"heatFrames": 210
}
{
"shinespark": {
"frames": 90,
"excessFrames": 5
}
}
|
|
Spark in line with the top of the door. Sparking too low or too high will crash early. Entrance condition: {
"comeInShinecharged": {
"framesRequired": 13
}
}
Requires: "canMidairShinespark"
{
"heatFrames": 205
}
{
"shinespark": {
"frames": 92,
"excessFrames": 3
}
}
|
|
Spark in line with the top of the door. Sparking too low or too high will crash early. Entrance condition: {
"comeInWithSpark": {
"position": "top"
}
}
Requires: "canMidairShinespark"
{
"heatFrames": 195
}
{
"shinespark": {
"frames": 95,
"excessFrames": 3
}
}
|
|
Spark in line with the top of the door. Sparking too low or too high will crash early. Entrance condition: {
"comeInShinecharging": {
"length": 3,
"openEnd": 1
}
}
Requires: "canMidairShinespark"
{
"heatFrames": 210
}
{
"shinespark": {
"frames": 90,
"excessFrames": 3
}
}
|
|
Entrance condition: {
"comeInShinecharging": {
"length": 3,
"openEnd": 0
}
}
Requires: {
"or": [
{
"and": [
"canHorizontalShinespark",
{
"shinespark": {
"frames": 76,
"excessFrames": 4
}
},
{
"heatFrames": 210
}
]
},
{
"and": [
"canShinechargeMovement",
"canMidairShinespark",
{
"shinespark": {
"frames": 67,
"excessFrames": 4
}
},
{
"heatFrames": 300
}
]
}
]
}
|
|
From: 1
Top Left Door
To: 6
Top Right Door
After landing, do a small jump and spark mid-air. Alternatively, if you can avoid tripping while entering the room, another option is to moonwalk back against the left door to get high enough to spark without bonking the platform on the right. Entrance condition: {
"comeInShinecharged": {
"framesRequired": 30
}
}
Requires: "canMidairShinespark"
{
"shinespark": {
"frames": 18
}
}
Exit condition: {
"leaveWithSpark": {
"position": "bottom"
}
}
|
|
From: 5
Middle Right Door
To: 1
Top Left Door
Quickly climb the left side of the room to just have enough time to shinespark out the door. Requires precise ledge grabs, but some precise walljumps can make it slightly easier. Entrance condition: {
"comeInShinecharging": {
"length": 12,
"openEnd": 0
}
}
Requires: "HiJump"
"canMidairShinespark"
"canShinechargeMovementTricky"
"canInsaneJump"
{
"shinespark": {
"frames": 5
}
}
Exit condition: {
"leaveWithSpark": {}
}
|
|
From: 5
Middle Right Door
To: 1
Top Left Door
Quickly climb the right side of the room to just have enough time to shinespark out the door. Entrance condition: {
"comeInShinecharging": {
"length": 4,
"openEnd": 1
}
}
Requires: "HiJump"
"canMidairShinespark"
"canShinechargeMovementTricky"
{
"shinespark": {
"frames": 6
}
}
Exit condition: {
"leaveWithSpark": {}
}
|
|
From: 5
Middle Right Door
To: 6
Top Right Door
Quickly climb the right side of the room to just have enough time to shinespark out the door. Entrance condition: {
"comeInShinecharging": {
"length": 4,
"openEnd": 1
}
}
Requires: "HiJump"
"canMidairShinespark"
"canShinechargeMovementTricky"
"canInsaneJump"
{
"shinespark": {
"frames": 6
}
}
Exit condition: {
"leaveWithSpark": {}
}
|
|
From: 5
Middle Right Door
To: 6
Top Right Door
Quickly climb the right side of the room to just have enough time to shinespark out the door. Entrance condition: {
"comeInShinecharging": {
"length": 5,
"openEnd": 1
}
}
Requires: "HiJump"
"canMidairShinespark"
"canShinechargeMovementTricky"
{
"shinespark": {
"frames": 10
}
}
Exit condition: {
"leaveWithSpark": {
"position": "bottom"
}
}
|
|
From: 2
Right Door
To: 3
Item
Notable: true Enter from the right door and spin jump onto the first ledge while barely landing on the ledge in order to prevent getting the Geruta on camera. Walk against the left wall and jump to trigger the Geruta. It should now be moving leftwards. Stand on the next platform against the right wall and shoot the Geruta to get it one shot away from being frozen. After a few swoops, it will come down; either freeze it or tank a hit. Then go up and stand on the corner and freeze it when it is in position. The Geruta will be stuck below and keep swooping, so if Energy permits, Samus will have several attempts. With full heat protection, Samus can quickly shinecharge left to right then run and spark midair to the left to save Energy. Entrance condition: {
"comeInNormally": {}
}
Requires: "h_canTrickyFrozenEnemyRunway"
"canCarefulJump"
"canHorizontalShinespark"
{
"canShineCharge": {
"usedTiles": 17,
"openEnd": 1
}
}
{
"heatFrames": 1050
}
{
"or": [
{
"shinespark": {
"frames": 55,
"excessFrames": 15
}
},
{
"and": [
"h_heatProof",
"canMidairShinespark",
{
"shinespark": {
"frames": 32,
"excessFrames": 15
}
}
]
}
]
}
|
|
From: 5
Top Right Door
To: 2
Far Left Door
Notable: true The timer is tight, so run through the Cacatacs and mid-air spark left through the speed blocks. Then run to the right and back to get speed to go through the rest. The shinespark expects to kill the crumble bridge pirate, to be safe. Entrance condition: {
"comeInShinecharging": {
"length": 5,
"openEnd": 1
}
}
Requires: "canShinechargeMovementTricky"
"canTrickyJump"
"canMidairShinespark"
{
"enemyDamage": {
"enemy": "Cacatac",
"type": "spike",
"hits": 1
}
}
{
"shinespark": {
"frames": 92,
"excessFrames": 10
}
}
{
"heatFrames": 900
}
Clears obstacles: A |
|
From: 7
Junction Below Power Bomb Blocks
To: 2
Middle Left Door
Requires: {
"obstaclesCleared": [
"C",
"D"
]
}
"SpeedBooster"
"canShinechargeMovement"
{
"or": [
{
"shinespark": {
"frames": 19,
"excessFrames": 4
}
},
{
"and": [
"canShinechargeMovementComplex",
"canMidairShinespark",
{
"shinespark": {
"frames": 6,
"excessFrames": 4
}
}
]
}
]
}
|
|
Requires: "canMidairShinespark"
{
"canShineCharge": {
"usedTiles": 33,
"openEnd": 2
}
}
{
"or": [
{
"shinespark": {
"frames": 45,
"excessFrames": 5
}
},
{
"and": [
"canShinechargeMovementComplex",
{
"shinespark": {
"frames": 5
}
}
]
}
]
}
|
|
From: 1
Top Left Door
To: 4
Top Right Door
Entrance condition: {
"comeInShinecharged": {
"framesRequired": 130
}
}
Requires: "SpaceJump"
"canShinechargeMovementComplex"
"canMidairShinespark"
{
"shinespark": {
"frames": 21
}
}
Exit condition: {
"leaveWithSpark": {}
}
|
|
From: 3
Bottom Right Door
To: 1
Top Left Door
Entrance condition: {
"comeInShinecharged": {
"framesRequired": 160
}
}
Requires: "SpaceJump"
"canShinechargeMovementComplex"
"canMidairShinespark"
{
"shinespark": {
"frames": 21
}
}
Exit condition: {
"leaveWithSpark": {}
}
|
|
From: 3
Bottom Right Door
To: 4
Top Right Door
Entrance condition: {
"comeInShinecharging": {
"length": 7,
"openEnd": 1,
"gentleDownTiles": 3
}
}
Requires: "SpaceJump"
"canShinechargeMovementComplex"
"canMidairShinespark"
{
"shinespark": {
"frames": 15
}
}
Exit condition: {
"leaveWithSpark": {}
}
|
|
From: 4
Top Right Door
To: 1
Top Left Door
Entrance condition: {
"comeInShinecharged": {
"framesRequired": 130
}
}
Requires: "SpaceJump"
"canShinechargeMovementComplex"
"canMidairShinespark"
{
"shinespark": {
"frames": 21
}
}
Exit condition: {
"leaveWithSpark": {}
}
|
|
Takes three walljumps, and must shinespark at the apex. Entrance condition: {
"comeInShinecharged": {
"framesRequired": 110
}
}
Requires: "canPreciseWalljump"
"canConsecutiveWalljump"
"canShinechargeMovement"
"canMidairShinespark"
{
"shinespark": {
"frames": 78
}
}
|
|
From: 1
Left Door
To: 3
Item
Walljump or build run speed using the full runway to jump high enough for the shinespark. Entrance condition: {
"comeInShinecharged": {
"framesRequired": 80
}
}
Requires: {
"or": [
{
"and": [
"canWalljump",
{
"shinespark": {
"frames": 20
}
}
]
},
"canTrickyDashJump"
]
}
"HiJump"
"canShinechargeMovement"
"canMidairShinespark"
{
"shinespark": {
"frames": 60
}
}
|
|
Walljump or build run speed using the full runway to jump high enough for the shinespark. Entrance condition: {
"comeInShinecharging": {
"length": 9,
"openEnd": 0
}
}
Requires: {
"or": [
{
"and": [
"canWalljump",
{
"shinespark": {
"frames": 20
}
}
]
},
"canTrickyDashJump"
]
}
"HiJump"
"canShinechargeMovement"
"canMidairShinespark"
{
"shinespark": {
"frames": 60
}
}
|
|
Takes three walljumps, and must shinespark at the apex. Entrance condition: {
"comeInShinecharging": {
"length": 9,
"openEnd": 0
}
}
Requires: "canPreciseWalljump"
"canConsecutiveWalljump"
"canShinechargeMovement"
"canMidairShinespark"
{
"shinespark": {
"frames": 78
}
}
|
|
Notable: true Store a shinespark near the Grapple Room door and use the remaining runway to jump as far as possible to the right. Once near the acid platforms, Shinespark diagonally to reach the Missile Location. Entrance condition: {
"comeInShinecharged": {
"framesRequired": 175
}
}
Requires: "canTrickyJump"
"canShinechargeMovementComplex"
"canMidairShinespark"
{
"shinespark": {
"frames": 40
}
}
|
|
From: 4
Right Junction with Speed Blocks Broken
To: 1
Left Door
Notable: true Requires: "canShinechargeMovement"
"canMidairShinespark"
{
"canShineCharge": {
"usedTiles": 32,
"openEnd": 1
}
}
{
"shinespark": {
"frames": 52
}
}
|
|
From: 4
Right Junction with Speed Blocks Broken
To: 1
Left Door
Fire off the shinespark at the apex of two consecutive walljumps. Requires: "canWalljump"
"canShinechargeMovement"
"canMidairShinespark"
{
"canShineCharge": {
"usedTiles": 32,
"openEnd": 1
}
}
{
"shinespark": {
"frames": 90
}
}
|
|
From: 2
Middle Right Door
To: 3
Top Right Door
Jump into Screw Attack Room and spark diagonally once above the center of the door vertically. Or diagonally spark anywhere that is not the bottom of the door in the previous room. Entrance condition: {
"comeInShinecharged": {
"framesRequired": 15
}
}
Requires: "h_canNavigateHeatRooms"
"canMidairShinespark"
"canShinechargeMovement"
"canPrepareForNextRoom"
{
"heatFrames": 250
}
{
"shinespark": {
"frames": 18,
"excessFrames": 4
}
}
Clears obstacles: A |
|
Entrance condition: {
"comeInShinecharged": {
"framesRequired": 15
}
}
Requires: "h_canNavigateHeatRooms"
"canMidairShinespark"
{
"shinespark": {
"frames": 57,
"excessFrames": 4
}
}
{
"heatFrames": 230
}
|
|
Entrance condition: {
"comeInShinecharged": {
"framesRequired": 15
}
}
Requires: "h_canNavigateHeatRooms"
"canMidairShinespark"
{
"shinespark": {
"frames": 59,
"excessFrames": 5
}
}
{
"heatFrames": 190
}
|
|
Entrance condition: {
"comeInShinecharged": {
"framesRequired": 16
}
}
Requires: "h_canNavigateHeatRooms"
"canShinechargeMovement"
"canMidairShinespark"
{
"shinespark": {
"frames": 75,
"excessFrames": 10
}
}
{
"heatFrames": 270
}
|
|
Requires: "h_canNavigateHeatRooms"
"canMidairShinespark"
"canShinechargeMovement"
{
"canShineCharge": {
"usedTiles": 24,
"openEnd": 1
}
}
{
"shinespark": {
"frames": 75,
"excessFrames": 5
}
}
{
"heatFrames": 380
}
|
|
Jump before shinesparking to avoid an early crash. Entrance condition: {
"comeInShinecharged": {
"framesRequired": 15
}
}
Requires: "canMidairShinespark"
{
"shinespark": {
"frames": 78,
"excessFrames": 8
}
}
{
"heatFrames": 210
}
|
|
Jump before shinesparking to avoid an early crash. Entrance condition: {
"comeInShinecharged": {
"framesRequired": 15
}
}
Requires: "canMidairShinespark"
{
"shinespark": {
"frames": 78,
"excessFrames": 4
}
}
{
"heatFrames": 210
}
|
|
From: 7
Junction Left of Morph Tunnel
To: 7
Junction Left of Morph Tunnel
Use I-Frames from the first Dessgeega to run through the remaining enemies and store a shinespark. It helps to run towards the first hopper to take damage and then not stutter. Mid-air spark to kill all three at once. Requires: {
"canShineCharge": {
"usedTiles": 17,
"openEnd": 1
}
}
{
"enemyDamage": {
"enemy": "Dessgeega",
"type": "contact",
"hits": 1
}
}
"canHitbox"
"canMidairShinespark"
"canShinechargeMovementComplex"
{
"shinespark": {
"frames": 40
}
}
{
"heatFrames": 310
}
Clears obstacles: D |
|
Requires: "canShinechargeMovement"
{
"canShineCharge": {
"usedTiles": 33,
"openEnd": 2
}
}
"canMidairShinespark"
{
"shinespark": {
"frames": 80
}
}
Exit condition: {
"leaveWithSpark": {}
}
|
|
Land on the first spike platform, and use it to run and jump far enough through the room to trigger the fourth spike platform to fall. Fire a shot mid-air and activate the shinespark wind-up. Wait until the shot is at a specific position before sparking. Sparking too late will cause the shot to despawn before reaching the door. Sparking too early will cause Samus to bonk the door as it will not yet be open. A beam shot, Missile, or Super can be used. Entrance condition: {
"comeInShinecharged": {
"framesRequired": 85
}
}
Requires: "Gravity"
"canShinechargeMovementTricky"
"canHeroShot"
"canMidairShinespark"
{
"shinespark": {
"frames": 31
}
}
Exit condition: {
"leaveWithSpark": {}
}
|
|
Land on the floor, then jump and fire a shot mid-air and activate the shinespark wind-up. Wait until the shot is at a specific position before sparking. Sparking too late will cause the shot to despawn before reaching the door. Sparking too early will cause Samus to bonk the door as it will not yet be open. A beam shot, Missile, or Super can be used. Entrance condition: {
"comeInShinecharged": {
"framesRequired": 70
}
}
Requires: {
"not": "f_DefeatedPhantoon"
}
"canRiskPermanentLossOfAccess"
"canShinechargeMovementTricky"
"canHeroShot"
"canMidairShinespark"
{
"shinespark": {
"frames": 37
}
}
Exit condition: {
"leaveWithSpark": {}
}
|
|
Entrance condition: {
"comeInShinecharging": {
"length": 0,
"openEnd": 1
}
}
Requires: {
"not": "f_DefeatedPhantoon"
}
"canRiskPermanentLossOfAccess"
"canShinechargeMovementComplex"
"canMidairShinespark"
{
"shinespark": {
"frames": 20
}
}
Exit condition: {
"leaveWithSpark": {}
}
|
|
From: 1
Left Door
To: 2
Right Door
Entrance condition: {
"comeInShinecharging": {
"length": 0,
"openEnd": 1
}
}
Requires: {
"not": "f_DefeatedPhantoon"
}
"canRiskPermanentLossOfAccess"
"canShinechargeMovementTricky"
"canMidairShinespark"
{
"shinespark": {
"frames": 8
}
}
Exit condition: {
"leaveWithSpark": {}
}
|
|
Wait for the first spike platform to fall, jump onto it, and use it to run and jump far enough through the room to trigger the fourth spike platform to fall. Fire a shot mid-air and activate the shinespark wind-up. Wait until the shot is at a specific position before sparking. Sparking too late will cause the shot to despawn before reaching the door. Sparking too early will cause Samus to bonk the door as it will not yet be open. A beam shot, Missile, or Super can be used. Entrance condition: {
"comeInShinecharged": {
"framesRequired": 115
}
}
Requires: "Gravity"
"canShinechargeMovementTricky"
"canHeroShot"
"canMidairShinespark"
{
"shinespark": {
"frames": 31
}
}
Exit condition: {
"leaveWithSpark": {
"position": "top"
}
}
|
|
Land on the floor, then jump and fire a shot mid-air and activate the shinespark wind-up. Wait until the shot is at a specific position before sparking. Sparking too late will cause the shot to despawn before reaching the door. Sparking too early will cause Samus to bonk the door as it will not yet be open. A beam shot, Missile, or Super can be used. Entrance condition: {
"comeInShinecharged": {
"framesRequired": 70
}
}
Requires: {
"not": "f_DefeatedPhantoon"
}
"canRiskPermanentLossOfAccess"
"canShinechargeMovementTricky"
"canHeroShot"
"canMidairShinespark"
{
"shinespark": {
"frames": 37
}
}
Exit condition: {
"leaveWithSpark": {}
}
|
|
Entrance condition: {
"comeInShinecharging": {
"length": 0,
"openEnd": 1
}
}
Requires: {
"not": "f_DefeatedPhantoon"
}
"canRiskPermanentLossOfAccess"
"canShinechargeMovementComplex"
"canMidairShinespark"
{
"shinespark": {
"frames": 20
}
}
Exit condition: {
"leaveWithSpark": {}
}
|
|
From: 2
Right Door
To: 1
Left Door
Entrance condition: {
"comeInShinecharging": {
"length": 0,
"openEnd": 1
}
}
Requires: {
"not": "f_DefeatedPhantoon"
}
"canRiskPermanentLossOfAccess"
"canShinechargeMovementTricky"
"canMidairShinespark"
{
"shinespark": {
"frames": 8
}
}
Exit condition: {
"leaveWithSpark": {}
}
|
|
Entrance condition: {
"comeInShinecharged": {
"framesRequired": 30
}
}
Requires: "canMidairShinespark"
{
"shinespark": {
"frames": 39,
"excessFrames": 10
}
}
|
|
From: 1
Right Door
To: 2
Item (locked)
Jump as far as possible before activating the spark, while sparking high enough to crash into the Chozo statue's hand. Entrance condition: {
"comeInShinecharged": {
"framesRequired": 100
}
}
Requires: "canShinechargeMovementComplex"
"canMidairShinespark"
{
"shinespark": {
"frames": 33,
"excessFrames": 7
}
}
{
"not": "f_DefeatedPhantoon"
}
{
"or": [
"canRiskPermanentLossOfAccess",
"canCarefulJump"
]
}
|
|
From: 1
Right Door
To: 2
Item (locked)
Gain a shinecharge while entering the room. Run back to the door, and then run left and jump as far as possible before activating the spark, while sparking high enough to crash into the Chozo statue's hand. Entrance condition: {
"comeInShinecharging": {
"length": 7,
"openEnd": 0,
"steepDownTiles": 2
}
}
Requires: "canShinechargeMovementComplex"
"canMidairShinespark"
{
"shinespark": {
"frames": 33,
"excessFrames": 7
}
}
{
"or": [
"canRiskPermanentLossOfAccess",
"canCarefulJump"
]
}
|
|
From: 2
Bottom Right Door
To: 5
Platform Junction Near Top Left Door
Start the dash as close to the door transition as possible in order to have a larger window for storing the shinecharge. Entrance condition: {
"comeInRunning": {
"speedBooster": true,
"minTiles": 0.4375
}
}
Requires: "canWaterShineCharge"
{
"or": [
{
"shinespark": {
"frames": 41,
"excessFrames": 7
}
},
{
"and": [
"canMidairShinespark",
{
"shinespark": {
"frames": 38,
"excessFrames": 7
}
}
]
}
]
}
|
|
From: 2
Bottom Right Door
To: 6
Middle Junction Near Top Left Pirate
Start the dash as close to the door transition as possible in order to have a larger window for storing the shinecharge. With low energy, shinespark diagonally to the middle ledge on the left. Entrance condition: {
"comeInRunning": {
"speedBooster": true,
"minTiles": 0.4375
}
}
Requires: "canWaterShineCharge"
{
"or": [
{
"shinespark": {
"frames": 43,
"excessFrames": 26
}
},
{
"and": [
"canMidairShinespark",
{
"shinespark": {
"frames": 38,
"excessFrames": 25
}
}
]
}
]
}
{
"or": [
{
"enemyDamage": {
"enemy": "Pink Space Pirate (standing)",
"type": "contact",
"hits": 1
}
},
{
"enemyKill": {
"enemies": [
[
"Pink Space Pirate (standing)"
]
],
"explicitWeapons": [
"Plasma"
]
}
}
]
}
{
"or": [
"h_canCrouchJumpDownGrab",
"canSpringBallJumpMidAir",
{
"and": [
"Ice",
"Plasma"
]
}
]
}
|
|
From: 2
Bottom Right Door
To: 6
Middle Junction Near Top Left Pirate
Start the dash as close to the door transition as possible in order to have a larger window for storing the shinecharge. Spark up and fall onto the platform left of the fish. Entrance condition: {
"comeInRunning": {
"speedBooster": true,
"minTiles": 0.4375
}
}
Requires: "canWaterShineCharge"
{
"or": [
{
"shinespark": {
"frames": 43,
"excessFrames": 9
}
},
{
"and": [
"canMidairShinespark",
{
"shinespark": {
"frames": 38,
"excessFrames": 9
}
}
]
}
]
}
|
|
Requires Samus to enter in a state that can diagonally spark immediately. Entrance condition: {
"comeInShinecharged": {
"framesRequired": 10
},
"comesThroughToilet": "any"
}
Requires: "h_canNavigateUnderwater"
"canPrepareForNextRoom"
"canMidairShinespark"
{
"shinespark": {
"frames": 3,
"excessFrames": 0
}
}
|
|
Immediately spark after the door transition into the wall just to the right of the top right door. Entrance condition: {
"comeInShinecharged": {
"framesRequired": 10
},
"comesThroughToilet": "any"
}
Requires: "Gravity"
"canPrepareForNextRoom"
"canMidairShinespark"
{
"shinespark": {
"frames": 70,
"excessFrames": 16
}
}
|
|
From: 4
Top Left Door
To: 7
Spawn At Junction Near Top Right Door
Immediately spark after the door transition into the wall just to the right of the top right door. Entrance condition: {
"comeInShinecharged": {
"framesRequired": 10
},
"comesThroughToilet": "any"
}
Requires: "canSuitlessMaridia"
"canPrepareForNextRoom"
"canMidairShinespark"
{
"shinespark": {
"frames": 88,
"excessFrames": 21
}
}
|
|
Entrance condition: {
"comeInShinecharged": {
"framesRequired": 80
},
"comesThroughToilet": "any"
}
Requires: "Gravity"
{
"or": [
{
"shinespark": {
"frames": 77,
"excessFrames": 3
}
},
{
"and": [
"canMidairShinespark",
{
"shinespark": {
"frames": 69,
"excessFrames": 3
}
}
]
}
]
}
Clears obstacles: A |
|
To avoid breaking the speed blocks, align Samus on the first plant, just to the left of the door. Entrance condition: {
"comeInShinecharged": {
"framesRequired": 60
},
"comesThroughToilet": "any"
}
Requires: "Gravity"
"canMidairShinespark"
{
"shinespark": {
"frames": 71,
"excessFrames": 3
}
}
|
|
Entrance condition: {
"comeInShinecharged": {
"framesRequired": 100
},
"comesThroughToilet": "any"
}
Requires: "canSuitlessMaridia"
"canMidairShinespark"
{
"shinespark": {
"frames": 73,
"excessFrames": 3
}
}
|
|
Entrance condition: {
"comeInShinecharging": {
"length": 4,
"steepDownTiles": 1,
"openEnd": 1
}
}
Requires: "Gravity"
{
"or": [
{
"shinespark": {
"frames": 77,
"excessFrames": 3
}
},
{
"and": [
"canMidairShinespark",
{
"shinespark": {
"frames": 69,
"excessFrames": 3
}
}
]
}
]
}
Clears obstacles: A |
|
From: 2
Bottom Right Door
To: 6
Speed Blocked Item
Entrance condition: {
"comeInShinecharged": {
"framesRequired": 120
}
}
Requires: "Gravity"
{
"or": [
{
"shinespark": {
"frames": 77,
"excessFrames": 3
}
},
{
"and": [
"canMidairShinespark",
{
"shinespark": {
"frames": 69,
"excessFrames": 3
}
}
]
}
]
}
Clears obstacles: A |
|
To avoid breaking the speed blocks, align Samus on the first plant, just to the left of the door. Entrance condition: {
"comeInShinecharging": {
"length": 4,
"steepDownTiles": 1,
"openEnd": 1
}
}
Requires: "Gravity"
{
"or": [
{
"shinespark": {
"frames": 76,
"excessFrames": 3
}
},
{
"and": [
"canMidairShinespark",
{
"shinespark": {
"frames": 71,
"excessFrames": 3
}
}
]
}
]
}
|
|
From: 2
Bottom Right Door
To: 9
Junction Below Speed Blocks
To avoid breaking the speed blocks, align Samus on the first plant, just to the left of the door. Entrance condition: {
"comeInShinecharged": {
"framesRequired": 70
}
}
Requires: "Gravity"
{
"or": [
{
"shinespark": {
"frames": 76,
"excessFrames": 3
}
},
{
"and": [
"canMidairShinespark",
{
"shinespark": {
"frames": 71,
"excessFrames": 3
}
}
]
}
]
}
|
|
From: 2
Bottom Right Door
To: 9
Junction Below Speed Blocks
Entrance condition: {
"comeInShinecharging": {
"length": 1,
"openEnd": 1
}
}
Requires: "canSuitlessMaridia"
{
"or": [
{
"shinespark": {
"frames": 76,
"excessFrames": 3
}
},
{
"and": [
"canMidairShinespark",
{
"shinespark": {
"frames": 71,
"excessFrames": 3
}
}
]
}
]
}
|
|
From: 2
Bottom Right Door
To: 9
Junction Below Speed Blocks
Entrance condition: {
"comeInShinecharged": {
"framesRequired": 100
}
}
Requires: "canSuitlessMaridia"
"canShinechargeMovement"
{
"or": [
{
"shinespark": {
"frames": 76,
"excessFrames": 3
}
},
{
"and": [
"canMidairShinespark",
{
"shinespark": {
"frames": 71,
"excessFrames": 3
}
}
]
}
]
}
|
|
Requires: "Gravity"
{
"or": [
{
"canShineCharge": {
"usedTiles": 24,
"gentleUpTiles": 3,
"gentleDownTiles": 3,
"openEnd": 1
}
},
{
"and": [
{
"doorUnlockedAtNode": 3
},
{
"canShineCharge": {
"usedTiles": 25,
"gentleUpTiles": 3,
"gentleDownTiles": 3,
"openEnd": 1
}
}
]
}
]
}
{
"or": [
{
"shinespark": {
"frames": 77,
"excessFrames": 2
}
},
{
"and": [
"canMidairShinespark",
{
"shinespark": {
"frames": 50,
"excessFrames": 2
}
}
]
}
]
}
Clears obstacles: A |
|
Entrance condition: {
"comeInShinecharging": {
"length": 24,
"gentleUpTiles": 3,
"gentleDownTiles": 3,
"openEnd": 1
}
}
Requires: "Gravity"
{
"or": [
{
"shinespark": {
"frames": 77,
"excessFrames": 2
}
},
{
"and": [
"canMidairShinespark",
{
"shinespark": {
"frames": 50,
"excessFrames": 2
}
}
]
}
]
}
Clears obstacles: A |
|
From: 3
Middle Right Door
To: 6
Speed Blocked Item
Entrance condition: {
"comeInShinecharged": {
"framesRequired": 150
}
}
Requires: "Gravity"
"canMidairShinespark"
"canCarefulJump"
"canShinechargeMovement"
{
"shinespark": {
"frames": 50,
"excessFrames": 2
}
}
Clears obstacles: A |
|
From: 3
Middle Right Door
To: 6
Speed Blocked Item
This can be done with only a door-frame runway in the adjacent room. Entrance condition: {
"comeInRunning": {
"speedBooster": true,
"minTiles": 1
}
}
Requires: "canStutterWaterShineCharge"
"canMidairShinespark"
{
"canShineCharge": {
"usedTiles": 33,
"openEnd": 2
}
}
{
"shinespark": {
"frames": 62,
"excessFrames": 2
}
}
Clears obstacles: A |
|
Entrance condition: {
"comeInShinecharging": {
"length": 7,
"openEnd": 1
}
}
Requires: "canWaterShineCharge"
"canMidairShinespark"
"canCarefulJump"
"canShinechargeMovement"
{
"canShineCharge": {
"usedTiles": 33,
"openEnd": 2
}
}
{
"shinespark": {
"frames": 62,
"excessFrames": 2
}
}
Clears obstacles: A |
|
Requires: "Gravity"
{
"or": [
{
"canShineCharge": {
"usedTiles": 24,
"gentleUpTiles": 3,
"gentleDownTiles": 3,
"openEnd": 1
}
},
{
"and": [
{
"doorUnlockedAtNode": 3
},
{
"canShineCharge": {
"usedTiles": 25,
"gentleUpTiles": 3,
"gentleDownTiles": 3,
"openEnd": 1
}
}
]
}
]
}
{
"or": [
{
"shinespark": {
"frames": 76,
"excessFrames": 3
}
},
{
"and": [
"canMidairShinespark",
{
"shinespark": {
"frames": 50,
"excessFrames": 3
}
}
]
}
]
}
|
|
Entrance condition: {
"comeInShinecharged": {
"framesRequired": 80
}
}
Requires: "Gravity"
"canShinechargeMovement"
"canMidairShinespark"
{
"shinespark": {
"frames": 50,
"excessFrames": 3
}
}
|
|
Entrance condition: {
"comeInShinecharging": {
"length": 24,
"gentleUpTiles": 3,
"gentleDownTiles": 3,
"openEnd": 1
}
}
Requires: "Gravity"
{
"or": [
{
"shinespark": {
"frames": 76,
"excessFrames": 3
}
},
{
"and": [
"canMidairShinespark",
{
"shinespark": {
"frames": 50,
"excessFrames": 3
}
}
]
}
]
}
|
|
Entrance condition: {
"comeInShinecharged": {
"framesRequired": 145
}
}
Requires: "canSuitlessMaridia"
"canShinechargeMovement"
"canMidairShinespark"
{
"shinespark": {
"frames": 55,
"excessFrames": 3
}
}
|
|
From: 3
Middle Right Door
To: 9
Junction Below Speed Blocks
This can be done with only a door-frame runway in the adjacent room. Entrance condition: {
"comeInRunning": {
"speedBooster": true,
"minTiles": 1
}
}
Requires: "canStutterWaterShineCharge"
"canMidairShinespark"
{
"canShineCharge": {
"usedTiles": 33,
"openEnd": 2
}
}
{
"shinespark": {
"frames": 35,
"excessFrames": 3
}
}
|
|
From: 3
Middle Right Door
To: 9
Junction Below Speed Blocks
Entrance condition: {
"comeInShinecharging": {
"length": 7,
"openEnd": 1
}
}
Requires: "canWaterShineCharge"
"canMidairShinespark"
{
"canShineCharge": {
"usedTiles": 33,
"openEnd": 2
}
}
{
"shinespark": {
"frames": 35,
"excessFrames": 3
}
}
|
|
Requires: "Gravity"
{
"canShineCharge": {
"usedTiles": 17,
"steepUpTiles": 1,
"openEnd": 0
}
}
{
"or": [
{
"shinespark": {
"frames": 77,
"excessFrames": 3
}
},
{
"and": [
"canMidairShinespark",
{
"shinespark": {
"frames": 69,
"excessFrames": 3
}
}
]
}
]
}
Clears obstacles: A |
|
From: 8
Bottom Junction
To: 9
Junction Below Speed Blocks
To avoid breaking the speed blocks, align Samus on the first plant, just to the left of the door. Requires: "Gravity"
{
"canShineCharge": {
"usedTiles": 17,
"steepUpTiles": 1,
"openEnd": 0
}
}
{
"or": [
{
"shinespark": {
"frames": 76,
"excessFrames": 3
}
},
{
"and": [
"canMidairShinespark",
{
"shinespark": {
"frames": 69,
"excessFrames": 3
}
}
]
}
]
}
|
|
Requires: "Gravity"
{
"canShineCharge": {
"usedTiles": 19,
"gentleUpTiles": 2,
"openEnd": 1
}
}
"canShinechargeMovement"
{
"or": [
{
"shinespark": {
"frames": 60,
"excessFrames": 5
}
},
{
"and": [
"canMidairShinespark",
{
"shinespark": {
"frames": 55,
"excessFrames": 5
}
}
]
},
{
"and": [
"canMidairShinespark",
"HiJump",
{
"shinespark": {
"frames": 50,
"excessFrames": 5
}
}
]
}
]
}
Clears obstacles: B |
|
Entrance condition: {
"comeInShinecharging": {
"length": 18,
"gentleUpTiles": 2,
"openEnd": 1
}
}
Requires: "Gravity"
"canShinechargeMovement"
{
"or": [
{
"shinespark": {
"frames": 60,
"excessFrames": 5
}
},
{
"and": [
"canMidairShinespark",
{
"shinespark": {
"frames": 55,
"excessFrames": 5
}
}
]
},
{
"and": [
"canMidairShinespark",
"HiJump",
{
"shinespark": {
"frames": 50,
"excessFrames": 5
}
}
]
}
]
}
Clears obstacles: B |
|
Entrance condition: {
"comeInRunning": {
"speedBooster": true,
"minTiles": 2
}
}
Requires: "canStutterWaterShineCharge"
"canShinechargeMovement"
{
"canShineCharge": {
"usedTiles": 33,
"openEnd": 2
}
}
{
"or": [
{
"shinespark": {
"frames": 61,
"excessFrames": 7
}
},
{
"and": [
"canMidairShinespark",
{
"shinespark": {
"frames": 56,
"excessFrames": 7
}
}
]
},
{
"and": [
"canMidairShinespark",
"HiJump",
{
"shinespark": {
"frames": 52,
"excessFrames": 7
}
}
]
}
]
}
Clears obstacles: B |
|
Entrance condition: {
"comeInShinecharging": {
"length": 4,
"openEnd": 1
}
}
Requires: "canWaterShineCharge"
"canShinechargeMovement"
{
"canShineCharge": {
"usedTiles": 33,
"openEnd": 2
}
}
{
"or": [
{
"shinespark": {
"frames": 61,
"excessFrames": 7
}
},
{
"and": [
"canMidairShinespark",
{
"shinespark": {
"frames": 56,
"excessFrames": 7
}
}
]
},
{
"and": [
"canMidairShinespark",
"HiJump",
{
"shinespark": {
"frames": 52,
"excessFrames": 7
}
}
]
}
]
}
Clears obstacles: B |
|
Requires: "Gravity"
{
"canShineCharge": {
"usedTiles": 19,
"gentleUpTiles": 2,
"openEnd": 1
}
}
{
"or": [
{
"shinespark": {
"frames": 43,
"excessFrames": 4
}
},
{
"and": [
"canMidairShinespark",
{
"shinespark": {
"frames": 37,
"excessFrames": 5
}
}
]
},
{
"and": [
"canMidairShinespark",
"HiJump",
{
"shinespark": {
"frames": 32,
"excessFrames": 4
}
}
]
}
]
}
|
|
Entrance condition: {
"comeInShinecharging": {
"length": 18,
"gentleUpTiles": 2,
"openEnd": 1
}
}
Requires: "Gravity"
{
"or": [
{
"shinespark": {
"frames": 43,
"excessFrames": 4
}
},
{
"and": [
"canMidairShinespark",
{
"shinespark": {
"frames": 37,
"excessFrames": 5
}
}
]
},
{
"and": [
"canMidairShinespark",
"HiJump",
{
"shinespark": {
"frames": 32,
"excessFrames": 4
}
}
]
}
]
}
|
|
From: 1
Left Door
To: 3
Hidden Right Item
Requires at least 2 tiles in the adjacent room. Entrance condition: {
"comeInRunning": {
"speedBooster": true,
"minTiles": 2
}
}
Requires: "canStutterWaterShineCharge"
"canShinechargeMovement"
{
"canShineCharge": {
"usedTiles": 33,
"openEnd": 2
}
}
{
"or": [
{
"shinespark": {
"frames": 47,
"excessFrames": 5
}
},
{
"and": [
"canMidairShinespark",
{
"shinespark": {
"frames": 44,
"excessFrames": 5
}
}
]
},
{
"and": [
"canMidairShinespark",
"HiJump",
{
"shinespark": {
"frames": 41,
"excessFrames": 5
}
}
]
}
]
}
|
|
Entrance condition: {
"comeInShinecharging": {
"length": 4,
"openEnd": 1
}
}
Requires: "canWaterShineCharge"
"canShinechargeMovement"
{
"canShineCharge": {
"usedTiles": 33,
"openEnd": 2
}
}
{
"or": [
{
"shinespark": {
"frames": 47,
"excessFrames": 5
}
},
{
"and": [
"canMidairShinespark",
{
"shinespark": {
"frames": 44,
"excessFrames": 5
}
}
]
},
{
"and": [
"canMidairShinespark",
"HiJump",
{
"shinespark": {
"frames": 41,
"excessFrames": 5
}
}
]
}
]
}
|
|
Entrance condition: {
"comeInShinecharged": {
"framesRequired": 15
},
"comesThroughToilet": "any"
}
Requires: "canSuitlessMaridia"
"canMidairShinespark"
"canPrepareForNextRoom"
{
"shinespark": {
"frames": 67,
"excessFrames": 10
}
}
|
|
Entrance condition: {
"comeInShinecharged": {
"framesRequired": 55
},
"comesThroughToilet": "any"
}
Requires: "Gravity"
"canMidairShinespark"
{
"shinespark": {
"frames": 69,
"excessFrames": 6
}
}
|
|
Entrance condition: {
"comeInShinecharged": {
"framesRequired": 15
},
"comesThroughToilet": "any"
}
Requires: "Gravity"
"canMidairShinespark"
"canPrepareForNextRoom"
{
"shinespark": {
"frames": 72,
"excessFrames": 6
}
}
|
|
Entrance condition: {
"comeInShinecharged": {
"framesRequired": 20
},
"comesThroughToilet": "any"
}
Requires: "canSuitlessMaridia"
"canMidairShinespark"
"canPrepareForNextRoom"
{
"shinespark": {
"frames": 93,
"excessFrames": 12
}
}
|
|
Entrance condition: {
"comeInShinecharged": {
"framesRequired": 90
},
"comesThroughToilet": "any"
}
Requires: "canSuitlessMaridia"
"canMidairShinespark"
{
"shinespark": {
"frames": 86,
"excessFrames": 12
}
}
|
|
Run right-to-left to gain a shinecharge on the upper right ledge. Use a gravity jump, Space Jump, or HiJump to approach the door above and spark out. Requires: "Gravity"
{
"or": [
"SpaceJump",
"canGravityJump",
{
"and": [
"HiJump",
{
"or": [
"canWalljump",
"canTrickyDashJump"
]
}
]
}
]
}
{
"canShineCharge": {
"usedTiles": 20,
"gentleUpTiles": 3,
"gentleDownTiles": 1,
"steepUpTiles": 1,
"openEnd": 0
}
}
"canShinechargeMovementComplex"
"canMidairShinespark"
{
"shinespark": {
"frames": 8
}
}
Exit condition: {
"leaveWithSpark": {}
}
|
|
Entrance condition: {
"comeInShinechargedJumping": {
"framesRequired": 22
}
}
Requires: "Morph"
"canCrossRoomJumpIntoWater"
"canShinechargeMovement"
"canMidairShinespark"
{
"shinespark": {
"frames": 55
}
}
|
|
From: 4
Right Door
To: 6
Junction Right of Morph Passage
Entrance condition: {
"comeInShinechargedJumping": {
"framesRequired": 20
}
}
Requires: "Morph"
"canCrossRoomJumpIntoWater"
"canShinechargeMovement"
"canMidairShinespark"
{
"shinespark": {
"frames": 46,
"excessFrames": 3
}
}
|
|
Entrance condition: {
"comeInShinecharged": {
"framesRequired": 60
}
}
Requires: "canShinechargeMovement"
"canMidairShinespark"
"canCarefulJump"
{
"shinespark": {
"frames": 125,
"excessFrames": 20
}
}
|
|
Entrance condition: {
"comeInShinecharged": {
"framesRequired": 60
}
}
Requires: "canShinechargeMovement"
"canMidairShinespark"
"canCarefulJump"
{
"shinespark": {
"frames": 125,
"excessFrames": 6
}
}
|
|
Entrance condition: {
"comeInShinecharged": {
"framesRequired": 60
}
}
Requires: "canShinechargeMovement"
"canMidairShinespark"
"canCarefulJump"
{
"shinespark": {
"frames": 125
}
}
|
|
From: 1
Left Door
To: 2
Right Door
Slide into the hole where the shot block was and sink to the bottom. Shoot the door using a Hero shot and time the shinespark to follow the shot. Entrance condition: {
"comeInShinecharging": {
"length": 1,
"openEnd": 0
}
}
Requires: "canWaterShineCharge"
"canHeroShot"
"canShinechargeMovementTricky"
"canMidairShinespark"
{
"shinespark": {
"frames": 39
}
}
Exit condition: {
"leaveWithSpark": {
"position": "bottom"
}
}
|
|
From: 1
Left Door
To: 2
Right Door
Slide into the hole where the shot block was and sink to the bottom. Shoot the door using a Hero shot and time the shinespark to follow the shot. Either kill the ceiling crab so that Samus can jump forward, or stationary spinjump to avoid using the Shinespark early. Entrance condition: {
"comeInShinecharging": {
"length": 1,
"openEnd": 0
}
}
Requires: "canWaterShineCharge"
"canHeroShot"
"canShinechargeMovementTricky"
"canMidairShinespark"
"HiJump"
{
"or": [
{
"and": [
"Plasma",
"Wave"
]
},
"canStationarySpinJump"
]
}
{
"shinespark": {
"frames": 41
}
}
Exit condition: {
"leaveWithSpark": {}
}
|
|
From: 1
Left Door
To: 2
Right Door
Spinjump through the shotblocks and fire a Plasma + Wave shot on the way down, clearing the crabs. Begin the Shinespark windup while the Beam shot travels towards the door to open it. Entrance condition: {
"comeInShinecharging": {
"length": 0,
"openEnd": 0
}
}
Requires: "canWaterShineCharge"
"canHeroShot"
"canShinechargeMovementTricky"
"canMidairShinespark"
"Plasma"
"Wave"
{
"shinespark": {
"frames": 41
}
}
Exit condition: {
"leaveWithSpark": {}
}
|
|
From: 3
Draygon (locked)
To: 2
Right Door (locked)
Notable: true Charge a shinespark in the bottom of Draygon's room, then Gravity jump up in order to shinespark out of the right door. Requires: "canGravityJump"
"canShinechargeMovementComplex"
"canMidairShinespark"
{
"canShineCharge": {
"usedTiles": 20,
"openEnd": 1
}
}
{
"shinespark": {
"frames": 14
}
}
Exit condition: {
"leaveWithSpark": {}
}
|
|
Requires: "Gravity"
{
"canShineCharge": {
"usedTiles": 22,
"openEnd": 1
}
}
{
"or": [
{
"shinespark": {
"frames": 26,
"excessFrames": 5
}
},
{
"and": [
"canMidairShinespark",
{
"shinespark": {
"frames": 20,
"excessFrames": 4
}
}
]
}
]
}
|
|
From: 3
Draygon (locked)
To: 6
Draygon (unlocked)
Notable: true Shinecharge in-room, then horizontally spark through Draygon multiple times. It takes 3 Shinesparks if that is the only source of damage onto Draygon. Be careful of taking damage at the end of a Shinespark when near walls and on the killing Shinespark. Requires: "Gravity"
"canMidairShinespark"
"canShinechargeMovementComplex"
{
"or": [
"canShinechargeMovementTricky",
"h_canBreakThreeDraygonTurrets"
]
}
{
"canShineCharge": {
"usedTiles": 22,
"openEnd": 0
}
}
{
"enemyDamage": {
"enemy": "Draygon",
"type": "contact",
"hits": 2
}
}
{
"or": [
"HiJump",
{
"enemyDamage": {
"enemy": "Draygon",
"type": "contact",
"hits": 1
}
}
]
}
{
"shinespark": {
"frames": 150
}
}
Clears obstacles: f_DefeatedDraygon |
|
Requires: "h_canXMode"
"h_XModeSpikeHit"
"h_XModeSpikeHit"
{
"or": [
"h_XModeSpikeHit",
"canStationarySpinJump"
]
}
"Gravity"
"HiJump"
"SpaceJump"
"canShinechargeMovementComplex"
"canMidairShinespark"
{
"canShineCharge": {
"usedTiles": 33,
"openEnd": 2
}
}
{
"shinespark": {
"frames": 10
}
}
Exit condition: {
"leaveWithSpark": {}
}
|
|
Jump out of the sand before Shinesparking. Entrance condition: {
"comeInShinecharged": {
"framesRequired": 105
},
"comesThroughToilet": "any"
}
Requires: "canPlayInSand"
"canSunkenTileWideWallClimb"
"canShinechargeMovementComplex"
{
"or": [
"canMidairShinespark",
"canCarefulJump"
]
}
{
"shinespark": {
"frames": 11
}
}
|
|
From: 1
Top Sand Entrance
To: 4
Right Item
The shinespark must be performed near the upper ledge, and not inside the sandfall. Entrance condition: {
"comeInShinecharged": {
"framesRequired": 60
},
"comesThroughToilet": "any"
}
Requires: "Gravity"
"Morph"
"canMidairShinespark"
"canShinechargeMovement"
"canPrepareForNextRoom"
{
"shinespark": {
"frames": 18
}
}
|
|
From: 1
Top Sand Entrance
To: 4
Right Item
The shinespark must be performed near the upper ledge, and not inside the sandfall. Entrance condition: {
"comeInShinecharged": {
"framesRequired": 70
},
"comesThroughToilet": "any"
}
Requires: "canSuitlessMaridia"
"Morph"
"canMidairShinespark"
"canShinechargeMovementComplex"
"canPrepareForNextRoom"
{
"shinespark": {
"frames": 18
}
}
|
|
From: 3
Bottom Right Door
To: 1
Top Left Door
Charge a shinespark below the Oums, near the bottom right door, quickly move through the morph tunnel and spark up left to the middle door. This is an alternative to wall jumping. Requires: "Morph"
"Gravity"
"canShinechargeMovementComplex"
{
"or": [
{
"and": [
{
"canShineCharge": {
"usedTiles": 33,
"openEnd": 0
}
},
{
"shinespark": {
"frames": 20,
"excessFrames": 3
}
}
]
},
{
"and": [
"canMidairShinespark",
{
"canShineCharge": {
"usedTiles": 33,
"openEnd": 0
}
},
{
"shinespark": {
"frames": 15,
"excessFrames": 3
}
}
]
}
]
}
|
|
From: 3
Bottom Right Door
To: 4
Top Right Door
Charge a shinespark below the Oums, near the bottom right door, quickly move through the morph tunnel and spark up to the top door. This is an alternative to wall jumping. Requires: "Morph"
"Gravity"
"canShinechargeMovementComplex"
{
"or": [
{
"and": [
{
"canShineCharge": {
"usedTiles": 33,
"openEnd": 0
}
},
{
"shinespark": {
"frames": 39,
"excessFrames": 4
}
}
]
},
{
"and": [
"canMidairShinespark",
{
"canShineCharge": {
"usedTiles": 33,
"openEnd": 0
}
},
{
"shinespark": {
"frames": 33,
"excessFrames": 3
}
}
]
}
]
}
|
|
From: 1
Top Sand Entrance
To: 7
Below Morph Tunnel Junction
Shoot the shot block on the descent then shinespark diagonally up before hitting the sand. Entrance condition: {
"comeInShinecharged": {
"framesRequired": 55
},
"comesThroughToilet": "any"
}
Requires: "h_canNavigateUnderwater"
"canMidairShinespark"
"canShinechargeMovementComplex"
"Wave"
"canPrepareForNextRoom"
{
"shinespark": {
"frames": 17
}
}
|
|
Enter with a high shinespark through the door then shoot the opposite door and fall into it. Entrance condition: {
"comeInWithSpark": {
"position": "top"
}
}
Requires: "canMidairShinespark"
"canPrepareForNextRoom"
{
"shinespark": {
"frames": 20
}
}
|
|
Enter with a high shinespark through the door then shoot the opposite door and fall into it. Entrance condition: {
"comeInWithSpark": {
"position": "top"
}
}
Requires: "canMidairShinespark"
"canPrepareForNextRoom"
{
"shinespark": {
"frames": 20
}
}
|
|
Entrance condition: {
"comeInShinecharged": {
"framesRequired": 95
}
}
Requires: "canMidairShinespark"
"canShinechargeMovementComplex"
{
"or": [
"HiJump",
"canWalljump"
]
}
{
"shinespark": {
"frames": 17
}
}
Exit condition: {
"leaveWithSpark": {}
}
|
|
Use Hijump or one walljump on the left before a diagonal spark. Entrance condition: {
"comeInShinecharged": {
"framesRequired": 60
}
}
Requires: "canMidairShinespark"
"canShinechargeMovement"
{
"or": [
"HiJump",
"canWalljump"
]
}
{
"shinespark": {
"frames": 45,
"excessFrames": 11
}
}
|
|
Spark vertically to avoid hitting the right ledge. Entrance condition: {
"comeInShinecharged": {
"framesRequired": 120
},
"comesThroughToilet": "any"
}
Requires: "canShinechargeMovementComplex"
"canMidairShinespark"
{
"shinespark": {
"frames": 37,
"excessFrames": 10
}
}
{
"or": [
{
"enemyDamage": {
"enemy": "Choot",
"type": "contact",
"hits": 1
}
},
{
"enemyKill": {
"enemies": [
[
"Choot"
]
],
"explicitWeapons": [
"Missile",
"Super",
"ScrewAttack",
"PseudoScrew",
"Plasma",
"Charge+Wave",
"Charge+Spazer"
]
}
}
]
}
|
|
Shinespark from the left side of the water, or the very edge of the land. It helps to face right before Shinesparking. Entrance condition: {
"comeInShinecharged": {
"framesRequired": 120
}
}
Requires: "canShinechargeMovementComplex"
{
"or": [
{
"shinespark": {
"frames": 43,
"excessFrames": 3
}
},
{
"and": [
"canMidairShinespark",
{
"shinespark": {
"frames": 30,
"excessFrames": 3
}
}
]
}
]
}
|
|
A diagonal spark may take damage from the Choot It helps to face right before Shinesparking. Entrance condition: {
"comeInShinecharged": {
"framesRequired": 45
}
}
Requires: "canShinechargeMovementComplex"
"canMidairShinespark"
{
"shinespark": {
"frames": 13
}
}
|
|
Shinespark midair to avoid bonking. Jump outward before sparking save Energy. Entrance condition: {
"comeInShinecharging": {
"length": 3,
"openEnd": 0
}
}
Requires: "Gravity"
"canMidairShinespark"
"canShinechargeMovement"
{
"shinespark": {
"frames": 51,
"excessFrames": 4
}
}
|
|
Spark through the top of the door to avoid bonking. Entrance condition: {
"comeInWithSpark": {}
}
Requires: "Gravity"
"canMidairShinespark"
{
"shinespark": {
"frames": 61,
"excessFrames": 6
}
}
|
|
Spark through the top of the door to avoid bonking. Entrance condition: {
"comeInWithSpark": {}
}
Requires: "canMidairShinespark"
{
"shinespark": {
"frames": 75,
"excessFrames": 7
}
}
|
|
From: 1
Left Door
To: 2
Right Door
Gain an extra half-tile of runway by coming in very slowly to prevent falling off. Entrance condition: {
"comeInShinecharging": {
"length": 1,
"openEnd": 0
}
}
Requires: "canShinechargeMovementComplex"
"canSlowShortCharge"
"canMidairShinespark"
{
"canShineCharge": {
"usedTiles": 14,
"openEnd": 0
}
}
{
"shinespark": {
"frames": 69,
"excessFrames": 7
}
}
|
|
Shinespark midair to avoid bonking. Jump outward before sparking save Energy. Entrance condition: {
"comeInShinecharging": {
"length": 3,
"openEnd": 0
}
}
Requires: "Gravity"
"canMidairShinespark"
"canShinechargeMovement"
{
"shinespark": {
"frames": 51,
"excessFrames": 4
}
}
|
|
Spark through the top of the door to avoid bonking. Entrance condition: {
"comeInWithSpark": {}
}
Requires: "Gravity"
"canMidairShinespark"
{
"shinespark": {
"frames": 61,
"excessFrames": 6
}
}
|
|
Spark through the top of the door to avoid bonking. Entrance condition: {
"comeInWithSpark": {}
}
Requires: "canMidairShinespark"
{
"shinespark": {
"frames": 75,
"excessFrames": 7
}
}
|
|
From: 2
Right Door
To: 1
Left Door
Gain an extra half-tile of runway by coming in very slowly to prevent falling off. Entrance condition: {
"comeInShinecharging": {
"length": 1,
"openEnd": 0
}
}
Requires: "canShinechargeMovementComplex"
"canSlowShortCharge"
"canMidairShinespark"
{
"canShineCharge": {
"usedTiles": 14,
"openEnd": 0
}
}
{
"shinespark": {
"frames": 69,
"excessFrames": 7
}
}
|
|
Spark vertically through the bomb blocks. It is still possible to break the blocks while below 30 Energy by jumping before sparking. Entrance condition: {
"comeInShinecharged": {
"framesRequired": 40
}
}
Requires: "h_canNavigateUnderwater"
{
"or": [
{
"shinespark": {
"frames": 10,
"excessFrames": 8
}
},
{
"and": [
"canMidairShinespark",
{
"shinespark": {
"frames": 7,
"excessFrames": 7
}
}
]
}
]
}
|
|
From: 1
Left Door
To: 6
Junction Above Bomb Blocks
Spark vertically through the bomb blocks. It is still possible to break the blocks while below 30 Energy by jumping before sparking. Entrance condition: {
"comeInRunning": {
"speedBooster": true,
"minTiles": 2.4375
}
}
Requires: "canStutterWaterShineCharge"
{
"canShineCharge": {
"usedTiles": 33,
"openEnd": 2
}
}
{
"or": [
{
"shinespark": {
"frames": 10,
"excessFrames": 8
}
},
{
"and": [
"canMidairShinespark",
{
"shinespark": {
"frames": 7,
"excessFrames": 7
}
}
]
}
]
}
|
|
Spark vertically through the bomb blocks. It is still possible to break the blocks while below 30 Energy by jumping before sparking. Entrance condition: {
"comeInShinecharged": {
"framesRequired": 40
}
}
Requires: "h_canNavigateUnderwater"
{
"or": [
{
"shinespark": {
"frames": 10,
"excessFrames": 8
}
},
{
"and": [
"canMidairShinespark",
{
"shinespark": {
"frames": 7,
"excessFrames": 7
}
}
]
}
]
}
|
|
From: 2
Right Door
To: 6
Junction Above Bomb Blocks
Spark vertically through the bomb blocks. It is still possible to break the blocks while below 30 Energy by jumping before sparking. Entrance condition: {
"comeInRunning": {
"speedBooster": true,
"minTiles": 2.4375
}
}
Requires: "canStutterWaterShineCharge"
{
"canShineCharge": {
"usedTiles": 33,
"openEnd": 2
}
}
{
"or": [
{
"shinespark": {
"frames": 10,
"excessFrames": 8
}
},
{
"and": [
"canMidairShinespark",
{
"shinespark": {
"frames": 7,
"excessFrames": 7
}
}
]
}
]
}
|
|
From: 1
Left Door
To: 2
Right Door
Gain an extra half-tile of runway by coming in very slowly to prevent falling off. Entrance condition: {
"comeInShinecharging": {
"length": 1,
"openEnd": 0
}
}
Requires: "canShinechargeMovementComplex"
"canSlowShortCharge"
"canMidairShinespark"
{
"canShineCharge": {
"usedTiles": 14,
"openEnd": 0
}
}
{
"shinespark": {
"frames": 88,
"excessFrames": 5
}
}
|
|
From: 2
Right Door
To: 1
Left Door
Gain an extra half-tile of runway by coming in very slowly to prevent falling off. Entrance condition: {
"comeInShinecharging": {
"length": 1,
"openEnd": 0
}
}
Requires: "canShinechargeMovementComplex"
"canSlowShortCharge"
"canMidairShinespark"
{
"canShineCharge": {
"usedTiles": 14,
"openEnd": 0
}
}
{
"shinespark": {
"frames": 90,
"excessFrames": 5
}
}
|
|
From: 1
Top Right Door
To: 2
Left Door
Entrance condition: {
"comeInShinecharged": {
"framesRequired": 95
},
"comesThroughToilet": "no"
}
Requires: "canShinechargeMovementTricky"
{
"enemyDamage": {
"enemy": "Blue Sidehopper",
"type": "contact",
"hits": 1
}
}
"canMidairShinespark"
{
"shinespark": {
"frames": 21
}
}
Exit condition: {
"leaveWithSpark": {}
}
|
|
Spark through the top of the door to avoid the platforms. Entrance condition: {
"comeInWithSpark": {}
}
Requires: "canMidairShinespark"
{
"shinespark": {
"frames": 112,
"excessFrames": 16
}
}
|
|
Spark through the top of the door to avoid the platforms. Entrance condition: {
"comeInWithSpark": {}
}
Requires: "canMidairShinespark"
{
"shinespark": {
"frames": 112,
"excessFrames": 35
}
}
|
|
From: 3
Junction (Get Past Metroids, Left to Right)
To: 2
Right Door
Requires: "canMidairShinespark"
{
"canShineCharge": {
"usedTiles": 31,
"openEnd": 0
}
}
{
"or": [
{
"and": [
{
"obstaclesCleared": [
"A"
]
},
{
"shinespark": {
"frames": 54
}
}
]
},
{
"and": [
"HiJump",
{
"shinespark": {
"frames": 54
}
}
]
},
{
"and": [
{
"metroidFrames": 300
},
{
"shinespark": {
"frames": 54
}
}
]
},
{
"and": [
"canTrickyJump",
{
"shinespark": {
"frames": 75,
"excessFrames": 16
}
}
]
}
]
}
|
|
From: 4
Junction (Get Past Metroids, Right to Left)
To: 1
Left Door (locked)
Requires: "canMidairShinespark"
{
"canShineCharge": {
"usedTiles": 23,
"openEnd": 0
}
}
{
"shinespark": {
"frames": 80,
"excessFrames": 5
}
}
{
"or": [
{
"obstaclesCleared": [
"A"
]
},
"Ice",
"ScrewAttack",
"canPseudoScrew",
{
"metroidFrames": 200
}
]
}
|
|
Entrance condition: {
"comeInShinecharged": {
"framesRequired": 15
}
}
Requires: "canPrepareForNextRoom"
"canShinechargeMovement"
"canMidairShinespark"
{
"shinespark": {
"frames": 57,
"excessFrames": 13
}
}
|
|
From: 3
Bottom of Shaft
To: 1
Left Door
Notable: true Gain a shinecharge by running right-to-left at the bottom of the room. Move quickly to minimize damage from the acid, which will begin rising as soon as you reach the bottom of the room. Shinespark up the shaft. Requires: "Gravity"
{
"canShineCharge": {
"usedTiles": 17,
"openEnd": 0
}
}
{
"acidFrames": 90
}
"canShinechargeMovementComplex"
"canMidairShinespark"
{
"shinespark": {
"frames": 76,
"excessFrames": 6
}
}
|
|
From: 3
Bottom of Shaft
To: 1
Left Door
Notable: true Gain a shinecharge by running right-to-left at the bottom of the room, performing a stutter just before the acid reaches Samus' feet. Use spin jumps to minimize damage from the acid, and spark diagonally (to the left) mid-air to make it up the shaft. Requires: "canStutterWaterShineCharge"
{
"acidFrames": 215
}
"canShinechargeMovementTricky"
"canMidairShinespark"
{
"shinespark": {
"frames": 83,
"excessFrames": 2
}
}
|
