canSuitlessMaridia (Medium)
Navigating underwater without Gravity. This is not required for falling down a submerged room or for simple underwater platforming, such as where missing a jump does not leave Samus stuck somewhere.
Strats ()
|
Entrance condition: {
"comeInShinecharged": {
"framesRequired": 120
}
}
Requires: "f_TourianOpen" "canSuitlessMaridia" "canShinechargeMovementComplex" Exit condition: {
"leaveShinecharged": {
"framesRemaining": "auto"
}
}
|
|
Jump to the right side and diagonal spark left to escape the water. To spark as quickly as possible, buffer a spin jump by holding left (or right) and jump while riding the elevator. Entrance condition: {
"comeInShinecharged": {
"framesRequired": 35
}
}
Requires: "f_TourianOpen"
"h_canNavigateUnderwater"
"canShinechargeMovement"
{
"shinespark": {
"frames": 21,
"excessFrames": 8
}
}
|
|
Jump to either side and vertically spark out. To spark as quickly as possible, buffer a spin jump by holding left (or right) and jump while riding the elevator. Entrance condition: {
"comeInShinecharged": {
"framesRequired": 20
}
}
Requires: "f_TourianOpen"
"h_canNavigateUnderwater"
"canShinechargeMovement"
{
"shinespark": {
"frames": 24,
"excessFrames": 9
}
}
|
|
From: 4
Underwater Statues Event (locked)
To: 3
Statues Event (locked)
Requires: "f_TourianOpen" "canSuitlessMaridia" "HiJump" "canSpringBallJumpMidAir" |
|
Requires: "canSuitlessMaridia" "HiJump" |
|
Requires: "canSuitlessMaridia" "canBombJumpWaterEscape" |
|
From: 3
Junction (Left side Pit)
To: 1
Left Door
Notable: true 
Find the Choot that is closest to the surface of the water, crouch jump under it and damage boost onto the dry platform to the left. Requires: "canSuitlessMaridia"
"canHorizontalDamageBoost"
"canCrouchJump"
{
"enemyDamage": {
"enemy": "Choot",
"hits": 1,
"type": "contact"
}
}
|
|
Requires: "canSuitlessMaridia" "canUseFrozenEnemies" |
|
Requires: "canSuitlessMaridia"
"canSpaceJumpWaterBounce"
{
"or": [
"canWalljump",
{
"and": [
"canSpaceJumpWaterEscape",
"HiJump"
]
},
{
"and": [
"canTrickyJump",
"canDownGrab"
]
}
]
}
|
|
From: 3
Junction (Left side Pit)
To: 1
Left Door
Requires: "canSuitlessMaridia" "canSpringBallJumpMidAir" |
|
Requires: "canSuitlessMaridia" "HiJump" |
|
From: 3
Junction (Left side Pit)
To: 4
Junction (Right side Pit)
Requires: "canSuitlessMaridia" "canUseFrozenEnemies" |
|
From: 3
Junction (Left side Pit)
To: 4
Junction (Right side Pit)
Requires: "canSuitlessMaridia" "canSpringBallJumpMidAir" |
|
Requires: "canSuitlessMaridia"
"HiJump"
{
"or": [
"canSpringBallJumpMidAir",
"canSpaceJumpWaterBounce"
]
}
|
|
From: 4
Junction (Right side Pit)
To: 2
Right Door
Freeze the Choot when it swings right on its jump. Quickly get on top of it by first getting onto the pillar to the left, or with a SpringBall Jump. Perform a precise spring ball jump to get to the far right ledge, while avoiding hitting the water surface. While on the ledge, stand on the raised ground to the right and jump to the surface, then space jump across the water to the left. Requires: "canSuitlessMaridia"
"canTrickyUseFrozenEnemies"
"canCarefulJump"
"canSpringBallJumpMidAir"
{
"or": [
"canTrickySpringBallJump",
"canResetFallSpeed",
"canStationaryLateralMidAirMorph"
]
}
"canSpaceJumpWaterBounce"
"canWalljump"
|
|
Requires: "canSuitlessMaridia" "HiJump" |
|
From: 4
Junction (Right side Pit)
To: 3
Junction (Left side Pit)
Notable: true 
Crouch jump down grab to get over the first two pillars. Crouch jump damage boost on the Skultera then down grab to get over the third. Requires: "canSuitlessMaridia"
"canNeutralDamageBoost"
"h_canCrouchJumpDownGrab"
{
"enemyDamage": {
"enemy": "Skultera",
"hits": 1,
"type": "contact"
}
}
|
|
From: 4
Junction (Right side Pit)
To: 3
Junction (Left side Pit)
Requires: "canSuitlessMaridia" "canUseFrozenEnemies" |
|
From: 4
Junction (Right side Pit)
To: 3
Junction (Left side Pit)
Requires: "canSuitlessMaridia" "canSpringBallJumpMidAir" |
|
Requires: "canSuitlessMaridia"
"h_canDoubleSpringBallJumpWithHiJump"
{
"obstaclesNotCleared": [
"A"
]
}
|
|
Requires: "canGravityJump"
"canSuitlessMaridia"
{
"obstaclesNotCleared": [
"A"
]
}
|
|
It's a delayed walljump while the water is low, followed by a tight walljump off the bridge. This strat is easily bypassed by jumping through the door, or if the door can be opened. Requires: "canSuitlessMaridia" "canInsaneWalljump" |
|
It helps to begin jumping when the water level is high. Requires: "canSuitlessMaridia" "canTrickySpringBallJump" |
|
Requires: "canSuitlessMaridia"
{
"or": [
"canBombJumpWaterEscape",
{
"and": [
"h_canUseSpringBall",
"h_canJumpIntoIBJ"
]
}
]
}
|
|
From: 1
Right Door
To: 3
Dry Platform Junction
Watch a Zero (Caterpillar) climb along the ceiling before knocking it down near the speed blocks. Freeze it and jump on top. Escape the water with a spinjump or crouch jump. Requires: "canSuitlessMaridia"
"canBePatient"
"canTrickyUseFrozenEnemies"
{
"ammo": {
"type": "Super",
"count": 1
}
}
|
|
Requires: "canSuitlessMaridia" "canPreciseWalljump" |
|
Press pause slightly before jumping into morph, in order ensure Samus still has upward momentum when the pause fade-out finishes. Requires: "canSuitlessMaridia" "canTrickySpringBallJump" |
|
Lure the Gamets up out of the water. It may be helpful to freeze them on the ascent to prevent them from separating and moving horizontally. Positioning is much easier with Morph; simply morph on the runway before they start separating. Freeze a Gamet while there is a half-tile gap between it and the runway in order to extend it as much as possible. Requires: "h_canNavigateUnderwater"
{
"or": [
"h_canTrickyFrozenEnemyRunway",
{
"and": [
"h_canFrozenEnemyRunway",
"Morph"
]
}
]
}
Exit condition: {
"leaveWithRunway": {
"length": 6,
"openEnd": 0
}
}
|
|
From: 1
Left Door
To: 2
Right Door
Lure the Geemers up out of the water. It may be helpful to freeze them on the ascent to prevent them from separating and moving horizontally. At the top, position a Gamet flush with the central runway. Positioning is much easier with Morph; simply morph on the runway before they start separating. Freeze the Gamet before it begins moving horizontally, and it will be able to turn to the right. Use it as a frozen platform to cross both bodies of water. Lure the Gamet to the right and freeze it while there is a half-tile gap between it and the runway in order to extend it as much as possible. Requires: "h_canNavigateUnderwater"
"canTrickyJump"
{
"or": [
"h_canTrickyFrozenEnemyRunway",
{
"and": [
"h_canFrozenEnemyRunway",
"Morph"
]
}
]
}
{
"or": [
{
"ammo": {
"type": "Super",
"count": 1
}
},
{
"obstaclesCleared": [
"A"
]
}
]
}
Exit condition: {
"leaveWithRunway": {
"length": 9,
"openEnd": 0
}
}
|
|
From: 1
Left Door
To: 3
Junction Left of Green Gate
Notable: true 
1- Stand near the farm point, on the edge of where you make Gamets spawn. 2- Wait for the water position to be high. 3- Move to make the Gamets spawn. Moonwalk is useful here. 4- Quickly climb up to the last ledge before the door. 5- Run, jump, dboost off a Gamet. 6- Dboost a second time off the Gamet to cross the second moat. Requires: "h_canNavigateUnderwater"
"canTrickyJump"
"canHorizontalDamageBoost"
{
"enemyDamage": {
"enemy": "Gamet",
"type": "contact",
"hits": 2
}
}
|
|
From: 1
Left Door
To: 4
Center Platform Junction
1- Stand near the farm point, on the edge of where you make Gamets spawn. 2- Wait for the water position to be high. 3- Move to make the Gamets spawn. Moonwalk is useful here. 4- Quickly climb up to the last ledge before the door. 5- Run, jump, dboost off a Gamet. Requires: "h_canNavigateUnderwater"
"canHorizontalDamageBoost"
"canCarefulJump"
{
"enemyDamage": {
"enemy": "Gamet",
"type": "contact",
"hits": 1
}
}
|
|
From: 1
Left Door
To: 4
Center Platform Junction
Wait for the water to be rising and perform a max height SpringBall Jump. Requires: "canSuitlessMaridia" "HiJump" "h_canMaxHeightSpringBallJump" |
|
From: 4
Center Platform Junction
To: 3
Junction Left of Green Gate
Jump when the water level is at its lowest. Requires: "canSuitlessMaridia" "canTrickyJump" "h_canDoubleSpringBallJumpWithHiJump" |
|
Requires: "h_canNavigateUnderwater"
{
"or": [
"Gravity",
"HiJump",
"SpaceJump"
]
}
|
|
Requires: "canSuitlessMaridia" "canDownGrab" |
|
Requires: "canSuitlessMaridia"
{
"spikeHits": 2
}
|
|
Requires: "canSuitlessMaridia" "canCarefulJump" |
|
Requires: "canSuitlessMaridia"
{
"spikeHits": 2
}
|
|
Requires: "canSuitlessMaridia" "canCarefulJump" |
|
Requires at least 3 tiles to work, but some longer lengths don't work. Entrance condition: {
"comeInRunning": {
"speedBooster": true,
"minTiles": 3
}
}
Requires: "canSuitlessMaridia"
"canCarefulJump"
{
"or": [
"canWalljump",
"HiJump"
]
}
|
|
Requires: "canSuitlessMaridia" "canSpringBallJumpMidAir" |
|
Notable: true 
Position the Bull with beam shots before jumping into it. Requires: "canSuitlessMaridia"
"HiJump"
"canUseEnemies"
"canNeutralDamageBoost"
"canCrouchJump"
"Morph"
{
"enemyDamage": {
"enemy": "Bull",
"hits": 1,
"type": "contact"
}
}
|
|
It doesn't work from flush against the door. Start moving about half a tile away from it. Requires: "canSuitlessMaridia" "canTrickyDashJump" "canWalljump" |
|
Requires: "h_canNavigateUnderwater"
{
"resetRoom": {
"nodes": [
1,
4
],
"mustStayPut": false
}
}
{
"refill": [
"Energy",
"PowerBomb"
]
}
|
|
From: 2
Bottom Left Door
To: 1
Top Left Doorway
Notable: true 
Use a super to knock off a crab and freeze it mid-air. Then get on that crab, possibly using a door ledge Freeze a second crab on the edge of the hole above. Requires: "canMidAirMorph"
"canSuitlessMaridia"
{
"ammo": {
"type": "Super",
"count": 1
}
}
"canTrickyUseFrozenEnemies"
|
|
From: 2
Bottom Left Door
To: 1
Top Left Doorway
Notable: true 
Freeze one crab on the lip of the overhead opening and another on the edge of a doors platform then springballjump up. Use a Stationary Lateral Mid-Air Morph to gain enough jump height without bonking the ceiling. It is possible with a crouch jump to not need the second crab. Requires: "canSuitlessMaridia" "canTrickyJump" "canTrickySpringBallJump" "canTrickyUseFrozenEnemies" "canStationaryLateralMidAirMorph" |
|
Requires: "canSuitlessMaridia" "h_canDoubleSpringBallJumpWithHiJump" |
|
Freeze a crab on the edge of the hole in the ceiling. Then get on top of it with Gravity and a wall jump, jump assist, or second frozen crab on the ground, or a suitless Spring Ball jump with HiJump. Requires: "canMidAirMorph"
"canUseFrozenEnemies"
{
"or": [
{
"and": [
"Gravity",
{
"or": [
"HiJump",
"canWalljump",
"canSpringBallJumpMidAir",
"canTrickyUseFrozenEnemies"
]
}
]
},
{
"and": [
"HiJump",
"canSpringBallJumpMidAir",
"canSuitlessMaridia"
]
}
]
}
|
|
Stand on a frozen crab, then freeze a second one on the edge of the hole above. Use a crouch jump and/or down grab to get onto the crab above. Requires: "canMidAirMorph"
"canSuitlessMaridia"
"canTrickyUseFrozenEnemies"
"HiJump"
{
"or": [
"canCrouchJump",
"canDownGrab"
]
}
|
|
Use a Super to knock off a crab and freeze it mid-air. Freeze a second crab on the edge of the hole above. Requires: "canSuitlessMaridia"
"canTrickyJump"
{
"ammo": {
"type": "Super",
"count": 1
}
}
"canTrickyUseFrozenEnemies"
"canSpringBallJumpMidAir"
|
|
Requires: "h_canNavigateUnderwater"
{
"resetRoom": {
"nodes": [
2,
3
],
"mustStayPut": false
}
}
{
"refill": [
"Energy",
"PowerBomb"
]
}
|
|
From: 2
Bottom Left Door
To: 5
G-Mode Morph Junction (Top Half)
Entrance condition: {
"comeInWithGMode": {
"mode": "any",
"morphed": false
}
}
Requires: "Morph"
"h_canNavigateUnderwater"
{
"or": [
"canGravityJump",
{
"and": [
"Gravity",
"HiJump",
{
"or": [
"canSpringBallJumpMidAir",
"canWalljump"
]
}
]
},
{
"and": [
"canTrickyUseFrozenEnemies",
"HiJump",
"h_canCrouchJumpDownGrab"
]
},
{
"and": [
{
"ammo": {
"type": "Super",
"count": 1
}
},
"canTrickyUseFrozenEnemies",
"canOffScreenMovement"
]
},
{
"and": [
"canTrickyJump",
"canSpringBallJumpMidAir",
"canTrickyUseFrozenEnemies",
"canOffScreenMovement"
]
}
]
}
|
|
From: 3
Bottom Right Door
To: 5
G-Mode Morph Junction (Top Half)
Entrance condition: {
"comeInWithGMode": {
"mode": "any",
"morphed": false
}
}
Requires: "Morph"
"h_canNavigateUnderwater"
{
"or": [
"canGravityJump",
{
"and": [
"Gravity",
"HiJump",
{
"or": [
"canSpringBallJumpMidAir",
"canWalljump"
]
}
]
},
{
"and": [
"canTrickyUseFrozenEnemies",
"HiJump",
"h_canCrouchJumpDownGrab"
]
},
{
"and": [
{
"ammo": {
"type": "Super",
"count": 1
}
},
"canTrickyUseFrozenEnemies",
"canOffScreenMovement"
]
},
{
"and": [
"canTrickyJump",
"canSpringBallJumpMidAir",
"canTrickyUseFrozenEnemies",
"canOffScreenMovement"
]
}
]
}
|
|
Requires: "h_canNavigateUnderwater"
{
"resetRoom": {
"nodes": [
1
],
"mustStayPut": false
}
}
{
"refill": [
"PowerBomb"
]
}
|
|
From: 1
Left Door
To: 1
Left Door
Entrance condition: {
"comeInRunning": {
"speedBooster": true,
"minTiles": 2
}
}
Requires: "canSuitlessMaridia" "canShinechargeMovementTricky" "canStutterWaterShineCharge" Exit condition: {
"leaveShinecharged": {
"framesRemaining": 10
}
}
|
|
From: 1
Left Door
To: 1
Left Door
Entrance condition: {
"comeInRunning": {
"speedBooster": true,
"minTiles": 2
}
}
Requires: "canSuitlessMaridia"
"canShinechargeMovementComplex"
"canStutterWaterShineCharge"
{
"shinespark": {
"frames": 3
}
}
Exit condition: {
"leaveWithSpark": {}
}
|
|
From: 1
Left Door
To: 2
Right Door
Notable: true 
Requires a very precise stutter where Samus is moving slow enough while near the gate, so she can shoot it and it is fully open before she collides with it. A runway in the adjacent room of 2 tiles works best - with a longer runway, Samus will be moving too fast. Entrance condition: {
"comeInRunning": {
"speedBooster": true,
"minTiles": 1.4375
}
}
Requires: "canSuitlessMaridia"
"canShinechargeMovementComplex"
"canStutterWaterShineCharge"
"canDodgeWhileShooting"
{
"ammo": {
"type": "Super",
"count": 1
}
}
Exit condition: {
"leaveShinecharged": {
"framesRemaining": 70
}
}
|
|
Requires: "h_canNavigateUnderwater"
{
"resetRoom": {
"nodes": [
2
],
"mustStayPut": false
}
}
{
"refill": [
"Energy",
"PowerBomb"
]
}
|
|
From: 1
Bottom Left Door
To: 5
Platform Junction Near Top Left Door
Requires: "canSuitlessMaridia" "h_canDoubleSpringBallJumpWithHiJump" |
|
Entrance condition: {
"comeInShinecharged": {
"framesRequired": 30
}
}
Requires: "h_canNavigateUnderwater"
{
"shinespark": {
"frames": 55
}
}
|
|
From: 1
Bottom Left Door
To: 5
Platform Junction Near Top Left Door
Requires: "canSuitlessMaridia" "canTrickyUseFrozenEnemies" "HiJump" "canTrickySpringBallJump" |
|
From: 2
Bottom Right Door
To: 6
Middle Junction Near Top Left Pirate
The second jump is harder than a normal mid-air springball jump. Use either a stationary lateral mid air morph, to gain enough horizontal momentum, or a SpringFling to reduce Samus' fall speed as soon as it begins to build up. Requires: "canSuitlessMaridia"
"canTrickySpringBallJump"
{
"or": [
"canStationaryLateralMidAirMorph",
"canSpringFling"
]
}
{
"or": [
"canTrickyJump",
{
"enemyDamage": {
"enemy": "Pink Space Pirate (standing)",
"type": "contact",
"hits": 1
}
},
{
"enemyKill": {
"enemies": [
[
"Pink Space Pirate (standing)"
]
],
"explicitWeapons": [
"Plasma"
]
}
}
]
}
|
|
Requires: "canSuitlessMaridia"
"HiJump"
{
"or": [
"canCarefulJump",
"canSpringBallJumpMidAir",
{
"enemyDamage": {
"enemy": "Pink Space Pirate (standing)",
"type": "contact",
"hits": 1
}
},
{
"enemyKill": {
"enemies": [
[
"Pink Space Pirate (standing)"
]
],
"explicitWeapons": [
"Plasma"
]
}
}
]
}
|
|
Entrance condition: {
"comeInShinecharged": {
"framesRequired": 15
},
"comesThroughToilet": "any"
}
Requires: "h_canNavigateUnderwater"
"canHorizontalShinespark"
{
"shinespark": {
"frames": 90
}
}
|
|
From: 4
Top Left Door
To: 5
Platform Junction Near Top Left Door
Notable: true 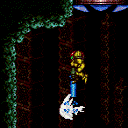
Enter on the left side of the door while aiming down and freeze the fish immediately. Entrance condition: {
"comeInNormally": {},
"comesThroughToilet": "no"
}
Requires: "h_canNavigateUnderwater"
"canPrepareForNextRoom"
"canTrickyUseFrozenEnemies"
{
"or": [
{
"and": [
"Wave",
"Plasma"
]
},
{
"and": [
"Plasma",
"Charge"
]
},
{
"and": [
"Wave",
"Spazer",
"Charge"
]
}
]
}
|
|
From: 4
Top Left Door
To: 5
Platform Junction Near Top Left Door
Notable: true 
Morph and unmorph before reaching the transition, and then drift to the ledge. Enter the room as far right as possible. Entrance condition: {
"comeInNormally": {},
"comesThroughToilet": "no"
}
Requires: "canSuitlessMaridia" "h_canResetFallSpeed" "canPrepareForNextRoom" |
|
From: 4
Top Left Door
To: 5
Platform Junction Near Top Left Door
Notable: true 
Wall jump in the room above, on the right wall of the doorway, immdiately before the door transition. Failure will likely result in a soft lock. To get to the ledge: If the room above has normal physics, hold right in this room. If the room above has water physics, shoot to break spin while holding right in this room. Entrance condition: {
"comeInNormally": {},
"comesThroughToilet": "any"
}
Requires: "canSuitlessMaridia" "canPreciseWalljump" "canPrepareForNextRoom" "canMidairWiggle" "canCarefulJump" |
|
Requires Samus to enter in a state that can diagonally spark immediately. Entrance condition: {
"comeInShinecharged": {
"framesRequired": 10
},
"comesThroughToilet": "any"
}
Requires: "h_canNavigateUnderwater"
"canPrepareForNextRoom"
"canMidairShinespark"
{
"shinespark": {
"frames": 3,
"excessFrames": 0
}
}
|
|
From: 4
Top Left Door
To: 7
Spawn At Junction Near Top Right Door
Immediately spark after the door transition into the wall just to the right of the top right door. Entrance condition: {
"comeInShinecharged": {
"framesRequired": 10
},
"comesThroughToilet": "any"
}
Requires: "canSuitlessMaridia"
"canPrepareForNextRoom"
"canMidairShinespark"
{
"shinespark": {
"frames": 88,
"excessFrames": 21
}
}
|
|
From: 5
Platform Junction Near Top Left Door
To: 4
Top Left Door
Notable: true 
Jump towards the door with HiJump equipped. A Flatley style jump can position Samus over the edge of the ledge, closer to the door. Turning around while facing down, just before touching the ceiling, is another way to move Samus a few pixels closer to the door. Requires: "canSuitlessMaridia"
"HiJump"
"canTrickyJump"
{
"or": [
"canFlatleyJump",
"canMomentumConservingTurnaround"
]
}
|
|
From: 5
Platform Junction Near Top Left Door
To: 4
Top Left Door
Notable: true
Jump towards the door with a Springball Jump, jumping as late as possible. A Flatley style jump can position Samus over the edge of the ledge, closer to the door, allowing for an earlier Springball jump. The slight fall from a Flatley Jump helps with the Springball jump, but then Samus must unmorph to extend her hitbox to touch the transition. A Stationary Lateral MidAir Morph also helps with this jump. Unmorphing after a missed jump can return Samus to the ledge to try again. Requires: "canSuitlessMaridia"
"canTrickySpringBallJump"
{
"or": [
"canTrickyJump",
"canStationaryLateralMidAirMorph"
]
}
|
|
Requires: "canSuitlessMaridia" "HiJump" "h_canUseSpringBall" |
|
From: 5
Platform Junction Near Top Left Door
To: 4
Top Left Door
Requires: "canSuitlessMaridia"
"canUseFrozenEnemies"
{
"or": [
"HiJump",
"canSpringBallJumpMidAir"
]
}
|
|
From: 5
Platform Junction Near Top Left Door
To: 6
Middle Junction Near Top Left Pirate
Requires: "h_canNavigateUnderwater" |
|
From: 6
Middle Junction Near Top Left Pirate
To: 5
Platform Junction Near Top Left Door
Freeze the fish a bit left of the peak in its swim cycle. Build run speed on top of the fish before jumping to the ledge. The positioning is more lenient if the fish is frozen while moving leftward. Requires: "canSuitlessMaridia" "canTrickyJump" "canTrickyUseFrozenEnemies" |
|
From: 6
Middle Junction Near Top Left Pirate
To: 5
Platform Junction Near Top Left Door
Requires: "canSuitlessMaridia"
{
"or": [
"HiJump",
"canSpringBallJumpMidAir"
]
}
|
|
From: 6
Middle Junction Near Top Left Pirate
To: 7
Spawn At Junction Near Top Right Door
Notable: true .png)
.gif)
This is particularly precise, and requires subpixel precision. Requires: "canSuitlessMaridia" "canInsaneJump" |
|
From: 6
Middle Junction Near Top Left Pirate
To: 7
Spawn At Junction Near Top Right Door
Requires: "canSuitlessMaridia"
"canCarefulJump"
{
"or": [
"HiJump",
"canSpringBallJumpMidAir"
]
}
|
|
From: 6
Middle Junction Near Top Left Pirate
To: 7
Spawn At Junction Near Top Right Door
Requires: "canSuitlessMaridia" "Plasma" "canUseFrozenEnemies" |
|
Requires: "canSuitlessMaridia"
{
"or": [
"HiJump",
"canSpringBallJumpMidAir"
]
}
|
|
From: 7
Spawn At Junction Near Top Right Door
To: 6
Middle Junction Near Top Left Pirate
Requires: "h_canNavigateUnderwater" |
|
From: 2
Bottom Right Door
To: 1
Left Doorway
Entrance condition: {
"comeInWithGMode": {
"mode": "any",
"morphed": true
}
}
Requires: {
"obstaclesCleared": [
"f_MaridiaTubeBroken"
]
}
{
"or": [
{
"and": [
"Gravity",
"h_canArtificialMorphMovement"
]
},
{
"and": [
"canSuitlessMaridia",
"h_canArtificialMorphSpringBall",
"HiJump"
]
}
]
}
Exit condition: {
"leaveWithGMode": {
"morphed": true
}
}
|
|
From: 2
Bottom Right Door
To: 3
Top Right Doorway
Entrance condition: {
"comeInWithGMode": {
"mode": "any",
"morphed": true
}
}
Requires: {
"obstaclesCleared": [
"f_MaridiaTubeBroken"
]
}
{
"or": [
{
"and": [
"Gravity",
"h_canArtificialMorphMovement"
]
},
{
"and": [
"canSuitlessMaridia",
"h_canArtificialMorphSpringBall",
"HiJump"
]
}
]
}
Exit condition: {
"leaveWithGMode": {
"morphed": true
}
}
|
|
From: 5
Inside Maridia Tube (locked)
To: 4
Top Door
Jump as the first action after breaking the tube to gravity jump to the top of the room. Open the door and go through it during the ascent. This can only be attempted once. Requires: {
"obstaclesCleared": [
"f_MaridiaTubeBroken"
]
}
{
"obstaclesCleared": [
"A"
]
}
"canRiskPermanentLossOfAccess"
"canSuitlessMaridia"
"canTrickyJump"
|
|
From: 5
Inside Maridia Tube (locked)
To: 6
Above Maridia Tube (locked)
Requires: {
"obstaclesCleared": [
"f_MaridiaTubeBroken"
]
}
"canSuitlessMaridia"
"canSpringBallJumpMidAir"
|
|
Requires: "canSuitlessMaridia" "canSpringBallJumpMidAir" |
|
From: 1
Bottom Door
To: 6
Speed Blocked Item
Notable: true 
Place bombs against the speed blocks until they are overloaded. Afterwards, freeze a crab on the edge of the speed blocks, such that Samus can jump inside and stand on the crab. Exit G-Mode and rotate to obtain the item, then kill the crab with Wave Beam to fall back down. Entrance condition: {
"comeInWithGMode": {
"mode": "any",
"morphed": false
},
"comesThroughToilet": "any"
}
Requires: "canTrickyUseFrozenEnemies"
"Wave"
"h_canUseMorphBombs"
{
"or": [
"Gravity",
{
"and": [
"canSuitlessMaridia",
"HiJump"
]
}
]
}
{
"or": [
"h_canUseSpringBall",
"canBeVeryPatient",
{
"and": [
"Gravity",
"h_canCeilingBombJump",
"h_canIBJ"
]
}
]
}
|
|
From: 1
Bottom Door
To: 6
Speed Blocked Item
Notable: true
Overloading the PLMs can be done with as few as 2 PBs if they are placed precisely. Place them two ledges above the item - to the left of the morph tunnel item. It is important that they are placed on either of the flat tiles, not the sloped tile on the right. Afterwards, freeze a crab on the edge of the speed blocks, such that Samus can jump inside and stand on the crab. Exit G-Mode and rotate to obtain the item, then kill the crab with Wave Beam to fall back down. Entrance condition: {
"comeInWithGMode": {
"mode": "direct",
"morphed": false
},
"comesThroughToilet": "no"
}
Requires: "canTrickyUseFrozenEnemies"
"Wave"
{
"or": [
"Gravity",
{
"and": [
"canSuitlessMaridia",
"HiJump"
]
}
]
}
"h_canUsePowerBombs"
"h_canUsePowerBombs"
|
|
Entrance condition: {
"comeInShinecharged": {
"framesRequired": 120
},
"comesThroughToilet": "any"
}
Requires: "canSuitlessMaridia"
{
"shinespark": {
"frames": 77,
"excessFrames": 2
}
}
Clears obstacles: A |
|
Entrance condition: {
"comeInShinecharged": {
"framesRequired": 60
},
"comesThroughToilet": "any"
}
Requires: "canSuitlessMaridia"
{
"shinespark": {
"frames": 76,
"excessFrames": 3
}
}
|
|
Entrance condition: {
"comeInShinecharged": {
"framesRequired": 100
},
"comesThroughToilet": "any"
}
Requires: "canSuitlessMaridia"
"canMidairShinespark"
{
"shinespark": {
"frames": 73,
"excessFrames": 3
}
}
|
|
From: 2
Bottom Right Door
To: 6
Speed Blocked Item
Notable: true
Place bombs against the speed blocks until they are overloaded. Afterwards, freeze a crab on the edge of the speed blocks, such that Samus can jump inside and stand on the crab. Exit G-Mode and rotate to obtain the item, then kill the crab with Wave Beam to fall back down. Entrance condition: {
"comeInWithGMode": {
"mode": "any",
"morphed": false
}
}
Requires: "canTrickyUseFrozenEnemies"
"Wave"
"h_canUseMorphBombs"
{
"or": [
"Gravity",
{
"and": [
"canSuitlessMaridia",
"HiJump"
]
}
]
}
{
"or": [
"h_canUseSpringBall",
"canBeVeryPatient",
{
"and": [
"Gravity",
"h_canCeilingBombJump",
"h_canIBJ"
]
}
]
}
|
|
From: 2
Bottom Right Door
To: 6
Speed Blocked Item
Notable: true
Overloading the PLMs can be done with as few as 2 PBs if they are placed precisely. Place them two ledges above the item - to the left of the morph tunnel item. It is important that they are placed on either of the flat tiles, not the sloped tile on the right. Afterwards, freeze a crab on the edge of the speed blocks, such that Samus can jump inside and stand on the crab. Exit G-Mode and rotate to obtain the item, then kill the crab with Wave Beam to fall back down. Entrance condition: {
"comeInWithGMode": {
"mode": "direct",
"morphed": false
}
}
Requires: "canTrickyUseFrozenEnemies"
"Wave"
{
"or": [
"Gravity",
{
"and": [
"canSuitlessMaridia",
"HiJump"
]
}
]
}
"h_canUsePowerBombs"
"h_canUsePowerBombs"
|
|
Entrance condition: {
"comeInShinecharging": {
"length": 1,
"openEnd": 1
}
}
Requires: "canSuitlessMaridia"
{
"shinespark": {
"frames": 77,
"excessFrames": 2
}
}
Clears obstacles: A |
|
From: 2
Bottom Right Door
To: 9
Junction Below Speed Blocks
Entrance condition: {
"comeInShinecharging": {
"length": 1,
"openEnd": 1
}
}
Requires: "canSuitlessMaridia"
{
"or": [
{
"shinespark": {
"frames": 76,
"excessFrames": 3
}
},
{
"and": [
"canMidairShinespark",
{
"shinespark": {
"frames": 71,
"excessFrames": 3
}
}
]
}
]
}
|
|
From: 2
Bottom Right Door
To: 9
Junction Below Speed Blocks
Entrance condition: {
"comeInShinecharged": {
"framesRequired": 100
}
}
Requires: "canSuitlessMaridia"
"canShinechargeMovement"
{
"or": [
{
"shinespark": {
"frames": 76,
"excessFrames": 3
}
},
{
"and": [
"canMidairShinespark",
{
"shinespark": {
"frames": 71,
"excessFrames": 3
}
}
]
}
]
}
|
|
Requires: "h_canNavigateUnderwater"
{
"resetRoom": {
"nodes": [
3
],
"mustStayPut": false
}
}
{
"refill": [
"PowerBomb"
]
}
|
|
From: 3
Middle Right Door
To: 6
Speed Blocked Item
Notable: true
Place bombs against the speed blocks until they are overloaded. Afterwards, freeze a crab on the edge of the speed blocks, such that Samus can jump inside and stand on the crab. Exit G-Mode and rotate to obtain the item, then kill the crab with Wave Beam to fall back down. Entrance condition: {
"comeInWithGMode": {
"mode": "any",
"morphed": false
}
}
Requires: "canTrickyUseFrozenEnemies"
"Wave"
"h_canUseMorphBombs"
{
"or": [
"Gravity",
{
"and": [
"canSuitlessMaridia",
"HiJump"
]
}
]
}
{
"or": [
"h_canUseSpringBall",
"canBeVeryPatient",
{
"and": [
"Gravity",
"h_canCeilingBombJump",
"h_canIBJ"
]
}
]
}
|
|
From: 3
Middle Right Door
To: 6
Speed Blocked Item
Notable: true
Overloading the PLMs can be done with as few as 2 PBs if they are placed precisely. Place them two ledges above the item - to the left of the morph tunnel item. It is important that they are placed on either of the flat tiles, not the sloped tile on the right. Afterwards, freeze a crab on the edge of the speed blocks, such that Samus can jump inside and stand on the crab. Exit G-Mode and rotate to obtain the item, then kill the crab with Wave Beam to fall back down. Entrance condition: {
"comeInWithGMode": {
"mode": "direct",
"morphed": false
}
}
Requires: "canTrickyUseFrozenEnemies"
"Wave"
{
"or": [
"Gravity",
{
"and": [
"canSuitlessMaridia",
"HiJump"
]
}
]
}
"h_canUsePowerBombs"
"h_canUsePowerBombs"
|
|
From: 3
Middle Right Door
To: 9
Junction Below Speed Blocks
Notable: true 
The tricky part is getting to the ledge below the missiles. There are two ways to do this: 1. Stand on a frozen crab with a frozen fish at the lowest height of its cycle to the right. Further to the right is better as long as it can be stood upon without the ledge above. Perform a stationary lateral midair morph into a max height spring ball jump to get onto the fish before it thaws. Press against the fish for the maximum amount of time possible while moving upwards in order to gain more height in order to get on top of it. 2. Freeze the global crab on the right wall, get onto it and up and onto the frozen fish before it thaws. Be careful not to fall through the crab. A fail will require Samus to reset the room, or wait a very long time in order for the crab to circle the room. Using a Super may make the crab fall on a floating platform, and it still takes more than a minute to return. Note that it is possible to turn off ice beam to immediately thaw any frozen enemies; this can help get the crab and fish in a good cycle with each other. Requires: "canSuitlessMaridia" "canTrickySpringBallJump" "canTrickyUseFrozenEnemies" "canTrickyJump" |
|
From: 3
Middle Right Door
To: 9
Junction Below Speed Blocks
Notable: true 
Use the slow global crab and Skulteras to get up. The last part, just below the item is the hardest. Get onto the global crab on the right wall. Either freeze the Skultera close to the wall and wall jump between them. or, a harder option without wall jumps is to refreeze the crab again, higher on the wall, while being careful not to clip through it. Freeze the Skultera at the left, near its minimum and jump to it, then the solid ground. Note that the fish will be pushed down slightly over time because of the sloped tiles, but it will be at its minimum by the time the global crab has arrived. Requires: "canSuitlessMaridia"
"canCrazyCrabClimb"
"canBeVeryPatient"
{
"or": [
"canSunkenTileWideWallClimb",
"canTrickyJump"
]
}
|
|
From: 3
Middle Right Door
To: 9
Junction Below Speed Blocks
Notable: true 
Use the slow global crab and Skulteras to get up. The last part, just below the item is the hardest. Wait for the global crab to be on vertical portion the ledge jutting out on the right or left - any other locations and it will fall on a platform and get stuck. Shoot a super and freeze it mid air. Using the frozen crab on the platform, the mid air crab, and the fish, jump up to the solid ground. Freeze the Skultera at the left, near its minimum and jump to it, then the solid ground. Note that the fish will be pushed down slightly over time because of the sloped tiles, but it will be at its minimum by the time the global crab has arrived. Requires: "canSuitlessMaridia"
"canCrazyCrabClimb"
"canBeVeryPatient"
{
"ammo": {
"type": "Super",
"count": 1
}
}
|
|
From: 3
Middle Right Door
To: 9
Junction Below Speed Blocks
Requires: "canSuitlessMaridia" "HiJump" "canTrickyUseFrozenEnemies" |
|
From: 3
Middle Right Door
To: 9
Junction Below Speed Blocks
Requires: "canSuitlessMaridia" "HiJump" "canSpringBallJumpMidAir" |
|
Entrance condition: {
"comeInShinecharged": {
"framesRequired": 145
}
}
Requires: "canSuitlessMaridia"
"canShinechargeMovement"
"canMidairShinespark"
{
"shinespark": {
"frames": 55,
"excessFrames": 3
}
}
|
|
Requires: "h_canNavigateUnderwater"
{
"resetRoom": {
"nodes": [
4
],
"mustStayPut": false
}
}
{
"refill": [
"PowerBomb"
]
}
|
|
From: 4
Top Right Door
To: 6
Speed Blocked Item
Notable: true
Place bombs against the speed blocks until they are overloaded. Afterwards, freeze a crab on the edge of the speed blocks, such that Samus can jump inside and stand on the crab. Exit G-Mode and rotate to obtain the item, then kill the crab with Wave Beam to fall back down. Entrance condition: {
"comeInWithGMode": {
"mode": "any",
"morphed": true
}
}
Requires: {
"or": [
"Gravity",
{
"and": [
"canSuitlessMaridia",
"HiJump"
]
}
]
}
"canTrickyUseFrozenEnemies"
"Wave"
"h_canArtificialMorphBombs"
{
"or": [
"h_canArtificialMorphSpringBall",
{
"and": [
"Morph",
"canBeVeryPatient"
]
},
{
"and": [
"Gravity",
"h_canArtificialMorphIBJ",
"h_canArtificialMorphCeilingBombJump"
]
},
{
"and": [
"Gravity",
"h_canArtificialMorphIBJ",
"canBeVeryPatient"
]
}
]
}
|
|
From: 4
Top Right Door
To: 6
Speed Blocked Item
Notable: true
Overloading the PLMs can be done with as few as 2 PBs if they are placed precisely. Place them two ledges above the item - to the left of the morph tunnel item. It is important that they are placed on either of the flat tiles, not the sloped tile on the right. Afterwards, freeze a crab on the edge of the speed blocks, such that Samus can jump inside and stand on the crab. Exit G-Mode and rotate to obtain the item, then kill the crab with Wave Beam to fall back down. Entrance condition: {
"comeInWithGMode": {
"mode": "direct",
"morphed": true
}
}
Requires: {
"or": [
"Gravity",
{
"and": [
"canSuitlessMaridia",
"canCrouchJump"
]
}
]
}
"canTrickyUseFrozenEnemies"
"Wave"
"h_canArtificialMorphPowerBomb"
"h_canArtificialMorphPowerBomb"
|
|
From: 4
Top Right Door
To: 6
Speed Blocked Item
Bring a Shinecharge from the top door to the speed blocks below the Missile item location. Be especially mindfull of the aquatic life during the descent. Line up directly below the speed blocks when jumping up, especially if using a SpringBall jump. Entrance condition: {
"comeInRunning": {
"speedBooster": true,
"minTiles": 1.4375
}
}
Requires: "canChainTemporaryBlue"
"canXRayTurnaround"
"canStutterWaterShineCharge"
{
"or": [
"Gravity",
{
"and": [
"canSuitlessMaridia",
"HiJump"
]
},
{
"and": [
"canSuitlessMaridia",
"canSpringBallJumpMidAir"
]
}
]
}
|
|
From: 5
Morph Passage Doorway
To: 7
Morph Tunnel Item
Turn HiJump and Gravity suit off before jumping and morphing into the tunnel. The crab will not come through the whole tunnel. Retreat to the right to avoid taking a hit. Requires: "canSuitlessMaridia" "canDisableEquipment" |
|
From: 8
Bottom Junction
To: 3
Middle Right Door
Notable: true
Wait a long time for the slow global crab. Freeze it when it comes around on the left, one tile above the bottom slope. Freeze the fish, get on the frozen crab, and wall jump between the fish and the wall and the wall. Wall jump towards the fish to gain height faster. Requires: "canSuitlessMaridia"
"canCrazyCrabClimb"
"canSunkenTileWideWallClimb"
"canBeVeryPatient"
"canMidairWiggle"
{
"obstaclesNotCleared": [
"A"
]
}
|
|
From: 8
Bottom Junction
To: 3
Middle Right Door
Freeze the crab on the corner of the ledge and the fish near the wall but with enough space for Samus to fit through and jump up using HiJump or a midair spring ball jump. Possible backups include: knocking the Scisor off the wall and freezing it midair, or with HiJump: freezing the Skultera near a wall and walljumping into it repeatedly, or freezing the Scisor on the ground and crouch jumping up to the Skultera, rubbing into the frozen enemy to gain extra height before downgrabbing. Requires: "canSuitlessMaridia"
{
"or": [
"HiJump",
"canTrickySpringBallJump"
]
}
"canTrickyUseFrozenEnemies"
|
|
Requires: "canSuitlessMaridia" "HiJump" "canSpringBallJumpMidAir" |
|
Requires: "h_canNavigateUnderwater"
{
"resetRoom": {
"nodes": [
1,
2
],
"mustStayPut": false
}
}
{
"refill": [
"PowerBomb"
]
}
|
|
From: 9
Junction Below Speed Blocks
To: 4
Top Right Door
Notable: true
Be sure not to lure the first crab on the right wall until the slow global crab is near. Freeze the crab coming down as a platform to stand on to jump onto the frozen global crab on the right. Near the end, use the global crab to get onto the top left corner of the room, then jump towards the walkway leading to the door. Requires: "canBeExtremelyPatient"
"canSuitlessMaridia"
"canCrazyCrabClimb"
"canTrickyJump"
{
"obstaclesNotCleared": [
"A"
]
}
|
|
From: 9
Junction Below Speed Blocks
To: 4
Top Right Door
Notable: true
After the global crab passes and starts climbing up, use a super and freeze it mid air to get to the left platform. Jump and a quick crab will start moving down the right wall. Quickly shoot it and freeze it to get over to the right. Wait a long while for the global crab to return. Let it pass, then use a super to freeze it mid air and get to the next platform. Follow the global crab the rest of the way up to the door while using it and the fish as platforms on the way. For a faster but tighter strat, knock off the first downward moving crab with a super and follow it up while freezing it and performing precise platforming. Requires: "canBeVeryPatient"
"canSuitlessMaridia"
"canCrazyCrabClimb"
{
"ammo": {
"type": "Super",
"count": 2
}
}
{
"obstaclesNotCleared": [
"A"
]
}
|
|
From: 9
Junction Below Speed Blocks
To: 4
Top Right Door
Be sure not to get the first downward moving crab on screen until Samus is in position to quickly and accurately shoot and freeze it. This is much tighter with spring ball relative to HiJump. Performing a max height spring ball jump from the frozen crab can get Samus to the next ledge. Getting to the ledge with the fish is particularly precise. Either stand at the very edge of the platform and perform a very precise max heigh spring ball jump, or stand against the left wall and and perform a slightly less tight stationary lateral morph into spring ball jump. Requires: "canSuitlessMaridia"
"canTrickyUseFrozenEnemies"
"canTrickySpringBallJump"
"canDodgeWhileShooting"
{
"or": [
"canInsaneJump",
{
"and": [
"Spazer",
"Wave"
]
},
"h_canMaxHeightSpringBallJump",
"Plasma"
]
}
{
"or": [
"h_canMaxHeightSpringBallJump",
"canStationaryLateralMidAirMorph"
]
}
|
|
From: 9
Junction Below Speed Blocks
To: 4
Top Right Door
Using the slow global crab to ascend the top section of Main Street requires the speed blocks to not be broken. If they are broken, the local fast crab can be used instead by letting it fall and climb the left wall. The trickiest part is getting to the second ledge. Freeze the crab when it is overhead and spring ball jump up onto it. Follow the crab up while using it as a platform multiple times. Requires: "canSuitlessMaridia"
"canSpringBallJumpMidAir"
"canTrickyUseFrozenEnemies"
"canTrickyJump"
{
"or": [
{
"obstaclesNotCleared": [
"A"
]
},
"canCrazyCrabClimb"
]
}
|
|
From: 9
Junction Below Speed Blocks
To: 4
Top Right Door
The first crab, coming down, is a bit tricky to freeze fast enough without any other beams or a missile. Prevent it from coming on screen until Samus is in position to hit it accurately. The global crab coming up can be used as a backup if the speed blocks are not broken. Requires: "canSuitlessMaridia"
"HiJump"
"canTrickyUseFrozenEnemies"
{
"or": [
"h_canCrouchJumpDownGrab",
{
"obstaclesNotCleared": [
"A"
]
}
]
}
|
|
Requires: "canSuitlessMaridia" "HiJump" "canSpringBallJumpMidAir" |
|
Place a bomb next to one of the baby turtles, then use spring ball to get on Mama Turtle's back. Start an IBJ above the waterline to get to the item. Entrance condition: {
"comeInWithGMode": {
"mode": "any",
"morphed": true
}
}
Requires: "canSuitlessMaridia" "h_canArtificialMorphSpringBall" "h_canArtificialMorphIBJ" Clears obstacles: A, B |
|
Requires getting back on Mama Turtle while she is at the right. Requires: "h_canNavigateUnderwater"
{
"or": [
"canTrickyJump",
{
"enemyDamage": {
"enemy": "Kame (Tatori)",
"type": "contact",
"hits": 1
}
}
]
}
Clears obstacles: A |
|
Ride Mama Turtle. To avoid getting hit, shoot one of her babies to wake her up, then quickly get on her back. Requires: "h_canNavigateUnderwater"
"canUseEnemies"
{
"or": [
"canCarefulJump",
{
"enemyDamage": {
"enemy": "Kame (Tatori)",
"type": "contact",
"hits": 1
}
}
]
}
Clears obstacles: A |
|
Letting Mama Turtle sleep, climb the right wall using HiJump (with a down-grab) and escape the water with Space Jump . Requires: "canSuitlessMaridia"
"HiJump"
"canDownGrab"
{
"or": [
{
"and": [
"canSpaceJumpWaterBounce",
"canWalljump"
]
},
"canSpaceJumpWaterEscape"
]
}
|
|
Requires: "h_canNavigateUnderwater"
{
"or": [
"Gravity",
{
"obstaclesNotCleared": [
"A"
]
},
{
"enemyDamage": {
"enemy": "Kame (Tatori)",
"type": "contact",
"hits": 1
}
}
]
}
{
"or": [
"Gravity",
"HiJump",
"canSpringBallJumpMidAir",
"h_canCrouchJumpDownGrab",
"canUseEnemies"
]
}
|
|
Jump over or on to Mama Turtle. The easiest method is to jump over her by jumping on her babies, spin jumping off of them and over her, then breaking spin before landing. Requires: "canSuitlessMaridia" "canTrickyJump" "canUseEnemies" |
|
Requires: "canSuitlessMaridia"
"canCarefulJump"
{
"or": [
"HiJump",
"Morph"
]
}
{
"or": [
"HiJump",
"canSpringBallJumpMidAir",
"h_canCrouchJumpDownGrab",
"canUseEnemies"
]
}
|
|
Requires: "h_canNavigateUnderwater" "Grapple" |
|
From: 1
Top Left Door
To: 9
Spawn At Junction Below Top Door
Notable: true .png)
.gif)
Crouch on the lowest stair, then shinespark horizontally to bonk at the top corner of the grapple block. Down grab to get onto it. Entrance condition: {
"comeInShinecharged": {
"framesRequired": 110
}
}
Requires: "canSuitlessMaridia"
"h_canCrouchJumpDownGrab"
"canHorizontalShinespark"
{
"shinespark": {
"frames": 56,
"excessFrames": 0
}
}
|
|
From: 1
Top Left Door
To: 12
G-Mode Junction (In Morph Tunnel)
Bounce from the right peak into the morph tunnel. Samus can't bounce twice in a single fall, so start from the right ground, not the raised scaffolding by the door. Entrance condition: {
"comeInWithGMode": {
"mode": "any",
"morphed": true
}
}
Requires: "canSuitlessMaridia"
"canTrickyJump"
{
"or": [
"h_EverestMorphTunnelExpanded",
{
"enemyDamage": {
"enemy": "Sciser",
"type": "contact",
"hits": 1
}
}
]
}
|
|
Near the bottom left door, there are three pathways upwards: one directly above the door and two to the right. Between the right pathways, is a crab moving to the right. Shooting a super against the wall will make it fall off and move left. Climb the crab up the left wall. Watch out for the crab above that is heading into the morph tunnel. Jump to the right platform before the upward crab goes into the tunnel. Lure the crab out of the hole by running to the right of the hill then back left or use moonwalk to scroll the camera. Near the end is particularly tricky. When the crab is on the underside of the metal blocks, freeze it and use it as a stepping platform. To do this, crouch jump and while moving upwards, hold left against the crab to get extra vertical movement. Down grabbing at the top is helpful. Requires: "canSuitlessMaridia"
"canCrazyCrabClimb"
"canTrickyJump"
"h_canCrouchJumpDownGrab"
"canCameraManip"
{
"ammo": {
"type": "Super",
"count": 1
}
}
|
|
Shinespark up left to get all the way up to the door. Entrance condition: {
"comeInShinecharged": {
"framesRequired": 5
},
"comesThroughToilet": "any"
}
Requires: "canSuitlessMaridia"
{
"shinespark": {
"frames": 62,
"excessFrames": 8
}
}
|
|
Requires: "h_canNavigateUnderwater"
{
"resetRoom": {
"nodes": [
2
],
"mustStayPut": false
}
}
{
"refill": [
"PowerBomb"
]
}
|
|
From: 2
Bottom Left Door
To: 7
Lower Hills Junction
Notable: true 
Jump into a mid-air morph, lay a Bomb, unmorph, use grapple to kill a Scisor, to be able to get a second jump mid-air. Requires: "h_canNavigateUnderwater" "HiJump" "canBombGrappleJump" |
|
From: 2
Bottom Left Door
To: 7
Lower Hills Junction
Notable: true 
Position 2 Scisors so that they can each be used for a Bomb-Grapple-Jump, back to back. This gives a total of 3 jumps to climb from the bottom of Everest up to one of the lower peaks. In the likely event of failure, the room will need to be reset and the crabs repositioned for the next attempt. Requires: "h_canNavigateUnderwater" "canBombGrappleJump" "h_canCrouchJumpDownGrab" |
|
Freeze the crab when it is hanging off the ledge then use it as a platform. Requires: "canSuitlessMaridia" "canTrickyUseFrozenEnemies" |
|
From: 2
Bottom Left Door
To: 7
Lower Hills Junction
Use the frozen crab as a platform. Requires: "canSuitlessMaridia"
"canUseFrozenEnemies"
{
"or": [
"HiJump",
"canSpringBallJumpMidAir"
]
}
|
|
Requires: "canSuitlessMaridia" "HiJump" "canSpringBallJumpMidAir" |
|
Use the rightmost crab to get up onto the lowest platform, while also damaging down the crab on the middle platform. Jump left onto the middle platform and freeze the crab just a bit left of the peak. Run and jump from on top of the crab to the higher platform to the left. A failure often requires resetting the room. Requires: "canSuitlessMaridia" "canTrickyUseFrozenEnemies" |
|
In the upward channel one right of the door, jump as high as possible to lure a fast crab moving down the tallest mountain. A crouch jump or breaking spin can be helpful. Damage down the crab while watching it loop around, then ride the crab up the left side. Freeze the crab at the top of the highest peak, stand on it to jump to the left. If you lose the fast crab, it is always possible to get it back by climbing the peak to the right. The crab there can be lured with HiJump alone. Requires: "canSuitlessMaridia" "HiJump" "canUseFrozenEnemies" |
|
Knock the crab off the wall immediately and then freeze. Requires: "h_canNavigateUnderwater"
"canTrickyUseFrozenEnemies"
{
"ammo": {
"type": "Super",
"count": 1
}
}
{
"resetRoom": {
"nodes": [
3
],
"mustStayPut": true
}
}
|
|
Requires: "canSuitlessMaridia" "HiJump" "canSpringBallJumpMidAir" |
|
From: 3
Bottom Right Door
To: 9
Spawn At Junction Below Top Door
Shinespark up left to get onto the platform below the door. If gravity suit is on, hold right to land on the platform. Entrance condition: {
"comeInShinecharged": {
"framesRequired": 5
},
"comesThroughToilet": "any"
}
Requires: "canSuitlessMaridia"
{
"shinespark": {
"frames": 62,
"excessFrames": 6
}
}
|
|
Requires: "h_canNavigateUnderwater" "Grapple" |
|
Entrance condition: {
"comeInShinecharged": {
"framesRequired": 15
},
"comesThroughToilet": "any"
}
Requires: "canSuitlessMaridia"
"canMidairShinespark"
"canPrepareForNextRoom"
{
"shinespark": {
"frames": 67,
"excessFrames": 10
}
}
|
|
Entrance condition: {
"comeInShinecharged": {
"framesRequired": 90
},
"comesThroughToilet": "any"
}
Requires: "canSuitlessMaridia"
"canHorizontalShinespark"
{
"shinespark": {
"frames": 61,
"excessFrames": 10
}
}
|
|
Entrance condition: {
"comeInShinecharged": {
"framesRequired": 20
},
"comesThroughToilet": "any"
}
Requires: "canSuitlessMaridia"
"canMidairShinespark"
"canPrepareForNextRoom"
{
"shinespark": {
"frames": 93,
"excessFrames": 12
}
}
|
|
Entrance condition: {
"comeInShinecharged": {
"framesRequired": 90
},
"comesThroughToilet": "any"
}
Requires: "canSuitlessMaridia"
"canMidairShinespark"
{
"shinespark": {
"frames": 86,
"excessFrames": 12
}
}
|
|
From: 5
Top Door
To: 12
G-Mode Junction (In Morph Tunnel)
Bounce from the right peak into the morph tunnel. Samus can't bounce twice in a single fall, so come to a stop on the top platform or avoid it completely. Entrance condition: {
"comeInWithGMode": {
"mode": "any",
"morphed": true
},
"comesThroughToilet": "any"
}
Requires: "canSuitlessMaridia"
"canTrickyJump"
{
"enemyDamage": {
"enemy": "Sciser",
"type": "contact",
"hits": 1
}
}
{
"or": [
"h_EverestMorphTunnelExpanded",
{
"enemyDamage": {
"enemy": "Sciser",
"type": "contact",
"hits": 1
}
}
]
}
|
|
There is a grappleable Powamp directly above each of the 3 peaks. Requires: "canSuitlessMaridia" "canUseEnemies" "Grapple" |
|
Requires: "canSuitlessMaridia"
{
"or": [
"HiJump",
{
"and": [
"canTrickySpringBallJump",
{
"or": [
"canCrouchJump",
"canSpringFling",
"canStationaryLateralMidAirMorph"
]
}
]
}
]
}
|
|
From: 7
Lower Hills Junction
To: 9
Spawn At Junction Below Top Door
There is a grappleable Powamp directly above each of the 3 peaks. Requires: "h_canNavigateUnderwater" "canUseEnemies" "Grapple" |
|
From: 7
Lower Hills Junction
To: 10
Upper Right Ledge Junction
Start the springball jumps from the highest ledge on the wall. Requires: "canSuitlessMaridia" "h_canDoubleSpringBallJumpWithHiJump" Clears obstacles: A, B |
|
There is a grappleable Powamp directly above each of the 3 peaks. Requires: "h_canNavigateUnderwater" "canUseEnemies" "Grapple" Clears obstacles: B |
|
From: 7
Lower Hills Junction
To: 10
Upper Right Ledge Junction
Notable: true 
Climbing the right side of Mt. Everest with only two supers and ice. (As used in 14% Icebooster) Requires luring 2 crabs. Use a super to knock off and freeze a crab midair. Be sure to lure a crab to the next section to crab climb further. If Samus has 2 supers, it is easier to bring 3 crabs; the third is from the morph tunnel to the left. Lure 2 crabs to the next section for a slightly easier crab climb. Note: The hardest part of this climb is the pixel precision when jumping around a ledge. Too many pixels: left is a fall, right you clip through the crab, low you miss the jump and fall, high is a bonk or crab clip. Requires: "canSuitlessMaridia"
"canCrazyCrabClimb"
"canTrickyJump"
"canBeVeryPatient"
{
"ammo": {
"type": "Super",
"count": 1
}
}
Clears obstacles: A, B |
|
From: 7
Lower Hills Junction
To: 10
Upper Right Ledge Junction
Notable: true 
Use the crab near the bottom right door. Before the final jump, freeze the crab high enough on the right wall that it can be lured up to the flat platform. Perform the final jump as it is unfreezing so it starts moving upward. Then go to the lower ground a bit to the right, jump and aim down to lower the camera to lure the crab. Note: The hardest part of this climb is the pixel precision when jumping around a ledge. Too many pixels: left is a fall, right you clip through the crab, low you miss the jump and fall, high is a bonk or crab clip. Requires: "canSuitlessMaridia" "canCrazyCrabClimb" "HiJump" "canTrickyJump" "canCameraManip" Clears obstacles: A, B |
|
From: 7
Lower Hills Junction
To: 10
Upper Right Ledge Junction
Notable: true
Use the crab near the bottom right door. Only one spring ball jump is needed, it is to get up onto the flat platform. After the spring ball jump, if the crab did not follow, go to the lower ground a bit to the right, jump and aim down to lower the camera to lure the crab. Note: The hardest part of this climb is the pixel precision when jumping around a ledge. Too many pixels: left is a fall, right you clip through the crab, low you miss the jump and fall, high is a bonk or crab clip. Requires: "canSuitlessMaridia" "canCrazyCrabClimb" "canTrickySpringBallJump" "canTrickyJump" "canCameraManip" Clears obstacles: A, B |
|
From: 7
Lower Hills Junction
To: 10
Upper Right Ledge Junction
Notable: true 
Climbing the right side of Mt. Everest with only two supers and ice. (As used in 14% Icebooster) Requires luring 3 crabs; the third crab is from the morph tunnel to the left. Use a super to knock off and freeze a crab midair. Be sure two crabs make it to the next section in order to crab climb further. Note: The hardest part of this climb is the pixel precision when jumping around a ledge. Too many pixels: left is a fall, right you clip through the crab, low you miss the jump and fall, high is a bonk or crab clip. Requires: "canSuitlessMaridia"
"canCrazyCrabClimb"
"canTrickyJump"
"canBeVeryPatient"
{
"ammo": {
"type": "Super",
"count": 1
}
}
Clears obstacles: A, B |
|
From: 7
Lower Hills Junction
To: 10
Upper Right Ledge Junction
Climbing the right side of Mt. Everest with two supers, ice, and HiJump. Requires luring 3 crabs; the third crab is from the morph tunnel to the left. Use a super to knock off and freeze a crab midair. Stand on it and let the other crab climb, then jump up and follow it. Be sure two crabs make it to the next section in order to crab climb further. Requires: "canSuitlessMaridia"
"canCrazyCrabClimb"
"HiJump"
{
"ammo": {
"type": "Super",
"count": 1
}
}
Clears obstacles: A, B |
|
From: 7
Lower Hills Junction
To: 10
Upper Right Ledge Junction
Climbing the right side of Mt. Everest with two supers, ice, and Spring Ball. Requires luring 3 crabs; the third crab is from the morph tunnel to the left. Use a super to knock off and freeze a crab midair. Stand on it and let the other crab climb, then jump up and follow it. Be sure two crabs make it to the next section in order to crab climb further. Requires: "canSuitlessMaridia"
"canCrazyCrabClimb"
"canTrickySpringBallJump"
{
"ammo": {
"type": "Super",
"count": 1
}
}
Clears obstacles: A, B |
|
From: 7
Lower Hills Junction
To: 10
Upper Right Ledge Junction
Freeze the crab midway up the right wall and jump and spring ball jump up to the higher platform. Luring a second crab, which will make it to the upper platform, may be useful to avoid a tricky spring ball jump and flatley jump to get to the top right door. Requires: "canSuitlessMaridia" "HiJump" "canTrickySpringBallJump" "canTrickyUseFrozenEnemies" Clears obstacles: A, B |
|
Requires: "h_canNavigateUnderwater" "Morph" |
|
There is a grappleable Powamp directly above each of the 3 peaks. Requires: "h_canNavigateUnderwater" "canUseEnemies" "Grapple" |
|
From: 8
Higher Hill Junction
To: 11
Upper Left Ledge Junction
Requires: "canSuitlessMaridia" "HiJump" "canSpringBallJumpMidAir" |
|
Requires: "h_canNavigateUnderwater" "Grapple" |
|
Requires: "h_canNavigateUnderwater" "Grapple" |
|
Use the grapple to fling Samus through the door. Requires: "h_canNavigateUnderwater" "Grapple" |
|
Requires: "canSuitlessMaridia" "HiJump" "canSpringBallJumpMidAir" |
|
From: 9
Spawn At Junction Below Top Door
To: 11
Upper Left Ledge Junction
Turn off Gravity and HiJump to jump directly here. Requires: "canSuitlessMaridia" "canDisableEquipment" |
|
From: 10
Upper Right Ledge Junction
To: 4
Top Right Door
Requires: "canSuitlessMaridia" "h_canDoubleSpringBallJumpWithHiJump" |
|
From: 10
Upper Right Ledge Junction
To: 4
Top Right Door
Notable: true
Requires having already lured a crab to this location, likely from above the bottom right door. Freeze the crab very high before going to the ledge on the right, delay jumping so it thaws and moves up a bit while on screen, jump aim down to lower the camera and lure it more. Alternatively, using moonwalk and a flatley jump at the top can prevent needing the crab again. Note: The hardest part of this climb is the pixel precision when jumping around a ledge. Too many pixels: left is a fall, right you clip through the crab, low you miss the jump and fall, high is a bonk or crab clip. Requires: "canSuitlessMaridia"
"canCrazyCrabClimb"
"HiJump"
"canTrickyJump"
"canCameraManip"
{
"obstaclesCleared": [
"B"
]
}
|
|
From: 10
Upper Right Ledge Junction
To: 4
Top Right Door
Notable: true
Requires having already lured a crab to this location, likely from above the bottom right door. Freeze the crab high before going to the ledge on the right, delay spring ball jumping so it thaws and moves up while on screen, jump aim down to lower the camera and lure it more. Freeze the crab again to use as a platform, approximately knee high. Jump on it and then jump to the platform above. Note: The hardest part of this climb is the pixel precision when jumping around a ledge. Too many pixels: left is a fall, right you clip through the crab, low you miss the jump and fall, high is a bonk or crab clip. Requires: "canSuitlessMaridia"
"canCrazyCrabClimb"
"canTrickySpringBallJump"
"canTrickyJump"
"canCameraManip"
{
"obstaclesCleared": [
"B"
]
}
|
|
From: 10
Upper Right Ledge Junction
To: 4
Top Right Door
Notable: true
Climbing the right side of Mt. Everest with only two supers and ice. (As used in 14% Icebooster) Requires originally luring 3 crabs. Two crabs and one super are needed from this location. Use a super to knock off and freeze a crab midair. Once close to the upper platform, freeze the crab at knee height to stand on it to jump up. Note: The hardest part of this climb is the pixel precision when jumping around a ledge. Too many pixels: left is a fall, right you clip through the crab, low you miss the jump and fall, high is a bonk or crab clip. Requires: "canSuitlessMaridia"
"canCrazyCrabClimb"
"canTrickyJump"
"canBeVeryPatient"
{
"ammo": {
"type": "Super",
"count": 1
}
}
{
"obstaclesCleared": [
"A"
]
}
|
|
From: 10
Upper Right Ledge Junction
To: 4
Top Right Door
Climbing the right side of Mt. Everest with only two supers, ice, and HiJump. Requires originally luring 3 crabs. Two crabs and one super are needed from this location. Use a super to knock off and freeze a crab midair. Jump on it and freeze the second as a platform to jump up to the door. Requires: "canSuitlessMaridia"
"HiJump"
"canTrickyUseFrozenEnemies"
{
"ammo": {
"type": "Super",
"count": 1
}
}
{
"obstaclesCleared": [
"A"
]
}
"canTrickyJump"
|
|
From: 10
Upper Right Ledge Junction
To: 4
Top Right Door
Climbing the right side of Mt. Everest with only two supers, ice, and Spring Ball. Requires originally luring 3 crabs. Two crabs and one super are needed from this location. Use a super to knock off and freeze a crab midair. Jump on it and freeze the second as a platform to jump up to the door. Requires: "canSuitlessMaridia"
"canTrickySpringBallJump"
"canCrazyCrabClimb"
{
"ammo": {
"type": "Super",
"count": 1
}
}
{
"obstaclesCleared": [
"A"
]
}
|
|
From: 10
Upper Right Ledge Junction
To: 4
Top Right Door
Notable: true
Climbing the right side of Mt. Everest with only one super and ice. (A trickier version than that used in 14% Icebooster) Requires having already lured a crab to this location, likely from above the bottom right door. Once close to the upper platform, freeze the crab at knee height to stand on it to jump up. Note: The hardest part of this climb is the pixel precision when jumping around a ledge. Too many pixels: left is a fall, right you clip through the crab, low you miss the jump and fall, high is a bonk or crab clip. Requires: "canSuitlessMaridia"
"canCrazyCrabClimb"
"canTrickyJump"
{
"obstaclesCleared": [
"B"
]
}
|
|
From: 10
Upper Right Ledge Junction
To: 4
Top Right Door
Start the jump from the higher ground to the left, specifically the right side of the second highest region. Requires: "canSuitlessMaridia" "HiJump" "canTrickySpringBallJump" "canFlatleyJump" |
|
From: 10
Upper Right Ledge Junction
To: 4
Top Right Door
Requires having already lured a crab, likely from above the bottom right door. Freeze the crab midway up the right wall and jump and spring ball jump up to the door. Requires: "canSuitlessMaridia"
"HiJump"
"canSpringBallJumpMidAir"
"canTrickyUseFrozenEnemies"
{
"obstaclesCleared": [
"B"
]
}
"canTrickyJump"
|
|
This strat uses the grapple blocks at the top left, not the Powamp. Failure also doesn't usually allow a second try (assuming the Powamp is not there). Requires: "canSuitlessMaridia"
"Grapple"
{
"or": [
"HiJump",
"canSpringBallJumpMidAir"
]
}
|
|
From: 10
Upper Right Ledge Junction
To: 4
Top Right Door
There is a grappleable Powamp directly above each of the 3 peaks. Requires: "canSuitlessMaridia" "canUseEnemies" "Grapple" |
|
From: 10
Upper Right Ledge Junction
To: 4
Top Right Door
Crouch at the edge of the overhang. Jump and just after the peak of the jump, grapple to the grapple blocks. This strat is finicky, and failure doesn't usually allow a second try (assuming the Powamp is not there). This is possible to do without a crouch jump, but it is much harder. Requires: "canSuitlessMaridia"
"canPreciseGrapple"
{
"or": [
"canCrouchJump",
"canTrickyJump"
]
}
|
|
Requires: "canSuitlessMaridia"
{
"or": [
"HiJump",
"canSpringBallJumpMidAir"
]
}
|
|
From: 11
Upper Left Ledge Junction
To: 9
Spawn At Junction Below Top Door
Start the spring ball jumps from the bottom of the slope. Requires: "canSuitlessMaridia" "h_canDoubleSpringBallJumpWithHiJump" |
|
Requires: "canSuitlessMaridia"
"canUseFrozenEnemies"
{
"or": [
"canWalljump",
"canSpringBallJumpMidAir",
{
"and": [
"HiJump",
"canDownGrab"
]
},
"canBombJumpWaterEscape"
]
}
|
|
Requires: "canSuitlessMaridia"
"HiJump"
{
"or": [
{
"and": [
"canWalljump",
"canCarefulJump"
]
},
"canSpringBallJumpMidAir"
]
}
|
|
Requires: "canSuitlessMaridia"
{
"or": [
{
"and": [
"canSpaceJumpWaterBounce",
"canWalljump"
]
},
{
"and": [
"canSpaceJumpWaterEscape",
"HiJump"
]
}
]
}
|
|
From: 1
Middle Left Door
To: 9
Junction Below Top Door
Bomb the Power Bomb blocks below to overload PLMs, then go up through the crumble blocks to escape. Entrance condition: {
"comeInWithGMode": {
"mode": "any",
"morphed": true
}
}
Requires: "h_canArtificialMorphBombs"
"h_canNavigateUnderwater"
{
"or": [
{
"and": [
"Gravity",
"h_canArtificialMorphIBJ"
]
},
{
"and": [
"HiJump",
"canSpringBallJumpMidAir"
]
},
{
"and": [
"HiJump",
"canConsecutiveWalljump",
"canPreciseWalljump"
]
}
]
}
|
|
From: 1
Middle Left Door
To: 11
G-Mode Overloaded PLMs Junction (By Bottom Left Door)
Bomb the PB blocks below to overload PLMs, then go up through the crumble blocks to escape. Entrance condition: {
"comeInWithGMode": {
"mode": "any",
"morphed": true
}
}
Requires: "h_canArtificialMorphBombs"
"h_canNavigateUnderwater"
{
"or": [
{
"and": [
"Gravity",
"h_canArtificialMorphIBJ"
]
},
{
"and": [
"HiJump",
"canSpringBallJumpMidAir"
]
},
{
"and": [
"HiJump",
"canConsecutiveWalljump",
"canPreciseWalljump"
]
}
]
}
|
|
From: 2
Bottom Left Door
To: 1
Middle Left Door
Notable: true 
Stop the snail when it is on the lower part of the overhang (hug the snail to gain extra jump height). Climb it by waiting until it is just about to become active to jump. Requires: "h_canNavigateUnderwater"
"canSnailClimb"
{
"or": [
{
"obstaclesCleared": [
"A"
]
},
"h_canUsePowerBombs"
]
}
Clears obstacles: A |
|
Requires: "canUseEnemies"
{
"or": [
"Gravity",
{
"and": [
"canSuitlessMaridia",
"HiJump"
]
}
]
}
{
"or": [
{
"obstaclesCleared": [
"A"
]
},
"h_canUsePowerBombs"
]
}
Clears obstacles: A |
|
Entrance condition: {
"comeInRunning": {
"speedBooster": true,
"minTiles": 2.4375
}
}
Requires: "canSuitlessMaridia"
"h_canUsePowerBombs"
"canStutterWaterShineCharge"
"canShinechargeMovement"
{
"canShineCharge": {
"usedTiles": 33,
"openEnd": 2
}
}
{
"shinespark": {
"frames": 25,
"excessFrames": 11
}
}
Clears obstacles: A |
|
Requires: "canSuitlessMaridia"
"HiJump"
"canSpringBallJumpMidAir"
{
"or": [
{
"obstaclesCleared": [
"A"
]
},
"h_canUsePowerBombs"
]
}
Clears obstacles: A |
|
Entrance condition: {
"comeInShinecharged": {
"framesRequired": 130
}
}
Requires: "canSuitlessMaridia"
"h_canUsePowerBombs"
"canShinechargeMovement"
{
"shinespark": {
"frames": 25,
"excessFrames": 11
}
}
Clears obstacles: A |
|
Requires: "canSuitlessMaridia"
"HiJump"
"canConsecutiveWalljump"
{
"or": [
{
"obstaclesCleared": [
"A"
]
},
"h_canUsePowerBombs"
]
}
Clears obstacles: A |
|
From: 2
Bottom Left Door
To: 2
Bottom Left Door
Entrance condition: {
"comeInRunning": {
"speedBooster": true,
"minTiles": 2
}
}
Requires: "canSuitlessMaridia"
"canShinechargeMovementComplex"
"canStutterWaterShineCharge"
{
"canShineCharge": {
"usedTiles": 33,
"openEnd": 2
}
}
{
"or": [
{
"shinespark": {
"frames": 12
}
},
{
"and": [
"canShinechargeMovementTricky",
{
"shinespark": {
"frames": 3
}
}
]
}
]
}
Exit condition: {
"leaveWithSpark": {}
}
|
|
Requires: "canSuitlessMaridia"
{
"or": [
{
"and": [
"HiJump",
"h_canUseSpringBall"
]
},
"canPlayInSand"
]
}
|
|
Entrance condition: {
"comeInRunning": {
"speedBooster": true,
"minTiles": 0.4375
}
}
Requires: "canSuitlessMaridia"
"canShinechargeMovementComplex"
"canWaterShineCharge"
"canHorizontalShinespark"
{
"canShineCharge": {
"usedTiles": 33,
"openEnd": 2
}
}
{
"shinespark": {
"frames": 139,
"excessFrames": 66
}
}
|
|
Requires: "h_canNavigateUnderwater" |
|
From: 2
Bottom Left Door
To: 5
Right Door
Notable: true
Stop the snail when it is on the lower part of the overhang (hug the snail to gain extra jump height). Climb it by waiting until it is just about to become active to jump. Requires: "h_canNavigateUnderwater" "canSnailClimb" |
|
Requires: "canSuitlessMaridia" "canGrappleJump" |
|
Requires: "canSnailClimb"
"h_canUseSpringBall"
{
"or": [
"Gravity",
{
"and": [
"canSuitlessMaridia",
"HiJump"
]
}
]
}
|
|
From: 2
Bottom Left Door
To: 7
Top Right Left Item
Notable: true 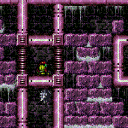
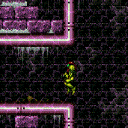
PLMs can be overloaded in direct G-Mode with a single Power Bomb if both items are still there and 2 PBs if only one item is. There is a row of tiles that works, just above and to the left of the right door. The row is one tile higher than the horizontal pipe that is part of the door frame, spanning from the left to one tile away from the right wall. Entrance condition: {
"comeInWithGMode": {
"mode": "direct",
"morphed": true
}
}
Requires: {
"or": [
{
"itemNotCollectedAtNode": 7
},
{
"itemNotCollectedAtNode": 8
}
]
}
"h_canArtificialMorphSpringBall"
"h_canArtificialMorphPowerBomb"
"h_canArtificialMorphPowerBomb"
"h_canNavigateUnderwater"
"canSnailClimb"
{
"or": [
"Gravity",
{
"and": [
"HiJump",
{
"or": [
"canCrouchJump",
"canDownGrab"
]
}
]
}
]
}
|
|
From: 2
Bottom Left Door
To: 7
Top Right Left Item
Notable: true
PLMs can be overloaded in direct G-Mode with a single Power Bomb if both items are still there and 2 PBs if only one item is. There is a row of tiles that works, just above and to the left of the right door. The row is one tile higher than the horizontal pipe that is part of the door frame, spanning from the left to one tile away from the right wall. Entrance condition: {
"comeInWithGMode": {
"mode": "direct",
"morphed": false
}
}
Requires: {
"or": [
{
"itemNotCollectedAtNode": 7
},
{
"itemNotCollectedAtNode": 8
}
]
}
"h_canUsePowerBombs"
"h_canUsePowerBombs"
"h_canNavigateUnderwater"
"canSnailClimb"
{
"or": [
"Gravity",
"h_canMaxHeightSpringBallJump",
{
"and": [
"HiJump",
{
"or": [
"canCrouchJump",
"canDownGrab"
]
}
]
}
]
}
|
|
From: 2
Bottom Left Door
To: 9
Junction Below Top Door
Notable: true
Stop the snail when it is on the lower part of the overhang (hug the snail to gain extra jump height). Climb it by waiting until it is just about to become active to jump. Watch out for snails coming from above, or aggressive snails from below, who will either block or attack Samus. Requires: "h_canNavigateUnderwater" "canSnailClimb" |
|
Requires: "canSuitlessMaridia" "canGrappleJump" |
|
Watch out for snails coming from above, or aggressive snails from below, who will either block or attack Samus. Requires: "canSnailClimb"
"h_canUseSpringBall"
{
"or": [
"Gravity",
{
"and": [
"canSuitlessMaridia",
"HiJump"
]
}
]
}
|
|
From: 2
Bottom Left Door
To: 11
G-Mode Overloaded PLMs Junction (By Bottom Left Door)
Overload PLMs using the Grapple Blocks. Entrance condition: {
"comeInWithGMode": {
"mode": "any",
"morphed": false
}
}
Requires: "Grapple" "h_canNavigateUnderwater" |
|
Requires: "canSuitlessMaridia"
"HiJump"
{
"or": [
"h_canUseSpringBall",
"canPlayInSand"
]
}
|
|
Requires: "h_canNavigateUnderwater" |
|
From: 5
Right Door
To: 7
Top Right Left Item
Notable: true
PLMs can be overloaded in direct G-Mode with a single Power Bomb if both items are still there and 2 PBs if only one item is. There is a row of tiles that works, just above and to the left of the right door. The row is one tile higher than the horizontal pipe that is part of the door frame, spanning from the left to one tile away from the right wall. Entrance condition: {
"comeInWithGMode": {
"mode": "direct",
"morphed": true
}
}
Requires: {
"or": [
{
"itemNotCollectedAtNode": 7
},
{
"itemNotCollectedAtNode": 8
}
]
}
"h_canArtificialMorphSpringBall"
"h_canArtificialMorphPowerBomb"
"h_canArtificialMorphPowerBomb"
"h_canNavigateUnderwater"
"canSnailClimb"
{
"or": [
"Gravity",
{
"and": [
"HiJump",
{
"or": [
"canCrouchJump",
"canDownGrab"
]
}
]
}
]
}
|
|
From: 5
Right Door
To: 7
Top Right Left Item
Notable: true
PLMs can be overloaded in direct G-Mode with a single Power Bomb if both items are still there and 2 PBs if only one item is. There is a row of tiles that works, just above and to the left of the right door. The row is one tile higher than the horizontal pipe that is part of the door frame, spanning from the left to one tile away from the right wall. Entrance condition: {
"comeInWithGMode": {
"mode": "direct",
"morphed": false
}
}
Requires: {
"or": [
{
"itemNotCollectedAtNode": 7
},
{
"itemNotCollectedAtNode": 8
}
]
}
"h_canUsePowerBombs"
"h_canUsePowerBombs"
"h_canNavigateUnderwater"
"canSnailClimb"
{
"or": [
"Gravity",
"h_canMaxHeightSpringBallJump",
{
"and": [
"HiJump",
{
"or": [
"canCrouchJump",
"canDownGrab"
]
}
]
}
]
}
|
|
From: 5
Right Door
To: 11
G-Mode Overloaded PLMs Junction (By Bottom Left Door)
Overload PLMs using the Grapple Blocks. Entrance condition: {
"comeInWithGMode": {
"mode": "any",
"morphed": false
}
}
Requires: "Grapple" "h_canNavigateUnderwater" |
|
Entrance condition: {
"comeInShinecharged": {
"framesRequired": 55
},
"comesThroughToilet": "any"
}
Requires: "canSuitlessMaridia"
"canHorizontalShinespark"
{
"shinespark": {
"frames": 99,
"excessFrames": 29
}
}
|
|
The two snails together can setup G-Mode on either side of the door. Requires: "canUpwardGModeSetup" "h_canNavigateUnderwater" "canTwoTileSqueeze" Exit condition: {
"leaveWithGModeSetup": {}
}
|
|
From: 6
Top Door
To: 7
Top Right Left Item
Notable: true
PLMs can be overloaded in direct G-Mode with a single Power Bomb if both items are still there and 2 PBs if only one item is. There is a row of tiles that works, just above and to the left of the right door. The row is one tile higher than the horizontal pipe that is part of the door frame, spanning from the left to one tile away from the right wall. Entrance condition: {
"comeInWithGMode": {
"mode": "direct",
"morphed": true
},
"comesThroughToilet": "no"
}
Requires: {
"or": [
{
"itemNotCollectedAtNode": 7
},
{
"itemNotCollectedAtNode": 8
}
]
}
"h_canArtificialMorphSpringBall"
"h_canArtificialMorphPowerBomb"
"h_canArtificialMorphPowerBomb"
"h_canNavigateUnderwater"
"canSnailClimb"
{
"or": [
"Gravity",
{
"and": [
"HiJump",
{
"or": [
"canCrouchJump",
"canDownGrab"
]
}
]
}
]
}
|
|
From: 6
Top Door
To: 7
Top Right Left Item
Notable: true
PLMs can be overloaded in direct G-Mode with a single Power Bomb if both items are still there and 2 PBs if only one item is. There is a row of tiles that works, just above and to the left of the right door. The row is one tile higher than the horizontal pipe that is part of the door frame, spanning from the left to one tile away from the right wall. Entrance condition: {
"comeInWithGMode": {
"mode": "direct",
"morphed": false
},
"comesThroughToilet": "no"
}
Requires: {
"or": [
{
"itemNotCollectedAtNode": 7
},
{
"itemNotCollectedAtNode": 8
}
]
}
"h_canUsePowerBombs"
"h_canUsePowerBombs"
"h_canNavigateUnderwater"
"canSnailClimb"
{
"or": [
"Gravity",
"h_canMaxHeightSpringBallJump",
{
"and": [
"HiJump",
{
"or": [
"canCrouchJump",
"canDownGrab"
]
}
]
}
]
}
|
|
From: 6
Top Door
To: 11
G-Mode Overloaded PLMs Junction (By Bottom Left Door)
Overload PLMs using the Grapple Blocks. Entrance condition: {
"comeInWithGMode": {
"mode": "any",
"morphed": false
},
"comesThroughToilet": "any"
}
Requires: "Grapple" "h_canNavigateUnderwater" |
|
From: 9
Junction Below Top Door
To: 1
Middle Left Door
Notable: true 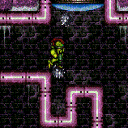
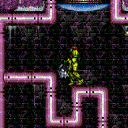
Use two snails to perform an 'Enemy Stuck Moonfall' to bypass the bomb blocks above the middle left door of Aqueduct. Position one snail on the above door shell, and the second above the corner of pipe below Samus will clip through the lower snail, taking damage, then continue through a segment of pipe where the crumble blocks can be reached. Facing both snails during the moonfall while positioning Samus for the clip can be precise Depending on the exact heights of the snails, it may be necessary to pose change while clipping. Requires: "h_canNavigateUnderwater"
"canEnemyStuckMoonfall"
"canBePatient"
{
"enemyDamage": {
"enemy": "Yard",
"type": "contact",
"hits": 1
}
}
|
|
Requires: "canSuitlessMaridia" "h_canBombThings" |
|
Requires: "canSuitlessMaridia" "canFlatleyJump" "HiJump" |
|
Requires: "canSuitlessMaridia" "h_canSpringFling" "canTrickySpringBallJump" |
|
From: 9
Junction Below Top Door
To: 5
Right Door
Requires: "canSuitlessMaridia" "canStationaryLateralMidAirMorph" "canTrickySpringBallJump" "canResetFallSpeed" |
|
Requires: "h_canNavigateUnderwater" |
|
Requires: "h_canNavigateUnderwater" "canTrickyUseFrozenEnemies" "canPlayInSand" |
|
Requires: "h_canNavigateUnderwater" |
|
Requires: "canSuitlessMaridia"
"canPlayInSand"
{
"or": [
"HiJump",
"canEscapeSand",
"h_canUseMorphBombs"
]
}
|
|
Requires: "h_canNavigateUnderwater" "canTrickyUseFrozenEnemies" "canPlayInSand" |
|
Requires: "canSuitlessMaridia"
"canPlayInSand"
{
"or": [
"HiJump",
"canEscapeSand",
"h_canUseMorphBombs"
]
}
|
|
Requires: "h_canNavigateUnderwater" |
|
Overload PLMs by touching the sand, then move through the speed blocks. Avoiding the sand pits is easier without Gravity or HiJump. Entrance condition: {
"comeInWithGMode": {
"mode": "any",
"morphed": false
}
}
Requires: "canSuitlessMaridia" |
|
From: 1
Left Door
To: 4
Right Door
Requires: "canSuitlessMaridia"
"HiJump"
{
"or": [
"h_canUseSpringBall",
"canPlayInSand"
]
}
{
"obstaclesCleared": [
"A"
]
}
|
|
Entrance condition: {
"comeInShinecharged": {
"framesRequired": 60
}
}
Requires: "canSuitlessMaridia"
"canHorizontalShinespark"
{
"shinespark": {
"frames": 159,
"excessFrames": 43
}
}
Clears obstacles: A |
|
From: 1
Left Door
To: 5
Item
Notable: true 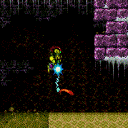
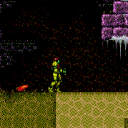
Lure a Puyo close to the sand and use it to Bomb-Grapple-Jump up to the Morph Ball maze. It helps to predict the jump pattern of the enemy. Requires: "canSuitlessMaridia" "canBombGrappleJump" "canCrouchJump" |
|
Requires: "canSuitlessMaridia" "Morph" "canTrickyUseFrozenEnemies" |
|
Requires: "canSuitlessMaridia"
"Morph"
{
"or": [
"canTrickySpringBallJump",
"HiJump"
]
}
|
|
From: 4
Right Door
To: 1
Left Door
Requires: "canSuitlessMaridia"
"HiJump"
{
"or": [
"h_canUseSpringBall",
"canPlayInSand"
]
}
{
"obstaclesCleared": [
"A"
]
}
|
|
Coming in with zero momentum, all it takes is one non-HiJump full height jump forward, then activate. Entrance condition: {
"comeInShinecharged": {
"framesRequired": 160
}
}
Requires: "canSuitlessMaridia"
"canHorizontalShinespark"
{
"shinespark": {
"frames": 147,
"excessFrames": 15
}
}
Clears obstacles: A |
|
From: 4
Right Door
To: 6
Junction Right of Morph Passage
Use the respawning Zoas to double jump up to the Morph Ball maze. Requires: "canSuitlessMaridia" "h_canCrouchJumpDownGrab" "canBombGrappleJump" |
|
From: 4
Right Door
To: 6
Junction Right of Morph Passage
Requires: "canSuitlessMaridia" "canUseFrozenEnemies" |
|
From: 4
Right Door
To: 6
Junction Right of Morph Passage
Requires: "canSuitlessMaridia"
{
"or": [
"canSpringBallJumpMidAir",
"HiJump"
]
}
|
|
From: 5
Item
To: 6
Junction Right of Morph Passage
Jump and mid-air morph. This is much easier with Gravity and HiJump turned off. Requires: "canSuitlessMaridia" "Morph" "canDisableEquipment" |
|
From: 6
Junction Right of Morph Passage
To: 5
Item
Jump and mid-air morph. This is much easier with Gravity and HiJump turned off. Requires: "canSuitlessMaridia" "Morph" "canDisableEquipment" |
|
From: 1
Bottom Left Door
To: 2
Right Door
Notable: true 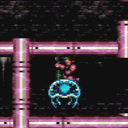
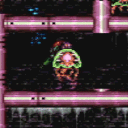
Crouch under the crumble blocks while aiming upward, using both angle buttons then freeze the Mochtroid while it is on Samus. Jump onto the Mochtroid by quickly pressing down after jumping, when on it, press up to stand then jump through the ceiling. With no jump assists, use a frozen Mochtroid as a platform to get to the ledge above the door. Requires: "h_canNavigateUnderwater" "canCeilingClip" "canUseFrozenEnemies" |
|
From: 1
Bottom Left Door
To: 2
Right Door
Find the crumble blocks and crystal flash mid-air, just below them. They are on the far right of the ceiling of the bottom right pathway. Hold down as the CF ends to break the non-respawning crumble blocks. This is for the much harder version, without Gravity and Bombs. Requires: "h_canJumpIntoCrystalFlashClip"
"canSuitlessMaridia"
{
"or": [
"HiJump",
"canSpringBallJumpMidAir",
{
"and": [
"h_canCrouchJumpDownGrab",
"canCarefulJump"
]
},
"canUseFrozenEnemies"
]
}
|
|
From: 2
Right Door
To: 1
Bottom Left Door
Notable: true
Crouch under the crumble blocks while aiming upward, using both angle buttons then freeze the Mochtroid while it is on Samus. Jump onto the Mochtroid by quickly pressing down after jumping, when on it, press up to stand then jump through the ceiling. With no jump assists, use a frozen Mochtroid as a platform to get to the ledge above the door. Requires: "h_canNavigateUnderwater"
"canCeilingClip"
"canUseFrozenEnemies"
{
"or": [
{
"and": [
"h_canCrouchJumpDownGrab",
"canTrickyJump"
]
},
"HiJump",
"Gravity",
"canSpringBallJumpMidAir"
]
}
|
|
From: 2
Right Door
To: 1
Bottom Left Door
Notable: true 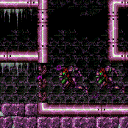
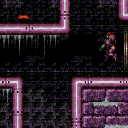
Quickly move next to the first set of speed blocks at the left end of the hole. Shoot a Wave shot, then just before it goes off screen, horizontally spark to the left to get through all the shot and speed blocks. A spin jump may be used to move horizontally into place much quicker. Entrance condition: {
"comeInShinecharged": {
"framesRequired": 120
}
}
Requires: "canSuitlessMaridia"
"canCarefulJump"
"Wave"
"canShinechargeMovementComplex"
"canHorizontalShinespark"
{
"shinespark": {
"frames": 75,
"excessFrames": 8
}
}
|
|
From: 2
Right Door
To: 1
Bottom Left Door
Find the crumble blocks and crystal flash mid-air, just below them. They are on the far left of the ceiling of the middle left pathway. Hold down as the CF ends to break the non-respawning crumble blocks. This is for the much harder version, without Gravity and Bombs. Requires: "h_canJumpIntoCrystalFlashClip"
"canSuitlessMaridia"
{
"or": [
{
"and": [
"h_canCrouchJumpDownGrab",
"canTrickyJump"
]
},
"HiJump",
"Gravity",
"canSpringBallJumpMidAir"
]
}
|
|
Requires: "h_canNavigateUnderwater"
{
"or": [
{
"and": [
"h_canCrouchJumpDownGrab",
"canTrickyJump"
]
},
"HiJump",
"Gravity",
"canSpringBallJumpMidAir"
]
}
Exit condition: {
"leaveWithGModeSetup": {
"knockback": false
}
}
|
|
From: 3
Botwoon Phase 1
To: 5
Botwoon Phase 2 (locked)
Notable: true 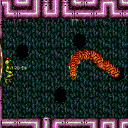
Fight Botwoon without Gravity suit. The left corner can be used to avoid most attacks and may be worth using even in the opening of the fight for safety. Requires: "canSuitlessMaridia"
{
"enemyKill": {
"enemies": [
[
"Botwoon 1"
]
]
}
}
|
|
From: 4
Back-Side Botwoon (locked)
To: 6
Back-Side Botwoon (unlocked)
Notable: true 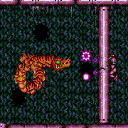
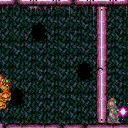
Even when suitless, it's possible to stand far enough that the acid attack doesn't spawn. Botwoon still gets hit. So there's a safe way to take no damage. Requires: "canSuitlessMaridia"
"Charge"
"Wave"
"canDodgeWhileShooting"
{
"or": [
"Morph",
{
"enemyDamage": {
"enemy": "Botwoon 1",
"type": "acid",
"hits": 2
}
}
]
}
Clears obstacles: f_DefeatedBotwoon |
|
From: 4
Back-Side Botwoon (locked)
To: 6
Back-Side Botwoon (unlocked)
Notable: true A charge beam shot will pass right through the dividing wall if fired from the correct 2pixel window. Using angle down the spot is where Samus' front toe touches the wall. Using angle up, it is where Samus' front foot is on the seam in the floor. Requires: "h_canNavigateUnderwater"
{
"enemyKill": {
"enemies": [
[
"Reverse Botwoon 1"
],
[
"Reverse Botwoon 2"
]
],
"explicitWeapons": [
"Charge+Plasma",
"Charge+Ice+Spazer"
]
}
}
Clears obstacles: f_DefeatedBotwoon |
|
From: 4
Back-Side Botwoon (locked)
To: 6
Back-Side Botwoon (unlocked)
Notable: true Stand on the appropriate pixel for shooting diagonally through the wall and use the microwave trick to defeat Botwoon. Using angle up, it is where Samus' front foot is on the seam in the floor. There is not proper spacing for landing an angle down shot and xraying. Waiting for Botwoon to peak their head through the wall works too but is less safe. Requires: "h_canNavigateUnderwater" "Charge" "Plasma" "canXRayWaitForIFrames" Clears obstacles: f_DefeatedBotwoon |
|
From: 4
Back-Side Botwoon (locked)
To: 6
Back-Side Botwoon (unlocked)
Notable: true 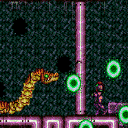
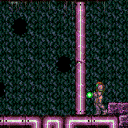
Stand near the dividing wall and unleash the Plasma Special Beam Attack! Requires: "h_canNavigateUnderwater"
{
"enemyKill": {
"enemies": [
[
"Reverse Botwoon 1"
],
[
"Reverse Botwoon 2"
]
],
"explicitWeapons": [
"Plasma Shield"
]
}
}
Clears obstacles: f_DefeatedBotwoon |
|
From: 4
Back-Side Botwoon (locked)
To: 6
Back-Side Botwoon (unlocked)
Notable: true 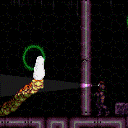
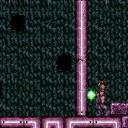
Wait for Botwoon to spawn then use a Plasma Special Beam Attack. Use XRay to slow time and watch for a particle to overlap Botwoons head, then proceed to Microwave. Requires: "h_canNavigateUnderwater"
"canSpecialBeamAttack"
"Plasma"
"canXRayWaitForIFrames"
{
"ammo": {
"type": "PowerBomb",
"count": 2
}
}
Clears obstacles: f_DefeatedBotwoon |
|
From: 4
Back-Side Botwoon (locked)
To: 6
Back-Side Botwoon (unlocked)
Notable: true 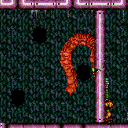
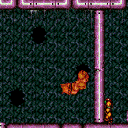
Wait for the one pattern (bottom->right) where Botwoon's head passes through the dividing barrier briefly and fire a Super Missile. This takes a long time, averaging one super per minute. Requires: "h_canNavigateUnderwater"
"canBeExtremelyPatient"
{
"enemyKill": {
"enemies": [
[
"Reverse Botwoon 1"
],
[
"Reverse Botwoon 2"
]
],
"explicitWeapons": [
"Super"
]
}
}
Clears obstacles: f_DefeatedBotwoon |
|
Use a frozen Mochtroid to extend the length of the runway. Positioning the Mochtroid can be done by dropping down below then climbing back up with the frozen Mochtroid as a platform. Alternatively, freeze the Mochtroid with an angle-down shot while falling below then quickly climb back up. Requires: "h_canNavigateUnderwater"
"h_canFrozenEnemyRunway"
{
"or": [
"canMochtroidIceClimb",
{
"and": [
"Gravity",
{
"or": [
"SpaceJump",
"canWalljump"
]
}
]
}
]
}
{
"enemyDamage": {
"enemy": "Mochtroid",
"type": "contact",
"hits": 2
}
}
Exit condition: {
"leaveWithRunway": {
"length": 4,
"openEnd": 1
}
}
|
|
From: 1
Left Door
To: 3
Top Right Door
Notable: true 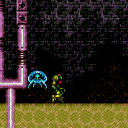
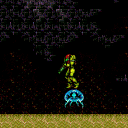
Climb a mochtroid with ice using the wall to help guide them. Mochtroid damage is pretty hard to avoid, but it is possible. Requires: "canSuitlessMaridia"
"canMochtroidIceClimb"
"canPlayInSand"
"canCameraManip"
"canTrickyJump"
{
"or": [
"canInsaneJump",
{
"enemyDamage": {
"enemy": "Mochtroid",
"type": "contact",
"hits": 2
}
}
]
}
|
|
From: 1
Left Door
To: 3
Top Right Door
Notable: true .png)
.gif)
Use the spikes, which are not in the water, to jump from platform to platform as a way to cross the Colosseum. Requires knowing the position of every spike in the room, and hitting the spikes while morphed can help. The first jump is particularly tough. A SpringBallJump from the sand with HiJump, or Grapple can be used to get past it. Requires: "canWalljump"
"Morph"
"canCarefulJump"
"canIframeSpikeJump"
{
"or": [
"Grapple",
{
"and": [
"canSuitlessMaridia",
"canPlayInSand",
"HiJump",
"canNeutralDamageBoost",
"canTrickySpringBallJump",
{
"spikeHits": 2
}
]
}
]
}
{
"spikeHits": 1
}
{
"or": [
{
"spikeHits": 1
},
"canHorizontalDamageBoost"
]
}
|
|
Climb a mochtroid with ice using the wall to help guide them. It is very easy to take damage if not preemptive with freezes. Mochtroid movement and freeze timing gets harder at the waterline. Requires: "h_canNavigateUnderwater"
"canMochtroidIceClimb"
"canPlayInSand"
"canCameraManip"
{
"or": [
"Gravity",
"HiJump"
]
}
"canTrickyJump"
{
"or": [
"canInsaneJump",
{
"enemyDamage": {
"enemy": "Mochtroid",
"type": "contact",
"hits": 2
}
}
]
}
|
|
Use Grapple Beam to cross the Colosseum. The first two room segments can be safely grappled across from in the water. The third room segment grapple is tricky. It is possible to use the spikes as platforms instead. Requires: "canSuitlessMaridia"
"canCarefulJump"
{
"or": [
"canPreciseGrapple",
"canGrappleJump"
]
}
|
|
Requires: "h_canNavigateUnderwater" "Grapple" |
|
Requires: "h_canNavigateUnderwater" "canMochtroidIceClimb" |
|
Entrance condition: {
"comeInShinecharged": {
"framesRequired": 20
}
}
Requires: "h_canNavigateUnderwater"
{
"shinespark": {
"frames": 24,
"excessFrames": 6
}
}
|
|
From: 3
Top Right Door
To: 1
Left Door
Notable: true
Jump out of the sand to lure down mochtroids to freeze. It's recommended to bring a Mochtroid into the middle section of the room. Mochtroid damage is pretty hard to avoid, but can be. Requires: "canSuitlessMaridia"
"canTrickyJump"
"canPlayInSand"
"canMochtroidIceClimb"
"canCameraManip"
{
"or": [
"canInsaneJump",
{
"enemyDamage": {
"enemy": "Mochtroid",
"type": "contact",
"hits": 2
}
}
]
}
|
|
Jump out of the sand to lure down mochtroids to freeze. It's recommended to bring a Mochtroid into the middle section of the room. Mochtroid damage is pretty hard to avoid, but can be. Mochtroid movement and freeze timing gets harder at the waterline. Requires: "h_canNavigateUnderwater"
{
"or": [
"Gravity",
"HiJump"
]
}
"canTrickyJump"
"canPlayInSand"
"canMochtroidIceClimb"
"canCameraManip"
{
"or": [
"canInsaneJump",
{
"enemyDamage": {
"enemy": "Mochtroid",
"type": "contact",
"hits": 2
}
}
]
}
|
|
Requires: "canSuitlessMaridia"
"Grapple"
{
"or": [
"canPlayInSand",
"canPreciseGrapple"
]
}
|
|
Use a frozen Mochtroid to extend the length of the runway. Positioning the Mochtroid can be done by dropping down below then climbing back up with the frozen Mochtroid as a platform. Alternatively, freeze the Mochtroid with an angle-down shot while falling below then quickly climb back up. Requires: "h_canNavigateUnderwater"
"h_canFrozenEnemyRunway"
{
"or": [
"canMochtroidIceClimb",
{
"and": [
"Gravity",
{
"or": [
"SpaceJump",
"canWalljump"
]
}
]
}
]
}
{
"enemyDamage": {
"enemy": "Mochtroid",
"type": "contact",
"hits": 2
}
}
Exit condition: {
"leaveWithRunway": {
"length": 4,
"openEnd": 1
}
}
|
|
Entrance condition: {
"comeInShinecharged": {
"framesRequired": 60
}
}
Requires: "h_canNavigateUnderwater"
{
"shinespark": {
"frames": 40,
"excessFrames": 6
}
}
{
"or": [
"canCrouchJump",
"Gravity",
"HiJump",
"canSpringBallJumpMidAir",
{
"and": [
"canTrickyUseFrozenEnemies",
{
"ammo": {
"type": "Super",
"count": 1
}
}
]
}
]
}
|
|
Notable: true 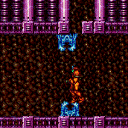
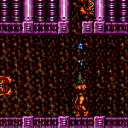
Freeze a crab multiple times to climb the upper Crab Shaft. It may be easier to climb the left shaft by knocking the crab off the wall, or by bringing up a crab from the lower area. Requires: "h_canNavigateUnderwater"
"canTrickyUseFrozenEnemies"
"canCarefulJump"
{
"or": [
"canCrouchJump",
"Gravity",
"HiJump",
"canSpringBallJumpMidAir",
{
"ammo": {
"type": "Super",
"count": 1
}
}
]
}
|
|
From: 1
Left Door
To: 3
Top Door
Notable: true 
Wall jump back and forth up the shaft. It's a really long climb. Requires: "canSuitlessMaridia" "HiJump" "canConsecutiveWalljump" |
|
Requires: "canSuitlessMaridia" "canSpringBallJumpMidAir" "HiJump" |
|
Requires: "canSuitlessMaridia" "HiJump" "canUseFrozenEnemies" |
|
Requires: "canSuitlessMaridia" "canTrickySpringBallJump" "canUseFrozenEnemies" |
|
Notable: true
Freeze a crab below the opening, and another one at the ceiling on the lip of the entrance. Stand on a frozen crab and crouch jump to the one on the ceiling. When against the top crab, press into it to be pushed up onto it. Requires: "canSuitlessMaridia" "canTrickyUseFrozenEnemies" "canCrouchJump" |
|
Involves a Super to freeze a crab in midair. Requires: "canSuitlessMaridia"
"canTrickyUseFrozenEnemies"
{
"ammo": {
"type": "Super",
"count": 1
}
}
|
|
Requires: "canSuitlessMaridia"
"HiJump"
{
"or": [
"h_canCrouchJumpDownGrab",
"canSpringBallJumpMidAir",
"canUseFrozenEnemies"
]
}
|
|
Requires: "canSuitlessMaridia"
"canSpringBallJumpMidAir"
{
"or": [
"h_canMaxHeightSpringBallJump",
"HiJump",
"canUseFrozenEnemies"
]
}
|
|
The Global crab in the upper section can be knocked off the wall to enter the left side of the above door. Otherwise, there are more crabs in the lower section of the room. Requires: "canUpwardGModeSetup"
"canTrickyUseFrozenEnemies"
{
"or": [
{
"ammo": {
"type": "Super",
"count": 1
}
},
"Gravity",
{
"and": [
"canSuitlessMaridia",
{
"or": [
"HiJump",
"canBePatient"
]
}
]
}
]
}
Exit condition: {
"leaveWithGModeSetup": {}
}
|
|
Takes more time to setup than with Gravity, but you can spark from a bit further out because of the water physics. Entrance condition: {
"comeInShinecharged": {
"framesRequired": 90
}
}
Requires: "canSuitlessMaridia"
{
"shinespark": {
"frames": 25
}
}
|
|
From: 3
Draygon (locked)
To: 2
Right Door (locked)
Notable: true 
Performing a grapple jump off of a Draygon turret. Usually done by bouncing off the wall for momentum. Requires: "canSuitlessMaridia"
"canGrappleJump"
{
"draygonElectricityFrames": 60
}
"h_canBreakOneDraygonTurret"
|
|
Notable: true 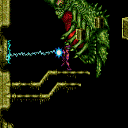
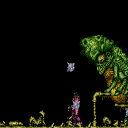
Kill Draygon by grappling to the top left turret. Number of Draygon hits seems to vary, taking a worst case guess at 5. Requires: "h_canNavigateUnderwater"
"canUseGrapple"
{
"draygonElectricityFrames": 240
}
{
"enemyDamage": {
"enemy": "Draygon",
"type": "contact",
"hits": 5
}
}
Clears obstacles: f_DefeatedDraygon |
|
From: 3
Draygon (locked)
To: 6
Draygon (unlocked)
Notable: true 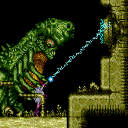
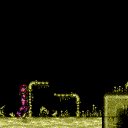
Kill Draygon by grappling to a bottom turret as you get grabbed. Avoids taking all the hits from Draygon. Requires: "h_canNavigateUnderwater"
"canPreciseGrapple"
"h_canBreakOneDraygonTurret"
{
"draygonElectricityFrames": 240
}
Clears obstacles: f_DefeatedDraygon |
|
Notable: true 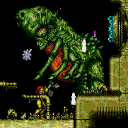
Fight Draygon without gravity, but with morph. Requires: "canSuitlessMaridia"
"Morph"
"h_canBreakThreeDraygonTurrets"
{
"enemyKill": {
"enemies": [
[
"Draygon"
]
],
"farmableAmmo": [
"Missile",
"Super"
]
}
}
Clears obstacles: f_DefeatedDraygon |
|
From: 1
Left Door
To: 6
East Cactus Alley Junction (Right of Morph Tunnel)
Hug the right wall after killing the first Cacatac in order to avoid its invisible, stationary projectiles. Entrance condition: {
"comeInWithGMode": {
"mode": "any",
"morphed": true
}
}
Requires: "h_canNavigateUnderwater"
{
"or": [
"h_canArtificialMorphSpringBall",
"h_canArtificialMorphBombHorizontally"
]
}
{
"or": [
{
"and": [
"h_canArtificialMorphBombs",
{
"or": [
"Gravity",
"h_canArtificialMorphSpringBall"
]
}
]
},
"h_canArtificialMorphPowerBomb",
{
"enemyDamage": {
"enemy": "Cacatac",
"hits": 1,
"type": "contact"
}
}
]
}
{
"or": [
"h_canArtificialMorphSpringBall",
{
"and": [
"Gravity",
"h_canArtificialMorphBombThings"
]
}
]
}
|
|
From: 2
Right Door
To: 4
Top Right Ledge Junction
Use SpaceJump to break out of the water. Afterward, it's easiest to use a wall jump to gain height but this is not required. Requires: "canSuitlessMaridia"
"HiJump"
{
"or": [
"canSpaceJumpWaterEscape",
{
"and": [
"canSpaceJumpWaterBounce",
"canWalljump"
]
}
]
}
|
|
From: 2
Right Door
To: 4
Top Right Ledge Junction
SpringBall jump just as Samus exits the water to reach the distant ledge. To get enough horizontal distance, either use a Stationary Lateral Mid-Air Morph with a crouch jump for extra height, or spin jump out before morphing. Or SpringBall jump part of the way over and land on a Bomb explosion to cross the rest of the distance. Requires: "canSuitlessMaridia"
"HiJump"
"h_canMaxHeightSpringBallJump"
"canTrickyJump"
{
"or": [
"canStationaryLateralMidAirMorph",
{
"and": [
"canJumpIntoIBJ",
"h_canBombHorizontally"
]
}
]
}
|
|
From: 3
Junction Left of Morph Tunnel
To: 1
Left Door
Requires: "canSuitlessMaridia"
"HiJump"
"canPreciseWalljump"
{
"or": [
"canConsecutiveWalljump",
"canDelayedWalljump"
]
}
|
|
From: 3
Junction Left of Morph Tunnel
To: 1
Left Door
Requires: "canSuitlessMaridia"
{
"or": [
{
"and": [
"canSpaceJumpWaterBounce",
"canWalljump"
]
},
{
"and": [
"canSpaceJumpWaterEscape",
"HiJump"
]
}
]
}
|
|
From: 3
Junction Left of Morph Tunnel
To: 1
Left Door
Start the jump from the raised alcove. Requires: "canSuitlessMaridia" "HiJump" "canSpringBallJumpMidAir" |
|
From: 3
Junction Left of Morph Tunnel
To: 6
East Cactus Alley Junction (Right of Morph Tunnel)
Requires: "h_canNavigateUnderwater"
{
"or": [
"h_canUseSpringBall",
{
"and": [
"Gravity",
"h_canBombThings"
]
}
]
}
|
|
From: 3
Junction Left of Morph Tunnel
To: 6
East Cactus Alley Junction (Right of Morph Tunnel)
This can be done by turning off Gravity and HiJump to do a mid-air morph through the morph tunnel. Requires: "canSuitlessMaridia" "Morph" "canDisableEquipment" |
|
From: 5
Bottom Middle Junction
To: 4
Top Right Ledge Junction
Notable: true 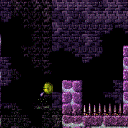
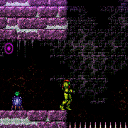
When the Cacatac on the ground fires a spike, perform a springball Jump to break the waterline and then hit the spike for extra height. Requires: "HiJump"
"canSuitlessMaridia"
"canCarefulJump"
"canTrickySpringBallJump"
"canLateralMidAirMorph"
"canNeutralDamageBoost"
{
"enemyDamage": {
"enemy": "Cacatac",
"hits": 2,
"type": "spike"
}
}
|
|
From: 5
Bottom Middle Junction
To: 6
East Cactus Alley Junction (Right of Morph Tunnel)
This can be done by turning off Gravity and HiJump to jump over both spike pits. Requires: "canSuitlessMaridia"
"canDisableEquipment"
"canCarefulJump"
{
"or": [
"Gravity",
"HiJump",
"canSpringBallJumpMidAir"
]
}
|
|
From: 5
Bottom Middle Junction
To: 6
East Cactus Alley Junction (Right of Morph Tunnel)
Requires: "canSuitlessMaridia"
"HiJump"
{
"spikeHits": 1
}
{
"or": [
"canWalljump",
"canSpaceJumpWaterEscape",
"canSpringBallJumpMidAir",
{
"and": [
"h_canJumpIntoIBJ",
"h_canUseSpringBall"
]
},
{
"and": [
"h_canIBJ",
"canBombJumpWaterEscape"
]
},
{
"spikeHits": 1
}
]
}
|
|
From: 5
Bottom Middle Junction
To: 6
East Cactus Alley Junction (Right of Morph Tunnel)
This can be done by turning off Gravity and HiJump to jump over both spike pits. Requires: "canSuitlessMaridia"
"canSpringBallJumpMidAir"
{
"spikeHits": 1
}
{
"or": [
"canTrickySpringBallJump",
{
"and": [
"canWalljump",
"canSpaceJumpWaterBounce"
]
},
{
"and": [
"h_canJumpIntoIBJ",
"h_canUseSpringBall"
]
},
{
"and": [
"h_canIBJ",
"canBombJumpWaterEscape"
]
},
{
"spikeHits": 1
}
]
}
|
|
From: 6
East Cactus Alley Junction (Right of Morph Tunnel)
To: 5
Bottom Middle Junction
Requires: "canSuitlessMaridia"
{
"or": [
{
"spikeHits": 1
},
"canSpringBallJumpMidAir",
{
"and": [
"HiJump",
{
"or": [
"canWalljump",
"h_canCrouchJumpDownGrab",
"canSpaceJumpWaterEscape"
]
}
]
},
{
"and": [
"h_canIBJ",
"canBombJumpWaterEscape"
]
}
]
}
{
"or": [
{
"spikeHits": 1
},
"HiJump"
]
}
|
|
From: 6
East Cactus Alley Junction (Right of Morph Tunnel)
To: 5
Bottom Middle Junction
This can be done by turning off Gravity and HiJump to jump over both spike pits. Requires: "canSuitlessMaridia" "canDisableEquipment" "canCarefulJump" |
|
From: 1
Top Sand Entrance
To: 3
Top Left Item
Notable: true 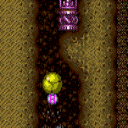

Reach the left side item using a single bomb explosion barely reach it. Use HiJump to reach the water line and then use a Bomb Jump Water Escape motion to Bomb jump out of the water. Do not Morph until fully out of the water to place the Bomb with the correct height. And do not place the Bomb at the max possible height, but a little lower where it will bounce Samus higher. Requires: "canSuitlessMaridia" "HiJump" "canPlayInSand" "h_canCrouchJumpDownGrab" "canBombJumpWaterEscape" |
|
It's possible to get out of the sand suitless and without HiJump after falling from the chute, by hugging the left side and moving quickly. Requires: "canSuitlessMaridia"
"canPlayInSand"
{
"or": [
{
"and": [
"h_canMaxHeightSpringBallJump",
{
"or": [
"canWalljump",
"can4HighMidAirMorph",
"h_canJumpIntoIBJ"
]
}
]
}
]
}
|
|
Requires: "canSuitlessMaridia"
"HiJump"
{
"or": [
"canPlayInSand",
{
"and": [
"canPrepareForNextRoom",
"h_canUseSpringBall"
]
}
]
}
{
"or": [
{
"and": [
{
"or": [
"canWalljump",
"canSpaceJumpWaterEscape"
]
},
{
"or": [
"h_canCrouchJumpDownGrab",
"canSunkenTileWideWallClimb"
]
}
]
},
"canSpringBallJumpMidAir",
{
"and": [
"h_canCrouchJumpDownGrab",
"canBombJumpWaterEscape",
"h_canIBJ"
]
}
]
}
|
|
Perform a double springball jump with the first jump being a bounce on the sand. Requires: "canSuitlessMaridia"
{
"or": [
"canPrepareForNextRoom",
"canPlayInSand"
]
}
"h_canDoubleSpringBallJumpWithHiJump"
|
|
From: 1
Top Sand Entrance
To: 4
Right Item
Notable: true 
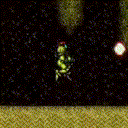
Walljump up and instant morph with exact timing and positioning so as to enter the Power Bomb location through the maze's exit. Requires: "canSuitlessMaridia" "canConsecutiveWalljump" "canPlayInSand" "HiJump" "canInsaneWalljump" "can3HighWallMidAirMorph" |
|
From: 1
Top Sand Entrance
To: 4
Right Item
Notable: true 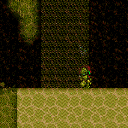
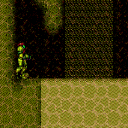
By using the sandfall physics, it is possible to springballjump to the Maridia Power Bomb location without Gravity or HiJump. This requires a very precise spinjump into the sandfall which also exits the sandfall, after being pushed down, with more height than a regular jump. It is very easy to fall into the sand and be unable to escape. Requires: "canSuitlessMaridia" "canSandfallBounce" "canTrickySpringBallJump" "canTrickyJump" |
|
Requires: "Morph" "canSuitlessMaridia" "canPlayInSand" "HiJump" "canSpringBallJumpMidAir" |
|
From: 1
Top Sand Entrance
To: 4
Right Item
The shinespark must be performed near the upper ledge, and not inside the sandfall. Entrance condition: {
"comeInShinecharged": {
"framesRequired": 70
},
"comesThroughToilet": "any"
}
Requires: "canSuitlessMaridia"
"Morph"
"canMidairShinespark"
"canShinechargeMovementComplex"
"canPrepareForNextRoom"
{
"shinespark": {
"frames": 18
}
}
|
|
From: 1
Top Sand Entrance
To: 4
Right Item
Shinespark vertically from the sand to get onto the first ledge. Carefully get to the second ledge and return to lure the Boulder, or shoot it with a Super. Entrance condition: {
"comeInShinecharged": {
"framesRequired": 140
},
"comesThroughToilet": "any"
}
Requires: "canSuitlessMaridia"
"Morph"
"canPlayInSand"
"canShinechargeMovementComplex"
{
"shinespark": {
"frames": 12
}
}
{
"or": [
"HiJump",
"canSpringBallJumpMidAir",
"canSunkenTileWideWallClimb"
]
}
{
"or": [
"canTrickyJump",
{
"ammo": {
"type": "Super",
"count": 1
}
},
{
"enemyDamage": {
"enemy": "Boulder",
"type": "contact",
"hits": 1
}
}
]
}
|
|
From: 1
Top Left Door
To: 1
Top Left Door
Use a frozen Mochtroid to extend the length of the runway. Positioning the Mochtroid can be done by dropping down below then climbing back up with the frozen Mochtroid as a platform. Alternatively, freeze the Mochtroid with an angle-down shot while falling below then quickly climb back up. Requires: "h_canNavigateUnderwater"
"h_canFrozenEnemyRunway"
{
"or": [
"canMochtroidIceClimb",
{
"and": [
"Gravity",
{
"or": [
"SpaceJump",
"canWalljump"
]
}
]
}
]
}
{
"enemyDamage": {
"enemy": "Mochtroid",
"type": "contact",
"hits": 2
}
}
Exit condition: {
"leaveWithRunway": {
"length": 3,
"openEnd": 1
}
}
|
|
Requires: "canSuitlessMaridia"
"HiJump"
{
"or": [
{
"and": [
"canSpaceJumpWaterBounce",
"canWalljump"
]
},
"canSpaceJumpWaterEscape"
]
}
|
|
Requires: "h_canNavigateUnderwater" "Grapple" |
|
Requires: "h_canNavigateUnderwater" "canMochtroidIceClimb" |
|
SpringBall jump just as Samus exits the water to reach the distant ledge. A Crouch jump makes the SpringBall jump easier, but at the cost of some horizontal movement. Requires: "canSuitlessMaridia" "HiJump" "canTrickyJump" "h_canMaxHeightSpringBallJump" "canStationaryLateralMidAirMorph" |
|
Requires: "h_canNavigateUnderwater" "Grapple" |
|
Requires: "h_canNavigateUnderwater"
"canMochtroidIceClimb"
{
"or": [
"Gravity",
"canDodgeWhileShooting",
{
"enemyDamage": {
"enemy": "Mochtroid",
"hits": 2,
"type": "contact"
}
},
"Wave",
"Spazer",
"Plasma",
{
"and": [
"canPrepareForNextRoom",
"Charge"
]
}
]
}
|
|
From: 2
Bottom Left Door
To: 1
Top Left Door
Requires: "canSuitlessMaridia" "canDoubleSpringBallJumpMidAir" "HiJump" |
|
Run away from the oums and reclimb after each if jumping over them is difficult. Requires: "Morph"
"canSuitlessMaridia"
{
"or": [
"canSpringBallJumpMidAir",
"HiJump",
"canSunkenTileWideWallClimb"
]
}
|
|
From: 3
Bottom Right Door
To: 2
Bottom Left Door
Notable: true 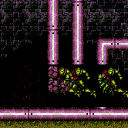
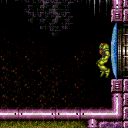
Quickly shoot out the 3 shot blocks then horizontal spark breaking the speed blocks. Wait for the Oums to roll on their own to a place where they can be climbed. Do not stand on the Oums when they begin to attack. Entrance condition: {
"comeInShinecharged": {
"framesRequired": 100
}
}
Requires: "Morph"
"canSuitlessMaridia"
"canUseEnemies"
"canHorizontalShinespark"
{
"shinespark": {
"frames": 91,
"excessFrames": 4
}
}
|
|
Halfie Climb Enter with Shinespark from the Bottom Right (Conserve Health) (Very Hard)
Halfie Climb Room
From: 3
Bottom Right Door
To: 2
Bottom Left Door
Notable: true
Quickly shoot out the 3 shot blocks then horizontal spark breaking the speed blocks. Jump forward to save some health before Shinesparking Wait for the Oums to roll on their own to a place where they can be climbed. Do not stand on the Oums when they begin to attack. Entrance condition: {
"comeInShinecharged": {
"framesRequired": 125
}
}
Requires: "Morph"
"canSuitlessMaridia"
"canUseEnemies"
"canHorizontalShinespark"
"canShinechargeMovementComplex"
{
"shinespark": {
"frames": 70,
"excessFrames": 4
}
}
|
|
From: 3
Bottom Right Door
To: 2
Bottom Left Door
Requires: "Morph"
"canSuitlessMaridia"
{
"or": [
"canSpringBallJumpMidAir",
"HiJump"
]
}
|
|
From: 4
Top Right Door
To: 4
Top Right Door
Use a frozen Mochtroid to extend the length of the runway. Positioning the Mochtroid can be done by dropping down below then climbing back up with the frozen Mochtroid as a platform. Alternatively, freeze the Mochtroid with an angle-down shot while falling below then quickly climb back up. Requires: "h_canNavigateUnderwater"
"h_canFrozenEnemyRunway"
{
"or": [
"canMochtroidIceClimb",
{
"and": [
"Gravity",
{
"or": [
"SpaceJump",
"canWalljump"
]
}
]
}
]
}
{
"enemyDamage": {
"enemy": "Mochtroid",
"type": "contact",
"hits": 2
}
}
Exit condition: {
"leaveWithRunway": {
"length": 4,
"openEnd": 1
}
}
|
|
Requires: "h_canNavigateUnderwater" |
|
Requires: "canSuitlessMaridia" "HiJump" "canSpringBallJumpMidAir" |
|
It takes a bit more time to set up the spark when suitless. Entrance condition: {
"comeInShinecharged": {
"framesRequired": 60
}
}
Requires: "canSuitlessMaridia"
{
"shinespark": {
"frames": 40,
"excessFrames": 8
}
}
|
|
Requires: "h_canNavigateUnderwater" |
|
From: 1
Bottom Left Door
To: 2
Top Right Door
Requires: "canSuitlessMaridia"
"HiJump"
{
"or": [
"canSpringBallJumpMidAir",
"canSpaceJumpWaterBounce",
"canUseFrozenEnemies"
]
}
|
|
Entrance condition: {
"comeInShinecharged": {
"framesRequired": 20
}
}
Requires: "canSuitlessMaridia"
{
"shinespark": {
"frames": 20,
"excessFrames": 0
}
}
|
|
From: 1
Bottom Left Door
To: 2
Top Right Door
Requires: "canSuitlessMaridia" "canUseFrozenEnemies" "canTrickySpringBallJump" "canCrouchJump" |
|
From: 1
Top Sand Entrance
To: 7
Below Morph Tunnel Junction
Get to the left side of the room while avoiding the hole in the ground, jump up through the Morph tunnel. Jump up to the ledge with either Gravity, HiJump and a Crouch Jump Down Grab, or a maximum height Spring Ball Jump. Entrance condition: {
"comeInWithGMode": {
"mode": "any",
"morphed": false
},
"comesThroughToilet": "any"
}
Requires: "Morph"
{
"or": [
"Gravity",
{
"and": [
"canSuitlessMaridia",
"HiJump",
"h_canCrouchJumpDownGrab"
]
},
{
"and": [
"canSuitlessMaridia",
"h_canMaxHeightSpringBallJump"
]
}
]
}
|
|
From: 1
Top Sand Entrance
To: 7
Below Morph Tunnel Junction
Shoot the shot block before reaching the sand and then shinespark up. A diagonal ShineSpark will most likely not have any horizontal movement when performed from the sand. Entrance condition: {
"comeInShinecharged": {
"framesRequired": 85
},
"comesThroughToilet": "any"
}
Requires: "h_canNavigateUnderwater"
"canPlayInSand"
"canShinechargeMovementComplex"
"Wave"
{
"shinespark": {
"frames": 24,
"excessFrames": 5
}
}
|
|
From: 1
Top Sand Entrance
To: 7
Below Morph Tunnel Junction
Shoot the shot block on the descent then shinespark diagonally up before hitting the sand. Entrance condition: {
"comeInShinecharged": {
"framesRequired": 55
},
"comesThroughToilet": "any"
}
Requires: "h_canNavigateUnderwater"
"canMidairShinespark"
"canShinechargeMovementComplex"
"Wave"
"canPrepareForNextRoom"
{
"shinespark": {
"frames": 17
}
}
|
|
From: 1
Top Sand Entrance
To: 7
Below Morph Tunnel Junction
Break the shot block before reaching the sand and then shinespark up. A diagonal ShineSpark will most likely not have any horizontal movement when performed from the sand. Entrance condition: {
"comeInShinecharged": {
"framesRequired": 160
},
"comesThroughToilet": "any"
}
Requires: "h_canNavigateUnderwater"
"canPlayInSand"
"canHeroShot"
"canTrickyJump"
"canShinechargeMovementTricky"
{
"shinespark": {
"frames": 25,
"excessFrames": 4
}
}
|
|
From: 1
Top Sand Entrance
To: 7
Below Morph Tunnel Junction
Break the shot block before reaching the sand and then shinespark up. Samus cannot shinespark after unmorphing until she touches the sand and this can be used to shoot upwards without sparking. A diagonal ShineSpark will most likely not have any horizontal movement when performed from the sand. Entrance condition: {
"comeInShinecharged": {
"framesRequired": 150
},
"comesThroughToilet": "any"
}
Requires: "h_canNavigateUnderwater"
"canPlayInSand"
"canShinechargeMovementTricky"
{
"or": [
"canResetFallSpeed",
{
"and": [
"canPrepareForNextRoom",
"h_canUsePowerBombs"
]
}
]
}
{
"shinespark": {
"frames": 24,
"excessFrames": 5
}
}
|
|
From: 1
Top Sand Entrance
To: 7
Below Morph Tunnel Junction
HiJump with a good jump from the sand can reach the Solid Rock Maze region. Use the sandfall if Samus gets stuck in the sand. Bouncing on the sand as springball can reach the above maze by altering Samus' fall height, like by bouncing under the solid ledge before trying to jump up. Requires: "canSuitlessMaridia"
{
"or": [
"canPrepareForNextRoom",
"canPlayInSand"
]
}
"HiJump"
"h_canMaxHeightSpringBallJump"
|
|
From: 1
Top Sand Entrance
To: 7
Below Morph Tunnel Junction
HiJump with a good jump from the sand can reach the Solid Rock Maze region. Use the sandfall if Samus gets stuck in the sand. Requires: "canSuitlessMaridia" "canPlayInSand" "HiJump" "canConsecutiveWalljump" "canSpaceJumpWaterBounce" |
|
From: 1
Top Sand Entrance
To: 7
Below Morph Tunnel Junction
Notable: true 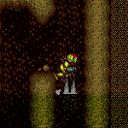
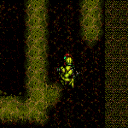
HiJump with a good jump from the sand can reach the Solid Rock Maze region. Use the sandfall if Samus gets stuck in the sand. Perform several wall jumps to climb up to the water level, then precise wall jumps to break free. Requires: "canSuitlessMaridia" "canPlayInSand" "HiJump" "canConsecutiveWalljump" "canPreciseWalljump" |
|
From: 7
Below Morph Tunnel Junction
To: 1
Top Sand Entrance
Requires: "canSuitlessMaridia"
"HiJump"
{
"or": [
"canPreciseWalljump",
"canSpaceJumpWaterBounce"
]
}
|
|
From: 7
Below Morph Tunnel Junction
To: 5
Morph Tunnel Junction
Requires: "canSuitlessMaridia" "canTrickySpringBallJump" "canCarefulJump" |
|
From: 7
Below Morph Tunnel Junction
To: 5
Morph Tunnel Junction
Escape the water with either HiJump or SpaceJump, then carefully jump and morph into the tunnel. Requires: "canSuitlessMaridia"
"Morph"
{
"or": [
{
"and": [
"HiJump",
"canPreciseWalljump",
"canWallJumpInstantMorph"
]
},
{
"and": [
"HiJump",
"canSpaceJumpWaterEscape"
]
},
{
"and": [
"canPreciseWalljump",
"canSpaceJumpWaterBounce"
]
}
]
}
|
|
From: 7
Below Morph Tunnel Junction
To: 5
Morph Tunnel Junction
Notable: true 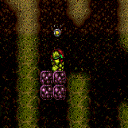
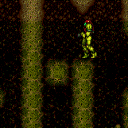
Jump off of the crumble blocks consecutively while placing a bomb on the water line and convert that into an IBJ to climb the West Sand Hole maze. Requires: "canSuitlessMaridia" "h_canJumpIntoIBJ" "canBombJumpWaterEscape" "canCrumbleJump" |
|
From: 1
Left Door
To: 3
Right Door
Notable: true 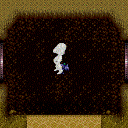
From the doorframe, wait for the Zoa to rise out of the water, then use it to damage boost into the open opposite door. Requires: "canSuitlessMaridia"
"canTrickyJump"
"canHorizontalDamageBoost"
{
"enemyDamage": {
"enemy": "Zoa",
"type": "contact",
"hits": 1
}
}
|
|
Requires: {
"or": [
"Gravity",
{
"and": [
"canSuitlessMaridia",
"HiJump"
]
}
]
}
{
"doorUnlockedAtNode": 1
}
|
|
Escape by wall jumping when the water is low or using a crouch jump and down grab when it's high. Requires: "canSuitlessMaridia"
"canCarefulJump"
{
"or": [
"canWalljump",
"h_canCrouchJumpDownGrab",
"canTrickySpringBallJump"
]
}
{
"doorUnlockedAtNode": 1
}
|
|
Keep freezing the Yapping Maw while using a frozen bug to escape. Requires: "canSuitlessMaridia"
"canUseFrozenEnemies"
{
"doorUnlockedAtNode": 1
}
|
|
Escape by wall jumping when the water is low or using a crouch jump and down grab when it's high. Requires: "canSuitlessMaridia"
{
"ammo": {
"type": "Super",
"count": 1
}
}
{
"or": [
"canWalljump",
"h_canCrouchJumpDownGrab",
"canTrickySpringBallJump"
]
}
{
"doorUnlockedAtNode": 1
}
|
|
From: 4
Junction Below Left Door
To: 5
Junction Below Right Door
Notable: true 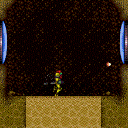
Avoid the Yapping Maw after entering by not standing in one place for too long. Kill the Zoa and quickly jump across the sand. Hitting the Zoas will drop Samus deep into the sand below. Requires: "canSuitlessMaridia" "canTrickyJump" "canPlayInSand" |
|
From: 4
Junction Below Left Door
To: 5
Junction Below Right Door
Freeze the Zoa as it spawns and jump on it then jump across the room. Freeze any Yapping Maws that attack and use them or a frozen Zoa as a platform to leave. Requires: "canSuitlessMaridia" "canUseFrozenEnemies" "canCarefulJump" |
|
From: 4
Junction Below Left Door
To: 5
Junction Below Right Door
Kill the Zoa while avoiding the Yapping Maw, then cross the sand. Spring ball can be used to help cross the sand. Requires: "canSuitlessMaridia"
"HiJump"
{
"or": [
"canPlayInSand",
"h_canUseSpringBall",
"SpaceJump"
]
}
|
|
From: 4
Junction Below Left Door
To: 5
Junction Below Right Door
Requires: "canSuitlessMaridia"
"canPlayInSand"
{
"ammo": {
"type": "Super",
"count": 1
}
}
|
|
Requires: {
"or": [
"Gravity",
{
"and": [
"canSuitlessMaridia",
"HiJump"
]
}
]
}
{
"doorUnlockedAtNode": 3
}
|
|
Escape by wall jumping when the water is low or using a crouch jump and down grab when it's high. Requires: "canSuitlessMaridia"
"canCarefulJump"
{
"or": [
"canWalljump",
"h_canCrouchJumpDownGrab",
"canTrickySpringBallJump"
]
}
{
"doorUnlockedAtNode": 3
}
|
|
Keep freezing the Yapping Maw while using a frozen bug to escape. Requires: "canSuitlessMaridia"
"canUseFrozenEnemies"
{
"doorUnlockedAtNode": 3
}
|
|
From: 5
Junction Below Right Door
To: 3
Right Door
Escape by wall jumping when the water is low or using a crouch jump and down grab when it's high. Requires: "canSuitlessMaridia"
{
"ammo": {
"type": "Super",
"count": 1
}
}
{
"or": [
"canWalljump",
"h_canCrouchJumpDownGrab",
"canTrickySpringBallJump"
]
}
{
"doorUnlockedAtNode": 3
}
|
|
From: 5
Junction Below Right Door
To: 4
Junction Below Left Door
Notable: true
Avoid the Yapping Maw after entering by not standing in one place for too long. Kill the Zoa and quickly jump across the sand. Hitting the Zoas will drop Samus deep into the sand below. Requires: "canSuitlessMaridia" "canTrickyJump" "canPlayInSand" |
|
From: 5
Junction Below Right Door
To: 4
Junction Below Left Door
Freeze the Zoa as it spawns and jump on it then jump across the room. Freeze any Yapping Maws that attack and use them or a frozen Zoa as a platform to leave. Requires: "canSuitlessMaridia" "canUseFrozenEnemies" "canCarefulJump" |
|
From: 5
Junction Below Right Door
To: 4
Junction Below Left Door
Kill the Zoa while avoiding the Yapping Maw, then cross the sand. Spring ball can be used to help cross the sand. Requires: "canSuitlessMaridia"
"HiJump"
{
"or": [
"canPlayInSand",
"h_canUseSpringBall",
"SpaceJump"
]
}
|
|
From: 5
Junction Below Right Door
To: 4
Junction Below Left Door
Requires: "canSuitlessMaridia"
"canPlayInSand"
{
"ammo": {
"type": "Super",
"count": 1
}
}
|
|
From: 1
Left Door
To: 2
Right Door
Notable: true 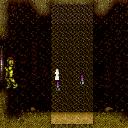
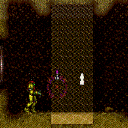
Kill all the Zoas and don't pick up their drops. If the door is unlocked, stand in the doorframe and jump across the room. Otherwise, jump across the sand, starting 1.5 tiles away from the sandfall. Hold jump and forward the whole time. Samus will dip into the sand, but still make it to the other side. Requires: "canSuitlessMaridia"
"canCarefulJump"
{
"or": [
{
"doorUnlockedAtNode": 1
},
"canTrickyJump"
]
}
"canPlayInSand"
|
|
From: 1
Left Door
To: 2
Right Door
It is possible to get out of the sand with nothing. While holding down, crouch jump then press forward diagonal to clip into the wall enough to jump out. Requires: "canSuitlessMaridia" "h_canCrouchJumpDownGrab" "canEscapeSand" |
|
Use the frozen Zoas as a bridge. Falling will require Samus to use ice beam and a crouch jump to escape. Requires: "canSuitlessMaridia" "canUseFrozenEnemies" "canPlayInSand" |
|
Requires: "canSuitlessMaridia" "HiJump" |
|
It is relatively easy to get out of the sand by rapidly placing bombs. Requires: "canSuitlessMaridia" "canPlayInSand" "h_canUseMorphBombs" |
|
From: 2
Right Door
To: 1
Left Door
Notable: true
Kill all the Zoas and don't pick up their drops. If the door is unlocked, stand in the doorframe and jump across the room. Otherwise, jump across the sand, starting 1.5 tiles away from the sandfall. Hold jump and forward the whole time. Samus will dip into the sand, but still make it to the other side. Requires: "canSuitlessMaridia"
"canCarefulJump"
{
"or": [
{
"doorUnlockedAtNode": 2
},
"canTrickyJump"
]
}
"canPlayInSand"
|
|
From: 2
Right Door
To: 1
Left Door
It is possible to get out of the sand with nothing. While holding down, crouch jump then press forward diagonal to clip into the wall enough to jump out. Requires: "canSuitlessMaridia" "h_canCrouchJumpDownGrab" "canEscapeSand" |
|
Use the frozen Zoas as a bridge. Falling will require Samus to use ice beam and a crouch jump to escape. Requires: "canSuitlessMaridia" "canUseFrozenEnemies" "canPlayInSand" |
|
Requires: "canSuitlessMaridia" "HiJump" |
|
It is relatively easy to get out of the sand with rapidly placing bombs. Requires: "canSuitlessMaridia" "h_canUseMorphBombs" "canPlayInSand" |
|
Notable: true 
Repeatedly freeze the Zoas to slowly push Samus into the wall and through the locked doorway. Requires: "h_canNavigateUnderwater"
"canWallIceClip"
"Wave"
{
"enemyDamage": {
"enemy": "Zoa",
"type": "contact",
"hits": 2
}
}
Bypasses door shell: true |
|
Requires: "h_canNavigateUnderwater" |
|
Requires: "h_canNavigateUnderwater" |
|
From: 2
Right Door
To: 3
Junction Left of Morph Tunnel
Notable: true 
Freeze one of the Menus (bugs) in a position where you can use it to get into the morph passage. One of the easier methods is with a damage boost. Stand in the water, take a hit for positioning, and freeze the bug near but left of Samus. Then morph on top and damage boost into the morph tunnel as it unfreezes. Requires: "Morph"
"h_canNavigateUnderwater"
"canTrickyUseFrozenEnemies"
"canNeutralDamageBoost"
{
"enemyDamage": {
"enemy": "Menu",
"type": "contact",
"hits": 2
}
}
|
|
From: 2
Bottom Right Door
To: 1
Left Vertical Door
Requires: "canSuitlessMaridia" "HiJump" "canCarefulJump" "canTrickyUseFrozenEnemies" "h_canCrouchJumpDownGrab" |
|
Requires: "canSuitlessMaridia"
"HiJump"
"canSpringBallJumpMidAir"
{
"or": [
"h_canCrouchJumpDownGrab",
"canTrickySpringBallJump",
"canWalljump"
]
}
|
|
From: 2
Bottom Right Door
To: 3
Middle Right Door
Notable: true 
Use the Skultera to get onto the top right platform. There are two distinct ways to get up using the top Skultera. 1. Freeze it at the bottom of its path to the left. Crouch jump and down grab to get onto it. The positioning is very precise. 2. Freeze it about a half-tile from the right wall and very quickly stationary spin jump and quickly walljump mash to get up before it thaws. This may be easier by jumping away from the wall, towards the fish, to gain height faster. Requires: "canSuitlessMaridia"
"canTrickyUseFrozenEnemies"
{
"or": [
{
"and": [
"canTrickyJump",
"h_canCrouchJumpDownGrab"
]
},
{
"and": [
"canStationarySpinJump",
"canSunkenTileWideWallClimb"
]
}
]
}
|
|
Requires: "canSuitlessMaridia"
{
"or": [
"HiJump",
"canSpringBallJumpMidAir"
]
}
|
|
Entrance condition: {
"comeInWithGMode": {
"mode": "any",
"morphed": true
}
}
Requires: {
"or": [
"Gravity",
{
"and": [
"canSuitlessMaridia",
"HiJump",
"h_canArtificialMorphSpringBall"
]
}
]
}
"h_canArtificialMorphIBJ"
|
|
Entrance condition: {
"comeInWithGMode": {
"mode": "any",
"morphed": true
}
}
Requires: {
"or": [
"Gravity",
{
"and": [
"canSuitlessMaridia",
"HiJump",
"h_canArtificialMorphSpringBall"
]
}
]
}
"h_canArtificialMorphIBJ"
|
|
From: 2
Bottom Door
To: 4
Water Level Junction
The fish can safely be damaged from the door until they are ready to be used as platforms. Requires: "h_canNavigateUnderwater"
"canUseFrozenEnemies"
{
"or": [
"canTrickyUseFrozenEnemies",
"HiJump",
"canSpringBallJumpMidAir",
"Gravity",
"h_canCrouchJumpDownGrab"
]
}
|
|
From: 2
Bottom Door
To: 4
Water Level Junction
Requires: "canSuitlessMaridia" "HiJump" "canSpringBallJumpMidAir" |
|
From: 2
Bottom Door
To: 4
Water Level Junction
Spark vertically by the first plant on the right to hit the floating island. Entrance condition: {
"comeInShinecharged": {
"framesRequired": 50
},
"comesThroughToilet": "no"
}
Requires: "canSuitlessMaridia"
"canShinechargeMovement"
{
"shinespark": {
"frames": 14,
"excessFrames": 4
}
}
|
|
From: 2
Bottom Door
To: 4
Water Level Junction
Spark vertically by the first plant on the right to hit the floating island. Entrance condition: {
"comeInShinecharged": {
"framesRequired": 60
},
"comesThroughToilet": "yes"
}
Requires: "canSuitlessMaridia"
"canShinechargeMovement"
{
"shinespark": {
"frames": 14,
"excessFrames": 4
}
}
|
|
From: 4
Water Level Junction
To: 1
Left Door
Crouch jump + down grab only works as a way out of the water on the right side. Requires: "canSuitlessMaridia" "h_canCrouchJumpDownGrab" "canTrickyJump" |
|
Perform a precise wall jump as the water is lowering. Climbing up the right side of the room is slightly easier. Requires: "canSuitlessMaridia" "canPreciseWalljump" |
|
Safely kill the first Choot, then roll through the bottom of the room after passing the two Puyos. Expects one to two Puyo hits while crossing the room. Requires: "h_canNavigateUnderwater"
"Morph"
{
"enemyDamage": {
"enemy": "Puyo",
"type": "contact",
"hits": 1
}
}
{
"or": [
"canCarefulJump",
{
"enemyDamage": {
"enemy": "Puyo",
"type": "contact",
"hits": 1
}
}
]
}
|
|
From: 4
Junction Between Items
To: 1
Right Door
A stationary spinjump can fit into the 1 tile wide hole where Samus can slowly infinite walljump to freedom. Requires: "canSuitlessMaridia" "canStationarySpinJump" "canSunkenTileWideWallClimb" |
|
Requires: "canSuitlessMaridia"
"HiJump"
{
"or": [
"canWalljump",
"h_canCrouchJumpDownGrab"
]
}
|
|
This is a max height springball jump. Requires: "canSuitlessMaridia" "h_canMaxHeightSpringBallJump" |
|
From: 1
Left Door
To: 3
Junction Below Right Door
Requires: "canSuitlessMaridia" "HiJump" "canJumpIntoRespawningBlock" |
|
From: 1
Left Door
To: 3
Junction Below Right Door
It is recommended to shoot the ceiling block immediately upon room entry to bring one of the Puyos down so that it will not be a problem later. Requires: "canSuitlessMaridia"
"h_canMaxHeightSpringBallJump"
{
"or": [
"can4HighMidAirMorph",
"canStationaryLateralMidAirMorph",
{
"and": [
"canNeutralDamageBoost",
{
"enemyDamage": {
"enemy": "Puyo",
"type": "contact",
"hits": 2
}
}
]
}
]
}
|
|
From: 1
Left Door
To: 3
Junction Below Right Door
It is recommended to shoot the ceiling block immediately upon room entry to bring one of the Puyos down so that it will not be a problem later. Requires: "canSuitlessMaridia"
"canTrickySpringBallJump"
"canTrickyJump"
"canJumpIntoRespawningBlock"
{
"or": [
"can4HighMidAirMorph",
"canStationaryLateralMidAirMorph"
]
}
|
|
Requires: "canSuitlessMaridia"
"HiJump"
{
"or": [
"canSpringBallJumpMidAir",
"h_canCrouchJumpDownGrab",
"canUseFrozenEnemies"
]
}
|
|
Involves breaking the top left Puyo free and then freezing it while it falls. Walk to the end of the door platform and wait for the above puyo to land on the shot block. It will float there until its next jump, where it will slowly descend. Requires: "canSuitlessMaridia"
"canTrickyUseFrozenEnemies"
{
"or": [
"h_canCrouchJumpDownGrab",
"canTwoTileSqueeze",
"Morph"
]
}
|
|
Requires: {
"or": [
"h_canNavigateUnderwater",
{
"enemyDamage": {
"enemy": "Puyo",
"type": "contact",
"hits": 1
}
}
]
}
|
|
From: 3
Junction Below Right Door
To: 2
Right Door
Notable: true 
Positioning the Puyo requires it to perform a big jump then start falling with a frame perfect freeze. One possible setup stands on the left tile of the right side and lets the puyo jump up taking a contact hit. Then so long as the puyo isn't on the very edge, it will do a big jump. Clip onto the puyo by doing an aim down jump and switching to a forward diagonal at the right time. Requires: "canSuitlessMaridia"
"h_canNonTrivialCeilingClip"
"canTrickyUseFrozenEnemies"
{
"enemyDamage": {
"enemy": "Puyo",
"type": "contact",
"hits": 8
}
}
|
|
From: 3
Junction Below Right Door
To: 2
Right Door
Place a PB up against the crumble blocks, then jump and midair morph into that same position at the end of the explosion while holding CF inputs. Immediately after the CF, hold down to break the crumble blocks. Requires: "h_canJumpIntoCrystalFlashClip" "canSuitlessMaridia" |
|
From: 1
Left Door
To: 1
Left Door
The easiest way to lure an Evir projectile and get through the door before it is to stand facing and against the door cap, open the door then turn right and run back to the left. Requires: "h_canNavigateUnderwater" Exit condition: {
"leaveWithGModeSetup": {}
}
|
|
The sand does not impede Samus in G-Mode. It is possible to jump to the tall pillar with nothing, requiring a subpixel precise jump. Running before jumping doesn't help. Stand one pixel from the right edge and spinjump to the right. Entrance condition: {
"comeInWithGMode": {
"mode": "any",
"morphed": false
}
}
Requires: "h_canNavigateUnderwater"
{
"or": [
"Gravity",
"HiJump",
"canSpringBallJumpMidAir",
"canInsaneJump"
]
}
|
|
Requires: "canSuitlessMaridia"
"HiJump"
"canPlayInSand"
{
"or": [
"Ice",
{
"enemyKill": {
"enemies": [
[
"Evir"
],
[
"Evir"
]
],
"explicitWeapons": [
"Plasma",
"Super",
"PowerBombPeriphery"
]
}
}
]
}
|
|
From: 1
Left Door
To: 4
Junction Below Sand Entrance
By entering the room with run speed, it is possible to jump over the pair of Evirs. Entrance condition: {
"comeInRunning": {
"speedBooster": "any",
"minTiles": 3.4375
}
}
Requires: "canSuitlessMaridia" "HiJump" "canCarefulJump" |
|
From: 1
Left Door
To: 4
Junction Below Sand Entrance
Requires: "canSuitlessMaridia"
"HiJump"
"canPlayInSand"
{
"enemyDamage": {
"enemy": "Evir",
"type": "particle",
"hits": 1
}
}
|
|
The sand does not impede Samus in G-Mode. Entrance condition: {
"comeInWithGMode": {
"mode": "any",
"morphed": false
}
}
Requires: "h_canNavigateUnderwater"
{
"or": [
"Gravity",
"HiJump",
"canSpringBallJumpMidAir"
]
}
|
|
From: 2
Right Door
To: 2
Right Door
Notable: true 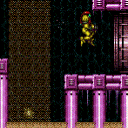
The Evir won't shoot unless Samus enters the sand falls. Getting to the transition tiles while standing before the projectile while suitless is very precise. From the sand, turnaround spinjump towards the right. Turn towards the sandfall about when you're level with the platform. Turn right and shoot as soon as you enter the sandfall. And try to land right next to the transition. Requires: "canSuitlessMaridia" "canPlayInSand" "canMidairWiggle" "HiJump" "canInsaneJump" Exit condition: {
"leaveWithGModeSetup": {}
}
|
|
Requires: "canSuitlessMaridia" "HiJump" "canPlayInSand" |
|
The sand does not impede Samus in G-Mode. Entrance condition: {
"comeInWithGMode": {
"mode": "any",
"morphed": false
},
"comesThroughToilet": "any"
}
Requires: "h_canNavigateUnderwater"
{
"or": [
"Gravity",
"HiJump",
"canSpringBallJumpMidAir"
]
}
|
|
The sand does not impede Samus in G-Mode. It is possible to jump to the tall pillar with nothing, requiring a subpixel precise jump. Running before jumping doesn't help. Stand one pixel from the right edge and spinjump to the right. Entrance condition: {
"comeInWithGMode": {
"mode": "any",
"morphed": false
},
"comesThroughToilet": "any"
}
Requires: "h_canNavigateUnderwater"
{
"or": [
"Gravity",
"HiJump",
"canSpringBallJumpMidAir",
"canTrickyJump"
]
}
|
|
From: 4
Junction Below Sand Entrance
To: 1
Left Door
Notable: true .png)
.gif)
If entering from the sandfall above, come in at the far left of the transition, with either a spin-jump or i-frames, to avoid the Evir shot; land on the right side of the pillar to the left, being careful to not bring left Evir on camera. If coming from the right side of the room, then moonwalk on the center pillar to scroll the camera as far right as possible, to avoid getting hit by an Evir shot; alternatively, jump slightly to the left and freeze the Evir, then return back to the center pillar before jumping across the sand. Freeze the right Evir and jump onto it. Quickly move left and fire an angle-down shot to freeze the left Evir before it descends too far. Jump onto the left Evir, back up to the right side of it to maximize space to build momentum, and jump to the left onto the sand and then onto the ledge. If Samus does not quite get enough height to make it onto the ledge, then break spin, turn around to the right, land on the sand again, and do a turnaround spin-jump to the left. If the Evirs descend too far, it is possible to use a Power Bomb to bring them back up again, but caution is needed to avoid killing the first Evir, and it is difficult to avoid getting shot. Requires: "canSuitlessMaridia"
"canTrickyJump"
"canTrickyUseFrozenEnemies"
"canPlayInSand"
{
"or": [
"canCameraManip",
{
"and": [
{
"ammo": {
"type": "PowerBomb",
"count": 1
}
},
{
"enemyDamage": {
"enemy": "Evir",
"type": "particle",
"hits": 2
}
}
]
}
]
}
|
|
Requires: "canSuitlessMaridia"
"HiJump"
"canPlayInSand"
{
"or": [
"canTrickyJump",
{
"enemyDamage": {
"enemy": "Evir",
"type": "particle",
"hits": 1
}
},
"Ice",
{
"enemyKill": {
"enemies": [
[
"Evir"
],
[
"Evir"
]
],
"explicitWeapons": [
"Super",
"Plasma",
"PowerBombPeriphery"
]
}
}
]
}
|
|
From: 4
Junction Below Sand Entrance
To: 2
Right Door
Notable: true 
On the left side of the raised platform, jump for max height. Lateral Midair Morph for horizontal momentum, and perform the springball jump the moment before touching the sandfall. Pause again to disable springball as soon as possible. Requires: "canSuitlessMaridia"
"HiJump"
"canTrickySpringBallJump"
"canStationaryLateralMidAirMorph"
"canSpringFling"
"canPlayInSand"
{
"or": [
{
"enemyDamage": {
"enemy": "Evir",
"type": "particle",
"hits": 1
}
},
{
"enemyKill": {
"enemies": [
[
"Evir"
]
],
"explicitWeapons": [
"Plasma",
"Super",
"PowerBomb"
]
}
}
]
}
|
|
From: 4
Junction Below Sand Entrance
To: 2
Right Door
Notable: true .png)
.gif)
From the sand fall, quickly get onto the left platform to prevent the right side Evir from lowering too far. Jump on the sand to the right while freezing the Evir as high as possible. Refreeze the Evir so it is a slightly higher platform than the right pillar. Perform a spring ball jump with a stationary lateral mid-air morph from the left side of the current platform to get onto the Evir. Use a running jump off of the Evir. As a backup, it may be possible to make the Evir rise again by hitting it with a PB - place the PB in the air to avoid double hitting and killing it. Requires: "canSuitlessMaridia" "canTrickyUseFrozenEnemies" "canPlayInSand" "h_canMaxHeightSpringBallJump" "canStationaryLateralMidAirMorph" |
|
From: 4
Junction Below Sand Entrance
To: 2
Right Door
Let the Evir descend slightly from its spawn point to be at the correct height. A power bomb can be used to bring it back up if it falls too far. Requires: "canSuitlessMaridia" "HiJump" "canTrickyJump" "canTrickyUseFrozenEnemies" "canPlayInSand" |
|
From: 1
Left Door
To: 4
Junction Below Top Door
The spark takes Samus directly to the top platform. Entrance condition: {
"comeInShinecharged": {
"framesRequired": 30
}
}
Requires: "h_canNavigateUnderwater"
{
"shinespark": {
"frames": 23,
"excessFrames": 10
}
}
|
|
Spark vertically through the bomb blocks. It is still possible to break the blocks while below 30 Energy by jumping before sparking. Entrance condition: {
"comeInShinecharged": {
"framesRequired": 40
}
}
Requires: "h_canNavigateUnderwater"
{
"or": [
{
"shinespark": {
"frames": 10,
"excessFrames": 8
}
},
{
"and": [
"canMidairShinespark",
{
"shinespark": {
"frames": 7,
"excessFrames": 7
}
}
]
}
]
}
|
|
From: 2
Right Door
To: 4
Junction Below Top Door
The spark takes Samus directly to the top platform. Entrance condition: {
"comeInShinecharged": {
"framesRequired": 30
}
}
Requires: "h_canNavigateUnderwater"
{
"shinespark": {
"frames": 23,
"excessFrames": 10
}
}
|
|
Spark vertically through the bomb blocks. It is still possible to break the blocks while below 30 Energy by jumping before sparking. Entrance condition: {
"comeInShinecharged": {
"framesRequired": 40
}
}
Requires: "h_canNavigateUnderwater"
{
"or": [
{
"shinespark": {
"frames": 10,
"excessFrames": 8
}
},
{
"and": [
"canMidairShinespark",
{
"shinespark": {
"frames": 7,
"excessFrames": 7
}
}
]
}
]
}
|
|
Requires: "canSuitlessMaridia" "h_canBombThings" |
|
Requires: "canSuitlessMaridia"
{
"or": [
{
"and": [
"HiJump",
{
"or": [
"canDownGrab",
"canSpringBallJumpMidAir",
"canConsecutiveWalljump"
]
}
]
},
"h_canMaxHeightSpringBallJump"
]
}
|
|
From: 1
West Leg Left Door
To: 2
East Leg Right Door
Notable: true 
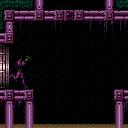
Preselect Grapple and be ready to use it when entering the room. Release up or angle up before release grapple so the shinespark does not activate instantly. Use the windup frames for a shinespark to extend the duration timer. Entrance condition: {
"comeInShinecharged": {
"framesRequired": 150
}
}
Requires: "h_canNavigateUnderwater"
"canShinechargeMovement"
"Grapple"
{
"shinespark": {
"frames": 65
}
}
{
"enemyDamage": {
"enemy": "Menu",
"type": "contact",
"hits": 1
}
}
|
|
Jump from door platform to door platform while avoiding the sand. Requires: "h_canNavigateUnderwater" |
|
Jump from door platform to door platform while avoiding the sand. Requires: "h_canNavigateUnderwater" |
|
From: 3
West Leg Right Door
To: 2
East Leg Right Door
Notable: true
Preselect Grapple and be ready to use it when entering the room. Release up or angle up before release grapple so the shinespark does not activate instantly. Use the windup frames for a shinespark to extend the duration timer. Entrance condition: {
"comeInShinecharged": {
"framesRequired": 150
}
}
Requires: "h_canNavigateUnderwater"
"canShinechargeMovement"
"Grapple"
{
"shinespark": {
"frames": 65
}
}
{
"enemyDamage": {
"enemy": "Menu",
"type": "contact",
"hits": 1
}
}
|
|
Requires: "h_canNavigateUnderwater"
{
"or": [
"canPlayInSand",
{
"and": [
"HiJump",
"h_canUseSpringBall"
]
},
{
"and": [
"Gravity",
{
"or": [
"HiJump",
"h_canUseSpringBall",
"SpaceJump"
]
}
]
}
]
}
|
|
From: 4
West Leg Sand
To: 2
East Leg Right Door
Notable: true 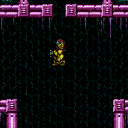
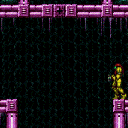
Use the grapple block to initiate a Grapple Jump to climb up to the higher level and above the water line. Aiming the Grapple Jump to line up with the one tile hole is difficult and Samus is moving at high speeds. Escaping the water is also difficult as Samus must be standing at the water line when jumping for the next part of the grapple jump. It may be easier to jump out of the water by turning HiJump off. A Grapple Jump can be a spin jump by running briefly before jumping and that can be used to begin Walljumping or Space Jumping. Requires: "canSuitlessMaridia"
"canTrickyGrappleJump"
"canMidairWiggle"
{
"or": [
{
"enemyDamage": {
"enemy": "Menu",
"type": "contact",
"hits": 1
}
},
"SpaceJump",
{
"and": [
"canConsecutiveWalljump",
{
"or": [
"ScrewAttack",
"canStaggeredWalljump"
]
}
]
}
]
}
|
|
Requires: "h_canNavigateUnderwater"
{
"or": [
"canPlayInSand",
{
"and": [
"HiJump",
"h_canUseSpringBall"
]
},
{
"and": [
"Gravity",
{
"or": [
"HiJump",
"h_canUseSpringBall",
"SpaceJump"
]
}
]
}
]
}
|
|
From: 4
West Leg Sand
To: 5
Junction Above Grapple Block
Notable: true
Use the grapple block to initiate a Grapple Jump to climb up to the higher level. Aiming the Grapple Jump to line up with the one tile hole is difficult and Samus is moving at high speeds. Requires: "canSuitlessMaridia" "canTrickyGrappleJump" "canMidairWiggle" |
|
From: 4
West Leg Sand
To: 5
Junction Above Grapple Block
Notable: true 
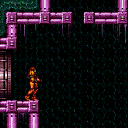
Use a flatley turnaround jump to get Samus inside the gap during a spinjump. Samus must jump from the left side platform. Requires: "Grapple" "canSuitlessMaridia" "HiJump" "canFlatleyJump" "canSunkenTileWideWallClimb" |
|
From: 4
West Leg Sand
To: 5
Junction Above Grapple Block
Requires a mid-air SpringBall jump off the sand. Break spin before touching the sand, and then spinjump to get a good jump off of the sand. A stationary spinjump or a turnaround spin jump can help but morphing will remove all horizontal momentum. Requires: "Grapple" "canSuitlessMaridia" "HiJump" "canSpringBallJumpMidAir" "canPlayInSand" "canTrickyJump" |
|
Using movement tricks to reduce fall speed even slightly can avoid touching the sand. A Flatley style turnaround over the grapple block hole reduces fall speed some, but also needs a down back or a tiny jump. Requires: "canSuitlessMaridia"
{
"or": [
{
"and": [
"canFlatleyJump",
{
"or": [
"canTrickyJump",
"canDownBack"
]
}
]
},
"canWalljump",
"h_canResetFallSpeed"
]
}
|
|
Watch for the water level to start falling to time the jump to escape at its lowest point. Then use SpaceJump to splash on top of the water. Time another jump with the water level or walljump to fully escape the water. Requires: "canSuitlessMaridia"
{
"or": [
{
"and": [
"canSpaceJumpWaterBounce",
"canWalljump"
]
},
"canSpaceJumpWaterEscape"
]
}
"HiJump"
{
"or": [
{
"enemyDamage": {
"enemy": "Menu",
"type": "contact",
"hits": 1
}
},
"ScrewAttack",
"canStaggeredWalljump",
"canPseudoScrew"
]
}
|
|
Roll all the way right before using Xray to stand up, aligned with the right side tiles. Partially clip into the floor to enable the next jump. Use an R-Jump to morph into the tunnel. The second morph ball sized hole can be passed by simply jumping out of the floor clip position with diagonal held. Requires: "h_canNavigateUnderwater" "canXRayStandUp" "canPartialFloorClip" "canRJump" |
|
Requires: "h_canNavigateUnderwater" "h_canUseSpringBall" |
|
From: 2
Item
To: 1
Left Door
Notable: true 
Perform a canSunkenTileWideWallClimb to get to the water surface, then use space jump at the water surface. Then either use space jump when the water is low then a spring ball jump to escape, or space jump when the water is high into a tight midair morph. Requires: "Morph" "canSuitlessMaridia" "canSpringBallJumpMidAir" "canSunkenTileWideWallClimb" "canTrickyJump" "can4HighMidAirMorph" "canSpaceJumpWaterBounce" |
|
Space jump while partially submerged for more time to mid-air morph. Requires: "Morph" "canSuitlessMaridia" "HiJump" "canSpaceJumpWaterBounce" "can4HighMidAirMorph" |
|
Requires: "Morph" "canSuitlessMaridia" "HiJump" "canSpringBallJumpMidAir" |
|
From: 2
Item
To: 1
Left Door
Wall jump until Samus is just below the water line and then morph and place a Bomb Use the brief moment during the Bomb explosion that knocks Samus upwards to setup a Springball jump to jump out of the water. Requires: "canSuitlessMaridia" "canSunkenTileWideWallClimb" "canUnderwaterBombIntoSpringBallJump" "canWallJumpInstantMorph" |
|
Entrance condition: {
"comeInWithGMode": {
"mode": "any",
"morphed": false
}
}
Requires: "h_canNavigateUnderwater"
{
"or": [
"canCarefulJump",
"h_canCrouchJumpDownGrab",
"HiJump",
"Gravity",
"canSpringBallJumpMidAir"
]
}
{
"or": [
"canCarefulJump",
{
"enemyDamage": {
"enemy": "Evir",
"type": "particle",
"hits": 1
}
}
]
}
|
|
Requires: "canSuitlessMaridia" "HiJump" "canTrickySpringBallJump" "canPlayInSand" |
|
From: 1
Left Door
To: 5
Left Pillar Junction
Notable: true 
Time a bomb to hit Samus when she is morphed, 1 pixel into the sand, inside a sandfall, and moving horizontally. There is a setup using a Sand IBJ to rise up the sandfall from the floor and Sandfall Bounce with the correct timing. An alternate setup places the bomb before entering the sand and jumps into it with a very fast jump morph, using HiJump. Requires: "canSuitlessMaridia"
"canTrickyJump"
"canSandfallBounce"
"h_canUseMorphBombs"
{
"or": [
"canSandIBJ",
{
"and": [
"HiJump",
"can4HighMidAirMorph"
]
}
]
}
|
|
Entrance condition: {
"comeInWithGMode": {
"mode": "any",
"morphed": false
}
}
Requires: "h_canNavigateUnderwater" "canCarefulJump" |
|
From: 2
Right Door
To: 2
Right Door
The Evir won't shoot unless Samus is on the left tile of the platform. Getting to the transition tiles while standing before the projectile can be tricky. Either do two quick small spin jumps, one onto it and one back, breaking spin before landing both times, or start with Samus' toe barely on the last tile, move left then do a short spin jump to the right, also breaking spin before landing. Requires: "canSuitlessMaridia" "canTurnaroundSpinJump" "canTrickyJump" Exit condition: {
"leaveWithGModeSetup": {}
}
|
|
From: 2
Right Door
To: 4
Below Sand Entrance
Requires: "canSuitlessMaridia"
"HiJump"
"canPlayInSand"
{
"or": [
"canCarefulJump",
{
"enemyDamage": {
"enemy": "Evir",
"type": "particle",
"hits": 1
}
}
]
}
|
|
From: 2
Right Door
To: 4
Below Sand Entrance
It is possible to cross this segment with nothing. Cancel spin before hitting the sand, then get a good jump off the sand in multiple places. Requires: "canSuitlessMaridia" "canTrickyJump" "canPlayInSand" |
|
Entrance condition: {
"comeInWithGMode": {
"mode": "any",
"morphed": false
},
"comesThroughToilet": "any"
}
Requires: "h_canNavigateUnderwater"
{
"or": [
"canCarefulJump",
"h_canCrouchJumpDownGrab",
"HiJump",
"Gravity",
"canSpringBallJumpMidAir"
]
}
{
"or": [
"canCarefulJump",
{
"enemyDamage": {
"enemy": "Evir",
"type": "particle",
"hits": 1
}
}
]
}
|
|
Entrance condition: {
"comeInWithGMode": {
"mode": "any",
"morphed": false
},
"comesThroughToilet": "any"
}
Requires: "h_canNavigateUnderwater" |
|
From: 4
Below Sand Entrance
To: 2
Right Door
Requires: "canSuitlessMaridia"
"canPlayInSand"
"HiJump"
{
"or": [
"canCarefulJump",
{
"enemyDamage": {
"enemy": "Evir",
"type": "particle",
"hits": 1
}
}
]
}
|
|
From: 4
Below Sand Entrance
To: 2
Right Door
Notable: true .png)
.gif)
From the sand fall, quickly get onto the left platform to prevent the right side Evir from lowering too far. Freeze the right Evir, then jump on the sand to the right while shooting ice over the first Evir to also freeze the second. Freezing the first Evir very high up would also work. As a backup, it may be possible to make them rise again by hitting them with a PB - place the PB in the air to avoid double hitting and killing them. Requires: "canSuitlessMaridia" "canPlayInSand" "canTrickyJump" "canTrickyUseFrozenEnemies" |
|
From: 4
Below Sand Entrance
To: 2
Right Door
Notable: true 
Perform multiple stationary lateral mid-air morphs, while avoiding the Evir projectiles, to cross the room. It is necessary to start the jumps from the far side of the platforms in order to gain more horizontal momentum before entering the sand falls. Falling into the sand will often result in a soft lock. Requires: "canSuitlessMaridia"
"canPlayInSand"
"h_canMaxHeightSpringBallJump"
"canStationaryLateralMidAirMorph"
{
"or": [
{
"enemyKill": {
"enemies": [
[
"Evir"
]
],
"explicitWeapons": [
"Super",
"Missile",
"PowerBombPeriphery",
"Plasma"
]
}
},
{
"enemyDamage": {
"enemy": "Evir",
"type": "particle",
"hits": 1
}
}
]
}
|
|
From: 4
Below Sand Entrance
To: 5
Left Pillar Junction
Requires: "canSuitlessMaridia"
"HiJump"
"canPlayInSand"
{
"or": [
"canTrickyJump",
{
"enemyDamage": {
"enemy": "Evir",
"type": "particle",
"hits": 1
}
}
]
}
|
|
From: 4
Below Sand Entrance
To: 5
Left Pillar Junction
Notable: true .png)
.gif)
Freeze the Evir quickly before it descends and use it to get to the platforms. Getting a good jump while on the right side of the floating block can get Samus to the leftmost block. With a clean jump off of the sand, Samus can then get onto the final vertical pillar. Requires: "canSuitlessMaridia" "canPlayInSand" "canTrickyJump" "canTrickyUseFrozenEnemies" |
|
From: 4
Below Sand Entrance
To: 5
Left Pillar Junction
Notable: true
Perform multiple stationary lateral mid-air morphs, while avoiding the Evir projectiles, to cross the room. It is necessary to start the jumps from the far side of the platforms in order to gain more horizontal momentum before entering the sand falls. Falling into the sand will often result in a soft lock. Requires: "canSuitlessMaridia"
"canPlayInSand"
"h_canMaxHeightSpringBallJump"
{
"or": [
{
"enemyKill": {
"enemies": [
[
"Evir"
]
],
"explicitWeapons": [
"Super",
"Missile",
"PowerBombPeriphery",
"Plasma"
]
}
},
{
"enemyDamage": {
"enemy": "Evir",
"type": "particle",
"hits": 1
}
}
]
}
|
|
From: 4
Below Sand Entrance
To: 5
Left Pillar Junction
Notable: true .png)
.gif)
Use the projectile from a fully submerged Evir to boost Samus into the sandfall, providing just enough height to make the first and hardest jump. Time the projectile to hit Samus when at the maximum height from a jump. The hit must be on the right side of Samus and with no inputs held, but also hold forward during the damage knockback to move through the sandfall. Getting a good jump while on the right side of the next floating block can get Samus to the leftmost block. With a clean jump off of the sand, Samus can then get onto the final vertical pillar. Requires: "canSuitlessMaridia"
"canPlayInSand"
"canInsaneJump"
"canCrouchJump"
"canNeutralDamageBoost"
{
"enemyDamage": {
"enemy": "Evir",
"type": "particle",
"hits": 1
}
}
|
|
Requires: "h_canNavigateUnderwater"
{
"or": [
"Gravity",
"canPlayInSand",
"HiJump"
]
}
|
|
Fall into the sand and roll all the way to the left, through an invisible tile and under the door platform. Shoot upwards to break part of the platform, then perform a crouch jump and down grab or a tile-wide wall jump climb to escape. Requires: "canSuitlessMaridia"
"Morph"
{
"or": [
"canSunkenTileWideWallClimb",
"h_canCrouchJumpDownGrab"
]
}
|
|
From: 5
Left Pillar Junction
To: 4
Below Sand Entrance
Requires: "canSuitlessMaridia"
"HiJump"
"canPlayInSand"
{
"or": [
"canCarefulJump",
"canSpringBallJumpMidAir"
]
}
{
"or": [
"canTrickyJump",
{
"enemyDamage": {
"enemy": "Evir",
"type": "particle",
"hits": 1
}
}
]
}
|
|
From: 5
Left Pillar Junction
To: 4
Below Sand Entrance
Notable: true
Perform multiple stationary lateral mid-air morphs, while avoiding the Evir projectiles, to cross the room. It is necessary to start the jumps from the far side of the platforms in order to gain more horizontal momentum before entering the sand falls. Falling into the sand will often result in a soft lock. Requires: "canSuitlessMaridia" "canPlayInSand" "h_canMaxHeightSpringBallJump" "canStationaryLateralMidAirMorph" |