canTrickySpringBallJump (Hard)
A precise, mid-air spring ball jump. This includes those with a relatively tight pause, jump, and morph, in order to spring ball jump just above shallow water. And those which require the jump input to be pressed near the peak of the jump, which cannot be done by buffering the jump out of the pause menu. To do this, pause as early as possible before jumping and morphing in order to have as much visibility as possible after equipping Spring Ball to time the second jump. This can also be used out of a Spring Wall or from a spin jump, in order to gain more horizontal distance before triggering the second jump. This, along with a crouch jump, is also needed in order to perform a maximum height spring ball jump. Maximum height jumps primarily have underwater applications, as it enables Samus to barely make it up 7 tiles vertically.
Dependencies: canMidAirMorph, canDisableEquipment, canSpringBallJumpMidAir
Strats ()
|
Climb Temporary Blue Chain Through Bomb Blocks Without XRay (Bottom Left to Bottom, Cross-Room) (Extreme)
Climb
From: 2
Bottom Left Door
To: 4
Middle Right Door
Notable: true 
A Temporary Blue Chain with movement assists to climb up and destroy the bomb blocks blocking the bottom morph tunnel. Entrance condition: {
"comeInShinecharging": {
"length": 14,
"openEnd": 0
}
}
Requires: "canChainTemporaryBlue"
{
"or": [
"HiJump",
"canTrickySpringBallJump"
]
}
"canTrickyJump"
Clears obstacles: A |
|
Climb Temporary Blue Chain Through Bomb Blocks Without XRay (Bottom Left to Bottom, In-Room) (Extreme)
Climb
From: 6
Main Junction
To: 4
Middle Right Door
Notable: true
A Temporary Blue Chain with movement assists to climb up and destroy the bomb blocks blocking the bottom morph tunnel. Requires: "canChainTemporaryBlue"
{
"or": [
"HiJump",
"canTrickySpringBallJump"
]
}
"canTrickyJump"
{
"obstaclesCleared": [
"A"
]
}
{
"or": [
{
"canShineCharge": {
"usedTiles": 18,
"openEnd": 0
}
},
{
"and": [
{
"canShineCharge": {
"usedTiles": 19,
"openEnd": 0
}
},
{
"doorUnlockedAtNode": 2
}
]
}
]
}
|
|
From the right door, run and jump while on the dirt mound directly right of the ship. Then SpringBall Jump to reach the Bomb blocks leading to Gauntlet. Requires: "canTrickySpringBallJump"
"canLateralMidAirMorph"
"HiJump"
{
"canShineCharge": {
"usedTiles": 33,
"openEnd": 2
}
}
|
|
Requires: "canTrickyDashJump" "HiJump" "canTrickySpringBallJump" |
|
From: 5
Alcatraz Door
To: 8
Central Junction
Run and spin jump into a spring ball jump, starting from the floating platform. Requires: "canTrickySpringBallJump" "canTrickyJump" |
|
From: 4
Junction (Right side Pit)
To: 2
Right Door
Freeze the Choot when it swings right on its jump. Quickly get on top of it by first getting onto the pillar to the left, or with a SpringBall Jump. Perform a precise spring ball jump to get to the far right ledge, while avoiding hitting the water surface. While on the ledge, stand on the raised ground to the right and jump to the surface, then space jump across the water to the left. Requires: "canSuitlessMaridia"
"canTrickyUseFrozenEnemies"
"canCarefulJump"
"canSpringBallJumpMidAir"
{
"or": [
"canTrickySpringBallJump",
"canResetFallSpeed",
"canStationaryLateralMidAirMorph"
]
}
"canSpaceJumpWaterBounce"
"canWalljump"
|
|
Requires: "Gravity"
{
"or": [
"canTrickySpringBallJump",
{
"and": [
"HiJump",
"canWalljump"
]
},
{
"and": [
"HiJump",
"canSpringBallJumpMidAir"
]
},
{
"and": [
"HiJump",
"SpeedBooster"
]
}
]
}
{
"obstaclesNotCleared": [
"A"
]
}
|
|
From: 17
G-Mode Morph Junction Direct (By Left Door)
To: 10
Left Morph Maze Item
Notable: true 
To overload the PLMs, place a PB precisely to the right of the bottom of the second overhang above the door to the Moat. This is at the max jump height without HiJump. Placing the PB higher or lower will not overload the PLMs without many PBs. Requires: {
"itemNotCollectedAtNode": 10
}
"h_canUsePowerBombs"
{
"or": [
"h_canFly",
{
"and": [
"canTrickyDashJump",
"canTrickySpringBallJump",
"HiJump"
]
}
]
}
Clears obstacles: B |
|
It helps to begin jumping when the water level is high. Requires: "canSuitlessMaridia" "canTrickySpringBallJump" |
|
From: 10
Right Etecoon Shaft - Bottom Left Door
To: 14
Right Etecoon Shaft - Wall Jump Climb Checkpoint Junction
With a runway of at least 12 tiles in the adjacent room, Samus should always be able to jump high enough if she jumps just before hitting the right wall. Entrance condition: {
"comeInRunning": {
"minTiles": 12,
"speedBooster": true
}
}
Requires: "canTrickySpringBallJump" |
|
From: 10
Right Etecoon Shaft - Bottom Left Door
To: 14
Right Etecoon Shaft - Wall Jump Climb Checkpoint Junction
Run a precise distance, to hit a peak of the speed vs height graph. With Samus' back against the closed door, jump about a tile before hitting the right wall. Requires: "canTrickyDashJump" "canTrickySpringBallJump" |
|
From: 1
Left Door
To: 3
Top Junction
Perform a Spring Ball jump from a speedy jump in the previous room. Entrance condition: {
"comeInJumping": {
"speedBooster": true,
"minTiles": 7
}
}
Requires: "canPrepareForNextRoom" "canTrickySpringBallJump" "canCarefulJump" |
|
From: 1
Left Door
To: 3
Top Junction
Perform a very precise Spring Ball jump from the doorframe onto the Grapple block. A running spin jump or crouch jump can be used. Requires: {
"doorUnlockedAtNode": 1
}
"canTrickySpringBallJump"
"canTrickyJump"
{
"obstaclesCleared": [
"A"
]
}
{
"obstaclesNotCleared": [
"C"
]
}
|
|
From: 1
Left Door
To: 3
Top Junction
Perform a very precise Spring Ball jump through the transition and onto the Grapple block. A running spin jump or crouch jump can be used. Entrance condition: {
"comeInJumping": {
"speedBooster": false,
"minTiles": 0.4375
}
}
Requires: "canPrepareForNextRoom" "canTrickySpringBallJump" "canTrickyJump" |
|
From: 2
Right Door
To: 3
Top Junction
X-Ray climb until Samus is a little over halfway off screen; the position is not precise. Face right, then do a turnaround buffer spin jump into a Spring Ball jump to reach the ledge. The pause input can be pressed at the same time as the turnaround. It helps to do an airball to gain horizontal speed. The jump input after pausing should not be buffered, in order to allow a little time for the spring fling horizontal speed to take effect. Entrance condition: {
"comeInWithDoorStuckSetup": {}
}
Requires: "canXRayClimb" "canTrickyJump" "canLateralMidAirMorph" "canTrickySpringBallJump" "canSpringFling" |
|
Jump at the very end of the runway in-room. Requires a runway in the adjacent room of at least 7 tiles. Entrance condition: {
"comeInRunning": {
"speedBooster": true,
"minTiles": 7
}
}
Requires: "canTrickySpringBallJump" "canTrickyDashJump" |
|
Press pause slightly before jumping into morph, in order ensure Samus still has upward momentum when the pause fade-out finishes. Requires: "canSuitlessMaridia" "canTrickySpringBallJump" |
|
From: 2
Right Door
To: 3
Safe Block in the Middle of the Room
Requires: {
"or": [
"h_canTrickySpringwall",
{
"and": [
"h_canMaxHeightSpringBallJump",
"canNeutralDamageBoost"
]
}
]
}
{
"spikeHits": 1
}
|
|
From: 4
Small Ledge Below Left Door
To: 1
Left Door
Requires: "HiJump"
"canSpringBallJumpMidAir"
{
"or": [
"canTrickySpringBallJump",
{
"and": [
"canIframeSpikeJump",
{
"spikeHits": 1
}
]
}
]
}
|
|
From: 4
Small Ledge Below Left Door
To: 1
Left Door
Notable: true 
Jump from the safe spot on the spikey stairs and use the momentum change from equipping SpringBall to move closer to the door's platform. Then SpringBall jump to reach the door. Requires: "canTrickySpringBallJump" "canSpringFling" |
|
From: 7
Junction (Bottom Rippers)
To: 6
Junction (Above Bottom Rippers)
Requires: "canSpringBallJumpMidAir"
{
"or": [
"canWalljump",
{
"and": [
"HiJump",
"canTrickyJump"
]
}
]
}
{
"or": [
"canTrickySpringBallJump",
"canSpringwall"
]
}
|
|
From: 2
Left Side - Top Middle Door
To: 1
Left Side - Top Door
Entrance condition: {
"comeInRunning": {
"minTiles": 15,
"speedBooster": true
}
}
Requires: "canTrickyJump"
"canTrickySpringBallJump"
"canNeutralDamageBoost"
{
"enemyDamage": {
"enemy": "Waver",
"type": "contact",
"hits": 1
}
}
|
|
From: 2
Left Side - Top Middle Door
To: 7
Top Right Door
Entrance condition: {
"comeInRunning": {
"minTiles": 15,
"speedBooster": true
}
}
Requires: "canTrickyJump"
"canTrickySpringBallJump"
"canNeutralDamageBoost"
{
"enemyDamage": {
"enemy": "Cacatac",
"type": "contact",
"hits": 1
}
}
|
|
From: 9
Main Junction
To: 1
Left Side - Top Door
Notable: true 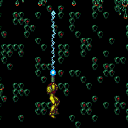
Perform a very tight Spring Ball jump from the Save room door runway, starting from either a crouch or spin jump, then use Grapple to barely reach the ceiling blocks. Requires: "canTrickySpringBallJump" "canPreciseGrapple" |
|
Run and Jump into a Springball Jump from the Save Room runway. Requires: "HiJump" "canTrickySpringBallJump" |
|
From: 2
Bottom Left Door
To: 1
Top Left Door
Spin jump into the room with at least 1 tile of run speed. Perform a lateral mid-air morph into a spring ball jump. Press against the left side of the first moving platform to gain enough height to get on top of it. Entrance condition: {
"comeInJumping": {
"minTiles": 1,
"speedBooster": "any"
}
}
Requires: "canPrepareForNextRoom"
"canLateralMidAirMorph"
"canTrickySpringBallJump"
"canTrickyJump"
{
"heatFrames": 160
}
|
|
Spin jump into the room with at least 2 tiles of run speed. Perform a lateral mid-air morph into a spring ball jump. Land on the second moving platform. Entrance condition: {
"comeInJumping": {
"minTiles": 2,
"speedBooster": "any"
}
}
Requires: "canPrepareForNextRoom"
"canLateralMidAirMorph"
"canTrickySpringBallJump"
"canTrickyJump"
{
"heatFrames": 280
}
|
|
Lava physics will reduce Samus' horizontal momentum. Requires: {
"or": [
"h_lavaProof",
"canSuitlessLavaDive"
]
}
"canSpringwall"
"canTrickySpringBallJump"
"HiJump"
"canUseEnemies"
{
"heatFrames": 195
}
{
"lavaFrames": 180
}
|
|
Requires: "canTrickySpringBallJump"
"canTrickyJump"
"canLateralMidAirMorph"
{
"acidFrames": 55
}
|
|
Requires: "canLateralMidAirMorph"
"canTrickySpringBallJump"
{
"acidFrames": 25
}
|
|
Starting from the second-highest platform on the left, run and jump into a mid-air Spring Ball jump. It helps but is not required to then unmorph to reset fall speed. Requires: "canTrickySpringBallJump" |
|
From: 1
Left Door
To: 4
Center Platform Junction
Wait for the water to be rising and perform a max height SpringBall Jump. Requires: "canSuitlessMaridia" "HiJump" "h_canMaxHeightSpringBallJump" |
|
From: 5
Main Junction
To: 1
Top Left Door
Run on the the moving platform into a midair spring ball jump as far horizontal as possible. Unmorph or spring fling to reset fall speed can help. Requires: "canTrickyJump" "canTrickySpringBallJump" |
|
From: 4
Right Junction with Speed Blocks Broken
To: 1
Left Door
Requires: "SpeedBooster"
{
"or": [
"HiJump",
{
"and": [
"canLateralMidAirMorph",
"canTrickySpringBallJump"
]
}
]
}
|
|
From: 5
Small Platforms Junction
To: 1
Left Door
Requires: "h_canTrickySpringwall" |
|
From: 5
Small Platforms Junction
To: 3
Item
Requires: "HiJump" "canTrickyDashJump" "canTrickySpringBallJump" |
|
Notable: true 
A particularly precise springwall. Aim the walljump at the bottom of the second sloped wall fixture, where it looks like you cant jump off of. Optimize pause timing, use an instant morph, and get a max height springball jump. A delayed wall jump helps. Requires: "HiJump" "h_canTrickySpringwall" "canPreciseWalljump" "can3HighWallMidAirMorph" |
|
From: 5
Golden Torizo (locked)
To: 4
Hidden Right Item
Uses a Springwall to put a bomb on the left corner bomb block, then a second one to get in there. Then clears the rest of the bomb blocks normally. It winds up costing less heat frames than IBJ, if you fall. Requires: "h_canNavigateHeatRooms"
"h_canUseMorphBombs"
"canSpringwall"
"canTrickySpringBallJump"
{
"heatFrames": 900
}
|
|
From: 2
Middle Right Door
To: 5
Junction Above Bottom Blocks with Top Blocks Broken
Use a Springwall to get up to the bomb blocks, to break them with a bomb. Requires: "h_canNavigateHeatRooms"
"h_canUseMorphBombs"
"canSpringwall"
"canTrickySpringBallJump"
{
"heatFrames": 300
}
Clears obstacles: A |
|
From: 5
Junction Above Bottom Blocks with Top Blocks Broken
To: 3
Top Right Door
Requires: "HiJump"
{
"doorUnlockedAtNode": 2
}
"canTrickySpringBallJump"
{
"heatFrames": 200
}
|
|
From: 4
Junction Below Bomb Blocks
To: 2
Top Right Door
This is possible by jumping on the crumble blocks into a mid-air spring ball jump, or by avoiding them. The crumbles can be avoided by starting with either an air ball, a 3 tile high mid-air morph, or a low spring wall. These are generally safer, as bouncing on the crumble blocks with Spring Ball is trivial. Requires: {
"obstaclesCleared": [
"A"
]
}
"canTrickySpringBallJump"
{
"heatFrames": 250
}
{
"or": [
{
"and": [
"can4HighMidAirMorph",
"canSpringFling"
]
},
"canLateralMidAirMorph",
"canCrumbleJump",
{
"and": [
"h_canTrickySpringwall",
"canPreciseWalljump"
]
}
]
}
|
|
From: 2
Bottom Left Door
To: 1
Top Left Doorway
Notable: true 
Freeze one crab on the lip of the overhead opening and another on the edge of a doors platform then springballjump up. Use a Stationary Lateral Mid-Air Morph to gain enough jump height without bonking the ceiling. It is possible with a crouch jump to not need the second crab. Requires: "canSuitlessMaridia" "canTrickyJump" "canTrickySpringBallJump" "canTrickyUseFrozenEnemies" "canStationaryLateralMidAirMorph" |
|
From: 1
Bottom Left Door
To: 5
Platform Junction Near Top Left Door
Requires 3 tiles of run speed (with no open end) to make it past the overhang above the door. Entrance condition: {
"comeInJumping": {
"speedBooster": true,
"minTiles": 2.4375
}
}
Requires: "HiJump" "canCrossRoomJumpIntoWater" "canMomentumConservingTurnaround" "canTrickySpringBallJump" "canInsaneJump" |
|
From: 1
Bottom Left Door
To: 5
Platform Junction Near Top Left Door
Requires: "canSuitlessMaridia" "canTrickyUseFrozenEnemies" "HiJump" "canTrickySpringBallJump" |
|
From: 2
Bottom Right Door
To: 6
Middle Junction Near Top Left Pirate
The second jump is harder than a normal mid-air springball jump. Use either a stationary lateral mid air morph, to gain enough horizontal momentum, or a SpringFling to reduce Samus' fall speed as soon as it begins to build up. Requires: "canSuitlessMaridia"
"canTrickySpringBallJump"
{
"or": [
"canStationaryLateralMidAirMorph",
"canSpringFling"
]
}
{
"or": [
"canTrickyJump",
{
"enemyDamage": {
"enemy": "Pink Space Pirate (standing)",
"type": "contact",
"hits": 1
}
},
{
"enemyKill": {
"enemies": [
[
"Pink Space Pirate (standing)"
]
],
"explicitWeapons": [
"Plasma"
]
}
}
]
}
|
|
From: 5
Platform Junction Near Top Left Door
To: 4
Top Left Door
Notable: true 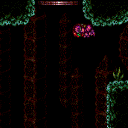
Jump towards the door with a Springball Jump, jumping as late as possible. A Flatley style jump can position Samus over the edge of the ledge, closer to the door, allowing for an earlier Springball jump. The slight fall from a Flatley Jump helps with the Springball jump, but then Samus must unmorph to extend her hitbox to touch the transition. A Stationary Lateral MidAir Morph also helps with this jump. Unmorphing after a missed jump can return Samus to the ledge to try again. Requires: "canSuitlessMaridia"
"canTrickySpringBallJump"
{
"or": [
"canTrickyJump",
"canStationaryLateralMidAirMorph"
]
}
|
|
Standing on the platform in the room below, crouch jump and perform a spring ball jump mid-air just before reaching the transition. Entrance condition: {
"comeInWithPlatformBelow": {
"maxHeight": 10,
"maxLeftPosition": -1,
"minRightPosition": -1
},
"comesThroughToilet": "any"
}
Requires: "canCrossRoomJumpIntoWater" "canCrouchJump" "canTrickySpringBallJump" |
|
From: 3
Middle Right Door
To: 9
Junction Below Speed Blocks
Notable: true 
The tricky part is getting to the ledge below the missiles. There are two ways to do this: 1. Stand on a frozen crab with a frozen fish at the lowest height of its cycle to the right. Further to the right is better as long as it can be stood upon without the ledge above. Perform a stationary lateral midair morph into a max height spring ball jump to get onto the fish before it thaws. Press against the fish for the maximum amount of time possible while moving upwards in order to gain more height in order to get on top of it. 2. Freeze the global crab on the right wall, get onto it and up and onto the frozen fish before it thaws. Be careful not to fall through the crab. A fail will require Samus to reset the room, or wait a very long time in order for the crab to circle the room. Using a Super may make the crab fall on a floating platform, and it still takes more than a minute to return. Note that it is possible to turn off ice beam to immediately thaw any frozen enemies; this can help get the crab and fish in a good cycle with each other. Requires: "canSuitlessMaridia" "canTrickySpringBallJump" "canTrickyUseFrozenEnemies" "canTrickyJump" |
|
From: 8
Bottom Junction
To: 3
Middle Right Door
Freeze the crab on the corner of the ledge and the fish near the wall but with enough space for Samus to fit through and jump up using HiJump or a midair spring ball jump. Possible backups include: knocking the Scisor off the wall and freezing it midair, or with HiJump: freezing the Skultera near a wall and walljumping into it repeatedly, or freezing the Scisor on the ground and crouch jumping up to the Skultera, rubbing into the frozen enemy to gain extra height before downgrabbing. Requires: "canSuitlessMaridia"
{
"or": [
"HiJump",
"canTrickySpringBallJump"
]
}
"canTrickyUseFrozenEnemies"
|
|
From: 9
Junction Below Speed Blocks
To: 4
Top Right Door
Be sure not to get the first downward moving crab on screen until Samus is in position to quickly and accurately shoot and freeze it. This is much tighter with spring ball relative to HiJump. Performing a max height spring ball jump from the frozen crab can get Samus to the next ledge. Getting to the ledge with the fish is particularly precise. Either stand at the very edge of the platform and perform a very precise max heigh spring ball jump, or stand against the left wall and and perform a slightly less tight stationary lateral morph into spring ball jump. Requires: "canSuitlessMaridia"
"canTrickyUseFrozenEnemies"
"canTrickySpringBallJump"
"canDodgeWhileShooting"
{
"or": [
"canInsaneJump",
{
"and": [
"Spazer",
"Wave"
]
},
"h_canMaxHeightSpringBallJump",
"Plasma"
]
}
{
"or": [
"h_canMaxHeightSpringBallJump",
"canStationaryLateralMidAirMorph"
]
}
|
|
Time a pause before jumping to give a significant momentum boost in order to reach the Grapple Block. Requires: "h_canMaxHeightSpringBallJump" "canSpringFling" Clears obstacles: B |
|
From: 3
Bottom Right Door
To: 10
Upper Right Ledge Junction
Run and jump up through the door using HiJump and SpeedBooster in the room below and Springball Jump at the top of the jump. Entrance condition: {
"comeInWithPlatformBelow": {
"maxHeight": 6,
"maxLeftPosition": 2.5,
"minRightPosition": -2.5
},
"comesThroughToilet": "any"
}
Requires: "canCrossRoomJumpIntoWater" "HiJump" "SpeedBooster" "canTrickySpringBallJump" |
|
From: 3
Bottom Right Door
To: 10
Upper Right Ledge Junction
Run and jump up through the door using HiJump and SpeedBooster in the room below and Springball Jump at the peak of the jump. Entrance condition: {
"comeInWithPlatformBelow": {
"maxHeight": 7,
"maxLeftPosition": 2.5,
"minRightPosition": -2.5
},
"comesThroughToilet": "any"
}
Requires: "canCrossRoomJumpIntoWater" "HiJump" "SpeedBooster" "canTrickySpringBallJump" "canTrickyJump" |
|
From: 3
Bottom Right Door
To: 10
Upper Right Ledge Junction
Wall jump off either side of the door frame in the room below and Springball Jump at the height of the jump. Entrance condition: {
"comeInWithWallJumpBelow": {
"minHeight": 2
},
"comesThroughToilet": "any"
}
Requires: "canCrossRoomJumpIntoWater" "HiJump" "canTrickySpringBallJump" "canTrickyJump" |
|
Requires: "canSuitlessMaridia"
{
"or": [
"HiJump",
{
"and": [
"canTrickySpringBallJump",
{
"or": [
"canCrouchJump",
"canSpringFling",
"canStationaryLateralMidAirMorph"
]
}
]
}
]
}
|
|
From: 7
Lower Hills Junction
To: 10
Upper Right Ledge Junction
Notable: true 
Use the crab near the bottom right door. Only one spring ball jump is needed, it is to get up onto the flat platform. After the spring ball jump, if the crab did not follow, go to the lower ground a bit to the right, jump and aim down to lower the camera to lure the crab. Note: The hardest part of this climb is the pixel precision when jumping around a ledge. Too many pixels: left is a fall, right you clip through the crab, low you miss the jump and fall, high is a bonk or crab clip. Requires: "canSuitlessMaridia" "canCrazyCrabClimb" "canTrickySpringBallJump" "canTrickyJump" "canCameraManip" Clears obstacles: A, B |
|
From: 7
Lower Hills Junction
To: 10
Upper Right Ledge Junction
Climbing the right side of Mt. Everest with two supers, ice, and Spring Ball. Requires luring 3 crabs; the third crab is from the morph tunnel to the left. Use a super to knock off and freeze a crab midair. Stand on it and let the other crab climb, then jump up and follow it. Be sure two crabs make it to the next section in order to crab climb further. Requires: "canSuitlessMaridia"
"canCrazyCrabClimb"
"canTrickySpringBallJump"
{
"ammo": {
"type": "Super",
"count": 1
}
}
Clears obstacles: A, B |
|
From: 7
Lower Hills Junction
To: 10
Upper Right Ledge Junction
Freeze the crab midway up the right wall and jump and spring ball jump up to the higher platform. Luring a second crab, which will make it to the upper platform, may be useful to avoid a tricky spring ball jump and flatley jump to get to the top right door. Requires: "canSuitlessMaridia" "HiJump" "canTrickySpringBallJump" "canTrickyUseFrozenEnemies" Clears obstacles: A, B |
|
From: 10
Upper Right Ledge Junction
To: 4
Top Right Door
Notable: true
Requires having already lured a crab to this location, likely from above the bottom right door. Freeze the crab high before going to the ledge on the right, delay spring ball jumping so it thaws and moves up while on screen, jump aim down to lower the camera and lure it more. Freeze the crab again to use as a platform, approximately knee high. Jump on it and then jump to the platform above. Note: The hardest part of this climb is the pixel precision when jumping around a ledge. Too many pixels: left is a fall, right you clip through the crab, low you miss the jump and fall, high is a bonk or crab clip. Requires: "canSuitlessMaridia"
"canCrazyCrabClimb"
"canTrickySpringBallJump"
"canTrickyJump"
"canCameraManip"
{
"obstaclesCleared": [
"B"
]
}
|
|
From: 10
Upper Right Ledge Junction
To: 4
Top Right Door
Climbing the right side of Mt. Everest with only two supers, ice, and Spring Ball. Requires originally luring 3 crabs. Two crabs and one super are needed from this location. Use a super to knock off and freeze a crab midair. Jump on it and freeze the second as a platform to jump up to the door. Requires: "canSuitlessMaridia"
"canTrickySpringBallJump"
"canCrazyCrabClimb"
{
"ammo": {
"type": "Super",
"count": 1
}
}
{
"obstaclesCleared": [
"A"
]
}
|
|
From: 10
Upper Right Ledge Junction
To: 4
Top Right Door
Start the jump from the higher ground to the left, specifically the right side of the second highest region. Requires: "canSuitlessMaridia" "HiJump" "canTrickySpringBallJump" "canFlatleyJump" |
|
From: 2
Bottom Door
To: 3
Bottom Right Ledge
Standing on the platform in the room below, perform a spring ball jump mid-air just before reaching the transition. Entrance condition: {
"comeInWithPlatformBelow": {
"maxHeight": 10,
"maxLeftPosition": 2,
"minRightPosition": -2
},
"comesThroughToilet": "any"
}
Requires: "canCrossRoomJumpIntoWater" "canTrickySpringBallJump" |
|
From: 2
Bottom Door
To: 3
Bottom Right Ledge
Notable: true 
Use a Space Jump water bounce followed by a tight mid-air morph, to get a mid-air Spring Ball jump out of the water. Requires: "canSpaceJumpWaterBounce" "canTrickySpringBallJump" "can4HighMidAirMorph" |
|
From: 2
Bottom Left Door
To: 7
Top Right Left Item
Notable: true 
PLMs can be overloaded in direct G-Mode with a single Power Bomb if both items are still there and 2 PBs if only one item is. There is a row of tiles that works, just above and to the left of the right door. The row is one tile higher than the horizontal pipe that is part of the door frame, spanning from the left to one tile away from the right wall. Entrance condition: {
"comeInWithGMode": {
"mode": "direct",
"morphed": false
}
}
Requires: {
"or": [
{
"itemNotCollectedAtNode": 7
},
{
"itemNotCollectedAtNode": 8
}
]
}
"h_canUsePowerBombs"
"h_canUsePowerBombs"
"h_canNavigateUnderwater"
"canSnailClimb"
{
"or": [
"Gravity",
"h_canMaxHeightSpringBallJump",
{
"and": [
"HiJump",
{
"or": [
"canCrouchJump",
"canDownGrab"
]
}
]
}
]
}
|
|
From: 5
Right Door
To: 7
Top Right Left Item
Notable: true
PLMs can be overloaded in direct G-Mode with a single Power Bomb if both items are still there and 2 PBs if only one item is. There is a row of tiles that works, just above and to the left of the right door. The row is one tile higher than the horizontal pipe that is part of the door frame, spanning from the left to one tile away from the right wall. Entrance condition: {
"comeInWithGMode": {
"mode": "direct",
"morphed": false
}
}
Requires: {
"or": [
{
"itemNotCollectedAtNode": 7
},
{
"itemNotCollectedAtNode": 8
}
]
}
"h_canUsePowerBombs"
"h_canUsePowerBombs"
"h_canNavigateUnderwater"
"canSnailClimb"
{
"or": [
"Gravity",
"h_canMaxHeightSpringBallJump",
{
"and": [
"HiJump",
{
"or": [
"canCrouchJump",
"canDownGrab"
]
}
]
}
]
}
|
|
From: 6
Top Door
To: 7
Top Right Left Item
Notable: true
PLMs can be overloaded in direct G-Mode with a single Power Bomb if both items are still there and 2 PBs if only one item is. There is a row of tiles that works, just above and to the left of the right door. The row is one tile higher than the horizontal pipe that is part of the door frame, spanning from the left to one tile away from the right wall. Entrance condition: {
"comeInWithGMode": {
"mode": "direct",
"morphed": false
},
"comesThroughToilet": "no"
}
Requires: {
"or": [
{
"itemNotCollectedAtNode": 7
},
{
"itemNotCollectedAtNode": 8
}
]
}
"h_canUsePowerBombs"
"h_canUsePowerBombs"
"h_canNavigateUnderwater"
"canSnailClimb"
{
"or": [
"Gravity",
"h_canMaxHeightSpringBallJump",
{
"and": [
"HiJump",
{
"or": [
"canCrouchJump",
"canDownGrab"
]
}
]
}
]
}
|
|
Requires: "canSuitlessMaridia" "h_canSpringFling" "canTrickySpringBallJump" |
|
From: 9
Junction Below Top Door
To: 5
Right Door
Requires: "canSuitlessMaridia" "canStationaryLateralMidAirMorph" "canTrickySpringBallJump" "canResetFallSpeed" |
|
From: 11
G-Mode Overloaded PLMs Junction (By Bottom Left Door)
To: 7
Top Right Left Item
After PLMs are overloaded, use a snail to help climb to the top right items. Requires: "canSnailClimb"
{
"or": [
"Gravity",
"h_canMaxHeightSpringBallJump",
{
"and": [
"HiJump",
{
"or": [
"canCrouchJump",
"canDownGrab"
]
}
]
}
]
}
|
|
Requires: "canSuitlessMaridia"
"Morph"
{
"or": [
"canTrickySpringBallJump",
"HiJump"
]
}
|
|
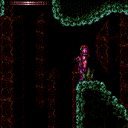
From: 1
Left Door
To: 3
Top Right Door
Notable: true .png)
.gif)
Use the spikes, which are not in the water, to jump from platform to platform as a way to cross the Colosseum. Requires knowing the position of every spike in the room, and hitting the spikes while morphed can help. The first jump is particularly tough. A SpringBallJump from the sand with HiJump, or Grapple can be used to get past it. Requires: "canWalljump"
"Morph"
"canCarefulJump"
"canIframeSpikeJump"
{
"or": [
"Grapple",
{
"and": [
"canSuitlessMaridia",
"canPlayInSand",
"HiJump",
"canNeutralDamageBoost",
"canTrickySpringBallJump",
{
"spikeHits": 2
}
]
}
]
}
{
"spikeHits": 1
}
{
"or": [
{
"spikeHits": 1
},
"canHorizontalDamageBoost"
]
}
|
|
Requires: "Gravity" "HiJump" "canPlayInSand" "canTrickySpringBallJump" |
|
From: 2
Bottom Right Door
To: 3
Top Right Door
Requires a runway of one tile in the adjacent room. Entrance condition: {
"comeInJumping": {
"speedBooster": false,
"minTiles": 1
}
}
Requires: "canTrickySpringBallJump" "canCrossRoomJumpIntoWater" "canMomentumConservingTurnaround" |
|
Pause for the Gravity Jump as late as possible and then repause as soon as possible for the SpringBall Jump. Requires: "canTrickySpringBallJump" "canGravityJump" "canTrickyJump" |
|
Notable: true Stay out of the water, and by extension the sand, of Colosseum by using the spikes as platforms. Morphing before landing on the spikes helps to be able to control the knockback. The final spike jump (which would be the most difficult) is avoided by doing a crouch jump into spring ball jump into IBJ to reach the left door. Perform the spring ball jump near max height. Place the first bomb between about 4 and 6 frames after the spring ball jump; ideally it should be just above the water line. Press pause between about 5 and 10 frames after placing the bomb, to disable Spring Ball (a 'spring fling', to reset fall speed). Place the second bomb soon after regaining control, while the game is fading back in. Requires: "HiJump"
"canPreciseWalljump"
"canIframeSpikeJump"
{
"spikeHits": 2
}
"canNeutralDamageBoost"
{
"or": [
"canHorizontalDamageBoost",
{
"spikeHits": 1
}
]
}
"h_canMaxHeightSpringBallJump"
{
"or": [
"canSpringFling",
"canInsaneJump"
]
}
"canBombJumpWaterEscape"
"h_canJumpIntoIBJ"
|
|
Requires: "Gravity" "HiJump" "canPlayInSand" "canTrickySpringBallJump" |
|
Requires: "canSuitlessMaridia" "canTrickySpringBallJump" "canUseFrozenEnemies" |
|
Requires: "canSuitlessMaridia"
"canSpringBallJumpMidAir"
{
"or": [
"h_canMaxHeightSpringBallJump",
"HiJump",
"canUseFrozenEnemies"
]
}
|
|
Requires: "Gravity"
"canSpringwall"
"canTrickySpringBallJump"
{
"resetRoom": {
"nodes": [
1
]
}
}
|
|
From: 2
Right Door
To: 4
Top Right Ledge Junction
Requires a runway of at least 1 tile in the adjacent room, although it is easier with more. Entrance condition: {
"comeInJumping": {
"speedBooster": false,
"minTiles": 1
}
}
Requires: {
"or": [
"canWalljump",
"canTrickySpringBallJump",
"SpaceJump"
]
}
"canCrossRoomJumpIntoWater"
|
|
From: 2
Right Door
To: 4
Top Right Ledge Junction
There is just enough distance for a MidAir SpringBall jump to reach without HiJump. Requires: "Gravity"
"canSpringBallJumpMidAir"
{
"or": [
"HiJump",
{
"and": [
"h_canMaxHeightSpringBallJump",
"canSpringFling"
]
}
]
}
|
|
From: 2
Right Door
To: 4
Top Right Ledge Junction
SpringBall jump just as Samus exits the water to reach the distant ledge. To get enough horizontal distance, either use a Stationary Lateral Mid-Air Morph with a crouch jump for extra height, or spin jump out before morphing. Or SpringBall jump part of the way over and land on a Bomb explosion to cross the rest of the distance. Requires: "canSuitlessMaridia"
"HiJump"
"h_canMaxHeightSpringBallJump"
"canTrickyJump"
{
"or": [
"canStationaryLateralMidAirMorph",
{
"and": [
"canJumpIntoIBJ",
"h_canBombHorizontally"
]
}
]
}
|
|
Cacatac Alley HiJumpless Double SpringBall Jump and Bomb-Grapple-Jump (Beyond)
East Cactus Alley Room
From: 5
Bottom Middle Junction
To: 4
Top Right Ledge Junction
Notable: true 
1) Crouch jump and then SpringBall jump. 2) Bomb-Grapple-Jump using the distant Cacatac who is above the water. 3) SpringBall jump again just as Samus exits the water. Requires: "canBombGrappleJump" "canDoubleSpringBallJumpMidAir" "h_canMaxHeightSpringBallJump" |
|
From: 5
Bottom Middle Junction
To: 4
Top Right Ledge Junction
Notable: true 
When the Cacatac on the ground fires a spike, perform a springball Jump to break the waterline and then hit the spike for extra height. Requires: "HiJump"
"canSuitlessMaridia"
"canCarefulJump"
"canTrickySpringBallJump"
"canLateralMidAirMorph"
"canNeutralDamageBoost"
{
"enemyDamage": {
"enemy": "Cacatac",
"hits": 2,
"type": "spike"
}
}
|
|
From: 5
Bottom Middle Junction
To: 6
East Cactus Alley Junction (Right of Morph Tunnel)
This can be done by turning off Gravity and HiJump to jump over both spike pits. Requires: "canSuitlessMaridia"
"canSpringBallJumpMidAir"
{
"spikeHits": 1
}
{
"or": [
"canTrickySpringBallJump",
{
"and": [
"canWalljump",
"canSpaceJumpWaterBounce"
]
},
{
"and": [
"h_canJumpIntoIBJ",
"h_canUseSpringBall"
]
},
{
"and": [
"h_canIBJ",
"canBombJumpWaterEscape"
]
},
{
"spikeHits": 1
}
]
}
|
|
It's possible to get out of the sand suitless and without HiJump after falling from the chute, by hugging the left side and moving quickly. Requires: "canSuitlessMaridia"
"canPlayInSand"
{
"or": [
{
"and": [
"h_canMaxHeightSpringBallJump",
{
"or": [
"canWalljump",
"can4HighMidAirMorph",
"h_canJumpIntoIBJ"
]
}
]
}
]
}
|
|
From: 1
Top Sand Entrance
To: 4
Right Item
Notable: true 
By using the sandfall physics, it is possible to springballjump to the Maridia Power Bomb location without Gravity or HiJump. This requires a very precise spinjump into the sandfall which also exits the sandfall, after being pushed down, with more height than a regular jump. It is very easy to fall into the sand and be unable to escape. Requires: "canSuitlessMaridia" "canSandfallBounce" "canTrickySpringBallJump" "canTrickyJump" |
|
SpringBall jump just as Samus exits the water to reach the distant ledge. A Crouch jump makes the SpringBall jump easier, but at the cost of some horizontal movement. Requires: "canSuitlessMaridia" "HiJump" "canTrickyJump" "h_canMaxHeightSpringBallJump" "canStationaryLateralMidAirMorph" |
|
From: 2
Bottom Left Door
To: 4
Top Right Door
Requires a runway of 1 tile in the adjacent room. Use a spring ball jump after breaking the water, then ibj. Take two Mochtroid hits or use a double bomb jump. Entrance condition: {
"comeInJumping": {
"speedBooster": false,
"minTiles": 1
}
}
Requires: "canTrickySpringBallJump"
"h_canJumpIntoIBJ"
{
"or": [
"h_canDoubleBombJump",
{
"enemyDamage": {
"enemy": "Mochtroid",
"type": "contact",
"hits": 2
}
}
]
}
"canCrossRoomJumpIntoWater"
|
|
From: 2
Bottom Left Door
To: 4
Top Right Door
Requires a runway of 1 tile in the adjacent room. Entrance condition: {
"comeInJumping": {
"speedBooster": "any",
"minTiles": 1
}
}
Requires: "HiJump" "canMomentumConservingTurnaround" "canTrickySpringBallJump" "canCrossRoomJumpIntoWater" |
|
From: 1
Bottom Left Door
To: 2
Top Right Door
Requires: "canSuitlessMaridia" "canUseFrozenEnemies" "canTrickySpringBallJump" "canCrouchJump" |
|
From: 1
Top Sand Entrance
To: 7
Below Morph Tunnel Junction
Get to the left side of the room while avoiding the hole in the ground, jump up through the Morph tunnel. Jump up to the ledge with either Gravity, HiJump and a Crouch Jump Down Grab, or a maximum height Spring Ball Jump. Entrance condition: {
"comeInWithGMode": {
"mode": "any",
"morphed": false
},
"comesThroughToilet": "any"
}
Requires: "Morph"
{
"or": [
"Gravity",
{
"and": [
"canSuitlessMaridia",
"HiJump",
"h_canCrouchJumpDownGrab"
]
},
{
"and": [
"canSuitlessMaridia",
"h_canMaxHeightSpringBallJump"
]
}
]
}
|
|
From: 1
Top Sand Entrance
To: 7
Below Morph Tunnel Junction
HiJump with a good jump from the sand can reach the Solid Rock Maze region. Use the sandfall if Samus gets stuck in the sand. Bouncing on the sand as springball can reach the above maze by altering Samus' fall height, like by bouncing under the solid ledge before trying to jump up. Requires: "canSuitlessMaridia"
{
"or": [
"canPrepareForNextRoom",
"canPlayInSand"
]
}
"HiJump"
"h_canMaxHeightSpringBallJump"
|
|
From: 7
Below Morph Tunnel Junction
To: 5
Morph Tunnel Junction
Requires: "canSuitlessMaridia" "canTrickySpringBallJump" "canCarefulJump" |
|
Escape by wall jumping when the water is low or using a crouch jump and down grab when it's high. Requires: "canSuitlessMaridia"
"canCarefulJump"
{
"or": [
"canWalljump",
"h_canCrouchJumpDownGrab",
"canTrickySpringBallJump"
]
}
{
"doorUnlockedAtNode": 1
}
|
|
Escape by wall jumping when the water is low or using a crouch jump and down grab when it's high. Requires: "canSuitlessMaridia"
{
"ammo": {
"type": "Super",
"count": 1
}
}
{
"or": [
"canWalljump",
"h_canCrouchJumpDownGrab",
"canTrickySpringBallJump"
]
}
{
"doorUnlockedAtNode": 1
}
|
|
Escape by wall jumping when the water is low or using a crouch jump and down grab when it's high. Requires: "canSuitlessMaridia"
"canCarefulJump"
{
"or": [
"canWalljump",
"h_canCrouchJumpDownGrab",
"canTrickySpringBallJump"
]
}
{
"doorUnlockedAtNode": 3
}
|
|
From: 5
Junction Below Right Door
To: 3
Right Door
Escape by wall jumping when the water is low or using a crouch jump and down grab when it's high. Requires: "canSuitlessMaridia"
{
"ammo": {
"type": "Super",
"count": 1
}
}
{
"or": [
"canWalljump",
"h_canCrouchJumpDownGrab",
"canTrickySpringBallJump"
]
}
{
"doorUnlockedAtNode": 3
}
|
|
Requires: {
"or": [
"canWalljump",
"h_canFly",
{
"and": [
"HiJump",
{
"or": [
"canSpringBallJumpMidAir",
"canUseFrozenEnemies"
]
}
]
},
"canTrickySpringBallJump"
]
}
|
|
Requires: "canSuitlessMaridia"
"HiJump"
"canSpringBallJumpMidAir"
{
"or": [
"h_canCrouchJumpDownGrab",
"canTrickySpringBallJump",
"canWalljump"
]
}
|
|
Gain a shinecharge by running right-to-left on the underwater runway on the right side of the room. Use HiJump or a Spring Ball jump to quickly exit the water to the left and spark up. Requires: "Gravity"
"SpeedBooster"
{
"or": [
"HiJump",
"canTrickySpringBallJump",
"canWalljump",
{
"and": [
"canGravityJump",
"canShinechargeMovementTricky"
]
}
]
}
{
"enemyKill": {
"enemies": [
[
"Owtch",
"Owtch"
]
]
}
}
"canShinechargeMovementComplex"
{
"canShineCharge": {
"usedTiles": 16,
"openEnd": 2,
"gentleDownTiles": 2,
"gentleUpTiles": 2,
"steepDownTiles": 1,
"steepUpTiles": 1,
"startingDownTiles": 1
}
}
{
"shinespark": {
"frames": 43,
"excessFrames": 3
}
}
|
|
From: 2
Bottom Door
To: 4
Water Level Junction
Standing on the platform in the room below, jump up (crouch jump makes it easier) and press right against the door frame through the transition. After the transition, perform a spring ball jump mid-air to reach the ledge. Entrance condition: {
"comeInWithPlatformBelow": {
"minHeight": 7,
"maxHeight": 7,
"maxLeftPosition": 1,
"minRightPosition": 1
},
"comesThroughToilet": "no"
}
Requires: "canCrossRoomJumpIntoWater"
"canTrickySpringBallJump"
{
"or": [
"canCrouchJump",
"canTrickyJump"
]
}
|
|
From: 2
Bottom Door
To: 4
Water Level Junction
Standing on the platform in the room below, perform a spring ball jump mid-air a few tiles below the transition. Hold right through the transition, and do not bonk the door frame. Entrance condition: {
"comeInWithPlatformBelow": {
"minHeight": 9,
"maxHeight": 10,
"maxLeftPosition": 1,
"minRightPosition": 1
},
"comesThroughToilet": "no"
}
Requires: "canCrossRoomJumpIntoWater" "canTrickySpringBallJump" "can4HighMidAirMorph" |
|
From: 2
Bottom Door
To: 4
Water Level Junction
Standing on the platform in the room below, perform a spring ball jump mid-air a few tiles below the transition. It is necessary to morph very quickly after jumping in order to spring ball jump as low as necessary. Hold right through the transition, and do not bonk the door frame. Entrance condition: {
"comeInWithPlatformBelow": {
"minHeight": 8,
"maxHeight": 8,
"maxLeftPosition": 1,
"minRightPosition": 1
},
"comesThroughToilet": "no"
}
Requires: "canCrossRoomJumpIntoWater" "can4HighMidAirMorph" "canTrickySpringBallJump" "canInsaneJump" |
|
This is a max height springball jump. Requires: "canSuitlessMaridia" "h_canMaxHeightSpringBallJump" |
|
From: 1
Left Door
To: 3
Junction Below Right Door
It is recommended to shoot the ceiling block immediately upon room entry to bring one of the Puyos down so that it will not be a problem later. Requires: "canSuitlessMaridia"
"h_canMaxHeightSpringBallJump"
{
"or": [
"can4HighMidAirMorph",
"canStationaryLateralMidAirMorph",
{
"and": [
"canNeutralDamageBoost",
{
"enemyDamage": {
"enemy": "Puyo",
"type": "contact",
"hits": 2
}
}
]
}
]
}
|
|
From: 1
Left Door
To: 3
Junction Below Right Door
It is recommended to shoot the ceiling block immediately upon room entry to bring one of the Puyos down so that it will not be a problem later. Requires: "canSuitlessMaridia"
"canTrickySpringBallJump"
"canTrickyJump"
"canJumpIntoRespawningBlock"
{
"or": [
"can4HighMidAirMorph",
"canStationaryLateralMidAirMorph"
]
}
|
|
From: 1
Left Door
To: 2
Right Door
Notable: true 
Enter with enough run speed to jump (after the transition) across the full room using one SpringBall Jump. When exiting the first Sandfall, Samus will be rising still. That is the time to Springball jump. Entrance condition: {
"comeInRunning": {
"minTiles": 10,
"speedBooster": true
}
}
Requires: "canPlayInSand" "canCrossRoomJumpIntoWater" "canLateralMidAirMorph" "canTrickySpringBallJump" "canTrickyJump" |
|
From: 2
Right Door
To: 1
Left Door
Notable: true
Enter with enough run speed to jump (after the transition) across the full room using one SpringBall Jump. When exiting the first Sandfall, Samus will be rising still. That is the time to Springball jump. Alternatively, an immediate pause can be used to SpringBall jump during the first narrow gap between Sandfalls. Sometimes Samus will land above the sand on the far left end of the room, where it will be necessary to unmorph and jump out. Entrance condition: {
"comeInRunning": {
"minTiles": 10,
"speedBooster": true
}
}
Requires: "canPlayInSand" "canCrossRoomJumpIntoWater" "canLateralMidAirMorph" "canTrickySpringBallJump" "canTrickyJump" |
|
Freeze the Evir soon after entering the room. Use a Spring Ball jump to reach the first pillar, then continue across using the Evir as a platform. Requires: "canTrickyUseFrozenEnemies" "canTrickySpringBallJump" |
|
From: 4
Junction Below Sand Entrance
To: 2
Right Door
Notable: true 
On the left side of the raised platform, jump for max height. Lateral Midair Morph for horizontal momentum, and perform the springball jump the moment before touching the sandfall. Pause again to disable springball as soon as possible. Requires: "canSuitlessMaridia"
"HiJump"
"canTrickySpringBallJump"
"canStationaryLateralMidAirMorph"
"canSpringFling"
"canPlayInSand"
{
"or": [
{
"enemyDamage": {
"enemy": "Evir",
"type": "particle",
"hits": 1
}
},
{
"enemyKill": {
"enemies": [
[
"Evir"
]
],
"explicitWeapons": [
"Plasma",
"Super",
"PowerBomb"
]
}
}
]
}
|
|
From: 4
Junction Below Sand Entrance
To: 2
Right Door
Notable: true .png)
.gif)
From the sand fall, quickly get onto the left platform to prevent the right side Evir from lowering too far. Jump on the sand to the right while freezing the Evir as high as possible. Refreeze the Evir so it is a slightly higher platform than the right pillar. Perform a spring ball jump with a stationary lateral mid-air morph from the left side of the current platform to get onto the Evir. Use a running jump off of the Evir. As a backup, it may be possible to make the Evir rise again by hitting it with a PB - place the PB in the air to avoid double hitting and killing it. Requires: "canSuitlessMaridia" "canTrickyUseFrozenEnemies" "canPlayInSand" "h_canMaxHeightSpringBallJump" "canStationaryLateralMidAirMorph" |
|
Requires: "Gravity"
{
"or": [
"Ice",
"ScrewAttack",
{
"enemyKill": {
"enemies": [
[
"Evir"
]
],
"explicitWeapons": [
"Plasma",
"Super",
"PowerBombPeriphery"
]
}
},
{
"enemyDamage": {
"enemy": "Evir",
"type": "particle",
"hits": 1
}
}
]
}
{
"and": [
"canPlayInSand",
{
"or": [
"canWalljump",
"HiJump",
"canUseFrozenEnemies",
"canGravityJump",
{
"and": [
"canTrickyJump",
"can4HighMidAirMorph",
"canTrickySpringBallJump"
]
}
]
}
]
}
|
|
Requires: "canSuitlessMaridia"
{
"or": [
{
"and": [
"HiJump",
{
"or": [
"canDownGrab",
"canSpringBallJumpMidAir",
"canConsecutiveWalljump"
]
}
]
},
"h_canMaxHeightSpringBallJump"
]
}
|
|
From: 4
West Leg Sand
To: 5
Junction Above Grapple Block
Break spin before touching the sand, and then spinjump to get a good jump off of the sand. Requires: "Gravity" "Grapple" "canTrickySpringBallJump" "canPlayInSand" |
|
From: 5
Junction Above Grapple Block
To: 2
East Leg Right Door
Notable: true Wait the water tide to reach its peak, then crouch jump into a spring ball jump into an IBJ. Perform the spring ball jump near max height. Place the first bomb between about 4 and 6 frames after the spring ball jump; ideally it should be just above the water line. Press pause between about 5 and 10 frames after placing the bomb, to disable Spring Ball (a 'spring fling', to reset fall speed). Place the second bomb soon after regaining control, while the game is fading back in. When close to the top, perform a spring ball jump to reach the ledge; release jump as soon as Samus is high enough to clear the ledge, in order to avoid taking a Menu hit. Requires: "HiJump" "h_canMaxHeightSpringBallJump" "canSpringFling" "canBombJumpWaterEscape" "canDoubleBombJump" "h_canJumpIntoIBJ" |
|
Requires: "canSuitlessMaridia" "HiJump" "canTrickySpringBallJump" "canPlayInSand" |
|
From: 1
Left Door
To: 5
Left Pillar Junction
Notable: true 

Enter with at least 1 tile of run speed from an air room, with Speedbooster unequipped. Jump from near the end of the runway (though a jump from 1-2 tiles away from the end can still work). Press pause while crossing the narrow first sandfall, then perform a lateral mid-air morph after exiting the sandfall. Equip both Spring Ball and Speed Booster, and perform a mid-air Spring Ball jump at somewhere close to the maximum height. Unequip Spring Ball while descending through the wide second sidefall. Entrance condition: {
"comeInRunning": {
"speedBooster": true,
"minTiles": 1
}
}
Requires: "canCrossRoomJumpIntoWater" "canPlayInSand" "canLateralMidAirMorph" "canTrickySpringBallJump" "canSpringFling" |
|
From: 4
Below Sand Entrance
To: 2
Right Door
Notable: true 
Perform multiple stationary lateral mid-air morphs, while avoiding the Evir projectiles, to cross the room. It is necessary to start the jumps from the far side of the platforms in order to gain more horizontal momentum before entering the sand falls. Falling into the sand will often result in a soft lock. Requires: "canSuitlessMaridia"
"canPlayInSand"
"h_canMaxHeightSpringBallJump"
"canStationaryLateralMidAirMorph"
{
"or": [
{
"enemyKill": {
"enemies": [
[
"Evir"
]
],
"explicitWeapons": [
"Super",
"Missile",
"PowerBombPeriphery",
"Plasma"
]
}
},
{
"enemyDamage": {
"enemy": "Evir",
"type": "particle",
"hits": 1
}
}
]
}
|
|
From: 4
Below Sand Entrance
To: 5
Left Pillar Junction
Notable: true
Perform multiple stationary lateral mid-air morphs, while avoiding the Evir projectiles, to cross the room. It is necessary to start the jumps from the far side of the platforms in order to gain more horizontal momentum before entering the sand falls. Falling into the sand will often result in a soft lock. Requires: "canSuitlessMaridia"
"canPlayInSand"
"h_canMaxHeightSpringBallJump"
{
"or": [
{
"enemyKill": {
"enemies": [
[
"Evir"
]
],
"explicitWeapons": [
"Super",
"Missile",
"PowerBombPeriphery",
"Plasma"
]
}
},
{
"enemyDamage": {
"enemy": "Evir",
"type": "particle",
"hits": 1
}
}
]
}
|
|
From: 5
Left Pillar Junction
To: 4
Below Sand Entrance
Notable: true
Perform multiple stationary lateral mid-air morphs, while avoiding the Evir projectiles, to cross the room. It is necessary to start the jumps from the far side of the platforms in order to gain more horizontal momentum before entering the sand falls. Falling into the sand will often result in a soft lock. Requires: "canSuitlessMaridia" "canPlayInSand" "h_canMaxHeightSpringBallJump" "canStationaryLateralMidAirMorph" |