canUseFrozenEnemies (Basic)
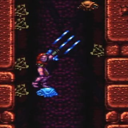
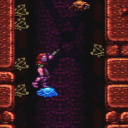
Can use Ice Beam to freeze enemies to use as platforms or as wall jump supports, to reach higher areas
Dependencies: canUseEnemies
Strats ()
|
From: 2
Bottom Left Door
To: 2
Bottom Left Door
Requires: "canUseFrozenEnemies" Exit condition: {
"leaveWithRunway": {
"length": 45,
"openEnd": 1
}
}
|
|
Notable: true 
Wall jump up 9 times, placing a PB at the top. Only works in direct g-mode with the item still uncollected. Entrance condition: {
"comeInWithGMode": {
"mode": "direct",
"morphed": false
}
}
Requires: {
"itemNotCollectedAtNode": 3
}
"canConsecutiveWalljump"
"Morph"
{
"or": [
"canRiskPermanentLossOfAccess",
"canXRayClimb"
]
}
{
"ammo": {
"type": "PowerBomb",
"count": 9
}
}
"canBeVeryPatient"
{
"or": [
"canUseFrozenEnemies",
"canTrickyJump",
{
"and": [
"ScrewAttack",
"SpaceJump"
]
},
{
"and": [
"canCarefulJump",
{
"or": [
"ScrewAttack",
"SpeedBooster"
]
}
]
},
{
"enemyKill": {
"enemies": [
[
"Boyon",
"Boyon",
"Boyon",
"Boyon"
]
]
}
},
{
"enemyDamage": {
"enemy": "Boyon",
"hits": 1,
"type": "contact"
}
}
]
}
|
|
Requires: "canUseFrozenEnemies"
{
"canShineCharge": {
"usedTiles": 33,
"openEnd": 2
}
}
{
"shinespark": {
"frames": 130,
"excessFrames": 6
}
}
|
|
From: 2
Bottom Left Door
To: 3
Item
Quickly Walljump to conserve health on the shinespark. Requires: "canUseFrozenEnemies"
"canShinechargeMovementComplex"
"canFastWalljumpClimb"
{
"canShineCharge": {
"usedTiles": 33,
"openEnd": 2
}
}
{
"shinespark": {
"frames": 98,
"excessFrames": 6
}
}
|
|
Use an extra speedy jump or walljump to conserve health on the shinespark. Requires: "canUseFrozenEnemies"
"canShinechargeMovement"
"HiJump"
{
"canShineCharge": {
"usedTiles": 33,
"openEnd": 2
}
}
{
"shinespark": {
"frames": 108,
"excessFrames": 6
}
}
|
|
Freeze the Yapping Maw while it is in the air, extended. Requires: {
"obstaclesCleared": [
"A"
]
}
"canMidairShinespark"
"canUseFrozenEnemies"
{
"shinespark": {
"frames": 45
}
}
{
"canShineCharge": {
"usedTiles": 21,
"openEnd": 0,
"startingDownTiles": 1,
"steepDownTiles": 2,
"steepUpTiles": 2
}
}
Exit condition: {
"leaveWithSpark": {
"position": "top"
}
}
|
|
Requires: {
"or": [
"canCarefulJump",
"canUseFrozenEnemies",
"SpaceJump",
{
"and": [
"Gravity",
{
"or": [
"HiJump",
"canWalljump",
"h_canCrouchJumpDownGrab",
"h_canIBJ",
"canSpringBallJumpMidAir"
]
}
]
}
]
}
|
|
Requires: "canSuitlessMaridia" "canUseFrozenEnemies" |
|
From: 3
Junction (Left side Pit)
To: 4
Junction (Right side Pit)
Requires: "canSuitlessMaridia" "canUseFrozenEnemies" |
|
From: 4
Junction (Right side Pit)
To: 3
Junction (Left side Pit)
Requires: "canSuitlessMaridia" "canUseFrozenEnemies" |
|
From: 12
Top Junction
To: 9
Top Hidden Item (Above Trippers)
Jump on the left platforms to get the middle Tripper on screen, luring it to the right. Get on the middle Tripper and use it to jump to the item. This requires a somewhat precise shot and jump, particularly if the top Tripper is in the way. The jump and shot can be easier and done at the apex of a single jump starting with a crouch. Freezing the Trippers can make this much easier. Requires: "canUseEnemies"
{
"or": [
"canCarefulJump",
"canUseFrozenEnemies",
"canPreciseWalljump"
]
}
|
|
From: 1
Bottom Left Door
To: 3
Hidden Ceiling Item
Requires: "h_ZebesIsAwake" "canUseFrozenEnemies" |
|
Requires: "canUseFrozenEnemies" |
|
Requires: {
"or": [
"HiJump",
"h_canFly",
"canWalljump",
"canUseFrozenEnemies",
"canSpringBallJumpMidAir"
]
}
|
|
From: 1
Top Left Door
To: 5
Top Right Door
Entrance condition: {
"comeInShinecharged": {
"framesRequired": 1
}
}
Requires: {
"shinespark": {
"frames": 68,
"excessFrames": 20
}
}
"canUseFrozenEnemies"
|
|
Entrance condition: {
"comeInShinecharging": {
"length": 10,
"openEnd": 1
}
}
Requires: {
"or": [
{
"shinespark": {
"frames": 68,
"excessFrames": 29
}
},
{
"and": [
"canMidairShinespark",
{
"shinespark": {
"frames": 60,
"excessFrames": 28
}
}
]
}
]
}
"canUseFrozenEnemies"
|
|
From: 1
Top Left Door
To: 5
Top Right Door
Entrance condition: {
"comeInShinecharged": {
"framesRequired": 50
}
}
Requires: "canMidairShinespark"
{
"shinespark": {
"frames": 60,
"excessFrames": 28
}
}
"canUseFrozenEnemies"
|
|
From: 1
Top Left Door
To: 5
Top Right Door
Entrance condition: {
"comeInShinecharged": {
"framesRequired": 20
}
}
Requires: {
"shinespark": {
"frames": 68,
"excessFrames": 29
}
}
"canUseFrozenEnemies"
|
|
Without any suits or tanks, Samus will need to move the Beetom part way up the room, shake it off, and go back and farm multiple times. While the Beetom is near the top section, by the Rippers, shake the Beetom off, and re-grab it and ascend the shaft. Either use frozen Rippers as platforms, while shooting diagonally to prevent freezing the Beetom, or kill the Rippers before ascending. Be careful not to apply too many inputs after grabbing the Beetom in order to get to the top before it is shaken off. Requires: {
"obstaclesNotCleared": [
"A"
]
}
"HiJump"
{
"or": [
"canUseFrozenEnemies",
{
"and": [
"SpaceJump",
{
"obstaclesCleared": [
"B"
]
}
]
},
{
"and": [
"canConsecutiveWalljump",
{
"obstaclesCleared": [
"B"
]
}
]
}
]
}
{
"enemyDamage": {
"enemy": "Beetom",
"type": "contact",
"hits": 9
}
}
Exit condition: {
"leaveWithGModeSetup": {
"knockback": false
}
}
|
|
From: 7
Junction (Bottom Rippers)
To: 6
Junction (Above Bottom Rippers)
Requires: "canUseFrozenEnemies"
{
"or": [
"HiJump",
"canWalljump",
"canSpringBallJumpMidAir",
"h_canIBJ"
]
}
|
|
Requires: "canUseFrozenEnemies"
{
"obstaclesNotCleared": [
"B"
]
}
|
|
From: 2
Top Right Door
To: 2
Top Right Door
Lure a Zeb up from below by freezing it or quickly moving after the Zeb has spawned, but before it becomes visible. Note that Samus must start on the right side of the Zeb in order for it to move rightwards once it starts moving horizontally. Requires: {
"or": [
"canUseFrozenEnemies",
"canTrickyJump"
]
}
Exit condition: {
"leaveWithGModeSetup": {}
}
|
|
From: 3
Bottom Right Door
To: 3
Bottom Right Door
Lure a Zeb by freezing it or by moving quickly while carefully preventing it from going off screen. Requires: {
"or": [
"canUseFrozenEnemies",
"canTrickyJump"
]
}
Exit condition: {
"leaveWithGModeSetup": {}
}
|
|
Requires: {
"or": [
"canWalljump",
"HiJump",
"h_canFly",
"canUseFrozenEnemies",
"canSpringBallJumpMidAir"
]
}
|
|
Requires: "canUseFrozenEnemies"
{
"or": [
"canTrickyUseFrozenEnemies",
"canWalljump",
"HiJump",
"canSpringBallJumpMidAir",
"h_canCrouchJumpDownGrab"
]
}
|
|
Requires: "canUseFrozenEnemies"
{
"or": [
"canTrickyUseFrozenEnemies",
"canWalljump",
"HiJump"
]
}
|
|
From: 3
Bottom Left Junction
To: 1
Left Door
Notable: true 
Guide the morph tunnel Sova on top of the shot blocks by keeping it on camera. Move the camera away once it is on top of the shot blocks. It will not move while off camera. Stand directly below the OffCamera Sova and fire up and jump to break the shot blocks. Either lower its health while guiding it, or as it begins to fall, there is time. As it falls, shoot again to freeze it at the right height. As a backup, the same Sova can be frozen on the left wall, dropped from the shot blocks again, or frozen on the right wall. Requires: "canUseFrozenEnemies"
"canTrickyJump"
"canCameraManip"
{
"heatFrames": 1100
}
|
|
Requires: "canUseFrozenEnemies"
{
"heatFrames": 950
}
|
|
From: 2
Bottom Left Door
To: 1
Top Left Door
Notable: true 
Wall jump up the left wall and then on the moving platform (Kamer) while avoiding the Fune's fireball. The Kamers will temporarily move down if Samus is below them, so it is best to walk under the first Kamer before climbing the wall. It is possible to freeze or kill the Fune with a Super or Power Bomb to make things easier. Requires: "canPreciseWalljump"
"canConsecutiveWalljump"
"canUseEnemies"
{
"or": [
{
"heatFrames": 560
},
{
"and": [
"canCarefulJump",
{
"heatFrames": 360
}
]
},
{
"and": [
"canTrickyJump",
{
"heatFrames": 240
}
]
},
{
"and": [
{
"or": [
"canUseFrozenEnemies",
{
"ammo": {
"type": "Super",
"count": 1
}
}
]
},
{
"heatFrames": 432
}
]
},
{
"and": [
{
"ammo": {
"type": "PowerBomb",
"count": 1
}
},
{
"heatFrames": 456
}
]
}
]
}
|
|
From: 3
Hidden Platform Item
To: 4
Junction Above Hidden Platform Item
Requires: {
"heatFrames": 50
}
{
"or": [
{
"and": [
"canWalljump",
{
"lavaFrames": 30
}
]
},
{
"and": [
"HiJump",
{
"lavaFrames": 30
}
]
},
{
"and": [
"Gravity",
{
"lavaFrames": 20
}
]
},
{
"and": [
"canUseFrozenEnemies",
{
"obstaclesNotCleared": [
"A"
]
},
{
"lavaFrames": 30
}
]
},
{
"and": [
{
"heatFrames": 190
},
{
"lavaFrames": 65
}
]
}
]
}
|
|
From: 2
Left Shaft - Bottom Right Door
To: 3
Left Shaft - Middle Right Door
Kill the Alcoon, then freeze the Multiviola to use as a platform. Requires: "canUseFrozenEnemies"
{
"heatFrames": 450
}
|
|
From: 3
Left Shaft - Middle Right Door
To: 4
Left Shaft - Top Right Door
Wait for the Alcoon to walk off the edge. Use it and the Multiviola as platforms. Spawn the Alcoon, then run back to the right so it will not stop and fire projectiles. Requires: "canUseFrozenEnemies"
{
"heatFrames": 1300
}
|
|
From: 4
Left Shaft - Top Right Door
To: 6
Left Shaft - Top Junction
Wait for the Alcoon to walk off the edge. Use it and the Multiviola as platforms. Requires: "canUseFrozenEnemies"
{
"heatFrames": 830
}
|
|
From: 6
Left Shaft - Top Junction
To: 1
Left Shaft - Top Left Door
Requires: "canUseFrozenEnemies"
{
"heatFrames": 600
}
|
|
From: 5
Bottom Floating Platform Junction
To: 4
Top Floating Platform Junction
Requires: "canUseFrozenEnemies"
{
"heatFrames": 250
}
|
|
Lure the Geruta left by jumping towards it from below. Freeze it and use it as a platform. Requires: "canUseFrozenEnemies"
"HiJump"
{
"heatFrames": 1150
}
|
|
Notable: true 
Jump and aim down to lower the camera so the middle platform Sova starts moving. Then freeze it by aiming down, shoot the shot block, and use the Sova as a stable platform. Requires: "canUseFrozenEnemies"
"canCameraManip"
{
"heatFrames": 350
}
Clears obstacles: A |
|
Climb up the left, freeze the top-left Sova, and use it as a platform to reach the door. Requires: "canUseFrozenEnemies"
"canConsecutiveWalljump"
{
"heatFrames": 800
}
|
|
Expects to freeze and use two Sovas back-to-back, as leniency to account for position variations. Also has an extra buffer for possibly needing to wait beforehand for the left Sova to position itself right. Requires: "canUseFrozenEnemies"
{
"heatFrames": 400
}
|
|
Requires: "Morph"
{
"or": [
"canWalljump",
"HiJump",
"h_canFly",
"canUseFrozenEnemies"
]
}
|
|
Requires: "Morph"
{
"or": [
"canWalljump",
"h_canFly",
"canUseFrozenEnemies"
]
}
|
|
Freeze a Sova once it enters one of the slots on the wall and then use it as a platform. Requires: "Morph"
"canUseFrozenEnemies"
{
"heatFrames": 840
}
|
|
Requires: "Morph"
"canUseFrozenEnemies"
{
"heatFrames": 350
}
|
|
An ice shot through the morph tunnel can freeze the Boyon even without Wave. Requires: "Morph"
"canUseFrozenEnemies"
{
"heatFrames": 300
}
|
|
Requires: "Gravity"
{
"or": [
"canWalljump",
"HiJump",
"canSpringBallJumpMidAir",
"h_canFly",
"canUseFrozenEnemies",
"canGravityJump"
]
}
|
|
Use the moving platform (Kamer) to elevate the Gamets and then freeze them. Requires: "canUseFrozenEnemies" |
|
From: 5
Small Platforms Junction
To: 1
Left Door
Lure a Mella from the right by breaking the speed blocks or using Morph. Then you need to manipulate it to go high enough to be used as a stepping stone once frozen. Requires: "canUseFrozenEnemies"
"canManipulateMellas"
{
"or": [
{
"obstaclesCleared": [
"B"
]
},
"Morph"
]
}
|
|
From: 5
Small Platforms Junction
To: 3
Item
Lure a Mella from the right by breaking the speed blocks or using Morph. Then manipulate it to go high enough to be used as a stepping stone once frozen. Without movement items it may be necessary to continue manipulating it from above, jumping and aiming down to freeze it. Requires: "canUseFrozenEnemies"
"canManipulateMellas"
{
"or": [
{
"and": [
"canBePatient",
"canWalljump"
]
},
"canBeVeryPatient"
]
}
{
"or": [
{
"obstaclesCleared": [
"B"
]
},
"Morph"
]
}
|
|
From: 5
Small Platforms Junction
To: 3
Item
Lure a Mella from the right by breaking the speed blocks or using Morph. Then you need to manipulate it to go high enough to be used as a stepping stone once frozen. Requires: "canUseFrozenEnemies"
"canManipulateMellas"
"HiJump"
{
"or": [
{
"obstaclesCleared": [
"B"
]
},
"Morph"
]
}
|
|
From: 3
Bottom Platform Junction
To: 4
Center Floating Platforms Junction
Freeze a pirate to use as a platform. A very strong beam is required to stay out of the acid. Requires: "h_canNavigateHeatRooms"
"Charge"
"canUseFrozenEnemies"
"Plasma"
{
"heatFrames": 440
}
|
|
Crouch in front of the standing pirate to freely shoot charge shots. Shoot upon entering the room to interupt the pirate lazer attack. Stay far enough away from the wall to avoid the wall pirate. Jumping can be used to distract the wall pirate, in particular when trying to jump to the overhead platform. Requires: "h_canNavigateHeatRooms"
"Charge"
"canUseFrozenEnemies"
{
"or": [
"Wave",
"Spazer",
"Plasma",
{
"ammo": {
"type": "Super",
"count": 2
}
},
{
"ammo": {
"type": "Missile",
"count": 8
}
},
{
"heatFrames": 550
}
]
}
{
"heatFrames": 550
}
|
|
Requires: "h_canNavigateHeatRooms"
"canUseFrozenEnemies"
"h_canCrouchJumpDownGrab"
{
"heatFrames": 700
}
{
"or": [
{
"and": [
"h_canUsePowerBombs",
{
"heatFrames": 50
}
]
},
{
"obstaclesCleared": [
"A"
]
}
]
}
Clears obstacles: A |
|
From: 5
Firefleas Bottom Left Platform Junction
To: 7
Fireflea Statue's Claw Junction
Be careful not to touch the firefleas or they will die. Requires: {
"or": [
{
"and": [
"canWalljump",
"canUseFrozenEnemies"
]
},
{
"and": [
"HiJump",
"canUseFrozenEnemies"
]
},
"canTrickyUseFrozenEnemies"
]
}
|
|
From: 7
Junction By Lower Alcoons (Left of Spike Pits)
To: 1
Left Door
Requires: "h_canNavigateHeatRooms"
"canUseFrozenEnemies"
{
"heatFrames": 330
}
|
|
From: 7
Junction By Lower Alcoons (Left of Spike Pits)
To: 6
Junction By Left Door (Right of Pit)
Requires: "h_canNavigateHeatRooms"
"canUseFrozenEnemies"
{
"heatFrames": 310
}
|
|
Requires: {
"or": [
"canWalljump",
"HiJump",
"h_canFly",
"SpeedBooster",
"h_canCrouchJumpDownGrab",
"canSpringBallJumpMidAir",
"h_canSpringBallBombJump",
"canUseFrozenEnemies"
]
}
|
|
From: 7
Bottom Door
To: 3
Bottom Left Door
Use the Covern to partial ceiling clip so your beam can reach the shot block of the ceiling at the end of the Morph tunnel to the left. It is possible to mid-air morph to get into the morph tunnel with nothing, from the Covern, the ground, or the stairs below. Requires: "Morph"
"canUseFrozenEnemies"
"canCeilingClip"
{
"not": "f_DefeatedPhantoon"
}
"canRiskPermanentLossOfAccess"
Clears obstacles: B |
|
Freeze a crab on the edge of the hole in the ceiling. Then get on top of it with Gravity and a wall jump, jump assist, or second frozen crab on the ground, or a suitless Spring Ball jump with HiJump. Requires: "canMidAirMorph"
"canUseFrozenEnemies"
{
"or": [
{
"and": [
"Gravity",
{
"or": [
"HiJump",
"canWalljump",
"canSpringBallJumpMidAir",
"canTrickyUseFrozenEnemies"
]
}
]
},
{
"and": [
"HiJump",
"canSpringBallJumpMidAir",
"canSuitlessMaridia"
]
}
]
}
|
|
Requires: "Gravity"
{
"or": [
"canWalljump",
"h_canFly",
"canUseFrozenEnemies",
"canGravityJump"
]
}
|
|
From: 5
Platform Junction Near Top Left Door
To: 4
Top Left Door
Requires: "canSuitlessMaridia"
"canUseFrozenEnemies"
{
"or": [
"HiJump",
"canSpringBallJumpMidAir"
]
}
|
|
From: 6
Middle Junction Near Top Left Pirate
To: 7
Spawn At Junction Near Top Right Door
Requires: "canSuitlessMaridia" "Plasma" "canUseFrozenEnemies" |
|
From: 1
Bottom Door
To: 3
Middle Right Door
Run and spin jump to the left through the transition with as much horiziontal speed as possible, without bonking the door frame. Hold left through the transition to avoid the fish and land on the platform to the left. With limited runway, this may require a very precise jump. Then reach the platform above either using a crouch-jump down-grab or by freezing the fish. Entrance condition: {
"comeInWithPlatformBelow": {
"maxHeight": 6,
"maxLeftPosition": -0.5,
"minRightPosition": 2.5
},
"comesThroughToilet": "yes"
}
Requires: "canCrossRoomJumpIntoWater"
"canInsaneJump"
{
"or": [
"h_canCrouchJumpDownGrab",
"canUseFrozenEnemies"
]
}
|
|
Spin jump to the left through the transition. Bonking the left side of the door frame works but is not required. Hold left through the transition to avoid the fish and land on the platform to the left. Then reach the platform above either using a crouch-jump down-grab or by freezing the fish. Entrance condition: {
"comeInWithPlatformBelow": {
"maxHeight": 6,
"maxLeftPosition": 2,
"minRightPosition": -2
},
"comesThroughToilet": "no"
}
Requires: "canCrossRoomJumpIntoWater"
{
"or": [
"h_canCrouchJumpDownGrab",
"canUseFrozenEnemies"
]
}
|
|
From: 1
Bottom Door
To: 3
Middle Right Door
Run and spin jump to the left through the transition with as much horiziontal speed as possible, without bonking the door frame. Hold left through the transition to avoid the fish and land on the platform to the left. Then reach the platform above either using a crouch-jump down-grab or by freezing the fish. Entrance condition: {
"comeInWithPlatformBelow": {
"maxHeight": 6,
"maxLeftPosition": -0.5,
"minRightPosition": 4.5
},
"comesThroughToilet": "yes"
}
Requires: "canCrossRoomJumpIntoWater"
"canTrickyJump"
{
"or": [
"h_canCrouchJumpDownGrab",
"canUseFrozenEnemies"
]
}
|
|
Requires: "Gravity"
{
"or": [
"HiJump",
"canWalljump",
"h_canFly",
"canUseFrozenEnemies",
"canSpringBallJumpMidAir",
"canGravityJump"
]
}
|
|
From: 2
Bottom Left Door
To: 7
Lower Hills Junction
Use the frozen crab as a platform. Requires: "canSuitlessMaridia"
"canUseFrozenEnemies"
{
"or": [
"HiJump",
"canSpringBallJumpMidAir"
]
}
|
|
In the upward channel one right of the door, jump as high as possible to lure a fast crab moving down the tallest mountain. A crouch jump or breaking spin can be helpful. Damage down the crab while watching it loop around, then ride the crab up the left side. Freeze the crab at the top of the highest peak, stand on it to jump to the left. If you lose the fast crab, it is always possible to get it back by climbing the peak to the right. The crab there can be lured with HiJump alone. Requires: "canSuitlessMaridia" "HiJump" "canUseFrozenEnemies" |
|
Requires: "canSuitlessMaridia"
"canUseFrozenEnemies"
{
"or": [
"canWalljump",
"canSpringBallJumpMidAir",
{
"and": [
"HiJump",
"canDownGrab"
]
},
"canBombJumpWaterEscape"
]
}
|
|
From: 4
Right Door
To: 6
Junction Right of Morph Passage
Requires: "canSuitlessMaridia" "canUseFrozenEnemies" |
|
From: 1
Bottom Left Door
To: 2
Right Door
Notable: true 
Crouch under the crumble blocks while aiming upward, using both angle buttons then freeze the Mochtroid while it is on Samus. Jump onto the Mochtroid by quickly pressing down after jumping, when on it, press up to stand then jump through the ceiling. With no jump assists, use a frozen Mochtroid as a platform to get to the ledge above the door. Requires: "h_canNavigateUnderwater" "canCeilingClip" "canUseFrozenEnemies" |
|
From: 1
Bottom Left Door
To: 2
Right Door
Find the crumble blocks and crystal flash mid-air, just below them. They are on the far right of the ceiling of the bottom right pathway. Hold down as the CF ends to break the non-respawning crumble blocks. This is for the much harder version, without Gravity and Bombs. Requires: "h_canJumpIntoCrystalFlashClip"
"canSuitlessMaridia"
{
"or": [
"HiJump",
"canSpringBallJumpMidAir",
{
"and": [
"h_canCrouchJumpDownGrab",
"canCarefulJump"
]
},
"canUseFrozenEnemies"
]
}
|
|
From: 2
Right Door
To: 1
Bottom Left Door
Notable: true
Crouch under the crumble blocks while aiming upward, using both angle buttons then freeze the Mochtroid while it is on Samus. Jump onto the Mochtroid by quickly pressing down after jumping, when on it, press up to stand then jump through the ceiling. With no jump assists, use a frozen Mochtroid as a platform to get to the ledge above the door. Requires: "h_canNavigateUnderwater"
"canCeilingClip"
"canUseFrozenEnemies"
{
"or": [
{
"and": [
"h_canCrouchJumpDownGrab",
"canTrickyJump"
]
},
"HiJump",
"Gravity",
"canSpringBallJumpMidAir"
]
}
|
|
From: 2
Bottom Right Door
To: 2
Bottom Right Door
Notable: true Crouch and freeze a Mochtroid to clip into the space behind the grapple blocks. Jump and tap grapple while aiming diagonally to be pushed into the wall just the right amount. Samus should be one tile below the grapple blocks and fully in the wall. Too short a tap and the next grapple will not work, too long and Samus will be stuck in the wall. Grapple diagonally again to be pushed into the transition. Requires: {
"or": [
{
"and": [
"Gravity",
"canUseFrozenEnemies",
"canCeilingClip"
]
},
{
"and": [
"canTrickyUseFrozenEnemies",
"h_canNonTrivialCeilingClip"
]
}
]
}
"canGrappleClip"
Bypasses door shell: true |
|
Requires: "Gravity"
{
"or": [
"HiJump",
"canWalljump",
"h_canFly",
"canUseFrozenEnemies"
]
}
|
|
Requires: "canSuitlessMaridia" "HiJump" "canUseFrozenEnemies" |
|
Requires: "canSuitlessMaridia" "canTrickySpringBallJump" "canUseFrozenEnemies" |
|
Entrance condition: {
"comeInWithGrappleTeleport": {
"blockPositions": [
[
12,
12
],
[
12,
13
]
]
}
}
Requires: {
"or": [
"canUseFrozenEnemies",
"HiJump",
"canSpringBallJumpMidAir"
]
}
|
|
Notable: true 
Similar to naked watering hole escape. Freeze a crab under the gap above, do a stationary spinjump facing right, then walljump until you're up. Another frozen crab can help complete the way up. Requires: "canSunkenTileWideWallClimb" "canUseFrozenEnemies" "canStationarySpinJump" |
|
Requires: "canSuitlessMaridia"
"HiJump"
{
"or": [
"h_canCrouchJumpDownGrab",
"canSpringBallJumpMidAir",
"canUseFrozenEnemies"
]
}
|
|
Requires: "canSuitlessMaridia"
"canSpringBallJumpMidAir"
{
"or": [
"h_canMaxHeightSpringBallJump",
"HiJump",
"canUseFrozenEnemies"
]
}
|
|
Entrance condition: {
"comeInWithGrappleTeleport": {
"blockPositions": [
[
3,
12
],
[
3,
13
]
]
}
}
Requires: {
"or": [
"canUseFrozenEnemies",
"HiJump",
"canSpringBallJumpMidAir"
]
}
|
|
If the top door is blue, it will open immediately after the teleport, not allowing Samus to swing directly onto the platform. Entrance condition: {
"comeInWithGrappleTeleport": {
"blockPositions": [
[
7,
2
]
]
}
}
Requires: {
"or": [
"canUseFrozenEnemies",
"HiJump",
"canSpringBallJumpMidAir"
]
}
|
|
Requires: "Gravity"
{
"or": [
"h_canCrouchJumpDownGrab",
"canUseFrozenEnemies",
"canGravityJump",
"canWalljump",
"HiJump",
"canSpringBallJumpMidAir",
"h_canFly",
"h_canSpringBallBombJump"
]
}
|
|
From: 1
Bottom Left Door
To: 2
Top Right Door
Requires: "canSuitlessMaridia"
"HiJump"
{
"or": [
"canSpringBallJumpMidAir",
"canSpaceJumpWaterBounce",
"canUseFrozenEnemies"
]
}
|
|
From: 1
Bottom Left Door
To: 2
Top Right Door
Requires: "canSuitlessMaridia" "canUseFrozenEnemies" "canTrickySpringBallJump" "canCrouchJump" |
|
Keep freezing the Yapping Maw while using a frozen bug to escape. Requires: "canSuitlessMaridia"
"canUseFrozenEnemies"
{
"doorUnlockedAtNode": 1
}
|
|
From: 4
Junction Below Left Door
To: 5
Junction Below Right Door
Freeze the Zoa as it spawns and jump on it then jump across the room. Freeze any Yapping Maws that attack and use them or a frozen Zoa as a platform to leave. Requires: "canSuitlessMaridia" "canUseFrozenEnemies" "canCarefulJump" |
|
Keep freezing the Yapping Maw while using a frozen bug to escape. Requires: "canSuitlessMaridia"
"canUseFrozenEnemies"
{
"doorUnlockedAtNode": 3
}
|
|
From: 5
Junction Below Right Door
To: 4
Junction Below Left Door
Freeze the Zoa as it spawns and jump on it then jump across the room. Freeze any Yapping Maws that attack and use them or a frozen Zoa as a platform to leave. Requires: "canSuitlessMaridia" "canUseFrozenEnemies" "canCarefulJump" |
|
Use the frozen Zoas as a bridge. Falling will require Samus to use ice beam and a crouch jump to escape. Requires: "canSuitlessMaridia" "canUseFrozenEnemies" "canPlayInSand" |
|
Use the frozen Zoas as a bridge. Falling will require Samus to use ice beam and a crouch jump to escape. Requires: "canSuitlessMaridia" "canUseFrozenEnemies" "canPlayInSand" |
|
Requires: {
"or": [
"canWalljump",
"h_canFly",
{
"and": [
"HiJump",
{
"or": [
"canSpringBallJumpMidAir",
"canUseFrozenEnemies"
]
}
]
},
"canTrickySpringBallJump"
]
}
|
|
From: 1
Bottom Left Door
To: 4
G-Mode Junction (Top by Elevator)
Entrance condition: {
"comeInWithGMode": {
"mode": "any",
"morphed": false
}
}
Requires: {
"or": [
"canUseFrozenEnemies",
{
"and": [
"canPreciseWalljump",
"canStaggeredWalljump"
]
}
]
}
|
|
Requires: "canUseFrozenEnemies" |
|
Entrance condition: {
"comeInWithGMode": {
"mode": "any",
"morphed": false
}
}
Requires: {
"or": [
"canUseFrozenEnemies",
{
"and": [
"canPreciseWalljump",
"canStaggeredWalljump"
]
}
]
}
|
|
Shoot at a wall pirate from below to freeze it. Plasma is not required for wall pirates. Firing at a Standing Pirate with anything will prevent it from shooting for a short time. Requires: "canUseFrozenEnemies" "canPreciseWalljump" |
|
From: 2
Bottom Door
To: 4
Water Level Junction
The fish can safely be damaged from the door until they are ready to be used as platforms. Requires: "h_canNavigateUnderwater"
"canUseFrozenEnemies"
{
"or": [
"canTrickyUseFrozenEnemies",
"HiJump",
"canSpringBallJumpMidAir",
"Gravity",
"h_canCrouchJumpDownGrab"
]
}
|
|
From: 1
Left Door
To: 3
Junction Below Right Door
Quickly shoot to break the shot block and then do a momentumConservingTurnaround to ascend into the little region. Another movement item will be needed to get closer to the crumble blocks. Entrance condition: {
"comeInJumping": {
"speedBooster": false,
"minTiles": 2
}
}
Requires: "canTrickyJump"
"canCrossRoomJumpIntoWater"
"canMomentumConservingTurnaround"
{
"or": [
"canUseFrozenEnemies",
"canSpringBallJumpMidAir",
"HiJump"
]
}
|
|
Requires: "canSuitlessMaridia"
"HiJump"
{
"or": [
"canSpringBallJumpMidAir",
"h_canCrouchJumpDownGrab",
"canUseFrozenEnemies"
]
}
|
|
Requires: "Gravity"
{
"or": [
"Ice",
"ScrewAttack",
{
"enemyKill": {
"enemies": [
[
"Evir"
]
],
"explicitWeapons": [
"Plasma",
"Super",
"PowerBombPeriphery"
]
}
},
{
"enemyDamage": {
"enemy": "Evir",
"type": "particle",
"hits": 1
}
}
]
}
{
"and": [
"canPlayInSand",
{
"or": [
"canWalljump",
"HiJump",
"canUseFrozenEnemies",
"canGravityJump",
{
"and": [
"canTrickyJump",
"can4HighMidAirMorph",
"canTrickySpringBallJump"
]
}
]
}
]
}
|
|
From: 4
Below Sand Entrance
To: 2
Right Door
Requires: "Gravity"
{
"or": [
"canPlayInSand",
"canUseFrozenEnemies",
"canCarefulJump"
]
}
{
"or": [
"canCarefulJump",
{
"enemyDamage": {
"enemy": "Evir",
"type": "particle",
"hits": 1
}
}
]
}
|
|
Wait for the Rinka to spawn, then jump, so the trajectory is as high as possible. Space jump makes this a bit easier. If the Metroids are alive, lure them off screen to the left. Requires: {
"or": [
"canTrickyJump",
"SpaceJump"
]
}
{
"or": [
"canMetroidAvoid",
"canUseFrozenEnemies",
"ScrewAttack",
"f_KilledMetroidRoom1"
]
}
Exit condition: {
"leaveWithGModeSetup": {}
}
|
|
From: 2
Bottom Right Door (locked)
To: 2
Bottom Right Door (locked)
If the Metroids are alive, lure them off screen. Requires: {
"or": [
"canMetroidAvoid",
"canUseFrozenEnemies",
"ScrewAttack",
"f_KilledMetroidRoom2"
]
}
Exit condition: {
"leaveWithGModeSetup": {}
}
|