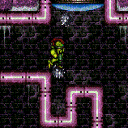
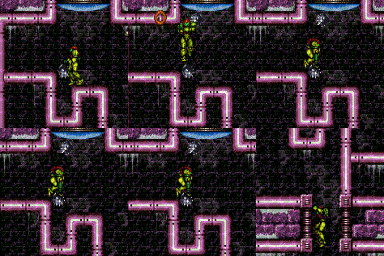
canBePatient (Extreme)
Executing a strat that requires waiting or doing the same thing over and over again for a substantial amount of time, potentially more than 1.5 minutes, even with good execution.
Strats ()
|
From: 6
Main Junction
To: 3
Top Right Door
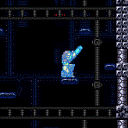
Notable: true A long Temporary Blue Chain with x-ray turnarounds to climb up and destroy the bomb blocks blocking the top morph tunnel. Requires: "canChainTemporaryBlue"
"canXRayTurnaround"
"canTrickyJump"
"canBePatient"
{
"canShineCharge": {
"usedTiles": 27.5,
"openEnd": 0
}
}
{
"obstaclesCleared": [
"A"
]
}
|
|
Requires: {
"or": [
{
"enemyKill": {
"enemies": [
[
"Boyon",
"Boyon",
"Boyon",
"Boyon"
]
],
"excludedWeapons": [
"Bombs",
"PseudoScrew"
]
}
},
{
"and": [
"canBePatient",
"h_canUseMorphBombs"
]
},
{
"and": [
{
"enemyDamage": {
"enemy": "Boyon",
"type": "contact",
"hits": 16
}
},
"canCarefulJump",
"canPseudoScrew"
]
}
]
}
Clears obstacles: A |
|
From: 5
Bottom Junction (Right of Boyons)
To: 2
Bottom Left Door
Requires: {
"or": [
{
"enemyKill": {
"enemies": [
[
"Boyon",
"Boyon",
"Boyon",
"Boyon"
]
],
"excludedWeapons": [
"Bombs",
"PseudoScrew"
]
}
},
{
"and": [
"canBePatient",
"h_canUseMorphBombs"
]
}
]
}
Clears obstacles: A |
|
Climb up 3 screens. Entrance condition: {
"comeInWithGMode": {
"mode": "direct",
"morphed": false
}
}
Requires: "canXRayClimb" "canBePatient" |
|
From: 4
Bottom Right Door
To: 3
Top Right Door
Climb up 3 screens. Entrance condition: {
"comeInShinecharged": {
"framesRequired": 1
}
}
Requires: {
"shinespark": {
"frames": 1,
"excessFrames": 1
}
}
"canShinesparkDeepStuck"
"canXRayClimb"
"canBePatient"
|
|
From: 3
Bottom Left Horizontal Door
To: 3
Bottom Left Horizontal Door
Wait 90 seconds for a global Geemer. Requires: {
"enemyDamage": {
"enemy": "Geemer (blue)",
"type": "contact",
"hits": 1
}
}
"h_ZebesIsAwake"
"canBePatient"
|
|
From: 5
Alcatraz Door
To: 8
Central Junction
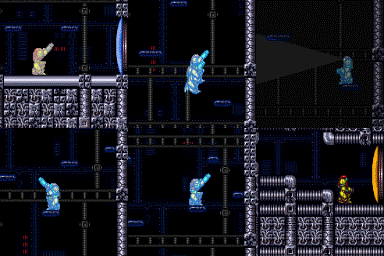
Notable: true Wait for a global Geemer to make the long trip along the map, or shoot a Super 20 to 30 seconds after entering the room to knock it off the ceiling and save a lot of time. Freeze it just after it starts climbing the bomb blocks. Spin-jump above it, which will put Samus into a forced crouch where X-Ray cannot be used. Use Grapple to kill a a second Geemer, restoring the ability to use X-Ray. Use X-Ray to stand up, then jump up through the ceiling. Requires: "h_ZebesIsAwake"
"canBePatient"
{
"or": [
"canBeVeryPatient",
{
"ammo": {
"type": "Super",
"count": 1
}
}
]
}
"canPreciseCeilingClip"
"canTrickyUseFrozenEnemies"
"canUseGrapple"
"canXRayStandUp"
|
|
From: 6
Bottom Right Door (On the Left Shaft)
To: 6
Bottom Right Door (On the Left Shaft)
Wait 2 minutes for a global Geemer. Requires: {
"enemyDamage": {
"enemy": "Geemer (blue)",
"type": "contact",
"hits": 1
}
}
"h_ZebesIsAwake"
{
  "or": [
    "canBePatient",
    {
      "ammo": {
        "type": "Super",
        "count": 1
      }
    }
  ]
}
|
|
From: 6
Bottom Right Door (On the Left Shaft)
To: 6
Bottom Right Door (On the Left Shaft)
Wait 2 minutes for a global Geemer, or use a Super to grab a closer one. Requires: "h_ZebesIsAwake"
{
"or": [
"canBePatient",
{
"ammo": {
"type": "Super",
"count": 1
}
}
]
}
Exit condition: {
"leaveWithGModeSetup": {}
}
|
|
From: 6
Bottom Right Door (On the Left Shaft)
To: 6
Bottom Right Door (On the Left Shaft)
Wait 2 minutes for a global Geemer, or use a Super to grab a closer one. Requires: "h_canFrozenEnemyRunway"
"h_ZebesIsAwake"
{
"or": [
"canBePatient",
{
"ammo": {
"type": "Super",
"count": 1
}
}
]
}
Exit condition: {
"leaveWithRunway": {
"length": 5,
"openEnd": 1,
"steepUpTiles": 1
}
}
|
|
From: 7
Bottom Left Vertical Door
To: 7
Bottom Left Vertical Door
Line up with the far right or left side of doorframe in the room below, to be able to not fall back through after entry, as the door remains open. Be careful not to fall into the door while being hit by the Geemer. Requires: {
"enemyDamage": {
"enemy": "Geemer (blue)",
"type": "contact",
"hits": 1
}
}
"h_ZebesIsAwake"
{
"or": [
"canBePatient",
{
"ammo": {
"type": "Super",
"count": 1
}
}
]
}
|
|
From: 1
Left Door
To: 1
Left Door
Notable: true Use R-Mode to get a blue suit to cross the room and get the item, or to leave the right shinecharged. In R-Mode, fill your Reserves at the farm. Damage down again so that Samus is within 1 Zebbo hit from triggering Reserves. Gain a shinecharge in-room without gaining more energy. It is possible to time the despawn of a drop with the acid if no ammo is owned. Shinespark vertically, such that a Zebbo can hit Samus in the wind-up to cause a reserve trigger, giving a blue suit. It is then fine to farm the Zebbos again. Entrance condition: {
"comeInWithRMode": {}
}
Requires: "canBePatient"
{
"or": [
{
"canShineCharge": {
"usedTiles": 14,
"openEnd": 0,
"steepUpTiles": 1,
"steepDownTiles": 1
}
},
{
"and": [
{
"canShineCharge": {
"usedTiles": 15,
"openEnd": 0,
"steepUpTiles": 1,
"steepDownTiles": 1
}
},
{
"doorUnlockedAtNode": 1
}
]
},
{
"and": [
{
"canShineCharge": {
"usedTiles": 18,
"openEnd": 1,
"steepUpTiles": 1,
"steepDownTiles": 1
}
},
"h_canDestroyBombWalls"
]
},
{
"and": [
{
"canShineCharge": {
"usedTiles": 19,
"openEnd": 1,
"steepUpTiles": 1,
"steepDownTiles": 1
}
},
"h_canDestroyBombWalls",
{
"doorUnlockedAtNode": 1
}
]
}
]
}
Clears obstacles: B, D |
|
From: 2
Right Door
To: 1
Left Door
This is harder when crossing the room and easier if the left door can be used to reset the room, but it will cost one extra Power Bomb. Place a Power Bomb near the first and third bomb walls. One Waver will be alive by the fifth wall, which will only move while on camera. Get it to move to the right in order to safely Power Bomb the final set of walls. Follow the Waver around the room a few times in order to get it to the left doorway. Requires: "Morph"
{
"ammo": {
"type": "PowerBomb",
"count": 3
}
}
"canBePatient"
Exit condition: {
"leaveWithGModeSetup": {}
}
|
|
X-Ray climb about 2.5 screen lengths, until the camera shows Samus' helmet on the bottom of the screen. Shoot up to clear the shot blocks and resume climbing until you can walk out to the right. Fix the camera by shooting the floor shot block and jumping down. The pirate will attack while climbing past it. Entrance condition: {
"comeInWithDoorStuckSetup": {}
}
Requires: "canXRayClimb"
{
"or": [
{
"enemyDamage": {
"enemy": "Green Space Pirate (standing)",
"hits": 1,
"type": "laser"
}
},
{
"enemyKill": {
"enemies": [
[
"Green Space Pirate (standing)"
]
],
"explicitWeapons": [
"Charge",
"Ice",
"Wave",
"Spazer",
"Plasma",
"Missile",
"Super"
]
}
}
]
}
"canBePatient"
|
|
X-Ray climb about 2.5 screen lengths, until the camera shows Samus' helmet on the bottom of the screen. Shoot up to clear the shot blocks and resume climbing until you can walk out to the left. Fix the camera by shooting the floor shot block and jumping down. The bottom pirate will attack while climbing past it. Entrance condition: {
"comeInWithDoorStuckSetup": {}
}
Requires: "canXRayClimb"
{
"or": [
{
"enemyDamage": {
"enemy": "Green Space Pirate (standing)",
"hits": 1,
"type": "laser"
}
},
{
"enemyKill": {
"enemies": [
[
"Green Space Pirate (standing)"
]
],
"explicitWeapons": [
"Charge",
"Ice",
"Wave",
"Spazer",
"Plasma",
"Missile",
"Super"
]
}
}
]
}
"canBePatient"
|
|
From: 10
G-Mode Morph Junction (Middle Right Door)
To: 9
Junction Below Items
Place bombs against the bottom of the crumble blocks to overload PLMs. Requires: "h_canArtificialMorphBombs"
{
"or": [
{
"and": [
"h_canArtificialMorphSpringBall",
{
"or": [
"canBePatient",
"HiJump"
]
}
]
},
"h_canArtificialMorphCeilingBombJump"
]
}
|
|
The nearby Global crab can be used to exit on the left side of the door. Exiting on the right will require travelling the Morph maze to find a local crab or two. Requires: "canUpwardGModeSetup" "canTrickyUseFrozenEnemies" "h_canUseSpringBall" "canBePatient" Exit condition: {
"leaveWithGModeSetup": {}
}
|
|
From: 5
Lower Section - Bottom Right Door
To: 2
Upper Right Section - Top Right Door
Enter with G-mode direct, back up to between 1 and 6 pixels from the door transition, and activate X-ray to get very deep stuck in the door. Climb up 4 screens, and perform a turnaround buffered spin-jump away from the door to trigger the transition, bypassing any lock on the door. Entrance condition: {
"comeInWithGMode": {
"mode": "direct",
"morphed": false
}
}
Requires: "canXRayClimb" "canBePatient" Bypasses door shell: true |
|
From: 5
Lower Section - Bottom Right Door
To: 3
Upper Right Section - Bottom Right Door
Climb up 3 screens. Entrance condition: {
"comeInWithGMode": {
"mode": "direct",
"morphed": false
}
}
Requires: "canXRayClimb" "canBePatient" |
|
From: 5
Lower Section - Bottom Right Door
To: 3
Upper Right Section - Bottom Right Door
Climb up 3 screens. Entrance condition: {
"comeInShinecharged": {
"framesRequired": 1
}
}
Requires: {
"shinespark": {
"frames": 1,
"excessFrames": 1
}
}
"canShinesparkDeepStuck"
"canXRayClimb"
"canBePatient"
|
|
From: 5
Lower Section - Bottom Right Door
To: 3
Upper Right Section - Bottom Right Door
Enter with G-mode direct, back up to between 1 and 6 pixels from the door transition, and activate X-ray to get very deep stuck in the door. Climb up 3 screens, and perform a turnaround buffered spin-jump away from the door to trigger the transition, bypassing any lock on the door. Entrance condition: {
"comeInWithGMode": {
"mode": "direct",
"morphed": false
}
}
Requires: "canXRayClimb" "canBePatient" Bypasses door shell: true |
|
From: 4
Right Item
To: 2
Top Left Door
Use both Geemers to climb the tall shaft by repeatedly freezing them. Note that one moves locally when on camera and the other moves globally. Once Samus is close to the top Bomb Block, freeze one Geemer low and jump as high as possible before placing a power bomb. Continue climbing with the Geemer that survives. Requires: {
"or": [
"h_canUsePowerBombs",
{
"and": [
{
"obstaclesCleared": [
"B"
]
},
"Morph"
]
},
{
"obstaclesCleared": [
"C"
]
}
]
}
"h_canUsePowerBombs"
"canMidAirMorph"
"canTrickyUseFrozenEnemies"
"canTrickyJump"
"canBePatient"
"canCameraManip"
Clears obstacles: A, B |
|
From: 2
Above Power Bomb Blocks - Top Left Door
To: 2
Above Power Bomb Blocks - Top Left Door
It takes 80 seconds for the global Zeela to make it over here. A Super could speed this up, but it's likely to just get the Zeela stuck. Requires: "canBePatient"
{
"enemyDamage": {
"enemy": "Zeela",
"type": "contact",
"hits": 1
}
}
|
|
From: 2
Above Power Bomb Blocks - Top Left Door
To: 2
Above Power Bomb Blocks - Top Left Door
It is possible to save a lot of time by using a Super to knock the clockwise Zeela off the small platform above. Requires: {
"or": [
"canBePatient",
{
"ammo": {
"type": "Super",
"count": 1
}
}
]
}
Exit condition: {
"leaveWithGModeSetup": {}
}
|
|
From: 2
Above Power Bomb Blocks - Top Left Door
To: 2
Above Power Bomb Blocks - Top Left Door
It is possible to save a lot of time by using a Super to knock the clockwise Zeela off the small platform above. Requires: "h_canFrozenEnemyRunway"
{
"or": [
"canBePatient",
{
"ammo": {
"type": "Super",
"count": 1
}
}
]
}
Exit condition: {
"leaveWithRunway": {
"length": 5,
"openEnd": 1
}
}
|
|
From: 4
Above Power Bomb Blocks - Middle Left Door
To: 4
Above Power Bomb Blocks - Middle Left Door
It takes 70 seconds for the global Zeela to make it over here. A Super could speed this up, but it's likely to just get the Zeela stuck. Requires: "canBePatient"
{
"enemyDamage": {
"enemy": "Zeela",
"type": "contact",
"hits": 1
}
}
|
|
From: 4
Above Power Bomb Blocks - Middle Left Door
To: 4
Above Power Bomb Blocks - Middle Left Door
It is possible to save a lot of time by using a Super to knock the clockwise Zeela off the small platform above. Requires: {
"or": [
"canBePatient",
{
"ammo": {
"type": "Super",
"count": 1
}
}
]
}
Exit condition: {
"leaveWithGModeSetup": {}
}
|
|
From: 4
Above Power Bomb Blocks - Middle Left Door
To: 4
Above Power Bomb Blocks - Middle Left Door
It is possible to save a lot of time by using a Super to knock the clockwise Zeela off the small platform above. Requires: "h_canFrozenEnemyRunway"
{
"or": [
"canBePatient",
{
"ammo": {
"type": "Super",
"count": 1
}
}
]
}
Exit condition: {
"leaveWithRunway": {
"length": 4,
"openEnd": 1
}
}
|
|
From: 6
Above Power Bomb Blocks - Bottom Right Door
To: 6
Above Power Bomb Blocks - Bottom Right Door
Requires: "h_canFrozenEnemyRunway" "canBePatient" Exit condition: {
"leaveWithRunway": {
"length": 5,
"openEnd": 1
}
}
|
|
From: 7
Below Power Bomb Blocks - Top Right Door
To: 3
Above Power Bomb Blocks - Top Right Door
Enter with G-mode direct, back up to between 1 and 6 pixels from the door transition, and activate X-ray to get very deep stuck in the door. Climb up 3 screens, and perform a turnaround buffered spin-jump away from the door to trigger the transition, bypassing any lock on the door. Entrance condition: {
"comeInWithGMode": {
"mode": "direct",
"morphed": false
}
}
Requires: "canXRayClimb" "canBePatient" Bypasses door shell: true |
|
From: 8
Below Power Bomb Blocks - Bottom Left Door
To: 5
Above Power Bomb Blocks - Bottom Left Door
Enter with G-mode direct, back up to between 1 and 6 pixels from the door transition, and activate X-ray to get very deep stuck in the door. Climb up 4 screens, and perform a turnaround buffered spin-jump away from the door to trigger the transition, bypassing any lock on the door. Entrance condition: {
"comeInWithGMode": {
"mode": "direct",
"morphed": false
}
}
Requires: "canXRayClimb" "canBePatient" Bypasses door shell: true |
|
From: 8
Below Power Bomb Blocks - Bottom Left Door
To: 8
Below Power Bomb Blocks - Bottom Left Door
If coming from above, let the Zeela below the Power Bomb blocks to circle until it is on the bottom right area, then go up and place the bomb on the bottom central platform to break the blocks without killing the Zeela. Then quickly shoot the shot block to direct it down to the lower section. Requires: "h_canFrozenEnemyRunway" "canBePatient" Exit condition: {
"leaveWithRunway": {
"length": 4,
"openEnd": 1
}
}
|
|
From: 8
Below Power Bomb Blocks - Bottom Left Door
To: 12
Above Power Bomb Blocks - Main Junction
Climb up 4 screens. Entrance condition: {
"comeInWithDoorStuckSetup": {}
}
Requires: "canXRayClimb" "canBePatient" |
|
From: 9
Right Etecoon Shaft - Top Left Door
To: 12
Above Power Bomb Blocks - Main Junction
Place bombs against the item Chozo ball to overload PLMs. Then go through the bomb blocks and tunnel. IBJ up the left side, blind, until getting on the top small platform. Place a Power Bomb and exit g-mode before the bomb goes off to break the blocks. Entrance condition: {
"comeInWithGMode": {
"mode": "any",
"morphed": true
}
}
Requires: {
"itemNotCollectedAtNode": 11
}
"canRiskPermanentLossOfAccess"
"h_canArtificialMorphIBJ"
"h_canArtificialMorphPowerBomb"
"canBePatient"
"canOffScreenMovement"
|
|
From: 10
Right Etecoon Shaft - Bottom Left Door
To: 12
Above Power Bomb Blocks - Main Junction
IBJ up and place bombs against the item Chozo ball to overload PLMs. Then go through the bomb blocks and tunnel. IBJ up again, blind, until getting on the top small platform. Place a Power Bomb and exit g-mode before the bomb goes off to break the blocks. Entrance condition: {
"comeInWithGMode": {
"mode": "any",
"morphed": true
}
}
Requires: {
"itemNotCollectedAtNode": 11
}
"canRiskPermanentLossOfAccess"
"h_canArtificialMorphIBJ"
"h_canArtificialMorphPowerBomb"
"canBePatient"
"canOffScreenMovement"
|
|
From: 10
Right Etecoon Shaft - Bottom Left Door
To: 13
Below Power Bomb Blocks - Main Junction
IBJ up and place bombs against the item Chozo ball to overload PLMs. Then go through the bomb blocks and tunnel, then exit g-mode. Entrance condition: {
"comeInWithGMode": {
"mode": "any",
"morphed": true
}
}
Requires: {
"itemNotCollectedAtNode": 11
}
"canRiskPermanentLossOfAccess"
"h_canArtificialMorphIBJ"
"canBePatient"
|
|
From: 12
Above Power Bomb Blocks - Main Junction
To: 13
Below Power Bomb Blocks - Main Junction
Notable: true Freeze two Zeelas to perform an 'Enemy Stuck Moonfall' in order to clip through the Power Bomb blocks. Position one Zeela upside down on a ceiling, and another below it on the ground. Freezing them together is the hardest part. Freezing one then unequipping Ice Beam to dispel the ice effect works well to synchronize them. They must be frozen for the full duration of the moonfall to automatically clip through the floor, but sliding off early can also work. From directly on top of the Power Bomb blocks, no pose change is needed, but a Super Missile can speed up the Zeela setup greatly. Requires: "canEnemyStuckMoonfall"
"canTrickyUseFrozenEnemies"
{
"or": [
{
"ammo": {
"type": "Super",
"count": 1
}
},
"canBePatient"
]
}
|
|
From: 13
Below Power Bomb Blocks - Main Junction
To: 14
Right Etecoon Shaft - Wall Jump Climb Checkpoint Junction
Notable: true Break the bomb block at the bottom right of the main shaft. Bring a Zeela down to the bottom of the room. Morph inside the tunnel, take a Zeela hit, then jump, aim down, and shoot to freeze the Zeela as it starts to move up and while Samus is close to landing. Jump and aim down to get on top of the Zeela. If the Zeela is precisely positioned exactly 12 pixels above the ground, you can press up to make Samus stand; Otherwise, if you have X-ray, then the Zeela should be frozen lower, and you can morph and unmorph and use X-ray to force Samus to stand up; in this case there is a 6-pixel window over which it works, with the Zeela being between 4 and 9 pixels above the ground. In either case, after standing up on top of the Zeela, jump and aim down to break the crumble block. Then, before the crumble respawns, morph and use Spring Ball (if available) to jump back up and into the tunnel; without Spring Ball, a quick mid-air morph also works but is more difficult. Requires: "h_canBombThings"
"h_additionalBomb"
{
"enemyDamage": {
"enemy": "Zeela",
"type": "contact",
"hits": 1
}
}
"canTrickyUseFrozenEnemies"
"canTrickyJump"
{
"or": [
"canXRayCeilingClip",
{
"and": [
"canPreciseCeilingClip",
"canInsaneJump",
"canBeVeryPatient"
]
}
]
}
{
"or": [
"h_canUseSpringBall",
{
"and": [
"can4HighMidAirMorph",
"canInsaneJump"
]
}
]
}
{
"or": [
"canBePatient",
{
"obstaclesNotCleared": [
"A"
]
}
]
}
|
|
Wait for the slow global Zeelas. They take almost 2 minutes to get there. Requires: {
"enemyDamage": {
"enemy": "Zeela",
"type": "contact",
"hits": 1
}
}
"canBePatient"
|
|
Wait for the slow global Zeelas. They take almost 2 minutes to get there. Requires: "canBePatient" Exit condition: {
"leaveWithGModeSetup": {}
}
|
|
Wait for the slow global Zeelas. They take almost 2 minutes to get there. Requires: "h_canFrozenEnemyRunway" "canBePatient" Exit condition: {
"leaveWithRunway": {
"length": 4,
"openEnd": 1
}
}
|
|
Requires: "Charge"
{
"or": [
{
"and": [
"Ice",
"Wave"
]
},
{
"and": [
"Ice",
"Spazer"
]
},
{
"and": [
"Spazer",
"Wave"
]
},
{
"and": [
"canBePatient",
{
"or": [
"Ice",
"Wave",
"Spazer"
]
}
]
},
"Plasma",
"canBeVeryPatient"
]
}
Clears obstacles: f_DefeatedSporeSpawn |
|
Requires: {
"resourceCapacity": [
{
"type": "Missile",
"count": 1
}
]
}
{
"or": [
"canDodgeWhileShooting",
"canBePatient"
]
}
Clears obstacles: f_DefeatedSporeSpawn |
|
From: 6
Right Side - Top Middle Door
To: 2
Right Side - Top Door
Enter with G-mode direct, back up to between 1 and 6 pixels from the door transition, and activate X-ray to get very deep stuck in the door. Climb up 4 screens, and perform a turnaround buffered spin-jump away from the door to trigger the transition, bypassing any lock on the door. Entrance condition: {
"comeInWithGMode": {
"mode": "direct",
"morphed": false
}
}
Requires: "canXRayClimb" "canBePatient" Bypasses door shell: true |
|
From: 9
Left Side - Bottom Door
To: 11
Middle Item
Go into the morph tunnel below the Charge Beam location and Crystal Flash to force a standup and jump through. Samus is now unable to use X-Ray. Without Morph, be careful not to overload PLMs using the camera scroll blocks on the path upward. Then partially floor clip into the left side of the bomb block, and jump to clip through and escape. To exit G-Mode, damage down until the reserves trigger, which can be done most quickly using the Sidehoppers. Entrance condition: {
"comeInWithGMode": {
"mode": "any",
"morphed": true
}
}
Requires: {
"or": [
"h_canArtificialMorphIBJ",
"Morph",
{
"and": [
"h_canArtificialMorphSpringBall",
{
"or": [
"HiJump",
{
"and": [
"h_canArtificialMorphSpringBallBombJump",
"h_additionalBomb",
"h_additionalBomb",
"h_additionalBomb"
]
}
]
}
]
}
]
}
"h_canArtificialMorphCrystalFlash"
{
"or": [
"Morph",
{
"and": [
"canTwoTileSqueeze",
"canPartialFloorClip",
"canCeilingClip"
]
}
]
}
"canBePatient"
|
|
There are camera scroll blocks just below the speed blocks, so it is easy to overload PLMs by bouncing into them. A single IBJ is slow enough at the top to overload them before Samus can hit the blocks. Entrance condition: {
"comeInWithGMode": {
"mode": "any",
"morphed": true
}
}
Requires: "h_canArtificialMorphIBJ" "canBePatient" |
|
From: 3
Right Door
To: 2
Bottom Left Door
Notable: true Using Speed Booster, run through and break the bomb wall to free the global Zeela. Break the speed blocks just before the Zeela gets to them in order for it to go down to the bottom half of the room. The speed blocks respawn very quickly, so this requires very precise timing. Normally, it takes the Zeela a minimum of 2 minutes to setup, but a super can make it fall down the shaft, saving 30 seconds. It may be easiest to knock the Zeela from the ceiling directly into the hole, saving another 30 seconds: Shoot a well-timed Super diagonally at the ground just before breaking the speed blocks. Requires: "canBePatient" "SpeedBooster" Exit condition: {
"leaveWithGModeSetup": {}
}
|
|
From: 3
Right Door
To: 2
Bottom Left Door
Notable: true Use a Reo (Bee) and a Zeela to perform an 'Enemy Stuck Moonfall', clipping Samus through the Speed blocks. Break the Bomb blocks to bring enemies over to the Speed blocks. Have a Reo wait off camera while the Zeela walks onto the Speed blocks, then freeze the Bee just above Samus' head. Try to freeze both enemies near the same time and start the moonfall as quickly as possible. Requires: "canTrickyUseFrozenEnemies"
"canEnemyStuckMoonfall"
"canBePatient"
"canCameraManip"
{
"obstaclesCleared": [
"A"
]
}
|
|
From: 1
Right Door
To: 3
Dry Platform Junction
Watch a Zero (Caterpillar) climb along the ceiling before knocking it down near the speed blocks. Freeze it and jump on top. Escape the water with a spinjump or crouch jump. Requires: "canSuitlessMaridia"
"canBePatient"
"canTrickyUseFrozenEnemies"
{
"ammo": {
"type": "Super",
"count": 1
}
}
|
|
From: 1
Right Door
To: 2
Chozo Item
Traverse the room while avoiding or killing the Boyons. If the Chozo item is still there, it is best to exit G-Mode before the final Power Bomb goes off to ensure that PLMs aren't overloaded. If Samus falls into a Samus Eater, she will often be teleported into it when exiting G-Mode. Entrance condition: {
"comeInWithGMode": {
"mode": "any",
"morphed": true
}
}
Requires: "h_canArtificialMorphPowerBomb"
{
"or": [
"h_canArtificialMorphMovement",
{
"and": [
"h_canArtificialMorphBombs",
"canBePatient"
]
}
]
}
Clears obstacles: B |
|
Requires: {
"or": [
{
"enemyKill": {
"enemies": [
[
"Boyon",
"Boyon",
"Boyon",
"Boyon"
]
],
"excludedWeapons": [
"Bombs",
"PseudoScrew"
]
}
},
{
"and": [
"canBePatient",
"h_canUseMorphBombs"
]
},
{
"and": [
{
"enemyDamage": {
"enemy": "Boyon",
"type": "contact",
"hits": 16
}
},
"canPseudoScrew"
]
}
]
}
Clears obstacles: A |
|
From: 5
Top Right Door (Through Morph Tunnel)
To: 5
Top Right Door (Through Morph Tunnel)
It takes around 2 minutes to get the Zero to this door. Requires: "canBePatient"
{
"or": [
{
"ammo": {
"type": "Super",
"count": 1
}
},
{
"obstaclesCleared": [
"A"
]
}
]
}
"Morph"
{
"or": [
"HiJump",
"canWalljump",
"h_canFly",
"canTrickyUseFrozenEnemies",
"canSpringBallJumpMidAir"
]
}
Exit condition: {
"leaveWithGModeSetup": {}
}
|
|
From: 5
Top Right Door (Through Morph Tunnel)
To: 5
Top Right Door (Through Morph Tunnel)
It takes around 2 minutes to get the Zero to this door. Let the Zero climb the right wall and jump on top of it in Morph Ball form to bounce up to the Cacatac platform. Requires: "canBePatient"
{
"or": [
{
"ammo": {
"type": "Super",
"count": 1
}
},
{
"obstaclesCleared": [
"A"
]
}
]
}
"Morph"
"canNeutralDamageBoost"
"canTrickyJump"
"h_canCrouchJumpDownGrab"
{
"enemyDamage": {
"enemy": "Zero",
"type": "contact",
"hits": 1
}
}
Exit condition: {
"leaveWithGModeSetup": {}
}
|
|
From: 2
Right Door
To: 2
Right Door
It takes 90 seconds after room entry to get hit by a Waver. It is the second Waver that comes nearby. Requires: "canBePatient" Exit condition: {
"leaveWithGModeSetup": {}
}
|
|
Getting up during Phase 2 can be done by jumping on Kraid's projectile platforms or a well timed crouch jump + down grab. Requires: "Charge"
{
"or": [
"Wave",
"Spazer",
"Plasma",
"canBePatient"
]
}
{
"or": [
"HiJump",
"canWalljump",
"SpaceJump",
"canSpringBallJumpMidAir",
{
"and": [
"canDodgeWhileShooting",
{
"or": [
"canCarefulJump",
"h_canCrouchJumpDownGrab"
]
}
]
}
]
}
Clears obstacles: f_DefeatedKraid |
|
4 supers are required to kill Kraid. Only 1 is needed to get him to stand up, after which they are farmable, even though the drop rate is low. Getting up during Phase 2 can be done by jumping on Kraid's projectile platforms or a well timed crouch jump + down grab. Requires: {
"or": [
{
"ammo": {
"type": "Super",
"count": 5
}
},
{
"and": [
{
"ammo": {
"type": "Super",
"count": 4
}
},
"canDodgeWhileShooting"
]
},
{
"and": [
{
"ammo": {
"type": "Super",
"count": 3
}
},
"canDodgeWhileShooting",
"canBePatient"
]
},
{
"and": [
{
"ammo": {
"type": "Super",
"count": 1
}
},
"canDodgeWhileShooting",
"canBeVeryPatient"
]
}
]
}
{
"or": [
"HiJump",
"canWalljump",
"SpaceJump",
"canSpringBallJumpMidAir",
{
"and": [
"canDodgeWhileShooting",
{
"or": [
"canCarefulJump",
"h_canCrouchJumpDownGrab"
]
}
]
}
]
}
Clears obstacles: f_DefeatedKraid |
|
From: 4
Left Side - Bottom Door
To: 1
Left Side - Top Door
Enter with G-mode direct, back up to between 1 and 6 pixels from the door transition, and activate X-ray to get very deep stuck in the door. Climb up 3 screens, and perform a turnaround buffered spin-jump away from the door to trigger the transition, bypassing any lock on the door. Entrance condition: {
"comeInWithGMode": {
"mode": "direct",
"morphed": false
}
}
Requires: "canXRayClimb" "canBePatient" Bypasses door shell: true |
|
Climb up 3 screens. Entrance condition: {
"comeInWithDoorStuckSetup": {}
}
Requires: "canXRayClimb" "canBePatient" |
|
From: 7
Top Right Door
To: 7
Top Right Door
Place a Power Bomb on the bottom stair attached to the door in order to prevent killing the Sova, or free a Sova from the Morph maze with Bombs. If coming from below, be sure to lure the Sova to the bottom before placing a Power Bomb near the blocks in order to prevent killing it. Use Space Jump to follow the Sova to the top right door. Freeze it just at the bottom of the small stairs, as Samus can run over the half-tile gap that remains. Requires: "h_canFrozenEnemyRunway"
"SpaceJump"
"canBePatient"
{
"or": [
{
"obstaclesCleared": [
"A"
]
},
"h_canBombThings"
]
}
Exit condition: {
"leaveWithRunway": {
"length": 5,
"openEnd": 1
}
}
|
|
From: 2
Bottom Left Door
To: 1
Top Left Door
Climb up 1 screen. Entrance condition: {
"comeInShinecharged": {
"framesRequired": 1
}
}
Requires: {
"shinespark": {
"frames": 1,
"excessFrames": 1
}
}
"canShinesparkDeepStuck"
"canXRayClimb"
"canBePatient"
{
"heatFrames": 1600
}
|
|
From: 4
Bottom Right Door
To: 6
Top Right Door
Enter with G-mode direct, back up to between 1 and 6 pixels from the door transition, and activate X-ray to get very deep stuck in the door. Climb up 3 screens, and perform a turnaround buffered spin-jump away from the door to trigger the transition, bypassing any lock on the door. Entrance condition: {
"comeInWithGMode": {
"mode": "direct",
"morphed": false
}
}
Requires: "canXRayClimb" "canBePatient" Bypasses door shell: true |
|
Climb up 3 screens. Entrance condition: {
"comeInWithDoorStuckSetup": {}
}
Requires: "canXRayClimb"
{
"heatFrames": 4000
}
"canBePatient"
|
|
Enter with G-mode direct, back up to between 1 and 6 pixels from the door transition, and activate X-ray to get very deep stuck in the door. Climb up 3 screens, and perform a turnaround buffered spin-jump away from the door to trigger the transition, bypassing any lock on the door. Entrance condition: {
"comeInWithGMode": {
"mode": "direct",
"morphed": false
}
}
Requires: "h_heatProof" "canXRayClimb" "canBePatient" Bypasses door shell: true |
|
From: 2
Middle Left Door
To: 2
Middle Left Door
Release the ceiling Sova while being careful not to kill it if using Power Bombs. The Sova takes 90 seconds to get to the door if the Power Bomb blocks are broken and 45 seconds if they are not. Using a Super when the Sova is exiting the ceiling takes only 12 seconds. Requires: {
"obstaclesCleared": [
"A"
]
}
{
"obstaclesCleared": [
"B"
]
}
{
"or": [
"canBePatient",
{
"ammo": {
"type": "Super",
"count": 1
}
},
{
"obstaclesNotCleared": [
"C"
]
}
]
}
Exit condition: {
"leaveWithGModeSetup": {}
}
|
|
From: 2
Middle Left Door
To: 2
Middle Left Door
If the Power Bomb blocks are broken and the room cannot be reset, the runway can be extended by waiting for the slow global Sova. Be careful to prevent killing the Sova when breaking the Power Bomb blocks, while still ensuring breaking the ceiling Bomb blocks. Using a Super to knock off the Sova once it is near the gates will save approximately 30 seconds. Requires: "h_canFrozenEnemyRunway"
{
"obstaclesCleared": [
"A",
"B",
"C"
]
}
{
"or": [
"canBeVeryPatient",
{
"and": [
"canBePatient",
{
"ammo": {
"type": "Super",
"count": 1
}
}
]
}
]
}
Exit condition: {
"leaveWithRunway": {
"length": 7,
"openEnd": 1
}
}
|
|
From: 1
Top Right Door
To: 1
Top Right Door
Wait 80 seconds for the Sova to get into position, then freeze it to bridge the gap and significantly extend the runway. The other Sovas can be farmed or used as a backup. Requires: "h_canFrozenEnemyRunway"
"canBePatient"
{
"heatFrames": 4800
}
Exit condition: {
"leaveWithRunway": {
"length": 10,
"openEnd": 1
}
}
|
|
From: 2
Middle Right Door
To: 2
Middle Right Door
Wait 3 minutes for the Sova to get into position, or 100 seconds with Morph by going ahead of them to break the shot blocks as they get there. This can be further reduced to 45 seconds with a Super by knocking a Sova off after it exits the morph tunnel. The other Sovas can be farmed or used as a backup. Requires: "h_canFrozenEnemyRunway"
{
"or": [
{
"and": [
"h_heatProof",
"canBeVeryPatient"
]
},
{
"and": [
"h_heatProof",
"canBePatient",
"Morph"
]
},
{
"and": [
{
"ammo": {
"type": "Super",
"count": 1
}
},
{
"heatFrames": 2600
}
]
}
]
}
Exit condition: {
"leaveWithRunway": {
"length": 4,
"openEnd": 1
}
}
|
|
Requires: "h_canCeilingBombJump" "canLongCeilingBombJump" "canBePatient" |
|
Requires: "h_canCeilingBombJump" "canLongCeilingBombJump" "canBePatient" |
|
From: 5
Small Platforms Junction
To: 3
Item
Lure a Mella from the right by breaking the speed blocks or using Morph. Then manipulate it to go high enough to be used as a stepping stone once frozen. Without movement items it may be necessary to continue manipulating it from above, jumping and aiming down to freeze it. Requires: "canUseFrozenEnemies"
"canManipulateMellas"
{
"or": [
{
"and": [
"canBePatient",
"canWalljump"
]
},
"canBeVeryPatient"
]
}
{
"or": [
{
"obstaclesCleared": [
"B"
]
},
"Morph"
]
}
|
|
Knock a Viola off of the middle platforms and ride it up the right wall by freezing it with Ice Beam. Requires: "canTrickyUseFrozenEnemies"
{
"ammo": {
"type": "Super",
"count": 1
}
}
"canBePatient"
|
|
From: 3
Bottom Right Door
To: 4
Top Door
Use a Super to knock a Viola off of the middle platforms and ride it up the right wall by freezing it with Ice Beam. Once it reaches the top door, use another Super to knock it off again, and freeze it mid-air. Use Morph and X-Ray to stand on top of it and clip up through the door shell above. Requires: {
"ammo": {
"type": "Super",
"count": 2
}
}
"canTrickyUseFrozenEnemies"
"h_canXRayCeilingClip"
"canBePatient"
Bypasses door shell: true |
|
Climb up 3 screens, then perform a turn-around spin jump to the left to reach the platform. Entrance condition: {
"comeInWithDoorStuckSetup": {}
}
Requires: "canBePatient" "canXRayClimb" |
|
From: 5
Golden Torizo (locked)
To: 8
Golden Torizo (unlocked)
Notable: true This strat requires much farming. It assumes a capacity of and starting with only 5 supers for five sessions of farming. A safe farming method is to face left while standing in the safe spot. Then fire straight up to shoot the orbs as they appear. Jump up while GT's beak is not open to collect the drops. Plasma allows all of the orbs to be broken at once. Grapple allows for more drops to be collected by shooting diagonally, and collecting the items using Grapple. Keep the number of current Missiles below 31 so that GT will be guaranteed to use the attack which creates drops. Firing Supers requires a very steady fire rate so that for every Super Missile caught by GT, the next 4 Supers do damage. Requires: "h_canNavigateHeatRooms"
"canTrickyJump"
"canBePatient"
{
"ammo": {
"type": "Super",
"count": 5
}
}
{
"or": [
{
"and": [
"Plasma",
{
"heatFrames": 3100
}
]
},
{
"and": [
"canPreciseGrapple",
{
"heatFrames": 3200
}
]
},
{
"heatFrames": 4500
}
]
}
Clears obstacles: f_DefeatedGoldenTorizo |
|
From: 3
Metal Pirates Junction
To: 3
Metal Pirates Junction
Uncharged Spazer does half damage. Requires: "h_heatProof"
"canDodgeWhileShooting"
{
"or": [
{
"and": [
"Spazer",
"canBeVeryPatient"
]
},
{
"and": [
"Charge",
"canBeVeryPatient"
]
},
{
"and": [
"Charge",
"Ice",
"canBePatient"
]
}
]
}
Clears obstacles: A |
|
From: 7
Junction At Middle Right Door With Bottom KiHunter Cleared
To: 5
Top Junction Between Doors
Requires: "h_heatProof"
"canBePatient"
{
"enemyKill": {
"enemies": [
[
"Kihunter (red)",
"Kihunter (red)"
]
]
}
}
|
|
From: 6
Bottom Platform Junction With Pirates Killed
To: 4
Junction Above Bomb Blocks
Requires: "h_canNavigateHeatRooms"
"h_canIBJ"
{
"or": [
{
"and": [
"canJumpIntoIBJ",
{
"heatFrames": 1460
}
]
},
{
"and": [
"canDoubleBombJump",
{
"heatFrames": 1000
}
]
},
{
"and": [
"canJumpIntoIBJ",
"canDoubleBombJump",
{
"heatFrames": 800
}
]
},
{
"heatFrames": 2000
}
]
}
{
"or": [
"h_canUsePowerBombs",
{
"and": [
"h_canBombAboveIBJ",
"canStaggeredIBJ",
{
"heatFrames": 180
}
]
},
{
"and": [
"h_heatProof",
"canBePatient"
]
},
{
"obstaclesCleared": [
"A"
]
}
]
}
Clears obstacles: A |
|
From: 1
Top Left Door
To: 4
Junction Above Bomb Block
Requires: "h_heatProof"
"canBePatient"
{
"enemyKill": {
"enemies": [
[
"Kihunter (red)",
"Kihunter (red)",
"Kihunter (red)"
]
]
}
}
Clears obstacles: A |
|
From: 4
Junction Above Bomb Block
To: 1
Top Left Door
Shoot them from below. It is possible for the KiHunters to fall through the gaps in the side, but is unlikely. Jumping may lower the camera position making it harder to shoot the KiHunters. But once it is lowered, jump to make them active and vulnerable to damage. Requires: "h_heatProof"
"canBePatient"
{
"enemyKill": {
"enemies": [
[
"Kihunter (red)",
"Kihunter (red)",
"Kihunter (red)"
]
]
}
}
{
"or": [
"h_canCrouchJumpDownGrab",
"canWalljump",
"HiJump",
"canSpringBallJumpMidAir",
"SpaceJump",
"h_canIBJ",
{
"and": [
"h_canSpringBallBombJump",
"h_additionalBomb",
"h_additionalBomb"
]
}
]
}
Clears obstacles: A |
|
From: 6
Junction Left of Power Bomb Blocks
To: 4
Junction Right of Power Bomb Blocks
Requires: "h_heatProof"
{
"or": [
"Charge",
"Spazer"
]
}
"canBePatient"
Clears obstacles: C, D |
|
From: 7
Junction Left of Morph Tunnel
To: 4
Junction Right of Power Bomb Blocks
Lure the Ground Hoppers to the Morph Tunnel The left ceiling Dessgeega can be safely killed above the Power Bomb statue. Requires: "h_heatProof" "canBePatient" "h_canUseMorphBombs" Clears obstacles: C, D |
|
Notable: true On room entry, place a Power Bomb to kill the Atomic and land on the Workrobot. Wait for the Workrobot to move across the room until it meets with a second robot. Depending on where the robots meet, either roll off and quickly roll under the Atomic, stay on for a second to try to lure the Atomic left a bit, or use a Power Bomb to kill it. Be careful not to hit any of the invisible, stationary lasers, and don't place any Power Bombs too close to the right wall or it will hit the bomb block and it will no longer be passable. Quickly use the camera scroll blocks just left of the bomb blocks, in order to overload PLMs and go through them before the Atomic hits Samus. Entrance condition: {
"comeInWithGMode": {
"mode": "any",
"morphed": true
}
}
Requires: "f_DefeatedPhantoon"
"canBePatient"
"h_canArtificialMorphPowerBomb"
{
"or": [
"canTrickyJump",
"h_canArtificialMorphPowerBomb"
]
}
|
|
From: 2
Item (Behind the Bomb Wall) (locked)
To: 1
Left Door
Notable: true In R-Mode, kill the Coverns until there is Energy in Samus's Reserves. Get into the Morph tunnel and go to the far left. Wait for Coverns to damage Samus down until Reserves trigger, forcing a stand up and enabling her to escape. Note that it is required to break the bomb block above the Morph tunnel as well, in order to clip out. Requires: {
"obstaclesCleared": [
"A"
]
}
"canCeilingClip"
"canBePatient"
"Morph"
{
"or": [
"Ice",
"Wave",
"Spazer",
"Plasma",
"ScrewAttack"
]
}
|
|
Requires: "h_canCeilingBombJump" "canLongCeilingBombJump" "canBePatient" |
|
From: 1
Right Door
To: 2
Item (locked)
Entrance condition: {
"comeInWithGMode": {
"mode": "any",
"morphed": true
}
}
Requires: "h_canArtificialMorphCeilingBombJump" "canLongCeilingBombJump" "canBePatient" Clears obstacles: A |
|
Requires: "h_canCeilingBombJump" "canLongCeilingBombJump" "canBePatient" |
|
From: 7
Bottom Door
To: 3
Bottom Left Door
In R-Mode, kill the Coverns until there is Energy in Samus's Reserves. Get into the Morph tunnel and go to the far left. Wait for Coverns to damage Samus down until Reserves trigger, forcing a stand up and enabling her to shoot the shot blocks and escape. Entrance condition: {
"comeInWithRMode": {},
"comesThroughToilet": "any"
}
Requires: "Morph"
{
"not": "f_DefeatedPhantoon"
}
"canRiskPermanentLossOfAccess"
{
"or": [
"canBePatient",
"Plasma"
]
}
Clears obstacles: B |
|
From: 1
Top Left Door
To: 1
Top Left Door
Follow the crab from the bottom right door to the top left door. This takes approximately 90 seconds. It is also possible to knock the crab off of the middle peak with a super and follow it to the left which may save time. Requires: "Gravity"
"canBePatient"
{
"or": [
"SpaceJump",
{
"and": [
{
"ammo": {
"type": "Super",
"count": 1
}
},
{
"or": [
"HiJump",
"canSpringBallJumpMidAir",
"canGravityJump",
"canConsecutiveWalljump",
"SpeedBooster"
]
}
]
}
]
}
Exit condition: {
"leaveWithGModeSetup": {}
}
|
|
From: 1
Top Left Door
To: 1
Top Left Door
Follow the crab from the bottom right door to the top left door. This takes approximately 90 seconds. It is also possible to knock the crab off of the middle peak with a super and follow it to the left which may save time. Requires: "h_canFrozenEnemyRunway"
"Gravity"
"canBePatient"
{
"or": [
"SpaceJump",
{
"and": [
{
"ammo": {
"type": "Super",
"count": 1
}
},
{
"or": [
"HiJump",
"canSpringBallJumpMidAir",
"canGravityJump",
"canConsecutiveWalljump",
"SpeedBooster"
]
}
]
}
]
}
Exit condition: {
"leaveWithRunway": {
"length": 4,
"openEnd": 0
}
}
|
|
From: 9
Junction Below Top Door
To: 1
Middle Left Door
Notable: true Use two snails to perform an 'Enemy Stuck Moonfall' to bypass the bomb blocks above the middle left door of Aqueduct. Position one snail on the above door shell, and the second above the corner of pipe below Samus will clip through the lower snail, taking damage, then continue through a segment of pipe where the crumble blocks can be reached. Facing both snails during the moonfall while positioning Samus for the clip can be precise Depending on the exact heights of the snails, it may be necessary to pose change while clipping. Requires: "h_canNavigateUnderwater"
"canEnemyStuckMoonfall"
"canBePatient"
{
"enemyDamage": {
"enemy": "Yard",
"type": "contact",
"hits": 1
}
}
|
|
The Global crab in the upper section can be knocked off the wall to enter the left side of the above door. Otherwise, there are more crabs in the lower section of the room. Requires: "canUpwardGModeSetup"
"canTrickyUseFrozenEnemies"
{
"or": [
{
"ammo": {
"type": "Super",
"count": 1
}
},
"Gravity",
{
"and": [
"canSuitlessMaridia",
{
"or": [
"HiJump",
"canBePatient"
]
}
]
}
]
}
Exit condition: {
"leaveWithGModeSetup": {}
}
|
|
Climb up 2.5 screens. Stop when about half of Samus (or less) is visible at the top of the screen. Turn-around a couple times to move to the right, to get close to falling out. Then perform a buffered spin-jump while turning around to the right, to make it onto the platform. The Choot will be safely off-camera and will not hit Samus while passing through it. Entrance condition: {
"comeInWithGMode": {
"mode": "direct",
"morphed": false
}
}
Requires: "canXRayClimb" "canBePatient" "canOffScreenMovement" |
|
From: 1
Bottom Left Door
To: 2
Top Right Door
Climb up 2.5 screens. Stop when about half of Samus (or less) is visible at the top of the screen. Turn-around a couple times to move to the right, to get close to falling out. Then perform a buffered spin-jump while turning around to the right, to make it onto the platform. The Choot will be safely off-camera and will not hit Samus while passing through it. Entrance condition: {
"comeInWithDoorStuckSetup": {}
}
Requires: "canShinesparkDeepStuck"
{
"shinespark": {
"frames": 1,
"excessFrames": 1
}
}
"canXRayClimb"
"canBePatient"
"canOffScreenMovement"
|
|
Climb up 2.5 screens. Entrance condition: {
"comeInWithDoorStuckSetup": {}
}
Requires: "canXRayClimb" "canBePatient" |
|
Requires: "canBePatient"
{
"resetRoom": {
"nodes": [
3
],
"mustStayPut": false
}
}
{
"refill": [
"Energy",
"Missile",
"Super"
]
}
|
|
It takes between 1-2 minutes for the Puyos to wake up and get to the doorway. Requires: "canBePatient"
{
"enemyDamage": {
"enemy": "Puyo",
"type": "contact",
"hits": 1
}
}
|
|
It takes between 1-2 minutes for the Puyos to wake up and get to the doorway. Requires: "canBePatient" Exit condition: {
"leaveWithGModeSetup": {}
}
|
|
Requires: "canBePatient"
{
"or": [
"canDodgeWhileShooting",
"Charge",
"Ice"
]
}
{
"resetRoom": {
"nodes": [
1
],
"mustStayPut": false
}
}
{
"refill": [
"Super",
"PowerBomb"
]
}
|
|
Requires: {
"or": [
"h_hasBeamUpgrade",
"canDodgeWhileShooting",
"Grapple",
"ScrewAttack",
"canBePatient",
{
"resourceCapacity": [
{
"type": "Missile",
"count": 1
}
]
},
"h_canUsePowerBombs"
]
}
|
|
Requires: {
"or": [
"h_hasBeamUpgrade",
"canDodgeWhileShooting",
"Grapple",
"ScrewAttack",
"canBePatient",
{
"resourceCapacity": [
{
"type": "Missile",
"count": 1
}
]
},
"h_canUsePowerBombs"
]
}
|
|
Requires: "canBePatient"
{
"or": [
"canDodgeWhileShooting",
"Charge",
"Ice"
]
}
{
"resetRoom": {
"nodes": [
2
],
"mustStayPut": false
}
}
{
"refill": [
"Super",
"PowerBomb"
]
}
|
|
From: 1
West Leg Left Door
To: 2
East Leg Right Door
This climb is from the left side of the left room, the room with the breakable grapple block. Climb up 3 screens. Entrance condition: {
"comeInWithDoorStuckSetup": {}
}
Requires: "canXRayClimb" "canBePatient" |
|
From: 3
West Leg Right Door
To: 2
East Leg Right Door
This climb is right side of the left room - the room with the breakable grapple block. Climb up 3 screens. Entrance condition: {
"comeInWithDoorStuckSetup": {}
}
Requires: "canXRayClimb" "canBePatient" |
|
This takes 1 min 40 sec if Shaktool is done digging. Requires: {
"enemyDamage": {
"enemy": "Shaktool",
"type": "contact",
"hits": 1
}
}
{
"or": [
"canBePatient",
{
"and": [
"canRiskPermanentLossOfAccess",
{
"not": "f_ShaktoolDoneDigging"
}
]
}
]
}
|
|
Entrance condition: {
"comeInWithGMode": {
"mode": "any",
"morphed": true
}
}
Requires: "f_KilledMetroidRoom1" "h_canArtificialMorphCeilingBombJump" "canLongCeilingBombJump" "canBePatient" |
|
Run from or Roll under the pirate lazers. The Pirates will also not shoot if they come on screen while Samus is crouched. Requires: {
"or": [
"HiJump",
"canWalljump",
"h_canFly"
]
}
{
  "or": [
    {
      "and": [
        "canDodgeWhileShooting",
        "canCameraManip",
        {
          "or": [
            "Plasma",
            {
              "and": [
                "h_hasBeamUpgrade",
                "canBePatient"
              ]
            },
            "canBeVeryPatient"
          ]
        }
      ]
    },
    {
      "and": [
        {
          "or": [
            "canBePatient",
            {
              "enemyDamage": {
                "enemy": "Tourian Space Pirate (all)",
                "type": "contact",
                "hits": 1
              }
            }
          ]
        },
        {
          "or": [
            "Morph",
            "canTurnaroundAimCancel",
            "canXRayTurnaround"
          ]
        }
      ]
    }
  ]
}
|
|
Run from or Roll under the pirate lazers. The Pirates will also not shoot if they come on screen while Samus is crouched. Requires: {
"or": [
{
"and": [
"canDodgeWhileShooting",
"canCameraManip",
{
"or": [
"Plasma",
{
"and": [
"h_hasBeamUpgrade",
"canBePatient"
]
},
"canBeVeryPatient"
]
}
]
},
{
"and": [
{
"or": [
"canBePatient",
{
"enemyDamage": {
"enemy": "Tourian Space Pirate (all)",
"type": "contact",
"hits": 1
}
}
]
},
{
"or": [
"Morph",
"canTurnaroundAimCancel",
"canXRayTurnaround"
]
}
]
}
]
}
|
|
Requires: {
"canShineCharge": {
"usedTiles": 33,
"openEnd": 2
}
}
{
"or": [
{
"enemyDamage": {
"enemy": "Tourian Space Pirate (all)",
"type": "contact",
"hits": 1
}
},
{
"and": [
"Plasma",
"canHitbox"
]
},
"Morph",
"ScrewAttack",
{
"and": [
"canDodgeWhileShooting",
"canCameraManip",
{
"or": [
"h_hasBeamUpgrade",
"canBePatient"
]
}
]
}
]
}
Exit condition: {
"leaveShinecharged": {
"framesRemaining": 120
}
}
|
.png)
.gif)
