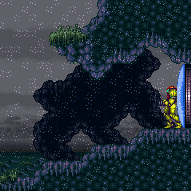
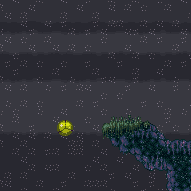
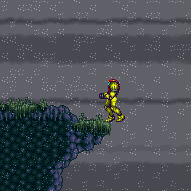
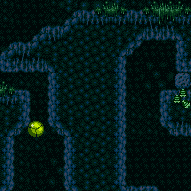
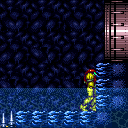
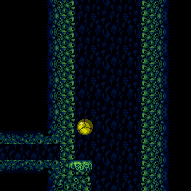
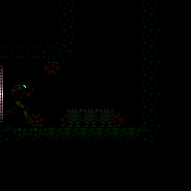
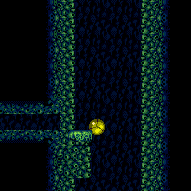
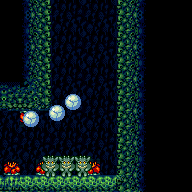
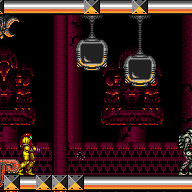
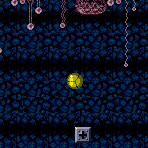
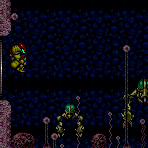
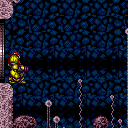
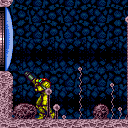
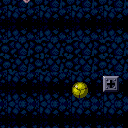
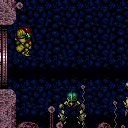
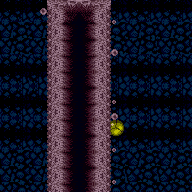
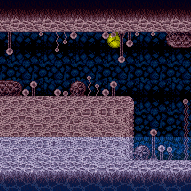
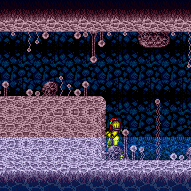
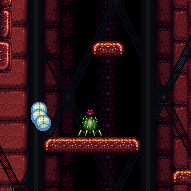
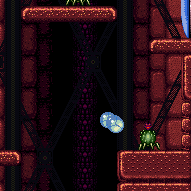
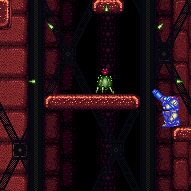
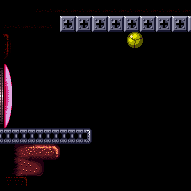
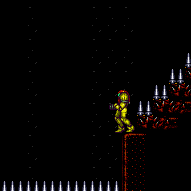
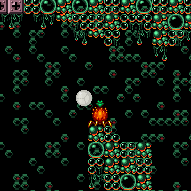
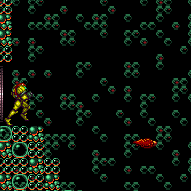
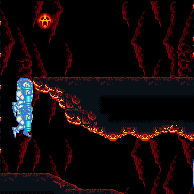
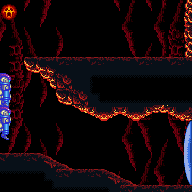
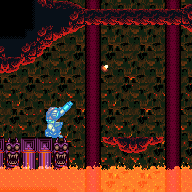
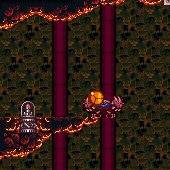
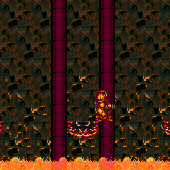
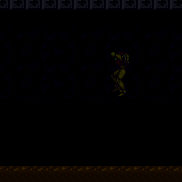
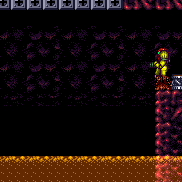
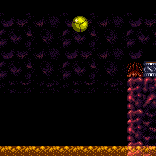
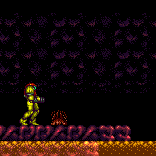
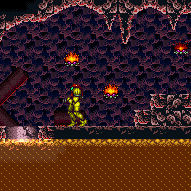
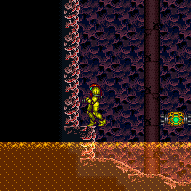
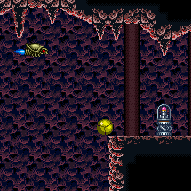
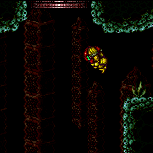
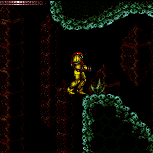
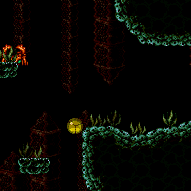
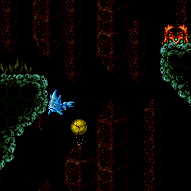
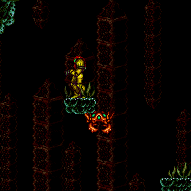
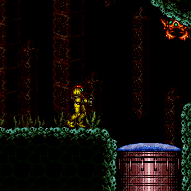
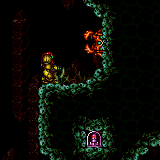
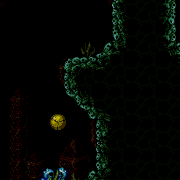
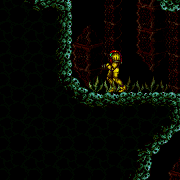
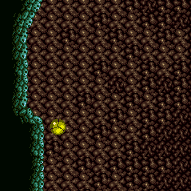
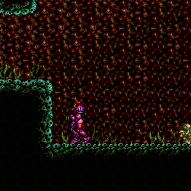
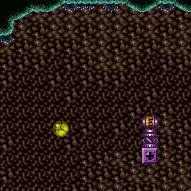
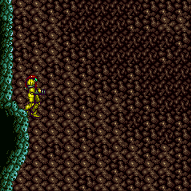
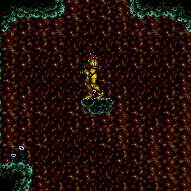
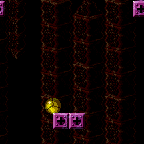
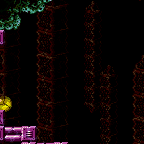
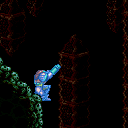
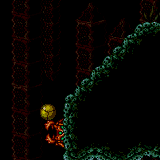
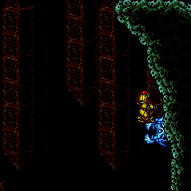
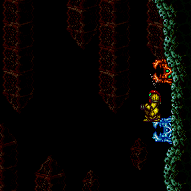
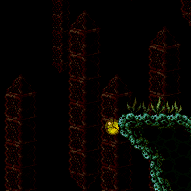
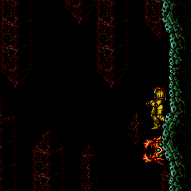
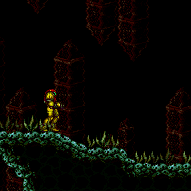
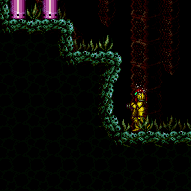
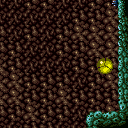
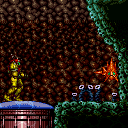
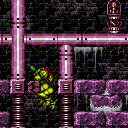
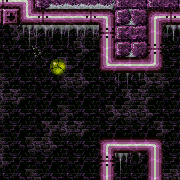
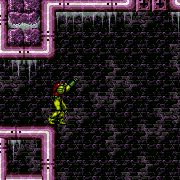
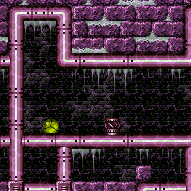
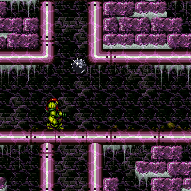
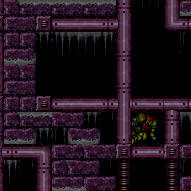
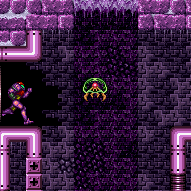
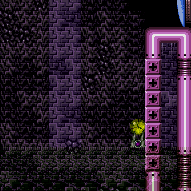
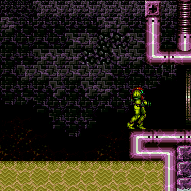
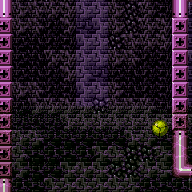
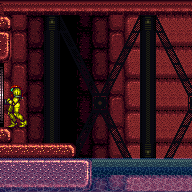
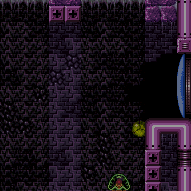
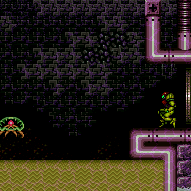
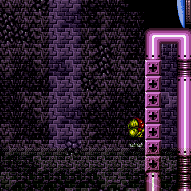
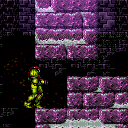
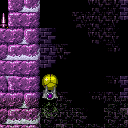
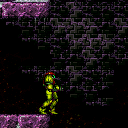
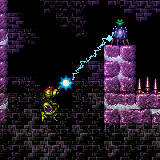
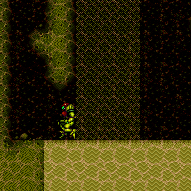
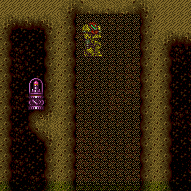
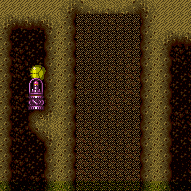
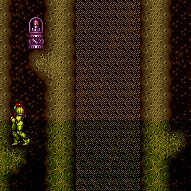
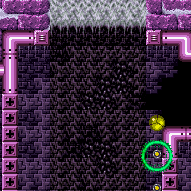
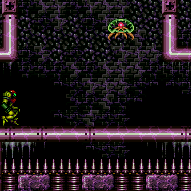
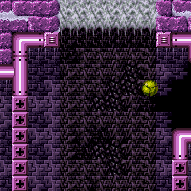
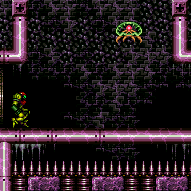
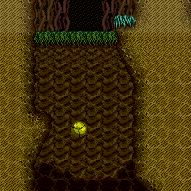
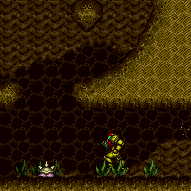
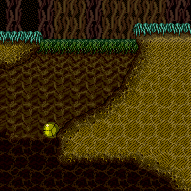
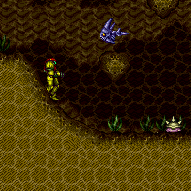
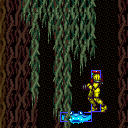
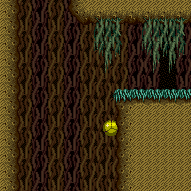
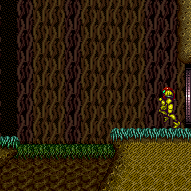
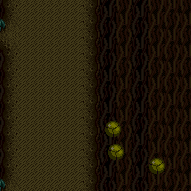
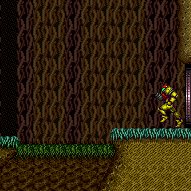
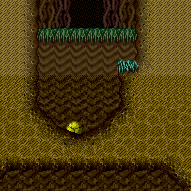
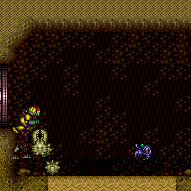
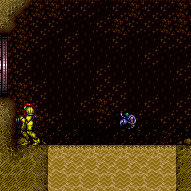
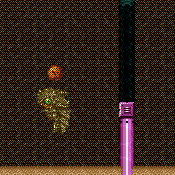
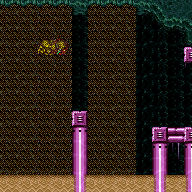
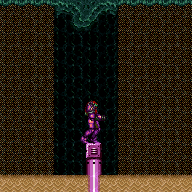
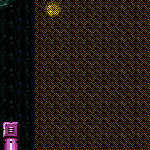
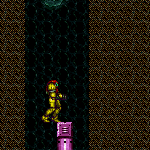
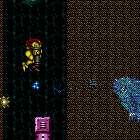
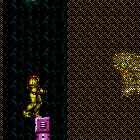
canTrickySpringBallJump (Hard)
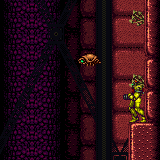
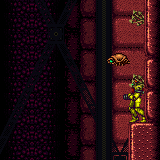
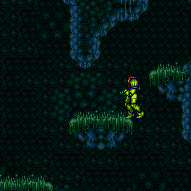
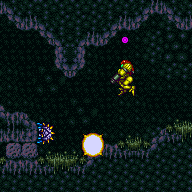
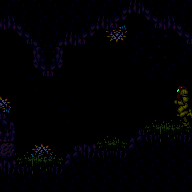
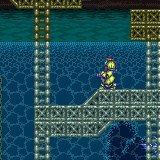
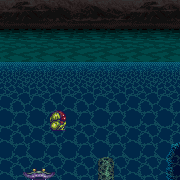
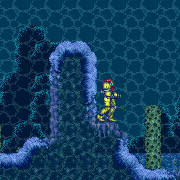
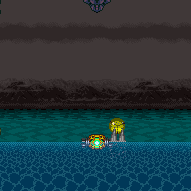
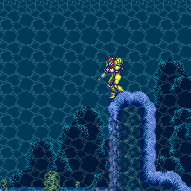
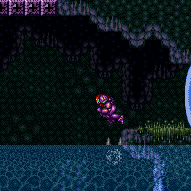
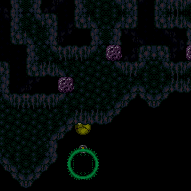
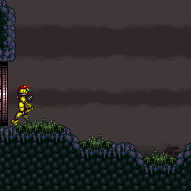
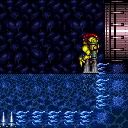
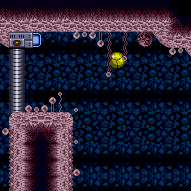
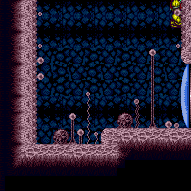
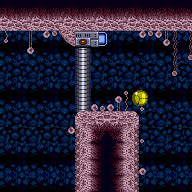
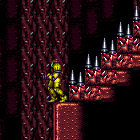
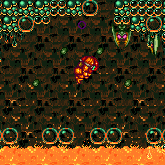
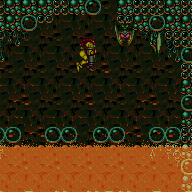
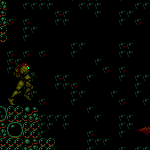
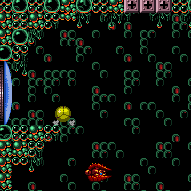
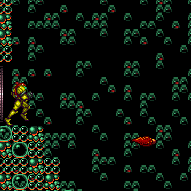
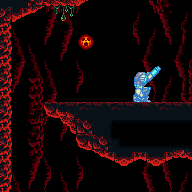
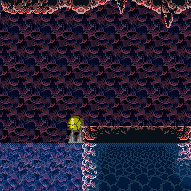
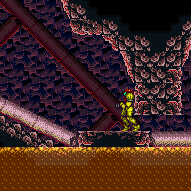
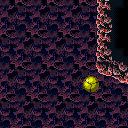
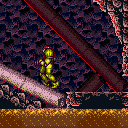
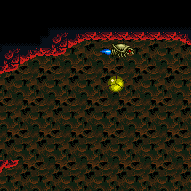
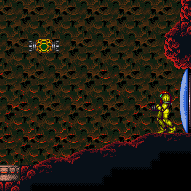
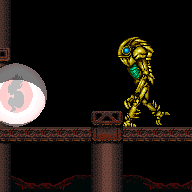
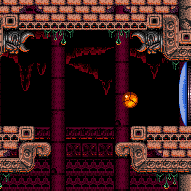
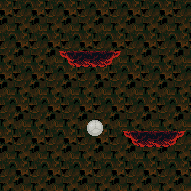
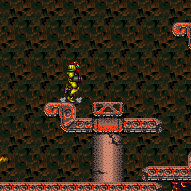
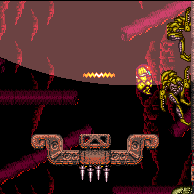
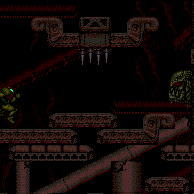
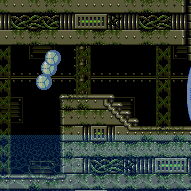
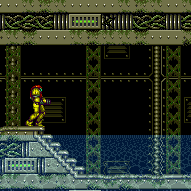
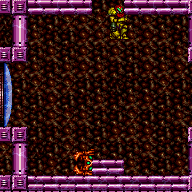
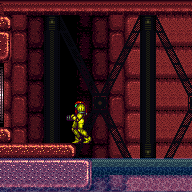
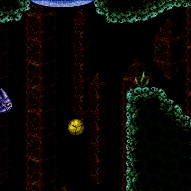
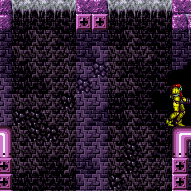
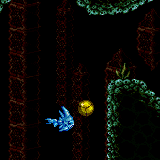
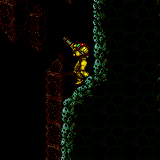
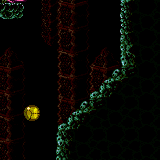
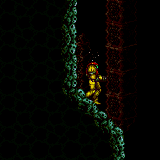
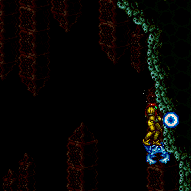
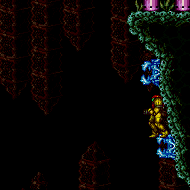
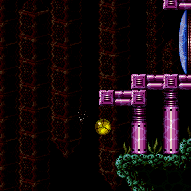
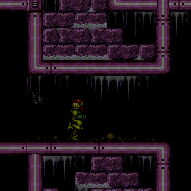
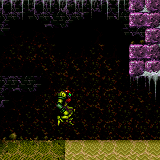
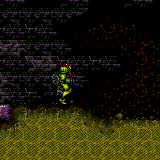
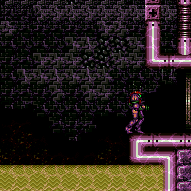
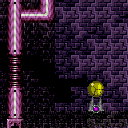
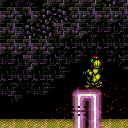
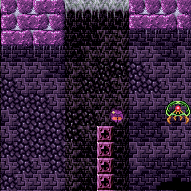
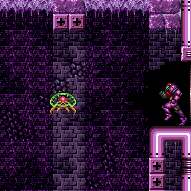
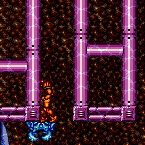
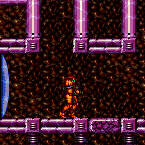
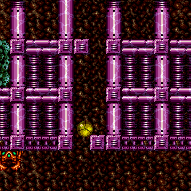
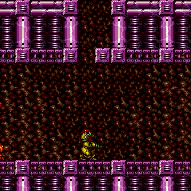
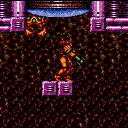
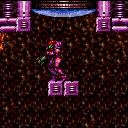
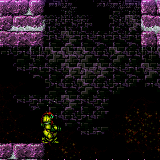
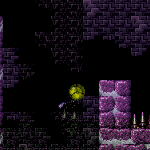
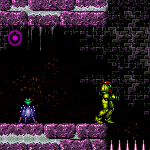
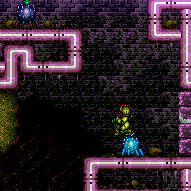
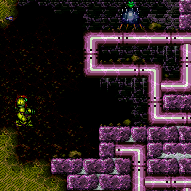
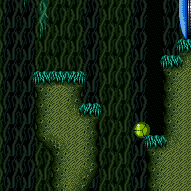
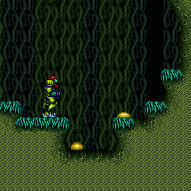
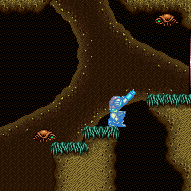
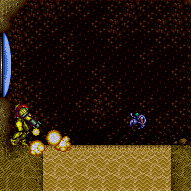
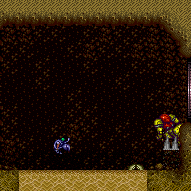
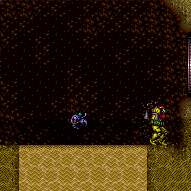
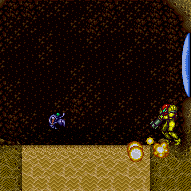
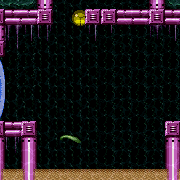
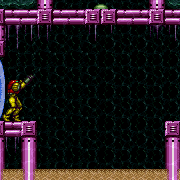
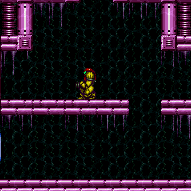
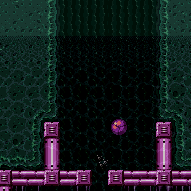
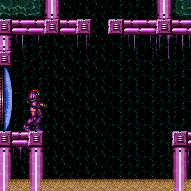
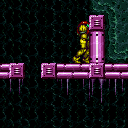
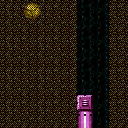
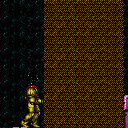
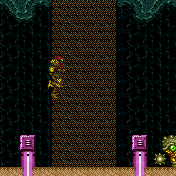
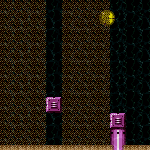
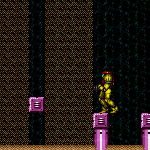
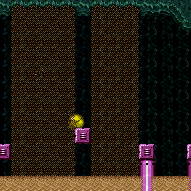
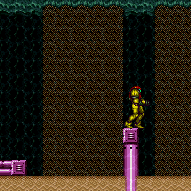
A precise, mid-air spring ball jump. This includes those with a relatively tight pause, jump, and morph, in order to spring ball jump just above shallow water. And those which require the jump input to be pressed near the peak of the jump, which cannot be done by buffering the jump out of the pause menu. To do this, pause as early as possible before jumping and morphing in order to have as much visibility as possible after equipping Spring Ball to time the second jump. This can also be used out of a Spring Wall or from a spin jump, in order to gain more horizontal distance before triggering the second jump. This, along with a crouch jump, is also needed in order to perform a maximum height spring ball jump. Maximum height jumps primarily have underwater applications, as it enables Samus to barely make it up 7 tiles vertically.
Dependencies: canTrivialMidAirMorph, canSpringBallJumpMidAir, canDisableEquipment, canMidAirMorph
Strats ()
Temporary Blue Chain Through Bomb Blocks Without X-Ray (Bottom Left to Bottom, Cross-Room)
(Extreme)
Climb
From: 2
Bottom Left Door
To: 4
Middle Right Door
A Temporary Blue Chain with movement assists to climb up and destroy the bomb blocks blocking the bottom morph tunnel. Entrance condition: {
"comeInShinecharging": {
"length": 14,
"openEnd": 0
}
}Requires: {
"notable": "Temporary Blue Chain Through Bomb Blocks"
}
"canChainTemporaryBlue"
{
"or": [
"HiJump",
"canTrickySpringBallJump"
]
}
"canTrickyJump"
"h_ClimbWithoutLava"Clears obstacles: A, B |
Temporary Blue Chain Through Bomb Blocks Without XRay (Bottom Left to Bottom, In-Room)
(Extreme)
Climb
From: 6
Main Junction
To: 4
Middle Right Door
A Temporary Blue Chain with movement assists to climb up and destroy the bomb blocks blocking the bottom morph tunnel. Requires: {
"notable": "Temporary Blue Chain Through Bomb Blocks"
}
{
"or": [
"HiJump",
"canTrickySpringBallJump"
]
}
{
"or": [
{
"canShineCharge": {
"usedTiles": 18,
"openEnd": 0
}
},
{
"and": [
{
"canShineCharge": {
"usedTiles": 19,
"openEnd": 0
}
},
{
"doorUnlockedAtNode": 2
}
]
}
]
}
"canChainTemporaryBlue"
"canTrickyJump"
{
"obstaclesCleared": [
"A"
]
}
{
"or": [
"h_ClimbWithoutLava",
{
"obstaclesNotCleared": [
"B"
]
}
]
}Unlocks doors: {"nodeId":2,"types":["ammo"],"requires":[]} |
|
From the right door, run and jump while on the dirt mound directly right of the ship. Then SpringBall Jump to reach the Bomb blocks leading to the top left door. Requires: "HiJump" "h_getBlueSpeedMaxRunway" "h_blueJump" "canLateralMidAirMorph" "canTrickySpringBallJump" |
|
Requires: "canSpeedyJump" "HiJump" "canTrickySpringBallJump" |
From: 5
Alcatraz Door
To: 8
Central Junction
This requires a nearly max-height Spring Ball jump While also moving horizontally a precise distance. It is easiest with a turnaround spin jump, but can also be done with a running spin jump into a spring ball jump, starting from the floating platform. Requires: "canTrickySpringBallJump" "canTrickyJump" |
|
Requires: "h_ZebesIsAwake"
{
"cycleFrames": 1860
}
{
"or": [
{
"resetRoom": {
"nodes": [
3,
4,
6,
7
]
}
},
{
"and": [
{
"resetRoom": {
"nodes": [
1
]
}
},
{
"cycleFrames": 420
},
{
"or": [
"ScrewAttack",
"h_useMorphBombs",
{
"and": [
{
"getBlueSpeed": {
"usedTiles": 25,
"steepUpTiles": 3,
"steepDownTiles": 3,
"openEnd": 1
}
},
"canCarefulJump",
"h_blueJump"
]
}
]
}
]
},
{
"and": [
{
"resetRoom": {
"nodes": [
2
]
}
},
{
"cycleFrames": 240
},
"Morph"
]
},
{
"and": [
"Morph",
{
"resetRoom": {
"nodes": [
5
]
}
},
{
"cycleFrames": 420
},
{
"or": [
"h_bombThings",
{
"and": [
"SpaceJump",
"canMidAirMorph",
"canCarefulJump"
]
},
{
"and": [
{
"notable": "Alcatraz Escape"
},
"canPreciseWallJump",
"canConsecutiveWallJump",
"canWallJumpInstantMorph"
]
},
{
"and": [
"canTrickySpringBallJump",
"canTrickyJump"
]
},
{
"and": [
"HiJump",
"canTrickyDashJump",
"canMidAirMorph"
]
}
]
}
]
}
]
}Resets obstacles: R-Mode Farm cycle drops: 11 Geemer (blue) Dev note: A two-way farming strat could be added, e.g. if it is possible to reset the room at both the top-right and the bottom. |
|
Requires: "canSuitlessMaridia" "canTrickySpringBallJump" |
From: 4
Junction (Right side Pit)
To: 2
Right Door
Freeze the Choot when it swings right on its jump. Quickly get on top of it by first getting onto the pillar to the left, or with a Spring Ball jump. Perform a precise spring ball jump to get to the far right ledge, while avoiding hitting the water surface. While on the ledge, stand on the raised ground to the right and jump to the surface, then space jump across the water to the left. Requires: "canTrickyUseFrozenEnemies"
"canTrickySpringBallJump"
{
"or": [
{
"and": [
"canResetFallSpeed",
"canTrickyJump"
]
},
"canStationaryLateralMidAirMorph",
"canSpringFling"
]
}
"canSpaceJumpWaterBounce"
"canWallJump" |
From: 4
Junction (Right side Pit)
To: 2
Right Door
In the center of the room, freeze the Skultera at the highest point in its cycle. Then use a max height Spring Ball jump to escape the water and land on the above platform. Use spacejump to continue to the door. Requires: "canSuitlessMaridia" "canUseFrozenEnemies" "h_underwaterMaxHeightSpringBallJump" "SpaceJump" |
|
Stand on the edge of the ledge below the door and Spring Ball jump up. This requires a quick morph and an early pause in order to fully pause before breaking the waterline and starting to fall. A crouch jump is not helpful here as it just gets Samus to the air sooner, where she will start to fall. Requires: "canSuitlessMaridia" "HiJump" "canTrickySpringBallJump" |
From: 4
Junction (Right side Pit)
To: 2
Right Door
Requires: "canSuitlessMaridia"
{
"or": [
{
"and": [
"HiJump",
"canSpringBallJumpMidAir"
]
},
{
"and": [
"HiJump",
"canTrickyUseFrozenEnemies"
]
},
{
"and": [
"canTrickyUseFrozenEnemies",
"canTrickySpringBallJump",
{
"or": [
"canResetFallSpeed",
"canStationaryLateralMidAirMorph",
"canSpringFling"
]
}
]
}
]
}
"h_storedSpark"
{
"shinespark": {
"frames": 11,
"excessFrames": 5
}
} |
|
Requires: "Gravity"
{
"or": [
{
"and": [
"canTrickySpringBallJump",
{
"or": [
"canLateralMidAirMorph",
"canTrickyJump"
]
}
]
},
{
"and": [
"HiJump",
"canWallJump",
{
"or": [
"canDash",
"canTrickyJump"
]
}
]
},
{
"and": [
"HiJump",
"canSpringBallJumpMidAir"
]
},
{
"and": [
"HiJump",
"canSpeedyJump"
]
}
]
}
{
"obstaclesNotCleared": [
"A",
"B",
"C"
]
} |
From: 17
G-Mode Morph Junction Direct (By Left Door)
To: 1
Lower Section - Bottom Left Door
To overload the PLMs, place a Power Bomb precisely to the right of the bottom of the second overhang above the bottom left door. This is at the max jump height without HiJump. Placing the Power Bomb higher or lower will not overload the PLMs without many Power Bombs. Requires: "canPowerBombItemOverloadPLMs"
"canComplexGMode"
{
"notable": "G-mode Overload PLMs by Power Bombing Morph Maze Item"
}
"h_usePowerBomb"
{
"or": [
"SpaceJump",
"canLongIBJ",
{
"and": [
"canTrickyDashJump",
"canTrickySpringBallJump",
"HiJump"
]
}
]
}Collects items: 10 Dev note: This requires the item to not be collected, but there is no reason to do this without it being there, so there is no canRiskPermanentLossOfAccess. |
|
Requires: "canSuitlessMaridia" "canTrickySpringBallJump" |
|
It is possible to escape the water with a wall jump when the water is low, or a crouch jump and down grab when it is high. Requires: {
"doorUnlockedAtNode": 2
}
{
"or": [
"canDownGrab",
"canWallJump",
"Gravity",
"HiJump",
"canTrickySpringBallJump"
]
}Unlocks doors: {"types":["ammo"],"requires":[]}Dev note: The crouch jump is not actually necessary but helps slightly. It is also possible to use the crouch jump while maintaining the flash suit. |
From: 4
Above Power Bomb Blocks - Middle Left Door
To: 3
Above Power Bomb Blocks - Top Right Door
Entrance condition: {
"comeInShinecharging": {
"length": 3,
"openEnd": 0
}
}Requires: "canChainTemporaryBlue"
{
"or": [
"HiJump",
"canTrickySpringBallJump",
"canXRayTurnaround"
]
}Exit condition: {
"leaveWithTemporaryBlue": {}
}Unlocks doors: {"types":["ammo"],"requires":[]} |
From: 10
Right Etecoon Shaft - Bottom Left Door
To: 14
Right Etecoon Shaft - Wall Jump Checkpoint
With a runway of at least 12 tiles in the adjacent room, Samus should always be able to jump high enough if she jumps just before hitting the right wall. Entrance condition: {
"comeInRunning": {
"speedBooster": "yes",
"minTiles": 12
}
}Requires: "canSpeedyJump" "canTrickySpringBallJump" |
From: 10
Right Etecoon Shaft - Bottom Left Door
To: 14
Right Etecoon Shaft - Wall Jump Checkpoint
Run a precise distance, to hit a peak of the speed vs height graph. With Samus' back against the closed door, jump about a tile before hitting the right wall. Requires: "canTrickyDashJump" "canTrickySpringBallJump" |
From: 10
Right Etecoon Shaft - Bottom Left Door
To: 14
Right Etecoon Shaft - Wall Jump Checkpoint
Entrance condition: {
"comeInWithSidePlatform": {
"platforms": [
{
"minHeight": 2,
"maxHeight": 2,
"minTiles": 45,
"speedBooster": "yes",
"obstructions": [
[
1,
0
]
],
"requires": [],
"note": "Applies to Halfie Climb Room."
},
{
"minHeight": 3,
"maxHeight": 3,
"minTiles": 39.4375,
"speedBooster": "yes",
"obstructions": [
[
3,
2
]
],
"requires": [],
"note": "Applies to Metal Pirates Room.",
"detailNote": [
"This has a 2-frame window for the jump,",
"then a 1-frame or 2-frame window for the morph (after the transition), depending on the jump,",
"with a last-frame jump giving a 2-frame morph window."
]
}
]
}
}Requires: "canInsaneJump" "canMomentumConservingMorph" "canTrickySpringBallJump" Dev note: This strat is not very useful, since the in-room tricky dash jump into spring ball jump is easier. |
From: 1
Left Door
To: 3
Top Junction
Entrance condition: {
"comeInJumping": {
"speedBooster": "yes",
"minTiles": 7
}
}Requires: "canPrepareForNextRoom" "canTrickySpringBallJump" "canSpeedyJump" |
From: 1
Left Door
To: 3
Top Junction
Perform a very precise Spring Ball jump from the door frame onto the Grapple block. It helps but is not required to use a running spin jump or crouch jump. Requires: {
"doorUnlockedAtNode": 1
}
"canTrickySpringBallJump"
"canTrickyJump"
{
"obstaclesCleared": [
"A"
]
}
{
"obstaclesNotCleared": [
"C"
]
}Dev note: FIXME: Direct G-Mode would have a usable door frame. |
From: 1
Left Door
To: 3
Top Junction
Perform a very precise Spring Ball jump through the transition and onto the Grapple block. A running spin jump or crouch jump can be used. Entrance condition: {
"comeInJumping": {
"speedBooster": "no",
"minTiles": 0.4375
}
}Requires: "canPrepareForNextRoom" "canTrickySpringBallJump" "canTrickyJump" |
From: 2
Right Door
To: 3
Top Junction
X-Ray climb until Samus is a little over halfway off screen; the position is not precise. Face right, then do a turnaround buffer spin jump into a Spring Ball jump to reach the ledge. The pause input can be pressed at the same time as the turnaround. It helps to do an airball to gain horizontal speed. The jump input after pausing should not be buffered, in order to allow a little time for the spring fling horizontal speed to take effect. Entrance condition: {
"comeInWithDoorStuckSetup": {}
}Requires: "canXRayClimb" "canTrickyJump" "canLateralMidAirMorph" "canTrickySpringBallJump" "canSpringFling" |
From: 2
Right Door
To: 3
Top Junction
Entrance condition: {
"comeInWithSidePlatform": {
"platforms": [
{
"minHeight": 1,
"maxHeight": 1,
"minTiles": 16,
"speedBooster": "yes",
"obstructions": [
[
1,
0
]
],
"requires": [
"canTrickyDashJump"
],
"note": [
"This applies to Lava Dive Room"
],
"detailNote": [
"This needs extra run speed $2.0 or $2.1,",
"being sure to maintain forward momentum while performing the mid-air jump to boost its height."
]
},
{
"minHeight": 2,
"maxHeight": 2,
"minTiles": 9.4375,
"speedBooster": "yes",
"obstructions": [
[
1,
0
]
],
"requires": [
"canTrickyDashJump"
],
"note": [
"This applies to Shaktool Room, Tourian Hopper Room, and Bowling Alley (bottom)."
],
"detailNote": [
"This needs extra run speed $2.0 or $2.1,",
"being sure to maintain forward momentum while performing the mid-air jump to boost its height."
]
},
{
"minHeight": 2,
"maxHeight": 2,
"minTiles": 27.4375,
"speedBooster": "yes",
"obstructions": [
[
1,
0
]
],
"note": [
"This applies to Dust Torizo Room and Noob Bridge."
]
},
{
"minHeight": 3,
"maxHeight": 3,
"minTiles": 9.4375,
"speedBooster": "yes",
"obstructions": [
[
1,
0
]
],
"requires": [
"canTrickyDashJump"
],
"note": [
"This applies to Bomb Torizo Room, Pink Brinstar Wave Gate Room, Phantoon's Room, Fish Tank, Botwoon's Room, and Big Boy Room."
],
"detailNote": [
"This needs extra run speed $2.0 or $2.1,",
"being sure to maintain forward momentum while performing the mid-air jump to boost its height."
]
},
{
"minHeight": 3,
"maxHeight": 3,
"minTiles": 28.2472,
"speedBooster": "yes",
"obstructions": [
[
1,
0
]
],
"requires": [],
"note": [
"This applies to Double Chamber."
]
},
{
"minHeight": 1,
"maxHeight": 1,
"minTiles": 23.8731,
"speedBooster": "yes",
"obstructions": [
[
3,
0
]
],
"requires": [
"canMomentumConservingMorph"
],
"note": [
"This applies to Below Botwoon Energy Tank and Botwoon Energy Tank Room."
],
"detailNote": [
"This may be easier with a pause buffer and Gravity jump (though not required):",
"time a pause to hit just after jumping and aiming down,",
"then unequip Gravity and hold down during the unpause black screen to buffer the morph."
]
},
{
"minHeight": 2,
"maxHeight": 2,
"minTiles": 31,
"speedBooster": "yes",
"obstructions": [
[
3,
0
]
],
"requires": [
"canMomentumConservingMorph",
"canTrickyDashJump"
],
"note": [
"This applies to Metroid Room 1, Statues Hallway, and Baby Kraid Room."
],
"detailNote": [
"In Metroid Room 1, this requires extra run speed of $4.0 or $4.1;",
"in the other rooms, it is also possible to gain more speed."
]
},
{
"minHeight": 3,
"maxHeight": 3,
"minTiles": 21.4375,
"speedBooster": "yes",
"obstructions": [
[
3,
0
]
],
"requires": [
"canMomentumConservingMorph",
"canTrickyDashJump"
],
"note": [
"This applies to Draygon's Room, Blue Brinstar Energy Tank Room, Bowling Alley (middle, power off), and Basement (power on)."
],
"detailNote": [
"In Draygon's Room, this requires extra run speed of $4.0 or $4.1;",
"in the other rooms, it may also be possible to gain more speed."
]
},
{
"minHeight": 3,
"maxHeight": 3,
"minTiles": 39.4375,
"speedBooster": "yes",
"obstructions": [
[
3,
2
]
],
"note": [
"This applies to Metal Pirates Room."
]
},
{
"minHeight": 3,
"maxHeight": 3,
"minTiles": 45,
"speedBooster": "yes",
"obstructions": [
[
5,
0
]
],
"note": [
"This applies to Basement."
]
},
{
"minHeight": 3,
"maxHeight": 3,
"minTiles": 37.4375,
"speedBooster": "yes",
"obstructions": [
[
5,
2
]
],
"requires": [
"canMomentumConservingMorph"
],
"note": [
"This applies to Flyway."
]
}
]
}
}Requires: "canTrickySpringBallJump" Clears obstacles: B |
|
Entrance condition: {
"comeInRunning": {
"speedBooster": "yes",
"minTiles": 14
}
}Requires: "canSpeedyJump" "canTrickySpringBallJump" |
From: 2
Right Door
To: 3
Top Junction
Using exactly 2 runway tiles (with open end) in the other room, jump at the very end of the runway in-room. Entrance condition: {
"comeInRunning": {
"speedBooster": "yes",
"minTiles": 2
}
}Requires: "canTrickySpringBallJump" "canTrickyDashJump" |
|
Press pause slightly before jumping into morph, in order ensure Samus still has upward momentum when the pause fade-out finishes. Requires: "canSuitlessMaridia" "canTrickySpringBallJump" |
From: 3
Dry Platform Junction
To: 3
Dry Platform Junction
Requires: {
"or": [
"SpaceJump",
"canPreciseWallJump",
"canTrickySpringBallJump",
{
"and": [
"h_useSpringBall",
"canIBJ",
{
"tech": "canJumpIntoIBJ"
}
]
}
]
}
{
"canShineCharge": {
"usedTiles": 32,
"openEnd": 1
}
}
{
"or": [
{
"and": [
"h_enemyDrops",
"h_CrystalSparkWithoutLenience"
]
},
"h_CrystalSpark"
]
}Dev note: No lenience, because Power Bombs can be farmed from the Zeros. Only Includes methods to get to 3 quickly. FIXME: With a heated room and the vanilla 5 Energy from small drops, farming would not be possible without Varia, Gravity, or energy free shinesparks. |
|
Entrance condition: {
"comeInWithTemporaryBlue": {}
}Requires: {
"doorUnlockedAtNode": 1
}
"HiJump"
{
"or": [
"Gravity",
{
"and": [
"canTrickySpringBallJump",
"canDodgeWhileShooting",
"canLongChainTemporaryBlue",
{
"enemyKill": {
"enemies": [
[
"Yapping Maw"
]
],
"explicitWeapons": [
"Super"
]
}
}
]
}
]
}
"canChainTemporaryBlue"
"canXRayTurnaround"Unlocks doors: {"nodeId":1,"types":["ammo"],"requires":[]} |
From: 2
Middle Left Door
To: 1
Top Left Door
Entrance condition: {
"comeInShinecharging": {
"length": 7,
"openEnd": 0
}
}Requires: "canLongChainTemporaryBlue"
"canXRayTurnaround"
{
"or": [
"HiJump",
"canTrickySpringBallJump"
]
}Exit condition: {
"leaveWithTemporaryBlue": {}
}Unlocks doors: {"types":["ammo"],"requires":[]} |
From: 2
Middle Left Door
To: 4
Bottom Right Door
If the Cac moves left and is in the way, it can be killed with temp blue as Samus unmorphs to land. Otherwise, after landing, move quickly to jump up to the next platform, to avoid being hit by the Cac or its projectiles. Entrance condition: {
"comeInShinecharging": {
"length": 3,
"openEnd": 0
}
}Requires: "canChainTemporaryBlue" "canTrickySpringBallJump" Exit condition: {
"leaveWithTemporaryBlue": {}
}Unlocks doors: {"types":["ammo"],"requires":[]} |
From: 3
Bottom Left Door
To: 1
Top Left Door
Entrance condition: {
"comeInShinecharging": {
"length": 2,
"openEnd": 0
}
}Requires: "canLongChainTemporaryBlue"
"canXRayTurnaround"
{
"or": [
"HiJump",
"canTrickySpringBallJump"
]
}Exit condition: {
"leaveWithTemporaryBlue": {}
}Unlocks doors: {"types":["ammo"],"requires":[]} |
From: 3
Bottom Left Door
To: 4
Bottom Right Door
Entrance condition: {
"comeInShinecharging": {
"length": 2,
"openEnd": 0
}
}Requires: "canLongChainTemporaryBlue"
"canXRayTurnaround"
{
"or": [
"HiJump",
"canTrickySpringBallJump"
]
}Exit condition: {
"leaveWithTemporaryBlue": {}
}Unlocks doors: {"types":["ammo"],"requires":[]} |
From: 4
Bottom Right Door
To: 1
Top Left Door
Entrance condition: {
"comeInShinecharging": {
"length": 2,
"openEnd": 0
}
}Requires: "canChainTemporaryBlue"
{
"or": [
"HiJump",
"canTrickySpringBallJump"
]
}Exit condition: {
"leaveWithTemporaryBlue": {}
}Unlocks doors: {"types":["ammo"],"requires":[]} |
From: 2
Right Door
To: 3
Safe Block in the Middle of the Room
Crouch jump and Spring Ball near the peak of the jump to hit the side of the spikes and boost up onto them. This is also possible from standing on the spikes to avoid the crouch jump. With a very precise spring ball jump, it can also be done without a crouch jump. After getting up onto the spikes, take a second hit from the spikes, hold left, then face right, unmorph, and use either a horizontal damage boost or a couple of blue suit spike jumps to reach the safe platform. Requires: {
"or": [
{
"and": [
"h_maxHeightSpringBallJump",
"canNeutralDamageBoost"
]
},
{
"and": [
"canInsaneJump",
"canTrickySpringBallJump",
"canNeutralDamageBoost"
]
},
{
"and": [
{
"spikeHits": 1
},
"canTrickySpringBallJump",
"canTrickyJump",
"canNeutralDamageBoost"
]
}
]
}
{
"or": [
{
"and": [
{
"tech": "canHorizontalDamageBoost"
},
{
"noFlashSuit": {}
},
{
"spikeHits": 3
}
]
},
{
"and": [
"canBlueSuitSpikeJump",
{
"spikeHits": 4
}
]
}
]
} |
From: 2
Right Door
To: 3
Safe Block in the Middle of the Room
Crouch jump and Spring Ball near the peak of the jump to hit the side of the spikes and boost up onto them. This is also possible with a springwall, or from standing on the spikes to avoid the crouch jump. With a very precise spring ball jump, it can also be done without a crouch jump. Requires: {
"noBlueSuit": {}
}
{
"or": [
"h_trickySpringwall",
{
"and": [
"h_maxHeightSpringBallJump",
"canNeutralDamageBoost"
]
},
{
"and": [
"canInsaneJump",
"canTrickySpringBallJump",
"canNeutralDamageBoost"
]
},
{
"and": [
{
"spikeHits": 1
},
"canTrickySpringBallJump",
"canTrickyJump",
"canNeutralDamageBoost"
]
}
]
}
{
"spikeHits": 1
} |
From: 4
Small Ledge Below Left Door
To: 1
Left Door
Requires: "HiJump"
"canSpringBallJumpMidAir"
{
"or": [
"canTrickySpringBallJump",
{
"and": [
"canUseIFrames",
{
"spikeHits": 1
}
]
}
]
} |
From: 4
Small Ledge Below Left Door
To: 1
Left Door
Spring Ball jump from the safe spot on the spikey stairs. Moving over far enough left before the peak of the jump is the trickiest part of the jump. There are multiple things which can help get further left: Perform a lateral morph to maintain Samus' horizontal momentum. Morphing and pausing quickly, then delay the Spring Ball jump until after getting a horizontal boost from equipping Spring Ball. Start with a short run and spin jump to move over more before morphing. It is possible to unequip Spring Ball to get a small Spring Fling, but it can be tricky to get any use out of it and it only helps a small amount. Requires: {
"notable": "Tricky Spring Ball Jump"
}
"canTrickyJump"
"canTrickySpringBallJump"
{
"or": [
"canLateralMidAirMorph",
"can4HighMidAirMorph"
]
} |
From: 7
Junction (Bottom of Room)
To: 6
Junction (Above Bottom Rippers)
Requires: "canTrickySpringBallJump"
{
"or": [
"canConsecutiveWallJump",
"HiJump",
{
"and": [
"canTrickyJump",
"canLateralMidAirMorph",
"canResetFallSpeed",
{
"or": [
{
"ammo": {
"type": "PowerBomb",
"count": 1
}
},
{
"ammo": {
"type": "Super",
"count": 1
}
},
{
"enemyDamage": {
"enemy": "Ripper",
"type": "contact",
"hits": 1
}
},
"canTrickyDodgeEnemies"
]
}
]
},
"canSpringFling"
]
}
{
"or": [
"canTrickyJump",
"canLateralMidAirMorph",
"canSpringwall"
]
} |
|
Enter the room with a Missile selected on auto-cancel, holding angle-up. Fire a Missile shot to kill the first Skree, then run right and immediately fire a beam shot to destroy the shot block. Run off the edge and down-grab onto the next platform. Run and jump directly up where the shot block used to be, moving quickly enough to dodge the Skree projectiles by going under them. Use a wall jump, HiJump, or a mid-air spring ball jump to make it up. Requires: "canDash"
"canAutoCancelWeapon"
{
"ammo": {
"type": "Missile",
"count": 1
}
}
"canTrickyDodgeEnemies"
"canInsaneJump"
{
"or": [
{
"and": [
"HiJump",
{
"heatFrames": 160
}
]
},
{
"and": [
"canWallJump",
{
"heatFrames": 180
}
]
},
{
"and": [
"canTrickySpringBallJump",
{
"heatFrames": 195
}
]
}
]
}Dev note: FIXME: this can be done without a Missile (only Power Beam) with only about 5 more heat frames. |
|
Shoot the Skree and shotblock from the door. While avoiding Skree projectiles, jump to the next bubble platform followed by jumping directly up where the shot block used to be, performing a mid-air spring ball jump to make it up to the ledge. Requires: "canDash"
"canTrickySpringBallJump"
"canTrickyJump"
{
"heatFrames": 240
} |
From: 2
Left Side - Top Middle Door
To: 1
Left Side - Top Door
Entrance condition: {
"comeInRunning": {
"speedBooster": "yes",
"minTiles": 15
}
}Requires: "canSpeedyJump"
"canTrickyJump"
"canTrickySpringBallJump"
"canNeutralDamageBoost"
{
"enemyDamage": {
"enemy": "Waver",
"type": "contact",
"hits": 1
}
} |
From: 2
Left Side - Top Middle Door
To: 1
Left Side - Top Door
Use 7 tiles from the adjacent runway then use Spring Ball at the peak of the jump and bounce off the Waver to get up onto the top left ledge. Entrance condition: {
"comeInRunning": {
"speedBooster": "yes",
"minTiles": 7
}
}Requires: "canTrickyDashJump"
"canTrickySpringBallJump"
"canNeutralDamageBoost"
{
"enemyDamage": {
"enemy": "Waver",
"type": "contact",
"hits": 1
}
} |
From: 2
Left Side - Top Middle Door
To: 7
Top Right Door
Entrance condition: {
"comeInRunning": {
"speedBooster": "yes",
"minTiles": 15
}
}Requires: "canSpeedyJump"
"canTrickyJump"
"canTrickySpringBallJump"
"canNeutralDamageBoost"
{
"enemyDamage": {
"enemy": "Cacatac",
"type": "contact",
"hits": 1
}
} |
From: 9
Main Junction
To: 1
Left Side - Top Door
Perform a very tight Spring Ball jump from the Save room door runway, starting from either a crouch or spin jump, then use Grapple to barely reach the ceiling blocks. Requires: {
"notable": "Tricky Spring Ball Jump with Grapple"
}
"canTrickySpringBallJump"
"canPreciseGrapple" |
|
Requires: "HiJump" "canTrickySpringBallJump" |
|
With Grapple, a running jump then single Grapple swing can be used before PLMs are overloaded, alternatively jump on the crumble blocks and Grapple the Ripper. Entrance condition: {
"comeInWithGMode": {
"mode": "indirect",
"morphed": false
}
}Requires: {
"or": [
"SpaceJump",
"canTrickySpringBallJump",
{
"and": [
"canWallJump",
{
"or": [
"canDash",
"HiJump",
{
"and": [
"canBlueSuitSpikeJump",
{
"spikeHits": 1
}
]
}
]
}
]
},
{
"and": [
"HiJump",
"canSpeedyJump"
]
},
{
"and": [
"canPreciseGrapple",
{
"or": [
"canDash",
"canUseEnemies",
"canInsaneJump"
]
}
]
}
]
}
"h_heatedGModeOpenDifferentDoor" |
Blue Cross-Room Jump, Leave With Temporary Blue (Speedy Jump, Spring Ball Jump)
(Extreme+)
Double Chamber
From: 2
Bottom Left Door
To: 1
Top Left Door
Entrance condition: {
"comeInGettingBlueSpeed": {
"length": 0,
"openEnd": 1,
"minExtraRunSpeed": "$2.0"
}
}Requires: "canSpeedyJump"
"canLateralMidAirMorph"
"canTrickySpringBallJump"
"canInsaneJump"
"canPauseRemorphTemporaryBlue"
"canXRayTurnaround"
{
"heatFrames": 440
}Exit condition: {
"leaveWithTemporaryBlue": {}
}Unlocks doors: {"types":["super","powerbomb"],"requires":[]}
{"types":["missiles"],"requires":[{"heatFrames":50}]} |
From: 2
Bottom Left Door
To: 1
Top Left Door
Spin jump into the room with at least 1 tile of run speed. Perform a lateral mid-air morph into a spring ball jump. Press against the left side of the first moving platform to gain enough height to get on top of it. Entrance condition: {
"comeInJumping": {
"speedBooster": "any",
"minTiles": 1
}
}Requires: "canPrepareForNextRoom"
"canLateralMidAirMorph"
"canTrickySpringBallJump"
"canTrickyJump"
{
"heatFrames": 160
} |
From: 2
Bottom Left Door
To: 1
Top Left Door
Requires: "canTrickySpringBallJump"
"canTrickyJump"
{
"doorUnlockedAtNode": 2
}
{
"heatFrames": 265
} |
|
It is possible to climb the left side of the room with SpeedBooster alone, with either a tricky dash jump or a vertical shinespark, then Grapple the Ripper or ceiling blocks. With Grapple, a running jump then single Grapple swing can be used before PLMs are overloaded, alternatively jump on the crumble blocks and Grapple the Ripper. Entrance condition: {
"comeInWithGMode": {
"mode": "indirect",
"morphed": false
}
}Requires: {
"or": [
"SpaceJump",
"canTrickySpringBallJump",
{
"and": [
"canWallJump",
{
"or": [
"canDash",
"HiJump",
{
"and": [
"canBlueSuitSpikeJump",
{
"spikeHits": 1
}
]
}
]
}
]
},
{
"and": [
"HiJump",
"canSpeedyJump"
]
},
{
"and": [
"canTrickyDashJump",
"canPreciseGrapple"
]
},
{
"and": [
"canPreciseGrapple",
{
"canShineCharge": {
"usedTiles": 28,
"gentleUpTiles": 3,
"gentleDownTiles": 3,
"openEnd": 0
}
},
{
"or": [
{
"shinespark": {
"frames": 18,
"excessFrames": 8
}
},
{
"and": [
"canSpeedyJump",
{
"shinespark": {
"frames": 16,
"excessFrames": 10
}
}
]
}
]
}
]
}
]
}
"h_heatedGModeOpenDifferentDoor" |
|
Spin jump into the room with at least 2 tiles of run speed. Perform a lateral mid-air morph into a spring ball jump. Land on the second moving platform. Entrance condition: {
"comeInJumping": {
"speedBooster": "any",
"minTiles": 2
}
}Requires: "canPrepareForNextRoom"
"canLateralMidAirMorph"
"canTrickySpringBallJump"
"canTrickyJump"
{
"heatFrames": 280
}
{
"or": [
{
"noFlashSuit": {}
},
"canComplexCarryFlashSuit",
"Ice",
"Wave",
"Spazer",
"Plasma",
{
"heatFrames": 300
}
]
}Clears obstacles: A |
|
Pause while crumble jumping, and quickly mid-air morph and equip Spring Ball, to obtain a boost in horizontal speed before mid-air Spring Ball jumping. Requires: "canCrumbleJump"
"canTrickySpringBallJump"
"canSpringFling"
"h_trickyToCarryFlashSuit"
{
"heatFrames": 270
}
{
"or": [
"canDash",
{
"and": [
{
"haveBlueSuit": {}
},
"canInsaneJump",
{
"heatFrames": 190
}
]
}
]
} |
|
Jump onto the crumble blocks to make them solid, then use them as a platform to cross the room. With Grapple, a running jump then single Grapple swing can be used before PLMs are overloaded, alternatively jump on the crumble blocks and Grapple the Ripper. Entrance condition: {
"comeInWithGMode": {
"mode": "any",
"morphed": false
}
}Requires: {
"or": [
"SpaceJump",
{
"and": [
"canStaggeredIBJ",
"canDoubleBombJump",
"canBombHorizontally"
]
},
{
"and": [
"canDash",
{
"or": [
"canTrickySpringBallJump",
"canInsaneWallJump",
{
"and": [
"HiJump",
"canWallJump"
]
},
{
"and": [
"HiJump",
"canSpeedyJump"
]
},
"h_IBJFromSpikes"
]
}
]
},
{
"and": [
"canPreciseGrapple",
{
"or": [
"canDash",
"canUseEnemies",
"canInsaneJump"
]
}
]
}
]
}
{
"heatFrames": 0
}Dev note: FIXME: some more of these options may be possible with a blue suit, with greater difficulty. |
|
Jump onto the crumble blocks to make them solid, then use them as a platform to cross the room. With Grapple, a running jump then single Grapple swing can be used before PLMs are overloaded, alternatively jump on the crumble blocks and Grapple the Ripper. In indirect G-mode, stand where the gate will spawn and exit G-mode to open the gate. In direct G-mode, overload PLMs by shooting the gate then position Samus a few pixels away from the gate to where upward diagonal shots go through it. Crouch then shoot diagonally and quickly exit G-mode (3-7 frames later) to open the gate on G-mode exit. Entrance condition: {
"comeInWithGMode": {
"mode": "any",
"morphed": false
}
}Requires: "canComplexGMode"
"h_heatedGMode"
{
"or": [
"SpaceJump",
{
"and": [
"canStaggeredIBJ",
"canDoubleBombJump",
"canBombHorizontally"
]
},
{
"and": [
"canDash",
{
"or": [
"canTrickySpringBallJump",
"canInsaneWallJump",
{
"and": [
"HiJump",
"canWallJump"
]
},
{
"and": [
"HiJump",
"canSpeedyJump"
]
},
"h_IBJFromSpikes"
]
}
]
},
{
"and": [
"canPreciseGrapple",
{
"or": [
"canDash",
"canUseEnemies",
"canInsaneJump"
]
}
]
}
]
}
{
"heatFrames": 35
}Clears obstacles: A Dev note: The canComplexGMode is only used here to describe opening the gate in direct G-mode without gate glitching. However, the indirect variant still requires canHeatedGMode or Varia - with Varia, indirect strats can instead be used to go to the top left door and return. FIXME: some more of these options may be possible with a blue suit, with greater difficulty. |
From: 3
Right Door
To: 6
G-Mode, Remote Acquire Junction (Bottom Right)
Jump onto the crumble blocks to make them solid, then use them as a platform to get to the item. With Grapple, a running jump then single Grapple swing can be used before PLMs are overloaded, alternatively jump on the crumble blocks and Grapple the Ripper. Avoid touching all 6 crumbles, so Samus can use the item to overload PLMs and go through one of the crumbles to get to the left side of the room. If the item has already been obtained, Samus can shoot the gate many times to overload PLMs. Entrance condition: {
"comeInWithGMode": {
"mode": "direct",
"morphed": false
}
}Requires: "canRemoteAcquire"
{
"or": [
"SpaceJump",
"canCeilingBombJump",
{
"and": [
"canBombHorizontally",
"canIBJ",
"h_usePowerBomb"
]
},
{
"and": [
"canStaggeredIBJ",
"canDoubleBombJump",
"canBombHorizontally"
]
},
{
"and": [
"canPreciseGrapple",
"canUseEnemies"
]
},
{
"and": [
"canDash",
{
"or": [
"canTrickySpringBallJump",
"canInsaneWallJump",
{
"and": [
"HiJump",
"canWallJump"
]
},
{
"and": [
"HiJump",
"canSpeedyJump"
]
},
"h_IBJFromSpikes"
]
}
]
}
]
}
{
"heatFrames": 0
} |
From: 3
Right Door
To: 7
G-Mode Junction (Bottom Right)
Jump onto the crumble blocks to make them solid, then use them as a platform to cross the room. With Grapple, a running jump then single Grapple swing can be used before PLMs are overloaded, alternatively jump on the crumble blocks and Grapple the Ripper. Entrance condition: {
"comeInWithGMode": {
"mode": "indirect",
"morphed": false
}
}Requires: "Morph"
{
"or": [
"SpaceJump",
"canCeilingBombJump",
{
"and": [
"canStaggeredIBJ",
"canDoubleBombJump",
"canBombHorizontally"
]
},
{
"and": [
"canBombHorizontally",
"canIBJ",
"h_usePowerBomb"
]
},
{
"and": [
"canDash",
{
"or": [
"canTrickySpringBallJump",
"canInsaneWallJump",
{
"and": [
"HiJump",
"canWallJump"
]
},
{
"and": [
"HiJump",
"canSpeedyJump"
]
},
"h_IBJFromSpikes"
]
}
]
},
{
"and": [
"canPreciseGrapple",
{
"or": [
"canDash",
"canUseEnemies",
"canInsaneJump"
]
}
]
}
]
}
{
"heatFrames": 0
}Dev note: With Grapple, Morph isn't needed, but there's no reason to go there without Morph. |
|
Pause while crumble jumping, and quickly mid-air morph and equip Spring Ball, to obtain a boost in horizontal speed before mid-air Spring Ball jumping. Requires: "canCrumbleJump"
"canTrickySpringBallJump"
"canSpringFling"
"canInsaneJump"
"h_trickyToCarryFlashSuit"
{
"heatFrames": 280
}
{
"or": [
"canDash",
{
"heatFrames": 80
}
]
}Dev note: Compared to the other direction, this direction requires traveling one more tile horizontally, which makes it more difficult. |
|
Note that the Geemers do much less damage than the Pirates Requires: {
"or": [
{
"enemyDamage": {
"enemy": "Red Space Pirate (standing)",
"type": "contact",
"hits": 3
}
},
{
"and": [
{
"enemyDamage": {
"enemy": "Geemer (grey)",
"type": "contact",
"hits": 3
}
},
{
"or": [
{
"and": [
"canCarefulJump",
"HiJump"
]
},
"canPreciseWallJump",
{
"and": [
"canDodgeWhileShooting",
"SpaceJump"
]
},
"canTrickySpringBallJump",
"canUseIFrames"
]
}
]
}
]
} |
From: 2
Left Shaft - Bottom Right Door
To: 1
Left Shaft - Top Left Door
Entrance condition: {
"comeInShinecharging": {
"length": 12,
"openEnd": 0,
"gentleUpTiles": 4
}
}Requires: "canXRayTurnaround"
"canLongChainTemporaryBlue"
{
"or": [
{
"and": [
"HiJump",
{
"heatFrames": 1220
}
]
},
{
"and": [
"canTrickySpringBallJump",
{
"heatFrames": 1440
}
]
}
]
}Exit condition: {
"leaveWithTemporaryBlue": {}
}Unlocks doors: {"types":["super","powerbomb"],"requires":[]}
{"types":["missiles"],"requires":[{"heatFrames":50}]} |
From: 2
Left Shaft - Bottom Right Door
To: 3
Left Shaft - Middle Right Door
Entrance condition: {
"comeInShinecharging": {
"length": 12,
"openEnd": 0,
"gentleUpTiles": 4
}
}Requires: "canXRayTurnaround"
"canLongChainTemporaryBlue"
{
"or": [
{
"and": [
"HiJump",
{
"heatFrames": 365
}
]
},
{
"and": [
"canTrickySpringBallJump",
{
"heatFrames": 380
}
]
}
]
}Exit condition: {
"leaveWithTemporaryBlue": {}
}Unlocks doors: {"types":["super","powerbomb"],"requires":[]}
{"types":["missiles"],"requires":[{"heatFrames":50}]} |
From: 2
Left Shaft - Bottom Right Door
To: 4
Left Shaft - Top Right Door
Entrance condition: {
"comeInShinecharging": {
"length": 12,
"openEnd": 0,
"gentleUpTiles": 4
}
}Requires: "canXRayTurnaround"
"canLongChainTemporaryBlue"
{
"or": [
{
"and": [
"HiJump",
{
"heatFrames": 700
}
]
},
{
"and": [
"canTrickySpringBallJump",
{
"heatFrames": 840
}
]
}
]
}Exit condition: {
"leaveWithTemporaryBlue": {}
}Unlocks doors: {"types":["super","powerbomb"],"requires":[]}
{"types":["missiles"],"requires":[{"heatFrames":50}]} |
From: 3
Left Shaft - Middle Right Door
To: 1
Left Shaft - Top Left Door
Entrance condition: {
"comeInGettingBlueSpeed": {
"length": 3,
"openEnd": 1,
"minExtraRunSpeed": "$2.0"
}
}Requires: "canXRayTurnaround"
"canLongChainTemporaryBlue"
{
"or": [
{
"and": [
"HiJump",
{
"heatFrames": 890
}
]
},
{
"and": [
"canTrickySpringBallJump",
{
"heatFrames": 1020
}
]
}
]
}Exit condition: {
"leaveWithTemporaryBlue": {}
}Unlocks doors: {"types":["super","powerbomb"],"requires":[]}
{"types":["missiles"],"requires":[{"heatFrames":50}]}Dev note: FIXME: This could be done with lower run speed, at the cost of more heat frames. |
From: 3
Left Shaft - Middle Right Door
To: 4
Left Shaft - Top Right Door
Entrance condition: {
"comeInGettingBlueSpeed": {
"length": 3,
"openEnd": 1,
"minExtraRunSpeed": "$2.0"
}
}Requires: "canXRayTurnaround"
"canLongChainTemporaryBlue"
{
"or": [
{
"and": [
"HiJump",
{
"heatFrames": 370
}
]
},
{
"and": [
"canTrickySpringBallJump",
{
"heatFrames": 380
}
]
}
]
}Exit condition: {
"leaveWithTemporaryBlue": {}
}Unlocks doors: {"types":["super","powerbomb"],"requires":[]}
{"types":["missiles"],"requires":[{"heatFrames":50}]}Dev note: FIXME: This could be done with lower run speed, at the cost of more heat frames. |
From: 4
Left Shaft - Top Right Door
To: 1
Left Shaft - Top Left Door
Entrance condition: {
"comeInGettingBlueSpeed": {
"length": 3,
"openEnd": 1,
"minExtraRunSpeed": "$2.0"
}
}Requires: "canXRayTurnaround"
"canLongChainTemporaryBlue"
{
"or": [
{
"and": [
"HiJump",
{
"heatFrames": 490
}
]
},
{
"and": [
"canTrickySpringBallJump",
{
"heatFrames": 580
}
]
}
]
}Exit condition: {
"leaveWithTemporaryBlue": {}
}Unlocks doors: {"types":["super","powerbomb"],"requires":[]}
{"types":["missiles"],"requires":[{"heatFrames":50}]}Dev note: FIXME: This could be done with lower run speed, at the cost of more heat frames. |
From: 2
Bottom Left Door
To: 1
Top Left Door
Entrance condition: {
"comeInShinecharging": {
"length": 4,
"openEnd": 0
}
}Requires: {
"or": [
"canXRayCancelShinecharge",
{
"heatFrames": 160
}
]
}
"canLongChainTemporaryBlue"
"canXRayTurnaround"
{
"or": [
{
"and": [
"HiJump",
{
"heatFrames": 690
}
]
},
{
"and": [
"canTrickySpringBallJump",
{
"heatFrames": 745
}
]
}
]
}Exit condition: {
"leaveWithTemporaryBlue": {}
}Unlocks doors: {"types":["super","powerbomb"],"requires":[]}
{"types":["missiles"],"requires":[{"heatFrames":50}]} |
From: 2
Bottom Left Door
To: 3
Top Right Door
Entrance condition: {
"comeInShinecharging": {
"length": 4,
"openEnd": 0
}
}Requires: {
"or": [
"canXRayCancelShinecharge",
{
"heatFrames": 160
}
]
}
"canLongChainTemporaryBlue"
{
"or": [
{
"and": [
"HiJump",
{
"heatFrames": 680
}
]
},
{
"and": [
"canTrickySpringBallJump",
"canXRayTurnaround",
{
"heatFrames": 775
}
]
}
]
}Exit condition: {
"leaveWithTemporaryBlue": {}
}Unlocks doors: {"types":["super","powerbomb"],"requires":[]}
{"types":["missiles"],"requires":[{"heatFrames":50}]} |
From: 5
Bottom Floating Platform Junction
To: 4
Top Floating Platform Junction
Bring up the Gamets to the platform above, in order to delay farming them. If not enough big energy drops spawn, go back down, farm up, and try again. Requires: "canFarmWhileShooting"
"canBePatient"
{
"or": [
"canWallJump",
{
"and": [
"HiJump",
"canCameraManip",
"canInsaneJump"
]
},
"SpaceJump",
"h_crouchJumpDownGrab",
"canTrickySpringBallJump",
{
"and": [
"h_useMorphBombs",
{
"tech": "canUnmorphBombBoost"
}
]
}
]
}
{
"heatFrames": 35
} |
|
Use mid-air Spring Ball jumps to manipulate the Geruta into position near the ledge. Then do a Spring Ball jump into a neutral damage boost (while still morphed) to reach the ledge. Requires: "canDash"
{
"notable": "Spring Ball Jump into Damage Boost"
}
{
"heatFrames": 1920
}
"canTrickyDodgeEnemies"
"canTrickySpringBallJump"
"canNeutralDamageBoost"
{
"enemyDamage": {
"enemy": "Geruta",
"type": "contact",
"hits": 1
}
} |
|
Requires: "canTrickySpringBallJump"
"canTrickyJump"
"can4HighMidAirMorph"
{
"acidFrames": 55
} |
From: 4
Central Junction
To: 2
Top Door
Requires: {
"or": [
{
"and": [
{
"or": [
"f_DefeatedCrocomire",
{
"obstaclesCleared": [
"f_DefeatedCrocomire"
]
}
]
},
{
"canShineCharge": {
"usedTiles": 40,
"openEnd": 1
}
}
]
},
{
"and": [
"canXRayTurnaround",
{
"canShineCharge": {
"usedTiles": 31,
"openEnd": 0
}
}
]
}
]
}
{
"or": [
"HiJump",
"canTrickySpringBallJump"
]
}
"canChainTemporaryBlue"Exit condition: {
"leaveWithTemporaryBlue": {
"direction": "left"
}
}Unlocks doors: {"types":["ammo"],"requires":[]} |
From: 4
Central Junction
To: 2
Top Door
Requires: {
"or": [
{
"canShineCharge": {
"usedTiles": 20,
"openEnd": 0
}
},
{
"and": [
{
"or": [
"f_DefeatedCrocomire",
{
"obstaclesCleared": [
"f_DefeatedCrocomire"
]
}
]
},
{
"canShineCharge": {
"usedTiles": 37,
"openEnd": 0
}
}
]
},
{
"and": [
"canXRayTurnaround",
{
"canShineCharge": {
"usedTiles": 31,
"openEnd": 0
}
}
]
}
]
}
{
"or": [
"HiJump",
"canTrickySpringBallJump"
]
}
"canChainTemporaryBlue"Exit condition: {
"leaveWithTemporaryBlue": {
"direction": "right"
}
}Unlocks doors: {"types":["ammo"],"requires":[]} |
|
Requires: {
"or": [
"f_DefeatedCrocomire",
{
"obstaclesCleared": [
"f_DefeatedCrocomire"
]
}
]
}
"canLateralMidAirMorph"
"can4HighMidAirMorph"
"canTrickySpringBallJump"
{
"acidFrames": 25
} |
|
Requires: {
"or": [
"f_DefeatedCrocomire",
{
"obstaclesCleared": [
"f_DefeatedCrocomire"
]
}
]
}
"can4HighMidAirMorph"
"canTrickySpringBallJump"
"canSpringFling"
{
"acidFrames": 50
} |
|
Starting from the second-highest platform on the left, run and jump into a mid-air Spring Ball jump. It helps but is not required to then unmorph to reset fall speed. Requires: "canTrickySpringBallJump" |
From: 1
Left Door
To: 4
Center Platform Junction
Requires: "canSuitlessMaridia" "HiJump" "h_underwaterMaxHeightSpringBallJump" |
|
Carefully swing between the Rippers at the top of the room to the item. The last two swings are the hardest Morphing and unmorphing to reset Samus's fall speed can help give a bit more time to position the Rippers. It can help to Grapple the same Ripper again to get it in a better position. Position the third Ripper far to the right then fling to the fourth, which is far to the right and very close to the ceiling. Moving the fourth Ripper to the right a bit can also help in order to make the last fling less precise. Be careful not to fling directly into the ceiling, as it is easy to hit the uneven surface and fall. If Samus falls, it may be helpful to reset the room. Requires: {
"notable": "Indiana Jones Grapple (With Retries)"
}
"canUseEnemies"
"canPreciseGrapple"
"h_midAirShootUp"
{
"or": [
{
"and": [
"canInsaneJump",
"h_trickyToCarryFlashSuit"
]
},
{
"enemyDamage": {
"enemy": "Ripper 2 (green)",
"type": "contact",
"hits": 4
}
}
]
}
{
"or": [
{
"and": [
"HiJump",
"canSpringBallJumpMidAir"
]
},
{
"and": [
"canSpeedyJump",
"HiJump",
"canTrickyWallJump"
]
},
"h_trickySpringwall"
]
} |
From: 2
Right Vertical Door
To: 1
Left Door
Requires: {
"obstaclesCleared": [
"A",
"B",
"E"
]
}
"canTrickySpringBallJump"
"canTrickySpringBallBounce"
"canInsaneJump"Exit condition: {
"leaveWithSpringBallBounce": {
"remoteRunway": {
"length": 45,
"openEnd": 1
},
"landingRunway": {
"length": 10,
"openEnd": 1
},
"minExtraRunSpeed": "$4.0",
"movementType": "controlled"
}
}Unlocks doors: {"types":["ammo"],"requires":[],"useImplicitRequires":false} |
From: 2
Right Vertical Door
To: 1
Left Door
Requires: {
"obstaclesCleared": [
"B",
"E"
]
}
"canSpeedyJump"
"canTrickySpringBallJump"
"canTrickySpringBallBounce"
"canInsaneJump"Exit condition: {
"leaveWithSpringBallBounce": {
"remoteRunway": {
"length": 32,
"openEnd": 1,
"gentleUpTiles": 6
},
"landingRunway": {
"length": 10,
"openEnd": 1
},
"minExtraRunSpeed": "$4.0",
"movementType": "controlled"
}
}Unlocks doors: {"types":["ammo"],"requires":[],"useImplicitRequires":false} |
From: 2
Right Vertical Door
To: 1
Left Door
Requires: {
"obstaclesCleared": [
"B",
"E"
]
}
{
"getBlueSpeed": {
"usedTiles": 32,
"gentleUpTiles": 6,
"openEnd": 1
}
}
{
"or": [
{
"and": [
"HiJump",
"canSpeedyJump"
]
},
"SpaceJump",
{
"and": [
"canTrickySpringBallJump",
"canPauseRemorphTemporaryBlue"
]
}
]
}
"canTrickyJump"
"canChainTemporaryBlue"Exit condition: {
"leaveWithTemporaryBlue": {}
}Unlocks doors: {"types":["ammo"],"requires":[],"useImplicitRequires":false} |
|
Requires: "canSpeedyJump"
{
"obstaclesCleared": [
"B"
]
}
{
"or": [
"HiJump",
{
"and": [
"canLateralMidAirMorph",
"canTrickySpringBallJump"
]
}
]
} |
|
Requires: "h_trickySpringwall" |
From: 5
Small Platforms Junction
To: 3
Item
Requires: "HiJump" "canTrickyDashJump" "canTrickySpringBallJump" |
|
A particularly precise springwall. Aim the walljump at the bottom of the second sloped wall fixture, where it looks like you cant jump off of. Optimize pause timing, use an instant morph, and get a max height springball jump. A delayed wall jump helps. Requires: {
"notable": "Springwall"
}
"HiJump"
"h_trickySpringwall"
"canPreciseWallJump"
"can3HighWallMidAirMorph" |
From: 3
Bottom Right Door
To: 1
Top Left Door
Run on the the moving platform into a midair spring ball jump as far horizontal as possible. Unmorph or spring fling to reset fall speed can help. Requires: "canTrickyJump"
"canTrickySpringBallJump"
{
"or": [
"canDash",
"canSpringFling"
]
} |
From: 2
Bottom Right Door
To: 3
Acid Chozo Statue
Gain a shinecharge and spark into the wall at the left side of the room to clip into it. From there, X-Ray climb to the top portion of the room (about 0.75 screens). Samus will be visible but off-camera, making the movement tricky. Only certain horizontal positions for the spark will work. There are periodic windows of approximately 4 good pixels followed by 8 bad pixels. Moonwalking back against the ledge below the door will put Samus into a good position. Being centered over this two-tile ledge is another position that works. Entrance condition: {
"comeInShinecharged": {}
}Requires: {
"shineChargeFrames": 35
}
{
"shinespark": {
"frames": 33,
"excessFrames": 0
}
}
"canShinesparkSlopeClip"
"canXRayClimb"
"canOffScreenMovement"
{
"or": [
"canPreciseWallJump",
"SpaceJump",
"HiJump",
"canTrickySpringBallJump"
]
}
{
"heatFrames": 970
} |
From: 2
Bottom Right Door
To: 3
Acid Chozo Statue
Gain a shinecharge and spark into the wall at the left side of the room to clip into it. From there, X-Ray climb to the top portion of the room (about 0.75 screens). Samus will be visible but off-camera, making the movement tricky. Only certain horizontal positions for the spark will work. There are periodic windows of approximately 4 good pixels followed by 8 bad pixels. Moonwalking back against the ledge below the door will put Samus into a good position. Being centered over this two-tile ledge is another position that works. Entrance condition: {
"comeInShinecharging": {
"length": 3,
"openEnd": 1
}
}Requires: {
"shinespark": {
"frames": 33,
"excessFrames": 0
}
}
"canShinesparkSlopeClip"
"canXRayClimb"
"canOffScreenMovement"
{
"or": [
"canPreciseWallJump",
"SpaceJump",
"HiJump",
"canTrickySpringBallJump"
]
}
{
"heatFrames": 970
} |
|
Use a Crystal Flash to refill reserve energy. If Golden Torizo is alive, perform the Crystal Flash in the left corner of the room; otherwise it can be done near the door. Then use heat damage to trigger an R-mode forced standup near the crumble blocks with upward momentum, in order to clip up through them. Several different combinations of items and techniques can make this possible: 1) Space Jump, with a mid-air morph (not required but makes it easier), 2) HiJump and a mid-air Spring Ball jump, most easily by equipping both HiJump and SpringBall during the pause, 3) A walljump into Spring Ball jump, equipping Spring Ball soon after the wall jump into order to gain horizontal speed before the mid-air jump. 4) HiJump and Speedbooster, running and jumping into a mid-air morph, In every case, precise timing is needed to be in the correct location when reserves trigger, just below the crumbles but without bonking them. Having less upward momentum can provide more lenience for timing the forced standup clip, though if Samus' momentum is not enough to make it onto the ledge then a crumble jump may also be required. Entrance condition: {
"comeInWithRMode": {}
}Requires: {
"notable": "R-Mode Forced Standup Clip"
}
"canRModeStandupClip"
{
"or": [
{
"or": [
"f_DefeatedGoldenTorizo",
{
"obstaclesCleared": [
"f_DefeatedGoldenTorizo"
]
}
]
},
{
"heatFrames": 100
}
]
}
"h_heatedCrystalFlash"
{
"or": [
{
"and": [
"SpaceJump",
"can4HighMidAirMorph"
]
},
{
"and": [
"HiJump",
"canSpringBallJumpMidAir"
]
},
{
"and": [
"HiJump",
"canSpeedyJump",
"canMidAirMorph",
"canCrumbleJump"
]
},
{
"and": [
"h_trickySpringwall",
"canCrumbleJump"
]
}
]
}
{
"resourceCapacity": [
{
"type": "RegularEnergy",
"count": 99
}
]
}
{
"autoReserveTrigger": {}
}
{
"heatFrames": 100
}Clears obstacles: door_2 Dev note: FIXME: A variant of this strat could go to the item node instead of the door, possibly with slightly different heat frames at the end. FIXME: As an alternative to doing a Crystal Flash, Golden Torizo could be used as a farm, with canRiskPermanentLossOfAccess. |
|
It may help to disable HiJump first and then re-equip it with the springball jump. Doing this, the springball jump may be buffered. Requires: {
"obstaclesCleared": [
"A"
]
}
"HiJump"
{
"doorUnlockedAtNode": 2
}
"canTrickySpringBallJump"
{
"or": [
"canLateralMidAirMorph",
"canSpringFling"
]
}
{
"heatFrames": 120
}Unlocks doors: {"nodeId":2,"types":["missiles"],"requires":[{"heatFrames":50}]}
{"nodeId":2,"types":["super"],"requires":[]}
{"nodeId":2,"types":["powerbomb"],"requires":[{"heatFrames":110}]} |
From: 1
Left Door
To: 2
Right Door
Cross the room while avoiding the pirate's stationary invisible lasers. On entry, fall to the right to land past the first pirate, then run and jump over the next pirate and continue to the top door. It is possible but precise to cross the room without any items or a wall jump by jumping from the slightly raised platform on the right. At the top, wait on the left platform to the pirate's right side - shoot to make it face Samus - and let it spawn invisible lasers to overload them. This will prevent the runway pirate from being able to create any, making it easy to kill while keeping the runway clear. Crystal Flash, drain in the acid if needed, then shinecharge. Stand in the acid, at the shallowest point. Crouch and jump into windup at low energy to interrupt. Buffer X-Ray and hold right during reserve refill and then leave the room. Entrance condition: {
"comeInWithGMode": {
"mode": "direct",
"morphed": false
}
}Requires: "canDash"
{
"or": [
"canWallJump",
"HiJump",
"SpaceJump",
"canTrickySpringBallJump",
"canInsaneJump",
{
"and": [
"Charge",
"canTrickyUseFrozenEnemies",
"Plasma",
"canTrickyJump"
]
}
]
}
{
"disableEquipment": "ETank"
}
"h_CrystalFlashForReserveEnergy"
{
"or": [
{
"enemyKill": {
"enemies": [
[
"Yellow Space Pirate (standing)"
]
]
}
},
{
"getBlueSpeed": {
"usedTiles": 17,
"gentleDownTiles": 6,
"openEnd": 0
}
}
]
}
{
"canShineCharge": {
"usedTiles": 19,
"gentleDownTiles": 6,
"openEnd": 1
}
}
{
"acidFrames": 4
}
{
"or": [
{
"and": [
"canReserveTriggerBufferXRay",
{
"autoReserveTrigger": {
"implicitHeatFrames": "no"
}
}
]
},
{
"autoReserveTrigger": {}
}
]
}
"canRModeSparkInterrupt"
{
"heatFrames": 116
} |
|
Requires: "canDash"
{
"obstaclesCleared": [
"A"
]
}
{
"or": [
"canCarefulJump",
"ScrewAttack",
{
"enemyDamage": {
"enemy": "Yellow Space Pirate (standing)",
"type": "laser",
"hits": 1
}
}
]
}
{
"or": [
{
"and": [
"canWallJump",
{
"heatFrames": 345
}
]
},
{
"and": [
"HiJump",
{
"heatFrames": 345
}
]
},
{
"and": [
"canWallJump",
"HiJump",
{
"heatFrames": 300
}
]
},
{
"and": [
"canTrickySpringBallJump",
{
"heatFrames": 345
}
]
},
{
"and": [
"canJumpIntoIBJ",
"canTrickyJump",
{
"heatFrames": 500
}
]
}
]
} |
From: 4
Junction Below Bomb Blocks
To: 2
Top Right Door
This is possible by jumping on the crumble blocks into a mid-air spring ball jump, or by avoiding them. The crumbles can be avoided by starting with either an air ball, a 3 tile high mid-air morph, or a low spring wall. These are generally safer, as bouncing on the crumble blocks with Spring Ball is trivial. Requires: {
"obstaclesCleared": [
"B"
]
}
"canDash"
"canTrickySpringBallJump"
{
"heatFrames": 250
}
{
"or": [
{
"and": [
"can4HighMidAirMorph",
"canSpringFling"
]
},
{
"and": [
"canLateralMidAirMorph",
"canTrickyJump"
]
},
"canCrumbleJump",
{
"and": [
"h_trickySpringwall",
"canPreciseWallJump"
]
}
]
} |
From: 2
Bottom Left Door
To: 4
Junction Above Bomb Blocks
Avoid the bottom Pirates and jump high enough to break the bomb blocks with a power bomb. During the explosion, climb the right wall passing through any Pirates and use a movement item to reach the top. Requires: {
"notable": "Power Bombs and a Jump Assist"
}
"canDash"
"canHitbox"
"h_usePowerBomb"
"canTrivialMidAirMorph"
{
"or": [
{
"and": [
"SpaceJump",
"canPreciseWallJump",
{
"heatFrames": 490
}
]
},
{
"and": [
"HiJump",
"canSpeedyJump",
"SpaceJump",
{
"heatFrames": 420
}
]
},
{
"and": [
"canSpringwall",
{
"heatFrames": 490
}
]
},
{
"and": [
"HiJump",
"canPreciseWallJump",
"canInsaneJump",
{
"heatFrames": 470
}
]
},
{
"and": [
"HiJump",
"canSpeedyJump",
"canTrickySpringBallJump",
"canInsaneJump",
{
"heatFrames": 410
}
]
},
{
"and": [
"HiJump",
"SpaceJump",
"canInsaneJump",
{
"heatFrames": 600
}
]
}
]
}
{
"or": [
"h_heatResistant",
"canPauseAbuse",
{
"resourceCapacity": [
{
"type": "RegularEnergy",
"count": 149
}
]
}
]
}Clears obstacles: A Dev note: With Reserves only, canPauseAbuse is used as a proxy for pause abuse or optimal reserve management and character movement. |
From: 6
Bottom Platform Junction With Pirates Killed
To: 4
Junction Above Bomb Blocks
Requires: {
"obstaclesCleared": [
"A"
]
}
"HiJump"
"canTrickyDashJump"
"canTrickySpringBallJump"
{
"heatFrames": 350
} |
From: 6
Bowling Chozo Statue
To: 1
Top Left Door
Jump or Spring Ball jump into a breakable Grapple block. The timing is precise and it can help to break two Grapple blocks to use one as a cue. Crystal Flash then X-ray climb to the region above (less than 1 screen). There is a chance that Samus will not be able to Crystal Flash unless first placing a Bomb or Power Bomb. Requires: {
"notable": "Grapple Block Crystal Flash"
}
"canUseGrapple"
"canJumpIntoRespawningBlock"
"canTrickyJump"
{
"or": [
"HiJump",
"canTrickySpringBallJump",
{
"and": [
"canSpringBallJumpMidAir",
{
"not": "f_DefeatedPhantoon"
},
"canRiskPermanentLossOfAccess"
]
}
]
}
"h_bombThings"
"h_CrystalFlash"
"canXRayClimb"
{
"or": [
"h_fourTileJumpMorph",
"h_useSpringBall",
"canIBJ",
{
"getBlueSpeed": {
"usedTiles": 16,
"steepDownTiles": 4,
"openEnd": 0
}
},
{
"and": [
{
"not": "f_DefeatedPhantoon"
},
"canRiskPermanentLossOfAccess"
]
}
]
}Exit condition: {
"leaveNormally": {}
}Unlocks doors: {"types":["ammo"],"requires":[]}Dev note: FIXME: This may be possible with a spike hit and speedy jump. |
From: 1
Left Door
To: 2
Right Door
If possible (and applicable), kill the Bull ahead of time, and do a shinecharge to gain temporary blue. Otherwise, shoot the Bull to get it out of the way; then, after getting blue speed with a stutter water shinecharge, jump directly into a spring ball jump rather than shinecharging first. Requires: {
"or": [
{
"enemyKill": {
"enemies": [
[
"Bull"
]
]
}
},
{
"and": [
{
"not": "f_DefeatedPhantoon"
},
"canRiskPermanentLossOfAccess"
]
},
"canTrickyJump"
]
}
"canStutterWaterShineCharge"
"h_getBlueSpeedMaxRunway"
"canTrickySpringBallJump"
"canChainTemporaryBlue"Exit condition: {
"leaveWithTemporaryBlue": {}
}Unlocks doors: {"types":["ammo"],"requires":[]}Dev note: FIXME: Leaving with a blue spring ball bounce is possible without `canChainTemporaryBlue`, allowing a flash suit to be carried. |
|
Requires: "canSuitlessMaridia" "canTrickySpringBallJump" |
From: 2
Bottom Left Door
To: 1
Top Left Doorway
Freeze one crab on the lip of the overhead opening and another on the edge of a doors platform then springballjump up. Use a Stationary Lateral Mid-Air Morph to gain enough jump height without bonking the ceiling. It is possible with a crouch jump to not need the second crab. Requires: {
"notable": "Suitless Crab Climb Superless with Spring Ball"
}
"canSuitlessMaridia"
"canTrickyJump"
"canTrickySpringBallJump"
"canTrickyUseFrozenEnemies"
"canStationaryLateralMidAirMorph"Dev note: It is possible without canStationaryLateralMidAirMorph, but very precise. |
From: 3
Bottom Right Door
To: 4
Top Right Doorway
Entrance condition: {
"comeInWithSidePlatform": {
"platforms": [
{
"minHeight": 1,
"maxHeight": 1,
"minTiles": 4,
"speedBooster": "yes",
"obstructions": [
[
1,
0
]
],
"requires": [
"canMomentumConservingTurnaround"
],
"note": [
"This applies to Skree Boost Room."
]
},
{
"minHeight": 2,
"maxHeight": 2,
"minTiles": 5.4375,
"speedBooster": "any",
"obstructions": [
[
1,
0
]
],
"requires": [
"canMomentumConservingTurnaround"
],
"note": [
"This applies to Early Super Room."
],
"detailNote": [
"If Speed Booster is equipped, then a momentum-conserving morph should be used instead of a turnaround."
]
},
{
"minHeight": 3,
"maxHeight": 3,
"minTiles": 14.4375,
"speedBooster": "any",
"obstructions": [
[
3,
2
]
],
"requires": [
{
"or": [
"canMomentumConservingTurnaround",
"canMomentumConservingMorph"
]
}
],
"note": [
"This applies to Metal Pirates Room."
]
}
]
}
}Requires: "canCrossRoomJumpIntoWater" "canTrickySpringBallJump" Dev note: A spring ball bounce could be done here instead of a side platform jump, but this strat is still included in cases where it's a reasonable alternative. |
|
Requires: "Gravity"
{
"or": [
"canWallJump",
"SpaceJump",
"canLongIBJ",
{
"and": [
"canJumpIntoIBJ",
"canBombHorizontally"
]
},
"h_maxHeightSpringBallJump",
{
"and": [
"HiJump",
"canSpringBallJumpMidAir"
]
}
]
}Dev note: The h_maxHeightSpringBallJump is not a h_underwaterMaxHeightSpringBallJump, because Gravity is required. |
From: 1
Bottom Left Door
To: 5
Platform Junction Near Top Left Door
Entrance condition: {
"comeInJumping": {
"speedBooster": "yes",
"minTiles": 2.4375
}
}Requires: "HiJump" "canCrossRoomJumpIntoWater" "canMomentumConservingTurnaround" "canTrickySpringBallJump" "canInsaneJump" |
From: 1
Bottom Left Door
To: 5
Platform Junction Near Top Left Door
Requires: "canSuitlessMaridia" "canTrickyUseFrozenEnemies" "HiJump" "canTrickySpringBallJump" "h_midAirShootUp" |
From: 2
Bottom Right Door
To: 1
Bottom Left Door
Run into the room to gain temporary blue with a water shinecharge. Use X-ray along with HiJump and/or Spring Ball to chain it through the room. Entrance condition: {
"comeInRunning": {
"speedBooster": "yes",
"minTiles": 0.4375
}
}Requires: "canWaterShineCharge"
"canStationaryLateralMidAirMorph"
{
"or": [
{
"and": [
"HiJump",
"canTrickySpringBallJump"
]
},
{
"and": [
{
"or": [
"HiJump",
"canTrickySpringBallJump"
]
},
"canBeVeryPatient"
]
}
]
}
"canXRayTurnaround"
"canLongChainTemporaryBlue"Exit condition: {
"leaveWithTemporaryBlue": {}
}Unlocks doors: {"types":["ammo"],"requires":[]} |
From: 2
Bottom Right Door
To: 3
Top Right Door
Run into the room to gain temporary blue with a water shinecharge. Use X-ray along with HiJump to chain it through the room. Entrance condition: {
"comeInRunning": {
"speedBooster": "yes",
"minTiles": 0.4375
}
}Requires: "canWaterShineCharge"
"canStationaryLateralMidAirMorph"
"HiJump"
{
"or": [
"canBeVeryPatient",
"canTrickySpringBallJump"
]
}
"canXRayTurnaround"
"canLongChainTemporaryBlue"Exit condition: {
"leaveWithTemporaryBlue": {
"direction": "any"
}
}Unlocks doors: {"types":["ammo"],"requires":[]}Dev note: FIXME: This could be done with Spring Ball instead of HiJump; but it requires some space on either the left or right of the door in the room above, e.g. it won't work with the vanilla connection, and we would need some way to model that. |
From: 2
Bottom Right Door
To: 6
Middle Junction Near Top Left Pirate
The second jump is harder than a normal mid-air spring ball jump. Use either a stationary lateral mid air morph, to gain enough horizontal momentum, or a SpringFling to reduce Samus' fall speed as soon as it begins to build up. Shooting towards Pirates will cause them to stop in place and not fire back. Requires: "canSuitlessMaridia"
"canTrickySpringBallJump"
{
"or": [
"canStationaryLateralMidAirMorph",
"canSpringFling"
]
}
{
"or": [
"canTrickyJump",
"canDodgeWhileShooting",
{
"enemyDamage": {
"enemy": "Pink Space Pirate (standing)",
"type": "contact",
"hits": 1
}
},
{
"enemyKill": {
"enemies": [
[
"Pink Space Pirate (standing)"
]
],
"explicitWeapons": [
"Plasma"
]
}
}
]
}
{
"or": [
"canTrickyJump",
{
"enemyDamage": {
"enemy": "Pink Space Pirate (standing)",
"type": "contact",
"hits": 1
}
},
{
"enemyKill": {
"enemies": [
[
"Pink Space Pirate (standing)"
]
],
"explicitWeapons": [
"Plasma"
]
}
}
]
} |
|
Entrance condition: {
"comeInWithGMode": {
"mode": "direct",
"morphed": false
},
"comesThroughToilet": "any"
}Requires: {
"or": [
"canGravityJump",
{
"and": [
"Gravity",
{
"or": [
"canConsecutiveWallJump",
"SpaceJump",
"canLongIBJ",
{
"and": [
"HiJump",
"canWallJump"
]
},
{
"and": [
"HiJump",
"canTrickyDashJump",
"canDownGrab"
]
},
"h_maxHeightSpringBallJump",
{
"and": [
"HiJump",
"canSpringBallJumpMidAir"
]
}
]
}
]
},
{
"and": [
"Gravity",
"canUseFrozenEnemies",
{
"or": [
"canWallJump",
{
"and": [
"HiJump",
"canSpeedyJump"
]
},
"canSpringBallJumpMidAir"
]
}
]
},
"h_doubleSpringBallJumpWithHiJump",
{
"and": [
"canSuitlessMaridia",
"canTrickyUseFrozenEnemies",
"HiJump",
"canTrickySpringBallJump"
]
}
]
}Exit condition: {
"leaveWithGMode": {
"morphed": false
}
}Dev note: The h_maxHeightSpringBallJump is not a h_underwaterMaxHeightSpringBallJump, because Gravity is required. |
From: 5
Platform Junction Near Top Left Door
To: 4
Top Left Door
Jump towards the door with a Springball Jump, jumping as late as possible. A Flatley style jump can position Samus over the edge of the ledge, closer to the door, allowing for an earlier Springball jump. The slight fall from a Flatley Jump helps with the Springball jump, but then Samus must unmorph to extend her hitbox to touch the transition. A Stationary Lateral MidAir Morph also helps with this jump. Unmorphing after a missed jump can return Samus to the ledge to try again. Requires: {
"notable": "Top Left Direct Jump"
}
"canSuitlessMaridia"
"canTrickySpringBallJump"
{
"or": [
"canTrickyJump",
"canStationaryLateralMidAirMorph"
]
} |
From: 7
Platform Below Top Right Door
To: 6
Middle Junction Near Top Left Pirate
Tank the pirate then quickly crouch jump and down grab or use HiJump to get to the ledge. Requires: "canSuitlessMaridia"
"canUseIFrames"
{
"enemyDamage": {
"enemy": "Pink Space Pirate (standing)",
"type": "contact",
"hits": 1
}
}
{
"or": [
"HiJump",
"h_underwaterCrouchJumpDownGrab",
{
"and": [
"canTrickyJump",
"canTrickySpringBallJump"
]
}
]
} |
|
Standing on the platform in the room below, and perform a spring ball jump mid-air just before reaching the transition. Entrance condition: {
"comeInWithPlatformBelow": {
"maxHeight": 10,
"maxLeftPosition": -1,
"minRightPosition": -1
},
"comesThroughToilet": "any"
}Requires: "canCrossRoomJumpIntoWater" "canTrickySpringBallJump" Dev note: Crouch jumping is not required. |
|
Entrance condition: {
"comeInWithGMode": {
"mode": "direct",
"morphed": false
},
"comesThroughToilet": "no"
}Requires: {
"notable": "G-Mode Overload Speed Blocks then use Global Crab"
}
"canComplexGMode"
"h_navigateUnderwater"
{
"or": [
"canGravityJump",
{
"and": [
"Gravity",
"canWallJump"
]
},
{
"and": [
"Gravity",
"canTrickyUseFrozenEnemies",
"h_underwaterCrouchJumpDownGrab"
]
},
{
"and": [
"HiJump",
{
"or": [
{
"and": [
{
"notable": "Underwater Walljumps"
},
"canUnderwaterWallJump"
]
},
"canSpringBallJumpMidAir",
{
"and": [
"canTrickyUseFrozenEnemies",
"h_underwaterCrouchJump"
]
}
]
}
]
},
{
"and": [
"h_underwaterMaxHeightSpringBallJump",
"canTrickyUseFrozenEnemies",
"canBeVeryPatient",
{
"or": [
"canStationaryLateralMidAirMorph",
{
"ammo": {
"type": "Super",
"count": 1
}
}
]
}
]
}
]
}Clears obstacles: B |
From: 1
Bottom Door
To: 12
G-Mode Junction By Middle Right Door
Entrance condition: {
"comeInWithGMode": {
"mode": "indirect",
"morphed": false
},
"comesThroughToilet": "any"
}Requires: {
"notable": "G-Mode Overload Speed Blocks then use Global Crab"
}
"canComplexGMode"
"h_navigateUnderwater"
{
"or": [
"canGravityJump",
{
"and": [
"Gravity",
"canWallJump"
]
},
{
"and": [
"Gravity",
"canTrickyUseFrozenEnemies",
"h_underwaterCrouchJumpDownGrab"
]
},
{
"and": [
"HiJump",
{
"or": [
{
"and": [
{
"notable": "Underwater Walljumps"
},
"canUnderwaterWallJump"
]
},
"canSpringBallJumpMidAir",
{
"and": [
"canTrickyUseFrozenEnemies",
"h_underwaterCrouchJump"
]
}
]
}
]
},
{
"and": [
"h_underwaterMaxHeightSpringBallJump",
"canTrickyUseFrozenEnemies",
"canBeVeryPatient",
{
"or": [
"canStationaryLateralMidAirMorph",
{
"ammo": {
"type": "Super",
"count": 1
}
}
]
}
]
}
]
} |
From: 2
Bottom Right Door
To: 12
G-Mode Junction By Middle Right Door
Entrance condition: {
"comeInWithGMode": {
"mode": "direct",
"morphed": false
}
}Requires: {
"notable": "G-Mode Overload Speed Blocks then use Global Crab"
}
"canComplexGMode"
"h_navigateUnderwater"
{
"or": [
"canGravityJump",
{
"and": [
"Gravity",
"canWallJump"
]
},
{
"and": [
"Gravity",
"canTrickyUseFrozenEnemies",
"h_underwaterCrouchJumpDownGrab"
]
},
{
"and": [
"HiJump",
{
"or": [
{
"and": [
{
"notable": "Underwater Walljumps"
},
"canUnderwaterWallJump"
]
},
"canSpringBallJumpMidAir",
{
"and": [
"canTrickyUseFrozenEnemies",
"h_underwaterCrouchJump"
]
}
]
}
]
},
{
"and": [
"h_underwaterMaxHeightSpringBallJump",
"canTrickyUseFrozenEnemies",
"canBeVeryPatient",
{
"or": [
"canStationaryLateralMidAirMorph",
{
"ammo": {
"type": "Super",
"count": 1
}
}
]
}
]
}
]
}Clears obstacles: B |
From: 2
Bottom Right Door
To: 12
G-Mode Junction By Middle Right Door
Entrance condition: {
"comeInWithGMode": {
"mode": "indirect",
"morphed": false
}
}Requires: {
"notable": "G-Mode Overload Speed Blocks then use Global Crab"
}
"canComplexGMode"
"h_navigateUnderwater"
{
"or": [
"canGravityJump",
{
"and": [
"Gravity",
"canWallJump"
]
},
{
"and": [
"Gravity",
"canTrickyUseFrozenEnemies",
"h_underwaterCrouchJumpDownGrab"
]
},
{
"and": [
"HiJump",
{
"or": [
{
"and": [
{
"notable": "Underwater Walljumps"
},
"canUnderwaterWallJump"
]
},
"canSpringBallJumpMidAir",
{
"and": [
"canTrickyUseFrozenEnemies",
"h_underwaterCrouchJump"
]
}
]
}
]
},
{
"and": [
"h_underwaterMaxHeightSpringBallJump",
"canTrickyUseFrozenEnemies",
"canBeVeryPatient",
{
"or": [
"canStationaryLateralMidAirMorph",
{
"ammo": {
"type": "Super",
"count": 1
}
}
]
}
]
}
]
} |
From: 3
Middle Right Door
To: 9
Junction Below Speed Blocks
The tricky part is getting to the ledge below the missiles. There are two ways to do this: 1. Stand on a frozen crab with a frozen fish at the lowest height of its cycle to the right. Further to the right is better as long as it can be stood upon without the ledge above. Perform a stationary lateral midair morph into a max height spring ball jump to get onto the fish before it thaws. Press against the fish for the maximum amount of time possible while moving upwards in order to gain more height in order to get on top of it. 2. Freeze the global crab on the right wall, get onto it and up and onto the frozen fish before it thaws. Be careful not to fall through the crab. A fail will require Samus to reset the room, or wait a very long time in order for the crab to circle the room. Using a Super may make the crab fall on a floating platform, and it still takes more than a minute to return. Note that it is possible to turn off ice beam to immediately thaw any frozen enemies; this can help get the crab and fish in a good cycle with each other. Requires: {
"notable": "Climb with Ice and Spring Ball"
}
"canSuitlessMaridia"
"canTrickySpringBallJump"
"canTrickyUseFrozenEnemies"
"canTrickyJump" |
From: 8
Bottom Junction
To: 3
Middle Right Door
Freeze the crab on the corner of the ledge and the fish near the wall but with enough space for Samus to fit through and jump up. Perform a stationary lateral midair morph and press against the fish to get enough height to get onto it. Requires: "canSuitlessMaridia" "h_underwaterMaxHeightSpringBallJump" "canStationaryLateralMidAirMorph" "canTrickyUseFrozenEnemies" |
From: 8
Bottom Junction
To: 3
Middle Right Door
Use a Super to knock the crab off the wall and freeze it midair. It can help to jump before firing the beam to freeze it a bit higher. Quickly freeze the fish and Spring Ball jump to get onto it. Note that the fish does not move while off camera, so this may be used to help get the fish cycle in a good position. Requires: "canSuitlessMaridia"
"canTrickySpringBallJump"
"canTrickyUseFrozenEnemies"
{
"ammo": {
"type": "Super",
"count": 1
}
} |
|
Requires: {
"or": [
{
"resetRoom": {
"nodes": [
1
]
}
},
{
"and": [
{
"resetRoom": {
"nodes": [
2
]
}
},
{
"or": [
{
"and": [
"Gravity",
{
"cycleFrames": 40
}
]
},
{
"cycleFrames": 100
}
]
}
]
}
]
}
{
"or": [
{
"and": [
"Plasma",
{
"cycleFrames": 160
}
]
},
{
"and": [
"Wave",
{
"cycleFrames": 220
}
]
},
{
"and": [
"ScrewAttack",
{
"cycleFrames": 250
}
]
},
{
"and": [
{
"haveBlueSuit": {}
},
{
"cycleFrames": 250
}
]
},
{
"and": [
"Spazer",
{
"cycleFrames": 250
}
]
},
{
"and": [
"Ice",
{
"cycleFrames": 315
}
]
},
{
"and": [
"canFarmWhileShooting",
{
"cycleFrames": 480
}
]
},
{
"cycleFrames": 600
}
]
}
{
"or": [
"Gravity",
{
"and": [
"Grapple",
{
"cycleFrames": 150
}
]
},
{
"and": [
"HiJump",
{
"cycleFrames": 135
}
]
},
{
"and": [
"canTrickySpringBallJump",
{
"cycleFrames": 315
},
"h_doubleEquipmentScreenCycleFrames"
]
}
]
}Resets obstacles: A, B, C, R-Mode Farm cycle drops: 1 Skultera |
From: 9
Junction Below Speed Blocks
To: 4
Top Right Door
Using the slow global crab to ascend the top section of the room requires the speed blocks to not be broken. Jump with either Springball or HiJump onto the global crab while it is climbing the section above the Speed locked item. Have Reserves set to manual and return them to auto after taking a deadly crab hit in order to gain two damage boosts. If the Speed blocks are broken, the global crab will not be able to reach this part of the room. If Morph is unavailable, then a down-grab must be done blind: buffer the down input through the reserve refill, then press forward immediately after taking damage. Requires: "canSuitlessMaridia"
{
"obstaclesNotCleared": [
"A"
]
}
{
"obstaclesNotCleared": [
"R-Mode"
]
}
"h_underwaterCrouchJump"
"canInsaneJump"
{
"or": [
"h_underwaterMaxHeightSpringBallJump",
"HiJump"
]
}
{
"or": [
"h_midAirMorphReserveDoubleDamageBoost",
{
"and": [
"canReserveDoubleDamageBoost",
"canOffScreenMovement",
"h_trickyToCarryFlashSuit"
]
}
]
}
{
"autoReserveTrigger": {
"minReserveEnergy": 85
}
}
{
"enemyDamage": {
"enemy": "Sciser",
"type": "contact",
"hits": 1
}
} |
From: 9
Junction Below Speed Blocks
To: 4
Top Right Door
Be sure not to get the first downward moving crab on screen until Samus is in position to quickly and accurately shoot and freeze it. This is much tighter with spring ball relative to HiJump. Performing a max height spring ball jump from the frozen crab can get Samus to the next ledge. Getting to the ledge with the fish is particularly precise. Either stand at the very edge of the platform and perform a very precise max heigh spring ball jump, or stand against the left wall and and perform a slightly less tight stationary lateral morph into spring ball jump. Requires: "canSuitlessMaridia"
"canTrickyUseFrozenEnemies"
"canTrickySpringBallJump"
"canDodgeWhileShooting"
{
"or": [
"canInsaneJump",
{
"and": [
"Spazer",
"Wave"
]
},
{
"and": [
"h_underwaterMaxHeightSpringBallJump",
{
"or": [
"Wave",
"Spazer"
]
}
]
},
"Plasma"
]
}
{
"or": [
"h_underwaterMaxHeightSpringBallJump",
"canStationaryLateralMidAirMorph"
]
} |
From: 12
G-Mode Junction By Middle Right Door
To: 10
Direct G-Mode Morph, On Ledge Above Speed Blocks
Climb to the ledge left of the morph tunnel item. With Ice, carefully and quickly freeze the last crab high enough to use as a platform. With a slow ascent, such as with Spring Ball and Ice, the crab will need to circle the entire room, it is possible to use a Super when it passes the speed blocks to speed this up significantly. Requires: {
"obstaclesCleared": [
"B"
]
}
"Morph"
"h_navigateUnderwater"
{
"or": [
"canGravityJump",
{
"and": [
"Gravity",
"canWallJump"
]
},
{
"and": [
"Gravity",
"canTrickyUseFrozenEnemies"
]
},
{
"and": [
"HiJump",
{
"or": [
"canSpringBallJumpMidAir",
{
"and": [
{
"notable": "Underwater Walljumps"
},
"canUnderwaterWallJump"
]
}
]
}
]
},
{
"and": [
"HiJump",
"canTrickyUseFrozenEnemies",
{
"or": [
"h_underwaterCrouchJump",
"canDownGrab"
]
}
]
},
{
"and": [
"h_underwaterMaxHeightSpringBallJump",
"canTrickyUseFrozenEnemies",
"canBeVeryPatient"
]
}
]
}Dev note: FIXME: HiJump strats may need canBeVeryPatient if they can't be done before the crab is in position |
From: 12
G-Mode Junction By Middle Right Door
To: 11
G-Mode, Below Speed Blocks (Overloaded PLMs)
Place bombs against the speed blocks until they are overloaded. With a slow ascent, such as with Spring Ball and Ice, the crab will need to circle the entire room, it is possible to use a Super when it passes the speed blocks to speed this up significantly. Requires: "canComplexGMode"
{
"notable": "G-Mode Overload Speed Blocks then use Global Crab"
}
"h_useMorphBombs"
"h_navigateUnderwater"
{
"or": [
"canGravityJump",
{
"and": [
"Gravity",
"canWallJump"
]
},
{
"and": [
"HiJump",
{
"or": [
"canSpringBallJumpMidAir",
{
"and": [
{
"notable": "Underwater Walljumps"
},
"canUnderwaterWallJump"
]
}
]
}
]
},
{
"and": [
"canTrickyUseFrozenEnemies",
{
"or": [
"HiJump",
"Gravity",
"h_underwaterMaxHeightSpringBallJump"
]
}
]
}
]
}
{
"or": [
{
"and": [
"Gravity",
"h_useSpringBall"
]
},
{
"and": [
"HiJump",
"h_useSpringBall"
]
},
{
"and": [
"Gravity",
"canCeilingBombJump"
]
},
"canBeVeryPatient"
]
} |
From: 1
Left Door
To: 5
Top Left Junction
Requires: "canGravityJump" "HiJump" "canTrickySpringBallJump" |
|
Pausing and morphing early can help by giving Samus a bit of a Spring Fling. Unmorph to reset Samus' fall speed to grab the item. Requires: "canTrickySpringBallJump" "canTrickyJump" "canResetFallSpeed" |
From: 5
Top Left Junction
To: 2
Top Item
Time a pause before jumping to give a significant momentum boost in order to reach the Grapple Block. Requires: "canTrickySpringBallJump" "canTrickyJump" "canSpringFling" Clears obstacles: B |
|
Entrance condition: {
"comeInWithGMode": {
"mode": "direct",
"morphed": false
},
"comesThroughToilet": "any"
}Requires: {
"or": [
"Gravity",
"HiJump",
"canTrickySpringBallJump",
{
"and": [
{
"not": "f_MaridiaTubeBroken"
},
"canRiskPermanentLossOfAccess"
]
}
]
}Exit condition: {
"leaveWithGMode": {
"morphed": false
}
} |
|
Requires: {
"or": [
"f_MaridiaTubeBroken",
{
"obstaclesCleared": [
"f_MaridiaTubeBroken"
]
}
]
}
"canSuitlessMaridia"
"canTrickySpringBallJump" |
|
Requires: "canSuitlessMaridia"
"canTrickySpringBallJump"
{
"or": [
"h_underwaterCrouchJump",
"canTrickyJump"
]
}Unlocks doors: {"types":["ammo"],"requires":[]} |
|
In the other room, use 6 runway tiles to gain an extra run speed of exactly $1.D, with Speed Booster unequipped. Jump into a lateral mid-air morph and touch the door transition while descending close to the ground. Hold jump to do an uncontrolled bounce immediately after the transition. Pause as Samus passes under the first ceiling Grapple block. Equip Speed Booster and unequip Spring Ball, to get a spring fling. Pause again and re-equip Spring Ball to get a second spring fling. Continue holding jump to bounce on both Grapple platforms with uncontrolled bounces; Samus must bounce on the left edge of the first platform in order to just barely make the bounce on the right edge of the second platform. Perform one more spring fling, by unequipping Spring Ball as Samus begins to descend. Samus should make it into the nook below the right door; A Flatley jump into mid-air spring ball jump will get Samus up to the door. Entrance condition: {
"comeInSpinning": {
"speedBooster": "no",
"unusableTiles": 3,
"minExtraRunSpeed": "$1.D",
"maxExtraRunSpeed": "$1.D"
}
}Requires: {
"notable": "Spring Ball Bounce Left to Right"
}
"canTrickyDashJump"
"canInsaneJump"
"canCrossRoomJumpIntoWater"
"canTrickySpringBallBounce"
"canFlatleyJump"
"canTrickySpringBallJump"Dev note: A comeInSpinning entrance condition is used to ensure it is possible to enter in the right position, even though technically Samus should enter morphed rather than spinning. With longer runway, a number of variations of this strat are possible: entering with a mockball (or controlled bounce) with speed at least $4.4, it is possible to bounce immediately on entry and do two spring flings to reach the second Grapple platform directly. with the same type of entry and speeds at least $5.4, it is possible do controlled bounces on both Grapple platforms, with no spring fling needed. |
From: 1
Top Left Door
To: 5
Top Door
If HiJump or Spring Ball is available, use a Gravity jump from the top of the island; otherwise, use the higher ledge to the left, jump slightly early to avoid getting too much jump height (to avoid bonking the ceiling Grapple blocks), and quickly do a stationary lateral mid-air morph. Entrance condition: {
"comeInShinecharging": {
"length": 1,
"openEnd": 0
}
}Requires: "canGravityJump"
"canLongChainTemporaryBlue"
{
"or": [
"HiJump",
"canTrickySpringBallJump",
{
"and": [
"canStationaryLateralMidAirMorph",
"canInsaneJump"
]
}
]
}Exit condition: {
"leaveWithTemporaryBlue": {
"direction": "right"
}
}Unlocks doors: {"types":["ammo"],"requires":[]}Dev note: FIXME: A suitless version of this could work, with HiJump + Spring Ball; but it would require leaving while morphed, which would need some space to move horizontally in the room above before landing, which we don't yet have a way to model. |
From: 2
Bottom Left Door
To: 7
Lower Hills Junction
Jump with either Springball or HiJump onto a Sciser while it is climbing the right-most mountain. Have Reserves set to manual and return them to auto after taking a deadly crab hit in order to gain two damage boosts. This gains barely enough height to reach the ledge above. If Morph is unavailable, then a down-grab must be done blind: buffer the down input through the reserve refill, then press forward immediately after taking damage. Requires: "h_navigateUnderwater"
"h_underwaterCrouchJump"
"canInsaneJump"
{
"or": [
"h_underwaterMaxHeightSpringBallJump",
"HiJump"
]
}
{
"or": [
"h_midAirMorphReserveDoubleDamageBoost",
{
"and": [
"canReserveDoubleDamageBoost",
"canOffScreenMovement",
"h_trickyToCarryFlashSuit"
]
}
]
}
{
"autoReserveTrigger": {
"minReserveEnergy": 85
}
}
{
"enemyDamage": {
"enemy": "Sciser",
"type": "contact",
"hits": 1
}
} |
|
Entrance condition: {
"comeInWithWallJumpBelow": {
"minHeight": 2
},
"comesThroughToilet": "any"
}Requires: {
"or": [
"canTrickyJump",
"canTrickySpringBallJump",
"HiJump"
]
}
"canCrossRoomJumpIntoWater"Dev note: The walljump is very disconnected from the springball jump, so it is not a springwall. |
|
Use the rightmost crab to get up onto the lowest platform, while also damaging down the crab on the middle platform. Jump left onto the middle platform and freeze the crab just a bit left of the peak. Without any movement items, Spinjump from on top of the crab to the higher platform towards the left. A failure often requires resetting the room. Requires: "canSuitlessMaridia"
"canTrickyUseFrozenEnemies"
{
"or": [
"canTrickyJump",
"canTrickySpringBallJump",
"HiJump"
]
}Dev note: Although this goes through 7, it requires starting at 2 to get the crab to move into position. |
From: 2
Bottom Left Door
To: 11
Upper Left Ledge Junction
Climb the crabs on the right and use them to bring down the center crab, who is already on the highest peak. Damage down the crab while watching it loop around, then ride the crab up the left side. Freeze the crab at the top of the highest peak, stand on it to jump to the left. Use a stationary lateral mid-air morph to get enough momentum for the Spring Ball jump to reach the left ledge. Requires: "canSuitlessMaridia" "canTrickySpringBallJump" "canStationaryLateralMidAirMorph" "canTrickyUseFrozenEnemies" Dev note: Although this may go through 7 and 8, it requires starting at 2 to get the crab to move into position. |
From: 3
Bottom Right Door
To: 10
Upper Right Ledge Junction
Run and jump up through the door using HiJump and Speed Booster in the room below and Spring Ball jump at the top of the jump. Entrance condition: {
"comeInWithPlatformBelow": {
"maxHeight": 6,
"maxLeftPosition": 2.5,
"minRightPosition": -2.5
},
"comesThroughToilet": "any"
}Requires: "canCrossRoomJumpIntoWater" "HiJump" "canSpeedyJump" "canTrickySpringBallJump" |
From: 3
Bottom Right Door
To: 10
Upper Right Ledge Junction
Run and jump up through the door using HiJump and Speed Booster in the room below and Spring Ball jump at the peak of the jump. Entrance condition: {
"comeInWithPlatformBelow": {
"maxHeight": 7,
"maxLeftPosition": 2.5,
"minRightPosition": -2.5
},
"comesThroughToilet": "any"
}Requires: "canCrossRoomJumpIntoWater" "HiJump" "canSpeedyJump" "canTrickySpringBallJump" "canTrickyJump" |
From: 3
Bottom Right Door
To: 10
Upper Right Ledge Junction
Wall jump off either side of the door frame in the room below and Spring Ball jump at the height of the jump. Entrance condition: {
"comeInWithWallJumpBelow": {
"minHeight": 2
},
"comesThroughToilet": "any"
}Requires: "canCrossRoomJumpIntoWater" "HiJump" "canTrickySpringBallJump" "canTrickyJump" |
|
Requires: {
"or": [
"HiJump",
{
"and": [
"canTrickySpringBallJump",
"canSuitlessMaridia",
{
"or": [
"canTrickyJump",
"canSpringFling",
"canStationaryLateralMidAirMorph"
]
}
]
}
]
}Dev note: Using a frozen crab for an easier springball jump goes from 2 to 8. |
From: 7
Lower Hills Junction
To: 10
Upper Right Ledge Junction
Use the crab near the bottom right door. Only one spring ball jump is needed, it is to get up onto the flat platform. After the spring ball jump, if the crab did not follow, go to the lower ground a bit to the right, jump and aim down to lower the camera to lure the crab. Note: The hardest part of this climb is the pixel precision when jumping around a ledge. Too many pixels: left is a fall, right you clip through the crab, low you miss the jump and fall, high is a bonk or crab clip. Requires: {
"notable": "Right Crab Climb with Only Spring Ball"
}
"canSuitlessMaridia"
"canCrazyCrabClimb"
"canTrickySpringBallJump"
"canTrickyJump"
"canCameraManip"Clears obstacles: A, B |
From: 7
Lower Hills Junction
To: 10
Upper Right Ledge Junction
Climbing the right side of the room with two Supers, Ice, and Spring Ball. Requires luring 3 crabs; the third crab is from the morph tunnel to the left. Use a Super to knock off and freeze a crab midair. Stand on it and let the other crab climb, then jump up and follow it. Be sure two crabs make it to the next section in order to crab climb further. Requires: {
"notable": "Right Crab Climb with Supers and Spring Ball"
}
"canSuitlessMaridia"
"canCrazyCrabClimb"
"canTrickySpringBallJump"
{
"ammo": {
"type": "Super",
"count": 1
}
}Clears obstacles: A, B |
From: 7
Lower Hills Junction
To: 10
Upper Right Ledge Junction
Freeze the crab midway up the right wall and jump and spring ball jump up to the higher platform. Luring a second crab, which will make it to the upper platform, may be useful to avoid a tricky spring ball jump and flatley jump to get to the top right door. Requires: "canSuitlessMaridia" "HiJump" "canTrickySpringBallJump" "canTrickyJump" "canTrickyUseFrozenEnemies" Clears obstacles: A, B Dev note: It is possible to bring 2 crabs with this method, but is relatively pointless. |
From: 10
Upper Right Ledge Junction
To: 4
Top Right Door
Requires having already lured a crab to this location, likely from above the bottom right door. Freeze the crab high before going to the ledge on the right, delay spring ball jumping so it thaws and moves up while on screen, jump aim down to lower the camera and lure it more. Freeze the crab again to use as a platform, approximately knee high. Jump on it and then jump to the platform above. Note: The hardest part of this climb is the pixel precision when jumping around a ledge. Too many pixels: left is a fall, right you clip through the crab, low you miss the jump and fall, high is a bonk or crab clip. Requires: {
"notable": "Right Crab Climb with Only Spring Ball"
}
"canSuitlessMaridia"
"canCrazyCrabClimb"
"canTrickySpringBallJump"
"canTrickyJump"
"canCameraManip"
{
"obstaclesCleared": [
"B"
]
} |
From: 10
Upper Right Ledge Junction
To: 4
Top Right Door
Climbing the right side of the room with only two Supers, Ice, and Spring Ball. Requires originally luring 3 crabs. Two crabs and one Super are needed from this location. Use a Super to knock off and freeze a crab midair. Jump on it and freeze the second as a platform to jump up to the door. Requires: {
"notable": "Right Crab Climb with Supers and Spring Ball"
}
"canSuitlessMaridia"
"canTrickySpringBallJump"
"canCrazyCrabClimb"
{
"ammo": {
"type": "Super",
"count": 1
}
}
{
"obstaclesCleared": [
"A"
]
} |
From: 10
Upper Right Ledge Junction
To: 4
Top Right Door
Start the jump from the higher ground to the left, specifically the right side of the second highest region. Requires: "canSuitlessMaridia" "HiJump" "canTrickySpringBallJump" "canFlatleyJump" |
|
Requires: {
"or": [
"HiJump",
"canTrickySpringBallJump"
]
} |
From: 2
Bottom Door
To: 3
Bottom Right Ledge
Standing on the platform in the room below, perform a spring ball jump mid-air just before reaching the transition. Entrance condition: {
"comeInWithPlatformBelow": {
"maxHeight": 10,
"maxLeftPosition": 2,
"minRightPosition": -2
},
"comesThroughToilet": "any"
}Requires: "canCrossRoomJumpIntoWater" "canTrickySpringBallJump" Dev note: Crouch jumping is not needed here. |
|
Use a Space Jump water bounce followed by a tight mid-air morph, to get a mid-air Spring Ball jump out of the water. Requires: {
"notable": "Space Jump Spring Ball Jump"
}
"canSpaceJumpWaterBounce"
"canTrickySpringBallJump"
"can4HighMidAirMorph" |
From: 2
Bottom Left Door
To: 1
Middle Left Door
Use double spring ball jumps to reach the top-right of the room with temporary blue. To cross the two gaps at the top of the room to the left while chaining temporary blue, use spring ball jumps with HiJump disabled; in each case, perform a stationary lateral mid-air morph or a spring fling (or both); Entrance condition: {
"comeInRunning": {
"speedBooster": "yes",
"minTiles": 0.4375
}
}Requires: "h_waterGetBlueSpeed"
"HiJump"
"canLongChainTemporaryBlue"
"canBeExtremelyPatient"
"canXRayTurnaround"
"canDoubleSpringBallJumpMidAir"
"canTrickySpringBallJump"
{
"or": [
"canStationaryLateralMidAirMorph",
"canSpringFling"
]
}
"can4HighMidAirMorph" |
From: 2
Bottom Left Door
To: 1
Middle Left Door
Use double spring ball jumps to reach the top-right of the room with temporary blue. To cross the two gaps at the top of the room to the left while chaining temporary blue, use spring ball jumps with HiJump disabled; in each case, perform a stationary lateral mid-air morph or a spring fling (or both); Entrance condition: {
"comeInWithTemporaryBlue": {}
}Requires: "HiJump"
"canLongChainTemporaryBlue"
"canBeExtremelyPatient"
"canXRayTurnaround"
"canDoubleSpringBallJumpMidAir"
"canTrickySpringBallJump"
{
"or": [
"canStationaryLateralMidAirMorph",
"canSpringFling"
]
}
"can4HighMidAirMorph" |
|
Use a double spring ball jump to reach the top of the room with temporary blue. To cross the two gaps at the top of the room while chaining temporary blue, use spring ball jumps with HiJump disabled; in each case, perform a stationary lateral mid-air morph or a spring fling (or both); Entrance condition: {
"comeInWithTemporaryBlue": {}
}Requires: "HiJump"
"canLongChainTemporaryBlue"
"canDoubleSpringBallJumpMidAir"
"canTrickySpringBallJump"
{
"or": [
"canStationaryLateralMidAirMorph",
"canSpringFling"
]
}
"canBeVeryPatient" |
|
Chain temporary blue to reach the Speed blocks below the items. Perform a spring ball jump and immediately unmorph and continue holding up, to break some of the Speed blocks while passing up through them. Leave one of the bottom Speed blocks unbroken to use as a platform. The top speed blocks will respawn; clip through them either using a snail clip with X-Ray or a Crystal Flash clip; In the case of a Crystal Flash clip, menu to Grapple before the Crystal Flash ends and mash shoot while holding down. Entrance condition: {
"comeInWithTemporaryBlue": {}
}Requires: {
"notable": "Suitless Temporary Blue To Items"
}
"canSuitlessMaridia"
"HiJump"
"canChainTemporaryBlue"
"canTrickySpringBallJump"
{
"or": [
"canXRayCeilingClip",
{
"and": [
"h_jumpIntoCrystalFlashClip",
"Grapple"
]
}
]
} |
|
Requires: "canSuitlessMaridia" "canSpringFling" "canTrickySpringBallJump" |
|
Requires either a spring fling or a stationary lateral midair morph with an unmorph to reset fall speed. Requires: "canSuitlessMaridia"
"canTrickySpringBallJump"
{
"or": [
"canSpringFling",
{
"and": [
"canStationaryLateralMidAirMorph",
"canResetFallSpeed"
]
}
]
} |
From: 11
G-Mode Overloaded PLMs (By Bottom Left Door)
To: 7
Top Right Left Item
Requires: "canGMode"
"canSnailClimb"
{
"or": [
"Gravity",
"h_underwaterMaxHeightSpringBallJump",
{
"and": [
"HiJump",
{
"or": [
"h_underwaterCrouchJump",
"canDownGrab"
]
}
]
}
]
} |
From: 13
Direct G-Mode Morph (By Bottom Left Door)
To: 7
Top Right Left Item
PLMs can be overloaded in direct G-Mode with a single Power Bomb if both items are still there and 2 PBs if only one item is. There is a row of tiles that works, just above and to the left of the right door. The row is one tile higher than the horizontal pipe that is part of the door frame, spanning from the left to one tile away from the right wall. Requires: "canPowerBombItemOverloadPLMs"
{
"notable": "G-Mode Overload PLMs - Power Bomb the Items"
}
{
"or": [
{
"itemNotCollectedAtNode": 7
},
{
"itemNotCollectedAtNode": 8
}
]
}
"h_usePowerBomb"
"h_usePowerBomb"
"h_navigateUnderwater"
"canSnailClimb"
{
"or": [
"Gravity",
"h_underwaterMaxHeightSpringBallJump",
{
"and": [
"HiJump",
{
"or": [
"h_underwaterCrouchJump",
"canDownGrab"
]
}
]
}
]
}Dev note: This does not include canRiskPermanentLossOfAccess, as it is only worth doing this strat if the items are there. |
|
Requires: "canSuitlessMaridia"
{
"or": [
{
"and": [
"canTrickySpringBallJump",
{
"or": [
"h_underwaterCrouchJump",
"canLateralMidAirMorph"
]
}
]
},
{
"and": [
"HiJump",
"h_useSpringBall"
]
},
{
"and": [
"HiJump",
"canMidAirMorph"
]
}
]
}Collects items: 5 |
|
Chain temporary blue across the room in order to break the Speed blocks. If available, bouncing using Spring Ball can help speed this up significantly. If two Power Bombs are also available, they can be used to break the shot blocks along the way without needing to stop bouncing. Entrance condition: {
"comeInWithTemporaryBlue": {
"direction": "right"
},
"comesThroughToilet": "any"
}Requires: "canChainTemporaryBlue"
{
"or": [
"HiJump",
"canTrickySpringBallJump",
"canInsaneJump"
]
}
{
"or": [
{
"and": [
"canSpringBallBounce",
{
"or": [
{
"ammo": {
"type": "PowerBomb",
"count": 2
}
},
{
"and": [
"canLongChainTemporaryBlue",
"can4HighMidAirMorph"
]
}
]
}
]
},
{
"and": [
"canLongChainTemporaryBlue",
"canStationaryLateralMidAirMorph",
"can4HighMidAirMorph",
"canBeVeryPatient"
]
}
]
} |
From: 1
Bottom Left Door
To: 2
Right Door
Chain temporary blue across the room in order to break the Speed blocks. If available, bouncing using Spring Ball can help speed this up significantly. If two Power Bombs are also available, they can be used to break the shot blocks along the way without needing to stop bouncing. Entrance condition: {
"comeInWithTemporaryBlue": {
"direction": "left"
},
"comesThroughToilet": "any"
}Requires: "canChainTemporaryBlue"
"canXRayTurnaround"
{
"or": [
"HiJump",
"canTrickySpringBallJump",
"canInsaneJump"
]
}
{
"or": [
{
"and": [
"canSpringBallBounce",
{
"or": [
{
"ammo": {
"type": "PowerBomb",
"count": 2
}
},
{
"and": [
"canLongChainTemporaryBlue",
"can4HighMidAirMorph"
]
}
]
}
]
},
{
"and": [
"canLongChainTemporaryBlue",
"canStationaryLateralMidAirMorph",
"can4HighMidAirMorph",
"canBeVeryPatient"
]
}
]
} |
From: 2
Right Door
To: 1
Bottom Left Door
Crouch under the crumble blocks. Holding both angle buttons to aim upward, freeze the Mochtroid while it is on Samus. Jump onto the Mochtroid by quickly pressing down after jumping. When on it, press up to stand then jump through the ceiling. Use the middle section of pipes as a platform to reach the top level, above the Mochtroid. Requires: {
"notable": "Mochtroid Ice Clip"
}
"h_navigateUnderwater"
"canUseFrozenEnemies"
{
"or": [
"HiJump",
"Gravity",
"canTrickySpringBallJump"
]
}
{
"disableEquipment": "Gravity"
}
{
"or": [
"canTrickyJump",
{
"and": [
"canDodgeWhileShooting",
{
"enemyDamage": {
"enemy": "Mochtroid",
"type": "contact",
"hits": 1
}
}
]
},
{
"enemyDamage": {
"enemy": "Mochtroid",
"type": "contact",
"hits": 2
}
}
]
}Dev note: The canCeilingClip was left out, because this is easier than all other clips, and can instead be a notable in a lower difficulty. |
|
Use normalized movement to land on the sand without losing a blue suit. One way is to do the following: from the platforms at the top of the room, simply walk off the ledge; from the platforms two tiles above the sand, do a full height jump; from the sand itself, do full height jumps, with or without breaking spin. Requires: {
"notable": "Blue Suit Sand Traversal"
}
{
"haveBlueSuit": {}
}
"Gravity"
"HiJump"
"canPlayInSand"
"canTrickySpringBallJump" |
From: 1
Left Door
To: 3
Top Right Door
Use the spikes, which are not in the water, to jump from platform to platform as a way to cross the room. Requires knowing the position of every spike in the room, and hitting the spikes while morphed can help. The first jump is particularly tough. A Spring Ball jump from the sand to the spike with HiJump, or a frozen Mochtroid can be used to get past it. Requires: {
"notable": "Spike Platforming with Move Assist"
}
"canDash"
"canWallJump"
"canSuitlessMaridia"
"canPlayInSand"
"canTrickyJump"
"Morph"
"canUseIFrames"
"canNeutralDamageBoost"
{
"spikeHits": 3
}
{
"or": [
{
"and": [
"HiJump",
"canTrickySpringBallJump"
]
},
{
"and": [
"canMochtroidIceClimb",
{
"or": [
"canInsaneJump",
{
"enemyDamage": {
"enemy": "Mochtroid",
"type": "contact",
"hits": 1
}
}
]
}
]
}
]
}
{
"or": [
{
"spikeHits": 1
},
"canHorizontalDamageBoost"
]
} |
|
Requires: {
"noBlueSuit": {}
}
"Gravity"
"HiJump"
"canPlayInSand"
"canTrickySpringBallJump" |
|
Perform the spring ball jump near max height. Place the first bomb between a few frames after the spring ball jump; ideally it should be just above the water line. Press pause a few frames after placing the bomb, to disable Spring Ball (a 'spring fling', to reset fall speed). Place the second bomb soon after regaining control, while the game is fading back in, then continue into an IBJ. Requires: {
"notable": "Bomb Jump Water Escape"
}
"HiJump"
"h_underwaterMaxHeightSpringBallJump"
"canSpringFling"
"canBombJumpWaterEscape"
"canJumpIntoIBJ" |
From: 2
Bottom Right Door
To: 3
Top Right Door
Entrance condition: {
"comeInJumping": {
"speedBooster": "no",
"minTiles": 1
}
}Requires: "canTrickySpringBallJump" "canCrossRoomJumpIntoWater" "canTrickyJump" "canMomentumConservingTurnaround" Dev note: Possible with no openend using a harder jump but a runway that small doesn't exist. |
From: 2
Bottom Right Door
To: 3
Top Right Door
Entrance condition: {
"comeInJumping": {
"speedBooster": "no",
"minTiles": 2
}
}Requires: "canTrickySpringBallJump" "canCrossRoomJumpIntoWater" "canMomentumConservingTurnaround" Dev note: FIXME: Can be lowered to canBufferedMomentumConservingTurnaround. |
|
Pause for the Gravity Jump as late as possible and then repause as soon as possible for the Spring Ball jump. Requires: "canTrickySpringBallJump" "canGravityJump" "canTrickyJump" |
|
Use normalized movement to land on the sand without losing a blue suit. One way is to do the following: from the platforms at the top of the room, simply walk off the ledge; from the platforms two tiles above the sand, do a full height jump; from the sand itself, do full height jumps, with or without breaking spin. Requires: {
"notable": "Blue Suit Sand Traversal"
}
{
"haveBlueSuit": {}
}
"Gravity"
"HiJump"
"canPlayInSand"
"canTrickySpringBallJump" |
|
Stay out of the water, and by extension the sand, of the room by using the spikes as platforms. Morphing before landing on the spikes helps to be able to control the knockback. The final spike jump (which would be the most difficult) is avoided by doing a crouch jump into spring ball jump into IBJ to reach the left door. Perform the spring ball jump near max height. Place the first bomb between about 4 and 6 frames after the spring ball jump; ideally it should be just above the water line. Press pause between about 5 and 10 frames after placing the bomb, to disable Spring Ball (a 'spring fling', to reset fall speed). Place the second bomb soon after regaining control, while the game is fading back in. A spike hit in the center of the room can avoided by doing another spring ball jump into IBJ (also with a spring fling). Requires: {
"notable": "Bomb Jump Water Escape"
}
"canDash"
"HiJump"
"canPreciseWallJump"
"canUseIFrames"
{
"spikeHits": 1
}
"canNeutralDamageBoost"
"canTrickyJump"
{
"or": [
"canHorizontalDamageBoost",
{
"spikeHits": 1
}
]
}
{
"or": [
"canBePatient",
{
"spikeHits": 1
}
]
}
"h_underwaterMaxHeightSpringBallJump"
"canSpringFling"
"canBombJumpWaterEscape"
"canJumpIntoIBJ"Dev note: The IBJ at the left side of the room can be done without a 'spring fling' but is far more precise: the first bomb must be placed exactly two frames before the spring ball jump, and the spring ball jump should be performed just before max height, during the 4-frame window between 2 and 5 frames before the last possible frame to jump (there are also 1-frame windows at 0 and 8 frames before the last frame). FIXME: This can be possible to do while carrying a blue suit, with much greater difficulty. |
|
Requires: {
"noBlueSuit": {}
}
"Gravity"
"HiJump"
"canPlayInSand"
"canTrickySpringBallJump" |
|
Freeze a crab multiple times to climb the upper section. It may be easier to climb the left shaft by knocking the crab off the wall, or by bringing up a crab from the lower area. Requires: {
"notable": "Ice Only Crab Climb"
}
"h_navigateUnderwater"
"canTrickyUseFrozenEnemies"
"canCarefulJump"
{
"or": [
"canSunkenTileWideWallClimb",
"canTrickyJump",
"canTrickySpringBallJump",
{
"ammo": {
"type": "Super",
"count": 1
}
}
]
} |
Come in Getting Blue Speed, Leave With Temporary Blue (Spring Ball Jump, Pause Remorph)
(Insane)
Crab Shaft
From: 2
Right Door
To: 1
Left Door
Face right and perform a mid-air spring ball jump through the single-tile gap. Entrance condition: {
"comeInGettingBlueSpeed": {
"length": 1,
"openEnd": 1
}
}Requires: "canSuitlessMaridia" "HiJump" "canLongChainTemporaryBlue" "canXRayTurnaround" "canTrickySpringBallJump" Exit condition: {
"leaveWithTemporaryBlue": {}
}Unlocks doors: {"types":["ammo"],"requires":[]} |
|
Requires: "canSuitlessMaridia"
"canSpringBallJumpMidAir"
{
"or": [
"h_underwaterMaxHeightSpringBallJump",
"HiJump",
"canUseFrozenEnemies"
]
} |
Come in Getting Blue Speed, Leave With Temporary Blue (Spring Ball Jump, Pause Remorph)
(Insane)
Crab Shaft
From: 2
Right Door
To: 3
Top Door
Perform a long series of tricky spring ball jumps to get up through the room while chaining temporary blue. After each spring ball jump, immediately unmorph to avoid bonking the wall and losing temporary blue. Aim down and use a pause buffer to remorph and continue chaining temporary blue. Entrance condition: {
"comeInGettingBlueSpeed": {
"length": 1,
"openEnd": 1
}
}Requires: "HiJump" "canSuitlessMaridia" "canLongChainTemporaryBlue" "canXRayTurnaround" "canTrickySpringBallJump" "canPauseRemorphTemporaryBlue" "canBeVeryPatient" Exit condition: {
"leaveWithTemporaryBlue": {
"direction": "any"
}
}Unlocks doors: {"types":["ammo"],"requires":[]} |
From: 4
Platform Below Top Door
To: 3
Top Door
To get a crab at the top of the room, either use a Super to knock off the central crab, or bring the bottom global crab by breaking the shot block in the middle of the room and using Ice to climb it to the top of the room. Shoot a Super as the crab crawls on the side of the blocks near the top door, then freeze it mid-air pixel perfectly. Perform a tight down grab to get onto it then jump through the door shell. Knocking the crab off while it is on the the door or ceiling will not work. Requires: {
"notable": "Crab High Pixel Ice Clip Door Lock Skip"
}
{
"or": [
{
"ammo": {
"type": "Super",
"count": 1
}
},
{
"notable": "Ice Only Crab Climb"
},
"Gravity",
"HiJump",
"canTrickySpringBallJump"
]
}
{
"ammo": {
"type": "Super",
"count": 1
}
}
"h_highPixelIceClip"Bypasses door shell: true |
|
To get a crab at the top of the room, either use a Super to knock off the central crab, or bring the bottom global crab by breaking the shot block in the middle of the room and using Ice to climb it to the top of the room. Shoot a Super as the crab crawls near the top door, then freeze it mid-air and use it to clip up past the door shell. Without Morph and X-Ray, Samus must shoot the Super while the crab is on a block next to the door, not on the door itself. With Morph and X-Ray, knock the crab off while on the ceiling one tile lower than the doorshell for a one-frame freeze window. This has a two-frame window with Gravity or HiJump. Requires: {
"notable": "Crab Ice Clip Door Lock Skip"
}
{
"ammo": {
"type": "Super",
"count": 1
}
}
{
"or": [
{
"ammo": {
"type": "Super",
"count": 1
}
},
{
"notable": "Ice Only Crab Climb"
},
"Gravity",
"HiJump",
"canTrickySpringBallJump"
]
}
{
"or": [
"h_XRayMorphIceClip",
{
"and": [
"Gravity",
"h_preciseIceClip"
]
}
]
}Bypasses door shell: true |
|
Requires: "HiJump"
{
"shineChargeFrames": 0
}
"h_getBlueSpeedMaxRunway"
"canXRayTurnaround"
"canLongChainTemporaryBlue"
"canTrickySpringBallJump"
"canPauseRemorphTemporaryBlue"Exit condition: {
"leaveWithTemporaryBlue": {
"direction": "any"
}
}Unlocks doors: {"types":["ammo"],"requires":[]}Dev note: The `h_getBlueSpeedMaxRunway` requirement is to satisfy the tests, since we don't have a way to represent that the temporary blue originates from the startsWithShineCharge. |
|
Requires: {
"resetRoom": {
"nodes": [
1
]
}
}
{
"or": [
{
"and": [
"Gravity",
{
"or": [
{
"and": [
"HiJump",
"canSpeedyJump",
"canTrickyJump",
{
"cycleFrames": 300
}
]
},
{
"and": [
"HiJump",
"canWallJump",
{
"cycleFrames": 310
}
]
},
{
"and": [
"SpaceJump",
{
"cycleFrames": 360
}
]
},
{
"and": [
"canTrickyWallJump",
{
"cycleFrames": 380
}
]
},
{
"and": [
"canSpringBallJumpMidAir",
{
"or": [
"HiJump",
"canSpringwall",
{
"and": [
"canTrickySpringBallJump",
"canTrickyJump"
]
}
]
},
{
"cycleFrames": 340
},
"h_doubleEquipmentScreenCycleFrames"
]
},
{
"and": [
"canDoubleBombJump",
{
"cycleFrames": 830
}
]
}
]
}
]
},
{
"and": [
"canSuitlessMaridia",
{
"or": [
{
"and": [
"HiJump",
"canTrickyJump",
"canMidairWiggle",
"canTrickyWallJump",
{
"cycleFrames": 360
}
]
},
{
"and": [
"HiJump",
"canSpaceJumpWaterBounce",
"canWallJump",
{
"cycleFrames": 390
}
]
},
{
"and": [
"HiJump",
"canSpaceJumpWaterEscape",
{
"cycleFrames": 430
}
]
},
{
"and": [
{
"notable": "Suitless Bootless Space Jump"
},
"canSpaceJumpWaterBounce",
"canWallJump",
{
"cycleFrames": 440
}
]
},
{
"and": [
"HiJump",
"canTrickySpringBallJump",
{
"or": [
"canTrickyJump",
"canFlatleyJump"
]
},
{
"cycleFrames": 360
},
"h_doubleEquipmentScreenCycleFrames"
]
}
]
}
]
}
]
}Resets obstacles: R-Mode Farm cycle drops: 1 Cacatac |
|
Requires: {
"resetRoom": {
"nodes": [
2
]
}
}
{
"or": [
{
"and": [
"Gravity",
{
"or": [
{
"and": [
"canWallJump",
{
"cycleFrames": 740
}
]
},
{
"and": [
"SpaceJump",
{
"cycleFrames": 790
}
]
},
{
"and": [
"HiJump",
"canTrickyDashJump",
{
"cycleFrames": 795
}
]
},
{
"and": [
"canSpringBallJumpMidAir",
{
"or": [
"HiJump",
"canSpringFling"
]
},
{
"cycleFrames": 920
},
"h_doubleEquipmentScreenCycleFrames"
]
},
{
"and": [
"canDiagonalBombJump",
{
"cycleFrames": 1380
}
]
}
]
}
]
},
{
"and": [
"canSuitlessMaridia",
{
"or": [
{
"and": [
"HiJump",
"canSpaceJumpWaterBounce",
"canWallJump",
{
"cycleFrames": 810
}
]
},
{
"and": [
"HiJump",
"canSpaceJumpWaterEscape",
{
"cycleFrames": 850
}
]
},
{
"and": [
"HiJump",
"h_underwaterMaxHeightSpringBallJump",
"canTrickyJump",
"canStationaryLateralMidAirMorph",
{
"cycleFrames": 1070
},
"h_doubleEquipmentScreenCycleFrames"
]
}
]
}
]
}
]
}Resets obstacles: R-Mode Farm cycle drops: 2 Cacatac |
From: 2
Right Door
To: 4
Top Right Ledge Junction
Requires a runway of at least 1 tile in the adjacent room, although it is easier with more. Entrance condition: {
"comeInJumping": {
"speedBooster": "no",
"minTiles": 1
}
}Requires: {
"or": [
"canWallJump",
"canTrickySpringBallJump",
"SpaceJump"
]
}
"canCrossRoomJumpIntoWater" |
From: 2
Right Door
To: 4
Top Right Ledge Junction
There is just enough distance for a MidAir Spring Ball jump to reach without HiJump, with either a crouch jump or air ball. To do this, pause and morph early in order to get a spring fling from equipping Spring Ball. Requires: "Gravity"
"canSpringBallJumpMidAir"
{
"or": [
"HiJump",
{
"and": [
"h_maxHeightSpringBallJump",
"canSpringFling"
]
},
{
"and": [
"canTrickyJump",
"canLateralMidAirMorph",
"canTrickySpringBallJump",
"canSpringFling",
"h_complexToCarryFlashSuit"
]
}
]
}Dev note: The h_maxHeightSpringBallJump is not a h_underwaterMaxHeightSpringBallJump, because Gravity is required. |
From: 2
Right Door
To: 4
Top Right Ledge Junction
Spring Ball jump just as Samus exits the water to reach the distant ledge. To get enough horizontal distance, either use a Stationary Lateral Mid-Air Morph with a crouch jump for extra height, or spin jump out before morphing. Or Spring Ball jump part of the way over and land on a Bomb explosion to cross the rest of the distance. Requires: "canSuitlessMaridia"
"HiJump"
"h_underwaterMaxHeightSpringBallJump"
{
"or": [
"canStationaryLateralMidAirMorph",
{
"and": [
{
"tech": "canJumpIntoIBJ"
},
"canBombHorizontally"
]
}
]
}Dev note: The canCrouchJump is not required but makes the strat easier The canStationaryLateralMidAirMorph is not strictly required but better describes the difficulty. |
From: 3
Junction Left of Morph Tunnel
To: 1
Left Door
1) Start the jump from the raised alcove, standing on the edge facing right. 2) Turn-around spin jump to get the necessary horizontal speed to reach the upper ledge. 3) Spring Ball jump after breaking the water line. A lateral mid-air morph or spring fling can help, but are not required. Unmorphing on a failed attempt can help avoid spike damage. Requires: "canSuitlessMaridia"
"HiJump"
"canTrickySpringBallJump"
{
"or": [
"canTrickyJump",
"canFlatleyJump"
]
} |
From: 5
Bottom Middle Junction
To: 4
Top Right Ledge Junction
Perform the spring ball jump near max height. Place the first bomb after the spring ball jump; just above the water line. Press pause just after placing the bomb, to disable Spring Ball (a 'spring fling', to reset fall speed). Place the second bomb soon after regaining control, while the game is fading back in. Requires: {
"notable": "Bomb Jump Water Escape"
}
"HiJump"
"h_underwaterMaxHeightSpringBallJump"
"canSpringFling"
"canBombJumpWaterEscape"
"canJumpIntoIBJ" |
From: 5
Bottom Middle Junction
To: 4
Top Right Ledge Junction
1) Crouch jump and then Spring Ball jump. 2) Bomb-Grapple-Jump using the distant Cacatac who is above the water. 3) Spring Ball jump again just as Samus exits the water. Requires: {
"notable": "HiJumpless Double Spring Ball Jump and Bomb-Grapple-Jump"
}
"canBombGrappleJump"
"canDoubleSpringBallJumpMidAir"
"h_underwaterMaxHeightSpringBallJump" |
From: 5
Bottom Middle Junction
To: 4
Top Right Ledge Junction
When the Cacatac on the ground fires a spike, perform a Spring Ball jump to break the waterline and then hit the spike for extra height. With a blue suit, after the mid-air Spring Ball jump Samus would be invulnerable and unable to take a boost from the spike. But by unequipping Spring Ball again, it becomes possible. Requires: {
"notable": "Spring Ball Spike Boost"
}
"h_underwaterCrouchJump"
"HiJump"
"canSuitlessMaridia"
"canTrickyJump"
"canTrickySpringBallJump"
{
"or": [
"canInsaneJump",
"canStationaryLateralMidAirMorph"
]
}
{
"or": [
"canNeutralDamageBoost",
{
"and": [
"canSpringFling",
"h_midAirMorphDamageBoost"
]
}
]
}
{
"enemyDamage": {
"enemy": "Cacatac",
"type": "spike",
"hits": 2
}
}Dev note: The crouch jump is not strictly necessary but it helps significantly. |
From: 5
Bottom Middle Junction
To: 6
Junction Right of Morph Tunnel
This can be done by turning off Gravity and HiJump to jump over both spike pits. Requires: "canSuitlessMaridia"
"canSpringBallJumpMidAir"
{
"spikeHits": 1
}
{
"or": [
"canTrickySpringBallJump",
{
"and": [
"canWallJump",
"canSpaceJumpWaterBounce"
]
},
{
"and": [
"canJumpIntoIBJ",
"h_useSpringBall"
]
},
{
"spikeHits": 1
}
]
} |
From: 6
Junction Right of Morph Tunnel
To: 5
Bottom Middle Junction
Requires: "canSuitlessMaridia"
{
"or": [
{
"spikeHits": 1
},
"canTrickySpringBallJump",
{
"and": [
"HiJump",
{
"or": [
"canWallJump",
"canDownGrab",
"canSpaceJumpWaterEscape",
"canSpringBallJumpMidAir"
]
}
]
}
]
}
{
"or": [
{
"spikeHits": 1
},
"HiJump"
]
} |
|
By using the sandfall physics, it is possible to Spring Ball jump to the Maridia Power Bomb location without Gravity or HiJump. This requires a very precise spinjump into the sandfall which also exits the sandfall, after being pushed down, with more height than a regular jump. It is very easy to fall into the sand and be unable to escape. Requires: {
"notable": "Sandfall Bounce"
}
"canSandfallBounce"
"canTrickySpringBallJump"
"canTrickyJump" |
From: 1
Top Sand Entrance
To: 5
Junction Below Left Item
It's possible to get out of the sand suitless and without HiJump after falling from the chute, by hugging the left side and moving quickly. Requires: "canSuitlessMaridia" "canPlayInSand" "h_underwaterMaxHeightSpringBallJump" |
|
Requires: "canSuitlessMaridia"
"canTrickySpringBallJump"
{
"or": [
"HiJump",
"can4HighMidAirMorph"
]
} |
From: 1
Top Left Door
To: 4
Top Right Door
Entrance condition: {
"comeInShinecharging": {
"length": 1,
"openEnd": 0
}
}Requires: "Gravity" "HiJump" "canTrickySpringBallJump" "canChainTemporaryBlue" Exit condition: {
"leaveWithTemporaryBlue": {}
}Unlocks doors: {"types":["ammo"],"requires":[]} |
From: 1
Top Left Door
To: 4
Top Right Door
Requires a runway of 1 tile in the adjacent room. Use a Spring Ball jump after getting out of the water. Entrance condition: {
"comeInJumping": {
"speedBooster": "any",
"minTiles": 1
}
}Requires: "canCrossRoomJumpIntoWater" "canTrickyJump" "canTrickySpringBallJump" |
|
Stationary lateral midair morph into a SpringBall jump just as Samus exits the water to reach the distant ledge. This can either be done from a crouch jump from the last pixel, giving an 8-frame window to jump while out of the water, or from a spin jump, which gives a 2-frame window to jump while out of the water. Samus could also start from a standing position, requiring the last pixel and only giving a 2-frame window. Requires: "canSuitlessMaridia"
"HiJump"
"canTrickyJump"
"canTrickySpringBallJump"
"canStationaryLateralMidAirMorph"
{
"or": [
"h_underwaterCrouchJump",
"canInsaneJump"
]
} |
From: 2
Bottom Left Door
To: 4
Top Right Door
Entrance condition: {
"comeInShinecharging": {
"length": 3,
"openEnd": 1
}
}Requires: "HiJump"
{
"or": [
{
"and": [
"canGravityJump",
"canTrickySpringBallJump",
"canChainTemporaryBlue"
]
},
{
"and": [
"canTrickyUseFrozenEnemies",
"canLongChainTemporaryBlue"
]
}
]
}Exit condition: {
"leaveWithTemporaryBlue": {}
}Unlocks doors: {"types":["ammo"],"requires":[]}Dev note: FIXME: Probably more of the runway could be used, but with increasing difficulty. |
From: 2
Bottom Left Door
To: 4
Top Right Door
Requires a runway of 1 tile in the adjacent room. Use a spring ball jump after breaking the water, then ibj. Take two Mochtroid hits or use a double bomb jump. Entrance condition: {
"comeInJumping": {
"speedBooster": "no",
"minTiles": 1
}
}Requires: "canTrickySpringBallJump"
"canJumpIntoIBJ"
"canTrickyJump"
{
"or": [
"canDoubleBombJump",
{
"enemyDamage": {
"enemy": "Mochtroid",
"type": "contact",
"hits": 2
}
}
]
}
"canCrossRoomJumpIntoWater" |
From: 2
Bottom Left Door
To: 4
Top Right Door
Entrance condition: {
"comeInJumping": {
"speedBooster": "any",
"minTiles": 1
}
}Requires: "HiJump" "canBufferedMomentumConservingTurnaround" "canTrickySpringBallJump" "canCrossRoomJumpIntoWater" |
From: 2
Bottom Left Door
To: 4
Top Right Door
Entrance condition: {
"comeInJumping": {
"speedBooster": "yes",
"minTiles": 16
}
}Requires: "canTrickySpringBallJump" "canCrossRoomJumpIntoWater" |
From: 2
Bottom Left Door
To: 4
Top Right Door
Requires: "canGravityJump" "HiJump" "canTrickySpringBallJump" |
From: 2
Bottom Left Door
To: 4
Top Right Door
This requires gaining speed by running a precise distance of 7 tiles (extra run speed of $2.0 or $2.1). Entrance condition: {
"comeInJumping": {
"speedBooster": "yes",
"minTiles": 6.4375
}
}Requires: "canTrickyDashJump" "canTrickySpringBallJump" "canCrossRoomJumpIntoWater" |
From: 6
Bottom Shinecharged
To: 4
Top Right Door
Requires: "h_shinechargeMaxRunway"
{
"shineChargeFrames": 0
}
"canXRayTurnaround"
"HiJump"
{
"or": [
{
"and": [
"canGravityJump",
"canTrickySpringBallJump",
"canChainTemporaryBlue"
]
},
{
"and": [
"canTrickyUseFrozenEnemies",
"canLongChainTemporaryBlue"
]
}
]
}Exit condition: {
"leaveWithTemporaryBlue": {}
}Unlocks doors: {"types":["ammo"],"requires":[]} |
From: 2
Bottom Left Door
To: 1
Top Left Door
Gaining blue speed with a precise amount of run speed (extra run speed of $2.0 or $2.1), and bounce through the transition. After the transition, unmorph, hold an angle button, aim down, and pause near the peak of Samus' jump. Buffer a morph out of the pause to continue chaining temporary blue. Use a spring ball jump to escape the water. Entrance condition: {
"comeInWithBlueSpringBallBounce": {
"movementType": "any",
"minExtraRunSpeed": "$2.0",
"maxExtraRunSpeed": "$2.1"
}
}Requires: "canTrickyDashJump" "canCrossRoomJumpIntoWater" "canPauseRemorphTemporaryBlue" "canXRayTurnaround" "canTrickySpringBallJump" Exit condition: {
"leaveWithTemporaryBlue": {}
}Unlocks doors: {"types":["ammo"],"requires":[]} |
From: 4
Bottom Right Shinecharged
To: 1
Top Left Door
To get out of the water at the top, do another gravity jump or spring ball jump, preferably while the water is high. Requires: "h_shinechargeMaxRunway"
{
"shineChargeFrames": 0
}
"canXRayTurnaround"
"canLongChainTemporaryBlue"
{
"or": [
"canGravityJump",
{
"and": [
"HiJump",
"canTrickySpringBallJump"
]
}
]
}Exit condition: {
"leaveWithTemporaryBlue": {}
}Unlocks doors: {"types":["ammo"],"requires":[]} |
From: 1
Bottom Left Door
To: 2
Top Right Door
Requires: "canSuitlessMaridia" "canUseFrozenEnemies" "canTrickySpringBallJump" "h_underwaterCrouchJump" |
From: 1
Top Sand Entrance
To: 7
Below Morph Tunnel Junction
Get to the left side of the room while avoiding the hole in the ground, jump up through the Morph tunnel. Jump up to the ledge with either Gravity, HiJump and a Crouch Jump Down Grab, or a maximum height Spring Ball Jump. Entrance condition: {
"comeInWithGMode": {
"mode": "any",
"morphed": false
},
"comesThroughToilet": "any"
}Requires: "Morph"
"h_navigateUnderwater"
{
"or": [
"Gravity",
{
"and": [
"HiJump",
"h_underwaterCrouchJumpDownGrab"
]
},
"h_underwaterMaxHeightSpringBallJump"
]
} |
From: 1
Top Sand Entrance
To: 7
Below Morph Tunnel Junction
HiJump with a good jump from the sand can reach the Solid Rock Maze region. Use the sandfall if Samus gets stuck in the sand. Bouncing on the sand as springball can reach the above maze by altering Samus' fall height, like by bouncing under the solid ledge before trying to jump up. Perform a max height Spring Ball jump, starting from a crouch jump, in order to make it up onto the ledge. Requires: "canSuitlessMaridia"
{
"or": [
"canPrepareForNextRoom",
"canPlayInSand"
]
}
"HiJump"
"h_underwaterMaxHeightSpringBallJump"Dev note: Jumping through the sandfall is failable enough to require canPlayInSand This is not a traditional max height spring ball jump, as it requires HiJump and crosses the waterline, but it requires similar inputs and precision. |
From: 7
Below Morph Tunnel Junction
To: 5
Morph Tunnel Junction
Requires: "canSuitlessMaridia" "canTrickySpringBallJump" "can4HighMidAirMorph" "canCarefulJump" |
|
Requires: {
"or": [
{
"resetRoom": {
"nodes": [
1
]
}
},
{
"and": [
{
"resetRoom": {
"nodes": [
2
]
}
},
{
"cycleFrames": 120
}
]
}
]
}
{
"or": [
"canWallJump",
{
"and": [
"SpaceJump",
{
"cycleFrames": 300
}
]
},
{
"and": [
"canTrickySpringBallJump",
{
"cycleFrames": 320
},
"h_doubleEquipmentScreenCycleFrames",
"h_doubleEquipmentScreenCycleFrames",
"h_doubleEquipmentScreenCycleFrames"
]
}
]
}
"canDodgeWhileShooting"
{
"or": [
{
"and": [
"Plasma",
{
"cycleFrames": 820
}
]
},
{
"and": [
"Grapple",
{
"cycleFrames": 900
}
]
},
{
"and": [
"ScrewAttack",
{
"cycleFrames": 1000
}
]
},
{
"and": [
{
"haveBlueSuit": {}
},
{
"cycleFrames": 1000
}
]
},
{
"and": [
"Wave",
{
"cycleFrames": 1080
}
]
},
{
"and": [
"Spazer",
{
"cycleFrames": 1140
}
]
},
{
"cycleFrames": 2040
}
]
}
{
"or": [
"canFarmWhileShooting",
{
"cycleFrames": 500
}
]
}Farm cycle drops: 4 Puyo, 3 Choot |
From: 1
Bottom Left Door
To: 2
Top Right Door
Perform a sequence of three mid-air Spring Ball jumps, each immediately followed by an unmorph to avoid bonking the wall; after each unmorph, use a pause-buffered remorph to continue chaining temporary blue. Entrance condition: {
"comeInShinecharging": {
"length": 0,
"openEnd": 1
}
}Requires: "HiJump"
"canTrickySpringBallJump"
"canPauseRemorphTemporaryBlue"
"canLongChainTemporaryBlue"
{
"enemyDamage": {
"enemy": "Choot",
"type": "contact",
"hits": 1
}
}Exit condition: {
"leaveWithTemporaryBlue": {}
}Unlocks doors: {"types":["ammo"],"requires":[]}Dev note: The Choot hit is possible to avoid, but it's not yet clear if this can be done reliably. |
|
Requires: "canTrickySpringBallJump"
{
"or": [
"Wave",
"Spazer",
"Plasma",
"h_usePowerBomb",
"canTrickyJump",
{
"enemyDamage": {
"enemy": "Choot",
"type": "contact",
"hits": 1
}
}
]
} |
From: 1
Bottom Left Door
To: 2
Right Door
Entrance condition: {
"comeInShinecharging": {
"length": 1,
"openEnd": 0
}
}Requires: "canLongChainTemporaryBlue"
{
"or": [
"HiJump",
{
"and": [
"canTrickySpringBallJump",
"canPauseRemorphTemporaryBlue"
]
}
]
}Exit condition: {
"leaveWithTemporaryBlue": {}
}Unlocks doors: {"types":["ammo"],"requires":[]} |
From: 2
Right Door
To: 3
Elevator
This strat is included for completeness, though generally it would be easier to do a spring ball bounce instead. Entrance condition: {
"comeInWithSidePlatform": {
"platforms": [
{
"minHeight": 2,
"maxHeight": 2,
"minTiles": 45,
"speedBooster": "yes",
"obstructions": [
[
1,
0
]
],
"note": [
"This applies to Noob Bridge."
]
},
{
"minHeight": 2,
"maxHeight": 2,
"minTiles": 45,
"speedBooster": "yes",
"obstructions": [
[
3,
0
]
],
"note": [
"This applies to Statues Hallway and Baby Kraid Room."
]
},
{
"minHeight": 3,
"maxHeight": 3,
"minTiles": 45,
"speedBooster": "yes",
"obstructions": [
[
3,
0
]
],
"note": [
"This applies to Bowling Alley (middle, power off) and Basement (power on)."
]
},
{
"minHeight": 3,
"maxHeight": 3,
"minTiles": 39.4375,
"speedBooster": "yes",
"obstructions": [
[
3,
2
]
],
"note": [
"This applies to Metal Pirates Room."
]
}
]
}
}Requires: "HiJump" "canInsaneJump" "canMomentumConservingMorph" "canInsaneMidAirMorph" "canTrickySpringBallJump" |
From: 3
Junction Left of Morph Tunnel
To: 1
Left Door
Requires: "canTrickyJump"
{
"or": [
"canPreciseWallJump",
"canTrickySpringBallJump"
]
} |
|
Requires: {
"obstaclesCleared": [
"C"
]
}
{
"canShineCharge": {
"usedTiles": 20,
"openEnd": 2
}
}
"canChainTemporaryBlue"
"canXRayTurnaround"
"HiJump"
"canTrickySpringBallJump"Exit condition: {
"leaveWithTemporaryBlue": {}
} |
|
Using the bottom of the room, shortcharge to use the echoes created by shinesparking to kill all of the Standing Pirates. Turn around and diagonal spark the ceiling to kill the pirates. Building a spark towards the left allows for enough run speed to jump to the middle level. Then vertical shinespark out which kills the top pirate. Requires: {
"obstaclesCleared": [
"C"
]
}
"canShinechargeMovementComplex"
"canUseSpeedEchoes"
{
"canShineCharge": {
"usedTiles": 21,
"openEnd": 0
}
}
{
"or": [
{
"and": [
{
"or": [
"HiJump",
"canWallJump",
"canSpeedyJump",
"canTrickySpringBallJump",
"SpaceJump"
]
},
{
"shinespark": {
"frames": 28,
"excessFrames": 8
}
}
]
},
{
"and": [
{
"or": [
"canWallJump",
{
"and": [
"canShinechargeMovementTricky",
{
"or": [
"canSpeedyJump",
"canTrickySpringBallJump",
"SpaceJump"
]
}
]
}
]
},
{
"shinespark": {
"frames": 20,
"excessFrames": 8
}
}
]
},
{
"and": [
"HiJump",
{
"shinespark": {
"frames": 16,
"excessFrames": 8
}
}
]
},
{
"and": [
"HiJump",
"canSpeedyJump",
"canShinechargeMovementTricky",
{
"shinespark": {
"frames": 11,
"excessFrames": 8
}
}
]
}
]
}Clears obstacles: A |
|
Requires: {
"resetRoom": {
"nodes": [
1
]
}
}
{
"or": [
"canDash",
{
"cycleFrames": 120
}
]
}
{
"or": [
"canWallJump",
"HiJump",
{
"and": [
"SpaceJump",
{
"cycleFrames": 300
}
]
},
{
"and": [
"canTrickySpringBallJump",
{
"cycleFrames": 360
},
"h_doubleEquipmentScreenCycleFrames",
"h_doubleEquipmentScreenCycleFrames",
"h_doubleEquipmentScreenCycleFrames"
]
},
{
"and": [
"canDoubleBombJump",
{
"cycleFrames": 930
}
]
}
]
}
{
"or": [
{
"and": [
{
"or": [
"Grapple",
"Wave",
"Plasma"
]
},
{
"cycleFrames": 750
}
]
},
{
"and": [
{
"or": [
"ScrewAttack",
{
"haveBlueSuit": {}
}
]
},
{
"cycleFrames": 820
}
]
},
{
"and": [
"Spazer",
{
"cycleFrames": 850
}
]
},
{
"and": [
"canPseudoScrew",
{
"cycleFrames": 870
}
]
},
{
"cycleFrames": 1080
}
]
}Resets obstacles: R-Mode Farm cycle drops: 3 Choot |
|
Requires: "canSuitlessMaridia"
"HiJump"
"canSpringBallJumpMidAir"
{
"or": [
"h_underwaterCrouchJumpDownGrab",
"canTrickySpringBallJump",
"canWallJump"
]
} |
|
Requires: "canSuitlessMaridia"
"canSpringBallJumpMidAir"
{
"or": [
"canWallJump",
"h_underwaterCrouchJumpDownGrab",
"canTrickySpringBallJump"
]
} |
|
Gain a shinecharge by running right-to-left on the underwater runway on the right side of the room. Use HiJump or a Spring Ball jump to quickly exit the water to the left and spark up. Requires: "Gravity"
{
"or": [
"HiJump",
"canTrickySpringBallJump",
"canWallJump",
{
"and": [
"canGravityJump",
"canShinechargeMovementTricky"
]
}
]
}
{
"enemyKill": {
"enemies": [
[
"Owtch",
"Owtch"
]
]
}
}
"canShinechargeMovementComplex"
{
"canShineCharge": {
"usedTiles": 16,
"gentleUpTiles": 2,
"gentleDownTiles": 2,
"steepUpTiles": 1,
"steepDownTiles": 1,
"startingSteepDownTiles": 1,
"startingGentleDownTiles": 2,
"openEnd": 2
}
}
{
"shinespark": {
"frames": 43,
"excessFrames": 3
}
}Dev note: FIXME: It's technically possible to evade the Owtches without killing them, but it's unclear if this can be done reliably. A 2->5 shinespark strat from here can also be added, using less energy than the existing strat that uses the runway at the bottom of the room. |
From: 3
Middle Right Door
To: 4
Top Right Door
Freeze the island Choot when it is at the far left of its second-highest swoop. Run right-to-left on it and perform a last-frame jump into a max-height spring ball jump. Getting the highest possible run speed requires starting from the right-most 87.5% of the last pixel (subpixel position at least $2000). Press pause at the same time as starting to run, or slightly earlier, and perform the mid-air morph quickly; timing the pause to hit as early as possible after morphing will maximize the time that Spring Ball is equipped, boosting Samus' horizontal speed and making it possible to clear the corner of the ceiling. Requires: {
"notable": "Insane Frozen Choot Spring Ball Jump"
}
"canDash"
"canTrickyUseFrozenEnemies"
"HiJump"
"can4HighMidAirMorph"
"canTrickySpringBallJump"
"canInsaneJump"Dev note: There is at least a 3-frame window for freezing the Choot that works: two frames with the Choot in position ($2DE, $2F7), and one frame in position ($2E1, $2F9) It is possible to make the jump with one less frame of run speed; in this case Samus should start running from a few pixels further left, and a tighter mid-air morph may be required. |
From: 3
Middle Right Door
To: 4
Top Right Door
Run into the room, pressing pause immediately when entering. Jump into a mid-air spring ball jump to reach the ledge above. Perform the spring ball jump while still moving forward, in order to get a boost in jump height. Entrance condition: {
"comeInRunning": {
"speedBooster": "yes",
"minTiles": 5.4375
}
}Requires: "HiJump"
"canSpeedyJump"
"canTrickyJump"
"canLateralMidAirMorph"
"canTrickySpringBallJump"
{
"or": [
"canSpringFling",
"canInsaneJump",
"can4HighMidAirMorph"
]
}Dev note: This assumes extra run speed of $1.B entering the room, at least $2.6 when jumping (a 2-frame window in the worst case). |
From: 3
Middle Right Door
To: 4
Top Right Door
Run into the room, pressing pause immediately when entering. Jump into a mid-air spring ball jump to reach the ledge above. Perform the spring ball jump while still moving forward, in order to get a boost in jump height. Entrance condition: {
"comeInRunning": {
"speedBooster": "yes",
"minTiles": 43
}
}Requires: "canSpeedyJump" "canTrickyJump" "canLateralMidAirMorph" "canTrickySpringBallJump" Dev note: This assumes max run speed (extra run speed of $7.0). |
From: 3
Middle Right Door
To: 4
Top Right Door
Run into the room, pressing pause immediately when entering. Jump into a mid-air spring ball jump to reach the ledge above. Perform the spring ball jump while still moving forward, in order to get a boost in jump height. Entrance condition: {
"comeInRunning": {
"speedBooster": "yes",
"minTiles": 34
}
}Requires: "canTrickyDashJump" "canLateralMidAirMorph" "canTrickySpringBallJump" Dev note: An extra run speed of at least $6.0 or $6.1 is needed. |
From: 3
Middle Right Door
To: 5
Top Junction
Run into the room, pressing pause immediately when entering. Jump into a mid-air spring ball jump to reach the top ledge above; perform the spring ball jump while still moving forward, in order to get a boost in jump height. Entrance condition: {
"comeInRunning": {
"speedBooster": "yes",
"minTiles": 21
}
}Requires: "HiJump" "canSpeedyJump" "canTrickyJump" "canTrickySpringBallJump" Dev note: This assumes extra run speed of $4.6 entering the room, at least $4.D when jumping (a 2-frame window in the worst case). |
|
Requires: "Gravity"
{
"canShineCharge": {
"usedTiles": 22,
"gentleUpTiles": 2,
"gentleDownTiles": 4,
"steepUpTiles": 2,
"steepDownTiles": 3,
"openEnd": 0
}
}
{
"or": [
"HiJump",
"canGravityJump",
"canTrickySpringBallJump"
]
}
"canChainTemporaryBlue"Exit condition: {
"leaveWithTemporaryBlue": {}
} |
|
Requires: "Gravity"
{
"canShineCharge": {
"usedTiles": 22,
"gentleUpTiles": 2,
"gentleDownTiles": 4,
"steepUpTiles": 2,
"steepDownTiles": 3,
"openEnd": 0
}
}
{
"or": [
"HiJump",
"canGravityJump",
"canTrickySpringBallJump"
]
}
"canChainTemporaryBlue"Exit condition: {
"leaveWithTemporaryBlue": {
"direction": "left"
}
} |
From: 2
Bottom Door
To: 4
Water Level Junction
Standing on the platform in the room below, jump up (crouch jump makes it easier) and press right against the door frame through the transition. After the transition, perform a spring ball jump mid-air to reach the ledge. Entrance condition: {
"comeInWithPlatformBelow": {
"minHeight": 7,
"maxHeight": 7,
"maxLeftPosition": 1,
"minRightPosition": 1
},
"comesThroughToilet": "no"
}Requires: "canCrossRoomJumpIntoWater"
"canTrickySpringBallJump"
{
"or": [
"canCrouchJump",
"canTrickyJump"
]
} |
From: 2
Bottom Door
To: 4
Water Level Junction
Standing on the platform in the room below, perform a spring ball jump mid-air a few tiles below the transition. Hold right through the transition, and do not bonk the door frame. Entrance condition: {
"comeInWithPlatformBelow": {
"minHeight": 9,
"maxHeight": 10,
"maxLeftPosition": 1,
"minRightPosition": 1
},
"comesThroughToilet": "no"
}Requires: "canCrossRoomJumpIntoWater" "canTrickySpringBallJump" "can4HighMidAirMorph" |
From: 2
Bottom Door
To: 4
Water Level Junction
Standing on the platform in the room below, perform a spring ball jump mid-air a few tiles below the transition. It is necessary to morph very quickly after jumping in order to spring ball jump as low as necessary. Hold right through the transition, and do not bonk the door frame. Entrance condition: {
"comeInWithPlatformBelow": {
"minHeight": 8,
"maxHeight": 8.5,
"maxLeftPosition": 1,
"minRightPosition": 1
},
"comesThroughToilet": "no"
}Requires: "canCrossRoomJumpIntoWater" "can4HighMidAirMorph" "canTrickySpringBallJump" "canInsaneJump" |
|
Requires: {
"or": [
"Gravity",
"HiJump",
"canTrickySpringBallJump"
]
} |
|
Requires: "canSuitlessMaridia" "h_underwaterMaxHeightSpringBallJump" Dev note: FIXME add a slightly easier variant that damage boosts off of the Choot. |
|
Entrance condition: {
"comeInWithGMode": {
"mode": "direct",
"morphed": false
}
}Requires: "h_navigateUnderwater"
{
"or": [
"Gravity",
"HiJump",
"canWallJump",
"h_underwaterCrouchJumpDownGrab",
"canTrickySpringBallJump",
"canUseFrozenEnemies"
]
}Exit condition: {
"leaveWithGMode": {
"morphed": false
}
} |
|
Requires: "canSuitlessMaridia"
"canCarefulJump"
{
"or": [
"canWallJump",
"h_underwaterCrouchJumpDownGrab",
"canTrickySpringBallJump"
]
}
{
"doorUnlockedAtNode": 1
}Unlocks doors: {"nodeId":1,"types":["missiles"],"requires":["canDodgeWhileShooting"]}
{"nodeId":1,"types":["super"],"requires":[]}
{"nodeId":1,"types":["powerbomb"],"requires":["canTrickyJump"]} |
|
Requires: "canSuitlessMaridia"
{
"obstaclesCleared": [
"A"
]
}
{
"or": [
"canWallJump",
"h_underwaterCrouchJumpDownGrab",
"canTrickySpringBallJump"
]
}
{
"doorUnlockedAtNode": 1
}Unlocks doors: {"nodeId":1,"types":["ammo"],"requires":[]} |
|
Requires: "canSuitlessMaridia"
"canCarefulJump"
{
"or": [
"canWallJump",
"h_underwaterCrouchJumpDownGrab",
"canTrickySpringBallJump"
]
}
{
"doorUnlockedAtNode": 3
}Unlocks doors: {"nodeId":3,"types":["missiles"],"requires":["canDodgeWhileShooting"]}
{"nodeId":3,"types":["super"],"requires":[]}
{"nodeId":3,"types":["powerbomb"],"requires":["canTrickyJump"]} |
|
Requires: "canSuitlessMaridia"
{
"obstaclesCleared": [
"B"
]
}
{
"or": [
"canWallJump",
"h_underwaterCrouchJumpDownGrab",
"canTrickySpringBallJump"
]
}
{
"doorUnlockedAtNode": 3
}Unlocks doors: {"nodeId":3,"types":["ammo"],"requires":[]} |
From: 1
Left Door
To: 3
Junction Below Right Door
It is recommended to shoot the ceiling block immediately upon room entry to bring one of the Puyos down so that it will not be a problem later. Requires: "canSuitlessMaridia"
"h_underwaterMaxHeightSpringBallJump"
{
"or": [
"can4HighMidAirMorph",
"canStationaryLateralMidAirMorph",
{
"and": [
"canNeutralDamageBoost",
{
"enemyDamage": {
"enemy": "Puyo",
"type": "contact",
"hits": 2
}
}
]
}
]
} |
From: 1
Left Door
To: 3
Junction Below Right Door
It is recommended to shoot the ceiling block immediately upon room entry to bring one of the Puyos down so that it will not be a problem later. Requires: "canSuitlessMaridia"
"canTrickySpringBallJump"
"canTrickyJump"
"canJumpIntoRespawningBlock"
{
"or": [
"can4HighMidAirMorph",
"canStationaryLateralMidAirMorph"
]
} |
|
Enter with enough run speed to jump (after the transition) across the full room using one Spring Ball Jump. When exiting the first Sandfall, Samus will be rising still. That is the time to Spring Ball jump. Entrance condition: {
"comeInRunning": {
"speedBooster": "yes",
"minTiles": 10
}
}Requires: {
"notable": "Cross-Room Spring Ball Jump"
}
"canPlayInSand"
"canCrossRoomJumpIntoWater"
"h_speedJump"
"canLateralMidAirMorph"
"canTrickySpringBallJump"
"canTrickyJump" |
|
Enter with enough run speed to jump (after the transition) across the full room using one Spring Ball Jump. When exiting the first Sandfall, Samus will be rising still. That is the time to Spring Ball jump. Alternatively, an immediate pause can be used to Spring Ball jump during the first narrow gap between Sandfalls. Sometimes Samus will land above the sand on the far left end of the room, where it will be necessary to unmorph and jump out. Entrance condition: {
"comeInRunning": {
"speedBooster": "yes",
"minTiles": 10
}
}Requires: {
"notable": "Cross-Room Spring Ball Jump"
}
"canPlayInSand"
"canCrossRoomJumpIntoWater"
"h_speedJump"
"canLateralMidAirMorph"
"canTrickySpringBallJump"
"canTrickyJump" |
|
Requires: {
"or": [
"Gravity",
"HiJump",
"canTrickySpringBallJump"
]
} |
|
Requires: "Gravity"
{
"or": [
"canTrickyJump",
"Ice",
"ScrewAttack",
{
"haveBlueSuit": {}
},
{
"enemyKill": {
"enemies": [
[
"Evir"
]
],
"explicitWeapons": [
"Plasma",
"Super",
"PowerBombPeriphery"
]
}
},
{
"enemyDamage": {
"enemy": "Evir",
"type": "particle",
"hits": 1
}
}
]
}
"canPlayInSand"
{
"or": [
"canWallJump",
"HiJump",
"canUseFrozenEnemies",
"canGravityJump",
{
"and": [
"canTrickyJump",
"can4HighMidAirMorph",
"canTrickySpringBallJump"
]
}
]
}
{
"or": [
{
"noBlueSuit": {}
},
{
"notable": "Blue Suit Sand Walk"
}
]
}Dev note: Technically it could make sense to clear obstacle A if the Evirs are killed, but with Gravity it is irrelevant. |
|
On the left side of the raised platform, jump for max height. Lateral Midair Morph for horizontal momentum, and perform the Spring Ball jump the moment before touching the sandfall. Pause again to disable springball as soon as possible. Requires: {
"notable": "Spring Ball HiJump"
}
"canSuitlessMaridia"
"HiJump"
"canTrickySpringBallJump"
"canStationaryLateralMidAirMorph"
"canSpringFling"
"canPlayInSand"
{
"or": [
{
"enemyDamage": {
"enemy": "Evir",
"type": "particle",
"hits": 1
}
},
{
"enemyKill": {
"enemies": [
[
"Evir"
]
],
"explicitWeapons": [
"Plasma",
"Super",
"PowerBomb"
]
}
},
"canTrickyDodgeEnemies",
"h_pauseAbuseMinimalReserveRefill"
]
}
{
"or": [
{
"noBlueSuit": {}
},
{
"notable": "Blue Suit Sand Walk"
}
]
} |
From: 4
Junction Below Sand Entrance
To: 5
Right Pillar
From the sand fall, quickly get onto the left platform to prevent the right side Evir from lowering too far. Jump on the sand to the right while freezing the Evir as high as possible. Refreeze the Evir so it is a slightly higher platform than the right pillar. Perform a spring ball jump with a stationary lateral mid-air morph from the left side of the current platform to get onto the Evir. Use a running jump off of the Evir. As a backup, it may be possible to make the Evir rise again by hitting it with a PB - place the PB in the air to avoid double hitting and killing it. Requires: {
"notable": "Suitless Bootless Evir Freeze (Center to Right)"
}
"canSuitlessMaridia"
"canTrickyUseFrozenEnemies"
"canPlayInSand"
"h_underwaterMaxHeightSpringBallJump"
"canStationaryLateralMidAirMorph" |
|
Requires: "canSuitlessMaridia"
{
"or": [
{
"and": [
"HiJump",
{
"or": [
"canDownGrab",
"canSpringBallJumpMidAir",
"canConsecutiveWallJump"
]
}
]
},
"h_underwaterMaxHeightSpringBallJump"
]
} |
From: 4
West Leg Sand
To: 5
Junction Above Grapple Block
Requires: "Gravity" "Grapple" "canTrickySpringBallJump" "canTrickyJump" "canPlayInSand" |
From: 5
Junction Above Grapple Block
To: 2
East Leg Right Door
Wait the water tide to reach its peak, then crouch jump into a spring ball jump into an IBJ. Perform the spring ball jump near max height. Place the first bomb between about 4 and 6 frames after the spring ball jump; ideally it should be just above the water line. Press pause between about 5 and 10 frames after placing the bomb, to disable Spring Ball (a 'spring fling', to reset fall speed). Place the second bomb soon after regaining control, while the game is fading back in. When close to the top, perform a spring ball jump to reach the ledge; release jump as soon as Samus is high enough to clear the ledge, in order to avoid taking a Menu hit. Requires: {
"notable": "Bomb Jump Water Escape"
}
"HiJump"
"h_underwaterMaxHeightSpringBallJump"
"canSpringFling"
"canBombJumpWaterEscape"
"canJumpIntoIBJ"
"canLongIBJ"
"canDoubleBombJump"Dev note: This trick can technically be done without a 'spring fling' but is extremely precise. |
|
Enter with at least 1 tile of run speed from an air room, with Speed Booster unequipped. Jump from near the end of the runway (though a jump from 1-2 tiles away from the end can still work). Press pause while crossing the narrow first sandfall, then perform a lateral mid-air morph after exiting the sandfall. Equip both Spring Ball and Speed Booster, and perform a mid-air Spring Ball jump at somewhere close to the maximum height. Unequip Spring Ball while descending through the wide second sidefall. Entrance condition: {
"comeInRunning": {
"speedBooster": "no",
"minTiles": 1
}
}Requires: {
"notable": "Spring Fling with Momentum"
}
"canCrossRoomJumpIntoWater"
"canPlayInSand"
"canLateralMidAirMorph"
"canTrickySpringBallJump"
"canSpringFling"
"h_unpauseKeepMomentum" |
|
Requires: "canSuitlessMaridia" "HiJump" "canTrickySpringBallJump" "canPlayInSand" |
|
Perform multiple stationary lateral mid-air morphs, while avoiding the Evir projectiles, to cross the room. It is necessary to start the jumps from the far side of the platforms in order to gain more horizontal momentum before entering the sand falls. Falling into the sand will often result in a soft lock. It is possible to use a very precise spring fling instead of a stationary lateral mid-air morph, but it is harder. Requires: {
"notable": "Suitless Bootless Spring Ball"
}
"canSuitlessMaridia"
"canPlayInSand"
"h_underwaterMaxHeightSpringBallJump"
"canStationaryLateralMidAirMorph"
"canInsaneJump"
{
"or": [
{
"enemyKill": {
"enemies": [
[
"Evir",
"Evir"
]
],
"explicitWeapons": [
"Super",
"Missile",
"PowerBombPeriphery",
"Plasma"
]
}
},
"canTrickyDodgeEnemies"
]
} |
From: 4
Below Sand Entrance
To: 5
Left Pillar Junction
The first Spring Ball jump is performed farther away from the sand tile so Samus can build up momentum and height before entering the sand fall. The second jump must be made from the right half of the solid tile (but not the rightmost pixels.) The third jump will land on the sand and must be followed by a jump off of the sand. Falling into the sand will often result in a soft lock. Only the far left section of sand, near the door, can be escaped with a crouch jump. Requires: {
"notable": "Suitless Bootless Spring Ball"
}
"canSuitlessMaridia"
"canPlayInSand"
"h_underwaterMaxHeightSpringBallJump"
{
"or": [
{
"enemyKill": {
"enemies": [
[
"Evir"
],
[
"Evir"
]
],
"explicitWeapons": [
"Super",
"Missile",
"PowerBombPeriphery",
"Plasma"
]
}
},
"canTrickyDodgeEnemies"
]
} |
From: 5
Left Pillar Junction
To: 4
Below Sand Entrance
Perform multiple stationary lateral mid-air morphs, while avoiding the Evir projectiles, to cross the room. It is necessary to start the jumps from the far side of the platforms in order to gain more horizontal momentum before entering the sand falls. Falling into the sand will often result in a soft lock. Requires: {
"notable": "Suitless Bootless Spring Ball"
}
"canSuitlessMaridia"
"canPlayInSand"
"h_underwaterMaxHeightSpringBallJump"
"canStationaryLateralMidAirMorph"
"canInsaneJump" |
