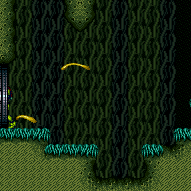
Kassiuz Room
Room ID: 217

|
Exit condition: {
"leaveWithRunway": {
"length": 3,
"openEnd": 1
}
} |
From: 1
Bottom Left Door
To: 1
Bottom Left Door


Requires: "h_trickyFrozenEnemyRunway" Exit condition: {
"leaveWithRunway": {
"length": 4,
"openEnd": 1
}
} |
|
Requires: {
"resetRoom": {
"nodes": [
1
]
}
}
{
"or": [
{
"and": [
"Grapple",
{
"cycleFrames": 180
}
]
},
{
"and": [
{
"or": [
"Plasma",
"Wave",
"Spazer",
"ScrewAttack",
{
"haveBlueSuit": {}
}
]
},
{
"cycleFrames": 210
}
]
},
{
"and": [
"canFarmWhileShooting",
{
"cycleFrames": 330
}
]
},
{
"cycleFrames": 400
}
]
}Farm cycle drops: 2 Puyo |
|
Requires: {
"or": [
{
"resetRoom": {
"nodes": [
1
]
}
},
{
"and": [
{
"resetRoom": {
"nodes": [
2
]
}
},
{
"cycleFrames": 120
}
]
}
]
}
{
"or": [
"canWallJump",
{
"and": [
"SpaceJump",
{
"cycleFrames": 300
}
]
},
{
"and": [
"canTrickySpringBallJump",
{
"cycleFrames": 320
},
"h_doubleEquipmentScreenCycleFrames",
"h_doubleEquipmentScreenCycleFrames",
"h_doubleEquipmentScreenCycleFrames"
]
}
]
}
"canDodgeWhileShooting"
{
"or": [
{
"and": [
"Plasma",
{
"cycleFrames": 820
}
]
},
{
"and": [
"Grapple",
{
"cycleFrames": 900
}
]
},
{
"and": [
"ScrewAttack",
{
"cycleFrames": 1000
}
]
},
{
"and": [
{
"haveBlueSuit": {}
},
{
"cycleFrames": 1000
}
]
},
{
"and": [
"Wave",
{
"cycleFrames": 1080
}
]
},
{
"and": [
"Spazer",
{
"cycleFrames": 1140
}
]
},
{
"cycleFrames": 2040
}
]
}
{
"or": [
"canFarmWhileShooting",
{
"cycleFrames": 500
}
]
}Farm cycle drops: 4 Puyo, 3 Choot |
|
Requires: "h_CrystalFlash" |
From: 1
Bottom Left Door
To: 1
Bottom Left Door
Exit condition: {
"leaveWithGModeSetup": {}
} |
|
Requires: {
"enemyDamage": {
"enemy": "Puyo",
"type": "contact",
"hits": 1
}
} |
|
Requires: {
"or": [
"canWallJump",
"SpaceJump",
"canLongIBJ",
"canJumpIntoIBJ",
{
"and": [
"HiJump",
{
"or": [
"canSpringBallJumpMidAir",
"canUseFrozenEnemies"
]
}
]
}
]
} |
|
Use Spring Ball to jump up the right side of the room. Requires: "canTrickySpringBallJump"
{
"or": [
"Wave",
"Spazer",
"Plasma",
"h_usePowerBomb",
"canTrickyJump",
{
"enemyDamage": {
"enemy": "Choot",
"type": "contact",
"hits": 1
}
}
]
} |
|

Entrance condition: {
"comeInShinecharging": {
"length": 2,
"openEnd": 1
}
}Requires: {
"shinespark": {
"frames": 58,
"excessFrames": 6
}
} |
From: 1
Bottom Left Door
To: 2
Top Right Door
Entrance condition: {
"comeInShinecharged": {}
}Requires: {
"shineChargeFrames": 20
}
{
"shinespark": {
"frames": 58,
"excessFrames": 6
}
} |
From: 1
Bottom Left Door
To: 2
Top Right Door
Perform a sequence of three mid-air Spring Ball jumps, each immediately followed by an unmorph to avoid bonking the wall; after each unmorph, use a pause-buffered remorph to continue chaining temporary blue. Entrance condition: {
"comeInShinecharging": {
"length": 0,
"openEnd": 1
}
}Requires: "HiJump"
"canTrickySpringBallJump"
"canPauseRemorphTemporaryBlue"
"canLongChainTemporaryBlue"
{
"enemyDamage": {
"enemy": "Choot",
"type": "contact",
"hits": 1
}
}Exit condition: {
"leaveWithTemporaryBlue": {}
}Unlocks doors: {"types":["ammo"],"requires":[]}Dev note: The Choot hit is possible to avoid, but it's not yet clear if this can be done reliably. |
|
With HiJump, climb to the first Choot platform, jump left and spark up right to save Energy. Requires: "h_storedSpark"
{
"or": [
{
"shinespark": {
"frames": 48,
"excessFrames": 12
}
},
{
"and": [
"HiJump",
{
"shinespark": {
"frames": 30,
"excessFrames": 10
}
}
]
}
]
} |
From: 1
Bottom Left Door
To: 2
Top Right Door
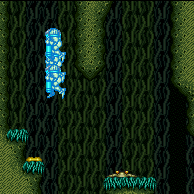
To save a lot of Energy, climb the room with ice before shinesparking to the door. To climb the room, stand on a frozen enemy, lure the Puyo from above and freeze it midair twice to progress. Requires: "canTrickyUseFrozenEnemies"
"canTrickyCarryFlashSuit"
{
"or": [
"Wave",
"Spazer",
"Plasma"
]
}
"h_storedSpark"
{
"shinespark": {
"frames": 13,
"excessFrames": 10
}
} |
From: 1
Bottom Left Door
To: 2
Top Right Door

Climb up 2.5 screens. Stop when about half of Samus (or less) is visible at the top of the screen. Turn-around a couple times to move to the right, to get close to falling out. Then perform a buffered spin-jump while turning around to the right, to make it onto the platform. The Choot will be safely off-camera and will not hit Samus while passing through it. Entrance condition: {
"comeInShinecharged": {}
}Requires: {
"shineChargeFrames": 1
}
"canShinesparkDeepStuck"
{
"shinespark": {
"frames": 1,
"excessFrames": 1
}
}
"canLongXRayClimb"
"canBePatient"
"canOffScreenMovement" |
|
Climb up 2.5 screens. Stop when about half of Samus (or less) is visible at the top of the screen. Turn-around a couple times to move to the right, to get close to falling out. Then perform a buffered spin-jump while turning around to the right, to make it onto the platform. The Choot will be safely off-camera and will not hit Samus while passing through it. Entrance condition: {
"comeInWithGMode": {
"mode": "direct",
"morphed": false
}
}Requires: "canComplexGMode" "canGModeXRayClimb" "canLongXRayClimb" "canBePatient" "canOffScreenMovement" |
|
IBJ up the climb. This is a lot easier with PBs or Spring Ball to help kill the enemies. With PBs, use one on entry to deal with the Puyos, then IBJ up the right side and use another to kill the middle Choot. Otherwise, Kill the Puyos then the bottom Choot with Bombs, falling off when necessary, then climb the left side of the room. Entrance condition: {
"comeInWithGMode": {
"mode": "any",
"morphed": true
}
}Requires: {
"or": [
"h_artificialMorphLongIBJ",
"h_artificialMorphJumpIntoIBJ"
]
}
{
"or": [
"h_artificialMorphSpringBall",
{
"and": [
"h_artificialMorphPowerBomb",
"h_artificialMorphPowerBomb"
]
},
{
"and": [
"h_artificialMorphStaggeredIBJ",
"canBeVeryPatient"
]
}
]
} |
|
Entrance condition: {
"comeInWithGrappleSwing": {
"blocks": [
{
"position": [
-1,
5
],
"environment": "water",
"note": "Mt. Everest"
},
{
"position": [
6,
4
],
"note": "Grapple Tutorial Room 2"
},
{
"position": [
2.375,
4.5625
],
"note": "Post Crocomire Farming Room"
}
]
}
}Requires: "canTrickyGrappleJump" "canMidairWiggle" |
From: 1
Bottom Left Door
To: 2
Top Right Door

Entrance condition: {
"comeInWithGrappleSwing": {
"blocks": [
{
"position": [
8,
3
],
"note": "Grapple Beam Room"
},
{
"position": [
7,
3
],
"note": "Colosseum"
}
]
}
}Requires: "canTrickyGrappleJump"
{
"or": [
{
"ammo": {
"type": "Missile",
"count": 1
}
},
{
"ammo": {
"type": "Super",
"count": 1
}
},
"Plasma",
{
"and": [
"canKago",
{
"enemyDamage": {
"enemy": "Choot",
"type": "contact",
"hits": 1
}
}
]
}
]
} |
From: 1
Bottom Left Door
To: 2
Top Right Door
Entrance condition: {
"comeInWithGrappleSwing": {
"blocks": [
{
"position": [
6,
2
],
"note": "Lava Grapple Tunnel"
},
{
"position": [
5,
2
],
"note": "The Moat, Double Chamber, Wrecked Ship Energy Tank Room"
}
]
}
}Requires: "canTrickyGrappleJump"
"HiJump"
{
"or": [
{
"ammo": {
"type": "Missile",
"count": 1
}
},
{
"ammo": {
"type": "Super",
"count": 1
}
},
"Plasma",
{
"and": [
"canKago",
{
"enemyDamage": {
"enemy": "Choot",
"type": "contact",
"hits": 1
}
}
]
}
]
} |
|
Entrance condition: {
"comeInWithGrappleSwing": {
"blocks": [
{
"position": [
8,
3
],
"note": "Grapple Beam Room"
},
{
"position": [
7,
3
],
"note": "Colosseum"
},
{
"position": [
6,
2
],
"note": "Lava Grapple Tunnel"
},
{
"position": [
5,
2
],
"note": "The Moat, Double Chamber, Wrecked Ship Energy Tank Room"
}
]
}
}Requires: "canTrickyGrappleJump" "canMidairWiggle" "canBeExtremelyPatient" |
From: 2
Top Right Door
To: 1
Bottom Left Door

Moonfall from the ledge just below the door, then weave between the floating platforms. It is possible to either perform the mid-air spark at high speed while falling, or to land and jump into a mid-air spark. Landing and jumping into a mid-air spark may be the easier method, especially if needing to leave in a specific position (top or bottom), but the shinecharge frames are very tight. It helps to get a good entry, by pressing down to gain the shinecharge as late as possible in the previous room; this will make Samus descend more during the crouching animation, to reach the ledge below quickly. It is recommended to initiate moonfall immediately, while still facing left, to avoid wasting time turning around. Alternatively, if activating the spark while falling at high speed, there are plenty of shinecharge frames available, but only a 2-frame window for activating the spark; if needing to leave in a specific position (top or bottom), it is frame-perfect; to leave in bottom position, break spin before the final turnaround, to adjust the alignment of Samus' vertical position, otherwise there is no frame that works. Entrance condition: {
"comeInShinecharging": {
"length": 0,
"openEnd": 1
}
}Requires: {
"notable": "Moonfall Spark"
}
"canMoonfall"
"canShinechargeMovementTricky"
"canInsaneJump"
{
"shinespark": {
"frames": 14,
"excessFrames": 0
}
}Exit condition: {
"leaveWithSpark": {}
}Unlocks doors: {"types":["super"],"requires":[]}
{"types":["missiles","powerbomb"],"requires":["never"]} |
|
|
From: 2
Top Right Door
To: 1
Bottom Left Door
Use a short speedball to destroy the top Choot or go under it. Then chain temporary blue into the next room. Entrance condition: {
"comeInGettingBlueSpeed": {
"length": 0,
"openEnd": 1,
"maxExtraRunSpeed": "$1.D"
}
}Requires: "canSpeedball" "canChainTemporaryBlue" Exit condition: {
"leaveWithTemporaryBlue": {}
}Unlocks doors: {"types":["ammo"],"requires":[]} |
|
Exit condition: {
"leaveWithRunway": {
"length": 1,
"openEnd": 1
}
} |
|
Exit condition: {
"leaveWithSidePlatform": {
"height": 1,
"runway": {
"length": 1,
"openEnd": 1
},
"obstruction": [
1,
0
]
}
}Dev note: Max extra run speed $0.8 |
|
Requires: {
"resetRoom": {
"nodes": [
2
]
}
}
{
"or": [
"canDash",
{
"cycleFrames": 20
}
]
}
{
"or": [
{
"and": [
"Grapple",
{
"cycleFrames": 100
}
]
},
{
"and": [
"Plasma",
{
"cycleFrames": 160
}
]
},
{
"and": [
"Wave",
{
"cycleFrames": 170
}
]
},
{
"and": [
"Spazer",
{
"cycleFrames": 200
}
]
},
{
"and": [
"ScrewAttack",
{
"cycleFrames": 200
}
]
},
{
"and": [
{
"haveBlueSuit": {}
},
{
"cycleFrames": 200
}
]
},
{
"and": [
"canPseudoScrew",
{
"cycleFrames": 220
}
]
},
{
"and": [
"canFarmWhileShooting",
{
"cycleFrames": 250
}
]
},
{
"cycleFrames": 300
}
]
}Farm cycle drops: 1 Choot |
|
Requires: "h_CrystalFlash" |
{
"$schema": "../../../schema/m3-room.schema.json",
"id": 217,
"name": "Kassiuz Room",
"area": "Maridia",
"subarea": "Inner",
"subsubarea": "Yellow",
"roomAddress": "0x7D387",
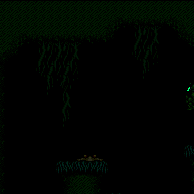
"roomEnvironments": [
{
"heated": false
}
],
"mapTileMask": [
[
1
],
[
1
],
[
1
],
[
1
]
],
"nodes": [
{
"id": 1,
"name": "Bottom Left Door",
"nodeType": "door",
"nodeSubType": "blue",
"nodeAddress": "0x001a5d0",
"doorOrientation": "left",
"doorEnvironments": [
{
"physics": "air"
}
],
"mapTileMask": [
[
1
],
[
1
],
[
2
],
[
2
]
]
},
{
"id": 2,
"name": "Top Right Door",
"nodeType": "door",
"nodeSubType": "blue",
"nodeAddress": "0x001a5dc",
"doorOrientation": "right",
"doorEnvironments": [
{
"physics": "air"
}
],
"mapTileMask": [
[
2
],
[
2
],
[
1
],
[
1
]
]
}
],
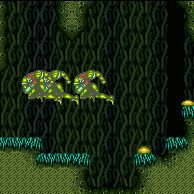
"enemies": [
{
"id": "e1",
"groupName": "Kassiuz Room Choots",
"enemyName": "Choot",
"quantity": 3,
"homeNodes": [
1,
2
]
},
{
"id": "e2",
"groupName": "Kassiuz Room Puyos",
"enemyName": "Puyo",
"quantity": 4,
"homeNodes": [
1,
2
]
}
],
"strats": [
{
"link": [
1,
1
],
"name": "Base (Unlock Door)",
"requires": [],
"unlocksDoors": [
{
"types": [
"ammo"
],
"requires": []
}
],
"flashSuitChecked": true,
"blueSuitChecked": true
},
{
"link": [
1,
1
],
"name": "Base (Come In Normally)",
"entranceCondition": {
"comeInNormally": {}
},
"requires": [],
"flashSuitChecked": true,
"blueSuitChecked": true
},
{
"link": [
1,
1
],
"name": "Base (Come In With Mockball)",
"entranceCondition": {
"comeInWithMockball": {
"adjacentMinTiles": 0,
"remoteAndLandingMinTiles": [
[
0,
0
]
],
"speedBooster": "any"
}
},
"requires": [],
"flashSuitChecked": true,
"blueSuitChecked": true
},
{
"link": [
2,
2
],
"name": "Base (Unlock Door)",
"requires": [],
"unlocksDoors": [
{
"types": [
"ammo"
],
"requires": []
}
],
"flashSuitChecked": true,
"blueSuitChecked": true
},
{
"link": [
2,
2
],
"name": "Base (Come In Normally)",
"entranceCondition": {
"comeInNormally": {}
},
"requires": [],
"flashSuitChecked": true,
"blueSuitChecked": true
},
{
"link": [
2,
2
],
"name": "Base (Come In With Mockball)",
"entranceCondition": {
"comeInWithMockball": {
"adjacentMinTiles": 0,
"remoteAndLandingMinTiles": [
[
0,
0
]
],
"speedBooster": "any"
}
},
"requires": [],
"flashSuitChecked": true,
"blueSuitChecked": true
},
{
"id": 1,
"link": [
1,
1
],
"name": "Leave with Runway",
"requires": [],
"exitCondition": {
"leaveWithRunway": {
"length": 3,
"openEnd": 1
}
},
"flashSuitChecked": true,
"blueSuitChecked": true
},
{
"id": 2,
"link": [
1,
1
],
"name": "Leave With Runway - Frozen Puyo",
"requires": [
"h_trickyFrozenEnemyRunway"
],
"exitCondition": {
"leaveWithRunway": {
"length": 4,
"openEnd": 1
}
},
"flashSuitChecked": true,
"blueSuitChecked": true
},
{
"id": 3,
"link": [
1,
1
],
"name": "Puyo Farm",
"requires": [
{
"resetRoom": {
"nodes": [
1
]
}
},
{
"or": [
{
"and": [
"Grapple",
{
"cycleFrames": 180
}
]
},
{
"and": [
{
"or": [
"Plasma",
"Wave",
"Spazer",
"ScrewAttack",
{
"haveBlueSuit": {}
}
]
},
{
"cycleFrames": 210
}
]
},
{
"and": [
"canFarmWhileShooting",
{
"cycleFrames": 330
}
]
},
{
"cycleFrames": 400
}
]
}
],
"farmCycleDrops": [
{
"enemy": "Puyo",
"count": 2
}
],
"flashSuitChecked": true,
"blueSuitChecked": true
},
{
"id": 27,
"link": [
1,
1
],
"name": "Puyo and Choot Farm",
"requires": [
{
"or": [
{
"resetRoom": {
"nodes": [
1
]
}
},
{
"and": [
{
"resetRoom": {
"nodes": [
2
]
}
},
{
"cycleFrames": 120
}
]
}
]
},
{
"or": [
"canWallJump",
{
"and": [
"SpaceJump",
{
"cycleFrames": 300
}
]
},
{
"and": [
"canTrickySpringBallJump",
{
"cycleFrames": 320
},
"h_doubleEquipmentScreenCycleFrames",
"h_doubleEquipmentScreenCycleFrames",
"h_doubleEquipmentScreenCycleFrames"
]
}
]
},
"canDodgeWhileShooting",
{
"or": [
{
"and": [
"Plasma",
{
"cycleFrames": 820
}
]
},
{
"and": [
"Grapple",
{
"cycleFrames": 900
}
]
},
{
"and": [
"ScrewAttack",
{
"cycleFrames": 1000
}
]
},
{
"and": [
{
"haveBlueSuit": {}
},
{
"cycleFrames": 1000
}
]
},
{
"and": [
"Wave",
{
"cycleFrames": 1080
}
]
},
{
"and": [
"Spazer",
{
"cycleFrames": 1140
}
]
},
{
"cycleFrames": 2040
}
]
},
{
"or": [
"canFarmWhileShooting",
{
"cycleFrames": 500
}
]
}
],
"farmCycleDrops": [
{
"enemy": "Puyo",
"count": 4
},
{
"enemy": "Choot",
"count": 3
}
],
"flashSuitChecked": true,
"blueSuitChecked": true
},
{
"id": 4,
"link": [
1,
1
],
"name": "Crystal Flash",
"requires": [
"h_CrystalFlash"
],
"flashSuitChecked": true,
"blueSuitChecked": true
},
{
"id": 5,
"link": [
1,
1
],
"name": "G-Mode Setup - Get Hit By Puyo",
"requires": [],
"exitCondition": {
"leaveWithGModeSetup": {}
},
"flashSuitChecked": true,
"blueSuitChecked": true
},
{
"id": 6,
"link": [
1,
1
],
"name": "G-Mode Regain Mobility",
"requires": [
{
  "enemyDamage": {
    "enemy": "Puyo",
    "type": "contact",
    "hits": 1
  }
}
],
"gModeRegainMobility": {},
"flashSuitChecked": true,
"blueSuitChecked": true
},
{
"id": 7,
"link": [
1,
2
],
"name": "Base",
"requires": [
{
  "or": [
    "canWallJump",
    "SpaceJump",
    "canLongIBJ",
    "canJumpIntoIBJ",
    {
      "and": [
        "HiJump",
        {
          "or": [
            "canSpringBallJumpMidAir",
            "canUseFrozenEnemies"
          ]
        }
      ]
    }
  ]
}
],
"flashSuitChecked": true,
"blueSuitChecked": true
},
{
"id": 21,
"link": [
1,
2
],
"name": "Spring Ball",
"requires": [
"canTrickySpringBallJump",
{
"or": [
"Wave",
"Spazer",
"Plasma",
"h_usePowerBomb",
"canTrickyJump",
{
"enemyDamage": {
"enemy": "Choot",
"type": "contact",
"hits": 1
}
}
]
}
],
"flashSuitChecked": true,
"blueSuitChecked": true,
"note": "Use Spring Ball to jump up the right side of the room."
},
{
"id": 8,
"link": [
1,
2
],
"name": "Shinespark",
"entranceCondition": {
"comeInShinecharging": {
"length": 2,
"openEnd": 1
}
},
"requires": [
{
  "shinespark": {
    "frames": 58,
    "excessFrames": 6
  }
}
],
"flashSuitChecked": true,
"blueSuitChecked": true
},
{
"id": 9,
"link": [
1,
2
],
"name": "Shinespark, Come in Shinecharged",
"entranceCondition": {
"comeInShinecharged": {}
},
"requires": [
{
"shineChargeFrames": 20
},
{
"shinespark": {
"frames": 58,
"excessFrames": 6
}
}
],
"flashSuitChecked": true,
"blueSuitChecked": true
},
{
"id": 18,
"link": [
1,
2
],
"name": "Come in Shinecharging, Leave With Temporary Blue",
"entranceCondition": {
"comeInShinecharging": {
"length": 0,
"openEnd": 1
}
},
"requires": [
"HiJump",
"canTrickySpringBallJump",
"canPauseRemorphTemporaryBlue",
"canLongChainTemporaryBlue",
{
"enemyDamage": {
"enemy": "Choot",
"type": "contact",
"hits": 1
}
}
],
"exitCondition": {
"leaveWithTemporaryBlue": {}
},
"unlocksDoors": [
{
"types": [
"ammo"
],
"requires": []
}
],
"flashSuitChecked": true,
"blueSuitChecked": true,
"note": [
"Perform a sequence of three mid-air Spring Ball jumps, each immediately followed by an unmorph to avoid bonking the wall;",
"after each unmorph, use a pause-buffered remorph to continue chaining temporary blue."
],
"devNote": [
"The Choot hit is possible to avoid, but it's not yet clear if this can be done reliably."
]
},
{
"id": 16,
"link": [
1,
2
],
"name": "Use Stored Spark",
"requires": [
"h_storedSpark",
{
"or": [
{
"shinespark": {
"frames": 48,
"excessFrames": 12
}
},
{
"and": [
"HiJump",
{
"shinespark": {
"frames": 30,
"excessFrames": 10
}
}
]
}
]
}
],
"flashSuitChecked": true,
"blueSuitChecked": true,
"note": "With HiJump, climb to the first Choot platform, jump left and spark up right to save Energy."
},
{
"id": 17,
"link": [
1,
2
],
"name": "Use Stored Spark, Frozen Puyo Climb",
"requires": [
"canTrickyUseFrozenEnemies",
"canTrickyCarryFlashSuit",
{
"or": [
"Wave",
"Spazer",
"Plasma"
]
},
"h_storedSpark",
{
"shinespark": {
"frames": 13,
"excessFrames": 10
}
}
],
"flashSuitChecked": true,
"blueSuitChecked": true,
"note": [
"To save a lot of Energy, climb the room with ice before shinesparking to the door.",
"To climb the room, stand on a frozen enemy, lure the Puyo from above and freeze it midair twice to progress."
]
},
{
"id": 10,
"link": [
1,
2
],
"name": "Shinespark Deep Stuck X-Ray Climb",
"entranceCondition": {
"comeInShinecharged": {}
},
"requires": [
{
"shineChargeFrames": 1
},
"canShinesparkDeepStuck",
{
"shinespark": {
"frames": 1,
"excessFrames": 1
}
},
"canLongXRayClimb",
"canBePatient",
"canOffScreenMovement"
],
"flashSuitChecked": true,
"blueSuitChecked": true,
"note": [
"Climb up 2.5 screens.",
"Stop when about half of Samus (or less) is visible at the top of the screen.",
"Turn-around a couple times to move to the right, to get close to falling out.",
"Then perform a buffered spin-jump while turning around to the right, to make it onto the platform.",
"The Choot will be safely off-camera and will not hit Samus while passing through it."
]
},
{
"id": 11,
"link": [
1,
2
],
"name": "G-Mode Deep Stuck X-Ray Climb",
"entranceCondition": {
"comeInWithGMode": {
"mode": "direct",
"morphed": false
}
},
"requires": [
"canComplexGMode",
"canGModeXRayClimb",
"canLongXRayClimb",
"canBePatient",
"canOffScreenMovement"
],
"flashSuitChecked": true,
"blueSuitChecked": true,
"note": [
"Climb up 2.5 screens.",
"Stop when about half of Samus (or less) is visible at the top of the screen.",
"Turn-around a couple times to move to the right, to get close to falling out.",
"Then perform a buffered spin-jump while turning around to the right, to make it onto the platform.",
"The Choot will be safely off-camera and will not hit Samus while passing through it."
]
},
{
"id": 12,
"link": [
1,
2
],
"name": "G-Mode Morph",
"entranceCondition": {
"comeInWithGMode": {
"mode": "any",
"morphed": true
}
},
"requires": [
{
"or": [
"h_artificialMorphLongIBJ",
"h_artificialMorphJumpIntoIBJ"
]
},
{
"or": [
"h_artificialMorphSpringBall",
{
"and": [
"h_artificialMorphPowerBomb",
"h_artificialMorphPowerBomb"
]
},
{
"and": [
"h_artificialMorphStaggeredIBJ",
"canBeVeryPatient"
]
}
]
}
],
"flashSuitChecked": true,
"blueSuitChecked": true,
"note": [
"IBJ up the climb. This is a lot easier with PBs or Spring Ball to help kill the enemies.",
"With PBs, use one on entry to deal with the Puyos, then IBJ up the right side and use another to kill the middle Choot.",
"Otherwise, Kill the Puyos then the bottom Choot with Bombs, falling off when necessary, then climb the left side of the room."
]
},
{
"id": 22,
"link": [
1,
2
],
"name": "Tricky Grapple Jump (Wiggle)",
"entranceCondition": {
"comeInWithGrappleSwing": {
"blocks": [
{
"position": [
-1,
5
],
"environment": "water",
"note": "Mt. Everest"
},
{
"position": [
6,
4
],
"note": "Grapple Tutorial Room 2"
},
{
"position": [
2.375,
4.5625
],
"note": "Post Crocomire Farming Room"
}
]
}
},
"requires": [
"canTrickyGrappleJump",
"canMidairWiggle"
],
"flashSuitChecked": false,
"blueSuitChecked": true
},
{
"id": 23,
"link": [
1,
2
],
"name": "Tricky Grapple Jump (Choot Kill or Kago)",
"entranceCondition": {
"comeInWithGrappleSwing": {
"blocks": [
{
"position": [
8,
3
],
"note": "Grapple Beam Room"
},
{
"position": [
7,
3
],
"note": "Colosseum"
}
]
}
},
"requires": [
"canTrickyGrappleJump",
{
"or": [
{
"ammo": {
"type": "Missile",
"count": 1
}
},
{
"ammo": {
"type": "Super",
"count": 1
}
},
"Plasma",
{
"and": [
"canKago",
{
"enemyDamage": {
"enemy": "Choot",
"type": "contact",
"hits": 1
}
}
]
}
]
}
],
"flashSuitChecked": false,
"blueSuitChecked": true
},
{
"id": 24,
"link": [
1,
2
],
"name": "Tricky Grapple Jump (HiJump, Choot Kill or Kago)",
"entranceCondition": {
"comeInWithGrappleSwing": {
"blocks": [
{
"position": [
6,
2
],
"note": "Lava Grapple Tunnel"
},
{
"position": [
5,
2
],
"note": "The Moat, Double Chamber, Wrecked Ship Energy Tank Room"
}
]
}
},
"requires": [
"canTrickyGrappleJump",
"HiJump",
{
"or": [
{
"ammo": {
"type": "Missile",
"count": 1
}
},
{
"ammo": {
"type": "Super",
"count": 1
}
},
"Plasma",
{
"and": [
"canKago",
{
"enemyDamage": {
"enemy": "Choot",
"type": "contact",
"hits": 1
}
}
]
}
]
}
],
"flashSuitChecked": false,
"blueSuitChecked": true
},
{
"id": 25,
"link": [
1,
2
],
"name": "Absurd Grapple Jump (Wiggle)",
"entranceCondition": {
"comeInWithGrappleSwing": {
"blocks": [
{
"position": [
8,
3
],
"note": "Grapple Beam Room"
},
{
"position": [
7,
3
],
"note": "Colosseum"
},
{
"position": [
6,
2
],
"note": "Lava Grapple Tunnel"
},
{
"position": [
5,
2
],
"note": "The Moat, Double Chamber, Wrecked Ship Energy Tank Room"
}
]
}
},
"requires": [
"canTrickyGrappleJump",
"canMidairWiggle",
"canBeExtremelyPatient"
],
"flashSuitChecked": false,
"blueSuitChecked": true
},
{
"id": 20,
"link": [
2,
1
],
"name": "Come In Shinecharging, Leave With Spark (Moonfall Spark)",
"entranceCondition": {
"comeInShinecharging": {
"length": 0,
"openEnd": 1
}
},
"requires": [
{
"notable": "Moonfall Spark"
},
"canMoonfall",
"canShinechargeMovementTricky",
"canInsaneJump",
{
"shinespark": {
"frames": 14,
"excessFrames": 0
}
}
],
"exitCondition": {
"leaveWithSpark": {}
},
"unlocksDoors": [
{
"types": [
"super"
],
"requires": []
},
{
"types": [
"missiles",
"powerbomb"
],
"requires": [
"never"
]
}
],
"flashSuitChecked": true,
"blueSuitChecked": true,
"note": [
"Moonfall from the ledge just below the door, then weave between the floating platforms.",
"It is possible to either perform the mid-air spark at high speed while falling, or to land and jump into a mid-air spark.",
"Landing and jumping into a mid-air spark may be the easier method, especially if needing to leave in a specific position (top or bottom),",
"but the shinecharge frames are very tight.",
"It helps to get a good entry, by pressing down to gain the shinecharge as late as possible in the previous room;",
"this will make Samus descend more during the crouching animation, to reach the ledge below quickly.",
"It is recommended to initiate moonfall immediately, while still facing left, to avoid wasting time turning around.",
"Alternatively, if activating the spark while falling at high speed, there are plenty of shinecharge frames available,",
"but only a 2-frame window for activating the spark;",
"if needing to leave in a specific position (top or bottom), it is frame-perfect;",
"to leave in bottom position, break spin before the final turnaround, to adjust the alignment of Samus' vertical position,",
"otherwise there is no frame that works."
]
},
{
"id": 13,
"link": [
2,
1
],
"name": "Base",
"requires": [],
"flashSuitChecked": true,
"blueSuitChecked": true
},
{
"id": 19,
"link": [
2,
1
],
"name": "Cross-Room Blue Speed Jump, Leave With Temporary Blue",
"entranceCondition": {
"comeInGettingBlueSpeed": {
"length": 0,
"openEnd": 1,
"maxExtraRunSpeed": "$1.D"
}
},
"requires": [
"canSpeedball",
"canChainTemporaryBlue"
],
"exitCondition": {
"leaveWithTemporaryBlue": {}
},
"unlocksDoors": [
{
"types": [
"ammo"
],
"requires": []
}
],
"flashSuitChecked": true,
"blueSuitChecked": true,
"note": [
"Use a short speedball to destroy the top Choot or go under it.",
"Then chain temporary blue into the next room."
]
},
{
"id": 14,
"link": [
2,
2
],
"name": "Leave with Runway",
"requires": [],
"exitCondition": {
"leaveWithRunway": {
"length": 1,
"openEnd": 1
}
},
"flashSuitChecked": true,
"blueSuitChecked": true
},
{
"id": 26,
"link": [
2,
2
],
"name": "Leave With Side Platform",
"requires": [],
"exitCondition": {
"leaveWithSidePlatform": {
"height": 1,
"runway": {
"length": 1,
"openEnd": 1
},
"obstruction": [
1,
0
]
}
},
"flashSuitChecked": true,
"blueSuitChecked": true,
"devNote": "Max extra run speed $0.8"
},
{
"id": 28,
"link": [
2,
2
],
"name": "Choot Farm",
"requires": [
{
"resetRoom": {
"nodes": [
2
]
}
},
{
"or": [
"canDash",
{
"cycleFrames": 20
}
]
},
{
"or": [
{
"and": [
"Grapple",
{
"cycleFrames": 100
}
]
},
{
"and": [
"Plasma",
{
"cycleFrames": 160
}
]
},
{
"and": [
"Wave",
{
"cycleFrames": 170
}
]
},
{
"and": [
"Spazer",
{
"cycleFrames": 200
}
]
},
{
"and": [
"ScrewAttack",
{
"cycleFrames": 200
}
]
},
{
"and": [
{
"haveBlueSuit": {}
},
{
"cycleFrames": 200
}
]
},
{
"and": [
"canPseudoScrew",
{
"cycleFrames": 220
}
]
},
{
"and": [
"canFarmWhileShooting",
{
"cycleFrames": 250
}
]
},
{
"cycleFrames": 300
}
]
}
],
"farmCycleDrops": [
{
"enemy": "Choot",
"count": 1
}
],
"flashSuitChecked": true,
"blueSuitChecked": true
},
{
"id": 15,
"link": [
2,
2
],
"name": "Crystal Flash",
"requires": [
"h_CrystalFlash"
],
"flashSuitChecked": true,
"blueSuitChecked": true
}
],
"notables": [
{
"id": 1,
"name": "Moonfall Spark",
"note": [
"Moonfall from the ledge just below the door, then weave between the floating platforms.",
"It is possible to either perform the mid-air spark at high speed while falling, or to land and jump into a mid-air spark."
]
}
],
"nextStratId": 29,
"nextNotableId": 2
}