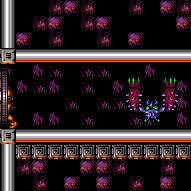
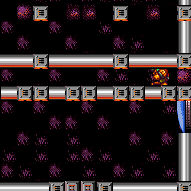
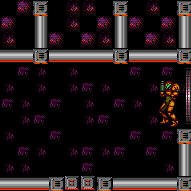
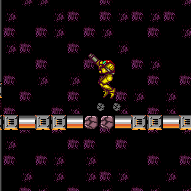
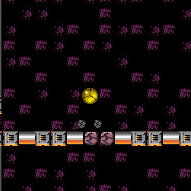
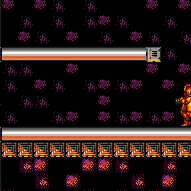
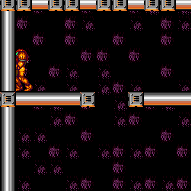
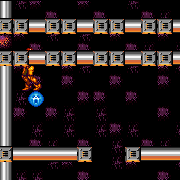
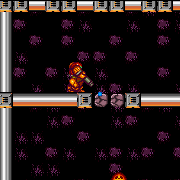
Mickey Mouse Room
Room ID: 144
From: 1
Bottom Left Door
To: 1
Bottom Left Door
This runway requires killing the Dessgeegas closest to the door, and taking a Multiviola hit if the Multiviola is alive. Requires: {
"heatFrames": 250
}
{
"or": [
{
"obstaclesCleared": [
"C"
]
},
{
"and": [
{
"heatFrames": 100
},
{
"enemyKill": {
"enemies": [
[
"Dessgeega",
"Dessgeega",
"Dessgeega"
]
],
"explicitWeapons": [
"ScrewAttack"
]
}
}
]
},
{
"and": [
{
"heatFrames": 350
},
{
"enemyKill": {
"enemies": [
[
"Dessgeega",
"Dessgeega",
"Dessgeega"
]
],
"explicitWeapons": [
"Plasma",
"Super",
"Missile"
]
}
}
]
}
]
}Exit condition: {
"leaveWithRunway": {
"length": 45,
"openEnd": 1
}
}Dev note: The Multiviolas move out of the way if coming from the left, or they can be killed with the Dessgeegas. |
From: 1
Bottom Left Door
To: 1
Bottom Left Door
The Multiviola can be killed by aiming diagonally down when entering the room and shooting a strong enough beam shot (not ice). Entrance condition: {
"comeInNormally": {}
}Requires: "canPrepareForNextRoom"
{
"or": [
"Plasma",
{
"and": [
"Charge",
{
"or": [
"Wave",
"Spazer"
]
}
]
}
]
}
{
"heatFrames": 100
}Exit condition: {
"leaveWithRunway": {
"length": 7,
"openEnd": 1
}
}Unlocks doors: {"types":["super"],"requires":[]}
{"types":["missiles","powerbomb"],"requires":["never"]}Dev note: Taking a hit by the Multiviola isn't an option, as it will stop Samus' run and then the Dessgeega will be in the way. |
|
Entrance condition: {
"comeInNormally": {}
}Requires: {
"enemyDamage": {
"enemy": "Multiviola",
"type": "contact",
"hits": 1
}
}
{
"heatFrames": 40
} |
From: 1
Bottom Left Door
To: 1
Bottom Left Door
The Multiviola will immediately reach Samus at the door when entering the room. By entering the room in a jump and aiming down, there is just enough time to shoot the multiviola. Or by entering the room aiming diagonally down and firing a beam shot. Entrance condition: {
"comeInNormally": {}
}Requires: "canPrepareForNextRoom"
{
"or": [
{
"and": [
{
"enemyKill": {
"enemies": [
[
"Multiviola"
]
],
"explicitWeapons": [
"PseudoScrew",
"ScrewAttack"
]
}
},
{
"heatFrames": 30
}
]
},
{
"and": [
"canTrickyJump",
{
"enemyKill": {
"enemies": [
[
"Multiviola"
]
],
"explicitWeapons": [
"Missile",
"Super"
]
}
},
{
"heatFrames": 30
}
]
},
{
"and": [
{
"enemyKill": {
"enemies": [
[
"Multiviola"
]
],
"explicitWeapons": [
"Charge+Ice",
"Ice+Wave",
"Ice+Spazer"
]
}
},
{
"heatFrames": 60
}
]
},
{
"enemyKill": {
"enemies": [
[
"Multiviola"
]
],
"explicitWeapons": [
"Plasma",
"Charge+Spazer",
"Charge+Wave"
]
}
},
{
"haveBlueSuit": {}
}
]
}
{
"heatFrames": 40
}Dev note: You can kill the Multiviola with a super without jumping but it would be a notable strat for being frame precise and it's not worth separating it out. This does not clear obstacle E, because this is not the Multiviola that can be used for the ice clip. |
From: 1
Bottom Left Door
To: 1
Bottom Left Door
Entrance condition: {
"comeInGettingBlueSpeed": {
"length": 0,
"openEnd": 1
}
}Requires: "canPrepareForNextRoom"
{
"heatFrames": 0
} |
From: 1
Bottom Left Door
To: 1
Bottom Left Door
Requires: "canPrepareForNextRoom"
"h_heatProof"
{
"resetRoom": {
"nodes": [
1
]
}
}
{
"or": [
"Plasma",
"ScrewAttack",
{
"and": [
"canPseudoScrew",
{
"cycleFrames": 30
}
]
},
{
"and": [
"Wave",
"Ice",
{
"cycleFrames": 30
}
]
},
{
"haveBlueSuit": {}
}
]
}
{
"cycleFrames": 60
}Resets obstacles: A, B, C, D, E, F Farm cycle drops: 1 Multiviola |
From: 1
Bottom Left Door
To: 1
Bottom Left Door
Requires: "canPrepareForNextRoom"
"canDodgeWhileShooting"
"h_heatProof"
{
"resetRoom": {
"nodes": [
1
]
}
}
{
"or": [
{
"and": [
"Plasma",
"Wave",
{
"cycleFrames": 770
}
]
},
{
"and": [
"Plasma",
{
"cycleFrames": 1290
}
]
},
{
"and": [
"ScrewAttack",
{
"cycleFrames": 610
}
]
},
{
"and": [
{
"haveBlueSuit": {}
},
{
"cycleFrames": 660
}
]
}
]
}Clears obstacles: C, E, F Resets obstacles: A, B, D Farm cycle drops: 2 Multiviola, 5 Dessgeega |
|
Requires: {
"obstaclesCleared": [
"C",
"E"
]
}
"h_heatedCrystalFlash" |
|
Entrance condition: {
"comeInWithMockball": {
"speedBooster": "any",
"adjacentMinTiles": 0,
"remoteAndLandingMinTiles": [
[
0,
0
]
]
}
}Requires: {
"enemyDamage": {
"enemy": "Multiviola",
"type": "contact",
"hits": 1
}
}
{
"heatFrames": 40
} |
|
If Samus has less than 73 Energy, she will still have i-frames when the Multiviola hits and she will need to wait until the Dessgeega comes. If needed, hold forward when getting hit, to prevent getting knocked out of the room. Requires: {
"or": [
{
"and": [
{
"resourceAvailable": [
{
"type": "RegularEnergy",
"count": 75
}
]
},
{
"enemyDamage": {
"enemy": "Multiviola",
"type": "contact",
"hits": 1
}
}
]
},
{
"and": [
"canTrickyGMode",
{
"resourceAvailable": [
{
"type": "RegularEnergy",
"count": 73
}
]
},
{
"enemyDamage": {
"enemy": "Multiviola",
"type": "contact",
"hits": 1
}
}
]
},
{
"enemyDamage": {
"enemy": "Dessgeega",
"type": "contact",
"hits": 1
}
}
]
}Dev note: This is rounded up to 75 Energy, because gaining artificial morph at 73 Energy would be frame-perfect, because Samus gets hit on the last possible frame. FIXME: This should require canTrickyGMode if high Energy, artificial morphing, and needing to remain in-room, because it's easy to touch the transition, as this is not currently representable, this should be considered when adding in-room G-mode strats where it might apply. |
From: 1
Bottom Left Door
To: 1
Bottom Left Door
Requires: {
"heatFrames": 145
}Exit condition: {
"leaveWithGModeSetup": {}
}Unlocks doors: {"types":["missiles","super"],"requires":[]}
{"types":["powerbomb"],"requires":["canUseIFrames",{"heatFrames":150}]}Dev note: Unlocking the door with a Power Bomb will give Samus i-frames for one or two Dessgeega hits. |
From: 1
Bottom Left Door
To: 1
Bottom Left Door
Samus will not take a hit by the Multiviola, as she still has i-frames when it reaches her. Entrance condition: {
"comeInWithGMode": {
"mode": "direct",
"morphed": false
}
}Exit condition: {
"leaveWithGMode": {
"morphed": false
}
} |
From: 1
Bottom Left Door
To: 1
Bottom Left Door
Samus will not take a hit by the Multiviola, as she still has i-frames when it reaches her. Entrance condition: {
"comeInWithGMode": {
"mode": "direct",
"morphed": true
}
}Exit condition: {
"leaveWithGMode": {
"morphed": true
}
} |
From: 1
Bottom Left Door
To: 2
Top Right Door


Entrance condition: {
"comeInWithRMode": {}
}Requires: "canRModeStandupClip"
"h_RModeCanRefillReserves"
"h_heatProof"
{
"or": [
"Plasma",
"ScrewAttack"
]
}
{
"or": [
"canMidAirMorph",
"canBeVeryPatient"
]
}
{
"partialRefill": {
"type": "ReserveEnergy",
"limit": 40
}
}
{
"disableEquipment": "Varia"
}
{
"autoReserveTrigger": {
"implicitHeatFrames": "suitless"
}
}
{
"suitlessHeatFrames": 30
} |
From: 1
Bottom Left Door
To: 6
Bottom Right Corner Junction


Due to X-Ray beam cooldown, Screw Attack is the only way to avoid a Multiviola hit on entry. Clear the runway. If that was enough to get reserve energy, you can use the final Dessgeega to interrupt, otherwise carry the shinecharge into the first Multiviola box, or use a heat interrupt. Entrance condition: {
"comeInWithRMode": {}
}Requires: {
"or": [
{
"and": [
{
"enemyDamage": {
"enemy": "Multiviola",
"type": "contact",
"hits": 1
}
},
{
"heatFrames": 40
}
]
},
{
"and": [
{
"enemyKill": {
"enemies": [
[
"Multiviola"
]
],
"explicitWeapons": [
"ScrewAttack"
]
}
},
{
"heatFrames": 30
}
]
}
]
}
{
"or": [
{
"and": [
"canDodgeWhileShooting",
"Plasma",
"canHitbox",
"h_getBlueSpeedMaxRunway"
]
},
{
"and": [
"canDodgeWhileShooting",
"Charge",
"Ice",
"Wave",
"Spazer",
{
"heatFrames": 1080
}
]
},
{
"and": [
{
"enemyKill": {
"enemies": [
[
"Dessgeega",
"Dessgeega",
"Dessgeega",
"Multiviola",
"Multiviola"
]
],
"explicitWeapons": [
"Missile"
]
}
},
{
"heatFrames": 480
}
]
},
{
"and": [
{
"enemyKill": {
"enemies": [
[
"Dessgeega",
"Dessgeega",
"Dessgeega",
"Multiviola",
"Multiviola"
]
],
"explicitWeapons": [
"Super"
]
}
},
{
"heatFrames": 380
}
]
},
{
"and": [
"ScrewAttack",
{
"heatFrames": 230
}
]
}
]
}
{
"or": [
"h_heatedCrystalFlashForReserveEnergy",
{
"and": [
"h_heatProof",
"h_RModeCanRefillReserves",
{
"resourceMissingAtMost": [
{
"type": "Missile",
"count": 0
}
]
},
{
"partialRefill": {
"type": "ReserveEnergy",
"limit": 20
}
}
]
}
]
}
"h_shinechargeMaxRunway"
{
"autoReserveTrigger": {
"maxReserveEnergy": 95
}
}
"canRModeSparkInterrupt"Clears obstacles: C, E, F Dev note: FIXME: Room needs movement/heatframe counts to enter the Multiviola boxes from below and return. |
From: 1
Bottom Left Door
To: 6
Bottom Right Corner Junction
Crystal Flash immediately on entry, do so very quickly in order to have the Power Bomb go off before the Dessgeega gets to Samus. Short-charge to run through the second Desgeega and use the third to damage down if needed, then go back and run to full speed again. Follow the Multiviola to the right wall but stop before running through it. Take a hit from the Multiviola if needed, then run left with i-frames to get ahead of it. Windup and get hit by the Multiviola to interrupt, then leave. Note that a mobile G-Mode entry doesn't get hit by the Multiviola due to i-frames. For Immobile, enter with a small enough amount of Energy to where Samus will be at or below 50 after the Multiviola hit and can immediately Crystal Flash. Entrance condition: {
"comeInWithGMode": {
"mode": "direct",
"morphed": false
}
}Requires: {
"disableEquipment": "ETank"
}
"canTrickyDodgeEnemies"
"h_CrystalFlashForReserveEnergy"
{
"getBlueSpeed": {
"usedTiles": 24,
"openEnd": 0
}
}
"h_shinechargeMaxRunway"
{
"or": [
{
"and": [
"canReserveTriggerBufferXRay",
{
"autoReserveTrigger": {
"implicitHeatFrames": "no"
}
},
{
"heatFrames": 76
}
]
},
{
"and": [
{
"autoReserveTrigger": {}
},
{
"heatFrames": 44
}
]
}
]
}
"canRModeSparkInterrupt"Clears obstacles: C, E, F |
From: 1
Bottom Left Door
To: 6
Bottom Right Corner Junction
Entrance condition: {
"comeInGettingBlueSpeed": {
"length": 0,
"openEnd": 1
}
}Requires: {
"heatFrames": 135
}Clears obstacles: C, E, F |
|
Requires: {
"haveBlueSuit": {}
}
{
"heatFrames": 320
}Clears obstacles: C, E, F |
|
More heat frames than shinespark frames because the shinespark bonk takes some time. Entrance condition: {
"comeInWithSpark": {}
}Requires: {
"heatFrames": 160
}
{
"shinespark": {
"frames": 77,
"excessFrames": 2
}
}Clears obstacles: C, E, F |
From: 1
Bottom Left Door
To: 6
Bottom Right Corner Junction
Time Plasma shots so that Samus can run through the first two Dessgeegas and gain blue speed. Shooting into the floor can give more control over the enemy i-frames. Requires: "canDodgeWhileShooting"
"Plasma"
"canHitbox"
"h_getBlueSpeedMaxRunway"
{
"heatFrames": 145
}Clears obstacles: C, E, F |
From: 1
Bottom Left Door
To: 7
Junction Left of Two Rightmost Dessgeegas
Requires: "canDash"
{
"obstaclesCleared": [
"C",
"E"
]
}
{
"heatFrames": 180
} |
From: 1
Bottom Left Door
To: 7
Junction Left of Two Rightmost Dessgeegas
Entrance condition: {
"comeInNormally": {}
}Requires: "canDash"
{
"heatFrames": 240
}
{
"enemyDamage": {
"enemy": "Multiviola",
"type": "contact",
"hits": 1
}
}
{
"enemyDamage": {
"enemy": "Dessgeega",
"type": "contact",
"hits": 1
}
} |
From: 1
Bottom Left Door
To: 7
Junction Left of Two Rightmost Dessgeegas
Requires: "canDash"
{
"heatFrames": 200
}
{
"enemyDamage": {
"enemy": "Dessgeega",
"type": "contact",
"hits": 2
}
} |
From: 1
Bottom Left Door
To: 7
Junction Left of Two Rightmost Dessgeegas
Requires: "canDash"
"Plasma"
{
"heatFrames": 380
}Clears obstacles: C, E |
From: 1
Bottom Left Door
To: 7
Junction Left of Two Rightmost Dessgeegas
Sparing the Multiviolas is required to perform an ice clip further in. However, it requires going slower. Requires: "canDash"
"Plasma"
"canDodgeWhileShooting"
{
"heatFrames": 480
}Clears obstacles: C |
From: 1
Bottom Left Door
To: 7
Junction Left of Two Rightmost Dessgeegas
Requires: "canDash"
"canDodgeWhileShooting"
"Charge"
"Ice"
"Wave"
"Spazer"
{
"heatFrames": 1080
}Clears obstacles: C Dev note: Without canDodgeWhileShooting, tanking the damage and running through is best. |
From: 1
Bottom Left Door
To: 7
Junction Left of Two Rightmost Dessgeegas
Requires: "canDash"
{
"enemyKill": {
"enemies": [
[
"Dessgeega",
"Dessgeega",
"Dessgeega",
"Multiviola",
"Multiviola"
]
],
"explicitWeapons": [
"Missile"
]
}
}
{
"heatFrames": 480
}Clears obstacles: C, E |
From: 1
Bottom Left Door
To: 7
Junction Left of Two Rightmost Dessgeegas
Sparing the Multiviolas is required to perform an ice clip further in. However, it requires going slower. Requires: "canDash"
"canDodgeWhileShooting"
{
"enemyKill": {
"enemies": [
[
"Dessgeega",
"Dessgeega",
"Dessgeega"
]
],
"explicitWeapons": [
"Missile"
]
}
}
{
"heatFrames": 540
}Clears obstacles: C |
From: 1
Bottom Left Door
To: 7
Junction Left of Two Rightmost Dessgeegas
Requires: "canDash"
{
"enemyKill": {
"enemies": [
[
"Dessgeega",
"Dessgeega",
"Dessgeega",
"Multiviola",
"Multiviola"
]
],
"explicitWeapons": [
"Super"
]
}
}
{
"heatFrames": 380
}Clears obstacles: C, E |
From: 1
Bottom Left Door
To: 7
Junction Left of Two Rightmost Dessgeegas
Sparing the Multiviolas is required to perform an ice clip further in. However, it requires going slower. Requires: "canDash"
"canDodgeWhileShooting"
{
"enemyKill": {
"enemies": [
[
"Dessgeega",
"Dessgeega",
"Dessgeega"
]
],
"explicitWeapons": [
"Super"
]
}
}
{
"heatFrames": 380
}Clears obstacles: C |
From: 1
Bottom Left Door
To: 7
Junction Left of Two Rightmost Dessgeegas
Requires: "canDash"
"ScrewAttack"
{
"heatFrames": 230
}Clears obstacles: C Dev note: You can't catch the Multiviolas to kill them with Screw without reaching node 6. |
From: 2
Top Right Door
To: 1
Bottom Left Door
Crystal Flash on the topmost ledge to open the bomb blocks and navigate the Multiviola boxes. Samus cannot use Power Bombs or X-Ray after the Crystal Flash until R-Mode ends. Kill the two right Dessgeegas from the safety of the Multiviola box, then clear the rest of the runway. Use the Multiviola at the end to interrupt, or use a heat interrupt. Entrance condition: {
"comeInWithRMode": {}
}Requires: {
"heatFrames": 15
}
"h_heatedCrystalFlashForReserveEnergy"
{
"or": [
{
"and": [
"ScrewAttack",
{
"heatFrames": 650
}
]
},
{
"and": [
"Plasma",
{
"heatFrames": 850
},
{
"or": [
"Wave",
{
"heatFrames": 300
}
]
}
]
},
{
"and": [
"Ice",
"Wave",
"Spazer",
{
"heatFrames": 750
},
{
"or": [
{
"heatFrames": 750
},
{
"and": [
{
"enemyKill": {
"enemies": [
[
"Dessgeega",
"Dessgeega"
]
],
"explicitWeapons": [
"Missile"
]
}
},
{
"heatFrames": 670
}
]
},
{
"and": [
{
"enemyKill": {
"enemies": [
[
"Dessgeega",
"Dessgeega"
]
],
"explicitWeapons": [
"Super"
]
}
},
{
"heatFrames": 400
}
]
}
]
}
]
},
{
"and": [
"Wave",
{
"heatFrames": 1350
},
{
"or": [
{
"and": [
{
"enemyKill": {
"enemies": [
[
"Dessgeega",
"Dessgeega"
]
],
"excludedWeapons": [
"Bombs",
"PseudoScrew",
"PowerBomb"
]
}
},
{
"heatFrames": 3000
}
]
},
{
"and": [
{
"enemyKill": {
"enemies": [
[
"Dessgeega",
"Dessgeega"
]
],
"explicitWeapons": [
"Missile"
]
}
},
{
"heatFrames": 670
}
]
},
{
"and": [
{
"enemyKill": {
"enemies": [
[
"Dessgeega",
"Dessgeega"
]
],
"explicitWeapons": [
"Super"
]
}
},
{
"heatFrames": 400
}
]
}
]
}
]
},
{
"and": [
{
"heatFrames": 400
},
{
"enemyDamage": {
"enemy": "Multiviola",
"type": "contact",
"hits": 3
}
},
{
"or": [
{
"and": [
{
"enemyKill": {
"enemies": [
[
"Dessgeega",
"Dessgeega"
]
],
"excludedWeapons": [
"Bombs",
"PseudoScrew",
"PowerBomb"
]
}
},
{
"heatFrames": 3000
}
]
},
{
"and": [
{
"enemyKill": {
"enemies": [
[
"Dessgeega",
"Dessgeega"
]
],
"explicitWeapons": [
"Missile"
]
}
},
{
"heatFrames": 670
}
]
},
{
"and": [
{
"enemyKill": {
"enemies": [
[
"Dessgeega",
"Dessgeega"
]
],
"explicitWeapons": [
"Super"
]
}
},
{
"heatFrames": 400
}
]
}
]
}
]
},
{
"and": [
"h_heatProof",
{
"enemyKill": {
"enemies": [
[
"Dessgeega",
"Dessgeega"
]
],
"excludedWeapons": [
"Bombs",
"PseudoScrew",
"PowerBomb"
]
}
}
]
}
]
}
{
"or": [
{
"and": [
{
"getBlueSpeed": {
"usedTiles": 23,
"openEnd": 2
}
},
{
"heatFrames": 200
}
]
},
{
"and": [
"h_heatProof",
"canDodgeWhileShooting",
{
"enemyKill": {
"enemies": [
[
"Dessgeega"
],
[
"Dessgeega"
],
[
"Dessgeega"
],
[
"Multiviola"
],
[
"Multiviola"
]
],
"excludedWeapons": [
"Bombs",
"PseudoScrew",
"PowerBomb",
"PowerBeam"
]
}
}
]
},
{
"and": [
{
"heatFrames": 400
},
"Plasma",
{
"or": [
"Wave",
{
"heatFrames": 100
}
]
}
]
},
{
"and": [
{
"enemyKill": {
"enemies": [
[
"Dessgeega"
],
[
"Dessgeega"
],
[
"Dessgeega"
],
[
"Multiviola"
],
[
"Multiviola"
]
],
"explicitWeapons": [
"Missile"
]
}
},
{
"heatFrames": 500
}
]
},
{
"and": [
{
"enemyKill": {
"enemies": [
[
"Dessgeega"
],
[
"Dessgeega"
],
[
"Dessgeega"
],
[
"Multiviola"
],
[
"Multiviola"
]
],
"explicitWeapons": [
"Super"
]
}
},
{
"heatFrames": 400
}
]
},
{
"and": [
"ScrewAttack",
{
"heatFrames": 320
}
]
}
]
}
"h_shinechargeMaxRunway"
{
"autoReserveTrigger": {
"maxReserveEnergy": 95
}
}
"canRModeSparkInterrupt"
{
"heatFrames": 30
}Clears obstacles: A, B, C, D, E, F |
From: 2
Top Right Door
To: 1
Bottom Left Door
Use normal bombs or a Power Bomb to open the bomb blocks. Use one Power Bomb before a Crystal Flash to navigate the Multiviola boxes. Samus cannot use Power Bombs or X-Ray after the Crystal Flash until R-Mode ends. Kill the two right Dessgeegas from the safety of the Multiviola box, then clear the rest of the runway. The Multiviola at the end to interrupt, or use a heat interrupt. Entrance condition: {
"comeInWithRMode": {}
}Requires: {
"or": [
{
"and": [
"h_usePowerBomb",
{
"heatFrames": 180
}
]
},
{
"and": [
{
"heatFrames": 160
},
{
"or": [
"ScrewAttack",
{
"and": [
"h_useMorphBombs",
{
"heatFrames": 60
}
]
}
]
}
]
}
]
}
"h_usePowerBomb"
{
"heatFrames": 260
}
"h_heatedCrystalFlashForReserveEnergy"
{
"heatFrames": 120
}
{
"or": [
{
"and": [
{
"enemyKill": {
"enemies": [
[
"Dessgeega",
"Dessgeega"
]
],
"excludedWeapons": [
"Bombs",
"PseudoScrew",
"PowerBomb"
]
}
},
{
"heatFrames": 3000
}
]
},
{
"and": [
"Plasma",
{
"heatFrames": 400
}
]
},
{
"and": [
"Ice",
"Wave",
"Spazer",
{
"heatFrames": 750
}
]
},
{
"and": [
"ScrewAttack",
{
"heatFrames": 200
}
]
},
{
"and": [
{
"enemyKill": {
"enemies": [
[
"Dessgeega",
"Dessgeega"
]
],
"explicitWeapons": [
"Missile"
]
}
},
{
"heatFrames": 670
}
]
},
{
"and": [
{
"enemyKill": {
"enemies": [
[
"Dessgeega",
"Dessgeega"
]
],
"explicitWeapons": [
"Super"
]
}
},
{
"heatFrames": 400
}
]
}
]
}
{
"or": [
{
"and": [
{
"getBlueSpeed": {
"usedTiles": 23,
"openEnd": 2
}
},
{
"heatFrames": 200
}
]
},
{
"and": [
"h_heatProof",
"canDodgeWhileShooting",
{
"enemyKill": {
"enemies": [
[
"Dessgeega"
],
[
"Dessgeega"
],
[
"Dessgeega"
],
[
"Multiviola"
],
[
"Multiviola"
]
],
"excludedWeapons": [
"Bombs",
"PseudoScrew",
"PowerBomb",
"PowerBeam"
]
}
}
]
},
{
"and": [
{
"heatFrames": 400
},
"Plasma",
{
"or": [
"Wave",
{
"heatFrames": 100
}
]
}
]
},
{
"and": [
{
"enemyKill": {
"enemies": [
[
"Dessgeega"
],
[
"Dessgeega"
],
[
"Dessgeega"
],
[
"Multiviola"
],
[
"Multiviola"
]
],
"explicitWeapons": [
"Missile"
]
}
},
{
"heatFrames": 500
}
]
},
{
"and": [
{
"enemyKill": {
"enemies": [
[
"Dessgeega"
],
[
"Dessgeega"
],
[
"Dessgeega"
],
[
"Multiviola"
],
[
"Multiviola"
]
],
"explicitWeapons": [
"Super"
]
}
},
{
"heatFrames": 400
}
]
},
{
"and": [
"ScrewAttack",
{
"heatFrames": 320
}
]
}
]
}
"h_shinechargeMaxRunway"
{
"autoReserveTrigger": {
"maxReserveEnergy": 95
}
}
"canRModeSparkInterrupt"
{
"heatFrames": 30
}Clears obstacles: A, B, C, D, E, F |
From: 2
Top Right Door
To: 1
Bottom Left Door
Use normal bombs or a Power Bomb to open the bomb blocks, then navigate the Multiviola boxes. Kill the two right Dessgeegas, then Crystal Flash. Samus cannot use Power Bombs or X-Ray after the Crystal Flash until R-Mode ends. Clear the rest of the runway. Use the Multiviola at the end to interrupt, or use a heat interrupt. Entrance condition: {
"comeInWithRMode": {}
}Requires: {
"or": [
{
"and": [
"h_usePowerBomb",
{
"heatFrames": 180
}
]
},
{
"and": [
{
"heatFrames": 160
},
{
"or": [
"ScrewAttack",
{
"and": [
"h_useMorphBombs",
{
"heatFrames": 60
}
]
}
]
}
]
}
]
}
{
"or": [
{
"and": [
"ScrewAttack",
{
"heatFrames": 650
}
]
},
{
"and": [
"Plasma",
{
"heatFrames": 850
},
{
"or": [
"Wave",
{
"heatFrames": 300
}
]
}
]
},
{
"and": [
{
"or": [
{
"and": [
{
"enemyKill": {
"enemies": [
[
"Multiviola",
"Multiviola"
],
[
"Multiviola",
"Multiviola",
"Multiviola"
]
],
"explicitWeapons": [
"PowerBomb"
]
}
},
{
"heatFrames": 500
}
]
},
{
"and": [
"Ice",
"Wave",
"Spazer",
{
"heatFrames": 750
}
]
},
{
"and": [
"Wave",
{
"heatFrames": 1350
}
]
},
{
"and": [
{
"heatFrames": 400
},
{
"enemyDamage": {
"enemy": "Multiviola",
"type": "contact",
"hits": 3
}
}
]
}
]
},
{
"or": [
{
"and": [
{
"enemyKill": {
"enemies": [
[
"Dessgeega",
"Dessgeega"
]
],
"explicitWeapons": [
"Missile"
]
}
},
{
"heatFrames": 670
}
]
},
{
"and": [
{
"enemyKill": {
"enemies": [
[
"Dessgeega",
"Dessgeega"
]
],
"explicitWeapons": [
"Super"
]
}
},
{
"heatFrames": 400
}
]
},
{
"and": [
{
"enemyKill": {
"enemies": [
[
"Dessgeega",
"Dessgeega"
]
],
"explicitWeapons": [
"PowerBomb"
]
}
},
{
"heatFrames": 500
}
]
},
{
"and": [
"Ice",
"Wave",
"Spazer",
{
"heatFrames": 750
}
]
}
]
}
]
},
{
"and": [
"h_heatProof",
{
"enemyKill": {
"enemies": [
[
"Dessgeega",
"Dessgeega"
]
],
"excludedWeapons": [
"Bombs",
"PseudoScrew"
]
}
}
]
}
]
}
"h_heatedCrystalFlashForReserveEnergy"
{
"or": [
{
"and": [
{
"getBlueSpeed": {
"usedTiles": 23,
"openEnd": 2
}
},
{
"heatFrames": 200
}
]
},
{
"and": [
"h_heatProof",
"canDodgeWhileShooting",
{
"enemyKill": {
"enemies": [
[
"Dessgeega"
],
[
"Dessgeega"
],
[
"Dessgeega"
],
[
"Multiviola"
],
[
"Multiviola"
]
],
"excludedWeapons": [
"Bombs",
"PseudoScrew",
"PowerBomb",
"PowerBeam"
]
}
}
]
},
{
"and": [
{
"heatFrames": 400
},
"Plasma",
{
"or": [
"Wave",
{
"heatFrames": 100
}
]
}
]
},
{
"and": [
{
"enemyKill": {
"enemies": [
[
"Dessgeega"
],
[
"Dessgeega"
],
[
"Dessgeega"
],
[
"Multiviola"
],
[
"Multiviola"
]
],
"explicitWeapons": [
"Missile"
]
}
},
{
"heatFrames": 500
}
]
},
{
"and": [
{
"enemyKill": {
"enemies": [
[
"Dessgeega"
],
[
"Dessgeega"
],
[
"Dessgeega"
],
[
"Multiviola"
],
[
"Multiviola"
]
],
"explicitWeapons": [
"Super"
]
}
},
{
"heatFrames": 400
}
]
},
{
"and": [
"ScrewAttack",
{
"heatFrames": 320
}
]
}
]
}
"h_shinechargeMaxRunway"
{
"autoReserveTrigger": {
"maxReserveEnergy": 95
}
}
"canRModeSparkInterrupt"
{
"heatFrames": 30
}Clears obstacles: A, B, C, D, E, F |
|
Use normal bombs or a Power Bomb to open the bomb blocks, then navigate the Multiviola boxes. Kill the two right Dessgeegas, then clear the rest of the runway. Use the Multiviola at the end to interrupt, or use a heat interrupt. If Samus ends up needing to Crystal Flash at any point, remember that Samus cannot use Power Bombs or X-Ray afterwards until R-Mode ends. Entrance condition: {
"comeInWithRMode": {}
}Requires: "canBeLucky"
{
"or": [
{
"and": [
"h_usePowerBomb",
{
"heatFrames": 180
}
]
},
{
"and": [
{
"heatFrames": 160
},
{
"or": [
"ScrewAttack",
{
"and": [
"h_useMorphBombs",
{
"heatFrames": 60
}
]
}
]
}
]
}
]
}
{
"or": [
{
"and": [
"ScrewAttack",
{
"heatFrames": 650
}
]
},
{
"and": [
"Plasma",
{
"heatFrames": 850
},
{
"or": [
"Wave",
{
"heatFrames": 300
}
]
}
]
},
{
"and": [
{
"or": [
{
"and": [
{
"enemyKill": {
"enemies": [
[
"Multiviola",
"Multiviola"
],
[
"Multiviola",
"Multiviola",
"Multiviola"
]
],
"explicitWeapons": [
"PowerBomb"
]
}
},
{
"heatFrames": 500
}
]
},
{
"and": [
"Ice",
"Wave",
"Spazer",
{
"heatFrames": 750
}
]
},
{
"and": [
"Wave",
{
"heatFrames": 1350
}
]
},
{
"and": [
{
"heatFrames": 400
},
{
"enemyDamage": {
"enemy": "Multiviola",
"type": "contact",
"hits": 3
}
}
]
}
]
},
{
"or": [
{
"and": [
{
"enemyKill": {
"enemies": [
[
"Dessgeega",
"Dessgeega"
]
],
"explicitWeapons": [
"Missile"
]
}
},
{
"heatFrames": 670
}
]
},
{
"and": [
{
"enemyKill": {
"enemies": [
[
"Dessgeega",
"Dessgeega"
]
],
"explicitWeapons": [
"Super"
]
}
},
{
"heatFrames": 400
}
]
},
{
"and": [
{
"enemyKill": {
"enemies": [
[
"Dessgeega",
"Dessgeega"
]
],
"explicitWeapons": [
"PowerBomb"
]
}
},
{
"heatFrames": 500
}
]
},
{
"and": [
"Ice",
"Wave",
"Spazer",
{
"heatFrames": 750
}
]
}
]
}
]
},
{
"and": [
"h_heatProof",
{
"enemyKill": {
"enemies": [
[
"Dessgeega",
"Dessgeega"
]
],
"excludedWeapons": [
"Bombs",
"PseudoScrew",
"PowerBomb"
]
}
}
]
}
]
}
{
"or": [
{
"and": [
{
"getBlueSpeed": {
"usedTiles": 23,
"openEnd": 2
}
},
{
"heatFrames": 200
}
]
},
{
"and": [
"h_heatProof",
"canDodgeWhileShooting",
{
"enemyKill": {
"enemies": [
[
"Dessgeega"
],
[
"Dessgeega"
],
[
"Dessgeega"
],
[
"Multiviola"
],
[
"Multiviola"
]
],
"excludedWeapons": [
"Bombs",
"PseudoScrew",
"PowerBomb",
"PowerBeam"
]
}
}
]
},
{
"and": [
{
"heatFrames": 400
},
"Plasma",
{
"or": [
"Wave",
{
"heatFrames": 100
}
]
}
]
},
{
"and": [
{
"enemyKill": {
"enemies": [
[
"Dessgeega"
],
[
"Dessgeega"
],
[
"Dessgeega"
],
[
"Multiviola"
],
[
"Multiviola"
]
],
"explicitWeapons": [
"Missile"
]
}
},
{
"heatFrames": 500
}
]
},
{
"and": [
{
"enemyKill": {
"enemies": [
[
"Dessgeega"
],
[
"Dessgeega"
],
[
"Dessgeega"
],
[
"Multiviola"
],
[
"Multiviola"
]
],
"explicitWeapons": [
"Super"
]
}
},
{
"heatFrames": 400
}
]
},
{
"and": [
"ScrewAttack",
{
"heatFrames": 320
}
]
}
]
}
"h_RModeCanRefillReserves"
{
"partialRefill": {
"type": "ReserveEnergy",
"limit": 20
}
}
"h_shinechargeMaxRunway"
{
"autoReserveTrigger": {
"maxReserveEnergy": 95
}
}
"canRModeSparkInterrupt"
{
"heatFrames": 30
}Clears obstacles: A, B, C, D, E, F |
|
Exit condition: {
"leaveWithRunway": {
"length": 1,
"openEnd": 1
}
} |
|


Entrance condition: {
"comeInNormally": {}
}Requires: {
"heatFrames": 180
}Exit condition: {
"leaveWithSidePlatform": {
"height": 3,
"runway": {
"length": 12,
"openEnd": 0
},
"obstruction": [
1,
0
]
}
}Unlocks doors: {"types":["missiles"],"requires":[{"heatFrames":50}]}
{"types":["super"],"requires":[]}
{"types":["powerbomb"],"requires":[{"heatFrames":110}]}Dev note: Max extra run speed $2.9. The `comeInNormally` condition is to ensure the shot blocks are intact; waiting for them to respawn could also be an option but would require more heat frames. |
|
Requires: {
"heatFrames": 15
}
"h_heatedCrystalFlash"Clears obstacles: A, B |
|
Place the power bomb while passing through the shot block gap (or before) to save some time. Requires: {
"obstaclesNotCleared": [
"A"
]
}
{
"noBlueSuit": {}
}
"h_usePowerBomb"
{
"heatFrames": 180
}Clears obstacles: A, B Dev note: We don't want the blocks to already be cleared (e.g. from Crystal Flash at node 2) because then we may need to crumble jump. FIXME: We could add a separate strat for the case where the blocks are already broken. |
From: 2
Top Right Door
To: 4
Junction Below Bomb Blocks
Requires: {
"heatFrames": 150
}
{
"obstaclesNotCleared": [
"A"
]
}
{
"or": [
"ScrewAttack",
{
"and": [
"h_useMorphBombs",
{
"heatFrames": 60
}
]
},
{
"obstaclesCleared": [
"B"
]
}
]
}Clears obstacles: B |
|
Requires: {
"haveBlueSuit": {}
}
{
"or": [
"canCrumbleJump",
"h_useSpringBall",
"SpaceJump"
]
}
{
"heatFrames": 160
}Clears obstacles: B |
From: 2
Top Right Door
To: 4
Junction Below Bomb Blocks
Carry Temporary Blue through the top door to break the left side of the bomb blocks. Morph while falling through the shot block to bounce on the crumble blocks towards the morph tunnel. Then unmorph near the wall to fall straight down with temporary blue, if needed. Entrance condition: {
"comeInWithTemporaryBlue": {}
}Requires: "canPrepareForNextRoom"
"canChainTemporaryBlue"
"h_useSpringBall"
{
"heatFrames": 300
}Clears obstacles: B Dev note: You could jump into the room for the initial Temporary Blue and turn around with XRay twice, but this room is heated so that would be costly. |
From: 2
Top Right Door
To: 4
Junction Below Bomb Blocks

Carry Temporary Blue through the top door to break the left side of the bomb blocks. There is a small frame window where Samus can soft unmorph on the crumble blocks and jump again while retaining temporary blue. Entrance condition: {
"comeInWithTemporaryBlue": {}
}Requires: {
"notable": "Temporary Blue Crumble Jump without Spring Ball"
}
"canPrepareForNextRoom"
"canChainTemporaryBlue"
"canInsaneJump"
"canCrumbleJump"
{
"heatFrames": 300
}Clears obstacles: B Dev note: You could jump into the room for the initial Temporary Blue and turn around with XRay twice, but this room is heated so that would be costly. |
From: 2
Top Right Door
To: 6
Bottom Right Corner Junction
Moonfall into the door transition and stay in spin to fall through the top 4 levels of solid tiles. A flatley style turnaround will land between the Bomb and Crumble blocks and can be continued with another Moonfall. Entrance condition: {
"comeInWithStoredFallSpeed": {
"fallSpeedInTiles": 1
}
}Requires: "canPrepareForNextRoom"
"canMoonfall"
"canFreeFallClip"
{
"enemyDamage": {
"enemy": "Multiviola",
"type": "contact",
"hits": 1
}
}
{
"or": [
{
"ammo": {
"type": "Missile",
"count": 3
}
},
{
"ammo": {
"type": "Super",
"count": 3
}
},
"Plasma",
"h_heatProof"
]
}
{
"heatFrames": 300
}Dev note: Entering the room with a moonfall can be assumed always possible for comeInWithStoredFallSpeed. FIXME: This could benefit from another node below 4. |
|
Requires: "h_heatedCrystalFlash" |
|
Requires: "Morph"
{
"heatFrames": 110
}
{
"or": [
"canDash",
{
"heatFrames": 10
}
]
} |
From: 4
Junction Below Bomb Blocks
To: 2
Top Right Door


Requires: {
"obstaclesCleared": [
"B"
]
}
{
"obstaclesNotCleared": [
"A"
]
}
{
"noBlueSuit": {}
}
{
"heatFrames": 160
}
{
"or": [
"h_crouchJumpDownGrab",
"canWallJump",
"canSpringBallJumpMidAir",
"HiJump",
{
"and": [
"SpaceJump",
{
"heatFrames": 20
}
]
},
{
"and": [
"canSpringBallBombJump",
{
"heatFrames": 50
}
]
},
{
"and": [
"canJumpIntoIBJ",
{
"heatFrames": 60
}
]
}
]
} |
From: 4
Junction Below Bomb Blocks
To: 2
Top Right Door
Jump into the respawning shot block. It helps significantly to aim down to get trapped into the block. A normalized method to set this up is to shoot the block then immediately perform 5 full-height jumps. Requires: {
"obstaclesCleared": [
"B"
]
}
{
"obstaclesNotCleared": [
"A"
]
}
{
"noBlueSuit": {}
}
{
"heatFrames": 600
}
"canJumpIntoRespawningBlock"
{
"or": [
{
"heatFrames": 900
},
{
"and": [
"canInsaneJump",
"canComplexCarryFlashSuit"
]
}
]
}Dev note: The 900 heat frame option gives two leniency attempts. This is likely only useful to avoid a crouch jump and preserve a flash suit. This is not needed on strats that go directly from 9 to 2, because they require a crouch jump or X-ray. |
|


Requires: {
"obstaclesCleared": [
"B"
]
}
"SpaceJump"
{
"heatFrames": 180
}
{
"or": [
"canDash",
{
"heatFrames": 10
}
]
} |
From: 4
Junction Below Bomb Blocks
To: 2
Top Right Door

Requires one jump off a crumble block Requires: {
"obstaclesCleared": [
"B"
]
}
"HiJump"
"canCrumbleJump"
{
"heatFrames": 160
} |
From: 4
Junction Below Bomb Blocks
To: 2
Top Right Door
Use SpringBall to just bounce on the crumble blocks. Requires: {
"obstaclesCleared": [
"B"
]
}
"HiJump"
"h_useSpringBall"
{
"heatFrames": 175
} |
From: 4
Junction Below Bomb Blocks
To: 2
Top Right Door

This is possible by jumping on the crumble blocks into a mid-air spring ball jump, or by avoiding them. The crumbles can be avoided by starting with either an air ball, a 3 tile high mid-air morph, or a low spring wall. These are generally safer, as bouncing on the crumble blocks with Spring Ball is trivial. Requires: {
"obstaclesCleared": [
"B"
]
}
"canDash"
"canTrickySpringBallJump"
{
"heatFrames": 250
}
{
"or": [
{
"and": [
"can4HighMidAirMorph",
"canSpringFling"
]
},
{
"and": [
"canLateralMidAirMorph",
"canTrickyJump"
]
},
"canCrumbleJump",
{
"and": [
"h_trickySpringwall",
"canPreciseWallJump"
]
}
]
} |
From: 4
Junction Below Bomb Blocks
To: 2
Top Right Door

Spin jump off a crumble block with exactly 1 frame of dash speed. That gives just enough height to be able to wall jump out. Requires: {
"notable": "Crumble Tricky Dash Jump"
}
{
"obstaclesCleared": [
"B"
]
}
"canCrumbleJump"
"canTrickyDashJump"
"canPreciseWallJump"
"canInsaneJump"
{
"heatFrames": 180
} |
From: 4
Junction Below Bomb Blocks
To: 2
Top Right Door
Jump and mid-air morph off a crumble block to begin the IBJ. Use double bomb jumps to make it up quickly before the shot block respawns. Requires: {
"obstaclesCleared": [
"B"
]
}
"canCrumbleJump"
"canInsaneJump"
"canJumpIntoIBJ"
"canDoubleBombJump"
{
"heatFrames": 360
}Dev note: This is likely to only be useful if the in-room item is Bombs, and Samus had to break the blocks with a Power Bomb to get to it. |
|
Shoot the block before starting or in mid-air, then use Spring Ball to bounce on the crumble blocks and start an IBJ. The shot block respawns quickly so it's pretty unforgiving on the IBJ executions. Conservatively placing bombs for the IBJ will not make it up in time, unless the block is broken while IBJing. Requires: {
"obstaclesCleared": [
"B"
]
}
"canJumpIntoIBJ"
"h_useSpringBall"
{
"or": [
"canTrickyJump",
"canDoubleBombJump",
"canBombAboveIBJ",
{
"ammo": {
"type": "PowerBomb",
"count": 1
}
}
]
}
{
"heatFrames": 500
} |
|
Requires: {
"heatFrames": 85
}
{
"useFlashSuit": {}
}
{
"shinespark": {
"frames": 10,
"excessFrames": 6
}
}
{
"heatFrames": 140
} |
|
Requires: "Morph"
{
"heatFrames": 80
} |
From: 4
Junction Below Bomb Blocks
To: 3
Item
Requires: "h_usePowerBomb"
{
"heatFrames": 80
}Clears obstacles: A, B |
From: 4
Junction Below Bomb Blocks
To: 3
Item
Position the Power Bomb far enough left to only partially clear the bomb blocks. Requires: {
"obstaclesNotCleared": [
"A"
]
}
"h_usePowerBomb"
{
"heatFrames": 95
}Clears obstacles: B Dev note: This is possible when ice clipping with the multiviola. |
|
Requires: "h_useMorphBombs"
{
"heatFrames": 80
}Clears obstacles: B |
From: 4
Junction Below Bomb Blocks
To: 4
Junction Below Bomb Blocks
Requires: "h_heatedCrystalFlash" Clears obstacles: A, B |
From: 4
Junction Below Bomb Blocks
To: 4
Junction Below Bomb Blocks
Requires: "h_usePowerBomb"
{
"heatFrames": 120
}Clears obstacles: A, B |
|
Requires: "h_useMorphBombs"
{
"heatFrames": 100
}Clears obstacles: B |
From: 4
Junction Below Bomb Blocks
To: 4
Junction Below Bomb Blocks
Requires: {
"haveBlueSuit": {}
}
{
"heatFrames": 5
}Clears obstacles: B |
From: 4
Junction Below Bomb Blocks
To: 6
Bottom Right Corner Junction
Requires: {
"obstaclesCleared": [
"D"
]
}
"canDash"
{
"heatFrames": 350
} |
From: 4
Junction Below Bomb Blocks
To: 6
Bottom Right Corner Junction
Requires: {
"haveBlueSuit": {}
}
{
"heatFrames": 400
} |
From: 4
Junction Below Bomb Blocks
To: 6
Bottom Right Corner Junction
Requires: {
"heatFrames": 360
}
{
"or": [
{
"enemyDamage": {
"enemy": "Multiviola",
"type": "contact",
"hits": 3
}
},
{
"and": [
"canDodgeWhileShooting",
{
"enemyDamage": {
"enemy": "Multiviola",
"type": "contact",
"hits": 2
}
}
]
},
{
"and": [
"canTrickyDodgeEnemies",
{
"enemyDamage": {
"enemy": "Multiviola",
"type": "contact",
"hits": 1
}
}
]
}
]
} |
From: 4
Junction Below Bomb Blocks
To: 6
Bottom Right Corner Junction
Considered killable with Power Beam without taking damage. Dodge the middle single Multiviola when it jumps up. Requires: "h_heatProof"
{
"or": [
"canCameraManip",
{
"enemyDamage": {
"enemy": "Multiviola",
"type": "contact",
"hits": 2
}
}
]
}Clears obstacles: D |
From: 4
Junction Below Bomb Blocks
To: 6
Bottom Right Corner Junction
Requires: "ScrewAttack"
{
"or": [
"canDodgeWhileShooting",
{
"and": [
"canCarefulJump",
{
"enemyDamage": {
"enemy": "Multiviola",
"type": "contact",
"hits": 1
}
}
]
},
{
"enemyDamage": {
"enemy": "Multiviola",
"type": "contact",
"hits": 2
}
}
]
}
{
"heatFrames": 360
}Clears obstacles: D |
From: 4
Junction Below Bomb Blocks
To: 6
Bottom Right Corner Junction
Requires: {
"or": [
{
"and": [
"Wave",
"Plasma"
]
},
{
"and": [
"Plasma",
{
"heatFrames": 300
}
]
},
{
"and": [
"Wave",
"Ice",
"Spazer",
{
"heatFrames": 300
}
]
},
{
"and": [
"Wave",
{
"heatFrames": 900
}
]
}
]
}
{
"heatFrames": 450
}Clears obstacles: D |
From: 4
Junction Below Bomb Blocks
To: 6
Bottom Right Corner Junction
Requires: {
"enemyKill": {
"enemies": [
[
"Multiviola",
"Multiviola"
],
[
"Multiviola",
"Multiviola",
"Multiviola"
]
],
"explicitWeapons": [
"PowerBomb"
]
}
}
{
"heatFrames": 500
}Clears obstacles: D |
From: 4
Junction Below Bomb Blocks
To: 6
Bottom Right Corner Junction


Requires: "h_usePowerBomb"
{
"heatFrames": 260
}
"h_heatedCrystalFlash"
{
"heatFrames": 120
} |
|
Taking damage off a Dessgeega at the far right, coming in from the top, allows you to charge a blue suit and get through to the door. Requires: {
"or": [
{
"obstaclesCleared": [
"F"
]
},
{
"and": [
"canUseIFrames",
{
"enemyDamage": {
"enemy": "Dessgeega",
"type": "contact",
"hits": 1
}
}
]
}
]
}
{
"getBlueSpeed": {
"usedTiles": 23,
"openEnd": 2
}
}
{
"heatFrames": 200
}Clears obstacles: C, E Unlocks doors: {"types":["missiles"],"requires":[{"heatFrames":30}]} |
|
Requires: {
"haveBlueSuit": {}
}
{
"heatFrames": 320
} |
From: 6
Bottom Right Corner Junction
To: 4
Junction Below Bomb Blocks

Menu to Grappling Beam before the crystal flash ends and mash shoot while holding down to be forced on top of the solid block. Requires: "h_heatProof"
"h_jumpIntoCrystalFlashClip"
"Grapple"
{
"or": [
{
"obstaclesCleared": [
"D"
]
},
{
"obstaclesCleared": [
"F"
]
},
{
"enemyDamage": {
"enemy": "Multiviola",
"type": "contact",
"hits": 2
}
}
]
}Clears obstacles: A, B, D Dev note: It is considered free to kill the Multiviolas with Power Beam while heatproof, and heatproof is required for the CF clip. All of the bomb blocks will be destroyed while performing the Crystal Flash. |
From: 6
Bottom Right Corner Junction
To: 6
Bottom Right Corner Junction
Requires: {
"obstaclesCleared": [
"F"
]
}
"h_heatedCrystalFlash" |
From: 6
Bottom Right Corner Junction
To: 6
Bottom Right Corner Junction
Requires: {
"obstaclesCleared": [
"C"
]
}
{
"obstaclesCleared": [
"F"
]
}
"h_shinechargeMaxRunway"
"h_heatedCrystalSpark" |
From: 6
Bottom Right Corner Junction
To: 7
Junction Left of Two Rightmost Dessgeegas
Requires: "canDash"
{
"obstaclesCleared": [
"F"
]
}
{
"heatFrames": 150
} |
From: 6
Bottom Right Corner Junction
To: 7
Junction Left of Two Rightmost Dessgeegas
Requires: "canDash"
{
"heatFrames": 150
}
{
"enemyDamage": {
"enemy": "Dessgeega",
"type": "contact",
"hits": 1
}
} |
From: 6
Bottom Right Corner Junction
To: 7
Junction Left of Two Rightmost Dessgeegas
Requires: {
"enemyKill": {
"enemies": [
[
"Dessgeega",
"Dessgeega"
]
],
"excludedWeapons": [
"Bombs",
"PseudoScrew"
]
}
}
{
"heatFrames": 3000
}Clears obstacles: F Dev note: Bombs excluded because there's no safe setup. |
From: 6
Bottom Right Corner Junction
To: 7
Junction Left of Two Rightmost Dessgeegas
Requires: "canDash"
{
"or": [
{
"and": [
"Plasma",
{
"heatFrames": 250
}
]
},
{
"and": [
"Ice",
"Wave",
"Spazer",
{
"heatFrames": 600
}
]
}
]
}
{
"heatFrames": 150
}Clears obstacles: F |
From: 6
Bottom Right Corner Junction
To: 7
Junction Left of Two Rightmost Dessgeegas
Requires: "canDash"
"ScrewAttack"
{
"heatFrames": 200
}Clears obstacles: F |
From: 6
Bottom Right Corner Junction
To: 7
Junction Left of Two Rightmost Dessgeegas
Requires: "canDash"
{
"or": [
{
"and": [
{
"enemyKill": {
"enemies": [
[
"Dessgeega",
"Dessgeega"
]
],
"explicitWeapons": [
"Missile"
]
}
},
{
"heatFrames": 420
}
]
},
{
"and": [
{
"enemyKill": {
"enemies": [
[
"Dessgeega",
"Dessgeega"
]
],
"explicitWeapons": [
"Super"
]
}
},
{
"heatFrames": 250
}
]
},
{
"and": [
{
"enemyKill": {
"enemies": [
[
"Dessgeega",
"Dessgeega"
]
],
"explicitWeapons": [
"PowerBomb"
]
}
},
{
"heatFrames": 350
}
]
}
]
}
{
"heatFrames": 150
}Clears obstacles: F |
From: 6
Bottom Right Corner Junction
To: 9
Junction Below Crumble Blocks, Set Up to Clip
Guide the bottom-right Multiviola to the upper section of the room. Lure the Dessgeegas away to avoid killing the Multiviola. Remove all enemies and possibly also the row of bomb blocks with a power bomb before attempting to guide the Multiviola. It will need to bounce each room segment multiple times before lining up to go through each shot block. Ice can be used to more safely get around the Multiviola as it is bouncing. However, opening the left side door will change the bounce locations and make the strat no longer possible. Instead the enemy can be allowed to go off camera and then Samus can prepare to run away as it comes back. Waiting in the next room segment is a safe way to wait for the Multiviola to bounce and still be able to break shot blocks. Requires: {
"notable": "Multiviola Ice Clip"
}
"h_heatProof"
"canTrickyUseFrozenEnemies"
{
"or": [
"canCameraManip",
"canDodgeWhileShooting"
]
}
{
"obstaclesNotCleared": [
"E"
]
}
{
"enemyDamage": {
"enemy": "Multiviola",
"type": "contact",
"hits": 5
}
}
{
"or": [
{
"enemyKill": {
"enemies": [
[
"Dessgeega"
],
[
"Dessgeega"
],
[
"Dessgeega"
]
],
"explicitWeapons": [
"Plasma",
"ScrewAttack",
"Charge+Ice+Wave",
"Ice+Wave+Spazer",
"Missile",
"Super"
]
}
},
{
"obstaclesCleared": [
"C"
]
}
]
}
{
"or": [
{
"enemyKill": {
"enemies": [
[
"Dessgeega",
"Dessgeega"
]
],
"explicitWeapons": [
"Plasma",
"ScrewAttack",
"Charge+Ice+Wave",
"Ice+Wave+Spazer",
"Missile",
"Super"
]
}
},
{
"obstaclesCleared": [
"F"
]
}
]
}Clears obstacles: C, D, F Dev note: This is not just getting up there, but also bringing the correct Multiviola with you. Five hits for leniency because it is hard to avoid damage even while freezing the Multiviola. 2.5 minute strat with Plasma |
From: 7
Junction Left of Two Rightmost Dessgeegas
To: 1
Bottom Left Door
Requires: "canDash"
{
"obstaclesCleared": [
"C"
]
}
{
"heatFrames": 200
}Unlocks doors: {"types":["missiles"],"requires":[{"heatFrames":30}]} |
From: 7
Junction Left of Two Rightmost Dessgeegas
To: 1
Bottom Left Door
Requires: "canDash"
{
"heatFrames": 250
}
{
"enemyDamage": {
"enemy": "Dessgeega",
"type": "contact",
"hits": 2
}
}Unlocks doors: {"types":["missiles"],"requires":[{"heatFrames":30}]} |
From: 7
Junction Left of Two Rightmost Dessgeegas
To: 1
Bottom Left Door
Some weapons are very slow at killing the Multiviolas and require use of the safe spot in the bottom right Multiviola cage. Requires: "h_heatProof"
{
"obstaclesCleared": [
"F"
]
}
{
"or": [
{
"and": [
"canDodgeWhileShooting",
{
"enemyKill": {
"enemies": [
[
"Dessgeega"
],
[
"Dessgeega"
],
[
"Dessgeega"
]
],
"excludedWeapons": [
"Bombs",
"PseudoScrew",
"Charge",
"Charge+Ice",
"Spazer"
]
}
}
]
},
{
"and": [
"canBeVeryPatient",
"Charge"
]
},
{
"and": [
"canBePatient",
"Charge",
"Ice"
]
},
{
"and": [
"canBePatient",
"Spazer"
]
},
{
"obstaclesCleared": [
"C"
]
}
]
}
{
"or": [
{
"and": [
"canCarefulJump",
{
"enemyKill": {
"enemies": [
[
"Multiviola"
],
[
"Multiviola"
]
],
"excludedWeapons": [
"Bombs",
"PowerBeam"
]
}
}
]
},
{
"enemyDamage": {
"enemy": "Multiviola",
"type": "contact",
"hits": 2
}
},
{
"obstaclesCleared": [
"E"
]
}
]
}Clears obstacles: C, E Unlocks doors: {"types":["missiles"],"requires":[{"heatFrames":30}]}Dev note: Bombs are excluded because there is no safe setup. Without canDodgeWhileShooting, tanking the damage and running through is best. |
From: 7
Junction Left of Two Rightmost Dessgeegas
To: 1
Bottom Left Door
Requires: "canDash"
{
"obstaclesCleared": [
"F"
]
}
"Plasma"
"Wave"
{
"heatFrames": 400
}Clears obstacles: C, E Unlocks doors: {"types":["missiles"],"requires":[{"heatFrames":30}]} |
From: 7
Junction Left of Two Rightmost Dessgeegas
To: 1
Bottom Left Door
Requires: "canDash"
{
"obstaclesCleared": [
"F"
]
}
"Plasma"
{
"heatFrames": 500
}Clears obstacles: C, E Unlocks doors: {"types":["missiles"],"requires":[{"heatFrames":30}]} |
From: 7
Junction Left of Two Rightmost Dessgeegas
To: 1
Bottom Left Door
Requires: "canDash"
{
"obstaclesCleared": [
"F"
]
}
{
"heatFrames": 200
}
{
"or": [
{
"and": [
{
"enemyKill": {
"enemies": [
[
"Dessgeega",
"Dessgeega",
"Dessgeega"
]
],
"explicitWeapons": [
"Missile"
]
}
},
{
"heatFrames": 300
}
]
},
{
"obstaclesCleared": [
"C"
]
}
]
}
{
"or": [
{
"enemyKill": {
"enemies": [
[
"Multiviola",
"Multiviola"
]
],
"explicitWeapons": [
"Missile"
]
}
},
{
"obstaclesCleared": [
"E"
]
}
]
}Clears obstacles: C, E Unlocks doors: {"types":["missiles"],"requires":[{"heatFrames":30}]} |
From: 7
Junction Left of Two Rightmost Dessgeegas
To: 1
Bottom Left Door
Requires: "canDash"
{
"obstaclesCleared": [
"F"
]
}
{
"heatFrames": 200
}
{
"or": [
{
"and": [
{
"enemyKill": {
"enemies": [
[
"Dessgeega",
"Dessgeega",
"Dessgeega"
]
],
"explicitWeapons": [
"Super"
]
}
},
{
"heatFrames": 200
}
]
},
{
"obstaclesCleared": [
"C"
]
}
]
}
{
"or": [
{
"enemyKill": {
"enemies": [
[
"Multiviola",
"Multiviola"
]
],
"explicitWeapons": [
"Super"
]
}
},
{
"obstaclesCleared": [
"E"
]
}
]
}Clears obstacles: C, E Unlocks doors: {"types":["missiles"],"requires":[{"heatFrames":30}]} |
From: 7
Junction Left of Two Rightmost Dessgeegas
To: 1
Bottom Left Door
Requires: "canDash"
"ScrewAttack"
{
"heatFrames": 320
}Clears obstacles: C, E Unlocks doors: {"types":["missiles"],"requires":[{"heatFrames":30}]} |
From: 7
Junction Left of Two Rightmost Dessgeegas
To: 6
Bottom Right Corner Junction
Requires: "canDash"
{
"obstaclesCleared": [
"F"
]
}
{
"heatFrames": 100
} |
From: 7
Junction Left of Two Rightmost Dessgeegas
To: 6
Bottom Right Corner Junction
Requires: "canDash"
{
"heatFrames": 150
}
{
"enemyDamage": {
"enemy": "Dessgeega",
"type": "contact",
"hits": 1
}
} |
From: 7
Junction Left of Two Rightmost Dessgeegas
To: 6
Bottom Right Corner Junction
Requires: "canDash"
{
"obstaclesCleared": [
"C"
]
}
"Plasma"
{
"heatFrames": 400
}Clears obstacles: F |
From: 7
Junction Left of Two Rightmost Dessgeegas
To: 6
Bottom Right Corner Junction
Requires: "canDash"
{
"obstaclesCleared": [
"C"
]
}
"canDodgeWhileShooting"
"Charge"
"Ice"
"Wave"
"Spazer"
{
"heatFrames": 550
}Clears obstacles: F Dev note: Without canDodgeWhileShooting, tanking the damage and running through is best. |
From: 7
Junction Left of Two Rightmost Dessgeegas
To: 6
Bottom Right Corner Junction
Requires: "canDash"
{
"obstaclesCleared": [
"C"
]
}
{
"enemyKill": {
"enemies": [
[
"Dessgeega",
"Dessgeega"
]
],
"explicitWeapons": [
"Super"
]
}
}
{
"heatFrames": 200
}Clears obstacles: F |
From: 7
Junction Left of Two Rightmost Dessgeegas
To: 6
Bottom Right Corner Junction
Requires: "canDash"
"ScrewAttack"
{
"heatFrames": 160
}Clears obstacles: F |
From: 7
Junction Left of Two Rightmost Dessgeegas
To: 6
Bottom Right Corner Junction
Requires: "canDash"
{
"obstaclesCleared": [
"C"
]
}
{
"enemyKill": {
"enemies": [
[
"Dessgeega",
"Dessgeega"
]
],
"explicitWeapons": [
"Missile"
]
}
}
{
"heatFrames": 400
}Clears obstacles: F |
From: 9
Junction Below Crumble Blocks, Set Up to Clip
To: 2
Top Right Door


Bring the correct Viola up from the bottom, it can be frozen to avoid damage. After it comes though the uppermost shot blocks, back into the right hand corner and shot buffer on what would be the second hit from the Viola if you were not freezing or avoiding it. Should the shot buffer be missed then the Viola will have to bounce around many more times before being on a cycle where the buffered shot will freeze it in the correct position. Get onto the right side of the Viola, Samus should be standing and partially clipped into the solid tile. Crouch jump and 3 or 4 frames after pressing jump (2 frame window) hold down. Samus will appear to be stuck between the bomb blocks and the solid tile. Press forwards or up to stand up and jump to clip through. If Samus doesn't clip at all down was pressed too soon, if Samus clips the first blocks but appears to be floating while aiming down then down was pressed too late. Requires: {
"notable": "Multiviola Ice Clip"
}
"h_heatProof"
"h_preciseIceClip"
"canPartialFloorClip"
"canTrickyJump"
{
"enemyDamage": {
"enemy": "Multiviola",
"type": "contact",
"hits": 1
}
}
{
"or": [
"h_crouchJumpDownGrab",
"canWallJump",
"canSpringBallJumpMidAir",
"HiJump",
"SpaceJump",
"canJumpIntoIBJ"
]
}Dev note: This may be possible with a high pixel ice clip. FIXME: using a flash suit should also be possible. |
From: 9
Junction Below Crumble Blocks, Set Up to Clip
To: 2
Top Right Door
Freeze the Multiviola on the left side, just below the solid block. XRay standup and jump to clip up, then jump again to get on top of the bomb blocks. Requires: {
"notable": "Multiviola Ice Clip"
}
"h_heatProof"
"h_XRayMorphIceClip"
{
"or": [
"h_crouchJumpDownGrab",
"canWallJump",
"canSpringBallJumpMidAir",
"HiJump",
"SpaceJump",
"canJumpIntoIBJ"
]
} |
From: 9
Junction Below Crumble Blocks, Set Up to Clip
To: 2
Top Right Door


Breaking only the left side bomb blocks makes it easier for the Multiviola to enter a pattern where it will pass through the top shot block. The Multiviola needs to go through the crumble blocks moving to the right, if it goes through moving left it won't clear the shot blocks. If all the bomb blocks are broken, standing on the right side of the crumbles will allow the Multiviola to pass through the top shot block. Requires: {
"notable": "Multiviola Ice Clip"
}
"canBePatient"
"canTrickyGMode"
"h_heatProof"
"canTrickyJump"
{
"enemyDamage": {
"enemy": "Multiviola",
"type": "contact",
"hits": 1
}
}
{
"or": [
{
"and": [
"h_preciseIceClip",
{
"or": [
{
"and": [
"h_useMorphBombs",
{
"or": [
"h_useSpringBall",
"can4HighMidAirMorph"
]
}
]
},
{
"ammo": {
"type": "PowerBomb",
"count": 1
}
},
{
"obstaclesCleared": [
"B"
]
}
]
}
]
},
{
"and": [
"canTrickyCarryFlashSuit",
"h_preciseIceClip",
{
"useFlashSuit": {}
},
{
"shinespark": {
"frames": 11,
"excessFrames": 5
}
}
]
},
{
"and": [
"h_XRayMorphIceClip",
{
"or": [
"Bombs",
"ScrewAttack",
{
"ammo": {
"type": "PowerBomb",
"count": 1
}
},
{
"obstaclesCleared": [
"B"
]
}
]
}
]
}
]
}Exit condition: {
"leaveWithGModeSetup": {}
}Unlocks doors: {"types":["ammo"],"requires":[]} |
From: 9
Junction Below Crumble Blocks, Set Up to Clip
To: 4
Junction Below Bomb Blocks
Ice Clip through the crumble blocks using a Multiviola from the bottom of the room and then Crumble Jump to clip through the bomb blocks. The ice clip can be setup by standing in a corner and firing forward when the Multiviola hits Samus, if it is moving downwards towards Samus. Break the bomb blocks with a Power Bomb before bringing the Multiviola up for the clip. Requires: {
"notable": "Multiviola Ice Clip"
}
"h_heatProof"
"h_preciseIceClip"
{
"enemyDamage": {
"enemy": "Multiviola",
"type": "contact",
"hits": 1
}
}
{
"or": [
"h_usePowerBomb",
{
"obstaclesCleared": [
"A"
]
}
]
}Clears obstacles: A, B |
From: 9
Junction Below Crumble Blocks, Set Up to Clip
To: 4
Junction Below Bomb Blocks
Freeze the Multiviola on the left side, just below the solid block. XRay standup and jump to clip up, then Morph to be in the morph tunnel. Requires: {
"notable": "Multiviola Ice Clip"
}
"h_heatProof"
"h_XRayMorphIceClip" |
From: 9
Junction Below Crumble Blocks, Set Up to Clip
To: 4
Junction Below Bomb Blocks

Ice Clip through the crumble blocks using a Multiviola from the bottom of the room and then Crumble Jump to clip through the bomb blocks. The ice clip can be setup by standing in a corner and firing forward when the Multiviola hits Samus, if it is moving downwards towards Samus. Jump and aim down to break the crumble blocks. Then quickly spinjump to break the bomb blocks with Screw Attack. Requires: {
"notable": "Multiviola Ice Clip"
}
"h_heatProof"
"h_preciseIceClip"
{
"enemyDamage": {
"enemy": "Multiviola",
"type": "contact",
"hits": 1
}
}
"ScrewAttack"
{
"obstaclesNotCleared": [
"A"
]
}Clears obstacles: B |
From: 9
Junction Below Crumble Blocks, Set Up to Clip
To: 4
Junction Below Bomb Blocks
Ice Clip through the crumble blocks using a Multiviola from the bottom of the room and then Crumble Jump to clip through the bomb blocks. The ice clip can be setup by standing in a corner and firing forward when the Multiviola hits Samus, if it is moving downwards towards Samus. Very quickly jump and morph to place a bomb against the bomb blocks. Or break the crumble blocks and use Spring Ball to jump again to place the bomb. Then jump again while the Multiviola is still frozen to clip through. Requires: {
"notable": "Multiviola Ice Clip"
}
"h_heatProof"
"h_preciseIceClip"
{
"enemyDamage": {
"enemy": "Multiviola",
"type": "contact",
"hits": 1
}
}
{
"obstaclesNotCleared": [
"A"
]
}
"h_useMorphBombs"
{
"or": [
"h_useSpringBall",
"can4HighMidAirMorph"
]
}Clears obstacles: B |
{
"$schema": "../../../schema/m3-room.schema.json",
"id": 144,
"name": "Mickey Mouse Room",
"area": "Norfair",
"subarea": "Lower",
"subsubarea": "East",
"roomAddress": "0x7B40A",
"roomEnvironments": [
{
"heated": true
}
],
"mapTileMask": [
[
0,
0,
0,
1
],
[
0,
0,
1,
1
],
[
0,
0,
0,
1
],
[
1,
1,
1,
1
]
],
"nodes": [
{
"id": 1,
"name": "Bottom Left Door",
"nodeType": "door",
"nodeSubType": "gray",
"nodeAddress": "0x001992a",
"doorOrientation": "left",
"doorEnvironments": [
{
"physics": "air"
}
],
"useImplicitComeInNormally": false,
"useImplicitComeInWithMockball": false,
"locks": [
{
"name": "Mickey Mouse Gray Lock (to Fast Pillars Setup Room)",
"lockType": "killEnemies",
"unlockStrats": [
{
"name": "Kill 5 Multiviolas",
"requires": [
{
"obstaclesCleared": [
"D"
]
}
],
"flashSuitChecked": true,
"blueSuitChecked": true,
"devNote": [
"The Multiviolas are far away and can't be killed from here, hence the obstacle requirement.",
"The only path through this room where killing them and leaving here would be meaningful would have passed through node 4 at some point.",
"So this strat is only doable by killing the Multiviolas when going 4 -> 6."
]
},
{
"name": "Kill Bottom Left",
"requires": [
{
"obstaclesCleared": [
"C"
]
},
{
"obstaclesCleared": [
"E"
]
}
],
"flashSuitChecked": true,
"blueSuitChecked": true,
"devNote": "The obstacles must already be cleared on the assumption that Samus travels to 7 or 6 and back to unlock the door."
}
],
"yields": [
"f_ZebesAwake"
],
"devNote": [
"In reality, any combination of 5 enemies will unlock the door.",
"But this room is way too complicated to try and track all possibilities.",
"We went with the two most plausible ones."
]
}
],
"mapTileMask": [
[
0,
0,
0,
1
],
[
0,
0,
1,
1
],
[
0,
0,
0,
1
],
[
2,
1,
1,
1
]
]
},
{
"id": 2,
"name": "Top Right Door",
"nodeType": "door",
"nodeSubType": "blue",
"nodeAddress": "0x0019936",
"doorOrientation": "right",
"doorEnvironments": [
{
"physics": "air"
}
],
"mapTileMask": [
[
0,
0,
0,
2
],
[
0,
0,
1,
1
],
[
0,
0,
0,
1
],
[
1,
1,
1,
1
]
]
},
{
"id": 3,
"name": "Item",
"nodeType": "item",
"nodeSubType": "visible",
"nodeItem": "Missile",
"nodeAddress": "0x78F30",
"mapTileMask": [
[
0,
0,
0,
1
],
[
0,
0,
2,
1
],
[
0,
0,
0,
1
],
[
1,
1,
1,
1
]
],
"locks": [
{
"name": "Dummy Item Lock",
"lockType": "gameFlag",
"unlockStrats": [
{
"name": "Base (Collect Item)",
"notable": false,
"requires": [],
"flashSuitChecked": true,
"blueSuitChecked": true
}
]
}
]
},
{
"id": 4,
"name": "Junction Below Bomb Blocks",
"nodeType": "junction",
"nodeSubType": "junction",
"mapTileMask": [
[
0,
0,
0,
1
],
[
0,
0,
1,
2
],
[
0,
0,
0,
1
],
[
1,
1,
1,
1
]
],
"note": "Represents being below the bomb blocks, regardless of whether they are broken"
},
{
"id": 6,
"name": "Bottom Right Corner Junction",
"nodeType": "junction",
"nodeSubType": "junction",
"mapTileMask": [
[
0,
0,
0,
1
],
[
0,
0,
1,
1
],
[
0,
0,
0,
2
],
[
1,
1,
1,
2
]
],
"note": "Position at the far right end of the bottom hallway"
},
{
"id": 7,
"name": "Junction Left of Two Rightmost Dessgeegas",
"nodeType": "junction",
"nodeSubType": "junction",
"mapTileMask": [
[
0,
0,
0,
1
],
[
0,
0,
1,
1
],
[
0,
0,
0,
1
],
[
1,
2,
2,
1
]
],
"note": "Position to the left of the rightmost two Dessgeegas"
},
{
"id": 9,
"name": "Junction Below Crumble Blocks, Set Up to Clip",
"nodeType": "junction",
"nodeSubType": "junction",
"mapTileMask": [
[
0,
0,
0,
1
],
[
0,
0,
1,
1
],
[
0,
0,
0,
2
],
[
1,
1,
1,
1
]
],
"note": "This is below the crumble blocks, after getting a Multiviola in that chamber."
}
],
"obstacles": [
{
"id": "A",
"name": "All Bomb Blocks",
"obstacleType": "inanimate",
"devNote": "If this obstacle is cleared, then obstacle B should also be cleared."
},
{
"id": "B",
"name": "Some Bomb Blocks",
"obstacleType": "inanimate",
"note": "Represents the leftmost set of bomb blocks from obstacle A."
},
{
"id": "C",
"name": "Runway Dessgeegas",
"obstacleType": "enemies",
"note": "The 3 Dessgeegas closest to the left door"
},
{
"id": "D",
"name": "Boxed-in Multiviolas",
"obstacleType": "enemies",
"note": "The 5 Multiviolas in the Multiviola boxes"
},
{
"id": "E",
"name": "Bottom Multiviolas",
"obstacleType": "enemies",
"note": "The 2 Multiviolas in the bottom hallway"
},
{
"id": "F",
"name": "Far Dessgeegas",
"obstacleType": "enemies",
"note": "The 2 Dessgeegas farthest from the left door in the bottom hallway"
}
],
"enemies": [
{
"id": "e1",
"groupName": "Mickey Mouse Bottom Multiviolas",
"enemyName": "Multiviola",
"quantity": 2,
"betweenNodes": [
1,
7
]
},
{
"id": "e2",
"groupName": "Mickey Mouse Left Dessgeegas",
"enemyName": "Dessgeega",
"quantity": 3,
"betweenNodes": [
1,
7
]
},
{
"id": "e3",
"groupName": "Mickey Mouse Top Multiviolas",
"enemyName": "Multiviola",
"quantity": 5,
"betweenNodes": [
6,
4
]
},
{
"id": "e4",
"groupName": "Mickey Mouse Right Dessgeegas",
"enemyName": "Dessgeega",
"quantity": 2,
"homeNodes": [
6,
7
]
}
],
"strats": [
{
"link": [
1,
1
],
"name": "Base (Unlock Door)",
"requires": [],
"unlocksDoors": [
{
"types": [
"missiles"
],
"requires": [
{
"heatFrames": 50
}
]
},
{
"types": [
"super"
],
"requires": []
},
{
"types": [
"powerbomb"
],
"requires": [
{
"heatFrames": 110
}
]
}
],
"flashSuitChecked": true,
"blueSuitChecked": true
},
{
"link": [
2,
2
],
"name": "Base (Come In Normally)",
"entranceCondition": {
"comeInNormally": {}
},
"requires": [],
"flashSuitChecked": true,
"blueSuitChecked": true
},
{
"link": [
2,
2
],
"name": "Base (Come In With Mockball)",
"entranceCondition": {
"comeInWithMockball": {
"adjacentMinTiles": 0,
"remoteAndLandingMinTiles": [
[
0,
0
]
],
"speedBooster": "any"
}
},
"requires": [
{
"heatFrames": 10
}
],
"flashSuitChecked": true,
"blueSuitChecked": true
},
{
"name": "Base (Collect Item)",
"notable": false,
"requires": [],
"flashSuitChecked": true,
"blueSuitChecked": true,
"link": [
3,
3
],
"collectsItems": [
3
]
},
{
"id": 1,
"link": [
1,
1
],
"name": "Leave With Runway (Full Runway)",
"requires": [
{
"heatFrames": 250
},
{
"or": [
{
"obstaclesCleared": [
"C"
]
},
{
"and": [
{
"heatFrames": 100
},
{
"enemyKill": {
"enemies": [
[
"Dessgeega",
"Dessgeega",
"Dessgeega"
]
],
"explicitWeapons": [
"ScrewAttack"
]
}
}
]
},
{
"and": [
{
"heatFrames": 350
},
{
"enemyKill": {
"enemies": [
[
"Dessgeega",
"Dessgeega",
"Dessgeega"
]
],
"explicitWeapons": [
"Plasma",
"Super",
"Missile"
]
}
}
]
}
]
}
],
"exitCondition": {
"leaveWithRunway": {
"length": 45,
"openEnd": 1
}
},
"flashSuitChecked": true,
"blueSuitChecked": true,
"note": "This runway requires killing the Dessgeegas closest to the door, and taking a Multiviola hit if the Multiviola is alive.",
"devNote": "The Multiviolas move out of the way if coming from the left, or they can be killed with the Dessgeegas."
},
{
"id": 2,
"link": [
1,
1
],
"name": "Leave With Runway (Short Runway)",
"entranceCondition": {
"comeInNormally": {}
},
"requires": [
"canPrepareForNextRoom",
{
"or": [
"Plasma",
{
"and": [
"Charge",
{
"or": [
"Wave",
"Spazer"
]
}
]
}
]
},
{
"heatFrames": 100
}
],
"exitCondition": {
"leaveWithRunway": {
"length": 7,
"openEnd": 1
}
},
"unlocksDoors": [
{
"types": [
"super"
],
"requires": []
},
{
"types": [
"missiles",
"powerbomb"
],
"requires": [
"never"
]
}
],
"flashSuitChecked": true,
"blueSuitChecked": true,
"note": "The Multiviola can be killed by aiming diagonally down when entering the room and shooting a strong enough beam shot (not ice).",
"devNote": "Taking a hit by the Multiviola isn't an option, as it will stop Samus' run and then the Dessgeega will be in the way."
},
{
"id": 77,
"link": [
1,
1
],
"name": "Base, Get Hit on Entry",
"entranceCondition": {
"comeInNormally": {}
},
"requires": [
{
"enemyDamage": {
"enemy": "Multiviola",
"type": "contact",
"hits": 1
}
},
{
"heatFrames": 40
}
],
"flashSuitChecked": true,
"blueSuitChecked": true
},
{
"id": 78,
"link": [
1,
1
],
"name": "Kill Multiviola on Entry",
"entranceCondition": {
"comeInNormally": {}
},
"requires": [
"canPrepareForNextRoom",
{
"or": [
{
"and": [
{
"enemyKill": {
"enemies": [
[
"Multiviola"
]
],
"explicitWeapons": [
"PseudoScrew",
"ScrewAttack"
]
}
},
{
"heatFrames": 30
}
]
},
{
"and": [
"canTrickyJump",
{
"enemyKill": {
"enemies": [
[
"Multiviola"
]
],
"explicitWeapons": [
"Missile",
"Super"
]
}
},
{
"heatFrames": 30
}
]
},
{
"and": [
{
"enemyKill": {
"enemies": [
[
"Multiviola"
]
],
"explicitWeapons": [
"Charge+Ice",
"Ice+Wave",
"Ice+Spazer"
]
}
},
{
"heatFrames": 60
}
]
},
{
"enemyKill": {
"enemies": [
[
"Multiviola"
]
],
"explicitWeapons": [
"Plasma",
"Charge+Spazer",
"Charge+Wave"
]
}
},
{
"haveBlueSuit": {}
}
]
},
{
"heatFrames": 40
}
],
"flashSuitChecked": true,
"blueSuitChecked": true,
"note": [
"The Multiviola will immediately reach Samus at the door when entering the room.",
"By entering the room in a jump and aiming down, there is just enough time to shoot the multiviola.",
"Or by entering the room aiming diagonally down and firing a beam shot."
],
"devNote": [
"You can kill the Multiviola with a super without jumping but it would be a notable strat for being frame precise and it's not worth separating it out.",
"This does not clear obstacle E, because this is not the Multiviola that can be used for the ice clip."
]
},
{
"id": 3,
"link": [
1,
1
],
"name": "Kill Multiviola on Entry (Blue Speed)",
"entranceCondition": {
"comeInGettingBlueSpeed": {
"length": 0,
"openEnd": 1
}
},
"requires": [
"canPrepareForNextRoom",
{
"heatFrames": 0
}
],
"flashSuitChecked": true,
"blueSuitChecked": true
},
{
"id": 89,
"link": [
1,
1
],
"name": "Single Multiviola Farm",
"requires": [
"canPrepareForNextRoom",
"h_heatProof",
{
"resetRoom": {
"nodes": [
1
]
}
},
{
"or": [
"Plasma",
"ScrewAttack",
{
"and": [
"canPseudoScrew",
{
"cycleFrames": 30
}
]
},
{
"and": [
"Wave",
"Ice",
{
"cycleFrames": 30
}
]
},
{
"haveBlueSuit": {}
}
]
},
{
"cycleFrames": 60
}
],
"resetsObstacles": [
"A",
"B",
"C",
"D",
"E",
"F"
],
"farmCycleDrops": [
{
"enemy": "Multiviola",
"count": 1
}
],
"flashSuitChecked": true,
"blueSuitChecked": true
},
{
"id": 90,
"link": [
1,
1
],
"name": "Multiviola and Dessgeega Farm",
"requires": [
"canPrepareForNextRoom",
"canDodgeWhileShooting",
"h_heatProof",
{
"resetRoom": {
"nodes": [
1
]
}
},
{
"or": [
{
"and": [
"Plasma",
"Wave",
{
"cycleFrames": 770
}
]
},
{
"and": [
"Plasma",
{
"cycleFrames": 1290
}
]
},
{
"and": [
"ScrewAttack",
{
"cycleFrames": 610
}
]
},
{
"and": [
{
"haveBlueSuit": {}
},
{
"cycleFrames": 660
}
]
}
]
}
],
"clearsObstacles": [
"C",
"E",
"F"
],
"resetsObstacles": [
"A",
"B",
"D"
],
"farmCycleDrops": [
{
"enemy": "Multiviola",
"count": 2
},
{
"enemy": "Dessgeega",
"count": 5
}
],
"flashSuitChecked": true,
"blueSuitChecked": true
},
{
"id": 4,
"link": [
1,
1
],
"name": "Crystal Flash",
"requires": [
{
"obstaclesCleared": [
"C",
"E"
]
},
"h_heatedCrystalFlash"
],
"flashSuitChecked": true,
"blueSuitChecked": true
},
{
"id": 85,
"link": [
1,
1
],
"name": "Mockball Entry, Tank Hit",
"entranceCondition": {
"comeInWithMockball": {
"speedBooster": "any",
"adjacentMinTiles": 0,
"remoteAndLandingMinTiles": [
[
0,
0
]
]
}
},
"requires": [
{
"enemyDamage": {
"enemy": "Multiviola",
"type": "contact",
"hits": 1
}
},
{
"heatFrames": 40
}
],
"flashSuitChecked": true,
"blueSuitChecked": true
},
{
"id": 5,
"link": [
1,
1
],
"name": "G-Mode Regain Mobility",
"requires": [
{
  "or": [
    {
      "and": [
        {
          "resourceAvailable": [
            {
              "type": "RegularEnergy",
              "count": 75
            }
          ]
        },
        {
          "enemyDamage": {
            "enemy": "Multiviola",
            "type": "contact",
            "hits": 1
          }
        }
      ]
    },
    {
      "and": [
        "canTrickyGMode",
        {
          "resourceAvailable": [
            {
              "type": "RegularEnergy",
              "count": 73
            }
          ]
        },
        {
          "enemyDamage": {
            "enemy": "Multiviola",
            "type": "contact",
            "hits": 1
          }
        }
      ]
    },
    {
      "enemyDamage": {
        "enemy": "Dessgeega",
        "type": "contact",
        "hits": 1
      }
    }
  ]
}
],
"gModeRegainMobility": {},
"flashSuitChecked": true,
"blueSuitChecked": true,
"note": [
"If Samus has less than 73 Energy, she will still have i-frames when the Multiviola hits and she will need to wait until the Dessgeega comes.",
"If needed, hold forward when getting hit, to prevent getting knocked out of the room."
],
"devNote": [
"This is rounded up to 75 Energy, because gaining artificial morph at 73 Energy would be frame-perfect, because Samus gets hit on the last possible frame.",
"FIXME: This should require canTrickyGMode if high Energy, artificial morphing, and needing to remain in-room, because it's easy to touch the transition,",
"as this is not currently representable, this should be considered when adding in-room G-mode strats where it might apply."
]
},
{
"id": 86,
"link": [
1,
1
],
"name": "G-Mode Setup - Get Hit By Dessgeega",
"requires": [
{
  "heatFrames": 145
}
],
"exitCondition": {
"leaveWithGModeSetup": {}
},
"unlocksDoors": [
{
"types": [
"missiles",
"super"
],
"requires": []
},
{
"types": [
"powerbomb"
],
"requires": [
"canUseIFrames",
{
"heatFrames": 150
}
]
}
],
"flashSuitChecked": true,
"blueSuitChecked": true,
"devNote": "Unlocking the door with a Power Bomb will give Samus i-frames for one or two Dessgeega hits."
},
{
"id": 6,
"link": [
1,
1
],
"name": "Carry G-Mode Back Through",
"entranceCondition": {
"comeInWithGMode": {
"mode": "direct",
"morphed": false
}
},
"requires": [],
"exitCondition": {
"leaveWithGMode": {
"morphed": false
}
},
"bypassesDoorShell": "free",
"flashSuitChecked": true,
"blueSuitChecked": true,
"note": "Samus will not take a hit by the Multiviola, as she still has i-frames when it reaches her."
},
{
"id": 7,
"link": [
1,
1
],
"name": "Carry G-Mode Morph Back Through",
"entranceCondition": {
"comeInWithGMode": {
"mode": "direct",
"morphed": true
}
},
"requires": [],
"exitCondition": {
"leaveWithGMode": {
"morphed": true
}
},
"bypassesDoorShell": "free",
"flashSuitChecked": true,
"blueSuitChecked": true,
"note": "Samus will not take a hit by the Multiviola, as she still has i-frames when it reaches her."
},
{
"id": 100,
"link": [
1,
2
],
"name": "R-Mode Forced Standup Clip",
"entranceCondition": {
"comeInWithRMode": {}
},
"requires": [
"canRModeStandupClip",
"h_RModeCanRefillReserves",
"h_heatProof",
{
"or": [
"Plasma",
"ScrewAttack"
]
},
{
"or": [
"canMidAirMorph",
"canBeVeryPatient"
]
},
{
"partialRefill": {
"type": "ReserveEnergy",
"limit": 40
}
},
{
"disableEquipment": "Varia"
},
{
"autoReserveTrigger": {
"implicitHeatFrames": "suitless"
}
},
{
"suitlessHeatFrames": 30
}
],
"flashSuitChecked": true,
"blueSuitChecked": true
},
{
"id": 94,
"link": [
1,
6
],
"name": "R-Mode Spark Interrupt",
"entranceCondition": {
"comeInWithRMode": {}
},
"requires": [
{
"or": [
{
"and": [
{
"enemyDamage": {
"enemy": "Multiviola",
"type": "contact",
"hits": 1
}
},
{
"heatFrames": 40
}
]
},
{
"and": [
{
"enemyKill": {
"enemies": [
[
"Multiviola"
]
],
"explicitWeapons": [
"ScrewAttack"
]
}
},
{
"heatFrames": 30
}
]
}
]
},
{
"or": [
{
"and": [
"canDodgeWhileShooting",
"Plasma",
"canHitbox",
"h_getBlueSpeedMaxRunway"
]
},
{
"and": [
"canDodgeWhileShooting",
"Charge",
"Ice",
"Wave",
"Spazer",
{
"heatFrames": 1080
}
]
},
{
"and": [
{
"enemyKill": {
"enemies": [
[
"Dessgeega",
"Dessgeega",
"Dessgeega",
"Multiviola",
"Multiviola"
]
],
"explicitWeapons": [
"Missile"
]
}
},
{
"heatFrames": 480
}
]
},
{
"and": [
{
"enemyKill": {
"enemies": [
[
"Dessgeega",
"Dessgeega",
"Dessgeega",
"Multiviola",
"Multiviola"
]
],
"explicitWeapons": [
"Super"
]
}
},
{
"heatFrames": 380
}
]
},
{
"and": [
"ScrewAttack",
{
"heatFrames": 230
}
]
}
]
},
{
"or": [
"h_heatedCrystalFlashForReserveEnergy",
{
"and": [
"h_heatProof",
"h_RModeCanRefillReserves",
{
"resourceMissingAtMost": [
{
"type": "Missile",
"count": 0
}
]
},
{
"partialRefill": {
"type": "ReserveEnergy",
"limit": 20
}
}
]
}
]
},
"h_shinechargeMaxRunway",
{
"autoReserveTrigger": {
"maxReserveEnergy": 95
}
},
"canRModeSparkInterrupt"
],
"clearsObstacles": [
"C",
"E",
"F"
],
"flashSuitChecked": true,
"blueSuitChecked": true,
"note": [
"Due to X-Ray beam cooldown, Screw Attack is the only way to avoid a Multiviola hit on entry.",
"Clear the runway. If that was enough to get reserve energy, you can use the final Dessgeega to interrupt,",
"otherwise carry the shinecharge into the first Multiviola box, or use a heat interrupt."
],
"devNote": [
"FIXME: Room needs movement/heatframe counts to enter the Multiviola boxes from below and return."
]
},
{
"id": 99,
"link": [
1,
6
],
"name": "Direct G-Mode Spark Interrupt",
"entranceCondition": {
"comeInWithGMode": {
"mode": "direct",
"morphed": false
}
},
"requires": [
{
"disableEquipment": "ETank"
},
"canTrickyDodgeEnemies",
"h_CrystalFlashForReserveEnergy",
{
"getBlueSpeed": {
"usedTiles": 24,
"openEnd": 0
}
},
"h_shinechargeMaxRunway",
{
"or": [
{
"and": [
"canReserveTriggerBufferXRay",
{
"autoReserveTrigger": {
"implicitHeatFrames": "no"
}
},
{
"heatFrames": 76
}
]
},
{
"and": [
{
"autoReserveTrigger": {}
},
{
"heatFrames": 44
}
]
}
]
},
"canRModeSparkInterrupt"
],
"clearsObstacles": [
"C",
"E",
"F"
],
"flashSuitChecked": true,
"blueSuitChecked": true,
"note": [
"Crystal Flash immediately on entry, do so very quickly in order to have the Power Bomb go off before the Dessgeega gets to Samus.",
"Short-charge to run through the second Desgeega and use the third to damage down if needed, then go back and run to full speed again.",
"Follow the Multiviola to the right wall but stop before running through it. Take a hit from the Multiviola if needed, then run left with i-frames to get ahead of it.",
"Windup and get hit by the Multiviola to interrupt, then leave."
],
"detailNote": [
"Note that a mobile G-Mode entry doesn't get hit by the Multiviola due to i-frames.",
"For Immobile, enter with a small enough amount of Energy to where Samus will be at or below 50 after the Multiviola hit and can immediately Crystal Flash."
]
},
{
"id": 8,
"link": [
1,
6
],
"name": "Blue Speed Run",
"entranceCondition": {
"comeInGettingBlueSpeed": {
"length": 0,
"openEnd": 1
}
},
"requires": [
{
  "heatFrames": 135
}
],
"clearsObstacles": [
"C",
"E",
"F"
],
"flashSuitChecked": true,
"blueSuitChecked": true
},
{
"id": 101,
"link": [
1,
6
],
"name": "Blue Suit",
"requires": [
{
"haveBlueSuit": {}
},
{
"heatFrames": 320
}
],
"clearsObstacles": [
"C",
"E",
"F"
],
"flashSuitChecked": true,
"blueSuitChecked": true
},
{
"id": 9,
"link": [
1,
6
],
"name": "Shinespark",
"entranceCondition": {
"comeInWithSpark": {}
},
"requires": [
{
"heatFrames": 160
},
{
"shinespark": {
"frames": 77,
"excessFrames": 2
}
}
],
"clearsObstacles": [
"C",
"E",
"F"
],
"flashSuitChecked": true,
"blueSuitChecked": true,
"note": "More heat frames than shinespark frames because the shinespark bonk takes some time."
},
{
"id": 10,
"link": [
1,
6
],
"name": "Plasma Hitbox Run-Through",
"requires": [
"canDodgeWhileShooting",
"Plasma",
"canHitbox",
"h_getBlueSpeedMaxRunway",
{
"heatFrames": 145
}
],
"clearsObstacles": [
"C",
"E",
"F"
],
"flashSuitChecked": true,
"blueSuitChecked": true,
"note": [
"Time Plasma shots so that Samus can run through the first two Dessgeegas and gain blue speed.",
"Shooting into the floor can give more control over the enemy i-frames."
]
},
{
"id": 11,
"link": [
1,
7
],
"name": "Already Killed",
"requires": [
"canDash",
{
"obstaclesCleared": [
"C",
"E"
]
},
{
  "heatFrames": 180
}
],
"flashSuitChecked": true,
"blueSuitChecked": true
},
{
"id": 12,
"link": [
1,
7
],
"name": "Tank the Damage, Run Through on Entry",
"entranceCondition": {
"comeInNormally": {}
},
"requires": [
"canDash",
{
"heatFrames": 240
},
{
"enemyDamage": {
"enemy": "Multiviola",
"type": "contact",
"hits": 1
}
},
{
"enemyDamage": {
"enemy": "Dessgeega",
"type": "contact",
"hits": 1
}
}
],
"flashSuitChecked": true,
"blueSuitChecked": true
},
{
"id": 13,
"link": [
1,
7
],
"name": "Tank the Damage",
"requires": [
"canDash",
{
"heatFrames": 200
},
{
"enemyDamage": {
"enemy": "Dessgeega",
"type": "contact",
"hits": 2
}
}
],
"flashSuitChecked": true,
"blueSuitChecked": true
},
{
"id": 14,
"link": [
1,
7
],
"name": "Plasma Kill",
"requires": [
"canDash",
"Plasma",
{
"heatFrames": 380
}
],
"clearsObstacles": [
"C",
"E"
],
"flashSuitChecked": true,
"blueSuitChecked": true
},
{
"id": 15,
"link": [
1,
7
],
"name": "Plasma Kill Sparing Multiviolas",
"requires": [
"canDash",
"Plasma",
"canDodgeWhileShooting",
{
"heatFrames": 480
}
],
"clearsObstacles": [
"C"
],
"flashSuitChecked": true,
"blueSuitChecked": true,
"note": [
"Sparing the Multiviolas is required to perform an ice clip further in.",
"However, it requires going slower."
]
},
{
"id": 16,
"link": [
1,
7
],
"name": "Beam Combo Kill",
"requires": [
"canDash",
"canDodgeWhileShooting",
"Charge",
"Ice",
"Wave",
"Spazer",
{
"heatFrames": 1080
}
],
"clearsObstacles": [
"C"
],
"flashSuitChecked": true,
"blueSuitChecked": true,
"devNote": "Without canDodgeWhileShooting, tanking the damage and running through is best."
},
{
"id": 17,
"link": [
1,
7
],
"name": "Missiles Kill",
"requires": [
"canDash",
{
"enemyKill": {
"enemies": [
[
"Dessgeega",
"Dessgeega",
"Dessgeega",
"Multiviola",
"Multiviola"
]
],
"explicitWeapons": [
"Missile"
]
}
},
{
"heatFrames": 480
}
],
"clearsObstacles": [
"C",
"E"
],
"flashSuitChecked": true,
"blueSuitChecked": true
},
{
"id": 18,
"link": [
1,
7
],
"name": "Missiles Kill Sparing Multiviolas",
"requires": [
"canDash",
"canDodgeWhileShooting",
{
"enemyKill": {
"enemies": [
[
"Dessgeega",
"Dessgeega",
"Dessgeega"
]
],
"explicitWeapons": [
"Missile"
]
}
},
{
"heatFrames": 540
}
],
"clearsObstacles": [
"C"
],
"flashSuitChecked": true,
"blueSuitChecked": true,
"note": [
"Sparing the Multiviolas is required to perform an ice clip further in.",
"However, it requires going slower."
]
},
{
"id": 19,
"link": [
1,
7
],
"name": "Supers Kill",
"requires": [
"canDash",
{
"enemyKill": {
"enemies": [
[
"Dessgeega",
"Dessgeega",
"Dessgeega",
"Multiviola",
"Multiviola"
]
],
"explicitWeapons": [
"Super"
]
}
},
{
"heatFrames": 380
}
],
"clearsObstacles": [
"C",
"E"
],
"flashSuitChecked": true,
"blueSuitChecked": true
},
{
"id": 20,
"link": [
1,
7
],
"name": "Supers Kill Sparing Multiviolas",
"requires": [
"canDash",
"canDodgeWhileShooting",
{
"enemyKill": {
"enemies": [
[
"Dessgeega",
"Dessgeega",
"Dessgeega"
]
],
"explicitWeapons": [
"Super"
]
}
},
{
"heatFrames": 380
}
],
"clearsObstacles": [
"C"
],
"flashSuitChecked": true,
"blueSuitChecked": true,
"note": [
"Sparing the Multiviolas is required to perform an ice clip further in.",
"However, it requires going slower."
]
},
{
"id": 21,
"link": [
1,
7
],
"name": "Screw Kill",
"requires": [
"canDash",
"ScrewAttack",
{
"heatFrames": 230
}
],
"clearsObstacles": [
"C"
],
"flashSuitChecked": true,
"blueSuitChecked": true,
"devNote": "You can't catch the Multiviolas to kill them with Screw without reaching node 6."
},
{
"id": 95,
"link": [
2,
1
],
"name": "Crystal Flash at Bomb Blocks, R-Mode Spark Interrupt",
"entranceCondition": {
"comeInWithRMode": {}
},
"requires": [
{
"heatFrames": 15
},
"h_heatedCrystalFlashForReserveEnergy",
{
"or": [
{
"and": [
"ScrewAttack",
{
"heatFrames": 650
}
]
},
{
"and": [
"Plasma",
{
"heatFrames": 850
},
{
"or": [
"Wave",
{
"heatFrames": 300
}
]
}
]
},
{
"and": [
"Ice",
"Wave",
"Spazer",
{
"heatFrames": 750
},
{
"or": [
{
"heatFrames": 750
},
{
"and": [
{
"enemyKill": {
"enemies": [
[
"Dessgeega",
"Dessgeega"
]
],
"explicitWeapons": [
"Missile"
]
}
},
{
"heatFrames": 670
}
]
},
{
"and": [
{
"enemyKill": {
"enemies": [
[
"Dessgeega",
"Dessgeega"
]
],
"explicitWeapons": [
"Super"
]
}
},
{
"heatFrames": 400
}
]
}
]
}
]
},
{
"and": [
"Wave",
{
"heatFrames": 1350
},
{
"or": [
{
"and": [
{
"enemyKill": {
"enemies": [
[
"Dessgeega",
"Dessgeega"
]
],
"excludedWeapons": [
"Bombs",
"PseudoScrew",
"PowerBomb"
]
}
},
{
"heatFrames": 3000
}
]
},
{
"and": [
{
"enemyKill": {
"enemies": [
[
"Dessgeega",
"Dessgeega"
]
],
"explicitWeapons": [
"Missile"
]
}
},
{
"heatFrames": 670
}
]
},
{
"and": [
{
"enemyKill": {
"enemies": [
[
"Dessgeega",
"Dessgeega"
]
],
"explicitWeapons": [
"Super"
]
}
},
{
"heatFrames": 400
}
]
}
]
}
]
},
{
"and": [
{
"heatFrames": 400
},
{
"enemyDamage": {
"enemy": "Multiviola",
"type": "contact",
"hits": 3
}
},
{
"or": [
{
"and": [
{
"enemyKill": {
"enemies": [
[
"Dessgeega",
"Dessgeega"
]
],
"excludedWeapons": [
"Bombs",
"PseudoScrew",
"PowerBomb"
]
}
},
{
"heatFrames": 3000
}
]
},
{
"and": [
{
"enemyKill": {
"enemies": [
[
"Dessgeega",
"Dessgeega"
]
],
"explicitWeapons": [
"Missile"
]
}
},
{
"heatFrames": 670
}
]
},
{
"and": [
{
"enemyKill": {
"enemies": [
[
"Dessgeega",
"Dessgeega"
]
],
"explicitWeapons": [
"Super"
]
}
},
{
"heatFrames": 400
}
]
}
]
}
]
},
{
"and": [
"h_heatProof",
{
"enemyKill": {
"enemies": [
[
"Dessgeega",
"Dessgeega"
]
],
"excludedWeapons": [
"Bombs",
"PseudoScrew",
"PowerBomb"
]
}
}
]
}
]
},
{
"or": [
{
"and": [
{
"getBlueSpeed": {
"usedTiles": 23,
"openEnd": 2
}
},
{
"heatFrames": 200
}
]
},
{
"and": [
"h_heatProof",
"canDodgeWhileShooting",
{
"enemyKill": {
"enemies": [
[
"Dessgeega"
],
[
"Dessgeega"
],
[
"Dessgeega"
],
[
"Multiviola"
],
[
"Multiviola"
]
],
"excludedWeapons": [
"Bombs",
"PseudoScrew",
"PowerBomb",
"PowerBeam"
]
}
}
]
},
{
"and": [
{
"heatFrames": 400
},
"Plasma",
{
"or": [
"Wave",
{
"heatFrames": 100
}
]
}
]
},
{
"and": [
{
"enemyKill": {
"enemies": [
[
"Dessgeega"
],
[
"Dessgeega"
],
[
"Dessgeega"
],
[
"Multiviola"
],
[
"Multiviola"
]
],
"explicitWeapons": [
"Missile"
]
}
},
{
"heatFrames": 500
}
]
},
{
"and": [
{
"enemyKill": {
"enemies": [
[
"Dessgeega"
],
[
"Dessgeega"
],
[
"Dessgeega"
],
[
"Multiviola"
],
[
"Multiviola"
]
],
"explicitWeapons": [
"Super"
]
}
},
{
"heatFrames": 400
}
]
},
{
"and": [
"ScrewAttack",
{
"heatFrames": 320
}
]
}
]
},
"h_shinechargeMaxRunway",
{
"autoReserveTrigger": {
"maxReserveEnergy": 95
}
},
"canRModeSparkInterrupt",
{
"heatFrames": 30
}
],
"clearsObstacles": [
"A",
"B",
"C",
"D",
"E",
"F"
],
"flashSuitChecked": true,
"blueSuitChecked": true,
"note": [
"Crystal Flash on the topmost ledge to open the bomb blocks and navigate the Multiviola boxes.",
"Samus cannot use Power Bombs or X-Ray after the Crystal Flash until R-Mode ends.",
"Kill the two right Dessgeegas from the safety of the Multiviola box, then clear the rest of the runway.",
"Use the Multiviola at the end to interrupt, or use a heat interrupt."
]
},
{
"id": 96,
"link": [
2,
1
],
"name": "Crystal Flash Multiviola Kill, R-Mode Spark Interrupt",
"entranceCondition": {
"comeInWithRMode": {}
},
"requires": [
{
"or": [
{
"and": [
"h_usePowerBomb",
{
"heatFrames": 180
}
]
},
{
"and": [
{
"heatFrames": 160
},
{
"or": [
"ScrewAttack",
{
"and": [
"h_useMorphBombs",
{
"heatFrames": 60
}
]
}
]
}
]
}
]
},
"h_usePowerBomb",
{
"heatFrames": 260
},
"h_heatedCrystalFlashForReserveEnergy",
{
"heatFrames": 120
},
{
"or": [
{
"and": [
{
"enemyKill": {
"enemies": [
[
"Dessgeega",
"Dessgeega"
]
],
"excludedWeapons": [
"Bombs",
"PseudoScrew",
"PowerBomb"
]
}
},
{
"heatFrames": 3000
}
]
},
{
"and": [
"Plasma",
{
"heatFrames": 400
}
]
},
{
"and": [
"Ice",
"Wave",
"Spazer",
{
"heatFrames": 750
}
]
},
{
"and": [
"ScrewAttack",
{
"heatFrames": 200
}
]
},
{
"and": [
{
"enemyKill": {
"enemies": [
[
"Dessgeega",
"Dessgeega"
]
],
"explicitWeapons": [
"Missile"
]
}
},
{
"heatFrames": 670
}
]
},
{
"and": [
{
"enemyKill": {
"enemies": [
[
"Dessgeega",
"Dessgeega"
]
],
"explicitWeapons": [
"Super"
]
}
},
{
"heatFrames": 400
}
]
}
]
},
{
"or": [
{
"and": [
{
"getBlueSpeed": {
"usedTiles": 23,
"openEnd": 2
}
},
{
"heatFrames": 200
}
]
},
{
"and": [
"h_heatProof",
"canDodgeWhileShooting",
{
"enemyKill": {
"enemies": [
[
"Dessgeega"
],
[
"Dessgeega"
],
[
"Dessgeega"
],
[
"Multiviola"
],
[
"Multiviola"
]
],
"excludedWeapons": [
"Bombs",
"PseudoScrew",
"PowerBomb",
"PowerBeam"
]
}
}
]
},
{
"and": [
{
"heatFrames": 400
},
"Plasma",
{
"or": [
"Wave",
{
"heatFrames": 100
}
]
}
]
},
{
"and": [
{
"enemyKill": {
"enemies": [
[
"Dessgeega"
],
[
"Dessgeega"
],
[
"Dessgeega"
],
[
"Multiviola"
],
[
"Multiviola"
]
],
"explicitWeapons": [
"Missile"
]
}
},
{
"heatFrames": 500
}
]
},
{
"and": [
{
"enemyKill": {
"enemies": [
[
"Dessgeega"
],
[
"Dessgeega"
],
[
"Dessgeega"
],
[
"Multiviola"
],
[
"Multiviola"
]
],
"explicitWeapons": [
"Super"
]
}
},
{
"heatFrames": 400
}
]
},
{
"and": [
"ScrewAttack",
{
"heatFrames": 320
}
]
}
]
},
"h_shinechargeMaxRunway",
{
"autoReserveTrigger": {
"maxReserveEnergy": 95
}
},
"canRModeSparkInterrupt",
{
"heatFrames": 30
}
],
"clearsObstacles": [
"A",
"B",
"C",
"D",
"E",
"F"
],
"flashSuitChecked": true,
"blueSuitChecked": true,
"note": [
"Use normal bombs or a Power Bomb to open the bomb blocks. Use one Power Bomb before a Crystal Flash to",
"navigate the Multiviola boxes. Samus cannot use Power Bombs or X-Ray after the Crystal Flash until R-Mode ends.",
"Kill the two right Dessgeegas from the safety of the Multiviola box, then clear the rest of the runway.",
"The Multiviola at the end to interrupt, or use a heat interrupt."
]
},
{
"id": 97,
"link": [
2,
1
],
"name": "Crystal Flash at Desgeega Corner, R-Mode Spark Interrupt",
"entranceCondition": {
"comeInWithRMode": {}
},
"requires": [
{
"or": [
{
"and": [
"h_usePowerBomb",
{
"heatFrames": 180
}
]
},
{
"and": [
{
"heatFrames": 160
},
{
"or": [
"ScrewAttack",
{
"and": [
"h_useMorphBombs",
{
"heatFrames": 60
}
]
}
]
}
]
}
]
},
{
"or": [
{
"and": [
"ScrewAttack",
{
"heatFrames": 650
}
]
},
{
"and": [
"Plasma",
{
"heatFrames": 850
},
{
"or": [
"Wave",
{
"heatFrames": 300
}
]
}
]
},
{
"and": [
{
"or": [
{
"and": [
{
"enemyKill": {
"enemies": [
[
"Multiviola",
"Multiviola"
],
[
"Multiviola",
"Multiviola",
"Multiviola"
]
],
"explicitWeapons": [
"PowerBomb"
]
}
},
{
"heatFrames": 500
}
]
},
{
"and": [
"Ice",
"Wave",
"Spazer",
{
"heatFrames": 750
}
]
},
{
"and": [
"Wave",
{
"heatFrames": 1350
}
]
},
{
"and": [
{
"heatFrames": 400
},
{
"enemyDamage": {
"enemy": "Multiviola",
"type": "contact",
"hits": 3
}
}
]
}
]
},
{
"or": [
{
"and": [
{
"enemyKill": {
"enemies": [
[
"Dessgeega",
"Dessgeega"
]
],
"explicitWeapons": [
"Missile"
]
}
},
{
"heatFrames": 670
}
]
},
{
"and": [
{
"enemyKill": {
"enemies": [
[
"Dessgeega",
"Dessgeega"
]
],
"explicitWeapons": [
"Super"
]
}
},
{
"heatFrames": 400
}
]
},
{
"and": [
{
"enemyKill": {
"enemies": [
[
"Dessgeega",
"Dessgeega"
]
],
"explicitWeapons": [
"PowerBomb"
]
}
},
{
"heatFrames": 500
}
]
},
{
"and": [
"Ice",
"Wave",
"Spazer",
{
"heatFrames": 750
}
]
}
]
}
]
},
{
"and": [
"h_heatProof",
{
"enemyKill": {
"enemies": [
[
"Dessgeega",
"Dessgeega"
]
],
"excludedWeapons": [
"Bombs",
"PseudoScrew"
]
}
}
]
}
]
},
"h_heatedCrystalFlashForReserveEnergy",
{
"or": [
{
"and": [
{
"getBlueSpeed": {
"usedTiles": 23,
"openEnd": 2
}
},
{
"heatFrames": 200
}
]
},
{
"and": [
"h_heatProof",
"canDodgeWhileShooting",
{
"enemyKill": {
"enemies": [
[
"Dessgeega"
],
[
"Dessgeega"
],
[
"Dessgeega"
],
[
"Multiviola"
],
[
"Multiviola"
]
],
"excludedWeapons": [
"Bombs",
"PseudoScrew",
"PowerBomb",
"PowerBeam"
]
}
}
]
},
{
"and": [
{
"heatFrames": 400
},
"Plasma",
{
"or": [
"Wave",
{
"heatFrames": 100
}
]
}
]
},
{
"and": [
{
"enemyKill": {
"enemies": [
[
"Dessgeega"
],
[
"Dessgeega"
],
[
"Dessgeega"
],
[
"Multiviola"
],
[
"Multiviola"
]
],
"explicitWeapons": [
"Missile"
]
}
},
{
"heatFrames": 500
}
]
},
{
"and": [
{
"enemyKill": {
"enemies": [
[
"Dessgeega"
],
[
"Dessgeega"
],
[
"Dessgeega"
],
[
"Multiviola"
],
[
"Multiviola"
]
],
"explicitWeapons": [
"Super"
]
}
},
{
"heatFrames": 400
}
]
},
{
"and": [
"ScrewAttack",
{
"heatFrames": 320
}
]
}
]
},
"h_shinechargeMaxRunway",
{
"autoReserveTrigger": {
"maxReserveEnergy": 95
}
},
"canRModeSparkInterrupt",
{
"heatFrames": 30
}
],
"clearsObstacles": [
"A",
"B",
"C",
"D",
"E",
"F"
],
"flashSuitChecked": true,
"blueSuitChecked": true,
"note": [
"Use normal bombs or a Power Bomb to open the bomb blocks, then navigate the Multiviola boxes.",
"Kill the two right Dessgeegas, then Crystal Flash. Samus cannot use Power Bombs or X-Ray after the Crystal Flash until R-Mode ends.",
"Clear the rest of the runway. Use the Multiviola at the end to interrupt, or use a heat interrupt."
]
},
{
"id": 98,
"link": [
2,
1
],
"name": "R-Mode Spark Interrupt",
"entranceCondition": {
"comeInWithRMode": {}
},
"requires": [
"canBeLucky",
{
"or": [
{
"and": [
"h_usePowerBomb",
{
"heatFrames": 180
}
]
},
{
"and": [
{
"heatFrames": 160
},
{
"or": [
"ScrewAttack",
{
"and": [
"h_useMorphBombs",
{
"heatFrames": 60
}
]
}
]
}
]
}
]
},
{
"or": [
{
"and": [
"ScrewAttack",
{
"heatFrames": 650
}
]
},
{
"and": [
"Plasma",
{
"heatFrames": 850
},
{
"or": [
"Wave",
{
"heatFrames": 300
}
]
}
]
},
{
"and": [
{
"or": [
{
"and": [
{
"enemyKill": {
"enemies": [
[
"Multiviola",
"Multiviola"
],
[
"Multiviola",
"Multiviola",
"Multiviola"
]
],
"explicitWeapons": [
"PowerBomb"
]
}
},
{
"heatFrames": 500
}
]
},
{
"and": [
"Ice",
"Wave",
"Spazer",
{
"heatFrames": 750
}
]
},
{
"and": [
"Wave",
{
"heatFrames": 1350
}
]
},
{
"and": [
{
"heatFrames": 400
},
{
"enemyDamage": {
"enemy": "Multiviola",
"type": "contact",
"hits": 3
}
}
]
}
]
},
{
"or": [
{
"and": [
{
"enemyKill": {
"enemies": [
[
"Dessgeega",
"Dessgeega"
]
],
"explicitWeapons": [
"Missile"
]
}
},
{
"heatFrames": 670
}
]
},
{
"and": [
{
"enemyKill": {
"enemies": [
[
"Dessgeega",
"Dessgeega"
]
],
"explicitWeapons": [
"Super"
]
}
},
{
"heatFrames": 400
}
]
},
{
"and": [
{
"enemyKill": {
"enemies": [
[
"Dessgeega",
"Dessgeega"
]
],
"explicitWeapons": [
"PowerBomb"
]
}
},
{
"heatFrames": 500
}
]
},
{
"and": [
"Ice",
"Wave",
"Spazer",
{
"heatFrames": 750
}
]
}
]
}
]
},
{
"and": [
"h_heatProof",
{
"enemyKill": {
"enemies": [
[
"Dessgeega",
"Dessgeega"
]
],
"excludedWeapons": [
"Bombs",
"PseudoScrew",
"PowerBomb"
]
}
}
]
}
]
},
{
"or": [
{
"and": [
{
"getBlueSpeed": {
"usedTiles": 23,
"openEnd": 2
}
},
{
"heatFrames": 200
}
]
},
{
"and": [
"h_heatProof",
"canDodgeWhileShooting",
{
"enemyKill": {
"enemies": [
[
"Dessgeega"
],
[
"Dessgeega"
],
[
"Dessgeega"
],
[
"Multiviola"
],
[
"Multiviola"
]
],
"excludedWeapons": [
"Bombs",
"PseudoScrew",
"PowerBomb",
"PowerBeam"
]
}
}
]
},
{
"and": [
{
"heatFrames": 400
},
"Plasma",
{
"or": [
"Wave",
{
"heatFrames": 100
}
]
}
]
},
{
"and": [
{
"enemyKill": {
"enemies": [
[
"Dessgeega"
],
[
"Dessgeega"
],
[
"Dessgeega"
],
[
"Multiviola"
],
[
"Multiviola"
]
],
"explicitWeapons": [
"Missile"
]
}
},
{
"heatFrames": 500
}
]
},
{
"and": [
{
"enemyKill": {
"enemies": [
[
"Dessgeega"
],
[
"Dessgeega"
],
[
"Dessgeega"
],
[
"Multiviola"
],
[
"Multiviola"
]
],
"explicitWeapons": [
"Super"
]
}
},
{
"heatFrames": 400
}
]
},
{
"and": [
"ScrewAttack",
{
"heatFrames": 320
}
]
}
]
},
"h_RModeCanRefillReserves",
{
"partialRefill": {
"type": "ReserveEnergy",
"limit": 20
}
},
"h_shinechargeMaxRunway",
{
"autoReserveTrigger": {
"maxReserveEnergy": 95
}
},
"canRModeSparkInterrupt",
{
"heatFrames": 30
}
],
"clearsObstacles": [
"A",
"B",
"C",
"D",
"E",
"F"
],
"flashSuitChecked": true,
"blueSuitChecked": true,
"note": [
"Use normal bombs or a Power Bomb to open the bomb blocks, then navigate the Multiviola boxes.",
"Kill the two right Dessgeegas, then clear the rest of the runway. Use the Multiviola at the end to interrupt, or use a heat interrupt.",
"If Samus ends up needing to Crystal Flash at any point, remember that Samus cannot use Power Bombs or X-Ray afterwards until R-Mode ends."
]
},
{
"id": 22,
"link": [
2,
2
],
"name": "Leave With Runway",
"requires": [],
"exitCondition": {
"leaveWithRunway": {
"length": 1,
"openEnd": 1
}
},
"flashSuitChecked": true,
"blueSuitChecked": true
},
{
"id": 87,
"link": [
2,
2
],
"name": "Leave With Side Platform",
"entranceCondition": {
"comeInNormally": {}
},
"requires": [
{
"heatFrames": 180
}
],
"exitCondition": {
"leaveWithSidePlatform": {
"height": 3,
"runway": {
"length": 12,
"openEnd": 0
},
"obstruction": [
1,
0
]
}
},
"unlocksDoors": [
{
"types": [
"missiles"
],
"requires": [
{
"heatFrames": 50
}
]
},
{
"types": [
"super"
],
"requires": []
},
{
"types": [
"powerbomb"
],
"requires": [
{
"heatFrames": 110
}
]
}
],
"flashSuitChecked": true,
"blueSuitChecked": true,
"devNote": [
"Max extra run speed $2.9.",
"The `comeInNormally` condition is to ensure the shot blocks are intact;",
"waiting for them to respawn could also be an option but would require more heat frames."
]
},
{
"id": 23,
"link": [
2,
2
],
"name": "Crystal Flash",
"requires": [
{
"heatFrames": 15
},
"h_heatedCrystalFlash"
],
"clearsObstacles": [
"A",
"B"
],
"flashSuitChecked": true,
"blueSuitChecked": true
},
{
"id": 24,
"link": [
2,
4
],
"name": "Power Bomb",
"requires": [
{
"obstaclesNotCleared": [
"A"
]
},
{
"noBlueSuit": {}
},
"h_usePowerBomb",
{
"heatFrames": 180
}
],
"clearsObstacles": [
"A",
"B"
],
"flashSuitChecked": true,
"blueSuitChecked": true,
"note": "Place the power bomb while passing through the shot block gap (or before) to save some time.",
"devNote": [
"We don't want the blocks to already be cleared (e.g. from Crystal Flash at node 2) because then we may need to crumble jump.",
"FIXME: We could add a separate strat for the case where the blocks are already broken."
]
},
{
"id": 25,
"link": [
2,
4
],
"name": "Break Left Blocks Only",
"requires": [
{
"heatFrames": 150
},
{
"obstaclesNotCleared": [
"A"
]
},
{
"or": [
"ScrewAttack",
{
"and": [
"h_useMorphBombs",
{
"heatFrames": 60
}
]
},
{
"obstaclesCleared": [
"B"
]
}
]
}
],
"clearsObstacles": [
"B"
],
"flashSuitChecked": true,
"blueSuitChecked": true
},
{
"id": 102,
"link": [
2,
4
],
"name": "Blue Suit",
"requires": [
{
"haveBlueSuit": {}
},
{
"or": [
"canCrumbleJump",
"h_useSpringBall",
"SpaceJump"
]
},
{
"heatFrames": 160
}
],
"clearsObstacles": [
"B"
],
"flashSuitChecked": true,
"blueSuitChecked": true
},
{
"id": 26,
"link": [
2,
4
],
"name": "Temporary Blue Bounce onto Crumbles with Spring Ball",
"entranceCondition": {
"comeInWithTemporaryBlue": {}
},
"requires": [
"canPrepareForNextRoom",
"canChainTemporaryBlue",
"h_useSpringBall",
{
"heatFrames": 300
}
],
"clearsObstacles": [
"B"
],
"flashSuitChecked": true,
"blueSuitChecked": true,
"note": [
"Carry Temporary Blue through the top door to break the left side of the bomb blocks.",
"Morph while falling through the shot block to bounce on the crumble blocks towards the morph tunnel.",
"Then unmorph near the wall to fall straight down with temporary blue, if needed."
],
"devNote": "You could jump into the room for the initial Temporary Blue and turn around with XRay twice, but this room is heated so that would be costly."
},
{
"id": 27,
"link": [
2,
4
],
"name": "Temporary Blue Crumble Jump without Spring Ball",
"entranceCondition": {
"comeInWithTemporaryBlue": {}
},
"requires": [
{
"notable": "Temporary Blue Crumble Jump without Spring Ball"
},
"canPrepareForNextRoom",
"canChainTemporaryBlue",
"canInsaneJump",
"canCrumbleJump",
{
"heatFrames": 300
}
],
"clearsObstacles": [
"B"
],
"flashSuitChecked": true,
"blueSuitChecked": true,
"note": [
"Carry Temporary Blue through the top door to break the left side of the bomb blocks.",
"There is a small frame window where Samus can soft unmorph on the crumble blocks and jump again while retaining temporary blue."
],
"devNote": "You could jump into the room for the initial Temporary Blue and turn around with XRay twice, but this room is heated so that would be costly."
},
{
"id": 28,
"link": [
2,
6
],
"name": "Stored Moonfall Clip",
"entranceCondition": {
"comeInWithStoredFallSpeed": {
"fallSpeedInTiles": 1
}
},
"requires": [
"canPrepareForNextRoom",
"canMoonfall",
"canFreeFallClip",
{
"enemyDamage": {
"enemy": "Multiviola",
"type": "contact",
"hits": 1
}
},
{
"or": [
{
"ammo": {
"type": "Missile",
"count": 3
}
},
{
"ammo": {
"type": "Super",
"count": 3
}
},
"Plasma",
"h_heatProof"
]
},
{
"heatFrames": 300
}
],
"flashSuitChecked": true,
"blueSuitChecked": true,
"note": [
"Moonfall into the door transition and stay in spin to fall through the top 4 levels of solid tiles.",
"A flatley style turnaround will land between the Bomb and Crumble blocks and can be continued with another Moonfall."
],
"devNote": [
"Entering the room with a moonfall can be assumed always possible for comeInWithStoredFallSpeed.",
"FIXME: This could benefit from another node below 4."
]
},
{
"id": 29,
"link": [
3,
3
],
"name": "Crystal Flash",
"requires": [
"h_heatedCrystalFlash"
],
"flashSuitChecked": true,
"blueSuitChecked": true
},
{
"id": 30,
"link": [
3,
4
],
"name": "Base",
"requires": [
"Morph",
{
"heatFrames": 110
},
{
"or": [
"canDash",
{
"heatFrames": 10
}
]
}
],
"flashSuitChecked": true,
"blueSuitChecked": true
},
{
"id": 31,
"link": [
4,
2
],
"name": "Base - Blocks Mostly Intact",
"requires": [
{
"obstaclesCleared": [
"B"
]
},
{
"obstaclesNotCleared": [
"A"
]
},
{
"noBlueSuit": {}
},
{
"heatFrames": 160
},
{
"or": [
"h_crouchJumpDownGrab",
"canWallJump",
"canSpringBallJumpMidAir",
"HiJump",
{
"and": [
"SpaceJump",
{
"heatFrames": 20
}
]
},
{
"and": [
"canSpringBallBombJump",
{
"heatFrames": 50
}
]
},
{
"and": [
"canJumpIntoIBJ",
{
"heatFrames": 60
}
]
}
]
}
],
"flashSuitChecked": true,
"blueSuitChecked": true
},
{
"id": 91,
"link": [
4,
2
],
"name": "Jump Into Respawning Block - Blocks Mostly Intact",
"requires": [
{
"obstaclesCleared": [
"B"
]
},
{
"obstaclesNotCleared": [
"A"
]
},
{
"noBlueSuit": {}
},
{
"heatFrames": 600
},
"canJumpIntoRespawningBlock",
{
"or": [
{
"heatFrames": 900
},
{
"and": [
"canInsaneJump",
"canComplexCarryFlashSuit"
]
}
]
}
],
"wallJumpAvoid": true,
"flashSuitChecked": true,
"blueSuitChecked": true,
"note": [
"Jump into the respawning shot block. It helps significantly to aim down to get trapped into the block.",
"A normalized method to set this up is to shoot the block then immediately perform 5 full-height jumps."
],
"devNote": [
"The 900 heat frame option gives two leniency attempts.",
"This is likely only useful to avoid a crouch jump and preserve a flash suit.",
"This is not needed on strats that go directly from 9 to 2, because they require a crouch jump or X-ray."
]
},
{
"id": 32,
"link": [
4,
2
],
"name": "Space Jump",
"requires": [
{
"obstaclesCleared": [
"B"
]
},
"SpaceJump",
{
"heatFrames": 180
},
{
"or": [
"canDash",
{
"heatFrames": 10
}
]
}
],
"flashSuitChecked": true,
"blueSuitChecked": true
},
{
"id": 33,
"link": [
4,
2
],
"name": "Crumble Jump with HiJump",
"requires": [
{
"obstaclesCleared": [
"B"
]
},
"HiJump",
"canCrumbleJump",
{
"heatFrames": 160
}
],
"flashSuitChecked": true,
"blueSuitChecked": true,
"note": "Requires one jump off a crumble block"
},
{
"id": 34,
"link": [
4,
2
],
"name": "Spring Ball Bounce on Crumble Blocks with HiJump",
"requires": [
{
"obstaclesCleared": [
"B"
]
},
"HiJump",
"h_useSpringBall",
{
"heatFrames": 175
}
],
"flashSuitChecked": true,
"blueSuitChecked": true,
"note": "Use SpringBall to just bounce on the crumble blocks."
},
{
"id": 35,
"link": [
4,
2
],
"name": "Mid-Air Spring Ball Jump Over Crumble Blocks",
"requires": [
{
"obstaclesCleared": [
"B"
]
},
"canDash",
"canTrickySpringBallJump",
{
"heatFrames": 250
},
{
"or": [
{
"and": [
"can4HighMidAirMorph",
"canSpringFling"
]
},
{
"and": [
"canLateralMidAirMorph",
"canTrickyJump"
]
},
"canCrumbleJump",
{
"and": [
"h_trickySpringwall",
"canPreciseWallJump"
]
}
]
}
],
"flashSuitChecked": true,
"blueSuitChecked": true,
"note": [
"This is possible by jumping on the crumble blocks into a mid-air spring ball jump, or by avoiding them.",
"The crumbles can be avoided by starting with either an air ball, a 3 tile high mid-air morph, or a low spring wall.",
"These are generally safer, as bouncing on the crumble blocks with Spring Ball is trivial."
]
},
{
"id": 36,
"link": [
4,
2
],
"name": "Crumble Tricky Dash Jump",
"requires": [
{
"notable": "Crumble Tricky Dash Jump"
},
{
"obstaclesCleared": [
"B"
]
},
"canCrumbleJump",
"canTrickyDashJump",
"canPreciseWallJump",
"canInsaneJump",
{
"heatFrames": 180
}
],
"flashSuitChecked": true,
"blueSuitChecked": true,
"note": [
"Spin jump off a crumble block with exactly 1 frame of dash speed.",
"That gives just enough height to be able to wall jump out."
]
},
{
"id": 37,
"link": [
4,
2
],
"name": "Crumble Jump IBJ",
"requires": [
{
"obstaclesCleared": [
"B"
]
},
"canCrumbleJump",
"canInsaneJump",
"canJumpIntoIBJ",
"canDoubleBombJump",
{
"heatFrames": 360
}
],
"flashSuitChecked": true,
"blueSuitChecked": true,
"note": [
"Jump and mid-air morph off a crumble block to begin the IBJ.",
"Use double bomb jumps to make it up quickly before the shot block respawns."
],
"devNote": "This is likely to only be useful if the in-room item is Bombs, and Samus had to break the blocks with a Power Bomb to get to it."
},
{
"id": 38,
"link": [
4,
2
],
"name": "Spring Ball IBJ",
"requires": [
{
"obstaclesCleared": [
"B"
]
},
"canJumpIntoIBJ",
"h_useSpringBall",
{
"or": [
"canTrickyJump",
"canDoubleBombJump",
"canBombAboveIBJ",
{
"ammo": {
"type": "PowerBomb",
"count": 1
}
}
]
},
{
"heatFrames": 500
}
],
"flashSuitChecked": true,
"blueSuitChecked": true,
"note": [
"Shoot the block before starting or in mid-air, then use Spring Ball to bounce on the crumble blocks and start an IBJ.",
"The shot block respawns quickly so it's pretty unforgiving on the IBJ executions.",
"Conservatively placing bombs for the IBJ will not make it up in time, unless the block is broken while IBJing."
]
},
{
"id": 92,
"link": [
4,
2
],
"name": "Use Flash Suit",
"requires": [
{
"heatFrames": 85
},
{
"useFlashSuit": {}
},
{
"shinespark": {
"frames": 10,
"excessFrames": 6
}
},
{
"heatFrames": 140
}
],
"flashSuitChecked": true,
"blueSuitChecked": true
},
{
"id": 39,
"link": [
4,
3
],
"name": "Base",
"requires": [
"Morph",
{
"heatFrames": 80
}
],
"flashSuitChecked": true,
"blueSuitChecked": true
},
{
"id": 40,
"link": [
4,
3
],
"name": "Power Bomb All the Blocks for Later",
"requires": [
"h_usePowerBomb",
{
"heatFrames": 80
}
],
"clearsObstacles": [
"A",
"B"
],
"flashSuitChecked": true,
"blueSuitChecked": true
},
{
"id": 41,
"link": [
4,
3
],
"name": "Power Bomb the Left Blocks for Later",
"requires": [
{
"obstaclesNotCleared": [
"A"
]
},
"h_usePowerBomb",
{
"heatFrames": 95
}
],
"clearsObstacles": [
"B"
],
"flashSuitChecked": true,
"blueSuitChecked": true,
"note": "Position the Power Bomb far enough left to only partially clear the bomb blocks.",
"devNote": "This is possible when ice clipping with the multiviola."
},
{
"id": 42,
"link": [
4,
3
],
"name": "Bomb a Block for Later",
"requires": [
"h_useMorphBombs",
{
"heatFrames": 80
}
],
"clearsObstacles": [
"B"
],
"flashSuitChecked": true,
"blueSuitChecked": true
},
{
"id": 43,
"link": [
4,
4
],
"name": "Crystal Flash",
"requires": [
"h_heatedCrystalFlash"
],
"clearsObstacles": [
"A",
"B"
],
"flashSuitChecked": true,
"blueSuitChecked": true
},
{
"id": 44,
"link": [
4,
4
],
"name": "Power Bomb",
"requires": [
"h_usePowerBomb",
{
"heatFrames": 120
}
],
"clearsObstacles": [
"A",
"B"
],
"flashSuitChecked": true,
"blueSuitChecked": true
},
{
"id": 45,
"link": [
4,
4
],
"name": "Bombs",
"requires": [
"h_useMorphBombs",
{
"heatFrames": 100
}
],
"clearsObstacles": [
"B"
],
"flashSuitChecked": true,
"blueSuitChecked": true
},
{
"id": 103,
"link": [
4,
4
],
"name": "Blue Suit",
"requires": [
{
"haveBlueSuit": {}
},
{
"heatFrames": 5
}
],
"clearsObstacles": [
"B"
],
"flashSuitChecked": true,
"blueSuitChecked": true
},
{
"id": 46,
"link": [
4,
6
],
"name": "Already Killed",
"requires": [
{
"obstaclesCleared": [
"D"
]
},
"canDash",
{
"heatFrames": 350
}
],
"flashSuitChecked": true,
"blueSuitChecked": true
},
{
"id": 104,
"link": [
4,
6
],
"name": "Blue Suit",
"requires": [
{
"haveBlueSuit": {}
},
{
"heatFrames": 400
}
],
"flashSuitChecked": true,
"blueSuitChecked": true
},
{
"id": 47,
"link": [
4,
6
],
"name": "Tank the Damage",
"requires": [
{
"heatFrames": 360
},
{
"or": [
{
"enemyDamage": {
"enemy": "Multiviola",
"type": "contact",
"hits": 3
}
},
{
"and": [
"canDodgeWhileShooting",
{
"enemyDamage": {
"enemy": "Multiviola",
"type": "contact",
"hits": 2
}
}
]
},
{
"and": [
"canTrickyDodgeEnemies",
{
"enemyDamage": {
"enemy": "Multiviola",
"type": "contact",
"hits": 1
}
}
]
}
]
}
],
"flashSuitChecked": true,
"blueSuitChecked": true
},
{
"id": 48,
"link": [
4,
6
],
"name": "HeatProof Kill",
"requires": [
"h_heatProof",
{
"or": [
"canCameraManip",
{
"enemyDamage": {
"enemy": "Multiviola",
"type": "contact",
"hits": 2
}
}
]
}
],
"clearsObstacles": [
"D"
],
"flashSuitChecked": true,
"blueSuitChecked": true,
"note": [
"Considered killable with Power Beam without taking damage.",
"Dodge the middle single Multiviola when it jumps up."
]
},
{
"id": 49,
"link": [
4,
6
],
"name": "Screw Kill",
"requires": [
"ScrewAttack",
{
"or": [
"canDodgeWhileShooting",
{
"and": [
"canCarefulJump",
{
"enemyDamage": {
"enemy": "Multiviola",
"type": "contact",
"hits": 1
}
}
]
},
{
"enemyDamage": {
"enemy": "Multiviola",
"type": "contact",
"hits": 2
}
}
]
},
{
"heatFrames": 360
}
],
"clearsObstacles": [
"D"
],
"flashSuitChecked": true,
"blueSuitChecked": true
},
{
"id": 50,
"link": [
4,
6
],
"name": "Strong Beam Kill",
"requires": [
{
"or": [
{
"and": [
"Wave",
"Plasma"
]
},
{
"and": [
"Plasma",
{
"heatFrames": 300
}
]
},
{
"and": [
"Wave",
"Ice",
"Spazer",
{
"heatFrames": 300
}
]
},
{
"and": [
"Wave",
{
"heatFrames": 900
}
]
}
]
},
{
"heatFrames": 450
}
],
"clearsObstacles": [
"D"
],
"flashSuitChecked": true,
"blueSuitChecked": true
},
{
"id": 51,
"link": [
4,
6
],
"name": "Power Bomb Kill",
"requires": [
{
"enemyKill": {
"enemies": [
[
"Multiviola",
"Multiviola"
],
[
"Multiviola",
"Multiviola",
"Multiviola"
]
],
"explicitWeapons": [
"PowerBomb"
]
}
},
{
"heatFrames": 500
}
],
"clearsObstacles": [
"D"
],
"flashSuitChecked": true,
"blueSuitChecked": true
},
{
"id": 88,
"link": [
4,
6
],
"name": "Cross with Crystal Flash",
"requires": [
"h_usePowerBomb",
{
"heatFrames": 260
},
"h_heatedCrystalFlash",
{
"heatFrames": 120
}
],
"flashSuitChecked": true,
"blueSuitChecked": true
},
{
"id": 52,
"link": [
6,
1
],
"name": "Blue Speed Run",
"requires": [
{
"or": [
{
"obstaclesCleared": [
"F"
]
},
{
"and": [
"canUseIFrames",
{
"enemyDamage": {
"enemy": "Dessgeega",
"type": "contact",
"hits": 1
}
}
]
}
]
},
{
"getBlueSpeed": {
"usedTiles": 23,
"openEnd": 2
}
},
{
"heatFrames": 200
}
],
"unlocksDoors": [
{
"types": [
"missiles"
],
"requires": [
{
"heatFrames": 30
}
]
}
],
"clearsObstacles": [
"C",
"E"
],
"flashSuitChecked": true,
"blueSuitChecked": true,
"note": "Taking damage off a Dessgeega at the far right, coming in from the top, allows you to charge a blue suit and get through to the door."
},
{
"id": 105,
"link": [
6,
1
],
"name": "Blue Suit",
"requires": [
{
"haveBlueSuit": {}
},
{
"heatFrames": 320
}
],
"flashSuitChecked": true,
"blueSuitChecked": true
},
{
"id": 53,
"link": [
6,
4
],
"name": "Crystal Flash Grapple Clip",
"requires": [
"h_heatProof",
"h_jumpIntoCrystalFlashClip",
"Grapple",
{
"or": [
{
"obstaclesCleared": [
"D"
]
},
{
"obstaclesCleared": [
"F"
]
},
{
"enemyDamage": {
"enemy": "Multiviola",
"type": "contact",
"hits": 2
}
}
]
}
],
"clearsObstacles": [
"A",
"B",
"D"
],
"flashSuitChecked": true,
"blueSuitChecked": true,
"note": "Menu to Grappling Beam before the crystal flash ends and mash shoot while holding down to be forced on top of the solid block.",
"devNote": [
"It is considered free to kill the Multiviolas with Power Beam while heatproof, and heatproof is required for the CF clip.",
"All of the bomb blocks will be destroyed while performing the Crystal Flash."
]
},
{
"id": 54,
"link": [
6,
6
],
"name": "Crystal Flash",
"requires": [
{
"obstaclesCleared": [
"F"
]
},
"h_heatedCrystalFlash"
],
"flashSuitChecked": true,
"blueSuitChecked": true
},
{
"id": 106,
"link": [
6,
6
],
"name": "Crystal Spark",
"requires": [
{
"obstaclesCleared": [
"C"
]
},
{
"obstaclesCleared": [
"F"
]
},
"h_shinechargeMaxRunway",
"h_heatedCrystalSpark"
],
"flashSuitChecked": true,
"blueSuitChecked": true
},
{
"id": 55,
"link": [
6,
7
],
"name": "Already Killed",
"requires": [
"canDash",
{
"obstaclesCleared": [
"F"
]
},
{
"heatFrames": 150
}
],
"flashSuitChecked": true,
"blueSuitChecked": true
},
{
"id": 56,
"link": [
6,
7
],
"name": "Tank the Damage",
"requires": [
"canDash",
{
"heatFrames": 150
},
{
"enemyDamage": {
"enemy": "Dessgeega",
"type": "contact",
"hits": 1
}
}
],
"flashSuitChecked": true,
"blueSuitChecked": true
},
{
"id": 57,
"link": [
6,
7
],
"name": "Slow Kill",
"requires": [
{
"enemyKill": {
"enemies": [
[
"Dessgeega",
"Dessgeega"
]
],
"excludedWeapons": [
"Bombs",
"PseudoScrew"
]
}
},
{
"heatFrames": 3000
}
],
"clearsObstacles": [
"F"
],
"flashSuitChecked": true,
"blueSuitChecked": true,
"devNote": "Bombs excluded because there's no safe setup."
},
{
"id": 58,
"link": [
6,
7
],
"name": "Beam Kill",
"requires": [
"canDash",
{
"or": [
{
"and": [
"Plasma",
{
"heatFrames": 250
}
]
},
{
"and": [
"Ice",
"Wave",
"Spazer",
{
"heatFrames": 600
}
]
}
]
},
{
"heatFrames": 150
}
],
"clearsObstacles": [
"F"
],
"flashSuitChecked": true,
"blueSuitChecked": true
},
{
"id": 59,
"link": [
6,
7
],
"name": "Screw Kill",
"requires": [
"canDash",
"ScrewAttack",
{
"heatFrames": 200
}
],
"clearsObstacles": [
"F"
],
"flashSuitChecked": true,
"blueSuitChecked": true
},
{
"id": 60,
"link": [
6,
7
],
"name": "Ammo Kill",
"requires": [
"canDash",
{
"or": [
{
"and": [
{
"enemyKill": {
"enemies": [
[
"Dessgeega",
"Dessgeega"
]
],
"explicitWeapons": [
"Missile"
]
}
},
{
"heatFrames": 420
}
]
},
{
"and": [
{
"enemyKill": {
"enemies": [
[
"Dessgeega",
"Dessgeega"
]
],
"explicitWeapons": [
"Super"
]
}
},
{
"heatFrames": 250
}
]
},
{
"and": [
{
"enemyKill": {
"enemies": [
[
"Dessgeega",
"Dessgeega"
]
],
"explicitWeapons": [
"PowerBomb"
]
}
},
{
"heatFrames": 350
}
]
}
]
},
{
"heatFrames": 150
}
],
"clearsObstacles": [
"F"
],
"flashSuitChecked": true,
"blueSuitChecked": true
},
{
"id": 61,
"link": [
6,
9
],
"name": "Ice Clip Setup",
"requires": [
{
"notable": "Multiviola Ice Clip"
},
"h_heatProof",
"canTrickyUseFrozenEnemies",
{
"or": [
"canCameraManip",
"canDodgeWhileShooting"
]
},
{
"obstaclesNotCleared": [
"E"
]
},
{
"enemyDamage": {
"enemy": "Multiviola",
"type": "contact",
"hits": 5
}
},
{
"or": [
{
"enemyKill": {
"enemies": [
[
"Dessgeega"
],
[
"Dessgeega"
],
[
"Dessgeega"
]
],
"explicitWeapons": [
"Plasma",
"ScrewAttack",
"Charge+Ice+Wave",
"Ice+Wave+Spazer",
"Missile",
"Super"
]
}
},
{
"obstaclesCleared": [
"C"
]
}
]
},
{
"or": [
{
"enemyKill": {
"enemies": [
[
"Dessgeega",
"Dessgeega"
]
],
"explicitWeapons": [
"Plasma",
"ScrewAttack",
"Charge+Ice+Wave",
"Ice+Wave+Spazer",
"Missile",
"Super"
]
}
},
{
"obstaclesCleared": [
"F"
]
}
]
}
],
"clearsObstacles": [
"C",
"D",
"F"
],
"flashSuitChecked": true,
"blueSuitChecked": true,
"note": [
"Guide the bottom-right Multiviola to the upper section of the room.",
"Lure the Dessgeegas away to avoid killing the Multiviola.",
"Remove all enemies and possibly also the row of bomb blocks with a power bomb before attempting to guide the Multiviola.",
"It will need to bounce each room segment multiple times before lining up to go through each shot block.",
"Ice can be used to more safely get around the Multiviola as it is bouncing.",
"However, opening the left side door will change the bounce locations and make the strat no longer possible.",
"Instead the enemy can be allowed to go off camera and then Samus can prepare to run away as it comes back.",
"Waiting in the next room segment is a safe way to wait for the Multiviola to bounce and still be able to break shot blocks."
],
"devNote": [
"This is not just getting up there, but also bringing the correct Multiviola with you.",
"Five hits for leniency because it is hard to avoid damage even while freezing the Multiviola.",
"2.5 minute strat with Plasma"
]
},
{
"id": 62,
"link": [
7,
1
],
"name": "Already Killed",
"requires": [
"canDash",
{
"obstaclesCleared": [
"C"
]
},
{
"heatFrames": 200
}
],
"unlocksDoors": [
{
"types": [
"missiles"
],
"requires": [
{
"heatFrames": 30
}
]
}
],
"flashSuitChecked": true,
"blueSuitChecked": true
},
{
"id": 63,
"link": [
7,
1
],
"name": "Tank the Damage",
"requires": [
"canDash",
{
"heatFrames": 250
},
{
"enemyDamage": {
"enemy": "Dessgeega",
"type": "contact",
"hits": 2
}
}
],
"unlocksDoors": [
{
"types": [
"missiles"
],
"requires": [
{
"heatFrames": 30
}
]
}
],
"flashSuitChecked": true,
"blueSuitChecked": true
},
{
"id": 64,
"link": [
7,
1
],
"name": "HeatProof Kill",
"requires": [
"h_heatProof",
{
"obstaclesCleared": [
"F"
]
},
{
"or": [
{
"and": [
"canDodgeWhileShooting",
{
"enemyKill": {
"enemies": [
[
"Dessgeega"
],
[
"Dessgeega"
],
[
"Dessgeega"
]
],
"excludedWeapons": [
"Bombs",
"PseudoScrew",
"Charge",
"Charge+Ice",
"Spazer"
]
}
}
]
},
{
"and": [
"canBeVeryPatient",
"Charge"
]
},
{
"and": [
"canBePatient",
"Charge",
"Ice"
]
},
{
"and": [
"canBePatient",
"Spazer"
]
},
{
"obstaclesCleared": [
"C"
]
}
]
},
{
"or": [
{
"and": [
"canCarefulJump",
{
"enemyKill": {
"enemies": [
[
"Multiviola"
],
[
"Multiviola"
]
],
"excludedWeapons": [
"Bombs",
"PowerBeam"
]
}
}
]
},
{
"enemyDamage": {
"enemy": "Multiviola",
"type": "contact",
"hits": 2
}
},
{
"obstaclesCleared": [
"E"
]
}
]
}
],
"unlocksDoors": [
{
"types": [
"missiles"
],
"requires": [
{
"heatFrames": 30
}
]
}
],
"clearsObstacles": [
"C",
"E"
],
"flashSuitChecked": true,
"blueSuitChecked": true,
"note": "Some weapons are very slow at killing the Multiviolas and require use of the safe spot in the bottom right Multiviola cage.",
"devNote": [
"Bombs are excluded because there is no safe setup.",
"Without canDodgeWhileShooting, tanking the damage and running through is best."
]
},
{
"id": 65,
"link": [
7,
1
],
"name": "Wave Plasma Kill",
"requires": [
"canDash",
{
"obstaclesCleared": [
"F"
]
},
"Plasma",
"Wave",
{
"heatFrames": 400
}
],
"unlocksDoors": [
{
"types": [
"missiles"
],
"requires": [
{
"heatFrames": 30
}
]
}
],
"clearsObstacles": [
"C",
"E"
],
"flashSuitChecked": true,
"blueSuitChecked": true
},
{
"id": 66,
"link": [
7,
1
],
"name": "Plasma Kill",
"requires": [
"canDash",
{
"obstaclesCleared": [
"F"
]
},
"Plasma",
{
"heatFrames": 500
}
],
"unlocksDoors": [
{
"types": [
"missiles"
],
"requires": [
{
"heatFrames": 30
}
]
}
],
"clearsObstacles": [
"C",
"E"
],
"flashSuitChecked": true,
"blueSuitChecked": true
},
{
"id": 67,
"link": [
7,
1
],
"name": "Missiles Kill",
"requires": [
"canDash",
{
"obstaclesCleared": [
"F"
]
},
{
"heatFrames": 200
},
{
"or": [
{
"and": [
{
"enemyKill": {
"enemies": [
[
"Dessgeega",
"Dessgeega",
"Dessgeega"
]
],
"explicitWeapons": [
"Missile"
]
}
},
{
"heatFrames": 300
}
]
},
{
"obstaclesCleared": [
"C"
]
}
]
},
{
"or": [
{
"enemyKill": {
"enemies": [
[
"Multiviola",
"Multiviola"
]
],
"explicitWeapons": [
"Missile"
]
}
},
{
"obstaclesCleared": [
"E"
]
}
]
}
],
"unlocksDoors": [
{
"types": [
"missiles"
],
"requires": [
{
"heatFrames": 30
}
]
}
],
"clearsObstacles": [
"C",
"E"
],
"flashSuitChecked": true,
"blueSuitChecked": true
},
{
"id": 68,
"link": [
7,
1
],
"name": "Supers Kill",
"requires": [
"canDash",
{
"obstaclesCleared": [
"F"
]
},
{
"heatFrames": 200
},
{
"or": [
{
"and": [
{
"enemyKill": {
"enemies": [
[
"Dessgeega",
"Dessgeega",
"Dessgeega"
]
],
"explicitWeapons": [
"Super"
]
}
},
{
"heatFrames": 200
}
]
},
{
"obstaclesCleared": [
"C"
]
}
]
},
{
"or": [
{
"enemyKill": {
"enemies": [
[
"Multiviola",
"Multiviola"
]
],
"explicitWeapons": [
"Super"
]
}
},
{
"obstaclesCleared": [
"E"
]
}
]
}
],
"unlocksDoors": [
{
"types": [
"missiles"
],
"requires": [
{
"heatFrames": 30
}
]
}
],
"clearsObstacles": [
"C",
"E"
],
"flashSuitChecked": true,
"blueSuitChecked": true
},
{
"id": 69,
"link": [
7,
1
],
"name": "Screw Kill",
"requires": [
"canDash",
"ScrewAttack",
{
"heatFrames": 320
}
],
"unlocksDoors": [
{
"types": [
"missiles"
],
"requires": [
{
"heatFrames": 30
}
]
}
],
"clearsObstacles": [
"C",
"E"
],
"flashSuitChecked": true,
"blueSuitChecked": true
},
{
"id": 70,
"link": [
7,
6
],
"name": "Already Killed",
"requires": [
"canDash",
{
"obstaclesCleared": [
"F"
]
},
{
"heatFrames": 100
}
],
"flashSuitChecked": true,
"blueSuitChecked": true
},
{
"id": 71,
"link": [
7,
6
],
"name": "Tank the Damage",
"requires": [
"canDash",
{
"heatFrames": 150
},
{
"enemyDamage": {
"enemy": "Dessgeega",
"type": "contact",
"hits": 1
}
}
],
"flashSuitChecked": true,
"blueSuitChecked": true
},
{
"id": 72,
"link": [
7,
6
],
"name": "Plasma Kill",
"requires": [
"canDash",
{
"obstaclesCleared": [
"C"
]
},
"Plasma",
{
"heatFrames": 400
}
],
"clearsObstacles": [
"F"
],
"flashSuitChecked": true,
"blueSuitChecked": true
},
{
"id": 73,
"link": [
7,
6
],
"name": "Beam Combo Kill",
"requires": [
"canDash",
{
"obstaclesCleared": [
"C"
]
},
"canDodgeWhileShooting",
"Charge",
"Ice",
"Wave",
"Spazer",
{
"heatFrames": 550
}
],
"clearsObstacles": [
"F"
],
"flashSuitChecked": true,
"blueSuitChecked": true,
"devNote": "Without canDodgeWhileShooting, tanking the damage and running through is best."
},
{
"id": 74,
"link": [
7,
6
],
"name": "Supers Kill",
"requires": [
"canDash",
{
"obstaclesCleared": [
"C"
]
},
{
"enemyKill": {
"enemies": [
[
"Dessgeega",
"Dessgeega"
]
],
"explicitWeapons": [
"Super"
]
}
},
{
"heatFrames": 200
}
],
"clearsObstacles": [
"F"
],
"flashSuitChecked": true,
"blueSuitChecked": true
},
{
"id": 75,
"link": [
7,
6
],
"name": "Screw Kill",
"requires": [
"canDash",
"ScrewAttack",
{
"heatFrames": 160
}
],
"clearsObstacles": [
"F"
],
"flashSuitChecked": true,
"blueSuitChecked": true
},
{
"id": 76,
"link": [
7,
6
],
"name": "Missiles Kill",
"requires": [
"canDash",
{
"obstaclesCleared": [
"C"
]
},
{
"enemyKill": {
"enemies": [
[
"Dessgeega",
"Dessgeega"
]
],
"explicitWeapons": [
"Missile"
]
}
},
{
"heatFrames": 400
}
],
"clearsObstacles": [
"F"
],
"flashSuitChecked": true,
"blueSuitChecked": true
},
{
"id": 79,
"link": [
9,
2
],
"name": "Multiviola Clip (Bomb Block Clip)",
"requires": [
{
"notable": "Multiviola Ice Clip"
},
"h_heatProof",
"h_preciseIceClip",
"canPartialFloorClip",
"canTrickyJump",
{
"enemyDamage": {
"enemy": "Multiviola",
"type": "contact",
"hits": 1
}
},
{
"or": [
"h_crouchJumpDownGrab",
"canWallJump",
"canSpringBallJumpMidAir",
"HiJump",
"SpaceJump",
"canJumpIntoIBJ"
]
}
],
"flashSuitChecked": true,
"blueSuitChecked": true,
"note": [
"Bring the correct Viola up from the bottom, it can be frozen to avoid damage. After it comes though the uppermost shot blocks, back into the right hand corner and shot buffer on what would be the second hit from the Viola if you were not freezing or avoiding it.",
"Should the shot buffer be missed then the Viola will have to bounce around many more times before being on a cycle where the buffered shot will freeze it in the correct position.",
"Get onto the right side of the Viola, Samus should be standing and partially clipped into the solid tile. Crouch jump and 3 or 4 frames after pressing jump (2 frame window) hold down. Samus will appear to be stuck between the bomb blocks and the solid tile. Press forwards or up to stand up and jump to clip through.",
"If Samus doesn't clip at all down was pressed too soon, if Samus clips the first blocks but appears to be floating while aiming down then down was pressed too late."
],
"devNote": [
"This may be possible with a high pixel ice clip.",
"FIXME: using a flash suit should also be possible."
]
},
{
"id": 80,
"link": [
9,
2
],
"name": "Multiviola Clip (X-Ray Standup Bomb Block Clip)",
"requires": [
{
"notable": "Multiviola Ice Clip"
},
"h_heatProof",
"h_XRayMorphIceClip",
{
"or": [
"h_crouchJumpDownGrab",
"canWallJump",
"canSpringBallJumpMidAir",
"HiJump",
"SpaceJump",
"canJumpIntoIBJ"
]
}
],
"flashSuitChecked": true,
"blueSuitChecked": true,
"note": [
"Freeze the Multiviola on the left side, just below the solid block.",
"XRay standup and jump to clip up, then jump again to get on top of the bomb blocks."
]
},
{
"id": 93,
"link": [
9,
2
],
"name": "G-Mode Setup - Get Hit By Multiviola",
"requires": [
{
"notable": "Multiviola Ice Clip"
},
"canBePatient",
"canTrickyGMode",
"h_heatProof",
"canTrickyJump",
{
"enemyDamage": {
"enemy": "Multiviola",
"type": "contact",
"hits": 1
}
},
{
"or": [
{
"and": [
"h_preciseIceClip",
{
"or": [
{
"and": [
"h_useMorphBombs",
{
"or": [
"h_useSpringBall",
"can4HighMidAirMorph"
]
}
]
},
{
"ammo": {
"type": "PowerBomb",
"count": 1
}
},
{
"obstaclesCleared": [
"B"
]
}
]
}
]
},
{
"and": [
"canTrickyCarryFlashSuit",
"h_preciseIceClip",
{
"useFlashSuit": {}
},
{
"shinespark": {
"frames": 11,
"excessFrames": 5
}
}
]
},
{
"and": [
"h_XRayMorphIceClip",
{
"or": [
"Bombs",
"ScrewAttack",
{
"ammo": {
"type": "PowerBomb",
"count": 1
}
},
{
"obstaclesCleared": [
"B"
]
}
]
}
]
}
]
}
],
"exitCondition": {
"leaveWithGModeSetup": {}
},
"unlocksDoors": [
{
"types": [
"ammo"
],
"requires": []
}
],
"flashSuitChecked": true,
"blueSuitChecked": true,
"note": [
"Breaking only the left side bomb blocks makes it easier for the Multiviola to enter a pattern where it will pass through the top shot block.",
"The Multiviola needs to go through the crumble blocks moving to the right, if it goes through moving left it won't clear the shot blocks.",
"If all the bomb blocks are broken, standing on the right side of the crumbles will allow the Multiviola to pass through the top shot block."
]
},
{
"id": 81,
"link": [
9,
4
],
"name": "Multiviola Clip (Power Bomb)",
"requires": [
{
"notable": "Multiviola Ice Clip"
},
"h_heatProof",
"h_preciseIceClip",
{
"enemyDamage": {
"enemy": "Multiviola",
"type": "contact",
"hits": 1
}
},
{
"or": [
"h_usePowerBomb",
{
"obstaclesCleared": [
"A"
]
}
]
}
],
"clearsObstacles": [
"A",
"B"
],
"flashSuitChecked": true,
"blueSuitChecked": true,
"note": [
"Ice Clip through the crumble blocks using a Multiviola from the bottom of the room and then Crumble Jump to clip through the bomb blocks.",
"The ice clip can be setup by standing in a corner and firing forward when the Multiviola hits Samus, if it is moving downwards towards Samus.",
"Break the bomb blocks with a Power Bomb before bringing the Multiviola up for the clip."
]
},
{
"id": 82,
"link": [
9,
4
],
"name": "Multiviola Clip (X-Ray Standup and Morph)",
"requires": [
{
"notable": "Multiviola Ice Clip"
},
"h_heatProof",
"h_XRayMorphIceClip"
],
"flashSuitChecked": true,
"blueSuitChecked": true,
"note": [
"Freeze the Multiviola on the left side, just below the solid block.",
"XRay standup and jump to clip up, then Morph to be in the morph tunnel."
]
},
{
"id": 83,
"link": [
9,
4
],
"name": "Multiviola Clip (Screw Attack)",
"requires": [
{
"notable": "Multiviola Ice Clip"
},
"h_heatProof",
"h_preciseIceClip",
{
"enemyDamage": {
"enemy": "Multiviola",
"type": "contact",
"hits": 1
}
},
"ScrewAttack",
{
"obstaclesNotCleared": [
"A"
]
}
],
"clearsObstacles": [
"B"
],
"flashSuitChecked": true,
"blueSuitChecked": true,
"note": [
"Ice Clip through the crumble blocks using a Multiviola from the bottom of the room and then Crumble Jump to clip through the bomb blocks.",
"The ice clip can be setup by standing in a corner and firing forward when the Multiviola hits Samus, if it is moving downwards towards Samus.",
"Jump and aim down to break the crumble blocks.",
"Then quickly spinjump to break the bomb blocks with Screw Attack."
]
},
{
"id": 84,
"link": [
9,
4
],
"name": "Multiviola Clip (Bombs)",
"requires": [
{
"notable": "Multiviola Ice Clip"
},
"h_heatProof",
"h_preciseIceClip",
{
"enemyDamage": {
"enemy": "Multiviola",
"type": "contact",
"hits": 1
}
},
{
"obstaclesNotCleared": [
"A"
]
},
"h_useMorphBombs",
{
"or": [
"h_useSpringBall",
"can4HighMidAirMorph"
]
}
],
"clearsObstacles": [
"B"
],
"flashSuitChecked": true,
"blueSuitChecked": true,
"note": [
"Ice Clip through the crumble blocks using a Multiviola from the bottom of the room and then Crumble Jump to clip through the bomb blocks.",
"The ice clip can be setup by standing in a corner and firing forward when the Multiviola hits Samus, if it is moving downwards towards Samus.",
"Very quickly jump and morph to place a bomb against the bomb blocks.",
"Or break the crumble blocks and use Spring Ball to jump again to place the bomb.",
"Then jump again while the Multiviola is still frozen to clip through."
]
}
],
"notables": [
{
"id": 1,
"name": "Multiviola Ice Clip",
"note": [
"Guide the bottom right Multiviola from the bottom of the room all the way to the crumble blocks and use it to ice clip through.",
"The Multiviola will bounce around the bottom area 4 times before it is able to pass through the shot block.",
"The door to the left cannot be opened and the respawning shot blocks needs to be removed at the right time.",
"Avoid damage by freezing the Multiviola, or letting it go off camera while setting up for the next step.",
"The Ice Clip can jump through the crumble blocks and then break or clip again through the bomb blocks.",
"Or clip directly into the morph tunnel leading to the Missile location."
]
},
{
"id": 2,
"name": "Temporary Blue Crumble Jump without Spring Ball",
"note": [
"Carry Temporary Blue through the top door to break the left side of the bomb blocks.",
"There is a small frame window where Samus can soft unmorph on the crumble blocks and jump again while retaining temporary blue."
]
},
{
"id": 3,
"name": "Crumble Tricky Dash Jump",
"note": [
"Spin jump off a crumble block with exactly 1 frame of dash speed.",
"That gives just enough height to be able to walljump out."
]
}
],
"nextStratId": 107,
"nextNotableId": 5
}