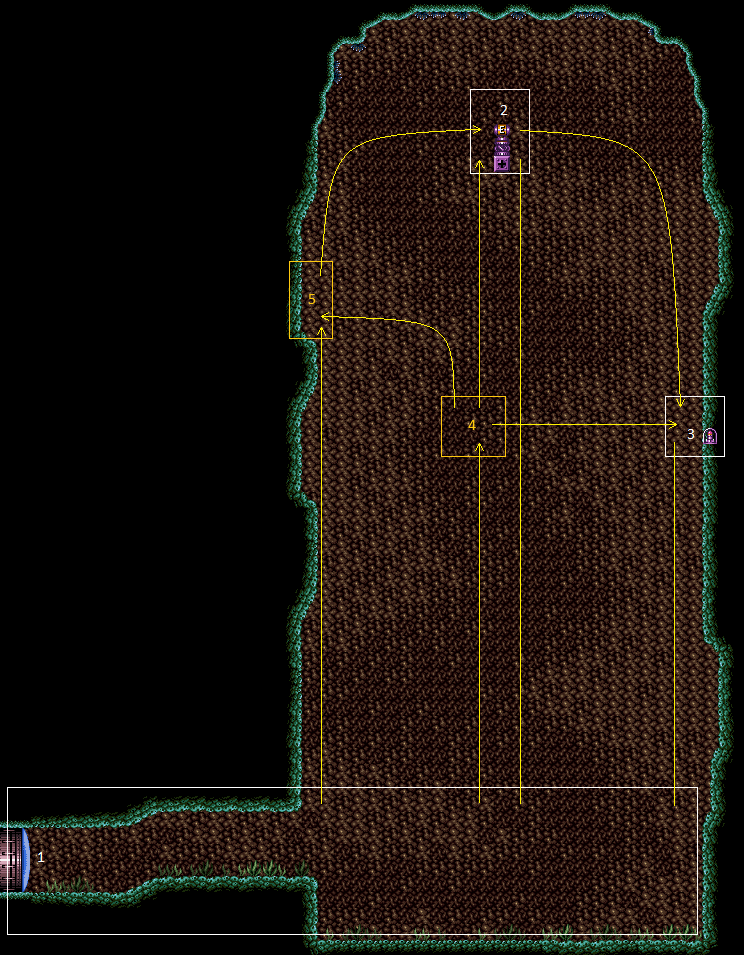
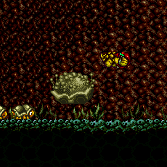
Mama Turtle Room
Room ID: 178
|
Exit condition: {
"leaveWithRunway": {
"length": 19,
"openEnd": 1,
"gentleDownTiles": 2
}
} |
From: 1
Left Door
To: 1
Left Door
Entrance condition: {
"comeInStutterShinecharging": {
"minTiles": 2
}
}Requires: "canStutterWaterShineCharge"
"canShinechargeMovementComplex"
{
"or": [
{
"shinespark": {
"frames": 12,
"excessFrames": 0
}
},
{
"and": [
"canShinechargeMovementTricky",
{
"shinespark": {
"frames": 3,
"excessFrames": 0
}
}
]
}
]
}Exit condition: {
"leaveWithSpark": {}
}Unlocks doors: {"types":["super"],"requires":[]}
{"types":["missiles","powerbomb"],"requires":["never"]} |
From: 1
Left Door
To: 1
Left Door
With only 1 tile of runway, this requires a single-frame stutter (release forward then repress on the next frame), on the last possible frame. Entrance condition: {
"comeInStutterShinecharging": {
"minTiles": 1
}
}Requires: "canShinechargeMovementComplex"
"canPreciseStutterWaterShineCharge"
"canInsaneJump"
"h_shinechargeMaxRunway"
{
"or": [
{
"shinespark": {
"frames": 12,
"excessFrames": 0
}
},
{
"and": [
"canShinechargeMovementTricky",
{
"shinespark": {
"frames": 3,
"excessFrames": 0
}
}
]
}
]
}Exit condition: {
"leaveWithSpark": {}
}Unlocks doors: {"types":["super"],"requires":[]}
{"types":["missiles","powerbomb"],"requires":["never"]} |
From: 1
Left Door
To: 1
Left Door
With a runway of 5 tiles (open end) in the other room, the ideal timing for the stutter is to release forward for 5 frames, and repress forward on the last possible frame before the transition. Other timings can work, but will gain the shinecharge further from the door, leaving fewer shinecharge frames remaining. After gaining the shinecharge, continue holding forward in order to make Samus stand. Then turnaround spin jump back toward the door, and continue spin jumping to reach the transition with a shinecharge. Entrance condition: {
"comeInStutterShinecharging": {
"minTiles": 5
}
}Requires: "canPreciseStutterWaterShineCharge"
"canShinechargeMovementTricky"
"canInsaneJump"
{
"shineChargeFrames": 130
}
{
"or": [
"canBeVeryPatient",
{
"shineChargeFrames": 15
}
]
}Exit condition: {
"leaveShinecharged": {}
}Unlocks doors: {"types":["super"],"requires":[]}
{"types":["missiles","powerbomb"],"requires":["never"]} |
From: 1
Left Door
To: 1
Left Door
With only a runway of 4 tiles (open end) in the other room, the ideal timing for the stutter is to release forward for 4 frames, and repress forward on the last possible frame before the transition. It also works well to release forward for 3 frames and repress on the last possible frame. Other timings can also work, but may gain the shinecharge further from the door, leaving fewer shinecharge frames remaining. After gaining the shinecharge, continue holding forward in order to make Samus stand. Then turnaround spin jump back toward the door, and continue spin jumping to reach the transition with a shinecharge. Entrance condition: {
"comeInStutterShinecharging": {
"minTiles": 4
}
}Requires: "canPreciseStutterWaterShineCharge"
"canShinechargeMovementTricky"
"canInsaneJump"
{
"shineChargeFrames": 140
}
{
"or": [
"canBeVeryPatient",
{
"shineChargeFrames": 10
}
]
}Exit condition: {
"leaveShinecharged": {}
}Unlocks doors: {"types":["super"],"requires":[]}
{"types":["missiles","powerbomb"],"requires":["never"]} |
From: 1
Left Door
To: 1
Left Door
With only a runway of 3 tiles (open end) in the other room, the ideal timing for the stutter is to release forward for 3 or 4 frames, and repress forward on the last possible frame before the transition. Other timings can work, but will gain the shinecharge further from the door, leaving fewer shinecharge frames remaining. After gaining the shinecharge, continue holding forward in order to make Samus stand. Then turnaround spin jump back toward the door, and continue spin jumping to reach the transition with a shinecharge. Alternatively, with greater difficulty but saving some shinecharge frames, after performing the turnaround spin jump, briefly moonwalk back, then retain momentum by boomeranging forward (switching from pressing backward to pressing forward on the next frame), and arm pump to reach the door quickly. Entrance condition: {
"comeInStutterShinecharging": {
"minTiles": 3
}
}Requires: "canPreciseStutterWaterShineCharge"
"canShinechargeMovementTricky"
"canInsaneJump"
{
"shineChargeFrames": 145
}
{
"or": [
"canBeVeryPatient",
{
"shineChargeFrames": 10
}
]
}Exit condition: {
"leaveShinecharged": {}
}Unlocks doors: {"types":["super"],"requires":[]}
{"types":["missiles","powerbomb"],"requires":["never"]}Dev note: The same shinecharge frames could be achieved with a closed end runway (effective length of 2.4375), with a 3-frame stutter, but there doesn't appear to be any application. |
From: 1
Left Door
To: 1
Left Door
With only a runway of 2 tiles (open end) in the other room, the ideal timing for the stutter is to release forward for 3 frames, and repress forward on the last possible frame before the transition. Other timings can work, but will gain the shinecharge further from the door, leaving fewer shinecharge frames remaining. After gaining the shinecharge, continue holding forward in order to make Samus stand. Then turnaround spin jump back toward the door, and continue spin jumping to reach the transition with a shinecharge. Alternatively, with greater difficulty but saving some shinecharge frames, after performing the turnaround spin jump, briefly moonwalk back, then retain momentum by boomeranging forward (switching from pressing backward to pressing forward on the next frame), and arm pump to reach the door quickly. Entrance condition: {
"comeInStutterShinecharging": {
"minTiles": 2
}
}Requires: "canPreciseStutterWaterShineCharge"
"canShinechargeMovementTricky"
"canInsaneJump"
{
"shineChargeFrames": 150
}
{
"or": [
"canBeVeryPatient",
{
"shineChargeFrames": 15
}
]
}Exit condition: {
"leaveShinecharged": {}
}Unlocks doors: {"types":["super"],"requires":[]}
{"types":["missiles","powerbomb"],"requires":["never"]}Dev note: FIXME: The canBeVeryPatient requirement is for difficulty placement of the boomerang method; but the boomerang (or maybe specifically the moonwalk boomerang) should possibly be its own tech, and the same with rapid arm pumping. |
From: 1
Left Door
To: 1
Left Door
With only 1 tile of runway in the other room, Samus should ideally start on the last pixel of runway with X subpixels of $3FFF or less. Run toward the door, releasing forward for exactly 1 frame and pressing it again on the last possible frame before the transition. Starting with X subpixels of $7FFF can also work (e.g., by simply backing against the door ledge, then jumping and turning around mid-air); in this case, Samus must advance 1 or 2 pixels with an arm pump before the transition (e.g., firing a shot or pressing and/or releasing an angle button), and the shinecharge will be gained slightly further away from the door. After gaining the shinecharge, continue holding forward in order to make Samus stand. Then turnaround spin jump back toward the door, and continue spin jumping to reach the transition with a shinecharge. Alternatively, with greater difficulty but saving some shinecharge frames, after performing the turnaround spin jump, briefly moonwalk back, then retain momentum by boomeranging forward (switching from pressing backward to pressing forward on the next frame), and arm pump to reach the door quickly. Ideal subpixels ($3FFF) can be achieved using one of several methods: 1) press forward against the door ledge (or a wall aligned with it); jump, and while mid-air, tap forward for exactly 1 frame to land with subpixels $BFFF, moonwalk back for exactly 1 frame to end with subpixels $3FFF. 2) press forward against the door ledge (from a platform below, assuming one exists) turn around (while on the ground), and moonwalk back two pixels, then jump and mid-air turnaround onto the ledge; if Samus jumped from the correct pixel but does not land on the ledge, then it was needed to moonwalk back 1 more frame; in this case it is possible to retry by doing a mid-air turnaround back onto the platform, and moonwalking back for 1 frame. 3) if X-Ray is available, press against the door ledge (from a platform below, assuming one exists) turn around (while on the ground), then jump and mid-air turnaround toward the door, and use X-Ray to turnaround in place away from the door; repeat this sequence 3 more times: jump, mid-air turnaround, X-Ray turnaround; then do one more jump and mid-air turnaround, high enough to land on the door ledge, and Samus should be in the correct position with subpixels $3FFF. Entrance condition: {
"comeInStutterShinecharging": {
"minTiles": 1
}
}Requires: "canPreciseStutterWaterShineCharge"
"canInsaneJump"
"canBeVeryPatient"
"canShinechargeMovementTricky"
{
"shineChargeFrames": 160
}Exit condition: {
"leaveShinecharged": {}
}Unlocks doors: {"types":["super"],"requires":[]}
{"types":["missiles","powerbomb"],"requires":["never"]} |
From: 1
Left Door
To: 1
Left Door
Entrance condition: {
"comeInStutterShinecharging": {
"minTiles": 2
}
}Requires: "canPreciseStutterWaterShineCharge" "canXRayTurnaround" "canChainTemporaryBlue" Exit condition: {
"leaveWithTemporaryBlue": {}
}Unlocks doors: {"types":["ammo"],"requires":[]} |
From: 1
Left Door
To: 1
Left Door
With only 1 tile of runway in the other room, Samus should ideally start on the last pixel of runway with X subpixels of $3FFF or less. Run toward the door, releasing forward for exactly 1 frame and pressing it again on the last possible frame before the transition. Starting with X subpixels of $7FFF can also work (e.g., by simply backing against the door ledge, then jumping and turning around mid-air); in this case, Samus must advance 1 or 2 pixels with an arm pump before the transition (e.g., firing a shot or pressing and/or releasing an angle button), Entrance condition: {
"comeInStutterShinecharging": {
"minTiles": 1
}
}Requires: "canPreciseStutterWaterShineCharge" "canInsaneJump" "canXRayTurnaround" "canChainTemporaryBlue" Exit condition: {
"leaveWithTemporaryBlue": {}
}Unlocks doors: {"types":["ammo"],"requires":[]}Dev note: FIXME: The canInsaneJump requirement is for difficulty placement; use a more appropriate tech if possible. |
|
Requires: "h_CrystalFlash" |
|
Entrance condition: {
"comeInShinecharging": {
"length": 18,
"openEnd": 0,
"gentleUpTiles": 2
},
"comesInHeated": "no"
}Requires: "Gravity" "h_CrystalSpark" |
|
Requires: "Gravity"
{
"or": [
{
"canShineCharge": {
"usedTiles": 18,
"gentleUpTiles": 2,
"openEnd": 0
}
},
{
"and": [
{
"doorUnlockedAtNode": 1
},
{
"canShineCharge": {
"usedTiles": 19,
"gentleUpTiles": 2,
"openEnd": 0
}
}
]
}
]
}
"h_CrystalSpark" |
From: 1
Left Door
To: 1
Left Door
Entrance condition: {
"comeInStutterShinecharging": {
"minTiles": 1
},
"comesInHeated": "no"
}Requires: "canPreciseStutterWaterShineCharge" "h_underwaterCrystalSpark" Dev note: FIXME: This is possible with one tile, but it's a lot worse. It would be very tedious to set up for many attempts. |
|


This requires a precisely timed Crystal Flash, such that Mama Turtle hits Samus immediately after she gets Reserve Energy, to prevent getting double hit. The precise timing is not required with the ability to survive another hit after the Reserve trigger. Samus will sometimes be forced onto Mama Turtle's back, which can force a third hit; this can be prevented by holding forward as she hits Samus. Entrance condition: {
"comeInWithRMode": {}
}Requires: "canRModeCrystalFlashInterrupt"
{
"or": [
{
"and": [
{
"ammo": {
"type": "Missile",
"count": 10
}
},
{
"or": [
"h_fullEnemyDamageReduction",
{
"and": [
"h_partialEnemyDamageReduction",
{
"resourceCapacity": [
{
"type": "RegularEnergy",
"count": 149
}
]
},
{
"resourceCapacity": [
{
"type": "ReserveEnergy",
"count": 149
}
]
}
]
},
{
"and": [
{
"resourceCapacity": [
{
"type": "RegularEnergy",
"count": 249
}
]
},
{
"resourceCapacity": [
{
"type": "ReserveEnergy",
"count": 249
}
]
}
]
}
]
}
]
},
{
"and": [
{
"ammo": {
"type": "Missile",
"count": 2
}
},
"canComplexRModeCrystalFlashInterrupt"
]
}
]
} |
|


Crystal Flash upon entering. Wake Mama Turtle, shinecharge, then use Mama Turtle to interrupt. With ~200 Reserve Energy and at least 1 Energy tank, Samus will still be refilling reserves and Mama Turtle will return and hit again. It is possible to midair spark as Mama Turtle is approaching, where she will hit Samus on the first pass, but not after. This is frame perfect with Gravity, and when Samus is forced into a standup, her feet will be slightly less than a full tile below the ledge. Entrance condition: {
"comeInWithRMode": {}
}Requires: "Gravity"
"h_CrystalFlashForReserveEnergy"
{
"canShineCharge": {
"usedTiles": 18,
"gentleUpTiles": 2,
"openEnd": 1
}
}
{
"autoReserveTrigger": {}
}
"canRModeSparkInterrupt"
{
"or": [
"canInsaneJump",
{
"enemyDamage": {
"enemy": "Kame (Tatori)",
"type": "contact",
"hits": 1
}
},
{
"resourceAtMost": [
{
"type": "RegularEnergy",
"count": 150
}
]
}
]
} |
From: 1
Left Door
To: 1
Left Door

On room entry, roll into one of the baby turtles in order to get Mama Turtle to wake up. This then requires a precisely timed Crystal Flash, such that Mama Turtle hits Samus immediately after she gets Reserve Energy, to prevent getting double hit. The precise timing is not required with the ability to survive another hit after the Reserve trigger. Samus will sometimes be forced onto Mama Turtle's back, which can force a third hit; this can be prevented by holding forward as she hits Samus. Entrance condition: {
"comeInWithGMode": {
"mode": "direct",
"morphed": true
}
}Requires: "h_artificialMorphRModeCrystalFlashInterrupt"
{
"or": [
{
"and": [
{
"ammo": {
"type": "Missile",
"count": 10
}
},
{
"or": [
"h_fullEnemyDamageReduction",
{
"and": [
"h_partialEnemyDamageReduction",
{
"resourceCapacity": [
{
"type": "RegularEnergy",
"count": 149
}
]
},
{
"resourceCapacity": [
{
"type": "ReserveEnergy",
"count": 149
}
]
}
]
},
{
"and": [
{
"resourceCapacity": [
{
"type": "RegularEnergy",
"count": 249
}
]
},
{
"resourceCapacity": [
{
"type": "ReserveEnergy",
"count": 249
}
]
}
]
}
]
}
]
},
{
"and": [
{
"ammo": {
"type": "Missile",
"count": 2
}
},
"canComplexRModeCrystalFlashInterrupt"
]
}
]
} |
|
Requires: "Gravity" "SpaceJump" Clears obstacles: B |
|
Requires: "Gravity"
{
"canShineCharge": {
"usedTiles": 19,
"gentleUpTiles": 2,
"openEnd": 1
}
}
"canShinechargeMovement"
{
"or": [
{
"shinespark": {
"frames": 60,
"excessFrames": 5
}
},
{
"and": [
"canMidairShinespark",
{
"shinespark": {
"frames": 55,
"excessFrames": 5
}
}
]
},
{
"and": [
"canMidairShinespark",
"HiJump",
{
"shinespark": {
"frames": 50,
"excessFrames": 5
}
}
]
},
{
"and": [
"canShinechargeMovementComplex",
"HiJump",
{
"shinespark": {
"frames": 47,
"excessFrames": 5
}
}
]
},
{
"and": [
"canShinechargeMovementComplex",
"HiJump",
"canSpeedyJump",
{
"shinespark": {
"frames": 44,
"excessFrames": 5
}
}
]
}
]
}Clears obstacles: B Dev note: This could have a few more excess frames if not getting on top of the block at 2. |
|
Entrance condition: {
"comeInShinecharging": {
"length": 18,
"openEnd": 1,
"gentleUpTiles": 2
}
}Requires: "Gravity"
"canShinechargeMovement"
{
"or": [
{
"shinespark": {
"frames": 60,
"excessFrames": 5
}
},
{
"and": [
"canMidairShinespark",
{
"shinespark": {
"frames": 55,
"excessFrames": 5
}
}
]
},
{
"and": [
"canMidairShinespark",
"HiJump",
{
"shinespark": {
"frames": 50,
"excessFrames": 5
}
}
]
},
{
"and": [
"canShinechargeMovementComplex",
"HiJump",
{
"shinespark": {
"frames": 47,
"excessFrames": 5
}
}
]
},
{
"and": [
"canShinechargeMovementComplex",
"HiJump",
"canSpeedyJump",
{
"shinespark": {
"frames": 44,
"excessFrames": 5
}
}
]
}
]
}Clears obstacles: B Dev note: This could have a few more excess frames if not getting on top of the block to go to 2. |
|
Entrance condition: {
"comeInShinecharged": {}
}Requires: {
"shineChargeFrames": 110
}
"Gravity"
"canShinechargeMovement"
{
"shinespark": {
"frames": 60
}
}Clears obstacles: B Dev note: This could have a few more excess frames if not getting on top of the block to go to 2. |
|
Entrance condition: {
"comeInShinecharging": {
"length": 4,
"openEnd": 1
}
}Requires: "canWaterShineCharge"
"canShinechargeMovement"
{
"or": [
{
"shinespark": {
"frames": 61,
"excessFrames": 7
}
},
{
"and": [
"canMidairShinespark",
{
"shinespark": {
"frames": 56,
"excessFrames": 7
}
}
]
},
{
"and": [
"canMidairShinespark",
"HiJump",
{
"shinespark": {
"frames": 52,
"excessFrames": 7
}
}
]
}
]
}Clears obstacles: B Dev note: This could have a few more excess frames if not getting on top of the block to go to 2. This runway length is just an estimate of the worst case scenario for difficulties that can't use canStutterWaterShineCharge. |
|


Entrance condition: {
"comeInStutterShinecharging": {
"minTiles": 2
}
}Requires: "canStutterWaterShineCharge"
"canShinechargeMovement"
{
"or": [
{
"shinespark": {
"frames": 61,
"excessFrames": 7
}
},
{
"and": [
"canMidairShinespark",
{
"shinespark": {
"frames": 56,
"excessFrames": 7
}
}
]
},
{
"and": [
"canMidairShinespark",
"HiJump",
{
"shinespark": {
"frames": 52,
"excessFrames": 7
}
}
]
}
]
}Clears obstacles: B Dev note: This could have a few more excess frames if not getting on top of the block to go to 2. |
|
With only 1 tile of runway, this requires releasing forward for 1 or 2 frames and repressing forward on the last possible frame. Entrance condition: {
"comeInStutterShinecharging": {
"minTiles": 1
}
}Requires: "canPreciseStutterWaterShineCharge"
"canShinechargeMovement"
{
"or": [
{
"shinespark": {
"frames": 61,
"excessFrames": 7
}
},
{
"and": [
"canMidairShinespark",
{
"shinespark": {
"frames": 56,
"excessFrames": 7
}
}
]
},
{
"and": [
"canMidairShinespark",
"HiJump",
{
"shinespark": {
"frames": 52,
"excessFrames": 7
}
}
]
}
]
}Clears obstacles: B Dev note: This could have a few more excess frames if not getting on top of the block to go to 2. |
|


Get into position as close to the center of the room as possible while not being too close to any baby turtles. Start an IBJ without hiting any baby turtles otherwhise Mama Turtle will wake up. Entrance condition: {
"comeInWithGMode": {
"mode": "any",
"morphed": true
}
}Requires: "Gravity" "h_artificialMorphLongIBJ" "h_artificialMorphBombHorizontally" Clears obstacles: B |
|

Place a bomb next to one of the baby turtles, then use spring ball to get on Mama Turtle's back. Start an IBJ above the waterline to get to the item. Entrance condition: {
"comeInWithGMode": {
"mode": "any",
"morphed": true
}
}Requires: "canSuitlessMaridia" "h_artificialMorphSpringBall" "h_artificialMorphLongIBJ" Clears obstacles: A, B |
|
Requires: "Gravity"
{
"or": [
"canWallJump",
"SpaceJump",
"canLongIBJ"
]
} |
From: 1
Left Door
To: 3
Hidden Right Item
Requires getting back on Mama Turtle while she is at the right. The safest way is to have a normalized fall speed with either a full height jump or falling from the ledge above. If suitless, walking off the right ledge when she hits the left wall can be a good indicator to help land on her safely. Shrinking Samus' hitbox after touching the turtles back will also usually help. While near the right wall, shoot the item and grab it. If the shot misses, carefully fall back down and safely land on Mama Turtle again. After grabbing the item, fall on her again to avoid taking a hit; jump to the left at the top of the ride to escape the water safely. Requires: "h_navigateUnderwater"
"canUseEnemies"
"canCarefulJump"
{
"or": [
"canTrickyDodgeEnemies",
{
"and": [
"Gravity",
"canTrickyJump"
]
},
{
"enemyDamage": {
"enemy": "Kame (Tatori)",
"type": "contact",
"hits": 1
}
},
"h_pauseAbuseMinimalReserveRefill"
]
}Clears obstacles: A Dev note: FIXME: Is it worth adding a suitless bootless strat that follows this and gets back to the left without another hit? |
|
Ride Mama Turtle. To avoid getting hit, shoot one of her babies to wake her up, then quickly get on her back. Requires: {
"obstaclesNotCleared": [
"A"
]
}
"h_navigateUnderwater"
"canUseEnemies"
{
"or": [
"canCarefulJump",
{
"enemyDamage": {
"enemy": "Kame (Tatori)",
"type": "contact",
"hits": 1
}
}
]
}Clears obstacles: A |
|
Requires getting back on Mama Turtle while she is at the right. The safest way is to have a normalized fall speed with either a full height jump or falling from the ledge above. If suitless, walking off the right ledge when she hits the left wall can be a good indicator to help land on her safely. Shrinking Samus' hitbox after touching the turtles back will also usually help. Requires: "h_navigateUnderwater"
"canUseEnemies"
{
"or": [
"canTrickyDodgeEnemies",
{
"and": [
"Gravity",
"canTrickyJump"
]
},
{
"haveBlueSuit": {}
},
{
"enemyDamage": {
"enemy": "Kame (Tatori)",
"type": "contact",
"hits": 1
}
},
"h_pauseAbuseMinimalReserveRefill"
]
}Clears obstacles: A |
|

Requires: "Gravity"
{
"or": [
"canConsecutiveWallJump",
{
"and": [
"canWallJump",
"HiJump"
]
},
"SpaceJump",
"canLongIBJ"
]
} |
From: 1
Left Door
To: 5
Top Left Junction
Gravity jump, then quickly pause and turn on Spring Ball for a Spring Ball jump. Requires: "canGravityJump" "HiJump" "canTrickySpringBallJump" |
|

Letting Mama Turtle sleep, climb the right wall using HiJump (with a down-grab) and escape the water with Space Jump . Requires: "HiJump"
"canDownGrab"
{
"or": [
{
"and": [
"canSpaceJumpWaterBounce",
"canWallJump"
]
},
"canSpaceJumpWaterEscape"
]
} |
|
Requires: "Gravity"
{
"or": [
"canConsecutiveWallJump",
{
"and": [
"canWallJump",
"HiJump"
]
},
"SpaceJump",
"canLongIBJ"
]
} |
|
Requires getting back on Mama Turtle while she is at the right. The safest way is to have a normalized fall speed with either a full height jump or falling from the ledge above. If suitless, walking off the right ledge when she hits the left wall can be a good indicator to help land on her safely. Shrinking Samus' hitbox after touching the turtles back will also usually help. At the top of the ride, jump to the top right ledge. Requires: "h_navigateUnderwater"
"canUseEnemies"
{
"or": [
"canTrickyDodgeEnemies",
{
"and": [
"Gravity",
"canTrickyJump"
]
},
{
"haveBlueSuit": {}
},
{
"enemyDamage": {
"enemy": "Kame (Tatori)",
"type": "contact",
"hits": 1
}
},
"h_pauseAbuseMinimalReserveRefill"
]
}Clears obstacles: A |
|

Requires: "Gravity"
{
"canShineCharge": {
"usedTiles": 19,
"gentleUpTiles": 2,
"openEnd": 1
}
}
{
"or": [
{
"shinespark": {
"frames": 43,
"excessFrames": 4
}
},
{
"and": [
"canMidairShinespark",
{
"shinespark": {
"frames": 37,
"excessFrames": 5
}
}
]
},
{
"and": [
"canMidairShinespark",
"HiJump",
{
"shinespark": {
"frames": 32,
"excessFrames": 4
}
}
]
},
{
"and": [
"canShinechargeMovementComplex",
"HiJump",
"canSpeedyJump",
{
"shinespark": {
"frames": 24,
"excessFrames": 5
}
}
]
}
]
} |
From: 1
Left Door
To: 6
Top Right Junction
Entrance condition: {
"comeInShinecharging": {
"length": 18,
"openEnd": 1,
"gentleUpTiles": 2
}
}Requires: "Gravity"
{
"or": [
{
"shinespark": {
"frames": 43,
"excessFrames": 4
}
},
{
"and": [
"canMidairShinespark",
{
"shinespark": {
"frames": 37,
"excessFrames": 5
}
}
]
},
{
"and": [
"canMidairShinespark",
"HiJump",
{
"shinespark": {
"frames": 32,
"excessFrames": 4
}
}
]
},
{
"and": [
"canShinechargeMovementComplex",
"HiJump",
"canSpeedyJump",
{
"shinespark": {
"frames": 26,
"excessFrames": 5
}
}
]
}
]
} |
From: 1
Left Door
To: 6
Top Right Junction
Entrance condition: {
"comeInShinecharged": {}
}Requires: {
"shineChargeFrames": 80
}
"Gravity"
{
"shinespark": {
"frames": 43,
"excessFrames": 4
}
} |
|
Entrance condition: {
"comeInShinecharging": {
"length": 4,
"openEnd": 1
}
}Requires: "canWaterShineCharge"
"canShinechargeMovement"
{
  "or": [
    {
      "shinespark": {
        "frames": 47,
        "excessFrames": 5
      }
    },
    {
      "and": [
        "canMidairShinespark",
        {
          "shinespark": {
            "frames": 44,
            "excessFrames": 5
          }
        }
      ]
    },
    {
      "and": [
        "canMidairShinespark",
        "HiJump",
        {
          "shinespark": {
            "frames": 41,
            "excessFrames": 5
          }
        }
      ]
    }
  ]
}Dev note: This runway length is just an estimate of the worst case scenario for difficulties that can't use canStutterWaterShineCharge. |
From: 1
Left Door
To: 6
Top Right Junction

Requires at least 2 tiles in the adjacent room. Entrance condition: {
"comeInStutterShinecharging": {
"minTiles": 2
}
}Requires: "canShinechargeMovement"
{
"or": [
{
"shinespark": {
"frames": 47,
"excessFrames": 5
}
},
{
"and": [
"canMidairShinespark",
{
"shinespark": {
"frames": 44,
"excessFrames": 5
}
}
]
},
{
"and": [
"canMidairShinespark",
"HiJump",
{
"shinespark": {
"frames": 41,
"excessFrames": 5
}
}
]
}
]
} |
From: 1
Left Door
To: 6
Top Right Junction
With only 1 tile of runway, this requires a single-frame stutter (release forward then repress on the next frame), on the last possible frame. Entrance condition: {
"comeInStutterShinecharging": {
"minTiles": 1
}
}Requires: "canPreciseStutterWaterShineCharge"
"canInsaneJump"
"canShinechargeMovement"
{
"or": [
{
"shinespark": {
"frames": 47,
"excessFrames": 5
}
},
{
"and": [
"canMidairShinespark",
{
"shinespark": {
"frames": 44,
"excessFrames": 5
}
}
]
},
{
"and": [
"canMidairShinespark",
"HiJump",
{
"shinespark": {
"frames": 41,
"excessFrames": 5
}
}
]
}
]
} |
From: 1
Left Door
To: 6
Top Right Junction
IBJ up a bit, then bomb over Mama Turtle and her babies to prevent her from waking. Then IBJ to the high right ledge before exiting g-mode. Entrance condition: {
"comeInWithGMode": {
"mode": "any",
"morphed": true
}
}Requires: "Gravity" "h_artificialMorphLongIBJ" "h_artificialMorphBombHorizontally" |
|
Resets obstacles: B |
|

Get a bit of run speed on the block and jump to the right ledge. If Samus misses the ledge, try to shoot the block to still collect the item. Requires: {
"or": [
{
"and": [
"canDash",
"canCarefulJump",
"canDisableEquipment"
]
},
"canUseGrapple",
"canWallJump",
"SpaceJump"
]
}
{
"obstaclesCleared": [
"B"
]
}Resets obstacles: B Collects items: 2 |
|
Requires: {
"or": [
"Gravity",
{
"obstaclesNotCleared": [
"A"
]
},
{
"enemyDamage": {
"enemy": "Kame (Tatori)",
"type": "contact",
"hits": 1
}
}
]
}
{
"or": [
"Gravity",
"HiJump",
"canSpringBallJumpMidAir",
"h_underwaterCrouchJumpDownGrab",
"canUseEnemies"
]
} |
|
Requires: "canSuitlessMaridia" "canCarefulJump" "HiJump" |
|
Jump over or on to Mama Turtle. The easiest method is to jump over her by jumping on her babies, or to Morph under her. Requires: "canSuitlessMaridia"
"canTrickyJump"
{
"or": [
"canSpringBallJumpMidAir",
"h_underwaterCrouchJumpDownGrab",
"canUseEnemies"
]
} |
|

With a miss of the Grapple, if Samus hasn't moved horizontally, simply fall straight down to land safely back on Mama Turtle. Requires: "canUseGrapple"
{
"or": [
"HiJump",
"canSpringBallJumpMidAir"
]
}
"h_midAirShootUp" |
|
If Mama Turtle is in her starting location, stand on the rightmost side of her to be aligned below the grapple block. With a miss, if Samus hasn't moved horizontally, simply fall straight down to land safely back on to her. Requires: "canPreciseGrapple" "h_midAirShootUp" Clears obstacles: B |
|
Requires: "SpaceJump" Clears obstacles: B |
|

Once out of the water, jump into an IBJ. With a miss, if Samus hasn't moved horizontally, simply fall straight down to land safely back on Mama Turtle. Requires: "canJumpIntoIBJ"
{
"or": [
"canLongIBJ",
"HiJump"
]
}Clears obstacles: B |
|

Spring Ball jump from Mama Turtle's back. With a fail, if Samus hasn't moved horizontally, simply fall straight down to land safely back on Mama Turtle. Requires: "HiJump" "canSpringBallJumpMidAir" Clears obstacles: B |
|
Reveal the item while jumping to the right wall and collect it as Samus falls past. Requires: "canDash"
"canDodgeWhileShooting"
"canCarefulJump"
{
"notable": "Shoot Down and Grab Right Item"
}
{
"or": [
"Wave",
"Spazer",
"h_usePowerBomb",
{
"and": [
"canTrickyJump",
"canDodgeWhileShooting",
{
"ammo": {
"type": "Missile",
"count": 5
}
}
]
},
{
"and": [
"canTrickyJump",
"canResetFallSpeed",
"canDownBack"
]
},
"canInsaneJump"
]
} |
|
Requires: {
"or": [
"canDash",
"canTrickyJump"
]
}Dev note: To reach the upper ledge without dashing, Mama Turtle could be moved over to the left. |
|
Requires: {
"or": [
"canWallJump",
"SpaceJump",
{
"and": [
"HiJump",
"canDash",
"canCarefulJump"
]
},
{
"and": [
"canUseGrapple",
{
"or": [
"HiJump",
"canSpringBallJumpMidAir",
"canPreciseGrapple"
]
},
"h_midAirShootUp"
]
}
]
} |
|
Requires: {
"or": [
"SpaceJump",
{
"and": [
"canPreciseGrapple",
{
"or": [
"h_midAirShootUp",
"HiJump",
"canWallJump"
]
}
]
}
]
}Clears obstacles: B |
|

Grappling the block does not require canPreciseGrapple if Mama Turtle is asleep, as there is no risk of death on a miss. Requires: "canUseGrapple"
"h_midAirShootUp"
{
"obstaclesNotCleared": [
"A"
]
}Clears obstacles: B |
|
Starting from the top left ledge, wall jump to place a bomb or Power Bomb just below and to the right of the bottom left plant on the wall. Use the bomb to boost Samus towards the item, then unmorph to reduce her fall speed and barely reach the item. Requires: "canWallJumpBombBoost" |
|

Briefly run on the top ledge on either side (left is slightly easier) then jump and wall jump on the grapple block. Requires: "HiJump" "canTrickyJump" "canSpeedyJump" "canWallJump" Clears obstacles: B |
From: 5
Top Left Junction
To: 2
Top Item


Briefly run on the top left ledge then perform a last-frame jump to barely touch the item and then fall. It is best not to moon-walk back against the wall and instead press against it and then turn around to be 1 pixel away. A wall-jump check as Samus is close to the item can expand her hitbox and make it possible from either pixel. Note that this strat is also possible on the right side of the room, but is tighter and requires backing up against the wall. Requires: "HiJump" "canTrickyJump" "canSpeedyJump" |
|

Requires: "canSpringwall" "canResetFallSpeed" |
|
Requires: "canSpringwall" "canSpringFling" Clears obstacles: B |
|
Pausing and morphing early can help by giving Samus a bit of a Spring Fling. Unmorph to reset Samus' fall speed to grab the item. Requires: "canTrickySpringBallJump" "canTrickyJump" "canResetFallSpeed" |
From: 5
Top Left Junction
To: 2
Top Item
Time a pause before jumping to give a significant momentum boost in order to reach the Grapple Block. Requires: "canTrickySpringBallJump" "canTrickyJump" "canSpringFling" Clears obstacles: B |
|

Perform a running stationary spinjump from a precise spot, with 3 frames of dash speed (the maximum possible); then do a CWJ off the wall above, one tile further out. This makes it possible to just barely walljump off the grapple block. Requires: {
"notable": "Insane Walljump"
}
"HiJump"
"canInsaneJump"
"canStationarySpinJump"
"canInsaneWallJump"
"canCWJ"Clears obstacles: B |
|
To save energy, start from the upper right ledge; it may require repositioning Mama Turtle to the right to get to the ledge. Requires: "h_storedSpark"
{
"or": [
{
"shinespark": {
"frames": 10,
"excessFrames": 6
}
},
{
"and": [
"HiJump",
{
"shinespark": {
"frames": 6,
"excessFrames": 5
}
}
]
}
]
} |
|
Requires: {
"or": [
"canPreciseGrapple",
"SpaceJump"
]
}Clears obstacles: B |
|
Grappling the block does not require canPreciseGrapple if Mama Turtle is asleep, as there is no risk of death on a miss. Requires: "canUseGrapple"
{
"obstaclesNotCleared": [
"A"
]
}Clears obstacles: B |
|
Briefly run on the top ledge on either side (left is slightly easier) then jump and wall jump on the grapple block. Requires: "HiJump" "canTrickyJump" "canSpeedyJump" "canWallJump" Clears obstacles: B |
|
It is possible to springwall to grab the item, and then morph and reset fall speed again after entering the water suitless to land safely on the left ledge. Requires: "canSpringwall" "canResetFallSpeed" |
From: 6
Top Right Junction
To: 3
Hidden Right Item
From the safe spot above the item, shoot down the wall to break the item block. After hearing it break, jump down and collect the item. Alternatively, a Power Bomb can be used while riding Mama Turtle or on the top right ledge. Requires: {
"notable": "Shoot Down and Grab Right Item"
}Dev note: It is minimally easier to shoot the block with a wide beam. A Power Bomb can also be used, but it doesn't seem intuitive at this difficulty. |
From: 6
Top Right Junction
To: 6
Top Right Junction
From the safe spot above the item, shoot down the wall to break the item block. After hearing it break, spin jump down and collect the item, then walljump back up; or carefully descend and grab it with SpaceJump. Requires: {
"notable": "Shoot Down and Grab Right Item"
}
{
"or": [
"canPreciseWallJump",
{
"and": [
"canTrickyJump",
"SpaceJump"
]
}
]
}Collects items: 3 Dev note: It is minimally easier to shoot the block with a wide beam. A Power Bomb can also be used, but it doesn't seem intuitive at this difficulty. |
{
"$schema": "../../../schema/m3-room.schema.json",
"id": 178,
"name": "Mama Turtle Room",
"area": "Maridia",
"subarea": "Outer",
"roomAddress": "0x7D055",
"roomEnvironments": [
{
"heated": false
}
],
"mapTileMask": [
[
0,
1,
1
],
[
0,
1,
1
],
[
0,
1,
1
],
[
1,
1,
1
]
],
"nodes": [
{
"id": 1,
"name": "Left Door",
"nodeType": "door",
"nodeSubType": "blue",
"nodeAddress": "0x001a408",
"doorOrientation": "left",
"doorEnvironments": [
{
"physics": "water"
}
],
"mapTileMask": [
[
0,
1,
1
],
[
0,
1,
1
],
[
0,
1,
1
],
[
2,
2,
2
]
]
},
{
"id": 2,
"name": "Top Item",
"nodeType": "item",
"nodeSubType": "visible",
"nodeItem": "ETank",
"nodeAddress": "0x7C47D",
"mapTileMask": [
[
0,
2,
1
],
[
0,
2,
1
],
[
0,
2,
1
],
[
1,
1,
1
]
],
"locks": [
{
"name": "Dummy Item Lock",
"lockType": "gameFlag",
"unlockStrats": [
{
"name": "Base (Collect Item)",
"notable": false,
"requires": [],
"flashSuitChecked": true,
"blueSuitChecked": true
}
]
}
]
},
{
"id": 3,
"name": "Hidden Right Item",
"nodeType": "item",
"nodeSubType": "hidden",
"nodeItem": "Missile",
"nodeAddress": "0x7C483",
"mapTileMask": [
[
0,
1,
1
],
[
0,
1,
2
],
[
0,
1,
2
],
[
1,
1,
1
]
],
"locks": [
{
"name": "Dummy Item Lock",
"lockType": "gameFlag",
"unlockStrats": [
{
"name": "Base (Collect Item)",
"notable": false,
"requires": [],
"flashSuitChecked": true,
"blueSuitChecked": true
}
]
}
]
},
{
"id": 4,
"name": "On Mama Turtle",
"nodeType": "junction",
"nodeSubType": "junction",
"mapTileMask": [
[
0,
1,
1
],
[
0,
1,
1
],
[
0,
2,
2
],
[
1,
1,
1
]
],
"note": "On Mama Turtle's back, above the waterline, directly above her starting position."
},
{
"id": 5,
"name": "Top Left Junction",
"nodeType": "junction",
"nodeSubType": "junction",
"mapTileMask": [
[
0,
1,
1
],
[
0,
2,
1
],
[
0,
2,
1
],
[
1,
1,
1
]
],
"note": "Out of the water, on the top left ledge."
},
{
"id": 6,
"name": "Top Right Junction",
"nodeType": "junction",
"nodeSubType": "junction",
"mapTileMask": [
[
0,
1,
2
],
[
0,
1,
2
],
[
0,
1,
2
],
[
1,
1,
1
]
],
"note": "Out of the water, on the top right ledge above item."
}
],
"obstacles": [
{
"id": "A",
"name": "Mama Turtle Sleeping",
"obstacleType": "abstract"
},
{
"id": "B",
"name": "Get on top of the Grapple Block",
"obstacleType": "abstract"
}
],
"enemies": [
{
"id": "e1",
"groupName": "Mama Turtle",
"enemyName": "Kame (Tatori)",
"quantity": 1,
"homeNodes": [
1
]
},
{
"id": "e2",
"groupName": "Baby Turtles",
"enemyName": "Kame Baby",
"quantity": 4,
"homeNodes": [
1
]
}
],
"strats": [
{
"link": [
1,
1
],
"name": "Base (Unlock Door)",
"requires": [],
"unlocksDoors": [
{
"types": [
"ammo"
],
"requires": []
}
],
"flashSuitChecked": true,
"blueSuitChecked": true
},
{
"link": [
1,
1
],
"name": "Base (Come In Normally)",
"entranceCondition": {
"comeInNormally": {}
},
"requires": [],
"flashSuitChecked": true,
"blueSuitChecked": true
},
{
"link": [
1,
1
],
"name": "Base (Come In With Mockball)",
"entranceCondition": {
"comeInWithMockball": {
"adjacentMinTiles": 0,
"remoteAndLandingMinTiles": [
[
0,
0
]
],
"speedBooster": "any"
}
},
"requires": [],
"flashSuitChecked": true,
"blueSuitChecked": true
},
{
"name": "Base (Collect Item)",
"notable": false,
"requires": [],
"flashSuitChecked": true,
"blueSuitChecked": true,
"link": [
2,
2
],
"collectsItems": [
2
]
},
{
"name": "Base (Collect Item)",
"notable": false,
"requires": [],
"flashSuitChecked": true,
"blueSuitChecked": true,
"link": [
3,
3
],
"collectsItems": [
3
]
},
{
"id": 1,
"link": [
1,
1
],
"name": "Leave with Runway",
"requires": [],
"exitCondition": {
"leaveWithRunway": {
"length": 19,
"openEnd": 1,
"gentleDownTiles": 2
}
},
"flashSuitChecked": true,
"blueSuitChecked": true
},
{
"id": 2,
"link": [
1,
1
],
"name": "Stutter Shinecharge, Leave With Spark",
"entranceCondition": {
"comeInStutterShinecharging": {
"minTiles": 2
}
},
"requires": [
"canStutterWaterShineCharge",
"canShinechargeMovementComplex",
{
"or": [
{
"shinespark": {
"frames": 12,
"excessFrames": 0
}
},
{
"and": [
"canShinechargeMovementTricky",
{
"shinespark": {
"frames": 3,
"excessFrames": 0
}
}
]
}
]
}
],
"exitCondition": {
"leaveWithSpark": {}
},
"unlocksDoors": [
{
"types": [
"super"
],
"requires": []
},
{
"types": [
"missiles",
"powerbomb"
],
"requires": [
"never"
]
}
],
"flashSuitChecked": true,
"blueSuitChecked": true
},
{
"id": 57,
"link": [
1,
1
],
"name": "Very Precise Stutter Shinecharge, Leave With Spark",
"entranceCondition": {
"comeInStutterShinecharging": {
"minTiles": 1
}
},
"requires": [
"canShinechargeMovementComplex",
"canPreciseStutterWaterShineCharge",
"canInsaneJump",
"h_shinechargeMaxRunway",
{
"or": [
{
"shinespark": {
"frames": 12,
"excessFrames": 0
}
},
{
"and": [
"canShinechargeMovementTricky",
{
"shinespark": {
"frames": 3,
"excessFrames": 0
}
}
]
}
]
}
],
"exitCondition": {
"leaveWithSpark": {}
},
"unlocksDoors": [
{
"types": [
"super"
],
"requires": []
},
{
"types": [
"missiles",
"powerbomb"
],
"requires": [
"never"
]
}
],
"flashSuitChecked": true,
"blueSuitChecked": true,
"note": [
"With only 1 tile of runway, this requires a single-frame stutter (release forward then repress on the next frame), on the last possible frame."
]
},
{
"id": 58,
"link": [
1,
1
],
"name": "Precise Stutter Shinecharge, Leave Shinecharged (5-tile runway)",
"entranceCondition": {
"comeInStutterShinecharging": {
"minTiles": 5
}
},
"requires": [
"canPreciseStutterWaterShineCharge",
"canShinechargeMovementTricky",
"canInsaneJump",
{
"shineChargeFrames": 130
},
{
"or": [
"canBeVeryPatient",
{
"shineChargeFrames": 15
}
]
}
],
"exitCondition": {
"leaveShinecharged": {}
},
"unlocksDoors": [
{
"types": [
"super"
],
"requires": []
},
{
"types": [
"missiles",
"powerbomb"
],
"requires": [
"never"
]
}
],
"flashSuitChecked": true,
"blueSuitChecked": true,
"note": [
"With a runway of 5 tiles (open end) in the other room,",
"the ideal timing for the stutter is to release forward for 5 frames, and repress forward on the last possible frame before the transition.",
"Other timings can work, but will gain the shinecharge further from the door, leaving fewer shinecharge frames remaining.",
"After gaining the shinecharge, continue holding forward in order to make Samus stand.",
"Then turnaround spin jump back toward the door, and continue spin jumping to reach the transition with a shinecharge."
]
},
{
"id": 59,
"link": [
1,
1
],
"name": "Precise Stutter Shinecharge, Leave Shinecharged (4-tile runway)",
"entranceCondition": {
"comeInStutterShinecharging": {
"minTiles": 4
}
},
"requires": [
"canPreciseStutterWaterShineCharge",
"canShinechargeMovementTricky",
"canInsaneJump",
{
"shineChargeFrames": 140
},
{
"or": [
"canBeVeryPatient",
{
"shineChargeFrames": 10
}
]
}
],
"exitCondition": {
"leaveShinecharged": {}
},
"unlocksDoors": [
{
"types": [
"super"
],
"requires": []
},
{
"types": [
"missiles",
"powerbomb"
],
"requires": [
"never"
]
}
],
"flashSuitChecked": true,
"blueSuitChecked": true,
"note": [
"With only a runway of 4 tiles (open end) in the other room,",
"the ideal timing for the stutter is to release forward for 4 frames, and repress forward on the last possible frame before the transition.",
"It also works well to release forward for 3 frames and repress on the last possible frame.",
"Other timings can also work, but may gain the shinecharge further from the door, leaving fewer shinecharge frames remaining.",
"After gaining the shinecharge, continue holding forward in order to make Samus stand.",
"Then turnaround spin jump back toward the door, and continue spin jumping to reach the transition with a shinecharge."
]
},
{
"id": 60,
"link": [
1,
1
],
"name": "Precise Stutter Shinecharge, Leave Shinecharged (3-tile runway)",
"entranceCondition": {
"comeInStutterShinecharging": {
"minTiles": 3
}
},
"requires": [
"canPreciseStutterWaterShineCharge",
"canShinechargeMovementTricky",
"canInsaneJump",
{
"shineChargeFrames": 145
},
{
"or": [
"canBeVeryPatient",
{
"shineChargeFrames": 10
}
]
}
],
"exitCondition": {
"leaveShinecharged": {}
},
"unlocksDoors": [
{
"types": [
"super"
],
"requires": []
},
{
"types": [
"missiles",
"powerbomb"
],
"requires": [
"never"
]
}
],
"flashSuitChecked": true,
"blueSuitChecked": true,
"note": [
"With only a runway of 3 tiles (open end) in the other room,",
"the ideal timing for the stutter is to release forward for 3 or 4 frames, and repress forward on the last possible frame before the transition.",
"Other timings can work, but will gain the shinecharge further from the door, leaving fewer shinecharge frames remaining.",
"After gaining the shinecharge, continue holding forward in order to make Samus stand.",
"Then turnaround spin jump back toward the door, and continue spin jumping to reach the transition with a shinecharge.",
"Alternatively, with greater difficulty but saving some shinecharge frames,",
"after performing the turnaround spin jump, briefly moonwalk back, then retain momentum by boomeranging forward",
"(switching from pressing backward to pressing forward on the next frame),",
"and arm pump to reach the door quickly."
],
"devNote": [
"The same shinecharge frames could be achieved with a closed end runway (effective length of 2.4375),",
"with a 3-frame stutter, but there doesn't appear to be any application."
]
},
{
"id": 61,
"link": [
1,
1
],
"name": "Precise Stutter Shinecharge, Leave Shinecharged (2-tile runway)",
"entranceCondition": {
"comeInStutterShinecharging": {
"minTiles": 2
}
},
"requires": [
"canPreciseStutterWaterShineCharge",
"canShinechargeMovementTricky",
"canInsaneJump",
{
"shineChargeFrames": 150
},
{
"or": [
"canBeVeryPatient",
{
"shineChargeFrames": 15
}
]
}
],
"exitCondition": {
"leaveShinecharged": {}
},
"unlocksDoors": [
{
"types": [
"super"
],
"requires": []
},
{
"types": [
"missiles",
"powerbomb"
],
"requires": [
"never"
]
}
],
"flashSuitChecked": true,
"blueSuitChecked": true,
"note": [
"With only a runway of 2 tiles (open end) in the other room,",
"the ideal timing for the stutter is to release forward for 3 frames, and repress forward on the last possible frame before the transition.",
"Other timings can work, but will gain the shinecharge further from the door, leaving fewer shinecharge frames remaining.",
"After gaining the shinecharge, continue holding forward in order to make Samus stand.",
"Then turnaround spin jump back toward the door, and continue spin jumping to reach the transition with a shinecharge.",
"Alternatively, with greater difficulty but saving some shinecharge frames,",
"after performing the turnaround spin jump, briefly moonwalk back, then retain momentum by boomeranging forward",
"(switching from pressing backward to pressing forward on the next frame),",
"and arm pump to reach the door quickly."
],
"devNote": [
"FIXME: The canBeVeryPatient requirement is for difficulty placement of the boomerang method;",
"but the boomerang (or maybe specifically the moonwalk boomerang) should possibly be its own tech,",
"and the same with rapid arm pumping."
]
},
{
"id": 62,
"link": [
1,
1
],
"name": "Precise Stutter Shinecharge, Leave Shinecharged (1-tile runway)",
"entranceCondition": {
"comeInStutterShinecharging": {
"minTiles": 1
}
},
"requires": [
"canPreciseStutterWaterShineCharge",
"canInsaneJump",
"canBeVeryPatient",
"canShinechargeMovementTricky",
{
"shineChargeFrames": 160
}
],
"exitCondition": {
"leaveShinecharged": {}
},
"unlocksDoors": [
{
"types": [
"super"
],
"requires": []
},
{
"types": [
"missiles",
"powerbomb"
],
"requires": [
"never"
]
}
],
"flashSuitChecked": true,
"blueSuitChecked": true,
"note": [
"With only 1 tile of runway in the other room, Samus should ideally start on the last pixel of runway with X subpixels of $3FFF or less.",
"Run toward the door, releasing forward for exactly 1 frame and pressing it again on the last possible frame before the transition.",
"Starting with X subpixels of $7FFF can also work (e.g., by simply backing against the door ledge, then jumping and turning around mid-air);",
"in this case, Samus must advance 1 or 2 pixels with an arm pump before the transition (e.g., firing a shot or pressing and/or releasing an angle button),",
"and the shinecharge will be gained slightly further away from the door.",
"After gaining the shinecharge, continue holding forward in order to make Samus stand.",
"Then turnaround spin jump back toward the door, and continue spin jumping to reach the transition with a shinecharge.",
"Alternatively, with greater difficulty but saving some shinecharge frames,",
"after performing the turnaround spin jump, briefly moonwalk back, then retain momentum by boomeranging forward",
"(switching from pressing backward to pressing forward on the next frame),",
"and arm pump to reach the door quickly."
],
"detailNote": [
"Ideal subpixels ($3FFF) can be achieved using one of several methods:",
"1) press forward against the door ledge (or a wall aligned with it);",
"jump, and while mid-air, tap forward for exactly 1 frame to land with subpixels $BFFF,",
"moonwalk back for exactly 1 frame to end with subpixels $3FFF.",
"2) press forward against the door ledge (from a platform below, assuming one exists)",
"turn around (while on the ground), and moonwalk back two pixels,",
"then jump and mid-air turnaround onto the ledge;",
"if Samus jumped from the correct pixel but does not land on the ledge, then it was needed to moonwalk back 1 more frame;",
"in this case it is possible to retry by doing a mid-air turnaround back onto the platform, and moonwalking back for 1 frame.",
"3) if X-Ray is available, press against the door ledge (from a platform below, assuming one exists)",
"turn around (while on the ground), then jump and mid-air turnaround toward the door,",
"and use X-Ray to turnaround in place away from the door;",
"repeat this sequence 3 more times: jump, mid-air turnaround, X-Ray turnaround;",
"then do one more jump and mid-air turnaround, high enough to land on the door ledge,",
"and Samus should be in the correct position with subpixels $3FFF."
]
},
{
"id": 63,
"link": [
1,
1
],
"name": "Precise Stutter Shinecharge, Leave With Temporary Blue",
"entranceCondition": {
"comeInStutterShinecharging": {
"minTiles": 2
}
},
"requires": [
"canPreciseStutterWaterShineCharge",
"canXRayTurnaround",
"canChainTemporaryBlue"
],
"exitCondition": {
"leaveWithTemporaryBlue": {}
},
"unlocksDoors": [
{
"types": [
"ammo"
],
"requires": []
}
],
"flashSuitChecked": true,
"blueSuitChecked": true
},
{
"id": 64,
"link": [
1,
1
],
"name": "Very Precise Stutter Shinecharge, Leave With Temporary Blue",
"entranceCondition": {
"comeInStutterShinecharging": {
"minTiles": 1
}
},
"requires": [
"canPreciseStutterWaterShineCharge",
"canInsaneJump",
"canXRayTurnaround",
"canChainTemporaryBlue"
],
"exitCondition": {
"leaveWithTemporaryBlue": {}
},
"unlocksDoors": [
{
"types": [
"ammo"
],
"requires": []
}
],
"flashSuitChecked": true,
"blueSuitChecked": true,
"note": [
"With only 1 tile of runway in the other room, Samus should ideally start on the last pixel of runway with X subpixels of $3FFF or less.",
"Run toward the door, releasing forward for exactly 1 frame and pressing it again on the last possible frame before the transition.",
"Starting with X subpixels of $7FFF can also work (e.g., by simply backing against the door ledge, then jumping and turning around mid-air);",
"in this case, Samus must advance 1 or 2 pixels with an arm pump before the transition (e.g., firing a shot or pressing and/or releasing an angle button),"
],
"devNote": [
"FIXME: The canInsaneJump requirement is for difficulty placement; use a more appropriate tech if possible."
]
},
{
"id": 3,
"link": [
1,
1
],
"name": "Crystal Flash",
"requires": [
"h_CrystalFlash"
],
"flashSuitChecked": true,
"blueSuitChecked": true
},
{
"id": 71,
"link": [
1,
1
],
"name": "Come in Shinecharging, Crystal Spark",
"entranceCondition": {
"comeInShinecharging": {
"length": 18,
"openEnd": 0,
"gentleUpTiles": 2
},
"comesInHeated": "no"
},
"requires": [
"Gravity",
"h_CrystalSpark"
],
"flashSuitChecked": true,
"blueSuitChecked": true
},
{
"id": 72,
"link": [
1,
1
],
"name": "Crystal Spark (In-Room)",
"requires": [
"Gravity",
{
"or": [
{
"canShineCharge": {
"usedTiles": 18,
"gentleUpTiles": 2,
"openEnd": 0
}
},
{
"and": [
{
"doorUnlockedAtNode": 1
},
{
"canShineCharge": {
"usedTiles": 19,
"gentleUpTiles": 2,
"openEnd": 0
}
}
]
}
]
},
"h_CrystalSpark"
],
"flashSuitChecked": true,
"blueSuitChecked": true
},
{
"id": 73,
"link": [
1,
1
],
"name": "Precise Stutter Water Shinecharge, Crystal Spark",
"entranceCondition": {
"comeInStutterShinecharging": {
"minTiles": 1
},
"comesInHeated": "no"
},
"requires": [
"canPreciseStutterWaterShineCharge",
"h_underwaterCrystalSpark"
],
"flashSuitChecked": true,
"blueSuitChecked": true,
"devNote": [
"FIXME: This is possible with one tile, but it's a lot worse. It would be very tedious to set up for many attempts."
]
},
{
"id": 68,
"link": [
1,
1
],
"name": "R-Mode Crystal Flash Interrupt",
"entranceCondition": {
"comeInWithRMode": {}
},
"requires": [
"canRModeCrystalFlashInterrupt",
{
"or": [
{
"and": [
{
"ammo": {
"type": "Missile",
"count": 10
}
},
{
"or": [
"h_fullEnemyDamageReduction",
{
"and": [
"h_partialEnemyDamageReduction",
{
"resourceCapacity": [
{
"type": "RegularEnergy",
"count": 149
}
]
},
{
"resourceCapacity": [
{
"type": "ReserveEnergy",
"count": 149
}
]
}
]
},
{
"and": [
{
"resourceCapacity": [
{
"type": "RegularEnergy",
"count": 249
}
]
},
{
"resourceCapacity": [
{
"type": "ReserveEnergy",
"count": 249
}
]
}
]
}
]
}
]
},
{
"and": [
{
"ammo": {
"type": "Missile",
"count": 2
}
},
"canComplexRModeCrystalFlashInterrupt"
]
}
]
}
],
"flashSuitChecked": true,
"blueSuitChecked": true,
"note": [
"This requires a precisely timed Crystal Flash, such that Mama Turtle hits Samus immediately after she gets Reserve Energy, to prevent getting double hit.",
"The precise timing is not required with the ability to survive another hit after the Reserve trigger.",
"Samus will sometimes be forced onto Mama Turtle's back, which can force a third hit; this can be prevented by holding forward as she hits Samus."
]
},
{
"id": 70,
"link": [
1,
1
],
"name": "R-Mode Spark Interrupt",
"entranceCondition": {
"comeInWithRMode": {}
},
"requires": [
"Gravity",
"h_CrystalFlashForReserveEnergy",
{
"canShineCharge": {
"usedTiles": 18,
"gentleUpTiles": 2,
"openEnd": 1
}
},
{
"autoReserveTrigger": {}
},
"canRModeSparkInterrupt",
{
"or": [
"canInsaneJump",
{
"enemyDamage": {
"enemy": "Kame (Tatori)",
"type": "contact",
"hits": 1
}
},
{
"resourceAtMost": [
{
"type": "RegularEnergy",
"count": 150
}
]
}
]
}
],
"flashSuitChecked": true,
"blueSuitChecked": true,
"note": [
"Crystal Flash upon entering. Wake Mama Turtle, shinecharge, then use Mama Turtle to interrupt."
],
"detailNote": [
"With ~200 Reserve Energy and at least 1 Energy tank, Samus will still be refilling reserves and Mama Turtle will return and hit again.",
"It is possible to midair spark as Mama Turtle is approaching, where she will hit Samus on the first pass, but not after.",
"This is frame perfect with Gravity, and when Samus is forced into a standup, her feet will be slightly less than a full tile below the ledge."
]
},
{
"id": 69,
"link": [
1,
1
],
"name": "Direct G-mode Morph, Crystal Flash Interrupt",
"entranceCondition": {
"comeInWithGMode": {
"mode": "direct",
"morphed": true
}
},
"requires": [
"h_artificialMorphRModeCrystalFlashInterrupt",
{
"or": [
{
"and": [
{
"ammo": {
"type": "Missile",
"count": 10
}
},
{
"or": [
"h_fullEnemyDamageReduction",
{
"and": [
"h_partialEnemyDamageReduction",
{
"resourceCapacity": [
{
"type": "RegularEnergy",
"count": 149
}
]
},
{
"resourceCapacity": [
{
"type": "ReserveEnergy",
"count": 149
}
]
}
]
},
{
"and": [
{
"resourceCapacity": [
{
"type": "RegularEnergy",
"count": 249
}
]
},
{
"resourceCapacity": [
{
"type": "ReserveEnergy",
"count": 249
}
]
}
]
}
]
}
]
},
{
"and": [
{
"ammo": {
"type": "Missile",
"count": 2
}
},
"canComplexRModeCrystalFlashInterrupt"
]
}
]
}
],
"flashSuitChecked": true,
"blueSuitChecked": true,
"note": [
"On room entry, roll into one of the baby turtles in order to get Mama Turtle to wake up.",
"This then requires a precisely timed Crystal Flash, such that Mama Turtle hits Samus immediately after she gets Reserve Energy, to prevent getting double hit.",
"The precise timing is not required with the ability to survive another hit after the Reserve trigger.",
"Samus will sometimes be forced onto Mama Turtle's back, which can force a third hit; this can be prevented by holding forward as she hits Samus."
]
},
{
"id": 4,
"link": [
1,
2
],
"name": "Base",
"requires": [
"Gravity",
"SpaceJump"
],
"clearsObstacles": [
"B"
],
"flashSuitChecked": true,
"blueSuitChecked": true
},
{
"id": 5,
"link": [
1,
2
],
"name": "In-Room Shinespark",
"requires": [
"Gravity",
{
"canShineCharge": {
"usedTiles": 19,
"gentleUpTiles": 2,
"openEnd": 1
}
},
"canShinechargeMovement",
{
"or": [
{
"shinespark": {
"frames": 60,
"excessFrames": 5
}
},
{
"and": [
"canMidairShinespark",
{
"shinespark": {
"frames": 55,
"excessFrames": 5
}
}
]
},
{
"and": [
"canMidairShinespark",
"HiJump",
{
"shinespark": {
"frames": 50,
"excessFrames": 5
}
}
]
},
{
"and": [
"canShinechargeMovementComplex",
"HiJump",
{
"shinespark": {
"frames": 47,
"excessFrames": 5
}
}
]
},
{
"and": [
"canShinechargeMovementComplex",
"HiJump",
"canSpeedyJump",
{
"shinespark": {
"frames": 44,
"excessFrames": 5
}
}
]
}
]
}
],
"clearsObstacles": [
"B"
],
"flashSuitChecked": true,
"blueSuitChecked": true,
"devNote": "This could have a few more excess frames if not getting on top of the block at 2."
},
{
"id": 6,
"link": [
1,
2
],
"name": "Come in Shinecharging, Shinespark",
"entranceCondition": {
"comeInShinecharging": {
"length": 18,
"openEnd": 1,
"gentleUpTiles": 2
}
},
"requires": [
"Gravity",
"canShinechargeMovement",
{
"or": [
{
"shinespark": {
"frames": 60,
"excessFrames": 5
}
},
{
"and": [
"canMidairShinespark",
{
"shinespark": {
"frames": 55,
"excessFrames": 5
}
}
]
},
{
"and": [
"canMidairShinespark",
"HiJump",
{
"shinespark": {
"frames": 50,
"excessFrames": 5
}
}
]
},
{
"and": [
"canShinechargeMovementComplex",
"HiJump",
{
"shinespark": {
"frames": 47,
"excessFrames": 5
}
}
]
},
{
"and": [
"canShinechargeMovementComplex",
"HiJump",
"canSpeedyJump",
{
"shinespark": {
"frames": 44,
"excessFrames": 5
}
}
]
}
]
}
],
"clearsObstacles": [
"B"
],
"flashSuitChecked": true,
"blueSuitChecked": true,
"devNote": "This could have a few more excess frames if not getting on top of the block to go to 2."
},
{
"id": 7,
"link": [
1,
2
],
"name": "Come in Shinecharged, Shinespark",
"entranceCondition": {
"comeInShinecharged": {}
},
"requires": [
{
"shineChargeFrames": 110
},
"Gravity",
"canShinechargeMovement",
{
"shinespark": {
"frames": 60
}
}
],
"clearsObstacles": [
"B"
],
"flashSuitChecked": true,
"blueSuitChecked": true,
"devNote": "This could have a few more excess frames if not getting on top of the block to go to 2."
},
{
"id": 8,
"link": [
1,
2
],
"name": "Suitless Water Shinecharge",
"entranceCondition": {
"comeInShinecharging": {
"length": 4,
"openEnd": 1
}
},
"requires": [
"canWaterShineCharge",
"canShinechargeMovement",
{
"or": [
{
"shinespark": {
"frames": 61,
"excessFrames": 7
}
},
{
"and": [
"canMidairShinespark",
{
"shinespark": {
"frames": 56,
"excessFrames": 7
}
}
]
},
{
"and": [
"canMidairShinespark",
"HiJump",
{
"shinespark": {
"frames": 52,
"excessFrames": 7
}
}
]
}
]
}
],
"clearsObstacles": [
"B"
],
"flashSuitChecked": true,
"blueSuitChecked": true,
"devNote": [
"This could have a few more excess frames if not getting on top of the block to go to 2.",
"This runway length is just an estimate of the worst case scenario for difficulties that can't use canStutterWaterShineCharge."
]
},
{
"id": 9,
"link": [
1,
2
],
"name": "Stutter Water Shinecharge",
"entranceCondition": {
"comeInStutterShinecharging": {
"minTiles": 2
}
},
"requires": [
"canStutterWaterShineCharge",
"canShinechargeMovement",
{
"or": [
{
"shinespark": {
"frames": 61,
"excessFrames": 7
}
},
{
"and": [
"canMidairShinespark",
{
"shinespark": {
"frames": 56,
"excessFrames": 7
}
}
]
},
{
"and": [
"canMidairShinespark",
"HiJump",
{
"shinespark": {
"frames": 52,
"excessFrames": 7
}
}
]
}
]
}
],
"clearsObstacles": [
"B"
],
"flashSuitChecked": true,
"blueSuitChecked": true,
"devNote": "This could have a few more excess frames if not getting on top of the block to go to 2."
},
{
"id": 65,
"link": [
1,
2
],
"name": "Precise Stutter Water Shinecharge",
"entranceCondition": {
"comeInStutterShinecharging": {
"minTiles": 1
}
},
"requires": [
"canPreciseStutterWaterShineCharge",
"canShinechargeMovement",
{
"or": [
{
"shinespark": {
"frames": 61,
"excessFrames": 7
}
},
{
"and": [
"canMidairShinespark",
{
"shinespark": {
"frames": 56,
"excessFrames": 7
}
}
]
},
{
"and": [
"canMidairShinespark",
"HiJump",
{
"shinespark": {
"frames": 52,
"excessFrames": 7
}
}
]
}
]
}
],
"clearsObstacles": [
"B"
],
"flashSuitChecked": true,
"blueSuitChecked": true,
"note": [
"With only 1 tile of runway, this requires releasing forward for 1 or 2 frames",
"and repressing forward on the last possible frame."
],
"devNote": "This could have a few more excess frames if not getting on top of the block to go to 2."
},
{
"id": 10,
"link": [
1,
2
],
"name": "G-Mode Morph - Let Mama Turtle Sleep",
"entranceCondition": {
"comeInWithGMode": {
"mode": "any",
"morphed": true
}
},
"requires": [
"Gravity",
"h_artificialMorphLongIBJ",
"h_artificialMorphBombHorizontally"
],
"clearsObstacles": [
"B"
],
"flashSuitChecked": true,
"blueSuitChecked": true,
"note": [
"Get into position as close to the center of the room as possible while not being too close to any baby turtles.",
"Start an IBJ without hiting any baby turtles otherwhise Mama Turtle will wake up."
]
},
{
"id": 11,
"link": [
1,
2
],
"name": "G-Mode Morph - Wake Mama Turtle",
"entranceCondition": {
"comeInWithGMode": {
"mode": "any",
"morphed": true
}
},
"requires": [
"canSuitlessMaridia",
"h_artificialMorphSpringBall",
"h_artificialMorphLongIBJ"
],
"clearsObstacles": [
"A",
"B"
],
"flashSuitChecked": true,
"blueSuitChecked": true,
"note": [
"Place a bomb next to one of the baby turtles, then use spring ball to get on Mama Turtle's back.",
"Start an IBJ above the waterline to get to the item."
]
},
{
"id": 16,
"link": [
1,
3
],
"name": "Let Mama Turtle Sleep",
"requires": [
"Gravity",
{
"or": [
"canWallJump",
"SpaceJump",
"canLongIBJ"
]
}
],
"flashSuitChecked": true,
"blueSuitChecked": true
},
{
"id": 45,
"link": [
1,
3
],
"name": "Ride Mama Turtle on the Right (Grab Item)",
"requires": [
"h_navigateUnderwater",
"canUseEnemies",
"canCarefulJump",
{
"or": [
"canTrickyDodgeEnemies",
{
"and": [
"Gravity",
"canTrickyJump"
]
},
{
"enemyDamage": {
"enemy": "Kame (Tatori)",
"type": "contact",
"hits": 1
}
},
"h_pauseAbuseMinimalReserveRefill"
]
}
],
"clearsObstacles": [
"A"
],
"flashSuitChecked": true,
"blueSuitChecked": true,
"note": [
"Requires getting back on Mama Turtle while she is at the right.",
"The safest way is to have a normalized fall speed with either a full height jump or falling from the ledge above.",
"If suitless, walking off the right ledge when she hits the left wall can be a good indicator to help land on her safely.",
"Shrinking Samus' hitbox after touching the turtles back will also usually help.",
"While near the right wall, shoot the item and grab it. If the shot misses, carefully fall back down and safely land on Mama Turtle again.",
"After grabbing the item, fall on her again to avoid taking a hit; jump to the left at the top of the ride to escape the water safely."
],
"devNote": "FIXME: Is it worth adding a suitless bootless strat that follows this and gets back to the left without another hit?"
},
{
"id": 20,
"link": [
1,
4
],
"name": "Ride Mama Turtle",
"requires": [
{
"obstaclesNotCleared": [
"A"
]
},
"h_navigateUnderwater",
"canUseEnemies",
{
"or": [
"canCarefulJump",
{
"enemyDamage": {
"enemy": "Kame (Tatori)",
"type": "contact",
"hits": 1
}
}
]
}
],
"clearsObstacles": [
"A"
],
"flashSuitChecked": true,
"blueSuitChecked": true,
"note": "Ride Mama Turtle. To avoid getting hit, shoot one of her babies to wake her up, then quickly get on her back."
},
{
"id": 46,
"link": [
1,
4
],
"name": "Get Back on Mama Turtle",
"requires": [
"h_navigateUnderwater",
"canUseEnemies",
{
"or": [
"canTrickyDodgeEnemies",
{
"and": [
"Gravity",
"canTrickyJump"
]
},
{
"haveBlueSuit": {}
},
{
"enemyDamage": {
"enemy": "Kame (Tatori)",
"type": "contact",
"hits": 1
}
},
"h_pauseAbuseMinimalReserveRefill"
]
}
],
"clearsObstacles": [
"A"
],
"flashSuitChecked": true,
"blueSuitChecked": true,
"note": [
"Requires getting back on Mama Turtle while she is at the right.",
"The safest way is to have a normalized fall speed with either a full height jump or falling from the ledge above.",
"If suitless, walking off the right ledge when she hits the left wall can be a good indicator to help land on her safely.",
"Shrinking Samus' hitbox after touching the turtles back will also usually help."
]
},
{
"id": 21,
"link": [
1,
5
],
"name": "Let Mama Turtle Sleep",
"requires": [
"Gravity",
{
"or": [
"canConsecutiveWallJump",
{
"and": [
"canWallJump",
"HiJump"
]
},
"SpaceJump",
"canLongIBJ"
]
}
],
"flashSuitChecked": true,
"blueSuitChecked": true
},
{
"id": 56,
"link": [
1,
5
],
"name": "Gravity Jump, Spring Ball Jump, Let Mama Turtle Sleep",
"requires": [
"canGravityJump",
"HiJump",
"canTrickySpringBallJump"
],
"flashSuitChecked": true,
"blueSuitChecked": true,
"note": "Gravity jump, then quickly pause and turn on Spring Ball for a Spring Ball jump."
},
{
"id": 22,
"link": [
1,
5
],
"name": "Suitless Climb the Right Wall",
"requires": [
"HiJump",
"canDownGrab",
{
"or": [
{
"and": [
"canSpaceJumpWaterBounce",
"canWallJump"
]
},
"canSpaceJumpWaterEscape"
]
}
],
"flashSuitChecked": true,
"blueSuitChecked": true,
"note": "Letting Mama Turtle sleep, climb the right wall using HiJump (with a down-grab) and escape the water with Space Jump ."
},
{
"id": 47,
"link": [
1,
6
],
"name": "Let Mama Turtle Sleep",
"requires": [
"Gravity",
{
"or": [
"canConsecutiveWallJump",
{
"and": [
"canWallJump",
"HiJump"
]
},
"SpaceJump",
"canLongIBJ"
]
}
],
"flashSuitChecked": true,
"blueSuitChecked": true
},
{
"id": 12,
"link": [
1,
6
],
"name": "Ride Mama Turtle on the Right",
"requires": [
"h_navigateUnderwater",
"canUseEnemies",
{
"or": [
"canTrickyDodgeEnemies",
{
"and": [
"Gravity",
"canTrickyJump"
]
},
{
"haveBlueSuit": {}
},
{
"enemyDamage": {
"enemy": "Kame (Tatori)",
"type": "contact",
"hits": 1
}
},
"h_pauseAbuseMinimalReserveRefill"
]
}
],
"clearsObstacles": [
"A"
],
"flashSuitChecked": true,
"blueSuitChecked": true,
"note": [
"Requires getting back on Mama Turtle while she is at the right.",
"The safest way is to have a normalized fall speed with either a full height jump or falling from the ledge above.",
"If suitless, walking off the right ledge when she hits the left wall can be a good indicator to help land on her safely.",
"Shrinking Samus' hitbox after touching the turtles back will also usually help.",
"At the top of the ride, jump to the top right ledge."
]
},
{
"id": 13,
"link": [
1,
6
],
"name": "In-Room Shinespark",
"requires": [
"Gravity",
{
"canShineCharge": {
"usedTiles": 19,
"gentleUpTiles": 2,
"openEnd": 1
}
},
{
"or": [
{
"shinespark": {
"frames": 43,
"excessFrames": 4
}
},
{
"and": [
"canMidairShinespark",
{
"shinespark": {
"frames": 37,
"excessFrames": 5
}
}
]
},
{
"and": [
"canMidairShinespark",
"HiJump",
{
"shinespark": {
"frames": 32,
"excessFrames": 4
}
}
]
},
{
"and": [
"canShinechargeMovementComplex",
"HiJump",
"canSpeedyJump",
{
"shinespark": {
"frames": 24,
"excessFrames": 5
}
}
]
}
]
}
],
"flashSuitChecked": true,
"blueSuitChecked": true
},
{
"id": 14,
"link": [
1,
6
],
"name": "Come in Shinecharging, Shinespark",
"entranceCondition": {
"comeInShinecharging": {
"length": 18,
"openEnd": 1,
"gentleUpTiles": 2
}
},
"requires": [
"Gravity",
{
"or": [
{
"shinespark": {
"frames": 43,
"excessFrames": 4
}
},
{
"and": [
"canMidairShinespark",
{
"shinespark": {
"frames": 37,
"excessFrames": 5
}
}
]
},
{
"and": [
"canMidairShinespark",
"HiJump",
{
"shinespark": {
"frames": 32,
"excessFrames": 4
}
}
]
},
{
"and": [
"canShinechargeMovementComplex",
"HiJump",
"canSpeedyJump",
{
"shinespark": {
"frames": 26,
"excessFrames": 5
}
}
]
}
]
}
],
"flashSuitChecked": true,
"blueSuitChecked": true
},
{
"id": 15,
"link": [
1,
6
],
"name": "Come in Shinecharged, Shinespark",
"entranceCondition": {
"comeInShinecharged": {}
},
"requires": [
{
"shineChargeFrames": 80
},
"Gravity",
{
"shinespark": {
"frames": 43,
"excessFrames": 4
}
}
],
"flashSuitChecked": true,
"blueSuitChecked": true
},
{
"id": 17,
"link": [
1,
6
],
"name": "Suitless Water Shinecharge",
"entranceCondition": {
"comeInShinecharging": {
"length": 4,
"openEnd": 1
}
},
"requires": [
"canWaterShineCharge",
"canShinechargeMovement",
{
"or": [
{
"shinespark": {
"frames": 47,
"excessFrames": 5
}
},
{
"and": [
"canMidairShinespark",
{
"shinespark": {
"frames": 44,
"excessFrames": 5
}
}
]
},
{
"and": [
"canMidairShinespark",
"HiJump",
{
"shinespark": {
"frames": 41,
"excessFrames": 5
}
}
]
}
]
}
],
"flashSuitChecked": true,
"blueSuitChecked": true,
"devNote": "This runway length is just an estimate of the worst case scenario for difficulties that can't use canStutterWaterShineCharge."
},
{
"id": 18,
"link": [
1,
6
],
"name": "Stutter Water Shinecharge, Shinespark",
"entranceCondition": {
"comeInStutterShinecharging": {
"minTiles": 2
}
},
"requires": [
"canShinechargeMovement",
{
"or": [
{
"shinespark": {
"frames": 47,
"excessFrames": 5
}
},
{
"and": [
"canMidairShinespark",
{
"shinespark": {
"frames": 44,
"excessFrames": 5
}
}
]
},
{
"and": [
"canMidairShinespark",
"HiJump",
{
"shinespark": {
"frames": 41,
"excessFrames": 5
}
}
]
}
]
}
],
"flashSuitChecked": true,
"blueSuitChecked": true,
"note": "Requires at least 2 tiles in the adjacent room."
},
{
"id": 67,
"link": [
1,
6
],
"name": "Very Precise Stutter Shinecharge, Shinespark",
"entranceCondition": {
"comeInStutterShinecharging": {
"minTiles": 1
}
},
"requires": [
"canPreciseStutterWaterShineCharge",
"canInsaneJump",
"canShinechargeMovement",
{
"or": [
{
"shinespark": {
"frames": 47,
"excessFrames": 5
}
},
{
"and": [
"canMidairShinespark",
{
"shinespark": {
"frames": 44,
"excessFrames": 5
}
}
]
},
{
"and": [
"canMidairShinespark",
"HiJump",
{
"shinespark": {
"frames": 41,
"excessFrames": 5
}
}
]
}
]
}
],
"flashSuitChecked": true,
"blueSuitChecked": true,
"note": [
"With only 1 tile of runway, this requires a single-frame stutter (release forward then repress on the next frame), on the last possible frame."
]
},
{
"id": 19,
"link": [
1,
6
],
"name": "G-Mode Morph - Let Mama Turtle Sleep",
"entranceCondition": {
"comeInWithGMode": {
"mode": "any",
"morphed": true
}
},
"requires": [
"Gravity",
"h_artificialMorphLongIBJ",
"h_artificialMorphBombHorizontally"
],
"flashSuitChecked": true,
"blueSuitChecked": true,
"note": "IBJ up a bit, then bomb over Mama Turtle and her babies to prevent her from waking. Then IBJ to the high right ledge before exiting g-mode."
},
{
"id": 23,
"link": [
2,
1
],
"name": "Base",
"requires": [],
"resetsObstacles": [
"B"
],
"flashSuitChecked": true,
"blueSuitChecked": true
},
{
"id": 24,
"link": [
2,
6
],
"name": "Jump to the Right Ledge",
"requires": [
{
"or": [
{
"and": [
"canDash",
"canCarefulJump",
"canDisableEquipment"
]
},
"canUseGrapple",
"canWallJump",
"SpaceJump"
]
},
{
"obstaclesCleared": [
"B"
]
}
],
"resetsObstacles": [
"B"
],
"collectsItems": [
2
],
"flashSuitChecked": true,
"blueSuitChecked": true,
"note": "Get a bit of run speed on the block and jump to the right ledge. If Samus misses the ledge, try to shoot the block to still collect the item."
},
{
"id": 25,
"link": [
3,
1
],
"name": "Base",
"requires": [
{
"or": [
"Gravity",
{
"obstaclesNotCleared": [
"A"
]
},
{
"enemyDamage": {
"enemy": "Kame (Tatori)",
"type": "contact",
"hits": 1
}
}
]
},
{
"or": [
"Gravity",
"HiJump",
"canSpringBallJumpMidAir",
"h_underwaterCrouchJumpDownGrab",
"canUseEnemies"
]
}
],
"flashSuitChecked": true,
"blueSuitChecked": true
},
{
"id": 26,
"link": [
3,
1
],
"name": "Suitless Dodge",
"requires": [
"canSuitlessMaridia",
"canCarefulJump",
"HiJump"
],
"flashSuitChecked": true,
"blueSuitChecked": true
},
{
"id": 27,
"link": [
3,
1
],
"name": "Suitless Bootless Dodge",
"requires": [
"canSuitlessMaridia",
"canTrickyJump",
{
"or": [
"canSpringBallJumpMidAir",
"h_underwaterCrouchJumpDownGrab",
"canUseEnemies"
]
}
],
"flashSuitChecked": true,
"blueSuitChecked": true,
"note": [
"Jump over or on to Mama Turtle.",
"The easiest method is to jump over her by jumping on her babies, or to Morph under her."
]
},
{
"id": 28,
"link": [
4,
2
],
"name": "Grapple",
"requires": [
"canUseGrapple",
{
"or": [
"HiJump",
"canSpringBallJumpMidAir"
]
},
"h_midAirShootUp"
],
"flashSuitChecked": true,
"blueSuitChecked": true,
"note": "With a miss of the Grapple, if Samus hasn't moved horizontally, simply fall straight down to land safely back on Mama Turtle."
},
{
"id": 48,
"link": [
4,
2
],
"name": "Grapple, Land on the Pedestal",
"requires": [
"canPreciseGrapple",
"h_midAirShootUp"
],
"clearsObstacles": [
"B"
],
"flashSuitChecked": true,
"blueSuitChecked": true,
"note": [
"If Mama Turtle is in her starting location, stand on the rightmost side of her to be aligned below the grapple block.",
"With a miss, if Samus hasn't moved horizontally, simply fall straight down to land safely back on to her."
]
},
{
"id": 29,
"link": [
4,
2
],
"name": "Space Jump",
"requires": [
"SpaceJump"
],
"clearsObstacles": [
"B"
],
"flashSuitChecked": true,
"blueSuitChecked": true
},
{
"id": 30,
"link": [
4,
2
],
"name": "Jump into IBJ",
"requires": [
"canJumpIntoIBJ",
{
"or": [
"canLongIBJ",
"HiJump"
]
}
],
"clearsObstacles": [
"B"
],
"flashSuitChecked": true,
"blueSuitChecked": true,
"note": [
"Once out of the water, jump into an IBJ.",
"With a miss, if Samus hasn't moved horizontally, simply fall straight down to land safely back on Mama Turtle."
]
},
{
"id": 31,
"link": [
4,
2
],
"name": "Spring Ball Jump",
"requires": [
"HiJump",
"canSpringBallJumpMidAir"
],
"clearsObstacles": [
"B"
],
"flashSuitChecked": true,
"blueSuitChecked": true,
"note": [
"Spring Ball jump from Mama Turtle's back.",
"With a fail, if Samus hasn't moved horizontally, simply fall straight down to land safely back on Mama Turtle."
]
},
{
"id": 33,
"link": [
4,
3
],
"name": "Reveal Item while Jumping",
"requires": [
"canDash",
"canDodgeWhileShooting",
"canCarefulJump",
{
"notable": "Shoot Down and Grab Right Item"
},
{
"or": [
"Wave",
"Spazer",
"h_usePowerBomb",
{
"and": [
"canTrickyJump",
"canDodgeWhileShooting",
{
"ammo": {
"type": "Missile",
"count": 5
}
}
]
},
{
"and": [
"canTrickyJump",
"canResetFallSpeed",
"canDownBack"
]
},
"canInsaneJump"
]
}
],
"flashSuitChecked": true,
"blueSuitChecked": true,
"note": "Reveal the item while jumping to the right wall and collect it as Samus falls past."
},
{
"id": 34,
"link": [
4,
5
],
"name": "Base",
"requires": [
{
  "or": [
    "canDash",
    "canTrickyJump"
  ]
}
],
"flashSuitChecked": true,
"blueSuitChecked": true,
"devNote": [
"To reach the upper ledge without dashing, Mama Turtle could be moved over to the left."
]
},
{
"id": 49,
"link": [
4,
6
],
"name": "Base",
"requires": [
{
  "or": [
    "canWallJump",
    "SpaceJump",
    {
      "and": [
        "HiJump",
        "canDash",
        "canCarefulJump"
      ]
    },
    {
      "and": [
        "canUseGrapple",
        {
          "or": [
            "HiJump",
            "canSpringBallJumpMidAir",
            "canPreciseGrapple"
          ]
        },
        "h_midAirShootUp"
      ]
    }
  ]
}
],
"flashSuitChecked": true,
"blueSuitChecked": true
},
{
"id": 35,
"link": [
5,
2
],
"name": "Base",
"requires": [
{
  "or": [
    "SpaceJump",
    {
      "and": [
        "canPreciseGrapple",
        {
          "or": [
            "h_midAirShootUp",
            "HiJump",
            "canWallJump"
          ]
        }
      ]
    }
  ]
}
],
"clearsObstacles": [
"B"
],
"flashSuitChecked": true,
"blueSuitChecked": true
},
{
"id": 43,
"link": [
5,
2
],
"name": "Grapple, Mama Turtle is Sleeping",
"requires": [
"canUseGrapple",
"h_midAirShootUp",
{
"obstaclesNotCleared": [
"A"
]
}
],
"clearsObstacles": [
"B"
],
"flashSuitChecked": true,
"blueSuitChecked": true,
"note": "Grappling the block does not require canPreciseGrapple if Mama Turtle is asleep, as there is no risk of death on a miss."
},
{
"id": 36,
"link": [
5,
2
],
"name": "Wall Jump Bomb Boost",
"requires": [
"canWallJumpBombBoost"
],
"flashSuitChecked": true,
"blueSuitChecked": true,
"note": [
"Starting from the top left ledge, wall jump to place a bomb or Power Bomb just below and to the right of the bottom left plant on the wall.",
"Use the bomb to boost Samus towards the item, then unmorph to reduce her fall speed and barely reach the item."
]
},
{
"id": 37,
"link": [
5,
2
],
"name": "Tricky Speedy HiJump",
"requires": [
"HiJump",
"canTrickyJump",
"canSpeedyJump",
"canWallJump"
],
"clearsObstacles": [
"B"
],
"flashSuitChecked": true,
"blueSuitChecked": true,
"note": [
"Briefly run on the top ledge on either side (left is slightly easier) then jump and wall jump on the grapple block."
]
},
{
"id": 38,
"link": [
5,
2
],
"name": "Tricky Speed HiJump, Walljumpless",
"requires": [
"HiJump",
"canTrickyJump",
"canSpeedyJump"
],
"flashSuitChecked": true,
"blueSuitChecked": true,
"note": [
"Briefly run on the top left ledge then perform a last-frame jump to barely touch the item and then fall.",
"It is best not to moon-walk back against the wall and instead press against it and then turn around to be 1 pixel away.",
"A wall-jump check as Samus is close to the item can expand her hitbox and make it possible from either pixel.",
"Note that this strat is also possible on the right side of the room, but is tighter and requires backing up against the wall."
]
},
{
"id": 39,
"link": [
5,
2
],
"name": "Springwall",
"requires": [
"canSpringwall",
"canResetFallSpeed"
],
"flashSuitChecked": true,
"blueSuitChecked": true
},
{
"id": 40,
"link": [
5,
2
],
"name": "Springwall onto Grapple Block",
"requires": [
"canSpringwall",
"canSpringFling"
],
"clearsObstacles": [
"B"
],
"flashSuitChecked": true,
"blueSuitChecked": true
},
{
"id": 41,
"link": [
5,
2
],
"name": "Walljumpless Spring Ball Jump",
"requires": [
"canTrickySpringBallJump",
"canTrickyJump",
"canResetFallSpeed"
],
"flashSuitChecked": true,
"blueSuitChecked": true,
"note": "Pausing and morphing early can help by giving Samus a bit of a Spring Fling. Unmorph to reset Samus' fall speed to grab the item."
},
{
"id": 66,
"link": [
5,
2
],
"name": "Walljumpless Spring Fling onto Grapple Block",
"requires": [
"canTrickySpringBallJump",
"canTrickyJump",
"canSpringFling"
],
"clearsObstacles": [
"B"
],
"flashSuitChecked": true,
"blueSuitChecked": true,
"note": "Time a pause before jumping to give a significant momentum boost in order to reach the Grapple Block."
},
{
"id": 42,
"link": [
5,
2
],
"name": "Insane Walljump",
"requires": [
{
"notable": "Insane Walljump"
},
"HiJump",
"canInsaneJump",
"canStationarySpinJump",
"canInsaneWallJump",
"canCWJ"
],
"clearsObstacles": [
"B"
],
"flashSuitChecked": true,
"blueSuitChecked": true,
"note": [
"Perform a running stationary spinjump from a precise spot, with 3 frames of dash speed (the maximum possible);",
"then do a CWJ off the wall above, one tile further out.",
"This makes it possible to just barely walljump off the grapple block."
]
},
{
"id": 44,
"link": [
5,
2
],
"name": "Use Stored Spark",
"requires": [
"h_storedSpark",
{
"or": [
{
"shinespark": {
"frames": 10,
"excessFrames": 6
}
},
{
"and": [
"HiJump",
{
"shinespark": {
"frames": 6,
"excessFrames": 5
}
}
]
}
]
}
],
"flashSuitChecked": true,
"blueSuitChecked": true,
"note": "To save energy, start from the upper right ledge; it may require repositioning Mama Turtle to the right to get to the ledge."
},
{
"id": 50,
"link": [
6,
2
],
"name": "Base",
"requires": [
{
  "or": [
    "canPreciseGrapple",
    "SpaceJump"
  ]
}
],
"clearsObstacles": [
"B"
],
"flashSuitChecked": true,
"blueSuitChecked": true
},
{
"id": 51,
"link": [
6,
2
],
"name": "Grapple, Mama Turtle is Sleeping",
"requires": [
"canUseGrapple",
{
"obstaclesNotCleared": [
"A"
]
}
],
"clearsObstacles": [
"B"
],
"flashSuitChecked": true,
"blueSuitChecked": true,
"note": "Grappling the block does not require canPreciseGrapple if Mama Turtle is asleep, as there is no risk of death on a miss."
},
{
"id": 52,
"link": [
6,
2
],
"name": "Tricky Speedy HiJump",
"requires": [
"HiJump",
"canTrickyJump",
"canSpeedyJump",
"canWallJump"
],
"clearsObstacles": [
"B"
],
"flashSuitChecked": true,
"blueSuitChecked": true,
"note": [
"Briefly run on the top ledge on either side (left is slightly easier) then jump and wall jump on the grapple block."
]
},
{
"id": 53,
"link": [
6,
2
],
"name": "Springwall",
"requires": [
"canSpringwall",
"canResetFallSpeed"
],
"flashSuitChecked": true,
"blueSuitChecked": true,
"note": "It is possible to springwall to grab the item, and then morph and reset fall speed again after entering the water suitless to land safely on the left ledge."
},
{
"id": 54,
"link": [
6,
3
],
"name": "Shoot Down and Grab Right Item",
"requires": [
{
  "notable": "Shoot Down and Grab Right Item"
}
],
"flashSuitChecked": true,
"blueSuitChecked": true,
"note": [
"From the safe spot above the item, shoot down the wall to break the item block.",
"After hearing it break, jump down and collect the item.",
"Alternatively, a Power Bomb can be used while riding Mama Turtle or on the top right ledge."
],
"devNote": "It is minimally easier to shoot the block with a wide beam. A Power Bomb can also be used, but it doesn't seem intuitive at this difficulty."
},
{
"id": 55,
"link": [
6,
6
],
"name": "Collect Right Item from Ledge and Return",
"requires": [
{
"notable": "Shoot Down and Grab Right Item"
},
{
"or": [
"canPreciseWallJump",
{
"and": [
"canTrickyJump",
"SpaceJump"
]
}
]
}
],
"collectsItems": [
3
],
"flashSuitChecked": true,
"blueSuitChecked": true,
"note": [
"From the safe spot above the item, shoot down the wall to break the item block.",
"After hearing it break, spin jump down and collect the item, then walljump back up; or carefully descend and grab it with SpaceJump."
],
"devNote": "It is minimally easier to shoot the block with a wide beam. A Power Bomb can also be used, but it doesn't seem intuitive at this difficulty."
}
],
"notables": [
{
"id": 1,
"name": "Insane Walljump",
"note": [
"Perform a running stationary spinjump from a precise spot, then a CWJ with slightly more speed off the wall one tile further out.",
"This makes it possible to just barely walljump off the grapple block."
]
},
{
"id": 2,
"name": "Shoot Down and Grab Right Item",
"note": [
"Shooting downwards while falling against the right wall, or while on the top right ledge in order to reveal the right item and then grab it."
]
}
],
"nextStratId": 74,
"nextNotableId": 3
}