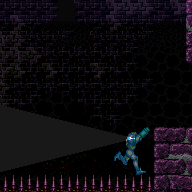
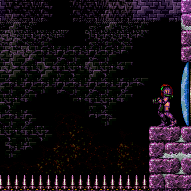
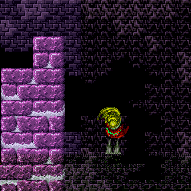
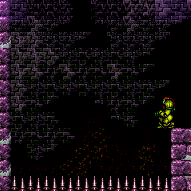
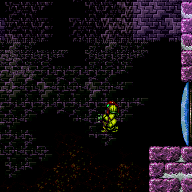
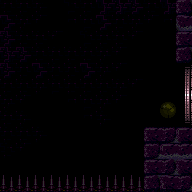
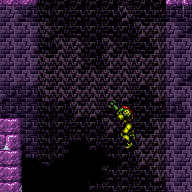
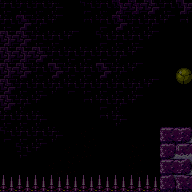
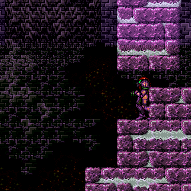
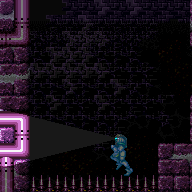
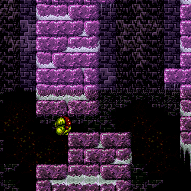
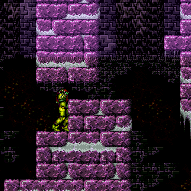
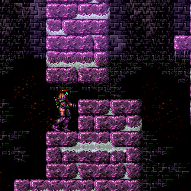
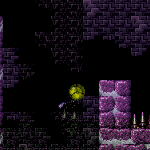
East Cactus Alley
Room ID: 196
|
Exit condition: {
"leaveWithRunway": {
"length": 5,
"openEnd": 1
}
} |
|
Requires: {
"resetRoom": {
"nodes": [
1
]
}
}
{
"or": [
{
"and": [
"Gravity",
{
"or": [
{
"and": [
"HiJump",
"canSpeedyJump",
"canTrickyJump",
{
"cycleFrames": 300
}
]
},
{
"and": [
"HiJump",
"canWallJump",
{
"cycleFrames": 310
}
]
},
{
"and": [
"SpaceJump",
{
"cycleFrames": 360
}
]
},
{
"and": [
"canTrickyWallJump",
{
"cycleFrames": 380
}
]
},
{
"and": [
"canSpringBallJumpMidAir",
{
"or": [
"HiJump",
"canSpringwall",
{
"and": [
"canTrickySpringBallJump",
"canTrickyJump"
]
}
]
},
{
"cycleFrames": 340
},
"h_doubleEquipmentScreenCycleFrames"
]
},
{
"and": [
"canDoubleBombJump",
{
"cycleFrames": 830
}
]
}
]
}
]
},
{
"and": [
"canSuitlessMaridia",
{
"or": [
{
"and": [
"HiJump",
"canTrickyJump",
"canMidairWiggle",
"canTrickyWallJump",
{
"cycleFrames": 360
}
]
},
{
"and": [
"HiJump",
"canSpaceJumpWaterBounce",
"canWallJump",
{
"cycleFrames": 390
}
]
},
{
"and": [
"HiJump",
"canSpaceJumpWaterEscape",
{
"cycleFrames": 430
}
]
},
{
"and": [
{
"notable": "Suitless Bootless Space Jump"
},
"canSpaceJumpWaterBounce",
"canWallJump",
{
"cycleFrames": 440
}
]
},
{
"and": [
"HiJump",
"canTrickySpringBallJump",
{
"or": [
"canTrickyJump",
"canFlatleyJump"
]
},
{
"cycleFrames": 360
},
"h_doubleEquipmentScreenCycleFrames"
]
}
]
}
]
}
]
}Resets obstacles: R-Mode Farm cycle drops: 1 Cacatac |
|
Entrance condition: {
"comeInShinecharging": {
"length": 4,
"openEnd": 0
},
"comesInHeated": "no"
}Requires: "h_CrystalSpark" |
|
Requires: "canShinechargeMovementComplex"
"h_spikeXModeShinecharge"
{
"or": [
"h_XModeSpikeHit",
"canStationarySpinJump",
"canTrickyJump"
]
}
"Gravity"
{
"or": [
{
"and": [
"HiJump",
"SpaceJump",
{
"shineChargeFrames": 130
}
]
},
{
"and": [
"HiJump",
"canPreciseWallJump",
{
"shineChargeFrames": 160
}
]
},
{
"and": [
"SpaceJump",
"canPreciseWallJump",
{
"shineChargeFrames": 160
}
]
}
]
}Exit condition: {
"leaveShinecharged": {}
}Dev note: Two spike hits are expected per attempt (with any additional leniency hits being multiplied by this amount). |
|
Requires: "h_spikeXModeShinecharge"
"canShinechargeMovementTricky"
"canTrickyJump"
"Gravity"
{
"or": [
{
"and": [
"HiJump",
"canTrickyDashJump"
]
},
{
"and": [
"canFastWallJumpClimb",
"canPreciseWallJump"
]
},
{
"and": [
"SpaceJump",
"canInsaneJump",
{
"shinespark": {
"frames": 3
}
}
]
}
]
}
{
"shinespark": {
"frames": 5
}
}Exit condition: {
"leaveWithSpark": {}
}Dev note: Two spike hits are expected per attempt (with any additional leniency hits being multiplied by this amount). |
|
Entrance condition: {
"comeInWithRMode": {}
}Clears obstacles: R-Mode |
|
Requires: {
"obstaclesNotCleared": [
"R-Mode"
]
}
"h_CrystalFlash" |
|
Requires: "Gravity"
"h_spikeDoubleXModeBlueSuit"
{
"shinespark": {
"frames": 2
}
} |
|
|
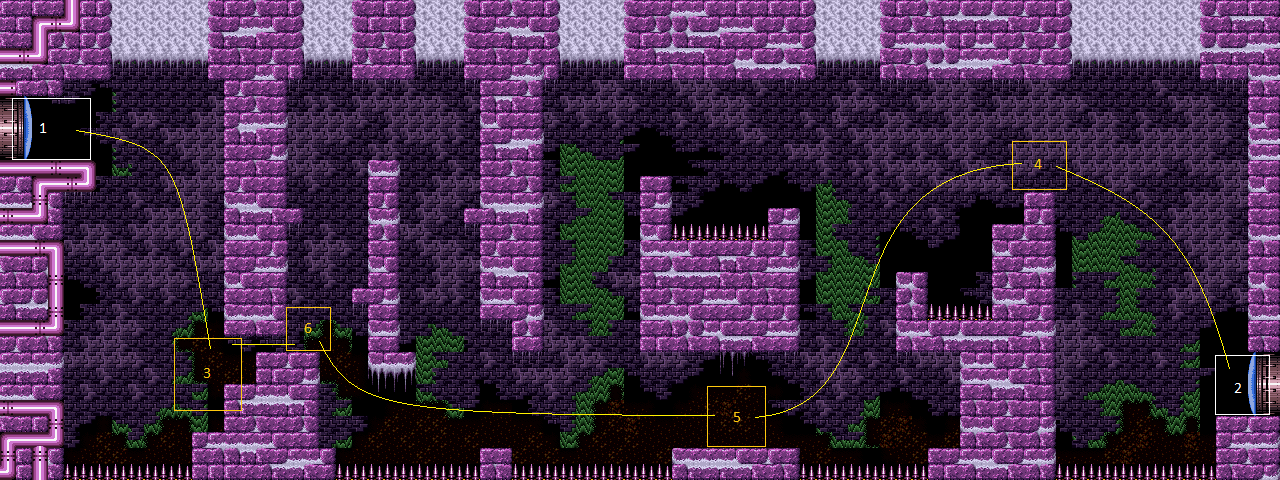
From: 1
Left Door
To: 4
Top Right Ledge Junction
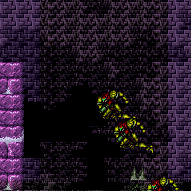
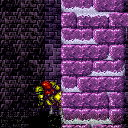
Hug the right wall after killing the first Cacatac in order to avoid its invisible, stationary projectiles. After getting to the small island platform, diagonal IBJ up while avoiding the top Cacatac. Alternatively HBJ to the next platform and Spring Ball from the right edge of this platform into an IBJ above the spikes. Entrance condition: {
"comeInWithGMode": {
"mode": "any",
"morphed": true
}
}Requires: "Gravity"
{
"or": [
"h_artificialMorphDiagonalBombJump",
{
"and": [
"h_artificialMorphHBJ",
"h_artificialMorphJumpIntoIBJ"
]
}
]
} |
|

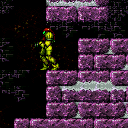
Hug the right wall after killing the first Cacatac in order to avoid its invisible, stationary projectiles. Entrance condition: {
"comeInWithGMode": {
"mode": "any",
"morphed": true
}
}Requires: "h_navigateUnderwater"
{
"or": [
"h_artificialMorphSpringBall",
"h_artificialMorphBombHorizontally"
]
}
{
"or": [
{
"and": [
"h_artificialMorphBombs",
{
"or": [
"Gravity",
"h_artificialMorphSpringBall"
]
}
]
},
"h_artificialMorphPowerBomb",
{
"enemyDamage": {
"enemy": "Cacatac",
"type": "contact",
"hits": 1
}
}
]
}
{
"or": [
"h_artificialMorphSpringBall",
{
"and": [
"Gravity",
"h_artificialMorphBombThings"
]
}
]
} |
From: 2
Right Door
To: 1
Left Door


Pause and just before the pause fully triggers, jump and press left, and then disable Gravity and Spring Ball. With HiJump and a good jump, it is possible to jump straight to the high ledge, but quickly pausing and turning on Spring Ball and jumping again can help as a backup. Without HiJump, use this jump to start an IBJ directly over the spike pit, then boost horizontally to the left ledge. Jump over the Cacatac and the spike pits with suitless Spring Flings. The final jump can be done the same way as the first, if Samus is not able to wall jump. Entrance condition: {
"comeInWithGMode": {
"mode": "any",
"morphed": true
}
}Requires: "canGravityJump"
"h_artificialMorphSpringFling"
{
"or": [
"HiJump",
{
"and": [
"h_artificialMorphJumpIntoIBJ",
"canInsaneJump"
]
},
{
"and": [
"h_artificialMorphJumpIntoIBJ",
{
"spikeHits": 1
}
]
}
]
} |
|
This requires multiple HBJ to get over spike pits. The first one, by the right door, must be started at the top of an IBJ. Entrance condition: {
"comeInWithGMode": {
"mode": "any",
"morphed": true
}
}Requires: {
"notable": "G-Mode Morph, IBJ, HBJ"
}
"Gravity"
{
"or": [
"h_artificialMorphLongIBJ",
"h_artificialMorphJumpIntoIBJ"
]
}
"h_artificialMorphDiagonalBombJump"
"h_artificialMorphHBJ" |
From: 2
Right Door
To: 1
Left Door
Pause and on the last frame before the pause triggers, press left and jump, and then disable Gravity and Spring Ball. On the first possible frame, repause and equip Spring Ball again then buffer the second jump out of the pause. Both of these actions are frame perfect. If the first jump was done correctly, Samus will move upwards with very little horizontal movement until breaking the water, after which she will swing rapidly to the left. Jump over the Cacatac and the spike pits with suitless Spring Flings. The final jump can be done the same way as the first, if Samus is not able to wall jump. This one is more lenient, and has a 4-frame window for the second jump, if the first is performed frame-perfectly. Entrance condition: {
"comeInWithGMode": {
"mode": "any",
"morphed": true
}
}Requires: "canGravityJump"
"h_artificialMorphSpringFling"
"canTrickyGMode"
{
"or": [
"h_artificialMorphBombThings",
{
"enemyDamage": {
"enemy": "Cacatac",
"type": "contact",
"hits": 1
}
}
]
} |
|
Entrance condition: {
"comeInWithGrappleTeleport": {
"blockPositions": [
[
5,
3
],
[
7,
2
]
]
}
} |
|
Entrance condition: {
"comeInWithGrappleTeleport": {
"blockPositions": [
[
3,
12
],
[
3,
13
]
]
}
}Bypasses door shell: true |
From: 2
Right Door
To: 1
Left Door
Entrance condition: {
"comeInWithGrappleTeleport": {
"blockPositions": [
[
3,
12
]
]
}
}Exit condition: {
"leaveWithGrappleTeleport": {
"blockPositions": [
[
3,
12
]
]
}
}Bypasses door shell: true |
From: 2
Right Door
To: 1
Left Door
Entrance condition: {
"comeInWithGrappleTeleport": {
"blockPositions": [
[
3,
13
]
]
}
}Exit condition: {
"leaveWithGrappleTeleport": {
"blockPositions": [
[
3,
13
]
]
}
}Bypasses door shell: true |
|


Exit the previous room with Samus in a standing pose (while grappled). After teleporting, press right to release Grapple while staying standing (not being forced into a crouch). Then X-ray climb 1 screen to get up to the door transition, without needing to open the door. Entrance condition: {
"comeInWithGrappleTeleport": {
"blockPositions": [
[
2,
18
],
[
2,
19
],
[
2,
28
],
[
2,
29
]
]
}
}Requires: "canXRayClimb" Bypasses door shell: true |
|
Exit condition: {
"leaveWithRunway": {
"length": 3,
"openEnd": 1
}
} |
From: 2
Right Door
To: 2
Right Door
Requires: "Gravity" "HiJump" "canPreciseSpaceJump" Exit condition: {
"leaveWithMockball": {
"remoteRunway": {
"length": 5,
"openEnd": 1
},
"landingRunway": {
"length": 3,
"openEnd": 1
}
}
} |
|
Requires: {
"resetRoom": {
"nodes": [
2
]
}
}
{
"or": [
{
"and": [
"Gravity",
{
"or": [
{
"and": [
"canWallJump",
{
"cycleFrames": 740
}
]
},
{
"and": [
"SpaceJump",
{
"cycleFrames": 790
}
]
},
{
"and": [
"HiJump",
"canTrickyDashJump",
{
"cycleFrames": 795
}
]
},
{
"and": [
"canSpringBallJumpMidAir",
{
"or": [
"HiJump",
"canSpringFling"
]
},
{
"cycleFrames": 920
},
"h_doubleEquipmentScreenCycleFrames"
]
},
{
"and": [
"canDiagonalBombJump",
{
"cycleFrames": 1380
}
]
}
]
}
]
},
{
"and": [
"canSuitlessMaridia",
{
"or": [
{
"and": [
"HiJump",
"canSpaceJumpWaterBounce",
"canWallJump",
{
"cycleFrames": 810
}
]
},
{
"and": [
"HiJump",
"canSpaceJumpWaterEscape",
{
"cycleFrames": 850
}
]
},
{
"and": [
"HiJump",
"h_underwaterMaxHeightSpringBallJump",
"canTrickyJump",
"canStationaryLateralMidAirMorph",
{
"cycleFrames": 1070
},
"h_doubleEquipmentScreenCycleFrames"
]
}
]
}
]
}
]
}Resets obstacles: R-Mode Farm cycle drops: 2 Cacatac |
|
Requires: "h_spikeXModeShinecharge"
{
"or": [
"h_XModeSpikeHit",
"canStationarySpinJump"
]
}
"Gravity"
"canShinechargeMovementComplex"
{
"shineChargeFrames": 65
}Exit condition: {
"leaveShinecharged": {}
}Dev note: Two spike hits are expected per attempt (with any additional leniency hits being multiplied by this amount). |
|
Entrance condition: {
"comeInWithRMode": {}
}Clears obstacles: R-Mode |
|
Requires: {
"obstaclesNotCleared": [
"R-Mode"
]
}
"h_CrystalFlash" |
|


Requires: "Gravity"
"h_spikeXModeSpikeSuit"
{
"shinespark": {
"frames": 6,
"excessFrames": 6
}
} |
From: 2
Right Door
To: 2
Right Door

Only unmorphing on the first possible frame will work; second frame will bonk the platform. Requires: "canUseFlashSuitInitialSpark"
"Gravity"
"h_spikeXModeSpikeSuit"
{
"shinespark": {
"frames": 7
}
}Exit condition: {
"leaveWithSpark": {
"position": "bottom"
}
} |
From: 2
Right Door
To: 2
Right Door
Crystal Flash at the door, and enter X-Mode on the spikes and shinecharge. Pause abuse on the spikes to interrupt. Let the damage push Samus into the wall to avoid multiple spike hits after gaining blue suit. Requires: {
"obstaclesCleared": [
"R-Mode"
]
}
"Gravity"
"h_CrystalFlashForReserveEnergy"
"h_usePowerBomb"
"canOffScreenMovement"
"canBeVeryPatient"
"canXMode"
"h_XModeSpikeHit"
"h_shinechargeMaxRunway"
{
"autoReserveTrigger": {}
}
"canRModePauseAbuseSparkInterrupt"
{
"spikeHits": 1
}Resets obstacles: R-Mode |
|
Requires: "Gravity"
{
"or": [
"SpaceJump",
"canWallJump",
"h_IBJFromSpikes"
]
} |
|
Perform an HBJ at the top of an IBJ. This is basically a very short diagonal bomb jump. Requires: "Gravity"
"canDiagonalBombJump"
{
"or": [
"canLongIBJ",
"canJumpIntoIBJ"
]
} |
From: 2
Right Door
To: 4
Top Right Ledge Junction


There is just enough distance for a MidAir Spring Ball jump to reach without HiJump, with either a crouch jump or air ball. To do this, pause and morph early in order to get a spring fling from equipping Spring Ball. Requires: "Gravity"
"canSpringBallJumpMidAir"
{
"or": [
"HiJump",
{
"and": [
"h_maxHeightSpringBallJump",
"canSpringFling"
]
},
{
"and": [
"canTrickyJump",
"canLateralMidAirMorph",
"canTrickySpringBallJump",
"canSpringFling",
"h_complexToCarryFlashSuit"
]
}
]
}Dev note: The h_maxHeightSpringBallJump is not a h_underwaterMaxHeightSpringBallJump, because Gravity is required. |
From: 2
Right Door
To: 4
Top Right Ledge Junction

Use Space Jump to break out of the water. Afterward, it's easiest to use a wall jump to gain height but this is not required. Requires: "HiJump"
{
"or": [
"canSpaceJumpWaterEscape",
{
"and": [
"canSpaceJumpWaterBounce",
"canWallJump"
]
}
]
} |
From: 2
Right Door
To: 4
Top Right Ledge Junction
Spring Ball jump just as Samus exits the water to reach the distant ledge. To get enough horizontal distance, either use a Stationary Lateral Mid-Air Morph with a crouch jump for extra height, or spin jump out before morphing. Or Spring Ball jump part of the way over and land on a Bomb explosion to cross the rest of the distance. Requires: "canSuitlessMaridia"
"HiJump"
"h_underwaterMaxHeightSpringBallJump"
{
"or": [
"canStationaryLateralMidAirMorph",
{
"and": [
{
"tech": "canJumpIntoIBJ"
},
"canBombHorizontally"
]
}
]
}Dev note: The canCrouchJump is not required but makes the strat easier The canStationaryLateralMidAirMorph is not strictly required but better describes the difficulty. |
|
Entrance condition: {
"comeInShinecharged": {}
}Requires: {
"shineChargeFrames": 10
}
"Gravity"
{
"shinespark": {
"frames": 21,
"excessFrames": 5
}
} |
|

Entrance condition: {
"comeInShinecharged": {}
}Requires: {
"shineChargeFrames": 10
}
{
"shinespark": {
"frames": 22,
"excessFrames": 5
}
} |
|

The in-room runway with the door closed works but is somewhat precise. With the door open the jump is easier, but only use a small portion of the runway that was occupied by the door. Requires: "Gravity" "HiJump" "canTrickyDashJump" |
From: 2
Right Door
To: 4
Top Right Ledge Junction
Take a spike hit and pause just after getting hit. Quickly crouch and jump just before the fade out ends. With a precise Gravity jump, it is possible to not need a crouch jump or down grab. Requires: "canGravityJump"
"HiJump"
{
"spikeHits": 1
}
"canUseIFrames"
"canTrickyJump"
{
"or": [
"canInsaneJump",
"canCrouchJump",
"canDownGrab"
]
}
{
"or": [
"canInsaneJump",
{
"spikeHits": 1
}
]
}
{
"or": [
{
"noBlueSuit": {}
},
"canBlueSuitSpikeJump"
]
}Dev note: The canCrouchJump is not a h_underwaterCrouchJump, because Gravity is required. |
|

Requires: "Gravity"
"h_spikeXModeShinecharge"
{
"or": [
"h_XModeSpikeHit",
"canStationarySpinJump"
]
}
{
"shinespark": {
"frames": 25,
"excessFrames": 5
}
}Dev note: Two spike hits are expected per attempt (with any additional leniency hits being multiplied by this amount). |
From: 2
Right Door
To: 4
Top Right Ledge Junction
Requires a runway of at least 1 tile in the adjacent room, although it is easier with more. Entrance condition: {
"comeInJumping": {
"speedBooster": "no",
"minTiles": 1
}
}Requires: {
"or": [
"canWallJump",
"canTrickySpringBallJump",
"SpaceJump"
]
}
"canCrossRoomJumpIntoWater" |
From: 2
Right Door
To: 4
Top Right Ledge Junction

Requires a runway of at least 1 tiles in the adjacent room, although it is easier with more. Start the IBJ as far left as possible. The furthest right is just right of the waterfall. Turning around, carefully, is one way to lose forward momentum and begin the IBJ. At the top of the IBJ bomb to the left and unmorph to reset fall speed. Entrance condition: {
"comeInJumping": {
"speedBooster": "no",
"minTiles": 1
}
}Requires: {
"notable": "Cross Room Jump with IBJ"
}
"canJumpIntoIBJ"
"canBombHorizontally"
"canResetFallSpeed"
"canCrossRoomJumpIntoWater"
"canTrickyJump" |
From: 2
Right Door
To: 4
Top Right Ledge Junction


Requires a runway of at least 1 tile in the adjacent room, although it is easier with more. Entrance condition: {
"comeInJumping": {
"speedBooster": "any",
"minTiles": 1
}
}Requires: "HiJump"
{
"or": [
"canWallJump",
"canTrickyJump",
"canSpeedyJump"
]
}
"canCrossRoomJumpIntoWater" |
From: 2
Right Door
To: 4
Top Right Ledge Junction
This assumes a runway of at least 2 tiles in the adjacent room, although it is easier with more. Entrance condition: {
"comeInJumping": {
"speedBooster": "any",
"minTiles": 2
}
}Requires: "HiJump" "canCrossRoomJumpIntoWater" |
From: 2
Right Door
To: 4
Top Right Ledge Junction
Use the bomb boost as Samus is going through the doorway, then spring ball after breaking the water, then IBJ or use an unmorph bomb boost. Entrance condition: {
"comeInWithBombBoost": {}
}Requires: "canSpringBallBombJump"
"canCrossRoomJumpIntoWater"
"canInsaneJump"
{
"or": [
"canJumpIntoIBJ",
"canUnmorphBombBoost"
]
}Dev note: This strat requires a minimum of 2 bombs or Power Bombs. This strat requires fairly high precision in order to jump out of the water, particularly if using a Power Bomb and down grab. It is also not particularly useful, as a normal Spring Ball jump is easier and can be done with a single tile runway. It seems like the only real uses of this strat would then be to prevent a pause (maintain a blue suit without speedbooster), or a cross room artificial morph with no doorcap in the previous room (cross room + g-mode strats haven't been added to logic yet). |
From: 2
Right Door
To: 4
Top Right Ledge Junction


Requires a runway of 7 tiles with no open end in the adjacent room, to hit a peak of the speed vs height graph. Entrance condition: {
"comeInJumping": {
"speedBooster": "yes",
"minTiles": 6.4375
}
}Requires: "canCrossRoomJumpIntoWater" "canTrickyDashJump" |
From: 2
Right Door
To: 4
Top Right Ledge Junction
Requires a runway of at least 17 tiles in the adjacent room. Entrance condition: {
"comeInJumping": {
"speedBooster": "yes",
"minTiles": 17
}
}Requires: "canCrossRoomJumpIntoWater" "canTrickyJump" |
From: 2
Right Door
To: 4
Top Right Ledge Junction
Assumes a runway of at least 18 tiles in the adjacent room. Entrance condition: {
"comeInJumping": {
"speedBooster": "yes",
"minTiles": 18
}
}Requires: "canCrossRoomJumpIntoWater" |
From: 2
Right Door
To: 4
Top Right Ledge Junction
Entrance condition: {
"comeInWithSidePlatform": {
"platforms": [
{
"minHeight": 2,
"maxHeight": 2,
"minTiles": 27.4375,
"speedBooster": "yes",
"obstructions": [
[
1,
0
]
],
"note": [
"This applies to Dust Torizo Room and Noob Bridge."
],
"devNote": [
"The jump could also be done with a shorter runway, with a tricky dash jump using run speed $4.0 or $4.1.",
"But it wouldn't apply to any more rooms in the game."
]
},
{
"minHeight": 3,
"maxHeight": 3,
"minTiles": 28.2472,
"speedBooster": "yes",
"obstructions": [
[
1,
0
]
],
"note": [
"This applies to Double Chamber."
],
"devNote": [
"The jump could also be done with a shorter runway, with a tricky dash jump using run speed $4.0 or $4.1.",
"But it wouldn't apply to any more rooms in the game."
]
},
{
"minHeight": 1,
"maxHeight": 1,
"minTiles": 23.8731,
"speedBooster": "yes",
"obstructions": [
[
3,
0
]
],
"environment": "water",
"requires": [
"canGravityJump",
"canMomentumConservingMorph"
],
"note": [
"This applies to Below Botwoon Energy Tank and Botwoon Energy Tank Room",
"gain run speed, and time a pause to unequip Gravity after Samus jumps and aims down;",
"hold down through the unpause to buffer a morph."
],
"detailNote": [
"With a momentum conserving turnaround, this has a 3-frame window for the jump,",
"and between a 1-frame and 3-frame window for the pause, depending on the jump timing",
"(with later jumps corresponding to larger windows for the pause to hit)."
]
},
{
"minHeight": 2,
"maxHeight": 2,
"minTiles": 45,
"speedBooster": "yes",
"obstructions": [
[
3,
0
]
],
"requires": [
"canInsaneJump",
"canMomentumConservingMorph"
],
"note": [
"This applies to Statues Hallway and Baby Kraid Room."
],
"devNote": [
"This almost works from Metroid Room 1 (with $4.1 run speed) but comes up a few pixels short."
]
},
{
"minHeight": 3,
"maxHeight": 3,
"minTiles": 21.4375,
"speedBooster": "yes",
"obstructions": [
[
3,
0
]
],
"environment": "water",
"requires": [
"canTrickyDashJump",
"canInsaneJump",
"canGravityJump",
"canMomentumConservingMorph"
],
"note": [
"This applies to Draygon's Room.",
"Start a little less than a tile away from the wall, gain run speed, and time a pause to unequip Gravity after Samus jumps and aims down;",
"hold down through the unpause to buffer a morph."
],
"detailNote": [
"Gain extra run speed of $4.0 or $4.1."
]
},
{
"minHeight": 3,
"maxHeight": 3,
"minTiles": 41.4375,
"speedBooster": "yes",
"obstructions": [
[
3,
0
]
],
"requires": [
"canInsaneJump",
"canMomentumConservingMorph"
],
"note": [
"This applies to Blue Brinstar Energy Tank Room (Power Bomb blocks broken), Bowling Alley (middle), and Basement."
]
},
{
"minHeight": 3,
"maxHeight": 3,
"minTiles": 45,
"speedBooster": "yes",
"obstructions": [
[
5,
0
]
],
"requires": [
"canInsaneJump",
"canMomentumConservingMorph",
"canInsaneMidAirMorph"
],
"note": [
"This applies to Basement (power off)."
]
},
{
"minHeight": 3,
"maxHeight": 3,
"minTiles": 39.4375,
"speedBooster": "yes",
"obstructions": [
[
3,
2
]
],
"requires": [],
"note": [
"This applies to Metal Pirates Room."
]
},
{
"minHeight": 3,
"maxHeight": 3,
"minTiles": 39.4375,
"speedBooster": "yes",
"obstructions": [
[
5,
2
]
],
"requires": [
"canMomentumConservingMorph"
],
"note": [
"This applies to Flyway"
]
}
]
}
}Requires: "canCrossRoomJumpIntoWater" |
|
X-ray climb until Samus is above the water surface. To avoid falling out, be careful not to turn left except while holding X-ray. From a standing position facing left, hold left and immediately jump, then use Space Jump to reach the ledge. Alternatively, from a standing position facing right, do a turn-around spin jump, waiting to jump until part way through the turn-around animation (otherwise Samus will bonk inside the wall) It is also possible to climb lower, with Samus' feet still in the water; in this case, the turn-around animation is slower, providing a larger window to jump, though in this case either a wall jump or a Space Jump water escape may be needed. Entrance condition: {
"comeInWithDoorStuckSetup": {}
}Requires: "canXRayClimb" "SpaceJump" |
From: 2
Right Door
To: 4
Top Right Ledge Junction
Requires: "canUnderwaterWallJumpBreakFree"
{
"spikeHits": 2
}Dev note: Two spike hits for leniency. |
|
Requires: "h_storedSpark"
{
"or": [
{
"shinespark": {
"frames": 18,
"excessFrames": 7
}
},
{
"and": [
"HiJump",
{
"shinespark": {
"frames": 15,
"excessFrames": 6
}
}
]
},
{
"and": [
"Gravity",
{
"shinespark": {
"frames": 14,
"excessFrames": 6
}
}
]
},
{
"and": [
"Gravity",
"HiJump",
{
"shinespark": {
"frames": 10,
"excessFrames": 6
}
}
]
}
]
} |
|
Entrance condition: {
"comeInWithGrappleSwing": {
"blocks": [
{
"position": [
13,
5
],
"environment": "water",
"note": "Mt. Everest"
},
{
"position": [
7,
3
],
"note": "The Precious Room"
},
{
"position": [
7,
2
],
"note": "The Moat"
}
]
}
}Requires: "canPreciseGrappleJump" |
|
Entrance condition: {
"comeInWithGrappleSwing": {
"blocks": [
{
"position": [
8,
2
],
"note": "Bowling Alley"
},
{
"position": [
7,
3
],
"obstructions": [
[
6,
10
]
],
"note": "Red Brinstar Firefleas Room"
},
{
"position": [
9,
2
],
"note": "Climb Supers Room, Bubble Mountain, Lava Grapple Tunnel"
}
]
}
}Requires: "canTrickyGrappleJump" |
From: 2
Right Door
To: 4
Top Right Ledge Junction

Entrance condition: {
"comeInWithGrappleSwing": {
"blocks": [
{
"position": [
7,
3
],
"environment": "water",
"note": "Pants Room"
}
]
}
}Requires: "canTrickyGrappleJump"
{
"or": [
"SpaceJump",
{
"and": [
"canJumpIntoIBJ",
"canBombHorizontally"
]
}
]
} |
From: 2
Right Door
To: 4
Top Right Ledge Junction
Requires: "Gravity"
"h_spikeDoubleXModeBlueSuit"
{
"shinespark": {
"frames": 2
}
} |
|
Requires: "Gravity" "SpaceJump" |
From: 3
Junction Left of Morph Tunnel
To: 1
Left Door


Requires: "Gravity"
{
"or": [
{
"and": [
"canPreciseWallJump",
"canConsecutiveWallJump"
]
},
{
"and": [
"HiJump",
"canWallJump"
]
}
]
} |
From: 3
Junction Left of Morph Tunnel
To: 1
Left Door
Requires: "Gravity"
{
"or": [
"canSpringwall",
{
"and": [
"HiJump",
"canSpringBallJumpMidAir"
]
}
]
} |
|
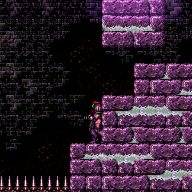
Jump from the raised alcove. This needs a jump on the last 2 possible frames. Down-grabbing does not help, and backing into the corner does not matter. Requires: "Gravity" "HiJump" "canSpeedyJump" "canTrickyJump" |
|

Requires: "Gravity"
{
"or": [
"canLongIBJ",
{
"and": [
"HiJump",
"canJumpIntoIBJ"
]
}
]
}
{
"or": [
"canBombHorizontally",
"h_IBJFromSpikes"
]
} |
From: 3
Junction Left of Morph Tunnel
To: 1
Left Door

Requires: "canSuitlessMaridia"
"HiJump"
"canPreciseWallJump"
{
"or": [
"canTrickyJump",
"canMidairWiggle"
]
}
{
"or": [
"canConsecutiveWallJump",
"canTrickyWallJump"
]
} |
From: 3
Junction Left of Morph Tunnel
To: 1
Left Door

Requires: "HiJump"
{
"or": [
"canSpaceJumpWaterEscape",
{
"and": [
"canSpaceJumpWaterBounce",
"canWallJump"
]
}
]
} |
From: 3
Junction Left of Morph Tunnel
To: 1
Left Door
With Space Jump alone, it is possible to jump to the water line and bounce on the surface. This requires a moderately precise Space Jump to start the Space Jump and then a wall jump to escape the water. Requires: {
"notable": "Suitless Bootless Space Jump"
}
"canSpaceJumpWaterBounce"
"canWallJump" |
From: 3
Junction Left of Morph Tunnel
To: 1
Left Door
1) Start the jump from the raised alcove, standing on the edge facing right. 2) Turn-around spin jump to get the necessary horizontal speed to reach the upper ledge. 3) Spring Ball jump after breaking the water line. A lateral mid-air morph or spring fling can help, but are not required. Unmorphing on a failed attempt can help avoid spike damage. Requires: "canSuitlessMaridia"
"HiJump"
"canTrickySpringBallJump"
{
"or": [
"canTrickyJump",
"canFlatleyJump"
]
} |
|


Requires: "h_storedSpark"
{
"or": [
{
"shinespark": {
"frames": 15,
"excessFrames": 4
}
},
{
"and": [
"HiJump",
{
"shinespark": {
"frames": 14,
"excessFrames": 4
}
}
]
},
{
"and": [
"Gravity",
{
"shinespark": {
"frames": 12,
"excessFrames": 4
}
}
]
},
{
"and": [
"Gravity",
"HiJump",
{
"shinespark": {
"frames": 8,
"excessFrames": 4
}
}
]
}
]
} |
From: 3
Junction Left of Morph Tunnel
To: 1
Left Door


Requires: "Gravity"
"h_spikeXModeShinecharge"
{
"shinespark": {
"frames": 12,
"excessFrames": 4
}
} |
From: 3
Junction Left of Morph Tunnel
To: 1
Left Door

Requires: "Gravity"
"canUseFlashSuitInitialSpark"
"h_spikeXModeSpikeSuit"
{
"shinespark": {
"frames": 25
}
} |
From: 3
Junction Left of Morph Tunnel
To: 1
Left Door
Requires: "Gravity"
"h_spikeDoubleXModeBlueSuit"
{
"shinespark": {
"frames": 2
}
} |
From: 3
Junction Left of Morph Tunnel
To: 3
Junction Left of Morph Tunnel
Requires: "Gravity"
"h_spikeXModeSpikeSuit"
{
"shinespark": {
"frames": 6,
"excessFrames": 6
}
} |
From: 3
Junction Left of Morph Tunnel
To: 6
Junction Right of Morph Tunnel
Requires: {
"or": [
"h_useSpringBall",
{
"and": [
"Gravity",
"h_bombThings"
]
}
]
} |
From: 3
Junction Left of Morph Tunnel
To: 6
Junction Right of Morph Tunnel
This can be done by turning off Gravity and HiJump to do a mid-air morph through the morph tunnel. Requires: "canSuitlessMaridia" "canMidAirMorph" "canDisableEquipment" "h_complexToCarryFlashSuit" |
From: 3
Junction Left of Morph Tunnel
To: 6
Junction Right of Morph Tunnel

This can be done with a wall jump instant morph to prevent pausing (which can be useful to prevent losing a blue suit). An R-jump can also be used but is only useful to save time by pausing once instead of twice. Requires: "h_navigateUnderwater" "h_threeTileJumpMorph" |
|
|
From: 4
Top Right Ledge Junction
To: 4
Top Right Ledge Junction


Requires: "h_spikeXModeSpikeSuit"
{
"shinespark": {
"frames": 11,
"excessFrames": 11
}
} |
From: 4
Top Right Ledge Junction
To: 4
Top Right Ledge Junction
Requires: "h_spikeDoubleXModeBlueSuit"
{
"shinespark": {
"frames": 0,
"excessFrames": 0
}
} |
From: 4
Top Right Ledge Junction
To: 4
Top Right Ledge Junction


Farm the Cacatac, jump to the left dry platform, and jump into the spike pit to enter X-Mode and shinecharge. Use the other Cacatac to interrupt. Requires: {
"obstaclesCleared": [
"R-Mode"
]
}
{
"or": [
{
"and": [
"h_CrystalFlashForReserveEnergy",
"h_usePowerBomb",
"canOffScreenMovement"
]
},
{
"and": [
"h_RModeCanRefillReserves",
{
"or": [
{
"resourceMissingAtMost": [
{
"type": "Super",
"count": 0
}
]
},
{
"and": [
{
"resourceMissingAtMost": [
{
"type": "Super",
"count": 4
}
]
},
"Gravity"
]
}
]
},
{
"partialRefill": {
"type": "ReserveEnergy",
"limit": 40
}
}
]
}
]
}
"canBeVeryPatient"
"canXMode"
"h_XModeSpikeHit"
"h_shinechargeMaxRunway"
{
"autoReserveTrigger": {}
}
"canRModeSparkInterrupt"Resets obstacles: R-Mode |
|
|
|
Requires: "Gravity"
{
"or": [
"SpaceJump",
"canWallJump",
"canSpringBallJumpMidAir",
"canDiagonalBombJump",
"h_IBJFromSpikes"
]
} |
From: 5
Bottom Middle Junction
To: 4
Top Right Ledge Junction


Kill the Cacatac above by standing near the edge, jumping, and shooting just before hitting the ceiling. While near the edge, perform a Gravity jump out of the water. A running jump makes this significantly harder. Requires: "canGravityJump" "canTrickyJump" |
From: 5
Bottom Middle Junction
To: 4
Top Right Ledge Junction
When the Cacatac on the ground fires a spike, perform a Spring Ball jump to break the waterline and then hit the spike for extra height. With a blue suit, after the mid-air Spring Ball jump Samus would be invulnerable and unable to take a boost from the spike. But by unequipping Spring Ball again, it becomes possible. Requires: {
"notable": "Spring Ball Spike Boost"
}
"h_underwaterCrouchJump"
"HiJump"
"canSuitlessMaridia"
"canTrickyJump"
"canTrickySpringBallJump"
{
"or": [
"canInsaneJump",
"canStationaryLateralMidAirMorph"
]
}
{
"or": [
"canNeutralDamageBoost",
{
"and": [
"canSpringFling",
"h_midAirMorphDamageBoost"
]
}
]
}
{
"enemyDamage": {
"enemy": "Cacatac",
"type": "spike",
"hits": 2
}
}Dev note: The crouch jump is not strictly necessary but it helps significantly. |
From: 5
Bottom Middle Junction
To: 4
Top Right Ledge Junction
Requires: "canUnderwaterWallJump" "canSpaceJumpWaterBounce" |
From: 5
Bottom Middle Junction
To: 4
Top Right Ledge Junction

1) Crouch jump and then Spring Ball jump. 2) Bomb-Grapple-Jump using the distant Cacatac who is above the water. 3) Spring Ball jump again just as Samus exits the water. Requires: {
"notable": "HiJumpless Double Spring Ball Jump and Bomb-Grapple-Jump"
}
"canBombGrappleJump"
"canDoubleSpringBallJumpMidAir"
"h_underwaterMaxHeightSpringBallJump" |
From: 5
Bottom Middle Junction
To: 4
Top Right Ledge Junction
Perform the spring ball jump near max height. Place the first bomb after the spring ball jump; just above the water line. Press pause just after placing the bomb, to disable Spring Ball (a 'spring fling', to reset fall speed). Place the second bomb soon after regaining control, while the game is fading back in. Requires: {
"notable": "Bomb Jump Water Escape"
}
"HiJump"
"h_underwaterMaxHeightSpringBallJump"
"canSpringFling"
"canBombJumpWaterEscape"
"canJumpIntoIBJ" |
From: 5
Bottom Middle Junction
To: 4
Top Right Ledge Junction
It is recommended to do this on the left wall to the right of the two lower Cacatacs, so that Samus can avoid the spikes on a fail. Requires: "canUnderwaterWallJumpBreakFree" |
From: 5
Bottom Middle Junction
To: 4
Top Right Ledge Junction

Requires: "Gravity"
"h_spikeXModeShinecharge"
{
"shinespark": {
"frames": 17,
"excessFrames": 12
}
} |
From: 5
Bottom Middle Junction
To: 4
Top Right Ledge Junction


Requires: "h_storedSpark"
{
"or": [
{
"shinespark": {
"frames": 20,
"excessFrames": 12
}
},
{
"and": [
"HiJump",
{
"shinespark": {
"frames": 17,
"excessFrames": 12
}
}
]
},
{
"and": [
"Gravity",
{
"shinespark": {
"frames": 16,
"excessFrames": 11
}
}
]
}
]
} |
|
Requires: "Gravity"
{
"or": [
"SpaceJump",
"canHBJ",
{
"and": [
"canDash",
{
"or": [
"canTrickyJump",
"canResetFallSpeed",
{
"enemyDamage": {
"enemy": "Cacatac",
"type": "spike",
"hits": 1
}
}
]
}
]
}
]
}
{
"or": [
"SpaceJump",
"canWallJump",
"HiJump",
"canIBJ",
"canHBJ",
"canSpringBallBombJump",
{
"spikeHits": 1
}
]
} |
From: 5
Bottom Middle Junction
To: 6
Junction Right of Morph Tunnel


Jump into the ceiling Cacatac and damage boost onto the platform between spike pits. Use i-frames to cross the second set of spikes. With greater difficulty, a Cacatac spike projectile can be used instead. Requires: "Gravity"
"canHorizontalDamageBoost"
"canUseIFrames"
{
"or": [
{
"enemyDamage": {
"enemy": "Cacatac",
"type": "contact",
"hits": 1
}
},
{
"and": [
"canTrickyDodgeEnemies",
{
"enemyDamage": {
"enemy": "Cacatac",
"type": "spike",
"hits": 1
}
}
]
}
]
} |
From: 5
Bottom Middle Junction
To: 6
Junction Right of Morph Tunnel
Horizontal damage boost using the spikes. Spin jump to get off the spikes before the leftmost Cacatac comes on-camera. Requires: "Gravity"
{
"spikeHits": 1
}
{
"tech": "canHorizontalDamageBoost"
}
"h_complexToCarryBlueSuit"
"canBlueSuitSpikeJump" |
From: 5
Bottom Middle Junction
To: 6
Junction Right of Morph Tunnel
Requires: "canSuitlessMaridia"
"HiJump"
{
"spikeHits": 1
}
{
"or": [
"Gravity",
"canWallJump",
"canSpaceJumpWaterEscape",
"canSpringBallJumpMidAir",
{
"and": [
"canJumpIntoIBJ",
"h_useSpringBall"
]
},
{
"spikeHits": 1
}
]
}Dev note: The first spike pit on the right is considered unavoidable, as if the player has Gravity and HiJump, the jump is quite tricky. In that scenario, the player will hit the spikes or need the strat with canDisableEquipment. |
From: 5
Bottom Middle Junction
To: 6
Junction Right of Morph Tunnel

This can be done by turning off Gravity and HiJump to jump over both spike pits. Requires: "canSuitlessMaridia"
{
"disableEquipment": "HiJump"
}
{
"disableEquipment": "Gravity"
}
"canTrickyJump"
{
"or": [
"Gravity",
"HiJump",
"canSpringBallJumpMidAir"
]
} |
From: 5
Bottom Middle Junction
To: 6
Junction Right of Morph Tunnel
This can be done by turning off Gravity and HiJump to jump over both spike pits. Requires: "canSuitlessMaridia"
"canSpringBallJumpMidAir"
{
"spikeHits": 1
}
{
"or": [
"canTrickySpringBallJump",
{
"and": [
"canWallJump",
"canSpaceJumpWaterBounce"
]
},
{
"and": [
"canJumpIntoIBJ",
"h_useSpringBall"
]
},
{
"spikeHits": 1
}
]
} |
From: 5
Bottom Middle Junction
To: 6
Junction Right of Morph Tunnel


It's possible to hit the block on the right while facing left to save some Energy, but that's not expected here. Requires: "h_storedSpark"
{
"shinespark": {
"frames": 10,
"excessFrames": 7
}
} |
From: 6
Junction Right of Morph Tunnel
To: 3
Junction Left of Morph Tunnel
Requires: "Morph" |
From: 6
Junction Right of Morph Tunnel
To: 5
Bottom Middle Junction
Requires: "canSuitlessMaridia"
{
"or": [
{
"spikeHits": 1
},
"canTrickySpringBallJump",
{
"and": [
"HiJump",
{
"or": [
"canWallJump",
"canDownGrab",
"canSpaceJumpWaterEscape",
"canSpringBallJumpMidAir"
]
}
]
}
]
}
{
"or": [
{
"spikeHits": 1
},
"HiJump"
]
} |
From: 6
Junction Right of Morph Tunnel
To: 5
Bottom Middle Junction
Requires: "Gravity"
{
"or": [
"SpaceJump",
"canHBJ",
{
"spikeHits": 1
}
]
} |
From: 6
Junction Right of Morph Tunnel
To: 5
Bottom Middle Junction
This can be done by turning off Gravity and HiJump to jump over both spike pits. Requires: "canSuitlessMaridia"
{
"disableEquipment": "HiJump"
}
{
"disableEquipment": "Gravity"
}
"canTrickyJump"
"canDownGrab" |
{
"$schema": "../../../schema/m3-room.schema.json",
"id": 196,
"name": "East Cactus Alley",
"area": "Maridia",
"subarea": "Inner",
"subsubarea": "Pink",
"roomAddress": "0x7DA2B",
"roomEnvironments": [
{
"heated": false
}
],
"mapTileMask": [
[
1,
1,
1,
1,
1
],
[
1,
1,
1,
1,
1
]
],
"nodes": [
{
"id": 1,
"name": "Left Door",
"nodeType": "door",
"nodeSubType": "blue",
"nodeAddress": "0x001a954",
"doorOrientation": "left",
"doorEnvironments": [
{
"physics": "air"
}
],
"mapTileMask": [
[
2,
1,
1,
1,
1
],
[
1,
1,
1,
1,
1
]
]
},
{
"id": 2,
"name": "Right Door",
"nodeType": "door",
"nodeSubType": "blue",
"nodeAddress": "0x001a960",
"doorOrientation": "right",
"doorEnvironments": [
{
"physics": "water"
}
],
"mapTileMask": [
[
1,
1,
1,
1,
1
],
[
1,
1,
1,
1,
2
]
]
},
{
"id": 3,
"name": "Junction Left of Morph Tunnel",
"nodeType": "junction",
"nodeSubType": "junction",
"mapTileMask": [
[
1,
1,
1,
1,
1
],
[
2,
1,
1,
1,
1
]
]
},
{
"id": 4,
"name": "Top Right Ledge Junction",
"nodeType": "junction",
"nodeSubType": "junction",
"mapTileMask": [
[
1,
1,
1,
2,
2
],
[
1,
1,
1,
1,
1
]
]
},
{
"id": 5,
"name": "Bottom Middle Junction",
"nodeType": "junction",
"nodeSubType": "junction",
"mapTileMask": [
[
1,
1,
2,
1,
1
],
[
1,
1,
2,
2,
1
]
]
},
{
"id": 6,
"name": "Junction Right of Morph Tunnel",
"nodeType": "junction",
"nodeSubType": "junction",
"mapTileMask": [
[
1,
2,
1,
1,
1
],
[
1,
2,
1,
1,
1
]
]
}
],
"obstacles": [
{
"id": "R-Mode",
"name": "Entered with R-Mode",
"obstacleType": "abstract"
}
],
"enemies": [
{
"id": "e1",
"groupName": "East Cactus Alley Left Cacatac",
"enemyName": "Cacatac",
"quantity": 1,
"homeNodes": [
3
]
},
{
"id": "e2",
"groupName": "East Cactus Alley Bottom Cacatacs",
"enemyName": "Cacatac",
"quantity": 2,
"homeNodes": [
5
]
},
{
"id": "e3",
"groupName": "East Cactus Alley Top Right Cacatacs",
"enemyName": "Cacatac",
"quantity": 2,
"homeNodes": [
4
]
},
{
"id": "e4",
"groupName": "East Cactus Alley Top Left Cacatac",
"enemyName": "Cacatac",
"quantity": 1,
"betweenNodes": [
5,
6
]
}
],
"strats": [
{
"link": [
1,
1
],
"name": "Base (Unlock Door)",
"requires": [],
"unlocksDoors": [
{
"types": [
"ammo"
],
"requires": []
}
],
"flashSuitChecked": true,
"blueSuitChecked": true
},
{
"link": [
1,
1
],
"name": "Base (Come In Normally)",
"entranceCondition": {
"comeInNormally": {}
},
"requires": [],
"flashSuitChecked": true,
"blueSuitChecked": true
},
{
"link": [
1,
1
],
"name": "Base (Come In With Mockball)",
"entranceCondition": {
"comeInWithMockball": {
"adjacentMinTiles": 0,
"remoteAndLandingMinTiles": [
[
0,
0
]
],
"speedBooster": "any"
}
},
"requires": [],
"flashSuitChecked": true,
"blueSuitChecked": true
},
{
"link": [
2,
2
],
"name": "Base (Unlock Door)",
"requires": [],
"unlocksDoors": [
{
"types": [
"ammo"
],
"requires": []
}
],
"flashSuitChecked": true,
"blueSuitChecked": true
},
{
"link": [
2,
2
],
"name": "Base (Come In Normally)",
"entranceCondition": {
"comeInNormally": {}
},
"requires": [],
"flashSuitChecked": true,
"blueSuitChecked": true
},
{
"link": [
2,
2
],
"name": "Base (Come In With Mockball)",
"entranceCondition": {
"comeInWithMockball": {
"adjacentMinTiles": 0,
"remoteAndLandingMinTiles": [
[
0,
0
]
],
"speedBooster": "any"
}
},
"requires": [],
"flashSuitChecked": true,
"blueSuitChecked": true
},
{
"id": 1,
"link": [
1,
1
],
"name": "Leave with Runway",
"requires": [],
"exitCondition": {
"leaveWithRunway": {
"length": 5,
"openEnd": 1
}
},
"flashSuitChecked": true,
"blueSuitChecked": true
},
{
"id": 2,
"link": [
1,
1
],
"name": "Cacatac Farm (1 Cacatac)",
"requires": [
{
"resetRoom": {
"nodes": [
1
]
}
},
{
"or": [
{
"and": [
"Gravity",
{
"or": [
{
"and": [
"HiJump",
"canSpeedyJump",
"canTrickyJump",
{
"cycleFrames": 300
}
]
},
{
"and": [
"HiJump",
"canWallJump",
{
"cycleFrames": 310
}
]
},
{
"and": [
"SpaceJump",
{
"cycleFrames": 360
}
]
},
{
"and": [
"canTrickyWallJump",
{
"cycleFrames": 380
}
]
},
{
"and": [
"canSpringBallJumpMidAir",
{
"or": [
"HiJump",
"canSpringwall",
{
"and": [
"canTrickySpringBallJump",
"canTrickyJump"
]
}
]
},
{
"cycleFrames": 340
},
"h_doubleEquipmentScreenCycleFrames"
]
},
{
"and": [
"canDoubleBombJump",
{
"cycleFrames": 830
}
]
}
]
}
]
},
{
"and": [
"canSuitlessMaridia",
{
"or": [
{
"and": [
"HiJump",
"canTrickyJump",
"canMidairWiggle",
"canTrickyWallJump",
{
"cycleFrames": 360
}
]
},
{
"and": [
"HiJump",
"canSpaceJumpWaterBounce",
"canWallJump",
{
"cycleFrames": 390
}
]
},
{
"and": [
"HiJump",
"canSpaceJumpWaterEscape",
{
"cycleFrames": 430
}
]
},
{
"and": [
{
"notable": "Suitless Bootless Space Jump"
},
"canSpaceJumpWaterBounce",
"canWallJump",
{
"cycleFrames": 440
}
]
},
{
"and": [
"HiJump",
"canTrickySpringBallJump",
{
"or": [
"canTrickyJump",
"canFlatleyJump"
]
},
{
"cycleFrames": 360
},
"h_doubleEquipmentScreenCycleFrames"
]
}
]
}
]
}
]
}
],
"resetsObstacles": [
"R-Mode"
],
"farmCycleDrops": [
{
"enemy": "Cacatac",
"count": 1
}
],
"flashSuitChecked": true,
"blueSuitChecked": true
},
{
"id": 95,
"link": [
1,
1
],
"name": "Come in Shinecharging, Crystal Spark",
"entranceCondition": {
"comeInShinecharging": {
"length": 4,
"openEnd": 0
},
"comesInHeated": "no"
},
"requires": [
"h_CrystalSpark"
],
"flashSuitChecked": true,
"blueSuitChecked": true
},
{
"id": 68,
"link": [
1,
1
],
"name": "X-Mode, Leave Shinecharged",
"requires": [
"canShinechargeMovementComplex",
"h_spikeXModeShinecharge",
{
"or": [
"h_XModeSpikeHit",
"canStationarySpinJump",
"canTrickyJump"
]
},
"Gravity",
{
"or": [
{
"and": [
"HiJump",
"SpaceJump",
{
"shineChargeFrames": 130
}
]
},
{
"and": [
"HiJump",
"canPreciseWallJump",
{
"shineChargeFrames": 160
}
]
},
{
"and": [
"SpaceJump",
"canPreciseWallJump",
{
"shineChargeFrames": 160
}
]
}
]
}
],
"exitCondition": {
"leaveShinecharged": {}
},
"flashSuitChecked": true,
"blueSuitChecked": true,
"devNote": [
"Two spike hits are expected per attempt (with any additional leniency hits being multiplied by this amount)."
]
},
{
"id": 3,
"link": [
1,
1
],
"name": "X-Mode, Leave With Spark",
"requires": [
"h_spikeXModeShinecharge",
"canShinechargeMovementTricky",
"canTrickyJump",
"Gravity",
{
"or": [
{
"and": [
"HiJump",
"canTrickyDashJump"
]
},
{
"and": [
"canFastWallJumpClimb",
"canPreciseWallJump"
]
},
{
"and": [
"SpaceJump",
"canInsaneJump",
{
"shinespark": {
"frames": 3
}
}
]
}
]
},
{
"shinespark": {
"frames": 5
}
}
],
"exitCondition": {
"leaveWithSpark": {}
},
"flashSuitChecked": true,
"blueSuitChecked": true,
"devNote": [
"Two spike hits are expected per attempt (with any additional leniency hits being multiplied by this amount)."
]
},
{
"id": 86,
"link": [
1,
1
],
"name": "R-Mode Entry",
"entranceCondition": {
"comeInWithRMode": {}
},
"requires": [],
"clearsObstacles": [
"R-Mode"
],
"flashSuitChecked": true,
"blueSuitChecked": true
},
{
"id": 4,
"link": [
1,
1
],
"name": "Crystal Flash",
"requires": [
{
"obstaclesNotCleared": [
"R-Mode"
]
},
"h_CrystalFlash"
],
"flashSuitChecked": true,
"blueSuitChecked": true
},
{
"id": 90,
"link": [
1,
1
],
"name": "Gain Blue Suit (Double X-Mode)",
"requires": [
"Gravity",
"h_spikeDoubleXModeBlueSuit",
{
"shinespark": {
"frames": 2
}
}
],
"flashSuitChecked": true,
"blueSuitChecked": true
},
{
"id": 5,
"link": [
1,
3
],
"name": "Base",
"requires": [],
"flashSuitChecked": true,
"blueSuitChecked": true
},
{
"id": 6,
"link": [
1,
4
],
"name": "G-Mode Morph Diagonal IBJ",
"entranceCondition": {
"comeInWithGMode": {
"mode": "any",
"morphed": true
}
},
"requires": [
"Gravity",
{
"or": [
"h_artificialMorphDiagonalBombJump",
{
"and": [
"h_artificialMorphHBJ",
"h_artificialMorphJumpIntoIBJ"
]
}
]
}
],
"flashSuitChecked": true,
"blueSuitChecked": true,
"note": [
"Hug the right wall after killing the first Cacatac in order to avoid its invisible, stationary projectiles.",
"After getting to the small island platform, diagonal IBJ up while avoiding the top Cacatac.",
"Alternatively HBJ to the next platform and Spring Ball from the right edge of this platform into an IBJ above the spikes."
]
},
{
"id": 7,
"link": [
1,
6
],
"name": "G-Mode Morph",
"entranceCondition": {
"comeInWithGMode": {
"mode": "any",
"morphed": true
}
},
"requires": [
"h_navigateUnderwater",
{
"or": [
"h_artificialMorphSpringBall",
"h_artificialMorphBombHorizontally"
]
},
{
"or": [
{
"and": [
"h_artificialMorphBombs",
{
"or": [
"Gravity",
"h_artificialMorphSpringBall"
]
}
]
},
"h_artificialMorphPowerBomb",
{
"enemyDamage": {
"enemy": "Cacatac",
"type": "contact",
"hits": 1
}
}
]
},
{
"or": [
"h_artificialMorphSpringBall",
{
"and": [
"Gravity",
"h_artificialMorphBombThings"
]
}
]
}
],
"flashSuitChecked": true,
"blueSuitChecked": true,
"note": "Hug the right wall after killing the first Cacatac in order to avoid its invisible, stationary projectiles."
},
{
"id": 75,
"link": [
2,
1
],
"name": "G-Mode Morph, Spring Ball Gravity Jump",
"entranceCondition": {
"comeInWithGMode": {
"mode": "any",
"morphed": true
}
},
"requires": [
"canGravityJump",
"h_artificialMorphSpringFling",
{
"or": [
"HiJump",
{
"and": [
"h_artificialMorphJumpIntoIBJ",
"canInsaneJump"
]
},
{
"and": [
"h_artificialMorphJumpIntoIBJ",
{
"spikeHits": 1
}
]
}
]
}
],
"flashSuitChecked": true,
"blueSuitChecked": true,
"note": [
"Pause and just before the pause fully triggers, jump and press left, and then disable Gravity and Spring Ball.",
"With HiJump and a good jump, it is possible to jump straight to the high ledge, but quickly pausing and turning on Spring Ball and jumping again can help as a backup.",
"Without HiJump, use this jump to start an IBJ directly over the spike pit, then boost horizontally to the left ledge.",
"Jump over the Cacatac and the spike pits with suitless Spring Flings. The final jump can be done the same way as the first, if Samus is not able to wall jump."
]
},
{
"id": 8,
"link": [
2,
1
],
"name": "G-Mode Morph, IBJ, HBJ",
"entranceCondition": {
"comeInWithGMode": {
"mode": "any",
"morphed": true
}
},
"requires": [
{
"notable": "G-Mode Morph, IBJ, HBJ"
},
"Gravity",
{
"or": [
"h_artificialMorphLongIBJ",
"h_artificialMorphJumpIntoIBJ"
]
},
"h_artificialMorphDiagonalBombJump",
"h_artificialMorphHBJ"
],
"flashSuitChecked": true,
"blueSuitChecked": true,
"note": "This requires multiple HBJ to get over spike pits. The first one, by the right door, must be started at the top of an IBJ."
},
{
"id": 76,
"link": [
2,
1
],
"name": "G-Mode Morph, Very Precise Gravity Jump Spring Ball Jump",
"entranceCondition": {
"comeInWithGMode": {
"mode": "any",
"morphed": true
}
},
"requires": [
"canGravityJump",
"h_artificialMorphSpringFling",
"canTrickyGMode",
{
"or": [
"h_artificialMorphBombThings",
{
"enemyDamage": {
"enemy": "Cacatac",
"type": "contact",
"hits": 1
}
}
]
}
],
"flashSuitChecked": true,
"blueSuitChecked": true,
"note": [
"Pause and on the last frame before the pause triggers, press left and jump, and then disable Gravity and Spring Ball.",
"On the first possible frame, repause and equip Spring Ball again then buffer the second jump out of the pause. Both of these actions are frame perfect.",
"If the first jump was done correctly, Samus will move upwards with very little horizontal movement until breaking the water, after which she will swing rapidly to the left.",
"Jump over the Cacatac and the spike pits with suitless Spring Flings. The final jump can be done the same way as the first, if Samus is not able to wall jump.",
"This one is more lenient, and has a 4-frame window for the second jump, if the first is performed frame-perfectly."
]
},
{
"id": 9,
"link": [
2,
1
],
"name": "Grapple Teleport",
"entranceCondition": {
"comeInWithGrappleTeleport": {
"blockPositions": [
[
5,
3
],
[
7,
2
]
]
}
},
"requires": [],
"flashSuitChecked": true,
"blueSuitChecked": true
},
{
"id": 10,
"link": [
2,
1
],
"name": "Grapple Teleport Door Lock Skip",
"entranceCondition": {
"comeInWithGrappleTeleport": {
"blockPositions": [
[
3,
12
],
[
3,
13
]
]
}
},
"requires": [],
"bypassesDoorShell": "yes",
"flashSuitChecked": true,
"blueSuitChecked": true
},
{
"id": 11,
"link": [
2,
1
],
"name": "Carry Grapple Teleport (Top Position)",
"entranceCondition": {
"comeInWithGrappleTeleport": {
"blockPositions": [
[
3,
12
]
]
}
},
"requires": [],
"exitCondition": {
"leaveWithGrappleTeleport": {
"blockPositions": [
[
3,
12
]
]
}
},
"bypassesDoorShell": "yes",
"flashSuitChecked": true,
"blueSuitChecked": true
},
{
"id": 12,
"link": [
2,
1
],
"name": "Carry Grapple Teleport (Bottom Position)",
"entranceCondition": {
"comeInWithGrappleTeleport": {
"blockPositions": [
[
3,
13
]
]
}
},
"requires": [],
"exitCondition": {
"leaveWithGrappleTeleport": {
"blockPositions": [
[
3,
13
]
]
}
},
"bypassesDoorShell": "yes",
"flashSuitChecked": true,
"blueSuitChecked": true
},
{
"id": 13,
"link": [
2,
1
],
"name": "Grapple Teleport X-Ray Climb",
"entranceCondition": {
"comeInWithGrappleTeleport": {
"blockPositions": [
[
2,
18
],
[
2,
19
],
[
2,
28
],
[
2,
29
]
]
}
},
"requires": [
"canXRayClimb"
],
"bypassesDoorShell": "yes",
"flashSuitChecked": true,
"blueSuitChecked": true,
"note": [
"Exit the previous room with Samus in a standing pose (while grappled).",
"After teleporting, press right to release Grapple while staying standing (not being forced into a crouch).",
"Then X-ray climb 1 screen to get up to the door transition, without needing to open the door."
]
},
{
"id": 14,
"link": [
2,
2
],
"name": "Leave with Runway",
"requires": [],
"exitCondition": {
"leaveWithRunway": {
"length": 3,
"openEnd": 1
}
},
"flashSuitChecked": true,
"blueSuitChecked": true
},
{
"id": 15,
"link": [
2,
2
],
"name": "Leave With Mockball (From Across Room)",
"requires": [
"Gravity",
"HiJump",
"canPreciseSpaceJump"
],
"exitCondition": {
"leaveWithMockball": {
"remoteRunway": {
"length": 5,
"openEnd": 1
},
"landingRunway": {
"length": 3,
"openEnd": 1
}
}
},
"flashSuitChecked": true,
"blueSuitChecked": true
},
{
"id": 16,
"link": [
2,
2
],
"name": "Cacatac Farm (2 Cacatacs)",
"requires": [
{
"resetRoom": {
"nodes": [
2
]
}
},
{
"or": [
{
"and": [
"Gravity",
{
"or": [
{
"and": [
"canWallJump",
{
"cycleFrames": 740
}
]
},
{
"and": [
"SpaceJump",
{
"cycleFrames": 790
}
]
},
{
"and": [
"HiJump",
"canTrickyDashJump",
{
"cycleFrames": 795
}
]
},
{
"and": [
"canSpringBallJumpMidAir",
{
"or": [
"HiJump",
"canSpringFling"
]
},
{
"cycleFrames": 920
},
"h_doubleEquipmentScreenCycleFrames"
]
},
{
"and": [
"canDiagonalBombJump",
{
"cycleFrames": 1380
}
]
}
]
}
]
},
{
"and": [
"canSuitlessMaridia",
{
"or": [
{
"and": [
"HiJump",
"canSpaceJumpWaterBounce",
"canWallJump",
{
"cycleFrames": 810
}
]
},
{
"and": [
"HiJump",
"canSpaceJumpWaterEscape",
{
"cycleFrames": 850
}
]
},
{
"and": [
"HiJump",
"h_underwaterMaxHeightSpringBallJump",
"canTrickyJump",
"canStationaryLateralMidAirMorph",
{
"cycleFrames": 1070
},
"h_doubleEquipmentScreenCycleFrames"
]
}
]
}
]
}
]
}
],
"resetsObstacles": [
"R-Mode"
],
"farmCycleDrops": [
{
"enemy": "Cacatac",
"count": 2
}
],
"flashSuitChecked": true,
"blueSuitChecked": true
},
{
"id": 17,
"link": [
2,
2
],
"name": "X-Mode, Leave Shinecharged",
"requires": [
"h_spikeXModeShinecharge",
{
"or": [
"h_XModeSpikeHit",
"canStationarySpinJump"
]
},
"Gravity",
"canShinechargeMovementComplex",
{
"shineChargeFrames": 65
}
],
"exitCondition": {
"leaveShinecharged": {}
},
"flashSuitChecked": true,
"blueSuitChecked": true,
"devNote": "Two spike hits are expected per attempt (with any additional leniency hits being multiplied by this amount)."
},
{
"id": 87,
"link": [
2,
2
],
"name": "R-Mode Entry",
"entranceCondition": {
"comeInWithRMode": {}
},
"requires": [],
"clearsObstacles": [
"R-Mode"
],
"flashSuitChecked": true,
"blueSuitChecked": true
},
{
"id": 18,
"link": [
2,
2
],
"name": "Crystal Flash",
"requires": [
{
"obstaclesNotCleared": [
"R-Mode"
]
},
"h_CrystalFlash"
],
"flashSuitChecked": true,
"blueSuitChecked": true
},
{
"id": 79,
"link": [
2,
2
],
"name": "Gain Flash Suit (X-Mode Spikesuit)",
"requires": [
"Gravity",
"h_spikeXModeSpikeSuit",
{
"shinespark": {
"frames": 6,
"excessFrames": 6
}
}
],
"flashSuitChecked": true,
"blueSuitChecked": true
},
{
"id": 80,
"link": [
2,
2
],
"name": "Gain Flash Suit (X-Mode Spikesuit) - Leave With Shinespark",
"requires": [
"canUseFlashSuitInitialSpark",
"Gravity",
"h_spikeXModeSpikeSuit",
{
"shinespark": {
"frames": 7
}
}
],
"exitCondition": {
"leaveWithSpark": {
"position": "bottom"
}
},
"flashSuitChecked": true,
"blueSuitChecked": true,
"note": [
"Only unmorphing on the first possible frame will work; second frame will bonk the platform."
]
},
{
"id": 88,
"link": [
2,
2
],
"name": "X-Mode Shinecharge, R-Mode Pause Abuse Spark Interrupt",
"requires": [
{
"obstaclesCleared": [
"R-Mode"
]
},
"Gravity",
"h_CrystalFlashForReserveEnergy",
"h_usePowerBomb",
"canOffScreenMovement",
"canBeVeryPatient",
"canXMode",
"h_XModeSpikeHit",
"h_shinechargeMaxRunway",
{
"autoReserveTrigger": {}
},
"canRModePauseAbuseSparkInterrupt",
{
"spikeHits": 1
}
],
"resetsObstacles": [
"R-Mode"
],
"flashSuitChecked": true,
"blueSuitChecked": true,
"note": [
"Crystal Flash at the door, and enter X-Mode on the spikes and shinecharge.",
"Pause abuse on the spikes to interrupt. Let the damage push Samus into the wall to avoid multiple spike hits after gaining blue suit."
]
},
{
"id": 19,
"link": [
2,
4
],
"name": "Base",
"requires": [
"Gravity",
{
"or": [
"SpaceJump",
"canWallJump",
"h_IBJFromSpikes"
]
}
],
"flashSuitChecked": true,
"blueSuitChecked": true
},
{
"id": 78,
"link": [
2,
4
],
"name": "IBJ Into HBJ",
"requires": [
"Gravity",
"canDiagonalBombJump",
{
"or": [
"canLongIBJ",
"canJumpIntoIBJ"
]
}
],
"flashSuitChecked": true,
"blueSuitChecked": true,
"note": "Perform an HBJ at the top of an IBJ. This is basically a very short diagonal bomb jump."
},
{
"id": 20,
"link": [
2,
4
],
"name": "Gravity and Spring Ball",
"requires": [
"Gravity",
"canSpringBallJumpMidAir",
{
"or": [
"HiJump",
{
"and": [
"h_maxHeightSpringBallJump",
"canSpringFling"
]
},
{
"and": [
"canTrickyJump",
"canLateralMidAirMorph",
"canTrickySpringBallJump",
"canSpringFling",
"h_complexToCarryFlashSuit"
]
}
]
}
],
"flashSuitChecked": true,
"blueSuitChecked": true,
"note": [
"There is just enough distance for a MidAir Spring Ball jump to reach without HiJump, with either a crouch jump or air ball.",
"To do this, pause and morph early in order to get a spring fling from equipping Spring Ball."
],
"devNote": "The h_maxHeightSpringBallJump is not a h_underwaterMaxHeightSpringBallJump, because Gravity is required."
},
{
"id": 21,
"link": [
2,
4
],
"name": "Suitless HiJump Space Jump Break Free",
"requires": [
"HiJump",
{
"or": [
"canSpaceJumpWaterEscape",
{
"and": [
"canSpaceJumpWaterBounce",
"canWallJump"
]
}
]
}
],
"flashSuitChecked": true,
"blueSuitChecked": true,
"note": [
"Use Space Jump to break out of the water.",
"Afterward, it's easiest to use a wall jump to gain height but this is not required."
]
},
{
"id": 22,
"link": [
2,
4
],
"name": "Suitless Hi-Jump Spring Ball Jump",
"requires": [
"canSuitlessMaridia",
"HiJump",
"h_underwaterMaxHeightSpringBallJump",
{
"or": [
"canStationaryLateralMidAirMorph",
{
"and": [
{
"tech": "canJumpIntoIBJ"
},
"canBombHorizontally"
]
}
]
}
],
"flashSuitChecked": true,
"blueSuitChecked": true,
"note": [
"Spring Ball jump just as Samus exits the water to reach the distant ledge.",
"To get enough horizontal distance, either use a Stationary Lateral Mid-Air Morph with a crouch jump for extra height, or spin jump out before morphing.",
"Or Spring Ball jump part of the way over and land on a Bomb explosion to cross the rest of the distance."
],
"devNote": [
"The canCrouchJump is not required but makes the strat easier",
"The canStationaryLateralMidAirMorph is not strictly required but better describes the difficulty."
]
},
{
"id": 23,
"link": [
2,
4
],
"name": "Shinespark",
"entranceCondition": {
"comeInShinecharged": {}
},
"requires": [
{
"shineChargeFrames": 10
},
"Gravity",
{
"shinespark": {
"frames": 21,
"excessFrames": 5
}
}
],
"flashSuitChecked": true,
"blueSuitChecked": true
},
{
"id": 24,
"link": [
2,
4
],
"name": "Suitless Shinespark",
"entranceCondition": {
"comeInShinecharged": {}
},
"requires": [
{
"shineChargeFrames": 10
},
{
"shinespark": {
"frames": 22,
"excessFrames": 5
}
}
],
"flashSuitChecked": true,
"blueSuitChecked": true
},
{
"id": 61,
"link": [
2,
4
],
"name": "Speedy HiJump",
"requires": [
"Gravity",
"HiJump",
"canTrickyDashJump"
],
"flashSuitChecked": true,
"blueSuitChecked": true,
"note": [
"The in-room runway with the door closed works but is somewhat precise.",
"With the door open the jump is easier, but only use a small portion of the runway that was occupied by the door."
]
},
{
"id": 72,
"link": [
2,
4
],
"name": "Precise Gravity Jump from Spikes",
"requires": [
"canGravityJump",
"HiJump",
{
"spikeHits": 1
},
"canUseIFrames",
"canTrickyJump",
{
"or": [
"canInsaneJump",
"canCrouchJump",
"canDownGrab"
]
},
{
"or": [
"canInsaneJump",
{
"spikeHits": 1
}
]
},
{
"or": [
{
"noBlueSuit": {}
},
"canBlueSuitSpikeJump"
]
}
],
"flashSuitChecked": true,
"blueSuitChecked": true,
"note": [
"Take a spike hit and pause just after getting hit. Quickly crouch and jump just before the fade out ends.",
"With a precise Gravity jump, it is possible to not need a crouch jump or down grab."
],
"devNote": "The canCrouchJump is not a h_underwaterCrouchJump, because Gravity is required."
},
{
"id": 25,
"link": [
2,
4
],
"name": "X-Mode Shinespark",
"requires": [
"Gravity",
"h_spikeXModeShinecharge",
{
"or": [
"h_XModeSpikeHit",
"canStationarySpinJump"
]
},
{
"shinespark": {
"frames": 25,
"excessFrames": 5
}
}
],
"flashSuitChecked": true,
"blueSuitChecked": true,
"devNote": "Two spike hits are expected per attempt (with any additional leniency hits being multiplied by this amount)."
},
{
"id": 26,
"link": [
2,
4
],
"name": "Cross Room Jump with Assist",
"entranceCondition": {
"comeInJumping": {
"speedBooster": "no",
"minTiles": 1
}
},
"requires": [
{
"or": [
"canWallJump",
"canTrickySpringBallJump",
"SpaceJump"
]
},
"canCrossRoomJumpIntoWater"
],
"flashSuitChecked": true,
"blueSuitChecked": true,
"note": "Requires a runway of at least 1 tile in the adjacent room, although it is easier with more."
},
{
"id": 27,
"link": [
2,
4
],
"name": "Cross Room Jump with IBJ",
"entranceCondition": {
"comeInJumping": {
"speedBooster": "no",
"minTiles": 1
}
},
"requires": [
{
"notable": "Cross Room Jump with IBJ"
},
"canJumpIntoIBJ",
"canBombHorizontally",
"canResetFallSpeed",
"canCrossRoomJumpIntoWater",
"canTrickyJump"
],
"wallJumpAvoid": true,
"flashSuitChecked": true,
"blueSuitChecked": true,
"note": [
"Requires a runway of at least 1 tiles in the adjacent room, although it is easier with more.",
"Start the IBJ as far left as possible. The furthest right is just right of the waterfall.",
"Turning around, carefully, is one way to lose forward momentum and begin the IBJ.",
"At the top of the IBJ bomb to the left and unmorph to reset fall speed."
]
},
{
"id": 28,
"link": [
2,
4
],
"name": "Cross Room Jump with HiJump",
"entranceCondition": {
"comeInJumping": {
"speedBooster": "any",
"minTiles": 1
}
},
"requires": [
"HiJump",
{
"or": [
"canWallJump",
"canTrickyJump",
"canSpeedyJump"
]
},
"canCrossRoomJumpIntoWater"
],
"flashSuitChecked": true,
"blueSuitChecked": true,
"note": "Requires a runway of at least 1 tile in the adjacent room, although it is easier with more."
},
{
"id": 29,
"link": [
2,
4
],
"name": "Cross Room Jump with HiJump (Lenient)",
"entranceCondition": {
"comeInJumping": {
"speedBooster": "any",
"minTiles": 2
}
},
"requires": [
"HiJump",
"canCrossRoomJumpIntoWater"
],
"flashSuitChecked": true,
"blueSuitChecked": true,
"note": "This assumes a runway of at least 2 tiles in the adjacent room, although it is easier with more."
},
{
"id": 30,
"link": [
2,
4
],
"name": "Cross Room Jump with Spring Ball, Bomb Boost",
"entranceCondition": {
"comeInWithBombBoost": {}
},
"requires": [
"canSpringBallBombJump",
"canCrossRoomJumpIntoWater",
"canInsaneJump",
{
"or": [
"canJumpIntoIBJ",
"canUnmorphBombBoost"
]
}
],
"wallJumpAvoid": true,
"flashSuitChecked": true,
"blueSuitChecked": true,
"note": "Use the bomb boost as Samus is going through the doorway, then spring ball after breaking the water, then IBJ or use an unmorph bomb boost.",
"devNote": [
"This strat requires a minimum of 2 bombs or Power Bombs.",
"This strat requires fairly high precision in order to jump out of the water, particularly if using a Power Bomb and down grab.",
"It is also not particularly useful, as a normal Spring Ball jump is easier and can be done with a single tile runway.",
"It seems like the only real uses of this strat would then be to prevent a pause (maintain a blue suit without speedbooster),",
"or a cross room artificial morph with no doorcap in the previous room (cross room + g-mode strats haven't been added to logic yet)."
]
},
{
"id": 31,
"link": [
2,
4
],
"name": "Cross Room Tricky Dash Jump",
"entranceCondition": {
"comeInJumping": {
"speedBooster": "yes",
"minTiles": 6.4375
}
},
"requires": [
"canCrossRoomJumpIntoWater",
"canTrickyDashJump"
],
"flashSuitChecked": true,
"blueSuitChecked": true,
"note": [
"Requires a runway of 7 tiles with no open end in the adjacent room, to hit a peak of the speed vs height graph."
]
},
{
"id": 32,
"link": [
2,
4
],
"name": "Cross Room Jump with Speed Booster",
"entranceCondition": {
"comeInJumping": {
"speedBooster": "yes",
"minTiles": 17
}
},
"requires": [
"canCrossRoomJumpIntoWater",
"canTrickyJump"
],
"flashSuitChecked": true,
"blueSuitChecked": true,
"note": [
"Requires a runway of at least 17 tiles in the adjacent room."
]
},
{
"id": 33,
"link": [
2,
4
],
"name": "Cross Room Jump with Speed Booster (Lenient)",
"entranceCondition": {
"comeInJumping": {
"speedBooster": "yes",
"minTiles": 18
}
},
"requires": [
"canCrossRoomJumpIntoWater"
],
"flashSuitChecked": true,
"blueSuitChecked": true,
"note": [
"Assumes a runway of at least 18 tiles in the adjacent room."
]
},
{
"id": 73,
"link": [
2,
4
],
"name": "Side Platform Cross Room Jump",
"entranceCondition": {
"comeInWithSidePlatform": {
"platforms": [
{
"minHeight": 2,
"maxHeight": 2,
"minTiles": 27.4375,
"speedBooster": "yes",
"obstructions": [
[
1,
0
]
],
"note": [
"This applies to Dust Torizo Room and Noob Bridge."
],
"devNote": [
"The jump could also be done with a shorter runway, with a tricky dash jump using run speed $4.0 or $4.1.",
"But it wouldn't apply to any more rooms in the game."
]
},
{
"minHeight": 3,
"maxHeight": 3,
"minTiles": 28.2472,
"speedBooster": "yes",
"obstructions": [
[
1,
0
]
],
"note": [
"This applies to Double Chamber."
],
"devNote": [
"The jump could also be done with a shorter runway, with a tricky dash jump using run speed $4.0 or $4.1.",
"But it wouldn't apply to any more rooms in the game."
]
},
{
"minHeight": 1,
"maxHeight": 1,
"minTiles": 23.8731,
"speedBooster": "yes",
"obstructions": [
[
3,
0
]
],
"environment": "water",
"requires": [
"canGravityJump",
"canMomentumConservingMorph"
],
"note": [
"This applies to Below Botwoon Energy Tank and Botwoon Energy Tank Room",
"gain run speed, and time a pause to unequip Gravity after Samus jumps and aims down;",
"hold down through the unpause to buffer a morph."
],
"detailNote": [
"With a momentum conserving turnaround, this has a 3-frame window for the jump,",
"and between a 1-frame and 3-frame window for the pause, depending on the jump timing",
"(with later jumps corresponding to larger windows for the pause to hit)."
]
},
{
"minHeight": 2,
"maxHeight": 2,
"minTiles": 45,
"speedBooster": "yes",
"obstructions": [
[
3,
0
]
],
"requires": [
"canInsaneJump",
"canMomentumConservingMorph"
],
"note": [
"This applies to Statues Hallway and Baby Kraid Room."
],
"devNote": [
"This almost works from Metroid Room 1 (with $4.1 run speed) but comes up a few pixels short."
]
},
{
"minHeight": 3,
"maxHeight": 3,
"minTiles": 21.4375,
"speedBooster": "yes",
"obstructions": [
[
3,
0
]
],
"environment": "water",
"requires": [
"canTrickyDashJump",
"canInsaneJump",
"canGravityJump",
"canMomentumConservingMorph"
],
"note": [
"This applies to Draygon's Room.",
"Start a little less than a tile away from the wall, gain run speed, and time a pause to unequip Gravity after Samus jumps and aims down;",
"hold down through the unpause to buffer a morph."
],
"detailNote": [
"Gain extra run speed of $4.0 or $4.1."
]
},
{
"minHeight": 3,
"maxHeight": 3,
"minTiles": 41.4375,
"speedBooster": "yes",
"obstructions": [
[
3,
0
]
],
"requires": [
"canInsaneJump",
"canMomentumConservingMorph"
],
"note": [
"This applies to Blue Brinstar Energy Tank Room (Power Bomb blocks broken), Bowling Alley (middle), and Basement."
]
},
{
"minHeight": 3,
"maxHeight": 3,
"minTiles": 45,
"speedBooster": "yes",
"obstructions": [
[
5,
0
]
],
"requires": [
"canInsaneJump",
"canMomentumConservingMorph",
"canInsaneMidAirMorph"
],
"note": [
"This applies to Basement (power off)."
]
},
{
"minHeight": 3,
"maxHeight": 3,
"minTiles": 39.4375,
"speedBooster": "yes",
"obstructions": [
[
3,
2
]
],
"requires": [],
"note": [
"This applies to Metal Pirates Room."
]
},
{
"minHeight": 3,
"maxHeight": 3,
"minTiles": 39.4375,
"speedBooster": "yes",
"obstructions": [
[
5,
2
]
],
"requires": [
"canMomentumConservingMorph"
],
"note": [
"This applies to Flyway"
]
}
]
}
},
"requires": [
"canCrossRoomJumpIntoWater"
],
"flashSuitChecked": true,
"blueSuitChecked": true
},
{
"id": 34,
"link": [
2,
4
],
"name": "X-Ray Climb Space Jump",
"entranceCondition": {
"comeInWithDoorStuckSetup": {}
},
"requires": [
"canXRayClimb",
"SpaceJump"
],
"flashSuitChecked": true,
"blueSuitChecked": true,
"note": [
"X-ray climb until Samus is above the water surface.",
"To avoid falling out, be careful not to turn left except while holding X-ray.",
"From a standing position facing left, hold left and immediately jump, then use Space Jump to reach the ledge.",
"Alternatively, from a standing position facing right, do a turn-around spin jump, waiting to jump until part way through the turn-around animation (otherwise Samus will bonk inside the wall)",
"It is also possible to climb lower, with Samus' feet still in the water; in this case, the turn-around animation is slower, providing a larger window to jump, though in this case either a wall jump or a Space Jump water escape may be needed."
]
},
{
"id": 62,
"link": [
2,
4
],
"name": "Underwater Walljump Break Free",
"requires": [
"canUnderwaterWallJumpBreakFree",
{
"spikeHits": 2
}
],
"flashSuitChecked": true,
"blueSuitChecked": true,
"devNote": "Two spike hits for leniency."
},
{
"id": 63,
"link": [
2,
4
],
"name": "Use Stored Spark",
"requires": [
"h_storedSpark",
{
"or": [
{
"shinespark": {
"frames": 18,
"excessFrames": 7
}
},
{
"and": [
"HiJump",
{
"shinespark": {
"frames": 15,
"excessFrames": 6
}
}
]
},
{
"and": [
"Gravity",
{
"shinespark": {
"frames": 14,
"excessFrames": 6
}
}
]
},
{
"and": [
"Gravity",
"HiJump",
{
"shinespark": {
"frames": 10,
"excessFrames": 6
}
}
]
}
]
}
],
"flashSuitChecked": true,
"blueSuitChecked": true
},
{
"id": 69,
"link": [
2,
4
],
"name": "Precise Grapple Jump",
"entranceCondition": {
"comeInWithGrappleSwing": {
"blocks": [
{
"position": [
13,
5
],
"environment": "water",
"note": "Mt. Everest"
},
{
"position": [
7,
3
],
"note": "The Precious Room"
},
{
"position": [
7,
2
],
"note": "The Moat"
}
]
}
},
"requires": [
"canPreciseGrappleJump"
],
"flashSuitChecked": true,
"blueSuitChecked": true
},
{
"id": 70,
"link": [
2,
4
],
"name": "Tricky Grapple Jump",
"entranceCondition": {
"comeInWithGrappleSwing": {
"blocks": [
{
"position": [
8,
2
],
"note": "Bowling Alley"
},
{
"position": [
7,
3
],
"obstructions": [
[
6,
10
]
],
"note": "Red Brinstar Firefleas Room"
},
{
"position": [
9,
2
],
"note": "Climb Supers Room, Bubble Mountain, Lava Grapple Tunnel"
}
]
}
},
"requires": [
"canTrickyGrappleJump"
],
"flashSuitChecked": false,
"blueSuitChecked": true
},
{
"id": 71,
"link": [
2,
4
],
"name": "Tricky Grapple Jump (With Assist)",
"entranceCondition": {
"comeInWithGrappleSwing": {
"blocks": [
{
"position": [
7,
3
],
"environment": "water",
"note": "Pants Room"
}
]
}
},
"requires": [
"canTrickyGrappleJump",
{
"or": [
"SpaceJump",
{
"and": [
"canJumpIntoIBJ",
"canBombHorizontally"
]
}
]
}
],
"flashSuitChecked": false,
"blueSuitChecked": true
},
{
"id": 91,
"link": [
2,
4
],
"name": "Gain Blue Suit (Double X-Mode)",
"requires": [
"Gravity",
"h_spikeDoubleXModeBlueSuit",
{
"shinespark": {
"frames": 2
}
}
],
"flashSuitChecked": true,
"blueSuitChecked": true
},
{
"id": 35,
"link": [
3,
1
],
"name": "Base",
"requires": [
"Gravity",
"SpaceJump"
],
"flashSuitChecked": true,
"blueSuitChecked": true
},
{
"id": 36,
"link": [
3,
1
],
"name": "Gravity and Wall Jump",
"requires": [
"Gravity",
{
"or": [
{
"and": [
"canPreciseWallJump",
"canConsecutiveWallJump"
]
},
{
"and": [
"HiJump",
"canWallJump"
]
}
]
}
],
"flashSuitChecked": true,
"blueSuitChecked": true
},
{
"id": 37,
"link": [
3,
1
],
"name": "Gravity and Spring Ball",
"requires": [
"Gravity",
{
"or": [
"canSpringwall",
{
"and": [
"HiJump",
"canSpringBallJumpMidAir"
]
}
]
}
],
"flashSuitChecked": true,
"blueSuitChecked": true
},
{
"id": 38,
"link": [
3,
1
],
"name": "Speedy Jump",
"requires": [
"Gravity",
"HiJump",
"canSpeedyJump",
"canTrickyJump"
],
"flashSuitChecked": true,
"blueSuitChecked": true,
"note": [
"Jump from the raised alcove."
],
"detailNote": [
"This needs a jump on the last 2 possible frames.",
"Down-grabbing does not help, and backing into the corner does not matter."
]
},
{
"id": 39,
"link": [
3,
1
],
"name": "IBJ",
"requires": [
"Gravity",
{
"or": [
"canLongIBJ",
{
"and": [
"HiJump",
"canJumpIntoIBJ"
]
}
]
},
{
"or": [
"canBombHorizontally",
"h_IBJFromSpikes"
]
}
],
"flashSuitChecked": true,
"blueSuitChecked": true
},
{
"id": 40,
"link": [
3,
1
],
"name": "Hi-Jump Wall Jump",
"requires": [
"canSuitlessMaridia",
"HiJump",
"canPreciseWallJump",
{
"or": [
"canTrickyJump",
"canMidairWiggle"
]
},
{
"or": [
"canConsecutiveWallJump",
"canTrickyWallJump"
]
}
],
"flashSuitChecked": true,
"blueSuitChecked": true
},
{
"id": 41,
"link": [
3,
1
],
"name": "Suitless Space Jump HiJump",
"requires": [
"HiJump",
{
"or": [
"canSpaceJumpWaterEscape",
{
"and": [
"canSpaceJumpWaterBounce",
"canWallJump"
]
}
]
}
],
"flashSuitChecked": true,
"blueSuitChecked": true
},
{
"id": 67,
"link": [
3,
1
],
"name": "Suitless Bootless Space Jump",
"requires": [
{
"notable": "Suitless Bootless Space Jump"
},
"canSpaceJumpWaterBounce",
"canWallJump"
],
"flashSuitChecked": true,
"blueSuitChecked": true,
"note": [
"With Space Jump alone, it is possible to jump to the water line and bounce on the surface.",
"This requires a moderately precise Space Jump to start the Space Jump and then a wall jump to escape the water."
]
},
{
"id": 42,
"link": [
3,
1
],
"name": "Suitless Spring Ball",
"requires": [
"canSuitlessMaridia",
"HiJump",
"canTrickySpringBallJump",
{
"or": [
"canTrickyJump",
"canFlatleyJump"
]
}
],
"flashSuitChecked": true,
"blueSuitChecked": true,
"note": [
"1) Start the jump from the raised alcove, standing on the edge facing right.",
"2) Turn-around spin jump to get the necessary horizontal speed to reach the upper ledge.",
"3) Spring Ball jump after breaking the water line.",
"A lateral mid-air morph or spring fling can help, but are not required.",
"Unmorphing on a failed attempt can help avoid spike damage."
]
},
{
"id": 81,
"link": [
3,
1
],
"name": "Use Stored Spark",
"requires": [
"h_storedSpark",
{
"or": [
{
"shinespark": {
"frames": 15,
"excessFrames": 4
}
},
{
"and": [
"HiJump",
{
"shinespark": {
"frames": 14,
"excessFrames": 4
}
}
]
},
{
"and": [
"Gravity",
{
"shinespark": {
"frames": 12,
"excessFrames": 4
}
}
]
},
{
"and": [
"Gravity",
"HiJump",
{
"shinespark": {
"frames": 8,
"excessFrames": 4
}
}
]
}
]
}
],
"wallJumpAvoid": true,
"flashSuitChecked": true,
"blueSuitChecked": true
},
{
"id": 82,
"link": [
3,
1
],
"name": "X-Mode, Shinespark Up",
"requires": [
"Gravity",
"h_spikeXModeShinecharge",
{
"shinespark": {
"frames": 12,
"excessFrames": 4
}
}
],
"wallJumpAvoid": true,
"flashSuitChecked": true,
"blueSuitChecked": true
},
{
"id": 83,
"link": [
3,
1
],
"name": "Gain Flash Suit (X-Mode Spikesuit) - Shinespark Up",
"requires": [
"Gravity",
"canUseFlashSuitInitialSpark",
"h_spikeXModeSpikeSuit",
{
"shinespark": {
"frames": 25
}
}
],
"wallJumpAvoid": true,
"flashSuitChecked": true,
"blueSuitChecked": true
},
{
"id": 92,
"link": [
3,
1
],
"name": "Gain Blue Suit (Double X-Mode)",
"requires": [
"Gravity",
"h_spikeDoubleXModeBlueSuit",
{
"shinespark": {
"frames": 2
}
}
],
"flashSuitChecked": true,
"blueSuitChecked": true
},
{
"id": 84,
"link": [
3,
3
],
"name": "Gain Flash Suit (X-Mode Spikesuit)",
"requires": [
"Gravity",
"h_spikeXModeSpikeSuit",
{
"shinespark": {
"frames": 6,
"excessFrames": 6
}
}
],
"flashSuitChecked": true,
"blueSuitChecked": true
},
{
"id": 43,
"link": [
3,
6
],
"name": "Base",
"requires": [
{
  "or": [
    "h_useSpringBall",
    {
      "and": [
        "Gravity",
        "h_bombThings"
      ]
    }
  ]
}
],
"flashSuitChecked": true,
"blueSuitChecked": true
},
{
"id": 44,
"link": [
3,
6
],
"name": "Suitless Bootless",
"requires": [
"canSuitlessMaridia",
"canMidAirMorph",
"canDisableEquipment",
"h_complexToCarryFlashSuit"
],
"flashSuitChecked": true,
"blueSuitChecked": true,
"note": "This can be done by turning off Gravity and HiJump to do a mid-air morph through the morph tunnel."
},
{
"id": 96,
"link": [
3,
6
],
"name": "Morph Without Disabling Gravity",
"requires": [
"h_navigateUnderwater",
"h_threeTileJumpMorph"
],
"flashSuitChecked": true,
"blueSuitChecked": true,
"note": [
"This can be done with a wall jump instant morph to prevent pausing (which can be useful to prevent losing a blue suit).",
"An R-jump can also be used but is only useful to save time by pausing once instead of twice."
]
},
{
"id": 45,
"link": [
4,
2
],
"name": "Base",
"requires": [],
"flashSuitChecked": true,
"blueSuitChecked": true
},
{
"id": 85,
"link": [
4,
4
],
"name": "Gain Flash Suit (X-Mode Spikesuit)",
"requires": [
"h_spikeXModeSpikeSuit",
{
"shinespark": {
"frames": 11,
"excessFrames": 11
}
}
],
"flashSuitChecked": true,
"blueSuitChecked": true
},
{
"id": 93,
"link": [
4,
4
],
"name": "Gain Blue Suit (Double X-Mode)",
"requires": [
"h_spikeDoubleXModeBlueSuit",
{
"shinespark": {
"frames": 0,
"excessFrames": 0
}
}
],
"flashSuitChecked": true,
"blueSuitChecked": true
},
{
"id": 89,
"link": [
4,
4
],
"name": "X-Mode Shinecharge, R-Mode Spark Interrupt",
"requires": [
{
"obstaclesCleared": [
"R-Mode"
]
},
{
"or": [
{
"and": [
"h_CrystalFlashForReserveEnergy",
"h_usePowerBomb",
"canOffScreenMovement"
]
},
{
"and": [
"h_RModeCanRefillReserves",
{
"or": [
{
"resourceMissingAtMost": [
{
"type": "Super",
"count": 0
}
]
},
{
"and": [
{
"resourceMissingAtMost": [
{
"type": "Super",
"count": 4
}
]
},
"Gravity"
]
}
]
},
{
"partialRefill": {
"type": "ReserveEnergy",
"limit": 40
}
}
]
}
]
},
"canBeVeryPatient",
"canXMode",
"h_XModeSpikeHit",
"h_shinechargeMaxRunway",
{
"autoReserveTrigger": {}
},
"canRModeSparkInterrupt"
],
"resetsObstacles": [
"R-Mode"
],
"flashSuitChecked": true,
"blueSuitChecked": true,
"note": [
"Farm the Cacatac, jump to the left dry platform, and jump into the spike pit to enter X-Mode and shinecharge.",
"Use the other Cacatac to interrupt."
]
},
{
"id": 46,
"link": [
4,
5
],
"name": "Base",
"requires": [],
"flashSuitChecked": true,
"blueSuitChecked": true
},
{
"id": 47,
"link": [
5,
4
],
"name": "Base",
"requires": [
"Gravity",
{
"or": [
"SpaceJump",
"canWallJump",
"canSpringBallJumpMidAir",
"canDiagonalBombJump",
"h_IBJFromSpikes"
]
}
],
"flashSuitChecked": true,
"blueSuitChecked": true
},
{
"id": 77,
"link": [
5,
4
],
"name": "Gravity Jump",
"requires": [
"canGravityJump",
"canTrickyJump"
],
"flashSuitChecked": true,
"blueSuitChecked": true,
"note": [
"Kill the Cacatac above by standing near the edge, jumping, and shooting just before hitting the ceiling.",
"While near the edge, perform a Gravity jump out of the water. A running jump makes this significantly harder."
]
},
{
"id": 48,
"link": [
5,
4
],
"name": "Spring Ball Spike Boost",
"requires": [
{
"notable": "Spring Ball Spike Boost"
},
"h_underwaterCrouchJump",
"HiJump",
"canSuitlessMaridia",
"canTrickyJump",
"canTrickySpringBallJump",
{
"or": [
"canInsaneJump",
"canStationaryLateralMidAirMorph"
]
},
{
"or": [
"canNeutralDamageBoost",
{
"and": [
"canSpringFling",
"h_midAirMorphDamageBoost"
]
}
]
},
{
"enemyDamage": {
"enemy": "Cacatac",
"type": "spike",
"hits": 2
}
}
],
"flashSuitChecked": true,
"blueSuitChecked": true,
"note": "When the Cacatac on the ground fires a spike, perform a Spring Ball jump to break the waterline and then hit the spike for extra height.",
"detailNote": [
"With a blue suit, after the mid-air Spring Ball jump Samus would be invulnerable and unable to take a boost from the spike.",
"But by unequipping Spring Ball again, it becomes possible."
],
"devNote": [
"The crouch jump is not strictly necessary but it helps significantly."
]
},
{
"id": 49,
"link": [
5,
4
],
"name": "Underwater Walljump",
"requires": [
"canUnderwaterWallJump",
"canSpaceJumpWaterBounce"
],
"flashSuitChecked": true,
"blueSuitChecked": true
},
{
"id": 50,
"link": [
5,
4
],
"name": "HiJumpless Double Spring Ball Jump and Bomb-Grapple-Jump",
"requires": [
{
"notable": "HiJumpless Double Spring Ball Jump and Bomb-Grapple-Jump"
},
"canBombGrappleJump",
"canDoubleSpringBallJumpMidAir",
"h_underwaterMaxHeightSpringBallJump"
],
"flashSuitChecked": false,
"blueSuitChecked": true,
"note": [
"1) Crouch jump and then Spring Ball jump.",
"2) Bomb-Grapple-Jump using the distant Cacatac who is above the water.",
"3) Spring Ball jump again just as Samus exits the water."
]
},
{
"id": 51,
"link": [
5,
4
],
"name": "Bomb Jump Water Escape",
"requires": [
{
"notable": "Bomb Jump Water Escape"
},
"HiJump",
"h_underwaterMaxHeightSpringBallJump",
"canSpringFling",
"canBombJumpWaterEscape",
"canJumpIntoIBJ"
],
"flashSuitChecked": true,
"blueSuitChecked": true,
"note": [
"Perform the spring ball jump near max height.",
"Place the first bomb after the spring ball jump; just above the water line.",
"Press pause just after placing the bomb, to disable Spring Ball (a 'spring fling', to reset fall speed).",
"Place the second bomb soon after regaining control, while the game is fading back in."
]
},
{
"id": 64,
"link": [
5,
4
],
"name": "Underwater Walljump Break Free",
"requires": [
"canUnderwaterWallJumpBreakFree"
],
"flashSuitChecked": true,
"blueSuitChecked": true,
"note": "It is recommended to do this on the left wall to the right of the two lower Cacatacs, so that Samus can avoid the spikes on a fail."
},
{
"id": 74,
"link": [
5,
4
],
"name": "X-Mode Shinespark",
"requires": [
"Gravity",
"h_spikeXModeShinecharge",
{
"shinespark": {
"frames": 17,
"excessFrames": 12
}
}
],
"flashSuitChecked": true,
"blueSuitChecked": true
},
{
"id": 65,
"link": [
5,
4
],
"name": "Use Stored Spark",
"requires": [
"h_storedSpark",
{
"or": [
{
"shinespark": {
"frames": 20,
"excessFrames": 12
}
},
{
"and": [
"HiJump",
{
"shinespark": {
"frames": 17,
"excessFrames": 12
}
}
]
},
{
"and": [
"Gravity",
{
"shinespark": {
"frames": 16,
"excessFrames": 11
}
}
]
}
]
}
],
"flashSuitChecked": true,
"blueSuitChecked": true
},
{
"id": 52,
"link": [
5,
6
],
"name": "Base",
"requires": [
"Gravity",
{
"or": [
"SpaceJump",
"canHBJ",
{
"and": [
"canDash",
{
"or": [
"canTrickyJump",
"canResetFallSpeed",
{
"enemyDamage": {
"enemy": "Cacatac",
"type": "spike",
"hits": 1
}
}
]
}
]
}
]
},
{
"or": [
"SpaceJump",
"canWallJump",
"HiJump",
"canIBJ",
"canHBJ",
"canSpringBallBombJump",
{
"spikeHits": 1
}
]
}
],
"flashSuitChecked": true,
"blueSuitChecked": true
},
{
"id": 53,
"link": [
5,
6
],
"name": "Cacatac Boost",
"requires": [
"Gravity",
"canHorizontalDamageBoost",
"canUseIFrames",
{
"or": [
{
"enemyDamage": {
"enemy": "Cacatac",
"type": "contact",
"hits": 1
}
},
{
"and": [
"canTrickyDodgeEnemies",
{
"enemyDamage": {
"enemy": "Cacatac",
"type": "spike",
"hits": 1
}
}
]
}
]
}
],
"flashSuitChecked": true,
"blueSuitChecked": true,
"note": [
"Jump into the ceiling Cacatac and damage boost onto the platform between spike pits.",
"Use i-frames to cross the second set of spikes.",
"With greater difficulty, a Cacatac spike projectile can be used instead."
]
},
{
"id": 94,
"link": [
5,
6
],
"name": "Blue Suit Spike Damage Boost",
"requires": [
"Gravity",
{
"spikeHits": 1
},
{
"tech": "canHorizontalDamageBoost"
},
"h_complexToCarryBlueSuit",
"canBlueSuitSpikeJump"
],
"flashSuitChecked": true,
"blueSuitChecked": true,
"note": [
"Horizontal damage boost using the spikes.",
"Spin jump to get off the spikes before the leftmost Cacatac comes on-camera."
]
},
{
"id": 54,
"link": [
5,
6
],
"name": "Suitless HiJump",
"requires": [
"canSuitlessMaridia",
"HiJump",
{
"spikeHits": 1
},
{
"or": [
"Gravity",
"canWallJump",
"canSpaceJumpWaterEscape",
"canSpringBallJumpMidAir",
{
"and": [
"canJumpIntoIBJ",
"h_useSpringBall"
]
},
{
"spikeHits": 1
}
]
}
],
"flashSuitChecked": true,
"blueSuitChecked": true,
"devNote": [
"The first spike pit on the right is considered unavoidable, as if the player has Gravity and HiJump, the jump is quite tricky.",
"In that scenario, the player will hit the spikes or need the strat with canDisableEquipment."
]
},
{
"id": 55,
"link": [
5,
6
],
"name": "Suitless Bootless Jump",
"requires": [
"canSuitlessMaridia",
{
"disableEquipment": "HiJump"
},
{
"disableEquipment": "Gravity"
},
"canTrickyJump",
{
"or": [
"Gravity",
"HiJump",
"canSpringBallJumpMidAir"
]
}
],
"flashSuitChecked": true,
"blueSuitChecked": true,
"note": "This can be done by turning off Gravity and HiJump to jump over both spike pits."
},
{
"id": 56,
"link": [
5,
6
],
"name": "Suitless Spring Ball",
"requires": [
"canSuitlessMaridia",
"canSpringBallJumpMidAir",
{
"spikeHits": 1
},
{
"or": [
"canTrickySpringBallJump",
{
"and": [
"canWallJump",
"canSpaceJumpWaterBounce"
]
},
{
"and": [
"canJumpIntoIBJ",
"h_useSpringBall"
]
},
{
"spikeHits": 1
}
]
}
],
"flashSuitChecked": true,
"blueSuitChecked": true,
"note": "This can be done by turning off Gravity and HiJump to jump over both spike pits."
},
{
"id": 66,
"link": [
5,
6
],
"name": "Use Stored Spark",
"requires": [
"h_storedSpark",
{
"shinespark": {
"frames": 10,
"excessFrames": 7
}
}
],
"flashSuitChecked": true,
"blueSuitChecked": true,
"note": "It's possible to hit the block on the right while facing left to save some Energy, but that's not expected here."
},
{
"id": 57,
"link": [
6,
3
],
"name": "Base",
"requires": [
"Morph"
],
"flashSuitChecked": true,
"blueSuitChecked": true
},
{
"id": 58,
"link": [
6,
5
],
"name": "Suitless",
"requires": [
"canSuitlessMaridia",
{
"or": [
{
"spikeHits": 1
},
"canTrickySpringBallJump",
{
"and": [
"HiJump",
{
"or": [
"canWallJump",
"canDownGrab",
"canSpaceJumpWaterEscape",
"canSpringBallJumpMidAir"
]
}
]
}
]
},
{
"or": [
{
"spikeHits": 1
},
"HiJump"
]
}
],
"flashSuitChecked": true,
"blueSuitChecked": true
},
{
"id": 59,
"link": [
6,
5
],
"name": "Gravity",
"requires": [
"Gravity",
{
"or": [
"SpaceJump",
"canHBJ",
{
"spikeHits": 1
}
]
}
],
"flashSuitChecked": true,
"blueSuitChecked": true
},
{
"id": 60,
"link": [
6,
5
],
"name": "Suitless Bootless",
"requires": [
"canSuitlessMaridia",
{
"disableEquipment": "HiJump"
},
{
"disableEquipment": "Gravity"
},
"canTrickyJump",
"canDownGrab"
],
"flashSuitChecked": true,
"blueSuitChecked": true,
"note": "This can be done by turning off Gravity and HiJump to jump over both spike pits."
}
],
"notables": [
{
"id": 1,
"name": "G-Mode Morph, IBJ, HBJ",
"note": "This requires multiple HBJ to get over spike pits. The first one, by the right door, must be started at the top of an IBJ."
},
{
"id": 2,
"name": "Cross Room Jump with IBJ",
"wallJumpAvoid": true,
"note": [
"Requires a runway of at least 1 tiles in the adjacent room, although it is easier with more.",
"Start the IBJ as far left as possible. The furthest right is just right of the waterfall.",
"Turning around, carefully, is one way to lose forward momentum and begin the IBJ.",
"At the top of the IBJ bomb to the left and unmorph to reset fall speed."
]
},
{
"id": 4,
"name": "Spring Ball Spike Boost",
"note": "When the Cacatac on the ground fires a spike, perform a Spring Ball jump to break the waterline and then hit the spike for extra height."
},
{
"id": 5,
"name": "HiJumpless Double Spring Ball Jump and Bomb-Grapple-Jump",
"note": [
"1) Crouch jump and then Spring Ball jump.",
"2) Bomb-Grapple-Jump using the distant Cacatac who is above the water.",
"3) Spring Ball jump again just as Samus exits the water."
]
},
{
"id": 6,
"name": "Bomb Jump Water Escape",
"note": [
"Perform the spring ball jump near max height.",
"Place the first bomb after the spring ball jump; just above the water line.",
"Press pause just after placing the bomb, to disable Spring Ball (a 'spring fling', to reset fall speed).",
"Place the second bomb soon after regaining control, while the game is fading back in."
]
},
{
"id": 7,
"name": "Suitless Bootless Space Jump",
"note": [
"With Space Jump alone, it is possible to jump to the water line and bounce on the surface.",
"This requires a moderately precise Space Jump to start the Space Jump and then a wall jump to escape the water."
]
}
],
"nextStratId": 97,
"nextNotableId": 8
}