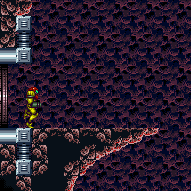
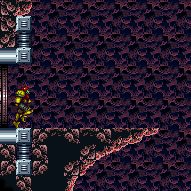
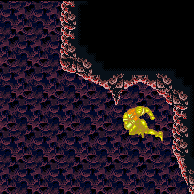
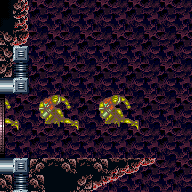
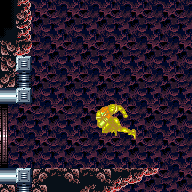
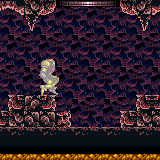
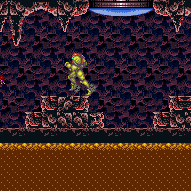
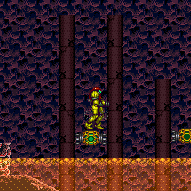
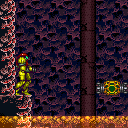
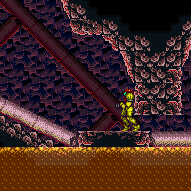
Indiana Jones Room
Room ID: 127
|
Exit condition: {
"leaveWithRunway": {
"length": 10,
"openEnd": 1
}
} |
|
Requires: "h_CrystalFlash" |
|
Requires: {
"doorUnlockedAtNode": 1
}Clears obstacles: E |
|
Requires: {
"noBlueSuit": {}
}
{
"or": [
{
"and": [
{
"resetRoom": {
"nodes": [
1
]
}
},
{
"cycleFrames": 880
}
]
},
{
"and": [
{
"resetRoom": {
"nodes": [
2
]
}
},
"Morph",
{
"cycleFrames": 1640
}
]
}
]
}
"SpaceJump"
"ScrewAttack"Resets obstacles: A, B, E Farm cycle drops: 4 Ripper 2 (green) |
|
Entrance condition: {
"comeInShinecharging": {
"length": 9,
"openEnd": 0
},
"comesInHeated": "no"
}Requires: "h_CrystalSpark" |
|


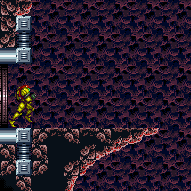
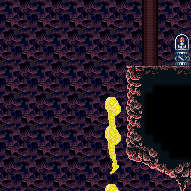
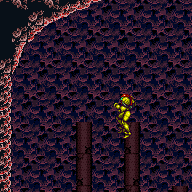
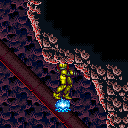
Swing counter-clockwise around the left-most Ripper closely (pressing up to retract Grapple), positioned as far left as possible while avoiding getting caught on the stalactite. After swinging under the stalactite with high enough speed, hold down to extend Grapple to push Samus to the left slightly, then release Grapple while Samus is still nearly horizontal. Quickly morph and frame-perfectly pause to equip or unequip Spring Ball. If successful, Samus will continue gaining fall speed while on the ground morphed. Immediately roll left through the door, which should have been opened in advance. Requires: "canUseEnemies"
{
"or": [
{
"haveBlueSuit": {}
},
{
"enemyDamage": {
"enemy": "Ripper 2 (green)",
"type": "contact",
"hits": 2
}
}
]
}
"Morph"
"SpringBall"
"h_trickyToCarryFlashSuit"Exit condition: {
"leaveWithSuperSink": {}
} |
From: 1
Left Door
To: 2
Right Vertical Door
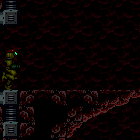
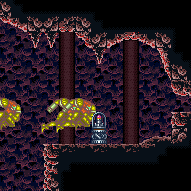
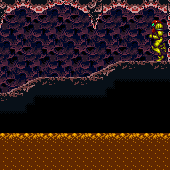
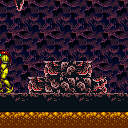
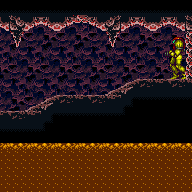
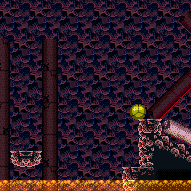
The blocks can be broken if you can generate blue speed using the previous room's runway, and carry it to the blocks by slowing floating down with Space Jump. Entrance condition: {
"comeInGettingBlueSpeed": {
"length": 9,
"openEnd": 0
}
}Requires: {
"notable": "Full Room Space Jump Through Speed Blocks"
}
"canBlueSpaceJump"
"canPreciseSpaceJump"Clears obstacles: B |
|
Requires: "SpaceJump" |
|
Jump with enough run speed to reach the wall below the Missile Item Location. Entrance condition: {
"comeInRunning": {
"speedBooster": "yes",
"minTiles": 29
}
}Requires: "canSpeedyJump" "canWallJump" "canCarefulJump" |
From: 1
Left Door
To: 3
Item
Takes three walljumps, and must shinespark at the apex. Entrance condition: {
"comeInShinecharged": {}
}Requires: {
"shineChargeFrames": 110
}
"canShinechargeMovementComplex"
"canPreciseWallJump"
"canConsecutiveWallJump"
{
"shinespark": {
"frames": 78
}
} |
From: 1
Left Door
To: 3
Item
Takes three walljumps, and must shinespark at the apex. Entrance condition: {
"comeInShinecharging": {
"length": 9,
"openEnd": 0
}
}Requires: "canShinechargeMovementComplex"
"canPreciseWallJump"
"canConsecutiveWallJump"
{
"shinespark": {
"frames": 78
}
} |
From: 1
Left Door
To: 3
Item
Wall jump or build run speed using the full runway to jump high enough for the shinespark. Entrance condition: {
"comeInShinecharged": {}
}Requires: {
"shineChargeFrames": 80
}
"HiJump"
"canShinechargeMovementComplex"
{
"or": [
{
"and": [
"canWallJump",
{
"shinespark": {
"frames": 80
}
}
]
},
{
"and": [
"canTrickyDashJump",
{
"shinespark": {
"frames": 60
}
}
]
}
]
} |
From: 1
Left Door
To: 3
Item
Wall jump or build run speed using the full runway to jump high enough for the shinespark. Entrance condition: {
"comeInShinecharging": {
"length": 9,
"openEnd": 0
}
}Requires: "HiJump"
"canShinechargeMovementComplex"
{
"or": [
{
"and": [
"canWallJump",
{
"shinespark": {
"frames": 80
}
}
]
},
{
"and": [
"canTrickyDashJump",
{
"shinespark": {
"frames": 60
}
}
]
}
]
} |
|
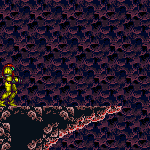
Store a shinespark near the left door and use the remaining runway to jump as far as possible to the right. Once near the acid platforms, Shinespark diagonally to reach the item location. Entrance condition: {
"comeInShinecharged": {}
}Requires: {
"shineChargeFrames": 155
}
{
"notable": "Left Side Diagonal Shinespark"
}
"h_speedJump"
"canTrickyJump"
"canShinechargeMovementTricky"
{
"shinespark": {
"frames": 40
}
} |
|


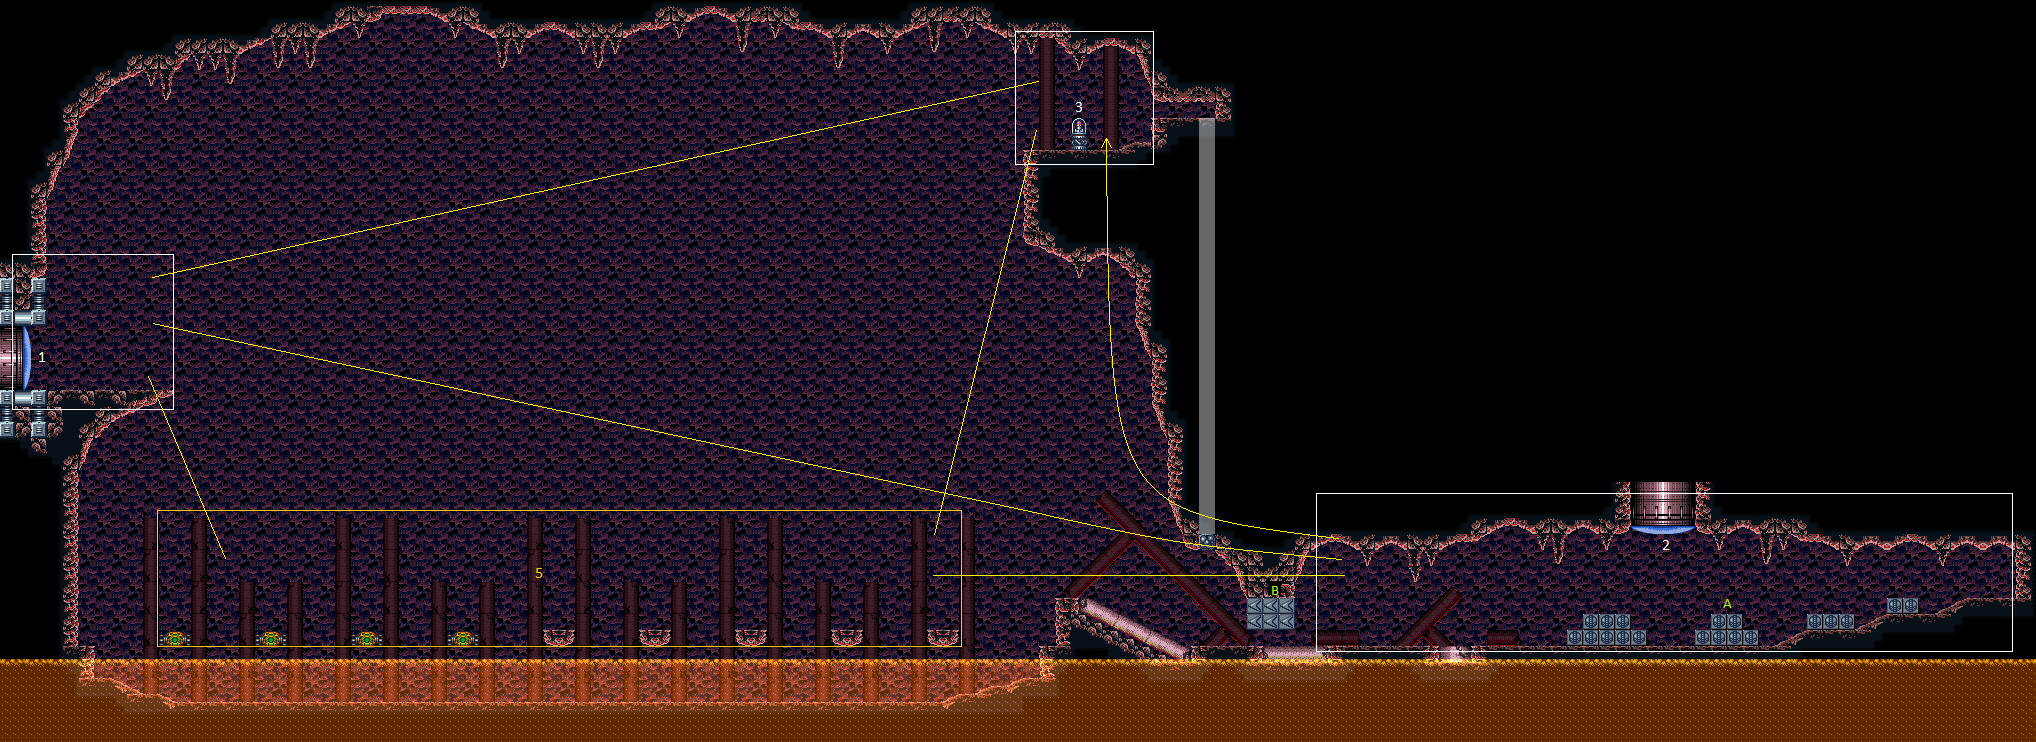
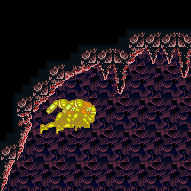
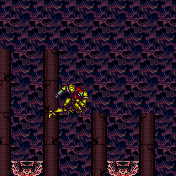
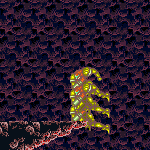
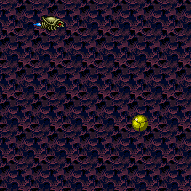
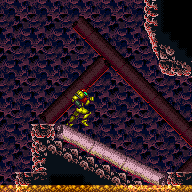
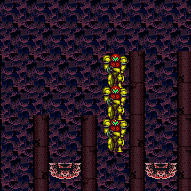
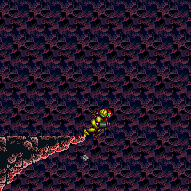
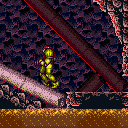
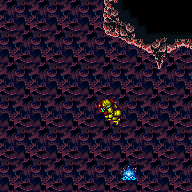
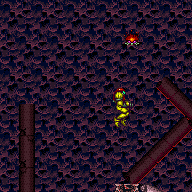
Carefully swing between the Rippers at the top of the room to the item. The last two swings are the hardest Morphing and unmorphing to reset Samus's fall speed can help give a bit more time to position the Rippers. It can help to Grapple the same Ripper again to get it in a better position. Position the third Ripper far to the right then fling to the fourth, which is far to the right and very close to the ceiling. Moving the fourth Ripper to the right a bit can also help in order to make the last fling less precise. Be careful not to fling directly into the ceiling, as it is easy to hit the uneven surface and fall. If Samus falls, it may be helpful to reset the room. Requires: {
"notable": "Indiana Jones Grapple (With Retries)"
}
"canUseEnemies"
"canPreciseGrapple"
"h_midAirShootUp"
{
"or": [
{
"and": [
"canInsaneJump",
"h_trickyToCarryFlashSuit"
]
},
{
"enemyDamage": {
"enemy": "Ripper 2 (green)",
"type": "contact",
"hits": 4
}
}
]
}
{
"or": [
{
"and": [
"HiJump",
"canSpringBallJumpMidAir"
]
},
{
"and": [
"canSpeedyJump",
"HiJump",
"canTrickyWallJump"
]
},
"h_trickySpringwall"
]
} |
|

Carefully swing between the Rippers at the top of the room to the item. The last two swings are the hardest Morphing and unmorphing to reset Samus's fall speed can help give a bit more time to position the Rippers. It can help to Grapple the same Ripper again to get it in a better position. Position the third Ripper far to the right then fling to the fourth, which is far to the right and very close to the ceiling. Moving the fourth Ripper to the right a bit can also help in order to make the last fling less precise. Be careful not to fling directly into the ceiling, as it is easy to hit the uneven surface and fall. Requires: {
"notable": "Indiana Jones Grapple (First Try)"
}
"canUseEnemies"
"canPreciseGrapple"
"h_midAirShootUp"
{
"or": [
{
"and": [
"canInsaneJump",
"h_trickyToCarryFlashSuit"
]
},
{
"and": [
"canResetFallSpeed",
{
"enemyDamage": {
"enemy": "Ripper 2 (green)",
"type": "contact",
"hits": 2
}
}
]
}
]
} |
|
|
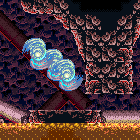
From: 1
Left Door
To: 5
Small Platforms Junction


Get past the speed blocks and farm the Mellas. Shinecharge while running back and use a Mella to interrupt. Getting past the blocks without Morph requires either an Insane Short Charge or an Acid Shinespark. Entrance condition: {
"comeInWithRMode": {}
}Requires: {
"or": [
"Morph",
{
"getBlueSpeed": {
"usedTiles": 12,
"gentleDownTiles": 6,
"openEnd": 1
}
},
{
"and": [
{
"notable": "Acid Shinespark"
},
"Gravity",
"canSuitlessLavaDive",
"h_shinechargeMaxRunway",
{
"acidFrames": 120
},
{
"shinespark": {
"frames": 35
}
}
]
}
]
}
"h_RModeCanRefillReserves"
{
"resourceMissingAtMost": [
{
"type": "Missile",
"count": 0
}
]
}
{
"partialRefill": {
"type": "ReserveEnergy",
"limit": 20
}
}
{
"canShineCharge": {
"usedTiles": 17,
"openEnd": 0
}
}
{
"autoReserveTrigger": {
"maxReserveEnergy": 95
}
}
"canRModeSparkInterrupt"Clears obstacles: B Dev note: FIXME: The acid spark could benefit from farming a Ripper first instead of needing to end with 99 E and disableable tanks. It could also maybe be done with both suits and some farming luck. |
From: 1
Left Door
To: 5
Small Platforms Junction
Crystal Flash, or farm Mellas and use a Power Bomb. Run through the speed blocks and use a Mella or the acid to interrupt. Entrance condition: {
"comeInWithRMode": {}
}Requires: {
"or": [
"h_CrystalFlashForReserveEnergy",
{
"and": [
"h_RModeCanRefillReserves",
{
"resourceMissingAtMost": [
{
"type": "Missile",
"count": 0
}
]
},
{
"partialRefill": {
"type": "ReserveEnergy",
"limit": 20
}
},
"h_usePowerBomb"
]
}
]
}
"h_shinechargeMaxRunway"
{
"or": [
{
"autoReserveTrigger": {
"maxReserveEnergy": 95
}
},
{
"and": [
{
"autoReserveTrigger": {}
},
{
"acidFrames": 20
}
]
}
]
}
"canRModeSparkInterrupt"Clears obstacles: A, B |
From: 1
Left Door
To: 6
G-Mode Morph Junction (At Speed Blocks)
Spring Ball across the platforms. Entrance condition: {
"comeInWithGMode": {
"mode": "any",
"morphed": true
}
}Requires: "h_artificialMorphSpringBall" |
From: 1
Left Door
To: 6
G-Mode Morph Junction (At Speed Blocks)
Perform a long diagonal bomb jump from the left door to the solid platforms above the acid. Entrance condition: {
"comeInWithGMode": {
"mode": "any",
"morphed": true
}
}Requires: {
"notable": "G-Mode Morph Long Diagonal Bomb Jump"
}
"h_artificialMorphDiagonalBombJump"
"h_artificialMorphLongIBJ" |
From: 1
Left Door
To: 6
G-Mode Morph Junction (At Speed Blocks)
Bomb boost horizontally at the top of an IBJ and land in the acid, then roll to the right and bomb out to safety. To save some Energy, it is possible to IBJ or double IBJ out of the acid onto the first solid platform. Entrance condition: {
"comeInWithGMode": {
"mode": "any",
"morphed": true
}
}Requires: "Gravity"
"h_artificialMorphIBJ"
"h_artificialMorphBombHorizontally"
"canSuitlessLavaDive"
{
"or": [
{
"acidFrames": 280
},
{
"and": [
"canTrickyJump",
{
"acidFrames": 220
}
]
},
{
"and": [
"canInsaneJump",
"h_artificialMorphDoubleBombJump",
{
"acidFrames": 175
}
]
}
]
} |
From: 1
Left Door
To: 7
Direct G-Mode Morph Junction (At Speed Blocks)
Spring Ball across the platforms. Entrance condition: {
"comeInWithGMode": {
"mode": "direct",
"morphed": true
}
}Requires: "h_artificialMorphSpringBall" |
From: 1
Left Door
To: 7
Direct G-Mode Morph Junction (At Speed Blocks)
Perform a long diagonal bomb jump from the left door to the solid platforms above the acid. Entrance condition: {
"comeInWithGMode": {
"mode": "direct",
"morphed": true
}
}Requires: {
"notable": "G-Mode Morph Long Diagonal Bomb Jump"
}
"h_artificialMorphDiagonalBombJump"
"h_artificialMorphLongIBJ" |
From: 2
Right Vertical Door
To: 1
Left Door
Fire off the shinespark at the apex of two consecutive walljumps. Requires: "canWallJump"
"canShinechargeMovementComplex"
{
"obstaclesCleared": [
"B"
]
}
{
"or": [
{
"canShineCharge": {
"usedTiles": 32,
"gentleUpTiles": 6,
"openEnd": 1
}
},
{
"and": [
"h_shinechargeMaxRunway",
{
"obstaclesCleared": [
"A"
]
}
]
}
]
}
{
"shinespark": {
"frames": 85
}
} |
From: 2
Right Vertical Door
To: 1
Left Door
Charge a spark to the right, then come back, run and jump, and do a horizontal spark at the apex. If needed, down-grab onto the ledge. Requires: {
"notable": "Big Jump Shinespark"
}
"h_speedJump"
"canShinechargeMovementComplex"
{
"obstaclesCleared": [
"B"
]
}
{
"canShineCharge": {
"usedTiles": 32,
"gentleDownTiles": 6,
"openEnd": 1
}
}
{
"shinespark": {
"frames": 52
}
}
"canDownGrab" |
From: 2
Right Vertical Door
To: 1
Left Door


Charge a spark to the right a specific distance of about 6 tiles past the broken Speed blocks. Then turn around, run and jump, and diagonal spark as late as possible. By shortening the jump it is easier but uses more Energy. With a shortened jump, it is possible but not expected to kill a Ripper and collect its drop while falling. Alternatively, it is possible to shinecharge right to left, then run and jump and then shinespark just before hitting the acid; This is a bit tighter and uses more Energy, but doesn't rely on the larger jump from Speed Booster. Requires: {
"notable": "Big Jump Shinespark"
}
"canShinechargeMovementTricky"
{
"obstaclesCleared": [
"B"
]
}
{
"canShineCharge": {
"usedTiles": 23,
"gentleDownTiles": 6,
"openEnd": 1
}
}
{
"or": [
{
"and": [
"h_speedJump",
{
"shinespark": {
"frames": 30,
"excessFrames": 2
}
}
]
},
{
"shinespark": {
"frames": 46,
"excessFrames": 2
}
}
]
}Dev note: There is a large variance in the number of shinespark frames based on the runway used and how long jump is held. The frames included are a reasonable approximation, although a tighter set of frames could be included with more specific details. |
|
Requires: "canSpeedyJump"
{
"obstaclesCleared": [
"B"
]
}
{
"or": [
"HiJump",
{
"and": [
"canLateralMidAirMorph",
"canTrickySpringBallJump"
]
}
]
} |
|
Requires: {
"or": [
{
"and": [
"canSpeedyJump",
"canCarefulJump"
]
},
{
"and": [
"h_speedJump",
"HiJump"
]
}
]
}
{
"obstaclesCleared": [
"A",
"B"
]
}Dev note: With HiJump we don't require canSpeedyJump tech here because the jump is 'trivial': it is intended in the vanilla game, telegraphed by the ramp, and is very lenient. |
From: 2
Right Vertical Door
To: 1
Left Door
Requires: {
"obstaclesCleared": [
"B",
"E"
]
}
{
"canShineCharge": {
"usedTiles": 32,
"gentleUpTiles": 6,
"openEnd": 1
}
}
"canWallJump"
"canShinechargeMovementComplex"
{
"shinespark": {
"frames": 85
}
}Exit condition: {
"leaveWithSpark": {}
}Unlocks doors: {"types":["ammo"],"requires":[],"useImplicitRequires":false} |
From: 2
Right Vertical Door
To: 1
Left Door

Requires: {
"obstaclesCleared": [
"B",
"E"
]
}
{
"canShineCharge": {
"usedTiles": 32,
"gentleDownTiles": 6,
"openEnd": 1
}
}
"canSpeedyJump"
"canShinechargeMovementComplex"
{
"shinespark": {
"frames": 57
}
}Exit condition: {
"leaveWithSpark": {
"position": "bottom"
}
}Unlocks doors: {"types":["ammo"],"requires":[],"useImplicitRequires":false} |
From: 2
Right Vertical Door
To: 1
Left Door

Requires: "HiJump"
"canSpeedyJump"
{
"obstaclesCleared": [
"B",
"E"
]
}
{
"canShineCharge": {
"usedTiles": 32,
"gentleDownTiles": 6,
"openEnd": 1
}
}
"canShinechargeMovementComplex"
{
"shinespark": {
"frames": 56
}
}Exit condition: {
"leaveWithSpark": {}
}Unlocks doors: {"types":["ammo"],"requires":[],"useImplicitRequires":false} |
From: 2
Right Vertical Door
To: 1
Left Door
Store a shinecharge and start running below the left side of the vertical door, to set up the jump in a way that shinesparking at the apex of the jump approximately aligns with the top of the far door. Requires: {
"obstaclesCleared": [
"A",
"B",
"E"
]
}
"h_shinechargeMaxRunway"
"canSpeedyJump"
"canShinechargeMovementComplex"
{
"shinespark": {
"frames": 53
}
}Exit condition: {
"leaveWithSpark": {}
}Unlocks doors: {"types":["ammo"],"requires":[],"useImplicitRequires":false} |
From: 2
Right Vertical Door
To: 1
Left Door
Requires: {
"obstaclesCleared": [
"B",
"E"
]
}
"canPreciseSpaceJump"Exit condition: {
"leaveSpinning": {
"remoteRunway": {
"length": 32,
"openEnd": 1,
"gentleUpTiles": 6
}
}
}Unlocks doors: {"types":["ammo"],"requires":[],"useImplicitRequires":false} |
From: 2
Right Vertical Door
To: 1
Left Door
Requires: {
"obstaclesCleared": [
"A",
"B",
"E"
]
}
"canPreciseSpaceJump"Exit condition: {
"leaveSpinning": {
"remoteRunway": {
"length": 45,
"openEnd": 1
}
}
}Unlocks doors: {"types":["ammo"],"requires":[],"useImplicitRequires":false} |
From: 2
Right Vertical Door
To: 1
Left Door


Requires: "HiJump"
{
"obstaclesCleared": [
"B",
"E"
]
}
"canSpeedyJump"
"canTrickyJump"Exit condition: {
"leaveWithMockball": {
"remoteRunway": {
"length": 32,
"openEnd": 1,
"gentleUpTiles": 6
},
"landingRunway": {
"length": 10,
"openEnd": 1
},
"minExtraRunSpeed": "$5.9"
}
}Unlocks doors: {"types":["ammo"],"requires":[],"useImplicitRequires":false} |
From: 2
Right Vertical Door
To: 1
Left Door
Requires: {
"obstaclesCleared": [
"A",
"B",
"E"
]
}
"canSpeedyJump"
"canTrickyJump"Exit condition: {
"leaveWithMockball": {
"remoteRunway": {
"length": 45,
"openEnd": 1
},
"landingRunway": {
"length": 10,
"openEnd": 1
},
"minExtraRunSpeed": "$6.D"
}
}Unlocks doors: {"types":["ammo"],"requires":[],"useImplicitRequires":false} |
From: 2
Right Vertical Door
To: 1
Left Door


Requires: {
"obstaclesCleared": [
"B",
"E"
]
}
"canPreciseSpaceJump"
"canInsaneJump"Exit condition: {
"leaveWithSpringBallBounce": {
"remoteRunway": {
"length": 32,
"openEnd": 1,
"gentleUpTiles": 6
},
"landingRunway": {
"length": 10,
"openEnd": 1
},
"movementType": "uncontrolled"
}
}Unlocks doors: {"types":["ammo"],"requires":[],"useImplicitRequires":false} |
From: 2
Right Vertical Door
To: 1
Left Door
Requires: {
"obstaclesCleared": [
"A",
"B",
"E"
]
}
"canPreciseSpaceJump"
"canInsaneJump"Exit condition: {
"leaveWithSpringBallBounce": {
"remoteRunway": {
"length": 45,
"openEnd": 1
},
"landingRunway": {
"length": 10,
"openEnd": 1
},
"movementType": "uncontrolled"
}
}Unlocks doors: {"types":["ammo"],"requires":[],"useImplicitRequires":false} |
From: 2
Right Vertical Door
To: 1
Left Door
Requires: {
"obstaclesCleared": [
"B",
"E"
]
}
"canSpeedyJump"
"canTrickySpringBallJump"
"canTrickySpringBallBounce"
"canInsaneJump"Exit condition: {
"leaveWithSpringBallBounce": {
"remoteRunway": {
"length": 32,
"openEnd": 1,
"gentleUpTiles": 6
},
"landingRunway": {
"length": 10,
"openEnd": 1
},
"minExtraRunSpeed": "$4.0",
"movementType": "controlled"
}
}Unlocks doors: {"types":["ammo"],"requires":[],"useImplicitRequires":false} |
From: 2
Right Vertical Door
To: 1
Left Door
Requires: {
"obstaclesCleared": [
"A",
"B",
"E"
]
}
"canTrickySpringBallJump"
"canTrickySpringBallBounce"
"canInsaneJump"Exit condition: {
"leaveWithSpringBallBounce": {
"remoteRunway": {
"length": 45,
"openEnd": 1
},
"landingRunway": {
"length": 10,
"openEnd": 1
},
"minExtraRunSpeed": "$4.0",
"movementType": "controlled"
}
}Unlocks doors: {"types":["ammo"],"requires":[],"useImplicitRequires":false} |
From: 2
Right Vertical Door
To: 1
Left Door


Requires: {
"obstaclesCleared": [
"B",
"E"
]
}
"canPreciseSpaceJump"
"canInsaneJump"Exit condition: {
"leaveSpaceJumping": {
"remoteRunway": {
"length": 32,
"openEnd": 1,
"gentleUpTiles": 6
}
}
}Unlocks doors: {"types":["ammo"],"requires":[],"useImplicitRequires":false} |
From: 2
Right Vertical Door
To: 1
Left Door
Requires: {
"obstaclesCleared": [
"A",
"B",
"E"
]
}
"canPreciseSpaceJump"
"canInsaneJump"Exit condition: {
"leaveSpaceJumping": {
"remoteRunway": {
"length": 45,
"openEnd": 1
}
}
}Unlocks doors: {"types":["ammo"],"requires":[],"useImplicitRequires":false} |
From: 2
Right Vertical Door
To: 1
Left Door


Requires: {
"obstaclesCleared": [
"B",
"E"
]
}
{
"getBlueSpeed": {
"usedTiles": 32,
"gentleUpTiles": 6,
"openEnd": 1
}
}
{
"or": [
{
"and": [
"HiJump",
"canSpeedyJump"
]
},
"SpaceJump",
{
"and": [
"canTrickySpringBallJump",
"canPauseRemorphTemporaryBlue"
]
}
]
}
"canTrickyJump"
"canChainTemporaryBlue"Exit condition: {
"leaveWithTemporaryBlue": {}
}Unlocks doors: {"types":["ammo"],"requires":[],"useImplicitRequires":false} |
From: 2
Right Vertical Door
To: 1
Left Door
Requires: {
"obstaclesCleared": [
"A",
"B",
"E"
]
}
"h_getBlueSpeedMaxRunway"
"canTrickyJump"
"canChainTemporaryBlue"Exit condition: {
"leaveWithTemporaryBlue": {}
}Unlocks doors: {"types":["ammo"],"requires":[],"useImplicitRequires":false} |
From: 2
Right Vertical Door
To: 2
Right Vertical Door
Requires: "h_usePowerBomb" Clears obstacles: A |
From: 2
Right Vertical Door
To: 2
Right Vertical Door
Requires: "h_getBlueSpeedMaxRunway"
{
"obstaclesCleared": [
"A"
]
}Clears obstacles: B |
From: 2
Right Vertical Door
To: 2
Right Vertical Door
Commonly known as a stutter-3, this is also doable as a 4-tap. Requires: {
"getBlueSpeed": {
"usedTiles": 17,
"openEnd": 0
}
}Clears obstacles: B |
|
Requires: {
"obstaclesCleared": [
"B"
]
}
"h_shinechargeMaxRunway"
"h_CrystalSpark"Clears obstacles: A |
From: 2
Right Vertical Door
To: 2
Right Vertical Door

Requires: "Ice"
{
"obstaclesCleared": [
"A"
]
}
{
"canShineCharge": {
"usedTiles": 17,
"gentleDownTiles": 3,
"steepDownTiles": 3,
"openEnd": 0
}
}
{
"enemyDamage": {
"enemy": "Mella",
"type": "contact",
"hits": 1
}
}
"canSlopeSpark"
{
"shinespark": {
"frames": 5,
"excessFrames": 5
}
}Dev note: FIXME: Ice makes it easier to get a mella in the correct position but it may be possible without it. |
From: 2
Right Vertical Door
To: 2
Right Vertical Door
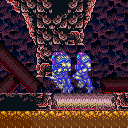
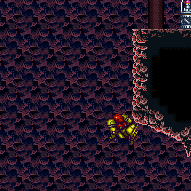
Freeze a Mella at a precise distance below the door in order to crouch-jump up and clip through the door shell. The pixel window is larger and higher with Morph and an X-Ray stand-up, in which case a standing jump is used. It can help to moonwalk towards a Mella that has never been on screen, so that it starts swooping immediately as it first enters the screen. This will make it so that when Samus is below it, it will always swoop and go up slightly compared to the previous swoop. Once it is close to the right height, move away so it stops swooping, freeze it and quickly try the clip, if it doesn't work, quickly leave and try again. Requires: "canManipulateMellas"
"h_iceClip"
{
"or": [
"Morph",
"canInsaneJump",
{
"enemyDamage": {
"enemy": "Mella",
"type": "contact",
"hits": 1
}
}
]
}Bypasses door shell: true |
|
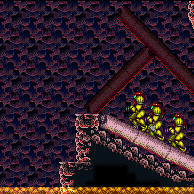
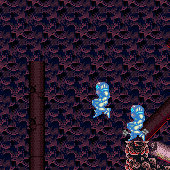
Shoot the Mellas when they first begin to come on screen, and they will not move. Requires: {
"or": [
{
"and": [
{
"resetRoom": {
"nodes": [
1
]
}
},
{
"cycleFrames": 1020
},
"Morph",
{
"or": [
"SpaceJump",
{
"and": [
"HiJump",
"canSpeedyJump",
"canWallJump",
{
"cycleFrames": 120
}
]
},
{
"and": [
"HiJump",
"canSpringBallJumpMidAir",
"h_doubleEquipmentScreenCycleFrames",
{
"cycleFrames": 540
}
]
},
{
"and": [
"canJumpIntoIBJ",
{
"cycleFrames": 1400
}
]
}
]
}
]
},
{
"and": [
{
"resetRoom": {
"nodes": [
2
]
}
},
{
"cycleFrames": 240
}
]
}
]
}
{
"or": [
{
"and": [
"canDash",
{
"or": [
"Grapple",
"Wave",
"Spazer",
"Plasma",
{
"and": [
"ScrewAttack",
{
"cycleFrames": 60
}
]
},
{
"and": [
"canDodgeWhileShooting",
{
"cycleFrames": 300
}
]
},
{
"and": [
"canFarmWhileShooting",
{
"cycleFrames": 120
}
]
}
]
}
]
},
{
"and": [
{
"haveBlueSuit": {}
},
{
"cycleFrames": 60
}
]
}
]
}Resets obstacles: A, B, E Farm cycle drops: 5 Mella |
From: 2
Right Vertical Door
To: 2
Right Vertical Door

Get a normal height jump by releasing run with SpeedBooster and no HiJump. Break spin to reach the transition without a wall jump. Requires: {
"obstaclesCleared": [
"A",
"B"
]
}
{
"canShineCharge": {
"usedTiles": 38,
"gentleDownTiles": 6,
"openEnd": 2
}
}
"canShinechargeMovement"
{
"shineChargeFrames": 45
}Exit condition: {
"leaveShinecharged": {}
} |
From: 2
Right Vertical Door
To: 2
Right Vertical Door
Get a normal height jump by releasing run with SpeedBooster and no HiJump. Break spin to reach the transition without a wall jump. Requires: {
"obstaclesCleared": [
"B"
]
}
{
"obstaclesNotCleared": [
"A"
]
}
"canShinechargeMovement"
{
"canShineCharge": {
"usedTiles": 32,
"gentleDownTiles": 6,
"openEnd": 1
}
}
{
"shineChargeFrames": 65
}Exit condition: {
"leaveShinecharged": {}
} |
|
Requires: "h_CrystalFlash" Clears obstacles: A |
From: 2
Right Vertical Door
To: 2
Right Vertical Door
Exit condition: {
"leaveWithDoorFrameBelow": {
"height": 2
}
} |
From: 2
Right Vertical Door
To: 2
Right Vertical Door
Exit condition: {
"leaveWithPlatformBelow": {
"height": 9,
"leftPosition": -1,
"rightPosition": 2
}
} |
From: 2
Right Vertical Door
To: 2
Right Vertical Door
Requires: {
"obstaclesNotCleared": [
"A"
]
}Exit condition: {
"leaveWithPlatformBelow": {
"height": 7,
"leftPosition": -5.5,
"rightPosition": -1.5
}
}Dev note: With HiJump this can be used coming up Main Street, the bottom left of Mt. Everest, and The Beach. We could add other Power Bomb block platforms too (e.g. the lower ones, and on the right side), but they don't yet appear to have any application. |
From: 2
Right Vertical Door
To: 2
Right Vertical Door
Requires: {
"obstaclesCleared": [
"A"
]
}Exit condition: {
"leaveWithPlatformBelow": {
"height": 9,
"leftPosition": -23,
"rightPosition": 22
}
} |
From: 2
Right Vertical Door
To: 2
Right Vertical Door
Requires: {
"obstaclesCleared": [
"B"
]
}
"canTrickyJump"Exit condition: {
"leaveWithPlatformBelow": {
"height": 9,
"leftPosition": -38.5,
"rightPosition": -7
}
}Dev note: The tile next to the Power Bomb blocks is not counted as part of the jumpway, since using it would cause Samus to bonk. A tricky jump is required because of the difficulty of avoiding the Power Bomb blocks and still reaching the door. |
From: 2
Right Vertical Door
To: 2
Right Vertical Door
Requires: {
"obstaclesCleared": [
"A",
"B"
]
}Exit condition: {
"leaveWithPlatformBelow": {
"height": 9,
"leftPosition": -38.5,
"rightPosition": 22
}
}Dev note: This strat is for avoiding the canTrickyJump requirement when jumping left-to-right, if the Power Bomb blocks can be destroyed. It also makes it possible to gain more speed by running a few tiles further, which is needed for certain strats. |
From: 2
Right Vertical Door
To: 2
Right Vertical Door

Requires: {
"obstaclesCleared": [
"B"
]
}
{
"canShineCharge": {
"usedTiles": 32,
"openEnd": 1
}
}
"canChainTemporaryBlue"Exit condition: {
"leaveWithTemporaryBlue": {
"direction": "right"
}
} |
From: 2
Right Vertical Door
To: 2
Right Vertical Door

Requires: {
"or": [
{
"and": [
"canXRayTurnaround",
{
"obstaclesCleared": [
"B"
]
},
{
"canShineCharge": {
"usedTiles": 32,
"openEnd": 1
}
}
]
},
{
"and": [
{
"obstaclesCleared": [
"A"
]
},
{
"canShineCharge": {
"usedTiles": 21,
"gentleDownTiles": 6,
"openEnd": 0
}
}
]
}
]
}
"canChainTemporaryBlue"Exit condition: {
"leaveWithTemporaryBlue": {
"direction": "left"
}
} |
From: 2
Right Vertical Door
To: 2
Right Vertical Door
The easiest way to set up G-mode is to lure a low Mella to the door, take a hit, then jump and aim down and freeze it while it is high enough and still rising. If the Mella is not moving upwards, there is a good chance that Samus will be in a falling state as she is hit through the transition and can't use X-Ray. If Samus does not stay on the Mella, she can spin jump or midair morph directly onto the Mella without touching the transition. It may be worthwhile to keep the other Mellas alive so that on a failed attempt, Samus can freeze the Mella to go farm some of the others in room. Requires: "canManipulateMellas" "canUpwardGModeSetup" "canTrickyUseFrozenEnemies" "canInsaneJump" Exit condition: {
"leaveWithGModeSetup": {}
} |
From: 2
Right Vertical Door
To: 2
Right Vertical Door
Entrance condition: {
"comeInWithGMode": {
"mode": "direct",
"morphed": false
},
"comesThroughToilet": "any"
}Exit condition: {
"leaveWithGMode": {
"morphed": false
}
} |
From: 2
Right Vertical Door
To: 2
Right Vertical Door
Entrance condition: {
"comeInWithGMode": {
"mode": "direct",
"morphed": true
},
"comesThroughToilet": "any"
}Requires: "h_artificialMorphMovement" Exit condition: {
"leaveWithGMode": {
"morphed": true
}
} |
From: 2
Right Vertical Door
To: 2
Right Vertical Door
It can help to moonwalk towards a Mella that has never been on screen, so that it starts swooping immediately as it first enters the screen. This will make it so that when Samus is below it, it will always swoop and go up slightly compared to the previous swoop. Once it is close to the right height, move away so it stops swooping, freeze it and quickly try the clip, if it doesn't work, quickly leave and try again. Entrance condition: {
"comeInWithGMode": {
"mode": "indirect",
"morphed": false
},
"comesThroughToilet": "any"
}Requires: "canComplexGMode"
"canManipulateMellas"
{
"or": [
"h_preciseIceClip",
"h_highPixelIceClip"
]
}
"canInsaneJump"
{
"or": [
"Morph",
"canTrickyGMode",
{
"enemyDamage": {
"enemy": "Mella",
"type": "contact",
"hits": 1
}
}
]
}Exit condition: {
"leaveWithGMode": {
"morphed": false
}
}Bypasses door shell: true Dev note: This is only for indirect G-Mode, because it is trivial while in direct, and would use a different strat. |
|

Requires: {
"obstaclesCleared": [
"B"
]
}
"canMidairShinespark"
{
"or": [
{
"canShineCharge": {
"usedTiles": 32,
"gentleUpTiles": 6,
"openEnd": 1
}
},
{
"and": [
"h_shinechargeMaxRunway",
{
"obstaclesCleared": [
"A"
]
}
]
}
]
}
{
"or": [
{
"shinespark": {
"frames": 31,
"excessFrames": 6
}
},
{
"and": [
"HiJump",
{
"shinespark": {
"frames": 25,
"excessFrames": 5
}
}
]
},
{
"and": [
"HiJump",
"canSpeedyJump",
{
"shinespark": {
"frames": 19,
"excessFrames": 6
}
}
]
}
]
}Dev note: FIXME: A big jump spark could be used to save Energy. |
|
Requires: {
"obstaclesCleared": [
"B"
]
}
"HiJump"
"canSpeedyJump"
{
"or": [
"canSpringBallJumpMidAir",
"canWallJump"
]
} |
|


Start running from about 1 to 2 tiles right of the door, and jump at the top of the ramp. This needs extra run speed between $6.C and $6.F. Requires: {
"obstaclesCleared": [
"A",
"B"
]
}
"HiJump"
"canTrickyDashJump" |
|
Requires: {
"or": [
"Morph",
{
"obstaclesCleared": [
"B"
]
}
]
} |
From: 2
Right Vertical Door
To: 5
Small Platforms Junction
Spark from the ground, left of the Power Bomb blocks. Entrance condition: {
"comeInShinecharged": {},
"comesThroughToilet": "any"
}Requires: {
"shineChargeFrames": 80
}
"canHorizontalShinespark"
{
"shinespark": {
"frames": 115
}
}Clears obstacles: B |
From: 2
Right Vertical Door
To: 5
Small Platforms Junction
Spark from the ground, left of the Power Bomb blocks. Entrance condition: {
"comeInShinecharged": {},
"comesThroughToilet": "any"
}Requires: {
"shineChargeFrames": 80
}
"canHorizontalShinespark"
{
"shinespark": {
"frames": 115,
"excessFrames": 85
}
}
{
"or": [
"canTrickyJump",
{
"and": [
{
"or": [
"canWallJump",
"HiJump"
]
},
{
"acidFrames": 25
}
]
},
{
"and": [
"Gravity",
{
"acidFrames": 20
}
]
}
]
}Clears obstacles: B |
From: 2
Right Vertical Door
To: 5
Small Platforms Junction
Use a flash suit to spark horizontally through the speed blocks. Samus may stop above the acid, but it should always be possible to land on one of the platforms. Requires: {
"useFlashSuit": {}
}
{
"shinespark": {
"frames": 98,
"excessFrames": 95
}
}Clears obstacles: B |
|
Requires: {
"haveBlueSuit": {}
}Clears obstacles: B |
From: 2
Right Vertical Door
To: 5
Small Platforms Junction
Farm the Mellas for energy, then run through the speed blocks, shinecharge, and use a Mella to interrupt. Entrance condition: {
"comeInWithRMode": {},
"comesThroughToilet": "no"
}Requires: "h_RModeCanRefillReserves"
{
"resourceMissingAtMost": [
{
"type": "Missile",
"count": 0
}
]
}
{
"partialRefill": {
"type": "ReserveEnergy",
"limit": 20
}
}
{
"canShineCharge": {
"usedTiles": 17,
"openEnd": 0
}
}
{
"autoReserveTrigger": {
"maxReserveEnergy": 95
}
}
"canRModeSparkInterrupt"Clears obstacles: B |
From: 2
Right Vertical Door
To: 5
Small Platforms Junction
Crystal Flash, or farm Mellas and use a Power Bomb. Run through the speed blocks and use a Mella or the acid to interrupt. Entrance condition: {
"comeInWithRMode": {},
"comesThroughToilet": "no"
}Requires: {
"or": [
"h_CrystalFlashForReserveEnergy",
{
"and": [
"h_RModeCanRefillReserves",
{
"resourceMissingAtMost": [
{
"type": "Missile",
"count": 0
}
]
},
{
"partialRefill": {
"type": "ReserveEnergy",
"limit": 20
}
},
"h_usePowerBomb"
]
}
]
}
"h_shinechargeMaxRunway"
{
"or": [
{
"autoReserveTrigger": {
"maxReserveEnergy": 95
}
},
{
"and": [
{
"autoReserveTrigger": {}
},
{
"acidFrames": 20
}
]
}
]
}
"canRModeSparkInterrupt"Clears obstacles: A, B |
From: 2
Right Vertical Door
To: 6
G-Mode Morph Junction (At Speed Blocks)
With Bombs, killing the Mellas can be a bit tricky; it is recommended to use one to boost and place some midair before luring a Mella to more easily kill it. Entrance condition: {
"comeInWithGMode": {
"mode": "any",
"morphed": true
},
"comesThroughToilet": "any"
}Requires: {
"or": [
"h_artificialMorphSpringBall",
{
"and": [
"h_artificialMorphBombs",
"canTrickyDodgeEnemies"
]
},
{
"and": [
"h_artificialMorphBombs",
{
"enemyDamage": {
"enemy": "Mella",
"type": "contact",
"hits": 1
}
}
]
}
]
} |
From: 2
Right Vertical Door
To: 6
G-Mode Morph Junction (At Speed Blocks)
A single horizontal Power Bomb boost can get Samus on top of the blocks and kill most of the Mellas. The blocks will break after exiting G-mode. Entrance condition: {
"comeInWithGMode": {
"mode": "any",
"morphed": true
},
"comesThroughToilet": "any"
}Requires: {
"tech": "canBombHorizontally"
}
"h_artificialMorphPowerBomb"Clears obstacles: A Dev note: Obstacle A will not be cleared until exiting G-mode, but no G-mode strat will use that obstacle, so it should be fine clearing it now. |
From: 2
Right Vertical Door
To: 7
Direct G-Mode Morph Junction (At Speed Blocks)
With Bombs, killing the Mellas can be a bit tricky; it is recommended to use one to boost and place some midair before luring a Mella to more easily kill it. Entrance condition: {
"comeInWithGMode": {
"mode": "direct",
"morphed": true
},
"comesThroughToilet": "any"
}Requires: {
"or": [
"h_artificialMorphSpringBall",
{
"and": [
"h_artificialMorphBombs",
"canTrickyDodgeEnemies"
]
},
{
"and": [
"h_artificialMorphBombs",
{
"enemyDamage": {
"enemy": "Mella",
"type": "contact",
"hits": 1
}
}
]
}
]
} |
From: 2
Right Vertical Door
To: 7
Direct G-Mode Morph Junction (At Speed Blocks)
A single horizontal Power Bomb boost can get Samus on top of the blocks and kill most of the Mellas. The blocks will break after exiting G-mode. Entrance condition: {
"comeInWithGMode": {
"mode": "direct",
"morphed": true
},
"comesThroughToilet": "any"
}Requires: {
"tech": "canBombHorizontally"
}
"h_artificialMorphPowerBomb"Clears obstacles: A Dev note: Obstacle A will not be cleared until exiting G-mode, but no G-mode strat will use that obstacle, so it should be fine clearing it now. |
|

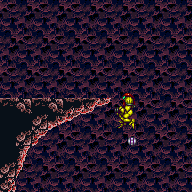
Involves Grappling off several Rippers, where falling may lead to a soft lock. Morphing and unmorphing to reset Samus's fall speed can help give a bit more time to position the Rippers. It can help to Grapple the same Ripper again to get it in a better position. Positioning the first Ripper far to the left until the second is visible can help make this much easier. Requires: {
"notable": "Indiana Jones Grapple (First Try)"
}
"canUseEnemies"
"canPreciseGrapple"
"h_midAirShootUp"
{
"or": [
{
"and": [
"canInsaneJump",
"h_trickyToCarryFlashSuit"
]
},
{
"and": [
"canResetFallSpeed",
{
"enemyDamage": {
"enemy": "Ripper 2 (green)",
"type": "contact",
"hits": 1
}
}
]
}
]
}Dev note: In general, the return route is easier, but is only useful after doing the left to right strat first. |
|
|
|
Requires: "SpaceJump" |
|

Requires: "canJumpIntoIBJ" |
From: 5
Small Platforms Junction
To: 1
Left Door
Requires: "HiJump" "canSpringBallJumpMidAir" |
|

Run on the moving platform (Kamer). Requires: "canSpeedyJump" "HiJump" "canTrickyWallJump" |
|

Requires: "h_trickySpringwall" |
From: 5
Small Platforms Junction
To: 1
Left Door
Use an unmorph bomb boost at the end of a mid-air SpringBall jump. Also requires a crouch-jump and down-grab to complete the maneuver. A spring fling can help add some lenience to the bomb placement and unmorph timing; it requires pausing early, before jumping, in order to be able to initiate another pause immediately before placing a Power Bomb. Requires: {
"notable": "Spring Ball Unmorph Bomb Boost"
}
"canSpringBallJumpMidAir"
"canUnmorphBombBoost"
"h_crouchJumpDownGrab" |
|

Lure a Mella from the right by breaking the speed blocks or using Morph. Then you need to manipulate it to go high enough to be used as a stepping stone once frozen. Requires: "canTrickyUseFrozenEnemies"
"canManipulateMellas"
{
"or": [
"canTrickyDodgeEnemies",
{
"enemyDamage": {
"enemy": "Mella",
"type": "contact",
"hits": 2
}
}
]
}
{
"or": [
{
"obstaclesCleared": [
"B"
]
},
"Morph"
]
} |
|


Jump back from the leftmost floating platform and diagonally shinespark at the peak of the jump towards the door to minimize shinespark damage. Requires: "h_storedSpark"
{
"shinespark": {
"frames": 22,
"excessFrames": 13
}
} |
From: 5
Small Platforms Junction
To: 1
Left Door
Lure a Mella from the right by breaking the speed blocks or using Morph. Then manipulate it to go high enough to be used in the left doorway. Raise the Mella up to just below the door's ledge and then climb up to the door. Reposition the Mella once towards the door, and before it finishes moving, stand in the doorframe so that the next Mella movement will hit Samus. If it drops below the camera it will be necessary to go back down and raise it again. Requires: "canManipulateMellas"
"canCameraManip"
"canBePatient"
"canComplexGMode"
{
"or": [
"SpaceJump",
"canTrickyUseFrozenEnemies",
{
"and": [
"HiJump",
"canSpringBallJumpMidAir"
]
},
{
"and": [
"HiJump",
"canSpeedyJump",
"canTrickyWallJump"
]
}
]
}
{
"or": [
"canTrickyDodgeEnemies",
{
"enemyDamage": {
"enemy": "Mella",
"type": "contact",
"hits": 2
}
}
]
}
{
"or": [
{
"obstaclesCleared": [
"B"
]
},
"Morph"
]
}Exit condition: {
"leaveWithGModeSetup": {}
}Unlocks doors: {"types":["ammo"],"requires":[]} |
|
Requires: {
"or": [
"Morph",
{
"obstaclesCleared": [
"B"
]
}
]
} |
From: 5
Small Platforms Junction
To: 2
Right Vertical Door

Gravity makes it possible to charge a spark in the acid in order to break the speed blocks. Requires: {
"notable": "Acid Shinespark"
}
"Gravity"
"canSuitlessLavaDive"
"h_shinechargeMaxRunway"
"canShinechargeMovement"
"canHorizontalShinespark"
{
"acidFrames": 120
}
{
"shinespark": {
"frames": 35
}
}Clears obstacles: B |
From: 5
Small Platforms Junction
To: 2
Right Vertical Door
Requires: {
"useFlashSuit": {}
}
{
"or": [
{
"shinespark": {
"frames": 33,
"excessFrames": 7
}
},
{
"and": [
{
"shinespark": {
"frames": 33,
"excessFrames": 30
}
},
{
"enemyDamage": {
"enemy": "Mella",
"type": "contact",
"hits": 1
}
}
]
}
]
}Clears obstacles: B |
|
Requires: {
"haveBlueSuit": {}
}Clears obstacles: B |
From: 5
Small Platforms Junction
To: 2
Right Vertical Door
Requires: {
"getBlueSpeed": {
"usedTiles": 12,
"gentleDownTiles": 6,
"openEnd": 1
}
}Clears obstacles: B |
|
Requires: {
"or": [
"SpaceJump",
"canLongIBJ"
]
} |
From: 5
Small Platforms Junction
To: 3
Item
Requires: "HiJump" "canTrickyDashJump" "canTrickySpringBallJump" |
|
A particularly precise springwall. Aim the walljump at the bottom of the second sloped wall fixture, where it looks like you cant jump off of. Optimize pause timing, use an instant morph, and get a max height springball jump. A delayed wall jump helps. Requires: {
"notable": "Springwall"
}
"HiJump"
"h_trickySpringwall"
"canPreciseWallJump"
"can3HighWallMidAirMorph" |
|
Lure a Mella from the right by breaking the speed blocks or using Morph. Then you need to manipulate it to go high enough to be used as a stepping stone once frozen. Requires: "canManipulateMellas"
"canTrickyUseFrozenEnemies"
"HiJump"
{
"or": [
"canTrickyDodgeEnemies",
{
"enemyDamage": {
"enemy": "Mella",
"type": "contact",
"hits": 2
}
}
]
}
{
"or": [
{
"obstaclesCleared": [
"B"
]
},
"Morph"
]
}
{
"or": [
"canWallJump",
"canSpringBallJumpMidAir"
]
} |
|
Lure a Mella from the right by breaking the speed blocks or using Morph. Then manipulate it to go high enough to be used as a stepping stone once frozen. Without movement items it may be necessary to continue manipulating it from above, jumping and aiming down to freeze it. Requires: "canTrickyUseFrozenEnemies"
"canManipulateMellas"
"canBePatient"
{
"or": [
"canWallJump",
"HiJump",
"canSpringBallJumpMidAir",
{
"and": [
"canBeVeryPatient",
{
"noFlashSuit": {}
}
]
}
]
}
{
"or": [
"canTrickyDodgeEnemies",
{
"enemyDamage": {
"enemy": "Mella",
"type": "contact",
"hits": 2
}
}
]
}
{
"or": [
{
"obstaclesCleared": [
"B"
]
},
"Morph"
]
} |
|
Freeze the Mella at a precise location in order to jump through the crumble block, then wall jump up the long channel and mid-air morph to get out. One normalized way to do this: Kill the first two Mellas, moonwalk to the right until the third Mella just barely goes off-camera, fire a shot, and move left to scroll the Mella back on-camera just before the shot would despawn, in order to freeze it at a specific height. While it is frozen, kill the remaining Mellas, and press against the wall of Speed blocks. Perform an action that changes Samus' pose (e.g., press an angle button, jump, or crouch/uncrouch) in order to be able to moonwalk from that position. Moonwalk backwards 5 pixels, then jump straight up, and continue holding jump while pressing right, to perform a buffered turn-around spin jump to the right. If executed correctly, the Mella will move horizontally left and will be at a good height to be able to freeze and clip through the crumble block with a crouch jump. Get on top of the Mella with a mid-air morph, position under the crumble block, then unmorph for the crouch jump. Quickly spin-jump to re-enter the shaft after breaking the crumble block. Tip: if Samus moonwalks back further than 5 pixels, press against the Speed blocks again before trying to moonwalk back again, to avoid possibly getting bad subpixels. Requires: {
"notable": "Mella Ice Clip"
}
"Morph"
"canMoonwalk"
"canManipulateMellas"
"h_preciseIceClip"
{
"or": [
"canConsecutiveWallJump",
{
"and": [
"HiJump",
"canWallJump"
]
}
]
}Dev note: The manipulation can also work with moonwalking back between 6 and 10 pixels, but depending on the exact position the bug may move at a shallow angle rather than exactly horizontally; in this case, the bug should be frozen a bit early (i.e. further right), to ensure it does not re-enter its idle animation where its height would become unpredictable. FIXME: Investigate if there is a normalized setup for freezing in the high-pixel position. FIXME: A freestyle version (or alternative normalized setup?) of the strat could be added, to avoid the canMoonwalk requirement, using X-Ray or a very precise freeze to get up. |
|
Requires: "h_storedSpark"
{
"or": [
{
"shinespark": {
"frames": 30,
"excessFrames": 6
}
},
{
"and": [
"HiJump",
{
"shinespark": {
"frames": 25,
"excessFrames": 6
}
}
]
}
]
}Clears obstacles: B |
From: 6
G-Mode Morph Junction (At Speed Blocks)
To: 1
Left Door
Cross the room with a Spring Ball jump into IBJ from the moving platforms above the acid. Requires: "canGMode" "h_artificialMorphJumpIntoIBJ" |
From: 6
G-Mode Morph Junction (At Speed Blocks)
To: 1
Left Door
Cross the room with a long diagonal bomb jump from the solid platforms above the acid. Requires: "canGMode"
{
"notable": "G-Mode Morph Long Diagonal Bomb Jump"
}
"h_artificialMorphDiagonalBombJump"
"h_artificialMorphLongIBJ" |
From: 6
G-Mode Morph Junction (At Speed Blocks)
To: 1
Left Door
Cross the solid platforms then horizontally boost into the acid and begin an IBJ. With more limited Energy, it is possible to IBJ high into the room and boost horizontally to fall into the acid a bit further to the left. Requires: "canGMode"
"Gravity"
"h_artificialMorphLongIBJ"
"h_artificialMorphBombHorizontally"
"canSuitlessLavaDive"
{
"acidFrames": 150
}Dev note: A Direct G-mode variant that collects the item is not included, because there is no way to stay artificially morphed and gain Energy. |
From: 6
G-Mode Morph Junction (At Speed Blocks)
To: 2
Right Vertical Door
Requires: "canGMode" |
From: 6
G-Mode Morph Junction (At Speed Blocks)
To: 2
Right Vertical Door
It can help to moonwalk towards a Mella that has never been on screen, so that it starts swooping immediately as it first enters the screen. This will make it so that when Samus is below it, it will always swoop and go up slightly compared to the previous swoop. Once it is close to the right height, move away so it stops swooping, freeze it and quickly try the clip, if it doesn't work, quickly leave and try again. Requires: "canComplexGMode"
"canManipulateMellas"
{
"or": [
"h_preciseIceClip",
"h_highPixelIceClip"
]
}
{
"or": [
"Morph",
"canInsaneJump",
{
"enemyDamage": {
"enemy": "Mella",
"type": "contact",
"hits": 1
}
}
]
}Exit condition: {
"leaveWithGMode": {
"morphed": false
}
}Bypasses door shell: true |
From: 6
G-Mode Morph Junction (At Speed Blocks)
To: 3
Item
Requires: "canGMode" "h_artificialMorphLongIBJ" |
From: 6
G-Mode Morph Junction (At Speed Blocks)
To: 5
Small Platforms Junction
Requires: "canGMode" |
From: 6
G-Mode Morph Junction (At Speed Blocks)
To: 6
G-Mode Morph Junction (At Speed Blocks)
Place a Power Bomb by the right blocks. They will break when exiting G-mode. Requires: "canGMode" "h_artificialMorphPowerBomb" Clears obstacles: A Dev note: Obstacle A will not be cleared until exiting G-mode, but no G-mode strat will use that obstacle, so it should be fine clearing it now. |
From: 7
Direct G-Mode Morph Junction (At Speed Blocks)
To: 1
Left Door
Touch the item then cross the room with a Spring Ball jump into IBJ from the moving platforms above the acid. Requires: "canRemoteAcquire" "h_artificialMorphLongIBJ" "h_artificialMorphJumpIntoIBJ" Collects items: 3 |
From: 7
Direct G-Mode Morph Junction (At Speed Blocks)
To: 1
Left Door
Touch the item then cross the room with a long diagonal bomb jump from the solid platforms above the acid. Requires: "canRemoteAcquire"
{
"notable": "G-Mode Morph Long Diagonal Bomb Jump"
}
"h_artificialMorphDiagonalBombJump"
"h_artificialMorphLongIBJ"Collects items: 3 |
From: 7
Direct G-Mode Morph Junction (At Speed Blocks)
To: 2
Right Vertical Door
IBJ to the item, touch it, and drop back down to the right of the speed blocks before exiting G-mode. Requires: "canRemoteAcquire" "h_artificialMorphLongIBJ" Collects items: 3 |
From: 7
Direct G-Mode Morph Junction (At Speed Blocks)
To: 6
G-Mode Morph Junction (At Speed Blocks)
Requires: "canGMode" |
From: 7
Direct G-Mode Morph Junction (At Speed Blocks)
To: 7
Direct G-Mode Morph Junction (At Speed Blocks)
Place a Power Bomb by the right blocks. They will break when exiting G-mode. Requires: "canGMode" "h_artificialMorphPowerBomb" Clears obstacles: A Dev note: Obstacle A will not be cleared until exiting G-mode, but no G-mode strat will use that obstacle, so it should be fine clearing it now. |
{
"$schema": "../../../schema/m3-room.schema.json",
"id": 127,
"name": "Indiana Jones Room",
"area": "Norfair",
"subarea": "Upper",
"subsubarea": "Crocomire",
"roomAddress": "0x7AB8F",
"roomEnvironments": [
{
"heated": false
}
],
"mapTileMask": [
[
1,
1,
1,
1,
1,
0,
0,
0
],
[
1,
1,
1,
1,
1,
0,
0,
0
],
[
1,
1,
1,
1,
1,
1,
1,
1
]
],
"nodes": [
{
"id": 1,
"name": "Left Door",
"nodeType": "door",
"nodeSubType": "blue",
"nodeAddress": "0x00194da",
"doorOrientation": "left",
"doorEnvironments": [
{
"physics": "air"
}
],
"mapTileMask": [
[
2,
2,
1,
1,
1,
0,
0,
0
],
[
2,
2,
1,
1,
1,
0,
0,
0
],
[
1,
1,
1,
1,
1,
1,
1,
1
]
]
},
{
"id": 2,
"name": "Right Vertical Door",
"nodeType": "door",
"nodeSubType": "blue",
"nodeAddress": "0x00194ce",
"doorOrientation": "up",
"doorEnvironments": [
{
"physics": "air"
}
],
"mapTileMask": [
[
1,
1,
1,
1,
1,
0,
0,
0
],
[
1,
1,
1,
1,
1,
0,
0,
0
],
[
1,
1,
1,
1,
1,
2,
2,
2
]
]
},
{
"id": 3,
"name": "Item",
"nodeType": "item",
"nodeSubType": "visible",
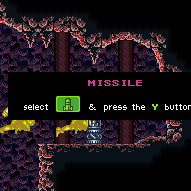
"nodeItem": "Missile",
"nodeAddress": "0x78C2A",
"mapTileMask": [
[
1,
1,
2,
2,
2,
0,
0,
0
],
[
1,
1,
2,
2,
2,
0,
0,
0
],
[
1,
1,
1,
1,
1,
1,
1,
1
]
],
"locks": [
{
"name": "Dummy Item Lock",
"lockType": "gameFlag",
"unlockStrats": [
{
"name": "Base (Collect Item)",
"notable": false,
"requires": [],
"flashSuitChecked": true,
"blueSuitChecked": true
}
]
}
]
},
{
"id": 5,
"name": "Small Platforms Junction",
"nodeType": "junction",
"nodeSubType": "junction",
"mapTileMask": [
[
1,
1,
1,
1,
1,
0,
0,
0
],
[
1,
1,
1,
1,
1,
0,
0,
0
],
[
2,
2,
2,
2,
2,
1,
1,
1
]
],
"note": "Represents being at the small platforms above the acid."
},
{
"id": 6,
"name": "G-Mode Morph Junction (At Speed Blocks)",
"nodeType": "junction",
"nodeSubType": "g-mode",
"mapTileMask": [
[
1,
1,
1,
1,
1,
0,
0,
0
],
[
1,
1,
1,
1,
1,
0,
0,
0
],
[
1,
1,
1,
1,
2,
2,
1,
1
]
],
"note": "Represents being at the bottom of the room with G-mode and Morph or artificial morph."
},
{
"id": 7,
"name": "Direct G-Mode Morph Junction (At Speed Blocks)",
"nodeType": "junction",
"nodeSubType": "g-mode",
"mapTileMask": [
[
1,
1,
1,
1,
1,
0,
0,
0
],
[
1,
1,
1,
1,
1,
0,
0,
0
],
[
1,
1,
1,
1,
2,
2,
1,
1
]
],
"note": "Represents being at the bottom of the room with direct G-mode and Morph or artificial morph."
}
],
"obstacles": [
{
"id": "A",
"name": "Power bomb blocks",
"obstacleType": "inanimate"
},
{
"id": "B",
"name": "Speed blocks",
"obstacleType": "inanimate"
},
{
"id": "E",
"name": "Left door open",
"obstacleType": "inanimate"
}
],
"enemies": [
{
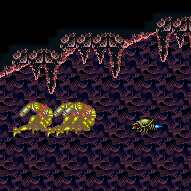
"id": "e1",
"groupName": "Indiana Jones Room Rippers 2s",
"enemyName": "Ripper 2 (green)",
"quantity": 4,
"betweenNodes": [
1,
3
]
},
{
"id": "e2",
"groupName": "Indiana Jones Room Mellas",
"enemyName": "Mella",
"quantity": 5,
"homeNodes": [
2
]
}
],
"strats": [
{
"link": [
1,
1
],
"name": "Base (Unlock Door)",
"requires": [],
"unlocksDoors": [
{
"types": [
"ammo"
],
"requires": []
}
],
"flashSuitChecked": true,
"blueSuitChecked": true
},
{
"link": [
1,
1
],
"name": "Base (Come In Normally)",
"entranceCondition": {
"comeInNormally": {}
},
"requires": [],
"flashSuitChecked": true,
"blueSuitChecked": true
},
{
"link": [
1,
1
],
"name": "Base (Come In With Mockball)",
"entranceCondition": {
"comeInWithMockball": {
"adjacentMinTiles": 0,
"remoteAndLandingMinTiles": [
[
0,
0
]
],
"speedBooster": "any"
}
},
"requires": [],
"flashSuitChecked": true,
"blueSuitChecked": true
},
{
"link": [
2,
2
],
"name": "Base (Unlock Door)",
"requires": [],
"unlocksDoors": [
{
"types": [
"ammo"
],
"requires": []
}
],
"flashSuitChecked": true,
"blueSuitChecked": true
},
{
"link": [
2,
2
],
"name": "Base (Come In Normally)",
"entranceCondition": {
"comeInNormally": {}
},
"requires": [],
"flashSuitChecked": true,
"blueSuitChecked": true
},
{
"name": "Base (Collect Item)",
"notable": false,
"requires": [],
"flashSuitChecked": true,
"blueSuitChecked": true,
"link": [
3,
3
],
"collectsItems": [
3
]
},
{
"id": 1,
"link": [
1,
1
],
"name": "Leave with Runway",
"requires": [],
"exitCondition": {
"leaveWithRunway": {
"length": 10,
"openEnd": 1
}
},
"flashSuitChecked": true,
"blueSuitChecked": true
},
{
"id": 2,
"link": [
1,
1
],
"name": "Crystal Flash",
"requires": [
"h_CrystalFlash"
],
"flashSuitChecked": true,
"blueSuitChecked": true
},
{
"id": 78,
"link": [
1,
1
],
"name": "Open Door",
"requires": [
{
  "doorUnlockedAtNode": 1
}
],
"clearsObstacles": [
"E"
],
"flashSuitChecked": true,
"blueSuitChecked": true
},
{
"id": 88,
"link": [
1,
1
],
"name": "Ripper Farm",
"requires": [
{
"noBlueSuit": {}
},
{
"or": [
{
"and": [
{
"resetRoom": {
"nodes": [
1
]
}
},
{
"cycleFrames": 880
}
]
},
{
"and": [
{
"resetRoom": {
"nodes": [
2
]
}
},
"Morph",
{
"cycleFrames": 1640
}
]
}
]
},
"SpaceJump",
"ScrewAttack"
],
"resetsObstacles": [
"A",
"B",
"E"
],
"farmCycleDrops": [
{
"enemy": "Ripper 2 (green)",
"count": 4
}
],
"flashSuitChecked": true,
"blueSuitChecked": true
},
{
"id": 141,
"link": [
1,
1
],
"name": "Come in Shinecharging, Crystal Spark",
"entranceCondition": {
"comeInShinecharging": {
"length": 9,
"openEnd": 0
},
"comesInHeated": "no"
},
"requires": [
"h_CrystalSpark"
],
"flashSuitChecked": true,
"blueSuitChecked": true
},
{
"id": 117,
"link": [
1,
1
],
"name": "Leave with Super Sink",
"requires": [
"canUseEnemies",
{
"or": [
{
"haveBlueSuit": {}
},
{
"enemyDamage": {
"enemy": "Ripper 2 (green)",
"type": "contact",
"hits": 2
}
}
]
},
"Morph",
"SpringBall",
"h_trickyToCarryFlashSuit"
],
"exitCondition": {
"leaveWithSuperSink": {}
},
"flashSuitChecked": true,
"blueSuitChecked": true,
"note": [
"Swing counter-clockwise around the left-most Ripper closely (pressing up to retract Grapple),",
"positioned as far left as possible while avoiding getting caught on the stalactite.",
"After swinging under the stalactite with high enough speed,",
"hold down to extend Grapple to push Samus to the left slightly,",
"then release Grapple while Samus is still nearly horizontal.",
"Quickly morph and frame-perfectly pause to equip or unequip Spring Ball.",
"If successful, Samus will continue gaining fall speed while on the ground morphed.",
"Immediately roll left through the door, which should have been opened in advance."
]
},
{
"id": 3,
"link": [
1,
2
],
"name": "Full Room Space Jump Through Speed Blocks",
"entranceCondition": {
"comeInGettingBlueSpeed": {
"length": 9,
"openEnd": 0
}
},
"requires": [
{
"notable": "Full Room Space Jump Through Speed Blocks"
},
"canBlueSpaceJump",
"canPreciseSpaceJump"
],
"clearsObstacles": [
"B"
],
"flashSuitChecked": true,
"blueSuitChecked": true,
"note": "The blocks can be broken if you can generate blue speed using the previous room's runway, and carry it to the blocks by slowing floating down with Space Jump."
},
{
"id": 4,
"link": [
1,
3
],
"name": "Base",
"requires": [
"SpaceJump"
],
"flashSuitChecked": true,
"blueSuitChecked": true
},
{
"id": 5,
"link": [
1,
3
],
"name": "Full Speed Jump to Missile",
"entranceCondition": {
"comeInRunning": {
"speedBooster": "yes",
"minTiles": 29
}
},
"requires": [
"canSpeedyJump",
"canWallJump",
"canCarefulJump"
],
"flashSuitChecked": true,
"blueSuitChecked": true,
"note": "Jump with enough run speed to reach the wall below the Missile Item Location."
},
{
"id": 6,
"link": [
1,
3
],
"name": "Come in Shinecharged, Shinespark (Bootless)",
"entranceCondition": {
"comeInShinecharged": {}
},
"requires": [
{
"shineChargeFrames": 110
},
"canShinechargeMovementComplex",
"canPreciseWallJump",
"canConsecutiveWallJump",
{
"shinespark": {
"frames": 78
}
}
],
"flashSuitChecked": true,
"blueSuitChecked": true,
"note": "Takes three walljumps, and must shinespark at the apex."
},
{
"id": 7,
"link": [
1,
3
],
"name": "Come in Shinecharging, Shinespark (Bootless)",
"entranceCondition": {
"comeInShinecharging": {
"length": 9,
"openEnd": 0
}
},
"requires": [
"canShinechargeMovementComplex",
"canPreciseWallJump",
"canConsecutiveWallJump",
{
"shinespark": {
"frames": 78
}
}
],
"flashSuitChecked": true,
"blueSuitChecked": true,
"note": "Takes three walljumps, and must shinespark at the apex."
},
{
"id": 8,
"link": [
1,
3
],
"name": "Come in Shinecharged, Shinespark (HiJump)",
"entranceCondition": {
"comeInShinecharged": {}
},
"requires": [
{
"shineChargeFrames": 80
},
"HiJump",
"canShinechargeMovementComplex",
{
"or": [
{
"and": [
"canWallJump",
{
"shinespark": {
"frames": 80
}
}
]
},
{
"and": [
"canTrickyDashJump",
{
"shinespark": {
"frames": 60
}
}
]
}
]
}
],
"flashSuitChecked": true,
"blueSuitChecked": true,
"note": "Wall jump or build run speed using the full runway to jump high enough for the shinespark."
},
{
"id": 9,
"link": [
1,
3
],
"name": "Come in Shinecharging, Shinespark (HiJump)",
"entranceCondition": {
"comeInShinecharging": {
"length": 9,
"openEnd": 0
}
},
"requires": [
"HiJump",
"canShinechargeMovementComplex",
{
"or": [
{
"and": [
"canWallJump",
{
"shinespark": {
"frames": 80
}
}
]
},
{
"and": [
"canTrickyDashJump",
{
"shinespark": {
"frames": 60
}
}
]
}
]
}
],
"flashSuitChecked": true,
"blueSuitChecked": true,
"note": "Wall jump or build run speed using the full runway to jump high enough for the shinespark."
},
{
"id": 10,
"link": [
1,
3
],
"name": "Come in Shinecharged, Diagonal Shinespark",
"entranceCondition": {
"comeInShinecharged": {}
},
"requires": [
{
"shineChargeFrames": 155
},
{
"notable": "Left Side Diagonal Shinespark"
},
"h_speedJump",
"canTrickyJump",
"canShinechargeMovementTricky",
{
"shinespark": {
"frames": 40
}
}
],
"flashSuitChecked": true,
"blueSuitChecked": true,
"note": [
"Store a shinespark near the left door and use the remaining runway to jump as far as possible to the right.",
"Once near the acid platforms, Shinespark diagonally to reach the item location."
]
},
{
"id": 137,
"link": [
1,
3
],
"name": "Indiana Jones Grapple (With Retries)",
"requires": [
{
"notable": "Indiana Jones Grapple (With Retries)"
},
"canUseEnemies",
"canPreciseGrapple",
"h_midAirShootUp",
{
"or": [
{
"and": [
"canInsaneJump",
"h_trickyToCarryFlashSuit"
]
},
{
"enemyDamage": {
"enemy": "Ripper 2 (green)",
"type": "contact",
"hits": 4
}
}
]
},
{
"or": [
{
"and": [
"HiJump",
"canSpringBallJumpMidAir"
]
},
{
"and": [
"canSpeedyJump",
"HiJump",
"canTrickyWallJump"
]
},
"h_trickySpringwall"
]
}
],
"flashSuitChecked": true,
"blueSuitChecked": true,
"note": "Carefully swing between the Rippers at the top of the room to the item. The last two swings are the hardest",
"detailNote": [
"Morphing and unmorphing to reset Samus's fall speed can help give a bit more time to position the Rippers.",
"It can help to Grapple the same Ripper again to get it in a better position.",
"Position the third Ripper far to the right then fling to the fourth, which is far to the right and very close to the ceiling.",
"Moving the fourth Ripper to the right a bit can also help in order to make the last fling less precise.",
"Be careful not to fling directly into the ceiling, as it is easy to hit the uneven surface and fall.",
"If Samus falls, it may be helpful to reset the room."
]
},
{
"id": 11,
"link": [
1,
3
],
"name": "Indiana Jones Grapple (First Try)",
"requires": [
{
"notable": "Indiana Jones Grapple (First Try)"
},
"canUseEnemies",
"canPreciseGrapple",
"h_midAirShootUp",
{
"or": [
{
"and": [
"canInsaneJump",
"h_trickyToCarryFlashSuit"
]
},
{
"and": [
"canResetFallSpeed",
{
"enemyDamage": {
"enemy": "Ripper 2 (green)",
"type": "contact",
"hits": 2
}
}
]
}
]
}
],
"flashSuitChecked": true,
"blueSuitChecked": true,
"note": "Carefully swing between the Rippers at the top of the room to the item. The last two swings are the hardest",
"detailNote": [
"Morphing and unmorphing to reset Samus's fall speed can help give a bit more time to position the Rippers.",
"It can help to Grapple the same Ripper again to get it in a better position.",
"Position the third Ripper far to the right then fling to the fourth, which is far to the right and very close to the ceiling.",
"Moving the fourth Ripper to the right a bit can also help in order to make the last fling less precise.",
"Be careful not to fling directly into the ceiling, as it is easy to hit the uneven surface and fall."
]
},
{
"id": 12,
"link": [
1,
5
],
"name": "Base",
"requires": [],
"flashSuitChecked": true,
"blueSuitChecked": true
},
{
"id": 133,
"link": [
1,
5
],
"name": "No Power Bombs, R-Mode Spark Interrupt",
"entranceCondition": {
"comeInWithRMode": {}
},
"requires": [
{
"or": [
"Morph",
{
"getBlueSpeed": {
"usedTiles": 12,
"gentleDownTiles": 6,
"openEnd": 1
}
},
{
"and": [
{
"notable": "Acid Shinespark"
},
"Gravity",
"canSuitlessLavaDive",
"h_shinechargeMaxRunway",
{
"acidFrames": 120
},
{
"shinespark": {
"frames": 35
}
}
]
}
]
},
"h_RModeCanRefillReserves",
{
"resourceMissingAtMost": [
{
"type": "Missile",
"count": 0
}
]
},
{
"partialRefill": {
"type": "ReserveEnergy",
"limit": 20
}
},
{
"canShineCharge": {
"usedTiles": 17,
"openEnd": 0
}
},
{
"autoReserveTrigger": {
"maxReserveEnergy": 95
}
},
"canRModeSparkInterrupt"
],
"clearsObstacles": [
"B"
],
"flashSuitChecked": true,
"blueSuitChecked": true,
"note": [
"Get past the speed blocks and farm the Mellas. Shinecharge while running back and use a Mella to interrupt.",
"Getting past the blocks without Morph requires either an Insane Short Charge or an Acid Shinespark."
],
"devNote": [
"FIXME: The acid spark could benefit from farming a Ripper first instead of needing to end with 99 E and disableable tanks.",
"It could also maybe be done with both suits and some farming luck."
]
},
{
"id": 134,
"link": [
1,
5
],
"name": "Clear the Power Bomb Blocks, R-Mode Spark Interrupt",
"entranceCondition": {
"comeInWithRMode": {}
},
"requires": [
{
"or": [
"h_CrystalFlashForReserveEnergy",
{
"and": [
"h_RModeCanRefillReserves",
{
"resourceMissingAtMost": [
{
"type": "Missile",
"count": 0
}
]
},
{
"partialRefill": {
"type": "ReserveEnergy",
"limit": 20
}
},
"h_usePowerBomb"
]
}
]
},
"h_shinechargeMaxRunway",
{
"or": [
{
"autoReserveTrigger": {
"maxReserveEnergy": 95
}
},
{
"and": [
{
"autoReserveTrigger": {}
},
{
"acidFrames": 20
}
]
}
]
},
"canRModeSparkInterrupt"
],
"clearsObstacles": [
"A",
"B"
],
"flashSuitChecked": true,
"blueSuitChecked": true,
"note": [
"Crystal Flash, or farm Mellas and use a Power Bomb. Run through the speed blocks and use a Mella or the acid to interrupt."
]
},
{
"id": 89,
"link": [
1,
6
],
"name": "G-Mode Morph Spring Ball",
"entranceCondition": {
"comeInWithGMode": {
"mode": "any",
"morphed": true
}
},
"requires": [
"h_artificialMorphSpringBall"
],
"flashSuitChecked": true,
"blueSuitChecked": true,
"note": "Spring Ball across the platforms."
},
{
"id": 90,
"link": [
1,
6
],
"name": "G-Mode Morph Long Diagonal Bomb Jump",
"entranceCondition": {
"comeInWithGMode": {
"mode": "any",
"morphed": true
}
},
"requires": [
{
"notable": "G-Mode Morph Long Diagonal Bomb Jump"
},
"h_artificialMorphDiagonalBombJump",
"h_artificialMorphLongIBJ"
],
"flashSuitChecked": true,
"blueSuitChecked": true,
"note": "Perform a long diagonal bomb jump from the left door to the solid platforms above the acid."
},
{
"id": 17,
"link": [
1,
6
],
"name": "G-Mode Morph Acid Dive IBJ",
"entranceCondition": {
"comeInWithGMode": {
"mode": "any",
"morphed": true
}
},
"requires": [
"Gravity",
"h_artificialMorphIBJ",
"h_artificialMorphBombHorizontally",
"canSuitlessLavaDive",
{
"or": [
{
"acidFrames": 280
},
{
"and": [
"canTrickyJump",
{
"acidFrames": 220
}
]
},
{
"and": [
"canInsaneJump",
"h_artificialMorphDoubleBombJump",
{
"acidFrames": 175
}
]
}
]
}
],
"flashSuitChecked": true,
"blueSuitChecked": true,
"note": [
"Bomb boost horizontally at the top of an IBJ and land in the acid, then roll to the right and bomb out to safety.",
"To save some Energy, it is possible to IBJ or double IBJ out of the acid onto the first solid platform."
]
},
{
"id": 101,
"link": [
1,
7
],
"name": "Direct G-Mode Morph Spring Ball",
"entranceCondition": {
"comeInWithGMode": {
"mode": "direct",
"morphed": true
}
},
"requires": [
"h_artificialMorphSpringBall"
],
"flashSuitChecked": true,
"blueSuitChecked": true,
"note": "Spring Ball across the platforms."
},
{
"id": 102,
"link": [
1,
7
],
"name": "Direct G-Mode Morph Long Diagonal Bomb Jump",
"entranceCondition": {
"comeInWithGMode": {
"mode": "direct",
"morphed": true
}
},
"requires": [
{
"notable": "G-Mode Morph Long Diagonal Bomb Jump"
},
"h_artificialMorphDiagonalBombJump",
"h_artificialMorphLongIBJ"
],
"flashSuitChecked": true,
"blueSuitChecked": true,
"note": "Perform a long diagonal bomb jump from the left door to the solid platforms above the acid."
},
{
"id": 18,
"link": [
2,
1
],
"name": "Wall Jump Shinespark to Left Door",
"requires": [
"canWallJump",
"canShinechargeMovementComplex",
{
"obstaclesCleared": [
"B"
]
},
{
"or": [
{
"canShineCharge": {
"usedTiles": 32,
"gentleUpTiles": 6,
"openEnd": 1
}
},
{
"and": [
"h_shinechargeMaxRunway",
{
"obstaclesCleared": [
"A"
]
}
]
}
]
},
{
"shinespark": {
"frames": 85
}
}
],
"flashSuitChecked": true,
"blueSuitChecked": true,
"note": "Fire off the shinespark at the apex of two consecutive walljumps."
},
{
"id": 19,
"link": [
2,
1
],
"name": "Big Jump Horizontal Shinespark",
"requires": [
{
"notable": "Big Jump Shinespark"
},
"h_speedJump",
"canShinechargeMovementComplex",
{
"obstaclesCleared": [
"B"
]
},
{
"canShineCharge": {
"usedTiles": 32,
"gentleDownTiles": 6,
"openEnd": 1
}
},
{
"shinespark": {
"frames": 52
}
},
"canDownGrab"
],
"flashSuitChecked": true,
"blueSuitChecked": true,
"note": [
"Charge a spark to the right, then come back, run and jump, and do a horizontal spark at the apex.",
"If needed, down-grab onto the ledge."
]
},
{
"id": 79,
"link": [
2,
1
],
"name": "Big Jump Diagonal Shinespark",
"requires": [
{
"notable": "Big Jump Shinespark"
},
"canShinechargeMovementTricky",
{
"obstaclesCleared": [
"B"
]
},
{
"canShineCharge": {
"usedTiles": 23,
"gentleDownTiles": 6,
"openEnd": 1
}
},
{
"or": [
{
"and": [
"h_speedJump",
{
"shinespark": {
"frames": 30,
"excessFrames": 2
}
}
]
},
{
"shinespark": {
"frames": 46,
"excessFrames": 2
}
}
]
}
],
"flashSuitChecked": true,
"blueSuitChecked": true,
"note": [
"Charge a spark to the right a specific distance of about 6 tiles past the broken Speed blocks.",
"Then turn around, run and jump, and diagonal spark as late as possible. By shortening the jump it is easier but uses more Energy.",
"With a shortened jump, it is possible but not expected to kill a Ripper and collect its drop while falling.",
"Alternatively, it is possible to shinecharge right to left, then run and jump and then shinespark just before hitting the acid;",
"This is a bit tighter and uses more Energy, but doesn't rely on the larger jump from Speed Booster."
],
"devNote": [
"There is a large variance in the number of shinespark frames based on the runway used and how long jump is held.",
"The frames included are a reasonable approximation, although a tighter set of frames could be included with more specific details."
]
},
{
"id": 20,
"link": [
2,
1
],
"name": "Short Run Speedy Jump",
"requires": [
"canSpeedyJump",
{
"obstaclesCleared": [
"B"
]
},
{
"or": [
"HiJump",
{
"and": [
"canLateralMidAirMorph",
"canTrickySpringBallJump"
]
}
]
}
],
"flashSuitChecked": true,
"blueSuitChecked": true
},
{
"id": 21,
"link": [
2,
1
],
"name": "Long Run Speed Jump",
"requires": [
{
"or": [
{
"and": [
"canSpeedyJump",
"canCarefulJump"
]
},
{
"and": [
"h_speedJump",
"HiJump"
]
}
]
},
{
"obstaclesCleared": [
"A",
"B"
]
}
],
"flashSuitChecked": true,
"blueSuitChecked": true,
"devNote": [
"With HiJump we don't require canSpeedyJump tech here because the jump is 'trivial':",
"it is intended in the vanilla game, telegraphed by the ramp, and is very lenient."
]
},
{
"id": 80,
"link": [
2,
1
],
"name": "Leave With Spark (Wall Jumps)",
"requires": [
{
"obstaclesCleared": [
"B",
"E"
]
},
{
"canShineCharge": {
"usedTiles": 32,
"gentleUpTiles": 6,
"openEnd": 1
}
},
"canWallJump",
"canShinechargeMovementComplex",
{
"shinespark": {
"frames": 85
}
}
],
"exitCondition": {
"leaveWithSpark": {}
},
"unlocksDoors": [
{
"types": [
"ammo"
],
"requires": [],
"useImplicitRequires": false
}
],
"flashSuitChecked": true,
"blueSuitChecked": true
},
{
"id": 81,
"link": [
2,
1
],
"name": "Leave With Spark (Short Speedy Jump)",
"requires": [
{
"obstaclesCleared": [
"B",
"E"
]
},
{
"canShineCharge": {
"usedTiles": 32,
"gentleDownTiles": 6,
"openEnd": 1
}
},
"canSpeedyJump",
"canShinechargeMovementComplex",
{
"shinespark": {
"frames": 57
}
}
],
"exitCondition": {
"leaveWithSpark": {
"position": "bottom"
}
},
"unlocksDoors": [
{
"types": [
"ammo"
],
"requires": [],
"useImplicitRequires": false
}
],
"flashSuitChecked": true,
"blueSuitChecked": true
},
{
"id": 82,
"link": [
2,
1
],
"name": "Leave With Spark (Short Speedy HiJump)",
"requires": [
"HiJump",
"canSpeedyJump",
{
"obstaclesCleared": [
"B",
"E"
]
},
{
"canShineCharge": {
"usedTiles": 32,
"gentleDownTiles": 6,
"openEnd": 1
}
},
"canShinechargeMovementComplex",
{
"shinespark": {
"frames": 56
}
}
],
"exitCondition": {
"leaveWithSpark": {}
},
"unlocksDoors": [
{
"types": [
"ammo"
],
"requires": [],
"useImplicitRequires": false
}
],
"flashSuitChecked": true,
"blueSuitChecked": true
},
{
"id": 83,
"link": [
2,
1
],
"name": "Leave With Spark (Long Speedy Jump)",
"requires": [
{
"obstaclesCleared": [
"A",
"B",
"E"
]
},
"h_shinechargeMaxRunway",
"canSpeedyJump",
"canShinechargeMovementComplex",
{
"shinespark": {
"frames": 53
}
}
],
"exitCondition": {
"leaveWithSpark": {}
},
"unlocksDoors": [
{
"types": [
"ammo"
],
"requires": [],
"useImplicitRequires": false
}
],
"flashSuitChecked": true,
"blueSuitChecked": true,
"note": [
"Store a shinecharge and start running below the left side of the vertical door, to set up the jump in a way that shinesparking at the apex of the jump approximately aligns with the top of the far door."
]
},
{
"id": 119,
"link": [
2,
1
],
"name": "Leave Spinning (Short Runway, Space Jump)",
"requires": [
{
"obstaclesCleared": [
"B",
"E"
]
},
"canPreciseSpaceJump"
],
"exitCondition": {
"leaveSpinning": {
"remoteRunway": {
"length": 32,
"openEnd": 1,
"gentleUpTiles": 6
}
}
},
"unlocksDoors": [
{
"types": [
"ammo"
],
"requires": [],
"useImplicitRequires": false
}
],
"flashSuitChecked": true,
"blueSuitChecked": true
},
{
"id": 120,
"link": [
2,
1
],
"name": "Leave Spinning (Long Runway, Space Jump)",
"requires": [
{
"obstaclesCleared": [
"A",
"B",
"E"
]
},
"canPreciseSpaceJump"
],
"exitCondition": {
"leaveSpinning": {
"remoteRunway": {
"length": 45,
"openEnd": 1
}
}
},
"unlocksDoors": [
{
"types": [
"ammo"
],
"requires": [],
"useImplicitRequires": false
}
],
"flashSuitChecked": true,
"blueSuitChecked": true
},
{
"id": 121,
"link": [
2,
1
],
"name": "Leave With Mockball (Short Runway, HiJump)",
"requires": [
"HiJump",
{
"obstaclesCleared": [
"B",
"E"
]
},
"canSpeedyJump",
"canTrickyJump"
],
"exitCondition": {
"leaveWithMockball": {
"remoteRunway": {
"length": 32,
"openEnd": 1,
"gentleUpTiles": 6
},
"landingRunway": {
"length": 10,
"openEnd": 1
},
"minExtraRunSpeed": "$5.9"
}
},
"unlocksDoors": [
{
"types": [
"ammo"
],
"requires": [],
"useImplicitRequires": false
}
],
"flashSuitChecked": true,
"blueSuitChecked": true
},
{
"id": 122,
"link": [
2,
1
],
"name": "Leave With Mockball (Long Runway)",
"requires": [
{
"obstaclesCleared": [
"A",
"B",
"E"
]
},
"canSpeedyJump",
"canTrickyJump"
],
"exitCondition": {
"leaveWithMockball": {
"remoteRunway": {
"length": 45,
"openEnd": 1
},
"landingRunway": {
"length": 10,
"openEnd": 1
},
"minExtraRunSpeed": "$6.D"
}
},
"unlocksDoors": [
{
"types": [
"ammo"
],
"requires": [],
"useImplicitRequires": false
}
],
"flashSuitChecked": true,
"blueSuitChecked": true
},
{
"id": 123,
"link": [
2,
1
],
"name": "Leave With Spring Ball Bounce (Short Runway, Space Jump)",
"requires": [
{
"obstaclesCleared": [
"B",
"E"
]
},
"canPreciseSpaceJump",
"canInsaneJump"
],
"exitCondition": {
"leaveWithSpringBallBounce": {
"remoteRunway": {
"length": 32,
"openEnd": 1,
"gentleUpTiles": 6
},
"landingRunway": {
"length": 10,
"openEnd": 1
},
"movementType": "uncontrolled"
}
},
"unlocksDoors": [
{
"types": [
"ammo"
],
"requires": [],
"useImplicitRequires": false
}
],
"flashSuitChecked": true,
"blueSuitChecked": true
},
{
"id": 124,
"link": [
2,
1
],
"name": "Leave With Spring Ball Bounce (Long Runway, Space Jump)",
"requires": [
{
"obstaclesCleared": [
"A",
"B",
"E"
]
},
"canPreciseSpaceJump",
"canInsaneJump"
],
"exitCondition": {
"leaveWithSpringBallBounce": {
"remoteRunway": {
"length": 45,
"openEnd": 1
},
"landingRunway": {
"length": 10,
"openEnd": 1
},
"movementType": "uncontrolled"
}
},
"unlocksDoors": [
{
"types": [
"ammo"
],
"requires": [],
"useImplicitRequires": false
}
],
"flashSuitChecked": true,
"blueSuitChecked": true
},
{
"id": 125,
"link": [
2,
1
],
"name": "Leave With Controlled Spring Ball Bounce (Short Runway, Mid-Air Jump)",
"requires": [
{
"obstaclesCleared": [
"B",
"E"
]
},
"canSpeedyJump",
"canTrickySpringBallJump",
"canTrickySpringBallBounce",
"canInsaneJump"
],
"exitCondition": {
"leaveWithSpringBallBounce": {
"remoteRunway": {
"length": 32,
"openEnd": 1,
"gentleUpTiles": 6
},
"landingRunway": {
"length": 10,
"openEnd": 1
},
"minExtraRunSpeed": "$4.0",
"movementType": "controlled"
}
},
"unlocksDoors": [
{
"types": [
"ammo"
],
"requires": [],
"useImplicitRequires": false
}
],
"flashSuitChecked": true,
"blueSuitChecked": true
},
{
"id": 126,
"link": [
2,
1
],
"name": "Leave With Controlled Spring Ball Bounce (Long Runway, Mid-Air Jump)",
"requires": [
{
"obstaclesCleared": [
"A",
"B",
"E"
]
},
"canTrickySpringBallJump",
"canTrickySpringBallBounce",
"canInsaneJump"
],
"exitCondition": {
"leaveWithSpringBallBounce": {
"remoteRunway": {
"length": 45,
"openEnd": 1
},
"landingRunway": {
"length": 10,
"openEnd": 1
},
"minExtraRunSpeed": "$4.0",
"movementType": "controlled"
}
},
"unlocksDoors": [
{
"types": [
"ammo"
],
"requires": [],
"useImplicitRequires": false
}
],
"flashSuitChecked": true,
"blueSuitChecked": true
},
{
"id": 127,
"link": [
2,
1
],
"name": "Leave Space Jumping (Short Runway)",
"requires": [
{
"obstaclesCleared": [
"B",
"E"
]
},
"canPreciseSpaceJump",
"canInsaneJump"
],
"exitCondition": {
"leaveSpaceJumping": {
"remoteRunway": {
"length": 32,
"openEnd": 1,
"gentleUpTiles": 6
}
}
},
"unlocksDoors": [
{
"types": [
"ammo"
],
"requires": [],
"useImplicitRequires": false
}
],
"flashSuitChecked": true,
"blueSuitChecked": true
},
{
"id": 128,
"link": [
2,
1
],
"name": "Leave Space Jumping (Long Runway)",
"requires": [
{
"obstaclesCleared": [
"A",
"B",
"E"
]
},
"canPreciseSpaceJump",
"canInsaneJump"
],
"exitCondition": {
"leaveSpaceJumping": {
"remoteRunway": {
"length": 45,
"openEnd": 1
}
}
},
"unlocksDoors": [
{
"types": [
"ammo"
],
"requires": [],
"useImplicitRequires": false
}
],
"flashSuitChecked": true,
"blueSuitChecked": true
},
{
"id": 129,
"link": [
2,
1
],
"name": "Leave With Temporary Blue (Short Runway)",
"requires": [
{
"obstaclesCleared": [
"B",
"E"
]
},
{
"getBlueSpeed": {
"usedTiles": 32,
"gentleUpTiles": 6,
"openEnd": 1
}
},
{
"or": [
{
"and": [
"HiJump",
"canSpeedyJump"
]
},
"SpaceJump",
{
"and": [
"canTrickySpringBallJump",
"canPauseRemorphTemporaryBlue"
]
}
]
},
"canTrickyJump",
"canChainTemporaryBlue"
],
"exitCondition": {
"leaveWithTemporaryBlue": {}
},
"unlocksDoors": [
{
"types": [
"ammo"
],
"requires": [],
"useImplicitRequires": false
}
],
"flashSuitChecked": true,
"blueSuitChecked": true
},
{
"id": 130,
"link": [
2,
1
],
"name": "Leave With Temporary Blue (Full Runway)",
"requires": [
{
"obstaclesCleared": [
"A",
"B",
"E"
]
},
"h_getBlueSpeedMaxRunway",
"canTrickyJump",
"canChainTemporaryBlue"
],
"exitCondition": {
"leaveWithTemporaryBlue": {}
},
"unlocksDoors": [
{
"types": [
"ammo"
],
"requires": [],
"useImplicitRequires": false
}
],
"flashSuitChecked": true,
"blueSuitChecked": true
},
{
"id": 22,
"link": [
2,
2
],
"name": "Break Power Bomb Blocks",
"requires": [
"h_usePowerBomb"
],
"clearsObstacles": [
"A"
],
"flashSuitChecked": true,
"blueSuitChecked": true
},
{
"id": 23,
"link": [
2,
2
],
"name": "Break Speed Blocks, Broken Power Bomb Blocks",
"requires": [
"h_getBlueSpeedMaxRunway",
{
"obstaclesCleared": [
"A"
]
}
],
"clearsObstacles": [
"B"
],
"flashSuitChecked": true,
"blueSuitChecked": true
},
{
"id": 24,
"link": [
2,
2
],
"name": "Break Speed Blocks, Short Charge",
"requires": [
{
  "getBlueSpeed": {
    "usedTiles": 17,
    "openEnd": 0
  }
}
],
"clearsObstacles": [
"B"
],
"flashSuitChecked": true,
"blueSuitChecked": true,
"note": "Commonly known as a stutter-3, this is also doable as a 4-tap."
},
{
"id": 142,
"link": [
2,
2
],
"name": "Crystal Spark",
"requires": [
{
"obstaclesCleared": [
"B"
]
},
"h_shinechargeMaxRunway",
"h_CrystalSpark"
],
"clearsObstacles": [
"A"
],
"flashSuitChecked": true,
"blueSuitChecked": true
},
{
"id": 138,
"link": [
2,
2
],
"name": "Gain Flash Suit (Slopespark)",
"requires": [
"Ice",
{
"obstaclesCleared": [
"A"
]
},
{
"canShineCharge": {
"usedTiles": 17,
"gentleDownTiles": 3,
"steepDownTiles": 3,
"openEnd": 0
}
},
{
"enemyDamage": {
"enemy": "Mella",
"type": "contact",
"hits": 1
}
},
"canSlopeSpark",
{
"shinespark": {
"frames": 5,
"excessFrames": 5
}
}
],
"flashSuitChecked": true,
"blueSuitChecked": true,
"devNote": [
"FIXME: Ice makes it easier to get a mella in the correct position but it may be possible without it."
]
},
{
"id": 25,
"link": [
2,
2
],
"name": "Mella Ice Clip Door Lock Skip",
"requires": [
"canManipulateMellas",
"h_iceClip",
{
"or": [
"Morph",
"canInsaneJump",
{
"enemyDamage": {
"enemy": "Mella",
"type": "contact",
"hits": 1
}
}
]
}
],
"bypassesDoorShell": "yes",
"flashSuitChecked": true,
"blueSuitChecked": false,
"note": [
"Freeze a Mella at a precise distance below the door in order to crouch-jump up and clip through the door shell.",
"The pixel window is larger and higher with Morph and an X-Ray stand-up, in which case a standing jump is used.",
"It can help to moonwalk towards a Mella that has never been on screen, so that it starts swooping immediately as it first enters the screen.",
"This will make it so that when Samus is below it, it will always swoop and go up slightly compared to the previous swoop.",
"Once it is close to the right height, move away so it stops swooping, freeze it and quickly try the clip, if it doesn't work, quickly leave and try again."
]
},
{
"id": 26,
"link": [
2,
2
],
"name": "Mella Farm",
"requires": [
{
"or": [
{
"and": [
{
"resetRoom": {
"nodes": [
1
]
}
},
{
"cycleFrames": 1020
},
"Morph",
{
"or": [
"SpaceJump",
{
"and": [
"HiJump",
"canSpeedyJump",
"canWallJump",
{
"cycleFrames": 120
}
]
},
{
"and": [
"HiJump",
"canSpringBallJumpMidAir",
"h_doubleEquipmentScreenCycleFrames",
{
"cycleFrames": 540
}
]
},
{
"and": [
"canJumpIntoIBJ",
{
"cycleFrames": 1400
}
]
}
]
}
]
},
{
"and": [
{
"resetRoom": {
"nodes": [
2
]
}
},
{
"cycleFrames": 240
}
]
}
]
},
{
"or": [
{
"and": [
"canDash",
{
"or": [
"Grapple",
"Wave",
"Spazer",
"Plasma",
{
"and": [
"ScrewAttack",
{
"cycleFrames": 60
}
]
},
{
"and": [
"canDodgeWhileShooting",
{
"cycleFrames": 300
}
]
},
{
"and": [
"canFarmWhileShooting",
{
"cycleFrames": 120
}
]
}
]
}
]
},
{
"and": [
{
"haveBlueSuit": {}
},
{
"cycleFrames": 60
}
]
}
]
}
],
"resetsObstacles": [
"A",
"B",
"E"
],
"farmCycleDrops": [
{
"enemy": "Mella",
"count": 5
}
],
"flashSuitChecked": true,
"blueSuitChecked": true,
"note": "Shoot the Mellas when they first begin to come on screen, and they will not move."
},
{
"id": 27,
"link": [
2,
2
],
"name": "Leave with Shinecharge - Power Bomb Blocks Destroyed",
"requires": [
{
"obstaclesCleared": [
"A",
"B"
]
},
{
"canShineCharge": {
"usedTiles": 38,
"gentleDownTiles": 6,
"openEnd": 2
}
},
"canShinechargeMovement",
{
"shineChargeFrames": 45
}
],
"exitCondition": {
"leaveShinecharged": {}
},
"flashSuitChecked": true,
"blueSuitChecked": true,
"note": [
"Get a normal height jump by releasing run with SpeedBooster and no HiJump.",
"Break spin to reach the transition without a wall jump."
]
},
{
"id": 28,
"link": [
2,
2
],
"name": "Leave with Shinecharge - Power Bomb Blocks Intact",
"requires": [
{
"obstaclesCleared": [
"B"
]
},
{
  "obstaclesNotCleared": [
    "A"
  ]
},
"canShinechargeMovement",
{
"canShineCharge": {
"usedTiles": 32,
"gentleDownTiles": 6,
"openEnd": 1
}
},
{
"shineChargeFrames": 65
}
],
"exitCondition": {
"leaveShinecharged": {}
},
"flashSuitChecked": true,
"blueSuitChecked": true,
"note": [
"Get a normal height jump by releasing run with SpeedBooster and no HiJump.",
"Break spin to reach the transition without a wall jump."
]
},
{
"id": 29,
"link": [
2,
2
],
"name": "Crystal Flash",
"requires": [
"h_CrystalFlash"
],
"clearsObstacles": [
"A"
],
"flashSuitChecked": true,
"blueSuitChecked": true
},
{
"id": 30,
"link": [
2,
2
],
"name": "Leave With Door Frame Below",
"requires": [],
"exitCondition": {
"leaveWithDoorFrameBelow": {
"height": 2
}
},
"flashSuitChecked": true,
"blueSuitChecked": true
},
{
"id": 31,
"link": [
2,
2
],
"name": "Leave With Platform Below - Basic Platform",
"requires": [],
"exitCondition": {
"leaveWithPlatformBelow": {
"height": 9,
"leftPosition": -1,
"rightPosition": 2
}
},
"flashSuitChecked": true,
"blueSuitChecked": true
},
{
"id": 32,
"link": [
2,
2
],
"name": "Leave With Platform Below - Upper Left Power Bomb Block",
"requires": [
{
"obstaclesNotCleared": [
"A"
]
}
],
"exitCondition": {
"leaveWithPlatformBelow": {
"height": 7,
"leftPosition": -5.5,
"rightPosition": -1.5
}
},
"flashSuitChecked": true,
"blueSuitChecked": true,
"devNote": [
"With HiJump this can be used coming up Main Street, the bottom left of Mt. Everest, and The Beach.",
"We could add other Power Bomb block platforms too (e.g. the lower ones, and on the right side), but they don't yet appear to have any application."
]
},
{
"id": 33,
"link": [
2,
2
],
"name": "Leave With Platform Below - Power Bomb Blocks Broken",
"requires": [
{
  "obstaclesCleared": [
    "A"
  ]
}
],
"exitCondition": {
"leaveWithPlatformBelow": {
"height": 9,
"leftPosition": -23,
"rightPosition": 22
}
},
"flashSuitChecked": true,
"blueSuitChecked": true
},
{
"id": 34,
"link": [
2,
2
],
"name": "Leave With Platform Below - Speed Blocks Broken",
"requires": [
{
"obstaclesCleared": [
"B"
]
},
"canTrickyJump"
],
"exitCondition": {
"leaveWithPlatformBelow": {
"height": 9,
"leftPosition": -38.5,
"rightPosition": -7
}
},
"flashSuitChecked": true,
"blueSuitChecked": true,
"devNote": [
"The tile next to the Power Bomb blocks is not counted as part of the jumpway, since using it would cause Samus to bonk.",
"A tricky jump is required because of the difficulty of avoiding the Power Bomb blocks and still reaching the door."
]
},
{
"id": 35,
"link": [
2,
2
],
"name": "Leave With Platform Below - Power Bomb and Speed Blocks Broken",
"requires": [
{
  "obstaclesCleared": [
    "A",
    "B"
  ]
}
],
"exitCondition": {
"leaveWithPlatformBelow": {
"height": 9,
"leftPosition": -38.5,
"rightPosition": 22
}
},
"flashSuitChecked": true,
"blueSuitChecked": true,
"devNote": [
"This strat is for avoiding the canTrickyJump requirement when jumping left-to-right, if the Power Bomb blocks can be destroyed.",
"It also makes it possible to gain more speed by running a few tiles further, which is needed for certain strats."
]
},
{
"id": 131,
"link": [
2,
2
],
"name": "Leave With Temporary Blue (Facing Right)",
"requires": [
{
"obstaclesCleared": [
"B"
]
},
{
"canShineCharge": {
"usedTiles": 32,
"openEnd": 1
}
},
"canChainTemporaryBlue"
],
"exitCondition": {
"leaveWithTemporaryBlue": {
"direction": "right"
}
},
"flashSuitChecked": true,
"blueSuitChecked": true
},
{
"id": 132,
"link": [
2,
2
],
"name": "Leave With Temporary Blue (Facing Left)",
"requires": [
{
"or": [
{
"and": [
"canXRayTurnaround",
{
"obstaclesCleared": [
"B"
]
},
{
"canShineCharge": {
"usedTiles": 32,
"openEnd": 1
}
}
]
},
{
"and": [
{
"obstaclesCleared": [
"A"
]
},
{
"canShineCharge": {
"usedTiles": 21,
"gentleDownTiles": 6,
"openEnd": 0
}
}
]
}
]
},
"canChainTemporaryBlue"
],
"exitCondition": {
"leaveWithTemporaryBlue": {
"direction": "left"
}
},
"flashSuitChecked": true,
"blueSuitChecked": true
},
{
"id": 87,
"link": [
2,
2
],
"name": "G-Mode Setup - Frozen Mella",
"requires": [
"canManipulateMellas",
"canUpwardGModeSetup",
"canTrickyUseFrozenEnemies",
"canInsaneJump"
],
"exitCondition": {
"leaveWithGModeSetup": {}
},
"flashSuitChecked": true,
"blueSuitChecked": true,
"note": [
"The easiest way to set up G-mode is to lure a low Mella to the door, take a hit, then jump and aim down and freeze it while it is high enough and still rising.",
"If the Mella is not moving upwards, there is a good chance that Samus will be in a falling state as she is hit through the transition and can't use X-Ray.",
"If Samus does not stay on the Mella, she can spin jump or midair morph directly onto the Mella without touching the transition.",
"It may be worthwhile to keep the other Mellas alive so that on a failed attempt, Samus can freeze the Mella to go farm some of the others in room."
]
},
{
"id": 37,
"link": [
2,
2
],
"name": "Carry G-Mode Back Up",
"entranceCondition": {
"comeInWithGMode": {
"mode": "direct",
"morphed": false
},
"comesThroughToilet": "any"
},
"requires": [],
"exitCondition": {
"leaveWithGMode": {
"morphed": false
}
},
"bypassesDoorShell": "free",
"flashSuitChecked": true,
"blueSuitChecked": true
},
{
"id": 38,
"link": [
2,
2
],
"name": "Carry G-Mode Morph Back Up",
"entranceCondition": {
"comeInWithGMode": {
"mode": "direct",
"morphed": true
},
"comesThroughToilet": "any"
},
"requires": [
"h_artificialMorphMovement"
],
"exitCondition": {
"leaveWithGMode": {
"morphed": true
}
},
"bypassesDoorShell": "free",
"flashSuitChecked": true,
"blueSuitChecked": true
},
{
"id": 85,
"link": [
2,
2
],
"name": "G-Mode Mella Ice Clip, Door Lock Skip",
"entranceCondition": {
"comeInWithGMode": {
"mode": "indirect",
"morphed": false
},
"comesThroughToilet": "any"
},
"requires": [
"canComplexGMode",
"canManipulateMellas",
{
"or": [
"h_preciseIceClip",
"h_highPixelIceClip"
]
},
"canInsaneJump",
{
"or": [
"Morph",
"canTrickyGMode",
{
"enemyDamage": {
"enemy": "Mella",
"type": "contact",
"hits": 1
}
}
]
}
],
"exitCondition": {
"leaveWithGMode": {
"morphed": false
}
},
"bypassesDoorShell": "yes",
"flashSuitChecked": true,
"blueSuitChecked": true,
"note": [
"It can help to moonwalk towards a Mella that has never been on screen, so that it starts swooping immediately as it first enters the screen.",
"This will make it so that when Samus is below it, it will always swoop and go up slightly compared to the previous swoop.",
"Once it is close to the right height, move away so it stops swooping, freeze it and quickly try the clip, if it doesn't work, quickly leave and try again."
],
"devNote": "This is only for indirect G-Mode, because it is trivial while in direct, and would use a different strat."
},
{
"id": 39,
"link": [
2,
3
],
"name": "Shinespark",
"requires": [
{
"obstaclesCleared": [
"B"
]
},
"canMidairShinespark",
{
"or": [
{
"canShineCharge": {
"usedTiles": 32,
"gentleUpTiles": 6,
"openEnd": 1
}
},
{
"and": [
"h_shinechargeMaxRunway",
{
"obstaclesCleared": [
"A"
]
}
]
}
]
},
{
"or": [
{
"shinespark": {
"frames": 31,
"excessFrames": 6
}
},
{
"and": [
"HiJump",
{
"shinespark": {
"frames": 25,
"excessFrames": 5
}
}
]
},
{
"and": [
"HiJump",
"canSpeedyJump",
{
"shinespark": {
"frames": 19,
"excessFrames": 6
}
}
]
}
]
}
],
"flashSuitChecked": true,
"blueSuitChecked": true,
"devNote": "FIXME: A big jump spark could be used to save Energy."
},
{
"id": 40,
"link": [
2,
3
],
"name": "Speedy Jump",
"requires": [
{
"obstaclesCleared": [
"B"
]
},
"HiJump",
"canSpeedyJump",
{
"or": [
"canSpringBallJumpMidAir",
"canWallJump"
]
}
],
"flashSuitChecked": true,
"blueSuitChecked": true
},
{
"id": 118,
"link": [
2,
3
],
"name": "Tricky Dash Jump with HiJump",
"requires": [
{
"obstaclesCleared": [
"A",
"B"
]
},
"HiJump",
"canTrickyDashJump"
],
"flashSuitChecked": true,
"blueSuitChecked": true,
"note": [
"Start running from about 1 to 2 tiles right of the door, and jump at the top of the ramp."
],
"detailNote": [
"This needs extra run speed between $6.C and $6.F."
]
},
{
"id": 41,
"link": [
2,
5
],
"name": "Base",
"requires": [
{
  "or": [
    "Morph",
    {
      "obstaclesCleared": [
        "B"
      ]
    }
  ]
}
],
"flashSuitChecked": true,
"blueSuitChecked": true
},
{
"id": 42,
"link": [
2,
5
],
"name": "Full Shinespark",
"entranceCondition": {
"comeInShinecharged": {},
"comesThroughToilet": "any"
},
"requires": [
{
"shineChargeFrames": 80
},
"canHorizontalShinespark",
{
"shinespark": {
"frames": 115
}
}
],
"clearsObstacles": [
"B"
],
"flashSuitChecked": true,
"blueSuitChecked": true,
"note": "Spark from the ground, left of the Power Bomb blocks."
},
{
"id": 43,
"link": [
2,
5
],
"name": "Shinespark Ends Over Acid",
"entranceCondition": {
"comeInShinecharged": {},
"comesThroughToilet": "any"
},
"requires": [
{
"shineChargeFrames": 80
},
"canHorizontalShinespark",
{
"shinespark": {
"frames": 115,
"excessFrames": 85
}
},
{
"or": [
"canTrickyJump",
{
"and": [
{
"or": [
"canWallJump",
"HiJump"
]
},
{
"acidFrames": 25
}
]
},
{
"and": [
"Gravity",
{
"acidFrames": 20
}
]
}
]
}
],
"clearsObstacles": [
"B"
],
"flashSuitChecked": true,
"blueSuitChecked": true,
"note": "Spark from the ground, left of the Power Bomb blocks."
},
{
"id": 73,
"link": [
2,
5
],
"name": "Use Flash Suit",
"requires": [
{
"useFlashSuit": {}
},
{
"shinespark": {
"frames": 98,
"excessFrames": 95
}
}
],
"clearsObstacles": [
"B"
],
"flashSuitChecked": true,
"blueSuitChecked": true,
"note": "Use a flash suit to spark horizontally through the speed blocks. Samus may stop above the acid, but it should always be possible to land on one of the platforms."
},
{
"id": 139,
"link": [
2,
5
],
"name": "Blue Suit",
"requires": [
{
  "haveBlueSuit": {}
}
],
"clearsObstacles": [
"B"
],
"flashSuitChecked": true,
"blueSuitChecked": true
},
{
"id": 135,
"link": [
2,
5
],
"name": "No Power Bombs, R-Mode Spark Interrupt",
"entranceCondition": {
"comeInWithRMode": {},
"comesThroughToilet": "no"
},
"requires": [
"h_RModeCanRefillReserves",
{
"resourceMissingAtMost": [
{
"type": "Missile",
"count": 0
}
]
},
{
"partialRefill": {
"type": "ReserveEnergy",
"limit": 20
}
},
{
"canShineCharge": {
"usedTiles": 17,
"openEnd": 0
}
},
{
"autoReserveTrigger": {
"maxReserveEnergy": 95
}
},
"canRModeSparkInterrupt"
],
"clearsObstacles": [
"B"
],
"flashSuitChecked": true,
"blueSuitChecked": true,
"note": [
"Farm the Mellas for energy, then run through the speed blocks, shinecharge, and use a Mella to interrupt."
]
},
{
"id": 136,
"link": [
2,
5
],
"name": "Clear the Power Bomb Blocks, R-Mode Spark Interrupt",
"entranceCondition": {
"comeInWithRMode": {},
"comesThroughToilet": "no"
},
"requires": [
{
"or": [
"h_CrystalFlashForReserveEnergy",
{
"and": [
"h_RModeCanRefillReserves",
{
"resourceMissingAtMost": [
{
"type": "Missile",
"count": 0
}
]
},
{
"partialRefill": {
"type": "ReserveEnergy",
"limit": 20
}
},
"h_usePowerBomb"
]
}
]
},
"h_shinechargeMaxRunway",
{
"or": [
{
"autoReserveTrigger": {
"maxReserveEnergy": 95
}
},
{
"and": [
{
"autoReserveTrigger": {}
},
{
"acidFrames": 20
}
]
}
]
},
"canRModeSparkInterrupt"
],
"clearsObstacles": [
"A",
"B"
],
"flashSuitChecked": true,
"blueSuitChecked": true,
"note": [
"Crystal Flash, or farm Mellas and use a Power Bomb. Run through the speed blocks and use a Mella or the acid to interrupt."
]
},
{
"id": 44,
"link": [
2,
6
],
"name": "G-Mode Morph",
"entranceCondition": {
"comeInWithGMode": {
"mode": "any",
"morphed": true
},
"comesThroughToilet": "any"
},
"requires": [
{
  "or": [
    "h_artificialMorphSpringBall",
    {
      "and": [
        "h_artificialMorphBombs",
        "canTrickyDodgeEnemies"
      ]
    },
    {
      "and": [
        "h_artificialMorphBombs",
        {
          "enemyDamage": {
            "enemy": "Mella",
            "type": "contact",
            "hits": 1
          }
        }
      ]
    }
  ]
}
],
"flashSuitChecked": true,
"blueSuitChecked": true,
"note": [
"With Bombs, killing the Mellas can be a bit tricky;",
"it is recommended to use one to boost and place some midair before luring a Mella to more easily kill it."
]
},
{
"id": 103,
"link": [
2,
6
],
"name": "G-Mode Morph, Power Bomb the Blocks and Mellas",
"entranceCondition": {
"comeInWithGMode": {
"mode": "any",
"morphed": true
},
"comesThroughToilet": "any"
},
"requires": [
{
"tech": "canBombHorizontally"
},
"h_artificialMorphPowerBomb"
],
"clearsObstacles": [
"A"
],
"flashSuitChecked": true,
"blueSuitChecked": true,
"note": "A single horizontal Power Bomb boost can get Samus on top of the blocks and kill most of the Mellas. The blocks will break after exiting G-mode.",
"devNote": "Obstacle A will not be cleared until exiting G-mode, but no G-mode strat will use that obstacle, so it should be fine clearing it now."
},
{
"id": 104,
"link": [
2,
7
],
"name": "Direct G-Mode Morph",
"entranceCondition": {
"comeInWithGMode": {
"mode": "direct",
"morphed": true
},
"comesThroughToilet": "any"
},
"requires": [
{
  "or": [
    "h_artificialMorphSpringBall",
    {
      "and": [
        "h_artificialMorphBombs",
        "canTrickyDodgeEnemies"
      ]
    },
    {
      "and": [
        "h_artificialMorphBombs",
        {
          "enemyDamage": {
            "enemy": "Mella",
            "type": "contact",
            "hits": 1
          }
        }
      ]
    }
  ]
}
],
"flashSuitChecked": true,
"blueSuitChecked": true,
"note": [
"With Bombs, killing the Mellas can be a bit tricky;",
"it is recommended to use one to boost and place some midair before luring a Mella to more easily kill it."
]
},
{
"id": 105,
"link": [
2,
7
],
"name": "Direct G-Mode Morph, Power Bomb the Blocks and Mellas",
"entranceCondition": {
"comeInWithGMode": {
"mode": "direct",
"morphed": true
},
"comesThroughToilet": "any"
},
"requires": [
{
"tech": "canBombHorizontally"
},
"h_artificialMorphPowerBomb"
],
"clearsObstacles": [
"A"
],
"flashSuitChecked": true,
"blueSuitChecked": true,
"note": "A single horizontal Power Bomb boost can get Samus on top of the blocks and kill most of the Mellas. The blocks will break after exiting G-mode.",
"devNote": "Obstacle A will not be cleared until exiting G-mode, but no G-mode strat will use that obstacle, so it should be fine clearing it now."
},
{
"id": 46,
"link": [
3,
1
],
"name": "Indiana Jones Grapple in Reverse",
"requires": [
{
"notable": "Indiana Jones Grapple (First Try)"
},
"canUseEnemies",
"canPreciseGrapple",
"h_midAirShootUp",
{
"or": [
{
"and": [
"canInsaneJump",
"h_trickyToCarryFlashSuit"
]
},
{
"and": [
"canResetFallSpeed",
{
"enemyDamage": {
"enemy": "Ripper 2 (green)",
"type": "contact",
"hits": 1
}
}
]
}
]
}
],
"flashSuitChecked": true,
"blueSuitChecked": true,
"note": [
"Involves Grappling off several Rippers, where falling may lead to a soft lock.",
"Morphing and unmorphing to reset Samus's fall speed can help give a bit more time to position the Rippers.",
"It can help to Grapple the same Ripper again to get it in a better position.",
"Positioning the first Ripper far to the left until the second is visible can help make this much easier."
],
"devNote": "In general, the return route is easier, but is only useful after doing the left to right strat first."
},
{
"id": 49,
"link": [
3,
5
],
"name": "Base",
"requires": [],
"flashSuitChecked": true,
"blueSuitChecked": true
},
{
"id": 50,
"link": [
5,
1
],
"name": "Base",
"requires": [
"SpaceJump"
],
"flashSuitChecked": true,
"blueSuitChecked": true
},
{
"id": 51,
"link": [
5,
1
],
"name": "Jump into IBJ",
"requires": [
"canJumpIntoIBJ"
],
"flashSuitChecked": true,
"blueSuitChecked": true
},
{
"id": 52,
"link": [
5,
1
],
"name": "HiJump, Spring Ball Jump",
"requires": [
"HiJump",
"canSpringBallJumpMidAir"
],
"flashSuitChecked": true,
"blueSuitChecked": true
},
{
"id": 53,
"link": [
5,
1
],
"name": "Speedy Jump",
"requires": [
"canSpeedyJump",
"HiJump",
"canTrickyWallJump"
],
"flashSuitChecked": true,
"blueSuitChecked": true,
"note": "Run on the moving platform (Kamer)."
},
{
"id": 54,
"link": [
5,
1
],
"name": "Tricky Spring Wall",
"requires": [
"h_trickySpringwall"
],
"flashSuitChecked": true,
"blueSuitChecked": true
},
{
"id": 84,
"link": [
5,
1
],
"name": "Spring Ball Unmorph Bomb Boost",
"requires": [
{
"notable": "Spring Ball Unmorph Bomb Boost"
},
"canSpringBallJumpMidAir",
"canUnmorphBombBoost",
"h_crouchJumpDownGrab"
],
"flashSuitChecked": true,
"blueSuitChecked": true,
"note": [
"Use an unmorph bomb boost at the end of a mid-air SpringBall jump.",
"Also requires a crouch-jump and down-grab to complete the maneuver.",
"A spring fling can help add some lenience to the bomb placement and unmorph timing;",
"it requires pausing early, before jumping, in order to be able to initiate another pause immediately before placing a Power Bomb."
]
},
{
"id": 55,
"link": [
5,
1
],
"name": "Frozen Mella Door",
"requires": [
"canTrickyUseFrozenEnemies",
"canManipulateMellas",
{
"or": [
"canTrickyDodgeEnemies",
{
"enemyDamage": {
"enemy": "Mella",
"type": "contact",
"hits": 2
}
}
]
},
{
"or": [
{
"obstaclesCleared": [
"B"
]
},
"Morph"
]
}
],
"flashSuitChecked": true,
"blueSuitChecked": true,
"note": [
"Lure a Mella from the right by breaking the speed blocks or using Morph.",
"Then you need to manipulate it to go high enough to be used as a stepping stone once frozen."
]
},
{
"id": 74,
"link": [
5,
1
],
"name": "Use Stored Spark",
"requires": [
"h_storedSpark",
{
"shinespark": {
"frames": 22,
"excessFrames": 13
}
}
],
"flashSuitChecked": true,
"blueSuitChecked": true,
"note": "Jump back from the leftmost floating platform and diagonally shinespark at the peak of the jump towards the door to minimize shinespark damage."
},
{
"id": 56,
"link": [
5,
1
],
"name": "G-Mode Setup - Get Hit By Mella",
"requires": [
"canManipulateMellas",
"canCameraManip",
"canBePatient",
"canComplexGMode",
{
"or": [
"SpaceJump",
"canTrickyUseFrozenEnemies",
{
"and": [
"HiJump",
"canSpringBallJumpMidAir"
]
},
{
"and": [
"HiJump",
"canSpeedyJump",
"canTrickyWallJump"
]
}
]
},
{
"or": [
"canTrickyDodgeEnemies",
{
"enemyDamage": {
"enemy": "Mella",
"type": "contact",
"hits": 2
}
}
]
},
{
"or": [
{
"obstaclesCleared": [
"B"
]
},
"Morph"
]
}
],
"exitCondition": {
"leaveWithGModeSetup": {}
},
"unlocksDoors": [
{
"types": [
"ammo"
],
"requires": []
}
],
"flashSuitChecked": true,
"blueSuitChecked": true,
"note": [
"Lure a Mella from the right by breaking the speed blocks or using Morph.",
"Then manipulate it to go high enough to be used in the left doorway.",
"Raise the Mella up to just below the door's ledge and then climb up to the door.",
"Reposition the Mella once towards the door, and before it finishes moving, stand in the doorframe so that the next Mella movement will hit Samus.",
"If it drops below the camera it will be necessary to go back down and raise it again."
]
},
{
"id": 57,
"link": [
5,
2
],
"name": "Base",
"requires": [
{
  "or": [
    "Morph",
    {
      "obstaclesCleared": [
        "B"
      ]
    }
  ]
}
],
"flashSuitChecked": true,
"blueSuitChecked": true
},
{
"id": 58,
"link": [
5,
2
],
"name": "Acid Shinespark",
"requires": [
{
"notable": "Acid Shinespark"
},
"Gravity",
"canSuitlessLavaDive",
"h_shinechargeMaxRunway",
"canShinechargeMovement",
"canHorizontalShinespark",
{
"acidFrames": 120
},
{
"shinespark": {
"frames": 35
}
}
],
"clearsObstacles": [
"B"
],
"flashSuitChecked": true,
"blueSuitChecked": true,
"note": "Gravity makes it possible to charge a spark in the acid in order to break the speed blocks."
},
{
"id": 75,
"link": [
5,
2
],
"name": "Use Flash Suit",
"requires": [
{
"useFlashSuit": {}
},
{
"or": [
{
"shinespark": {
"frames": 33,
"excessFrames": 7
}
},
{
"and": [
{
"shinespark": {
"frames": 33,
"excessFrames": 30
}
},
{
"enemyDamage": {
"enemy": "Mella",
"type": "contact",
"hits": 1
}
}
]
}
]
}
],
"clearsObstacles": [
"B"
],
"flashSuitChecked": true,
"blueSuitChecked": true
},
{
"id": 140,
"link": [
5,
2
],
"name": "Blue Suit",
"requires": [
{
  "haveBlueSuit": {}
}
],
"clearsObstacles": [
"B"
],
"flashSuitChecked": true,
"blueSuitChecked": true
},
{
"id": 76,
"link": [
5,
2
],
"name": "Break Speed Blocks, Insane Short Charge",
"requires": [
{
  "getBlueSpeed": {
    "usedTiles": 12,
    "gentleDownTiles": 6,
    "openEnd": 1
  }
}
],
"clearsObstacles": [
"B"
],
"flashSuitChecked": true,
"blueSuitChecked": true
},
{
"id": 59,
"link": [
5,
3
],
"name": "Base",
"requires": [
{
  "or": [
    "SpaceJump",
    "canLongIBJ"
  ]
}
],
"flashSuitChecked": true,
"blueSuitChecked": true
},
{
"id": 60,
"link": [
5,
3
],
"name": "Speedy Jump Spring Ball Jump",
"requires": [
"HiJump",
"canTrickyDashJump",
"canTrickySpringBallJump"
],
"flashSuitChecked": true,
"blueSuitChecked": true
},
{
"id": 61,
"link": [
5,
3
],
"name": "Springwall",
"requires": [
{
"notable": "Springwall"
},
"HiJump",
"h_trickySpringwall",
"canPreciseWallJump",
"can3HighWallMidAirMorph"
],
"flashSuitChecked": true,
"blueSuitChecked": true,
"note": [
"A particularly precise springwall.",
"Aim the walljump at the bottom of the second sloped wall fixture, where it looks like you cant jump off of.",
"Optimize pause timing, use an instant morph, and get a max height springball jump. A delayed wall jump helps."
]
},
{
"id": 62,
"link": [
5,
3
],
"name": "Indy Jones Short Mella",
"requires": [
"canManipulateMellas",
"canTrickyUseFrozenEnemies",
"HiJump",
{
"or": [
"canTrickyDodgeEnemies",
{
"enemyDamage": {
"enemy": "Mella",
"type": "contact",
"hits": 2
}
}
]
},
{
"or": [
{
"obstaclesCleared": [
"B"
]
},
"Morph"
]
},
{
"or": [
"canWallJump",
"canSpringBallJumpMidAir"
]
}
],
"flashSuitChecked": true,
"blueSuitChecked": true,
"note": [
"Lure a Mella from the right by breaking the speed blocks or using Morph.",
"Then you need to manipulate it to go high enough to be used as a stepping stone once frozen."
]
},
{
"id": 63,
"link": [
5,
3
],
"name": "Indy Jones Long Mella",
"requires": [
"canTrickyUseFrozenEnemies",
"canManipulateMellas",
"canBePatient",
{
"or": [
"canWallJump",
"HiJump",
"canSpringBallJumpMidAir",
{
"and": [
"canBeVeryPatient",
{
"noFlashSuit": {}
}
]
}
]
},
{
"or": [
"canTrickyDodgeEnemies",
{
"enemyDamage": {
"enemy": "Mella",
"type": "contact",
"hits": 2
}
}
]
},
{
"or": [
{
"obstaclesCleared": [
"B"
]
},
"Morph"
]
}
],
"flashSuitChecked": true,
"blueSuitChecked": true,
"note": [
"Lure a Mella from the right by breaking the speed blocks or using Morph.",
"Then manipulate it to go high enough to be used as a stepping stone once frozen.",
"Without movement items it may be necessary to continue manipulating it from above, jumping and aiming down to freeze it."
]
},
{
"id": 64,
"link": [
5,
3
],
"name": "Mella Ice Clip",
"requires": [
{
"notable": "Mella Ice Clip"
},
"Morph",
"canMoonwalk",
"canManipulateMellas",
"h_preciseIceClip",
{
"or": [
"canConsecutiveWallJump",
{
"and": [
"HiJump",
"canWallJump"
]
}
]
}
],
"flashSuitChecked": true,
"blueSuitChecked": true,
"note": [
"Freeze the Mella at a precise location in order to jump through the crumble block, then wall jump up the long channel and mid-air morph to get out.",
"One normalized way to do this: Kill the first two Mellas, moonwalk to the right until the third Mella just barely goes off-camera,",
"fire a shot, and move left to scroll the Mella back on-camera just before the shot would despawn, in order to freeze it at a specific height.",
"While it is frozen, kill the remaining Mellas, and press against the wall of Speed blocks.",
"Perform an action that changes Samus' pose (e.g., press an angle button, jump, or crouch/uncrouch) in order to be able to moonwalk from that position.",
"Moonwalk backwards 5 pixels, then jump straight up, and continue holding jump while pressing right, to perform a buffered turn-around spin jump to the right.",
"If executed correctly, the Mella will move horizontally left and will be at a good height to be able to freeze and clip through the crumble block with a crouch jump.",
"Get on top of the Mella with a mid-air morph, position under the crumble block, then unmorph for the crouch jump.",
"Quickly spin-jump to re-enter the shaft after breaking the crumble block.",
"Tip: if Samus moonwalks back further than 5 pixels, press against the Speed blocks again before trying to moonwalk back again, to avoid possibly getting bad subpixels."
],
"devNote": [
"The manipulation can also work with moonwalking back between 6 and 10 pixels, but depending on the exact position the bug may move at a shallow angle rather than exactly horizontally;",
"in this case, the bug should be frozen a bit early (i.e. further right), to ensure it does not re-enter its idle animation where its height would become unpredictable.",
"FIXME: Investigate if there is a normalized setup for freezing in the high-pixel position.",
"FIXME: A freestyle version (or alternative normalized setup?) of the strat could be added, to avoid the canMoonwalk requirement, using X-Ray or a very precise freeze to get up."
]
},
{
"id": 77,
"link": [
5,
3
],
"name": "Use Stored Spark",
"requires": [
"h_storedSpark",
{
"or": [
{
"shinespark": {
"frames": 30,
"excessFrames": 6
}
},
{
"and": [
"HiJump",
{
"shinespark": {
"frames": 25,
"excessFrames": 6
}
}
]
}
]
}
],
"clearsObstacles": [
"B"
],
"flashSuitChecked": true,
"blueSuitChecked": true
},
{
"id": 106,
"link": [
6,
1
],
"name": "G-Mode Morph Spring Ball, IBJ",
"requires": [
"canGMode",
"h_artificialMorphJumpIntoIBJ"
],
"flashSuitChecked": true,
"blueSuitChecked": true,
"note": "Cross the room with a Spring Ball jump into IBJ from the moving platforms above the acid."
},
{
"id": 107,
"link": [
6,
1
],
"name": "G-Mode Morph Long Diagonal Bomb Jump",
"requires": [
"canGMode",
{
"notable": "G-Mode Morph Long Diagonal Bomb Jump"
},
"h_artificialMorphDiagonalBombJump",
"h_artificialMorphLongIBJ"
],
"flashSuitChecked": true,
"blueSuitChecked": true,
"note": "Cross the room with a long diagonal bomb jump from the solid platforms above the acid."
},
{
"id": 72,
"link": [
6,
1
],
"name": "G-Mode Morph Acid Dive IBJ",
"requires": [
"canGMode",
"Gravity",
"h_artificialMorphLongIBJ",
"h_artificialMorphBombHorizontally",
"canSuitlessLavaDive",
{
"acidFrames": 150
}
],
"flashSuitChecked": true,
"blueSuitChecked": true,
"note": [
"Cross the solid platforms then horizontally boost into the acid and begin an IBJ.",
"With more limited Energy, it is possible to IBJ high into the room and boost horizontally to fall into the acid a bit further to the left."
],
"devNote": "A Direct G-mode variant that collects the item is not included, because there is no way to stay artificially morphed and gain Energy."
},
{
"id": 108,
"link": [
6,
2
],
"name": "Exit G-Mode (Right of Speed Blocks)",
"requires": [
"canGMode"
],
"flashSuitChecked": true,
"blueSuitChecked": true
},
{
"id": 86,
"link": [
6,
2
],
"name": "G-Mode Morph Mella Ice Clip, Door Lock Skip",
"requires": [
"canComplexGMode",
"canManipulateMellas",
{
"or": [
"h_preciseIceClip",
"h_highPixelIceClip"
]
},
{
"or": [
"Morph",
"canInsaneJump",
{
"enemyDamage": {
"enemy": "Mella",
"type": "contact",
"hits": 1
}
}
]
}
],
"exitCondition": {
"leaveWithGMode": {
"morphed": false
}
},
"bypassesDoorShell": "yes",
"flashSuitChecked": true,
"blueSuitChecked": true,
"note": [
"It can help to moonwalk towards a Mella that has never been on screen, so that it starts swooping immediately as it first enters the screen.",
"This will make it so that when Samus is below it, it will always swoop and go up slightly compared to the previous swoop.",
"Once it is close to the right height, move away so it stops swooping, freeze it and quickly try the clip, if it doesn't work, quickly leave and try again."
]
},
{
"id": 109,
"link": [
6,
3
],
"name": "G-Mode Morph, IBJ",
"requires": [
"canGMode",
"h_artificialMorphLongIBJ"
],
"flashSuitChecked": true,
"blueSuitChecked": true
},
{
"id": 110,
"link": [
6,
5
],
"name": "Exit G-Mode (Left of Speed Blocks)",
"requires": [
"canGMode"
],
"flashSuitChecked": true,
"blueSuitChecked": true
},
{
"id": 111,
"link": [
6,
6
],
"name": "G-Mode Morph, Power Bomb the Blocks",
"requires": [
"canGMode",
"h_artificialMorphPowerBomb"
],
"clearsObstacles": [
"A"
],
"flashSuitChecked": true,
"blueSuitChecked": true,
"note": "Place a Power Bomb by the right blocks. They will break when exiting G-mode.",
"devNote": "Obstacle A will not be cleared until exiting G-mode, but no G-mode strat will use that obstacle, so it should be fine clearing it now."
},
{
"id": 112,
"link": [
7,
1
],
"name": "G-Mode Morph Spring Ball, IBJ, Remote Acquire",
"requires": [
"canRemoteAcquire",
"h_artificialMorphLongIBJ",
"h_artificialMorphJumpIntoIBJ"
],
"collectsItems": [
3
],
"flashSuitChecked": true,
"blueSuitChecked": true,
"note": "Touch the item then cross the room with a Spring Ball jump into IBJ from the moving platforms above the acid."
},
{
"id": 113,
"link": [
7,
1
],
"name": "G-Mode Morph Long Diagonal Bomb Jump, Remote Acquire",
"requires": [
"canRemoteAcquire",
{
"notable": "G-Mode Morph Long Diagonal Bomb Jump"
},
"h_artificialMorphDiagonalBombJump",
"h_artificialMorphLongIBJ"
],
"collectsItems": [
3
],
"flashSuitChecked": true,
"blueSuitChecked": true,
"note": "Touch the item then cross the room with a long diagonal bomb jump from the solid platforms above the acid."
},
{
"id": 114,
"link": [
7,
2
],
"name": "G-Mode Morph, IBJ, Remote Acquire",
"requires": [
"canRemoteAcquire",
"h_artificialMorphLongIBJ"
],
"collectsItems": [
3
],
"flashSuitChecked": true,
"blueSuitChecked": true,
"note": "IBJ to the item, touch it, and drop back down to the right of the speed blocks before exiting G-mode."
},
{
"id": 115,
"link": [
7,
6
],
"name": "G-Mode Morph",
"requires": [
"canGMode"
],
"flashSuitChecked": true,
"blueSuitChecked": true
},
{
"id": 116,
"link": [
7,
7
],
"name": "G-Mode Morph, Power Bomb the Blocks",
"requires": [
"canGMode",
"h_artificialMorphPowerBomb"
],
"clearsObstacles": [
"A"
],
"flashSuitChecked": true,
"blueSuitChecked": true,
"note": "Place a Power Bomb by the right blocks. They will break when exiting G-mode.",
"devNote": "Obstacle A will not be cleared until exiting G-mode, but no G-mode strat will use that obstacle, so it should be fine clearing it now."
}
],
"notables": [
{
"id": 1,
"name": "Indiana Jones Grapple (First Try)",
"note": [
"Involves Grappling off several Rippers, where falling may lead to a soft lock.",
"Morphing and unmorphing to reset Samus's fall speed can help give a bit more time to position the Rippers.",
"It can help to Grapple the same Ripper again to get it in a better position.",
"Position the third Ripper far to the right then fling to the fourth, which is far to the right and very close to the ceiling.",
"Moving the fourth Ripper to the right a bit can also help in order to make the last fling less precise.",
"Be careful not to fling directly into the ceiling, as it is easy to hit the uneven surface and fall.",
"On the return route, positioning the first Ripper far to the left until the second is visible can help make this much easier."
]
},
{
"id": 2,
"name": "G-Mode Morph Long Diagonal Bomb Jump",
"note": "Perform a long diagonal bomb jump from the left door to the solid platforms above the acid."
},
{
"id": 3,
"name": "Full Room Space Jump Through Speed Blocks",
"note": "The blocks can be broken if you can generate a blue suit using the previous room's runway, and carry it to the blocks by slowing floating down with Space Jump."
},
{
"id": 4,
"name": "Left Side Diagonal Shinespark",
"note": [
"Store a shinespark near the left door and use the remaining runway to jump as far as possible to the right.",
"Once near the acid platforms, Shinespark diagonally to reach the item location."
]
},
{
"id": 5,
"name": "Big Jump Shinespark",
"note": "Charge a spark to the right, then come back, run and jump, and perform a shinespark (horizontally or diagonally) to reach the ledge."
},
{
"id": 6,
"name": "Acid Shinespark",
"note": "Gravity makes it possible to charge a spark in the acid in order to break the speed blocks."
},
{
"id": 7,
"name": "Springwall",
"note": [
"A particularly precise springwall.",
"Aim the walljump at the bottom of the second sloped wall fixture, where it looks like you cant jump off of.",
"Optimize pause timing, use an instant morph, and get a max height springball jump. A delayed wall jump helps."
]
},
{
"id": 8,
"name": "Mella Ice Clip",
"note": [
"Freeze the Mella at a precise location in order to jump through the crumble block, then wall jump up the long channel and mid air morph to get out."
]
},
{
"id": 9,
"name": "Spring Ball Unmorph Bomb Boost",
"note": [
"Use an unmorph bomb boost at the end of a mid-air SpringBall jump.",
"Also requires a crouchjump and downgrab to complete the maneuver.",
"A spring fling can help add some lenience to the bomb placement and unmorph timing;",
"it requires pausing early before jumping, in order to be able to initiate another pause immediately before placing a Power Bomb."
]
},
{
"id": 10,
"name": "Indiana Jones Grapple (With Retries)",
"note": [
"Involves Grappling off several Rippers, but Samus will have enough movement items to get back up and try again after a fall.",
"Morphing and unmorphing to reset Samus's fall speed can help give a bit more time to position the Rippers.",
"It can help to Grapple the same Ripper again to get it in a better position.",
"Position the third Ripper far to the right then fling to the fourth, which is far to the right and very close to the ceiling.",
"Moving the fourth Ripper to the right a bit can also help in order to make the last fling less precise.",
"Be careful not to fling directly into the ceiling, as it is easy to hit the uneven surface and fall."
]
}
],
"nextStratId": 143,
"nextNotableId": 11
}