Colosseum
Room ID: 189
|
Exit condition: {
"leaveWithRunway": {
"length": 3,
"openEnd": 1
}
} |
|


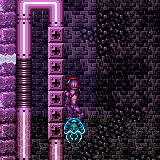
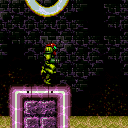
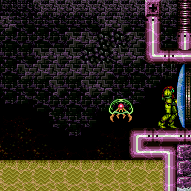
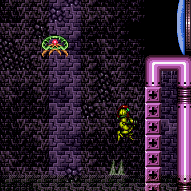
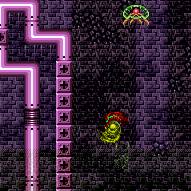
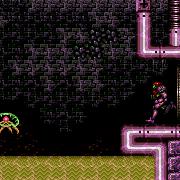
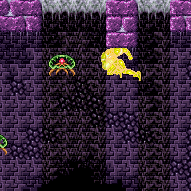
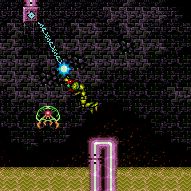
Use a frozen Mochtroid to extend the length of the runway. Positioning the Mochtroid can be done by dropping down below then climbing back up with the frozen Mochtroid as a platform. Alternatively, freeze the Mochtroid with an angle-down shot while falling below then quickly climb back up. Requires: "h_navigateUnderwater"
"h_frozenEnemyRunway"
{
"or": [
"canMochtroidIceClimb",
{
"and": [
"Gravity",
{
"or": [
"SpaceJump",
"canWallJump"
]
}
]
}
]
}
{
"enemyDamage": {
"enemy": "Mochtroid",
"type": "contact",
"hits": 2
}
}Exit condition: {
"leaveWithRunway": {
"length": 4,
"openEnd": 1
}
}Dev note: There are many other ways to get into position, but they would require manipulating the Mochtroid as much as canMochtroidIceClimb expects. |
|
Requires: {
"resetRoom": {
"nodes": [
1
]
}
}
{
"or": [
{
"and": [
"Plasma",
{
"cycleFrames": 70
}
]
},
{
"and": [
"Grapple",
{
"cycleFrames": 70
}
]
},
{
"and": [
"ScrewAttack",
{
"cycleFrames": 75
}
]
},
{
"and": [
{
"haveBlueSuit": {}
},
{
"cycleFrames": 75
}
]
},
{
"and": [
"Wave",
{
"cycleFrames": 80
}
]
},
{
"and": [
"Spazer",
{
"cycleFrames": 90
}
]
},
{
"and": [
"canDodgeWhileShooting",
{
"cycleFrames": 120
}
]
}
]
}Farm cycle drops: 1 Mochtroid |
|
Requires: {
"resetRoom": {
"nodes": [
1
]
}
}
"SpaceJump"
{
"or": [
{
"and": [
"canDash",
{
"or": [
{
"and": [
"Plasma",
{
"cycleFrames": 1035
}
]
},
{
"and": [
"Grapple",
{
"cycleFrames": 1050
}
]
},
{
"and": [
"ScrewAttack",
{
"cycleFrames": 1080
}
]
},
{
"and": [
"Wave",
{
"cycleFrames": 1090
}
]
},
{
"and": [
"Spazer",
{
"cycleFrames": 1150
}
]
},
{
"and": [
"canDodgeWhileShooting",
{
"cycleFrames": 1260
}
]
}
]
}
]
},
{
"and": [
{
"haveBlueSuit": {}
},
{
"cycleFrames": 1580
}
]
}
]
}Farm cycle drops: 4 Mochtroid |
|
Requires: "h_CrystalFlash" |
From: 1
Left Door
To: 1
Left Door
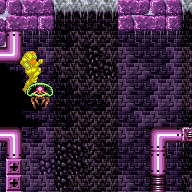
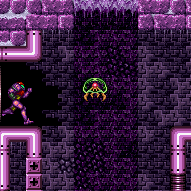
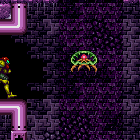
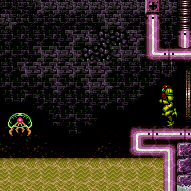
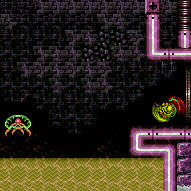
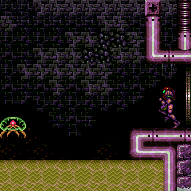
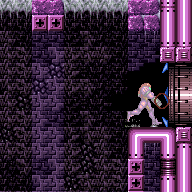
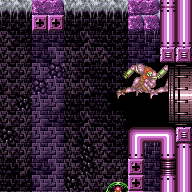
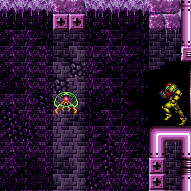
Farm the door Mochtroid and the one in the water. Jump over the sand pit and freeze the third Mochtroid. Climb using this Mochtroid up to the spike, then bounce off the Mochtroid and enter X-Mode. Arm-pump to move Samus off the spike tile (watch the Mochtroid). Shinecharge, release X-Ray, and start moving left as Samus falls back toward the sand. While falling, disable Ice Beam to force the Mochtroid to unfreeze and get grabbed by it while jumping out of the sand. Shinespark windup just before the Mochtroid drain hits to interrurpt. If Samus must land back in the sand, be sure to be moving horizontally to land on top of the sand rather than sinking into it. Entrance condition: {
"comeInWithRMode": {}
}Requires: "canTrickyUseFrozenEnemies"
{
"or": [
{
"enemyKill": {
"enemies": [
[
"Mochtroid",
"Mochtroid"
]
],
"excludedWeapons": [
"PowerBeam",
"Ice",
"Bombs"
]
}
},
"canInsaneJump"
]
}
"canPlayInSand"
{
"or": [
{
"and": [
"h_CrystalFlashForReserveEnergy",
"h_usePowerBomb",
"canOffScreenMovement"
]
},
{
"and": [
"h_RModeCanRefillReserves",
{
"partialRefill": {
"type": "ReserveEnergy",
"limit": 40
}
}
]
}
]
}
"canBeVeryPatient"
"canXMode"
"h_XModeSpikeHit"
"h_shinechargeMaxRunway"
{
"disableEquipment": "Ice"
}
{
"autoReserveTrigger": {
"maxReserveEnergy": 63
}
}
"canRModeSparkInterrupt"
{
"or": [
"Grapple",
{
"and": [
"Gravity",
"canWallJump"
]
}
]
} |
|

In the case of carrying a blue suit, it is possible to inch forward a pixel or two at a time using X-Ray without destroying the Mochtroid. Exit condition: {
"leaveWithGModeSetup": {
"knockback": false
}
} |
|
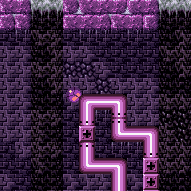
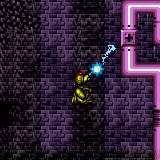
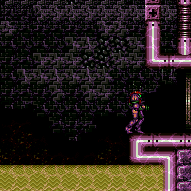
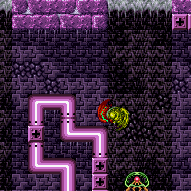
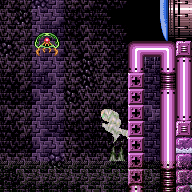
Get a boost from a Bomb or Power Bomb while grappled to the top Grapple block below the door. Samus will enter a 'glitched grapple hanging' state where Samus' graphics will appear corrupted while swinging with Grapple. Press jump to get a good bounce off the wall at the bottom of the swing, making it possible to swing up to the door. To avoid heavy lag, hold left while near the top of the swing, and hold angle down for the middle of the swing. Samus should usually enter the transition with the ability to stand in the next room. If needing to make sure that Samus can stand, or to ensure the transition happens further to the right, retract Grapple by pressing up while approaching door; then after coming to a stop, roll from holding left to holding diagonal down-left to approach the door at a controlled low speed. Requires: "Gravity" "canGrappleBombHang" "h_bombThings" Exit condition: {
"leaveWithGrappleTeleport": {
"blockPositions": [
[
3,
13
]
]
}
} |
|
Get a boost from a Bomb or Power Bomb while grappled to the top Grapple block below the door. Samus will enter a 'glitched grapple hanging' state where Samus' graphics will appear corrupted while swinging with Grapple. Press jump to get a good bounce off the wall at the bottom of the swing, making it possible to swing up to the door. To avoid heavy lag, hold left while near the top of the swing, and hold angle down for the middle of the swing. Press up while approaching the door to retract Grapple to avoid bonking the ceiling. Samus will typically come to rest at horizontal position $29. From here it is possible to roll from pressing left to pressing diagonally down-left to enter the transition, though this will create heavy lag and Samus will not be able to stand in the next room. Alternatively, only briefly press diagonally down-left and then press up, bringing Samus to a stop further left, typically at one of three positions $19, $1C, or $26. If Samus stops at position $26, then the process can be repeated to move closer to the door again, with a possibility of reaching position $19. If Samus then stops at positions $19 or $1C, then rolling from left to down-left will bring Samus into the transition in a pose that will be able to stand, and at horizontal position $15 (as far right as possible). If Samus stops at position $17 or closer, the setup will have to be started over. If needed to transition further to the left, it can be done from position $1C by rolling from left to down (with a brief down-left input), to result in a transition at a position of $14 or less. Requires: "Gravity" "canGrappleBombHang" "h_bombThings" Exit condition: {
"leaveWithGrappleTeleport": {
"blockPositions": [
[
3,
12
]
]
}
} |
From: 1
Left Door
To: 1
Left Door
Grapple to the second Grapple block from the bottom of the room, jump off from it, morph, and press against the Grapple wall to the left. Unmorph slightly before the peak of the jump (an 8-frame window), then immediately use grapple (a 2-frame window) to get stuck standing a pixel or two inside the second Grapple block below the door. Then jump (to force crouch), angle down, and grapple. Samus will enter a 'glitched grapple hanging' state where Samus' graphics will appear corrupted while swinging with Grapple. Press jump to get a good bounce off the wall at the bottom of the swing, making it possible to swing up to the door. To avoid heavy lag, hold down during the bottom part of the swing, and hold angle up during the top part. Samus should usually enter the transition with the ability to stand in the next room. If needing to make sure that Samus can stand, or to ensure the transition happens further to the right, retract Grapple by pressing up while approaching door; then after coming to a stop, roll from holding left to holding diagonal down-left to approach the door at a controlled low speed. Requires: "Gravity" "canUnmorphGrappleHang" Exit condition: {
"leaveWithGrappleTeleport": {
"blockPositions": [
[
3,
13
]
]
}
} |
From: 1
Left Door
To: 1
Left Door
Grapple to the second Grapple block from the bottom of the room, jump off from it, morph, and press against the Grapple wall to the left. Unmorph slightly before the peak of the jump (an 8-frame window), then immediately use grapple (a 2-frame window) to get stuck standing a pixel or two inside the second Grapple block below the door. Then jump (to force crouch), angle up, and grapple. Samus will enter a 'glitched grapple hanging' state where Samus' graphics will appear corrupted while swinging with Grapple. Press jump to get a good bounce off the wall at the bottom of the swing, making it possible to swing up to the door. To avoid heavy lag, hold down during the bottom part of the swing, and hold angle up during the top part. Press up while approaching the door to retract Grapple to avoid bonking the ceiling. Samus will typically come to rest at horizontal position $29. From here it is possible to roll from pressing left to pressing diagonally down-left to enter the transition, though this will create heavy lag and Samus will not be able to stand in the next room. Alternatively, only briefly press diagonally down-left and then press up, bringing Samus to a stop further left, typically at one of three positions $19, $1C, or $26. If Samus stops at position $26, then the process can be repeated to move closer to the door again, with a possibility of reaching position $19. If Samus then stops at positions $19 or $1C, then rolling from left to down-left will bring Samus into the transition in a pose that will be able to stand, and at horizontal position $15 (as far right as possible). If Samus stops at position $17 or closer, the setup will have to be started over. If needed to transition further to the left, it can be done from position $1C by rolling from left to down (with a brief down-left input), to result in a transition at a position of $14 or less. Requires: "Gravity" "canUnmorphGrappleHang" Exit condition: {
"leaveWithGrappleTeleport": {
"blockPositions": [
[
3,
12
]
]
}
} |
From: 1
Left Door
To: 1
Left Door

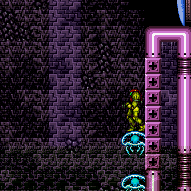
Freeze a Mochtroid at a specific position, where its top is about at the midpoint of the fourth Grapple block below the door. Stand on the frozen Mochtroid, and fire Grapple horizontally while walking toward the wall. If successful, Samus should clip slightly into the wall. Crouch, and fire Grapple while angling up. Samus will enter a 'glitched grapple hanging' state where Samus' graphics will appear corrupted while swinging with Grapple. Press jump to get a good bounce off the wall at the bottom of the swing, making it possible to swing up to the door. To avoid heavy lag, hold down during the bottom part of the swing, and hold angle up during the top part. Samus should usually enter the transition with the ability to stand in the next room. If needing to make sure that Samus can stand, or to ensure the transition happens further to the right, retract Grapple by pressing up while approaching door; then after coming to a stop, roll from holding left to holding diagonal down-left to approach the door at a controlled low speed. Requires: "Gravity" "canFrozenEnemyGrappleHang" Exit condition: {
"leaveWithGrappleTeleport": {
"blockPositions": [
[
3,
13
]
]
}
} |
From: 1
Left Door
To: 1
Left Door
Freeze a Mochtroid at a specific position, where its top is about at the midpoint of the third Grapple block below the door. Stand on the frozen Mochtroid, and fire Grapple horizontally while walking toward the wall. If successful, Samus should clip slightly into the wall. Crouch, and fire Grapple while angling up. Samus will enter a 'glitched grapple hanging' state where Samus' graphics will appear corrupted while swinging with Grapple. Press jump to get a good bounce off the wall at the bottom of the swing, making it possible to swing up to the door. To avoid heavy lag, hold down during the bottom part of the swing, and hold angle up during the top part. Press up while approaching the door to retract Grapple to avoid bonking the ceiling. Samus will typically come to rest at horizontal position $29. From here it is possible to roll from pressing left to pressing diagonally down-left to enter the transition, though this will create heavy lag and Samus will not be able to stand in the next room. Alternatively, only briefly press diagonally down-left and then press up, bringing Samus to a stop further left, typically at one of three positions $19, $1C, or $26. If Samus stops at position $26, then the process can be repeated to move closer to the door again, with a possibility of reaching position $19. If Samus then stops at positions $19 or $1C, then rolling from left to down-left will bring Samus into the transition in a pose that will be able to stand, and at horizontal position $15 (as far right as possible). If Samus stops at position $17 or closer, the setup will have to be started over. If needed to transition further to the left, it can be done from position $1C by rolling from left to down (with a brief down-left input), to result in a transition at a position of $14 or less. Requires: "Gravity" "canFrozenEnemyGrappleHang" Exit condition: {
"leaveWithGrappleTeleport": {
"blockPositions": [
[
3,
12
]
]
}
} |
|
Entrance condition: {
"comeInShinecharged": {}
}Requires: {
"notable": "Full Halfie Shinespark"
}
{
"shineChargeFrames": 20
}
"canShinechargeMovementComplex"
"canTrickyJump"
{
"shinespark": {
"frames": 128,
"excessFrames": 21
}
} |
From: 1
Left Door
To: 2
Bottom Right Door
Entrance condition: {
"comeInGettingBlueSpeed": {
"length": 2,
"openEnd": 1,
"maxExtraRunSpeed": "$2.4"
}
}Requires: "canBlueSpaceJump" "canPreciseSpaceJump" "canChainTemporaryBlue" Exit condition: {
"leaveWithTemporaryBlue": {}
}Unlocks doors: {"types":["ammo"],"requires":[]} |
|
Jumping to the first platform is relatively tight without a wall jump and requires disabling HiJump. Requires: "h_storedSpark"
"canDash"
{
"shinespark": {
"frames": 112,
"excessFrames": 19
}
} |
|


Cross the room with Grapple or wall jumps. Under the sand is spikes. Be sure not to turn around before landing or Samus will fall straight through the sand. Breaking spin while midair, such as by tapping an angle button, will help Samus land less deep in the sand - a quick jump when landing will give her a much higher jump. The last wall jump to get around the corner is tricky but it does not require a delayed wall jump, even without HiJump. Requires: "Gravity"
{
"or": [
{
"and": [
"HiJump",
"canWallJump",
{
"or": [
"canPlayInSand",
"canConsecutiveWallJump"
]
}
]
},
{
"and": [
"canTrickyWallJump",
"canConsecutiveWallJump"
]
},
{
"and": [
"canPreciseGrapple",
"canCarefulJump"
]
}
]
}
{
"or": [
{
"ammo": {
"type": "Missile",
"count": 2
}
},
{
"ammo": {
"type": "Super",
"count": 2
}
},
"canUseGrapple",
"canDodgeWhileShooting",
"Spazer",
"Wave",
"Plasma",
"ScrewAttack",
{
"haveBlueSuit": {}
},
{
"enemyDamage": {
"enemy": "Mochtroid",
"type": "contact",
"hits": 1
}
}
]
}
{
"or": [
"canPlayInSand",
{
"spikeHits": 2
}
]
}
{
"or": [
"Grapple",
{
"noBlueSuit": {}
}
]
} |
|
Use normalized movement to land on the sand without losing a blue suit. One way is to do the following: from the platforms at the top of the room, simply walk off the ledge; from the platforms two tiles above the sand, do a full height jump; from the sand itself, do full height jumps, with or without breaking spin. This same approach to the normalized movement can work with or without HiJump. Requires: {
"notable": "Blue Suit Sand Traversal"
}
{
"haveBlueSuit": {}
}
"Gravity"
"canConsecutiveWallJump" |
|


Requires: "SpaceJump"
{
"or": [
{
"ammo": {
"type": "Missile",
"count": 3
}
},
{
"ammo": {
"type": "Super",
"count": 3
}
},
"canUseGrapple",
"canTrickyJump",
"canDodgeWhileShooting",
"Spazer",
"Wave",
"Plasma",
"ScrewAttack",
{
"haveBlueSuit": {}
},
{
"enemyDamage": {
"enemy": "Mochtroid",
"type": "contact",
"hits": 2
}
}
]
} |
|
Initiate a Shinespark 1 tile below the ceiling to cross all of the room. Shinesparking too high or too low will crash and Samus will likely fall into the sand. Entrance condition: {
"comeInShinecharged": {}
}Requires: {
"shineChargeFrames": 20
}
{
"notable": "Full Halfie Shinespark"
}
"canShinechargeMovementComplex"
"canTrickyJump"
{
"or": [
{
"shinespark": {
"frames": 128,
"excessFrames": 6
}
},
{
"and": [
{
"shinespark": {
"frames": 128,
"excessFrames": 21
}
},
"canControlShinesparkEnd",
"canWallJump"
]
}
]
} |
|
Start an IBJ by either bouncing on the sand with Spring Ball, doing a stationary spinjump on the sand, or by crouch jumping in the sand while holding down. Requires: {
"noBlueSuit": {}
}
"Gravity"
"canLongIBJ"
"canJumpIntoIBJ"
{
"or": [
{
"and": [
"canTrickyJump",
"can4HighMidAirMorph",
"canPlayInSand"
]
},
"h_useSpringBall"
]
}
{
"or": [
"canDoubleBombJump",
"canStaggeredIBJ",
"canBePatient"
]
} |
|
Use normalized movement to land on the sand without losing a blue suit. One way is to do the following: from the platforms at the height of the top door, simply walk off the ledge; from the platforms two tiles above the sand, do a full height jump; from the sand itself, do full height spin jumps, ideally without breaking spin; from the high platform in the center of the room, jump up to bonk the ceiling before falling into the sand. This same approach to the normalized movement can work with or without HiJump. Requires: {
"notable": "Blue Suit Sand Traversal"
}
{
"haveBlueSuit": {}
}
"Gravity"
"canLongIBJ"
"canJumpIntoIBJ"
"can4HighMidAirMorph" |
|
Requires: {
"noBlueSuit": {}
}
"Gravity"
"HiJump"
"canPlayInSand"
"canTrickySpringBallJump" |
|
Use normalized movement to land on the sand without losing a blue suit. One way is to do the following: from the platforms at the top of the room, simply walk off the ledge; from the platforms two tiles above the sand, do a full height jump; from the sand itself, do full height jumps, with or without breaking spin. Requires: {
"notable": "Blue Suit Sand Traversal"
}
{
"haveBlueSuit": {}
}
"Gravity"
"HiJump"
"canPlayInSand"
"canTrickySpringBallJump" |
|
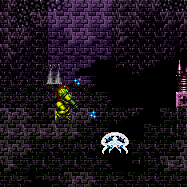
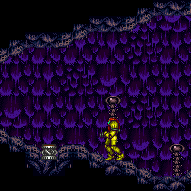
Use Grapple Beam to cross the room. The first two room segments can be safely grappled across from in the water. The third room segment grapple is tricky. It is possible to use the spikes as platforms instead. Requires: "canSuitlessMaridia"
"canDodgeWhileShooting"
"canPreciseGrapple"
{
"or": [
"canInsaneJump",
"canPlayInSand"
]
}
{
"or": [
"HiJump",
"canTrickyJump"
]
}
"h_complexToCarryFlashSuit" |
From: 1
Left Door
To: 3
Top Right Door
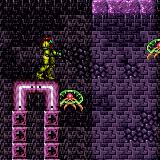
Use the spikes, which are not in the water, to jump from platform to platform as a way to cross the room. Requires knowing the position of every spike in the room, and hitting the spikes while morphed can help. The first jump is particularly tough. A Spring Ball jump from the sand to the spike with HiJump, or a frozen Mochtroid can be used to get past it. Requires: {
"notable": "Spike Platforming with Move Assist"
}
"canDash"
"canWallJump"
"canSuitlessMaridia"
"canPlayInSand"
"canTrickyJump"
"Morph"
"canUseIFrames"
"canNeutralDamageBoost"
{
"spikeHits": 3
}
{
"or": [
{
"and": [
"HiJump",
"canTrickySpringBallJump"
]
},
{
"and": [
"canMochtroidIceClimb",
{
"or": [
"canInsaneJump",
{
"enemyDamage": {
"enemy": "Mochtroid",
"type": "contact",
"hits": 1
}
}
]
}
]
}
]
}
{
"or": [
{
"spikeHits": 1
},
"canHorizontalDamageBoost"
]
} |
From: 1
Left Door
To: 3
Top Right Door
Use the spikes, which are not in the water, to jump from platform to platform as a way to cross the room. Requires knowing the position of every spike in the room, and hitting the spikes while morphed can help. The first jump is particularly tough. A springball rolling jump can be used to get past it. Entrance condition: {
"comeInRunning": {
"speedBooster": "any",
"minTiles": 2
}
}Requires: {
"notable": "Spike Platforming with Spring Ball (Left to Right)"
}
"canWallJump"
"Morph"
"canUseIFrames"
"h_useSpringBall"
"canMockball"
{
"spikeHits": 3
}
{
"or": [
{
"spikeHits": 1
},
"canHorizontalDamageBoost"
]
} |
From: 1
Left Door
To: 3
Top Right Door


Land on each set of spikes as a way to jump to the next safe platform. The first jump can be done with a very precise damage boost to bounce forward off the spike, or using morph. Requires: {
"notable": "Spike Platforming with No Equipment"
}
"canDash"
"canWallJump"
"canInsaneJump"
"canHorizontalDamageBoost"
"canUseIFrames"
{
"spikeHits": 3
}
{
"or": [
"Morph",
{
"spikeHits": 2
}
]
}
"h_extremelyTrickyToCarryFlashSuit"Dev note: Positioning on the spikes is harder to control without morph. |
|

Climb a mochtroid with ice using the wall to help guide them. It is very easy to take damage if not preemptive with freezes. Mochtroid movement and freeze timing gets harder at the waterline. Requires: "h_navigateUnderwater"
"canMochtroidIceClimb"
"canPlayInSand"
"canCameraManip"
"canTrickyJump"
{
"or": [
"Gravity",
"HiJump"
]
}
{
"or": [
"canInsaneJump",
{
"enemyDamage": {
"enemy": "Mochtroid",
"type": "contact",
"hits": 3
}
}
]
}
"h_complexToCarryFlashSuit" |
From: 1
Left Door
To: 3
Top Right Door

Climb a mochtroid with ice using the wall to help guide them. Mochtroid damage is pretty hard to avoid, but it is possible. Requires: {
"notable": "Mochtroid Suitless, HiJumpless Ice Climb"
}
"canSuitlessMaridia"
"canMochtroidIceClimb"
"canPlayInSand"
"canCameraManip"
"canTrickyJump"
{
"or": [
"canInsaneJump",
{
"enemyDamage": {
"enemy": "Mochtroid",
"type": "contact",
"hits": 3
}
}
]
}
{
"or": [
"canBePatient",
"canWallJump"
]
}
"h_trickyToCarryFlashSuit" |
From: 1
Left Door
To: 3
Top Right Door
Entrance condition: {
"comeInGettingBlueSpeed": {
"length": 2,
"openEnd": 1
}
}Requires: "canBlueSpaceJump" "canPreciseSpaceJump" "canChainTemporaryBlue" Exit condition: {
"leaveWithTemporaryBlue": {}
}Unlocks doors: {"types":["ammo"],"requires":[]} |
|
Entrance condition: {
"comeInWithGrappleTeleport": {
"blockPositions": [
[
108,
12
],
[
108,
13
]
]
}
}Bypasses door shell: true |
|
Entrance condition: {
"comeInWithGrappleTeleport": {
"blockPositions": [
[
108,
12
]
]
}
}Exit condition: {
"leaveWithGrappleTeleport": {
"blockPositions": [
[
108,
12
]
]
}
}Bypasses door shell: true |
|
Entrance condition: {
"comeInWithGrappleTeleport": {
"blockPositions": [
[
108,
13
]
]
}
}Exit condition: {
"leaveWithGrappleTeleport": {
"blockPositions": [
[
108,
13
]
]
}
}Bypasses door shell: true |
|


Jumping to the first platform is relatively tight without a wall jump and requires disabling HiJump. Requires: "h_storedSpark"
{
"shinespark": {
"frames": 112,
"excessFrames": 5
}
} |
From: 2
Bottom Right Door
To: 1
Left Door

Entrance condition: {
"comeInShinecharged": {}
}Requires: "canGravityJump"
"HiJump"
"canShinechargeMovementTricky"
{
"or": [
{
"and": [
"canSpeedyJump",
{
"shineChargeFrames": 90
},
{
"shinespark": {
"frames": 116,
"excessFrames": 5
}
}
]
},
{
"and": [
{
"shineChargeFrames": 125
},
{
"shinespark": {
"frames": 125,
"excessFrames": 5
}
}
]
}
]
} |
From: 2
Bottom Right Door
To: 1
Left Door
Entrance condition: {
"comeInGettingBlueSpeed": {
"length": 1,
"openEnd": 1,
"maxExtraRunSpeed": "$1.9"
}
}Requires: "Gravity" "HiJump" "canBlueSpaceJump" "canPreciseSpaceJump" "canChainTemporaryBlue" Exit condition: {
"leaveWithTemporaryBlue": {}
}Unlocks doors: {"types":["ammo"],"requires":[]}Dev note: This can be done at greater speed (at least up to $2.3) but would be more difficult. |
|
Entrance condition: {
"comeInWithGrappleTeleport": {
"blockPositions": [
[
5,
3
],
[
7,
2
]
]
}
} |
|
Entrance condition: {
"comeInWithGrappleTeleport": {
"blockPositions": [
[
3,
12
],
[
3,
13
]
]
}
}Bypasses door shell: true |
|
Entrance condition: {
"comeInWithGrappleTeleport": {
"blockPositions": [
[
3,
12
]
]
}
}Exit condition: {
"leaveWithGrappleTeleport": {
"blockPositions": [
[
3,
12
]
]
}
}Bypasses door shell: true |
From: 2
Bottom Right Door
To: 1
Left Door
Entrance condition: {
"comeInWithGrappleTeleport": {
"blockPositions": [
[
3,
13
]
]
}
}Exit condition: {
"leaveWithGrappleTeleport": {
"blockPositions": [
[
3,
13
]
]
}
}Bypasses door shell: true |
|
Exit the previous room with Samus in a standing pose (while grappled). After teleporting, press right to release Grapple while staying standing (not being forced into a crouch). Then X-ray climb 1 screen to get up to the door transition, without needing to open the door. Entrance condition: {
"comeInWithGrappleTeleport": {
"blockPositions": [
[
2,
28
],
[
2,
29
]
]
}
}Requires: "canXRayClimb" Bypasses door shell: true |
From: 2
Bottom Right Door
To: 2
Bottom Right Door
Crouch and freeze a Mochtroid to clip into the space behind the grapple blocks. Jump and tap grapple while aiming diagonally to be pushed into the wall just the right amount. Samus should be one tile below the grapple blocks and fully in the wall. Too short a tap and the next grapple will not work, too long and Samus will be stuck in the wall. Grapple diagonally again to be pushed into the transition. Requires: {
"notable": "Frozen Mochtroid Grapple Clip Door Lock Skip"
}
{
"or": [
{
"and": [
"Gravity",
"canUseFrozenEnemies",
"canCrouchJump",
"canCeilingClip"
]
},
{
"and": [
"h_XRayMorphIceClip",
"h_complexToCarryBlueSuit"
]
},
{
"and": [
"h_highPixelIceClip",
"h_trickyToCarryBlueSuit"
]
}
]
}
"canGrappleClip"Bypasses door shell: true Dev note: The 2-3 pixel window is trivial to get by crouching, the high pixel clip is easier here than normal, as no precise down grab is needed. The canCrouchJump is not a h_underwaterCrouchJump, because Gravity is required. |
From: 2
Bottom Right Door
To: 2
Bottom Right Door
Get a boost from a Bomb or Power Bomb while grappled to the second Grapple block below the top right door. Samus will enter a 'glitched grapple hanging' state where Samus' graphics will appear corrupted while swinging with Grapple. Press jump to get a good bounce off the wall at the bottom of the swing, making it possible to swing up to close the door. Heavy lag can typically be avoided by holding right during the bottom half of the swing. Retract Grapple while approaching the door. Samus should come to a stop about a tile in front of the door (at horizontal position $6D9). Press right and then left, and Samus will fall through the floor. Back to the right within the air pocket, then jump and use Grapple diagonally up against the second Grapple block from the bottom, near its top. Samus should be pushed most of the way inside the wall; if not, morph and roll out to try again. Once in position far enough inside the wall, grapple diagonally up again to be pushed into the transition. Requires: {
"notable": "Grapple Bomb Hang Door Lock Skip"
}
"Gravity"
"h_bombThings"
"canGrappleBombHang"
"canGrappleClip"Bypasses door shell: true |
From: 2
Bottom Right Door
To: 2
Bottom Right Door

Grapple to the second Grapple block from the bottom (the one partially underwater), jump off from it, morph, and press against the wall to the right. Unmorph slightly before the peak of the jump (a 3-frame window), then immediately use grapple (a 2-frame window) to get stuck standing a pixel inside the second Grapple block. Then jump (to force crouch), angle down, and grapple. Press jump to get a good bounce off the wall at the bottom of the swing, making it possible to swing up to close the door. To minimize lag, when grapple is extended horizontally release all inputs other than shot/grapple; there will still be a bit of unavoidable lag while Grapple is initially extending. Try to get a good first bounce; otherwise heavy lag may be difficult to avoid, and it may be better to retry from the beginning. Retract Grapple while approaching the door. Samus should come to a stop about a tile in front of the door (at horizontal position $6D9). Press right and then left, and Samus will fall through the floor. Back to the right within the air pocket, then jump and use Grapple diagonally up against the second Grapple block from the bottom, near its top. Samus should be pushed most of the way inside the wall; if not, morph and roll out to try again. Once in position far enough inside the wall, grapple diagonally up again to be pushed into the transition. Requires: {
"notable": "Unmorph Grapple Hang Door Lock Skip"
}
"Gravity"
"canUnmorphGrappleHang"
"canGrappleClip"Bypasses door shell: true |
|
Exit condition: {
"leaveWithRunway": {
"length": 4,
"openEnd": 1
}
} |
From: 2
Bottom Right Door
To: 2
Bottom Right Door


Use a frozen Mochtroid to extend the length of the runway. Positioning the Mochtroid is easiest by dropping into the sand and freezing it. Maintain a half-tile gap between the Mochtroid and the runway in order to extend it as much as possible. Requires: "h_frozenEnemyRunway"
"Gravity"
"canPlayInSand"
{
"enemyDamage": {
"enemy": "Mochtroid",
"type": "contact",
"hits": 1
}
}Exit condition: {
"leaveWithRunway": {
"length": 6,
"openEnd": 0
}
} |
|
Requires: {
"resetRoom": {
"nodes": [
2
]
}
}
{
"or": [
{
"and": [
"Plasma",
{
"cycleFrames": 95
}
]
},
{
"and": [
"Grapple",
{
"cycleFrames": 95
}
]
},
{
"and": [
"Gravity",
"ScrewAttack",
{
"cycleFrames": 95
}
]
},
{
"and": [
{
"haveBlueSuit": {}
},
{
"cycleFrames": 95
}
]
},
{
"and": [
"Wave",
{
"cycleFrames": 105
}
]
},
{
"and": [
"Spazer",
{
"cycleFrames": 115
}
]
},
{
"and": [
"canDodgeWhileShooting",
{
"cycleFrames": 145
}
]
}
]
}Farm cycle drops: 1 Mochtroid |
|
Requires: "h_CrystalFlash" |
From: 2
Bottom Right Door
To: 2
Bottom Right Door
Entrance condition: {
"comeInShinecharging": {
"length": 3,
"openEnd": 0
},
"comesInHeated": "no"
}Requires: "Gravity" "h_CrystalSpark" |
From: 2
Bottom Right Door
To: 2
Bottom Right Door

A single frame dashing stationary jump can make it easier to land on the spikes depending on where the mochtroid is frozen. Requires: "canWallJump"
"canTrickyUseFrozenEnemies"
"canTrickySpikeSuit"
"h_spikeXModeSpikeSuit"
{
"shinespark": {
"frames": 7
}
}
{
"or": [
"Grapple",
{
"spikeHits": 1
}
]
} |
From: 2
Bottom Right Door
To: 2
Bottom Right Door
Farm the door Mochtroid and the one in the water. Lure one of the next pair of Mochtroids toward the spike and freeze it. Climb using this Mochtroid up to the spike, then bounce off the Mochtroid and enter X-Mode. Arm-pump to move Samus off the spike tile (watch the Mochtroid). Shinecharge, release X-Ray, and start moving toward the Mochtroid as Samus falls back toward the sand. While falling, disable Ice Beam to force the Mochtroid to unfreeze and get grabbed by it while jumping out of the sand. Shinespark windup just before the Mochtroid drain hits to interrurpt. If Samus must land back in the sand, be sure to be moving horizontally to land on top of the sand rather than sinking into it. Entrance condition: {
"comeInWithRMode": {}
}Requires: "canTrickyUseFrozenEnemies"
"canPlayInSand"
{
"or": [
{
"and": [
"h_CrystalFlashForReserveEnergy",
"h_usePowerBomb",
"canOffScreenMovement"
]
},
{
"and": [
"h_RModeCanRefillReserves",
{
"partialRefill": {
"type": "ReserveEnergy",
"limit": 40
}
}
]
}
]
}
"canBeVeryPatient"
"canXMode"
"h_XModeSpikeHit"
"h_shinechargeMaxRunway"
{
"disableEquipment": "Ice"
}
{
"autoReserveTrigger": {
"maxReserveEnergy": 63
}
}
"canRModeSparkInterrupt"
{
"or": [
"Grapple",
{
"and": [
"Gravity",
"canWallJump"
]
}
]
} |
From: 2
Bottom Right Door
To: 2
Bottom Right Door

In the case of carrying a blue suit, it is possible to inch forward a pixel or two at a time using X-Ray without destroying the Mochtroid. Exit condition: {
"leaveWithGModeSetup": {
"knockback": false
}
} |
|


Requires: "Gravity"
{
"or": [
"canWallJump",
"SpaceJump",
"canLongIBJ",
"canJumpIntoIBJ",
{
"and": [
"HiJump",
"canSpringBallJumpMidAir"
]
},
{
"and": [
"HiJump",
"canGravityJump"
]
}
]
} |
|

Pause for the Gravity Jump as late as possible and then repause as soon as possible for the Spring Ball jump. Requires: "canTrickySpringBallJump" "canGravityJump" "canTrickyJump" |
|
Requires: "h_navigateUnderwater" "canMochtroidIceClimb" |
|
Requires: "h_navigateUnderwater"
"Grapple"
{
"or": [
"h_midAirShootUp",
"Gravity"
]
} |
|
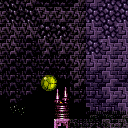
Crouch jump while holding shot to jump high enough to grapple horizontally to the second-lowest block. then fall, aim diagonally up, and grapple to the opposite wall after moving close enough to it, repeating this until Samus is above the water line. Grappling the same wall is also an option: in this case Samus will already be facing the wall when falling, so simply hold angle up and fire Grapple again immediately when Samus begins to fall; if done quickly, Samus will climb up to the next Grapple block. Requires: "Grapple" "canTrickyCarryFlashSuit" |
|


Entrance condition: {
"comeInShinecharged": {}
}Requires: {
"shineChargeFrames": 20
}
"h_navigateUnderwater"
{
"shinespark": {
"frames": 24,
"excessFrames": 6
}
} |
|
Perform the spring ball jump near max height. Place the first bomb between a few frames after the spring ball jump; ideally it should be just above the water line. Press pause a few frames after placing the bomb, to disable Spring Ball (a 'spring fling', to reset fall speed). Place the second bomb soon after regaining control, while the game is fading back in, then continue into an IBJ. Requires: {
"notable": "Bomb Jump Water Escape"
}
"HiJump"
"h_underwaterMaxHeightSpringBallJump"
"canSpringFling"
"canBombJumpWaterEscape"
"canJumpIntoIBJ" |
|

Requires a runway of one tile in the adjacent room. Entrance condition: {
"comeInJumping": {
"speedBooster": "no",
"minTiles": 1
}
}Requires: "canJumpIntoIBJ"
"canTrickyJump"
"canCrossRoomJumpIntoWater"
"canMomentumConservingTurnaround"
{
"enemyDamage": {
"enemy": "Mochtroid",
"type": "contact",
"hits": 2
}
}Dev note: Possible with no openend using a harder jump but a runway that small doesn't exist. |
|

Requires a runway of one tile in the adjacent room. Entrance condition: {
"comeInJumping": {
"speedBooster": "any",
"minTiles": 1
}
}Requires: "HiJump" "canTrickyJump" "canCrossRoomJumpIntoWater" "canMomentumConservingTurnaround" "canDownGrab" |
From: 2
Bottom Right Door
To: 3
Top Right Door
Requires a runway of two tiles in the adjacent room. Entrance condition: {
"comeInJumping": {
"speedBooster": "yes",
"minTiles": 1.4375
}
}Requires: "HiJump" "canCrossRoomJumpIntoWater" "canBufferedMomentumConservingTurnaround" |
From: 2
Bottom Right Door
To: 3
Top Right Door
Requires a runway of five tiles in the adjacent room. Entrance condition: {
"comeInJumping": {
"speedBooster": "any",
"minTiles": 5
}
}Requires: "HiJump" "canCrossRoomJumpIntoWater" "canBufferedMomentumConservingTurnaround" "canDownGrab" |
|
Requires running a very precise distance of 7 tiles with no open end in the adjacent room, to hit a peak of the speed vs height graph. Entrance condition: {
"comeInJumping": {
"speedBooster": "yes",
"minTiles": 6.4375
}
}Requires: "canTrickyDashJump" "canCrossRoomJumpIntoWater" "canBufferedMomentumConservingTurnaround" "canDownGrab" |
|
Gain speed using at least 18 tiles of runway, then Space Jump through the door transition. Entrance condition: {
"comeInSpaceJumping": {
"speedBooster": "yes",
"minTiles": 18.4375
}
}Requires: "canPreciseSpaceJump" "canCrossRoomJumpIntoWater" "canBufferedMomentumConservingTurnaround" |
From: 2
Bottom Right Door
To: 3
Top Right Door
Requires running a precise distance of 7 tiles with no open end in the adjacent room, to hit a peak of the speed vs height graph (at extra run speed $2.0 or $2.1). This needs a last-frame Space Jump in the previous room. At the lower of the two possible speeds ($2.0), the jump must be done very low through the door; at the higher speed ($2.1) there is a relatively large window of vertical positions that work. Entrance condition: {
"comeInSpaceJumping": {
"speedBooster": "yes",
"minTiles": 6.4375
}
}Requires: "canTrickyDashJump" "canPreciseSpaceJump" "canInsaneJump" "canCrossRoomJumpIntoWater" "canBufferedMomentumConservingTurnaround" "canDownGrab" |
From: 2
Bottom Right Door
To: 3
Top Right Door
Requires a runway of one tile in the adjacent room. Entrance condition: {
"comeInJumping": {
"speedBooster": "no",
"minTiles": 1
}
}Requires: "canTrickySpringBallJump" "canCrossRoomJumpIntoWater" "canTrickyJump" "canMomentumConservingTurnaround" Dev note: Possible with no openend using a harder jump but a runway that small doesn't exist. |
From: 2
Bottom Right Door
To: 3
Top Right Door
Uses a runway of two tiles in the adjacent room. Entrance condition: {
"comeInJumping": {
"speedBooster": "no",
"minTiles": 2
}
}Requires: "canTrickySpringBallJump" "canCrossRoomJumpIntoWater" "canMomentumConservingTurnaround" Dev note: FIXME: Can be lowered to canBufferedMomentumConservingTurnaround. |
|
Entrance condition: {
"comeInWithSidePlatform": {
"platforms": [
{
"minHeight": 2,
"maxHeight": 2,
"minTiles": 27.4375,
"speedBooster": "yes",
"obstructions": [
[
1,
0
]
],
"requires": [
"canMomentumConservingTurnaround"
],
"note": [
"This applies to Dust Torizo Room and Noob Bridge."
],
"devNote": [
"The jump could also be done with a shorter runway, with a tricky dash jump using run speed $4.0 or $4.1.",
"But it wouldn't apply to any more rooms in the game."
]
},
{
"minHeight": 3,
"maxHeight": 3,
"minTiles": 28.2472,
"speedBooster": "yes",
"obstructions": [
[
1,
0
]
],
"requires": [
"canMomentumConservingTurnaround"
],
"note": [
"This applies to Double Chamber."
],
"devNote": [
"The jump could also be done with a shorter runway, with a tricky dash jump using run speed $4.0 or $4.1.",
"But it wouldn't apply to any more rooms in the game."
]
},
{
"minHeight": 1,
"maxHeight": 1,
"minTiles": 23.8731,
"speedBooster": "yes",
"obstructions": [
[
3,
0
]
],
"environment": "water",
"requires": [
"canTrickyDashJump",
"canGravityJump",
"canMomentumConservingTurnaround"
],
"note": [
"This applies to Below Botwoon Energy Tank and Botwoon Energy Tank Room",
"gain run speed, and time a pause to unequip Gravity after Samus jumps;",
"hold down and back through the unpause to buffer a turnaround."
],
"detailNote": [
"With a momentum conserving turnaround, this has a 3-frame window for the jump,",
"and between a 5-frame and 7-frame window for the pause, depending on the jump timing",
"(with later jumps corresponding to larger windows for the pause to hit).",
"A ceiling mockball is also possible but with greater difficulty."
],
"devNote": [
"FIXME: The `canTrickyDashJump` is for difficulty placement but could probably be replaced by a more fitting tech,",
"since this isn't actually relying on a spike in jump height based on gaining a specific speed."
]
},
{
"minHeight": 2,
"maxHeight": 2,
"minTiles": 45,
"speedBooster": "yes",
"obstructions": [
[
3,
0
]
],
"requires": [
"canInsaneJump",
{
"or": [
"canMomentumConservingMorph",
"canMomentumConservingTurnaround"
]
}
],
"note": [
"This applies to Statues Hallway and Baby Kraid Room."
],
"devNote": [
"With a momentum conserving morph, this has a 2-frame window for the jump,",
"and a 1-frame or 2-frame window for the morph depending on the jump timing",
"(with a last-frame jump giving the larger window for the morph).",
"With a turnaround, this requires a last-frame jump, with a 2-frame window for the turnaround."
]
},
{
"minHeight": 3,
"maxHeight": 3,
"minTiles": 21.4375,
"speedBooster": "yes",
"obstructions": [
[
3,
0
]
],
"environment": "water",
"requires": [
"canTrickyDashJump",
"canInsaneJump",
"canGravityJump",
"canMomentumConservingTurnaround"
],
"note": [
"This applies to Draygon's Room.",
"Start a little less than about a tile away from the wall, gain run speed, and time a pause to unequip Gravity after Samus jumps;",
"hold down and back through the unpause to buffer a turnaround."
],
"detailNote": [
"Gain extra run speed of $4.0 or $4.1.",
"A last-frame jump with a speed of $4.1 gives a 5-frame window for the pause/turnaround,",
"while a second-to-last-frame jump with a speed of $4.0 gives a 2-frame window."
],
"devNote": [
"If Spring Ball is available, the frame window for the turnaround with $4.0 speed can be larger,",
"but it doesn't seem like a big enough difference to justify separate logical requirements."
]
},
{
"minHeight": 3,
"maxHeight": 3,
"minTiles": 41.4375,
"speedBooster": "yes",
"obstructions": [
[
3,
0
]
],
"requires": [
"canInsaneJump",
"canMomentumConservingTurnaround"
],
"note": [
"This applies to Blue Brinstar Energy Tank Room (Power Bomb blocks broken), Bowling Alley (middle), and Basement."
],
"detailNote": [
"With ideal starting position, this has a 2-frame window for the jump,",
"and a 1-frame or 3-frame window for the turnaround based on the jump timing",
"(with a last-frame jump giving the larger window for the turnaround).",
"A ceiling mockball is also possible but more difficult, requiring a last-frame jump and a 2-frame window for the morph."
],
"devNote": [
"The trick is more difficult if using the full runway in the long rooms Bowling Alley or Basement,",
"requiring a last-frame jump and a 2-frame window for the turnaround."
]
},
{
"minHeight": 3,
"maxHeight": 3,
"minTiles": 39.4375,
"speedBooster": "yes",
"obstructions": [
[
3,
2
]
],
"requires": [
"canMomentumConservingTurnaround"
],
"note": [
"This applies to Metal Pirates Room."
],
"detailNote": [
"Starting the turnaround before the transition helps make this easier."
]
},
{
"minHeight": 3,
"maxHeight": 3,
"minTiles": 37.4375,
"speedBooster": "yes",
"obstructions": [
[
5,
2
]
],
"requires": [
{
"or": [
"canMomentumConservingTurnaround",
"canMomentumConservingMorph"
]
}
],
"note": [
"This applies to Flyway"
],
"devNote": [
"This requires a last-frame jump, with a 3-frame window for the turnaround.",
"A ceiling mockball is also possible, with somewhat greater difficulty:",
"it needs a last-frame jump, with a 2-frame window for the morph."
]
}
]
}
}Requires: "canCrossRoomJumpIntoWater" "canTrickyJump" |
From: 2
Bottom Right Door
To: 3
Top Right Door
Entrance condition: {
"comeInWithSidePlatform": {
"platforms": [
{
"minHeight": 1,
"maxHeight": 1,
"minTiles": 4,
"speedBooster": "no",
"obstructions": [
[
1,
0
]
],
"note": "Applies to Skree Boost Room, Screw Attack Room, and Lava Dive"
},
{
"minHeight": 2,
"maxHeight": 2,
"minTiles": 5.4375,
"speedBooster": "no",
"obstructions": [
[
1,
0
]
],
"requires": [
"canTrickySpringBallJump",
"canTrickyJump"
],
"note": "Applies to Early Supers Room, Tourian Hopper Room, Bowling Alley (bottom), Dust Torizo Room, and Noob Bridge"
},
{
"minHeight": 3,
"maxHeight": 3,
"minTiles": 9.4375,
"speedBooster": "no",
"obstructions": [
[
1,
0
]
],
"requires": [
"canTrickySpringBallJump",
"canTrickyJump"
],
"note": "Applies to Bomb Torizo Room, Pink Brinstar Wave Gate Room, Phantoon's Room, Big Boy Room, and Double Chamber."
},
{
"minHeight": 3,
"maxHeight": 3,
"minTiles": 9.4375,
"speedBooster": "no",
"obstructions": [
[
3,
2
]
],
"requires": [
"canTrickySpringBallJump",
"canTrickyJump",
"canJumpIntoIBJ",
{
"enemyDamage": {
"enemy": "Mochtroid",
"type": "contact",
"hits": 1
}
}
],
"note": "Applies to Metal Pirates Room."
},
{
"minHeight": 2,
"maxHeight": 2,
"minTiles": 31,
"speedBooster": "yes",
"obstructions": [
[
3,
0
]
],
"requires": [
"canInsaneJump",
{
"or": [
"canMomentumConservingTurnaround",
"canMomentumConservingMorph"
]
}
],
"note": [
"This applies to Metroid Room 1."
],
"detailNote": [
"With ideal positioning, starting 5 or 6 pixels from the end of the runway,",
"this has a 2-frame window for the jump, and a 1-frame or 3-frame window for the turnaround based on the jump timing",
"(with a last-frame jump giving the larger window for the turnaround).",
"This can also be done with a momentum conserving morph:",
"it has a 2-frame window for the jump, and a 1-frame or 2-frame window for the turnaround based on the jump timing."
]
},
{
"minHeight": 3,
"maxHeight": 3,
"minTiles": 30.4375,
"speedBooster": "yes",
"obstructions": [
[
3,
0
]
],
"requires": [
"canInsaneJump",
"canMomentumConservingTurnaround"
],
"note": [
"This applies to Blue Brinstar Energy Tank Room (Power Bomb blocks intact)."
],
"detailNote": [
"With ideal starting position, this has a 2-frame window for the jump,",
"and a 1-frame or 3-frame window for the turnaround based on the jump timing",
"(with a last-frame jump giving the larger window for the turnaround)."
]
}
]
}
}Requires: "canCrossRoomJumpIntoWater" "canMomentumConservingTurnaround" "canSpringBallJumpMidAir" Dev note: This strat is included for completeness even though it's not really useful; it would be easier to use the runway attached to the door, even if it is only 1 tile long, i.e. with the 'Cross Room Jump with Spring Ball' strat (id: 51). |
|
Immediately when entering the room, turn around to the left while using X-ray and kill the Mochtroid, to prevent or minimize damage. Climb up 1 screen. Entrance condition: {
"comeInWithDoorStuckSetup": {}
}Requires: "canXRayClimb"
{
"or": [
"Ice",
"Wave",
"Spazer",
"Plasma",
"Grapple",
{
"ammo": {
"type": "Missile",
"count": 1
}
},
{
"ammo": {
"type": "Super",
"count": 1
}
},
{
"enemyDamage": {
"enemy": "Mochtroid",
"type": "contact",
"hits": 1
}
}
]
} |
|
Enter with G-mode direct, back up to between 1 and 6 pixels from the door transition, and activate X-ray to get very deep stuck in the door. Climb up 1 screen, and perform a turnaround buffered spin-jump away from the door to trigger the transition, bypassing any lock on the door. Entrance condition: {
"comeInWithGMode": {
"mode": "direct",
"morphed": false
}
}Requires: "canGModeXRayClimb" Bypasses door shell: true |
|
Requires: "canUnderwaterWallJump" "canSpaceJumpWaterBounce" |
|
Requires: "canUnderwaterWallJumpBreakFree" Dev note: FIXME: Crossing the room with just HiJump should be possible but terrible. |
From: 2
Bottom Right Door
To: 3
Top Right Door
Entrance condition: {
"comeInShinecharging": {
"length": 3,
"openEnd": 0
}
}Requires: "canXRayTurnaround" "canGravityJump" "HiJump" "canChainTemporaryBlue" Exit condition: {
"leaveWithTemporaryBlue": {}
}Unlocks doors: {"types":["ammo"],"requires":[]} |
Come in Shinecharging, Leave With Temporary Blue (Gravity Jump, Spring Ball Jump, Pause Remorph)
(Extreme+)
Colosseum
From: 2
Bottom Right Door
To: 3
Top Right Door

Position as far left as possible, hanging over the ledge, and use X-Ray to turn around to the right. Perform a gravity jump into a spring ball jump. Immediately after the spring ball jump, unmorph to avoid bonking the wall and losing blue speed. Use a pause buffer to morph again without losing temporary blue: pause as early as possible, and hold angle and aim-down while the pause hits; during the black screen, hold only the down input, to buffer a morph; coming out of the pause, during the morphing animation roll from down to right, and then hold angle and unmorph to chain temporary blue. Entrance condition: {
"comeInShinecharging": {
"length": 3,
"openEnd": 0
}
}Requires: "canXRayTurnaround" "canGravityJump" "canSpringBallJumpMidAir" "canInsaneJump" "canChainTemporaryBlue" "canPauseRemorphTemporaryBlue" Exit condition: {
"leaveWithTemporaryBlue": {}
}Unlocks doors: {"types":["ammo"],"requires":[]} |
|
Requires: "h_storedSpark"
{
"or": [
{
"shinespark": {
"frames": 20,
"excessFrames": 6
}
},
{
"and": [
"HiJump",
{
"shinespark": {
"frames": 17,
"excessFrames": 7
}
}
]
},
{
"and": [
"canGravityJump",
{
"shinespark": {
"frames": 10,
"excessFrames": 6
}
}
]
}
]
} |
|

Place bombs without moving horizontally, such that multiple hit the Mochtroid immediately as it attaches without being boosted into the doorway or sand. Entrance condition: {
"comeInWithGMode": {
"mode": "any",
"morphed": true
}
}Requires: "Gravity"
{
"or": [
"h_artificialMorphLongIBJ",
"h_artificialMorphJumpIntoIBJ"
]
} |
From: 2
Bottom Right Door
To: 3
Top Right Door


Quickly kill the Mochtroids with Bombs or a Power Bomb, or just roll into place and Gravity jump before they get to Samus. (With Bombs, place them without moving horizontally, such that multiple hit the Mochtroid immediately as it attaches without being boosted into the doorway or sand.) Start with a precise Gravity jump, where the initial jump is just before the pause fully triggers. Turn off Spring Ball and Gravity at the same time, then precisely repause and turn Spring back on. Entrance condition: {
"comeInWithGMode": {
"mode": "any",
"morphed": true
}
}Requires: "canGravityJump"
{
"tech": "canSpringBallJumpMidAir"
}
"h_artificialMorphSpringBall"
"canTrickyJump"Dev note: FIXME: It may be possible to cross the room both directions with HiJump, Gravity, Spring and some spike hits. |
From: 2
Bottom Right Door
To: 3
Top Right Door
Entrance condition: {
"comeInShinecharging": {
"length": 2,
"openEnd": 1
}
}Requires: "Gravity"
"canShinechargeMovementComplex"
{
"or": [
{
"and": [
"canConsecutiveWallJump",
{
"shineChargeFrames": 120
}
]
},
{
"and": [
"HiJump",
"canWallJump",
{
"shineChargeFrames": 95
}
]
}
]
}Exit condition: {
"leaveShinecharged": {}
}Unlocks doors: {"types":["super"],"requires":[]}
{"types":["missiles","powerbomb"],"requires":["never"]} |
|

Entrance condition: {
"comeInShinecharged": {}
}Requires: "Gravity"
"canShinechargeMovementComplex"
{
"or": [
{
"and": [
"canConsecutiveWallJump",
{
"shineChargeFrames": 120
}
]
},
{
"and": [
"HiJump",
"canWallJump",
{
"shineChargeFrames": 95
}
]
},
{
"and": [
"HiJump",
"canGravityJump",
"canShinechargeMovementTricky",
{
"shineChargeFrames": 120
}
]
}
]
}Exit condition: {
"leaveShinecharged": {}
}Unlocks doors: {"types":["super"],"requires":[]}
{"types":["missiles","powerbomb"],"requires":["never"]} |
From: 2
Bottom Right Door
To: 3
Top Right Door

Entrance condition: {
"comeInShinecharged": {}
}Requires: "Gravity"
"canShinechargeMovementComplex"
{
"or": [
{
"and": [
"canConsecutiveWallJump",
{
"shineChargeFrames": 100
},
{
"shinespark": {
"frames": 6,
"excessFrames": 0
}
}
]
},
{
"and": [
"HiJump",
"canWallJump",
{
"or": [
{
"shineChargeFrames": 85
},
{
"and": [
"canSpeedyJump",
{
"shineChargeFrames": 80
}
]
}
]
},
{
"shinespark": {
"frames": 5,
"excessFrames": 0
}
}
]
},
{
"and": [
"HiJump",
"canGravityJump",
"canShinechargeMovementTricky",
{
"or": [
{
"shineChargeFrames": 115
},
{
"and": [
"canSpeedyJump",
{
"shineChargeFrames": 100
}
]
}
]
},
{
"shinespark": {
"frames": 4,
"excessFrames": 0
}
}
]
}
]
}Exit condition: {
"leaveWithSpark": {
"position": "top"
}
}Unlocks doors: {"types":["super"],"requires":[]}
{"types":["missiles","powerbomb"],"requires":["never"]} |
From: 2
Bottom Right Door
To: 3
Top Right Door

Entrance condition: {
"comeInShinecharged": {}
}Requires: "Gravity"
"canShinechargeMovementComplex"
{
"or": [
{
"and": [
"canConsecutiveWallJump",
{
"shineChargeFrames": 100
},
{
"shinespark": {
"frames": 6,
"excessFrames": 0
}
}
]
},
{
"and": [
"HiJump",
"canWallJump",
{
"or": [
{
"shineChargeFrames": 75
},
{
"and": [
"canSpeedyJump",
{
"shineChargeFrames": 70
}
]
}
]
},
{
"shinespark": {
"frames": 6,
"excessFrames": 0
}
}
]
},
{
"and": [
"HiJump",
"canGravityJump",
"canShinechargeMovementTricky",
{
"or": [
{
"shineChargeFrames": 105
},
{
"and": [
"canSpeedyJump",
{
"shineChargeFrames": 90
}
]
}
]
},
{
"shinespark": {
"frames": 6,
"excessFrames": 0
}
}
]
}
]
}Exit condition: {
"leaveWithSpark": {
"position": "top"
}
}Unlocks doors: {"types":["super"],"requires":[]}
{"types":["missiles","powerbomb"],"requires":["never"]} |
|


Cross the room with Grapple or wall jumps. Under the sand is spikes. Be sure not to turn around before landing or Samus will fall straight through the sand. Breaking spin while midair, such as by tapping an angle button, will help Samus land less deep in the sand - a quick jump when landing will give her a much higher jump. Requires: "Gravity"
{
"or": [
"canConsecutiveWallJump",
"Grapple",
{
"and": [
"canWallJump",
"HiJump",
"canPlayInSand"
]
}
]
}
{
"or": [
{
"ammo": {
"type": "Missile",
"count": 2
}
},
{
"ammo": {
"type": "Super",
"count": 2
}
},
"canUseGrapple",
"canDodgeWhileShooting",
"Spazer",
"Wave",
"Plasma",
"ScrewAttack",
{
"haveBlueSuit": {}
},
{
"enemyDamage": {
"enemy": "Mochtroid",
"type": "contact",
"hits": 1
}
}
]
}
{
"or": [
"canPlayInSand",
{
"spikeHits": 1
}
]
}
{
"or": [
"Grapple",
{
"noBlueSuit": {}
}
]
} |
|
Use normalized movement to land on the sand without losing a blue suit. One way is to do the following: from the platforms at the top of the room, simply walk off the ledge; from the platforms two tiles above the sand, do a full height jump; from the sand itself, do full height jumps, with or without breaking spin. This same approach to the normalized movement can work with or without HiJump. Requires: {
"notable": "Blue Suit Sand Traversal"
}
{
"haveBlueSuit": {}
}
"Gravity"
"canConsecutiveWallJump" |
|

Requires: "SpaceJump"
{
"or": [
{
"ammo": {
"type": "Missile",
"count": 3
}
},
{
"ammo": {
"type": "Super",
"count": 3
}
},
"canUseGrapple",
"canTrickyJump",
"canDodgeWhileShooting",
"Spazer",
"Wave",
"Plasma",
"ScrewAttack",
{
"haveBlueSuit": {}
},
{
"enemyDamage": {
"enemy": "Mochtroid",
"type": "contact",
"hits": 2
}
}
]
} |
|
Initiate a Shinespark 1 tile below the ceiling to cross all of the room. Shinesparking too high or too low will crash and Samus will likely fall into the sand. Entrance condition: {
"comeInShinecharged": {}
}Requires: {
"shineChargeFrames": 10
}
{
"notable": "Full Halfie Shinespark"
}
"canShinechargeMovementComplex"
"canTrickyJump"
{
"or": [
{
"shinespark": {
"frames": 127,
"excessFrames": 4
}
},
{
"and": [
{
"shinespark": {
"frames": 127,
"excessFrames": 16
}
},
"canControlShinesparkEnd",
{
"or": [
"canWallJump",
"canTrickyJump"
]
}
]
}
]
} |
|
Start an IBJ by either bouncing on the sand with Spring Ball, doing a stationary spinjump on the sand, or by crouch jumping in the sand while holding down. Requires: {
"noBlueSuit": {}
}
"Gravity"
"canLongIBJ"
"canJumpIntoIBJ"
{
"or": [
{
"and": [
"canTrickyJump",
"can4HighMidAirMorph",
"canPlayInSand"
]
},
"h_useSpringBall"
]
}
{
"or": [
"canDoubleBombJump",
"canStaggeredIBJ",
"canBePatient"
]
} |
|
Use normalized movement to land on the sand without losing a blue suit. One way is to do the following: from the high platform at the right of the room, jump up to bonk the ceiling before falling into the sand; jump up to lure a Mochtroid down, and destroy it with the blue suit; if HiJump is unavailable, perform the first IBJ all the way left against the Grapple block wall to prevent the higher Mochtroid from coming on camera; from the platforms at the height of the top door, simply walk off the ledge; from the platforms two tiles above the sand, do a full height jump; from the sand itself, do full height spin jumps, ideally without breaking spin. The same approach to the normalized movement generally works with or without HiJump: but if performing many jumps in a row from sand to sand with HiJump, it is recommended to alternate between breaking spin and not breaking spin, to keep Samus' vertical subpixels in a good range. In any case, if failing an IBJ, unmorph before landing on the sand, in order to have a chance to keep the blue suit. Requires: {
"notable": "Blue Suit Sand Traversal"
}
{
"haveBlueSuit": {}
}
"Gravity"
"canLongIBJ"
"canJumpIntoIBJ"
"can4HighMidAirMorph"
"canTrickyDodgeEnemies" |
|
Requires: {
"noBlueSuit": {}
}
"Gravity"
"HiJump"
"canPlayInSand"
"canTrickySpringBallJump" |
|
Use normalized movement to land on the sand without losing a blue suit. One way is to do the following: from the platforms at the top of the room, simply walk off the ledge; from the platforms two tiles above the sand, do a full height jump; from the sand itself, do full height jumps, with or without breaking spin. Requires: {
"notable": "Blue Suit Sand Traversal"
}
{
"haveBlueSuit": {}
}
"Gravity"
"HiJump"
"canPlayInSand"
"canTrickySpringBallJump" |
|
Requires: "canSuitlessMaridia"
"canDodgeWhileShooting"
"canPreciseGrapple"
{
"or": [
"canInsaneJump",
"canPlayInSand"
]
}
{
"or": [
"HiJump",
"canTrickyJump"
]
}
"h_complexToCarryFlashSuit" |
|
Stay out of the water, and by extension the sand, of the room by using the spikes as platforms. Morphing before landing on the spikes helps to be able to control the knockback. The final spike jump (which would be the most difficult) is avoided by doing a crouch jump into spring ball jump into IBJ to reach the left door. Perform the spring ball jump near max height. Place the first bomb between about 4 and 6 frames after the spring ball jump; ideally it should be just above the water line. Press pause between about 5 and 10 frames after placing the bomb, to disable Spring Ball (a 'spring fling', to reset fall speed). Place the second bomb soon after regaining control, while the game is fading back in. A spike hit in the center of the room can avoided by doing another spring ball jump into IBJ (also with a spring fling). Requires: {
"notable": "Bomb Jump Water Escape"
}
"canDash"
"HiJump"
"canPreciseWallJump"
"canUseIFrames"
{
"spikeHits": 1
}
"canNeutralDamageBoost"
"canTrickyJump"
{
"or": [
"canHorizontalDamageBoost",
{
"spikeHits": 1
}
]
}
{
"or": [
"canBePatient",
{
"spikeHits": 1
}
]
}
"h_underwaterMaxHeightSpringBallJump"
"canSpringFling"
"canBombJumpWaterEscape"
"canJumpIntoIBJ"Dev note: The IBJ at the left side of the room can be done without a 'spring fling' but is far more precise: the first bomb must be placed exactly two frames before the spring ball jump, and the spring ball jump should be performed just before max height, during the 4-frame window between 2 and 5 frames before the last possible frame to jump (there are also 1-frame windows at 0 and 8 frames before the last frame). FIXME: This can be possible to do while carrying a blue suit, with much greater difficulty. |
From: 3
Top Right Door
To: 1
Left Door
Use the spikes, which are not in the water, to jump from platform to platform as a way to cross the room. Requires knowing the position of every spike in the room, and hitting the spikes while morphed can help. The final jump is particularly tough so a frozen Mochtroid is used to get past it. Requires: {
"notable": "Spike Platforming with Move Assist"
}
"canDash"
"canWallJump"
"canSuitlessMaridia"
"canPlayInSand"
"canTrickyJump"
"Morph"
"canUseIFrames"
"canNeutralDamageBoost"
{
"spikeHits": 3
}
"canMochtroidIceClimb"
{
"or": [
"canInsaneJump",
{
"enemyDamage": {
"enemy": "Mochtroid",
"type": "contact",
"hits": 1
}
}
]
}
{
"or": [
{
"spikeHits": 1
},
"canHorizontalDamageBoost"
]
} |
From: 3
Top Right Door
To: 1
Left Door

Stay out of the water, and by extension the sand, of the room by using the spikes as platforms. Landing on spikes aiming down with no other direction pressed can help control the knockback. Requires knowing the position of every spike in the room. The final spike jump is very difficult. Requires: {
"notable": "Spike Platforming with No Equipment"
}
"canDash"
"canPreciseWallJump"
"canInsaneJump"
"canUseIFrames"
{
"spikeHits": 3
}
"canNeutralDamageBoost"
{
"or": [
{
"and": [
"canHorizontalDamageBoost",
{
"noFlashSuit": {}
}
]
},
{
"spikeHits": 1
}
]
} |
|

Jump out of the sand to lure down mochtroids to freeze. It's recommended to bring a Mochtroid into the middle section of the room. Mochtroid damage is pretty hard to avoid, but can be. Mochtroid movement and freeze timing gets harder at the waterline. Requires: "h_navigateUnderwater"
{
"or": [
"Gravity",
"HiJump"
]
}
"canTrickyJump"
"canPlayInSand"
"canMochtroidIceClimb"
"canCameraManip"
{
"or": [
"canInsaneJump",
{
"enemyDamage": {
"enemy": "Mochtroid",
"type": "contact",
"hits": 3
}
}
]
}
"h_complexToCarryFlashSuit" |
From: 3
Top Right Door
To: 1
Left Door

Jump out of the sand to lure down mochtroids to freeze. It's recommended to bring a Mochtroid into the middle section of the room. Mochtroid damage is pretty hard to avoid, but can be. Requires: {
"notable": "Mochtroid Suitless, HiJumpless Ice Climb"
}
"canSuitlessMaridia"
"canTrickyJump"
"canPlayInSand"
"canMochtroidIceClimb"
"canCameraManip"
{
"or": [
"canInsaneJump",
{
"enemyDamage": {
"enemy": "Mochtroid",
"type": "contact",
"hits": 3
}
}
]
}
{
"or": [
"canBePatient",
"canWallJump"
]
}
"h_trickyToCarryFlashSuit" |
From: 3
Top Right Door
To: 1
Left Door
Entrance condition: {
"comeInGettingBlueSpeed": {
"length": 2,
"openEnd": 1
}
}Requires: "canBlueSpaceJump" "canPreciseSpaceJump" "canChainTemporaryBlue" Exit condition: {
"leaveWithTemporaryBlue": {}
}Unlocks doors: {"types":["ammo"],"requires":[]} |
|
Entrance condition: {
"comeInWithGrappleTeleport": {
"blockPositions": [
[
5,
3
],
[
7,
2
]
]
}
} |
|
Entrance condition: {
"comeInWithGrappleTeleport": {
"blockPositions": [
[
3,
12
],
[
3,
13
]
]
}
}Bypasses door shell: true |
|
Entrance condition: {
"comeInWithGrappleTeleport": {
"blockPositions": [
[
3,
12
]
]
}
}Exit condition: {
"leaveWithGrappleTeleport": {
"blockPositions": [
[
3,
12
]
]
}
}Bypasses door shell: true |
|
Entrance condition: {
"comeInWithGrappleTeleport": {
"blockPositions": [
[
3,
13
]
]
}
}Exit condition: {
"leaveWithGrappleTeleport": {
"blockPositions": [
[
3,
13
]
]
}
}Bypasses door shell: true |
|
Exit the previous room with Samus in a standing pose (while grappled). After teleporting, press right to release Grapple while staying standing (not being forced into a crouch). Then X-ray climb 1 screen to get up to the door transition, without needing to open the door. Entrance condition: {
"comeInWithGrappleTeleport": {
"blockPositions": [
[
2,
28
],
[
2,
29
]
]
}
}Requires: "canXRayClimb" Bypasses door shell: true |
|


Wall jump to the first platform then spark while standing, or spark from the right door - one tile lower than the Grapple blocks. Requires: "h_storedSpark"
{
"or": [
{
"shinespark": {
"frames": 121,
"excessFrames": 4
}
},
{
"and": [
"canPreciseWallJump",
{
"shinespark": {
"frames": 110,
"excessFrames": 4
}
}
]
}
]
}Dev note: FIXME: Adding another node at the first platform would allow for cross room strats from the bottom right door. |
|
|
From: 3
Top Right Door
To: 2
Bottom Right Door

Entrance condition: {
"comeInShinecharging": {
"length": 2,
"openEnd": 1
}
}Requires: "Gravity"
"canShinechargeMovementComplex"
{
"shineChargeFrames": 100
}Exit condition: {
"leaveShinecharged": {}
}Unlocks doors: {"types":["super"],"requires":[]}
{"types":["missiles","powerbomb"],"requires":["never"]} |
From: 3
Top Right Door
To: 2
Bottom Right Door
Entrance condition: {
"comeInShinecharging": {
"length": 1,
"openEnd": 0
}
}Requires: "canShinechargeMovementComplex"
{
"shineChargeFrames": 115
}Exit condition: {
"leaveShinecharged": {}
}Unlocks doors: {"types":["super"],"requires":[]}
{"types":["missiles","powerbomb"],"requires":["never"]} |
|

Entrance condition: {
"comeInShinecharged": {}
}Requires: "canShinechargeMovementComplex"
{
"or": [
{
"and": [
"Gravity",
"Wave",
{
"shineChargeFrames": 100
}
]
},
{
"and": [
"Gravity",
{
"shineChargeFrames": 105
}
]
},
{
"shineChargeFrames": 115
}
]
}Exit condition: {
"leaveShinecharged": {}
}Unlocks doors: {"types":["super"],"requires":[]}
{"types":["missiles","powerbomb"],"requires":["never"]} |
From: 3
Top Right Door
To: 2
Bottom Right Door
Entrance condition: {
"comeInShinecharged": {}
}Requires: "canShinechargeMovementComplex"
{
"shineChargeFrames": 80
}
{
"shinespark": {
"frames": 6,
"excessFrames": 0
}
}Exit condition: {
"leaveWithSpark": {}
}Unlocks doors: {"types":["super"],"requires":[]}
{"types":["missiles","powerbomb"],"requires":["never"]} |
From: 3
Top Right Door
To: 2
Bottom Right Door
Entrance condition: {
"comeInShinecharging": {
"length": 2,
"openEnd": 0
}
}Requires: "canChainTemporaryBlue" "canXRayTurnaround" Exit condition: {
"leaveWithTemporaryBlue": {}
}Unlocks doors: {"types":["ammo"],"requires":[]} |
From: 3
Top Right Door
To: 2
Bottom Right Door
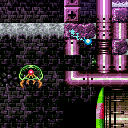

Perform a moonfall with stored fall speed to clip into the air space between the grapple blocks and the wall. Jump and tap grapple while aiming diagonally to be pushed into the wall just the right amount. Samus should be one tile below the grapple blocks and fully in the wall. Too short a tap and the next grapple will not work, too long and Samus will be stuck in the wall. Grapple diagonally again to be pushed into the transition. Entrance condition: {
"comeInWithStoredFallSpeed": {
"fallSpeedInTiles": 1
}
}Requires: {
"notable": "Stored Moonfall Grapple Door Lock Skip"
}
"canGrappleClip"Bypasses door shell: true |
From: 3
Top Right Door
To: 2
Bottom Right Door
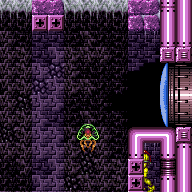
Land in the right side of the third Samus Eater on the floor of Hellway. This allows Samus to get inside the air pocket below the door. From there use Grapple to clip inside the wall and down into the transition, bypassing the door lock below. Entrance condition: {
"comeInWithSamusEaterTeleport": {
"floorPositions": [
[
15,
13
],
[
1,
13
]
],
"ceilingPositions": []
}
}Requires: "canGrappleClip" Bypasses door shell: true |
|


Enter the room with a super sink, and hold right, to clip down into the air pocket below the door. From there use Grapple to clip inside the wall and down into the transition, bypassing the door lock below. Entrance condition: {
"comeInWithSuperSink": {}
}Requires: "canGrappleClip" Bypasses door shell: true |
|
Exit condition: {
"leaveWithRunway": {
"length": 3,
"openEnd": 1
}
} |
From: 3
Top Right Door
To: 3
Top Right Door


Use a frozen Mochtroid to extend the length of the runway. Positioning the Mochtroid can be done by dropping down below then climbing back up with the frozen Mochtroid as a platform. Alternatively, freeze the Mochtroid with an angle-down shot while falling below then quickly climb back up. Requires: "h_navigateUnderwater"
"h_frozenEnemyRunway"
{
"or": [
"canMochtroidIceClimb",
{
"and": [
"Gravity",
{
"or": [
"SpaceJump",
"canWallJump"
]
}
]
}
]
}
{
"enemyDamage": {
"enemy": "Mochtroid",
"type": "contact",
"hits": 2
}
}Exit condition: {
"leaveWithRunway": {
"length": 4,
"openEnd": 1
}
}Dev note: There are many other ways to get into position, but they would require manipulating the Mochtroid as much as canMochtroidIceClimb expects. |
|


Exit condition: {
"leaveWithGrappleSwing": {
"blocks": [
{
"position": [
7,
3
],
"note": "Closest Grapple block above top-right door"
}
]
}
} |
From: 3
Top Right Door
To: 3
Top Right Door
Get a boost from a Bomb or Power Bomb while grappled to the second Grapple block below the door. Samus will enter a 'glitched grapple hanging' state where Samus' graphics will appear corrupted while swinging with Grapple. Press jump to get a good bounce off the wall at the bottom of the swing, making it possible to swing up to the door. Heavy lag can typically be avoided by holding right during the bottom half of the swing. Pressing right while inside the transition tiles will trigger the transition. Continue holding Grapple through the transition to initiate a teleport in the next room. If it is needed to trigger the transition further to the right (at position $6EE), then wait to come to a stop before pressing right. If it is needed to trigger the transition further to the left (positions $6EB or $6ED), then hold right while approaching the door. Either way, Samus should automatically be able to stand in the next room (e.g. for an X-Ray climb). Requires: "Gravity" "canGrappleBombHang" "h_bombThings" Exit condition: {
"leaveWithGrappleTeleport": {
"blockPositions": [
[
108,
13
]
]
}
} |
From: 3
Top Right Door
To: 3
Top Right Door
Get a boost from a Bomb or Power Bomb while grappled to the top Grapple block below the door. Samus will enter a 'glitched grapple hanging' state where Samus' graphics will appear corrupted while swinging with Grapple. Press jump to get a good bounce off the wall at the bottom of the swing, making it possible to swing up to the door. Heavy lag can typically be avoided by holding right during the bottom half of the swing. While swinging up, tap up to retract Grapple to avoid the ceiling (or tap up after after coming to rest against the ceiling if this happens). Samus should usually come to a stop one tile in front of the door (at horizontal position $6D7). Roll from pressing right to pressing diagonally down-right to enter the transition. If it is needed for Samus to be able to stand in the next room, then only briefly press diagonally down-right and then press up, bringing Samus to a stop at position $6E1 or $6E3; then roll from right to down-right to enter the transition (at horizontal positon $6EB). Requires: "Gravity" "canGrappleBombHang" "h_bombThings" Exit condition: {
"leaveWithGrappleTeleport": {
"blockPositions": [
[
108,
12
]
]
}
} |
From: 3
Top Right Door
To: 3
Top Right Door
Grapple to the second Grapple block from the bottom (the one partially underwater), jump off from it, morph, and press against the wall to the right. Unmorph slightly before the peak of the jump (a 3-frame window), then immediately use grapple (a 2-frame window) to get stuck standing a pixel inside the second Grapple block. Then jump (to force crouch), angle down, and grapple. Samus will enter a 'glitched grapple hanging' state where Samus' graphics will appear corrupted while swinging with Grapple. Press jump to get a good bounce off the wall at the bottom of the swing, making it possible to swing up to the door. To minimize lag, when grapple is extended horizontally release all inputs other than shot/grapple; there will still be a bit of unavoidable lag while Grapple is initially extending. Try to get a good first bounce; otherwise heavy lag may be difficult to avoid, and it may be better to retry from the beginning. Pressing right while inside the transition tiles will trigger the transition. Continue holding Grapple through the transition to initiate a teleport in the next room. If it is needed to trigger the transition further to the right (at position $6EE), then wait to come to a stop before pressing right. If it is needed to trigger the transition further to the left (positions $6EB or $6ED), then hold right while approaching the door. Either way, Samus should automatically be able to stand in the next room (e.g. for an X-Ray climb). Requires: "Gravity" "canUnmorphGrappleHang" Exit condition: {
"leaveWithGrappleTeleport": {
"blockPositions": [
[
108,
13
]
]
}
} |
From: 3
Top Right Door
To: 3
Top Right Door
Grapple to the fifth Grapple block below the door (the first one fully above the water line), jump off from it, and morph. Unmorph slightly before the peak of the jump (a 3-frame window), then immediately use grapple (a 2-frame window) to get stuck standing a pixel inside the second Grapple block. Then jump (to force crouch), angle down, and grapple. Samus will enter a 'glitched grapple hanging' state where Samus' graphics will appear corrupted while swinging with Grapple. Press jump to get a good bounce off the wall at the bottom of the swing, making it possible to swing up to the door. To minimize lag, when grapple is extended horizontally release all inputs other than shot/grapple; there will still be a bit of unavoidable lag while Grapple is initially extending. Try to get a good first bounce; otherwise heavy lag may be difficult to avoid, and it may be better to retry from the beginning. While swinging up, tap up to retract Grapple to avoid the ceiling (or tap up after after coming to rest against the ceiling if this happens). Samus should usually come to a stop one tile in front of the door (at horizontal position $6D7). Roll from pressing right to pressing diagonally down-right to enter the transition. If it is needed for Samus to be able to stand in the next room, then only briefly press diagonally down-right and then press up, bringing Samus to a stop at position $6E1 or $6E3; then roll from right to down-right to enter the transition (at horizontal positon $6EB). Requires: "Gravity" "canUnmorphGrappleHang" Exit condition: {
"leaveWithGrappleTeleport": {
"blockPositions": [
[
108,
12
]
]
}
} |
From: 3
Top Right Door
To: 3
Top Right Door
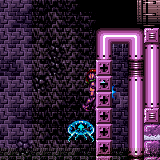
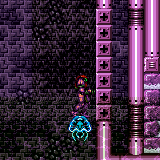
Freeze a Mochtroid at a specific position, aiming for its top to be slightly above the midpoint of the fourth Grapple block below the door. Stand on the frozen Mochtroid, and fire Grapple horizontally while walking toward the wall. If successful, Samus should clip slightly into the wall. Crouch, and fire Grapple while angling up. Samus will enter a 'glitched grapple hanging' state where Samus' graphics will appear corrupted while swinging with Grapple. Press jump to get a good bounce off the wall at the bottom of the swing, making it possible to swing up to the door. To minimize lag, when grapple is extended horizontally release all inputs other than shot/grapple; there will still be a bit of unavoidable lag while Grapple is initially extending. Try to get a good first bounce; otherwise heavy lag may be difficult to avoid, and it may be better to retry from the beginning. Pressing right while inside the transition tiles will trigger the transition. Continue holding Grapple through the transition to initiate a teleport in the next room. If it is needed to trigger the transition further to the right (at position $6EE), then wait to come to a stop before pressing right. If it is needed to trigger the transition further to the left (positions $6EB or $6ED), then hold right while approaching the door. Either way, Samus should automatically be able to stand in the next room (e.g. for an X-Ray climb). Requires: "Gravity" "canFrozenEnemyGrappleHang" Exit condition: {
"leaveWithGrappleTeleport": {
"blockPositions": [
[
108,
13
]
]
}
} |
From: 3
Top Right Door
To: 3
Top Right Door
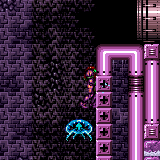
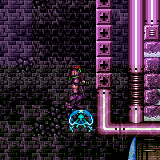
Freeze a Mochtroid at a specific position, aiming for its top to be slightly above the midpoint of the third Grapple block below the door. Stand on the frozen Mochtroid, and fire Grapple horizontally while walking toward the wall. If successful, Samus should clip slightly into the wall. Crouch, and fire Grapple while angling up. Samus will enter a 'glitched grapple hanging' state where Samus' graphics will appear corrupted while swinging with Grapple. Press jump to get a good bounce off the wall at the bottom of the swing, making it possible to swing up to the door. To minimize lag, when grapple is extended horizontally release all inputs other than shot/grapple; there will still be a bit of unavoidable lag while Grapple is initially extending. Try to get a good first bounce; otherwise heavy lag may be difficult to avoid, and it may be better to retry from the beginning. While swinging up, tap up to retract Grapple to avoid the ceiling (or tap up after after coming to rest against the ceiling if this happens). Samus should usually come to a stop one tile in front of the door (at horizontal position $6D7). Roll from pressing right to pressing diagonally down-right to enter the transition. If it is needed for Samus to be able to stand in the next room, then only briefly press diagonally down-right and then press up, bringing Samus to a stop at position $6E1 or $6E3; then roll from right to down-right to enter the transition (at horizontal positon $6EB). Requires: "Gravity" "canFrozenEnemyGrappleHang" Exit condition: {
"leaveWithGrappleTeleport": {
"blockPositions": [
[
108,
12
]
]
}
} |
|
Requires: {
"resetRoom": {
"nodes": [
3
]
}
}
{
"or": [
{
"and": [
"Plasma",
{
"cycleFrames": 70
}
]
},
{
"and": [
"Grapple",
{
"cycleFrames": 70
}
]
},
{
"and": [
"ScrewAttack",
{
"cycleFrames": 75
}
]
},
{
"and": [
{
"haveBlueSuit": {}
},
{
"cycleFrames": 75
}
]
},
{
"and": [
"Wave",
{
"cycleFrames": 80
}
]
},
{
"and": [
"Spazer",
{
"cycleFrames": 90
}
]
},
{
"and": [
"canDodgeWhileShooting",
{
"cycleFrames": 120
}
]
}
]
}Farm cycle drops: 1 Mochtroid |
|
Requires: {
"resetRoom": {
"nodes": [
3
]
}
}
"SpaceJump"
{
"or": [
{
"and": [
"canDash",
{
"or": [
{
"and": [
"ScrewAttack",
{
"cycleFrames": 710
}
]
},
{
"and": [
"Plasma",
{
"cycleFrames": 730
}
]
},
{
"and": [
"Grapple",
{
"cycleFrames": 770
}
]
},
{
"and": [
"Wave",
{
"cycleFrames": 810
}
]
},
{
"and": [
"Spazer",
{
"cycleFrames": 855
}
]
},
{
"and": [
"canDodgeWhileShooting",
"canTrickyJump",
{
"cycleFrames": 1140
}
]
}
]
}
]
},
{
"and": [
{
"haveBlueSuit": {}
},
{
"cycleFrames": 850
}
]
}
]
}Farm cycle drops: 3 Mochtroid |
|
Requires: "h_CrystalFlash" |
From: 3
Top Right Door
To: 3
Top Right Door
Farm the door Mochtroid and the one in the water. Lure one of the next pair of Mochtroids toward the spike and freeze it. Climb using this Mochtroid up to the spike, then bounce off the Mochtroid and enter X-Mode. Arm-pump to move Samus off the spike tile (watch the Mochtroid). Shinecharge, release X-Ray, and start moving toward the Mochtroid as Samus falls back toward the sand. While falling, disable Ice Beam to force the Mochtroid to unfreeze and get grabbed by it while jumping out of the sand. Shinespark windup just before the Mochtroid drain hits to interrurpt. If Samus must land back in the sand, be sure to be moving horizontally to land on top of the sand rather than sinking into it. Entrance condition: {
"comeInWithRMode": {}
}Requires: "canTrickyUseFrozenEnemies"
"canPlayInSand"
{
"or": [
{
"and": [
"h_CrystalFlashForReserveEnergy",
"h_usePowerBomb",
"canOffScreenMovement"
]
},
{
"and": [
"h_RModeCanRefillReserves",
{
"partialRefill": {
"type": "ReserveEnergy",
"limit": 40
}
}
]
}
]
}
"canBeVeryPatient"
"canXMode"
"h_XModeSpikeHit"
"h_shinechargeMaxRunway"
{
"disableEquipment": "Ice"
}
{
"autoReserveTrigger": {
"maxReserveEnergy": 63
}
}
"canRModeSparkInterrupt"
{
"or": [
"Grapple",
{
"and": [
"Gravity",
"canWallJump"
]
}
]
} |
|

In the case of carrying a blue suit, it is possible to inch forward a pixel or two at a time using X-Ray without destroying the Mochtroid. Exit condition: {
"leaveWithGModeSetup": {
"knockback": false
}
} |
{
"$schema": "../../../schema/m3-room.schema.json",
"id": 189,
"name": "Colosseum",
"area": "Maridia",
"subarea": "Inner",
"subsubarea": "Pink",
"roomAddress": "0x7D72A",
"roomEnvironments": [
{
"heated": false
}
],
"mapTileMask": [
[
1,
1,
1,
1,
1,
1,
1
],
[
1,
1,
1,
1,
1,
1,
1
]
],
"nodes": [
{
"id": 1,
"name": "Left Door",
"nodeType": "door",
"nodeSubType": "blue",
"nodeAddress": "0x001a7e0",
"doorOrientation": "left",
"doorEnvironments": [
{
"physics": "air"
}
],
"mapTileMask": [
[
2,
2,
2,
2,
1,
1,
1
],
[
2,
2,
2,
2,
1,
1,
1
]
]
},
{
"id": 2,
"name": "Bottom Right Door",
"nodeType": "door",
"nodeSubType": "green",
"nodeAddress": "0x001a7f8",
"doorOrientation": "right",
"doorEnvironments": [
{
"physics": "water"
}
],
"mapTileMask": [
[
1,
1,
1,
1,
1,
1,
1
],
[
1,
1,
1,
1,
1,
1,
2
]
]
},
{
"id": 3,
"name": "Top Right Door",
"nodeType": "door",
"nodeSubType": "red",
"nodeAddress": "0x001a7ec",
"doorOrientation": "right",
"doorEnvironments": [
{
"physics": "air"
}
],
"mapTileMask": [
[
1,
1,
1,
1,
2,
2,
2
],
[
1,
1,
1,
1,
2,
2,
1
]
]
}
],
"enemies": [
{
"id": "e1",
"groupName": "Colosseum Mochtroids",
"enemyName": "Mochtroid",
"quantity": 8,
"betweenNodes": [
1,
3
]
}
],
"strats": [
{
"link": [
1,
1
],
"name": "Base (Unlock Door)",
"requires": [],
"unlocksDoors": [
{
"types": [
"ammo"
],
"requires": []
}
],
"flashSuitChecked": true,
"blueSuitChecked": true
},
{
"link": [
1,
1
],
"name": "Base (Come In Normally)",
"entranceCondition": {
"comeInNormally": {}
},
"requires": [],
"flashSuitChecked": true,
"blueSuitChecked": true
},
{
"link": [
1,
1
],
"name": "Base (Come In With Mockball)",
"entranceCondition": {
"comeInWithMockball": {
"adjacentMinTiles": 0,
"remoteAndLandingMinTiles": [
[
0,
0
]
],
"speedBooster": "any"
}
},
"requires": [],
"flashSuitChecked": true,
"blueSuitChecked": true
},
{
"link": [
2,
2
],
"name": "Base (Unlock Door)",
"requires": [],
"unlocksDoors": [
{
"types": [
"ammo"
],
"requires": []
}
],
"flashSuitChecked": true,
"blueSuitChecked": true
},
{
"link": [
2,
2
],
"name": "Base (Come In Normally)",
"entranceCondition": {
"comeInNormally": {}
},
"requires": [],
"flashSuitChecked": true,
"blueSuitChecked": true
},
{
"link": [
2,
2
],
"name": "Base (Come In With Mockball)",
"entranceCondition": {
"comeInWithMockball": {
"adjacentMinTiles": 0,
"remoteAndLandingMinTiles": [
[
0,
0
]
],
"speedBooster": "any"
}
},
"requires": [],
"flashSuitChecked": true,
"blueSuitChecked": true
},
{
"link": [
3,
3
],
"name": "Base (Unlock Door)",
"requires": [],
"unlocksDoors": [
{
"types": [
"ammo"
],
"requires": []
}
],
"flashSuitChecked": true,
"blueSuitChecked": true
},
{
"link": [
3,
3
],
"name": "Base (Come In Normally)",
"entranceCondition": {
"comeInNormally": {}
},
"requires": [],
"flashSuitChecked": true,
"blueSuitChecked": true
},
{
"link": [
3,
3
],
"name": "Base (Come In With Mockball)",
"entranceCondition": {
"comeInWithMockball": {
"adjacentMinTiles": 0,
"remoteAndLandingMinTiles": [
[
0,
0
]
],
"speedBooster": "any"
}
},
"requires": [],
"flashSuitChecked": true,
"blueSuitChecked": true
},
{
"id": 1,
"link": [
1,
1
],
"name": "Leave with Runway",
"requires": [],
"exitCondition": {
"leaveWithRunway": {
"length": 3,
"openEnd": 1
}
},
"flashSuitChecked": true,
"blueSuitChecked": true
},
{
"id": 2,
"link": [
1,
1
],
"name": "Leave With Runway - Frozen Mochtroid",
"requires": [
"h_navigateUnderwater",
"h_frozenEnemyRunway",
{
"or": [
"canMochtroidIceClimb",
{
"and": [
"Gravity",
{
"or": [
"SpaceJump",
"canWallJump"
]
}
]
}
]
},
{
"enemyDamage": {
"enemy": "Mochtroid",
"type": "contact",
"hits": 2
}
}
],
"exitCondition": {
"leaveWithRunway": {
"length": 4,
"openEnd": 1
}
},
"flashSuitChecked": true,
"blueSuitChecked": true,
"note": [
"Use a frozen Mochtroid to extend the length of the runway.",
"Positioning the Mochtroid can be done by dropping down below then climbing back up with the frozen Mochtroid as a platform.",
"Alternatively, freeze the Mochtroid with an angle-down shot while falling below then quickly climb back up."
],
"devNote": "There are many other ways to get into position, but they would require manipulating the Mochtroid as much as canMochtroidIceClimb expects."
},
{
"id": 3,
"link": [
1,
1
],
"name": "Mochtroid Farm (1 Mochtroid)",
"requires": [
{
"resetRoom": {
"nodes": [
1
]
}
},
{
"or": [
{
"and": [
"Plasma",
{
"cycleFrames": 70
}
]
},
{
"and": [
"Grapple",
{
"cycleFrames": 70
}
]
},
{
"and": [
"ScrewAttack",
{
"cycleFrames": 75
}
]
},
{
"and": [
{
"haveBlueSuit": {}
},
{
"cycleFrames": 75
}
]
},
{
"and": [
"Wave",
{
"cycleFrames": 80
}
]
},
{
"and": [
"Spazer",
{
"cycleFrames": 90
}
]
},
{
"and": [
"canDodgeWhileShooting",
{
"cycleFrames": 120
}
]
}
]
}
],
"farmCycleDrops": [
{
"enemy": "Mochtroid",
"count": 1
}
],
"flashSuitChecked": true,
"blueSuitChecked": true
},
{
"id": 109,
"link": [
1,
1
],
"name": "Mochtroid Farm (4 Mochtroids)",
"requires": [
{
"resetRoom": {
"nodes": [
1
]
}
},
"SpaceJump",
{
"or": [
{
"and": [
"canDash",
{
"or": [
{
"and": [
"Plasma",
{
"cycleFrames": 1035
}
]
},
{
"and": [
"Grapple",
{
"cycleFrames": 1050
}
]
},
{
"and": [
"ScrewAttack",
{
"cycleFrames": 1080
}
]
},
{
"and": [
"Wave",
{
"cycleFrames": 1090
}
]
},
{
"and": [
"Spazer",
{
"cycleFrames": 1150
}
]
},
{
"and": [
"canDodgeWhileShooting",
{
"cycleFrames": 1260
}
]
}
]
}
]
},
{
"and": [
{
"haveBlueSuit": {}
},
{
"cycleFrames": 1580
}
]
}
]
}
],
"farmCycleDrops": [
{
"enemy": "Mochtroid",
"count": 4
}
],
"flashSuitChecked": true,
"blueSuitChecked": true
},
{
"id": 4,
"link": [
1,
1
],
"name": "Crystal Flash",
"requires": [
"h_CrystalFlash"
],
"flashSuitChecked": true,
"blueSuitChecked": true
},
{
"id": 117,
"link": [
1,
1
],
"name": "Frozen Mochtroid, X-Mode Shinecharge, R-Mode Spark Interrupt",
"entranceCondition": {
"comeInWithRMode": {}
},
"requires": [
"canTrickyUseFrozenEnemies",
{
"or": [
{
"enemyKill": {
"enemies": [
[
"Mochtroid",
"Mochtroid"
]
],
"excludedWeapons": [
"PowerBeam",
"Ice",
"Bombs"
]
}
},
"canInsaneJump"
]
},
"canPlayInSand",
{
"or": [
{
"and": [
"h_CrystalFlashForReserveEnergy",
"h_usePowerBomb",
"canOffScreenMovement"
]
},
{
"and": [
"h_RModeCanRefillReserves",
{
"partialRefill": {
"type": "ReserveEnergy",
"limit": 40
}
}
]
}
]
},
"canBeVeryPatient",
"canXMode",
"h_XModeSpikeHit",
"h_shinechargeMaxRunway",
{
"disableEquipment": "Ice"
},
{
"autoReserveTrigger": {
"maxReserveEnergy": 63
}
},
"canRModeSparkInterrupt",
{
"or": [
"Grapple",
{
"and": [
"Gravity",
"canWallJump"
]
}
]
}
],
"flashSuitChecked": true,
"blueSuitChecked": true,
"note": [
"Farm the door Mochtroid and the one in the water. Jump over the sand pit and freeze the third Mochtroid.",
"Climb using this Mochtroid up to the spike, then bounce off the Mochtroid and enter X-Mode.",
"Arm-pump to move Samus off the spike tile (watch the Mochtroid).",
"Shinecharge, release X-Ray, and start moving left as Samus falls back toward the sand.",
"While falling, disable Ice Beam to force the Mochtroid to unfreeze and get grabbed by it while jumping out of the sand.",
"Shinespark windup just before the Mochtroid drain hits to interrurpt. If Samus must land back in the sand, be sure to be",
"moving horizontally to land on top of the sand rather than sinking into it."
]
},
{
"id": 5,
"link": [
1,
1
],
"name": "G-Mode Setup - Get Hit By Mochtroid",
"requires": [],
"exitCondition": {
"leaveWithGModeSetup": {
"knockback": false
}
},
"flashSuitChecked": true,
"blueSuitChecked": true,
"note": "In the case of carrying a blue suit, it is possible to inch forward a pixel or two at a time using X-Ray without destroying the Mochtroid."
},
{
"id": 6,
"link": [
1,
1
],
"name": "Leave With Grapple Teleport (Bottom Position)",
"requires": [
"Gravity",
"canGrappleBombHang",
"h_bombThings"
],
"exitCondition": {
"leaveWithGrappleTeleport": {
"blockPositions": [
[
3,
13
]
]
}
},
"flashSuitChecked": true,
"blueSuitChecked": true,
"note": [
"Get a boost from a Bomb or Power Bomb while grappled to the top Grapple block below the door.",
"Samus will enter a 'glitched grapple hanging' state where Samus' graphics will appear corrupted while swinging with Grapple.",
"Press jump to get a good bounce off the wall at the bottom of the swing, making it possible to swing up to the door.",
"To avoid heavy lag, hold left while near the top of the swing, and hold angle down for the middle of the swing.",
"Samus should usually enter the transition with the ability to stand in the next room.",
"If needing to make sure that Samus can stand, or to ensure the transition happens further to the right, retract Grapple by pressing up while approaching door;",
"then after coming to a stop, roll from holding left to holding diagonal down-left to approach the door at a controlled low speed."
]
},
{
"id": 7,
"link": [
1,
1
],
"name": "Leave With Grapple Teleport (Top Position)",
"requires": [
"Gravity",
"canGrappleBombHang",
"h_bombThings"
],
"exitCondition": {
"leaveWithGrappleTeleport": {
"blockPositions": [
[
3,
12
]
]
}
},
"flashSuitChecked": true,
"blueSuitChecked": true,
"note": [
"Get a boost from a Bomb or Power Bomb while grappled to the top Grapple block below the door.",
"Samus will enter a 'glitched grapple hanging' state where Samus' graphics will appear corrupted while swinging with Grapple.",
"Press jump to get a good bounce off the wall at the bottom of the swing, making it possible to swing up to the door.",
"To avoid heavy lag, hold left while near the top of the swing, and hold angle down for the middle of the swing.",
"Press up while approaching the door to retract Grapple to avoid bonking the ceiling.",
"Samus will typically come to rest at horizontal position $29.",
"From here it is possible to roll from pressing left to pressing diagonally down-left to enter the transition, though this will create heavy lag and Samus will not be able to stand in the next room.",
"Alternatively, only briefly press diagonally down-left and then press up, bringing Samus to a stop further left, typically at one of three positions $19, $1C, or $26.",
"If Samus stops at position $26, then the process can be repeated to move closer to the door again, with a possibility of reaching position $19.",
"If Samus then stops at positions $19 or $1C, then rolling from left to down-left will bring Samus into the transition in a pose that will be able to stand, and at horizontal position $15 (as far right as possible).",
"If Samus stops at position $17 or closer, the setup will have to be started over.",
"If needed to transition further to the left, it can be done from position $1C by rolling from left to down (with a brief down-left input), to result in a transition at a position of $14 or less."
]
},
{
"id": 8,
"link": [
1,
1
],
"name": "Leave With Grapple Teleport (Unmorph, Bottom Position)",
"requires": [
"Gravity",
"canUnmorphGrappleHang"
],
"exitCondition": {
"leaveWithGrappleTeleport": {
"blockPositions": [
[
3,
13
]
]
}
},
"flashSuitChecked": true,
"blueSuitChecked": true,
"note": [
"Grapple to the second Grapple block from the bottom of the room, jump off from it, morph, and press against the Grapple wall to the left.",
"Unmorph slightly before the peak of the jump (an 8-frame window), then immediately use grapple (a 2-frame window) to get stuck standing a pixel or two inside the second Grapple block below the door.",
"Then jump (to force crouch), angle down, and grapple.",
"Samus will enter a 'glitched grapple hanging' state where Samus' graphics will appear corrupted while swinging with Grapple.",
"Press jump to get a good bounce off the wall at the bottom of the swing, making it possible to swing up to the door.",
"To avoid heavy lag, hold down during the bottom part of the swing, and hold angle up during the top part.",
"Samus should usually enter the transition with the ability to stand in the next room.",
"If needing to make sure that Samus can stand, or to ensure the transition happens further to the right, retract Grapple by pressing up while approaching door;",
"then after coming to a stop, roll from holding left to holding diagonal down-left to approach the door at a controlled low speed."
]
},
{
"id": 9,
"link": [
1,
1
],
"name": "Leave With Grapple Teleport (Unmorph, Top Position)",
"requires": [
"Gravity",
"canUnmorphGrappleHang"
],
"exitCondition": {
"leaveWithGrappleTeleport": {
"blockPositions": [
[
3,
12
]
]
}
},
"flashSuitChecked": true,
"blueSuitChecked": true,
"note": [
"Grapple to the second Grapple block from the bottom of the room, jump off from it, morph, and press against the Grapple wall to the left.",
"Unmorph slightly before the peak of the jump (an 8-frame window), then immediately use grapple (a 2-frame window) to get stuck standing a pixel or two inside the second Grapple block below the door.",
"Then jump (to force crouch), angle up, and grapple.",
"Samus will enter a 'glitched grapple hanging' state where Samus' graphics will appear corrupted while swinging with Grapple.",
"Press jump to get a good bounce off the wall at the bottom of the swing, making it possible to swing up to the door.",
"To avoid heavy lag, hold down during the bottom part of the swing, and hold angle up during the top part.",
"Press up while approaching the door to retract Grapple to avoid bonking the ceiling.",
"Samus will typically come to rest at horizontal position $29.",
"From here it is possible to roll from pressing left to pressing diagonally down-left to enter the transition, though this will create heavy lag and Samus will not be able to stand in the next room.",
"Alternatively, only briefly press diagonally down-left and then press up, bringing Samus to a stop further left, typically at one of three positions $19, $1C, or $26.",
"If Samus stops at position $26, then the process can be repeated to move closer to the door again, with a possibility of reaching position $19.",
"If Samus then stops at positions $19 or $1C, then rolling from left to down-left will bring Samus into the transition in a pose that will be able to stand, and at horizontal position $15 (as far right as possible).",
"If Samus stops at position $17 or closer, the setup will have to be started over.",
"If needed to transition further to the left, it can be done from position $1C by rolling from left to down (with a brief down-left input), to result in a transition at a position of $14 or less."
]
},
{
"id": 90,
"link": [
1,
1
],
"name": "Leave With Grapple Teleport (Frozen Mochtroid, Bottom Position)",
"requires": [
"Gravity",
"canFrozenEnemyGrappleHang"
],
"exitCondition": {
"leaveWithGrappleTeleport": {
"blockPositions": [
[
3,
13
]
]
}
},
"flashSuitChecked": true,
"blueSuitChecked": true,
"note": [
"Freeze a Mochtroid at a specific position, where its top is about at the midpoint of the fourth Grapple block below the door.",
"Stand on the frozen Mochtroid, and fire Grapple horizontally while walking toward the wall.",
"If successful, Samus should clip slightly into the wall.",
"Crouch, and fire Grapple while angling up.",
"Samus will enter a 'glitched grapple hanging' state where Samus' graphics will appear corrupted while swinging with Grapple.",
"Press jump to get a good bounce off the wall at the bottom of the swing, making it possible to swing up to the door.",
"To avoid heavy lag, hold down during the bottom part of the swing, and hold angle up during the top part.",
"Samus should usually enter the transition with the ability to stand in the next room.",
"If needing to make sure that Samus can stand, or to ensure the transition happens further to the right, retract Grapple by pressing up while approaching door;",
"then after coming to a stop, roll from holding left to holding diagonal down-left to approach the door at a controlled low speed."
]
},
{
"id": 91,
"link": [
1,
1
],
"name": "Leave With Grapple Teleport (Frozen Mochtroid, Top Position)",
"requires": [
"Gravity",
"canFrozenEnemyGrappleHang"
],
"exitCondition": {
"leaveWithGrappleTeleport": {
"blockPositions": [
[
3,
12
]
]
}
},
"flashSuitChecked": true,
"blueSuitChecked": true,
"note": [
"Freeze a Mochtroid at a specific position, where its top is about at the midpoint of the third Grapple block below the door.",
"Stand on the frozen Mochtroid, and fire Grapple horizontally while walking toward the wall.",
"If successful, Samus should clip slightly into the wall.",
"Crouch, and fire Grapple while angling up.",
"Samus will enter a 'glitched grapple hanging' state where Samus' graphics will appear corrupted while swinging with Grapple.",
"Press jump to get a good bounce off the wall at the bottom of the swing, making it possible to swing up to the door.",
"To avoid heavy lag, hold down during the bottom part of the swing, and hold angle up during the top part.",
"Press up while approaching the door to retract Grapple to avoid bonking the ceiling.",
"Samus will typically come to rest at horizontal position $29.",
"From here it is possible to roll from pressing left to pressing diagonally down-left to enter the transition, though this will create heavy lag and Samus will not be able to stand in the next room.",
"Alternatively, only briefly press diagonally down-left and then press up, bringing Samus to a stop further left, typically at one of three positions $19, $1C, or $26.",
"If Samus stops at position $26, then the process can be repeated to move closer to the door again, with a possibility of reaching position $19.",
"If Samus then stops at positions $19 or $1C, then rolling from left to down-left will bring Samus into the transition in a pose that will be able to stand, and at horizontal position $15 (as far right as possible).",
"If Samus stops at position $17 or closer, the setup will have to be started over.",
"If needed to transition further to the left, it can be done from position $1C by rolling from left to down (with a brief down-left input), to result in a transition at a position of $14 or less."
]
},
{
"id": 10,
"link": [
1,
2
],
"name": "Shinespark",
"entranceCondition": {
"comeInShinecharged": {}
},
"requires": [
{
"notable": "Full Halfie Shinespark"
},
{
"shineChargeFrames": 20
},
"canShinechargeMovementComplex",
"canTrickyJump",
{
"shinespark": {
"frames": 128,
"excessFrames": 21
}
}
],
"flashSuitChecked": true,
"blueSuitChecked": true
},
{
"id": 11,
"link": [
1,
2
],
"name": "Blue Space Jump, Leave With Temporary Blue",
"entranceCondition": {
"comeInGettingBlueSpeed": {
"length": 2,
"openEnd": 1,
"maxExtraRunSpeed": "$2.4"
}
},
"requires": [
"canBlueSpaceJump",
"canPreciseSpaceJump",
"canChainTemporaryBlue"
],
"exitCondition": {
"leaveWithTemporaryBlue": {}
},
"unlocksDoors": [
{
"types": [
"ammo"
],
"requires": []
}
],
"flashSuitChecked": true,
"blueSuitChecked": true
},
{
"id": 85,
"link": [
1,
2
],
"name": "Use Stored Spark",
"requires": [
"h_storedSpark",
"canDash",
{
"shinespark": {
"frames": 112,
"excessFrames": 19
}
}
],
"flashSuitChecked": true,
"blueSuitChecked": true,
"note": "Jumping to the first platform is relatively tight without a wall jump and requires disabling HiJump."
},
{
"id": 12,
"link": [
1,
3
],
"name": "Base",
"requires": [
"Gravity",
{
"or": [
{
"and": [
"HiJump",
"canWallJump",
{
"or": [
"canPlayInSand",
"canConsecutiveWallJump"
]
}
]
},
{
"and": [
"canTrickyWallJump",
"canConsecutiveWallJump"
]
},
{
"and": [
"canPreciseGrapple",
"canCarefulJump"
]
}
]
},
{
"or": [
{
"ammo": {
"type": "Missile",
"count": 2
}
},
{
"ammo": {
"type": "Super",
"count": 2
}
},
"canUseGrapple",
"canDodgeWhileShooting",
"Spazer",
"Wave",
"Plasma",
"ScrewAttack",
{
"haveBlueSuit": {}
},
{
"enemyDamage": {
"enemy": "Mochtroid",
"type": "contact",
"hits": 1
}
}
]
},
{
"or": [
"canPlayInSand",
{
"spikeHits": 2
}
]
},
{
"or": [
"Grapple",
{
"noBlueSuit": {}
}
]
}
],
"flashSuitChecked": true,
"blueSuitChecked": true,
"note": [
"Cross the room with Grapple or wall jumps.",
"Under the sand is spikes. Be sure not to turn around before landing or Samus will fall straight through the sand.",
"Breaking spin while midair, such as by tapping an angle button, will help Samus land less deep in the sand - a quick jump when landing will give her a much higher jump.",
"The last wall jump to get around the corner is tricky but it does not require a delayed wall jump, even without HiJump."
]
},
{
"id": 121,
"link": [
1,
3
],
"name": "Blue Suit Wall Jump",
"requires": [
{
"notable": "Blue Suit Sand Traversal"
},
{
"haveBlueSuit": {}
},
"Gravity",
"canConsecutiveWallJump"
],
"flashSuitChecked": true,
"blueSuitChecked": true,
"note": [
"Use normalized movement to land on the sand without losing a blue suit.",
"One way is to do the following:",
"from the platforms at the top of the room, simply walk off the ledge;",
"from the platforms two tiles above the sand, do a full height jump;",
"from the sand itself, do full height jumps, with or without breaking spin."
],
"detailNote": [
"This same approach to the normalized movement can work with or without HiJump."
]
},
{
"id": 13,
"link": [
1,
3
],
"name": "Space Jump",
"requires": [
"SpaceJump",
{
"or": [
{
"ammo": {
"type": "Missile",
"count": 3
}
},
{
"ammo": {
"type": "Super",
"count": 3
}
},
"canUseGrapple",
"canTrickyJump",
"canDodgeWhileShooting",
"Spazer",
"Wave",
"Plasma",
"ScrewAttack",
{
"haveBlueSuit": {}
},
{
"enemyDamage": {
"enemy": "Mochtroid",
"type": "contact",
"hits": 2
}
}
]
}
],
"flashSuitChecked": true,
"blueSuitChecked": true
},
{
"id": 14,
"link": [
1,
3
],
"name": "Full Halfie Shinespark (Forward)",
"entranceCondition": {
"comeInShinecharged": {}
},
"requires": [
{
"shineChargeFrames": 20
},
{
"notable": "Full Halfie Shinespark"
},
"canShinechargeMovementComplex",
"canTrickyJump",
{
"or": [
{
"shinespark": {
"frames": 128,
"excessFrames": 6
}
},
{
"and": [
{
"shinespark": {
"frames": 128,
"excessFrames": 21
}
},
"canControlShinesparkEnd",
"canWallJump"
]
}
]
}
],
"flashSuitChecked": true,
"blueSuitChecked": true,
"note": [
"Initiate a Shinespark 1 tile below the ceiling to cross all of the room.",
"Shinesparking too high or too low will crash and Samus will likely fall into the sand."
]
},
{
"id": 15,
"link": [
1,
3
],
"name": "IBJ",
"requires": [
{
"noBlueSuit": {}
},
"Gravity",
"canLongIBJ",
"canJumpIntoIBJ",
{
"or": [
{
"and": [
"canTrickyJump",
"can4HighMidAirMorph",
"canPlayInSand"
]
},
"h_useSpringBall"
]
},
{
"or": [
"canDoubleBombJump",
"canStaggeredIBJ",
"canBePatient"
]
}
],
"flashSuitChecked": true,
"blueSuitChecked": true,
"note": [
"Start an IBJ by either bouncing on the sand with Spring Ball, doing a stationary spinjump on the sand,",
"or by crouch jumping in the sand while holding down."
]
},
{
"id": 122,
"link": [
1,
3
],
"name": "Blue Suit IBJ",
"requires": [
{
"notable": "Blue Suit Sand Traversal"
},
{
"haveBlueSuit": {}
},
"Gravity",
"canLongIBJ",
"canJumpIntoIBJ",
"can4HighMidAirMorph"
],
"flashSuitChecked": true,
"blueSuitChecked": true,
"note": [
"Use normalized movement to land on the sand without losing a blue suit.",
"One way is to do the following:",
"from the platforms at the height of the top door, simply walk off the ledge;",
"from the platforms two tiles above the sand, do a full height jump;",
"from the sand itself, do full height spin jumps, ideally without breaking spin;",
"from the high platform in the center of the room, jump up to bonk the ceiling before falling into the sand."
],
"detailNote": [
"This same approach to the normalized movement can work with or without HiJump."
]
},
{
"id": 16,
"link": [
1,
3
],
"name": "Spring Ball Jump",
"requires": [
{
"noBlueSuit": {}
},
"Gravity",
"HiJump",
"canPlayInSand",
"canTrickySpringBallJump"
],
"flashSuitChecked": true,
"blueSuitChecked": true
},
{
"id": 123,
"link": [
1,
3
],
"name": "Blue Suit Spring Ball Jump",
"requires": [
{
"notable": "Blue Suit Sand Traversal"
},
{
"haveBlueSuit": {}
},
"Gravity",
"HiJump",
"canPlayInSand",
"canTrickySpringBallJump"
],
"flashSuitChecked": true,
"blueSuitChecked": true,
"note": [
"Use normalized movement to land on the sand without losing a blue suit.",
"One way is to do the following:",
"from the platforms at the top of the room, simply walk off the ledge;",
"from the platforms two tiles above the sand, do a full height jump;",
"from the sand itself, do full height jumps, with or without breaking spin."
]
},
{
"id": 17,
"link": [
1,
3
],
"name": "Suitless Grapple",
"requires": [
"canSuitlessMaridia",
"canDodgeWhileShooting",
"canPreciseGrapple",
{
"or": [
"canInsaneJump",
"canPlayInSand"
]
},
{
"or": [
"HiJump",
"canTrickyJump"
]
},
"h_complexToCarryFlashSuit"
],
"flashSuitChecked": true,
"blueSuitChecked": true,
"note": [
"Use Grapple Beam to cross the room. The first two room segments can be safely grappled across from in the water.",
"The third room segment grapple is tricky. It is possible to use the spikes as platforms instead."
]
},
{
"id": 18,
"link": [
1,
3
],
"name": "Spike Platforming with Move Assist (Left to Right)",
"requires": [
{
"notable": "Spike Platforming with Move Assist"
},
"canDash",
"canWallJump",
"canSuitlessMaridia",
"canPlayInSand",
"canTrickyJump",
"Morph",
"canUseIFrames",
"canNeutralDamageBoost",
{
"spikeHits": 3
},
{
"or": [
{
"and": [
"HiJump",
"canTrickySpringBallJump"
]
},
{
"and": [
"canMochtroidIceClimb",
{
"or": [
"canInsaneJump",
{
"enemyDamage": {
"enemy": "Mochtroid",
"type": "contact",
"hits": 1
}
}
]
}
]
}
]
},
{
"or": [
{
"spikeHits": 1
},
"canHorizontalDamageBoost"
]
}
],
"flashSuitChecked": true,
"blueSuitChecked": true,
"note": [
"Use the spikes, which are not in the water, to jump from platform to platform as a way to cross the room.",
"Requires knowing the position of every spike in the room, and hitting the spikes while morphed can help.",
"The first jump is particularly tough. A Spring Ball jump from the sand to the spike with HiJump, or a frozen Mochtroid can be used to get past it."
]
},
{
"id": 19,
"link": [
1,
3
],
"name": "Spike Platforming with Spring Ball (Left to Right)",
"entranceCondition": {
"comeInRunning": {
"speedBooster": "any",
"minTiles": 2
}
},
"requires": [
{
"notable": "Spike Platforming with Spring Ball (Left to Right)"
},
"canWallJump",
"Morph",
"canUseIFrames",
"h_useSpringBall",
"canMockball",
{
"spikeHits": 3
},
{
"or": [
{
"spikeHits": 1
},
"canHorizontalDamageBoost"
]
}
],
"flashSuitChecked": true,
"blueSuitChecked": true,
"note": [
"Use the spikes, which are not in the water, to jump from platform to platform as a way to cross the room.",
"Requires knowing the position of every spike in the room, and hitting the spikes while morphed can help.",
"The first jump is particularly tough. A springball rolling jump can be used to get past it."
]
},
{
"id": 20,
"link": [
1,
3
],
"name": "Spike Platforming with No Equipment (Left to Right)",
"requires": [
{
"notable": "Spike Platforming with No Equipment"
},
"canDash",
"canWallJump",
"canInsaneJump",
"canHorizontalDamageBoost",
"canUseIFrames",
{
"spikeHits": 3
},
{
"or": [
"Morph",
{
"spikeHits": 2
}
]
},
"h_extremelyTrickyToCarryFlashSuit"
],
"flashSuitChecked": true,
"blueSuitChecked": true,
"note": [
"Land on each set of spikes as a way to jump to the next safe platform.",
"The first jump can be done with a very precise damage boost to bounce forward off the spike, or using morph."
],
"devNote": "Positioning on the spikes is harder to control without morph."
},
{
"id": 21,
"link": [
1,
3
],
"name": "Mochtroid Ice Climb (Left to Right)",
"requires": [
"h_navigateUnderwater",
"canMochtroidIceClimb",
"canPlayInSand",
"canCameraManip",
"canTrickyJump",
{
"or": [
"Gravity",
"HiJump"
]
},
{
"or": [
"canInsaneJump",
{
"enemyDamage": {
"enemy": "Mochtroid",
"type": "contact",
"hits": 3
}
}
]
},
"h_complexToCarryFlashSuit"
],
"flashSuitChecked": true,
"blueSuitChecked": false,
"note": [
"Climb a mochtroid with ice using the wall to help guide them.",
"It is very easy to take damage if not preemptive with freezes.",
"Mochtroid movement and freeze timing gets harder at the waterline."
]
},
{
"id": 22,
"link": [
1,
3
],
"name": "Mochtroid Suitless, HiJumpless Ice Climb (Left to Right)",
"requires": [
{
"notable": "Mochtroid Suitless, HiJumpless Ice Climb"
},
"canSuitlessMaridia",
"canMochtroidIceClimb",
"canPlayInSand",
"canCameraManip",
"canTrickyJump",
{
"or": [
"canInsaneJump",
{
"enemyDamage": {
"enemy": "Mochtroid",
"type": "contact",
"hits": 3
}
}
]
},
{
"or": [
"canBePatient",
"canWallJump"
]
},
"h_trickyToCarryFlashSuit"
],
"flashSuitChecked": true,
"blueSuitChecked": false,
"note": [
"Climb a mochtroid with ice using the wall to help guide them.",
"Mochtroid damage is pretty hard to avoid, but it is possible."
]
},
{
"id": 23,
"link": [
1,
3
],
"name": "Blue Space Jump, Leave With Temporary Blue",
"entranceCondition": {
"comeInGettingBlueSpeed": {
"length": 2,
"openEnd": 1
}
},
"requires": [
"canBlueSpaceJump",
"canPreciseSpaceJump",
"canChainTemporaryBlue"
],
"exitCondition": {
"leaveWithTemporaryBlue": {}
},
"unlocksDoors": [
{
"types": [
"ammo"
],
"requires": []
}
],
"flashSuitChecked": true,
"blueSuitChecked": true
},
{
"id": 24,
"link": [
1,
3
],
"name": "Grapple Teleport Door Lock Skip",
"entranceCondition": {
"comeInWithGrappleTeleport": {
"blockPositions": [
[
108,
12
],
[
108,
13
]
]
}
},
"requires": [],
"bypassesDoorShell": "yes",
"flashSuitChecked": true,
"blueSuitChecked": true
},
{
"id": 25,
"link": [
1,
3
],
"name": "Carry Grapple Teleport (Top Position)",
"entranceCondition": {
"comeInWithGrappleTeleport": {
"blockPositions": [
[
108,
12
]
]
}
},
"requires": [],
"exitCondition": {
"leaveWithGrappleTeleport": {
"blockPositions": [
[
108,
12
]
]
}
},
"bypassesDoorShell": "yes",
"flashSuitChecked": true,
"blueSuitChecked": true
},
{
"id": 26,
"link": [
1,
3
],
"name": "Carry Grapple Teleport (Bottom Position)",
"entranceCondition": {
"comeInWithGrappleTeleport": {
"blockPositions": [
[
108,
13
]
]
}
},
"requires": [],
"exitCondition": {
"leaveWithGrappleTeleport": {
"blockPositions": [
[
108,
13
]
]
}
},
"bypassesDoorShell": "yes",
"flashSuitChecked": true,
"blueSuitChecked": true
},
{
"id": 86,
"link": [
1,
3
],
"name": "Use Stored Spark",
"requires": [
"h_storedSpark",
{
"shinespark": {
"frames": 112,
"excessFrames": 5
}
}
],
"flashSuitChecked": true,
"blueSuitChecked": true,
"note": "Jumping to the first platform is relatively tight without a wall jump and requires disabling HiJump."
},
{
"id": 94,
"link": [
2,
1
],
"name": "Come In Shinecharged, Shinespark (HiJump Gravity Jump)",
"entranceCondition": {
"comeInShinecharged": {}
},
"requires": [
"canGravityJump",
"HiJump",
"canShinechargeMovementTricky",
{
"or": [
{
"and": [
"canSpeedyJump",
{
"shineChargeFrames": 90
},
{
"shinespark": {
"frames": 116,
"excessFrames": 5
}
}
]
},
{
"and": [
{
"shineChargeFrames": 125
},
{
"shinespark": {
"frames": 125,
"excessFrames": 5
}
}
]
}
]
}
],
"flashSuitChecked": true,
"blueSuitChecked": true
},
{
"id": 27,
"link": [
2,
1
],
"name": "Blue Space Jump, Leave With Temporary Blue (Womple Jump)",
"entranceCondition": {
"comeInGettingBlueSpeed": {
"length": 1,
"openEnd": 1,
"maxExtraRunSpeed": "$1.9"
}
},
"requires": [
"Gravity",
"HiJump",
"canBlueSpaceJump",
"canPreciseSpaceJump",
"canChainTemporaryBlue"
],
"exitCondition": {
"leaveWithTemporaryBlue": {}
},
"unlocksDoors": [
{
"types": [
"ammo"
],
"requires": []
}
],
"flashSuitChecked": true,
"blueSuitChecked": true,
"devNote": "This can be done at greater speed (at least up to $2.3) but would be more difficult."
},
{
"id": 28,
"link": [
2,
1
],
"name": "Grapple Teleport",
"entranceCondition": {
"comeInWithGrappleTeleport": {
"blockPositions": [
[
5,
3
],
[
7,
2
]
]
}
},
"requires": [],
"flashSuitChecked": true,
"blueSuitChecked": true
},
{
"id": 29,
"link": [
2,
1
],
"name": "Grapple Teleport Door Lock Skip",
"entranceCondition": {
"comeInWithGrappleTeleport": {
"blockPositions": [
[
3,
12
],
[
3,
13
]
]
}
},
"requires": [],
"bypassesDoorShell": "yes",
"flashSuitChecked": true,
"blueSuitChecked": true
},
{
"id": 30,
"link": [
2,
1
],
"name": "Carry Grapple Teleport (Top Position)",
"entranceCondition": {
"comeInWithGrappleTeleport": {
"blockPositions": [
[
3,
12
]
]
}
},
"requires": [],
"exitCondition": {
"leaveWithGrappleTeleport": {
"blockPositions": [
[
3,
12
]
]
}
},
"bypassesDoorShell": "yes",
"flashSuitChecked": true,
"blueSuitChecked": true
},
{
"id": 31,
"link": [
2,
1
],
"name": "Carry Grapple Teleport (Bottom Position)",
"entranceCondition": {
"comeInWithGrappleTeleport": {
"blockPositions": [
[
3,
13
]
]
}
},
"requires": [],
"exitCondition": {
"leaveWithGrappleTeleport": {
"blockPositions": [
[
3,
13
]
]
}
},
"bypassesDoorShell": "yes",
"flashSuitChecked": true,
"blueSuitChecked": true
},
{
"id": 32,
"link": [
2,
1
],
"name": "Grapple Teleport X-Ray Climb",
"entranceCondition": {
"comeInWithGrappleTeleport": {
"blockPositions": [
[
2,
28
],
[
2,
29
]
]
}
},
"requires": [
"canXRayClimb"
],
"bypassesDoorShell": "yes",
"flashSuitChecked": true,
"blueSuitChecked": true,
"note": [
"Exit the previous room with Samus in a standing pose (while grappled).",
"After teleporting, press right to release Grapple while staying standing (not being forced into a crouch).",
"Then X-ray climb 1 screen to get up to the door transition, without needing to open the door."
]
},
{
"id": 33,
"link": [
2,
2
],
"name": "Frozen Mochtroid Grapple Clip Door Lock Skip",
"requires": [
{
"notable": "Frozen Mochtroid Grapple Clip Door Lock Skip"
},
{
"or": [
{
"and": [
"Gravity",
"canUseFrozenEnemies",
"canCrouchJump",
"canCeilingClip"
]
},
{
"and": [
"h_XRayMorphIceClip",
"h_complexToCarryBlueSuit"
]
},
{
"and": [
"h_highPixelIceClip",
"h_trickyToCarryBlueSuit"
]
}
]
},
"canGrappleClip"
],
"bypassesDoorShell": "yes",
"flashSuitChecked": true,
"blueSuitChecked": true,
"note": [
"Crouch and freeze a Mochtroid to clip into the space behind the grapple blocks.",
"Jump and tap grapple while aiming diagonally to be pushed into the wall just the right amount.",
"Samus should be one tile below the grapple blocks and fully in the wall.",
"Too short a tap and the next grapple will not work, too long and Samus will be stuck in the wall.",
"Grapple diagonally again to be pushed into the transition."
],
"devNote": [
"The 2-3 pixel window is trivial to get by crouching, the high pixel clip is easier here than normal, as no precise down grab is needed.",
"The canCrouchJump is not a h_underwaterCrouchJump, because Gravity is required."
]
},
{
"id": 34,
"link": [
2,
2
],
"name": "Grapple Bomb Hang Door Lock Skip",
"requires": [
{
"notable": "Grapple Bomb Hang Door Lock Skip"
},
"Gravity",
"h_bombThings",
"canGrappleBombHang",
"canGrappleClip"
],
"bypassesDoorShell": "yes",
"flashSuitChecked": true,
"blueSuitChecked": true,
"note": [
"Get a boost from a Bomb or Power Bomb while grappled to the second Grapple block below the top right door.",
"Samus will enter a 'glitched grapple hanging' state where Samus' graphics will appear corrupted while swinging with Grapple.",
"Press jump to get a good bounce off the wall at the bottom of the swing, making it possible to swing up to close the door.",
"Heavy lag can typically be avoided by holding right during the bottom half of the swing.",
"Retract Grapple while approaching the door.",
"Samus should come to a stop about a tile in front of the door (at horizontal position $6D9).",
"Press right and then left, and Samus will fall through the floor.",
"Back to the right within the air pocket, then jump and use Grapple diagonally up against the second Grapple block from the bottom, near its top.",
"Samus should be pushed most of the way inside the wall; if not, morph and roll out to try again.",
"Once in position far enough inside the wall, grapple diagonally up again to be pushed into the transition."
]
},
{
"id": 35,
"link": [
2,
2
],
"name": "Unmorph Grapple Hang Door Lock Skip",
"requires": [
{
"notable": "Unmorph Grapple Hang Door Lock Skip"
},
"Gravity",
"canUnmorphGrappleHang",
"canGrappleClip"
],
"bypassesDoorShell": "yes",
"flashSuitChecked": true,
"blueSuitChecked": true,
"note": [
"Grapple to the second Grapple block from the bottom (the one partially underwater), jump off from it, morph, and press against the wall to the right.",
"Unmorph slightly before the peak of the jump (a 3-frame window), then immediately use grapple (a 2-frame window) to get stuck standing a pixel inside the second Grapple block.",
"Then jump (to force crouch), angle down, and grapple.",
"Press jump to get a good bounce off the wall at the bottom of the swing, making it possible to swing up to close the door.",
"To minimize lag, when grapple is extended horizontally release all inputs other than shot/grapple; there will still be a bit of unavoidable lag while Grapple is initially extending.",
"Try to get a good first bounce; otherwise heavy lag may be difficult to avoid, and it may be better to retry from the beginning.",
"Retract Grapple while approaching the door.",
"Samus should come to a stop about a tile in front of the door (at horizontal position $6D9).",
"Press right and then left, and Samus will fall through the floor.",
"Back to the right within the air pocket, then jump and use Grapple diagonally up against the second Grapple block from the bottom, near its top.",
"Samus should be pushed most of the way inside the wall; if not, morph and roll out to try again.",
"Once in position far enough inside the wall, grapple diagonally up again to be pushed into the transition."
]
},
{
"id": 36,
"link": [
2,
2
],
"name": "Leave with Runway",
"requires": [],
"exitCondition": {
"leaveWithRunway": {
"length": 4,
"openEnd": 1
}
},
"flashSuitChecked": true,
"blueSuitChecked": true
},
{
"id": 37,
"link": [
2,
2
],
"name": "Leave With Runway - Frozen Mochtroid",
"requires": [
"h_frozenEnemyRunway",
"Gravity",
"canPlayInSand",
{
"enemyDamage": {
"enemy": "Mochtroid",
"type": "contact",
"hits": 1
}
}
],
"exitCondition": {
"leaveWithRunway": {
"length": 6,
"openEnd": 0
}
},
"flashSuitChecked": true,
"blueSuitChecked": true,
"note": [
"Use a frozen Mochtroid to extend the length of the runway.",
"Positioning the Mochtroid is easiest by dropping into the sand and freezing it.",
"Maintain a half-tile gap between the Mochtroid and the runway in order to extend it as much as possible."
]
},
{
"id": 110,
"link": [
2,
2
],
"name": "Mochtroid Farm (1 Mochtroid)",
"requires": [
{
"resetRoom": {
"nodes": [
2
]
}
},
{
"or": [
{
"and": [
"Plasma",
{
"cycleFrames": 95
}
]
},
{
"and": [
"Grapple",
{
"cycleFrames": 95
}
]
},
{
"and": [
"Gravity",
"ScrewAttack",
{
"cycleFrames": 95
}
]
},
{
"and": [
{
"haveBlueSuit": {}
},
{
"cycleFrames": 95
}
]
},
{
"and": [
"Wave",
{
"cycleFrames": 105
}
]
},
{
"and": [
"Spazer",
{
"cycleFrames": 115
}
]
},
{
"and": [
"canDodgeWhileShooting",
{
"cycleFrames": 145
}
]
}
]
}
],
"farmCycleDrops": [
{
"enemy": "Mochtroid",
"count": 1
}
],
"flashSuitChecked": true,
"blueSuitChecked": true
},
{
"id": 38,
"link": [
2,
2
],
"name": "Crystal Flash",
"requires": [
"h_CrystalFlash"
],
"flashSuitChecked": true,
"blueSuitChecked": true
},
{
"id": 127,
"link": [
2,
2
],
"name": "Come in Shinecharging, Crystal Spark",
"entranceCondition": {
"comeInShinecharging": {
"length": 3,
"openEnd": 0
},
"comesInHeated": "no"
},
"requires": [
"Gravity",
"h_CrystalSpark"
],
"flashSuitChecked": true,
"blueSuitChecked": true
},
{
"id": 120,
"link": [
2,
2
],
"name": "Gain Flash Suit (X-Mode Spikesuit)",
"requires": [
"canWallJump",
"canTrickyUseFrozenEnemies",
"canTrickySpikeSuit",
"h_spikeXModeSpikeSuit",
{
"shinespark": {
"frames": 7
}
},
{
"or": [
"Grapple",
{
"spikeHits": 1
}
]
}
],
"flashSuitChecked": true,
"blueSuitChecked": true,
"note": "A single frame dashing stationary jump can make it easier to land on the spikes depending on where the mochtroid is frozen."
},
{
"id": 118,
"link": [
2,
2
],
"name": "Frozen Mochtroid, X-Mode Shinecharge, R-Mode Spark Interrupt",
"entranceCondition": {
"comeInWithRMode": {}
},
"requires": [
"canTrickyUseFrozenEnemies",
"canPlayInSand",
{
"or": [
{
"and": [
"h_CrystalFlashForReserveEnergy",
"h_usePowerBomb",
"canOffScreenMovement"
]
},
{
"and": [
"h_RModeCanRefillReserves",
{
"partialRefill": {
"type": "ReserveEnergy",
"limit": 40
}
}
]
}
]
},
"canBeVeryPatient",
"canXMode",
"h_XModeSpikeHit",
"h_shinechargeMaxRunway",
{
"disableEquipment": "Ice"
},
{
"autoReserveTrigger": {
"maxReserveEnergy": 63
}
},
"canRModeSparkInterrupt",
{
"or": [
"Grapple",
{
"and": [
"Gravity",
"canWallJump"
]
}
]
}
],
"flashSuitChecked": true,
"blueSuitChecked": true,
"note": [
"Farm the door Mochtroid and the one in the water. Lure one of the next pair of Mochtroids toward the spike and freeze it.",
"Climb using this Mochtroid up to the spike, then bounce off the Mochtroid and enter X-Mode.",
"Arm-pump to move Samus off the spike tile (watch the Mochtroid).",
"Shinecharge, release X-Ray, and start moving toward the Mochtroid as Samus falls back toward the sand.",
"While falling, disable Ice Beam to force the Mochtroid to unfreeze and get grabbed by it while jumping out of the sand.",
"Shinespark windup just before the Mochtroid drain hits to interrurpt. If Samus must land back in the sand, be sure to be",
"moving horizontally to land on top of the sand rather than sinking into it."
]
},
{
"id": 39,
"link": [
2,
2
],
"name": "G-Mode Setup - Get Hit By Mochtroid",
"requires": [],
"exitCondition": {
"leaveWithGModeSetup": {
"knockback": false
}
},
"flashSuitChecked": true,
"blueSuitChecked": true,
"note": "In the case of carrying a blue suit, it is possible to inch forward a pixel or two at a time using X-Ray without destroying the Mochtroid."
},
{
"id": 40,
"link": [
2,
3
],
"name": "Base",
"requires": [
"Gravity",
{
"or": [
"canWallJump",
"SpaceJump",
"canLongIBJ",
"canJumpIntoIBJ",
{
"and": [
"HiJump",
"canSpringBallJumpMidAir"
]
},
{
"and": [
"HiJump",
"canGravityJump"
]
}
]
}
],
"flashSuitChecked": true,
"blueSuitChecked": true
},
{
"id": 41,
"link": [
2,
3
],
"name": "Gravity Jump, Spring Ball Jump",
"requires": [
"canTrickySpringBallJump",
"canGravityJump",
"canTrickyJump"
],
"flashSuitChecked": true,
"blueSuitChecked": true,
"note": "Pause for the Gravity Jump as late as possible and then repause as soon as possible for the Spring Ball jump."
},
{
"id": 42,
"link": [
2,
3
],
"name": "Mochtroid Climb",
"requires": [
"h_navigateUnderwater",
"canMochtroidIceClimb"
],
"flashSuitChecked": true,
"blueSuitChecked": true
},
{
"id": 43,
"link": [
2,
3
],
"name": "Grapple",
"requires": [
"h_navigateUnderwater",
"Grapple",
{
"or": [
"h_midAirShootUp",
"Gravity"
]
}
],
"flashSuitChecked": true,
"blueSuitChecked": true
},
{
"id": 114,
"link": [
2,
3
],
"name": "Grapple (Tricky Carry Flash Suit)",
"requires": [
"Grapple",
"canTrickyCarryFlashSuit"
],
"flashSuitChecked": true,
"blueSuitChecked": true,
"note": [
"Crouch jump while holding shot to jump high enough to grapple horizontally to the second-lowest block.",
"then fall, aim diagonally up, and grapple to the opposite wall after moving close enough to it,",
"repeating this until Samus is above the water line.",
"Grappling the same wall is also an option:",
"in this case Samus will already be facing the wall when falling,",
"so simply hold angle up and fire Grapple again immediately when Samus begins to fall;",
"if done quickly, Samus will climb up to the next Grapple block."
]
},
{
"id": 44,
"link": [
2,
3
],
"name": "Shinespark",
"entranceCondition": {
"comeInShinecharged": {}
},
"requires": [
{
"shineChargeFrames": 20
},
"h_navigateUnderwater",
{
"shinespark": {
"frames": 24,
"excessFrames": 6
}
}
],
"flashSuitChecked": true,
"blueSuitChecked": true
},
{
"id": 45,
"link": [
2,
3
],
"name": "Bomb Jump Water Escape",
"requires": [
{
"notable": "Bomb Jump Water Escape"
},
"HiJump",
"h_underwaterMaxHeightSpringBallJump",
"canSpringFling",
"canBombJumpWaterEscape",
"canJumpIntoIBJ"
],
"flashSuitChecked": true,
"blueSuitChecked": true,
"note": [
"Perform the spring ball jump near max height.",
"Place the first bomb between a few frames after the spring ball jump; ideally it should be just above the water line.",
"Press pause a few frames after placing the bomb, to disable Spring Ball (a 'spring fling', to reset fall speed).",
"Place the second bomb soon after regaining control, while the game is fading back in, then continue into an IBJ."
]
},
{
"id": 46,
"link": [
2,
3
],
"name": "Cross Room Jump with IBJ",
"entranceCondition": {
"comeInJumping": {
"speedBooster": "no",
"minTiles": 1
}
},
"requires": [
"canJumpIntoIBJ",
"canTrickyJump",
"canCrossRoomJumpIntoWater",
"canMomentumConservingTurnaround",
{
"enemyDamage": {
"enemy": "Mochtroid",
"type": "contact",
"hits": 2
}
}
],
"flashSuitChecked": true,
"blueSuitChecked": true,
"note": "Requires a runway of one tile in the adjacent room.",
"devNote": "Possible with no openend using a harder jump but a runway that small doesn't exist."
},
{
"id": 47,
"link": [
2,
3
],
"name": "Cross Room Jump with HiJump",
"entranceCondition": {
"comeInJumping": {
"speedBooster": "any",
"minTiles": 1
}
},
"requires": [
"HiJump",
"canTrickyJump",
"canCrossRoomJumpIntoWater",
"canMomentumConservingTurnaround",
"canDownGrab"
],
"flashSuitChecked": true,
"blueSuitChecked": true,
"note": "Requires a runway of one tile in the adjacent room."
},
{
"id": 115,
"link": [
2,
3
],
"name": "Cross Room Jump with HiJump and Speedbooster",
"entranceCondition": {
"comeInJumping": {
"speedBooster": "yes",
"minTiles": 1.4375
}
},
"requires": [
"HiJump",
"canCrossRoomJumpIntoWater",
"canBufferedMomentumConservingTurnaround"
],
"flashSuitChecked": true,
"blueSuitChecked": true,
"note": "Requires a runway of two tiles in the adjacent room."
},
{
"id": 116,
"link": [
2,
3
],
"name": "Cross Room Jump with HiJump (Lenient)",
"entranceCondition": {
"comeInJumping": {
"speedBooster": "any",
"minTiles": 5
}
},
"requires": [
"HiJump",
"canCrossRoomJumpIntoWater",
"canBufferedMomentumConservingTurnaround",
"canDownGrab"
],
"flashSuitChecked": true,
"blueSuitChecked": true,
"note": "Requires a runway of five tiles in the adjacent room."
},
{
"id": 48,
"link": [
2,
3
],
"name": "Cross Room Jump with Speedbooster",
"entranceCondition": {
"comeInJumping": {
"speedBooster": "yes",
"minTiles": 6.4375
}
},
"requires": [
"canTrickyDashJump",
"canCrossRoomJumpIntoWater",
"canBufferedMomentumConservingTurnaround",
"canDownGrab"
],
"flashSuitChecked": true,
"blueSuitChecked": true,
"note": "Requires running a very precise distance of 7 tiles with no open end in the adjacent room, to hit a peak of the speed vs height graph."
},
{
"id": 49,
"link": [
2,
3
],
"name": "Cross Room Speedy Space Jump",
"entranceCondition": {
"comeInSpaceJumping": {
"speedBooster": "yes",
"minTiles": 18.4375
}
},
"requires": [
"canPreciseSpaceJump",
"canCrossRoomJumpIntoWater",
"canBufferedMomentumConservingTurnaround"
],
"flashSuitChecked": true,
"blueSuitChecked": true,
"note": [
"Gain speed using at least 18 tiles of runway, then Space Jump through the door transition."
]
},
{
"id": 50,
"link": [
2,
3
],
"name": "Cross Room Insane Speedy Space Jump",
"entranceCondition": {
"comeInSpaceJumping": {
"speedBooster": "yes",
"minTiles": 6.4375
}
},
"requires": [
"canTrickyDashJump",
"canPreciseSpaceJump",
"canInsaneJump",
"canCrossRoomJumpIntoWater",
"canBufferedMomentumConservingTurnaround",
"canDownGrab"
],
"flashSuitChecked": false,
"blueSuitChecked": true,
"note": [
"Requires running a precise distance of 7 tiles with no open end in the adjacent room, to hit a peak of the speed vs height graph (at extra run speed $2.0 or $2.1).",
"This needs a last-frame Space Jump in the previous room.",
"At the lower of the two possible speeds ($2.0), the jump must be done very low through the door;",
"at the higher speed ($2.1) there is a relatively large window of vertical positions that work."
]
},
{
"id": 51,
"link": [
2,
3
],
"name": "Cross Room Jump with Spring Ball",
"entranceCondition": {
"comeInJumping": {
"speedBooster": "no",
"minTiles": 1
}
},
"requires": [
"canTrickySpringBallJump",
"canCrossRoomJumpIntoWater",
"canTrickyJump",
"canMomentumConservingTurnaround"
],
"flashSuitChecked": true,
"blueSuitChecked": true,
"note": "Requires a runway of one tile in the adjacent room.",
"devNote": "Possible with no openend using a harder jump but a runway that small doesn't exist."
},
{
"id": 104,
"link": [
2,
3
],
"name": "Cross Room Jump with Spring Ball (Lenient)",
"entranceCondition": {
"comeInJumping": {
"speedBooster": "no",
"minTiles": 2
}
},
"requires": [
"canTrickySpringBallJump",
"canCrossRoomJumpIntoWater",
"canMomentumConservingTurnaround"
],
"flashSuitChecked": true,
"blueSuitChecked": true,
"note": "Uses a runway of two tiles in the adjacent room.",
"devNote": "FIXME: Can be lowered to canBufferedMomentumConservingTurnaround."
},
{
"id": 107,
"link": [
2,
3
],
"name": "Side Platform Cross Room Jump",
"entranceCondition": {
"comeInWithSidePlatform": {
"platforms": [
{
"minHeight": 2,
"maxHeight": 2,
"minTiles": 27.4375,
"speedBooster": "yes",
"obstructions": [
[
1,
0
]
],
"requires": [
"canMomentumConservingTurnaround"
],
"note": [
"This applies to Dust Torizo Room and Noob Bridge."
],
"devNote": [
"The jump could also be done with a shorter runway, with a tricky dash jump using run speed $4.0 or $4.1.",
"But it wouldn't apply to any more rooms in the game."
]
},
{
"minHeight": 3,
"maxHeight": 3,
"minTiles": 28.2472,
"speedBooster": "yes",
"obstructions": [
[
1,
0
]
],
"requires": [
"canMomentumConservingTurnaround"
],
"note": [
"This applies to Double Chamber."
],
"devNote": [
"The jump could also be done with a shorter runway, with a tricky dash jump using run speed $4.0 or $4.1.",
"But it wouldn't apply to any more rooms in the game."
]
},
{
"minHeight": 1,
"maxHeight": 1,
"minTiles": 23.8731,
"speedBooster": "yes",
"obstructions": [
[
3,
0
]
],
"environment": "water",
"requires": [
"canTrickyDashJump",
"canGravityJump",
"canMomentumConservingTurnaround"
],
"note": [
"This applies to Below Botwoon Energy Tank and Botwoon Energy Tank Room",
"gain run speed, and time a pause to unequip Gravity after Samus jumps;",
"hold down and back through the unpause to buffer a turnaround."
],
"detailNote": [
"With a momentum conserving turnaround, this has a 3-frame window for the jump,",
"and between a 5-frame and 7-frame window for the pause, depending on the jump timing",
"(with later jumps corresponding to larger windows for the pause to hit).",
"A ceiling mockball is also possible but with greater difficulty."
],
"devNote": [
"FIXME: The `canTrickyDashJump` is for difficulty placement but could probably be replaced by a more fitting tech,",
"since this isn't actually relying on a spike in jump height based on gaining a specific speed."
]
},
{
"minHeight": 2,
"maxHeight": 2,
"minTiles": 45,
"speedBooster": "yes",
"obstructions": [
[
3,
0
]
],
"requires": [
"canInsaneJump",
{
"or": [
"canMomentumConservingMorph",
"canMomentumConservingTurnaround"
]
}
],
"note": [
"This applies to Statues Hallway and Baby Kraid Room."
],
"devNote": [
"With a momentum conserving morph, this has a 2-frame window for the jump,",
"and a 1-frame or 2-frame window for the morph depending on the jump timing",
"(with a last-frame jump giving the larger window for the morph).",
"With a turnaround, this requires a last-frame jump, with a 2-frame window for the turnaround."
]
},
{
"minHeight": 3,
"maxHeight": 3,
"minTiles": 21.4375,
"speedBooster": "yes",
"obstructions": [
[
3,
0
]
],
"environment": "water",
"requires": [
"canTrickyDashJump",
"canInsaneJump",
"canGravityJump",
"canMomentumConservingTurnaround"
],
"note": [
"This applies to Draygon's Room.",
"Start a little less than about a tile away from the wall, gain run speed, and time a pause to unequip Gravity after Samus jumps;",
"hold down and back through the unpause to buffer a turnaround."
],
"detailNote": [
"Gain extra run speed of $4.0 or $4.1.",
"A last-frame jump with a speed of $4.1 gives a 5-frame window for the pause/turnaround,",
"while a second-to-last-frame jump with a speed of $4.0 gives a 2-frame window."
],
"devNote": [
"If Spring Ball is available, the frame window for the turnaround with $4.0 speed can be larger,",
"but it doesn't seem like a big enough difference to justify separate logical requirements."
]
},
{
"minHeight": 3,
"maxHeight": 3,
"minTiles": 41.4375,
"speedBooster": "yes",
"obstructions": [
[
3,
0
]
],
"requires": [
"canInsaneJump",
"canMomentumConservingTurnaround"
],
"note": [
"This applies to Blue Brinstar Energy Tank Room (Power Bomb blocks broken), Bowling Alley (middle), and Basement."
],
"detailNote": [
"With ideal starting position, this has a 2-frame window for the jump,",
"and a 1-frame or 3-frame window for the turnaround based on the jump timing",
"(with a last-frame jump giving the larger window for the turnaround).",
"A ceiling mockball is also possible but more difficult, requiring a last-frame jump and a 2-frame window for the morph."
],
"devNote": [
"The trick is more difficult if using the full runway in the long rooms Bowling Alley or Basement,",
"requiring a last-frame jump and a 2-frame window for the turnaround."
]
},
{
"minHeight": 3,
"maxHeight": 3,
"minTiles": 39.4375,
"speedBooster": "yes",
"obstructions": [
[
3,
2
]
],
"requires": [
"canMomentumConservingTurnaround"
],
"note": [
"This applies to Metal Pirates Room."
],
"detailNote": [
"Starting the turnaround before the transition helps make this easier."
]
},
{
"minHeight": 3,
"maxHeight": 3,
"minTiles": 37.4375,
"speedBooster": "yes",
"obstructions": [
[
5,
2
]
],
"requires": [
{
"or": [
"canMomentumConservingTurnaround",
"canMomentumConservingMorph"
]
}
],
"note": [
"This applies to Flyway"
],
"devNote": [
"This requires a last-frame jump, with a 3-frame window for the turnaround.",
"A ceiling mockball is also possible, with somewhat greater difficulty:",
"it needs a last-frame jump, with a 2-frame window for the morph."
]
}
]
}
},
"requires": [
"canCrossRoomJumpIntoWater",
"canTrickyJump"
],
"flashSuitChecked": true,
"blueSuitChecked": true
},
{
"id": 108,
"link": [
2,
3
],
"name": "Side Platform Cross Room Jump into Spring Ball Jump",
"entranceCondition": {
"comeInWithSidePlatform": {
"platforms": [
{
"minHeight": 1,
"maxHeight": 1,
"minTiles": 4,
"speedBooster": "no",
"obstructions": [
[
1,
0
]
],
"note": "Applies to Skree Boost Room, Screw Attack Room, and Lava Dive"
},
{
"minHeight": 2,
"maxHeight": 2,
"minTiles": 5.4375,
"speedBooster": "no",
"obstructions": [
[
1,
0
]
],
"requires": [
"canTrickySpringBallJump",
"canTrickyJump"
],
"note": "Applies to Early Supers Room, Tourian Hopper Room, Bowling Alley (bottom), Dust Torizo Room, and Noob Bridge"
},
{
"minHeight": 3,
"maxHeight": 3,
"minTiles": 9.4375,
"speedBooster": "no",
"obstructions": [
[
1,
0
]
],
"requires": [
"canTrickySpringBallJump",
"canTrickyJump"
],
"note": "Applies to Bomb Torizo Room, Pink Brinstar Wave Gate Room, Phantoon's Room, Big Boy Room, and Double Chamber."
},
{
"minHeight": 3,
"maxHeight": 3,
"minTiles": 9.4375,
"speedBooster": "no",
"obstructions": [
[
3,
2
]
],
"requires": [
"canTrickySpringBallJump",
"canTrickyJump",
"canJumpIntoIBJ",
{
"enemyDamage": {
"enemy": "Mochtroid",
"type": "contact",
"hits": 1
}
}
],
"note": "Applies to Metal Pirates Room."
},
{
"minHeight": 2,
"maxHeight": 2,
"minTiles": 31,
"speedBooster": "yes",
"obstructions": [
[
3,
0
]
],
"requires": [
"canInsaneJump",
{
"or": [
"canMomentumConservingTurnaround",
"canMomentumConservingMorph"
]
}
],
"note": [
"This applies to Metroid Room 1."
],
"detailNote": [
"With ideal positioning, starting 5 or 6 pixels from the end of the runway,",
"this has a 2-frame window for the jump, and a 1-frame or 3-frame window for the turnaround based on the jump timing",
"(with a last-frame jump giving the larger window for the turnaround).",
"This can also be done with a momentum conserving morph:",
"it has a 2-frame window for the jump, and a 1-frame or 2-frame window for the turnaround based on the jump timing."
]
},
{
"minHeight": 3,
"maxHeight": 3,
"minTiles": 30.4375,
"speedBooster": "yes",
"obstructions": [
[
3,
0
]
],
"requires": [
"canInsaneJump",
"canMomentumConservingTurnaround"
],
"note": [
"This applies to Blue Brinstar Energy Tank Room (Power Bomb blocks intact)."
],
"detailNote": [
"With ideal starting position, this has a 2-frame window for the jump,",
"and a 1-frame or 3-frame window for the turnaround based on the jump timing",
"(with a last-frame jump giving the larger window for the turnaround)."
]
}
]
}
},
"requires": [
"canCrossRoomJumpIntoWater",
"canMomentumConservingTurnaround",
"canSpringBallJumpMidAir"
],
"flashSuitChecked": true,
"blueSuitChecked": true,
"devNote": [
"This strat is included for completeness even though it's not really useful;",
"it would be easier to use the runway attached to the door, even if it is only 1 tile long,",
"i.e. with the 'Cross Room Jump with Spring Ball' strat (id: 51)."
]
},
{
"id": 52,
"link": [
2,
3
],
"name": "X-Ray Climb",
"entranceCondition": {
"comeInWithDoorStuckSetup": {}
},
"requires": [
"canXRayClimb",
{
"or": [
"Ice",
"Wave",
"Spazer",
"Plasma",
"Grapple",
{
"ammo": {
"type": "Missile",
"count": 1
}
},
{
"ammo": {
"type": "Super",
"count": 1
}
},
{
"enemyDamage": {
"enemy": "Mochtroid",
"type": "contact",
"hits": 1
}
}
]
}
],
"flashSuitChecked": true,
"blueSuitChecked": true,
"note": [
"Immediately when entering the room, turn around to the left while using X-ray and kill the Mochtroid, to prevent or minimize damage.",
"Climb up 1 screen."
]
},
{
"id": 53,
"link": [
2,
3
],
"name": "Very Deep Stuck X-Ray Climb",
"entranceCondition": {
"comeInWithGMode": {
"mode": "direct",
"morphed": false
}
},
"requires": [
"canGModeXRayClimb"
],
"bypassesDoorShell": "yes",
"flashSuitChecked": true,
"blueSuitChecked": true,
"note": [
"Enter with G-mode direct, back up to between 1 and 6 pixels from the door transition, and activate X-ray to get very deep stuck in the door.",
"Climb up 1 screen, and perform a turnaround buffered spin-jump away from the door to trigger the transition, bypassing any lock on the door."
]
},
{
"id": 54,
"link": [
2,
3
],
"name": "Underwater Wall Jump",
"requires": [
"canUnderwaterWallJump",
"canSpaceJumpWaterBounce"
],
"flashSuitChecked": true,
"blueSuitChecked": true
},
{
"id": 87,
"link": [
2,
3
],
"name": "Underwater Wall Jump Break Free",
"requires": [
"canUnderwaterWallJumpBreakFree"
],
"flashSuitChecked": true,
"blueSuitChecked": true,
"devNote": "FIXME: Crossing the room with just HiJump should be possible but terrible."
},
{
"id": 55,
"link": [
2,
3
],
"name": "Come in Shinecharging, Leave With Temporary Blue (Gravity Jump HiJump)",
"entranceCondition": {
"comeInShinecharging": {
"length": 3,
"openEnd": 0
}
},
"requires": [
"canXRayTurnaround",
"canGravityJump",
"HiJump",
"canChainTemporaryBlue"
],
"exitCondition": {
"leaveWithTemporaryBlue": {}
},
"unlocksDoors": [
{
"types": [
"ammo"
],
"requires": []
}
],
"flashSuitChecked": true,
"blueSuitChecked": true
},
{
"id": 56,
"link": [
2,
3
],
"name": "Come in Shinecharging, Leave With Temporary Blue (Gravity Jump, Spring Ball Jump, Pause Remorph)",
"entranceCondition": {
"comeInShinecharging": {
"length": 3,
"openEnd": 0
}
},
"requires": [
"canXRayTurnaround",
"canGravityJump",
"canSpringBallJumpMidAir",
"canInsaneJump",
"canChainTemporaryBlue",
"canPauseRemorphTemporaryBlue"
],
"exitCondition": {
"leaveWithTemporaryBlue": {}
},
"unlocksDoors": [
{
"types": [
"ammo"
],
"requires": []
}
],
"flashSuitChecked": true,
"blueSuitChecked": true,
"note": [
"Position as far left as possible, hanging over the ledge, and use X-Ray to turn around to the right.",
"Perform a gravity jump into a spring ball jump.",
"Immediately after the spring ball jump, unmorph to avoid bonking the wall and losing blue speed.",
"Use a pause buffer to morph again without losing temporary blue:",
"pause as early as possible, and hold angle and aim-down while the pause hits;",
"during the black screen, hold only the down input, to buffer a morph;",
"coming out of the pause, during the morphing animation roll from down to right, and then hold angle and unmorph to chain temporary blue."
]
},
{
"id": 88,
"link": [
2,
3
],
"name": "Use Stored Spark",
"requires": [
"h_storedSpark",
{
"or": [
{
"shinespark": {
"frames": 20,
"excessFrames": 6
}
},
{
"and": [
"HiJump",
{
"shinespark": {
"frames": 17,
"excessFrames": 7
}
}
]
},
{
"and": [
"canGravityJump",
{
"shinespark": {
"frames": 10,
"excessFrames": 6
}
}
]
}
]
}
],
"flashSuitChecked": true,
"blueSuitChecked": true
},
{
"id": 57,
"link": [
2,
3
],
"name": "G-Mode Morph, IBJ",
"entranceCondition": {
"comeInWithGMode": {
"mode": "any",
"morphed": true
}
},
"requires": [
"Gravity",
{
"or": [
"h_artificialMorphLongIBJ",
"h_artificialMorphJumpIntoIBJ"
]
}
],
"flashSuitChecked": true,
"blueSuitChecked": true,
"note": "Place bombs without moving horizontally, such that multiple hit the Mochtroid immediately as it attaches without being boosted into the doorway or sand."
},
{
"id": 106,
"link": [
2,
3
],
"name": "G-Mode Morph, Gravity Jump, Spring Ball Jump",
"entranceCondition": {
"comeInWithGMode": {
"mode": "any",
"morphed": true
}
},
"requires": [
"canGravityJump",
{
"tech": "canSpringBallJumpMidAir"
},
"h_artificialMorphSpringBall",
"canTrickyJump"
],
"flashSuitChecked": true,
"blueSuitChecked": true,
"note": [
"Quickly kill the Mochtroids with Bombs or a Power Bomb, or just roll into place and Gravity jump before they get to Samus.",
"(With Bombs, place them without moving horizontally, such that multiple hit the Mochtroid immediately as it attaches without being boosted into the doorway or sand.)",
"Start with a precise Gravity jump, where the initial jump is just before the pause fully triggers.",
"Turn off Spring Ball and Gravity at the same time, then precisely repause and turn Spring back on."
],
"devNote": "FIXME: It may be possible to cross the room both directions with HiJump, Gravity, Spring and some spike hits."
},
{
"id": 95,
"link": [
2,
3
],
"name": "Come In Shinecharging, Leave Shinecharged",
"entranceCondition": {
"comeInShinecharging": {
"length": 2,
"openEnd": 1
}
},
"requires": [
"Gravity",
"canShinechargeMovementComplex",
{
"or": [
{
"and": [
"canConsecutiveWallJump",
{
"shineChargeFrames": 120
}
]
},
{
"and": [
"HiJump",
"canWallJump",
{
"shineChargeFrames": 95
}
]
}
]
}
],
"exitCondition": {
"leaveShinecharged": {}
},
"unlocksDoors": [
{
"types": [
"super"
],
"requires": []
},
{
"types": [
"missiles",
"powerbomb"
],
"requires": [
"never"
]
}
],
"flashSuitChecked": true,
"blueSuitChecked": true
},
{
"id": 96,
"link": [
2,
3
],
"name": "Carry Shinecharge",
"entranceCondition": {
"comeInShinecharged": {}
},
"requires": [
"Gravity",
"canShinechargeMovementComplex",
{
"or": [
{
"and": [
"canConsecutiveWallJump",
{
"shineChargeFrames": 120
}
]
},
{
"and": [
"HiJump",
"canWallJump",
{
"shineChargeFrames": 95
}
]
},
{
"and": [
"HiJump",
"canGravityJump",
"canShinechargeMovementTricky",
{
"shineChargeFrames": 120
}
]
}
]
}
],
"exitCondition": {
"leaveShinecharged": {}
},
"unlocksDoors": [
{
"types": [
"super"
],
"requires": []
},
{
"types": [
"missiles",
"powerbomb"
],
"requires": [
"never"
]
}
],
"flashSuitChecked": true,
"blueSuitChecked": true
},
{
"id": 97,
"link": [
2,
3
],
"name": "Come In Shinecharged, Leave With Spark (Top Position)",
"entranceCondition": {
"comeInShinecharged": {}
},
"requires": [
"Gravity",
"canShinechargeMovementComplex",
{
"or": [
{
"and": [
"canConsecutiveWallJump",
{
"shineChargeFrames": 100
},
{
"shinespark": {
"frames": 6,
"excessFrames": 0
}
}
]
},
{
"and": [
"HiJump",
"canWallJump",
{
"or": [
{
"shineChargeFrames": 85
},
{
"and": [
"canSpeedyJump",
{
"shineChargeFrames": 80
}
]
}
]
},
{
"shinespark": {
"frames": 5,
"excessFrames": 0
}
}
]
},
{
"and": [
"HiJump",
"canGravityJump",
"canShinechargeMovementTricky",
{
"or": [
{
"shineChargeFrames": 115
},
{
"and": [
"canSpeedyJump",
{
"shineChargeFrames": 100
}
]
}
]
},
{
"shinespark": {
"frames": 4,
"excessFrames": 0
}
}
]
}
]
}
],
"exitCondition": {
"leaveWithSpark": {
"position": "top"
}
},
"unlocksDoors": [
{
"types": [
"super"
],
"requires": []
},
{
"types": [
"missiles",
"powerbomb"
],
"requires": [
"never"
]
}
],
"flashSuitChecked": true,
"blueSuitChecked": true
},
{
"id": 98,
"link": [
2,
3
],
"name": "Come In Shinecharged, Leave With Spark (Bottom Position)",
"entranceCondition": {
"comeInShinecharged": {}
},
"requires": [
"Gravity",
"canShinechargeMovementComplex",
{
"or": [
{
"and": [
"canConsecutiveWallJump",
{
"shineChargeFrames": 100
},
{
"shinespark": {
"frames": 6,
"excessFrames": 0
}
}
]
},
{
"and": [
"HiJump",
"canWallJump",
{
"or": [
{
"shineChargeFrames": 75
},
{
"and": [
"canSpeedyJump",
{
"shineChargeFrames": 70
}
]
}
]
},
{
"shinespark": {
"frames": 6,
"excessFrames": 0
}
}
]
},
{
"and": [
"HiJump",
"canGravityJump",
"canShinechargeMovementTricky",
{
"or": [
{
"shineChargeFrames": 105
},
{
"and": [
"canSpeedyJump",
{
"shineChargeFrames": 90
}
]
}
]
},
{
"shinespark": {
"frames": 6,
"excessFrames": 0
}
}
]
}
]
}
],
"exitCondition": {
"leaveWithSpark": {
"position": "top"
}
},
"unlocksDoors": [
{
"types": [
"super"
],
"requires": []
},
{
"types": [
"missiles",
"powerbomb"
],
"requires": [
"never"
]
}
],
"flashSuitChecked": true,
"blueSuitChecked": true
},
{
"id": 58,
"link": [
3,
1
],
"name": "Base",
"requires": [
"Gravity",
{
"or": [
"canConsecutiveWallJump",
"Grapple",
{
"and": [
"canWallJump",
"HiJump",
"canPlayInSand"
]
}
]
},
{
"or": [
{
"ammo": {
"type": "Missile",
"count": 2
}
},
{
"ammo": {
"type": "Super",
"count": 2
}
},
"canUseGrapple",
"canDodgeWhileShooting",
"Spazer",
"Wave",
"Plasma",
"ScrewAttack",
{
"haveBlueSuit": {}
},
{
"enemyDamage": {
"enemy": "Mochtroid",
"type": "contact",
"hits": 1
}
}
]
},
{
"or": [
"canPlayInSand",
{
"spikeHits": 1
}
]
},
{
"or": [
"Grapple",
{
"noBlueSuit": {}
}
]
}
],
"flashSuitChecked": true,
"blueSuitChecked": true,
"note": [
"Cross the room with Grapple or wall jumps.",
"Under the sand is spikes. Be sure not to turn around before landing or Samus will fall straight through the sand.",
"Breaking spin while midair, such as by tapping an angle button, will help Samus land less deep in the sand - a quick jump when landing will give her a much higher jump."
]
},
{
"id": 124,
"link": [
3,
1
],
"name": "Blue Suit Wall Jump",
"requires": [
{
"notable": "Blue Suit Sand Traversal"
},
{
"haveBlueSuit": {}
},
"Gravity",
"canConsecutiveWallJump"
],
"flashSuitChecked": true,
"blueSuitChecked": true,
"note": [
"Use normalized movement to land on the sand without losing a blue suit.",
"One way is to do the following:",
"from the platforms at the top of the room, simply walk off the ledge;",
"from the platforms two tiles above the sand, do a full height jump;",
"from the sand itself, do full height jumps, with or without breaking spin."
],
"detailNote": [
"This same approach to the normalized movement can work with or without HiJump."
]
},
{
"id": 59,
"link": [
3,
1
],
"name": "Space Jump",
"requires": [
"SpaceJump",
{
"or": [
{
"ammo": {
"type": "Missile",
"count": 3
}
},
{
"ammo": {
"type": "Super",
"count": 3
}
},
"canUseGrapple",
"canTrickyJump",
"canDodgeWhileShooting",
"Spazer",
"Wave",
"Plasma",
"ScrewAttack",
{
"haveBlueSuit": {}
},
{
"enemyDamage": {
"enemy": "Mochtroid",
"type": "contact",
"hits": 2
}
}
]
}
],
"flashSuitChecked": true,
"blueSuitChecked": true
},
{
"id": 60,
"link": [
3,
1
],
"name": "Full Halfie Shinespark (Reverse)",
"entranceCondition": {
"comeInShinecharged": {}
},
"requires": [
{
"shineChargeFrames": 10
},
{
"notable": "Full Halfie Shinespark"
},
"canShinechargeMovementComplex",
"canTrickyJump",
{
"or": [
{
"shinespark": {
"frames": 127,
"excessFrames": 4
}
},
{
"and": [
{
"shinespark": {
"frames": 127,
"excessFrames": 16
}
},
"canControlShinesparkEnd",
{
"or": [
"canWallJump",
"canTrickyJump"
]
}
]
}
]
}
],
"flashSuitChecked": true,
"blueSuitChecked": true,
"note": [
"Initiate a Shinespark 1 tile below the ceiling to cross all of the room.",
"Shinesparking too high or too low will crash and Samus will likely fall into the sand."
]
},
{
"id": 61,
"link": [
3,
1
],
"name": "IBJ",
"requires": [
{
"noBlueSuit": {}
},
"Gravity",
"canLongIBJ",
"canJumpIntoIBJ",
{
"or": [
{
"and": [
"canTrickyJump",
"can4HighMidAirMorph",
"canPlayInSand"
]
},
"h_useSpringBall"
]
},
{
"or": [
"canDoubleBombJump",
"canStaggeredIBJ",
"canBePatient"
]
}
],
"flashSuitChecked": true,
"blueSuitChecked": true,
"note": [
"Start an IBJ by either bouncing on the sand with Spring Ball, doing a stationary spinjump on the sand,",
"or by crouch jumping in the sand while holding down."
]
},
{
"id": 125,
"link": [
3,
1
],
"name": "Blue Suit IBJ",
"requires": [
{
"notable": "Blue Suit Sand Traversal"
},
{
"haveBlueSuit": {}
},
"Gravity",
"canLongIBJ",
"canJumpIntoIBJ",
"can4HighMidAirMorph",
"canTrickyDodgeEnemies"
],
"flashSuitChecked": true,
"blueSuitChecked": true,
"note": [
"Use normalized movement to land on the sand without losing a blue suit.",
"One way is to do the following:",
"from the high platform at the right of the room, jump up to bonk the ceiling before falling into the sand;",
"jump up to lure a Mochtroid down, and destroy it with the blue suit;",
"if HiJump is unavailable, perform the first IBJ all the way left against the Grapple block wall to prevent the higher Mochtroid from coming on camera;",
"from the platforms at the height of the top door, simply walk off the ledge;",
"from the platforms two tiles above the sand, do a full height jump;",
"from the sand itself, do full height spin jumps, ideally without breaking spin."
],
"detailNote": [
"The same approach to the normalized movement generally works with or without HiJump:",
"but if performing many jumps in a row from sand to sand with HiJump,",
"it is recommended to alternate between breaking spin and not breaking spin,",
"to keep Samus' vertical subpixels in a good range.",
"In any case, if failing an IBJ, unmorph before landing on the sand, in order to have a chance to keep the blue suit."
]
},
{
"id": 62,
"link": [
3,
1
],
"name": "Spring Ball Jump",
"requires": [
{
"noBlueSuit": {}
},
"Gravity",
"HiJump",
"canPlayInSand",
"canTrickySpringBallJump"
],
"flashSuitChecked": true,
"blueSuitChecked": true
},
{
"id": 126,
"link": [
3,
1
],
"name": "Blue Suit Spring Ball Jump",
"requires": [
{
"notable": "Blue Suit Sand Traversal"
},
{
"haveBlueSuit": {}
},
"Gravity",
"HiJump",
"canPlayInSand",
"canTrickySpringBallJump"
],
"flashSuitChecked": true,
"blueSuitChecked": true,
"note": [
"Use normalized movement to land on the sand without losing a blue suit.",
"One way is to do the following:",
"from the platforms at the top of the room, simply walk off the ledge;",
"from the platforms two tiles above the sand, do a full height jump;",
"from the sand itself, do full height jumps, with or without breaking spin."
]
},
{
"id": 63,
"link": [
3,
1
],
"name": "Suitless Grapple",
"requires": [
"canSuitlessMaridia",
"canDodgeWhileShooting",
"canPreciseGrapple",
{
"or": [
"canInsaneJump",
"canPlayInSand"
]
},
{
"or": [
"HiJump",
"canTrickyJump"
]
},
"h_complexToCarryFlashSuit"
],
"flashSuitChecked": true,
"blueSuitChecked": true
},
{
"id": 64,
"link": [
3,
1
],
"name": "Bomb Jump Water Escape",
"requires": [
{
"notable": "Bomb Jump Water Escape"
},
"canDash",
"HiJump",
"canPreciseWallJump",
"canUseIFrames",
{
"spikeHits": 1
},
"canNeutralDamageBoost",
"canTrickyJump",
{
"or": [
"canHorizontalDamageBoost",
{
"spikeHits": 1
}
]
},
{
"or": [
"canBePatient",
{
"spikeHits": 1
}
]
},
"h_underwaterMaxHeightSpringBallJump",
"canSpringFling",
"canBombJumpWaterEscape",
"canJumpIntoIBJ"
],
"flashSuitChecked": true,
"blueSuitChecked": true,
"note": [
"Stay out of the water, and by extension the sand, of the room by using the spikes as platforms.",
"Morphing before landing on the spikes helps to be able to control the knockback.",
"The final spike jump (which would be the most difficult) is avoided by doing a crouch jump into spring ball jump into IBJ to reach the left door.",
"Perform the spring ball jump near max height.",
"Place the first bomb between about 4 and 6 frames after the spring ball jump; ideally it should be just above the water line.",
"Press pause between about 5 and 10 frames after placing the bomb, to disable Spring Ball (a 'spring fling', to reset fall speed).",
"Place the second bomb soon after regaining control, while the game is fading back in.",
"A spike hit in the center of the room can avoided by doing another spring ball jump into IBJ (also with a spring fling)."
],
"devNote": [
"The IBJ at the left side of the room can be done without a 'spring fling' but is far more precise:",
"the first bomb must be placed exactly two frames before the spring ball jump,",
"and the spring ball jump should be performed just before max height,",
"during the 4-frame window between 2 and 5 frames before the last possible frame to jump",
"(there are also 1-frame windows at 0 and 8 frames before the last frame).",
"FIXME: This can be possible to do while carrying a blue suit, with much greater difficulty."
]
},
{
"id": 128,
"link": [
3,
1
],
"name": "Spike Platforming with Move Assist (Right to Left)",
"requires": [
{
"notable": "Spike Platforming with Move Assist"
},
"canDash",
"canWallJump",
"canSuitlessMaridia",
"canPlayInSand",
"canTrickyJump",
"Morph",
"canUseIFrames",
"canNeutralDamageBoost",
{
"spikeHits": 3
},
"canMochtroidIceClimb",
{
"or": [
"canInsaneJump",
{
"enemyDamage": {
"enemy": "Mochtroid",
"type": "contact",
"hits": 1
}
}
]
},
{
"or": [
{
"spikeHits": 1
},
"canHorizontalDamageBoost"
]
}
],
"flashSuitChecked": true,
"blueSuitChecked": true,
"note": [
"Use the spikes, which are not in the water, to jump from platform to platform as a way to cross the room.",
"Requires knowing the position of every spike in the room, and hitting the spikes while morphed can help.",
"The final jump is particularly tough so a frozen Mochtroid is used to get past it."
]
},
{
"id": 65,
"link": [
3,
1
],
"name": "Spike Platforming with No Equipment (Right to Left)",
"requires": [
{
"notable": "Spike Platforming with No Equipment"
},
"canDash",
"canPreciseWallJump",
"canInsaneJump",
"canUseIFrames",
{
"spikeHits": 3
},
"canNeutralDamageBoost",
{
"or": [
{
"and": [
"canHorizontalDamageBoost",
{
"noFlashSuit": {}
}
]
},
{
"spikeHits": 1
}
]
}
],
"flashSuitChecked": true,
"blueSuitChecked": true,
"note": [
"Stay out of the water, and by extension the sand, of the room by using the spikes as platforms.",
"Landing on spikes aiming down with no other direction pressed can help control the knockback.",
"Requires knowing the position of every spike in the room.",
"The final spike jump is very difficult."
]
},
{
"id": 66,
"link": [
3,
1
],
"name": "Mochtroid Ice Climb (Right to Left)",
"requires": [
"h_navigateUnderwater",
{
"or": [
"Gravity",
"HiJump"
]
},
"canTrickyJump",
"canPlayInSand",
"canMochtroidIceClimb",
"canCameraManip",
{
"or": [
"canInsaneJump",
{
"enemyDamage": {
"enemy": "Mochtroid",
"type": "contact",
"hits": 3
}
}
]
},
"h_complexToCarryFlashSuit"
],
"flashSuitChecked": true,
"blueSuitChecked": false,
"note": [
"Jump out of the sand to lure down mochtroids to freeze.",
"It's recommended to bring a Mochtroid into the middle section of the room.",
"Mochtroid damage is pretty hard to avoid, but can be.",
"Mochtroid movement and freeze timing gets harder at the waterline."
]
},
{
"id": 67,
"link": [
3,
1
],
"name": "Mochtroid Suitless, HiJumpless Ice Climb (Right to Left)",
"requires": [
{
"notable": "Mochtroid Suitless, HiJumpless Ice Climb"
},
"canSuitlessMaridia",
"canTrickyJump",
"canPlayInSand",
"canMochtroidIceClimb",
"canCameraManip",
{
"or": [
"canInsaneJump",
{
"enemyDamage": {
"enemy": "Mochtroid",
"type": "contact",
"hits": 3
}
}
]
},
{
"or": [
"canBePatient",
"canWallJump"
]
},
"h_trickyToCarryFlashSuit"
],
"flashSuitChecked": true,
"blueSuitChecked": false,
"note": [
"Jump out of the sand to lure down mochtroids to freeze.",
"It's recommended to bring a Mochtroid into the middle section of the room.",
"Mochtroid damage is pretty hard to avoid, but can be."
]
},
{
"id": 68,
"link": [
3,
1
],
"name": "Blue Space Jump, Leave With Temporary Blue",
"entranceCondition": {
"comeInGettingBlueSpeed": {
"length": 2,
"openEnd": 1
}
},
"requires": [
"canBlueSpaceJump",
"canPreciseSpaceJump",
"canChainTemporaryBlue"
],
"exitCondition": {
"leaveWithTemporaryBlue": {}
},
"unlocksDoors": [
{
"types": [
"ammo"
],
"requires": []
}
],
"flashSuitChecked": true,
"blueSuitChecked": true
},
{
"id": 69,
"link": [
3,
1
],
"name": "Grapple Teleport",
"entranceCondition": {
"comeInWithGrappleTeleport": {
"blockPositions": [
[
5,
3
],
[
7,
2
]
]
}
},
"requires": [],
"flashSuitChecked": true,
"blueSuitChecked": true
},
{
"id": 70,
"link": [
3,
1
],
"name": "Grapple Teleport Door Lock Skip",
"entranceCondition": {
"comeInWithGrappleTeleport": {
"blockPositions": [
[
3,
12
],
[
3,
13
]
]
}
},
"requires": [],
"bypassesDoorShell": "yes",
"flashSuitChecked": true,
"blueSuitChecked": true
},
{
"id": 71,
"link": [
3,
1
],
"name": "Carry Grapple Teleport (Top Position)",
"entranceCondition": {
"comeInWithGrappleTeleport": {
"blockPositions": [
[
3,
12
]
]
}
},
"requires": [],
"exitCondition": {
"leaveWithGrappleTeleport": {
"blockPositions": [
[
3,
12
]
]
}
},
"bypassesDoorShell": "yes",
"flashSuitChecked": true,
"blueSuitChecked": true
},
{
"id": 72,
"link": [
3,
1
],
"name": "Carry Grapple Teleport (Bottom Position)",
"entranceCondition": {
"comeInWithGrappleTeleport": {
"blockPositions": [
[
3,
13
]
]
}
},
"requires": [],
"exitCondition": {
"leaveWithGrappleTeleport": {
"blockPositions": [
[
3,
13
]
]
}
},
"bypassesDoorShell": "yes",
"flashSuitChecked": true,
"blueSuitChecked": true
},
{
"id": 73,
"link": [
3,
1
],
"name": "Grapple Teleport X-Ray Climb",
"entranceCondition": {
"comeInWithGrappleTeleport": {
"blockPositions": [
[
2,
28
],
[
2,
29
]
]
}
},
"requires": [
"canXRayClimb"
],
"bypassesDoorShell": "yes",
"flashSuitChecked": true,
"blueSuitChecked": true,
"note": [
"Exit the previous room with Samus in a standing pose (while grappled).",
"After teleporting, press right to release Grapple while staying standing (not being forced into a crouch).",
"Then X-ray climb 1 screen to get up to the door transition, without needing to open the door."
]
},
{
"id": 89,
"link": [
3,
1
],
"name": "Use Stored Sparkt",
"requires": [
"h_storedSpark",
{
"or": [
{
"shinespark": {
"frames": 121,
"excessFrames": 4
}
},
{
"and": [
"canPreciseWallJump",
{
"shinespark": {
"frames": 110,
"excessFrames": 4
}
}
]
}
]
}
],
"flashSuitChecked": true,
"blueSuitChecked": true,
"note": "Wall jump to the first platform then spark while standing, or spark from the right door - one tile lower than the Grapple blocks.",
"devNote": "FIXME: Adding another node at the first platform would allow for cross room strats from the bottom right door."
},
{
"id": 74,
"link": [
3,
2
],
"name": "Base",
"requires": [],
"flashSuitChecked": true,
"blueSuitChecked": true
},
{
"id": 99,
"link": [
3,
2
],
"name": "Come In Shinecharging, Leave Shinecharged (Gravity)",
"entranceCondition": {
"comeInShinecharging": {
"length": 2,
"openEnd": 1
}
},
"requires": [
"Gravity",
"canShinechargeMovementComplex",
{
"shineChargeFrames": 100
}
],
"exitCondition": {
"leaveShinecharged": {}
},
"unlocksDoors": [
{
"types": [
"super"
],
"requires": []
},
{
"types": [
"missiles",
"powerbomb"
],
"requires": [
"never"
]
}
],
"flashSuitChecked": true,
"blueSuitChecked": true
},
{
"id": 100,
"link": [
3,
2
],
"name": "Come In Shinecharging, Leave Shinecharged (Suitless)",
"entranceCondition": {
"comeInShinecharging": {
"length": 1,
"openEnd": 0
}
},
"requires": [
"canShinechargeMovementComplex",
{
"shineChargeFrames": 115
}
],
"exitCondition": {
"leaveShinecharged": {}
},
"unlocksDoors": [
{
"types": [
"super"
],
"requires": []
},
{
"types": [
"missiles",
"powerbomb"
],
"requires": [
"never"
]
}
],
"flashSuitChecked": true,
"blueSuitChecked": true
},
{
"id": 101,
"link": [
3,
2
],
"name": "Carry Shinecharge",
"entranceCondition": {
"comeInShinecharged": {}
},
"requires": [
"canShinechargeMovementComplex",
{
"or": [
{
"and": [
"Gravity",
"Wave",
{
"shineChargeFrames": 100
}
]
},
{
"and": [
"Gravity",
{
"shineChargeFrames": 105
}
]
},
{
"shineChargeFrames": 115
}
]
}
],
"exitCondition": {
"leaveShinecharged": {}
},
"unlocksDoors": [
{
"types": [
"super"
],
"requires": []
},
{
"types": [
"missiles",
"powerbomb"
],
"requires": [
"never"
]
}
],
"flashSuitChecked": true,
"blueSuitChecked": true
},
{
"id": 102,
"link": [
3,
2
],
"name": "Come In Shinecharged, Leave With Spark",
"entranceCondition": {
"comeInShinecharged": {}
},
"requires": [
"canShinechargeMovementComplex",
{
"shineChargeFrames": 80
},
{
"shinespark": {
"frames": 6,
"excessFrames": 0
}
}
],
"exitCondition": {
"leaveWithSpark": {}
},
"unlocksDoors": [
{
"types": [
"super"
],
"requires": []
},
{
"types": [
"missiles",
"powerbomb"
],
"requires": [
"never"
]
}
],
"flashSuitChecked": true,
"blueSuitChecked": true
},
{
"id": 75,
"link": [
3,
2
],
"name": "Come in Shinecharging, Leave With Temporary Blue",
"entranceCondition": {
"comeInShinecharging": {
"length": 2,
"openEnd": 0
}
},
"requires": [
"canChainTemporaryBlue",
"canXRayTurnaround"
],
"exitCondition": {
"leaveWithTemporaryBlue": {}
},
"unlocksDoors": [
{
"types": [
"ammo"
],
"requires": []
}
],
"flashSuitChecked": true,
"blueSuitChecked": true
},
{
"id": 76,
"link": [
3,
2
],
"name": "Stored Moonfall Grapple Door Lock Skip",
"entranceCondition": {
"comeInWithStoredFallSpeed": {
"fallSpeedInTiles": 1
}
},
"requires": [
{
"notable": "Stored Moonfall Grapple Door Lock Skip"
},
"canGrappleClip"
],
"bypassesDoorShell": "yes",
"flashSuitChecked": true,
"blueSuitChecked": true,
"note": [
"Perform a moonfall with stored fall speed to clip into the air space between the grapple blocks and the wall.",
"Jump and tap grapple while aiming diagonally to be pushed into the wall just the right amount.",
"Samus should be one tile below the grapple blocks and fully in the wall.",
"Too short a tap and the next grapple will not work, too long and Samus will be stuck in the wall.",
"Grapple diagonally again to be pushed into the transition."
]
},
{
"id": 103,
"link": [
3,
2
],
"name": "Samus Eater Teleport, Grapple Door Lock Skip",
"entranceCondition": {
"comeInWithSamusEaterTeleport": {
"floorPositions": [
[
15,
13
],
[
1,
13
]
],
"ceilingPositions": []
}
},
"requires": [
"canGrappleClip"
],
"bypassesDoorShell": "yes",
"flashSuitChecked": true,
"blueSuitChecked": true,
"note": [
"Land in the right side of the third Samus Eater on the floor of Hellway.",
"This allows Samus to get inside the air pocket below the door.",
"From there use Grapple to clip inside the wall and down into the transition, bypassing the door lock below."
]
},
{
"id": 111,
"link": [
3,
2
],
"name": "Super Sink",
"entranceCondition": {
"comeInWithSuperSink": {}
},
"requires": [
"canGrappleClip"
],
"bypassesDoorShell": "yes",
"flashSuitChecked": true,
"blueSuitChecked": true,
"note": [
"Enter the room with a super sink, and hold right, to clip down into the air pocket below the door.",
"From there use Grapple to clip inside the wall and down into the transition, bypassing the door lock below."
]
},
{
"id": 77,
"link": [
3,
3
],
"name": "Leave with Runway",
"requires": [],
"exitCondition": {
"leaveWithRunway": {
"length": 3,
"openEnd": 1
}
},
"flashSuitChecked": true,
"blueSuitChecked": true
},
{
"id": 78,
"link": [
3,
3
],
"name": "Leave With Runway - Frozen Mochtroid",
"requires": [
"h_navigateUnderwater",
"h_frozenEnemyRunway",
{
"or": [
"canMochtroidIceClimb",
{
"and": [
"Gravity",
{
"or": [
"SpaceJump",
"canWallJump"
]
}
]
}
]
},
{
"enemyDamage": {
"enemy": "Mochtroid",
"type": "contact",
"hits": 2
}
}
],
"exitCondition": {
"leaveWithRunway": {
"length": 4,
"openEnd": 1
}
},
"flashSuitChecked": true,
"blueSuitChecked": true,
"note": [
"Use a frozen Mochtroid to extend the length of the runway.",
"Positioning the Mochtroid can be done by dropping down below then climbing back up with the frozen Mochtroid as a platform.",
"Alternatively, freeze the Mochtroid with an angle-down shot while falling below then quickly climb back up."
],
"devNote": "There are many other ways to get into position, but they would require manipulating the Mochtroid as much as canMochtroidIceClimb expects."
},
{
"id": 105,
"link": [
3,
3
],
"name": "Leave With Grapple Swing",
"requires": [],
"exitCondition": {
"leaveWithGrappleSwing": {
"blocks": [
{
"position": [
7,
3
],
"note": "Closest Grapple block above top-right door"
}
]
}
},
"flashSuitChecked": true,
"blueSuitChecked": true
},
{
"id": 79,
"link": [
3,
3
],
"name": "Leave With Grapple Teleport (Bottom Position)",
"requires": [
"Gravity",
"canGrappleBombHang",
"h_bombThings"
],
"exitCondition": {
"leaveWithGrappleTeleport": {
"blockPositions": [
[
108,
13
]
]
}
},
"flashSuitChecked": true,
"blueSuitChecked": true,
"note": [
"Get a boost from a Bomb or Power Bomb while grappled to the second Grapple block below the door.",
"Samus will enter a 'glitched grapple hanging' state where Samus' graphics will appear corrupted while swinging with Grapple.",
"Press jump to get a good bounce off the wall at the bottom of the swing, making it possible to swing up to the door.",
"Heavy lag can typically be avoided by holding right during the bottom half of the swing.",
"Pressing right while inside the transition tiles will trigger the transition.",
"Continue holding Grapple through the transition to initiate a teleport in the next room.",
"If it is needed to trigger the transition further to the right (at position $6EE), then wait to come to a stop before pressing right.",
"If it is needed to trigger the transition further to the left (positions $6EB or $6ED), then hold right while approaching the door.",
"Either way, Samus should automatically be able to stand in the next room (e.g. for an X-Ray climb)."
]
},
{
"id": 80,
"link": [
3,
3
],
"name": "Leave With Grapple Teleport (Top Position)",
"requires": [
"Gravity",
"canGrappleBombHang",
"h_bombThings"
],
"exitCondition": {
"leaveWithGrappleTeleport": {
"blockPositions": [
[
108,
12
]
]
}
},
"flashSuitChecked": true,
"blueSuitChecked": true,
"note": [
"Get a boost from a Bomb or Power Bomb while grappled to the top Grapple block below the door.",
"Samus will enter a 'glitched grapple hanging' state where Samus' graphics will appear corrupted while swinging with Grapple.",
"Press jump to get a good bounce off the wall at the bottom of the swing, making it possible to swing up to the door.",
"Heavy lag can typically be avoided by holding right during the bottom half of the swing.",
"While swinging up, tap up to retract Grapple to avoid the ceiling (or tap up after after coming to rest against the ceiling if this happens).",
"Samus should usually come to a stop one tile in front of the door (at horizontal position $6D7).",
"Roll from pressing right to pressing diagonally down-right to enter the transition.",
"If it is needed for Samus to be able to stand in the next room, then only briefly press diagonally down-right and then press up, bringing Samus to a stop at position $6E1 or $6E3;",
"then roll from right to down-right to enter the transition (at horizontal positon $6EB)."
]
},
{
"id": 81,
"link": [
3,
3
],
"name": "Leave With Grapple Teleport (Unmorph, Bottom Position)",
"requires": [
"Gravity",
"canUnmorphGrappleHang"
],
"exitCondition": {
"leaveWithGrappleTeleport": {
"blockPositions": [
[
108,
13
]
]
}
},
"flashSuitChecked": true,
"blueSuitChecked": true,
"note": [
"Grapple to the second Grapple block from the bottom (the one partially underwater), jump off from it, morph, and press against the wall to the right.",
"Unmorph slightly before the peak of the jump (a 3-frame window), then immediately use grapple (a 2-frame window) to get stuck standing a pixel inside the second Grapple block.",
"Then jump (to force crouch), angle down, and grapple.",
"Samus will enter a 'glitched grapple hanging' state where Samus' graphics will appear corrupted while swinging with Grapple.",
"Press jump to get a good bounce off the wall at the bottom of the swing, making it possible to swing up to the door.",
"To minimize lag, when grapple is extended horizontally release all inputs other than shot/grapple; there will still be a bit of unavoidable lag while Grapple is initially extending.",
"Try to get a good first bounce; otherwise heavy lag may be difficult to avoid, and it may be better to retry from the beginning.",
"Pressing right while inside the transition tiles will trigger the transition.",
"Continue holding Grapple through the transition to initiate a teleport in the next room.",
"If it is needed to trigger the transition further to the right (at position $6EE), then wait to come to a stop before pressing right.",
"If it is needed to trigger the transition further to the left (positions $6EB or $6ED), then hold right while approaching the door.",
"Either way, Samus should automatically be able to stand in the next room (e.g. for an X-Ray climb)."
]
},
{
"id": 82,
"link": [
3,
3
],
"name": "Leave With Grapple Teleport (Unmorph, Top Position)",
"requires": [
"Gravity",
"canUnmorphGrappleHang"
],
"exitCondition": {
"leaveWithGrappleTeleport": {
"blockPositions": [
[
108,
12
]
]
}
},
"flashSuitChecked": true,
"blueSuitChecked": true,
"note": [
"Grapple to the fifth Grapple block below the door (the first one fully above the water line), jump off from it, and morph.",
"Unmorph slightly before the peak of the jump (a 3-frame window), then immediately use grapple (a 2-frame window) to get stuck standing a pixel inside the second Grapple block.",
"Then jump (to force crouch), angle down, and grapple.",
"Samus will enter a 'glitched grapple hanging' state where Samus' graphics will appear corrupted while swinging with Grapple.",
"Press jump to get a good bounce off the wall at the bottom of the swing, making it possible to swing up to the door.",
"To minimize lag, when grapple is extended horizontally release all inputs other than shot/grapple; there will still be a bit of unavoidable lag while Grapple is initially extending.",
"Try to get a good first bounce; otherwise heavy lag may be difficult to avoid, and it may be better to retry from the beginning.",
"While swinging up, tap up to retract Grapple to avoid the ceiling (or tap up after after coming to rest against the ceiling if this happens).",
"Samus should usually come to a stop one tile in front of the door (at horizontal position $6D7).",
"Roll from pressing right to pressing diagonally down-right to enter the transition.",
"If it is needed for Samus to be able to stand in the next room, then only briefly press diagonally down-right and then press up, bringing Samus to a stop at position $6E1 or $6E3;",
"then roll from right to down-right to enter the transition (at horizontal positon $6EB)."
]
},
{
"id": 92,
"link": [
3,
3
],
"name": "Leave With Grapple Teleport (Frozen Mochtroid, Bottom Position)",
"requires": [
"Gravity",
"canFrozenEnemyGrappleHang"
],
"exitCondition": {
"leaveWithGrappleTeleport": {
"blockPositions": [
[
108,
13
]
]
}
},
"flashSuitChecked": true,
"blueSuitChecked": true,
"note": [
"Freeze a Mochtroid at a specific position, aiming for its top to be slightly above the midpoint of the fourth Grapple block below the door.",
"Stand on the frozen Mochtroid, and fire Grapple horizontally while walking toward the wall.",
"If successful, Samus should clip slightly into the wall.",
"Crouch, and fire Grapple while angling up.",
"Samus will enter a 'glitched grapple hanging' state where Samus' graphics will appear corrupted while swinging with Grapple.",
"Press jump to get a good bounce off the wall at the bottom of the swing, making it possible to swing up to the door.",
"To minimize lag, when grapple is extended horizontally release all inputs other than shot/grapple; there will still be a bit of unavoidable lag while Grapple is initially extending.",
"Try to get a good first bounce; otherwise heavy lag may be difficult to avoid, and it may be better to retry from the beginning.",
"Pressing right while inside the transition tiles will trigger the transition.",
"Continue holding Grapple through the transition to initiate a teleport in the next room.",
"If it is needed to trigger the transition further to the right (at position $6EE), then wait to come to a stop before pressing right.",
"If it is needed to trigger the transition further to the left (positions $6EB or $6ED), then hold right while approaching the door.",
"Either way, Samus should automatically be able to stand in the next room (e.g. for an X-Ray climb)."
]
},
{
"id": 93,
"link": [
3,
3
],
"name": "Leave With Grapple Teleport (Frozen Mochtroid, Top Position)",
"requires": [
"Gravity",
"canFrozenEnemyGrappleHang"
],
"exitCondition": {
"leaveWithGrappleTeleport": {
"blockPositions": [
[
108,
12
]
]
}
},
"flashSuitChecked": true,
"blueSuitChecked": true,
"note": [
"Freeze a Mochtroid at a specific position, aiming for its top to be slightly above the midpoint of the third Grapple block below the door.",
"Stand on the frozen Mochtroid, and fire Grapple horizontally while walking toward the wall.",
"If successful, Samus should clip slightly into the wall.",
"Crouch, and fire Grapple while angling up.",
"Samus will enter a 'glitched grapple hanging' state where Samus' graphics will appear corrupted while swinging with Grapple.",
"Press jump to get a good bounce off the wall at the bottom of the swing, making it possible to swing up to the door.",
"To minimize lag, when grapple is extended horizontally release all inputs other than shot/grapple; there will still be a bit of unavoidable lag while Grapple is initially extending.",
"Try to get a good first bounce; otherwise heavy lag may be difficult to avoid, and it may be better to retry from the beginning.",
"While swinging up, tap up to retract Grapple to avoid the ceiling (or tap up after after coming to rest against the ceiling if this happens).",
"Samus should usually come to a stop one tile in front of the door (at horizontal position $6D7).",
"Roll from pressing right to pressing diagonally down-right to enter the transition.",
"If it is needed for Samus to be able to stand in the next room, then only briefly press diagonally down-right and then press up, bringing Samus to a stop at position $6E1 or $6E3;",
"then roll from right to down-right to enter the transition (at horizontal positon $6EB)."
]
},
{
"id": 112,
"link": [
3,
3
],
"name": "Mochtroid Farm (1 Mochtroid)",
"requires": [
{
"resetRoom": {
"nodes": [
3
]
}
},
{
"or": [
{
"and": [
"Plasma",
{
"cycleFrames": 70
}
]
},
{
"and": [
"Grapple",
{
"cycleFrames": 70
}
]
},
{
"and": [
"ScrewAttack",
{
"cycleFrames": 75
}
]
},
{
"and": [
{
"haveBlueSuit": {}
},
{
"cycleFrames": 75
}
]
},
{
"and": [
"Wave",
{
"cycleFrames": 80
}
]
},
{
"and": [
"Spazer",
{
"cycleFrames": 90
}
]
},
{
"and": [
"canDodgeWhileShooting",
{
"cycleFrames": 120
}
]
}
]
}
],
"farmCycleDrops": [
{
"enemy": "Mochtroid",
"count": 1
}
],
"flashSuitChecked": true,
"blueSuitChecked": true
},
{
"id": 113,
"link": [
3,
3
],
"name": "Mochtroid Farm (3 Mochtroids)",
"requires": [
{
"resetRoom": {
"nodes": [
3
]
}
},
"SpaceJump",
{
"or": [
{
"and": [
"canDash",
{
"or": [
{
"and": [
"ScrewAttack",
{
"cycleFrames": 710
}
]
},
{
"and": [
"Plasma",
{
"cycleFrames": 730
}
]
},
{
"and": [
"Grapple",
{
"cycleFrames": 770
}
]
},
{
"and": [
"Wave",
{
"cycleFrames": 810
}
]
},
{
"and": [
"Spazer",
{
"cycleFrames": 855
}
]
},
{
"and": [
"canDodgeWhileShooting",
"canTrickyJump",
{
"cycleFrames": 1140
}
]
}
]
}
]
},
{
"and": [
{
"haveBlueSuit": {}
},
{
"cycleFrames": 850
}
]
}
]
}
],
"farmCycleDrops": [
{
"enemy": "Mochtroid",
"count": 3
}
],
"flashSuitChecked": true,
"blueSuitChecked": true
},
{
"id": 83,
"link": [
3,
3
],
"name": "Crystal Flash",
"requires": [
"h_CrystalFlash"
],
"flashSuitChecked": true,
"blueSuitChecked": true
},
{
"id": 119,
"link": [
3,
3
],
"name": "Frozen Mochtroid, X-Mode Shinecharge, R-Mode Spark Interrupt",
"entranceCondition": {
"comeInWithRMode": {}
},
"requires": [
"canTrickyUseFrozenEnemies",
"canPlayInSand",
{
"or": [
{
"and": [
"h_CrystalFlashForReserveEnergy",
"h_usePowerBomb",
"canOffScreenMovement"
]
},
{
"and": [
"h_RModeCanRefillReserves",
{
"partialRefill": {
"type": "ReserveEnergy",
"limit": 40
}
}
]
}
]
},
"canBeVeryPatient",
"canXMode",
"h_XModeSpikeHit",
"h_shinechargeMaxRunway",
{
"disableEquipment": "Ice"
},
{
"autoReserveTrigger": {
"maxReserveEnergy": 63
}
},
"canRModeSparkInterrupt",
{
"or": [
"Grapple",
{
"and": [
"Gravity",
"canWallJump"
]
}
]
}
],
"flashSuitChecked": true,
"blueSuitChecked": true,
"note": [
"Farm the door Mochtroid and the one in the water. Lure one of the next pair of Mochtroids toward the spike and freeze it.",
"Climb using this Mochtroid up to the spike, then bounce off the Mochtroid and enter X-Mode.",
"Arm-pump to move Samus off the spike tile (watch the Mochtroid).",
"Shinecharge, release X-Ray, and start moving toward the Mochtroid as Samus falls back toward the sand.",
"While falling, disable Ice Beam to force the Mochtroid to unfreeze and get grabbed by it while jumping out of the sand.",
"Shinespark windup just before the Mochtroid drain hits to interrurpt. If Samus must land back in the sand, be sure to be",
"moving horizontally to land on top of the sand rather than sinking into it."
]
},
{
"id": 84,
"link": [
3,
3
],
"name": "G-Mode Setup - Get Hit By Mochtroid",
"requires": [],
"exitCondition": {
"leaveWithGModeSetup": {
"knockback": false
}
},
"flashSuitChecked": true,
"blueSuitChecked": true,
"note": "In the case of carrying a blue suit, it is possible to inch forward a pixel or two at a time using X-Ray without destroying the Mochtroid."
}
],
"notables": [
{
"id": 1,
"name": "Spike Platforming with No Equipment",
"note": [
"Cross the room by using the spikes as platforms to stay out of the water.",
"Requires some very difficult jumps and excellent control over spike damage knockback."
]
},
{
"id": 2,
"name": "Mochtroid Suitless, HiJumpless Ice Climb",
"note": [
"Cross the room by using the Mochtroids as frozen platforms.",
"Some Mochtroids need to be led into the water either from the previous section of room or from jumping high in the current section.",
"Mochtroids are most stable to climb when they are against a wall."
]
},
{
"id": 4,
"name": "Full Halfie Shinespark",
"note": [
"Initiate a Shinespark 1 tile below the ceiling to cross all of the room.",
"Shinesparking too high or too low will crash and Samus will likely fall into the sand."
]
},
{
"id": 5,
"name": "Bomb Jump Water Escape",
"note": [
"With HiJump, perform a mid-air spring ball jump into an IBJ to escape the water.",
"This can be done at the left, the center, and right side of the room.",
"Use a spring fling to delay Samus' initial descent in order to get the IBJ started."
]
},
{
"id": 6,
"name": "Spike Platforming with Move Assist",
"note": [
"Use the spikes, which are not in the water, to jump from platform to platform as a way to cross the room.",
"Requires knowing the position of every spike in the room, and hitting the spikes while morphed can help.",
"The leftmost jump is particularly tough. Ice, or a SpringBallJump from the sand onto a spike with HiJump depending on the direction, can be used to get past it."
]
},
{
"id": 7,
"name": "Spike Platforming with Spring Ball (Left to Right)",
"note": [
"Use the spikes, which are not in the water, to jump from platform to platform as a way to cross the room.",
"Requires knowing the position of every spike in the room, and hitting the spikes while morphed can help.",
"The first jump is particularly tough. A springball rolling jump can be used to get past it."
]
},
{
"id": 8,
"name": "Frozen Mochtroid Grapple Clip Door Lock Skip",
"note": [
"Crouch and freeze a Mochtroid to clip into the space behind the grapple blocks.",
"Jump and tap grapple while aiming diagonally to be pushed into the wall just the right amount.",
"Samus should be one tile below the grapple blocks and fully in the wall.",
"Too short a tap and the next grapple will not work, too long and Samus will be stuck in the wall.",
"Grapple diagonally again to be pushed into the transition."
]
},
{
"id": 9,
"name": "Grapple Bomb Hang Door Lock Skip",
"note": [
"Get a boost from a Bomb or Power Bomb while grappled to the second Grapple block below the top right door.",
"Samus will enter a 'glitched grapple hanging' state where Samus' graphics will appear corrupted while swinging with Grapple.",
"Press jump to get a good bounce off the wall at the bottom of the swing, making it possible to swing up to close the door.",
"Heavy lag can typically be avoided by holding right during the bottom half of the swing.",
"Retract Grapple while approaching the door.",
"Samus should come to a stop about a tile in front of the door (at horizontal position $6D9).",
"Press right and then left, and Samus will fall through the floor.",
"Back to the right within the air pocket, then jump and use Grapple diagonally up against the second Grapple block from the bottom, near its top.",
"Samus should be pushed most of the way inside the wall; if not, morph and roll out to try again.",
"Once in position far enough inside the wall, grapple diagonally up again to be pushed into the transition."
]
},
{
"id": 10,
"name": "Unmorph Grapple Hang Door Lock Skip",
"note": [
"Grapple to the second Grapple block from the bottom (the one partially underwater), jump off from it, morph, and press against the wall to the right.",
"Unmorph slightly before the peak of the jump (a 3-frame window), then immediately use grapple (a 2-frame window) to get stuck standing a pixel inside the second Grapple block.",
"Then jump (to force crouch), angle down, and grapple.",
"Press jump to get a good bounce off the wall at the bottom of the swing, making it possible to swing up to close the door.",
"To minimize lag, when grapple is extended horizontally release all inputs other than shot/grapple; there will still be a bit of unavoidable lag while Grapple is initially extending.",
"Try to get a good first bounce; otherwise heavy lag may be difficult to avoid, and it may be better to retry from the beginning.",
"Retract Grapple while approaching the door.",
"Samus should come to a stop about a tile in front of the door (at horizontal position $6D9).",
"Press right and then left, and Samus will fall through the floor.",
"Back to the right within the air pocket, then jump and use Grapple diagonally up against the second Grapple block from the bottom, near its top.",
"Samus should be pushed most of the way inside the wall; if not, morph and roll out to try again.",
"Once in position far enough inside the wall, grapple diagonally up again to be pushed into the transition."
]
},
{
"id": 11,
"name": "Stored Moonfall Grapple Door Lock Skip",
"note": [
"Perform a moonfall with stored fall speed to clip into the air space between the grapple blocks and the wall.",
"Jump and tap grapple while aiming diagonally to be pushed into the wall just the right amount.",
"Samus should be one tile below the grapple blocks and fully in the wall.",
"Too short a tap and the next grapple will not work, too long and Samus will be stuck in the wall.",
"Grapple diagonally again to be pushed into the transition."
]
},
{
"id": 12,
"name": "Blue Suit Sand Traversal",
"note": [
"When landing on the sand without losing blue suit, whether or not Samus sinks into the sand and loses the blue suit is chaotic,",
"depending on how Samus' exact vertical pixel position aligns with the sand at the time of landing.",
"Therefore, normalized movement is required to reliably traverse the room using the sand without losing the blue suit.",
"The specific movements needed may vary by strat, but some general recommendations are the following:",
"from platforms level with the top door, simply walk off the ledge;",
"from platforms two tiles above the sand, do a full height jump;",
"from the sand itself, do full height spin jumps, with or without breaking spin;",
"from the high platforms two tiles above the top door, jump up to bonk the ceiling before falling into the sand."
]
}
],
"nextStratId": 129,
"nextNotableId": 13
}