canDodgeWhileShooting (Hard)
The ability to run from, jump over, or duck under attacks that do not require precise avoidance movements while shooting the enemy.
Strats ()
|
Requires: "h_canActivateBombTorizo"
{
"or": [
"canDodgeWhileShooting",
{
"ammo": {
"type": "Super",
"count": 2
}
},
{
"enemyDamage": {
"enemy": "Bomb Torizo",
"type": "contact",
"hits": 3
}
}
]
}
|
|
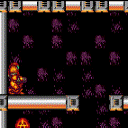
The Alcoons have a 99.5% Power Bomb drop rate, after which they only drop small energy. Requires: {
"or": [
"canDodgeWhileShooting",
"ScrewAttack",
"Wave",
"Ice",
"Spazer",
"Plasma"
]
}
{
"resetRoom": {
"nodes": [
1
],
"mustStayPut": false
}
}
{
"refill": [
"PowerBomb"
]
}
|
|
Duck under the first two Alcoon shots, or retreat back a platform to fight them with Power Beam. Requires: {
"or": [
"canDodgeWhileShooting",
{
"enemyDamage": {
"enemy": "Alcoon",
"type": "fireball",
"hits": 3
}
},
{
"enemyKill": {
"enemies": [
[
"Alcoon",
"Alcoon"
],
[
"Alcoon"
]
],
"excludedWeapons": [
"PowerBeam",
"Bombs"
]
}
}
]
}
|
|
Requires: "h_canUseMorphBombs"
{
"or": [
"canTrickyJump",
"Ice",
{
"ammo": {
"type": "Super",
"count": 2
}
},
{
"acidFrames": 100
}
]
}
{
"or": [
"canDodgeWhileShooting",
"Wave",
"Spazer",
{
"enemyDamage": {
"enemy": "Waver",
"type": "contact",
"hits": 2
}
}
]
}
{
"or": [
"canCarefulJump",
{
"and": [
"h_canUseSpringBall",
{
"acidFrames": 20
}
]
},
{
"and": [
"Gravity",
{
"acidFrames": 20
}
]
},
{
"acidFrames": 60
}
]
}
Clears obstacles: A |
|
Requires: "Morph"
{
"ammo": {
"type": "PowerBomb",
"count": 3
}
}
{
"or": [
"canDodgeWhileShooting",
{
"enemyDamage": {
"enemy": "Waver",
"type": "contact",
"hits": 1
}
}
]
}
{
"or": [
"canCarefulJump",
{
"ammo": {
"type": "PowerBomb",
"count": 1
}
},
{
"acidFrames": 104
}
]
}
Clears obstacles: A |
|
Requires: "h_canUseMorphBombs"
{
"or": [
"canDodgeWhileShooting",
"Ice",
{
"ammo": {
"type": "Super",
"count": 2
}
},
{
"acidFrames": 100
}
]
}
{
"or": [
"canTrickyJump",
"Wave",
{
"enemyDamage": {
"enemy": "Waver",
"type": "contact",
"hits": 2
}
}
]
}
{
"or": [
"canCarefulJump",
{
"acidFrames": 30
}
]
}
Clears obstacles: A |
|
Requires: "Morph"
{
"ammo": {
"type": "PowerBomb",
"count": 3
}
}
{
"or": [
"canDodgeWhileShooting",
"Ice",
{
"ammo": {
"type": "Super",
"count": 1
}
},
{
"acidFrames": 100
}
]
}
{
"or": [
"canCarefulJump",
{
"ammo": {
"type": "PowerBomb",
"count": 1
}
},
{
"acidFrames": 20
}
]
}
Clears obstacles: A |
|
From: 1
Left Door
To: 2
Right Door
Notable: true 
Enter the room while building a shinespark and use it on the lowest part of the ramp to diagonally spark up and out of the water. Use very low jump height space jumps to carry momentum to the far side of the submerged ramp. Freeze the first Choot from the middle platform. Either SpaceJump just right so as to pass above the second Choot, or freeze it as it touches Samus to pass through without losing speed. Then shinespark up and use SpaceJump to reach the door. Entrance condition: {
"comeInShinecharging": {
"length": 6,
"openEnd": 1,
"steepDownTiles": 1
}
}
Requires: "Ice"
"Wave"
"Spazer"
"canDodgeWhileShooting"
{
"shinespark": {
"frames": 14,
"excessFrames": 5
}
}
"canShinechargeMovementComplex"
"canMidairShinespark"
"SpaceJump"
"canTrickyJump"
|
|
From: 1
Left Door
To: 2
Right Door
Notable: true
Enter the room while building a shinespark and use it on the lowest part of the ramp to diagonally spark up and out of the water. Unmorphing with the correct timing and positioning for the Shinespark are very precise, and there are no extra frames on the Shinespark timer to work with. Carry the shinespark to the bottom of the ramp either with a bounce ball which takes damage from the Choot, or delay the first Choot with two shots and then use a late mockball. Then shinespark up and use SpaceJump to reach the door. Entrance condition: {
"comeInShinecharging": {
"length": 6,
"openEnd": 1,
"steepDownTiles": 1
}
}
Requires: {
"or": [
{
"and": [
{
"enemyDamage": {
"enemy": "Choot",
"type": "contact",
"hits": 1
}
},
"canNeutralDamageBoost",
"canBounceBall"
]
},
{
"and": [
"canDodgeWhileShooting",
"canMockball"
]
}
]
}
{
"shinespark": {
"frames": 14,
"excessFrames": 5
}
}
"canShinechargeMovementComplex"
"SpaceJump"
"canTrickyJump"
|
|
Enter the room while building a shinespark and use it on the lowest part of the ramp to cross the room and reach a raised ledge on the right side wall. From there, use SpaceJump to escape the water. Carry the shinespark to the bottom of the ramp by delaying the first Choot with two Power Beam shots, killing it, or bounceballing through it. The Choot can be shot diagonally from the middle platform, and again by running off that platform and aiming down to float above it. Entrance condition: {
"comeInShinecharging": {
"length": 6,
"openEnd": 1,
"steepDownTiles": 1
}
}
Requires: "canShinechargeMovementComplex"
"canCarefulJump"
{
"or": [
{
"and": [
"canMidairShinespark",
"canDodgeWhileShooting"
]
},
{
"and": [
{
"enemyDamage": {
"enemy": "Choot",
"type": "contact",
"hits": 1
}
},
"canNeutralDamageBoost",
"canBounceBall"
]
},
{
"and": [
"canMockball",
{
"or": [
"canPseudoScrew",
"ScrewAttack",
"Plasma",
"Wave",
{
"ammo": {
"type": "Missile",
"count": 1
}
},
{
"ammo": {
"type": "Super",
"count": 1
}
}
]
}
]
}
]
}
"canHorizontalShinespark"
{
"shinespark": {
"frames": 123,
"excessFrames": 5
}
}
"canSpaceJumpWaterBounce"
{
"or": [
{
"and": [
"HiJump",
"canSpaceJumpWaterEscape"
]
},
{
"and": [
"canTrickyJump",
"canDownGrab"
]
},
"canWalljump"
]
}
|
|
Store a shinecharge with enough space remaining to run and jump over all the steps with a single jump. Requires: {
"or": [
"canDodgeWhileShooting",
"ScrewAttack",
"h_hasBeamUpgrade"
]
}
{
"canShineCharge": {
"usedTiles": 25,
"openEnd": 0
}
}
"canShinechargeMovementComplex"
Exit condition: {
"leaveShinecharged": {
"framesRemaining": 75
}
}
|
|
Requires: {
"or": [
"canDodgeWhileShooting",
"ScrewAttack",
"h_hasBeamUpgrade"
]
}
Exit condition: {
"leaveWithRunway": {
"length": 4,
"openEnd": 1
}
}
|
|
Requires: {
"resourceCapacity": [
{
"type": "Missile",
"count": 1
}
]
}
{
"or": [
"canDodgeWhileShooting",
"canBePatient"
]
}
Clears obstacles: f_DefeatedSporeSpawn |
|
Spore Spawn's pollen does not drop Supers. The fight requires 4 Supers, where many misses could lead to a softlock. Requires: {
"or": [
"canDodgeWhileShooting",
{
"resourceCapacity": [
{
"type": "Missile",
"count": 1
}
]
},
{
"ammo": {
"type": "Super",
"count": 2
}
}
]
}
{
"ammo": {
"type": "Super",
"count": 4
}
}
Clears obstacles: f_DefeatedSporeSpawn |
|
From: 1
Top Right Door
To: 4
Top Left Junction
Open the door and kill the first hopper from inside the doorway. It won't be able to hit Samus for many jumps. It is possible to quickly get back to the right and crouch against the the ledge while aiming upward to safely kill the Sidehopper. Alternatively, morph can help with the second hopper, as it won't be able to hit Samus. Requires: {
"doorUnlockedAtNode": 1
}
"canDodgeWhileShooting"
{
"or": [
"Morph",
"Spazer",
"Wave",
"Plasma",
{
"enemyKill": {
"enemies": [
[
"Sidehopper"
]
],
"explicitWeapons": [
"Missile"
]
}
},
{
"enemyDamage": {
"enemy": "Sidehopper",
"type": "contact",
"hits": 2
}
},
"canTrickyJump"
]
}
Clears obstacles: A |
|
From: 1
Top Right Door
To: 4
Top Left Junction
Morph reduces damage because the ceiling Sidehopper can't reach a morphed Samus. Requires: {
"enemyDamage": {
"enemy": "Sidehopper",
"type": "contact",
"hits": 1
}
}
"Morph"
"canDodgeWhileShooting"
{
"or": [
"Spazer",
"Wave"
]
}
Clears obstacles: A |
|
From: 1
Top Right Door
To: 4
Top Left Junction
Morph reduces damage because the ceiling Sidehopper can't reach a Morphed Samus. Requires: {
"enemyDamage": {
"enemy": "Sidehopper",
"type": "contact",
"hits": 3
}
}
"Morph"
"canDodgeWhileShooting"
Clears obstacles: A |
|
From: 1
Top Right Door
To: 4
Top Left Junction
2 hits are expected to be taken. The first can be either from a Sidehopper or from a spike. Second hit will be from a Sidehopper. It is possible to avoid the first hit by opening the door and standing in the doorway while killing the first hopper. Requires: {
"enemyDamage": {
"enemy": "Sidehopper",
"type": "contact",
"hits": 1
}
}
{
"or": [
{
"enemyDamage": {
"enemy": "Sidehopper",
"type": "contact",
"hits": 1
}
},
{
"spikeHits": 1
},
{
"and": [
{
"doorUnlockedAtNode": 1
},
"canDodgeWhileShooting"
]
}
]
}
|
|
Requires: {
"or": [
{
"enemyKill": {
"enemies": [
[
"Green Space Pirate (standing)",
"Green Space Pirate (standing)",
"Green Space Pirate (standing)"
]
],
"excludedWeapons": [
"Bombs"
]
}
},
{
"and": [
{
"enemyKill": {
"enemies": [
[
"Green Space Pirate (standing)",
"Green Space Pirate (standing)",
"Green Space Pirate (standing)"
]
],
"explicitWeapons": [
"Bombs"
]
}
},
{
"or": [
"canCarefulJump",
{
"enemyDamage": {
"enemy": "Mini-Kraid",
"type": "spike",
"hits": 3
}
}
]
}
]
}
]
}
{
"or": [
"canDodgeWhileShooting",
"ScrewAttack",
{
"enemyDamage": {
"enemy": "Mini-Kraid",
"type": "spike",
"hits": 1
}
}
]
}
{
"or": [
{
"enemyKill": {
"enemies": [
[
"Mini-Kraid"
]
],
"excludedWeapons": [
"PowerBeam",
"Ice",
"Wave",
"Spazer",
"Bombs",
"Charge"
]
}
},
{
"and": [
{
"enemyKill": {
"enemies": [
[
"Mini-Kraid"
]
]
}
},
{
"enemyDamage": {
"enemy": "Mini-Kraid",
"type": "spike",
"hits": 3
}
}
]
}
]
}
Clears obstacles: A |
|
Requires: {
"enemyKill": {
"enemies": [
[
"Green Space Pirate (standing)",
"Green Space Pirate (standing)",
"Green Space Pirate (standing)"
]
]
}
}
{
"or": [
{
"enemyKill": {
"enemies": [
[
"Mini-Kraid"
]
],
"excludedWeapons": [
"PowerBeam",
"Ice",
"Wave",
"Spazer",
"Bombs",
"Charge"
]
}
},
{
"and": [
{
"enemyKill": {
"enemies": [
[
"Mini-Kraid"
]
]
}
},
{
"or": [
"canDodgeWhileShooting",
{
"enemyDamage": {
"enemy": "Mini-Kraid",
"type": "stone",
"hits": 1
}
}
]
}
]
}
]
}
Clears obstacles: A |
|
Getting up during Phase 2 can be done by jumping on Kraid's projectile platforms or a well timed crouch jump + down grab. Requires: "Charge"
{
"or": [
"Wave",
"Spazer",
"Plasma",
"canBePatient"
]
}
{
"or": [
"HiJump",
"canWalljump",
"SpaceJump",
"canSpringBallJumpMidAir",
{
"and": [
"canDodgeWhileShooting",
{
"or": [
"canCarefulJump",
"h_canCrouchJumpDownGrab"
]
}
]
}
]
}
Clears obstacles: f_DefeatedKraid |
|
Only 2 Missiles are needed to get Kraid to stand up, after which they are farmable. Getting up during Phase 2 can be done by jumping on Kraid's projectile platforms or a well timed crouch jump + down grab. Requires: {
"ammo": {
"type": "Missile",
"count": 2
}
}
{
"or": [
"HiJump",
"canWalljump",
"SpaceJump",
"canSpringBallJumpMidAir",
{
"and": [
"canDodgeWhileShooting",
{
"or": [
"canCarefulJump",
"h_canCrouchJumpDownGrab"
]
}
]
}
]
}
Clears obstacles: f_DefeatedKraid |
|
4 supers are required to kill Kraid. Only 1 is needed to get him to stand up, after which they are farmable, even though the drop rate is low. Getting up during Phase 2 can be done by jumping on Kraid's projectile platforms or a well timed crouch jump + down grab. Requires: {
"or": [
{
"ammo": {
"type": "Super",
"count": 5
}
},
{
"and": [
{
"ammo": {
"type": "Super",
"count": 4
}
},
"canDodgeWhileShooting"
]
},
{
"and": [
{
"ammo": {
"type": "Super",
"count": 3
}
},
"canDodgeWhileShooting",
"canBePatient"
]
},
{
"and": [
{
"ammo": {
"type": "Super",
"count": 1
}
},
"canDodgeWhileShooting",
"canBeVeryPatient"
]
}
]
}
{
"or": [
"HiJump",
"canWalljump",
"SpaceJump",
"canSpringBallJumpMidAir",
{
"and": [
"canDodgeWhileShooting",
{
"or": [
"canCarefulJump",
"h_canCrouchJumpDownGrab"
]
}
]
}
]
}
Clears obstacles: f_DefeatedKraid |
|
Jump between the kihunters to avoid damage. To kill the kihunters, shoot them as they come on screen. Requires: "canTrickyJump" "canDodgeWhileShooting" Clears obstacles: C |
|
Requires: "canTrickyJump"
{
"or": [
"ScrewAttack",
{
"and": [
"canDodgeWhileShooting",
{
"or": [
"Wave",
"Spazer",
"Plasma",
"canPseudoScrew",
{
"ammo": {
"type": "Missile",
"count": 1
}
},
{
"ammo": {
"type": "Super",
"count": 1
}
}
]
}
]
},
{
"heatFrames": 5
}
]
}
{
"heatFrames": 220
}
|
|
Requires: "canDodgeWhileShooting"
{
"heatFrames": 350
}
|
|
From: 1
Right Door
To: 4
Junction Above Hidden Platform Item
Clear the Sovas while standing in a safe spot from the Dragon Fireballs. Bring each Dragon on screen one at a time so that there are fewer projectiles to avoid. Requires: "canDodgeWhileShooting"
{
"heatFrames": 840
}
|
|
From: 1
Right Door
To: 4
Junction Above Hidden Platform Item
Bring each Dragon on screen one at a time so that there are fewer projectiles to avoid. Place one Power Bomb on the right side to clear the right Dragon and Sovas. Then use a second Power Bomb after waiting for the middle Dragon to finishing firing. Requires: "canDodgeWhileShooting"
{
"enemyKill": {
"enemies": [
[
"Dragon"
],
[
"Dragon",
"Dragon"
]
],
"explicitWeapons": [
"PowerBomb"
]
}
}
{
"heatFrames": 840
}
Clears obstacles: A |
|
From: 4
Left Shaft - Top Right Door
To: 1
Left Shaft - Top Left Door
Entrance condition: {
"comeInShinecharging": {
"length": 3,
"openEnd": 0
}
}
Requires: "HiJump"
"canTrickyJump"
"canShinechargeMovementComplex"
"canDodgeWhileShooting"
{
"or": [
{
"ammo": {
"type": "Missile",
"count": 1
}
},
"Plasma"
]
}
{
"shinespark": {
"frames": 14
}
}
{
"heatFrames": 190
}
Exit condition: {
"leaveWithSpark": {}
}
|
|
From: 6
Left Shaft - Top Junction
To: 6
Left Shaft - Top Junction
Requires: "h_heatProof"
{
"or": [
"canDodgeWhileShooting",
"ScrewAttack",
"Wave",
"Ice",
"Spazer",
"Plasma"
]
}
{
"or": [
"canWalljump",
"HiJump",
"h_canCrouchJumpDownGrab"
]
}
{
"resetRoom": {
"nodes": [
1,
2,
3,
4
],
"mustStayPut": false
}
}
{
"refill": [
"Missile",
"PowerBomb"
]
}
|
|
From: 3
Bottom Left Door
To: 7
Junction Below Power Bomb Blocks
Avoiding damage from all enemies with just Power Beam is tricky, but doable. Enter the room holding angle to remove momentum and avoid getting hit by the Dessgeega. Requires: "canDodgeWhileShooting" "canTrickyJump" "canPrepareForNextRoom" "canStopOnADime" Clears obstacles: D |
|
From: 3
Bottom Left Door
To: 7
Junction Below Power Bomb Blocks
Requires: {
"or": [
"Spazer",
"Plasma",
"ScrewAttack",
"Wave",
{
"and": [
"canDodgeWhileShooting",
"h_canUsePowerBombs"
]
},
{
"enemyKill": {
"enemies": [
[
"Sm. Dessgeega"
],
[
"Sm. Dessgeega"
]
],
"explicitWeapons": [
"Missile",
"Super"
]
}
},
{
"and": [
"canDodgeWhileShooting",
{
"enemyDamage": {
"enemy": "Sm. Dessgeega",
"type": "contact",
"hits": 1
}
}
]
},
{
"enemyDamage": {
"enemy": "Sm. Dessgeega",
"type": "contact",
"hits": 2
}
}
]
}
Clears obstacles: D |
|
From: 7
Junction Below Power Bomb Blocks
To: 3
Bottom Left Door
Avoiding damage from all enemies with just Power Beam is tricky, but doable. Requires: "canDodgeWhileShooting" "canCarefulJump" Clears obstacles: D |
|
From: 7
Junction Below Power Bomb Blocks
To: 3
Bottom Left Door
Requires: {
"or": [
"Spazer",
"Plasma",
"ScrewAttack",
"Wave",
{
"and": [
"canDodgeWhileShooting",
"h_canUsePowerBombs"
]
},
{
"enemyKill": {
"enemies": [
[
"Sm. Dessgeega"
],
[
"Sm. Dessgeega"
]
],
"explicitWeapons": [
"Missile",
"Super"
]
}
},
{
"and": [
"canDodgeWhileShooting",
{
"enemyDamage": {
"enemy": "Sm. Dessgeega",
"type": "contact",
"hits": 1
}
}
]
},
{
"enemyDamage": {
"enemy": "Sm. Dessgeega",
"type": "contact",
"hits": 2
}
}
]
}
Clears obstacles: D |
|
Requires: "Charge"
{
"or": [
"canDodgeWhileShooting",
{
"enemyDamage": {
"enemy": "Crocomire",
"type": "contact",
"hits": 5
}
}
]
}
Clears obstacles: f_DefeatedCrocomire |
|
From: 4
Crocomire (locked)
To: 7
Crocomire (unlocked)
Notable: true 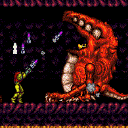

This can be a very long fight if Crocomire is stingy with the farming phases. Farming requires careful dodging in order to minimize energy drops. Delay grabbing all of the drops until necessary to reduce the chance of running out of ammo. Requires: "canDodgeWhileShooting"
"canBeVeryPatient"
{
"or": [
{
"ammo": {
"type": "Missile",
"count": 2
}
},
{
"ammo": {
"type": "Super",
"count": 2
}
}
]
}
{
"resourceCapacity": [
{
"type": "Missile",
"count": 5
}
]
}
Clears obstacles: f_DefeatedCrocomire |
|
Farming requires somewhat careful dodging in order to minimize energy drops. Requires: "canDodgeWhileShooting"
{
"or": [
{
"ammo": {
"type": "Missile",
"count": 2
}
},
{
"ammo": {
"type": "Super",
"count": 2
}
}
]
}
{
"or": [
"canTrickyJump",
{
"ammo": {
"type": "Missile",
"count": 25
}
}
]
}
{
"resourceCapacity": [
{
"type": "Missile",
"count": 10
}
]
}
Clears obstacles: f_DefeatedCrocomire |
|
While Crocomire's farmables may drop Supers, the rate is too low to rely on. If you run out, Croc will most likely push you into the spikes. It takes 8 Supers to kill croc if you don't let it move forward. Requires: {
"ammo": {
"type": "Super",
"count": 8
}
}
{
"or": [
"canDodgeWhileShooting",
{
"ammo": {
"type": "Super",
"count": 5
}
}
]
}
{
"or": [
"canTrickyJump",
{
"ammo": {
"type": "Super",
"count": 2
}
}
]
}
Clears obstacles: f_DefeatedCrocomire |
|
From: 3
Bottom Right Door
To: 1
Top Left Door
Kill the Gamets with Wave Beam when entering the room. Entrance condition: {
"comeInShinecharging": {
"length": 18,
"openEnd": 1,
"gentleDownTiles": 4,
"gentleUpTiles": 2
}
}
Requires: "Wave"
"canDodgeWhileShooting"
{
"shinespark": {
"frames": 25,
"excessFrames": 5
}
}
|
|
From: 3
Bottom Right Door
To: 2
Bottom Left Door
Entrance condition: {
"comeInShinecharging": {
"length": 18,
"openEnd": 1,
"gentleDownTiles": 4,
"gentleUpTiles": 2
}
}
Requires: "Wave" "canDodgeWhileShooting" Exit condition: {
"leaveShinecharged": {
"framesRemaining": 120
}
}
|
|
From: 3
Bottom Right Door
To: 4
Top Right Door
Kill the Gamets with Wave Beam when entering the room. Entrance condition: {
"comeInShinecharging": {
"length": 18,
"openEnd": 1,
"gentleDownTiles": 4,
"gentleUpTiles": 2
}
}
Requires: "Wave"
"canDodgeWhileShooting"
{
"shinespark": {
"frames": 25
}
}
|
|
From: 3
Bottom Right Door
To: 4
Top Right Door
Shoot the Gamets while entering the room for more runway. Entrance condition: {
"comeInShinecharging": {
"length": 18,
"openEnd": 0,
"gentleDownTiles": 4,
"gentleUpTiles": 2
}
}
Requires: "HiJump" "Wave" "canDodgeWhileShooting" "canShinechargeMovementComplex" Exit condition: {
"leaveShinecharged": {
"framesRemaining": 15
}
}
|
|
Shoot the Mellas when they first begin to come on screen, and they will not move. Requires: {
"or": [
"canDodgeWhileShooting",
"ScrewAttack",
"Ice",
"Wave",
"Spazer",
"Plasma"
]
}
{
"resetRoom": {
"nodes": [
2
],
"mustStayPut": false
}
}
{
"refill": [
"Energy",
"Missile"
]
}
Resets obstacles: A, B |
|
From: 5
Golden Torizo (locked)
To: 8
Golden Torizo (unlocked)
This is an estimate of the net damage taken, including farmed energy. Requires: "h_canNavigateHeatRooms"
{
"heatFrames": 2150
}
"Charge"
"Wave"
"Plasma"
{
"enemyDamage": {
"enemy": "Golden Torizo",
"type": "contact",
"hits": 2
}
}
{
"or": [
{
"enemyDamage": {
"enemy": "Golden Torizo",
"type": "contact",
"hits": 3
}
},
{
"and": [
"canDodgeWhileShooting",
{
"or": [
"ScrewAttack",
"Morph"
]
}
]
}
]
}
Clears obstacles: f_DefeatedGoldenTorizo |
|
From: 5
Golden Torizo (locked)
To: 8
Golden Torizo (unlocked)
This is an estimate of the net damage taken, including farmed energy. Requires: "h_canNavigateHeatRooms"
{
"heatFrames": 3600
}
"Charge"
"Plasma"
{
"enemyDamage": {
"enemy": "Golden Torizo",
"type": "contact",
"hits": 2
}
}
{
"or": [
{
"enemyDamage": {
"enemy": "Golden Torizo",
"type": "contact",
"hits": 6
}
},
{
"and": [
"canDodgeWhileShooting",
{
"or": [
"ScrewAttack",
"Morph"
]
}
]
}
]
}
Clears obstacles: f_DefeatedGoldenTorizo |
|
From: 5
Golden Torizo (locked)
To: 8
Golden Torizo (unlocked)
This is an estimate of the net damage taken, including farmed energy. Requires: "h_canNavigateHeatRooms"
{
"heatFrames": 1800
}
"Charge"
"Ice"
"Wave"
"Plasma"
{
"enemyDamage": {
"enemy": "Golden Torizo",
"type": "contact",
"hits": 1
}
}
{
"or": [
{
"enemyDamage": {
"enemy": "Golden Torizo",
"type": "contact",
"hits": 3
}
},
{
"and": [
"canDodgeWhileShooting",
{
"or": [
"ScrewAttack",
"Morph"
]
}
]
}
]
}
Clears obstacles: f_DefeatedGoldenTorizo |
|
From: 5
Golden Torizo (locked)
To: 8
Golden Torizo (unlocked)
This is an estimate of the net damage taken, including farmed energy. Requires: "h_heatProof"
"Charge"
"Ice"
"Wave"
"Spazer"
{
"enemyDamage": {
"enemy": "Golden Torizo",
"type": "contact",
"hits": 4
}
}
{
"or": [
{
"and": [
"canDodgeWhileShooting",
{
"or": [
"Morph",
"ScrewAttack",
{
"enemyDamage": {
"enemy": "Golden Torizo",
"type": "contact",
"hits": 6
}
}
]
}
]
},
{
"enemyDamage": {
"enemy": "Golden Torizo",
"type": "contact",
"hits": 13
}
}
]
}
Clears obstacles: f_DefeatedGoldenTorizo |
|
Requires: "h_canNavigateHeatRooms"
{
"heatFrames": 1200
}
{
"ammo": {
"type": "Super",
"count": 30
}
}
{
"enemyDamage": {
"enemy": "Golden Torizo",
"type": "super",
"hits": 4
}
}
{
"or": [
"canDodgeWhileShooting",
{
"ammo": {
"type": "Super",
"count": 5
}
},
{
"and": [
{
"enemyDamage": {
"enemy": "Golden Torizo",
"type": "super",
"hits": 2
}
},
{
"heatFrames": 200
}
]
}
]
}
Clears obstacles: f_DefeatedGoldenTorizo |
|
From: 1
Top Left Door
To: 1
Top Left Door
The Power Bombs must be placed carefully to hit the Pirate without destroying the PB blocks. This strat requires heatproof because it's pretty chaotic to execute. Requires: {
"obstaclesNotCleared": [
"A"
]
}
"h_heatProof"
"canDodgeWhileShooting"
"canTrickyJump"
{
"or": [
"canWalljump",
"HiJump",
"SpaceJump"
]
}
{
"enemyKill": {
"enemies": [
[
"Yellow Space Pirate (standing)",
"Yellow Space Pirate (wall)",
"Yellow Space Pirate (wall)"
]
],
"explicitWeapons": [
"PowerBombPeriphery"
]
}
}
Exit condition: {
"leaveWithRunway": {
"length": 13,
"openEnd": 0
}
}
|
|
From: 1
Top Left Door
To: 1
Top Left Door
Stun the bottom Pirate by shooting it. Requires: {
"obstaclesNotCleared": [
"A"
]
}
"canDodgeWhileShooting"
Exit condition: {
"leaveWithRunway": {
"length": 7,
"openEnd": 1
}
}
|
|
From: 3
Bottom Horizontal Door
To: 7
Junction By Lower Alcoons (Left of Spike Pits)
Kill the Alcoon without stopping. Requires: "h_canNavigateHeatRooms"
"canDodgeWhileShooting"
{
"or": [
{
"enemyKill": {
"enemies": [
[
"Alcoon"
]
],
"explicitWeapons": [
"Missile",
"Super",
"Wave+Plasma"
]
}
},
{
"and": [
"canPrepareForNextRoom",
"Charge",
"Wave",
"Spazer"
]
},
{
"and": [
"canPseudoScrew",
{
"heatFrames": 30
}
]
}
]
}
{
"or": [
"canCarefulJump",
{
"heatFrames": 10
}
]
}
{
"heatFrames": 100
}
|
|
From: 3
Bottom Horizontal Door
To: 7
Junction By Lower Alcoons (Left of Spike Pits)
Requires: "h_heatProof" "canDodgeWhileShooting" |
|
From: 4
Item
To: 6
Junction By Left Door (Right of Pit)
Requires: "h_canNavigateHeatRooms"
{
"or": [
{
"and": [
"canDodgeWhileShooting",
{
"heatFrames": 200
}
]
},
{
"and": [
"Morph",
{
"heatFrames": 200
}
]
},
{
"and": [
{
"enemyDamage": {
"enemy": "Alcoon",
"type": "fireball",
"hits": 1
}
},
{
"heatFrames": 160
}
]
}
]
}
Clears obstacles: A |
|
From: 6
Junction By Left Door (Right of Pit)
To: 4
Item
Run under the Alcoon as it spawns Requires: "h_canNavigateHeatRooms"
"canDodgeWhileShooting"
{
"heatFrames": 120
}
|
|
From: 6
Junction By Left Door (Right of Pit)
To: 4
Item
Kill the Alcoon in one hit as it spawns. Requires: "h_canNavigateHeatRooms"
"canDodgeWhileShooting"
{
"enemyKill": {
"enemies": [
[
"Alcoon"
]
],
"explicitWeapons": [
"Missile",
"Super",
"Charge+Plasma"
]
}
}
{
"heatFrames": 120
}
Clears obstacles: A |
|
From: 6
Junction By Left Door (Right of Pit)
To: 4
Item
Requires: "h_canNavigateHeatRooms"
{
"or": [
{
"and": [
"canDodgeWhileShooting",
{
"heatFrames": 200
}
]
},
{
"and": [
"Morph",
{
"heatFrames": 200
}
]
},
{
"and": [
{
"enemyDamage": {
"enemy": "Alcoon",
"type": "fireball",
"hits": 1
}
},
{
"heatFrames": 160
}
]
}
]
}
Clears obstacles: A |
|
From: 7
Junction By Lower Alcoons (Left of Spike Pits)
To: 3
Bottom Horizontal Door
Kill the Alcoon without stopping. Requires: "h_canNavigateHeatRooms"
"canDodgeWhileShooting"
{
"or": [
{
"enemyKill": {
"enemies": [
[
"Alcoon"
]
],
"explicitWeapons": [
"Missile",
"Super",
"Wave+Plasma",
"PseudoScrew",
"ScrewAttack",
"Charge+Wave+Spazer",
"Shinespark"
]
}
},
{
"and": [
"Plasma",
"canHitbox"
]
}
]
}
{
"heatFrames": 120
}
|
|
From: 7
Junction By Lower Alcoons (Left of Spike Pits)
To: 3
Bottom Horizontal Door
Requires: "h_heatProof" "canDodgeWhileShooting" |
|
From: 7
Junction By Lower Alcoons (Left of Spike Pits)
To: 7
Junction By Lower Alcoons (Left of Spike Pits)
Requires: "h_heatProof"
{
"or": [
"canDodgeWhileShooting",
"ScrewAttack",
"Wave",
"Ice",
"Spazer",
"Plasma"
]
}
{
"refill": [
"PowerBomb"
]
}
|
|
From: 3
Metal Pirates Junction
To: 3
Metal Pirates Junction
Requires: "h_canNavigateHeatRooms"
"Charge"
"Plasma"
{
"or": [
{
"and": [
{
"or": [
"canDodgeWhileShooting",
{
"enemyDamage": {
"enemy": "Space Pirate (fighting)",
"type": "contact",
"hits": 2
}
}
]
},
{
"or": [
"Ice",
"Wave"
]
},
{
"heatFrames": 700
}
]
},
{
"and": [
{
"or": [
"canDodgeWhileShooting",
{
"enemyDamage": {
"enemy": "Space Pirate (fighting)",
"type": "contact",
"hits": 2
}
}
]
},
"Ice",
"Wave",
{
"heatFrames": 450
}
]
},
{
"and": [
{
"or": [
"canDodgeWhileShooting",
{
"enemyDamage": {
"enemy": "Space Pirate (fighting)",
"type": "contact",
"hits": 2
}
}
]
},
{
"heatFrames": 950
}
]
},
{
"and": [
"canXRayWaitForIFrames",
{
"heatFrames": 250
}
]
}
]
}
Clears obstacles: A |
|
From: 3
Metal Pirates Junction
To: 3
Metal Pirates Junction
Requires: "h_canNavigateHeatRooms"
"canDodgeWhileShooting"
"Charge"
"Spazer"
{
"or": [
{
"heatFrames": 4400
},
{
"and": [
"Ice",
{
"heatFrames": 3000
}
]
},
{
"and": [
"Wave",
{
"heatFrames": 2650
}
]
},
{
"and": [
"Ice",
"Wave",
{
"heatFrames": 1750
}
]
}
]
}
Clears obstacles: A |
|
From: 3
Metal Pirates Junction
To: 3
Metal Pirates Junction
Requires: "h_heatProof"
"canDodgeWhileShooting"
"Plasma"
{
"refill": [
"Energy",
"Super"
]
}
|
|
From: 3
Metal Pirates Junction
To: 3
Metal Pirates Junction
Notable: true 
Use the Echoes created by shinesparking to defeat the Metal Pirates. This involves Shineparking into a precise point while also turning the Pirates vulnerable as the echoes reach them. Requires: "h_heatProof"
"canDodgeWhileShooting"
"canUseSpeedEchoes"
"canHitbox"
{
"refill": [
"Energy",
"Super"
]
}
|
|
Requires: "h_canNavigateHeatRooms"
{
"or": [
"canDodgeWhileShooting",
{
"enemyDamage": {
"enemy": "Space Pirate (fighting)",
"type": "contact",
"hits": 6
}
}
]
}
{
"enemyKill": {
"enemies": [
[
"Space Pirate (fighting)",
"Space Pirate (fighting)"
]
],
"explicitWeapons": [
"Missile"
]
}
}
{
"heatFrames": 2700
}
Clears obstacles: A |
|
Requires: "h_canNavigateHeatRooms"
{
"or": [
"canDodgeWhileShooting",
{
"enemyDamage": {
"enemy": "Space Pirate (fighting)",
"type": "contact",
"hits": 8
}
}
]
}
"Plasma"
{
"heatFrames": 2000
}
Clears obstacles: A |
|
Requires: "h_heatProof" "canDodgeWhileShooting" "Charge" "Wave" Clears obstacles: A |
|
Requires: "h_canNavigateHeatRooms"
{
"or": [
"canDodgeWhileShooting",
{
"enemyDamage": {
"enemy": "Space Pirate (fighting)",
"type": "contact",
"hits": 2
}
}
]
}
{
"enemyKill": {
"enemies": [
[
"Space Pirate (fighting)",
"Space Pirate (fighting)"
]
],
"explicitWeapons": [
"Super"
]
}
}
{
"heatFrames": 450
}
Clears obstacles: A |
|
From: 3
Metal Pirates Junction
To: 3
Metal Pirates Junction
Uncharged Spazer does half damage. Requires: "h_heatProof"
"canDodgeWhileShooting"
{
"or": [
{
"and": [
"Spazer",
"canBeVeryPatient"
]
},
{
"and": [
"Charge",
"canBeVeryPatient"
]
},
{
"and": [
"Charge",
"Ice",
"canBePatient"
]
}
]
}
Clears obstacles: A |
|
From: 6
Bottom Right Corner Junction
To: 9
Junction Below Crumble Blocks, Set Up to Clip
Notable: true 
Guide the bottom-right MultiViola to the upper section of the room. Lure the Dessgeegas away to avoid killing the multiviola. Remove all enemies and possibly also the row of bomb blocks with a power bomb before attempting to guide the Multiviola. It will need to bounce each room segment multiple times before lining up to go through each shot block. Ice can be used to more safely get around the Multiviola as it is bouncing. However, opening the left side door will change the bounce locations and make the strat no longer possible. Instead the enemy can be allowed to go off camera and then Samus can prepare to run away as it comes back. Waiting in the next room segment is a safe way to wait for the Multiviola to bounce and still be able to break shot blocks. Requires: "h_heatProof"
"canTrickyUseFrozenEnemies"
{
"or": [
"canCameraManip",
"canDodgeWhileShooting"
]
}
{
"obstaclesNotCleared": [
"E"
]
}
{
"enemyDamage": {
"enemy": "Multiviola",
"type": "contact",
"hits": 5
}
}
{
"or": [
{
"enemyKill": {
"enemies": [
[
"Dessgeega"
],
[
"Dessgeega"
],
[
"Dessgeega"
]
],
"explicitWeapons": [
"Plasma",
"ScrewAttack",
"Charge+Ice+Wave",
"Ice+Wave+Spazer",
"Missile",
"Super"
]
}
},
{
"obstaclesCleared": [
"C"
]
}
]
}
{
"or": [
{
"enemyKill": {
"enemies": [
[
"Dessgeega",
"Dessgeega"
]
],
"explicitWeapons": [
"Plasma",
"ScrewAttack",
"Charge+Ice+Wave",
"Ice+Wave+Spazer",
"Missile",
"Super"
]
}
},
{
"obstaclesCleared": [
"F"
]
}
]
}
Clears obstacles: C, D, F |
|
From: 7
Junction Left of Two Rightmost Dessgeegas
To: 8
Left Door Junction After Multiviola
Some weapons are very slow at killing the Multiviolas and require use of the safe spot in the bottom right Multiviola cage. Requires: "h_heatProof"
{
"obstaclesCleared": [
"F"
]
}
{
"or": [
{
"and": [
"canDodgeWhileShooting",
{
"enemyKill": {
"enemies": [
[
"Dessgeega"
],
[
"Dessgeega"
],
[
"Dessgeega"
]
],
"excludedWeapons": [
"Bombs",
"PseudoScrew"
]
}
}
]
},
{
"obstaclesCleared": [
"C"
]
}
]
}
{
"or": [
{
"enemyKill": {
"enemies": [
[
"Multiviola"
],
[
"Multiviola"
]
],
"excludedWeapons": [
"Bombs",
"PowerBeam"
]
}
},
{
"enemyDamage": {
"enemy": "Multiviola",
"type": "contact",
"hits": 2
}
},
{
"obstaclesCleared": [
"E"
]
}
]
}
Clears obstacles: C, E |
|
From: 1
Top Left Door
To: 7
Junction At Middle Right Door With Bottom KiHunter Cleared
By breaking the shot blocks and maneuvering through the room effeciently Samus will not have to spend much time waiting on KiHunters. Entrance condition: {
"comeInRunning": {
"minTiles": 1,
"speedBooster": "any"
}
}
Requires: "canDodgeWhileShooting"
"canCarefulJump"
{
"or": [
"canTrickyJump",
"canDownBack"
]
}
{
"or": [
"Charge",
"Spazer",
"Plasma",
"Wave",
"canInsaneJump"
]
}
{
"heatFrames": 540
}
|
|
From: 4
Top Right Door
To: 7
Junction At Middle Right Door With Bottom KiHunter Cleared
By breaking the shot blocks and maneuvering through the room effeciently Samus will not have to spend much time waiting on KiHunters. Entrance condition: {
"comeInRunning": {
"minTiles": 1,
"speedBooster": "any"
}
}
Requires: "canDodgeWhileShooting"
"canTrickyJump"
{
"or": [
"Charge",
"Spazer",
"Plasma",
"Wave",
{
"and": [
"canInsaneJump",
{
"or": [
"canDownBack",
"Morph"
]
}
]
}
]
}
{
"heatFrames": 540
}
|
|
From: 5
Top Junction Between Doors
To: 7
Junction At Middle Right Door With Bottom KiHunter Cleared
By breaking the shot blocks and maneuvering through the room effeciently Samus will not have to spend much time waiting on KiHunters. Requires: "canDodgeWhileShooting"
"canTrickyJump"
{
"or": [
"Spazer",
"Wave"
]
}
{
"heatFrames": 500
}
|
|
From: 5
Top Junction Between Doors
To: 7
Junction At Middle Right Door With Bottom KiHunter Cleared
Very quickly move through the room to meet the bottom KiHunter in a position where it is possible to jump over it. Down back through the shot blocks. If coming through the right door, Morphing may be easier. Jump over the KiHunter where it dips while moving left. Additionally, build full run speed before jumping to land all the way next to the door. Requires: "canInsaneJump"
"canDodgeWhileShooting"
"canPrepareForNextRoom"
{
"or": [
"Charge",
"Spazer",
"Plasma",
"Wave"
]
}
"canDownBack"
{
"heatFrames": 420
}
|
|
Jump to the previous level when the enemy gets close, or fight entirely from safety. Requires: "h_canNavigateHeatRooms"
"Plasma"
{
"or": [
"canDodgeWhileShooting",
{
"and": [
"Charge",
{
"heatFrames": 1800
}
]
}
]
}
{
"heatFrames": 1200
}
Clears obstacles: A |
|
Jump to the previous level when the enemy gets close, or fight entirely from safety. Two supers can hit per cycle when shooting from above. Requires: "h_canNavigateHeatRooms"
{
"enemyKill": {
"enemies": [
[
"Kihunter (red)",
"Kihunter (red)",
"Kihunter (red)"
]
],
"explicitWeapons": [
"Super"
]
}
}
{
"heatFrames": 800
}
{
"or": [
"canDodgeWhileShooting",
{
"and": [
"canCarefulJump",
{
"heatFrames": 800
}
]
}
]
}
Clears obstacles: A |
|
From: 4
Junction Right of Power Bomb Blocks
To: 6
Junction Left of Power Bomb Blocks
Requires: {
"obstaclesCleared": [
"D"
]
}
"canDodgeWhileShooting"
{
"enemyKill": {
"enemies": [
[
"Dessgeega"
]
],
"explicitWeapons": [
"Ice+Wave+Spazer",
"Plasma"
]
}
}
{
"heatFrames": 270
}
Clears obstacles: C |
|
From: 4
Junction Right of Power Bomb Blocks
To: 6
Junction Left of Power Bomb Blocks
Requires: {
"obstaclesCleared": [
"D"
]
}
"canDodgeWhileShooting"
"Morph"
{
"ammo": {
"type": "PowerBomb",
"count": 2
}
}
{
"or": [
"canHitbox",
{
"ammo": {
"type": "PowerBomb",
"count": 1
}
}
]
}
{
"heatFrames": 420
}
Clears obstacles: A, B, C |
|
From: 4
Junction Right of Power Bomb Blocks
To: 6
Junction Left of Power Bomb Blocks
Requires: {
"obstaclesCleared": [
"D"
]
}
"canDodgeWhileShooting"
{
"or": [
"Charge",
"Spazer"
]
}
{
"heatFrames": 12000
}
Clears obstacles: C |
|
From: 5
Junction Below Shot Block
To: 4
Junction Right of Power Bomb Blocks
Safely kill the left two Dessgeegas where the Power Bomb statue used to be. Lure the right side Ceiling hopper to the left before dealing with it. Requires: {
"or": [
{
"obstaclesCleared": [
"A"
]
},
"h_canUsePowerBombs"
]
}
{
"or": [
{
"and": [
"Plasma",
{
"or": [
"Ice",
"Wave"
]
},
{
"heatFrames": 540
}
]
},
{
"and": [
"canDodgeWhileShooting",
"Plasma",
{
"heatFrames": 1020
}
]
},
{
"and": [
"canDodgeWhileShooting",
"Ice",
"Spazer",
"Wave",
{
"heatFrames": 1800
}
]
},
{
"and": [
"canDodgeWhileShooting",
"Spazer",
{
"heatFrames": 3000
}
]
}
]
}
Clears obstacles: A, B, C, D |
|
From: 5
Junction Below Shot Block
To: 4
Junction Right of Power Bomb Blocks
Safely kill the left two Dessgeegas where the Power Bomb statue used to be. Lure the right side Ceiling hopper to the left before dealing with it. Requires: {
"or": [
{
"obstaclesCleared": [
"A"
]
},
"h_canUsePowerBombs"
]
}
"canDodgeWhileShooting"
{
"enemyKill": {
"enemies": [
[
"Dessgeega"
],
[
"Dessgeega",
"Dessgeega",
"Dessgeega"
]
],
"explicitWeapons": [
"Missile"
]
}
}
{
"heatFrames": 720
}
Clears obstacles: A, B, C, D |
|
From: 5
Junction Below Shot Block
To: 4
Junction Right of Power Bomb Blocks
Requires: "Morph"
{
"ammo": {
"type": "PowerBomb",
"count": 5
}
}
"canDodgeWhileShooting"
{
"or": [
"canHitbox",
{
"enemyDamage": {
"enemy": "Dessgeega",
"type": "contact",
"hits": 1
}
}
]
}
{
"heatFrames": 1080
}
Clears obstacles: A, B, C, D |
|
From: 7
Junction Left of Morph Tunnel
To: 4
Junction Right of Power Bomb Blocks
Requires: "canDodgeWhileShooting"
{
"enemyKill": {
"enemies": [
[
"Dessgeega"
],
[
"Dessgeega"
],
[
"Dessgeega"
]
],
"explicitWeapons": [
"Missile",
"PowerBomb",
"Plasma",
"Charge+Ice+Wave+Spazer"
]
}
}
{
"enemyDamage": {
"enemy": "Dessgeega",
"type": "contact",
"hits": 2
}
}
{
"heatFrames": 1020
}
Clears obstacles: D |
|
Requires: {
"or": [
"canDodgeWhileShooting",
"canTrickyJump",
{
"enemyKill": {
"enemies": [
[
"Kihunter (yellow)"
]
],
"explicitWeapons": [
"Missile",
"Super",
"ScrewAttack",
"Plasma",
"Ice+Wave+Spazer"
]
}
},
{
"enemyDamage": {
"enemy": "Kihunter (yellow)",
"type": "contact",
"hits": 1
}
}
]
}
|
|
Requires: {
"or": [
"canDodgeWhileShooting",
"canTrickyJump",
{
"enemyKill": {
"enemies": [
[
"Kihunter (yellow)"
],
[
"Kihunter (yellow)"
]
],
"explicitWeapons": [
"Missile",
"Super",
"ScrewAttack",
"Plasma",
"Ice+Wave+Spazer"
]
}
},
{
"enemyDamage": {
"enemy": "Kihunter (yellow)",
"type": "contact",
"hits": 2
}
}
]
}
|
|
Requires: {
"or": [
"canDodgeWhileShooting",
"canTrickyJump",
{
"enemyKill": {
"enemies": [
[
"Kihunter (yellow)"
],
[
"Kihunter (yellow)"
]
],
"explicitWeapons": [
"Missile",
"Super",
"ScrewAttack",
"Plasma",
"Ice+Wave+Spazer"
]
}
},
{
"enemyDamage": {
"enemy": "Kihunter (yellow)",
"type": "contact",
"hits": 1
}
}
]
}
|
|
Requires: {
"or": [
"canDodgeWhileShooting",
"canTrickyJump",
{
"enemyKill": {
"enemies": [
[
"Kihunter (yellow)"
]
],
"explicitWeapons": [
"Missile",
"Super",
"ScrewAttack",
"Plasma",
"Ice+Wave+Spazer"
]
}
},
{
"enemyDamage": {
"enemy": "Kihunter (yellow)",
"type": "contact",
"hits": 1
}
}
]
}
|
|
From: 1
Left Door
To: 2
Item (Behind the Bomb Wall) (locked)
Run on the conveyor to build Speed for breaking the bomb block. Push the right side Worker Robot onto the conveyor Jump low into the wall so Samus' head touches the block. Speed can be used to clear the Bulls. Requires: "Morph"
"f_DefeatedPhantoon"
"canCarefulJump"
{
"or": [
"canDodgeWhileShooting",
{
"enemyKill": {
"enemies": [
[
"Bull",
"Bull"
]
]
}
},
{
"enemyDamage": {
"enemy": "Bull",
"type": "contact",
"hits": 1
}
}
]
}
{
"canShineCharge": {
"usedTiles": 18,
"openEnd": 1
}
}
|
|
From: 1
Left Door
To: 2
Right Door
Notable: true 
Requires a very precise stutter where Samus is moving slow enough while near the gate, so she can shoot it and it is fully open before she collides with it. A runway in the adjacent room of 2 tiles works best - with a longer runway, Samus will be moving too fast. Entrance condition: {
"comeInRunning": {
"speedBooster": true,
"minTiles": 1.4375
}
}
Requires: "canSuitlessMaridia"
"canShinechargeMovementComplex"
"canStutterWaterShineCharge"
"canDodgeWhileShooting"
{
"ammo": {
"type": "Super",
"count": 1
}
}
Exit condition: {
"leaveShinecharged": {
"framesRemaining": 70
}
}
|
|
From: 2
Bottom Right Door
To: 3
Middle Right Door
Run with enough speed to jump (after the transition) to reach the far left ledge. Either kill or Kago through the Fish enemy. At slightly higher run speeds, Samus can jump from the bottom of the slope and avoid the fish. Entrance condition: {
"comeInRunning": {
"minTiles": 7,
"speedBooster": true
}
}
Requires: "HiJump"
"canCrossRoomJumpIntoWater"
"canTrickyJump"
"canDodgeWhileShooting"
{
"or": [
{
"ammo": {
"type": "Super",
"count": 1
}
},
{
"and": [
"Charge",
"Plasma"
]
},
{
"and": [
"Plasma",
"canHitbox"
]
},
{
"and": [
"canKago",
"canLateralMidAirMorph",
{
"enemyDamage": {
"enemy": "Skultera",
"type": "contact",
"hits": 1
}
}
]
}
]
}
|
|
Run with 7 tiles (no openend) of speed to jump (after the transition) to reach the far left ledge. Either kill or Kago through the Fish enemy. Entrance condition: {
"comeInRunning": {
"minTiles": 6.4375,
"speedBooster": true
}
}
Requires: "canCrossRoomJumpIntoWater"
"canTrickyDashJump"
"canDodgeWhileShooting"
{
"or": [
{
"ammo": {
"type": "Super",
"count": 1
}
},
{
"and": [
"Charge",
"Plasma"
]
},
{
"and": [
"Plasma",
"canHitbox"
]
},
{
"and": [
"canKago",
"canLateralMidAirMorph",
{
"enemyDamage": {
"enemy": "Skultera",
"type": "contact",
"hits": 1
}
}
]
}
]
}
|
|
From: 9
Junction Below Speed Blocks
To: 4
Top Right Door
Be sure not to get the first downward moving crab on screen until Samus is in position to quickly and accurately shoot and freeze it. This is much tighter with spring ball relative to HiJump. Performing a max height spring ball jump from the frozen crab can get Samus to the next ledge. Getting to the ledge with the fish is particularly precise. Either stand at the very edge of the platform and perform a very precise max heigh spring ball jump, or stand against the left wall and and perform a slightly less tight stationary lateral morph into spring ball jump. Requires: "canSuitlessMaridia"
"canTrickyUseFrozenEnemies"
"canTrickySpringBallJump"
"canDodgeWhileShooting"
{
"or": [
"canInsaneJump",
{
"and": [
"Spazer",
"Wave"
]
},
"h_canMaxHeightSpringBallJump",
"Plasma"
]
}
{
"or": [
"h_canMaxHeightSpringBallJump",
"canStationaryLateralMidAirMorph"
]
}
|
|
Be careful not to touch or bomb the sand in order to grab the item before PLMs are overloaded. Entrance condition: {
"comeInWithGMode": {
"mode": "direct",
"morphed": true
}
}
Requires: {
"or": [
{
"and": [
"Gravity",
"h_canArtificialMorphIBJ",
"canDodgeWhileShooting"
]
},
{
"and": [
"h_canArtificialMorphSpringBall",
{
"or": [
"Gravity",
"HiJump"
]
},
{
"or": [
"canTrickyJump",
"h_canArtificialMorphPowerBomb"
]
}
]
}
]
}
Clears obstacles: B |
|
Requires: {
"resetRoom": {
"nodes": [
1
],
"mustStayPut": false
}
}
{
"or": [
"canDodgeWhileShooting",
"Wave",
"Spazer",
"Plasma",
"Grapple",
{
"and": [
"ScrewAttack",
"Gravity"
]
}
]
}
{
"refill": [
"Energy",
"Missile",
"Super"
]
}
|
|
From: 4
Back-Side Botwoon (locked)
To: 6
Back-Side Botwoon (unlocked)
Notable: true 
With Gravity, dodging the acid is pretty trivial. Even without knowing about the distance trick expected in the suitless version. Requires: "Gravity"
"Charge"
"Wave"
{
"or": [
"canDodgeWhileShooting",
{
"enemyDamage": {
"enemy": "Botwoon 1",
"type": "acid",
"hits": 2
}
}
]
}
Clears obstacles: f_DefeatedBotwoon |
|
From: 4
Back-Side Botwoon (locked)
To: 6
Back-Side Botwoon (unlocked)
Notable: true
Even when suitless, it's possible to stand far enough that the acid attack doesn't spawn. Botwoon still gets hit. So there's a safe way to take no damage. Requires: "canSuitlessMaridia"
"Charge"
"Wave"
"canDodgeWhileShooting"
{
"or": [
"Morph",
{
"enemyDamage": {
"enemy": "Botwoon 1",
"type": "acid",
"hits": 2
}
}
]
}
Clears obstacles: f_DefeatedBotwoon |
|
Requires: "h_canNavigateUnderwater"
"canMochtroidIceClimb"
{
"or": [
"Gravity",
"canDodgeWhileShooting",
{
"enemyDamage": {
"enemy": "Mochtroid",
"hits": 2,
"type": "contact"
}
},
"Wave",
"Spazer",
"Plasma",
{
"and": [
"canPrepareForNextRoom",
"Charge"
]
}
]
}
|
|
From: 2
Bottom Left Door
To: 1
Top Left Door
Enter the room with a careful amount of momentum where Samus must spend extra time slowing down during the stutter, but must not have much run speed. Entrance condition: {
"comeInRunning": {
"speedBooster": true,
"minTiles": 2.4375
}
}
Requires: "canStutterWaterShineCharge"
{
"canShineCharge": {
"usedTiles": 33,
"openEnd": 2
}
}
{
"or": [
{
"enemyDamage": {
"enemy": "Mochtroid",
"type": "contact",
"hits": 2
}
},
{
"and": [
"canDodgeWhileShooting",
{
"or": [
"Wave",
"Spazer",
"Plasma",
{
"ammo": {
"type": "Missile",
"count": 1
}
},
{
"ammo": {
"type": "Super",
"count": 1
}
}
]
}
]
}
]
}
{
"shinespark": {
"frames": 20,
"excessFrames": 3
}
}
|
|
Requires: "Gravity"
{
"or": [
"SpaceJump",
"Grapple",
"canConsecutiveWalljump"
]
}
{
"or": [
"canDodgeWhileShooting",
"ScrewAttack",
"Wave",
"Spazer",
"Plasma",
"Grapple"
]
}
{
"resetRoom": {
"nodes": [
1,
2,
4
],
"mustStayPut": false
}
}
{
"refill": [
"Energy",
"Missile",
"Super"
]
}
|
|
From: 2
Bottom Left Door
To: 2
Bottom Left Door
Enter the room with a careful amount of momentum where Samus must spend extra time slowing down during the stutter, but must not have much run speed. Entrance condition: {
"comeInRunning": {
"speedBooster": true,
"minTiles": 2.4375
}
}
Requires: "canStutterWaterShineCharge"
"canShinechargeMovementComplex"
{
"canShineCharge": {
"usedTiles": 33,
"openEnd": 2
}
}
{
"or": [
{
"enemyDamage": {
"enemy": "Mochtroid",
"type": "contact",
"hits": 2
}
},
{
"and": [
"canDodgeWhileShooting",
{
"or": [
"Wave",
"Spazer",
"Plasma",
{
"ammo": {
"type": "Missile",
"count": 1
}
},
{
"ammo": {
"type": "Super",
"count": 1
}
}
]
}
]
}
]
}
{
"or": [
{
"shinespark": {
"frames": 12
}
},
{
"and": [
"canShinechargeMovementTricky",
{
"shinespark": {
"frames": 3
}
}
]
}
]
}
Exit condition: {
"leaveWithSpark": {}
}
|
|
From: 2
Bottom Left Door
To: 4
Top Right Door
Enter the room with a careful amount of momentum where Samus must spend extra time slowing down during the stutter, but must not have much run speed. Entrance condition: {
"comeInRunning": {
"speedBooster": true,
"minTiles": 2.4375
}
}
Requires: "canStutterWaterShineCharge"
{
"canShineCharge": {
"usedTiles": 33,
"openEnd": 2
}
}
{
"or": [
{
"enemyDamage": {
"enemy": "Mochtroid",
"type": "contact",
"hits": 2
}
},
{
"and": [
"canDodgeWhileShooting",
{
"or": [
"Wave",
"Spazer",
"Plasma",
{
"ammo": {
"type": "Missile",
"count": 1
}
},
{
"ammo": {
"type": "Super",
"count": 1
}
}
]
}
]
}
]
}
{
"shinespark": {
"frames": 39,
"excessFrames": 4
}
}
|
|
Requires: {
"or": [
{
"and": [
"canDodgeWhileShooting",
{
"enemyKill": {
"enemies": [
[
"Menu",
"Menu"
]
]
}
}
]
},
{
"enemyKill": {
"enemies": [
[
"Menu",
"Menu"
]
],
"explicitWeapons": [
"PowerBomb",
"ScrewAttack",
"Wave",
"Spazer",
"Plasma",
"Missile",
"Super"
]
}
},
{
"and": [
"canPrepareForNextRoom",
{
"enemyKill": {
"enemies": [
[
"Menu",
"Menu"
]
],
"explicitWeapons": [
"PseudoScrew"
]
}
}
]
}
]
}
Clears obstacles: A |
|
From: 3
Junction Left of Morph Tunnel
To: 1
Left Door
Requires: {
"or": [
"h_canIBJ",
"canWalljump",
"canSpringBallJumpMidAir"
]
}
{
"or": [
{
"enemyKill": {
"enemies": [
[
"Menu",
"Menu",
"Menu"
]
],
"explicitWeapons": [
"PowerBomb",
"ScrewAttack",
"Wave",
"Spazer",
"Plasma",
"Missile",
"Super"
]
}
},
{
"and": [
{
"enemyKill": {
"enemies": [
[
"Menu",
"Menu",
"Menu"
]
]
}
},
{
"or": [
{
"and": [
"canDodgeWhileShooting",
"canTrickyJump"
]
},
{
"and": [
"canDodgeWhileShooting",
{
"enemyDamage": {
"enemy": "Menu",
"type": "contact",
"hits": 1
}
}
]
},
{
"enemyDamage": {
"enemy": "Menu",
"type": "contact",
"hits": 2
}
}
]
}
]
}
]
}
|
|
From: 1
Left Door
To: 2
Right Door
Entrance condition: {
"comeInShinecharging": {
"length": 13,
"openEnd": 0
}
}
Requires: "Plasma" "canDodgeWhileShooting" Exit condition: {
"leaveShinecharged": {
"framesRemaining": 155
}
}
|
|
From: 2
Right Door
To: 1
Left Door
Entrance condition: {
"comeInShinecharging": {
"length": 13,
"openEnd": 0
}
}
Requires: "Plasma" "canDodgeWhileShooting" Exit condition: {
"leaveShinecharged": {
"framesRemaining": 155
}
}
|
|
Requires: {
"or": [
"h_hasBeamUpgrade",
"canDodgeWhileShooting",
"Grapple",
"ScrewAttack"
]
}
{
"resetRoom": {
"nodes": [
1
],
"mustStayPut": false
}
}
{
"refill": [
"Energy",
"Missile"
]
}
|
|
Requires: "canBePatient"
{
"or": [
"canDodgeWhileShooting",
"Charge",
"Ice"
]
}
{
"resetRoom": {
"nodes": [
1
],
"mustStayPut": false
}
}
{
"refill": [
"Super",
"PowerBomb"
]
}
|
|
Requires: {
"or": [
"h_hasBeamUpgrade",
"canDodgeWhileShooting",
"Grapple",
"ScrewAttack",
"canBePatient",
{
"resourceCapacity": [
{
"type": "Missile",
"count": 1
}
]
},
"h_canUsePowerBombs"
]
}
|
|
Requires: {
"or": [
"h_hasBeamUpgrade",
"canDodgeWhileShooting",
"Grapple",
"ScrewAttack",
"canBePatient",
{
"resourceCapacity": [
{
"type": "Missile",
"count": 1
}
]
},
"h_canUsePowerBombs"
]
}
|
|
Requires: {
"or": [
"h_hasBeamUpgrade",
"canDodgeWhileShooting",
"Grapple",
"ScrewAttack"
]
}
{
"resetRoom": {
"nodes": [
2
],
"mustStayPut": false
}
}
{
"refill": [
"Energy",
"Missile"
]
}
|
|
Requires: "canBePatient"
{
"or": [
"canDodgeWhileShooting",
"Charge",
"Ice"
]
}
{
"resetRoom": {
"nodes": [
2
],
"mustStayPut": false
}
}
{
"refill": [
"Super",
"PowerBomb"
]
}
|
|
Stand (don't crouch) next to the door and shoot diagonally down into the sand until the puyos are killed. Requires: "canDodgeWhileShooting"
{
"resetRoom": {
"nodes": [
1
],
"mustStayPut": false
}
}
{
"refill": [
"Energy",
"Missile",
"PowerBomb"
]
}
|
|
Requires: {
"or": [
"ScrewAttack",
"canTrickyJump",
{
"and": [
"canDodgeWhileShooting",
"canCameraManip",
{
"enemyKill": {
"enemies": [
[
"Blue Sidehopper",
"Blue Sidehopper"
]
]
}
}
]
}
]
}
Exit condition: {
"leaveWithGModeSetup": {}
}
|
|
Kill the top hopper quickly; the left hopper is more random. To be safe, plan to retreat right while attacking. It also helps to attempt to move the hopper off camera between attacks. Requires: "canDodgeWhileShooting"
"canTrickyJump"
"canCameraManip"
{
"enemyKill": {
"enemies": [
[
"Blue Sidehopper",
"Blue Sidehopper"
]
]
}
}
|
|
Notable: true Align with the wall below the door while facing left. Hold dash, turn around, start running and arm pump once. Jump from the rightmost 'X' in the background. Release forward at some point while airborne, but repress it again before the CWJ. Immediately after the CWJ, shoot the Metroid to avoid getting grabbed. Requires: "canCWJ"
"canInsaneWalljump"
{
"or": [
{
"obstaclesCleared": [
"A"
]
},
"canDodgeWhileShooting"
]
}
|
|
From: 3
Junction (Get Past Metroids, Left to Right)
To: 2
Right Door
Requires: {
"or": [
{
"and": [
{
"or": [
"canWalljump",
"HiJump"
]
},
{
"acidFrames": 20
}
]
},
{
"and": [
"Gravity",
{
"acidFrames": 10
}
]
}
]
}
{
"or": [
{
"obstaclesCleared": [
"A"
]
},
"Ice",
"ScrewAttack",
{
"and": [
"canPseudoScrew",
"canDodgeWhileShooting"
]
},
"canMetroidAvoid",
{
"metroidFrames": 150
}
]
}
|
|
From: 4
Junction (Get Past Metroids, Right to Left)
To: 1
Left Door (locked)
Requires: {
"acidFrames": 65
}
{
"or": [
{
"obstaclesCleared": [
"A"
]
},
"Ice",
"ScrewAttack",
{
"and": [
"canPseudoScrew",
"canDodgeWhileShooting"
]
},
{
"and": [
"canInsaneJump",
"canMetroidAvoid"
]
},
{
"metroidFrames": 670
}
]
}
|
|
Use ScrewAttack or a PseudoScrew to prevent Metroids from attaching to Samus. Requires: "canDodgeWhileShooting"
{
"or": [
"ScrewAttack",
"canPseudoScrew"
]
}
|
|
Use ScrewAttack or a PseudoScrew to prevent Metroids from attaching to Samus. Requires: {
"or": [
{
"and": [
"ScrewAttack",
"canDodgeWhileShooting"
]
},
{
"and": [
"canPseudoScrew",
"canPrepareForNextRoom",
"canDodgeWhileShooting"
]
}
]
}
|
|
Use ScrewAttack or a PseudoScrew to prevent Metroids from attaching to Samus. These abilities may also be used to temporarily prevent damage from Metroids if they do attach. Requires: {
"or": [
"ScrewAttack",
"canPseudoScrew"
]
}
{
"or": [
"canDodgeWhileShooting",
{
"and": [
"canCarefulJump",
"SpaceJump"
]
}
]
}
|
|
Requires: "Ice"
{
"enemyKill": {
"enemies": [
[
"Metroid",
"Metroid",
"Metroid"
]
],
"explicitWeapons": [
"Super",
"Missile"
]
}
}
{
"or": [
"canDodgeWhileShooting",
{
"enemyDamage": {
"enemy": "Rinka",
"type": "contact",
"hits": 1
}
}
]
}
Clears obstacles: A |
|
Requires: {
"or": [
"Ice",
{
"and": [
"ScrewAttack",
"canDodgeWhileShooting"
]
}
]
}
{
"or": [
"canDodgeWhileShooting",
{
"enemyDamage": {
"enemy": "Rinka",
"type": "contact",
"hits": 1
}
}
]
}
{
"or": [
"canTrickyJump",
{
"enemyDamage": {
"enemy": "Rinka",
"type": "contact",
"hits": 1
}
}
]
}
|
|
From: 1
Top Left Door
To: 2
Bottom Door (locked)
Requires: {
"enemyKill": {
"enemies": [
[
"Metroid",
"Metroid"
],
[
"Metroid"
]
],
"excludedWeapons": [
"PowerBomb"
]
}
}
"canDodgeWhileShooting"
Clears obstacles: A |
|
Requires: "Ice"
{
"enemyKill": {
"enemies": [
[
"Metroid",
"Metroid",
"Metroid"
]
],
"explicitWeapons": [
"Super",
"Missile"
]
}
}
{
"or": [
"canPrepareForNextRoom",
{
"resetRoom": {
"nodes": [
2
]
}
},
{
"and": [
"h_canUseMorphBombs",
"canDodgeWhileShooting",
"canEscapeEnemyGrab",
{
"metroidFrames": 120
}
]
}
]
}
{
"or": [
"canTrickyJump",
{
"enemyDamage": {
"enemy": "Rinka",
"type": "contact",
"hits": 1
}
}
]
}
Clears obstacles: A |
|
Requires: {
"or": [
"Ice",
{
"and": [
"ScrewAttack",
"canDodgeWhileShooting"
]
}
]
}
{
"or": [
"canCarefulJump",
{
"enemyDamage": {
"enemy": "Rinka",
"type": "contact",
"hits": 1
}
}
]
}
|
|
From: 2
Bottom Door (locked)
To: 1
Top Left Door
Notable: true 
Avoid all of the Rinkas and Metroids with no equipment and taking no damage. Begin by shooting the bottom Metroid hold it in place, and wait right below the first ledge. Once the middle Metroid passes by, jump up and shoot any Rinkas that are in the way. Repeat for the next ledge, clear any Rinkas, and then run to the door. Requires: "canMetroidAvoid" "canDodgeWhileShooting" "canCarefulJump" |
|
Move to the middle section after the first Metroid has died to kill the remaining two. Requires: {
"enemyKill": {
"enemies": [
[
"Metroid",
"Metroid"
],
[
"Metroid"
]
],
"explicitWeapons": [
"PowerBomb"
]
}
}
{
"metroidFrames": 280
}
{
"or": [
"canDodgeWhileShooting",
{
"metroidFrames": 100
}
]
}
Clears obstacles: A |
|
From: 3
Mother Brain (locked)
To: 4
Mother Brain (Phases 2 and 3) (locked)
Requires: "h_canPartiallyBreakMotherBrainGlass"
{
"or": [
{
"and": [
{
"ammo": {
"type": "Super",
"count": 5
}
},
{
"ammo": {
"type": "Missile",
"count": 15
}
},
{
"or": [
"canTrickyUseFrozenEnemies",
"canTrickyJump",
{
"enemyDamage": {
"enemy": "Rinka",
"type": "contact",
"hits": 1
}
}
]
}
]
},
{
"and": [
{
"ammo": {
"type": "Super",
"count": 10
}
},
{
"ammo": {
"type": "Missile",
"count": 2
}
}
]
},
{
"and": [
"h_SupersDoubleDamageMotherBrain",
{
"ammo": {
"type": "Super",
"count": 4
}
},
{
"ammo": {
"type": "Missile",
"count": 8
}
}
]
},
{
"and": [
"h_SupersDoubleDamageMotherBrain",
{
"ammo": {
"type": "Super",
"count": 2
}
},
{
"ammo": {
"type": "Missile",
"count": 18
}
},
{
"or": [
"canTrickyUseFrozenEnemies",
"canTrickyJump",
{
"enemyDamage": {
"enemy": "Rinka",
"type": "contact",
"hits": 1
}
}
]
}
]
}
]
}
{
"or": [
"canTrickyUseFrozenEnemies",
{
"and": [
"canDodgeWhileShooting",
{
"enemyDamage": {
"enemy": "Rinka",
"type": "contact",
"hits": 1
}
}
]
},
{
"enemyDamage": {
"enemy": "Rinka",
"type": "contact",
"hits": 2
}
}
]
}
|
|
From: 3
Mother Brain (locked)
To: 4
Mother Brain (Phases 2 and 3) (locked)
Requires: "f_MotherBrainGlassBroken"
{
"or": [
{
"and": [
{
"ammo": {
"type": "Missile",
"count": 30
}
},
{
"or": [
"canTrickyUseFrozenEnemies",
"canTrickyJump",
{
"enemyDamage": {
"enemy": "Rinka",
"type": "contact",
"hits": 1
}
}
]
}
]
},
{
"and": [
{
"ammo": {
"type": "Super",
"count": 5
}
},
{
"ammo": {
"type": "Missile",
"count": 15
}
}
]
}
]
}
{
"or": [
"canTrickyUseFrozenEnemies",
{
"and": [
"canDodgeWhileShooting",
{
"enemyDamage": {
"enemy": "Rinka",
"type": "contact",
"hits": 1
}
}
]
},
{
"enemyDamage": {
"enemy": "Rinka",
"type": "contact",
"hits": 2
}
}
]
}
|
|
From: 3
Mother Brain (locked)
To: 4
Mother Brain (Phases 2 and 3) (locked)
Requires: "f_MotherBrainGlassBroken"
{
"or": [
{
"ammo": {
"type": "Super",
"count": 10
}
},
{
"and": [
"h_SupersDoubleDamageMotherBrain",
{
"ammo": {
"type": "Super",
"count": 5
}
}
]
}
]
}
{
"or": [
"canTrickyUseFrozenEnemies",
"canDodgeWhileShooting",
{
"enemyDamage": {
"enemy": "Rinka",
"type": "contact",
"hits": 1
}
}
]
}
|
|
From: 3
Mother Brain (locked)
To: 4
Mother Brain (Phases 2 and 3) (locked)
Requires: "h_canPartiallyBreakMotherBrainGlass"
{
"ammo": {
"type": "Missile",
"count": 30
}
}
{
"or": [
"canTrickyUseFrozenEnemies",
{
"and": [
"canTrickyJump",
"canDodgeWhileShooting",
{
"enemyDamage": {
"enemy": "Rinka",
"type": "contact",
"hits": 1
}
}
]
},
{
"and": [
"canDodgeWhileShooting",
{
"enemyDamage": {
"enemy": "Rinka",
"type": "contact",
"hits": 2
}
}
]
},
{
"enemyDamage": {
"enemy": "Rinka",
"type": "contact",
"hits": 3
}
}
]
}
|
|
From: 3
Mother Brain (locked)
To: 4
Mother Brain (Phases 2 and 3) (locked)
Requires: "h_canPartiallyBreakMotherBrainGlass"
{
"or": [
{
"ammo": {
"type": "Super",
"count": 14
}
},
{
"and": [
"h_SupersDoubleDamageMotherBrain",
{
"ammo": {
"type": "Super",
"count": 12
}
}
]
}
]
}
{
"or": [
"canTrickyUseFrozenEnemies",
{
"and": [
"canDodgeWhileShooting",
{
"enemyDamage": {
"enemy": "Rinka",
"type": "contact",
"hits": 1
}
}
]
},
{
"enemyDamage": {
"enemy": "Rinka",
"type": "contact",
"hits": 2
}
}
]
}
|
|
From: 5
Between First and Second Zebetite (locked)
To: 11
Between First and Second Zebetite (unlocked)
Requires: "h_canOpenZebetites"
{
"or": [
{
"and": [
"canDodgeWhileShooting",
"canInsaneJump"
]
},
{
"enemyDamage": {
"enemy": "Rinka",
"type": "contact",
"hits": 1
}
}
]
}
|
|
From: 6
Between Second and Third Zebetite (locked)
To: 12
Between Second and Third Zebetite (unlocked)
Requires: "h_canOpenZebetites"
{
"or": [
{
"and": [
"canDodgeWhileShooting",
"canTrickyJump"
]
},
{
"enemyDamage": {
"enemy": "Rinka",
"type": "contact",
"hits": 1
}
}
]
}
|
|
From: 7
Between Third and Fourth Zebetite (locked)
To: 13
Between Third and Fourth Zebetite (unlocked)
Requires: "h_canOpenZebetites"
{
"enemyDamage": {
"enemy": "Rinka",
"type": "contact",
"hits": 1
}
}
|
|
From: 8
Before First Zebetite (locked)
To: 14
Before First Zebetite (unlocked)
Requires: "h_canOpenZebetites"
{
"or": [
"canDodgeWhileShooting",
{
"enemyDamage": {
"enemy": "Rinka",
"type": "contact",
"hits": 1
}
}
]
}
|
|
Run from or Roll under the pirate lazers. The Pirates will also not shoot if they come on screen while Samus is crouched. Requires: {
"or": [
"HiJump",
"canWalljump",
"h_canFly"
]
}
{
  "or": [
    {
      "and": [
        "canDodgeWhileShooting",
        "canCameraManip",
        {
          "or": [
            "Plasma",
            {
              "and": [
                "h_hasBeamUpgrade",
                "canBePatient"
              ]
            },
            "canBeVeryPatient"
          ]
        }
      ]
    },
    {
      "and": [
        {
          "or": [
            "canBePatient",
            {
              "enemyDamage": {
                "enemy": "Tourian Space Pirate (all)",
                "type": "contact",
                "hits": 1
              }
            }
          ]
        },
        {
          "or": [
            "Morph",
            "canTurnaroundAimCancel",
            "canXRayTurnaround"
          ]
        }
      ]
    }
  ]
}
|
|
Run from or Roll under the pirate lazers. The Pirates will also not shoot if they come on screen while Samus is crouched. Requires: {
"or": [
{
"and": [
"canDodgeWhileShooting",
"canCameraManip",
{
"or": [
"Plasma",
{
"and": [
"h_hasBeamUpgrade",
"canBePatient"
]
},
"canBeVeryPatient"
]
}
]
},
{
"and": [
{
"or": [
"canBePatient",
{
"enemyDamage": {
"enemy": "Tourian Space Pirate (all)",
"type": "contact",
"hits": 1
}
}
]
},
{
"or": [
"Morph",
"canTurnaroundAimCancel",
"canXRayTurnaround"
]
}
]
}
]
}
|
|
Requires: {
"canShineCharge": {
"usedTiles": 33,
"openEnd": 2
}
}
{
"or": [
{
"enemyDamage": {
"enemy": "Tourian Space Pirate (all)",
"type": "contact",
"hits": 1
}
},
{
"and": [
"Plasma",
"canHitbox"
]
},
"Morph",
"ScrewAttack",
{
"and": [
"canDodgeWhileShooting",
"canCameraManip",
{
"or": [
"h_hasBeamUpgrade",
"canBePatient"
]
}
]
}
]
}
Exit condition: {
"leaveShinecharged": {
"framesRemaining": 120
}
}
|
|
Requires: {
"obstaclesNotCleared": [
"A"
]
}
{
"or": [
"canCarefulJump",
"ScrewAttack",
"Morph",
{
"enemyDamage": {
"enemy": "Tourian Space Pirate (all)",
"type": "contact",
"hits": 1
}
}
]
}
{
"or": [
"canDodgeWhileShooting",
"Morph",
{
"enemyKill": {
"enemies": [
[
"Tourian Space Pirate (all)",
"Tourian Space Pirate (all)"
]
],
"explicitWeapons": [
"Plasma",
"ScrewAttack",
"Missile",
"Super"
]
}
},
{
"enemyDamage": {
"enemy": "Tourian Space Pirate (all)",
"type": "laser",
"hits": 8
}
},
{
"and": [
"Ice",
{
"enemyDamage": {
"enemy": "Tourian Space Pirate (all)",
"type": "laser",
"hits": 6
}
}
]
},
{
"and": [
{
"or": [
"Wave",
"Spazer"
]
},
{
"enemyDamage": {
"enemy": "Tourian Space Pirate (all)",
"type": "laser",
"hits": 3
}
}
]
},
{
"and": [
"Wave",
"Spazer",
{
"enemyDamage": {
"enemy": "Tourian Space Pirate (all)",
"type": "laser",
"hits": 2
}
}
]
}
]
}
Exit condition: {
"leaveWithRunway": {
"length": 26,
"openEnd": 1
}
}
|
|
Requires: "canCarefulJump"
{
"or": [
{
"and": [
"canTrickyJump",
"canDodgeWhileShooting"
]
},
{
"enemyKill": {
"enemies": [
[
"Tourian Space Pirate (all)",
"Tourian Space Pirate (all)"
]
],
"explicitWeapons": [
"Plasma",
"ScrewAttack",
"Missile",
"Super",
"PowerBomb"
]
}
},
{
"and": [
{
"or": [
"Ice",
"Wave",
"Spazer"
]
},
{
"or": [
"Morph",
"canDodgeWhileShooting"
]
}
]
},
{
"and": [
"Ice",
{
"enemyDamage": {
"enemy": "Tourian Space Pirate (all)",
"type": "laser",
"hits": 6
}
}
]
},
{
"and": [
{
"or": [
"Wave",
"Spazer"
]
},
{
"enemyDamage": {
"enemy": "Tourian Space Pirate (all)",
"type": "laser",
"hits": 3
}
}
]
},
{
"and": [
"Wave",
"Spazer",
{
"enemyDamage": {
"enemy": "Tourian Space Pirate (all)",
"type": "laser",
"hits": 2
}
}
]
}
]
}
Exit condition: {
"leaveWithRunway": {
"length": 26,
"openEnd": 1
}
}
|