canInsaneJump (Extreme)
Executing a jump that requires extremely precise timing, in the vicinity of frame-perfect precision.
Dependencies: canCarefulJump, canTrickyJump
Strats ()
|
Notable: true Enter the room with a very specific run speed to jump from the door, and land a speedball perfectly in the tunnel to break the Bomb block. Entrance condition: {
"comeInShinecharging": {
"length": 0,
"openEnd": 0
}
}
Requires: "canInsaneJump" "canSpeedball" "canTrickyDashJump" "canSlowShortCharge" |
|
From: 4
Middle Right Door
To: 6
Main Junction
Notable: true Enter the room with a very specific run speed to jump from the door, squeeze by the ceiling, and land a speedball perfectly in the tunnel to break the Bomb block. Entrance condition: {
"comeInShinecharging": {
"length": 1,
"openEnd": 0
}
}
Requires: "canSpeedball" "canTrickyDashJump" "canSlowShortCharge" "canInsaneJump" |
|
From: 2
Bottom Left Door
To: 5
Bottom Junction (Right of Boyons)
Requires: "canInsaneJump" |
|
From: 5
Bottom Junction (Right of Boyons)
To: 2
Bottom Left Door
Requires: "canInsaneJump" |
|
From: 5
Alcatraz Door
To: 8
Central Junction
Notable: true Wait 3 minutes for a global Geemer to waddle over, or shoot a Super 20 to 30 seconds after entering the room to knock it off the ceiling and save a lot of time. Damage down until Samus is one Geemer hit away from running out of energy, and set reserves to manual. Crouch jump at a very precise time and mid-air morph to contact the Geemer at the peak of the jump, pressing pause to be in the fade-out while getting hit and reaching 0 energy. Set reserves to auto, unpause, and hold left. While reserves are auto-refilling, Samus' i-frames will run out, allowing Samus to be hit by the Geemer again and be boosted high enough to reach the ledge. The screen will be black, which can be fixed by pausing and unpausing again. Requires: "h_ZebesIsAwake"
"HiJump"
"Morph"
{
"or": [
"canBeVeryPatient",
{
"ammo": {
"type": "Super",
"count": 1
}
}
]
}
"canCrouchJump"
"canInsaneJump"
"canPauseAbuse"
"canNeutralDamageBoost"
{
"autoReserveTrigger": {
"minReserveEnergy": 85
}
}
{
"enemyDamage": {
"enemy": "Geemer (blue)",
"type": "contact",
"hits": 1
}
}
|
|
From: 5
Alcatraz Door
To: 8
Central Junction
Notable: true Wait for a global Geemer to make the long trip along the map, or shoot a Super 20 to 30 seconds after entering the room to knock it off the ceiling and save a lot of time. Hold right against the bomb blocks, take damage from the Geemer, jump, aim-down, and shoot the Geemer shortly before landing. Samus should end up standing on the ground with the Geemer frozen on the wall slightly above the ground (overlapping Samus' hitbox). Facing the bomb blocks and pressed against them, jump while holding down (but not crouched) and then press forward at a precise time to break the aim-down pose. If successful, Samus will clip up through the ceiling. This can be attempted several times before the Geemer thaws. Requires: "HiJump"
"h_ZebesIsAwake"
{
"or": [
"canBeVeryPatient",
{
"ammo": {
"type": "Super",
"count": 1
}
}
]
}
"canPreciseCeilingClip"
"canTrickyUseFrozenEnemies"
{
"enemyDamage": {
"enemy": "Geemer (blue)",
"type": "contact",
"hits": 1
}
}
"canInsaneJump"
|
|
Bring temporary blue from the right side door all the way to the missile location using Springball, SpaceJump, or Morph-UnMorphs. Entrance condition: {
"comeInShinecharging": {
"length": 1,
"openEnd": 1
}
}
Requires: "canTemporaryBlue"
"canInsaneJump"
{
"or": [
"canChainTemporaryBlue",
{
"and": [
"canSpeedball",
"canSpringBallBounce",
"canSlowShortCharge"
]
},
{
"and": [
"canBlueSpaceJump",
"canMockball",
"canSlowShortCharge"
]
}
]
}
|
|
From: 2
Right Door
To: 1
Left Door
Notable: true Use SpeedBooster to break the runway Bomb block and then to shinespark across the room, saving Power Bombs. One Power Bomb is still needed to break the tunnel block. The shinespark timer is very tight and breaking the runway block while storing the Shinespark is required as it saves movement frames. Entrance condition: {
"comeInShinecharging": {
"length": 8,
"openEnd": 0
}
}
Requires: "canSlowShortCharge"
"canShinechargeMovementTricky"
"h_canUsePowerBombs"
"HiJump"
"Gravity"
{
"acidFrames": 16
}
"canInsaneJump"
{
"shinespark": {
"frames": 93,
"excessFrames": 15
}
}
|
|
Break the tunnel block with a Bomb and then return to safety. Break the runway block on the next cycle. SpringBall helps avoid acid damage. Bombing Samus up through the runway with a second Bomb can help, or it can trap Samus in the acid if liquid physics take effect. Requires: "h_canUseMorphBombs"
{
"or": [
"h_canUseSpringBall",
{
"acidFrames": 10
}
]
}
{
"or": [
"canInsaneJump",
{
"and": [
"canTrickyJump",
{
"acidFrames": 10
}
]
},
{
"and": [
"canCarefulJump",
{
"acidFrames": 120
}
]
},
{
"acidFrames": 200
}
]
}
|
|
From: 2
Middle Right Door
To: 1
Top Right Door
In Red Brinstar Firefleas, instead of simply grappling and moonwalking into the transition, perform a setup like in the Moat: Angle-up, jump, bonk the ceiling, then use Grapple just before landing and moonwalk back as it attaches. This will put Samus into a lower position after the transition. Samus will be stuck inside the wall. Perform a Crystal Flash, then morph and roll out. Entrance condition: {
"comeInWithGrappleTeleport": {
"blockPositions": [
[
5,
3
]
]
}
}
Requires: "canInsaneJump" "h_canCrystalFlash" |
|
From: 4
Bottom Right Door
To: 1
Top Right Door
In Red Brinstar Firefleas, instead of simply grappling and moonwalking into the transition, perform a setup like in the Moat: Angle-up, jump, bonk the ceiling, then use Grapple just before landing and moonwalk back as it attaches. This will put Samus into a lower position after the transition. Samus will be stuck inside the wall. Perform a Crystal Flash, then morph and roll out. Entrance condition: {
"comeInWithGrappleTeleport": {
"blockPositions": [
[
5,
3
]
]
}
}
Requires: "canInsaneJump" "h_canCrystalFlash" |
|
From: 1
Left Door
To: 1
Left Door
Notable: true Freeze all three Choots to significantly increase the length of the runway and run across the entire room. Freeze each immediately after it jumps in order to be able to run onto and off of it without a problem. Jump between two of them and wait for them to fall and start to rise again, taking one Choot hit in the process. This will give Samus just enough time to shoot them both and jump and freeze the third and barely be able to use the runway before they thaw. With this runway, Samus can then get a suitless, in-room shinecharge, with just a 1-tap. Requires: "h_canTrickyFrozenEnemyRunway"
"Gravity"
"canInsaneJump"
{
"enemyDamage": {
"enemy": "Choot",
"type": "contact",
"hits": 1
}
}
Exit condition: {
"leaveWithRunway": {
"length": 28,
"openEnd": 0,
"steepUpTiles": 6,
"steepDownTiles": 6
}
}
|
|
From: 1
Left Door
To: 1
Left Door
Notable: true Freeze all three Choots to significantly increase the length of the runway and run across the entire room. Freeze each immediately after it jumps in order to be able to run onto and off of it without a problem. Jump between two of them and wait for them to fall and start to rise again, taking one Choot hit in the process. This will give Samus just enough time to shoot them both and jump and freeze the third and barely be able to use the runway before they thaw. With this runway, Samus can then get a suitless, in-room shinecharge, with just a 1-tap. Requires: "h_canTrickyFrozenEnemyRunway"
"canInsaneJump"
{
"enemyDamage": {
"enemy": "Choot",
"type": "contact",
"hits": 1
}
}
Exit condition: {
"leaveWithRunway": {
"length": 15,
"openEnd": 1
}
}
|
|
From: 2
Right Door
To: 2
Right Door
Notable: true Freeze all three Choots to significantly increase the length of the runway and run across the entire room. Freeze each immediately after it jumps in order to be able to run onto and off of it without a problem. Jump between two of them and wait for them to fall and start to rise again, taking one Choot hit in the process. This will give Samus just enough time to shoot them both and jump and freeze the third and barely be able to use the runway before they thaw. With this runway, Samus can then get a suitless, in-room shinecharge, with just a 1-tap. Requires: "h_canTrickyFrozenEnemyRunway"
"Gravity"
"canInsaneJump"
{
"enemyDamage": {
"enemy": "Choot",
"type": "contact",
"hits": 1
}
}
Exit condition: {
"leaveWithRunway": {
"length": 28,
"openEnd": 0,
"steepUpTiles": 6,
"steepDownTiles": 6
}
}
|
|
From: 2
Right Door
To: 2
Right Door
Notable: true Freeze all three Choots to significantly increase the length of the runway and run across the entire room. Freeze each immediately after it jumps in order to be able to run onto and off of it without a problem. Jump between two of them and wait for them to fall and start to rise again, taking one Choot hit in the process. This will give Samus just enough time to shoot them both and jump and freeze the third and barely be able to use the runway before they thaw. With this runway, Samus can then get a suitless, in-room shinecharge, with just a 1-tap. Requires: "h_canTrickyFrozenEnemyRunway"
"canInsaneJump"
{
"enemyDamage": {
"enemy": "Choot",
"type": "contact",
"hits": 1
}
}
Exit condition: {
"leaveWithRunway": {
"length": 15,
"openEnd": 1
}
}
|
|
From: 1
Left Door
To: 2
Right Door
Notable: true Using an exact runway size of 7 tiles; use extremely precise, controlled springball bounces to cross the ocean. 7 tiles of runspeed can freely be achieved by requipping SpeedBooster after reaching the max normal run speed. Mockball down the submerged ramp and begin SpringBall bouncing either above the water, or under water using the platforms. The final SpringBall bounce must be on the left edge of the rightmost underwater platform. While the bounce is occuring, setup a mid-air SpringBall Jump to escape the water and reach the door. Requires: "canInsaneJump" "SpeedBooster" "canSpringBallBounce" "canDoubleSpringBallJumpMidAir" "canMockball" |
|
Notable: true Hold angle-up, jump, bonk the ceiling, and use Grapple just before landing. Moonwalk into the transition on the same frame that the Grapple Beam reaches the Grapple block. Continue holding Grapple through the door transition to initiate a teleport in the next room. Requires: "canMoonwalk" "canInsaneJump" Exit condition: {
"leaveWithGrappleTeleport": {
"blockPositions": [
[
7,
2
]
]
}
}
|
|
From: 13
Below Power Bomb Blocks - Main Junction
To: 14
Right Etecoon Shaft - Wall Jump Climb Checkpoint Junction
Notable: true Break the bomb block at the bottom right of the main shaft. Bring a Zeela down to the bottom of the room. Morph inside the tunnel, take a Zeela hit, then jump, aim down, and shoot to freeze the Zeela as it starts to move up and while Samus is close to landing. Jump and aim down to get on top of the Zeela. If the Zeela is precisely positioned exactly 12 pixels above the ground, you can press up to make Samus stand; Otherwise, if you have X-ray, then the Zeela should be frozen lower, and you can morph and unmorph and use X-ray to force Samus to stand up; in this case there is a 6-pixel window over which it works, with the Zeela being between 4 and 9 pixels above the ground. In either case, after standing up on top of the Zeela, jump and aim down to break the crumble block. Then, before the crumble respawns, morph and use Spring Ball (if available) to jump back up and into the tunnel; without Spring Ball, a quick mid-air morph also works but is more difficult. Requires: "h_canBombThings"
"h_additionalBomb"
{
"enemyDamage": {
"enemy": "Zeela",
"type": "contact",
"hits": 1
}
}
"canTrickyUseFrozenEnemies"
"canTrickyJump"
{
"or": [
"canXRayCeilingClip",
{
"and": [
"canPreciseCeilingClip",
"canInsaneJump",
"canBeVeryPatient"
]
}
]
}
{
"or": [
"h_canUseSpringBall",
{
"and": [
"can4HighMidAirMorph",
"canInsaneJump"
]
}
]
}
{
"or": [
"canBePatient",
{
"obstaclesNotCleared": [
"A"
]
}
]
}
|
|
From: 3
Bottom Right Door
To: 2
Top Right Door
Notable: true After teleporting, extend the Grapple, and swing back and forth to fix the camera and then to gain momentum. A precisely timed release of Grapple will allow Samus to fling onto the ledge on the right. Entrance condition: {
"comeInWithGrappleTeleport": {
"blockPositions": [
[
7,
2
]
]
}
}
Requires: "canInsaneJump" |
|
Green Hills Grapple Teleport into Grapple Jump (from Red Brinstar Firefleas) (Insane)
Green Hill Zone
From: 3
Bottom Right Door
To: 2
Top Right Door
Notable: true After teleporting, swing back and forth to fix the camera. Swing to the right by soft-bouncing against the door followed by fully extending the Grapple Beam. Release grapple low, but not too low, to get enough momentum while also leaving enough space to gain more height with a grapple jump to reach the ledge. Holding jump just before releasing Grapple may help prevent losing momentum. Entrance condition: {
"comeInWithGrappleTeleport": {
"blockPositions": [
[
5,
3
]
]
}
}
Requires: "canTrickyGrappleJump" "canInsaneJump" |
|
From: 2
Right Door
To: 3
Top Junction
Enter with G-Mode and use X-Ray to get stuck 9 pixels inside the door. X-Ray climb to a relatively specific height: after just one pixel of Samus' feet are visible while crouching facing left, perform between 20 and 22 more X-Ray stand-ups (any of these work). Use X-ray to face left, then run and jump to barely make it onto the ledge. Entrance condition: {
"comeInWithGMode": {
"mode": "direct",
"morphed": false
}
}
Requires: "canXRayClimb" "canOffScreenMovement" "canInsaneJump" |
|
From: 2
Right Door
To: 3
Top Junction
Get stuck 3 pixels inside the door, and X-ray climb to a precise height: after just one pixel of Samus' feet are visible while crouching facing left, perform exactly 7 more X-Ray stand-ups. Use X-ray to face left, then run and jump to barely make it onto the ledge. Entrance condition: {
"comeInWithDoorStuckSetup": {}
}
Requires: "HiJump" "canXRayClimb" "canOffScreenMovement" "canInsaneJump" |
|
From: 1
Right Door
To: 2
Chozo Item
Traverse the room while rolling on the thorns and avoiding the Samus Eaters. Roll from the first platform onto the thorns under the first set of Boyons. When just past the first Boyons, turn right and wait on the safe spot for a second to overload PLMs. Move right to touch the thorns and use that to damage boost leftwards onto the next thorns and roll into the third Samus Eater. Place a Power Bomb and then quickly unmorph and jump onto the block above and exit G-Mode before the Power Bomb explodes to break the wall. Note that if Samus is teleported into the Samus Eater when exiting G-Mode, then PLMs weren't properly overloaded before entering it. PLMs can be overloaded by waiting on their petals before entering them. Also note that there are much easier strats with more Energy or more Power Bombs. Entrance condition: {
"comeInWithGMode": {
"mode": "any",
"morphed": true
}
}
Requires: "canIframeSpikeJump"
"canNeutralDamageBoost"
"canInsaneJump"
{
"thornHits": 2
}
"h_canArtificialMorphPowerBomb"
Clears obstacles: B |
|
From: 1
Left Door
To: 2
Right Door
Notable: true This is a very long ceiling bomb jump. Crossing the room with artificial morph is particularly difficult without a good way to kill the Wavers. Entrance condition: {
"comeInWithGMode": {
"mode": "any",
"morphed": true
}
}
Requires: "h_canArtificialMorphCeilingBombJump" "canLongCeilingBombJump" "canBeVeryPatient" "canInsaneJump" |
|
From: 2
Right Door
To: 1
Left Door
Notable: true This is a very long ceiling bomb jump. Crossing the room with artificial morph is particularly difficult without a good way to kill the Wavers. It is recommended to avoid killing the Firefleas, as the room gets dark fast. Entrance condition: {
"comeInWithGMode": {
"mode": "any",
"morphed": true
}
}
Requires: "h_canArtificialMorphBombHorizontally" "h_canArtificialMorphIBJ" "h_canArtificialMorphCeilingBombJump" "canLongCeilingBombJump" "canBeVeryPatient" "canInsaneJump" |
|
From: 4
Small Ledge Below Left Door
To: 1
Left Door
Notable: true Jump to the door leading to X-Ray either by jumping from spikes or with a very precise jump. Cross the room by Jumping atop the spikes. Taking enemy damage can be used to reduce some spike damage. The final jump can either be made by jumping from the bottommost spike stair or from the safe stair. Setup run speed atop the spike stair by holding forward to be pushed backward. The safe stair jump is much harder, but can be made without every pixel of runway. Requires: "HiJump"
"canTrickyJump"
{
"or": [
{
"and": [
"canInsaneWalljump",
"canInsaneJump",
"h_canBackIntoCorner"
]
},
{
"and": [
{
"spikeHits": 1
},
"canPreciseWalljump",
"canIframeSpikeJump"
]
}
]
}
|
|
From: 1
Top Left Door
To: 9
Junction (Top Rippers)
Notable: true Freeze the Beetom and use it as a platform to climb the room without wall jumps. This can be done with well-timed Flatley jumps on top of the frozen Beetom, by turning around and spin jumping just as it unfreezes. This can be made easier (at the cost of some additional Beetom hits) with a pause-buffer method: Press pause, and begin a turn-around just before the pause hits; unequip Ice to immediately unfreeze the Beetom; unpause and press jump quickly after control resumes, but without buffering the input. For the top two jumps, it is possible to reduce the risk of damage by freezing the Beetom against the wall: in case of a failure due to an early (e.g. buffered) jump, the Beetom may stay stuck wiggling in the wall, and then it can be refrozen without needing to take damage to reposition it. Requires: "canTrickyUseFrozenEnemies"
"canFlatleyJump"
{
"or": [
{
"enemyDamage": {
"enemy": "Beetom",
"type": "contact",
"hits": 9
}
},
{
"and": [
"canInsaneJump",
{
"enemyDamage": {
"enemy": "Beetom",
"type": "contact",
"hits": 4
}
}
]
},
{
"and": [
"canBeVeryPatient",
{
"enemyDamage": {
"enemy": "Beetom",
"type": "contact",
"hits": 1
}
},
{
"refill": [
"Energy"
]
}
]
}
]
}
|
|
From: 4
Junction (Right Pit)
To: 3
Right Door
Notable: true Back up against the wall of the single-tile ledge. Run forward, perform a single arm pump, and jump on the last possible frame. Aim down just before reaching the platform. The arm pump can be performed by pressing shot, or by pressing an angle button (but not releasing it until after the jump). Requires: "h_canBackIntoCorner" "canInsaneJump" "canDownGrab" |
|
From: 4
Lava, Left Wall
To: 3
Above Lava Junction
Notable: true Begin on top of the lower left Namihe Jump into a double IBJ with such timing that Samus passes above the fired flame and such a way that there is no horizontal speed. A forward jump with run not held will work. Begin diagonal bomb jumping once past the start of the 2nd spike group from the top. Requires: "h_heatProof"
"Gravity"
{
"or": [
"h_lavaProof",
"canSuitlessLavaDive"
]
}
"h_canJumpIntoIBJ"
"h_canDoubleBombJump"
"h_canDiagonalBombJump"
"h_canStaggeredIBJ"
"canInsaneJump"
{
"heatFrames": 1560
}
{
"lavaFrames": 1520
}
|
|
From: 4
Lava, Left Wall
To: 3
Above Lava Junction
Notable: true Enter the Bottom-Left Namihe by Kagoing inside of it. Wait for a second hit to gain I-Frames and then very quickly walljump up the spikes and across to the right side wall. Requires: "canSuitlessLavaDive"
"canInsaneWalljump"
"canInsaneJump"
"canIframeSpikeJump"
"canStaggeredWalljump"
"canFastWalljumpClimb"
"canUseEnemies"
"canKago"
{
"heatFrames": 510
}
{
"lavaFrames": 480
}
{
"enemyDamage": {
"enemy": "Namihe",
"type": "kago",
"hits": 2
}
}
|
|
From: 3
Hidden Platform Item
To: 4
Junction Above Hidden Platform Item
Time the breaking of the hidden item block with a spinjump to avoid falling into the lava. Turnaround just before the item fanfare begins and then hold jump to buffer a spinjump. Requires: "canInsaneJump"
{
"heatFrames": 30
}
|
|
From: 3
Bottom Left Door
To: 6
Top Right Door
Entrance condition: {
"comeInShinecharging": {
"length": 12,
"openEnd": 0
}
}
Requires: "HiJump"
"canShinechargeMovementTricky"
"canInsaneJump"
{
"shinespark": {
"frames": 6
}
}
Exit condition: {
"leaveWithSpark": {}
}
|
|
From: 5
Middle Right Door
To: 1
Top Left Door
Quickly climb the left side of the room to just have enough time to shinespark out the door. Requires precise ledge grabs, but some precise walljumps can make it slightly easier. Entrance condition: {
"comeInShinecharging": {
"length": 12,
"openEnd": 0
}
}
Requires: "HiJump"
"canMidairShinespark"
"canShinechargeMovementTricky"
"canInsaneJump"
{
"shinespark": {
"frames": 5
}
}
Exit condition: {
"leaveWithSpark": {}
}
|
|
From: 5
Middle Right Door
To: 6
Top Right Door
Quickly climb the right side of the room to just have enough time to shinespark out the door. Entrance condition: {
"comeInShinecharging": {
"length": 4,
"openEnd": 1
}
}
Requires: "HiJump"
"canMidairShinespark"
"canShinechargeMovementTricky"
"canInsaneJump"
{
"shinespark": {
"frames": 6
}
}
Exit condition: {
"leaveWithSpark": {}
}
|
|
From: 6
Top Right Door
To: 7
Elevator
Jump onto the Sova platform, and off again, without getting hit. This requires a very clean ledge grab. Entrance condition: {
"comeInShinecharged": {
"framesRequired": 105
}
}
Requires: "canInsaneJump" "canShinechargeMovementTricky" Exit condition: {
"leaveShinecharged": {
"framesRemaining": "auto"
}
}
|
|
From: 6
Top Right Door
To: 7
Elevator
Jump onto the Sova platform without getting hit. This requires a very clean ledge grab. Entrance condition: {
"comeInShinecharging": {
"length": 3,
"openEnd": 0
}
}
Requires: "canInsaneJump" "canShinechargeMovementTricky" Exit condition: {
"leaveShinecharged": {
"framesRemaining": 80
}
}
|
|
Requires: "HiJump"
{
"or": [
{
"and": [
{
"doorUnlockedAtNode": 3
},
{
"doorUnlockedAtNode": 5
},
{
"canShineCharge": {
"usedTiles": 14,
"openEnd": 0
}
}
]
},
{
"and": [
{
"or": [
{
"doorUnlockedAtNode": 3
},
{
"doorUnlockedAtNode": 5
}
]
},
{
"canShineCharge": {
"usedTiles": 13,
"openEnd": 0
}
}
]
},
{
"canShineCharge": {
"usedTiles": 12,
"openEnd": 0
}
}
]
}
"canShinechargeMovementTricky"
"canInsaneJump"
{
"shinespark": {
"frames": 6
}
}
Exit condition: {
"leaveWithSpark": {}
}
|
|
With a precise enough jump and a quick airball, it's possible to avoid acid damage without a shinespark or wall jump. Requires: "SpeedBooster" "canInsaneJump" "canLateralMidAirMorph" |
|
Using momentum from the previous room, run and jump over the crumble blocks to reach the item. Entrance condition: {
"comeInRunning": {
"minTiles": 1,
"speedBooster": "any"
}
}
Requires: "canInsaneJump"
{
"heatFrames": 60
}
|
|
From: 5
Junction Above Bottom Blocks with Top Blocks Broken
To: 3
Top Right Door
Notable: true Position yourself in the door way a few pixels from the edge. Dashing stationary spinjump into a delayed CWJ and hopefully catch the upper ledge with a walljump. Requires: "h_heatProof"
"HiJump"
"canCWJ"
"canStationarySpinJump"
"canInsaneJump"
"canInsaneWalljump"
{
"doorUnlockedAtNode": 2
}
|
|
From: 2
Right Door
To: 5
Below Left Door Junction
Notable: true Enter the room blue with very low run speed (e.g. with a 4-tap). Use a precisely timed jump to bonk the large stalagtite in the ceiling and fall through both pirates, killing them with the blue speed. Enter the acid while aiming down to shrink Samus' hitbox. This strat works with all combinations of movement items and suits. Entrance condition: {
"comeInShinecharging": {
"length": 9,
"gentleDownTiles": 4,
"openEnd": 1
}
}
Requires: "h_canNavigateHeatRooms"
"canInsaneJump"
"canSuitlessLavaDive"
"canSlowShortCharge"
{
"heatFrames": 330
}
{
"acidFrames": 210
}
|
|
From: 2
Right Door
To: 5
Below Left Door Junction
Notable: true Begin running from the top of the second slope and jump at the bottom of the third slope, bonking the large stalagtite in the ceiling. Kill the first pirate with Screw Attack (or ahead of time with Charge+Plasma), and pass through the second pirate using a charged plasma shot. Enter the acid while aiming down to shrink Samus' hitbox. This strat works with all combinations of movement items and suits. Requires: "h_canNavigateHeatRooms"
"canInsaneJump"
"canSuitlessLavaDive"
"Charge"
"Plasma"
"canHitbox"
{
"or": [
"ScrewAttack",
{
"heatFrames": 210
}
]
}
{
"heatFrames": 330
}
{
"acidFrames": 210
}
|
|
From: 5
Bottom Junction
To: 1
Top Left Door
Run from the right door and jump at the very end of the raised flat ground. Aim down any time before the peak of the jump in order to not fall out of the block. Note that Samus can destroy the Power Bomb blocks above while waiting for the block to respawn. Requires: "canJumpIntoRespawningBlock"
"canTrickyJump"
{
"or": [
"canInsaneJump",
"h_heatProof"
]
}
{
"heatFrames": 550
}
{
"or": [
"h_canUsePowerBombs",
{
"obstaclesCleared": [
"A"
]
}
]
}
Clears obstacles: A |
|
From: 4
Right Farm Junction
To: 2
Right Door
The Zebbo needs to be 2 pixels higher than where it would be if Samus was standing. One setup is to peform a tiny hop just before the left Zebbo starts moving to the right then freeze it after it starts moving right. Get onto the runway and freeze the Zebbo again while maintaining a half-tile gap between it and the runway to extend it as much as possible. With more Energy, it is possible to morph on one of the medium-height pillars to align the Zebbo. With less Energy, it is possible to get the Zebbo into position by only freezing it once - after the small hop, jump towards the door and shoot downwards to freeze it in place. Requires: "h_canFrozenEnemyRunway"
{
"heatFrames": 300
}
{
"or": [
"canInsaneJump",
{
"heatFrames": 300
}
]
}
Exit condition: {
"leaveWithRunway": {
"length": 6,
"openEnd": 0
}
}
|
|
From: 2
Top Right Door
To: 4
Junction Below Bomb Blocks
Notable: true Carry Temporary Blue through the top door of Mickey Mouse to break the left side of the bomb blocks. There is a small frame window where Samus can soft unmorph on the crumble blocks and jump again while retaining temporary blue. Entrance condition: {
"comeInWithTemporaryBlue": {}
}
Requires: "h_canNavigateHeatRooms"
{
"obstaclesNotCleared": [
"A"
]
}
"canPrepareForNextRoom"
"canChainTemporaryBlue"
"canInsaneJump"
"canCrumbleJump"
{
"heatFrames": 300
}
Clears obstacles: B |
|
From: 4
Junction Below Bomb Blocks
To: 2
Top Right Door
Notable: true Spinjump off a crumble block with just a tiny amount of run speed. That gives just enough height to be able to walljump out. Requires: {
"obstaclesCleared": [
"A"
]
}
"canCrumbleJump"
"canTrickyDashJump"
"canPreciseWalljump"
"canInsaneJump"
{
"heatFrames": 180
}
|
|
From: 1
Left Door
To: 2
Right Door
Notable: true Cross the Pillar Room with Bombs and minimal damage. Some acid damage is expected, but any mistakes greatly increases the time spent in acid. Entrance condition: {
"comeInRunning": {
"minTiles": 1,
"speedBooster": "any"
}
}
Requires: "h_canUseMorphBombs"
"canWallJumpInstantMorph"
"canInsaneJump"
"canResetFallSpeed"
"canUnmorphBombBoost"
"canSuitlessLavaDive"
{
"heatFrames": 1320
}
{
"acidFrames": 128
}
|
|
From: 2
Right Door
To: 1
Left Door
Notable: true Cross the Pillar Room with Bombs and minimal damage. Some acid damage is expected, but any mistakes greatly increases the time spent in acid. Entrance condition: {
"comeInRunning": {
"minTiles": 3,
"speedBooster": "any"
}
}
Requires: "h_canUseMorphBombs"
"canWallJumpInstantMorph"
"canInsaneJump"
"canResetFallSpeed"
"canUnmorphBombBoost"
"canHBJ"
"canSuitlessLavaDive"
{
"heatFrames": 1320
}
{
"acidFrames": 128
}
|
|
From: 2
Right Door
To: 1
Left Door
Notable: true Place the PBs next to the pillars in order to only use 2. Avoid acid during the first Power Bomb by walljumping before placing the bomb. Avoiding acid damage at the last jump is tricky but possible. Requires: "Morph"
{
"ammo": {
"type": "PowerBomb",
"count": 2
}
}
"canCarefulJump"
{
"or": [
{
"and": [
"canWallJumpInstantMorph",
{
"heatFrames": 690
}
]
},
{
"and": [
"canWalljump",
{
"heatFrames": 660
},
{
"acidFrames": 36
}
]
},
{
"and": [
"canSuitlessLavaDive",
{
"heatFrames": 840
},
{
"acidFrames": 84
}
]
},
{
"and": [
"Gravity",
{
"heatFrames": 660
},
{
"acidFrames": 24
}
]
}
]
}
{
"or": [
"canInsaneJump",
{
"and": [
"canTrickyJump",
"canLateralMidAirMorph",
{
"heatFrames": 10
},
{
"acidFrames": 10
}
]
},
{
"and": [
"canPreciseWalljump",
{
"heatFrames": 50
},
{
"acidFrames": 32
}
]
},
{
"and": [
"Gravity",
{
"heatFrames": 20
},
{
"acidFrames": 20
}
]
},
{
"and": [
"canSuitlessLavaDive",
{
"heatFrames": 50
},
{
"acidFrames": 50
}
]
}
]
}
{
"or": [
"h_heatResistant",
"canPauseAbuse",
{
"resourceCapacity": [
{
"type": "RegularEnergy",
"count": 149
}
]
}
]
}
|
|
Break spin to leave some blocks intact in order to avoid damage from Puromis. Avoiding acid damage at the last jump is tricky but possible. Requires: "canInsaneJump"
"ScrewAttack"
{
"heatFrames": 500
}
|
|
From: 1
Top Left Door
To: 7
Junction At Middle Right Door With Bottom KiHunter Cleared
By breaking the shot blocks and maneuvering through the room effeciently Samus will not have to spend much time waiting on KiHunters. Entrance condition: {
"comeInRunning": {
"minTiles": 1,
"speedBooster": "any"
}
}
Requires: "canDodgeWhileShooting"
"canCarefulJump"
{
"or": [
"canTrickyJump",
"canDownBack"
]
}
{
"or": [
"Charge",
"Spazer",
"Plasma",
"Wave",
"canInsaneJump"
]
}
{
"heatFrames": 540
}
|
|
From: 4
Top Right Door
To: 7
Junction At Middle Right Door With Bottom KiHunter Cleared
By breaking the shot blocks and maneuvering through the room effeciently Samus will not have to spend much time waiting on KiHunters. Entrance condition: {
"comeInRunning": {
"minTiles": 1,
"speedBooster": "any"
}
}
Requires: "canDodgeWhileShooting"
"canTrickyJump"
{
"or": [
"Charge",
"Spazer",
"Plasma",
"Wave",
{
"and": [
"canInsaneJump",
{
"or": [
"canDownBack",
"Morph"
]
}
]
}
]
}
{
"heatFrames": 540
}
|
|
From: 5
Top Junction Between Doors
To: 7
Junction At Middle Right Door With Bottom KiHunter Cleared
Very quickly move through the room to meet the bottom KiHunter in a position where it is possible to jump over it. Down back through the shot blocks. If coming through the right door, Morphing may be easier. Jump over the KiHunter where it dips while moving left. Additionally, build full run speed before jumping to land all the way next to the door. Requires: "canInsaneJump"
"canDodgeWhileShooting"
"canPrepareForNextRoom"
{
"or": [
"Charge",
"Spazer",
"Plasma",
"Wave"
]
}
"canDownBack"
{
"heatFrames": 420
}
|
|
From: 2
Bottom Left Door
To: 4
Junction Above Bomb Blocks
Notable: true Deal an exact amount of damage to a wall pirate to freeze it while breaking the bomb blocks with a power bomb without taking damage. Quickly move to the right side and walljump up to the right height to power bomb out the bomb blocks, double hitting the top wall pirate. Wait for the full power bomb effect to end and wall jump once on the right wall and hit top pirate with 1 missile and 1 super. Jump and shoot the top pirate with a charge+ice shot. Hold a charge and walljump up the left wall and freeze the top pirate when it jumps across. Use the pirate to jump to the higher area. Requires: "h_canNavigateHeatRooms"
"canTrickyUseFrozenEnemies"
"Charge"
"canPreciseWalljump"
"canWalljumpWithCharge"
"Morph"
{
"ammo": {
"type": "Missile",
"count": 1
}
}
{
"ammo": {
"type": "Super",
"count": 1
}
}
{
"ammo": {
"type": "PowerBomb",
"count": 1
}
}
{
"heatFrames": 870
}
{
"or": [
"h_heatResistant",
{
"and": [
"canInsaneJump",
"canPauseAbuse"
]
},
{
"resourceCapacity": [
{
"type": "RegularEnergy",
"count": 149
}
]
}
]
}
Clears obstacles: A |
|
From: 2
Bottom Left Door
To: 4
Junction Above Bomb Blocks
Notable: true Deal an exact amount of damage to a wall pirate to freeze it while breaking the bomb blocks with a power bomb without taking damage. Wait briefly on the left side of the center platform, then jump and shoot 4 missiles at the top pirate. Walljump up the left wall such that the lower pirates are on screen long enough to jump accross to the left. Place a Bomb on the left wall to hit the top pirate when it jumps over, followed by a power bomb. Unmorph precisely below the middle pirate so both top pirates will jump back to the right, and begin charging Ice. Walljump up the left wall with charge held and freeze the top pirate when it jumps over and use it to reach the upper region. Requires: "h_canNavigateHeatRooms"
"canTrickyUseFrozenEnemies"
"Charge"
"canPreciseWalljump"
"canResetFallSpeed"
"canWalljumpWithCharge"
"h_canUseMorphBombs"
{
"ammo": {
"type": "Missile",
"count": 4
}
}
{
"ammo": {
"type": "PowerBomb",
"count": 1
}
}
{
"heatFrames": 900
}
{
"or": [
"h_heatResistant",
{
"and": [
"canInsaneJump",
"canPauseAbuse"
]
},
{
"resourceCapacity": [
{
"type": "RegularEnergy",
"count": 149
}
]
}
]
}
Clears obstacles: A |
|
From: 2
Bottom Left Door
To: 4
Junction Above Bomb Blocks
Notable: true Ignore the Yellow Pirates by walljumping up the left side to start a diagonal bomb jump from the wall, including a power bomb to clear the bomb blocks. Two quick walljumps upon entering the room can position Samus to get the left pirate to jump to the right and jump over the right pirate's lazer attack. Jump up the left wall and begin bomb jumping starting with a power bomb. Requires: "h_canNavigateHeatRooms"
"canFastWalljumpClimb"
"canWallJumpBombBoost"
"h_canDiagonalBombJump"
"h_canUsePowerBombs"
{
"heatFrames": 930
}
{
"or": [
"h_heatResistant",
{
"and": [
"canInsaneJump",
"canPauseAbuse"
]
},
{
"resourceCapacity": [
{
"type": "RegularEnergy",
"count": 149
}
]
}
]
}
Clears obstacles: A |
|
From: 3
Top Right Door
To: 1
Top Left Door
Exit the previous room with Samus in a standing pose (while grappled). After teleporting, press right to release Grapple while staying standing (not being forced into a crouch). Then X-ray climb to get up to the door transition, without needing to open the door. Kill the Pirate, or climb quickly to minimize damage from it. Entrance condition: {
"comeInWithGrappleTeleport": {
"blockPositions": [
[
2,
18
],
[
2,
19
]
]
}
}
Requires: "canXRayClimb"
{
"heatFrames": 1600
}
{
"or": [
{
"enemyDamage": {
"enemy": "Yellow Space Pirate (standing)",
"type": "laser",
"hits": 2
}
},
{
"and": [
"canInsaneJump",
{
"enemyDamage": {
"enemy": "Yellow Space Pirate (standing)",
"type": "laser",
"hits": 1
}
}
]
},
{
"and": [
{
"enemyKill": {
"enemies": [
[
"Yellow Space Pirate (standing)"
]
],
"explicitWeapons": [
"Missile",
"Super",
"Charge+Plasma"
]
}
},
{
"heatFrames": 120
}
]
}
]
}
Bypasses door shell: true |
|
From: 6
Bottom Platform Junction With Pirates Killed
To: 4
Junction Above Bomb Blocks
Notable: true Break the bomb blocks in The Worst Room In The Game with extremely precise walljumps. Either with a fully delayed max height jump from the wall, or with an instant turnaround after jumping from the lower layer of bomb blocks. Requires: "h_heatProof" "HiJump" "ScrewAttack" "canInsaneWalljump" "canInsaneJump" "canConsecutiveWalljump" "canMidairWiggle" Clears obstacles: A |
|
Notable: true Climb up about half a screen. If Phantoon is dead, the last part of the climb should be done carefully to avoid triggering collision with the spikes: Do not press forward or turn-around except while X-Ray is active. For each X-ray stand-up, release the turn-around input quickly to make sure that it is not still held after X-Ray deactivates. Once Samus is high enough, unequip X-Ray, jump up (from either standing or crouch) to clip past the spikes, and land, taking a single spike hit. Then use the i-frames from the spike hit to run and jump to the left to make it to the door. Samus is high enough after the top of her arm cannon first becomes visible at the bottom of the screen; or up to 3 additional climbs can be performed after that point. In case of an accidental spike collision, it is possible to recover: Unless Samus climbed higher than needed, she will still be stuck in the wall, will take a single spike hit, and be able to continue climbing. With Grapple it is possible to swing on the Grapple blocks, avoiding all spike damage. Spike damage can also be avoided with Space Jump, by doing a stationary turn-around spin jump, which is very precise. Entrance condition: {
"comeInWithDoorStuckSetup": {}
}
Requires: "canXRayClimb"
{
"or": [
{
"and": [
{
"spikeHits": 3
},
{
"resourceCapacity": [
{
"type": "RegularEnergy",
"count": 199
}
]
}
]
},
{
"and": [
{
"not": "f_DefeatedPhantoon"
},
"canRiskPermanentLossOfAccess"
]
},
{
"and": [
"canOffScreenMovement",
{
"or": [
{
"spikeHits": 1
},
"Grapple",
{
"and": [
"SpaceJump",
"canInsaneJump",
"canBeVeryPatient"
]
}
]
}
]
}
]
}
|
|
Fling Samus from the first set of grapple blocks to the second set without falling. Requires precise timing. It can help to perform a lateral mid-air morph and unmorph. Requires: "canPreciseGrapple"
"canTrickyJump"
{
"or": [
"canInsaneJump",
{
"and": [
"canLateralMidAirMorph",
{
"thornHits": 5
}
]
}
]
}
|
|
From: 1
Bottom Left Door
To: 5
Platform Junction Near Top Left Door
Requires 3 tiles of run speed (with no open end) to make it past the overhang above the door. Cross Room jump and aim towards the left side where the fish is. Shooting at it from below can deal damage sooner to get a faster freeze. Hug the frozen fish to gain the extra height needed to climb on top. Entrance condition: {
"comeInJumping": {
"speedBooster": true,
"minTiles": 2.4375
}
}
Requires: "HiJump"
"canCrossRoomJumpIntoWater"
"canMomentumConservingTurnaround"
"canTrickyUseFrozenEnemies"
"canInsaneJump"
"canDownGrab"
{
"or": [
"Wave",
"Spazer",
"Plasma"
]
}
|
|
From: 1
Bottom Left Door
To: 5
Platform Junction Near Top Left Door
Requires 3 tiles of run speed (with no open end) to make it past the overhang above the door. Entrance condition: {
"comeInJumping": {
"speedBooster": true,
"minTiles": 2.4375
}
}
Requires: "HiJump" "canCrossRoomJumpIntoWater" "canMomentumConservingTurnaround" "canTrickySpringBallJump" "canInsaneJump" |
|
From: 2
Bottom Right Door
To: 4
Top Left Door
Notable: true Entrance condition: {
"comeInWithGrappleTeleport": {
"blockPositions": [
[
5,
3
]
]
}
}
Requires: {
"doorUnlockedAtNode": 4
}
"canMidairWiggle"
"canTrickyGrappleJump"
"canInsaneJump"
|
|
From: 6
Middle Junction Near Top Left Pirate
To: 7
Spawn At Junction Near Top Right Door
Notable: true Requires: "canSuitlessMaridia" "canInsaneJump" |
|
From: 2
Bottom Right Door
To: 4
Top Door
Notable: true Requires a runway of at least 18 tiles in the adjacent room. Ride up the right wall just above the doorway, then turnaround before and after hitting the platform following the doorway slope. Continue up the rest of the way to reach the door. Entrance condition: {
"comeInJumping": {
"speedBooster": true,
"minTiles": 18
}
}
Requires: {
"obstaclesCleared": [
"f_MaridiaTubeBroken"
]
}
"canCrossRoomJumpIntoWater"
"canMomentumConservingTurnaround"
"canTrickyDashJump"
"canInsaneJump"
|
|
Glass Tunnel Grapple Teleport into Grapple Jump or Tube Intact (Lower Entrance) (Insane)
Glass Tunnel
From: 2
Bottom Right Door
To: 4
Top Door
Notable: true Swing to the right, shoot open the door above, and grapple jump through it. The grapple beam will need to be retracted while swinging to the right, to avoid bonking on the small platform. Entrance condition: {
"comeInWithGrappleTeleport": {
"blockPositions": [
[
5,
3
]
]
}
}
Requires: {
"doorUnlockedAtNode": 4
}
{
"or": [
{
"and": [
"canMidairWiggle",
"canTrickyGrappleJump",
"canInsaneJump"
]
},
{
"and": [
{
"not": "f_MaridiaTubeBroken"
},
"canRiskPermanentLossOfAccess"
]
}
]
}
|
|
Glass Tunnel Grapple Teleport into Grapple Jump or Tube Intact (Right Entrance) (Insane)
Glass Tunnel
From: 3
Top Right Doorway
To: 4
Top Door
Notable: true Swing to the right, shoot open the door above, and grapple jump through it. The grapple beam will need to be retracted while swinging to the right, to avoid bonking on the small platform. Entrance condition: {
"comeInWithGrappleTeleport": {
"blockPositions": [
[
5,
3
]
]
}
}
Requires: {
"doorUnlockedAtNode": 4
}
{
"or": [
{
"and": [
"canMidairWiggle",
"canTrickyGrappleJump",
"canInsaneJump"
]
},
{
"and": [
{
"not": "f_MaridiaTubeBroken"
},
"canRiskPermanentLossOfAccess"
]
}
]
}
|
|
From: 1
Bottom Door
To: 3
Middle Right Door
Run and spin jump to the left through the transition with as much horiziontal speed as possible, without bonking the door frame. Hold left through the transition to avoid the fish and land on the platform to the left. With limited runway, this may require a very precise jump. Then reach the platform above either using a crouch-jump down-grab or by freezing the fish. Entrance condition: {
"comeInWithPlatformBelow": {
"maxHeight": 6,
"maxLeftPosition": -0.5,
"minRightPosition": 2.5
},
"comesThroughToilet": "yes"
}
Requires: "canCrossRoomJumpIntoWater"
"canInsaneJump"
{
"or": [
"h_canCrouchJumpDownGrab",
"canUseFrozenEnemies"
]
}
|
|
From: 9
Junction Below Speed Blocks
To: 4
Top Right Door
Be sure not to get the first downward moving crab on screen until Samus is in position to quickly and accurately shoot and freeze it. This is much tighter with spring ball relative to HiJump. Performing a max height spring ball jump from the frozen crab can get Samus to the next ledge. Getting to the ledge with the fish is particularly precise. Either stand at the very edge of the platform and perform a very precise max heigh spring ball jump, or stand against the left wall and and perform a slightly less tight stationary lateral morph into spring ball jump. Requires: "canSuitlessMaridia"
"canTrickyUseFrozenEnemies"
"canTrickySpringBallJump"
"canDodgeWhileShooting"
{
"or": [
"canInsaneJump",
{
"and": [
"Spazer",
"Wave"
]
},
"h_canMaxHeightSpringBallJump",
"Plasma"
]
}
{
"or": [
"h_canMaxHeightSpringBallJump",
"canStationaryLateralMidAirMorph"
]
}
|
|
Notable: true Perform a running stationary spinjump from a precise spot, then a CWJ with slightly more speed off the wall one tile further out. This makes it possible to just barely walljump off the grapple block. Requires: "HiJump" "canInsaneJump" "canStationarySpinJump" "canConsecutiveWalljump" "canInsaneWalljump" "canCWJ" Clears obstacles: B |
|
From: 2
Bottom Left Door
To: 5
Top Door
Notable: true Run and jump up through the door using SpeedBooster in the room below. Bonk the door frame as you pass through the transition, to cancel your horizontal momentum. You need a vertical speed of exactly 7.8800 when passing through the transition, which requires the jump to be frame perfect. After the transition, as you reach the wall, begin holding right. Begin holding angle up at any time before approaching the door (and you can continue holding it until the end of the strat). As you approach the door (an 8-frame window), while holding angle up, release right for exactly one frame. This will put Samus into a pose aiming diagonally up and to the right. Immediately fire a shot to open the door (within the same 8-frame window); if successful, you will just barely clear the grapple block and pass through the door. Several things can cause you to bonk the grapple block: 1) entering the room with too much vertical speed, 2) not pressing against the wall as you come up, 3) releasing right for more than one frame, 4) releasing right too early. As an alternative to releasing right for one frame, you can instead press shot for one frame: if successful, Samus' pose will change to aiming diagonally without a shot being fired; if shot is pressed for more than one frame, then a shot will be fired horizontally, and the cooldown will prevent you from firing diagonally in time. Entrance condition: {
"comeInWithPlatformBelow": {
"minHeight": 9,
"maxHeight": 9,
"maxLeftPosition": -38.5,
"minRightPosition": -2
},
"comesThroughToilet": "no"
}
Requires: "canCrossRoomJumpIntoWater" "SpeedBooster" "HiJump" "canInsaneJump" |
|
From: 4
Top Right Door
To: 1
Top Left Door
Notable: true Requires running a very precise distance of 8 tiles in the adjacent room. Morph just before hitting the first ceiling grapple block, then bounce on both grapple block platforms. Entrance condition: {
"comeInJumping": {
"speedBooster": true,
"minTiles": 8
}
}
Requires: "canInsaneJump" "canTrickyDashJump" "canSpringBallBounce" "canCrossRoomJumpIntoWater" |
|
From: 4
Top Right Door
To: 9
Spawn At Junction Below Top Door
Notable: true Requires running a very precise distance of 8 tiles in the adjacent room. Morph just before hitting the first ceiling grapple block, then bounce on the first grapple block platform. Entrance condition: {
"comeInJumping": {
"speedBooster": true,
"minTiles": 8
}
}
Requires: "canInsaneJump" "canTrickyDashJump" "canSpringBallBounce" "canCrossRoomJumpIntoWater" |
|
From: 4
Top Right Door
To: 9
Spawn At Junction Below Top Door
Notable: true Requires running a very precise distance of 7 tiles with no open end in the adjacent room, as this is a peak in jump speed. Morph just before hitting the first ceiling grapple block, then turn on HiJump before bouncing on the first grapple block platform. Entrance condition: {
"comeInJumping": {
"speedBooster": true,
"minTiles": 6.4375
}
}
Requires: "HiJump" "canInsaneJump" "canTrickyDashJump" "canSpringBallBounce" "canCrossRoomJumpIntoWater" |
|
From: 6
Left Morph Passage Doorway
To: 8
Higher Hill Junction
Jump using Springball with the right timing leaving the Morph tunnel to avoid falling. Requires: "canInsaneJump" "h_canUseSpringBall" |
|
From: 6
Left Morph Passage Doorway
To: 8
Higher Hill Junction
Jump using Springball with the right timing leaving the Morph tunnel to avoid falling. Entrance condition: {
"comeInWithGMode": {
"mode": "any",
"morphed": true
}
}
Requires: "h_EverestMorphTunnelExpanded" "canInsaneJump" "h_canArtificialMorphSpringBall" |
|
From: 6
Left Morph Passage Doorway
To: 8
Higher Hill Junction
Jump using Springball with the right timing leaving the Morph tunnel to avoid falling. Entrance condition: {
"comeInWithGMode": {
"mode": "indirect",
"morphed": true
}
}
Requires: "canInsaneJump" "h_canArtificialMorphSpringBall" |
|
Notable: true Escape the water using a well-timed Space Jump water bounce followed by a frame-perfect Space jump just above the water, at a specific time when the tide is descending. Requires: "canSpaceJumpWaterEscape" "canInsaneJump" |
|
From: 1
Left Door
To: 5
Item
Needs a runway of 7 tiles with no open end in the adjacent room, to get enough height. This is a peak of height with speed booster, no hjb, while underwater. Jump before the transition with SpeedBooster off and then SpeedBooster back on after reaching the ceiling and Morphing. Entrance condition: {
"comeInJumping": {
"speedBooster": true,
"minTiles": 6.4375
}
}
Requires: "canLateralMidAirMorph"
"canDisableEquipment"
"canCrossRoomJumpIntoWater"
"canSpringBallBounce"
{
"or": [
{
"enemyDamage": {
"enemy": "Puyo",
"type": "contact",
"hits": 1
}
},
"canInsaneJump",
{
"and": [
"Plasma",
"canTrickyJump"
]
}
]
}
|
|
From: 1
Left Door
To: 3
Top Right Door
Notable: true Climb a mochtroid with ice using the wall to help guide them. Mochtroid damage is pretty hard to avoid, but it is possible. Requires: "canSuitlessMaridia"
"canMochtroidIceClimb"
"canPlayInSand"
"canCameraManip"
"canTrickyJump"
{
"or": [
"canInsaneJump",
{
"enemyDamage": {
"enemy": "Mochtroid",
"type": "contact",
"hits": 2
}
}
]
}
|
|
From: 1
Left Door
To: 3
Top Right Door
Notable: true Land on each set of spikes as a way to jump to the next safe platform. The first jump can be done with a very precise damage boost to bounce forward off the spike, or using morph. Requires: "canWalljump"
"canInsaneJump"
"canHorizontalDamageBoost"
"canIframeSpikeJump"
{
"spikeHits": 3
}
{
"or": [
"Morph",
{
"spikeHits": 2
}
]
}
|
|
Climb a mochtroid with ice using the wall to help guide them. It is very easy to take damage if not preemptive with freezes. Mochtroid movement and freeze timing gets harder at the waterline. Requires: "h_canNavigateUnderwater"
"canMochtroidIceClimb"
"canPlayInSand"
"canCameraManip"
{
"or": [
"Gravity",
"HiJump"
]
}
"canTrickyJump"
{
"or": [
"canInsaneJump",
{
"enemyDamage": {
"enemy": "Mochtroid",
"type": "contact",
"hits": 2
}
}
]
}
|
|
Notable: true Stay out of the water, and by extension the sand, of Colosseum by using the spikes as platforms. Morphing before landing on the spikes helps to be able to control the knockback. The final spike jump (which would be the most difficult) is avoided by doing a crouch jump into spring ball jump into IBJ to reach the left door. Perform the spring ball jump near max height. Place the first bomb between about 4 and 6 frames after the spring ball jump; ideally it should be just above the water line. Press pause between about 5 and 10 frames after placing the bomb, to disable Spring Ball (a 'spring fling', to reset fall speed). Place the second bomb soon after regaining control, while the game is fading back in. Requires: "HiJump"
"canPreciseWalljump"
"canIframeSpikeJump"
{
"spikeHits": 2
}
"canNeutralDamageBoost"
{
"or": [
"canHorizontalDamageBoost",
{
"spikeHits": 1
}
]
}
"h_canMaxHeightSpringBallJump"
{
"or": [
"canSpringFling",
"canInsaneJump"
]
}
"canBombJumpWaterEscape"
"h_canJumpIntoIBJ"
|
|
From: 3
Top Right Door
To: 1
Left Door
Notable: true Jump out of the sand to lure down mochtroids to freeze. It's recommended to bring a Mochtroid into the middle section of the room. Mochtroid damage is pretty hard to avoid, but can be. Requires: "canSuitlessMaridia"
"canTrickyJump"
"canPlayInSand"
"canMochtroidIceClimb"
"canCameraManip"
{
"or": [
"canInsaneJump",
{
"enemyDamage": {
"enemy": "Mochtroid",
"type": "contact",
"hits": 2
}
}
]
}
|
|
From: 3
Top Right Door
To: 1
Left Door
Notable: true Stay out of the water, and by extension the sand, of Colosseum by using the spikes as platforms. Landing on spikes aiming down with no other direction pressed can help control the knockback. Requires knowing the position of every spike in the room. The final spike jump is very difficult. Requires: "canPreciseWalljump"
"canInsaneJump"
"canIframeSpikeJump"
{
"spikeHits": 3
}
"canNeutralDamageBoost"
{
"or": [
"canHorizontalDamageBoost",
{
"spikeHits": 1
}
]
}
|
|
Jump out of the sand to lure down mochtroids to freeze. It's recommended to bring a Mochtroid into the middle section of the room. Mochtroid damage is pretty hard to avoid, but can be. Mochtroid movement and freeze timing gets harder at the waterline. Requires: "h_canNavigateUnderwater"
{
"or": [
"Gravity",
"HiJump"
]
}
"canTrickyJump"
"canPlayInSand"
"canMochtroidIceClimb"
"canCameraManip"
{
"or": [
"canInsaneJump",
{
"enemyDamage": {
"enemy": "Mochtroid",
"type": "contact",
"hits": 2
}
}
]
}
|
|
From: 1
Left Door (locked)
To: 1
Left Door (locked)
Get a boost from a Bomb or Power Bomb while grappled to the bottom half of the turret above the door. Samus will enter a 'glitched grapple hanging' state where Samus' graphics will appear corrupted while swinging with Grapple. Slightly delay the down press to extend Grapple, to avoid getting caught on the corner of the floor. Swing down, and hold left while approaching the door to trigger the transition. Continue holding Grapple through the door transition to initiate a teleport in the next room. If Samus needs to be standing in the next room (e.g. for an X-Ray climb), then be sure to touch the ground before reaching the transition; this can be done by timing the Grapple extension early enough, or, if enough energy is available, by doing a small bounce before going through the transition. Samus can reach the transition at either horizontal position 20 or 21, depending on the specific timing and positioning of the swing. Pressing diagonal up-left just before the transition (to retracting Grapple slightly) can help more consistently reach it at position 21. Requires: "h_canBreakOneDraygonTurret"
"Gravity"
"canGrappleBombHang"
"h_canBombThings"
{
"draygonElectricityFrames": 40
}
{
"or": [
"canInsaneJump",
{
"draygonElectricityFrames": 40
}
]
}
Exit condition: {
"leaveWithGrappleTeleport": {
"blockPositions": [
[
2,
19
]
]
}
}
|
|
From: 1
Left Door (locked)
To: 1
Left Door (locked)
Get a boost from a Bomb or Power Bomb while grappled to the bottom half of the turret above the door. This can be done by standing at the very edge of the ledge, jumping up into a mid-air morph, laying a bomb or Power Bomb, unmorphing, then grappling diagonally. It can also be done with a crouch jump, without needing to be so close to the edge of the ledge. Samus will enter a 'glitched grapple hanging' state where Samus' graphics will appear corrupted while swinging with Grapple. After the Grapple attachment, hold diagonally down-left to swing directly into the door and through the transition. Continue holding Grapple through the door transition to initiate a teleport in the next room. Samus should be able to stand in the next room (e.g. in case this is needed for an X-Ray climb). Samus may trigger the transition at either horizontal position 20 or 21, depending on the specific timing and positioning of the swing. To reliably trigger it at position 21, press diagonally up-left just before the transition to retract Grapple slightly. Requires: "h_canBreakOneDraygonTurret"
"canGrappleBombHang"
"h_canBombThings"
{
"draygonElectricityFrames": 45
}
{
"or": [
"canInsaneJump",
{
"draygonElectricityFrames": 45
}
]
}
Exit condition: {
"leaveWithGrappleTeleport": {
"blockPositions": [
[
2,
19
]
]
}
}
|
|
From: 1
Left Door (locked)
To: 1
Left Door (locked)
Get a boost from a Bomb or Power Bomb while grappled to the top half of the turret above the door. With HiJump, this can be done by standing on the low ground a couple tiles right of the ledge, jumping up into a mid-air morph, laying a bomb or Power Bomb, unmorphing, then grappling diagonally. Samus will enter a 'glitched grapple hanging' state where Samus' graphics will appear corrupted while swinging with Grapple. Slightly delay the down press to extend Grapple, to avoid getting caught on the corner of the floor. Swing down, and hold left while approaching the door to trigger the transition. Continue holding Grapple through the door transition to initiate a teleport in the next room. Samus should be able to stand in the next room (e.g. in case this is needed for an X-Ray climb). Samus can reach the transition at either horizontal position 20 or 21, depending on the specific timing and positioning of the swing. Requires: "h_canBreakOneDraygonTurret"
"HiJump"
"canGrappleBombHang"
"h_canBombThings"
{
"draygonElectricityFrames": 50
}
{
"or": [
"canInsaneJump",
{
"draygonElectricityFrames": 50
}
]
}
Exit condition: {
"leaveWithGrappleTeleport": {
"blockPositions": [
[
2,
18
]
]
}
}
|
|
From: 1
Left Door (locked)
To: 1
Left Door (locked)
Get a boost from a Bomb or Power Bomb while grappled to the top half of the turret above the door. Samus will enter a 'glitched grapple hanging' state where Samus' graphics will appear corrupted while swinging with Grapple. Swing down, and hold left while approaching the door to trigger the transition. Continue holding Grapple through the door transition to initiate a teleport in the next room. If Samus needs to be standing in the next room (e.g. for an X-Ray climb), then be sure to touch the ground before reaching the transition; this can be done by timing the Grapple extension early enough, or, if enough energy is available, by doing a small bounce before going through the transition. If it is needed to enter far to the right (at horizontal position 21), this can be done by pressing up to retract Grapple just before the transition. Requires: "h_canBreakOneDraygonTurret"
"Gravity"
"canGrappleBombHang"
"h_canBombThings"
{
"draygonElectricityFrames": 40
}
{
"or": [
"canInsaneJump",
{
"draygonElectricityFrames": 40
}
]
}
Exit condition: {
"leaveWithGrappleTeleport": {
"blockPositions": [
[
2,
18
]
]
}
}
|
|
From: 5
Top Junction
To: 4
Top Right Door
Notable: true Roll off the above ledge and use both the vertical speed resets from first (un)equipping SpringBall and then by unmorphing in order to reach the door. Pause shortly after rolling off the ledge, after falling for 1 tile. The timing is very precise. A downback helps by shrinking Samus' hitbox. Requires: "canInsaneJump" "h_canSpringFling" "canResetFallSpeed" "canDownBack" |
|
From: 2
Bottom Door
To: 1
Left Door
Using SpeedBooster in the room below and the full length of the runway (starting with Samus hanging over the edge as far as possible), run and jump precisely to make it through without bonking the door frame. Break spin before the transition to expand Samus' hitbox and trigger the transition earlier, retaining more speed and also making it easier to avoid bonking. Hold left through the transition to initiate a turn-around while entering the room. Land on the small platform at the top of the room. Entrance condition: {
"comeInWithPlatformBelow": {
"minHeight": 9,
"maxHeight": 9,
"maxLeftPosition": -38.5,
"minRightPosition": -7
},
"comesThroughToilet": "any"
}
Requires: "canCrossRoomJumpIntoWater" "SpeedBooster" "canTrickyJump" "canInsaneJump" |
|
From: 2
Bottom Door
To: 1
Left Door
Using SpeedBooster in the room below, start running at a precise position to be able to jump during a spike in the speed-to-jumpHeight chart. Break spin before the transition to expand Samus' hitbox and trigger the transition early, retaining more speed and also making it easier to avoid bonking. Hold left through the transition to initiate a turn-around while entering the room. Land on the small platform at the top of the room. Entrance condition: {
"comeInWithPlatformBelow": {
"minHeight": 9,
"maxHeight": 10,
"maxLeftPosition": -33.5,
"minRightPosition": -7
},
"comesThroughToilet": "any"
}
Requires: "canCrossRoomJumpIntoWater" "SpeedBooster" "canTrickyDashJump" "canInsaneJump" |
|
From: 2
Bottom Door
To: 4
Water Level Junction
Run and spin jump from the platform in the room below, gaining horizontal speed but without bonking the door frame. Perform a momentum-conserving turn-around to make it around the corner of the ledge above. With limited runway for gaining horizontal speed, the timing of the jump and turn-around may be very precise. Entrance condition: {
"comeInWithPlatformBelow": {
"minHeight": 8.5,
"maxHeight": 9,
"maxLeftPosition": -1.5,
"minRightPosition": 1.5
},
"comesThroughToilet": "yes"
}
Requires: "canCrossRoomJumpIntoWater" "HiJump" "canMomentumConservingTurnaround" "canInsaneJump" |
|
From: 2
Bottom Door
To: 4
Water Level Junction
Using SpeedBooster in the room below, run and jump through the door without bonking the door frame or breaking spin. Perform a mid-air wiggle to make into onto either ledge. Entrance condition: {
"comeInWithPlatformBelow": {
"minHeight": 9,
"maxHeight": 10,
"maxLeftPosition": -34.5,
"minRightPosition": -7
},
"comesThroughToilet": "yes"
}
Requires: "canCrossRoomJumpIntoWater" "SpeedBooster" "canInsaneJump" "canMidairWiggle" |
|
From: 2
Bottom Door
To: 4
Water Level Junction
Standing on the platform in the room below, perform a spring ball jump mid-air a few tiles below the transition. It is necessary to morph very quickly after jumping in order to spring ball jump as low as necessary. Hold right through the transition, and do not bonk the door frame. Entrance condition: {
"comeInWithPlatformBelow": {
"minHeight": 8,
"maxHeight": 8,
"maxLeftPosition": 1,
"minRightPosition": 1
},
"comesThroughToilet": "no"
}
Requires: "canCrossRoomJumpIntoWater" "can4HighMidAirMorph" "canTrickySpringBallJump" "canInsaneJump" |
|
The sand does not impede Samus in G-Mode. It is possible to jump to the tall pillar with nothing, requiring a subpixel precise jump. Running before jumping doesn't help. Stand one pixel from the right edge and spinjump to the right. Entrance condition: {
"comeInWithGMode": {
"mode": "any",
"morphed": false
}
}
Requires: "h_canNavigateUnderwater"
{
"or": [
"Gravity",
"HiJump",
"canSpringBallJumpMidAir",
"canInsaneJump"
]
}
|
|
From: 1
Left Door
To: 4
Junction Below Sand Entrance
Notable: true Requires a runway of 7 tiles (with no open end) in the adjacent room. Requires two precise inputs of jumping through the doorway and aiming down before hitting the ceiling. Damage boost off of the right Evir in order to land on the first pillar. With Ice, instead freeze the Evir to land on it and avoid the damage. When entering the room with a bad jump, it is possible to perform a midair wiggle to get back to the door platform. Entrance condition: {
"comeInJumping": {
"speedBooster": false,
"minTiles": 6.4375
}
}
Requires: "canCrossRoomJumpIntoWater"
"canPlayInSand"
"canInsaneJump"
{
"or": [
"canTrickyUseFrozenEnemies",
{
"and": [
"canNeutralDamageBoost",
{
"enemyDamage": {
"enemy": "Evir",
"type": "contact",
"hits": 1
}
}
]
}
]
}
|
|
From: 2
Right Door
To: 2
Right Door
Notable: true The Evir won't shoot unless Samus enters the sand falls. Getting to the transition tiles while standing before the projectile while suitless is very precise. From the sand, turnaround spinjump towards the right. Turn towards the sandfall about when you're level with the platform. Turn right and shoot as soon as you enter the sandfall. And try to land right next to the transition. Requires: "canSuitlessMaridia" "canPlayInSand" "canMidairWiggle" "HiJump" "canInsaneJump" Exit condition: {
"leaveWithGModeSetup": {}
}
|
|
To safely avoid the Evir shot, enter in a spin jump from either the far left or far right side of the transition. Requires: "canPrepareForNextRoom"
"canPlayInSand"
"canTrickyJump"
{
"or": [
"Gravity",
"HiJump",
"canInsaneJump"
]
}
|
|
Oasis Cross Room Jump with Screw Attack and Speed through the Top Door (From the Left) (Insane)
Oasis
From: 1
Left Door
To: 3
Top Door
Notable: true Use Screw Attack to break the bomb block by entering from a non-water room with a spin jump, and make it all the way through the top door. This uses exactly 14 tiles (with no open end) - more rises too fast to do the trick, less does not have the height needed to reach the door. Use angle to break spin, then a momentumConservingTurnaround as early as possible, right as you pass the above tile horizontally. Using the background for positioning may help. The second momentumConservingTurnaround is as late as possible, just before touching the above platform. A third momentumConservingTurnaround is used on the door as it is opening. Entrance condition: {
"comeInJumping": {
"speedBooster": true,
"minTiles": 13.4375
}
}
Requires: "canInsaneJump" "canCrossRoomJumpIntoWater" "ScrewAttack" "canMomentumConservingTurnaround" |
|
From: 1
Left Door
To: 4
Junction Below Top Door
Notable: true Use Screw Attack to break the bomb block by entering from a non-water room with a spin jump, and make it to the top. It helps to enter as low as possible and with as much horizontal speed as possible and with HiJump turned off. Entrance condition: {
"comeInJumping": {
"speedBooster": true,
"minTiles": 13
}
}
Requires: "canInsaneJump" "canCrossRoomJumpIntoWater" "ScrewAttack" "canMomentumConservingTurnaround" |
|
Oasis Cross Room Jump with Screw Attack and Speed through the Top Door (From the Right) (Insane)
Oasis
From: 2
Right Door
To: 3
Top Door
Notable: true Use Screw Attack to break the bomb block by entering from a non-water room with a spin jump, and make it all the way through the top door. This uses exactly 14 tiles (with no open end) - more rises too fast to do the trick, less does not have the height needed to reach the door. Use angle to break spin, then a momentumConservingTurnaround as early as possible, right as you pass the above tile horizontally. Using the background for positioning may help. The second momentumConservingTurnaround is as late as possible, just before touching the above platform. A third momentumConservingTurnaround is used on the door as it is opening. Entrance condition: {
"comeInJumping": {
"speedBooster": true,
"minTiles": 13.4375
}
}
Requires: "canInsaneJump" "canCrossRoomJumpIntoWater" "ScrewAttack" "canMomentumConservingTurnaround" |
|
From: 2
Right Door
To: 4
Junction Below Top Door
Notable: true Use Screw Attack to break the bomb block by entering from a non-water room with a spin jump, and make it to the top. It helps to enter as low as possible and with as much horizontal speed as possible and with HiJump turned off. Entrance condition: {
"comeInJumping": {
"speedBooster": true,
"minTiles": 13
}
}
Requires: "canInsaneJump" "canCrossRoomJumpIntoWater" "ScrewAttack" "canMomentumConservingTurnaround" |
|
Enter on the right side of the transition and move left to avoid damage. Requires: "canPrepareForNextRoom"
"canPlayInSand"
"canTrickyJump"
{
"or": [
"Gravity",
"HiJump",
"canInsaneJump"
]
}
|
|
From: 4
Below Sand Entrance
To: 5
Left Pillar Junction
Notable: true Use the projectile from a fully submerged Evir to boost Samus into the sandfall, providing just enough height to make the first and hardest jump. Time the projectile to hit Samus when at the maximum height from a jump. The hit must be on the right side of Samus and with no inputs held, but also hold forward during the damage knockback to move through the sandfall. Getting a good jump while on the right side of the next floating block can get Samus to the leftmost block. With a clean jump off of the sand, Samus can then get onto the final vertical pillar. Requires: "canSuitlessMaridia"
"canPlayInSand"
"canInsaneJump"
"canCrouchJump"
"canNeutralDamageBoost"
{
"enemyDamage": {
"enemy": "Evir",
"type": "particle",
"hits": 1
}
}
|
|
Notable: true Avoid the Baby Metroid with no items at all. Jump over it many times in order to clear a path through the seaweed. With a counter clockwise setup, stand as close to the transition as possible while allowing the Baby to circle Samus. Then jump towards the transition and touch it with a walljump check. A clockwise setup is more difficult to clear the seaweed, but can jump directly into the transition. Requires: {
"obstaclesNotCleared": [
"A"
]
}
"canBabyMetroidAvoid"
"canInsaneJump"
|
|
Notable: true Enter through the far left side of the door. Wait for the top hopper to move right to start running. Run under the right Hopper and jump over the left Hopper to avoid all damage. Jump when Samus reaches the leftmost lump in the ground to avoid the left hopper. It helps to keep the camera scrolled to the right. Entrance condition: {
"comeInNormally": {},
"comesThroughToilet": "no"
}
Requires: "canTrickyJump"
{
"or": [
"canPrepareForNextRoom",
{
"and": [
"canCameraManip",
"canMoonwalk",
"canInsaneJump"
]
}
]
}
|
|
Notable: true Try to scroll the camera to the right to keep the left Hopper off-camera for longer. Wait for the top hopper to move right to start running. Run under the right Hopper and jump over the left Hopper to avoid all damage. Jump when Samus reaches the leftmost lump in the ground to avoid the left hopper. Entrance condition: {
"comeInNormally": {},
"comesThroughToilet": "any"
}
Requires: "canCameraManip" "canMoonwalk" "canInsaneJump" |
|
From: 1
Left Door (locked)
To: 1
Left Door (locked)
Group all of the Metroids by hitting the first Rinka with a Power Bomb. Once grouped, use two more Power Bombs to finish them off. Requires: {
"enemyKill": {
"enemies": [
[
"Metroid",
"Metroid",
"Metroid",
"Metroid"
]
],
"explicitWeapons": [
"PowerBomb"
]
}
}
"canMetroidAvoid"
"canHitbox"
{
"or": [
{
"ammo": {
"type": "PowerBomb",
"count": 1
}
},
"canInsaneJump",
{
"metroidFrames": 100
}
]
}
Clears obstacles: A |
|
From: 3
Junction (Get Past Metroids, Left to Right)
To: 2
Right Door
SpinJump often to reduce the amount of time spent in the acid. Requires: {
"acidFrames": 65
}
{
"or": [
{
"obstaclesCleared": [
"A"
]
},
{
"and": [
"canMetroidAvoid",
"canInsaneJump"
]
},
"ScrewAttack",
{
"and": [
"canPseudoScrew",
"canTrickyJump"
]
},
{
"metroidFrames": 150
}
]
}
{
"or": [
"canTrickyJump",
{
"enemyDamage": {
"enemy": "Rinka",
"type": "contact",
"hits": 1
}
}
]
}
|
|
From: 3
Junction (Get Past Metroids, Left to Right)
To: 2
Right Door
Freeze the middle Metroid as soon as it comes on screen to use as a platform to cross over the acid. If no Metroids are alive, the far left Rinka can be used instead, at a high angle. The left Rinka can also just be used to setup an angle with the Rinka near the left edge of the pool. Requires: "canTrickyUseFrozenEnemies"
"canTrickyJump"
"canCameraManip"
{
"or": [
"canInsaneJump",
{
"and": [
{
"not": "f_KilledMetroidRoom1"
},
{
"obstaclesNotCleared": [
"A"
]
},
"canRiskPermanentLossOfAccess"
]
}
]
}
|
|
From: 4
Junction (Get Past Metroids, Right to Left)
To: 1
Left Door (locked)
Requires: {
"acidFrames": 65
}
{
"or": [
{
"obstaclesCleared": [
"A"
]
},
"Ice",
"ScrewAttack",
{
"and": [
"canPseudoScrew",
"canDodgeWhileShooting"
]
},
{
"and": [
"canInsaneJump",
"canMetroidAvoid"
]
},
{
"metroidFrames": 670
}
]
}
|
|
From: 4
Junction (Get Past Metroids, Right to Left)
To: 1
Left Door (locked)
Requires: {
"or": [
{
"and": [
"canDelayedWalljump",
{
"acidFrames": 20
}
]
},
{
"and": [
"HiJump",
"canWalljump",
{
"acidFrames": 20
}
]
},
{
"and": [
"Gravity",
{
"acidFrames": 10
}
]
}
]
}
{
"or": [
{
"obstaclesCleared": [
"A"
]
},
"Ice",
"ScrewAttack",
"canMetroidAvoid",
{
"and": [
"canPseudoScrew",
"canTrickyJump"
]
},
{
"metroidFrames": 420
}
]
}
{
"or": [
"canInsaneJump",
{
"and": [
"canTrickyJump",
"canLateralMidAirMorph"
]
},
{
"and": [
"canTrickyJump",
"canPreciseWalljump",
{
"acidFrames": 16
}
]
},
{
"and": [
"Gravity",
{
"acidFrames": 16
}
]
},
{
"acidFrames": 27
}
]
}
|
|
From: 4
Junction (Get Past Metroids, Right to Left)
To: 1
Left Door (locked)
Notable: true Aim the ceiling Rinka to travel horizontally across the top of the room and use it to damage boost between the two floating platforms. Killing the lower Rinka shortly before killing the higher Rinka will synchronize their respawn timers so that Samus can jump when the lower Rinka reappears in order to get a good angle on the higher Rinka. Jump to the floating platform ahead of the high Rinka, jumping extra high to lead the Metroid out of the way if it is alive. Jump into the Rinka once it reaches the left edge of the platform to reach the next platform. Then use I-frames to pass through the Metroid if it is still alive. Requires: {
"enemyDamage": {
"enemy": "Rinka",
"type": "contact",
"hits": 1
}
}
"canTrickyJump"
"canHorizontalDamageBoost"
"canCameraManip"
{
"or": [
{
"obstaclesCleared": [
"A"
]
},
{
"and": [
"canMetroidAvoid",
"canHitbox"
]
}
]
}
{
"or": [
"canInsaneJump",
{
"enemyDamage": {
"enemy": "Rinka",
"type": "contact",
"hits": 1
}
},
{
"and": [
"canTrickyJump",
"canLateralMidAirMorph"
]
},
{
"and": [
"Gravity",
{
"acidFrames": 16
}
]
},
{
"acidFrames": 27
}
]
}
|
|
From: 1
Left Door
To: 2
Right Door (locked)
Group the Metroids by hitting the first Rinka with a Power Bomb. Quickly moving to the right as the Power Bomb explodes may help as that area is more open with no Rinkas. Then Kill all three Metroids with Power Bombs while avoiding damage. Requires: {
"enemyKill": {
"enemies": [
[
"Metroid",
"Metroid",
"Metroid"
]
],
"explicitWeapons": [
"PowerBomb"
]
}
}
"canMetroidAvoid"
{
"or": [
{
"metroidFrames": 120
},
"canInsaneJump"
]
}
Clears obstacles: A |
|
Group the Metroids by hitting the first Rinka with a Power Bomb. Then Kill all three Metroids with Power Bombs while avoiding damage. Requires: {
"enemyKill": {
"enemies": [
[
"Metroid",
"Metroid",
"Metroid"
]
],
"explicitWeapons": [
"PowerBomb"
]
}
}
"canMetroidAvoid"
{
"or": [
{
"ammo": {
"type": "PowerBomb",
"count": 1
}
},
"canInsaneJump",
{
"metroidFrames": 100
}
]
}
Clears obstacles: A |
|
From: 2
Bottom Door (locked)
To: 1
Top Left Door
Notable: true Move to the left side of the lowest section and jump morph before placing the Power Bomb to kill all three Metroids. Then Kill all three Metroids with Power Bombs while avoiding damage. Requires: {
"enemyKill": {
"enemies": [
[
"Metroid",
"Metroid",
"Metroid"
]
],
"explicitWeapons": [
"PowerBomb"
]
}
}
"canMetroidAvoid"
"canHitbox"
{
"or": [
"can4HighMidAirMorph",
"canInsaneJump"
]
}
Clears obstacles: A |
|
From: 5
Between First and Second Zebetite (locked)
To: 11
Between First and Second Zebetite (unlocked)
Requires: "h_canOpenZebetites"
{
"or": [
{
"and": [
"canDodgeWhileShooting",
"canInsaneJump"
]
},
{
"enemyDamage": {
"enemy": "Rinka",
"type": "contact",
"hits": 1
}
}
]
}
|
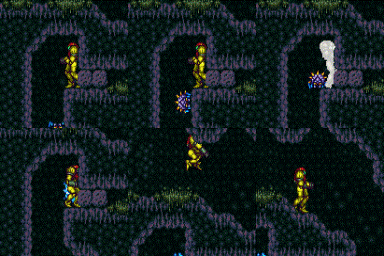
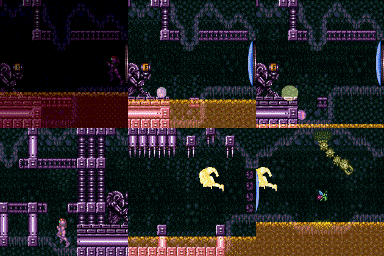
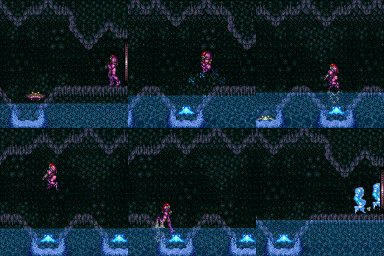
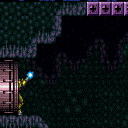
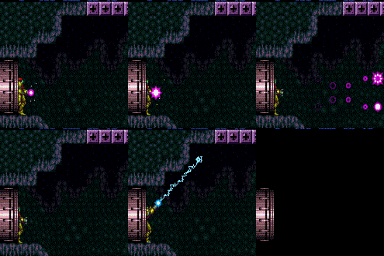
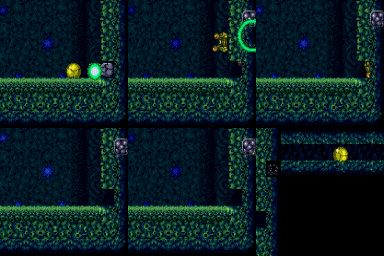
.png)
.gif)
.png)
.gif)
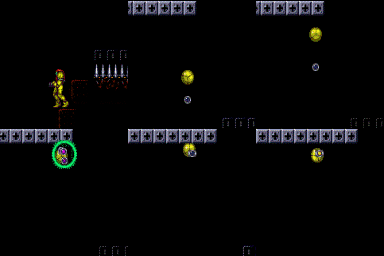
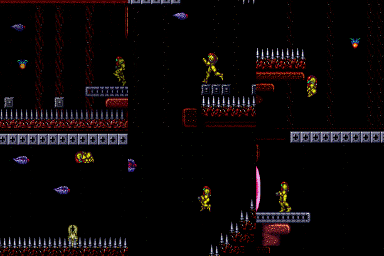
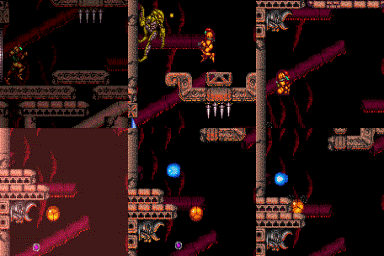
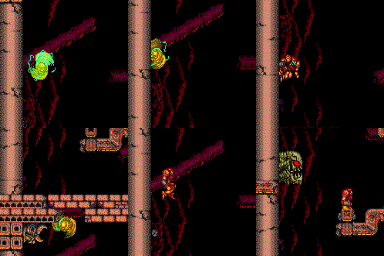
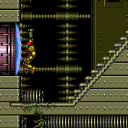
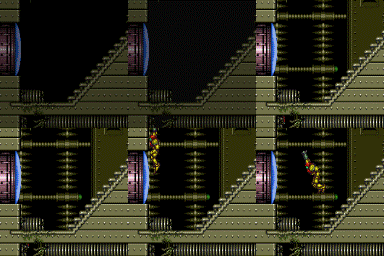
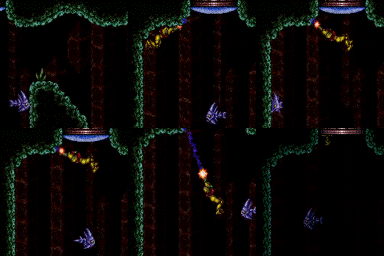
.png)
.gif)
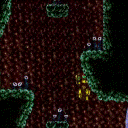

.png)
.gif)
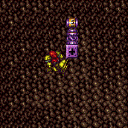
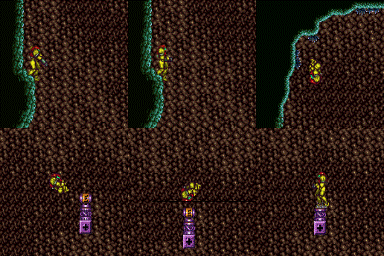
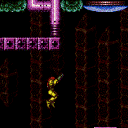
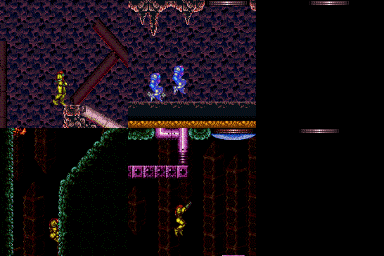
.png)
.gif)
.png)
.gif)
.png)
.gif)
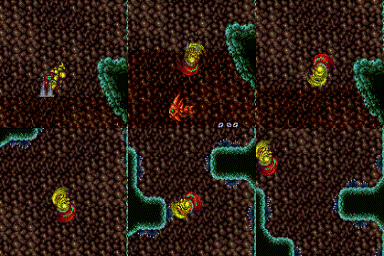
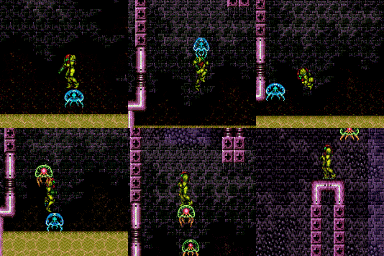

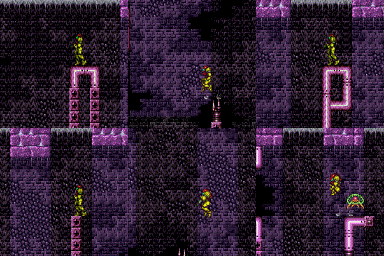
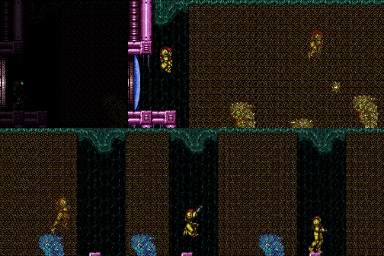
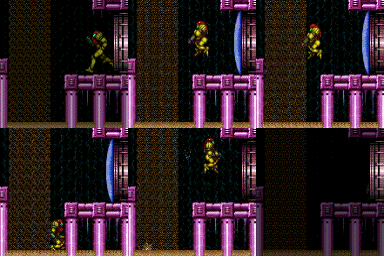
.png)
.gif)
