canLongChainTemporaryBlue (Insane)

The ability to move across large distances while maintaining Temporary Blue.
Dependencies: canTemporaryBlue, canLateralMidAirMorph, canMidAirMorph, canTrivialMidAirMorph, canDash, canChainTemporaryBlue
Strats ()
|
Entrance condition: {
"comeInWithTemporaryBlue": {
"direction": "any"
},
"comesThroughToilet": "any"
}Requires: "canLongChainTemporaryBlue" "canXRayTurnaround" Clears obstacles: A |
From: 3
Top Right Door
To: 6
Main Junction
Entrance condition: {
"comeInShinecharging": {
"length": 1,
"openEnd": 0
}
}Requires: "canInsaneJump" "canLongChainTemporaryBlue" "can4HighMidAirMorph" "canSpringBallBounce" Dev note: There is 1 unusable tile in this runway. |
From: 3
Top Right Door
To: 6
Main Junction
Entrance condition: {
"comeInWithTemporaryBlue": {}
}Requires: "canInsaneJump" "canLongChainTemporaryBlue" "can4HighMidAirMorph" "canSpringBallBounce" |
From: 4
Middle Right Door
To: 6
Main Junction
Entrance condition: {
"comeInShinecharging": {
"length": 2,
"openEnd": 0
}
}Requires: "canInsaneJump" "canLongChainTemporaryBlue" "canSpringBallBounce" "can4HighMidAirMorph" Dev note: There is 1 unusable tile in this runway. |
From: 4
Middle Right Door
To: 6
Main Junction
Entrance condition: {
"comeInWithTemporaryBlue": {}
}Requires: "canInsaneJump" "canLongChainTemporaryBlue" "canSpringBallBounce" "can4HighMidAirMorph" |
From: 6
Main Junction
To: 3
Top Right Door
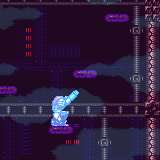
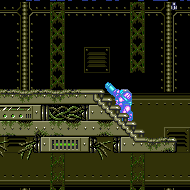
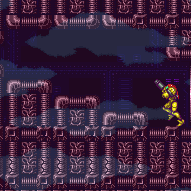
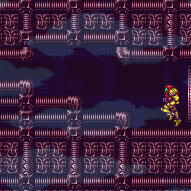
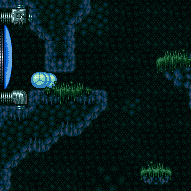
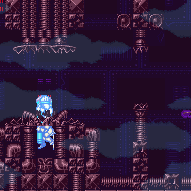
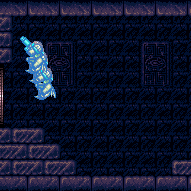
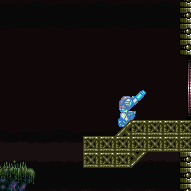
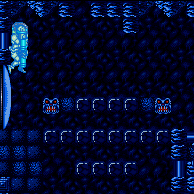
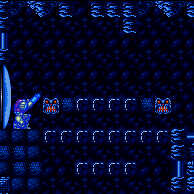
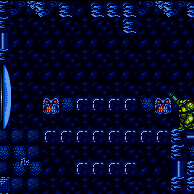
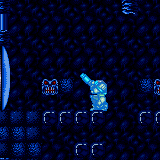
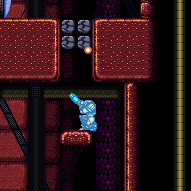
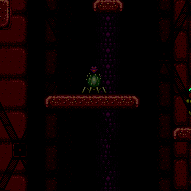
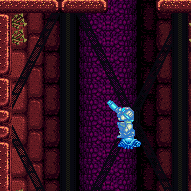
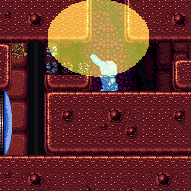
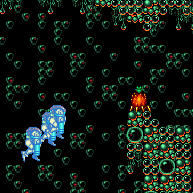
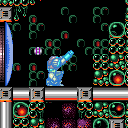
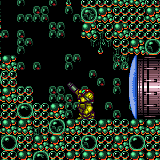
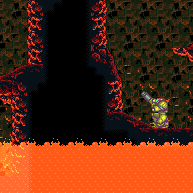
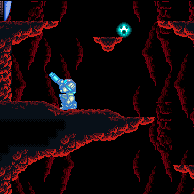
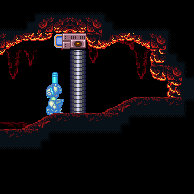
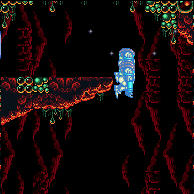
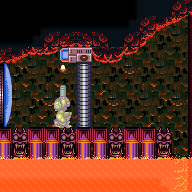
This is a long temporary blue chain with X-Ray turnarounds to climb up and destroy the bomb blocks blocking the top morph tunnel. Breaking the bomb blocks is difficult because there is not enough space above them to get a neutral bounce. It is best to break them by jumping from the top platform (inside the 3-tile-high space), as this provides a 2-frame window for the morph; in comparison, jumping from the platform below requires a frame-perfect morph. If Spring Ball is available, it can be used to increase the window by one frame. Requires: {
"notable": "Temporary Blue Chain Through Bomb Blocks"
}
{
"canShineCharge": {
"usedTiles": 27.5,
"openEnd": 0
}
}
"canLongChainTemporaryBlue"
"canXRayTurnaround"
"canTrickyJump"
"canBePatient"
"canInsaneJump"
{
"obstaclesCleared": [
"A"
]
}
{
"or": [
"h_ClimbWithoutLava",
{
"obstaclesNotCleared": [
"B"
]
}
]
}Dev note: The runway was reduced by 0.5 tiles, as you can't maintain Temporary Blue directly against a wall. |
From: 1
Top Left Door
To: 7
Junction (Left Ledge Below Bomb Blocks)
Entrance condition: {
"comeInWithTemporaryBlue": {}
}Requires: "canLongChainTemporaryBlue" "can4HighMidAirMorph" Clears obstacles: A |
From: 1
Top Left Door
To: 7
Junction (Left Ledge Below Bomb Blocks)

Entrance condition: {
"comeInGettingBlueSpeed": {
"length": 3,
"openEnd": 0
}
}Requires: {
"or": [
"canBlueSpaceJump",
{
"and": [
"canSpringBallBounce",
"canTrickyJump",
"h_blueJump"
]
},
"canLongChainTemporaryBlue"
]
}Clears obstacles: A |
|


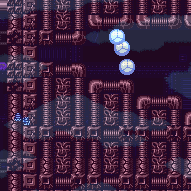
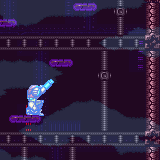
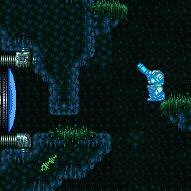
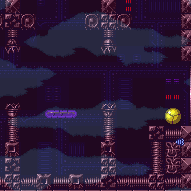
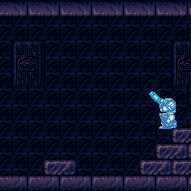
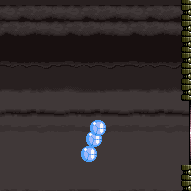
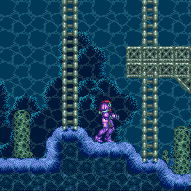
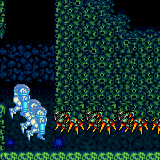
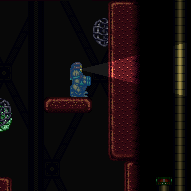
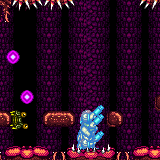
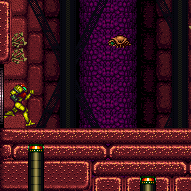
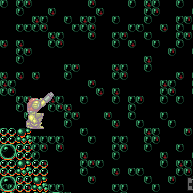
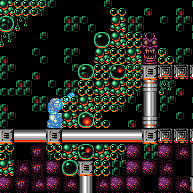
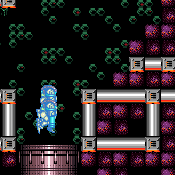
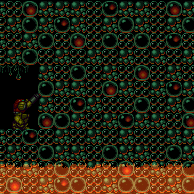
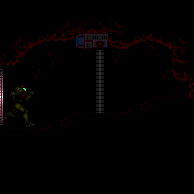
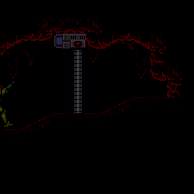
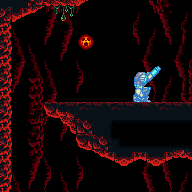
Use the runway near the Power Bomb room door to jump to the left, morphing as Samus begins descending, to bounce through the Bomb blocks. Any time while bouncing, hold an angle button and unmorph to gain temporary blue; then chain it to reach the door with temporary blue. The jump can be set up by using the full runway with a one-tap shortcharge, with the tap being at the top of the lowest slope. Requires: {
"notable": "Big Jump with Blue Speed"
}
{
"notable": "Big Jump Leave With Temporary Blue"
}
"canTrickyJump"
"Morph"
"canLateralMidAirMorph"
{
"getBlueSpeed": {
"usedTiles": 30,
"openEnd": 2
}
}
"h_blueJump"
"canLongChainTemporaryBlue"Exit condition: {
"leaveWithTemporaryBlue": {}
}Unlocks doors: {"types":["ammo"],"requires":[]} |
From: 8
Central Junction
To: 2
Middle Left Door

Requires: {
"canShineCharge": {
"usedTiles": 25,
"steepUpTiles": 3,
"steepDownTiles": 3,
"openEnd": 1
}
}
"canLongChainTemporaryBlue"
"canXRayTurnaround"
"can4HighMidAirMorph"
"canSpringBallBounce"Exit condition: {
"leaveWithTemporaryBlue": {}
}Unlocks doors: {"types":["ammo"],"requires":[]} |
From: 8
Central Junction
To: 3
Bottom Left Horizontal Door

Requires: {
"canShineCharge": {
"usedTiles": 25,
"steepUpTiles": 3,
"steepDownTiles": 3,
"openEnd": 1
}
}
"canLongChainTemporaryBlue"
"canXRayTurnaround"
"can4HighMidAirMorph"Exit condition: {
"leaveWithTemporaryBlue": {}
}Unlocks doors: {"types":["ammo"],"requires":[]} |
From: 8
Central Junction
To: 4
Top Right Door


Requires: {
"canShineCharge": {
"usedTiles": 25,
"steepUpTiles": 3,
"steepDownTiles": 3,
"openEnd": 1
}
}
"canLongChainTemporaryBlue"Exit condition: {
"leaveWithTemporaryBlue": {}
}Unlocks doors: {"types":["ammo"],"requires":[]} |
From: 8
Central Junction
To: 6
Bottom Right Door (On the Left Shaft)

Requires: {
"canShineCharge": {
"usedTiles": 25,
"steepUpTiles": 3,
"steepDownTiles": 3,
"openEnd": 1
}
}
"canLongChainTemporaryBlue"
"canXRayTurnaround"
"can4HighMidAirMorph"Exit condition: {
"leaveWithTemporaryBlue": {}
}Unlocks doors: {"types":["ammo"],"requires":[]} |
From: 8
Central Junction
To: 7
Bottom Left Vertical Door
Requires: {
"canShineCharge": {
"usedTiles": 25,
"steepUpTiles": 3,
"steepDownTiles": 3,
"openEnd": 1
}
}
"canLongChainTemporaryBlue"
"canXRayTurnaround"
"can4HighMidAirMorph"Exit condition: {
"leaveWithTemporaryBlue": {
"direction": "any"
}
}Unlocks doors: {"types":["ammo"],"requires":[]} |
From: 1
Left Door
To: 2
Right Door


Entrance condition: {
"comeInShinecharging": {
"length": 7,
"openEnd": 0
}
}Requires: "canLongChainTemporaryBlue" "canInsaneJump" Exit condition: {
"leaveWithTemporaryBlue": {}
}Unlocks doors: {"types":["ammo"],"requires":[]} |
From: 2
Right Door
To: 1
Left Door

Entrance condition: {
"comeInShinecharging": {
"length": 2,
"openEnd": 0
}
}Requires: "canLongChainTemporaryBlue" "canInsaneJump" Exit condition: {
"leaveWithTemporaryBlue": {}
}Unlocks doors: {"types":["ammo"],"requires":[]} |
|
Bring temporary blue from the right side door all the way to the missile location using Springball, SpaceJump, or Morph-UnMorphs. Entrance condition: {
"comeInShinecharging": {
"length": 1,
"openEnd": 1
}
}Requires: "canTemporaryBlue"
"canInsaneJump"
{
"or": [
"canLongChainTemporaryBlue",
{
"and": [
"canSpeedball",
"canSpringBallBounce",
"canSlowShortCharge"
]
},
{
"and": [
"canBlueSpaceJump",
"canMockball",
"canSlowShortCharge"
]
}
]
}Clears obstacles: A Dev note: There is 1 unusable tile in this runway. |
From: 2
Right Door
To: 3
Item
Entrance condition: {
"comeInWithTemporaryBlue": {}
}Requires: "canLongChainTemporaryBlue" "canInsaneJump" Clears obstacles: A |
From: 1
Left Door
To: 2
Right Door
Entrance condition: {
"comeInShinecharging": {
"length": 2,
"openEnd": 0
}
}Requires: "canLongChainTemporaryBlue" Exit condition: {
"leaveWithTemporaryBlue": {}
}Unlocks doors: {"types":["ammo"],"requires":[]} |
From: 2
Right Door
To: 1
Left Door
Entrance condition: {
"comeInShinecharging": {
"length": 2,
"openEnd": 0
}
}Requires: "canLongChainTemporaryBlue" Exit condition: {
"leaveWithTemporaryBlue": {}
}Unlocks doors: {"types":["ammo"],"requires":[]} |
From: 2
Right Door
To: 1
Left Door
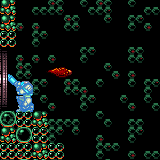
Carry temporary blue across the room, breaking the bomb blocks along the way. Use Spring Ball to bounce through the morph tunnel at the beginning, and across the final stretch at the end. Entrance condition: {
"comeInShinecharging": {
"length": 4,
"openEnd": 1
}
}Requires: "canLongChainTemporaryBlue"
"canTrickySpringBallBounce"
{
"acidFrames": 5
}
{
"or": [
"canInsaneJump",
{
"acidFrames": 30
}
]
}Clears obstacles: A, B |
|
Requires: "canWaterShineCharge"
{
"canShineCharge": {
"usedTiles": 20,
"openEnd": 1
}
}
"canLongChainTemporaryBlue"
"canXRayTurnaround"
"can4HighMidAirMorph"Exit condition: {
"leaveWithTemporaryBlue": {}
} |
|

Requires: {
"canShineCharge": {
"usedTiles": 33,
"steepUpTiles": 2,
"steepDownTiles": 5,
"openEnd": 0
}
}
"canLongChainTemporaryBlue"
"canXRayTurnaround"Exit condition: {
"leaveWithTemporaryBlue": {
"direction": "any"
}
} |
|


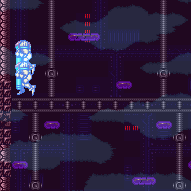
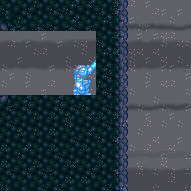
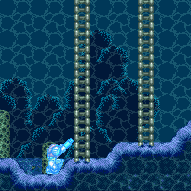
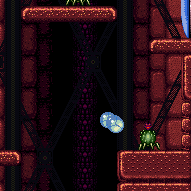
Gain temporary blue using the runway on the left side of the room, using HiJump or a Gravity jump where needed to get onto the ocean platforms. Requires: "Gravity"
{
"canShineCharge": {
"usedTiles": 20,
"steepUpTiles": 4,
"steepDownTiles": 2,
"startingSteepDownTiles": 1,
"openEnd": 0
}
}
"canLongChainTemporaryBlue"
"can4HighMidAirMorph"
{
"or": [
"HiJump",
"canGravityJump"
]
}Exit condition: {
"leaveWithTemporaryBlue": {}
}Dev note: With very precise mid-air morphs/unmorphs, it is possible to get onto the first or second ocean platform directly without HiJump or canGravityJump, by using the runway on the right side of the room. |
From: 1
Top Left Door
To: 2
Bottom Door
Entrance condition: {
"comeInShinecharging": {
"length": 10,
"openEnd": 1,
"steepUpTiles": 2,
"steepDownTiles": 1
}
}Requires: "canLongChainTemporaryBlue" "canXRayTurnaround" Exit condition: {
"leaveWithTemporaryBlue": {
"direction": "any"
}
}Unlocks doors: {"types":["ammo"],"requires":[]} |
From: 1
Left Door
To: 2
Right Door
Entrance condition: {
"comeInGettingBlueSpeed": {
"length": 4,
"openEnd": 1,
"steepDownTiles": 2
}
}Requires: "canLongChainTemporaryBlue" Exit condition: {
"leaveWithTemporaryBlue": {}
}Unlocks doors: {"types":["ammo"],"requires":[]} |
From: 2
Right Door
To: 1
Left Door

Entrance condition: {
"comeInGettingBlueSpeed": {
"length": 8,
"openEnd": 1,
"steepDownTiles": 2
}
}Requires: "canLongChainTemporaryBlue" Exit condition: {
"leaveWithTemporaryBlue": {}
}Unlocks doors: {"types":["ammo"],"requires":[]} |
From: 1
Left Door
To: 2
Right Door
Entrance condition: {
"comeInShinecharging": {
"length": 2,
"openEnd": 0,
"steepDownTiles": 1
}
}Requires: "canChainTemporaryBlue"
{
"or": [
"canBlueSpaceJump",
{
"and": [
"canGravityJump",
"canLongChainTemporaryBlue"
]
}
]
}Exit condition: {
"leaveWithTemporaryBlue": {}
}Unlocks doors: {"types":["ammo"],"requires":[]} |
From: 2
Right Door
To: 1
Left Door
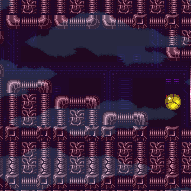
Enter with enough speed to jump onto or over the item pedestal, morphing mid-air and then unmorphing into temporary blue. Entrance condition: {
"comeInGettingBlueSpeed": {
"length": 4,
"openEnd": 0,
"minExtraRunSpeed": "$1.2"
}
}Requires: "canLongChainTemporaryBlue" Exit condition: {
"leaveWithTemporaryBlue": {}
}Collects items: 3 Unlocks doors: {"types":["ammo"],"requires":[]} |
From: 2
Upper Right Section - Top Right Door
To: 2
Upper Right Section - Top Right Door

Requires: "h_shinechargeMaxRunway" "canLongChainTemporaryBlue" Exit condition: {
"leaveWithTemporaryBlue": {}
} |
From: 4
Lower Section - Top Right Door
To: 4
Lower Section - Top Right Door
Requires: "Gravity"
"HiJump"
{
"or": [
{
"and": [
"h_shinechargeMaxRunway",
"canXRayTurnaround"
]
},
{
"canShineCharge": {
"usedTiles": 18,
"steepUpTiles": 3,
"steepDownTiles": 4,
"openEnd": 2
}
}
]
}
"canSpringBallJumpMidAir"
"canLongChainTemporaryBlue"Exit condition: {
"leaveWithTemporaryBlue": {}
} |
From: 5
Lower Section - Bottom Right Door
To: 5
Lower Section - Bottom Right Door
Requires: "Gravity"
"h_getBlueSpeedMaxRunway"
{
"or": [
{
"and": [
"canSpringBallJumpMidAir",
"canLongChainTemporaryBlue"
]
},
{
"and": [
"canBlueSpaceJump",
"canChainTemporaryBlue"
]
}
]
}Exit condition: {
"leaveWithTemporaryBlue": {}
} |
From: 1
Top Left Door
To: 3
Bottom Left Door
Entrance condition: {
"comeInShinecharging": {
"length": 1,
"openEnd": 0
}
}Requires: "canLongChainTemporaryBlue" "canSpringBallBounce" "canXRayTurnaround" Exit condition: {
"leaveWithTemporaryBlue": {}
}Unlocks doors: {"types":["ammo"],"requires":[]} |
From: 2
Right Door
To: 3
Bottom Left Door

Entrance condition: {
"comeInShinecharging": {
"length": 1,
"openEnd": 0
}
}Requires: "canLongChainTemporaryBlue" "canSpringBallBounce" Exit condition: {
"leaveWithTemporaryBlue": {}
}Unlocks doors: {"types":["ammo"],"requires":[]} |
From: 3
Bottom Left Door
To: 1
Top Left Door

Entrance condition: {
"comeInShinecharging": {
"length": 2,
"openEnd": 0
}
}Requires: "canLongChainTemporaryBlue" "canSpringBallBounce" "canXRayTurnaround" Exit condition: {
"leaveWithTemporaryBlue": {}
}Unlocks doors: {"types":["ammo"],"requires":[]} |
From: 3
Bottom Left Door
To: 2
Right Door


Entrance condition: {
"comeInShinecharging": {
"length": 2,
"openEnd": 0
}
}Requires: "canLongChainTemporaryBlue" "canSpringBallBounce" "canXRayTurnaround" Exit condition: {
"leaveWithTemporaryBlue": {}
}Unlocks doors: {"types":["ammo"],"requires":[]} |
From: 3
Bottom Left Door
To: 4
Bottom Right Door

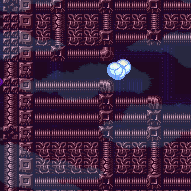
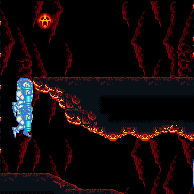
Enter the room with a blue speed jump to speedball through the spike tunnel. Then perform a long temporary blue chain across the room. Entrance condition: {
"comeInBlueSpinning": {
"maxExtraRunSpeed": "$1.E",
"unusableTiles": 1
}
}Requires: "canSpeedball" "canLongChainTemporaryBlue" Exit condition: {
"leaveWithTemporaryBlue": {}
}Unlocks doors: {"types":["ammo"],"requires":[]}Dev note: Somewhat higher run speeds can also work but with greater difficulty. |
From: 3
Bottom Left Door
To: 4
Bottom Right Door
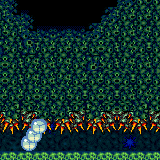

Gain temporary blue, and use Spring Ball to bounce through the spike tunnel. Then perform a long temporary blue chain across the room. Entrance condition: {
"comeInShinecharging": {
"length": 5,
"openEnd": 0
}
}Requires: "canSpringBallBounce"
{
"thornHits": 4
}
"canLongChainTemporaryBlue"Exit condition: {
"leaveWithTemporaryBlue": {}
}Unlocks doors: {"types":["ammo"],"requires":[]}Dev note: FIXME: It's possible to farm some drops along the way. |
|
Requires: {
"or": [
{
"canShineCharge": {
"usedTiles": 16,
"openEnd": 0
}
},
{
"and": [
{
"canShineCharge": {
"usedTiles": 17,
"openEnd": 0
}
},
{
"doorUnlockedAtNode": 2
}
]
}
]
}
"canLongChainTemporaryBlue"Exit condition: {
"leaveWithTemporaryBlue": {}
}Unlocks doors: {"nodeId":2,"types":["ammo"],"requires":[]} |
From: 2
Above Power Bomb Blocks - Top Left Door
To: 6
Above Power Bomb Blocks - Bottom Right Door


Entrance condition: {
"comeInShinecharging": {
"length": 3,
"openEnd": 0
}
}Requires: "canLongChainTemporaryBlue" "canXRayTurnaround" Exit condition: {
"leaveWithTemporaryBlue": {}
}Unlocks doors: {"types":["ammo"],"requires":[]} |
From: 2
Above Power Bomb Blocks - Top Left Door
To: 7
Below Power Bomb Blocks - Top Right Door


Entrance condition: {
"comeInShinecharging": {
"length": 3,
"openEnd": 0
}
}Requires: "canLongChainTemporaryBlue"
"canXRayTurnaround"
{
"ammo": {
"type": "PowerBomb",
"count": 1
}
}Exit condition: {
"leaveWithTemporaryBlue": {}
}Unlocks doors: {"types":["ammo"],"requires":[]} |
From: 2
Above Power Bomb Blocks - Top Left Door
To: 8
Below Power Bomb Blocks - Bottom Left Door


Entrance condition: {
"comeInShinecharging": {
"length": 3,
"openEnd": 0
}
}Requires: "canLongChainTemporaryBlue"
"canXRayTurnaround"
{
"ammo": {
"type": "PowerBomb",
"count": 1
}
}Exit condition: {
"leaveWithTemporaryBlue": {}
}Unlocks doors: {"types":["ammo"],"requires":[]} |
From: 3
Above Power Bomb Blocks - Top Right Door
To: 6
Above Power Bomb Blocks - Bottom Right Door


Entrance condition: {
"comeInShinecharging": {
"length": 4,
"openEnd": 0
}
}Requires: "canLongChainTemporaryBlue" "canXRayTurnaround" Exit condition: {
"leaveWithTemporaryBlue": {}
}Unlocks doors: {"types":["ammo"],"requires":[]} |
From: 3
Above Power Bomb Blocks - Top Right Door
To: 7
Below Power Bomb Blocks - Top Right Door


Entrance condition: {
"comeInShinecharging": {
"length": 4,
"openEnd": 0
}
}Requires: "canLongChainTemporaryBlue"
"canXRayTurnaround"
{
"ammo": {
"type": "PowerBomb",
"count": 1
}
}Exit condition: {
"leaveWithTemporaryBlue": {}
}Unlocks doors: {"types":["ammo"],"requires":[]} |
From: 3
Above Power Bomb Blocks - Top Right Door
To: 8
Below Power Bomb Blocks - Bottom Left Door


Entrance condition: {
"comeInShinecharging": {
"length": 4,
"openEnd": 0
}
}Requires: "canLongChainTemporaryBlue"
"canXRayTurnaround"
{
"ammo": {
"type": "PowerBomb",
"count": 1
}
}Exit condition: {
"leaveWithTemporaryBlue": {}
}Unlocks doors: {"types":["ammo"],"requires":[]} |
From: 4
Above Power Bomb Blocks - Middle Left Door
To: 6
Above Power Bomb Blocks - Bottom Right Door


Entrance condition: {
"comeInShinecharging": {
"length": 3,
"openEnd": 0
}
}Requires: "canLongChainTemporaryBlue" Exit condition: {
"leaveWithTemporaryBlue": {}
}Unlocks doors: {"types":["ammo"],"requires":[]} |
From: 4
Above Power Bomb Blocks - Middle Left Door
To: 7
Below Power Bomb Blocks - Top Right Door
Entrance condition: {
"comeInShinecharging": {
"length": 3,
"openEnd": 0
}
}Requires: "canLongChainTemporaryBlue"
{
"ammo": {
"type": "PowerBomb",
"count": 1
}
}Exit condition: {
"leaveWithTemporaryBlue": {}
}Unlocks doors: {"types":["ammo"],"requires":[]} |
From: 4
Above Power Bomb Blocks - Middle Left Door
To: 8
Below Power Bomb Blocks - Bottom Left Door
Entrance condition: {
"comeInShinecharging": {
"length": 3,
"openEnd": 0
}
}Requires: "canLongChainTemporaryBlue"
"canXRayTurnaround"
{
"ammo": {
"type": "PowerBomb",
"count": 1
}
}Exit condition: {
"leaveWithTemporaryBlue": {}
}Unlocks doors: {"types":["ammo"],"requires":[]} |
From: 5
Above Power Bomb Blocks - Bottom Left Door
To: 2
Above Power Bomb Blocks - Top Left Door


Entrance condition: {
"comeInShinecharging": {
"length": 12,
"openEnd": 0
}
}Requires: "canLongChainTemporaryBlue" "canXRayTurnaround" Exit condition: {
"leaveWithTemporaryBlue": {}
}Unlocks doors: {"types":["ammo"],"requires":[]} |
From: 5
Above Power Bomb Blocks - Bottom Left Door
To: 3
Above Power Bomb Blocks - Top Right Door


Entrance condition: {
"comeInShinecharging": {
"length": 12,
"openEnd": 0
}
}Requires: "canLongChainTemporaryBlue" "canXRayTurnaround" Exit condition: {
"leaveWithTemporaryBlue": {}
}Unlocks doors: {"types":["ammo"],"requires":[]} |
From: 5
Above Power Bomb Blocks - Bottom Left Door
To: 7
Below Power Bomb Blocks - Top Right Door


Entrance condition: {
"comeInShinecharging": {
"length": 12,
"openEnd": 0
}
}Requires: "canLongChainTemporaryBlue"
"canXRayTurnaround"
"can4HighMidAirMorph"
{
"ammo": {
"type": "PowerBomb",
"count": 1
}
}Exit condition: {
"leaveWithTemporaryBlue": {}
}Unlocks doors: {"types":["ammo"],"requires":[]} |
From: 5
Above Power Bomb Blocks - Bottom Left Door
To: 8
Below Power Bomb Blocks - Bottom Left Door


Entrance condition: {
"comeInShinecharging": {
"length": 12,
"openEnd": 0
}
}Requires: "canLongChainTemporaryBlue"
"can4HighMidAirMorph"
"canXRayTurnaround"
{
"ammo": {
"type": "PowerBomb",
"count": 1
}
}Exit condition: {
"leaveWithTemporaryBlue": {}
}Unlocks doors: {"types":["ammo"],"requires":[]} |
From: 6
Above Power Bomb Blocks - Bottom Right Door
To: 2
Above Power Bomb Blocks - Top Left Door


Entrance condition: {
"comeInShinecharging": {
"length": 12,
"openEnd": 0
}
}Requires: "canLongChainTemporaryBlue" "canXRayTurnaround" Exit condition: {
"leaveWithTemporaryBlue": {}
}Unlocks doors: {"types":["ammo"],"requires":[]} |
From: 6
Above Power Bomb Blocks - Bottom Right Door
To: 3
Above Power Bomb Blocks - Top Right Door


Entrance condition: {
"comeInShinecharging": {
"length": 12,
"openEnd": 0
}
}Requires: "canLongChainTemporaryBlue" "canXRayTurnaround" Exit condition: {
"leaveWithTemporaryBlue": {}
}Unlocks doors: {"types":["ammo"],"requires":[]} |
From: 6
Above Power Bomb Blocks - Bottom Right Door
To: 7
Below Power Bomb Blocks - Top Right Door


Entrance condition: {
"comeInShinecharging": {
"length": 12,
"openEnd": 0
}
}Requires: "canLongChainTemporaryBlue"
"canXRayTurnaround"
{
"ammo": {
"type": "PowerBomb",
"count": 1
}
}Exit condition: {
"leaveWithTemporaryBlue": {}
}Unlocks doors: {"types":["ammo"],"requires":[]} |
From: 6
Above Power Bomb Blocks - Bottom Right Door
To: 8
Below Power Bomb Blocks - Bottom Left Door


Entrance condition: {
"comeInShinecharging": {
"length": 12,
"openEnd": 0
}
}Requires: "canLongChainTemporaryBlue"
"canXRayTurnaround"
{
"ammo": {
"type": "PowerBomb",
"count": 1
}
}Exit condition: {
"leaveWithTemporaryBlue": {}
}Unlocks doors: {"types":["ammo"],"requires":[]} |
Come in Shinecharging, Leave With Temporary Blue (Partial Runway)
(Insane)
Green Brinstar Main Shaft
From: 6
Above Power Bomb Blocks - Bottom Right Door
To: 8
Below Power Bomb Blocks - Bottom Left Door


Entrance condition: {
"comeInShinecharging": {
"length": 6,
"openEnd": 0
}
}Requires: "canLongChainTemporaryBlue"
{
"ammo": {
"type": "PowerBomb",
"count": 1
}
}Exit condition: {
"leaveWithTemporaryBlue": {}
}Unlocks doors: {"types":["ammo"],"requires":[]} |
From: 7
Below Power Bomb Blocks - Top Right Door
To: 2
Above Power Bomb Blocks - Top Left Door
Entrance condition: {
"comeInShinecharging": {
"length": 2,
"openEnd": 0
}
}Requires: "canLongChainTemporaryBlue"
"canXRayTurnaround"
{
"ammo": {
"type": "PowerBomb",
"count": 1
}
}Exit condition: {
"leaveWithTemporaryBlue": {}
}Unlocks doors: {"types":["ammo"],"requires":[]} |
From: 7
Below Power Bomb Blocks - Top Right Door
To: 3
Above Power Bomb Blocks - Top Right Door
Entrance condition: {
"comeInShinecharging": {
"length": 2,
"openEnd": 0
}
}Requires: "canLongChainTemporaryBlue"
"canXRayTurnaround"
{
"ammo": {
"type": "PowerBomb",
"count": 1
}
}Exit condition: {
"leaveWithTemporaryBlue": {}
}Unlocks doors: {"types":["ammo"],"requires":[]} |
From: 7
Below Power Bomb Blocks - Top Right Door
To: 4
Above Power Bomb Blocks - Middle Left Door
Entrance condition: {
"comeInShinecharging": {
"length": 2,
"openEnd": 0
}
}Requires: "canLongChainTemporaryBlue"
"canXRayTurnaround"
{
"ammo": {
"type": "PowerBomb",
"count": 1
}
}Exit condition: {
"leaveWithTemporaryBlue": {}
}Unlocks doors: {"types":["ammo"],"requires":[]} |
From: 7
Below Power Bomb Blocks - Top Right Door
To: 6
Above Power Bomb Blocks - Bottom Right Door
Entrance condition: {
"comeInShinecharging": {
"length": 2,
"openEnd": 0
}
}Requires: "canLongChainTemporaryBlue"
"canXRayTurnaround"
{
"ammo": {
"type": "PowerBomb",
"count": 1
}
}Exit condition: {
"leaveWithTemporaryBlue": {}
}Unlocks doors: {"types":["ammo"],"requires":[]} |
From: 8
Below Power Bomb Blocks - Bottom Left Door
To: 2
Above Power Bomb Blocks - Top Left Door


Entrance condition: {
"comeInShinecharging": {
"length": 2,
"openEnd": 0
}
}Requires: "canLongChainTemporaryBlue"
"canXRayTurnaround"
"canBeVeryPatient"
{
"ammo": {
"type": "PowerBomb",
"count": 1
}
}Exit condition: {
"leaveWithTemporaryBlue": {}
}Unlocks doors: {"types":["ammo"],"requires":[]} |
From: 8
Below Power Bomb Blocks - Bottom Left Door
To: 3
Above Power Bomb Blocks - Top Right Door


Entrance condition: {
"comeInShinecharging": {
"length": 2,
"openEnd": 0
}
}Requires: "canLongChainTemporaryBlue"
"canXRayTurnaround"
"canBeVeryPatient"
{
"ammo": {
"type": "PowerBomb",
"count": 1
}
}Exit condition: {
"leaveWithTemporaryBlue": {}
}Unlocks doors: {"types":["ammo"],"requires":[]} |
From: 8
Below Power Bomb Blocks - Bottom Left Door
To: 4
Above Power Bomb Blocks - Middle Left Door


Entrance condition: {
"comeInShinecharging": {
"length": 2,
"openEnd": 0
}
}Requires: "canLongChainTemporaryBlue"
"canXRayTurnaround"
"canBeVeryPatient"
{
"ammo": {
"type": "PowerBomb",
"count": 1
}
}Exit condition: {
"leaveWithTemporaryBlue": {}
}Unlocks doors: {"types":["ammo"],"requires":[]} |
From: 8
Below Power Bomb Blocks - Bottom Left Door
To: 5
Above Power Bomb Blocks - Bottom Left Door


Entrance condition: {
"comeInShinecharging": {
"length": 2,
"openEnd": 0
}
}Requires: "canLongChainTemporaryBlue"
"canXRayTurnaround"
"canBeVeryPatient"
{
"ammo": {
"type": "PowerBomb",
"count": 1
}
}Exit condition: {
"leaveWithTemporaryBlue": {}
}Unlocks doors: {"types":["ammo"],"requires":[]} |
From: 8
Below Power Bomb Blocks - Bottom Left Door
To: 6
Above Power Bomb Blocks - Bottom Right Door


Entrance condition: {
"comeInShinecharging": {
"length": 2,
"openEnd": 0
}
}Requires: "canLongChainTemporaryBlue"
"canXRayTurnaround"
"canBeVeryPatient"
{
"ammo": {
"type": "PowerBomb",
"count": 1
}
}Exit condition: {
"leaveWithTemporaryBlue": {}
}Unlocks doors: {"types":["ammo"],"requires":[]} |
From: 8
Below Power Bomb Blocks - Bottom Left Door
To: 7
Below Power Bomb Blocks - Top Right Door


Entrance condition: {
"comeInShinecharging": {
"length": 3,
"openEnd": 0
}
}Requires: "canLongChainTemporaryBlue" "canXRayTurnaround" Exit condition: {
"leaveWithTemporaryBlue": {}
}Unlocks doors: {"types":["ammo"],"requires":[]} |
From: 9
Right Etecoon Shaft - Top Left Door
To: 10
Right Etecoon Shaft - Bottom Left Door


Requires: {
"canShineCharge": {
"usedTiles": 17,
"openEnd": 0
}
}
"canLongChainTemporaryBlue"
"canXRayTurnaround"
Exit condition: {
"leaveWithTemporaryBlue": {}
}Unlocks doors: {"types":["ammo"],"requires":[]} |
From: 13
Central Junction
To: 8
Right Side - Bottom Door

Use Spring Ball to bounce through the morph tunnel. Then continue chaining temporary blue into the next room. Requires: {
"canShineCharge": {
"usedTiles": 24,
"openEnd": 1
}
}
"canXRayTurnaround"
"canTrickySpringBallBounce"
"canLongChainTemporaryBlue"Exit condition: {
"leaveWithTemporaryBlue": {}
}Unlocks doors: {"types":["ammo"],"requires":[]} |
|

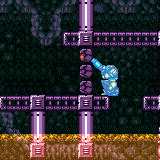
This is a long temporary blue chain to make it through all the speed blocks. If possible, destroy the enemies beforehand using Wave or a Power Bomb; otherwise, carefully kill them individually with temporary blue. Requires: {
"canShineCharge": {
"usedTiles": 32,
"openEnd": 1
}
}
"canLongChainTemporaryBlue"
"canXRayTurnaround"
{
"or": [
"Wave",
{
"ammo": {
"type": "PowerBomb",
"count": 1
}
},
"canDodgeWhileShooting"
]
}Clears obstacles: A |
|


It may help to disable HiJump for more controlled jumps. Entrance condition: {
"comeInWithTemporaryBlue": {}
}Requires: {
"doorUnlockedAtNode": 1
}
"HiJump"
{
"or": [
"Gravity",
{
"and": [
"canTrickySpringBallJump",
"canDodgeWhileShooting",
"canLongChainTemporaryBlue",
{
"enemyKill": {
"enemies": [
[
"Yapping Maw"
]
],
"explicitWeapons": [
"Super"
]
}
}
]
}
]
}
"canChainTemporaryBlue"
"canXRayTurnaround"Unlocks doors: {"nodeId":1,"types":["ammo"],"requires":[]} |
From: 1
Top Left Door
To: 3
Bottom Left Door

Entrance condition: {
"comeInShinecharging": {
"length": 4,
"openEnd": 0
}
}Requires: "canLongChainTemporaryBlue" "canXRayTurnaround" Exit condition: {
"leaveWithTemporaryBlue": {}
}Unlocks doors: {"types":["ammo"],"requires":[]} |
From: 2
Middle Left Door
To: 1
Top Left Door

Entrance condition: {
"comeInShinecharging": {
"length": 7,
"openEnd": 0
}
}Requires: "canLongChainTemporaryBlue"
"canXRayTurnaround"
{
"or": [
"HiJump",
"canTrickySpringBallJump"
]
}Exit condition: {
"leaveWithTemporaryBlue": {}
}Unlocks doors: {"types":["ammo"],"requires":[]} |
From: 2
Middle Left Door
To: 3
Bottom Left Door

Entrance condition: {
"comeInShinecharging": {
"length": 7,
"openEnd": 0
}
}Requires: "canLongChainTemporaryBlue" "canXRayTurnaround" Exit condition: {
"leaveWithTemporaryBlue": {}
}Unlocks doors: {"types":["ammo"],"requires":[]} |
From: 3
Bottom Left Door
To: 1
Top Left Door
Entrance condition: {
"comeInShinecharging": {
"length": 2,
"openEnd": 0
}
}Requires: "canLongChainTemporaryBlue"
"canXRayTurnaround"
{
"or": [
"HiJump",
"canTrickySpringBallJump"
]
}Exit condition: {
"leaveWithTemporaryBlue": {}
}Unlocks doors: {"types":["ammo"],"requires":[]} |
From: 3
Bottom Left Door
To: 2
Middle Left Door

Entrance condition: {
"comeInShinecharging": {
"length": 2,
"openEnd": 0
}
}Requires: "canLongChainTemporaryBlue" "canXRayTurnaround" Exit condition: {
"leaveWithTemporaryBlue": {}
}Unlocks doors: {"types":["ammo"],"requires":[]} |
From: 3
Bottom Left Door
To: 4
Bottom Right Door
Entrance condition: {
"comeInShinecharging": {
"length": 2,
"openEnd": 0
}
}Requires: "canLongChainTemporaryBlue"
"canXRayTurnaround"
{
"or": [
"HiJump",
"canTrickySpringBallJump"
]
}Exit condition: {
"leaveWithTemporaryBlue": {}
}Unlocks doors: {"types":["ammo"],"requires":[]} |
From: 4
Bottom Right Door
To: 3
Bottom Left Door
Entrance condition: {
"comeInShinecharging": {
"length": 2,
"openEnd": 0
}
}Requires: "canLongChainTemporaryBlue" "canXRayTurnaround" Exit condition: {
"leaveWithTemporaryBlue": {}
}Unlocks doors: {"types":["ammo"],"requires":[]} |
|

Use the Samus Eater second-closest to the right door, jumping into its far left side while moving forward to the right. Continue holding dash, forward, and angle-up or angle-down to gain a shinecharge while running in place inside the Samus Eater. The down press for the shinecharge must be precisely timed to occur after the Samus Eater releases Samus but before running into the wall (~2-frame window). Then use X-Ray to cancel the shinecharge frames, in order to jump out with temporary blue before the Samus Eater begins another cycle. If the down press for the shinecharge occurs too early, Samus will end up in an aim-down pose before landing and will not be able to gain temporary blue. In order to prevent Zebbos from interfering, spawn a drop and leave it uncollected in an out-of-the-way place. Requires: "canSamusEaterStandUp"
{
"samusEaterCycles": 1
}
"h_shinechargeMaxRunway"
"canXRayCancelShinecharge"
"canLongChainTemporaryBlue"Exit condition: {
"leaveWithTemporaryBlue": {}
} |
From: 2
Middle Left Door (Behind Power Bomb Blocks)
To: 1
Top Left Door
Lay the Power Bomb during a temporary blue chain immediately after morphing, placing it high enough that it does not boost Samus upward. Entrance condition: {
"comeInShinecharging": {
"length": 0,
"openEnd": 1
}
}Requires: "canLongChainTemporaryBlue"
{
"ammo": {
"type": "PowerBomb",
"count": 1
}
}
"can4HighMidAirMorph"
"canXRayTurnaround"Exit condition: {
"leaveWithTemporaryBlue": {}
}Unlocks doors: {"types":["ammo"],"requires":[]} |
From: 3
Bottom Left Door
To: 10
Temporary Blue Junction (Top Left Door)
Entrance condition: {
"comeInShinecharging": {
"length": 11,
"openEnd": 0
}
}Requires: "HiJump" "canTrickyUseFrozenEnemies" "canLongChainTemporaryBlue" "canXRayTurnaround" "canOffScreenMovement" Dev note: FIXME: This might also be possible with Spring Ball instead of HiJump, but if so it seems really bad. |
From: 4
Bottom Right Door
To: 10
Temporary Blue Junction (Top Left Door)
Entrance condition: {
"comeInShinecharging": {
"length": 11,
"openEnd": 0
}
}Requires: "HiJump" "canTrickyUseFrozenEnemies" "canLongChainTemporaryBlue" "canXRayTurnaround" "canOffScreenMovement" Dev note: FIXME: This might also be possible with Spring Ball instead of HiJump, but if so it seems really bad. |
From: 10
Temporary Blue Junction (Top Left Door)
To: 2
Middle Left Door (Behind Power Bomb Blocks)
Requires: "h_getBlueSpeedMaxRunway"
"canLongChainTemporaryBlue"
"canXRayTurnaround"
"can4HighMidAirMorph"
{
"ammo": {
"type": "PowerBomb",
"count": 1
}
}Exit condition: {
"leaveWithTemporaryBlue": {}
}Unlocks doors: {"types":["missiles","super"],"requires":[]}
{"types":["powerbomb"],"requires":[],"useImplicitRequires":false}Dev note: FIXME: The h_getBlueSpeedMaxRunway is to satisfy tests for now. We should add a proper way to represent that the blue state carries over from the previous strat. |
From: 10
Temporary Blue Junction (Top Left Door)
To: 3
Bottom Left Door
Requires: "h_getBlueSpeedMaxRunway" "canLongChainTemporaryBlue" "canXRayTurnaround" "canOffScreenMovement" Exit condition: {
"leaveWithTemporaryBlue": {}
}Unlocks doors: {"types":["ammo"],"requires":[]}Dev note: FIXME: The h_getBlueSpeedMaxRunway is to satisfy tests for now. We should add a proper way to represent that the blue state carries over from the previous strat. |
From: 10
Temporary Blue Junction (Top Left Door)
To: 4
Bottom Right Door
Requires: "h_getBlueSpeedMaxRunway" "canLongChainTemporaryBlue" "canXRayTurnaround" "canOffScreenMovement" Exit condition: {
"leaveWithTemporaryBlue": {}
}Unlocks doors: {"types":["ammo"],"requires":[]}Dev note: FIXME: The h_getBlueSpeedMaxRunway is to satisfy tests for now. We should add a proper way to represent that the blue state carries over from the previous strat. |
From: 1
Left Door
To: 3
Bottom Right Door


Tank one or more ceiling thorn hits in order to make it past the middle section. Entrance condition: {
"comeInShinecharging": {
"length": 4,
"openEnd": 0
}
}Requires: "canLongChainTemporaryBlue"
"can4HighMidAirMorph"
{
"thornHits": 1
}
{
"or": [
{
"thornHits": 2
},
"canBeVeryPatient"
]
}Exit condition: {
"leaveWithTemporaryBlue": {}
}Unlocks doors: {"types":["ammo"],"requires":[]}Dev note: Entirely avoiding the thorn hits is technically possible but extremely difficult. |
From: 2
Top Right Door
To: 3
Bottom Right Door


Tank one or more ceiling thorn hits in order to make it past the middle section. Entrance condition: {
"comeInShinecharging": {
"length": 3,
"openEnd": 0
}
}Requires: "canLongChainTemporaryBlue"
"canXRayTurnaround"
"can4HighMidAirMorph"
{
"thornHits": 1
}
{
"or": [
{
"thornHits": 2
},
"canBeVeryPatient"
]
}Exit condition: {
"leaveWithTemporaryBlue": {}
}Unlocks doors: {"types":["ammo"],"requires":[]}Dev note: Entirely avoiding the thorn hits is technically possible but extremely difficult. |
From: 3
Bottom Right Door
To: 1
Left Door


Tank one or more ceiling thorn hits in order to make it past the middle section. Entrance condition: {
"comeInShinecharging": {
"length": 2,
"openEnd": 0
}
}Requires: "canLongChainTemporaryBlue"
"can4HighMidAirMorph"
{
"thornHits": 1
}
{
"or": [
{
"thornHits": 2
},
"canBeVeryPatient"
]
}Exit condition: {
"leaveWithTemporaryBlue": {}
}Unlocks doors: {"types":["ammo"],"requires":[]}Dev note: Entirely avoiding the thorn hits is technically possible but extremely difficult. Farming in the middle of the strat could also be possible. |
From: 3
Bottom Right Door
To: 2
Top Right Door


Tank one or more ceiling thorn hits in order to make it past the middle section. Entrance condition: {
"comeInShinecharging": {
"length": 2,
"openEnd": 0
}
}Requires: "canLongChainTemporaryBlue"
"canXRayTurnaround"
"can4HighMidAirMorph"
{
"thornHits": 1
}
{
"or": [
{
"thornHits": 2
},
"canBeVeryPatient"
]
}Exit condition: {
"leaveWithTemporaryBlue": {}
}Unlocks doors: {"types":["ammo"],"requires":[]}Dev note: Entirely avoiding the thorn hits is technically possible but extremely difficult. Farming in the middle of the strat could also be possible. |
From: 1
Bottom Left Door
To: 2
Top Right Door
Entrance condition: {
"comeInShinecharging": {
"length": 2,
"openEnd": 1
}
}Requires: "canLongChainTemporaryBlue"
"HiJump"
{
"or": [
{
"heatFrames": 570
},
{
"and": [
"canXRayCancelShinecharge",
{
"heatFrames": 420
}
]
}
]
}Exit condition: {
"leaveWithTemporaryBlue": {}
}Unlocks doors: {"types":["super","powerbomb"],"requires":[]}
{"types":["missiles"],"requires":[{"heatFrames":50}]} |
From: 2
Top Right Door
To: 1
Bottom Left Door


Entrance condition: {
"comeInShinecharging": {
"length": 3,
"openEnd": 1
}
}Requires: "canLongChainTemporaryBlue"
{
"or": [
{
"heatFrames": 550
},
{
"and": [
"canXRayCancelShinecharge",
{
"heatFrames": 380
}
]
}
]
}Exit condition: {
"leaveWithTemporaryBlue": {}
}Unlocks doors: {"types":["super","powerbomb"],"requires":[]}
{"types":["missiles"],"requires":[{"heatFrames":50}]} |
From: 1
Left Side - Top Door
To: 2
Left Side - Top Middle Door
Use X-ray to cancel the shinecharge, in order to quickly destroy the Waver before taking a hit. Alternatively, run, jump, or slide off the edge, using a pause buffer to morph. Or if enough runway is available, simply avoid using the last tile to stay out of the way of the Waver. Entrance condition: {
"comeInShinecharging": {
"length": 3,
"openEnd": 1
}
}Requires: "canLongChainTemporaryBlue" "canXRayTurnaround" "canXRayCancelShinecharge" Exit condition: {
"leaveWithTemporaryBlue": {}
}Unlocks doors: {"types":["ammo"],"requires":[]} |
From: 1
Left Side - Top Door
To: 3
Left Side - Bottom Middle Door

Use X-ray to cancel the shinecharge, in order to quickly destroy the Waver before taking a hit. Alternatively, run, jump, or slide off the edge, using a pause buffer to morph. Or if enough runway is available, simply avoid using the last tile to stay out of the way of the Waver. Entrance condition: {
"comeInShinecharging": {
"length": 3,
"openEnd": 1
}
}Requires: "canLongChainTemporaryBlue" "canXRayTurnaround" "canXRayCancelShinecharge" Exit condition: {
"leaveWithTemporaryBlue": {}
}Unlocks doors: {"types":["ammo"],"requires":[]} |
From: 1
Left Side - Top Door
To: 4
Left Side - Bottom Door

Use X-ray to cancel the shinecharge, in order to quickly destroy the Waver before taking a hit. Alternatively, run, jump, or slide off the edge, using a pause buffer to morph. Or if enough runway is available, simply avoid using the last tile to stay out of the way of the Waver. Lay the Power Bomb low enough to kill the Sova. Descend during the Power Bomb explosion, to take advantage of the more lenient timing provided by the lag. Entrance condition: {
"comeInShinecharging": {
"length": 3,
"openEnd": 1
}
}Requires: "canLongChainTemporaryBlue"
"canXRayTurnaround"
"canXRayCancelShinecharge"
{
"ammo": {
"type": "PowerBomb",
"count": 1
}
}Exit condition: {
"leaveWithTemporaryBlue": {}
}Unlocks doors: {"types":["ammo"],"requires":[]} |
From: 1
Left Side - Top Door
To: 5
Bottom Door


Use X-ray to cancel the shinecharge, in order to quickly destroy the Waver before taking a hit. Alternatively, run, jump, or slide off the edge, using a pause buffer to morph. Or if enough runway is available, simply avoid using the last tile to stay out of the way of the Waver. Lay the Power Bomb low enough to kill the Sova. Descend during the Power Bomb explosion, to take advantage of the more lenient timing provided by the lag. Entrance condition: {
"comeInShinecharging": {
"length": 3,
"openEnd": 1
}
}Requires: "canLongChainTemporaryBlue"
"canXRayTurnaround"
"canXRayCancelShinecharge"
{
"ammo": {
"type": "PowerBomb",
"count": 1
}
}Exit condition: {
"leaveWithTemporaryBlue": {
"direction": "any"
}
}Unlocks doors: {"types":["ammo"],"requires":[]} |
From: 1
Left Side - Top Door
To: 6
Middle Right Door
Destroy the Cac by touching it while in aim-down pose; enter a speedball for a moment, before unmorphing past the two half-tile dropoffs. Alternatively, if enough run speed is available, it is also an option to airball over the Cac. Entrance condition: {
"comeInGettingBlueSpeed": {
"length": 3,
"openEnd": 1,
"minExtraRunSpeed": "$1.2"
}
}Requires: "canSpeedball" "canLongChainTemporaryBlue" Exit condition: {
"leaveWithTemporaryBlue": {}
}Unlocks doors: {"types":["ammo"],"requires":[]} |
From: 1
Left Side - Top Door
To: 7
Top Right Door


Destroy the Cac by touching it while in aim-down pose; enter a speedball for a moment, before unmorphing past the two half-tile drops. Alternatively, if enough run speed is available, it is also an option to airball over the Cac. Entrance condition: {
"comeInGettingBlueSpeed": {
"length": 3,
"openEnd": 1,
"minExtraRunSpeed": "$1.2"
}
}Requires: "canSpeedball" "canLongChainTemporaryBlue" Exit condition: {
"leaveWithTemporaryBlue": {}
}Unlocks doors: {"types":["ammo"],"requires":[]} |
From: 2
Left Side - Top Middle Door
To: 3
Left Side - Bottom Middle Door

Entrance condition: {
"comeInGettingBlueSpeed": {
"length": 2,
"openEnd": 1
}
}Requires: "canLongChainTemporaryBlue" "canXRayTurnaround" Exit condition: {
"leaveWithTemporaryBlue": {}
}Unlocks doors: {"types":["ammo"],"requires":[]} |
From: 2
Left Side - Top Middle Door
To: 4
Left Side - Bottom Door


Lay the Power Bomb low enough to kill the Sova. Descend during the Power Bomb explosion, to take advantage of the more lenient timing provided by the lag. Entrance condition: {
"comeInGettingBlueSpeed": {
"length": 2,
"openEnd": 1
}
}Requires: "canLongChainTemporaryBlue"
"canXRayTurnaround"
{
"ammo": {
"type": "PowerBomb",
"count": 1
}
}Exit condition: {
"leaveWithTemporaryBlue": {}
}Unlocks doors: {"types":["ammo"],"requires":[]} |
From: 2
Left Side - Top Middle Door
To: 5
Bottom Door

Lay the Power Bomb low enough to kill the Sova. Descend during the Power Bomb explosion, to take advantage of the more lenient timing provided by the lag. Entrance condition: {
"comeInGettingBlueSpeed": {
"length": 2,
"openEnd": 1
}
}Requires: "canLongChainTemporaryBlue"
"canXRayTurnaround"
{
"ammo": {
"type": "PowerBomb",
"count": 1
}
}Exit condition: {
"leaveWithTemporaryBlue": {
"direction": "any"
}
}Unlocks doors: {"types":["ammo"],"requires":[]} |
From: 2
Left Side - Top Middle Door
To: 7
Top Right Door
Entrance condition: {
"comeInGettingBlueSpeed": {
"length": 0,
"openEnd": 1,
"minExtraRunSpeed": "$2.6",
"maxExtraRunSpeed": "$2.F"
}
}Requires: "HiJump" "canLongChainTemporaryBlue" Exit condition: {
"leaveWithTemporaryBlue": {}
}Unlocks doors: {"types":["ammo"],"requires":[]}Dev note: The 2 in-room runway tiles are unusable, since at the minimal speed ($2.6) it is necessary to jump either through the transition or on the first frame after, to avoid bonking the ledge below the Cacatac. |
From: 2
Left Side - Top Middle Door
To: 7
Top Right Door

Entrance condition: {
"comeInShinecharging": {
"length": 2,
"openEnd": 0
}
}Requires: "HiJump" "canSpringBallJumpMidAir" "canLongChainTemporaryBlue" Exit condition: {
"leaveWithTemporaryBlue": {}
}Unlocks doors: {"types":["ammo"],"requires":[]} |
From: 3
Left Side - Bottom Middle Door
To: 2
Left Side - Top Middle Door

Entrance condition: {
"comeInShinecharging": {
"length": 4,
"openEnd": 1
}
}Requires: "canLongChainTemporaryBlue" "canXRayTurnaround" Exit condition: {
"leaveWithTemporaryBlue": {}
}Unlocks doors: {"types":["ammo"],"requires":[]} |
From: 3
Left Side - Bottom Middle Door
To: 4
Left Side - Bottom Door
Lay the Power Bomb low enough to kill the Sova. Descend during the Power Bomb explosion, to take advantage of the more lenient timing provided by the lag. Entrance condition: {
"comeInShinecharging": {
"length": 4,
"openEnd": 1
}
}Requires: "canLongChainTemporaryBlue"
"canXRayTurnaround"
{
"ammo": {
"type": "PowerBomb",
"count": 1
}
}Exit condition: {
"leaveWithTemporaryBlue": {}
}Unlocks doors: {"types":["ammo"],"requires":[]} |
From: 3
Left Side - Bottom Middle Door
To: 5
Bottom Door


Lay the Power Bomb low enough to kill the Sova. Descend during the Power Bomb explosion, to take advantage of the more lenient timing provided by the lag. Entrance condition: {
"comeInShinecharging": {
"length": 2,
"openEnd": 0
}
}Requires: "canLongChainTemporaryBlue"
{
"ammo": {
"type": "PowerBomb",
"count": 1
}
}Exit condition: {
"leaveWithTemporaryBlue": {
"direction": "right"
}
}Unlocks doors: {"types":["ammo"],"requires":[]}Dev note: FIXME: With X-Ray, more runway could be used. |
From: 3
Left Side - Bottom Middle Door
To: 6
Middle Right Door

Entrance condition: {
"comeInShinecharging": {
"length": 4,
"openEnd": 1
}
}Requires: "canLongChainTemporaryBlue" "canXRayTurnaround" "HiJump" "canSpringBallJumpMidAir" Exit condition: {
"leaveWithTemporaryBlue": {}
}Unlocks doors: {"types":["ammo"],"requires":[]} |
From: 3
Left Side - Bottom Middle Door
To: 7
Top Right Door

Entrance condition: {
"comeInShinecharging": {
"length": 4,
"openEnd": 1
}
}Requires: "canLongChainTemporaryBlue" "canXRayTurnaround" "HiJump" "canSpringBallJumpMidAir" Exit condition: {
"leaveWithTemporaryBlue": {}
}Unlocks doors: {"types":["ammo"],"requires":[]} |
From: 4
Left Side - Bottom Door
To: 2
Left Side - Top Middle Door


Entrance condition: {
"comeInShinecharging": {
"length": 4,
"openEnd": 0
}
}Requires: "canLongChainTemporaryBlue"
"canXRayTurnaround"
{
"ammo": {
"type": "PowerBomb",
"count": 1
}
}
"canBeVeryPatient"Exit condition: {
"leaveWithTemporaryBlue": {}
}Unlocks doors: {"types":["ammo"],"requires":[]}Dev note: The canBeVeryPatient requirement is for difficulty placement |
From: 4
Left Side - Bottom Door
To: 3
Left Side - Bottom Middle Door

Entrance condition: {
"comeInShinecharging": {
"length": 4,
"openEnd": 0
}
}Requires: "canLongChainTemporaryBlue"
"canXRayTurnaround"
{
"ammo": {
"type": "PowerBomb",
"count": 1
}
}
"canBeVeryPatient"Exit condition: {
"leaveWithTemporaryBlue": {}
}Unlocks doors: {"types":["ammo"],"requires":[]}Dev note: The canBeVeryPatient requirement is for difficulty placement |
From: 4
Left Side - Bottom Door
To: 6
Middle Right Door

Entrance condition: {
"comeInShinecharging": {
"length": 4,
"openEnd": 0
}
}Requires: "canLongChainTemporaryBlue"
"canXRayTurnaround"
{
"ammo": {
"type": "PowerBomb",
"count": 1
}
}
"HiJump"
"canSpringBallJumpMidAir"
"canBeVeryPatient"Exit condition: {
"leaveWithTemporaryBlue": {}
}Unlocks doors: {"types":["ammo"],"requires":[]}Dev note: The canBeVeryPatient requirement is for difficulty placement |
From: 4
Left Side - Bottom Door
To: 7
Top Right Door


Entrance condition: {
"comeInShinecharging": {
"length": 4,
"openEnd": 0
}
}Requires: "canLongChainTemporaryBlue"
"canXRayTurnaround"
{
"ammo": {
"type": "PowerBomb",
"count": 1
}
}
"HiJump"
"canSpringBallJumpMidAir"
"canBeVeryPatient"Exit condition: {
"leaveWithTemporaryBlue": {}
}Unlocks doors: {"types":["ammo"],"requires":[]}Dev note: The canBeVeryPatient requirement is for difficulty placement |
From: 6
Middle Right Door
To: 2
Left Side - Top Middle Door
Entrance condition: {
"comeInShinecharging": {
"length": 3,
"openEnd": 0
}
}Requires: "canLongChainTemporaryBlue" Exit condition: {
"leaveWithTemporaryBlue": {}
}Unlocks doors: {"types":["ammo"],"requires":[]} |
From: 6
Middle Right Door
To: 3
Left Side - Bottom Middle Door


Entrance condition: {
"comeInShinecharging": {
"length": 3,
"openEnd": 0
}
}Requires: "canLongChainTemporaryBlue" Exit condition: {
"leaveWithTemporaryBlue": {}
}Unlocks doors: {"types":["ammo"],"requires":[]} |
From: 6
Middle Right Door
To: 4
Left Side - Bottom Door


Lay the Power Bomb low enough to kill the Sova. Descend during the Power Bomb explosion, to take advantage of the more lenient timing provided by the lag. Entrance condition: {
"comeInShinecharging": {
"length": 3,
"openEnd": 0
}
}Requires: "canLongChainTemporaryBlue"
"canXRayTurnaround"
{
"ammo": {
"type": "PowerBomb",
"count": 1
}
}Exit condition: {
"leaveWithTemporaryBlue": {}
}Unlocks doors: {"types":["ammo"],"requires":[]} |
From: 6
Middle Right Door
To: 5
Bottom Door

Entrance condition: {
"comeInShinecharging": {
"length": 3,
"openEnd": 0
}
}Requires: "canLongChainTemporaryBlue"
"canXRayTurnaround"
{
"ammo": {
"type": "PowerBomb",
"count": 1
}
}Exit condition: {
"leaveWithTemporaryBlue": {
"direction": "any"
}
}Unlocks doors: {"types":["ammo"],"requires":[]} |
From: 6
Middle Right Door
To: 7
Top Right Door

Entrance condition: {
"comeInShinecharging": {
"length": 3,
"openEnd": 0
}
}Requires: "canLongChainTemporaryBlue" "canXRayTurnaround" Exit condition: {
"leaveWithTemporaryBlue": {}
}Unlocks doors: {"types":["ammo"],"requires":[]} |
From: 7
Top Right Door
To: 2
Left Side - Top Middle Door


Entrance condition: {
"comeInGettingBlueSpeed": {
"length": 2.5,
"openEnd": 1
}
}Requires: "canLongChainTemporaryBlue" Exit condition: {
"leaveWithTemporaryBlue": {}
}Unlocks doors: {"types":["ammo"],"requires":[]} |
From: 7
Top Right Door
To: 3
Left Side - Bottom Middle Door


Entrance condition: {
"comeInGettingBlueSpeed": {
"length": 2.5,
"openEnd": 1
}
}Requires: "canLongChainTemporaryBlue" Exit condition: {
"leaveWithTemporaryBlue": {}
}Unlocks doors: {"types":["ammo"],"requires":[]} |
From: 7
Top Right Door
To: 4
Left Side - Bottom Door

Lay the Power Bomb low enough to kill the Sova. Descend during the Power Bomb explosion, to take advantage of the more lenient timing provided by the lag. Entrance condition: {
"comeInGettingBlueSpeed": {
"length": 2.5,
"openEnd": 1
}
}Requires: "canLongChainTemporaryBlue"
"canXRayTurnaround"
{
"ammo": {
"type": "PowerBomb",
"count": 1
}
}Exit condition: {
"leaveWithTemporaryBlue": {}
}Unlocks doors: {"types":["ammo"],"requires":[]} |
From: 7
Top Right Door
To: 5
Bottom Door
Lay the Power Bomb low enough to kill the Sova. Descend during the Power Bomb explosion, to take advantage of the more lenient timing provided by the lag. Entrance condition: {
"comeInGettingBlueSpeed": {
"length": 2.5,
"openEnd": 1
}
}Requires: "canLongChainTemporaryBlue"
"canXRayTurnaround"
{
"ammo": {
"type": "PowerBomb",
"count": 1
}
}Exit condition: {
"leaveWithTemporaryBlue": {
"direction": "any"
}
}Unlocks doors: {"types":["ammo"],"requires":[]} |
From: 1
Left Door
To: 2
Right Door
Entrance condition: {
"comeInGettingBlueSpeed": {
"length": 3,
"openEnd": 1,
"minExtraRunSpeed": "$1.E"
}
}Requires: "canLongChainTemporaryBlue"
{
"heatFrames": 750
}Exit condition: {
"leaveWithTemporaryBlue": {}
}Unlocks doors: {"types":["super","powerbomb"],"requires":[]}
{"types":["missiles"],"requires":[{"heatFrames":50}]}Dev note: Lower run speeds can also work but may be more difficult or require more heat damage. |
From: 2
Right Door
To: 1
Left Door
Carefully planned movement is needed to avoid damage from the Gerutas, and to avoid bonking on the overhangs. Entrance condition: {
"comeInShinecharging": {
"length": 3,
"openEnd": 0
}
}Requires: "HiJump"
"canLongChainTemporaryBlue"
{
"heatFrames": 955
}
{
"or": [
"canXRayCancelShinecharge",
{
"heatFrames": 150
}
]
}Exit condition: {
"leaveWithTemporaryBlue": {}
}Unlocks doors: {"types":["super","powerbomb"],"requires":[]}
{"types":["missiles"],"requires":[{"heatFrames":50}]} |
From: 1
Left Door
To: 2
Right Door
Use angle-down shots to kill the Geruta from the left of the morph tunnel. Entrance condition: {
"comeInShinecharging": {
"length": 2,
"openEnd": 1
}
}Requires: "canLongChainTemporaryBlue"
"canTrickySpringBallBounce"
{
"heatFrames": 865
}
{
"or": [
"canXRayCancelShinecharge",
{
"heatFrames": 160
}
]
}Exit condition: {
"leaveWithTemporaryBlue": {}
}Unlocks doors: {"types":["super","powerbomb"],"requires":[]}
{"types":["missiles"],"requires":[{"heatFrames":50}]} |
From: 2
Right Door
To: 1
Left Door

Entrance condition: {
"comeInShinecharging": {
"length": 2,
"openEnd": 0
}
}Requires: "canLongChainTemporaryBlue"
"canTrickySpringBallBounce"
{
"heatFrames": 650
}
{
"or": [
"canXRayCancelShinecharge",
{
"heatFrames": 190
}
]
}Exit condition: {
"leaveWithTemporaryBlue": {}
}Unlocks doors: {"types":["super","powerbomb"],"requires":[]}
{"types":["missiles"],"requires":[{"heatFrames":50}]} |
From: 2
Middle Left Door
To: 1
Top Left Door
Entrance condition: {
"comeInShinecharging": {
"length": 4,
"openEnd": 1,
"gentleUpTiles": 2
}
}Requires: "canLongChainTemporaryBlue"
{
"heatFrames": 900
}
{
"or": [
"canXRayCancelShinecharge",
{
"heatFrames": 160
}
]
}
"canTrickySpringBallBounce"
"canXRayTurnaround"Exit condition: {
"leaveWithTemporaryBlue": {}
}Unlocks doors: {"types":["super","powerbomb"],"requires":[]}
{"types":["missiles"],"requires":[{"heatFrames":50}]} |
From: 2
Middle Left Door
To: 4
Top Right Door
Entrance condition: {
"comeInShinecharging": {
"length": 4,
"openEnd": 1,
"gentleUpTiles": 2
}
}Requires: "canLongChainTemporaryBlue"
{
"heatFrames": 860
}
{
"or": [
"canXRayCancelShinecharge",
{
"heatFrames": 160
}
]
}
"canTrickySpringBallBounce"
"canXRayTurnaround"Exit condition: {
"leaveWithTemporaryBlue": {}
}Unlocks doors: {"types":["super","powerbomb"],"requires":[]}
{"types":["missiles"],"requires":[{"heatFrames":50}]} |
From: 1
Left Door
To: 2
Right Door
Use Space Jump, Spring Ball, to carry blue speed across the room; alternatively, use a long series of temporary blue chains. Entrance condition: {
"comeInGettingBlueSpeed": {
"length": 13,
"openEnd": 1
}
}Requires: "canChainTemporaryBlue"
{
"or": [
{
"and": [
"canSpeedball",
"canSpringBallBounce",
{
"heatFrames": 490
}
]
},
{
"and": [
"SpaceJump",
{
"heatFrames": 420
}
]
},
{
"and": [
"canSpeedball",
"canLongChainTemporaryBlue",
{
"heatFrames": 780
}
]
}
]
}Exit condition: {
"leaveWithTemporaryBlue": {}
}Unlocks doors: {"types":["super","powerbomb"],"requires":[]}
{"types":["missiles"],"requires":[{"heatFrames":50}]} |
From: 1
Left Door
To: 3
Top Door
Use Space Jump, Spring Ball, to carry blue speed across the room; alternatively, use a long series of temporary blue chains. Entrance condition: {
"comeInShinecharging": {
"length": 13,
"openEnd": 1
}
}Requires: "canChainTemporaryBlue"
{
"or": [
{
"and": [
"canSpeedball",
"canSpringBallBounce",
{
"heatFrames": 400
}
]
},
{
"and": [
"SpaceJump",
{
"heatFrames": 420
}
]
},
{
"and": [
"canSpeedball",
"canLongChainTemporaryBlue",
{
"heatFrames": 670
}
]
}
]
}Exit condition: {
"leaveWithTemporaryBlue": {
"direction": "right"
}
}Unlocks doors: {"types":["super","powerbomb"],"requires":[]}
{"types":["missiles"],"requires":[{"heatFrames":50}]} |
From: 2
Right Door
To: 1
Left Door
Use Space Jump, Spring Ball, to carry blue speed across the room; alternatively, use a long series of temporary blue chains. Entrance condition: {
"comeInGettingBlueSpeed": {
"length": 13,
"openEnd": 1
}
}Requires: "canChainTemporaryBlue"
{
"or": [
{
"and": [
"canSpeedball",
"canSpringBallBounce",
{
"heatFrames": 490
}
]
},
{
"and": [
"SpaceJump",
{
"heatFrames": 420
}
]
},
{
"and": [
"canSpeedball",
"canLongChainTemporaryBlue",
{
"heatFrames": 790
}
]
}
]
}Exit condition: {
"leaveWithTemporaryBlue": {}
}Unlocks doors: {"types":["super","powerbomb"],"requires":[]}
{"types":["missiles"],"requires":[{"heatFrames":50}]} |
From: 1
Left Door
To: 2
Right Door


Entrance condition: {
"comeInGettingBlueSpeed": {
"length": 3,
"openEnd": 1
}
}Requires: "canLongChainTemporaryBlue"
{
"heatFrames": 760
}Exit condition: {
"leaveWithTemporaryBlue": {}
}Unlocks doors: {"types":["super","powerbomb"],"requires":[]}
{"types":["missiles"],"requires":[{"heatFrames":50}]} |
From: 2
Right Door
To: 1
Left Door

Entrance condition: {
"comeInGettingBlueSpeed": {
"length": 3,
"openEnd": 1,
"minExtraRunSpeed": "$0.A"
}
}Requires: "canLongChainTemporaryBlue"
{
"heatFrames": 790
}Exit condition: {
"leaveWithTemporaryBlue": {}
}Unlocks doors: {"types":["super","powerbomb"],"requires":[]}
{"types":["missiles"],"requires":[{"heatFrames":50}]}Dev note: A run speed of $0.7 would be enough to make the first jump (and even less could work with an additional jump). The slightly higher speed of $0.A saves a few heat frames, making it reasonable enough to get through on 1 tank. This constraint is mostly a technicality since these speeds are all lower than a human player would use. |
From: 3
Bottom Right Door
To: 1
Top Door


Entrance condition: {
"comeInShinecharging": {
"length": 11,
"openEnd": 1
}
}Requires: "canLongChainTemporaryBlue"
"canXRayTurnaround"
{
"heatFrames": 710
}
{
"or": [
"canXRayCancelShinecharge",
{
"heatFrames": 160
}
]
}Exit condition: {
"leaveWithTemporaryBlue": {
"direction": "any"
}
}Unlocks doors: {"types":["super","powerbomb"],"requires":[]}
{"types":["missiles"],"requires":[{"heatFrames":50}]} |
From: 3
Bottom Right Door
To: 1
Top Door
Entrance condition: {
"comeInShinecharging": {
"length": 8,
"openEnd": 1
}
}Requires: "canLongChainTemporaryBlue"
"canXRayTurnaround"
{
"heatFrames": 590
}
{
"or": [
"canXRayCancelShinecharge",
{
"heatFrames": 160
}
]
}Exit condition: {
"leaveWithTemporaryBlue": {
"direction": "any"
}
}Unlocks doors: {"types":["super","powerbomb"],"requires":[]}
{"types":["missiles"],"requires":[{"heatFrames":50}]} |
From: 1
Left Door
To: 2
Right Door
Entrance condition: {
"comeInGettingBlueSpeed": {
"length": 3,
"openEnd": 1,
"minExtraRunSpeed": "$1.2"
}
}Requires: "canLongChainTemporaryBlue"
{
"enemyDamage": {
"enemy": "Sova",
"type": "contact",
"hits": 1
}
}
{
"heatFrames": 1350
}Exit condition: {
"leaveWithTemporaryBlue": {}
}Unlocks doors: {"types":["super","powerbomb"],"requires":[]}
{"types":["missiles"],"requires":[{"heatFrames":50}]} |
From: 2
Right Door
To: 1
Left Door

Entrance condition: {
"comeInGettingBlueSpeed": {
"length": 3,
"openEnd": 1,
"minExtraRunSpeed": "$1.2"
}
}Requires: "canLongChainTemporaryBlue"
{
"heatFrames": 1450
}Exit condition: {
"leaveWithTemporaryBlue": {}
}Unlocks doors: {"types":["super","powerbomb"],"requires":[]}
{"types":["missiles"],"requires":[{"heatFrames":50}]} |
From: 1
Left Shaft - Top Left Door
To: 2
Left Shaft - Bottom Right Door
Entrance condition: {
"comeInShinecharging": {
"length": 7,
"openEnd": 0
}
}Requires: "canXRayCancelShinecharge"
"canXRayTurnaround"
"canLongChainTemporaryBlue"
{
"heatFrames": 1380
}Exit condition: {
"leaveWithTemporaryBlue": {}
}Unlocks doors: {"types":["super","powerbomb"],"requires":[]}
{"types":["missiles"],"requires":[{"heatFrames":50}]} |
From: 1
Left Shaft - Top Left Door
To: 3
Left Shaft - Middle Right Door


Entrance condition: {
"comeInShinecharging": {
"length": 7,
"openEnd": 0
}
}Requires: "canXRayCancelShinecharge"
"canXRayTurnaround"
"canLongChainTemporaryBlue"
{
"heatFrames": 830
}Exit condition: {
"leaveWithTemporaryBlue": {}
}Unlocks doors: {"types":["super","powerbomb"],"requires":[]}
{"types":["missiles"],"requires":[{"heatFrames":50}]} |
From: 1
Left Shaft - Top Left Door
To: 4
Left Shaft - Top Right Door

Entrance condition: {
"comeInShinecharging": {
"length": 7,
"openEnd": 0
}
}Requires: "canXRayCancelShinecharge"
"canXRayTurnaround"
"canLongChainTemporaryBlue"
{
"heatFrames": 505
}Exit condition: {
"leaveWithTemporaryBlue": {}
}Unlocks doors: {"types":["super","powerbomb"],"requires":[]}
{"types":["missiles"],"requires":[{"heatFrames":50}]} |
From: 2
Left Shaft - Bottom Right Door
To: 1
Left Shaft - Top Left Door
Entrance condition: {
"comeInShinecharging": {
"length": 12,
"openEnd": 0,
"gentleUpTiles": 4
}
}Requires: "canXRayTurnaround"
"canLongChainTemporaryBlue"
{
"or": [
{
"and": [
"HiJump",
{
"heatFrames": 1220
}
]
},
{
"and": [
"canTrickySpringBallJump",
{
"heatFrames": 1440
}
]
}
]
}Exit condition: {
"leaveWithTemporaryBlue": {}
}Unlocks doors: {"types":["super","powerbomb"],"requires":[]}
{"types":["missiles"],"requires":[{"heatFrames":50}]} |
From: 2
Left Shaft - Bottom Right Door
To: 3
Left Shaft - Middle Right Door
Entrance condition: {
"comeInShinecharging": {
"length": 12,
"openEnd": 0,
"gentleUpTiles": 4
}
}Requires: "canXRayTurnaround"
"canLongChainTemporaryBlue"
{
"or": [
{
"and": [
"HiJump",
{
"heatFrames": 365
}
]
},
{
"and": [
"canTrickySpringBallJump",
{
"heatFrames": 380
}
]
}
]
}Exit condition: {
"leaveWithTemporaryBlue": {}
}Unlocks doors: {"types":["super","powerbomb"],"requires":[]}
{"types":["missiles"],"requires":[{"heatFrames":50}]} |
From: 2
Left Shaft - Bottom Right Door
To: 4
Left Shaft - Top Right Door
Entrance condition: {
"comeInShinecharging": {
"length": 12,
"openEnd": 0,
"gentleUpTiles": 4
}
}Requires: "canXRayTurnaround"
"canLongChainTemporaryBlue"
{
"or": [
{
"and": [
"HiJump",
{
"heatFrames": 700
}
]
},
{
"and": [
"canTrickySpringBallJump",
{
"heatFrames": 840
}
]
}
]
}Exit condition: {
"leaveWithTemporaryBlue": {}
}Unlocks doors: {"types":["super","powerbomb"],"requires":[]}
{"types":["missiles"],"requires":[{"heatFrames":50}]} |
From: 3
Left Shaft - Middle Right Door
To: 1
Left Shaft - Top Left Door
Entrance condition: {
"comeInGettingBlueSpeed": {
"length": 3,
"openEnd": 1,
"minExtraRunSpeed": "$2.0"
}
}Requires: "canXRayTurnaround"
"canLongChainTemporaryBlue"
{
"or": [
{
"and": [
"HiJump",
{
"heatFrames": 890
}
]
},
{
"and": [
"canTrickySpringBallJump",
{
"heatFrames": 1020
}
]
}
]
}Exit condition: {
"leaveWithTemporaryBlue": {}
}Unlocks doors: {"types":["super","powerbomb"],"requires":[]}
{"types":["missiles"],"requires":[{"heatFrames":50}]}Dev note: FIXME: This could be done with lower run speed, at the cost of more heat frames. |
From: 3
Left Shaft - Middle Right Door
To: 2
Left Shaft - Bottom Right Door
Entrance condition: {
"comeInShinecharging": {
"length": 3,
"openEnd": 0
}
}Requires: "canXRayCancelShinecharge"
"canXRayTurnaround"
"canLongChainTemporaryBlue"
{
"heatFrames": 610
}Exit condition: {
"leaveWithTemporaryBlue": {}
}Unlocks doors: {"types":["super","powerbomb"],"requires":[]}
{"types":["missiles"],"requires":[{"heatFrames":50}]} |
From: 3
Left Shaft - Middle Right Door
To: 4
Left Shaft - Top Right Door
Entrance condition: {
"comeInGettingBlueSpeed": {
"length": 3,
"openEnd": 1,
"minExtraRunSpeed": "$2.0"
}
}Requires: "canXRayTurnaround"
"canLongChainTemporaryBlue"
{
"or": [
{
"and": [
"HiJump",
{
"heatFrames": 370
}
]
},
{
"and": [
"canTrickySpringBallJump",
{
"heatFrames": 380
}
]
}
]
}Exit condition: {
"leaveWithTemporaryBlue": {}
}Unlocks doors: {"types":["super","powerbomb"],"requires":[]}
{"types":["missiles"],"requires":[{"heatFrames":50}]}Dev note: FIXME: This could be done with lower run speed, at the cost of more heat frames. |
From: 4
Left Shaft - Top Right Door
To: 1
Left Shaft - Top Left Door
Entrance condition: {
"comeInGettingBlueSpeed": {
"length": 3,
"openEnd": 1,
"minExtraRunSpeed": "$2.0"
}
}Requires: "canXRayTurnaround"
"canLongChainTemporaryBlue"
{
"or": [
{
"and": [
"HiJump",
{
"heatFrames": 490
}
]
},
{
"and": [
"canTrickySpringBallJump",
{
"heatFrames": 580
}
]
}
]
}Exit condition: {
"leaveWithTemporaryBlue": {}
}Unlocks doors: {"types":["super","powerbomb"],"requires":[]}
{"types":["missiles"],"requires":[{"heatFrames":50}]}Dev note: FIXME: This could be done with lower run speed, at the cost of more heat frames. |
From: 4
Left Shaft - Top Right Door
To: 2
Left Shaft - Bottom Right Door
Entrance condition: {
"comeInShinecharging": {
"length": 3,
"openEnd": 0
}
}Requires: "canXRayCancelShinecharge"
"canXRayTurnaround"
"canLongChainTemporaryBlue"
{
"heatFrames": 945
}Exit condition: {
"leaveWithTemporaryBlue": {}
}Unlocks doors: {"types":["super","powerbomb"],"requires":[]}
{"types":["missiles"],"requires":[{"heatFrames":50}]} |
From: 4
Left Shaft - Top Right Door
To: 3
Left Shaft - Middle Right Door
Entrance condition: {
"comeInShinecharging": {
"length": 3,
"openEnd": 0
}
}Requires: "canXRayCancelShinecharge"
"canXRayTurnaround"
"canLongChainTemporaryBlue"
{
"heatFrames": 500
}Exit condition: {
"leaveWithTemporaryBlue": {}
}Unlocks doors: {"types":["super","powerbomb"],"requires":[]}
{"types":["missiles"],"requires":[{"heatFrames":50}]} |
From: 1
Top Left Door
To: 2
Bottom Left Door
Entrance condition: {
"comeInShinecharging": {
"length": 11,
"openEnd": 0
}
}Requires: "Wave"
{
"or": [
"canXRayCancelShinecharge",
{
"heatFrames": 160
}
]
}
"canXRayTurnaround"
"canLongChainTemporaryBlue"
{
"heatFrames": 560
}Exit condition: {
"leaveWithTemporaryBlue": {}
}Unlocks doors: {"types":["super","powerbomb"],"requires":[]}
{"types":["missiles"],"requires":[{"heatFrames":50}]} |
From: 2
Bottom Left Door
To: 1
Top Left Door
Entrance condition: {
"comeInShinecharging": {
"length": 4,
"openEnd": 0
}
}Requires: {
"or": [
"canXRayCancelShinecharge",
{
"heatFrames": 160
}
]
}
"canLongChainTemporaryBlue"
"canXRayTurnaround"
{
"or": [
{
"and": [
"HiJump",
{
"heatFrames": 690
}
]
},
{
"and": [
"canTrickySpringBallJump",
{
"heatFrames": 745
}
]
}
]
}Exit condition: {
"leaveWithTemporaryBlue": {}
}Unlocks doors: {"types":["super","powerbomb"],"requires":[]}
{"types":["missiles"],"requires":[{"heatFrames":50}]} |
From: 2
Bottom Left Door
To: 3
Top Right Door
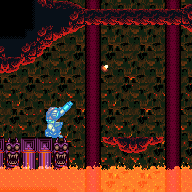
Entrance condition: {
"comeInShinecharging": {
"length": 4,
"openEnd": 0
}
}Requires: {
"or": [
"canXRayCancelShinecharge",
{
"heatFrames": 160
}
]
}
"canLongChainTemporaryBlue"
{
"or": [
{
"and": [
"HiJump",
{
"heatFrames": 680
}
]
},
{
"and": [
"canTrickySpringBallJump",
"canXRayTurnaround",
{
"heatFrames": 775
}
]
}
]
}Exit condition: {
"leaveWithTemporaryBlue": {}
}Unlocks doors: {"types":["super","powerbomb"],"requires":[]}
{"types":["missiles"],"requires":[{"heatFrames":50}]} |
From: 3
Top Right Door
To: 2
Bottom Left Door
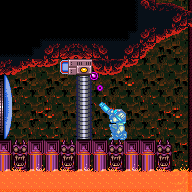
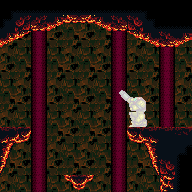
Entrance condition: {
"comeInShinecharging": {
"length": 11,
"openEnd": 0
}
}Requires: "Wave"
{
"or": [
"canXRayCancelShinecharge",
{
"heatFrames": 160
}
]
}
"canLongChainTemporaryBlue"
{
"heatFrames": 460
}Exit condition: {
"leaveWithTemporaryBlue": {}
}Unlocks doors: {"types":["super","powerbomb"],"requires":[]}
{"types":["missiles"],"requires":[{"heatFrames":50}]} |
From: 2
Bottom Left Door
To: 1
Top Left Door
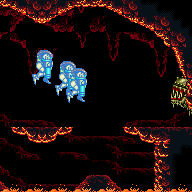
Move quickly (when X-Ray is not active) to climb the shaft before the Fune fireballs would reach Samus. Entrance condition: {
"comeInGettingBlueSpeed": {
"length": 4,
"openEnd": 1,
"minExtraRunSpeed": "$4.7"
}
}Requires: "canLongChainTemporaryBlue"
"canXRayTurnaround"
{
"heatFrames": 760
}Exit condition: {
"leaveWithTemporaryBlue": {}
}Unlocks doors: {"types":["super","powerbomb"],"requires":[]}
{"types":["missiles"],"requires":[{"heatFrames":50}]}Dev note: The last runway tile is considered unusable, as Samus is likely to clip down through it. |
From: 2
Bottom Left Door
To: 1
Top Left Door
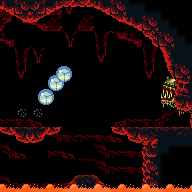
Move quickly (when X-Ray is not active) to climb the shaft before the Fune fireballs would reach Samus. Entrance condition: {
"comeInGettingBlueSpeed": {
"length": 5,
"openEnd": 1
}
}Requires: "canTrickySpringBallBounce"
"canLongChainTemporaryBlue"
"canXRayTurnaround"
{
"heatFrames": 1020
}Exit condition: {
"leaveWithTemporaryBlue": {}
}Unlocks doors: {"types":["super","powerbomb"],"requires":[]}
{"types":["missiles"],"requires":[{"heatFrames":50}]} |
From: 1
Top Left Door
To: 3
Bottom Left Door
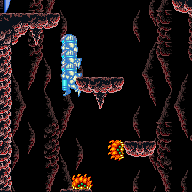
Entrance condition: {
"comeInShinecharging": {
"length": 4,
"openEnd": 0,
"gentleDownTiles": 2
}
}Requires: "canLongChainTemporaryBlue" "canXRayTurnaround" Exit condition: {
"leaveWithTemporaryBlue": {}
}Unlocks doors: {"types":["ammo"],"requires":[]} |
From: 1
Top Left Door
To: 4
Bottom Right Door

Entrance condition: {
"comeInShinecharging": {
"length": 4,
"openEnd": 0,
"gentleDownTiles": 2
}
}Requires: "canLongChainTemporaryBlue" "canXRayTurnaround" Exit condition: {
"leaveWithTemporaryBlue": {}
}Unlocks doors: {"types":["ammo"],"requires":[]} |
From: 1
Top Left Door
To: 5
Middle Right Door
Entrance condition: {
"comeInShinecharging": {
"length": 4,
"openEnd": 0,
"gentleDownTiles": 2
}
}Requires: "canLongChainTemporaryBlue" Exit condition: {
"leaveWithTemporaryBlue": {}
}Unlocks doors: {"types":["ammo"],"requires":[]} |
From: 2
Middle Left Door
To: 1
Top Left Door
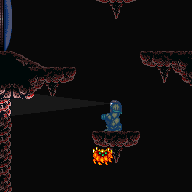
Entrance condition: {
"comeInShinecharging": {
"length": 3,
"openEnd": 0
}
}Requires: "canLongChainTemporaryBlue" "canXRayTurnaround" Exit condition: {
"leaveWithTemporaryBlue": {}
}Unlocks doors: {"types":["ammo"],"requires":[]} |
From: 2
Middle Left Door
To: 4
Bottom Right Door
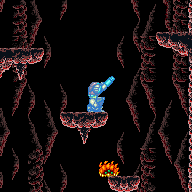

Entrance condition: {
"comeInShinecharging": {
"length": 3,
"openEnd": 0
}
}Requires: "canLongChainTemporaryBlue" "canXRayTurnaround" Exit condition: {
"leaveWithTemporaryBlue": {}
}Unlocks doors: {"types":["ammo"],"requires":[]} |
From: 2
Middle Left Door
To: 6
Top Right Door
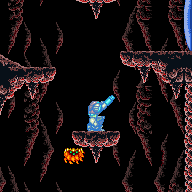
Entrance condition: {
"comeInShinecharging": {
"length": 3,
"openEnd": 0
}
}Requires: "canLongChainTemporaryBlue" Exit condition: {
"leaveWithTemporaryBlue": {}
}Unlocks doors: {"types":["ammo"],"requires":[]} |
From: 3
Bottom Left Door
To: 1
Top Left Door
Entrance condition: {
"comeInShinecharging": {
"length": 12,
"openEnd": 0
}
}Requires: "canLongChainTemporaryBlue" "canXRayTurnaround" Exit condition: {
"leaveWithTemporaryBlue": {}
}Unlocks doors: {"types":["ammo"],"requires":[]} |
From: 3
Bottom Left Door
To: 2
Middle Left Door

Entrance condition: {
"comeInShinecharging": {
"length": 12,
"openEnd": 0
}
}Requires: "canLongChainTemporaryBlue" "canXRayTurnaround" Exit condition: {
"leaveWithTemporaryBlue": {}
}Unlocks doors: {"types":["ammo"],"requires":[]} |
From: 3
Bottom Left Door
To: 4
Bottom Right Door
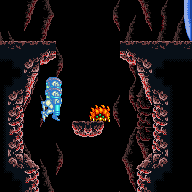
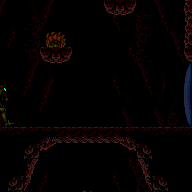
Entrance condition: {
"comeInShinecharging": {
"length": 12,
"openEnd": 0
}
}Requires: "canLongChainTemporaryBlue" "canXRayTurnaround" Exit condition: {
"leaveWithTemporaryBlue": {}
}Unlocks doors: {"types":["ammo"],"requires":[]} |
From: 3
Bottom Left Door
To: 4
Bottom Right Door
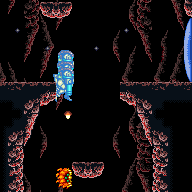
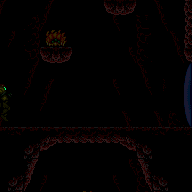
Entrance condition: {
"comeInShinecharging": {
"length": 4,
"openEnd": 1
}
}Requires: "canLongChainTemporaryBlue" Exit condition: {
"leaveWithTemporaryBlue": {}
}Unlocks doors: {"types":["ammo"],"requires":[]} |
From: 3
Bottom Left Door
To: 6
Top Right Door
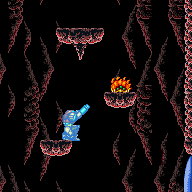

Entrance condition: {
"comeInShinecharging": {
"length": 12,
"openEnd": 0
}
}Requires: "canLongChainTemporaryBlue" "canXRayTurnaround" Exit condition: {
"leaveWithTemporaryBlue": {}
}Unlocks doors: {"types":["ammo"],"requires":[]} |
From: 4
Bottom Right Door
To: 1
Top Left Door
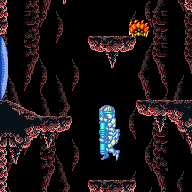
Entrance condition: {
"comeInShinecharging": {
"length": 8,
"openEnd": 0,
"gentleUpTiles": 4
}
}Requires: "canLongChainTemporaryBlue" "canXRayTurnaround" Exit condition: {
"leaveWithTemporaryBlue": {}
}Unlocks doors: {"types":["ammo"],"requires":[]} |
From: 4
Bottom Right Door
To: 2
Middle Left Door
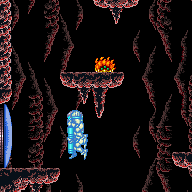
Entrance condition: {
"comeInShinecharging": {
"length": 8,
"openEnd": 0,
"gentleUpTiles": 4
}
}Requires: "canLongChainTemporaryBlue" "canXRayTurnaround" Exit condition: {
"leaveWithTemporaryBlue": {}
}Unlocks doors: {"types":["ammo"],"requires":[]} |
From: 4
Bottom Right Door
To: 3
Bottom Left Door

Entrance condition: {
"comeInShinecharging": {
"length": 7,
"openEnd": 0,
"gentleUpTiles": 4
}
}Requires: "canLongChainTemporaryBlue" "HiJump" Exit condition: {
"leaveWithTemporaryBlue": {}
}Unlocks doors: {"types":["ammo"],"requires":[]} |
From: 4
Bottom Right Door
To: 5
Middle Right Door
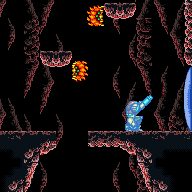
Entrance condition: {
"comeInShinecharging": {
"length": 8,
"openEnd": 0,
"gentleUpTiles": 4
}
}Requires: "canLongChainTemporaryBlue" "canXRayTurnaround" Exit condition: {
"leaveWithTemporaryBlue": {}
}Unlocks doors: {"types":["ammo"],"requires":[]} |
From: 4
Bottom Right Door
To: 6
Top Right Door
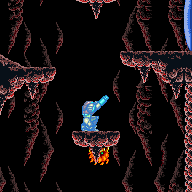
Entrance condition: {
"comeInShinecharging": {
"length": 8,
"openEnd": 0,
"gentleUpTiles": 4
}
}Requires: "canLongChainTemporaryBlue" "canXRayTurnaround" Exit condition: {
"leaveWithTemporaryBlue": {}
}Unlocks doors: {"types":["ammo"],"requires":[]} |
From: 5
Middle Right Door
To: 1
Top Left Door
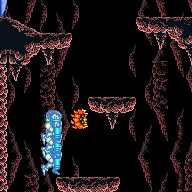
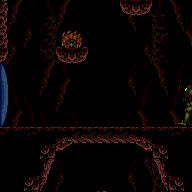
Entrance condition: {
"comeInShinecharging": {
"length": 12,
"openEnd": 0
}
}Requires: "canLongChainTemporaryBlue" "canXRayTurnaround" Exit condition: {
"leaveWithTemporaryBlue": {}
}Unlocks doors: {"types":["ammo"],"requires":[]} |
From: 5
Middle Right Door
To: 2
Middle Left Door
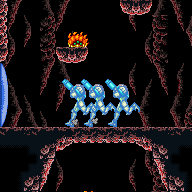

Entrance condition: {
"comeInShinecharging": {
"length": 12,
"openEnd": 0
}
}Requires: "canLongChainTemporaryBlue" "canXRayTurnaround" Exit condition: {
"leaveWithTemporaryBlue": {}
}Unlocks doors: {"types":["ammo"],"requires":[]} |
From: 5
Middle Right Door
To: 2
Middle Left Door
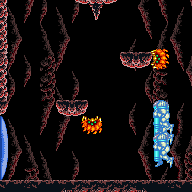

Entrance condition: {
"comeInShinecharging": {
"length": 12,
"openEnd": 0
}
}Requires: "canLongChainTemporaryBlue" "HiJump" Exit condition: {
"leaveWithTemporaryBlue": {}
}Unlocks doors: {"types":["ammo"],"requires":[]} |
From: 5
Middle Right Door
To: 4
Bottom Right Door
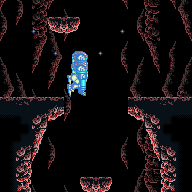

Entrance condition: {
"comeInShinecharging": {
"length": 12,
"openEnd": 0
}
}Requires: "canLongChainTemporaryBlue" "canXRayTurnaround" Exit condition: {
"leaveWithTemporaryBlue": {}
}Unlocks doors: {"types":["ammo"],"requires":[]} |
From: 5
Middle Right Door
To: 6
Top Right Door
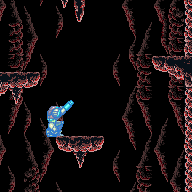

Entrance condition: {
"comeInShinecharging": {
"length": 12,
"openEnd": 0
}
}Requires: "canLongChainTemporaryBlue" "canXRayTurnaround" Exit condition: {
"leaveWithTemporaryBlue": {}
}Unlocks doors: {"types":["ammo"],"requires":[]} |
From: 6
Top Right Door
To: 3
Bottom Left Door
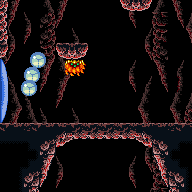
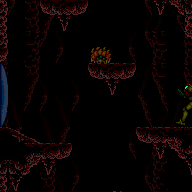
Entrance condition: {
"comeInShinecharging": {
"length": 4,
"openEnd": 0
}
}Requires: "canLongChainTemporaryBlue" "canXRayTurnaround" Exit condition: {
"leaveWithTemporaryBlue": {}
}Unlocks doors: {"types":["ammo"],"requires":[]} |
From: 6
Top Right Door
To: 4
Bottom Right Door
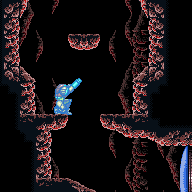

Entrance condition: {
"comeInShinecharging": {
"length": 4,
"openEnd": 0
}
}Requires: "canLongChainTemporaryBlue" "canXRayTurnaround" Exit condition: {
"leaveWithTemporaryBlue": {}
}Unlocks doors: {"types":["ammo"],"requires":[]} |
From: 6
Top Right Door
To: 5
Middle Right Door
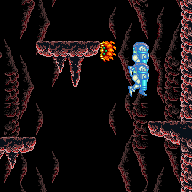
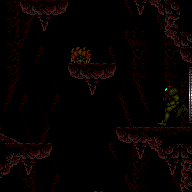
Entrance condition: {
"comeInShinecharging": {
"length": 4,
"openEnd": 0
}
}Requires: "canLongChainTemporaryBlue" "canXRayTurnaround" Exit condition: {
"leaveWithTemporaryBlue": {}
}Unlocks doors: {"types":["ammo"],"requires":[]} |
|
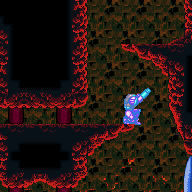
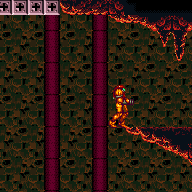
Use the platform at the top-right of the room to gain temporary blue, then chain it through the door. Requires: {
"heatFrames": 1180
}
{
"canShineCharge": {
"usedTiles": 15,
"openEnd": 2
}
}
"canLongChainTemporaryBlue"
"canXRayTurnaround"
{
"or": [
"canXRayCancelShinecharge",
{
"heatFrames": 160
}
]
}Exit condition: {
"leaveWithTemporaryBlue": {}
} |
|
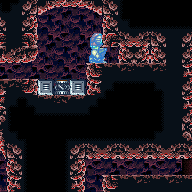
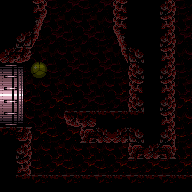
Entrance condition: {
"comeInWithTemporaryBlue": {}
}Requires: "canLongChainTemporaryBlue" "canXRayTurnaround" "canTrickySpringBallBounce" Clears obstacles: C |
From: 1
Left Door
To: 2
Right Door
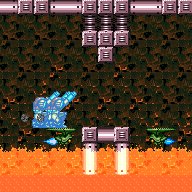
Entrance condition: {
"comeInGettingBlueSpeed": {
"length": 2,
"openEnd": 1,
"minExtraRunSpeed": "$1.D",
"maxExtraRunSpeed": "$2.F"
}
}Requires: {
"or": [
{
"and": [
"canBlueSpaceJump",
{
"heatFrames": 215
}
]
},
{
"and": [
"canTrickySpringBallBounce",
{
"heatFrames": 215
}
]
},
{
"and": [
"canLongChainTemporaryBlue",
{
"heatFrames": 370
}
]
}
]
}Exit condition: {
"leaveWithTemporaryBlue": {}
}Unlocks doors: {"types":["super","powerbomb"],"requires":[]}
{"types":["missiles"],"requires":[{"heatFrames":50}]} |
From: 2
Right Door
To: 1
Left Door
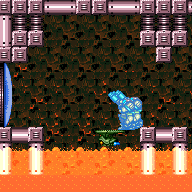
Entrance condition: {
"comeInGettingBlueSpeed": {
"length": 2,
"openEnd": 1,
"minExtraRunSpeed": "$1.9",
"maxExtraRunSpeed": "$2.F"
}
}Requires: "canChainTemporaryBlue"
{
"or": [
{
"and": [
"canBlueSpaceJump",
{
"heatFrames": 215
}
]
},
{
"and": [
"canTrickySpringBallBounce",
{
"heatFrames": 215
}
]
},
{
"and": [
"canLongChainTemporaryBlue",
"canInsaneJump",
{
"heatFrames": 380
}
]
}
]
}Exit condition: {
"leaveWithTemporaryBlue": {}
}Unlocks doors: {"types":["super","powerbomb"],"requires":[]}
{"types":["missiles"],"requires":[{"heatFrames":50}]} |
From: 1
Top Left Door
To: 3
Middle Right Door
Entrance condition: {
"comeInShinecharging": {
"length": 4,
"openEnd": 0
}
}Requires: {
"heatFrames": 2400
}
"canLongChainTemporaryBlue"
"canXRayTurnaround"Exit condition: {
"leaveWithTemporaryBlue": {}
}Unlocks doors: {"types":["ammo"],"requires":[]} |
From: 4
Top Right Door
To: 3
Middle Right Door
Entrance condition: {
"comeInShinecharging": {
"length": 4,
"openEnd": 0
}
}Requires: {
"heatFrames": 2400
}
"canLongChainTemporaryBlue"
"canXRayTurnaround"Exit condition: {
"leaveWithTemporaryBlue": {}
}Unlocks doors: {"types":["ammo"],"requires":[]} |
From: 1
Top Left Door
To: 2
Right Door
Entrance condition: {
"comeInShinecharging": {
"length": 3,
"openEnd": 0
}
}Requires: "canLongChainTemporaryBlue"
"canXRayTurnaround"
{
"electricityHits": 2
}Exit condition: {
"leaveWithTemporaryBlue": {}
}Unlocks doors: {"types":["ammo"],"requires":[]} |
From: 1
Top Left Door
To: 3
Bottom Left Door
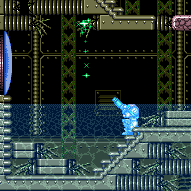
Entrance condition: {
"comeInShinecharging": {
"length": 3,
"openEnd": 0
}
}Requires: "canLongChainTemporaryBlue"
"canXRayTurnaround"
{
"electricityHits": 2
}
{
"or": [
"Gravity",
"HiJump",
"canSpringBallJumpMidAir"
]
}
"canBeVeryPatient"Exit condition: {
"leaveWithTemporaryBlue": {}
}Unlocks doors: {"types":["ammo"],"requires":[]} |
From: 2
Right Door
To: 1
Top Left Door
Entrance condition: {
"comeInShinecharging": {
"length": 11,
"openEnd": 0,
"steepDownTiles": 3
}
}Requires: "canLongChainTemporaryBlue" "canXRayTurnaround" Exit condition: {
"leaveWithTemporaryBlue": {}
}Unlocks doors: {"types":["ammo"],"requires":[]} |
From: 2
Right Door
To: 3
Bottom Left Door
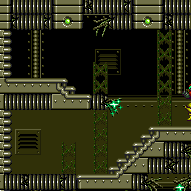
Entrance condition: {
"comeInShinecharging": {
"length": 11,
"openEnd": 0,
"steepDownTiles": 3
}
}Requires: "canLongChainTemporaryBlue"
"canXRayTurnaround"
{
"or": [
"Gravity",
"HiJump",
"canSpringBallJumpMidAir"
]
}Exit condition: {
"leaveWithTemporaryBlue": {}
}Unlocks doors: {"types":["ammo"],"requires":[]} |
|
Requires: {
"obstaclesNotCleared": [
"B"
]
}
{
"doorUnlockedAtNode": 3
}
{
"canShineCharge": {
"usedTiles": 13,
"openEnd": 1
}
}
"canLongChainTemporaryBlue"
"canXRayTurnaround"
"can4HighMidAirMorph"Clears obstacles: C Unlocks doors: {"nodeId":3,"types":["missiles","super"],"requires":[]}
{"nodeId":3,"types":["powerbomb"],"requires":["never"]} |
From: 4
Top Right Door
To: 6
Bottom Right Door

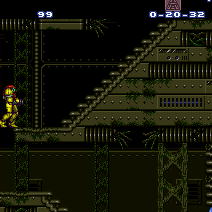
Requires: {
"or": [
{
"canShineCharge": {
"usedTiles": 12,
"steepUpTiles": 7,
"openEnd": 1
}
},
{
"and": [
{
"doorUnlockedAtNode": 4
},
{
"canShineCharge": {
"usedTiles": 13,
"steepUpTiles": 7,
"openEnd": 1
}
}
]
}
]
}
"can4HighMidAirMorph"
"canLongChainTemporaryBlue"
"canXRayTurnaround"
"canSpringBallBounce" |
|
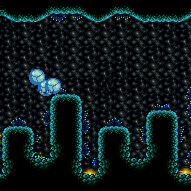
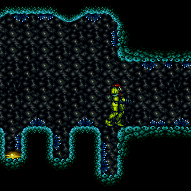
Requires: {
"obstaclesCleared": [
"A"
]
}
{
"getBlueSpeed": {
"usedTiles": 15,
"openEnd": 2
}
}
"canLongChainTemporaryBlue"Exit condition: {
"leaveWithTemporaryBlue": {}
} |
From: 4
Farm Junction Left of Gate
To: 1
Bottom Left Door
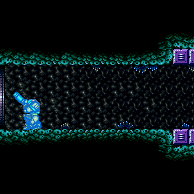
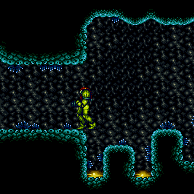
Requires: {
"obstaclesCleared": [
"A"
]
}
{
"getBlueSpeed": {
"usedTiles": 15,
"openEnd": 1
}
}
"canLongChainTemporaryBlue"Exit condition: {
"leaveWithTemporaryBlue": {}
}Unlocks doors: {"types":["ammo"],"requires":[]} |
From: 4
Farm Junction Left of Gate
To: 2
Bottom Right Door
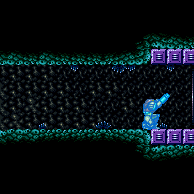
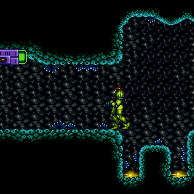
Requires: {
"obstaclesCleared": [
"A"
]
}
{
"getBlueSpeed": {
"usedTiles": 15,
"openEnd": 1
}
}
"canLongChainTemporaryBlue"
"canXRayTurnaround"Exit condition: {
"leaveWithTemporaryBlue": {}
}Unlocks doors: {"types":["ammo"],"requires":[]} |
|

Use the runway at the bottom-right side of the room to gain temporary blue. Use Gravity jumps to navigate to the left, chaining temporary blue through the door. Requires: {
"getBlueSpeed": {
"usedTiles": 24,
"openEnd": 1
}
}
"canLongChainTemporaryBlue"
"canGravityJump"Exit condition: {
"leaveWithTemporaryBlue": {}
} |
From: 2
Bottom Right Door
To: 1
Bottom Left Door


Run into the room to gain temporary blue with a water shinecharge. Use X-ray along with HiJump and/or Spring Ball to chain it through the room. Entrance condition: {
"comeInRunning": {
"speedBooster": "yes",
"minTiles": 0.4375
}
}Requires: "canWaterShineCharge"
"canStationaryLateralMidAirMorph"
{
"or": [
{
"and": [
"HiJump",
"canTrickySpringBallJump"
]
},
{
"and": [
{
"or": [
"HiJump",
"canTrickySpringBallJump"
]
},
"canBeVeryPatient"
]
}
]
}
"canXRayTurnaround"
"canLongChainTemporaryBlue"Exit condition: {
"leaveWithTemporaryBlue": {}
}Unlocks doors: {"types":["ammo"],"requires":[]} |
From: 2
Bottom Right Door
To: 2
Bottom Right Door

Start with low run speed by positioning exactly 2 pixels from the door. Entrance condition: {
"comeInRunning": {
"speedBooster": "yes",
"minTiles": 0.4375
}
}Requires: "canWaterShineCharge" "canXRayTurnaround" "canLongChainTemporaryBlue" Exit condition: {
"leaveWithTemporaryBlue": {}
}Unlocks doors: {"types":["ammo"],"requires":[]}Dev note: This can also be done with a stutter shinecharge, which can shorten the temp blue chain, but not by enough to remove the need for the canLongChainTemporaryBlue requirement. |
From: 2
Bottom Right Door
To: 3
Top Right Door


Run into the room to gain temporary blue with a water shinecharge. Use X-ray along with HiJump to chain it through the room. Entrance condition: {
"comeInRunning": {
"speedBooster": "yes",
"minTiles": 0.4375
}
}Requires: "canWaterShineCharge"
"canStationaryLateralMidAirMorph"
"HiJump"
{
"or": [
"canBeVeryPatient",
"canTrickySpringBallJump"
]
}
"canXRayTurnaround"
"canLongChainTemporaryBlue"Exit condition: {
"leaveWithTemporaryBlue": {
"direction": "any"
}
}Unlocks doors: {"types":["ammo"],"requires":[]}Dev note: FIXME: This could be done with Spring Ball instead of HiJump; but it requires some space on either the left or right of the door in the room above, e.g. it won't work with the vanilla connection, and we would need some way to model that. |
|


Use the runway at the bottom-right side of the room to gain temporary blue. Use Gravity jumps to navigate the room, chaining temporary blue through the door. Requires: {
"getBlueSpeed": {
"usedTiles": 24,
"openEnd": 1
}
}
"canLongChainTemporaryBlue"
"canGravityJump"
"canXRayTurnaround"Exit condition: {
"leaveWithTemporaryBlue": {
"direction": "any"
}
} |
From: 3
Middle Right Door
To: 3
Middle Right Door

Start with low run speed by positioning exactly 2 pixels from the door. Entrance condition: {
"comeInRunning": {
"speedBooster": "yes",
"minTiles": 0.4375
}
}Requires: "canWaterShineCharge" "canXRayTurnaround" "canLongChainTemporaryBlue" Exit condition: {
"leaveWithTemporaryBlue": {}
}Unlocks doors: {"types":["ammo"],"requires":[]}Dev note: This can also be done with a stutter shinecharge, which can shorten the temp blue chain, but not by enough to remove the need for the canLongChainTemporaryBlue requirement. |
|
Use the runway at the bottom of the room to gain temporary blue. Then Gravity jump three times to chain it up to the door. Requires: {
"canShineCharge": {
"usedTiles": 30,
"gentleUpTiles": 2,
"gentleDownTiles": 3,
"openEnd": 0
}
}
"canGravityJump"
"canLongChainTemporaryBlue"Exit condition: {
"leaveWithTemporaryBlue": {}
} |
From: 1
Top Left Door
To: 2
Bottom Left Door
Entrance condition: {
"comeInShinecharging": {
"length": 0,
"openEnd": 1
}
}Requires: "canSuitlessMaridia" "canLongChainTemporaryBlue" Exit condition: {
"leaveWithTemporaryBlue": {
"direction": "left"
}
}Unlocks doors: {"types":["ammo"],"requires":[]} |
From: 1
Top Left Door
To: 3
Bottom Right Door
Entrance condition: {
"comeInShinecharging": {
"length": 0,
"openEnd": 1
}
}Requires: "canSuitlessMaridia" "canLongChainTemporaryBlue" Exit condition: {
"leaveWithTemporaryBlue": {
"direction": "left"
}
}Unlocks doors: {"types":["ammo"],"requires":[]} |
From: 1
Top Left Door
To: 5
Top Door

If HiJump or Spring Ball is available, use a Gravity jump from the top of the island; otherwise, use the higher ledge to the left, jump slightly early to avoid getting too much jump height (to avoid bonking the ceiling Grapple blocks), and quickly do a stationary lateral mid-air morph. Entrance condition: {
"comeInShinecharging": {
"length": 1,
"openEnd": 0
}
}Requires: "canGravityJump"
"canLongChainTemporaryBlue"
{
"or": [
"HiJump",
"canTrickySpringBallJump",
{
"and": [
"canStationaryLateralMidAirMorph",
"canInsaneJump"
]
}
]
}Exit condition: {
"leaveWithTemporaryBlue": {
"direction": "right"
}
}Unlocks doors: {"types":["ammo"],"requires":[]}Dev note: FIXME: A suitless version of this could work, with HiJump + Spring Ball; but it would require leaving while morphed, which would need some space to move horizontally in the room above before landing, which we don't yet have a way to model. |
From: 4
Top Right Door
To: 2
Bottom Left Door
Entrance condition: {
"comeInShinecharging": {
"length": 1,
"openEnd": 0
}
}Requires: "canSuitlessMaridia" "canLongChainTemporaryBlue" Exit condition: {
"leaveWithTemporaryBlue": {
"direction": "left"
}
}Unlocks doors: {"types":["ammo"],"requires":[]} |
From: 4
Top Right Door
To: 3
Bottom Right Door
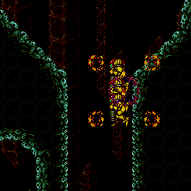

Entrance condition: {
"comeInShinecharging": {
"length": 1,
"openEnd": 0
}
}Requires: "canSuitlessMaridia" "canLongChainTemporaryBlue" Exit condition: {
"leaveWithTemporaryBlue": {
"direction": "left"
}
}Unlocks doors: {"types":["ammo"],"requires":[]} |
|
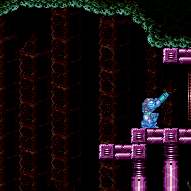
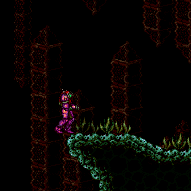
Use an in-room runway to gain temporary blue. Then Gravity jump to chain it up to the door. It is easiest to gain a shinecharge at the bottom of the room, though this requires a longer sequence of gravity jumps. Requires: {
"or": [
{
"and": [
{
"canShineCharge": {
"usedTiles": 36,
"gentleUpTiles": 1,
"gentleDownTiles": 2,
"steepUpTiles": 1,
"openEnd": 0
}
},
"canLongChainTemporaryBlue"
]
},
{
"and": [
{
"canShineCharge": {
"usedTiles": 20,
"gentleUpTiles": 3,
"gentleDownTiles": 2,
"steepUpTiles": 1,
"openEnd": 1
}
},
"canXRayTurnaround"
]
},
{
"canShineCharge": {
"usedTiles": 15,
"gentleDownTiles": 2,
"steepDownTiles": 1,
"openEnd": 1
}
}
]
}
"canChainTemporaryBlue"
"canGravityJump"Exit condition: {
"leaveWithTemporaryBlue": {}
} |
|

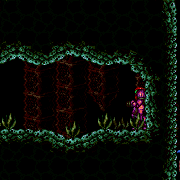
Use the runway at either the bottom or right side of the room to gain temporary blue. Then Gravity jump two or more times to chain it up to the door. Requires: {
"or": [
{
"and": [
{
"canShineCharge": {
"usedTiles": 30,
"gentleUpTiles": 2,
"gentleDownTiles": 3,
"openEnd": 0
}
},
"canXRayTurnaround",
"canInsaneJump"
]
},
{
"and": [
{
"canShineCharge": {
"usedTiles": 20,
"gentleUpTiles": 3,
"gentleDownTiles": 1,
"steepUpTiles": 1,
"openEnd": 0
}
},
"HiJump"
]
}
]
}
"canGravityJump"
"canLongChainTemporaryBlue"Exit condition: {
"leaveWithTemporaryBlue": {
"direction": "left"
}
} |
From: 1
Middle Left Door
To: 7
Top Right Left Item
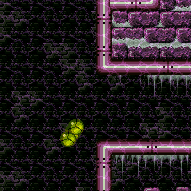
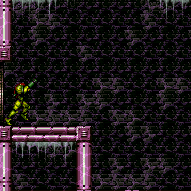
Use a double spring ball jump to reach the Speed blocks below the items while chaining temporary blue. Perform a spring ball jump and immediately unmorph and continue holding up, to break some of the Speed blocks while passing up through them. Leave one of the bottom Speed blocks unbroken to use as a platform. The top speed blocks will respawn; clip through them either using a snail clip with X-Ray or a Crystal Flash clip; In the case of a Crystal Flash clip, menu to Grapple before the Crystal Flash ends and mash shoot while holding down. Entrance condition: {
"comeInWithTemporaryBlue": {}
}Requires: {
"notable": "Suitless Temporary Blue To Items"
}
"canSuitlessMaridia"
"canLongChainTemporaryBlue"
{
  "ammo": {
    "type": "PowerBomb",
    "count": 1
  }
}
"h_doubleSpringBallJumpWithHiJump"
{
"or": [
"canXRayCeilingClip",
{
"and": [
"h_jumpIntoCrystalFlashClip",
"Grapple"
]
}
]
}
"canBeExtremelyPatient" |
From: 2
Bottom Left Door
To: 1
Middle Left Door
Use double spring ball jumps to reach the top-right of the room with temporary blue. To cross the two gaps at the top of the room to the left while chaining temporary blue, use spring ball jumps with HiJump disabled; in each case, perform a stationary lateral mid-air morph or a spring fling (or both); Entrance condition: {
"comeInRunning": {
"speedBooster": "yes",
"minTiles": 0.4375
}
}Requires: "h_waterGetBlueSpeed"
"HiJump"
"canLongChainTemporaryBlue"
"canBeExtremelyPatient"
"canXRayTurnaround"
"canDoubleSpringBallJumpMidAir"
"canTrickySpringBallJump"
{
"or": [
"canStationaryLateralMidAirMorph",
"canSpringFling"
]
}
"can4HighMidAirMorph" |
From: 2
Bottom Left Door
To: 1
Middle Left Door
Use double spring ball jumps to reach the top-right of the room with temporary blue. To cross the two gaps at the top of the room to the left while chaining temporary blue, use spring ball jumps with HiJump disabled; in each case, perform a stationary lateral mid-air morph or a spring fling (or both); Entrance condition: {
"comeInWithTemporaryBlue": {}
}Requires: "HiJump"
"canLongChainTemporaryBlue"
"canBeExtremelyPatient"
"canXRayTurnaround"
"canDoubleSpringBallJumpMidAir"
"canTrickySpringBallJump"
{
"or": [
"canStationaryLateralMidAirMorph",
"canSpringFling"
]
}
"can4HighMidAirMorph" |
From: 2
Bottom Left Door
To: 2
Bottom Left Door

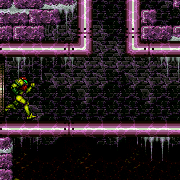
Start with low run speed by positioning exactly 2 pixels from the door. Use X-Ray to cancel the shinecharge early, to avoid getting hit by the angry snail. Entrance condition: {
"comeInRunning": {
"speedBooster": "yes",
"minTiles": 0.4375
}
}Requires: "canWaterShineCharge" "canXRayCancelShinecharge" "canXRayTurnaround" "canLongChainTemporaryBlue" Exit condition: {
"leaveWithTemporaryBlue": {}
}Unlocks doors: {"types":["ammo"],"requires":[]}Dev note: This can also be done with a stutter shinecharge, which can shorten the temp blue chain, but not by enough to remove the need for the canLongChainTemporaryBlue requirement. |
|
Use a double spring ball jump to reach the top of the room with temporary blue. To cross the two gaps at the top of the room while chaining temporary blue, use spring ball jumps with HiJump disabled; in each case, perform a stationary lateral mid-air morph or a spring fling (or both); Entrance condition: {
"comeInWithTemporaryBlue": {}
}Requires: "HiJump"
"canLongChainTemporaryBlue"
"canDoubleSpringBallJumpMidAir"
"canTrickySpringBallJump"
{
"or": [
"canStationaryLateralMidAirMorph",
"canSpringFling"
]
}
"canBeVeryPatient" |
|
Chain temporary blue across the room in order to break the Speed blocks. If available, bouncing using Spring Ball can help speed this up significantly. If two Power Bombs are also available, they can be used to break the shot blocks along the way without needing to stop bouncing. Entrance condition: {
"comeInWithTemporaryBlue": {
"direction": "right"
},
"comesThroughToilet": "any"
}Requires: "canChainTemporaryBlue"
{
"or": [
"HiJump",
"canTrickySpringBallJump",
"canInsaneJump"
]
}
{
"or": [
{
"and": [
"canSpringBallBounce",
{
"or": [
{
"ammo": {
"type": "PowerBomb",
"count": 2
}
},
{
"and": [
"canLongChainTemporaryBlue",
"can4HighMidAirMorph"
]
}
]
}
]
},
{
"and": [
"canLongChainTemporaryBlue",
"canStationaryLateralMidAirMorph",
"can4HighMidAirMorph",
"canBeVeryPatient"
]
}
]
} |
From: 1
Bottom Left Door
To: 2
Right Door
Chain temporary blue across the room in order to break the Speed blocks. If available, bouncing using Spring Ball can help speed this up significantly. If two Power Bombs are also available, they can be used to break the shot blocks along the way without needing to stop bouncing. Entrance condition: {
"comeInWithTemporaryBlue": {
"direction": "left"
},
"comesThroughToilet": "any"
}Requires: "canChainTemporaryBlue"
"canXRayTurnaround"
{
"or": [
"HiJump",
"canTrickySpringBallJump",
"canInsaneJump"
]
}
{
"or": [
{
"and": [
"canSpringBallBounce",
{
"or": [
{
"ammo": {
"type": "PowerBomb",
"count": 2
}
},
{
"and": [
"canLongChainTemporaryBlue",
"can4HighMidAirMorph"
]
}
]
}
]
},
{
"and": [
"canLongChainTemporaryBlue",
"canStationaryLateralMidAirMorph",
"can4HighMidAirMorph",
"canBeVeryPatient"
]
}
]
} |
|


Chain temporary blue across the room in order to break the Speed blocks. If available, bouncing using Spring Ball can help speed this up significantly. If two Power Bombs are also available, they can be used to break the shot blocks along the way without needing to stop bouncing; the first Power Bomb must be placed at a specific time, about 1 tile to the left of the first set of Speed blocks; the second Power Bomb should be placed as early as possible after coming off cooldown. Entrance condition: {
"comeInWithTemporaryBlue": {}
}Requires: "canChainTemporaryBlue"
"canStationaryLateralMidAirMorph"
{
"or": [
{
"and": [
"canSpringBallBounce",
{
"or": [
{
"ammo": {
"type": "PowerBomb",
"count": 2
}
},
{
"and": [
"canLongChainTemporaryBlue",
"can4HighMidAirMorph"
]
}
]
}
]
},
{
"and": [
"canLongChainTemporaryBlue",
"can4HighMidAirMorph",
"canBeVeryPatient"
]
}
]
} |
From: 2
Right Door
To: 1
Bottom Left Door


Chain temporary blue across the room in order to break the Speed blocks, using Spring Ball to speed up the process. If two Power Bombs are also available, they can be used to break the shot blocks along the way without needing to stop bouncing; the first Power Bomb must be placed at a specific time, about 1 tile to the left of the first set of Speed blocks; the second Power Bomb should be placed as early as possible after coming off cooldown. Entrance condition: {
"comeInShinecharging": {
"length": 1,
"openEnd": 1
}
}Requires: "canLongChainTemporaryBlue" "canStationaryLateralMidAirMorph" "canSpringBallBounce" "canSpringBallJumpMidAir" "can4HighMidAirMorph" Exit condition: {
"leaveWithTemporaryBlue": {
"direction": "left"
}
}Unlocks doors: {"types":["ammo"],"requires":[]}Dev note: The slower version of this strat (with HiJump instead of Spring Ball) is not included; it could require too much patience, considering that the chain continues into the next room. |
Come in Getting Blue Speed, Leave With Temporary Blue (Spring Ball Jump, Pause Remorph)
(Insane)
Crab Shaft
From: 2
Right Door
To: 1
Left Door
Face right and perform a mid-air spring ball jump through the single-tile gap. Entrance condition: {
"comeInGettingBlueSpeed": {
"length": 1,
"openEnd": 1
}
}Requires: "canSuitlessMaridia" "HiJump" "canLongChainTemporaryBlue" "canXRayTurnaround" "canTrickySpringBallJump" Exit condition: {
"leaveWithTemporaryBlue": {}
}Unlocks doors: {"types":["ammo"],"requires":[]} |
Come in Getting Blue Speed, Leave With Temporary Blue (Spring Ball Jump, Pause Remorph)
(Insane)
Crab Shaft
From: 2
Right Door
To: 3
Top Door
Perform a long series of tricky spring ball jumps to get up through the room while chaining temporary blue. After each spring ball jump, immediately unmorph to avoid bonking the wall and losing temporary blue. Aim down and use a pause buffer to remorph and continue chaining temporary blue. Entrance condition: {
"comeInGettingBlueSpeed": {
"length": 1,
"openEnd": 1
}
}Requires: "HiJump" "canSuitlessMaridia" "canLongChainTemporaryBlue" "canXRayTurnaround" "canTrickySpringBallJump" "canPauseRemorphTemporaryBlue" "canBeVeryPatient" Exit condition: {
"leaveWithTemporaryBlue": {
"direction": "any"
}
}Unlocks doors: {"types":["ammo"],"requires":[]} |
|
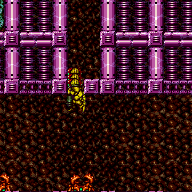
Requires: {
"shineChargeFrames": 0
}
"h_getBlueSpeedMaxRunway"
"canXRayTurnaround"
"canLongChainTemporaryBlue"Exit condition: {
"leaveWithTemporaryBlue": {}
}Unlocks doors: {"types":["ammo"],"requires":[]}Dev note: The `h_getBlueSpeedMaxRunway` requirement is to satisfy the tests, since we don't have a way to represent that the temporary blue originates from the startsWithShineCharge. |
|
Requires: "HiJump"
{
"shineChargeFrames": 0
}
"h_getBlueSpeedMaxRunway"
"canXRayTurnaround"
"canLongChainTemporaryBlue"
"canTrickySpringBallJump"
"canPauseRemorphTemporaryBlue"Exit condition: {
"leaveWithTemporaryBlue": {
"direction": "any"
}
}Unlocks doors: {"types":["ammo"],"requires":[]}Dev note: The `h_getBlueSpeedMaxRunway` requirement is to satisfy the tests, since we don't have a way to represent that the temporary blue originates from the startsWithShineCharge. |
From: 2
Bottom Left Door
To: 4
Top Right Door

Entrance condition: {
"comeInShinecharging": {
"length": 3,
"openEnd": 1
}
}Requires: "HiJump"
{
"or": [
{
"and": [
"canGravityJump",
"canTrickySpringBallJump",
"canChainTemporaryBlue"
]
},
{
"and": [
"canTrickyUseFrozenEnemies",
"canLongChainTemporaryBlue"
]
}
]
}Exit condition: {
"leaveWithTemporaryBlue": {}
}Unlocks doors: {"types":["ammo"],"requires":[]}Dev note: FIXME: Probably more of the runway could be used, but with increasing difficulty. |
From: 3
Bottom Right Door
To: 2
Bottom Left Door
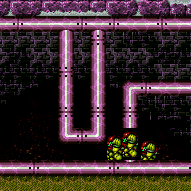
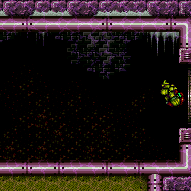
Use temporary blue to break the speed blocks. Use stationary lateral mid-air morphs to move quickly while chaining temporary blue, in order to reach the last speed blocks before the Oums. Climb on the Oums to reach the left side of the room. Do not stand on the Oums when they begin to attack. Entrance condition: {
"comeInBlueSpinning": {
"maxExtraRunSpeed": "$3.0",
"unusableTiles": 0
}
}Requires: "canLongChainTemporaryBlue" "canStationaryLateralMidAirMorph" "can4HighMidAirMorph" "canUseEnemies" Dev note: FIXME: This strat name is not accurate since it doesn't involve a shinespark; it's only this way because it shares the reusable notable. FIXME: Carrying a flash suit can be possible while chaining temporary blue underwater here; a speedball could also be possible to avoid the need for such a long chain. |
From: 3
Bottom Right Door
To: 2
Bottom Left Door


Use temporary blue to break the speed blocks. Use stationary lateral mid-air morphs to move quickly while chaining temporary blue, in order to reach the last speed blocks before the Oums. Climb on the Oums to reach the left side of the room. Do not stand on the Oums when they begin to attack. Entrance condition: {
"comeInWithTemporaryBlue": {}
}Requires: "canLongChainTemporaryBlue" "canStationaryLateralMidAirMorph" "can4HighMidAirMorph" "canUseEnemies" |
From: 6
Bottom Shinecharged
To: 1
Top Left Door
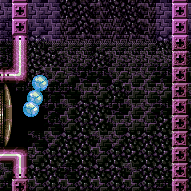
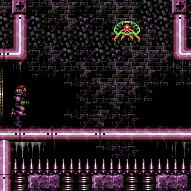
Requires: "h_shinechargeMaxRunway"
{
"shineChargeFrames": 0
}
"canXRayTurnaround"
"canChainTemporaryBlue"
{
"or": [
"canGravityJump",
{
"and": [
"HiJump",
"canTrickyUseFrozenEnemies",
"canLongChainTemporaryBlue"
]
}
]
}Exit condition: {
"leaveWithTemporaryBlue": {}
}Unlocks doors: {"types":["ammo"],"requires":[]} |
From: 6
Bottom Shinecharged
To: 4
Top Right Door
Requires: "h_shinechargeMaxRunway"
{
"shineChargeFrames": 0
}
"canXRayTurnaround"
"HiJump"
{
"or": [
{
"and": [
"canGravityJump",
"canTrickySpringBallJump",
"canChainTemporaryBlue"
]
},
{
"and": [
"canTrickyUseFrozenEnemies",
"canLongChainTemporaryBlue"
]
}
]
}Exit condition: {
"leaveWithTemporaryBlue": {}
}Unlocks doors: {"types":["ammo"],"requires":[]} |
From: 4
Bottom Right Shinecharged
To: 1
Top Left Door
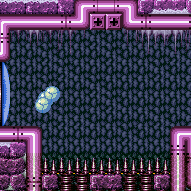
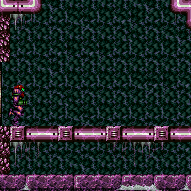
To get out of the water at the top, do another gravity jump or spring ball jump, preferably while the water is high. Requires: "h_shinechargeMaxRunway"
{
"shineChargeFrames": 0
}
"canXRayTurnaround"
"canLongChainTemporaryBlue"
{
"or": [
"canGravityJump",
{
"and": [
"HiJump",
"canTrickySpringBallJump"
]
}
]
}Exit condition: {
"leaveWithTemporaryBlue": {}
}Unlocks doors: {"types":["ammo"],"requires":[]} |
From: 1
Bottom Left Door
To: 2
Top Right Door
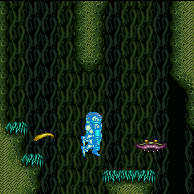
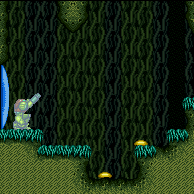
Perform a sequence of three mid-air Spring Ball jumps, each immediately followed by an unmorph to avoid bonking the wall; after each unmorph, use a pause-buffered remorph to continue chaining temporary blue. Entrance condition: {
"comeInShinecharging": {
"length": 0,
"openEnd": 1
}
}Requires: "HiJump"
"canTrickySpringBallJump"
"canPauseRemorphTemporaryBlue"
"canLongChainTemporaryBlue"
{
"enemyDamage": {
"enemy": "Choot",
"type": "contact",
"hits": 1
}
}Exit condition: {
"leaveWithTemporaryBlue": {}
}Unlocks doors: {"types":["ammo"],"requires":[]}Dev note: The Choot hit is possible to avoid, but it's not yet clear if this can be done reliably. |
From: 1
Bottom Left Door
To: 2
Right Door
Entrance condition: {
"comeInShinecharging": {
"length": 1,
"openEnd": 0
}
}Requires: "canLongChainTemporaryBlue"
{
"or": [
"HiJump",
{
"and": [
"canTrickySpringBallJump",
"canPauseRemorphTemporaryBlue"
]
}
]
}Exit condition: {
"leaveWithTemporaryBlue": {}
}Unlocks doors: {"types":["ammo"],"requires":[]} |
From: 2
Right Door
To: 1
Bottom Left Door
Entrance condition: {
"comeInShinecharging": {
"length": 2,
"openEnd": 0
}
}Requires: "canLongChainTemporaryBlue" Exit condition: {
"leaveWithTemporaryBlue": {}
}Unlocks doors: {"types":["ammo"],"requires":[]} |
From: 1
Left Vertical Door
To: 1
Left Vertical Door


Gain a shinecharge by running right-to-left on the long runway at the bottom of the room. Requires: "Gravity"
"HiJump"
{
"canShineCharge": {
"usedTiles": 42,
"gentleUpTiles": 2,
"steepUpTiles": 1,
"steepDownTiles": 3,
"openEnd": 1
}
}
"canXRayTurnaround"
"canLongChainTemporaryBlue"Exit condition: {
"leaveWithTemporaryBlue": {
"direction": "any"
}
}Unlocks doors: {"types":["ammo"],"requires":[]}Dev note: FIXME: This is also possible using Spring Ball jumps (with pause remorphs) instead of HiJump. |
From: 2
Bottom Right Door
To: 2
Bottom Right Door
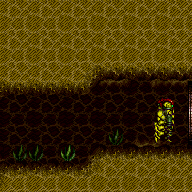
Start with low run speed by positioning exactly 2 pixels from the door. Use X-ray to turn around, and chain temporary blue back to the door. Entrance condition: {
"comeInRunning": {
"speedBooster": "yes",
"minTiles": 0.4375
}
}Requires: "canWaterShineCharge" "canXRayTurnaround" "canLongChainTemporaryBlue" Exit condition: {
"leaveWithTemporaryBlue": {}
}Unlocks doors: {"types":["ammo"],"requires":[]}Dev note: This can also be done with a stutter shinecharge, which can shorten the temp blue chain, but not by enough to remove the need for the canLongChainTemporaryBlue requirement. |
From: 3
Middle Right Door
To: 3
Middle Right Door
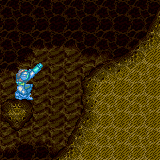
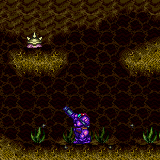
Gain a shinecharge by running right-to-left on the long runway at the bottom of the room. Requires: "Gravity"
{
"canShineCharge": {
"usedTiles": 42,
"gentleUpTiles": 2,
"steepUpTiles": 1,
"steepDownTiles": 3,
"openEnd": 1
}
}
"canLongChainTemporaryBlue"
"canXRayTurnaround"
Exit condition: {
"leaveWithTemporaryBlue": {}
}Unlocks doors: {"types":["ammo"],"requires":[]} |
|

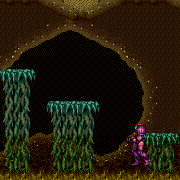
A half tile is considered unusable, in order to avoid sliding into the wall and losing blue state. Requires: "Gravity"
{
"canShineCharge": {
"usedTiles": 15,
"openEnd": 1
}
}
"canLongChainTemporaryBlue"Exit condition: {
"leaveWithTemporaryBlue": {}
}Dev note: FIXME: An extra half tile of runway could be gained by standing up inside the last tile of the platform. |
|
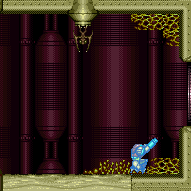
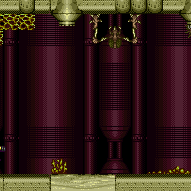
Requires: {
"getBlueSpeed": {
"usedTiles": 14,
"openEnd": 1
}
}
"canChainTemporaryBlue"
{
"or": [
"canLongChainTemporaryBlue",
"canSpringBallBounce",
"SpaceJump"
]
}Exit condition: {
"leaveWithTemporaryBlue": {}
}Unlocks doors: {"types":["ammo"],"requires":[]} |
From: 1
Top Right Door
To: 2
Bottom Right Door
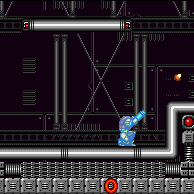
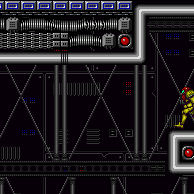
Use X-ray immediately after shinecharging, in order to be able to dodge the Rinkas. Entrance condition: {
"comeInShinecharging": {
"length": 2,
"openEnd": 0
}
}Requires: {
"or": [
"f_KilledMetroidRoom2",
{
"obstaclesCleared": [
"f_KilledMetroidRoom2"
]
}
]
}
"canXRayTurnaround"
"canLongChainTemporaryBlue"Exit condition: {
"leaveWithTemporaryBlue": {}
}Unlocks doors: {"types":["ammo"],"requires":[]}Dev note: Doing this with Metroids alive is technically possible but seems really bad. |
From: 2
Bottom Right Door
To: 1
Top Right Door
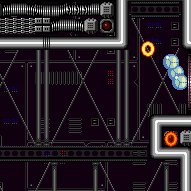
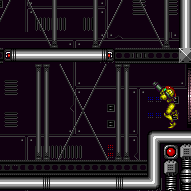
Use X-Ray immediately after shinecharging, in order to be able to dodge the Rinkas. Entrance condition: {
"comeInShinecharging": {
"length": 2,
"openEnd": 0
}
}Requires: {
"or": [
"f_KilledMetroidRoom2",
{
"obstaclesCleared": [
"f_KilledMetroidRoom2"
]
}
]
}
"canXRayTurnaround"
"canLongChainTemporaryBlue"Exit condition: {
"leaveWithTemporaryBlue": {}
}Unlocks doors: {"types":["ammo"],"requires":[]} |
|
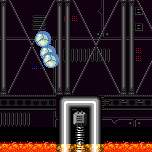

Requires: {
"or": [
"f_KilledMetroidRoom3",
{
"obstaclesCleared": [
"f_KilledMetroidRoom3"
]
}
]
}
{
"getBlueSpeed": {
"usedTiles": 29,
"openEnd": 2
}
}
"canChainTemporaryBlue"
{
"or": [
{
"and": [
"canLongChainTemporaryBlue",
{
"acidFrames": 20
},
{
"enemyDamage": {
"enemy": "Rinka",
"type": "contact",
"hits": 1
}
}
]
},
"canSpringBallBounce",
"SpaceJump"
]
}Exit condition: {
"leaveWithTemporaryBlue": {}
} |
From: 1
Top Left Door
To: 2
Bottom Door

Use X-ray immediately after shinecharging, in order to be able to dodge the Rinkas. Use spring ball to bounce through the 3-tile-high portion. Entrance condition: {
"comeInShinecharging": {
"length": 9,
"openEnd": 0
}
}Requires: {
"or": [
"f_KilledMetroidRoom4",
{
"obstaclesCleared": [
"f_KilledMetroidRoom4"
]
}
]
}
"canLongChainTemporaryBlue"
"canXRayTurnaround"
"canSpringBallBounce"Exit condition: {
"leaveWithTemporaryBlue": {
"direction": "any"
}
}Unlocks doors: {"types":["ammo"],"requires":[]}Dev note: It might technically be possible to get through the 3-tile-high part without Spring Ball, but this probably isn't really viable? |
From: 2
Middle Left Door
To: 1
Top Left Door
Entrance condition: {
"comeInShinecharging": {
"length": 2,
"openEnd": 0
}
}Requires: "canLongChainTemporaryBlue" "canXRayTurnaround" "can4HighMidAirMorph" Exit condition: {
"leaveWithTemporaryBlue": {}
}Unlocks doors: {"types":["ammo"],"requires":[]} |
From: 3
Bottom Left Door
To: 1
Top Left Door
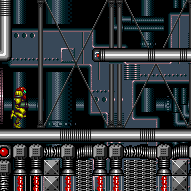
Use X-Ray immediately after shinecharging, in order to be able to dodge the Rinkas. Entrance condition: {
"comeInShinecharging": {
"length": 11,
"openEnd": 0
}
}Requires: "canLongChainTemporaryBlue" "can4HighMidAirMorph" "canXRayTurnaround" Exit condition: {
"leaveWithTemporaryBlue": {}
}Unlocks doors: {"types":["ammo"],"requires":[]} |
From: 3
Bottom Left Door
To: 2
Middle Left Door
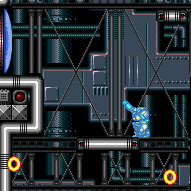

Use X-Ray immediately after shinecharging, in order to be able to dodge the Rinkas. Entrance condition: {
"comeInShinecharging": {
"length": 11,
"openEnd": 0
}
}Requires: "canLongChainTemporaryBlue" "canXRayTurnaround" Exit condition: {
"leaveWithTemporaryBlue": {}
}Unlocks doors: {"types":["ammo"],"requires":[]} |
From: 1
Top Right Doorway
To: 2
Left Door

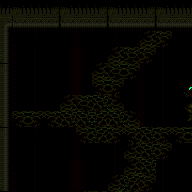
Carefully clear a path through the seaweed in order to chain temporary blue up or down the room. Entrance condition: {
"comeInShinecharging": {
"length": 3,
"openEnd": 0
}
}Requires: {
"notable": "Temporary Blue Chain"
}
"canLongChainTemporaryBlue"Exit condition: {
"leaveWithTemporaryBlue": {}
}Unlocks doors: {"types":["ammo"],"requires":[]} |
From: 1
Top Right Doorway
To: 3
Bottom Right Door
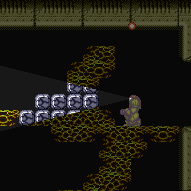
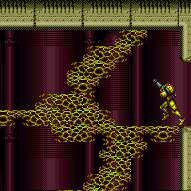
Carefully clear a path through the seaweed in order to chain temporary blue up or down the room. Entrance condition: {
"comeInShinecharging": {
"length": 3,
"openEnd": 0
}
}Requires: {
"notable": "Temporary Blue Chain"
}
"canLongChainTemporaryBlue"
"canXRayTurnaround"
Exit condition: {
"leaveWithTemporaryBlue": {}
}Unlocks doors: {"types":["ammo"],"requires":[]} |
From: 2
Left Door
To: 1
Top Right Doorway
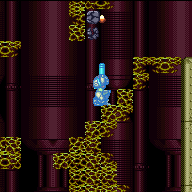
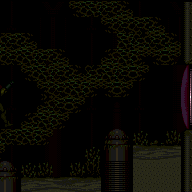
Carefully clear a path through the seaweed in order to chain temporary blue up or down the room. Entrance condition: {
"comeInShinecharging": {
"length": 1,
"openEnd": 0
}
}Requires: {
"notable": "Temporary Blue Chain"
}
"canLongChainTemporaryBlue"Exit condition: {
"leaveWithTemporaryBlue": {}
} |