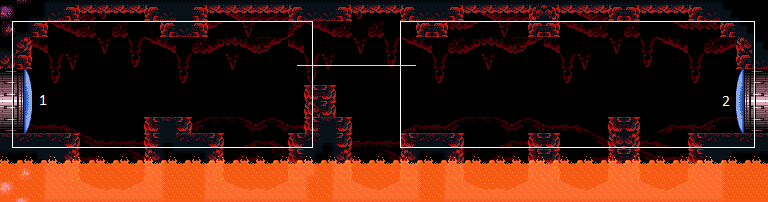
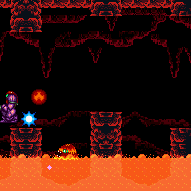
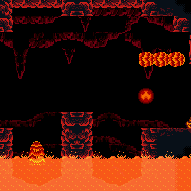
Magdollite Tunnel
Room ID: 114
|
Exit condition: {
"leaveWithRunway": {
"length": 4,
"openEnd": 1
}
} |
|
Requires: "h_heatProof"
{
"cycleFrames": 310
}Farm cycle drops: 3 Magdollite |
|
Requires: "h_heatedCrystalFlash" |
|
Entrance condition: {
"comeInShinecharging": {
"length": 3,
"openEnd": 0
}
}Requires: "h_heatedCrystalSpark" |
|
Follow the left Multiviola back and forth across the room while avoiding it and the Magdolites. Requires: "canComplexGMode"
{
"heatFrames": 1770
}
{
"or": [
"canInsaneJump",
"h_heatProof",
{
"and": [
"canTrickyDodgeEnemies",
{
"heatFrames": 460
},
{
"enemyDamage": {
"enemy": "Magdollite",
"type": "flame",
"hits": 2
}
}
]
}
]
}Exit condition: {
"leaveWithGModeSetup": {}
} |
|
Requires: {
"or": [
{
"heatFrames": 440
},
{
"and": [
{
"heatFrames": 340
},
{
"or": [
"canTrickyJump",
{
"and": [
{
"heatFrames": 50
},
"canDodgeWhileShooting",
{
"or": [
"Plasma",
"Wave",
"Spazer",
"ScrewAttack",
"canPseudoScrew",
{
"ammo": {
"type": "Missile",
"count": 1
}
},
{
"ammo": {
"type": "Super",
"count": 1
}
}
]
}
]
}
]
}
]
}
]
}
{
"or": [
"canDash",
{
"and": [
{
"haveBlueSuit": {}
},
{
"heatFrames": 130
}
]
}
]
} |
|
Requires: "canDash"
"SpaceJump"
{
"or": [
"ScrewAttack",
{
"and": [
"canPrepareForNextRoom",
"canPseudoScrew"
]
}
]
}
{
"heatFrames": 300
} |
|
Entrance condition: {
"comeInRunning": {
"speedBooster": "any",
"minTiles": 3
}
}Requires: "SpaceJump"
"canCarefulJump"
{
"or": [
"ScrewAttack",
{
"and": [
"canPrepareForNextRoom",
"canPseudoScrew"
]
}
]
}
{
"heatFrames": 230
} |
|
Entrance condition: {
"comeInGettingBlueSpeed": {
"length": 3,
"openEnd": 1,
"minExtraRunSpeed": "$1.C"
}
}Requires: "canBlueSpaceJump"
"canPreciseSpaceJump"
{
"heatFrames": 230
} |
|
The height for the Shinespark can be easily gotten by jumping against the door, up to the ceiling. Entrance condition: {
"comeInShinecharging": {
"length": 3,
"openEnd": 1
}
}Requires: "canShinechargeMovementComplex"
{
"shinespark": {
"frames": 57,
"excessFrames": 4
}
}
{
"heatFrames": 210
} |
|
The height for the Shinespark can be easily gotten by jumping against the door, up to the ceiling. Entrance condition: {
"comeInShinecharged": {}
}Requires: {
"shineChargeFrames": 16
}
"canShinechargeMovementComplex"
{
  "shinespark": {
    "frames": 57,
    "excessFrames": 4
  }
}
{
  "heatFrames": 210
} |
|


The Magdollite flames can be killed for drops. The left Multiviola will be in the way and should be killed too. Requires: "canDash"
"canFarmWhileShooting"
{
"heatFramesWithEnergyDrops": {
"frames": 240,
"drops": [
{
"enemy": "Multiviola",
"count": 1
},
{
"enemy": "Magdollite",
"count": 3
}
]
}
}
{
"heatFramesWithEnergyDrops": {
"frames": 180,
"drops": [
{
"enemy": "Magdollite",
"count": 5
}
]
}
}
{
"heatFrames": 110
} |
|
Requires: {
"haveBlueSuit": {}
}
"canFarmWhileShooting"
{
"heatFramesWithEnergyDrops": {
"frames": 225,
"drops": [
{
"enemy": "Magdollite",
"count": 3
}
]
}
}
{
"heatFramesWithEnergyDrops": {
"frames": 215,
"drops": [
{
"enemy": "Magdollite",
"count": 5
},
{
"enemy": "Multiviola",
"count": 1
}
]
}
}
{
"heatFrames": 215
} |
From: 1
Left Door
To: 2
Right Door


Entrance condition: {
"comeInGettingBlueSpeed": {
"length": 3,
"openEnd": 1
}
}Requires: "canLongChainTemporaryBlue"
{
"heatFrames": 760
}Exit condition: {
"leaveWithTemporaryBlue": {}
}Unlocks doors: {"types":["super","powerbomb"],"requires":[]}
{"types":["missiles"],"requires":[{"heatFrames":50}]} |
|
Stand next to the Magdollites while they are rising so that they place their invisible flames low and out of the way. Entrance condition: {
"comeInWithGMode": {
"mode": "any",
"morphed": false
}
}Requires: {
"or": [
"canTrickyJump",
"Wave",
"Spazer",
"Plasma",
"ScrewAttack",
{
"ammo": {
"type": "Missile",
"count": 1
}
},
{
"ammo": {
"type": "Super",
"count": 1
}
},
"h_usePowerBomb",
{
"enemyDamage": {
"enemy": "Multiviola",
"type": "contact",
"hits": 1
}
}
]
}
"h_heatedGModeOpenDifferentDoor" |
|
It is possible to kill a Multiviola by the door and pause abuse to grab its Energy drop on G-mode exit. While luring the right Multiviola around the room, it is important to prevnt the Magdollites from spawning too many fireballs, otherwise the Multiviola won't give any drops. Either kill the middle Magdollite with a Super and stay away from the others when possible, or use Ice keep them frozen. Be careful not to touch any invisible flames that the Magdollites do spawn. It is also possible to do this with nothing; stand on the right platform while the Magdollite shoots to the right, then go to left edge of the runway to the right, pause abuse and exit G-mode while crouching and shooting upwards to kill and collect the flame drops. Entrance condition: {
"comeInWithGMode": {
"mode": "any",
"morphed": false
}
}Requires: "h_heatedGModePauseAbuse"
{
"or": [
"canTrickyUseFrozenEnemies",
{
"ammo": {
"type": "Super",
"count": 1
}
},
{
"and": [
"canFarmWhileShooting",
"canInsaneJump"
]
}
]
} |
|
Requires: {
"or": [
{
"heatFrames": 420
},
{
"and": [
{
"heatFrames": 325
},
{
"or": [
"canInsaneJump",
{
"and": [
"canDodgeWhileShooting",
{
"or": [
"Plasma",
"Wave",
"Spazer",
"ScrewAttack",
"canPseudoScrew",
{
"ammo": {
"type": "Missile",
"count": 1
}
},
{
"ammo": {
"type": "Super",
"count": 1
}
}
]
}
]
}
]
}
]
},
{
"and": [
{
"heatFrames": 360
},
"canTrickyJump"
]
}
]
}
{
"or": [
"canDash",
{
"and": [
{
"haveBlueSuit": {}
},
{
"heatFrames": 175
}
]
}
]
} |
|
Without Screw or pseudo screw, it is possible to carefully space jump over the left Multiviola. Requires: "canDash"
"SpaceJump"
{
"or": [
"ScrewAttack",
{
"and": [
"canPrepareForNextRoom",
"canPseudoScrew"
]
},
"canPreciseSpaceJump"
]
}
{
"heatFrames": 310
} |
|
Entrance condition: {
"comeInRunning": {
"speedBooster": "any",
"minTiles": 3
}
}Requires: "SpaceJump"
{
"or": [
"ScrewAttack",
{
"and": [
"canPrepareForNextRoom",
"canPseudoScrew"
]
}
]
}
{
"heatFrames": 230
} |
|

Entrance condition: {
"comeInGettingBlueSpeed": {
"length": 3,
"openEnd": 1
}
}Requires: "canBlueSpaceJump"
"canPreciseSpaceJump"
{
"heatFrames": 220
} |
|
The height for the Shinespark can be easily gotten by jumping against the door, up to the ceiling. Entrance condition: {
"comeInShinecharging": {
"length": 3,
"openEnd": 1
}
}Requires: "canShinechargeMovementComplex"
{
"shinespark": {
"frames": 57,
"excessFrames": 4
}
}
{
"heatFrames": 210
} |
|
The height for the Shinespark can be easily gotten by jumping against the door, up to the ceiling. Entrance condition: {
"comeInShinecharged": {}
}Requires: {
"shineChargeFrames": 16
}
"canShinechargeMovementComplex"
{
  "shinespark": {
    "frames": 57,
    "excessFrames": 4
  }
}
{
  "heatFrames": 210
} |
|
The Magdollite flames can be killed for drops. Requires: "canDash"
"canFarmWhileShooting"
{
"heatFramesWithEnergyDrops": {
"frames": 150,
"drops": [
{
"enemy": "Magdollite",
"count": 5
}
]
}
}
{
"heatFramesWithEnergyDrops": {
"frames": 280,
"drops": [
{
"enemy": "Magdollite",
"count": 3
}
]
}
}
{
"heatFrames": 80
} |
|
The Magdollite flames and Multiviolas can be killed for drops. Requires: {
"haveBlueSuit": {}
}
"canFarmWhileShooting"
{
"heatFramesWithEnergyDrops": {
"frames": 190,
"drops": [
{
"enemy": "Magdollite",
"count": 6
}
]
}
}
{
"heatFramesWithEnergyDrops": {
"frames": 300,
"drops": [
{
"enemy": "Magdollite",
"count": 3
},
{
"enemy": "Multiviola",
"count": 2
}
]
}
}
{
"heatFrames": 240
} |
From: 2
Right Door
To: 1
Left Door

Entrance condition: {
"comeInGettingBlueSpeed": {
"length": 3,
"openEnd": 1,
"minExtraRunSpeed": "$0.A"
}
}Requires: "canLongChainTemporaryBlue"
{
"heatFrames": 790
}Exit condition: {
"leaveWithTemporaryBlue": {}
}Unlocks doors: {"types":["super","powerbomb"],"requires":[]}
{"types":["missiles"],"requires":[{"heatFrames":50}]}Dev note: A run speed of $0.7 would be enough to make the first jump (and even less could work with an additional jump). The slightly higher speed of $0.A saves a few heat frames, making it reasonable enough to get through on 1 tank. This constraint is mostly a technicality since these speeds are all lower than a human player would use. |
|
Stand on low platforms as the Magdollites are rising so that they place their invisible flames low and out of the way. After the third Magdollite is a Multiviola that can easily hit Samus; kill or dodge it by crouching just left of the Magdollite. Entrance condition: {
"comeInWithGMode": {
"mode": "any",
"morphed": false
}
}Requires: {
"or": [
"canTrickyJump",
"Ice",
"Wave",
"Plasma",
"ScrewAttack",
{
"ammo": {
"type": "Missile",
"count": 1
}
},
{
"ammo": {
"type": "Super",
"count": 1
}
},
"h_usePowerBomb",
{
"enemyDamage": {
"enemy": "Multiviola",
"type": "contact",
"hits": 1
}
}
]
}
"h_heatedGModeOpenDifferentDoor"Dev note: Methods for crossing the room without canTrickyJump require killing the left Multiviola in two hits or less. |
|

It is possible to kill a Multiviola by the door and pause abuse to grab its Energy drop on G-mode exit. This requires luring the left Multiviola around the room multiple times. It is important to prevnt the Magdollites from spawning too many fireballs, otherwise the Multiviola won't give any drops. Either kill them with Supers or use Ice keep them frozen. Be careful not to touch any invisible flames that the Magdollites do spawn. Entrance condition: {
"comeInWithGMode": {
"mode": "any",
"morphed": false
}
}Requires: "h_heatedGModePauseAbuse"
"canTrickyDodgeEnemies"
{
"or": [
"canTrickyUseFrozenEnemies",
{
"ammo": {
"type": "Super",
"count": 3
}
}
]
}Dev note: It is possible to do this with nothing, but requires precise positioning and lucky drops. |
|
Entrance condition: {
"comeInWithGrappleTeleport": {
"blockPositions": [
[
7,
2
]
]
}
}Requires: {
"heatFrames": 50
} |
|
Entrance condition: {
"comeInWithGrappleTeleport": {
"blockPositions": [
[
3,
12
],
[
3,
13
]
]
}
}Bypasses door shell: true |
From: 2
Right Door
To: 1
Left Door
Entrance condition: {
"comeInWithGrappleTeleport": {
"blockPositions": [
[
3,
12
]
]
}
}Exit condition: {
"leaveWithGrappleTeleport": {
"blockPositions": [
[
3,
12
]
]
}
}Bypasses door shell: true |
From: 2
Right Door
To: 1
Left Door
Entrance condition: {
"comeInWithGrappleTeleport": {
"blockPositions": [
[
3,
13
]
]
}
}Exit condition: {
"leaveWithGrappleTeleport": {
"blockPositions": [
[
3,
13
]
]
}
}Bypasses door shell: true |
|
Exit condition: {
"leaveWithRunway": {
"length": 4,
"openEnd": 1
}
} |
|
Requires: "h_heatedCrystalFlash" |
From: 2
Right Door
To: 2
Right Door
Entrance condition: {
"comeInShinecharging": {
"length": 3,
"openEnd": 0
}
}Requires: "h_heatedCrystalSpark" |
|
It may help to desynchronize the Magdollites by bringing them on camera at different times. Requires: "h_heatProof"
"canTrickyJump"
{
"cycleFrames": 320
}Farm cycle drops: 6 Magdollite |
From: 2
Right Door
To: 2
Right Door

Follow the right Multiviola to the left and back. Requires: {
"heatFrames": 570
}
{
"or": [
"canTrickyDodgeEnemies",
{
"enemyDamage": {
"enemy": "Multiviola",
"type": "contact",
"hits": 1
}
}
]
}
{
"or": [
"canDash",
{
"heatFrames": 30
}
]
}Exit condition: {
"leaveWithGModeSetup": {}
}Dev note: Could save some heat frames by setting this up while crossing the room. |
{
"$schema": "../../../schema/m3-room.schema.json",
"id": 114,
"name": "Magdollite Tunnel",
"area": "Norfair",
"subarea": "Upper",
"subsubarea": "East",
"roomAddress": "0x7AEB4",
"roomEnvironments": [
{
"heated": true
}
],
"mapTileMask": [
[
1,
1,
1
]
],
"nodes": [
{
"id": 1,
"name": "Left Door",
"nodeType": "door",
"nodeSubType": "blue",
"nodeAddress": "0x0019696",
"doorOrientation": "left",
"doorEnvironments": [
{
"physics": "air"
}
],
"mapTileMask": [
[
2,
2,
1
]
]
},
{
"id": 2,
"name": "Right Door",
"nodeType": "door",
"nodeSubType": "blue",
"nodeAddress": "0x00196a2",
"doorOrientation": "right",
"doorEnvironments": [
{
"physics": "air"
}
],
"mapTileMask": [
[
1,
2,
2
]
]
}
],
"enemies": [
{
"id": "e1",
"groupName": "Magdollite Tunnel Multiviolas",
"enemyName": "Multiviola",
"quantity": 2,
"homeNodes": [
1,
2
]
},
{
"id": "e2",
"groupName": "Magdollite Tunnel Magdollites",
"enemyName": "Magdollite",
"quantity": 3,
"homeNodes": [
1,
2
]
}
],
"strats": [
{
"link": [
1,
1
],
"name": "Base (Unlock Door)",
"requires": [],
"unlocksDoors": [
{
"types": [
"missiles"
],
"requires": [
{
  "heatFrames": 50
}
]
},
{
"types": [
"super"
],
"requires": []
},
{
"types": [
"powerbomb"
],
"requires": [
{
"heatFrames": 110
}
]
}
],
"flashSuitChecked": true,
"blueSuitChecked": true
},
{
"link": [
1,
1
],
"name": "Base (Come In Normally)",
"entranceCondition": {
"comeInNormally": {}
},
"requires": [],
"flashSuitChecked": true,
"blueSuitChecked": true
},
{
"link": [
1,
1
],
"name": "Base (Come In With Mockball)",
"entranceCondition": {
"comeInWithMockball": {
"adjacentMinTiles": 0,
"remoteAndLandingMinTiles": [
[
0,
0
]
],
"speedBooster": "any"
}
},
"requires": [
{
"heatFrames": 10
}
],
"flashSuitChecked": true,
"blueSuitChecked": true
},
{
"link": [
2,
2
],
"name": "Base (Unlock Door)",
"requires": [],
"unlocksDoors": [
{
"types": [
"missiles"
],
"requires": [
{
"heatFrames": 50
}
]
},
{
"types": [
"super"
],
"requires": []
},
{
"types": [
"powerbomb"
],
"requires": [
{
"heatFrames": 110
}
]
}
],
"flashSuitChecked": true,
"blueSuitChecked": true
},
{
"link": [
2,
2
],
"name": "Base (Come In Normally)",
"entranceCondition": {
"comeInNormally": {}
},
"requires": [],
"flashSuitChecked": true,
"blueSuitChecked": true
},
{
"link": [
2,
2
],
"name": "Base (Come In With Mockball)",
"entranceCondition": {
"comeInWithMockball": {
"adjacentMinTiles": 0,
"remoteAndLandingMinTiles": [
[
0,
0
]
],
"speedBooster": "any"
}
},
"requires": [
{
"heatFrames": 10
}
],
"flashSuitChecked": true,
"blueSuitChecked": true
},
{
"id": 1,
"link": [
1,
1
],
"name": "Leave with Runway",
"requires": [],
"exitCondition": {
"leaveWithRunway": {
"length": 4,
"openEnd": 1
}
},
"flashSuitChecked": true,
"blueSuitChecked": true
},
{
"id": 2,
"link": [
1,
1
],
"name": "Magdollite Farm",
"requires": [
"h_heatProof",
{
"cycleFrames": 310
}
],
"farmCycleDrops": [
{
"enemy": "Magdollite",
"count": 3
}
],
"flashSuitChecked": true,
"blueSuitChecked": true
},
{
"id": 3,
"link": [
1,
1
],
"name": "Crystal Flash",
"requires": [
"h_heatedCrystalFlash"
],
"flashSuitChecked": true,
"blueSuitChecked": true
},
{
"id": 35,
"link": [
1,
1
],
"name": "Come in Shinecharging, Crystal Spark",
"entranceCondition": {
"comeInShinecharging": {
"length": 3,
"openEnd": 0
}
},
"requires": [
"h_heatedCrystalSpark"
],
"flashSuitChecked": true,
"blueSuitChecked": true
},
{
"id": 26,
"link": [
1,
1
],
"name": "G-Mode Setup - Get Hit By Multiviola",
"requires": [
"canComplexGMode",
{
"heatFrames": 1770
},
{
"or": [
"canInsaneJump",
"h_heatProof",
{
"and": [
"canTrickyDodgeEnemies",
{
"heatFrames": 460
},
{
"enemyDamage": {
"enemy": "Magdollite",
"type": "flame",
"hits": 2
}
}
]
}
]
}
],
"exitCondition": {
"leaveWithGModeSetup": {}
},
"flashSuitChecked": true,
"blueSuitChecked": true,
"note": "Follow the left Multiviola back and forth across the room while avoiding it and the Magdolites."
},
{
"id": 4,
"link": [
1,
2
],
"name": "Base",
"requires": [
{
"or": [
{
"heatFrames": 440
},
{
"and": [
{
"heatFrames": 340
},
{
"or": [
"canTrickyJump",
{
"and": [
{
"heatFrames": 50
},
"canDodgeWhileShooting",
{
"or": [
"Plasma",
"Wave",
"Spazer",
"ScrewAttack",
"canPseudoScrew",
{
"ammo": {
"type": "Missile",
"count": 1
}
},
{
"ammo": {
"type": "Super",
"count": 1
}
}
]
}
]
}
]
}
]
}
]
},
{
"or": [
"canDash",
{
"and": [
{
"haveBlueSuit": {}
},
{
"heatFrames": 130
}
]
}
]
}
],
"flashSuitChecked": true,
"blueSuitChecked": true
},
{
"id": 5,
"link": [
1,
2
],
"name": "Space Jump",
"requires": [
"canDash",
"SpaceJump",
{
"or": [
"ScrewAttack",
{
"and": [
"canPrepareForNextRoom",
"canPseudoScrew"
]
}
]
},
{
"heatFrames": 300
}
],
"flashSuitChecked": true,
"blueSuitChecked": true
},
{
"id": 6,
"link": [
1,
2
],
"name": "Space Jump with Run Speed",
"entranceCondition": {
"comeInRunning": {
"speedBooster": "any",
"minTiles": 3
}
},
"requires": [
"SpaceJump",
"canCarefulJump",
{
"or": [
"ScrewAttack",
{
"and": [
"canPrepareForNextRoom",
"canPseudoScrew"
]
}
]
},
{
"heatFrames": 230
}
],
"flashSuitChecked": true,
"blueSuitChecked": true
},
{
"id": 7,
"link": [
1,
2
],
"name": "Blue Space Jump",
"entranceCondition": {
"comeInGettingBlueSpeed": {
"length": 3,
"openEnd": 1,
"minExtraRunSpeed": "$1.C"
}
},
"requires": [
"canBlueSpaceJump",
"canPreciseSpaceJump",
{
"heatFrames": 230
}
],
"flashSuitChecked": true,
"blueSuitChecked": true
},
{
"id": 8,
"link": [
1,
2
],
"name": "Shinespark (Come In Shinecharging)",
"entranceCondition": {
"comeInShinecharging": {
"length": 3,
"openEnd": 1
}
},
"requires": [
"canShinechargeMovementComplex",
{
"shinespark": {
"frames": 57,
"excessFrames": 4
}
},
{
"heatFrames": 210
}
],
"flashSuitChecked": true,
"blueSuitChecked": true,
"note": [
"The height for the Shinespark can be easily gotten by jumping against the door, up to the ceiling."
]
},
{
"id": 9,
"link": [
1,
2
],
"name": "Shinespark (Come In Shinecharged)",
"entranceCondition": {
"comeInShinecharged": {}
},
"requires": [
{
"shineChargeFrames": 16
},
"canShinechargeMovementComplex",
{
"shinespark": {
"frames": 57,
"excessFrames": 4
}
},
{
"heatFrames": 210
}
],
"flashSuitChecked": true,
"blueSuitChecked": true,
"note": [
"The height for the Shinespark can be easily gotten by jumping against the door, up to the ceiling."
]
},
{
"id": 10,
"link": [
1,
2
],
"name": "Cross While Farming",
"requires": [
"canDash",
"canFarmWhileShooting",
{
"heatFramesWithEnergyDrops": {
"frames": 240,
"drops": [
{
"enemy": "Multiviola",
"count": 1
},
{
"enemy": "Magdollite",
"count": 3
}
]
}
},
{
"heatFramesWithEnergyDrops": {
"frames": 180,
"drops": [
{
"enemy": "Magdollite",
"count": 5
}
]
}
},
{
"heatFrames": 110
}
],
"flashSuitChecked": true,
"blueSuitChecked": true,
"note": [
"The Magdollite flames can be killed for drops.",
"The left Multiviola will be in the way and should be killed too."
]
},
{
"id": 33,
"link": [
1,
2
],
"name": "Cross While Farming (Blue Suit)",
"requires": [
{
"haveBlueSuit": {}
},
"canFarmWhileShooting",
{
"heatFramesWithEnergyDrops": {
"frames": 225,
"drops": [
{
"enemy": "Magdollite",
"count": 3
}
]
}
},
{
"heatFramesWithEnergyDrops": {
"frames": 215,
"drops": [
{
"enemy": "Magdollite",
"count": 5
},
{
"enemy": "Multiviola",
"count": 1
}
]
}
},
{
"heatFrames": 215
}
],
"flashSuitChecked": true,
"blueSuitChecked": true
},
{
"id": 24,
"link": [
1,
2
],
"name": "Come in Getting Blue Speed, Leave With Temporary Blue",
"entranceCondition": {
"comeInGettingBlueSpeed": {
"length": 3,
"openEnd": 1
}
},
"requires": [
"canLongChainTemporaryBlue",
{
"heatFrames": 760
}
],
"exitCondition": {
"leaveWithTemporaryBlue": {}
},
"unlocksDoors": [
{
"types": [
"super",
"powerbomb"
],
"requires": []
},
{
"types": [
"missiles"
],
"requires": [
{
"heatFrames": 50
}
]
}
],
"flashSuitChecked": true,
"blueSuitChecked": true
},
{
"id": 28,
"link": [
1,
2
],
"name": "G-Mode",
"entranceCondition": {
"comeInWithGMode": {
"mode": "any",
"morphed": false
}
},
"requires": [
{
"or": [
"canTrickyJump",
"Wave",
"Spazer",
"Plasma",
"ScrewAttack",
{
"ammo": {
"type": "Missile",
"count": 1
}
},
{
"ammo": {
"type": "Super",
"count": 1
}
},
"h_usePowerBomb",
{
"enemyDamage": {
"enemy": "Multiviola",
"type": "contact",
"hits": 1
}
}
]
},
"h_heatedGModeOpenDifferentDoor"
],
"flashSuitChecked": true,
"blueSuitChecked": true,
"note": "Stand next to the Magdollites while they are rising so that they place their invisible flames low and out of the way."
},
{
"id": 29,
"link": [
1,
2
],
"name": "G-Mode, Farm on Exit",
"entranceCondition": {
"comeInWithGMode": {
"mode": "any",
"morphed": false
}
},
"requires": [
"h_heatedGModePauseAbuse",
{
"or": [
"canTrickyUseFrozenEnemies",
{
"ammo": {
"type": "Super",
"count": 1
}
},
{
"and": [
"canFarmWhileShooting",
"canInsaneJump"
]
}
]
}
],
"flashSuitChecked": true,
"blueSuitChecked": true,
"note": [
"It is possible to kill a Multiviola by the door and pause abuse to grab its Energy drop on G-mode exit.",
"While luring the right Multiviola around the room, it is important to prevnt the Magdollites from spawning too many fireballs, otherwise the Multiviola won't give any drops.",
"Either kill the middle Magdollite with a Super and stay away from the others when possible, or use Ice keep them frozen.",
"Be careful not to touch any invisible flames that the Magdollites do spawn.",
"It is also possible to do this with nothing; stand on the right platform while the Magdollite shoots to the right, then go to left edge of the runway to the right,",
"pause abuse and exit G-mode while crouching and shooting upwards to kill and collect the flame drops."
]
},
{
"id": 11,
"link": [
2,
1
],
"name": "Base",
"requires": [
{
"or": [
{
"heatFrames": 420
},
{
"and": [
{
"heatFrames": 325
},
{
"or": [
"canInsaneJump",
{
"and": [
"canDodgeWhileShooting",
{
"or": [
"Plasma",
"Wave",
"Spazer",
"ScrewAttack",
"canPseudoScrew",
{
"ammo": {
"type": "Missile",
"count": 1
}
},
{
"ammo": {
"type": "Super",
"count": 1
}
}
]
}
]
}
]
}
]
},
{
"and": [
{
"heatFrames": 360
},
"canTrickyJump"
]
}
]
},
{
"or": [
"canDash",
{
"and": [
{
"haveBlueSuit": {}
},
{
"heatFrames": 175
}
]
}
]
}
],
"flashSuitChecked": true,
"blueSuitChecked": true
},
{
"id": 12,
"link": [
2,
1
],
"name": "Space Jump",
"requires": [
"canDash",
"SpaceJump",
{
"or": [
"ScrewAttack",
{
"and": [
"canPrepareForNextRoom",
"canPseudoScrew"
]
},
"canPreciseSpaceJump"
]
},
{
"heatFrames": 310
}
],
"flashSuitChecked": true,
"blueSuitChecked": true,
"note": "Without Screw or pseudo screw, it is possible to carefully space jump over the left Multiviola."
},
{
"id": 13,
"link": [
2,
1
],
"name": "Space Jump with Run Speed",
"entranceCondition": {
"comeInRunning": {
"speedBooster": "any",
"minTiles": 3
}
},
"requires": [
"SpaceJump",
{
"or": [
"ScrewAttack",
{
"and": [
"canPrepareForNextRoom",
"canPseudoScrew"
]
}
]
},
{
"heatFrames": 230
}
],
"flashSuitChecked": true,
"blueSuitChecked": true
},
{
"id": 14,
"link": [
2,
1
],
"name": "Blue Space Jump",
"entranceCondition": {
"comeInGettingBlueSpeed": {
"length": 3,
"openEnd": 1
}
},
"requires": [
"canBlueSpaceJump",
"canPreciseSpaceJump",
{
"heatFrames": 220
}
],
"flashSuitChecked": true,
"blueSuitChecked": true
},
{
"id": 15,
"link": [
2,
1
],
"name": "Shinespark (Come In Shinecharging)",
"entranceCondition": {
"comeInShinecharging": {
"length": 3,
"openEnd": 1
}
},
"requires": [
"canShinechargeMovementComplex",
{
"shinespark": {
"frames": 57,
"excessFrames": 4
}
},
{
"heatFrames": 210
}
],
"flashSuitChecked": true,
"blueSuitChecked": true,
"note": [
"The height for the Shinespark can be easily gotten by jumping against the door, up to the ceiling."
]
},
{
"id": 16,
"link": [
2,
1
],
"name": "Shinespark (Come In Shinecharged)",
"entranceCondition": {
"comeInShinecharged": {}
},
"requires": [
{
"shineChargeFrames": 16
},
"canShinechargeMovementComplex",
{
"shinespark": {
"frames": 57,
"excessFrames": 4
}
},
{
"heatFrames": 210
}
],
"flashSuitChecked": true,
"blueSuitChecked": true,
"note": [
"The height for the Shinespark can be easily gotten by jumping against the door, up to the ceiling."
]
},
{
"id": 17,
"link": [
2,
1
],
"name": "Cross While Farming",
"requires": [
"canDash",
"canFarmWhileShooting",
{
"heatFramesWithEnergyDrops": {
"frames": 150,
"drops": [
{
"enemy": "Magdollite",
"count": 5
}
]
}
},
{
"heatFramesWithEnergyDrops": {
"frames": 280,
"drops": [
{
"enemy": "Magdollite",
"count": 3
}
]
}
},
{
"heatFrames": 80
}
],
"flashSuitChecked": true,
"blueSuitChecked": true,
"note": [
"The Magdollite flames can be killed for drops."
]
},
{
"id": 34,
"link": [
2,
1
],
"name": "Cross While Farming (Blue Suit)",
"requires": [
{
"haveBlueSuit": {}
},
"canFarmWhileShooting",
{
"heatFramesWithEnergyDrops": {
"frames": 190,
"drops": [
{
"enemy": "Magdollite",
"count": 6
}
]
}
},
{
"heatFramesWithEnergyDrops": {
"frames": 300,
"drops": [
{
"enemy": "Magdollite",
"count": 3
},
{
"enemy": "Multiviola",
"count": 2
}
]
}
},
{
"heatFrames": 240
}
],
"flashSuitChecked": true,
"blueSuitChecked": true,
"note": [
"The Magdollite flames and Multiviolas can be killed for drops."
]
},
{
"id": 25,
"link": [
2,
1
],
"name": "Come in Getting Blue Speed, Leave With Temporary Blue",
"entranceCondition": {
"comeInGettingBlueSpeed": {
"length": 3,
"openEnd": 1,
"minExtraRunSpeed": "$0.A"
}
},
"requires": [
"canLongChainTemporaryBlue",
{
"heatFrames": 790
}
],
"exitCondition": {
"leaveWithTemporaryBlue": {}
},
"unlocksDoors": [
{
"types": [
"super",
"powerbomb"
],
"requires": []
},
{
"types": [
"missiles"
],
"requires": [
{
"heatFrames": 50
}
]
}
],
"flashSuitChecked": true,
"blueSuitChecked": true,
"devNote": [
"A run speed of $0.7 would be enough to make the first jump (and even less could work with an additional jump).",
"The slightly higher speed of $0.A saves a few heat frames, making it reasonable enough to get through on 1 tank.",
"This constraint is mostly a technicality since these speeds are all lower than a human player would use."
]
},
{
"id": 30,
"link": [
2,
1
],
"name": "G-Mode",
"entranceCondition": {
"comeInWithGMode": {
"mode": "any",
"morphed": false
}
},
"requires": [
{
"or": [
"canTrickyJump",
"Ice",
"Wave",
"Plasma",
"ScrewAttack",
{
"ammo": {
"type": "Missile",
"count": 1
}
},
{
"ammo": {
"type": "Super",
"count": 1
}
},
"h_usePowerBomb",
{
"enemyDamage": {
"enemy": "Multiviola",
"type": "contact",
"hits": 1
}
}
]
},
"h_heatedGModeOpenDifferentDoor"
],
"flashSuitChecked": true,
"blueSuitChecked": true,
"note": [
"Stand on low platforms as the Magdollites are rising so that they place their invisible flames low and out of the way.",
"After the third Magdollite is a Multiviola that can easily hit Samus; kill or dodge it by crouching just left of the Magdollite."
],
"devNote": "Methods for crossing the room without canTrickyJump require killing the left Multiviola in two hits or less."
},
{
"id": 31,
"link": [
2,
1
],
"name": "G-Mode, Farm on Exit",
"entranceCondition": {
"comeInWithGMode": {
"mode": "any",
"morphed": false
}
},
"requires": [
"h_heatedGModePauseAbuse",
"canTrickyDodgeEnemies",
{
"or": [
"canTrickyUseFrozenEnemies",
{
"ammo": {
"type": "Super",
"count": 3
}
}
]
}
],
"flashSuitChecked": true,
"blueSuitChecked": true,
"note": [
"It is possible to kill a Multiviola by the door and pause abuse to grab its Energy drop on G-mode exit.",
"This requires luring the left Multiviola around the room multiple times.",
"It is important to prevnt the Magdollites from spawning too many fireballs, otherwise the Multiviola won't give any drops.",
"Either kill them with Supers or use Ice keep them frozen. Be careful not to touch any invisible flames that the Magdollites do spawn."
],
"devNote": "It is possible to do this with nothing, but requires precise positioning and lucky drops."
},
{
"id": 18,
"link": [
2,
1
],
"name": "Grapple Teleport",
"entranceCondition": {
"comeInWithGrappleTeleport": {
"blockPositions": [
[
7,
2
]
]
}
},
"requires": [
{
"heatFrames": 50
}
],
"flashSuitChecked": true,
"blueSuitChecked": true
},
{
"id": 19,
"link": [
2,
1
],
"name": "Grapple Teleport Door Lock Skip",
"entranceCondition": {
"comeInWithGrappleTeleport": {
"blockPositions": [
[
3,
12
],
[
3,
13
]
]
}
},
"requires": [],
"bypassesDoorShell": "yes",
"flashSuitChecked": true,
"blueSuitChecked": true
},
{
"id": 20,
"link": [
2,
1
],
"name": "Carry Grapple Teleport (Top Position)",
"entranceCondition": {
"comeInWithGrappleTeleport": {
"blockPositions": [
[
3,
12
]
]
}
},
"requires": [],
"exitCondition": {
"leaveWithGrappleTeleport": {
"blockPositions": [
[
3,
12
]
]
}
},
"bypassesDoorShell": "yes",
"flashSuitChecked": true,
"blueSuitChecked": true
},
{
"id": 21,
"link": [
2,
1
],
"name": "Carry Grapple Teleport (Bottom Position)",
"entranceCondition": {
"comeInWithGrappleTeleport": {
"blockPositions": [
[
3,
13
]
]
}
},
"requires": [],
"exitCondition": {
"leaveWithGrappleTeleport": {
"blockPositions": [
[
3,
13
]
]
}
},
"bypassesDoorShell": "yes",
"flashSuitChecked": true,
"blueSuitChecked": true
},
{
"id": 22,
"link": [
2,
2
],
"name": "Leave with Runway",
"requires": [],
"exitCondition": {
"leaveWithRunway": {
"length": 4,
"openEnd": 1
}
},
"flashSuitChecked": true,
"blueSuitChecked": true
},
{
"id": 23,
"link": [
2,
2
],
"name": "Crystal Flash",
"requires": [
"h_heatedCrystalFlash"
],
"flashSuitChecked": true,
"blueSuitChecked": true
},
{
"id": 36,
"link": [
2,
2
],
"name": "Come in Shinecharging, Crystal Spark",
"entranceCondition": {
"comeInShinecharging": {
"length": 3,
"openEnd": 0
}
},
"requires": [
"h_heatedCrystalSpark"
],
"flashSuitChecked": true,
"blueSuitChecked": true
},
{
"id": 32,
"link": [
2,
2
],
"name": "Double Magdollite Farm",
"requires": [
"h_heatProof",
"canTrickyJump",
{
"cycleFrames": 320
}
],
"farmCycleDrops": [
{
"enemy": "Magdollite",
"count": 6
}
],
"flashSuitChecked": true,
"blueSuitChecked": true,
"note": "It may help to desynchronize the Magdollites by bringing them on camera at different times."
},
{
"id": 27,
"link": [
2,
2
],
"name": "G-Mode Setup - Get Hit By Multiviola",
"requires": [
{
"heatFrames": 570
},
{
"or": [
"canTrickyDodgeEnemies",
{
"enemyDamage": {
"enemy": "Multiviola",
"type": "contact",
"hits": 1
}
}
]
},
{
"or": [
"canDash",
{
"heatFrames": 30
}
]
}
],
"exitCondition": {
"leaveWithGModeSetup": {}
},
"flashSuitChecked": true,
"blueSuitChecked": true,
"note": "Follow the right Multiviola to the left and back.",
"devNote": "Could save some heat frames by setting this up while crossing the room."
}
],
"notables": [],
"nextStratId": 37,
"nextNotableId": 1
}