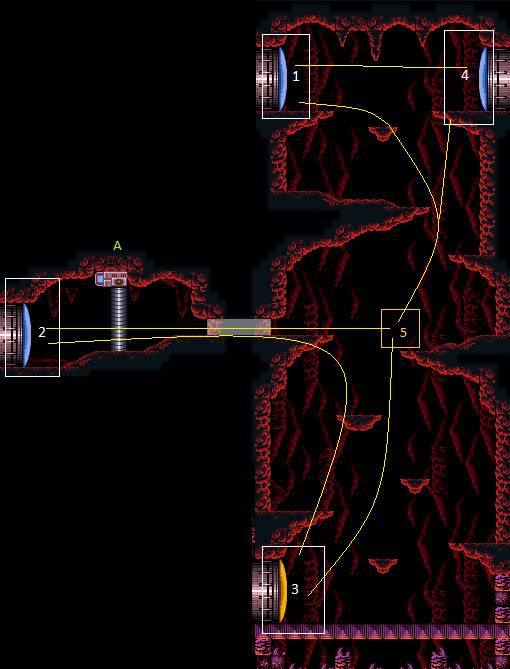
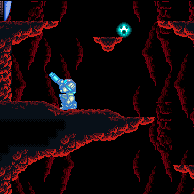
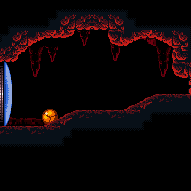
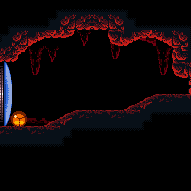
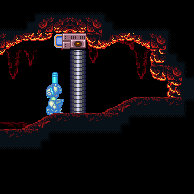
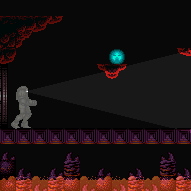
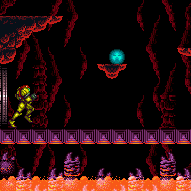
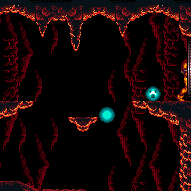
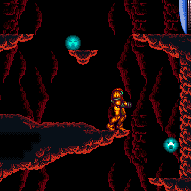
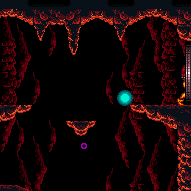
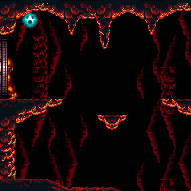
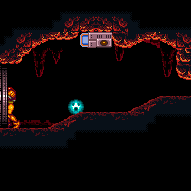
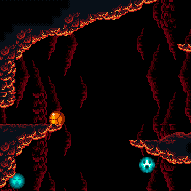
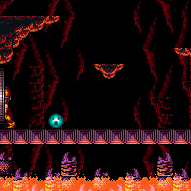
Kronic Boost Room
Room ID: 113
|
Exit condition: {
"leaveWithRunway": {
"length": 4,
"openEnd": 1
}
} |
|
Requires: {
"obstaclesNotCleared": [
"R-Mode"
]
}
"h_heatedCrystalFlash" |
|
Lay a Power Bomb immediately after killing the Viola, in order to get a Power Bomb drop even if full on Power Bombs. Jump straight up to collect the drop, then remorph and hold the Crystal Flash inputs. Requires: {
"obstaclesNotCleared": [
"R-Mode"
]
}
{
"heatFrames": 260
}
"h_heated10PowerBombCrystalFlash"
{
"heatFrames": 80
}Dev note: The heat frames here could be tightened by adding another node. |
From: 1
Top Left Door
To: 1
Top Left Door
Entrance condition: {
"comeInShinecharging": {
"length": 3,
"openEnd": 0
}
}Requires: {
"or": [
{
"and": [
"h_enemyDrops",
"h_heatedCrystalSparkWithoutLenience"
]
},
"h_heatedCrystalSpark"
]
}Dev note: No lenience, since the Violas are a good Power Bomb farm. |
|
Entrance condition: {
"comeInWithRMode": {}
}Clears obstacles: R-Mode |
From: 1
Top Left Door
To: 2
Middle Left Door

Entrance condition: {
"comeInWithGMode": {
"mode": "indirect",
"morphed": true
}
}Requires: {
"or": [
"h_artificialMorphMovement",
"h_artificialMorphBombHorizontally"
]
}
"h_heatedGModeOffCameraDoor"Dev note: It is possible to open the gate as it closes, but isn't expected since this is off camera. To do that would require resetting the room. |
|
Requires: {
"heatFrames": 85
}
{
"or": [
"canDash",
{
"heatFrames": 30
}
]
}Unlocks doors: {"types":["missiles"],"requires":[{"heatFrames":20}]} |
|


Entrance condition: {
"comeInShinecharged": {}
}Requires: {
"shineChargeFrames": 85
}
{
"heatFrames": 85
}Exit condition: {
"leaveShinecharged": {}
}Unlocks doors: {"types":["super"],"requires":[]}
{"types":["missiles","powerbomb"],"requires":["never"]} |
From: 1
Top Left Door
To: 4
Top Right Door


Entrance condition: {
"comeInShinecharged": {}
}Requires: {
"shineChargeFrames": 10
}
{
"shinespark": {
"frames": 21,
"excessFrames": 0
}
}
{
"heatFrames": 60
}Exit condition: {
"leaveWithSpark": {}
}Unlocks doors: {"types":["super"],"requires":[]}
{"types":["missiles","powerbomb"],"requires":["never"]} |
From: 1
Top Left Door
To: 4
Top Right Door


Entrance condition: {
"comeInShinecharging": {
"length": 3,
"openEnd": 0
}
}Requires: {
"heatFrames": 100
}
{
"shineChargeFrames": 90
}Exit condition: {
"leaveShinecharged": {}
}Unlocks doors: {"types":["super"],"requires":[]}
{"types":["missiles","powerbomb"],"requires":["never"]} |
From: 1
Top Left Door
To: 4
Top Right Door


Entrance condition: {
"comeInShinecharging": {
"length": 3,
"openEnd": 0
}
}Requires: {
"heatFrames": 60
}
{
"shinespark": {
"frames": 17,
"excessFrames": 0
}
}Exit condition: {
"leaveWithSpark": {}
}Unlocks doors: {"types":["super"],"requires":[]}
{"types":["missiles","powerbomb"],"requires":["never"]}Dev note: This strat is probably only useful if shinesparks are modified to not cost energy. |
From: 1
Top Left Door
To: 4
Top Right Door
Entrance condition: {
"comeInShinecharging": {
"length": 3,
"openEnd": 0
}
}Requires: "canChainTemporaryBlue"
{
"heatFrames": 310
}
{
"or": [
"canXRayCancelShinecharge",
{
"heatFrames": 160
}
]
}Exit condition: {
"leaveWithTemporaryBlue": {}
}Unlocks doors: {"types":["super","powerbomb"],"requires":[]}
{"types":["missiles"],"requires":[{"heatFrames":50}]} |
From: 1
Top Left Door
To: 4
Top Right Door
Knock the top Viola off twice to get it to the door quickly. Entrance condition: {
"comeInNormally": {}
}Requires: {
"ammo": {
"type": "Super",
"count": 2
}
}
{
"heatFrames": 780
}Exit condition: {
"leaveWithGModeSetup": {}
}Unlocks doors: {"types":["missiles"],"requires":[]}
{"types":["super"],"requires":[],"useImplicitRequires":false}
{"types":["powerbomb"],"requires":[{"heatFrames":140}]} |
From: 1
Top Left Door
To: 5
Middle Junction (Ledge Right of Morph Tunnel)
Requires: {
"heatFrames": 100
}
{
"or": [
"canDash",
{
"heatFrames": 35
}
]
} |
|
Entrance condition: {
"comeInWithGMode": {
"mode": "any",
"morphed": false
}
}Requires: {
"heatFrames": 0
} |
From: 2
Middle Left Door
To: 1
Top Left Door
Entrance condition: {
"comeInShinecharging": {
"length": 4,
"openEnd": 1,
"gentleUpTiles": 2
}
}Requires: "canLongChainTemporaryBlue"
{
"heatFrames": 900
}
{
"or": [
"canXRayCancelShinecharge",
{
"heatFrames": 160
}
]
}
"canTrickySpringBallBounce"
"canXRayTurnaround"Exit condition: {
"leaveWithTemporaryBlue": {}
}Unlocks doors: {"types":["super","powerbomb"],"requires":[]}
{"types":["missiles"],"requires":[{"heatFrames":50}]} |
From: 2
Middle Left Door
To: 1
Top Left Door
Entrance condition: {
"comeInWithGMode": {
"mode": "indirect",
"morphed": true
}
}Requires: "canOffScreenMovement" "h_heatedGModeOffCameraDoor" |
From: 2
Middle Left Door
To: 2
Middle Left Door
Exit condition: {
"leaveWithRunway": {
"length": 6,
"openEnd": 0,
"gentleDownTiles": 2
}
} |
From: 2
Middle Left Door
To: 2
Middle Left Door
Exit condition: {
"leaveWithRunway": {
"length": 11,
"openEnd": 0,
"gentleDownTiles": 4
}
} |
|
Requires: {
"obstaclesNotCleared": [
"R-Mode"
]
}
"h_heatedCrystalFlash" |
|
Requires: "h_heatProof"
"Morph"
{
"resetRoom": {
"nodes": [
2
]
}
}
{
"or": [
{
"and": [
"canDash",
{
"or": [
{
"and": [
{
"or": [
"Plasma",
"Wave",
"Spazer"
]
},
{
"cycleFrames": 630
}
]
},
{
"and": [
"Grapple",
{
"cycleFrames": 680
}
]
},
{
"cycleFrames": 770
}
]
}
]
},
{
"and": [
{
"haveBlueSuit": {}
},
{
"cycleFrames": 810
}
]
}
]
}Resets obstacles: A, R-Mode Farm cycle drops: 4 Viola |
From: 2
Middle Left Door
To: 2
Middle Left Door
Entrance condition: {
"comeInShinecharging": {
"length": 5,
"openEnd": 0,
"gentleUpTiles": 2
}
}Requires: {
"or": [
{
"and": [
"h_enemyDrops",
"h_heatedCrystalSparkWithoutLenience"
]
},
"h_heatedCrystalSpark"
]
}Dev note: No lenience, since the Violas are a good Power Bomb farm. |
|
Entrance condition: {
"comeInWithRMode": {}
}Clears obstacles: R-Mode |
|
Requires: "Morph"
{
"heatFrames": 225
}
{
"or": [
{
"and": [
"canDash",
{
"or": [
{
"heatFrames": 10
},
"canMockball",
{
"obstaclesCleared": [
"A"
]
}
]
}
]
},
{
"heatFrames": 15
}
]
}Clears obstacles: A Unlocks doors: {"types":["powerbomb"],"requires":[{"heatFrames":60}]} |
From: 2
Middle Left Door
To: 3
Bottom Left Door
Entrance condition: {
"comeInWithGMode": {
"mode": "indirect",
"morphed": true
}
}Requires: "h_heatedGModeOffCameraDoor" |
From: 2
Middle Left Door
To: 4
Top Right Door
Entrance condition: {
"comeInShinecharging": {
"length": 4,
"openEnd": 1,
"gentleUpTiles": 2
}
}Requires: "canLongChainTemporaryBlue"
{
"heatFrames": 860
}
{
"or": [
"canXRayCancelShinecharge",
{
"heatFrames": 160
}
]
}
"canTrickySpringBallBounce"
"canXRayTurnaround"Exit condition: {
"leaveWithTemporaryBlue": {}
}Unlocks doors: {"types":["super","powerbomb"],"requires":[]}
{"types":["missiles"],"requires":[{"heatFrames":50}]} |
From: 2
Middle Left Door
To: 4
Top Right Door

Entrance condition: {
"comeInWithGMode": {
"mode": "indirect",
"morphed": true
}
}Requires: "canOffScreenMovement" "h_heatedGModeOffCameraDoor" |
From: 2
Middle Left Door
To: 5
Middle Junction (Ledge Right of Morph Tunnel)
Requires: "Morph"
{
"heatFrames": 165
}
{
"or": [
{
"and": [
"canDash",
{
"or": [
{
"heatFrames": 10
},
"canMockball",
{
"obstaclesCleared": [
"A"
]
}
]
}
]
},
{
"heatFrames": 25
}
]
}Clears obstacles: A |
|
Requires: "Morph"
{
"heatFrames": 260
}
{
"or": [
{
"and": [
"Wave",
{
"heatFrames": 30
}
]
},
{
"obstaclesCleared": [
"A"
]
}
]
}Clears obstacles: A |
|


Requires: "Morph"
{
"heatFrames": 260
}
"h_heatedBlueGateGlitch"Clears obstacles: A |
From: 3
Bottom Left Door
To: 2
Middle Left Door

Entrance condition: {
"comeInWithGMode": {
"mode": "indirect",
"morphed": true
}
}Requires: "h_artificialMorphMovement" "h_heatedGModeOffCameraDoor" Dev note: It is possible to open the gate as it closes, but isn't expected since this is off camera. To do that would require resetting the room. |
From: 3
Bottom Left Door
To: 2
Middle Left Door
In Hellway, fall into the rightmost Samus Eater; in Alpha Power Bomb Room, fall into the middle Samus Eater. After teleporting and passing through the transition, X-Ray climb 1 screen to reach the space above, to the left of the blue gate. Samus will be off-camera, but the slopes at the top will push the camera up, indicating when the climb is done. Entrance condition: {
"comeInWithSamusEaterTeleport": {
"floorPositions": [
[
1,
13
],
[
2,
13
]
],
"ceilingPositions": []
}
}Requires: "h_heatProof" "h_lavaProof" "canXRayClimb" Dev note: Other Samus Eaters can also probably work. When entering with a floor Samus Eater as in this strat, lava protection is necessary: there is no way to enter with more than 4 energy, so even a tiny amount of lava damage would be fatal. |
From: 3
Bottom Left Door
To: 2
Middle Left Door


Jump into the first ceiling Samus Eater in Hellway. After teleporting and passing through the transition, X-Ray climb 1 screen to reach the space above, to the right of the blue gate. Samus will be off-camera, but the slopes at the top will push the camera up, indicating when the climb is done. Off-camera the gate can be opened with Wave beam but not with a gate glitch. Entrance condition: {
"comeInWithSamusEaterTeleport": {
"floorPositions": [],
"ceilingPositions": [
[
6,
3
]
]
}
}Requires: "h_heatProof" "canXRayClimb" "Wave" Dev note: Other ceiling Samus Eaters can also probably work. |
|
Exit condition: {
"leaveWithRunway": {
"length": 14,
"openEnd": 0
}
} |
|
Requires: "h_heatProof"
{
"or": [
{
"and": [
{
"resetRoom": {
"nodes": [
1,
4
]
}
},
{
"or": [
{
"and": [
"canDash",
{
"or": [
{
"and": [
{
"or": [
"Plasma",
"Wave",
"Spazer"
]
},
{
"cycleFrames": 450
}
]
},
{
"and": [
"Grapple",
{
"cycleFrames": 530
}
]
},
{
"cycleFrames": 660
}
]
}
]
},
{
"and": [
{
"haveBlueSuit": {}
},
{
"cycleFrames": 565
}
]
}
]
}
]
},
{
"and": [
{
"resetRoom": {
"nodes": [
3
]
}
},
{
"or": [
{
"and": [
"canDash",
{
"or": [
{
"and": [
{
"or": [
"Plasma",
"Wave",
"Spazer"
]
},
{
"cycleFrames": 450
}
]
},
{
"cycleFrames": 500
}
]
}
]
},
{
"and": [
{
"haveBlueSuit": {}
},
{
"cycleFrames": 570
}
]
}
]
}
]
}
]
}Resets obstacles: A, R-Mode Farm cycle drops: 4 Viola |
|
Requires: {
"obstaclesNotCleared": [
"R-Mode"
]
}
"h_heatedCrystalFlash" |
From: 3
Bottom Left Door
To: 3
Bottom Left Door
Lay a Power Bomb immediately after killing the Viola, in order to get a Power Bomb drop even if full on Power Bombs. Jump straight up to collect the drop, then remorph and hold the Crystal Flash inputs. Requires: {
"obstaclesNotCleared": [
"R-Mode"
]
}
{
"heatFrames": 240
}
"h_heated10PowerBombCrystalFlash"
{
"heatFrames": 70
} |
From: 3
Bottom Left Door
To: 3
Bottom Left Door
Entrance condition: {
"comeInShinecharging": {
"length": 13,
"openEnd": 0
}
}Requires: {
"or": [
{
"and": [
"h_enemyDrops",
"h_heatedCrystalSparkWithoutLenience"
]
},
"h_heatedCrystalSpark"
]
}Dev note: No lenience, since the Violas are a good Power Bomb farm. |
|
Requires: {
"or": [
{
"canShineCharge": {
"usedTiles": 13,
"openEnd": 0
}
},
{
"and": [
{
"doorUnlockedAtNode": 3
},
{
"canShineCharge": {
"usedTiles": 14,
"openEnd": 0
}
}
]
}
]
}
{
  "or": [
    {
      "and": [
        "h_enemyDrops",
        "h_heatedCrystalSparkWithoutLenience"
      ]
    },
    "h_heatedCrystalSpark"
  ]
}
Dev note: No lenience, since the Violas are a good Power Bomb farm. |
|
Entrance condition: {
"comeInWithRMode": {}
}Clears obstacles: R-Mode |
|


Farm three Violas. Shinecharge at the bottom of the room and use the lowest Viola to interrupt. Requires: {
"obstaclesCleared": [
"R-Mode"
]
}
{
"or": [
"h_heatedCrystalFlashForReserveEnergy",
{
"and": [
"h_heatProof",
"h_RModeCanRefillReserves",
{
"resourceMissingAtMost": [
{
"type": "PowerBomb",
"count": 0
}
]
},
{
"partialRefill": {
"type": "ReserveEnergy",
"limit": 20
}
}
]
}
]
}
{
"or": [
{
"canShineCharge": {
"usedTiles": 13,
"openEnd": 0
}
},
{
"and": [
{
"doorUnlockedAtNode": 3
},
{
"canShineCharge": {
"usedTiles": 14,
"openEnd": 0
}
}
]
}
]
}
{
"or": [
{
"autoReserveTrigger": {}
},
{
"and": [
"canReserveTriggerBufferXRay",
{
"autoReserveTrigger": {
"implicitHeatFrames": "no"
}
}
]
}
]
}
"canRModeSparkInterrupt"
{
"heatFrames": 30
}Resets obstacles: R-Mode |
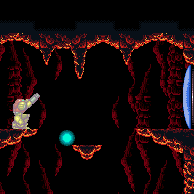
From: 3
Bottom Left Door
To: 3
Bottom Left Door
Use a Super to knock off the second from the bottom Viola. Be sure not to knock it off when it is on the left side, or it will get stuck on the bottom platform. Requires: {
"ammo": {
"type": "Super",
"count": 1
}
}
{
"heatFrames": 290
}Exit condition: {
"leaveWithGModeSetup": {}
} |
|
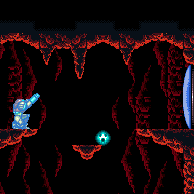
Use a Super to knock off the Viola to regain mobility. The Viola on the top right of the screen is the only one that can hit Samus here. Requires: {
"ammo": {
"type": "Super",
"count": 1
}
}
{
"enemyDamage": {
"enemy": "Viola",
"type": "contact",
"hits": 1
}
} |
From: 3
Bottom Left Door
To: 4
Top Right Door
Use a Super to knock off the very bottom Viola. Requires: {
"ammo": {
"type": "Super",
"count": 1
}
}
{
"heatFrames": 1430
}Exit condition: {
"leaveWithGModeSetup": {}
}Unlocks doors: {"types":["missiles","super"],"requires":[]}
{"types":["powerbomb"],"requires":[{"heatFrames":150}]} |
From: 3
Bottom Left Door
To: 5
Middle Junction (Ledge Right of Morph Tunnel)
Requires: {
"heatFrames": 120
}
{
"or": [
"canDash",
{
"heatFrames": 10
}
]
} |
|
Entrance condition: {
"comeInWithGMode": {
"mode": "any",
"morphed": false
}
}Requires: {
"heatFrames": 0
} |
|
Requires: {
"heatFrames": 85
}
{
"or": [
"canDash",
{
"heatFrames": 30
}
]
}Unlocks doors: {"types":["missiles"],"requires":[{"heatFrames":20}]} |
|


Entrance condition: {
"comeInShinecharged": {}
}Requires: {
"shineChargeFrames": 85
}
{
"heatFrames": 85
}Exit condition: {
"leaveShinecharged": {}
}Unlocks doors: {"types":["super"],"requires":[]}
{"types":["missiles","powerbomb"],"requires":["never"]} |
From: 4
Top Right Door
To: 1
Top Left Door


Entrance condition: {
"comeInShinecharged": {}
}Requires: {
"shineChargeFrames": 10
}
{
"shinespark": {
"frames": 21,
"excessFrames": 0
}
}
{
"heatFrames": 60
}Exit condition: {
"leaveWithSpark": {}
}Unlocks doors: {"types":["super"],"requires":[]}
{"types":["missiles","powerbomb"],"requires":["never"]} |
From: 4
Top Right Door
To: 1
Top Left Door


Entrance condition: {
"comeInShinecharging": {
"length": 3,
"openEnd": 1
}
}Requires: {
"heatFrames": 100
}
{
"shineChargeFrames": 90
}Exit condition: {
"leaveShinecharged": {}
}Unlocks doors: {"types":["super"],"requires":[]}
{"types":["missiles","powerbomb"],"requires":["never"]} |
From: 4
Top Right Door
To: 1
Top Left Door


Entrance condition: {
"comeInShinecharging": {
"length": 3,
"openEnd": 0
}
}Requires: {
"heatFrames": 60
}
{
"shinespark": {
"frames": 17,
"excessFrames": 0
}
}Exit condition: {
"leaveWithSpark": {}
}Unlocks doors: {"types":["super"],"requires":[]}
{"types":["missiles","powerbomb"],"requires":["never"]}Dev note: This strat is probably only useful if shinesparks are modified to not cost energy. |
From: 4
Top Right Door
To: 1
Top Left Door
Entrance condition: {
"comeInShinecharging": {
"length": 3,
"openEnd": 0
}
}Requires: "canChainTemporaryBlue"
{
"heatFrames": 310
}
{
"or": [
"canXRayCancelShinecharge",
{
"heatFrames": 160
}
]
}Exit condition: {
"leaveWithTemporaryBlue": {}
}Unlocks doors: {"types":["super","powerbomb"],"requires":[]}
{"types":["missiles"],"requires":[{"heatFrames":50}]} |
From: 4
Top Right Door
To: 2
Middle Left Door
Entrance condition: {
"comeInWithGMode": {
"mode": "indirect",
"morphed": true
}
}Requires: {
"or": [
"h_artificialMorphMovement",
"h_artificialMorphBombHorizontally"
]
}
"h_heatedGModeOffCameraDoor"Dev note: It is possible to open the gate as it closes, but isn't expected since this is off camera. To do that would require resetting the room. |
From: 4
Top Right Door
To: 2
Middle Left Door
Entrance condition: {
"comeInWithGrappleTeleport": {
"blockPositions": [
[
2,
18
],
[
2,
19
],
[
2,
28
],
[
2,
29
]
]
}
}Bypasses door shell: true |
From: 4
Top Right Door
To: 2
Middle Left Door
Entrance condition: {
"comeInWithGrappleTeleport": {
"blockPositions": [
[
2,
18
]
]
}
}Exit condition: {
"leaveWithGrappleTeleport": {
"blockPositions": [
[
2,
18
]
]
}
}Bypasses door shell: true |
From: 4
Top Right Door
To: 2
Middle Left Door
Entrance condition: {
"comeInWithGrappleTeleport": {
"blockPositions": [
[
2,
19
]
]
}
}Exit condition: {
"leaveWithGrappleTeleport": {
"blockPositions": [
[
2,
19
]
]
}
}Bypasses door shell: true |
From: 4
Top Right Door
To: 2
Middle Left Door
Entrance condition: {
"comeInWithGrappleTeleport": {
"blockPositions": [
[
2,
28
]
]
}
}Exit condition: {
"leaveWithGrappleTeleport": {
"blockPositions": [
[
2,
28
]
]
}
}Bypasses door shell: true |
From: 4
Top Right Door
To: 2
Middle Left Door
Entrance condition: {
"comeInWithGrappleTeleport": {
"blockPositions": [
[
2,
29
]
]
}
}Exit condition: {
"leaveWithGrappleTeleport": {
"blockPositions": [
[
2,
29
]
]
}
}Bypasses door shell: true |
From: 4
Top Right Door
To: 2
Middle Left Door
Exit the previous room with Samus in a standing pose (while grappled). After teleporting, press right to release Grapple while staying standing (not being forced into a crouch). Then X-ray climb 1 screen to get up to the door transition, without needing to open the door. Entrance condition: {
"comeInWithGrappleTeleport": {
"blockPositions": [
[
2,
34
]
]
}
}Requires: "canXRayClimb"
{
"heatFrames": 1600
}Bypasses door shell: true |
|
Exit condition: {
"leaveWithRunway": {
"length": 4,
"openEnd": 1
}
} |
|
Requires: {
"obstaclesNotCleared": [
"R-Mode"
]
}
"h_heatedCrystalFlash" |
|
Lay a Power Bomb immediately after killing the Viola, in order to get a Power Bomb drop even if full on Power Bombs. Jump straight up to collect the drop, then remorph and hold the Crystal Flash inputs. Requires: {
"obstaclesNotCleared": [
"R-Mode"
]
}
{
"heatFrames": 270
}
"h_heated10PowerBombCrystalFlash"
{
"heatFrames": 90
}Dev note: The heat frames here could be tightened by adding another node. |
From: 4
Top Right Door
To: 4
Top Right Door
Entrance condition: {
"comeInShinecharging": {
"length": 3,
"openEnd": 0
}
}Requires: {
"or": [
{
"and": [
"h_enemyDrops",
"h_heatedCrystalSparkWithoutLenience"
]
},
"h_heatedCrystalSpark"
]
}Dev note: No lenience, since the Violas are a good Power Bomb farm. |
|
Entrance condition: {
"comeInWithRMode": {}
}Clears obstacles: R-Mode |
From: 4
Top Right Door
To: 4
Top Right Door

Knock the top Viola off twice to get it to the door quickly. Entrance condition: {
"comeInNormally": {}
}Requires: {
"ammo": {
"type": "Super",
"count": 2
}
}
{
"heatFrames": 780
}Exit condition: {
"leaveWithGModeSetup": {}
}Unlocks doors: {"types":["missiles"],"requires":[]}
{"types":["super"],"requires":[],"useImplicitRequires":false}
{"types":["powerbomb"],"requires":[{"heatFrames":140}]} |
From: 4
Top Right Door
To: 5
Middle Junction (Ledge Right of Morph Tunnel)
Requires: {
"heatFrames": 85
}
{
"or": [
"canDash",
{
"heatFrames": 10
}
]
} |
|
Entrance condition: {
"comeInWithGMode": {
"mode": "any",
"morphed": false
}
}Requires: {
"heatFrames": 0
} |
From: 5
Middle Junction (Ledge Right of Morph Tunnel)
To: 1
Top Left Door
Requires: {
"heatFrames": 140
}
{
"or": [
"canDash",
{
"heatFrames": 20
}
]
} |
From: 5
Middle Junction (Ledge Right of Morph Tunnel)
To: 1
Top Left Door

Use a Super to knock off the top Viola in the lower half. Knock it off when it on the bottom just left of middle to have it fall all the way. Requires: {
"ammo": {
"type": "Super",
"count": 1
}
}
{
"heatFrames": 2130
}Exit condition: {
"leaveWithGModeSetup": {}
}Unlocks doors: {"types":["missiles","super"],"requires":[]}
{"types":["powerbomb"],"requires":[{"heatFrames":150}]} |
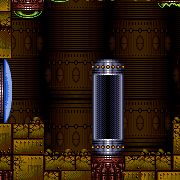
From: 5
Middle Junction (Ledge Right of Morph Tunnel)
To: 2
Middle Left Door
Requires: "Morph"
{
"heatFrames": 150
}
{
"or": [
{
"and": [
"Wave",
{
"heatFrames": 30
}
]
},
{
"obstaclesCleared": [
"A"
]
}
]
}
{
"or": [
"canDash",
{
"heatFrames": 40
}
]
}Clears obstacles: A |
From: 5
Middle Junction (Ledge Right of Morph Tunnel)
To: 2
Middle Left Door
Requires: "Morph"
{
"heatFrames": 150
}
"h_heatedBlueGateGlitch"
{
"or": [
"canDash",
{
"heatFrames": 65
}
]
}Clears obstacles: A |
From: 5
Middle Junction (Ledge Right of Morph Tunnel)
To: 2
Middle Left Door
Requires: "canDash"
"Morph"
{
"heatFrames": 150
}
{
"or": [
{
"and": [
"Wave",
{
"heatFrames": 30
}
]
},
{
"obstaclesCleared": [
"A"
]
}
]
}Exit condition: {
"leaveWithRunway": {
"length": 11,
"openEnd": 0,
"gentleDownTiles": 4
}
}Unlocks doors: {"types":["missiles"],"requires":[{"heatFrames":70}]}
{"types":["super"],"requires":[]}
{"types":["powerbomb"],"requires":[{"heatFrames":110}]} |
From: 5
Middle Junction (Ledge Right of Morph Tunnel)
To: 2
Middle Left Door
Requires: "canDash"
"Morph"
{
"heatFrames": 150
}
"h_heatedBlueGateGlitch"Exit condition: {
"leaveWithRunway": {
"length": 11,
"openEnd": 0,
"gentleDownTiles": 4
}
}Unlocks doors: {"types":["missiles"],"requires":[{"heatFrames":90}]}
{"types":["super"],"requires":[]}
{"types":["powerbomb"],"requires":[{"heatFrames":110}]} |
From: 5
Middle Junction (Ledge Right of Morph Tunnel)
To: 2
Middle Left Door
Use a Super to knock off the top Viola. Requires: {
"ammo": {
"type": "Super",
"count": 1
}
}
"Morph"
{
"heatFrames": 980
}
{
"or": [
"Wave",
{
"obstaclesCleared": [
"A"
]
}
]
}Exit condition: {
"leaveWithGModeSetup": {}
}Unlocks doors: {"types":["missiles","super"],"requires":[]}
{"types":["powerbomb"],"requires":[{"heatFrames":300}]}Dev note: Could save some heat frames by starting at 1 or 2, or by leaving the Viola just off camera, in the morph tunnel and gate glitch. |
From: 5
Middle Junction (Ledge Right of Morph Tunnel)
To: 3
Bottom Left Door
Requires: {
"heatFrames": 115
}
{
"or": [
"canDash",
{
"heatFrames": 15
}
]
}Unlocks doors: {"types":["missiles"],"requires":[{"heatFrames":50}]}
{"types":["super"],"requires":[]}
{"types":["powerbomb"],"requires":[{"heatFrames":60}]} |
From: 5
Middle Junction (Ledge Right of Morph Tunnel)
To: 3
Bottom Left Door
Requires: "canDash"
{
"heatFrames": 160
}Exit condition: {
"leaveWithRunway": {
"length": 14,
"openEnd": 0
}
}Unlocks doors: {"types":["missiles"],"requires":[{"heatFrames":50}]}
{"types":["super"],"requires":[]}
{"types":["powerbomb"],"requires":[{"heatFrames":60}]} |
From: 5
Middle Junction (Ledge Right of Morph Tunnel)
To: 3
Bottom Left Door
Use a Super to knock off the second from the bottom Viola. Be sure not to knock it off when it is on the left side, or it will get stuck on the bottom platform. Requires: {
"ammo": {
"type": "Super",
"count": 1
}
}
{
"heatFrames": 290
}Exit condition: {
"leaveWithGModeSetup": {}
}Unlocks doors: {"types":["missiles"],"requires":[]}
{"types":["super"],"requires":[],"useImplicitRequires":false}
{"types":["powerbomb"],"requires":["never"]} |
From: 5
Middle Junction (Ledge Right of Morph Tunnel)
To: 4
Top Right Door
Requires: {
"heatFrames": 135
} |
From: 5
Middle Junction (Ledge Right of Morph Tunnel)
To: 4
Top Right Door

With two Supers, knock the top Viola off twice to get it to the door quickly. Otherwise, use one Super to knock off the very bottom Viola. Requires: {
"ammo": {
"type": "Super",
"count": 1
}
}
{
"heatFrames": 820
}
{
"or": [
{
"ammo": {
"type": "Super",
"count": 1
}
},
{
"heatFrames": 720
}
]
}Exit condition: {
"leaveWithGModeSetup": {}
}Unlocks doors: {"types":["missiles","super"],"requires":[]}
{"types":["powerbomb"],"requires":[{"heatFrames":150}]} |
From: 5
Middle Junction (Ledge Right of Morph Tunnel)
To: 5
Middle Junction (Ledge Right of Morph Tunnel)
Requires: {
"obstaclesNotCleared": [
"R-Mode"
]
}
"h_heatedCrystalFlash" |
|
It is possible to use a Super to kill a Viola by the door and pause abuse to grab its Energy drop on G-mode exit. Requires: {
"or": [
{
"and": [
{
"ammo": {
"type": "Super",
"count": 1
}
},
"h_heatedGModePauseAbuse",
{
"heatFrames": 10
}
]
},
"h_heatedGModeOpenDifferentDoor"
]
}Dev note: As Violas only give small Energy, Samus is likely to lose a few Energy overall. |
From: 6
Right Side, In G-Mode
To: 5
Middle Junction (Ledge Right of Morph Tunnel)
Requires: "h_heatedGMode"
{
  "heatFrames": 0
}Dev note: This is used to then go through the morph tunnel. Artificial morph is only be helpful in indirect, as Samus would be off camera and can't gate glitch. |
{
"$schema": "../../../schema/m3-room.schema.json",
"id": 113,
"name": "Kronic Boost Room",
"area": "Norfair",
"subarea": "Upper",
"subsubarea": "East",
"roomAddress": "0x7AE74",
"roomEnvironments": [
{
"heated": true
}
],
"mapTileMask": [
[
0,
1
],
[
1,
1
],
[
0,
1
]
],
"nodes": [
{
"id": 1,
"name": "Top Left Door",
"nodeType": "door",
"nodeSubType": "blue",
"nodeAddress": "0x0019666",
"doorOrientation": "left",
"doorEnvironments": [
{
"physics": "air"
}
],
"mapTileMask": [
[
0,
2
],
[
1,
1
],
[
0,
1
]
]
},
{
"id": 2,
"name": "Middle Left Door",
"nodeType": "door",
"nodeSubType": "blue",
"nodeAddress": "0x001968a",
"doorOrientation": "left",
"doorEnvironments": [
{
"physics": "air"
}
],
"mapTileMask": [
[
0,
1
],
[
2,
1
],
[
0,
1
]
]
},
{
"id": 3,
"name": "Bottom Left Door",
"nodeType": "door",
"nodeSubType": "yellow",
"nodeAddress": "0x001967e",
"doorOrientation": "left",
"doorEnvironments": [
{
"physics": "air"
}
],
"mapTileMask": [
[
0,
1
],
[
1,
1
],
[
0,
2
]
]
},
{
"id": 4,
"name": "Top Right Door",
"nodeType": "door",
"nodeSubType": "blue",
"nodeAddress": "0x0019672",
"doorOrientation": "right",
"doorEnvironments": [
{
"physics": "air"
}
],
"mapTileMask": [
[
0,
2
],
[
1,
1
],
[
0,
1
]
]
},
{
"id": 5,
"name": "Middle Junction (Ledge Right of Morph Tunnel)",
"nodeType": "junction",
"nodeSubType": "junction",
"mapTileMask": [
[
0,
1
],
[
1,
2
],
[
0,
1
]
]
},
{
"id": 6,
"name": "Right Side, In G-Mode",
"nodeType": "junction",
"nodeSubType": "junction",
"mapTileMask": [
[
0,
2
],
[
1,
2
],
[
0,
2
]
]
}
],
"obstacles": [
{
"id": "A",
"name": "Blue Gate",
"obstacleType": "inanimate"
},
{
"id": "R-Mode",
"name": "Entered with R-Mode",
"obstacleType": "abstract"
}
],
"enemies": [
{
"id": "e1",
"groupName": "Kronic Boost Room Bottom Violas",
"enemyName": "Viola",
"quantity": 3,
"homeNodes": [
3
]
},
{
"id": "e2",
"groupName": "Kronic Boost Room Top Viola",
"enemyName": "Viola",
"quantity": 1,
"homeNodes": [
1,
4
]
}
],
"strats": [
{
"link": [
1,
1
],
"name": "Base (Unlock Door)",
"requires": [],
"unlocksDoors": [
{
"types": [
"missiles"
],
"requires": [
{
"heatFrames": 50
}
]
},
{
"types": [
"super"
],
"requires": []
},
{
"types": [
"powerbomb"
],
"requires": [
{
"heatFrames": 110
}
]
}
],
"flashSuitChecked": true,
"blueSuitChecked": true
},
{
"link": [
1,
1
],
"name": "Base (Come In Normally)",
"entranceCondition": {
"comeInNormally": {}
},
"requires": [],
"flashSuitChecked": true,
"blueSuitChecked": true
},
{
"link": [
1,
1
],
"name": "Base (Come In With Mockball)",
"entranceCondition": {
"comeInWithMockball": {
"adjacentMinTiles": 0,
"remoteAndLandingMinTiles": [
[
0,
0
]
],
"speedBooster": "any"
}
},
"requires": [
{
"heatFrames": 10
}
],
"flashSuitChecked": true,
"blueSuitChecked": true
},
{
"link": [
2,
2
],
"name": "Base (Unlock Door)",
"requires": [],
"unlocksDoors": [
{
"types": [
"missiles"
],
"requires": [
{
"heatFrames": 50
}
]
},
{
"types": [
"super"
],
"requires": []
},
{
"types": [
"powerbomb"
],
"requires": [
{
"heatFrames": 110
}
]
}
],
"flashSuitChecked": true,
"blueSuitChecked": true
},
{
"link": [
2,
2
],
"name": "Base (Come In Normally)",
"entranceCondition": {
"comeInNormally": {}
},
"requires": [],
"flashSuitChecked": true,
"blueSuitChecked": true
},
{
"link": [
2,
2
],
"name": "Base (Come In With Mockball)",
"entranceCondition": {
"comeInWithMockball": {
"adjacentMinTiles": 0,
"remoteAndLandingMinTiles": [
[
0,
0
]
],
"speedBooster": "any"
}
},
"requires": [
{
"heatFrames": 10
}
],
"flashSuitChecked": true,
"blueSuitChecked": true
},
{
"link": [
3,
3
],
"name": "Base (Unlock Door)",
"requires": [],
"unlocksDoors": [
{
"types": [
"missiles"
],
"requires": [
{
"heatFrames": 50
}
]
},
{
"types": [
"super"
],
"requires": []
},
{
"types": [
"powerbomb"
],
"requires": [
{
"heatFrames": 110
}
]
}
],
"flashSuitChecked": true,
"blueSuitChecked": true
},
{
"link": [
3,
3
],
"name": "Base (Come In Normally)",
"entranceCondition": {
"comeInNormally": {}
},
"requires": [],
"flashSuitChecked": true,
"blueSuitChecked": true
},
{
"link": [
3,
3
],
"name": "Base (Come In With Mockball)",
"entranceCondition": {
"comeInWithMockball": {
"adjacentMinTiles": 0,
"remoteAndLandingMinTiles": [
[
0,
0
]
],
"speedBooster": "any"
}
},
"requires": [
{
"heatFrames": 10
}
],
"flashSuitChecked": true,
"blueSuitChecked": true
},
{
"link": [
4,
4
],
"name": "Base (Unlock Door)",
"requires": [],
"unlocksDoors": [
{
"types": [
"missiles"
],
"requires": [
{
"heatFrames": 50
}
]
},
{
"types": [
"super"
],
"requires": []
},
{
"types": [
"powerbomb"
],
"requires": [
{
"heatFrames": 110
}
]
}
],
"flashSuitChecked": true,
"blueSuitChecked": true
},
{
"link": [
4,
4
],
"name": "Base (Come In Normally)",
"entranceCondition": {
"comeInNormally": {}
},
"requires": [],
"flashSuitChecked": true,
"blueSuitChecked": true
},
{
"link": [
4,
4
],
"name": "Base (Come In With Mockball)",
"entranceCondition": {
"comeInWithMockball": {
"adjacentMinTiles": 0,
"remoteAndLandingMinTiles": [
[
0,
0
]
],
"speedBooster": "any"
}
},
"requires": [
{
"heatFrames": 10
}
],
"flashSuitChecked": true,
"blueSuitChecked": true
},
{
"id": 1,
"link": [
1,
1
],
"name": "Leave with Runway",
"requires": [],
"exitCondition": {
"leaveWithRunway": {
"length": 4,
"openEnd": 1
}
},
"flashSuitChecked": true,
"blueSuitChecked": true
},
{
"id": 2,
"link": [
1,
1
],
"name": "Crystal Flash",
"requires": [
{
"obstaclesNotCleared": [
"R-Mode"
]
},
"h_heatedCrystalFlash"
],
"flashSuitChecked": true,
"blueSuitChecked": true
},
{
"id": 3,
"link": [
1,
1
],
"name": "10 Power Bomb Crystal Flash",
"requires": [
{
"obstaclesNotCleared": [
"R-Mode"
]
},
{
"heatFrames": 260
},
"h_heated10PowerBombCrystalFlash",
{
"heatFrames": 80
}
],
"flashSuitChecked": true,
"blueSuitChecked": true,
"note": [
"Lay a Power Bomb immediately after killing the Viola, in order to get a Power Bomb drop even if full on Power Bombs.",
"Jump straight up to collect the drop, then remorph and hold the Crystal Flash inputs."
],
"devNote": "The heat frames here could be tightened by adding another node."
},
{
"id": 80,
"link": [
1,
1
],
"name": "Come in Shinecharging, Crystal Spark",
"entranceCondition": {
"comeInShinecharging": {
"length": 3,
"openEnd": 0
}
},
"requires": [
{
  "or": [
    {
      "and": [
        "h_enemyDrops",
        "h_heatedCrystalSparkWithoutLenience"
      ]
    },
    "h_heatedCrystalSpark"
  ]
}
],
"flashSuitChecked": true,
"blueSuitChecked": true,
"devNote": [
"No lenience, since the Violas are a good Power Bomb farm."
]
},
{
"id": 75,
"link": [
1,
1
],
"name": "R-Mode Entry",
"entranceCondition": {
"comeInWithRMode": {}
},
"requires": [],
"clearsObstacles": [
"R-Mode"
],
"flashSuitChecked": true,
"blueSuitChecked": true
},
{
"id": 61,
"link": [
1,
2
],
"name": "Indirect G-Mode Morph, Through the Gate",
"entranceCondition": {
"comeInWithGMode": {
"mode": "indirect",
"morphed": true
}
},
"requires": [
{
"or": [
"h_artificialMorphMovement",
"h_artificialMorphBombHorizontally"
]
},
"h_heatedGModeOffCameraDoor"
],
"flashSuitChecked": true,
"blueSuitChecked": true,
"devNote": "It is possible to open the gate as it closes, but isn't expected since this is off camera. To do that would require resetting the room."
},
{
"id": 4,
"link": [
1,
4
],
"name": "Base",
"requires": [
{
"heatFrames": 85
},
{
"or": [
"canDash",
{
"heatFrames": 30
}
]
}
],
"unlocksDoors": [
{
"types": [
"missiles"
],
"requires": [
{
"heatFrames": 20
}
]
}
],
"flashSuitChecked": true,
"blueSuitChecked": true
},
{
"id": 5,
"link": [
1,
4
],
"name": "Carry Shinecharge",
"entranceCondition": {
"comeInShinecharged": {}
},
"requires": [
{
"shineChargeFrames": 85
},
{
"heatFrames": 85
}
],
"exitCondition": {
"leaveShinecharged": {}
},
"unlocksDoors": [
{
"types": [
"super"
],
"requires": []
},
{
"types": [
"missiles",
"powerbomb"
],
"requires": [
"never"
]
}
],
"flashSuitChecked": true,
"blueSuitChecked": true
},
{
"id": 6,
"link": [
1,
4
],
"name": "Come In Shinecharged, Leave Sparking",
"entranceCondition": {
"comeInShinecharged": {}
},
"requires": [
{
"shineChargeFrames": 10
},
{
"shinespark": {
"frames": 21,
"excessFrames": 0
}
},
{
"heatFrames": 60
}
],
"exitCondition": {
"leaveWithSpark": {}
},
"unlocksDoors": [
{
"types": [
"super"
],
"requires": []
},
{
"types": [
"missiles",
"powerbomb"
],
"requires": [
"never"
]
}
],
"flashSuitChecked": true,
"blueSuitChecked": true
},
{
"id": 7,
"link": [
1,
4
],
"name": "Come In Shinecharging, Leave Shinecharged",
"entranceCondition": {
"comeInShinecharging": {
"length": 3,
"openEnd": 0
}
},
"requires": [
{
"heatFrames": 100
},
{
"shineChargeFrames": 90
}
],
"exitCondition": {
"leaveShinecharged": {}
},
"unlocksDoors": [
{
"types": [
"super"
],
"requires": []
},
{
"types": [
"missiles",
"powerbomb"
],
"requires": [
"never"
]
}
],
"flashSuitChecked": true,
"blueSuitChecked": true
},
{
"id": 8,
"link": [
1,
4
],
"name": "Come In Shinecharging, Leave With Spark",
"entranceCondition": {
"comeInShinecharging": {
"length": 3,
"openEnd": 0
}
},
"requires": [
{
"heatFrames": 60
},
{
"shinespark": {
"frames": 17,
"excessFrames": 0
}
}
],
"exitCondition": {
"leaveWithSpark": {}
},
"unlocksDoors": [
{
"types": [
"super"
],
"requires": []
},
{
"types": [
"missiles",
"powerbomb"
],
"requires": [
"never"
]
}
],
"flashSuitChecked": true,
"blueSuitChecked": true,
"devNote": "This strat is probably only useful if shinesparks are modified to not cost energy."
},
{
"id": 47,
"link": [
1,
4
],
"name": "Come in Shinecharging, Leave With Temporary Blue",
"entranceCondition": {
"comeInShinecharging": {
"length": 3,
"openEnd": 0
}
},
"requires": [
"canChainTemporaryBlue",
{
"heatFrames": 310
},
{
"or": [
"canXRayCancelShinecharge",
{
"heatFrames": 160
}
]
}
],
"exitCondition": {
"leaveWithTemporaryBlue": {}
},
"unlocksDoors": [
{
"types": [
"super",
"powerbomb"
],
"requires": []
},
{
"types": [
"missiles"
],
"requires": [
{
"heatFrames": 50
}
]
}
],
"flashSuitChecked": true,
"blueSuitChecked": true
},
{
"id": 51,
"link": [
1,
4
],
"name": "G-Mode Setup - Get Hit By Viola",
"entranceCondition": {
"comeInNormally": {}
},
"requires": [
{
"ammo": {
"type": "Super",
"count": 2
}
},
{
"heatFrames": 780
}
],
"exitCondition": {
"leaveWithGModeSetup": {}
},
"unlocksDoors": [
{
"types": [
"missiles"
],
"requires": []
},
{
"types": [
"super"
],
"requires": [],
"useImplicitRequires": false
},
{
"types": [
"powerbomb"
],
"requires": [
{
"heatFrames": 140
}
]
}
],
"flashSuitChecked": true,
"blueSuitChecked": true,
"note": "Knock the top Viola off twice to get it to the door quickly."
},
{
"id": 9,
"link": [
1,
5
],
"name": "Base",
"requires": [
{
"heatFrames": 100
},
{
"or": [
"canDash",
{
"heatFrames": 35
}
]
}
],
"flashSuitChecked": true,
"blueSuitChecked": true
},
{
"id": 62,
"link": [
1,
6
],
"name": "G-Mode",
"entranceCondition": {
"comeInWithGMode": {
"mode": "any",
"morphed": false
}
},
"requires": [
{
"heatFrames": 0
}
],
"flashSuitChecked": true,
"blueSuitChecked": true
},
{
"id": 48,
"link": [
2,
1
],
"name": "Come in Shinecharging, Leave With Temporary Blue",
"entranceCondition": {
"comeInShinecharging": {
"length": 4,
"openEnd": 1,
"gentleUpTiles": 2
}
},
"requires": [
"canLongChainTemporaryBlue",
{
"heatFrames": 900
},
{
"or": [
"canXRayCancelShinecharge",
{
"heatFrames": 160
}
]
},
"canTrickySpringBallBounce",
"canXRayTurnaround"
],
"exitCondition": {
"leaveWithTemporaryBlue": {}
},
"unlocksDoors": [
{
"types": [
"super",
"powerbomb"
],
"requires": []
},
{
"types": [
"missiles"
],
"requires": [
{
"heatFrames": 50
}
]
}
],
"flashSuitChecked": true,
"blueSuitChecked": true
},
{
"id": 63,
"link": [
2,
1
],
"name": "Indirect G-Mode Morph, Blind Movement",
"entranceCondition": {
"comeInWithGMode": {
"mode": "indirect",
"morphed": true
}
},
"requires": [
"canOffScreenMovement",
"h_heatedGModeOffCameraDoor"
],
"flashSuitChecked": true,
"blueSuitChecked": true
},
{
"id": 10,
"link": [
2,
2
],
"name": "Leave with Runway Closed Gate",
"requires": [],
"exitCondition": {
"leaveWithRunway": {
"length": 6,
"openEnd": 0,
"gentleDownTiles": 2
}
},
"flashSuitChecked": true,
"blueSuitChecked": true
},
{
"id": 11,
"link": [
2,
2
],
"name": "Leave with Runway Open Gate",
"requires": [],
"exitCondition": {
"leaveWithRunway": {
"length": 11,
"openEnd": 0,
"gentleDownTiles": 4
}
},
"flashSuitChecked": true,
"blueSuitChecked": true
},
{
"id": 12,
"link": [
2,
2
],
"name": "Crystal Flash",
"requires": [
{
"obstaclesNotCleared": [
"R-Mode"
]
},
"h_heatedCrystalFlash"
],
"flashSuitChecked": true,
"blueSuitChecked": true
},
{
"id": 74,
"link": [
2,
2
],
"name": "Viola Farm",
"requires": [
"h_heatProof",
"Morph",
{
"resetRoom": {
"nodes": [
2
]
}
},
{
"or": [
{
"and": [
"canDash",
{
"or": [
{
"and": [
{
"or": [
"Plasma",
"Wave",
"Spazer"
]
},
{
"cycleFrames": 630
}
]
},
{
"and": [
"Grapple",
{
"cycleFrames": 680
}
]
},
{
"cycleFrames": 770
}
]
}
]
},
{
"and": [
{
"haveBlueSuit": {}
},
{
"cycleFrames": 810
}
]
}
]
}
],
"resetsObstacles": [
"A",
"R-Mode"
],
"farmCycleDrops": [
{
"enemy": "Viola",
"count": 4
}
],
"flashSuitChecked": true,
"blueSuitChecked": true
},
{
"id": 81,
"link": [
2,
2
],
"name": "Come in Shinecharging, Crystal Spark",
"entranceCondition": {
"comeInShinecharging": {
"length": 5,
"openEnd": 0,
"gentleUpTiles": 2
}
},
"requires": [
{
  "or": [
    {
      "and": [
        "h_enemyDrops",
        "h_heatedCrystalSparkWithoutLenience"
      ]
    },
    "h_heatedCrystalSpark"
  ]
}
],
"flashSuitChecked": true,
"blueSuitChecked": true,
"devNote": [
"No lenience, since the Violas are a good Power Bomb farm."
]
},
{
"id": 76,
"link": [
2,
2
],
"name": "R-Mode Entry",
"entranceCondition": {
"comeInWithRMode": {}
},
"requires": [],
"clearsObstacles": [
"R-Mode"
],
"flashSuitChecked": true,
"blueSuitChecked": true
},
{
"id": 13,
"link": [
2,
3
],
"name": "Base",
"requires": [
"Morph",
{
"heatFrames": 225
},
{
"or": [
{
"and": [
"canDash",
{
"or": [
{
"heatFrames": 10
},
"canMockball",
{
"obstaclesCleared": [
"A"
]
}
]
}
]
},
{
"heatFrames": 15
}
]
}
],
"unlocksDoors": [
{
"types": [
"powerbomb"
],
"requires": [
{
"heatFrames": 60
}
]
}
],
"clearsObstacles": [
"A"
],
"flashSuitChecked": true,
"blueSuitChecked": true
},
{
"id": 64,
"link": [
2,
3
],
"name": "Indirect G-Mode Morph, Simple Blind Movement",
"entranceCondition": {
"comeInWithGMode": {
"mode": "indirect",
"morphed": true
}
},
"requires": [
"h_heatedGModeOffCameraDoor"
],
"flashSuitChecked": true,
"blueSuitChecked": true
},
{
"id": 49,
"link": [
2,
4
],
"name": "Come in Shinecharging, Leave With Temporary Blue",
"entranceCondition": {
"comeInShinecharging": {
"length": 4,
"openEnd": 1,
"gentleUpTiles": 2
}
},
"requires": [
"canLongChainTemporaryBlue",
{
"heatFrames": 860
},
{
"or": [
"canXRayCancelShinecharge",
{
"heatFrames": 160
}
]
},
"canTrickySpringBallBounce",
"canXRayTurnaround"
],
"exitCondition": {
"leaveWithTemporaryBlue": {}
},
"unlocksDoors": [
{
"types": [
"super",
"powerbomb"
],
"requires": []
},
{
"types": [
"missiles"
],
"requires": [
{
"heatFrames": 50
}
]
}
],
"flashSuitChecked": true,
"blueSuitChecked": true
},
{
"id": 65,
"link": [
2,
4
],
"name": "Indirect G-Mode Morph, Blind Movement",
"entranceCondition": {
"comeInWithGMode": {
"mode": "indirect",
"morphed": true
}
},
"requires": [
"canOffScreenMovement",
"h_heatedGModeOffCameraDoor"
],
"flashSuitChecked": true,
"blueSuitChecked": true
},
{
"id": 14,
"link": [
2,
5
],
"name": "Base",
"requires": [
"Morph",
{
"heatFrames": 165
},
{
"or": [
{
"and": [
"canDash",
{
"or": [
{
"heatFrames": 10
},
"canMockball",
{
"obstaclesCleared": [
"A"
]
}
]
}
]
},
{
"heatFrames": 25
}
]
}
],
"clearsObstacles": [
"A"
],
"flashSuitChecked": true,
"blueSuitChecked": true
},
{
"id": 15,
"link": [
3,
2
],
"name": "Base",
"requires": [
"Morph",
{
"heatFrames": 260
},
{
"or": [
{
"and": [
"Wave",
{
"heatFrames": 30
}
]
},
{
"obstaclesCleared": [
"A"
]
}
]
}
],
"clearsObstacles": [
"A"
],
"flashSuitChecked": true,
"blueSuitChecked": true
},
{
"id": 16,
"link": [
3,
2
],
"name": "Gate Glitch",
"requires": [
"Morph",
{
"heatFrames": 260
},
"h_heatedBlueGateGlitch"
],
"clearsObstacles": [
"A"
],
"flashSuitChecked": true,
"blueSuitChecked": true
},
{
"id": 66,
"link": [
3,
2
],
"name": "Indirect G-Mode Morph, Through the Gate",
"entranceCondition": {
"comeInWithGMode": {
"mode": "indirect",
"morphed": true
}
},
"requires": [
"h_artificialMorphMovement",
"h_heatedGModeOffCameraDoor"
],
"flashSuitChecked": true,
"blueSuitChecked": true,
"devNote": "It is possible to open the gate as it closes, but isn't expected since this is off camera. To do that would require resetting the room."
},
{
"id": 59,
"link": [
3,
2
],
"name": "Samus Eater Teleport, X-Ray Climb (Lava Proof)",
"entranceCondition": {
"comeInWithSamusEaterTeleport": {
"floorPositions": [
[
1,
13
],
[
2,
13
]
],
"ceilingPositions": []
}
},
"requires": [
"h_heatProof",
"h_lavaProof",
"canXRayClimb"
],
"flashSuitChecked": true,
"blueSuitChecked": true,
"note": [
"In Hellway, fall into the rightmost Samus Eater;",
"in Alpha Power Bomb Room, fall into the middle Samus Eater.",
"After teleporting and passing through the transition, X-Ray climb 1 screen to reach the space above, to the left of the blue gate.",
"Samus will be off-camera, but the slopes at the top will push the camera up, indicating when the climb is done."
],
"devNote": [
"Other Samus Eaters can also probably work.",
"When entering with a floor Samus Eater as in this strat, lava protection is necessary:",
"there is no way to enter with more than 4 energy, so even a tiny amount of lava damage would be fatal."
]
},
{
"id": 60,
"link": [
3,
2
],
"name": "Samus Eater Teleport, X-Ray Climb (Wave)",
"entranceCondition": {
"comeInWithSamusEaterTeleport": {
"floorPositions": [],
"ceilingPositions": [
[
6,
3
]
]
}
},
"requires": [
"h_heatProof",
"canXRayClimb",
"Wave"
],
"flashSuitChecked": true,
"blueSuitChecked": true,
"note": [
"Jump into the first ceiling Samus Eater in Hellway.",
"After teleporting and passing through the transition, X-Ray climb 1 screen to reach the space above, to the right of the blue gate.",
"Samus will be off-camera, but the slopes at the top will push the camera up, indicating when the climb is done.",
"Off-camera the gate can be opened with Wave beam but not with a gate glitch."
],
"devNote": [
"Other ceiling Samus Eaters can also probably work."
]
},
{
"id": 17,
"link": [
3,
3
],
"name": "Leave with Runway",
"requires": [],
"exitCondition": {
"leaveWithRunway": {
"length": 14,
"openEnd": 0
}
},
"flashSuitChecked": true,
"blueSuitChecked": true
},
{
"id": 18,
"link": [
3,
3
],
"name": "Viola Farm",
"requires": [
"h_heatProof",
{
"or": [
{
"and": [
{
"resetRoom": {
"nodes": [
1,
4
]
}
},
{
"or": [
{
"and": [
"canDash",
{
"or": [
{
"and": [
{
"or": [
"Plasma",
"Wave",
"Spazer"
]
},
{
"cycleFrames": 450
}
]
},
{
"and": [
"Grapple",
{
"cycleFrames": 530
}
]
},
{
"cycleFrames": 660
}
]
}
]
},
{
"and": [
{
"haveBlueSuit": {}
},
{
"cycleFrames": 565
}
]
}
]
}
]
},
{
"and": [
{
"resetRoom": {
"nodes": [
3
]
}
},
{
"or": [
{
"and": [
"canDash",
{
"or": [
{
"and": [
{
"or": [
"Plasma",
"Wave",
"Spazer"
]
},
{
"cycleFrames": 450
}
]
},
{
"cycleFrames": 500
}
]
}
]
},
{
"and": [
{
"haveBlueSuit": {}
},
{
"cycleFrames": 570
}
]
}
]
}
]
}
]
}
],
"resetsObstacles": [
"A",
"R-Mode"
],
"farmCycleDrops": [
{
"enemy": "Viola",
"count": 4
}
],
"flashSuitChecked": true,
"blueSuitChecked": true
},
{
"id": 19,
"link": [
3,
3
],
"name": "Crystal Flash",
"requires": [
{
"obstaclesNotCleared": [
"R-Mode"
]
},
"h_heatedCrystalFlash"
],
"flashSuitChecked": true,
"blueSuitChecked": true
},
{
"id": 20,
"link": [
3,
3
],
"name": "10 Power Bomb Crystal Flash",
"requires": [
{
"obstaclesNotCleared": [
"R-Mode"
]
},
{
"heatFrames": 240
},
"h_heated10PowerBombCrystalFlash",
{
"heatFrames": 70
}
],
"flashSuitChecked": true,
"blueSuitChecked": true,
"note": [
"Lay a Power Bomb immediately after killing the Viola, in order to get a Power Bomb drop even if full on Power Bombs.",
"Jump straight up to collect the drop, then remorph and hold the Crystal Flash inputs."
]
},
{
"id": 82,
"link": [
3,
3
],
"name": "Come in Shinecharging, Crystal Spark",
"entranceCondition": {
"comeInShinecharging": {
"length": 13,
"openEnd": 0
}
},
"requires": [
{
"or": [
{
"and": [
"h_enemyDrops",
"h_heatedCrystalSparkWithoutLenience"
]
},
"h_heatedCrystalSpark"
]
}
],
"flashSuitChecked": true,
"blueSuitChecked": true,
"devNote": [
"No lenience, since the Violas are a good Power Bomb farm."
]
},
{
"id": 83,
"link": [
3,
3
],
"name": "Crystal Spark",
"requires": [
{
"or": [
{
"canShineCharge": {
"usedTiles": 13,
"openEnd": 0
}
},
{
"and": [
{
"doorUnlockedAtNode": 3
},
{
"canShineCharge": {
"usedTiles": 14,
"openEnd": 0
}
}
]
}
]
},
{
"or": [
{
"and": [
"h_enemyDrops",
"h_heatedCrystalSparkWithoutLenience"
]
},
"h_heatedCrystalSpark"
]
}
],
"flashSuitChecked": true,
"blueSuitChecked": true,
"devNote": [
"No lenience, since the Violas are a good Power Bomb farm."
]
},
{
"id": 77,
"link": [
3,
3
],
"name": "R-Mode Entry",
"entranceCondition": {
"comeInWithRMode": {}
},
"requires": [],
"clearsObstacles": [
"R-Mode"
],
"flashSuitChecked": true,
"blueSuitChecked": true
},
{
"id": 78,
"link": [
3,
3
],
"name": "R-Mode Spark Interrupt",
"requires": [
{
"obstaclesCleared": [
"R-Mode"
]
},
{
"or": [
"h_heatedCrystalFlashForReserveEnergy",
{
"and": [
"h_heatProof",
"h_RModeCanRefillReserves",
{
"resourceMissingAtMost": [
{
"type": "PowerBomb",
"count": 0
}
]
},
{
"partialRefill": {
"type": "ReserveEnergy",
"limit": 20
}
}
]
}
]
},
{
"or": [
{
"canShineCharge": {
"usedTiles": 13,
"openEnd": 0
}
},
{
"and": [
{
"doorUnlockedAtNode": 3
},
{
"canShineCharge": {
"usedTiles": 14,
"openEnd": 0
}
}
]
}
]
},
{
"or": [
{
"autoReserveTrigger": {}
},
{
"and": [
"canReserveTriggerBufferXRay",
{
"autoReserveTrigger": {
"implicitHeatFrames": "no"
}
}
]
}
]
},
"canRModeSparkInterrupt",
{
"heatFrames": 30
}
],
"resetsObstacles": [
"R-Mode"
],
"flashSuitChecked": true,
"blueSuitChecked": true,
"note": [
"Farm three Violas. Shinecharge at the bottom of the room and use the lowest Viola to interrupt."
]
},
{
"id": 52,
"link": [
3,
3
],
"name": "G-Mode Setup - Get Hit By Viola",
"requires": [
{
"ammo": {
"type": "Super",
"count": 1
}
},
{
"heatFrames": 290
}
],
"exitCondition": {
"leaveWithGModeSetup": {}
},
"flashSuitChecked": true,
"blueSuitChecked": true,
"note": "Use a Super to knock off the second from the bottom Viola. Be sure not to knock it off when it is on the left side, or it will get stuck on the bottom platform."
},
{
"id": 21,
"link": [
3,
3
],
"name": "G-Mode Regain Mobility",
"requires": [
{
"ammo": {
"type": "Super",
"count": 1
}
},
{
"enemyDamage": {
"enemy": "Viola",
"type": "contact",
"hits": 1
}
}
],
"gModeRegainMobility": {},
"flashSuitChecked": true,
"blueSuitChecked": true,
"note": [
"Use a Super to knock off the Viola to regain mobility.",
"The Viola on the top right of the screen is the only one that can hit Samus here."
]
},
{
"id": 53,
"link": [
3,
4
],
"name": "G-Mode Setup - Get Hit By Viola",
"requires": [
{
"ammo": {
"type": "Super",
"count": 1
}
},
{
"heatFrames": 1430
}
],
"exitCondition": {
"leaveWithGModeSetup": {}
},
"unlocksDoors": [
{
"types": [
"missiles",
"super"
],
"requires": []
},
{
"types": [
"powerbomb"
],
"requires": [
{
"heatFrames": 150
}
]
}
],
"flashSuitChecked": true,
"blueSuitChecked": true,
"note": "Use a Super to knock off the very bottom Viola."
},
{
"id": 22,
"link": [
3,
5
],
"name": "Base",
"requires": [
{
"heatFrames": 120
},
{
"or": [
"canDash",
{
"heatFrames": 10
}
]
}
],
"flashSuitChecked": true,
"blueSuitChecked": true
},
{
"id": 67,
"link": [
3,
6
],
"name": "G-Mode",
"entranceCondition": {
"comeInWithGMode": {
"mode": "any",
"morphed": false
}
},
"requires": [
{
  "heatFrames": 0
}
],
"flashSuitChecked": true,
"blueSuitChecked": true
},
{
"id": 23,
"link": [
4,
1
],
"name": "Base",
"requires": [
{
"heatFrames": 85
},
{
"or": [
"canDash",
{
"heatFrames": 30
}
]
}
],
"unlocksDoors": [
{
"types": [
"missiles"
],
"requires": [
{
"heatFrames": 20
}
]
}
],
"flashSuitChecked": true,
"blueSuitChecked": true
},
{
"id": 24,
"link": [
4,
1
],
"name": "Carry Shinecharge",
"entranceCondition": {
"comeInShinecharged": {}
},
"requires": [
{
"shineChargeFrames": 85
},
{
"heatFrames": 85
}
],
"exitCondition": {
"leaveShinecharged": {}
},
"unlocksDoors": [
{
"types": [
"super"
],
"requires": []
},
{
"types": [
"missiles",
"powerbomb"
],
"requires": [
"never"
]
}
],
"flashSuitChecked": true,
"blueSuitChecked": true
},
{
"id": 25,
"link": [
4,
1
],
"name": "Come In Shinecharged, Leave Sparking",
"entranceCondition": {
"comeInShinecharged": {}
},
"requires": [
{
"shineChargeFrames": 10
},
{
"shinespark": {
"frames": 21,
"excessFrames": 0
}
},
{
"heatFrames": 60
}
],
"exitCondition": {
"leaveWithSpark": {}
},
"unlocksDoors": [
{
"types": [
"super"
],
"requires": []
},
{
"types": [
"missiles",
"powerbomb"
],
"requires": [
"never"
]
}
],
"flashSuitChecked": true,
"blueSuitChecked": true
},
{
"id": 26,
"link": [
4,
1
],
"name": "Come In Shinecharging, Leave Shinecharged",
"entranceCondition": {
"comeInShinecharging": {
"length": 3,
"openEnd": 1
}
},
"requires": [
{
"heatFrames": 100
},
{
"shineChargeFrames": 90
}
],
"exitCondition": {
"leaveShinecharged": {}
},
"unlocksDoors": [
{
"types": [
"super"
],
"requires": []
},
{
"types": [
"missiles",
"powerbomb"
],
"requires": [
"never"
]
}
],
"flashSuitChecked": true,
"blueSuitChecked": true
},
{
"id": 27,
"link": [
4,
1
],
"name": "Come In Shinecharging, Leave With Spark",
"entranceCondition": {
"comeInShinecharging": {
"length": 3,
"openEnd": 0
}
},
"requires": [
{
"heatFrames": 60
},
{
"shinespark": {
"frames": 17,
"excessFrames": 0
}
}
],
"exitCondition": {
"leaveWithSpark": {}
},
"unlocksDoors": [
{
"types": [
"super"
],
"requires": []
},
{
"types": [
"missiles",
"powerbomb"
],
"requires": [
"never"
]
}
],
"flashSuitChecked": true,
"blueSuitChecked": true,
"devNote": "This strat is probably only useful if shinesparks are modified to not cost energy."
},
{
"id": 50,
"link": [
4,
1
],
"name": "Come in Shinecharging, Leave With Temporary Blue",
"entranceCondition": {
"comeInShinecharging": {
"length": 3,
"openEnd": 0
}
},
"requires": [
"canChainTemporaryBlue",
{
"heatFrames": 310
},
{
"or": [
"canXRayCancelShinecharge",
{
"heatFrames": 160
}
]
}
],
"exitCondition": {
"leaveWithTemporaryBlue": {}
},
"unlocksDoors": [
{
"types": [
"super",
"powerbomb"
],
"requires": []
},
{
"types": [
"missiles"
],
"requires": [
{
"heatFrames": 50
}
]
}
],
"flashSuitChecked": true,
"blueSuitChecked": true
},
{
"id": 68,
"link": [
4,
2
],
"name": "Indirect G-Mode Morph, Through the Gate",
"entranceCondition": {
"comeInWithGMode": {
"mode": "indirect",
"morphed": true
}
},
"requires": [
{
"or": [
"h_artificialMorphMovement",
"h_artificialMorphBombHorizontally"
]
},
"h_heatedGModeOffCameraDoor"
],
"flashSuitChecked": true,
"blueSuitChecked": true,
"devNote": "It is possible to open the gate as it closes, but isn't expected since this is off camera. To do that would require resetting the room."
},
{
"id": 28,
"link": [
4,
2
],
"name": "Grapple Teleport Door Lock Skip",
"entranceCondition": {
"comeInWithGrappleTeleport": {
"blockPositions": [
[
2,
18
],
[
2,
19
],
[
2,
28
],
[
2,
29
]
]
}
},
"requires": [],
"bypassesDoorShell": "yes",
"flashSuitChecked": true,
"blueSuitChecked": true
},
{
"id": 29,
"link": [
4,
2
],
"name": "Carry Grapple Teleport (Top Position)",
"entranceCondition": {
"comeInWithGrappleTeleport": {
"blockPositions": [
[
2,
18
]
]
}
},
"requires": [],
"exitCondition": {
"leaveWithGrappleTeleport": {
"blockPositions": [
[
2,
18
]
]
}
},
"bypassesDoorShell": "yes",
"flashSuitChecked": true,
"blueSuitChecked": true
},
{
"id": 30,
"link": [
4,
2
],
"name": "Carry Grapple Teleport (Upper Middle Position)",
"entranceCondition": {
"comeInWithGrappleTeleport": {
"blockPositions": [
[
2,
19
]
]
}
},
"requires": [],
"exitCondition": {
"leaveWithGrappleTeleport": {
"blockPositions": [
[
2,
19
]
]
}
},
"bypassesDoorShell": "yes",
"flashSuitChecked": true,
"blueSuitChecked": true
},
{
"id": 31,
"link": [
4,
2
],
"name": "Carry Grapple Teleport (Lower Middle Position)",
"entranceCondition": {
"comeInWithGrappleTeleport": {
"blockPositions": [
[
2,
28
]
]
}
},
"requires": [],
"exitCondition": {
"leaveWithGrappleTeleport": {
"blockPositions": [
[
2,
28
]
]
}
},
"bypassesDoorShell": "yes",
"flashSuitChecked": true,
"blueSuitChecked": true
},
{
"id": 32,
"link": [
4,
2
],
"name": "Carry Grapple Teleport (Bottom Position)",
"entranceCondition": {
"comeInWithGrappleTeleport": {
"blockPositions": [
[
2,
29
]
]
}
},
"requires": [],
"exitCondition": {
"leaveWithGrappleTeleport": {
"blockPositions": [
[
2,
29
]
]
}
},
"bypassesDoorShell": "yes",
"flashSuitChecked": true,
"blueSuitChecked": true
},
{
"id": 33,
"link": [
4,
2
],
"name": "Grapple Teleport X-Ray Climb",
"entranceCondition": {
"comeInWithGrappleTeleport": {
"blockPositions": [
[
2,
34
]
]
}
},
"requires": [
"canXRayClimb",
{
"heatFrames": 1600
}
],
"bypassesDoorShell": "yes",
"flashSuitChecked": true,
"blueSuitChecked": true,
"note": [
"Exit the previous room with Samus in a standing pose (while grappled).",
"After teleporting, press right to release Grapple while staying standing (not being forced into a crouch).",
"Then X-ray climb 1 screen to get up to the door transition, without needing to open the door."
]
},
{
"id": 34,
"link": [
4,
4
],
"name": "Leave with Runway",
"requires": [],
"exitCondition": {
"leaveWithRunway": {
"length": 4,
"openEnd": 1
}
},
"flashSuitChecked": true,
"blueSuitChecked": true
},
{
"id": 35,
"link": [
4,
4
],
"name": "Crystal Flash",
"requires": [
{
"obstaclesNotCleared": [
"R-Mode"
]
},
"h_heatedCrystalFlash"
],
"flashSuitChecked": true,
"blueSuitChecked": true
},
{
"id": 36,
"link": [
4,
4
],
"name": "10 Power Bomb Crystal Flash",
"requires": [
{
"obstaclesNotCleared": [
"R-Mode"
]
},
{
"heatFrames": 270
},
"h_heated10PowerBombCrystalFlash",
{
"heatFrames": 90
}
],
"flashSuitChecked": true,
"blueSuitChecked": true,
"note": [
"Lay a Power Bomb immediately after killing the Viola, in order to get a Power Bomb drop even if full on Power Bombs.",
"Jump straight up to collect the drop, then remorph and hold the Crystal Flash inputs."
],
"devNote": "The heat frames here could be tightened by adding another node."
},
{
"id": 84,
"link": [
4,
4
],
"name": "Come in Shinecharging, Crystal Spark",
"entranceCondition": {
"comeInShinecharging": {
"length": 3,
"openEnd": 0
}
},
"requires": [
{
  "or": [
    {
      "and": [
        "h_enemyDrops",
        "h_heatedCrystalSparkWithoutLenience"
      ]
    },
    "h_heatedCrystalSpark"
  ]
}
],
"flashSuitChecked": true,
"blueSuitChecked": true,
"devNote": [
"No lenience, since the Violas are a good Power Bomb farm."
]
},
{
"id": 79,
"link": [
4,
4
],
"name": "R-Mode Entry",
"entranceCondition": {
"comeInWithRMode": {}
},
"requires": [],
"clearsObstacles": [
"R-Mode"
],
"flashSuitChecked": true,
"blueSuitChecked": true
},
{
"id": 54,
"link": [
4,
4
],
"name": "G-Mode Setup - Get Hit By Viola",
"entranceCondition": {
"comeInNormally": {}
},
"requires": [
{
"ammo": {
"type": "Super",
"count": 2
}
},
{
"heatFrames": 780
}
],
"exitCondition": {
"leaveWithGModeSetup": {}
},
"unlocksDoors": [
{
"types": [
"missiles"
],
"requires": []
},
{
"types": [
"super"
],
"requires": [],
"useImplicitRequires": false
},
{
"types": [
"powerbomb"
],
"requires": [
{
"heatFrames": 140
}
]
}
],
"flashSuitChecked": true,
"blueSuitChecked": true,
"note": "Knock the top Viola off twice to get it to the door quickly."
},
{
"id": 37,
"link": [
4,
5
],
"name": "Base",
"requires": [
{
"heatFrames": 85
},
{
"or": [
"canDash",
{
"heatFrames": 10
}
]
}
],
"flashSuitChecked": true,
"blueSuitChecked": true
},
{
"id": 69,
"link": [
4,
6
],
"name": "G-Mode",
"entranceCondition": {
"comeInWithGMode": {
"mode": "any",
"morphed": false
}
},
"requires": [
{
  "heatFrames": 0
}
],
"flashSuitChecked": true,
"blueSuitChecked": true
},
{
"id": 38,
"link": [
5,
1
],
"name": "Base",
"requires": [
{
"heatFrames": 140
},
{
"or": [
"canDash",
{
"heatFrames": 20
}
]
}
],
"flashSuitChecked": true,
"blueSuitChecked": true
},
{
"id": 55,
"link": [
5,
1
],
"name": "G-Mode Setup - Get Hit By Viola",
"requires": [
{
"ammo": {
"type": "Super",
"count": 1
}
},
{
"heatFrames": 2130
}
],
"exitCondition": {
"leaveWithGModeSetup": {}
},
"unlocksDoors": [
{
"types": [
"missiles",
"super"
],
"requires": []
},
{
"types": [
"powerbomb"
],
"requires": [
{
"heatFrames": 150
}
]
}
],
"flashSuitChecked": true,
"blueSuitChecked": true,
"note": "Use a Super to knock off the top Viola in the lower half. Knock it off when it on the bottom just left of middle to have it fall all the way."
},
{
"id": 39,
"link": [
5,
2
],
"name": "Base",
"requires": [
"Morph",
{
"heatFrames": 150
},
{
"or": [
{
"and": [
"Wave",
{
"heatFrames": 30
}
]
},
{
"obstaclesCleared": [
"A"
]
}
]
},
{
"or": [
"canDash",
{
"heatFrames": 40
}
]
}
],
"clearsObstacles": [
"A"
],
"flashSuitChecked": true,
"blueSuitChecked": true
},
{
"id": 40,
"link": [
5,
2
],
"name": "Gate Glitch",
"requires": [
"Morph",
{
"heatFrames": 150
},
"h_heatedBlueGateGlitch",
{
"or": [
"canDash",
{
"heatFrames": 65
}
]
}
],
"clearsObstacles": [
"A"
],
"flashSuitChecked": true,
"blueSuitChecked": true
},
{
"id": 41,
"link": [
5,
2
],
"name": "Leave with Runway",
"requires": [
"canDash",
"Morph",
{
"heatFrames": 150
},
{
"or": [
{
"and": [
"Wave",
{
"heatFrames": 30
}
]
},
{
"obstaclesCleared": [
"A"
]
}
]
}
],
"exitCondition": {
"leaveWithRunway": {
"length": 11,
"openEnd": 0,
"gentleDownTiles": 4
}
},
"unlocksDoors": [
{
"types": [
"missiles"
],
"requires": [
{
"heatFrames": 70
}
]
},
{
"types": [
"super"
],
"requires": []
},
{
"types": [
"powerbomb"
],
"requires": [
{
"heatFrames": 110
}
]
}
],
"flashSuitChecked": true,
"blueSuitChecked": true
},
{
"id": 42,
"link": [
5,
2
],
"name": "Leave with Runway (Gate Glitch)",
"requires": [
"canDash",
"Morph",
{
"heatFrames": 150
},
"h_heatedBlueGateGlitch"
],
"exitCondition": {
"leaveWithRunway": {
"length": 11,
"openEnd": 0,
"gentleDownTiles": 4
}
},
"unlocksDoors": [
{
"types": [
"missiles"
],
"requires": [
{
"heatFrames": 90
}
]
},
{
"types": [
"super"
],
"requires": []
},
{
"types": [
"powerbomb"
],
"requires": [
{
"heatFrames": 110
}
]
}
],
"flashSuitChecked": true,
"blueSuitChecked": true
},
{
"id": 56,
"link": [
5,
2
],
"name": "G-Mode Setup - Get Hit By Viola",
"requires": [
{
"ammo": {
"type": "Super",
"count": 1
}
},
"Morph",
{
"heatFrames": 980
},
{
"or": [
"Wave",
{
"obstaclesCleared": [
"A"
]
}
]
}
],
"exitCondition": {
"leaveWithGModeSetup": {}
},
"unlocksDoors": [
{
"types": [
"missiles",
"super"
],
"requires": []
},
{
"types": [
"powerbomb"
],
"requires": [
{
"heatFrames": 300
}
]
}
],
"flashSuitChecked": true,
"blueSuitChecked": true,
"note": "Use a Super to knock off the top Viola.",
"devNote": "Could save some heat frames by starting at 1 or 2, or by leaving the Viola just off camera, in the morph tunnel and gate glitch."
},
{
"id": 43,
"link": [
5,
3
],
"name": "Base",
"requires": [
{
"heatFrames": 115
},
{
"or": [
"canDash",
{
"heatFrames": 15
}
]
}
],
"unlocksDoors": [
{
"types": [
"missiles"
],
"requires": [
{
"heatFrames": 50
}
]
},
{
"types": [
"super"
],
"requires": []
},
{
"types": [
"powerbomb"
],
"requires": [
{
"heatFrames": 60
}
]
}
],
"flashSuitChecked": true,
"blueSuitChecked": true
},
{
"id": 44,
"link": [
5,
3
],
"name": "Leave with Runway",
"requires": [
"canDash",
{
"heatFrames": 160
}
],
"exitCondition": {
"leaveWithRunway": {
"length": 14,
"openEnd": 0
}
},
"unlocksDoors": [
{
"types": [
"missiles"
],
"requires": [
{
"heatFrames": 50
}
]
},
{
"types": [
"super"
],
"requires": []
},
{
"types": [
"powerbomb"
],
"requires": [
{
"heatFrames": 60
}
]
}
],
"flashSuitChecked": true,
"blueSuitChecked": true
},
{
"id": 57,
"link": [
5,
3
],
"name": "G-Mode Setup - Get Hit By Viola",
"requires": [
{
"ammo": {
"type": "Super",
"count": 1
}
},
{
"heatFrames": 290
}
],
"exitCondition": {
"leaveWithGModeSetup": {}
},
"unlocksDoors": [
{
"types": [
"missiles"
],
"requires": []
},
{
"types": [
"super"
],
"requires": [],
"useImplicitRequires": false
},
{
"types": [
"powerbomb"
],
"requires": [
"never"
]
}
],
"flashSuitChecked": true,
"blueSuitChecked": true,
"note": "Use a Super to knock off the second from the bottom Viola. Be sure not to knock it off when it is on the left side, or it will get stuck on the bottom platform."
},
{
"id": 45,
"link": [
5,
4
],
"name": "Base",
"requires": [
{
  "heatFrames": 135
}
],
"flashSuitChecked": true,
"blueSuitChecked": true
},
{
"id": 58,
"link": [
5,
4
],
"name": "G-Mode Setup - Get Hit By Viola",
"requires": [
{
"ammo": {
"type": "Super",
"count": 1
}
},
{
"heatFrames": 820
},
{
"or": [
{
"ammo": {
"type": "Super",
"count": 1
}
},
{
"heatFrames": 720
}
]
}
],
"exitCondition": {
"leaveWithGModeSetup": {}
},
"unlocksDoors": [
{
"types": [
"missiles",
"super"
],
"requires": []
},
{
"types": [
"powerbomb"
],
"requires": [
{
"heatFrames": 150
}
]
}
],
"flashSuitChecked": true,
"blueSuitChecked": true,
"note": [
"With two Supers, knock the top Viola off twice to get it to the door quickly.",
"Otherwise, use one Super to knock off the very bottom Viola."
]
},
{
"id": 46,
"link": [
5,
5
],
"name": "Crystal Flash",
"requires": [
{
"obstaclesNotCleared": [
"R-Mode"
]
},
"h_heatedCrystalFlash"
],
"flashSuitChecked": true,
"blueSuitChecked": true
},
{
"id": 70,
"link": [
6,
1
],
"name": "G-Mode",
"requires": [
{
  "or": [
    {
      "and": [
        {
          "ammo": {
            "type": "Super",
            "count": 1
          }
        },
        "h_heatedGModePauseAbuse",
        {
          "heatFrames": 10
        }
      ]
    },
    "h_heatedGModeOpenDifferentDoor"
  ]
}
],
"flashSuitChecked": true,
"blueSuitChecked": true,
"note": "It is possible to use a Super to kill a Viola by the door and pause abuse to grab its Energy drop on G-mode exit.",
"devNote": "As Violas only give small Energy, Samus is likely to lose a few Energy overall."
},
{
"id": 71,
"link": [
6,
3
],
"name": "G-Mode",
"requires": [
{
  "or": [
    {
      "and": [
        {
          "ammo": {
            "type": "Super",
            "count": 1
          }
        },
        "h_heatedGModePauseAbuse",
        {
          "heatFrames": 10
        }
      ]
    },
    "h_heatedGModeOpenDifferentDoor"
  ]
}
],
"flashSuitChecked": true,
"blueSuitChecked": true,
"note": "It is possible to use a Super to kill a Viola by the door and pause abuse to grab its Energy drop on G-mode exit.",
"devNote": "As Violas only give small Energy, Samus is likely to lose a few Energy overall."
},
{
"id": 72,
"link": [
6,
4
],
"name": "G-Mode",
"requires": [
{
  "or": [
    {
      "and": [
        {
          "ammo": {
            "type": "Super",
            "count": 1
          }
        },
        "h_heatedGModePauseAbuse",
        {
          "heatFrames": 10
        }
      ]
    },
    "h_heatedGModeOpenDifferentDoor"
  ]
}
],
"flashSuitChecked": true,
"blueSuitChecked": true,
"note": "It is possible to use a Super to kill a Viola by the door and pause abuse to grab its Energy drop on G-mode exit.",
"devNote": "As Violas only give small Energy, Samus is likely to lose a few Energy overall."
},
{
"id": 73,
"link": [
6,
5
],
"name": "Exit G-Mode",
"requires": [
"h_heatedGMode",
{
"heatFrames": 0
}
],
"flashSuitChecked": true,
"blueSuitChecked": true,
"devNote": "This is used to then go through the morph tunnel. Artificial morph is only be helpful in indirect, as Samus would be off camera and can't gate glitch."
}
],
"notables": [],
"nextStratId": 85,
"nextNotableId": 1
}