canPrepareForNextRoom (Very Hard)
The ability to know which room is coming next and use that information to enter the room in a specific way. This could be achieved from remembering which rooms Samus has been to, using the map to figure out which room is coming next, etc.
Strats ()
|
From: 4
Lower Section - Top Right Door
To: 4
Lower Section - Top Right Door
Requires: "canPrepareForNextRoom"
{
"doorUnlockedAtNode": 4
}
"h_canCrystalFlash"
|
|
Requires: "SpaceJump"
{
"or": [
"canWalljump",
"canPrepareForNextRoom",
{
"and": [
"canSpaceJumpWaterEscape",
"HiJump"
]
}
]
}
|
|
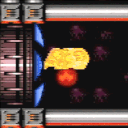
Enter the room ready to kill the hoppers before they can hit Samus. with a charge plasma shot ready, or in a screw attack spin jump, or a morph, ready to lay a power bomb. Requires: "canPrepareForNextRoom"
{
"or": [
{
"and": [
"Plasma",
"Charge"
]
},
"ScrewAttack",
{
"and": [
"h_canUsePowerBombs",
{
"enemyKill": {
"enemies": [
[
"Sidehopper"
]
],
"explicitWeapons": [
"Missile",
"Super",
"PowerBomb"
]
}
}
]
}
]
}
Clears obstacles: C |
|
Entrance condition: {
"comeInJumping": {
"speedBooster": "any",
"minTiles": 0.4375
}
}
Requires: "SpaceJump" "canPrepareForNextRoom" |
|
Entrance condition: {
"comeInJumping": {
"speedBooster": "any",
"minTiles": 0.4375
}
}
Requires: "SpaceJump" "canPrepareForNextRoom" |
|
From: 14
Left Side - Botom Middle Door Spawn At Junction
To: 5
Left Side - Bottom Middle Door (Blocked by Crumble Blocks)
Jump through the door and shoot it open as you enter, landing on the door frame to avoid falling through the crumbles. Requires: "canPrepareForNextRoom" |
|
From: 1
Left Door
To: 1
Left Door
Entrance condition: {
"comeInShinecharging": {
"length": 0,
"openEnd": 1
}
}
Requires: "canPrepareForNextRoom" Clears obstacles: A |
|
From: 1
Left Door
To: 1
Left Door
Entrance condition: {
"comeInWithSpark": {}
}
Requires: "canPrepareForNextRoom"
{
"shinespark": {
"frames": 24
}
}
Clears obstacles: A |
|
From: 1
Left Door
To: 1
Left Door
Requires: "canPrepareForNextRoom" "ScrewAttack" Clears obstacles: A |
|
Weaken the big hopper with a Power Beam shot and then use one Super to hit all three enemies when they stack together. Entrance condition: {
"comeInNormally": {}
}
Requires: {
"enemyDamage": {
"enemy": "Sm. Sidehopper",
"type": "contact",
"hits": 1
}
}
"canPrepareForNextRoom"
{
"ammo": {
"type": "Super",
"count": 1
}
}
Clears obstacles: A |
|
From: 1
Left Door
To: 3
Top Junction
Perform a Spring Ball jump from a speedy jump in the previous room. Entrance condition: {
"comeInJumping": {
"speedBooster": true,
"minTiles": 7
}
}
Requires: "canPrepareForNextRoom" "canTrickySpringBallJump" "canCarefulJump" |
|
Entrance condition: {
"comeInJumping": {
"minTiles": 1,
"speedBooster": "any"
}
}
Requires: "canPrepareForNextRoom"
{
"or": [
"SpaceJump",
"canWalljump",
{
"and": [
"Grapple",
{
"obstaclesNotCleared": [
"C"
]
}
]
},
{
"and": [
"HiJump",
"canSpringBallJumpMidAir"
]
}
]
}
|
|
Jump into the room and onto the Grapple block. Entrance condition: {
"comeInJumping": {
"speedBooster": true,
"minTiles": 6.4375
}
}
Requires: "canPrepareForNextRoom" "HiJump" "canDisableEquipment" "canCarefulJump" |
|
Jump into the room and onto the Grapple block. Entrance condition: {
"comeInJumping": {
"speedBooster": true,
"minTiles": 34.4375
}
}
Requires: "canPrepareForNextRoom" "canTrickyJump" |
|
From: 1
Left Door
To: 3
Top Junction
Perform a very precise Spring Ball jump through the transition and onto the Grapple block. A running spin jump or crouch jump can be used. Entrance condition: {
"comeInJumping": {
"speedBooster": false,
"minTiles": 0.4375
}
}
Requires: "canPrepareForNextRoom" "canTrickySpringBallJump" "canTrickyJump" |
|
Jump into the room and onto the Grapple block. Requires a runway of only 2 tiles in the adjacent room. Entrance condition: {
"comeInJumping": {
"speedBooster": true,
"minTiles": 1.4375
}
}
Requires: "canPrepareForNextRoom" "HiJump" "canTrickyDashJump" "canDisableEquipment" |
|
Jump into the room and onto the Grapple block. Entrance condition: {
"comeInJumping": {
"speedBooster": true,
"minTiles": 25
}
}
Requires: "canPrepareForNextRoom" "canTrickyDashJump" |
|
Being prepared and space jumping through the room can prevent a thorn hit. Requires: {
"or": [
"canPrepareForNextRoom",
"h_KraidCameraFix"
]
}
"SpaceJump"
|
|
Requires: {
"or": [
"canPrepareForNextRoom",
{
"enemyDamage": {
"enemy": "Beetom",
"type": "contact",
"hits": 2
}
}
]
}
{
"resetRoom": {
"nodes": [
1
],
"mustStayPut": false
}
}
"h_can10PowerBombCrystalFlash"
|
|
Requires: {
"or": [
"canPrepareForNextRoom",
{
"enemyDamage": {
"enemy": "Beetom",
"type": "contact",
"hits": 2
}
}
]
}
"h_canCrystalFlash"
|
|
From: 1
Left Door
To: 5
Bottom Right Junction
Notable: true 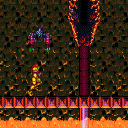
Normalized movement through the room can be used to manipulate the Sm. Dessgeegas and do this strat reliably without heat protection. The following is one way to do this; other approaches may also be possible. Before entering the room, damage down to between 127 and 159 energy, and unequip Speed Booster if it is collected. Position one pixel away from the door in the previous room. Hold angle-down (and optionally dash), enter the door transition, then hold shot while continuing to hold forward, angle-down, and dash. The shot block will be destroyed by the buffered shot. Continue holding right and dash to run under both Sm. Dessgeegas. After running under the second one, stop for a moment to prevent it from scrolling off camera. Morph, roll all the way against the right wall and quickly lay a Power Bomb. Move slightly to the left to avoid being bounced by the Power Bomb explosion. As the Sm. Dessgeega approaches, roll under it to the left to avoid being hit. Roll back to the right to collect its Power Bomb drop (which should be a ground level) and return to where the Power Bomb was laid, in time to perform the Crystal Flash inputs. Entrance condition: {
"comeInRunning": {
"minTiles": 0,
"maxTiles": 0.0625,
"speedBooster": false
}
}
Requires: "canPrepareForNextRoom"
{
"heatFrames": 570
}
"h_can10PowerBombCrystalFlash"
|
|
From: 2
Right Door
To: 5
Bottom Right Junction
Notable: true
A normalized entrance to the room can be used to manipulate the Sm. Dessgeegas and do this strat reliably without heat protection. The following is one way to do this; other approaches may also be possible. Before entering the room, damage down to between 90 and 125 energy. Position one pixel away from the door in the previous room. Enter the door transition (with or without holding dash), then hold dash and left until falling off the platform. Turn around and hold right, landing in the corner. Morph and lay a Power Bomb. Move slightly to the left to avoid being bounced by the Power Bomb explosion. As the Sm. Dessgeega approaches, roll under it to the left to avoid being hit. Roll back to the right to collect its Power Bomb drop (which should be a ground level) and return to where the Power Bomb was laid, in time to perform the Crystal Flash inputs. Entrance condition: {
"comeInRunning": {
"minTiles": 0,
"maxTiles": 0.0625,
"speedBooster": "any"
}
}
Requires: "canPrepareForNextRoom"
{
"heatFrames": 420
}
"h_can10PowerBombCrystalFlash"
|
|
From: 2
Bottom Left Door
To: 1
Top Left Door
Spin jump into the room with at least 1 tile of run speed. Then perform a mid-air Spring Ball jump to reach the ledge above. Entrance condition: {
"comeInJumping": {
"minTiles": 1,
"speedBooster": "any"
}
}
Requires: "HiJump"
"canPrepareForNextRoom"
"canSpringBallJumpMidAir"
{
"heatFrames": 120
}
|
|
From: 2
Bottom Left Door
To: 1
Top Left Door
Spin jump into the room with at least 1 tile of run speed. Perform a lateral mid-air morph into a spring ball jump. Press against the left side of the first moving platform to gain enough height to get on top of it. Entrance condition: {
"comeInJumping": {
"minTiles": 1,
"speedBooster": "any"
}
}
Requires: "canPrepareForNextRoom"
"canLateralMidAirMorph"
"canTrickySpringBallJump"
"canTrickyJump"
{
"heatFrames": 160
}
|
|
Wall jump up the left wall, perform a delayed wall jump on the Fune to reach the door. Requires: "canDelayedWalljump"
"canConsecutiveWalljump"
"canTrickyJump"
"canUseEnemies"
{
"or": [
{
"heatFrames": 190
},
{
"and": [
"canPrepareForNextRoom",
{
"heatFrames": 120
}
]
}
]
}
|
|
Requires: "HiJump"
"SpaceJump"
{
"heatFrames": 120
}
{
"or": [
"canPrepareForNextRoom",
{
"heatFrames": 70
}
]
}
|
|
Requires: "SpaceJump"
{
"heatFrames": 200
}
{
"or": [
"canPrepareForNextRoom",
{
"heatFrames": 100
}
]
}
|
|
Jump through the door transition, and wall jump off the second moving platform to get on top. Entrance condition: {
"comeInJumping": {
"minTiles": 1,
"speedBooster": "any"
}
}
Requires: "canPrepareForNextRoom"
"HiJump"
"canWalljump"
"canTrickyJump"
{
"heatFrames": 260
}
|
|
Spin jump into the room with at least 2 tiles of run speed. Perform a lateral mid-air morph into a spring ball jump. Land on the second moving platform. Entrance condition: {
"comeInJumping": {
"minTiles": 2,
"speedBooster": "any"
}
}
Requires: "canPrepareForNextRoom"
"canLateralMidAirMorph"
"canTrickySpringBallJump"
"canTrickyJump"
{
"heatFrames": 280
}
|
|
From: 3
Bottom Left Door
To: 7
Junction Below Power Bomb Blocks
Avoiding damage from all enemies with just Power Beam is tricky, but doable. Enter the room holding angle to remove momentum and avoid getting hit by the Dessgeega. Requires: "canDodgeWhileShooting" "canTrickyJump" "canPrepareForNextRoom" "canStopOnADime" Clears obstacles: D |
|
From: 6
Top Left Door Spawn At Junction (Above Crumble Blocks)
To: 1
Top Left Door
Requires: "canPrepareForNextRoom" "SpaceJump" |
|
From: 6
Top Left Door Spawn At Junction (Above Crumble Blocks)
To: 1
Top Left Door
Requires: "canPrepareForNextRoom" "canWalljump" |
|
From: 2
Right Door (locked)
To: 2
Right Door (locked)
If entering from the right door with Golden Torizo not yet defeated, come in already morphed, Crystal Flash immediately, then morph and roll under Golden Torizo. Requires: {
"or": [
"canPrepareForNextRoom",
"f_DefeatedGoldenTorizo"
]
}
"h_canHeatedCrystalFlash"
|
|
Requires: "canPrepareForNextRoom"
{
"heatFrames": 40
}
"h_canHeatedCrystalFlash"
Clears obstacles: B |
|
From: 2
Middle Right Door
To: 3
Top Right Door
Jump into Screw Attack Room and spark diagonally once above the center of the door vertically. Or diagonally spark anywhere that is not the bottom of the door in the previous room. Entrance condition: {
"comeInShinecharged": {
"framesRequired": 15
}
}
Requires: "h_canNavigateHeatRooms"
"canMidairShinespark"
"canShinechargeMovement"
"canPrepareForNextRoom"
{
"heatFrames": 250
}
{
"shinespark": {
"frames": 18,
"excessFrames": 4
}
}
Clears obstacles: A |
|
Requires: "h_canNavigateHeatRooms"
{
"heatFrames": 90
}
{
"or": [
{
"obstaclesCleared": [
"B"
]
},
{
"and": [
"ScrewAttack",
{
"or": [
"canPrepareForNextRoom",
{
"heatFrames": 30
}
]
}
]
}
]
}
Clears obstacles: B |
|
Screw Attack Room Temporary Blue Descent and Shinespark Escape Middle Door Part 1 (Expert)
Screw Attack Room
From: 2
Middle Right Door
To: 4
Item
Notable: true 
Store the shinecharge while hitting the door transition to maintain the ability to break blocks. Entrance condition: {
"comeInShinecharging": {
"length": 0,
"openEnd": 1
}
}
Requires: "canTemporaryBlue"
"canPrepareForNextRoom"
{
"heatFrames": 75
}
Clears obstacles: B, C |
|
This expects the more controlled Temporary Blue to fall though the blocks, not storing a shinecharge through the door. Entrance condition: {
"comeInShinecharging": {
"length": 0,
"openEnd": 1
}
}
Requires: "canTemporaryBlue"
"canPrepareForNextRoom"
{
"heatFrames": 75
}
Clears obstacles: B |
|
Moonfall to clip through the Bomb blocks Break spin with Shot or Angle Aim to avoid clipping all the way to the bottom of the room. Entrance condition: {
"comeInWithStoredFallSpeed": {
"fallSpeedInTiles": 1
}
}
Requires: "canPrepareForNextRoom"
"canMoonfall"
{
"or": [
"canWalljump",
"h_canCrouchJumpDownGrab"
]
}
{
"heatFrames": 170
}
|
|
Moonfall to clip through the Bomb blocks to the bottom of the room. Entrance condition: {
"comeInWithStoredFallSpeed": {
"fallSpeedInTiles": 1
}
}
Requires: "canPrepareForNextRoom"
"canMoonfall"
{
"heatFrames": 85
}
|
|
Requires: "h_canNavigateHeatRooms"
"canPrepareForNextRoom"
{
"or": [
"SpaceJump",
"canWalljump",
"canTrickyJump",
"canStationarySpinJump"
]
}
{
"heatFrames": 80
}
Clears obstacles: A |
|
From: 6
Left Door Spawn At Junction
To: 4
Center Floating Platforms Junction
Requires: "h_canNavigateHeatRooms"
"canPrepareForNextRoom"
"SpaceJump"
{
"heatFrames": 500
}
Clears obstacles: A |
|
Requires: "canPrepareForNextRoom"
{
"heatFrames": 40
}
"h_canHeatedCrystalFlash"
|
|
From: 1
Left Door
To: 2
Right Door
Entrance condition: {
"comeInJumping": {
"minTiles": 5,
"speedBooster": "any"
}
}
Requires: "h_canNavigateHeatRooms"
"SpaceJump"
"canPrepareForNextRoom"
{
"heatFrames": 260
}
|
|
From: 3
Bottom Horizontal Door
To: 7
Junction By Lower Alcoons (Left of Spike Pits)
Kill the Alcoon without stopping. Requires: "h_canNavigateHeatRooms"
"canDodgeWhileShooting"
{
"or": [
{
"enemyKill": {
"enemies": [
[
"Alcoon"
]
],
"explicitWeapons": [
"Missile",
"Super",
"Wave+Plasma"
]
}
},
{
"and": [
"canPrepareForNextRoom",
"Charge",
"Wave",
"Spazer"
]
},
{
"and": [
"canPseudoScrew",
{
"heatFrames": 30
}
]
}
]
}
{
"or": [
"canCarefulJump",
{
"heatFrames": 10
}
]
}
{
"heatFrames": 100
}
|
|
From: 1
Bottom Left Door
To: 1
Bottom Left Door
This runway requires killing the Dessgeegas closest to the door, and taking a Multiviola hit if the Multiviola is alive. Requires: {
"heatFrames": 250
}
{
"or": [
{
"obstaclesCleared": [
"E"
]
},
{
"enemyDamage": {
"enemy": "Multiviola",
"type": "contact",
"hits": 1
}
},
{
"and": [
"canPrepareForNextRoom",
{
"or": [
"Plasma",
{
"and": [
"Charge",
{
"or": [
"Wave",
"Spazer"
]
}
]
}
]
}
]
}
]
}
{
"or": [
{
"obstaclesCleared": [
"C"
]
},
{
"and": [
{
"heatFrames": 100
},
{
"enemyKill": {
"enemies": [
[
"Dessgeega",
"Dessgeega",
"Dessgeega"
]
],
"explicitWeapons": [
"ScrewAttack"
]
}
}
]
},
{
"and": [
{
"heatFrames": 350
},
{
"enemyKill": {
"enemies": [
[
"Dessgeega",
"Dessgeega",
"Dessgeega"
]
],
"explicitWeapons": [
"Plasma",
"Super",
"Missile"
]
}
}
]
}
]
}
Exit condition: {
"leaveWithRunway": {
"length": 45,
"openEnd": 1
}
}
|
|
From: 1
Bottom Left Door
To: 1
Bottom Left Door
The Multiviola can be killed by aiming diagonally down when entering the room and shooting a strong enough beam shot (not ice). Requires: {
"or": [
{
"obstaclesCleared": [
"E"
]
},
{
"and": [
"canPrepareForNextRoom",
{
"or": [
"Plasma",
{
"and": [
"Charge",
{
"or": [
"Wave",
"Spazer"
]
}
]
}
]
}
]
}
]
}
{
"heatFrames": 100
}
Exit condition: {
"leaveWithRunway": {
"length": 7,
"openEnd": 1
}
}
|
|
From: 1
Bottom Left Door
To: 8
Left Door Junction After Multiviola
The multiviola will immediately reach Samus at the door when entering the room. By entering the room in a jump and aiming down, there is just enough time to shoot the multiviola. Or by entering the room aiming diagonally down and firing a beam shot. Requires: "canPrepareForNextRoom"
{
"or": [
{
"and": [
"h_canNavigateHeatRooms",
{
"enemyKill": {
"enemies": [
[
"Multiviola"
]
],
"explicitWeapons": [
"PseudoScrew",
"ScrewAttack",
"Missile",
"Super"
]
}
},
{
"heatFrames": 30
}
]
},
{
"and": [
"h_canNavigateHeatRooms",
{
"enemyKill": {
"enemies": [
[
"Multiviola"
]
],
"explicitWeapons": [
"Charge+Ice",
"Ice+Wave",
"Ice+Spazer"
]
}
},
{
"heatFrames": 60
}
]
},
{
"enemyKill": {
"enemies": [
[
"Multiviola"
]
],
"explicitWeapons": [
"Plasma",
"Charge+Spazer",
"Charge+Wave"
]
}
}
]
}
|
|
From: 1
Bottom Left Door
To: 8
Left Door Junction After Multiviola
Entrance condition: {
"comeInShinecharging": {
"length": 0,
"openEnd": 1
}
}
Requires: "canPrepareForNextRoom" |
|
From: 2
Top Right Door
To: 4
Junction Below Bomb Blocks
Notable: true 
Carry Temporary Blue through the top door of Mickey Mouse to break the left side of the bomb blocks. There is a small frame window where Samus can soft unmorph on the crumble blocks and jump again while retaining temporary blue. Entrance condition: {
"comeInWithTemporaryBlue": {}
}
Requires: "h_canNavigateHeatRooms"
{
"obstaclesNotCleared": [
"A"
]
}
"canPrepareForNextRoom"
"canChainTemporaryBlue"
"canInsaneJump"
"canCrumbleJump"
{
"heatFrames": 300
}
Clears obstacles: B |
|
From: 2
Top Right Door
To: 4
Junction Below Bomb Blocks
Carry Temporary Blue through the top door of Mickey Mouse to break the left side of the bomb blocks. Morph while falling through the shot block to bounce on the crumble blocks towards the morph tunnel. Then unmorph near the wall to fall straight down with temporary blue, if needed. Entrance condition: {
"comeInWithTemporaryBlue": {}
}
Requires: "h_canNavigateHeatRooms"
{
"obstaclesNotCleared": [
"A"
]
}
"canPrepareForNextRoom"
"canChainTemporaryBlue"
"h_canUseSpringBall"
{
"heatFrames": 300
}
Clears obstacles: B |
|
From: 2
Top Right Door
To: 6
Bottom Right Corner Junction
Moonfall into the door transition and stay in spin to fall through the top 4 levels of solid tiles. A flatley style turnaround will land between the Bomb and Crumble blocks and can be continued with another Moonfall. Entrance condition: {
"comeInWithStoredFallSpeed": {
"fallSpeedInTiles": 1
}
}
Requires: "canPrepareForNextRoom"
"canMoonfall"
{
"enemyDamage": {
"enemy": "Multiviola",
"type": "contact",
"hits": 1
}
}
{
"or": [
{
"ammo": {
"type": "Missile",
"count": 3
}
},
{
"ammo": {
"type": "Super",
"count": 3
}
},
"Plasma",
"h_heatProof"
]
}
{
"heatFrames": 300
}
|
|
From: 1
Top Left Door
To: 1
Top Left Door
Enter the room aiming diagonally down and quickly use two grapple shots to break the shot blocks. Requires: "canPrepareForNextRoom" "canPreciseGrapple" Exit condition: {
"leaveWithRunway": {
"length": 13,
"openEnd": 0
}
}
|
|
From: 1
Top Left Door
To: 1
Top Left Door
Enter the room aiming diagonally down, with a missile set to auto-deselect. Quickly fire the missile and a beam shot to break both shot blocks and open the full runway. Requires: "canPrepareForNextRoom"
"canAutoCancelWeapon"
{
"ammo": {
"type": "Missile",
"count": 1
}
}
Exit condition: {
"leaveWithRunway": {
"length": 13,
"openEnd": 0
}
}
|
|
From: 4
Top Right Door
To: 4
Top Right Door
Enter the room aiming diagonally down and quickly use two grapple shots to break the shot blocks. Requires: "canPrepareForNextRoom" "canPreciseGrapple" Exit condition: {
"leaveWithRunway": {
"length": 13,
"openEnd": 0
}
}
|
|
From: 4
Top Right Door
To: 4
Top Right Door
Enter the room aiming diagonally down, with a missile set to auto-deselect. Quickly fire the missile and a beam shot to break both shot blocks and open the full runway. Requires: "canPrepareForNextRoom"
"canAutoCancelWeapon"
{
"ammo": {
"type": "Missile",
"count": 1
}
}
Exit condition: {
"leaveWithRunway": {
"length": 13,
"openEnd": 0
}
}
|
|
From: 5
Top Junction Between Doors
To: 7
Junction At Middle Right Door With Bottom KiHunter Cleared
Very quickly move through the room to meet the bottom KiHunter in a position where it is possible to jump over it. Down back through the shot blocks. If coming through the right door, Morphing may be easier. Jump over the KiHunter where it dips while moving left. Additionally, build full run speed before jumping to land all the way next to the door. Requires: "canInsaneJump"
"canDodgeWhileShooting"
"canPrepareForNextRoom"
{
"or": [
"Charge",
"Spazer",
"Plasma",
"Wave"
]
}
"canDownBack"
{
"heatFrames": 420
}
|
|
From: 2
Right Door
To: 4
Junction Above Bomb Block
Enter the room while spacejumping and weave between the pillars. Entrance condition: {
"comeInRunning": {
"minTiles": 4,
"speedBooster": "any"
}
}
Requires: "h_canNavigateHeatRooms"
"SpaceJump"
"Morph"
"canTrickyJump"
"canPrepareForNextRoom"
{
"heatFrames": 270
}
|
|
From: 8
Junction Below Top Right Door
To: 7
Junction Left of Morph Tunnel
Requires: {
"or": [
"canCarefulJump",
{
"hibashiHits": 1
}
]
}
"Morph"
{
"ammo": {
"type": "PowerBomb",
"count": 2
}
}
{
"or": [
{
"heatFrames": 270
},
{
"and": [
"canPrepareForNextRoom",
{
"heatFrames": 240
}
]
}
]
}
|
|
Enter on the left side of the door in order to land on the fish, then Damage Boost to reach the ledge on the right. Entrance condition: {
"comeInNormally": {},
"comesThroughToilet": "no"
}
Requires: "Gravity"
"canHorizontalDamageBoost"
"canPrepareForNextRoom"
{
"enemyDamage": {
"enemy": "Skultera",
"hits": 1,
"type": "contact"
}
}
|
|
From: 4
Top Left Door
To: 5
Platform Junction Near Top Left Door
Notable: true 
Enter on the left side of the door while aiming down and freeze the fish immediately. Entrance condition: {
"comeInNormally": {},
"comesThroughToilet": "no"
}
Requires: "h_canNavigateUnderwater"
"canPrepareForNextRoom"
"canTrickyUseFrozenEnemies"
{
"or": [
{
"and": [
"Wave",
"Plasma"
]
},
{
"and": [
"Plasma",
"Charge"
]
},
{
"and": [
"Wave",
"Spazer",
"Charge"
]
}
]
}
|
|
From: 4
Top Left Door
To: 5
Platform Junction Near Top Left Door
Notable: true 
Morph and unmorph before reaching the transition, and then drift to the ledge. Enter the room as far right as possible. Entrance condition: {
"comeInNormally": {},
"comesThroughToilet": "no"
}
Requires: "canSuitlessMaridia" "h_canResetFallSpeed" "canPrepareForNextRoom" |
|
From: 4
Top Left Door
To: 5
Platform Junction Near Top Left Door
Notable: true 
Wall jump in the room above, on the right wall of the doorway, immdiately before the door transition. Failure will likely result in a soft lock. To get to the ledge: If the room above has normal physics, hold right in this room. If the room above has water physics, shoot to break spin while holding right in this room. Entrance condition: {
"comeInNormally": {},
"comesThroughToilet": "any"
}
Requires: "canSuitlessMaridia" "canPreciseWalljump" "canPrepareForNextRoom" "canMidairWiggle" "canCarefulJump" |
|
Requires Samus to enter in a state that can diagonally spark immediately. Entrance condition: {
"comeInShinecharged": {
"framesRequired": 10
},
"comesThroughToilet": "any"
}
Requires: "h_canNavigateUnderwater"
"canPrepareForNextRoom"
"canMidairShinespark"
{
"shinespark": {
"frames": 3,
"excessFrames": 0
}
}
|
|
Immediately spark after the door transition into the wall just to the right of the top right door. Entrance condition: {
"comeInShinecharged": {
"framesRequired": 10
},
"comesThroughToilet": "any"
}
Requires: "Gravity"
"canPrepareForNextRoom"
"canMidairShinespark"
{
"shinespark": {
"frames": 70,
"excessFrames": 16
}
}
|
|
From: 4
Top Left Door
To: 7
Spawn At Junction Near Top Right Door
Immediately spark after the door transition into the wall just to the right of the top right door. Entrance condition: {
"comeInShinecharged": {
"framesRequired": 10
},
"comesThroughToilet": "any"
}
Requires: "canSuitlessMaridia"
"canPrepareForNextRoom"
"canMidairShinespark"
{
"shinespark": {
"frames": 88,
"excessFrames": 21
}
}
|
|
Entrance condition: {
"comeInShinecharged": {
"framesRequired": 15
},
"comesThroughToilet": "any"
}
Requires: "canSuitlessMaridia"
"canMidairShinespark"
"canPrepareForNextRoom"
{
"shinespark": {
"frames": 67,
"excessFrames": 10
}
}
|
|
Entrance condition: {
"comeInShinecharged": {
"framesRequired": 15
},
"comesThroughToilet": "any"
}
Requires: "Gravity"
"canMidairShinespark"
"canPrepareForNextRoom"
{
"shinespark": {
"frames": 72,
"excessFrames": 6
}
}
|
|
Entrance condition: {
"comeInShinecharged": {
"framesRequired": 20
},
"comesThroughToilet": "any"
}
Requires: "canSuitlessMaridia"
"canMidairShinespark"
"canPrepareForNextRoom"
{
"shinespark": {
"frames": 93,
"excessFrames": 12
}
}
|
|
From: 1
Top Left Sand Entrance
To: 5
Hidden Morph Tunnel Junction
Entrance condition: {
"comeInNormally": {},
"comesThroughToilet": "no"
}
Requires: "Morph"
{
"enemyDamage": {
"enemy": "Bull",
"type": "contact",
"hits": 1
}
}
{
"or": [
"canPrepareForNextRoom",
"canCarefulJump"
]
}
|
|
From: 1
Top Left Sand Entrance
To: 5
Hidden Morph Tunnel Junction
Mid Air Morph before reaching the door transition, and without hitting a wall, in order to drift into the Morph tunnel quickly enough. Entrance condition: {
"comeInNormally": {},
"comesThroughToilet": "any"
}
Requires: "canLateralMidAirMorph"
"canPrepareForNextRoom"
{
"enemyDamage": {
"enemy": "Bull",
"type": "contact",
"hits": 1
}
}
|
|
From: 3
Top Right Sand Entrance
To: 5
Hidden Morph Tunnel Junction
Entrance condition: {
"comeInNormally": {},
"comesThroughToilet": "no"
}
Requires: "Morph"
{
"enemyDamage": {
"enemy": "Bull",
"type": "contact",
"hits": 1
}
}
{
"or": [
"canPrepareForNextRoom",
"canCarefulJump"
]
}
|
|
From: 3
Top Right Sand Entrance
To: 5
Hidden Morph Tunnel Junction
Mid Air Morph before reaching the door transition, and without hitting a wall, in order to drift into the Morph tunnel quickly enough. Entrance condition: {
"comeInNormally": {},
"comesThroughToilet": "any"
}
Requires: "canLateralMidAirMorph"
"canPrepareForNextRoom"
{
"enemyDamage": {
"enemy": "Bull",
"type": "contact",
"hits": 1
}
}
|
|
Requires: "canSuitlessMaridia"
"HiJump"
{
"or": [
"canPlayInSand",
{
"and": [
"canPrepareForNextRoom",
"h_canUseSpringBall"
]
}
]
}
{
"or": [
{
"and": [
{
"or": [
"canWalljump",
"canSpaceJumpWaterEscape"
]
},
{
"or": [
"h_canCrouchJumpDownGrab",
"canSunkenTileWideWallClimb"
]
}
]
},
"canSpringBallJumpMidAir",
{
"and": [
"h_canCrouchJumpDownGrab",
"canBombJumpWaterEscape",
"h_canIBJ"
]
}
]
}
|
|
Perform a double springball jump with the first jump being a bounce on the sand. Requires: "canSuitlessMaridia"
{
"or": [
"canPrepareForNextRoom",
"canPlayInSand"
]
}
"h_canDoubleSpringBallJumpWithHiJump"
|
|
From: 1
Top Sand Entrance
To: 4
Right Item
The shinespark must be performed near the upper ledge, and not inside the sandfall. Entrance condition: {
"comeInShinecharged": {
"framesRequired": 60
},
"comesThroughToilet": "any"
}
Requires: "Gravity"
"Morph"
"canMidairShinespark"
"canShinechargeMovement"
"canPrepareForNextRoom"
{
"shinespark": {
"frames": 18
}
}
|
|
From: 1
Top Sand Entrance
To: 4
Right Item
The shinespark must be performed near the upper ledge, and not inside the sandfall. Entrance condition: {
"comeInShinecharged": {
"framesRequired": 70
},
"comesThroughToilet": "any"
}
Requires: "canSuitlessMaridia"
"Morph"
"canMidairShinespark"
"canShinechargeMovementComplex"
"canPrepareForNextRoom"
{
"shinespark": {
"frames": 18
}
}
|
|
Requires: "h_canNavigateUnderwater"
"canMochtroidIceClimb"
{
"or": [
"Gravity",
"canDodgeWhileShooting",
{
"enemyDamage": {
"enemy": "Mochtroid",
"hits": 2,
"type": "contact"
}
},
"Wave",
"Spazer",
"Plasma",
{
"and": [
"canPrepareForNextRoom",
"Charge"
]
}
]
}
|
|
From: 1
Top Sand Entrance
To: 7
Below Morph Tunnel Junction
Shoot the shot block on the descent then shinespark diagonally up before hitting the sand. Entrance condition: {
"comeInShinecharged": {
"framesRequired": 55
},
"comesThroughToilet": "any"
}
Requires: "h_canNavigateUnderwater"
"canMidairShinespark"
"canShinechargeMovementComplex"
"Wave"
"canPrepareForNextRoom"
{
"shinespark": {
"frames": 17
}
}
|
|
From: 1
Top Sand Entrance
To: 7
Below Morph Tunnel Junction
Break the shot block before reaching the sand and then shinespark up. Samus cannot shinespark after unmorphing until she touches the sand and this can be used to shoot upwards without sparking. A diagonal ShineSpark will most likely not have any horizontal movement when performed from the sand. Entrance condition: {
"comeInShinecharged": {
"framesRequired": 150
},
"comesThroughToilet": "any"
}
Requires: "h_canNavigateUnderwater"
"canPlayInSand"
"canShinechargeMovementTricky"
{
"or": [
"canResetFallSpeed",
{
"and": [
"canPrepareForNextRoom",
"h_canUsePowerBombs"
]
}
]
}
{
"shinespark": {
"frames": 24,
"excessFrames": 5
}
}
|
|
From: 1
Top Sand Entrance
To: 7
Below Morph Tunnel Junction
HiJump with a good jump from the sand can reach the Solid Rock Maze region. Use the sandfall if Samus gets stuck in the sand. Bouncing on the sand as springball can reach the above maze by altering Samus' fall height, like by bouncing under the solid ledge before trying to jump up. Requires: "canSuitlessMaridia"
{
"or": [
"canPrepareForNextRoom",
"canPlayInSand"
]
}
"HiJump"
"h_canMaxHeightSpringBallJump"
|
|
Enter with a high shinespark through the door then shoot the opposite door and fall into it. Entrance condition: {
"comeInWithSpark": {
"position": "top"
}
}
Requires: "canMidairShinespark"
"canPrepareForNextRoom"
{
"shinespark": {
"frames": 20
}
}
|
|
Entrance condition: {
"comeInJumping": {
"speedBooster": "any",
"minTiles": 0.4375
}
}
Requires: "SpaceJump" "canPrepareForNextRoom" |
|
Requires: {
"or": [
{
"and": [
"canDodgeWhileShooting",
{
"enemyKill": {
"enemies": [
[
"Menu",
"Menu"
]
]
}
}
]
},
{
"enemyKill": {
"enemies": [
[
"Menu",
"Menu"
]
],
"explicitWeapons": [
"PowerBomb",
"ScrewAttack",
"Wave",
"Spazer",
"Plasma",
"Missile",
"Super"
]
}
},
{
"and": [
"canPrepareForNextRoom",
{
"enemyKill": {
"enemies": [
[
"Menu",
"Menu"
]
],
"explicitWeapons": [
"PseudoScrew"
]
}
}
]
}
]
}
Clears obstacles: A |
|
To safely avoid the Evir shot, enter in a spin jump from either the far left or far right side of the transition. Requires: "canPrepareForNextRoom"
"canPlayInSand"
"canTrickyJump"
{
"or": [
"Gravity",
"HiJump",
"canInsaneJump"
]
}
|
|
Enter on the right side of the transition and move left to avoid damage. Requires: "canPrepareForNextRoom"
"canPlayInSand"
"canTrickyJump"
{
"or": [
"Gravity",
"HiJump",
"canInsaneJump"
]
}
|
|
Notable: true 
Enter through the far left side of the door. Wait for the top hopper to move right to start running. Run under the right Hopper and jump over the left Hopper to avoid all damage. Jump when Samus reaches the leftmost lump in the ground to avoid the left hopper. It helps to keep the camera scrolled to the right. Entrance condition: {
"comeInNormally": {},
"comesThroughToilet": "no"
}
Requires: "canTrickyJump"
{
"or": [
"canPrepareForNextRoom",
{
"and": [
"canCameraManip",
"canMoonwalk",
"canInsaneJump"
]
}
]
}
|
|
Wait for the top hopper to move right, then jump through the left hopper. The left hopper may be harder to dodge if the camera is scrolled to the left. Requires: "ScrewAttack"
"canCarefulJump"
{
"or": [
"canTrickyJump",
"SpaceJump",
{
"and": [
"canCameraManip",
"canPrepareForNextRoom"
]
},
{
"and": [
"canCameraManip",
"canMoonwalk"
]
}
]
}
|
|
From: 2
Left Door
To: 1
Top Right Door
Notable: true 
Time Samus' movement carefully to roll underneath a Blue Hopper and also race it to the far door. Enter the room in ball mode and let the hoppers jump against the wall a couple of times. After the lower hopper has long enough time between jumps, roll under and run to the door. Requires: "Morph" "canPrepareForNextRoom" "canTrickyJump" |
|
From: 2
Left Door
To: 1
Top Right Door
Notable: true Spin jump into the room with Screw Attack, holding left through the transition to land near the door. Do a turn-around spin jump to the right, bonking the ceiling and overhang and then falling straight down. Then run and spin jump to the right through the Hoppers, to make it to the door without taking damage. Requires: "canPrepareForNextRoom" "ScrewAttack" "canTrickyJump" |
|
From: 2
Left Door
To: 1
Top Right Door
Notable: true Use at least 4 tiles of runway to gain speed, running through the transition. Hold down during and after the transition in order to aim down and squeeze under the Hopper. Then immediately run to the right to make it to the door without taking damage. Entrance condition: {
"comeInRunning": {
"minTiles": 4,
"speedBooster": "any"
}
}
Requires: "canPrepareForNextRoom" "canTwoTileSqueeze" |
|
Jump far enough to land on the first floor pillar. Entrance condition: {
"comeInShinecharging": {
"length": 0,
"openEnd": 0
}
}
Requires: "canPrepareForNextRoom"
{
"or": [
"SpaceJump",
"canCarefulJump"
]
}
|
|
Enter the room in ball mode and let the hoppers jump against the wall a couple of times. Between hops, unmorph and shoot the lower hopper. Roll under the top hopper until it goes off camera to the left. Requires: "Morph"
"canPrepareForNextRoom"
{
"enemyKill": {
"enemies": [
[
"Blue Sidehopper"
]
]
}
}
"canCameraManip"
|
|
Requires: "canPrepareForNextRoom"
{
"or": [
{
"and": [
"ScrewAttack",
"SpaceJump"
]
},
{
"and": [
"Morph",
{
"or": [
"canTrickyJump",
{
"enemyKill": {
"enemies": [
[
"Blue Sidehopper"
]
]
}
}
]
}
]
}
]
}
Exit condition: {
"leaveWithGModeSetup": {}
}
|
|
Use ScrewAttack or a PseudoScrew to prevent Metroids from attaching to Samus. Requires: {
"or": [
{
"and": [
"ScrewAttack",
"canDodgeWhileShooting"
]
},
{
"and": [
"canPseudoScrew",
"canPrepareForNextRoom",
"canDodgeWhileShooting"
]
}
]
}
|
|
Requires: "Ice"
{
"enemyKill": {
"enemies": [
[
"Metroid",
"Metroid",
"Metroid"
]
],
"explicitWeapons": [
"Super",
"Missile"
]
}
}
{
"or": [
"canPrepareForNextRoom",
{
"resetRoom": {
"nodes": [
2
]
}
},
{
"and": [
"h_canUseMorphBombs",
"canDodgeWhileShooting",
"canEscapeEnemyGrab",
{
"metroidFrames": 120
}
]
}
]
}
{
"or": [
"canTrickyJump",
{
"enemyDamage": {
"enemy": "Rinka",
"type": "contact",
"hits": 1
}
}
]
}
Clears obstacles: A |
|
From: 2
Right Door
To: 1
Top Door
Enter shinecharged with a spin-jump. Perform quick ledge-grabs to reach the top of the room and spark out. Entrance condition: {
"comeInShinecharged": {
"framesRequired": 130
}
}
Requires: "canPrepareForNextRoom"
"ScrewAttack"
"HiJump"
"canWalljump"
"canShinechargeMovementTricky"
{
"shinespark": {
"frames": 6
}
}
Exit condition: {
"leaveWithSpark": {}
}
|
|
From: 2
Right Door
To: 1
Top Door
Enter shinecharged with a spin-jump. Perform quick ledge-grabs to reach the top of the room and spark out. Entrance condition: {
"comeInShinecharged": {
"framesRequired": 155
}
}
Requires: "canPrepareForNextRoom"
"canShinechargeMovementTricky"
{
"shinespark": {
"frames": 6
}
}
Exit condition: {
"leaveWithSpark": {}
}
|
|
Entrance condition: {
"comeInShinecharged": {
"framesRequired": 15
}
}
Requires: "canPrepareForNextRoom"
"canShinechargeMovement"
"canMidairShinespark"
{
"shinespark": {
"frames": 57,
"excessFrames": 13
}
}
|