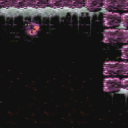
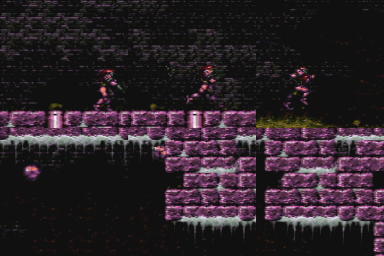
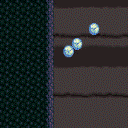
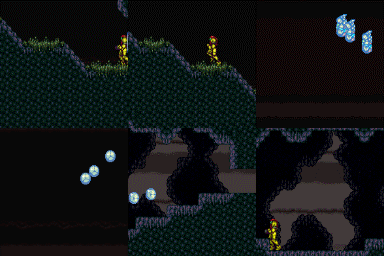
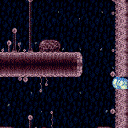
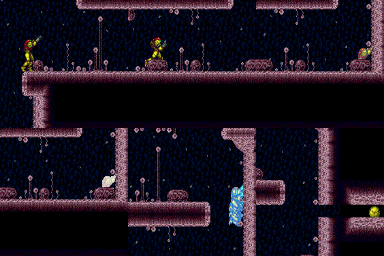
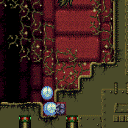
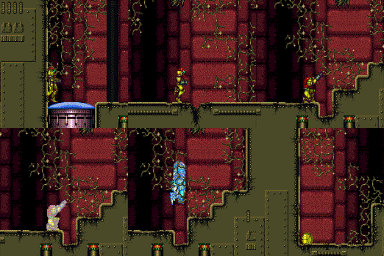
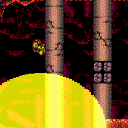
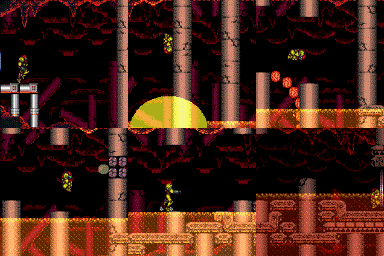
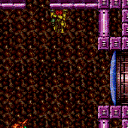
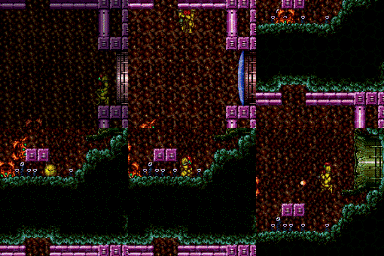
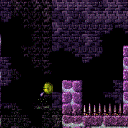
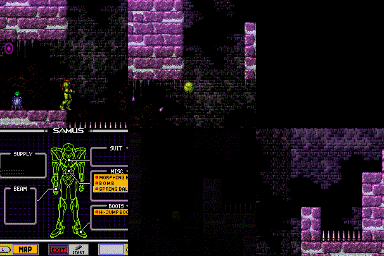
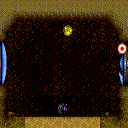
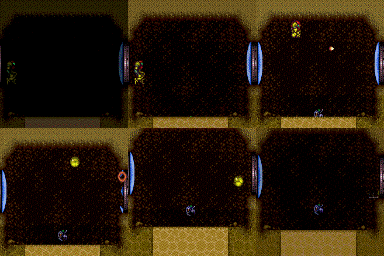
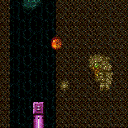
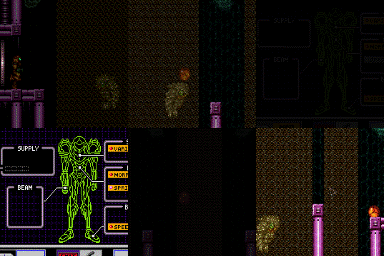
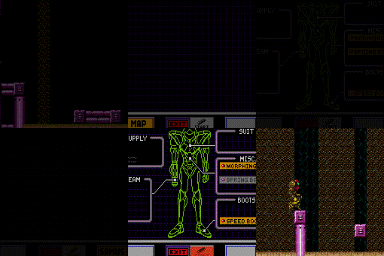
canLateralMidAirMorph (Hard)
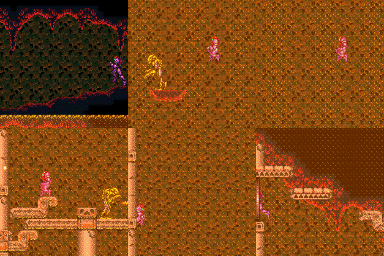
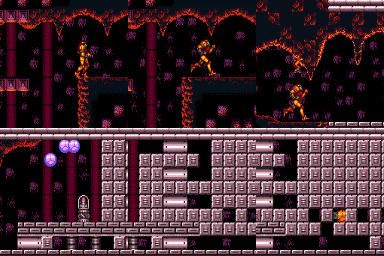
Performing the same input as a mockball, but in mid-air, in order to maintain forward momentum while morphing in mid-air.
Dependencies: canMidAirMorph
Strats ()
|
A Power Bomb can be placed on the ledge above the Gauntlet Bomb blocks to destroy them. Requires: "SpeedBooster"
{
"or": [
"canCarefulJump",
"ScrewAttack",
"canLateralMidAirMorph"
]
}
{
"or": [
{
"obstaclesCleared": [
"A"
]
},
"h_canUsePowerBombs",
"ScrewAttack"
]
}
Clears obstacles: A |
|
From: 3
Top Right Door
To: 1
Top Left Door
Notable: true Use the runway near the Power Bomb room door to jump towards the Gauntlet Entrance room Bomb blocks and break them using the temporary blue effect from SpeedBooster. Using the full runway, a one tap shortcharge where the tap is at the top of the lowest slope, jump and then Morph once Samus begins descending to bounce through all of the Bomb blocks. A controlled release of the jump button works in place of the shortcharge, where the bottom of the thick dark line in the background at the top of the room works as a visual cue. Requires: "canCarefulJump"
"Morph"
"canLateralMidAirMorph"
{
"canShineCharge": {
"usedTiles": 30,
"openEnd": 2
}
}
Clears obstacles: A |
|
From the right door, run and jump while on the dirt mound directly right of the ship. Then SpringBall Jump to reach the Bomb blocks leading to Gauntlet. Requires: "canTrickySpringBallJump"
"canLateralMidAirMorph"
"HiJump"
{
"canShineCharge": {
"usedTiles": 33,
"openEnd": 2
}
}
|
|
From: 2
Right Door
To: 4
Middle Junction (Left of Morph Tunnel)
A quick jump morph from the top of the slope will bounce into the tunnel and avoid acid damage. Entrance condition: {
"comeInShinecharging": {
"length": 4,
"openEnd": 0
}
}
Requires: "canTemporaryBlue"
"canLateralMidAirMorph"
{
"or": [
"canChainTemporaryBlue",
"can4HighMidAirMorph"
]
}
|
|
From: 2
Right Door
To: 4
Middle Junction (Left of Morph Tunnel)
Entrance condition: {
"comeInShinecharging": {
"length": 5,
"openEnd": 0
}
}
Requires: "canTemporaryBlue"
"canLateralMidAirMorph"
{
"acidFrames": 200
}
|
|
Execution of this strat is non-trivial, and failing will lead to falling into the pit. Depending on item loadout, that could be a softlock. Requires: "canDisableEquipment"
"canCarefulJump"
{
"or": [
{
"doorUnlockedAtNode": 2
},
"canTrickyJump",
"canLateralMidAirMorph",
"SpeedBooster"
]
}
|
|
Requires: {
"doorUnlockedAtNode": 2
}
"SpeedBooster"
"canLateralMidAirMorph"
"canCarefulJump"
|
|
Entrance condition: {
"comeInRunning": {
"speedBooster": true,
"minTiles": 15
}
}
Requires: "canTrickyJump" "canLateralMidAirMorph" |
|
Requires: "SpeedBooster" "canTrickyJump" "canLateralMidAirMorph" "can4HighMidAirMorph" |
|
From: 13
Central Junction
To: 7
Right Side - Bottom Middle Door (Behind the Super Block)
Notable: true Requires: "canSpeedball"
"canLateralMidAirMorph"
"canSlowShortCharge"
"canTrickyJump"
{
"canShineCharge": {
"usedTiles": 20,
"openEnd": 2
}
}
"canOffScreenSuperShot"
Clears obstacles: F |
|
From: 13
Central Junction
To: 7
Right Side - Bottom Middle Door (Behind the Super Block)
Notable: true Stop with Temporary Blue in front of the bomb blocks then jump and bounce into the morph tunnel to clear them. Requires: "canTrickyJump"
"canTemporaryBlue"
"canLateralMidAirMorph"
{
"canShineCharge": {
"usedTiles": 22,
"openEnd": 2
}
}
"canOffScreenSuperShot"
Clears obstacles: F |
|
From: 2
Right Door
To: 3
Top Junction
X-Ray climb until Samus is a little over halfway off screen; the position is not precise. Face right, then do a turnaround buffer spin jump into a Spring Ball jump to reach the ledge. The pause input can be pressed at the same time as the turnaround. It helps to do an airball to gain horizontal speed. The jump input after pausing should not be buffered, in order to allow a little time for the spring fling horizontal speed to take effect. Entrance condition: {
"comeInWithDoorStuckSetup": {}
}
Requires: "canXRayClimb" "canTrickyJump" "canLateralMidAirMorph" "canTrickySpringBallJump" "canSpringFling" |
|
A running lateral mid-air morph can squeeze into the hole with good enough timing. Requires: "h_canDestroyBombWalls" "canLateralMidAirMorph" "canTrickyJump" |
|
From: 5
Kihunter Junction
To: 3
Top Right Door
Notable: true A very low horizontal speed is needed to drop down and break the block without hitting the corner to the left or the block above the bomb block. Or with Temporary Blue, Samus can bounce into the bomb block. Requires: "Morph"
{
"obstaclesCleared": [
"C"
]
}
{
"obstaclesNotCleared": [
"D"
]
}
{
"or": [
{
"and": [
"canSlowShortCharge",
"canSpeedball",
{
"canShineCharge": {
"usedTiles": 17,
"openEnd": 0
}
}
]
},
{
"and": [
"canTemporaryBlue",
"canLateralMidAirMorph",
{
"canShineCharge": {
"usedTiles": 32,
"openEnd": 1
}
}
]
}
]
}
Clears obstacles: B |
|
From: 2
Bottom Left Door
To: 3
Right Vertical Door
Entrance condition: {
"comeInShinecharging": {
"length": 3,
"openEnd": 0
}
}
Requires: "canTemporaryBlue" "canLateralMidAirMorph" |
|
Requires: "canLateralMidAirMorph"
"canTrickyJump"
{
"or": [
"canCameraManip",
{
"enemyDamage": {
"enemy": "Cacatac",
"hits": 1,
"type": "contact"
}
}
]
}
|
|
Requires: "canXMode"
"canBounceBall"
"canLateralMidAirMorph"
"canShinechargeMovement"
{
"canShineCharge": {
"usedTiles": 33,
"openEnd": 2
}
}
"h_XModeSpikeHitLeniency"
"h_XModeSpikeHitLeniency"
{
"shinespark": {
"frames": 6
}
}
|
|
Either race the nearby sova to the morph tunnel or wait for the global Sova to come around. Build speed on the lower platform and jump towards the morph tunnel while performing a Midair Morph to reach the Sova in time. Guiding the local Sova around through the shot block again can be faster, but is not expected. Requires: "canNeutralDamageBoost"
"Morph"
{
"enemyDamage": {
"enemy": "Sova",
"hits": 1,
"type": "contact"
}
}
{
"or": [
{
"and": [
"canTrickyJump",
"canLateralMidAirMorph",
{
"heatFrames": 340
}
]
},
{
"heatFrames": 2700
}
]
}
|
|
From: 2
Bottom Left Door
To: 1
Top Left Door
Spin jump into the room with at least 1 tile of run speed. Perform a lateral mid-air morph into a spring ball jump. Press against the left side of the first moving platform to gain enough height to get on top of it. Entrance condition: {
"comeInJumping": {
"minTiles": 1,
"speedBooster": "any"
}
}
Requires: "canPrepareForNextRoom"
"canLateralMidAirMorph"
"canTrickySpringBallJump"
"canTrickyJump"
{
"heatFrames": 160
}
|
|
Spin jump into the room with at least 2 tiles of run speed. Perform a lateral mid-air morph into a spring ball jump. Land on the second moving platform. Entrance condition: {
"comeInJumping": {
"minTiles": 2,
"speedBooster": "any"
}
}
Requires: "canPrepareForNextRoom"
"canLateralMidAirMorph"
"canTrickySpringBallJump"
"canTrickyJump"
{
"heatFrames": 280
}
|
|
Entrance condition: {
"comeInRunning": {
"minTiles": 4,
"speedBooster": true
}
}
Requires: "canSpringFling"
"canLateralMidAirMorph"
"canCarefulJump"
{
"heatFrames": 120
}
|
|
A well-executed lateral mid-air morph can get into the passage without taking a hit. Requires: "canLateralMidAirMorph"
{
"heatFrames": 350
}
|
|
Requires: "canTrickySpringBallJump"
"canTrickyJump"
"canLateralMidAirMorph"
{
"acidFrames": 55
}
|
|
Requires: "canLateralMidAirMorph"
"canTrickySpringBallJump"
{
"acidFrames": 25
}
|
|
Requires: "canLateralMidAirMorph"
"canWalljump"
{
"acidFrames": 35
}
|
|
With a precise enough jump and a quick airball, it's possible to avoid acid damage without a shinespark or wall jump. Requires: "SpeedBooster" "canInsaneJump" "canLateralMidAirMorph" |
|
With SpeedBooster equipped, run from the top left platform and jump into an airball to reach the top right platform. It helps but is not required to moonwalk against the wall to maximize the available runway. Requires: "SpeedBooster" "canTrickyJump" "canLateralMidAirMorph" |
|
From: 1
Left Door
To: 4
Center Platform Junction
Entrance condition: {
"comeInRunning": {
"minTiles": 2,
"speedBooster": "any"
}
}
Requires: "canTrickyJump"
{
"or": [
"canWalljump",
"canLateralMidAirMorph"
]
}
|
|
Requires: "SpeedBooster"
"canTrickyJump"
{
"or": [
"canWalljump",
"canLateralMidAirMorph"
]
}
|
|
From: 3
Junction Left of Green Gate
To: 4
Center Platform Junction
Requires: {
"or": [
"Grapple",
"SpaceJump",
"canResetFallSpeed",
{
"and": [
"canTrickyJump",
"canLateralMidAirMorph"
]
},
{
"and": [
"Gravity",
"canStaggeredWalljump"
]
}
]
}
|
|
From: 4
Center Platform Junction
To: 3
Junction Left of Green Gate
Requires: "canCarefulJump" "canLateralMidAirMorph" "canSpringFling" "SpeedBooster" |
|
From: 4
Center Platform Junction
To: 3
Junction Left of Green Gate
Run and jump at the very edge of the center platform. Wait for the water level to begin lowering to walljump on the far edge. An airball may be a little easier. Requires: "canTrickyJump"
{
"or": [
"canLateralMidAirMorph",
"canInsaneWalljump",
{
"and": [
"SpeedBooster",
"canPreciseWalljump"
]
}
]
}
|
|
From: 4
Right Junction with Speed Blocks Broken
To: 1
Left Door
Requires: "SpeedBooster"
{
"or": [
"HiJump",
{
"and": [
"canLateralMidAirMorph",
"canTrickySpringBallJump"
]
}
]
}
|
|
From: 1
Top Right Door
To: 3
Acid Chozo Statue (locked)
Begin with SpeedBooster unequipped, and run&jump over the acid into an airball. Once Samus begins falling, equip SpringBall and SpeedBooster to safely land on the other side near the statue. Requires: "canSpringFling"
"canDisableEquipment"
"SpeedBooster"
"canTrickyJump"
"canLateralMidAirMorph"
{
"heatFrames": 210
}
|
|
From: 1
Top Right Door
To: 3
Acid Chozo Statue (locked)
There is a hole in the left side wall that Samus can fit into by shrinking her hitbox. Once in the wall, stand up if crouched then turnaround into a buffered spinjump to jump out of the acid. Requires: "h_canNavigateHeatRooms"
"canPartialFloorClip"
"canSuitlessLavaDive"
{
"or": [
{
"and": [
"canLateralMidAirMorph",
"canDownBack",
"canTrickyJump",
{
"acidFrames": 108
}
]
},
{
"and": [
"canTrickyJump",
{
"heatFrames": 30
},
{
"acidFrames": 136
}
]
},
{
"and": [
{
"heatFrames": 90
},
{
"acidFrames": 216
}
]
}
]
}
{
"heatFrames": 285
}
|
|
From: 2
Right Door
To: 3
Bottom Platform Junction
Notable: true Dive into the acid to the left of the first floating platform to quickly sink to the bottom of the room. It is possible to jump directly over the pirate at the bottom of the ramp directly to the gap between platforms. Falling in this way will land between platforms at the bottom of the room unless Samus slows or catches herself on the way down. Requires: "h_canNavigateHeatRooms"
"canSuitlessLavaDive"
{
"or": [
"SpaceJump",
"canTrickyJump",
{
"and": [
"canLateralMidAirMorph",
"canCarefulJump"
]
},
{
"and": [
"ScrewAttack",
"canCarefulJump"
]
},
{
"and": [
"h_heatProof",
{
"enemyKill": {
"enemies": [
[
"Yellow Space Pirate (standing)"
]
]
}
},
"canCarefulJump"
]
}
]
}
{
"heatFrames": 140
}
{
"or": [
"canResetFallSpeed",
"canPreciseWalljump",
{
"and": [
{
"heatFrames": 60
},
{
"acidFrames": 60
}
]
}
]
}
{
"heatFrames": 330
}
{
"acidFrames": 330
}
|
|
Requires: "h_canNavigateHeatRooms"
"HiJump"
{
"or": [
"SpeedBooster",
{
"heatFrames": 90
}
]
}
{
"heatFrames": 270
}
{
"or": [
"canCarefulJump",
"canLateralMidAirMorph",
"ScrewAttack",
{
"and": [
{
"enemyKill": {
"enemies": [
[
"Yellow Space Pirate (standing)"
]
],
"explicitWeapons": [
"Charge+Ice+Wave+Spazer"
]
}
},
{
"heatFrames": 240
}
]
},
{
"and": [
{
"enemyKill": {
"enemies": [
[
"Yellow Space Pirate (standing)"
]
],
"explicitWeapons": [
"Missile",
"Charge+Plasma"
]
}
},
{
"heatFrames": 120
}
]
},
{
"and": [
{
"enemyKill": {
"enemies": [
[
"Yellow Space Pirate (standing)"
]
],
"explicitWeapons": [
"Super"
]
}
},
{
"heatFrames": 60
}
]
}
]
}
|
|
From: 6
Junction By Left Door (Right of Pit)
To: 5
Spring Ball Maze Junction (Past the Bomb Blocks)
Notable: true Jump and Morph with a speedball to enter the morph tunnel and then use SpringBall to break the bomb blocks. Requires: "h_canNavigateHeatRooms"
"h_canUseSpringBall"
"canSpeedball"
"canLateralMidAirMorph"
{
"canShineCharge": {
"usedTiles": 26,
"gentleDownTiles": 2,
"openEnd": 1
}
}
{
"heatFrames": 160
}
Clears obstacles: B |
|
From: 4
Junction Below Bomb Blocks
To: 2
Top Right Door
This is possible by jumping on the crumble blocks into a mid-air spring ball jump, or by avoiding them. The crumbles can be avoided by starting with either an air ball, a 3 tile high mid-air morph, or a low spring wall. These are generally safer, as bouncing on the crumble blocks with Spring Ball is trivial. Requires: {
"obstaclesCleared": [
"A"
]
}
"canTrickySpringBallJump"
{
"heatFrames": 250
}
{
"or": [
{
"and": [
"can4HighMidAirMorph",
"canSpringFling"
]
},
"canLateralMidAirMorph",
"canCrumbleJump",
{
"and": [
"h_canTrickySpringwall",
"canPreciseWalljump"
]
}
]
}
|
|
From: 2
Right Door
To: 1
Left Door
Notable: true Place the PBs next to the pillars in order to only use 2. Avoid acid during the first Power Bomb by walljumping before placing the bomb. Avoiding acid damage at the last jump is tricky but possible. Requires: "Morph"
{
"ammo": {
"type": "PowerBomb",
"count": 2
}
}
"canCarefulJump"
{
"or": [
{
"and": [
"canWallJumpInstantMorph",
{
"heatFrames": 690
}
]
},
{
"and": [
"canWalljump",
{
"heatFrames": 660
},
{
"acidFrames": 36
}
]
},
{
"and": [
"canSuitlessLavaDive",
{
"heatFrames": 840
},
{
"acidFrames": 84
}
]
},
{
"and": [
"Gravity",
{
"heatFrames": 660
},
{
"acidFrames": 24
}
]
}
]
}
{
"or": [
"canInsaneJump",
{
"and": [
"canTrickyJump",
"canLateralMidAirMorph",
{
"heatFrames": 10
},
{
"acidFrames": 10
}
]
},
{
"and": [
"canPreciseWalljump",
{
"heatFrames": 50
},
{
"acidFrames": 32
}
]
},
{
"and": [
"Gravity",
{
"heatFrames": 20
},
{
"acidFrames": 20
}
]
},
{
"and": [
"canSuitlessLavaDive",
{
"heatFrames": 50
},
{
"acidFrames": 50
}
]
}
]
}
{
"or": [
"h_heatResistant",
"canPauseAbuse",
{
"resourceCapacity": [
{
"type": "RegularEnergy",
"count": 149
}
]
}
]
}
|
|
Break spin to leave some blocks intact in order to avoid damage from Puromis. Avoiding acid damage at the last jump is tricky but possible. Requires: "canTrickyJump"
"ScrewAttack"
{
"heatFrames": 530
}
{
"or": [
"canLateralMidAirMorph",
{
"and": [
"canPreciseWalljump",
{
"heatFrames": 20
},
{
"acidFrames": 10
}
]
},
{
"and": [
{
"heatFrames": 20
},
{
"acidFrames": 24
}
]
}
]
}
|
|
From: 2
Middle Left Door
To: 6
Bowling Chozo Statue (locked)
Start with Springball disabled. Jump over the spikes and midair morph. SpringFling on the way down, SpringBall bounce through the spikes, then SpringFling again to reach the statue taking only one spike hit. Entrance condition: {
"comeInRunning": {
"minTiles": 12,
"speedBooster": true
}
}
Requires: "canTrickyJump"
"canSpringFling"
"canLateralMidAirMorph"
"canIframeSpikeJump"
{
"spikeHits": 1
}
|
|
Fling Samus from the first set of grapple blocks to the second set without falling. Requires precise timing. It can help to perform a lateral mid-air morph and unmorph. Requires: "canPreciseGrapple"
"canTrickyJump"
{
"or": [
"canInsaneJump",
{
"and": [
"canLateralMidAirMorph",
{
"thornHits": 5
}
]
}
]
}
|
|
Entrance condition: {
"comeInShinecharging": {
"length": 11,
"openEnd": 1,
"steepDownTiles": 7
}
}
Requires: "canTemporaryBlue" "canLateralMidAirMorph" Clears obstacles: C |
|
Shinecharging up the stairs gives a longer effective runway than shinecharging down them. A frozen Atomic (or Covern) can be used for more runway. Requires: "canTemporaryBlue"
"canLateralMidAirMorph"
{
"or": [
{
"canShineCharge": {
"usedTiles": 11,
"openEnd": 2,
"steepUpTiles": 3
}
},
{
"and": [
"f_DefeatedPhantoon",
"h_canFrozenEnemyRunway",
{
"canShineCharge": {
"usedTiles": 13,
"openEnd": 1,
"steepUpTiles": 3
}
}
]
}
]
}
Clears obstacles: C |
|
From: 2
Bottom Left Door
To: 1
Top Left Doorway
Notable: true Only requires a runway of 6 tiles (with no open end) in the adjacent room. Perform an air ball while against the ceiling to make it up and through the morph tunnel. Use a Cross Room Jump into Water followed by a delayed Momentum Conserving Turnaround to reach the Morph tunnel above. Crossing to the right from the left door requires a more precise turnaround or morph timing which slides along the ceiling. Samus must also stay near a side of the center hole to reach the Morph tunnels. Entrance condition: {
"comeInJumping": {
"speedBooster": false,
"minTiles": 5.4375
}
}
Requires: "canCrossRoomJumpIntoWater" "canLateralMidAirMorph" "canMomentumConservingTurnaround" |
|
From: 2
Bottom Right Door
To: 3
Middle Right Door
Run with enough speed to jump (after the transition) to reach the far left ledge. Either kill or Kago through the Fish enemy. At slightly higher run speeds, Samus can jump from the bottom of the slope and avoid the fish. Entrance condition: {
"comeInRunning": {
"minTiles": 7,
"speedBooster": true
}
}
Requires: "HiJump"
"canCrossRoomJumpIntoWater"
"canTrickyJump"
"canDodgeWhileShooting"
{
"or": [
{
"ammo": {
"type": "Super",
"count": 1
}
},
{
"and": [
"Charge",
"Plasma"
]
},
{
"and": [
"Plasma",
"canHitbox"
]
},
{
"and": [
"canKago",
"canLateralMidAirMorph",
{
"enemyDamage": {
"enemy": "Skultera",
"type": "contact",
"hits": 1
}
}
]
}
]
}
|
|
Run with 7 tiles (no openend) of speed to jump (after the transition) to reach the far left ledge. Either kill or Kago through the Fish enemy. Entrance condition: {
"comeInRunning": {
"minTiles": 6.4375,
"speedBooster": true
}
}
Requires: "canCrossRoomJumpIntoWater"
"canTrickyDashJump"
"canDodgeWhileShooting"
{
"or": [
{
"ammo": {
"type": "Super",
"count": 1
}
},
{
"and": [
"Charge",
"Plasma"
]
},
{
"and": [
"Plasma",
"canHitbox"
]
},
{
"and": [
"canKago",
"canLateralMidAirMorph",
{
"enemyDamage": {
"enemy": "Skultera",
"type": "contact",
"hits": 1
}
}
]
}
]
}
|
|
From: 11
Upper Left Ledge Junction
To: 9
Spawn At Junction Below Top Door
Running does not help. This is most easily done with a late jump at the bottom of the slope. It is a bit less precise with an air ball or turning gravity suit back on and wall jumping on the platform at the end. Requires: "canGravityJump"
{
"or": [
"canTrickyJump",
{
"and": [
"canLateralMidAirMorph",
"canCarefulJump"
]
}
]
}
|
|
Requires: "Gravity"
"canLateralMidAirMorph"
"canCarefulJump"
{
"or": [
"canTrickyJump",
"canSpringBallBounce"
]
}
|
|
Needs max horizontal speed coming from 43 runway tiles in the adjacent room. Jump after the transition. Entrance condition: {
"comeInJumping": {
"speedBooster": true,
"minTiles": 43
}
}
Requires: "canTrickyJump" "canLateralMidAirMorph" "canCrossRoomJumpIntoWater" |
|
From: 1
Left Door
To: 5
Item
Needs a runway of 7 tiles with no open end in the adjacent room, to get enough height. This is a peak of height with speed booster, no hjb, while underwater. Jump before the transition with SpeedBooster off and then SpeedBooster back on after reaching the ceiling and Morphing. Entrance condition: {
"comeInJumping": {
"speedBooster": true,
"minTiles": 6.4375
}
}
Requires: "canLateralMidAirMorph"
"canDisableEquipment"
"canCrossRoomJumpIntoWater"
"canSpringBallBounce"
{
"or": [
{
"enemyDamage": {
"enemy": "Puyo",
"type": "contact",
"hits": 1
}
},
"canInsaneJump",
{
"and": [
"Plasma",
"canTrickyJump"
]
}
]
}
|
|
From: 1
Top Left Sand Entrance
To: 5
Hidden Morph Tunnel Junction
Mid Air Morph before reaching the door transition, and without hitting a wall, in order to drift into the Morph tunnel quickly enough. Entrance condition: {
"comeInNormally": {},
"comesThroughToilet": "any"
}
Requires: "canLateralMidAirMorph"
"canPrepareForNextRoom"
{
"enemyDamage": {
"enemy": "Bull",
"type": "contact",
"hits": 1
}
}
|
|
From: 3
Top Right Sand Entrance
To: 5
Hidden Morph Tunnel Junction
Mid Air Morph before reaching the door transition, and without hitting a wall, in order to drift into the Morph tunnel quickly enough. Entrance condition: {
"comeInNormally": {},
"comesThroughToilet": "any"
}
Requires: "canLateralMidAirMorph"
"canPrepareForNextRoom"
{
"enemyDamage": {
"enemy": "Bull",
"type": "contact",
"hits": 1
}
}
|
|
From: 1
Left Door (locked)
To: 2
Right Door (locked)
Requires an air ball and a runway of only 1 tile in the adjacent room. Aim to morph on contact with the ceiling to slide accross it for extra distance. Entrance condition: {
"comeInJumping": {
"speedBooster": "any",
"minTiles": 1
}
}
Requires: "canCrossRoomJumpIntoWater" "canLateralMidAirMorph" "canTrickyJump" |
|
From: 5
Bottom Middle Junction
To: 4
Top Right Ledge Junction
Notable: true When the Cacatac on the ground fires a spike, perform a springball Jump to break the waterline and then hit the spike for extra height. Requires: "HiJump"
"canSuitlessMaridia"
"canCarefulJump"
"canTrickySpringBallJump"
"canLateralMidAirMorph"
"canNeutralDamageBoost"
{
"enemyDamage": {
"enemy": "Cacatac",
"hits": 2,
"type": "spike"
}
}
|
|
From: 1
Left Door
To: 3
Right Door
Notable: true Build up run speed and jump into the transition to cross this room without touching the water. Shoot open the opposite door upon entering and morph before touching the ceiling to bounce into the open door. Entrance condition: {
"comeInJumping": {
"speedBooster": "any",
"minTiles": 6
}
}
Requires: "Morph" "canTrickyJump" "canLateralMidAirMorph" |
|
From: 1
Left Door
To: 3
Right Door
Notable: true Build up run speed and jump into the transition to cross this room without touching the water. Shoot open the opposite door upon entering and morph before touching the ceiling to bounce into the open door. Entrance condition: {
"comeInJumping": {
"speedBooster": true,
"minTiles": 5
}
}
Requires: "Morph" "canTrickyJump" "canLateralMidAirMorph" |
|
From: 3
Right Door
To: 1
Left Door
Notable: true Build up run speed and jump into the transition to cross this room without touching the water. Shoot open the opposite door upon entering and morph before touching the ceiling to bounce into the open door. Entrance condition: {
"comeInJumping": {
"speedBooster": "any",
"minTiles": 6
}
}
Requires: "Morph" "canTrickyJump" "canLateralMidAirMorph" |
|
From: 3
Right Door
To: 1
Left Door
Notable: true Build up run speed and jump into the transition to cross this room without touching the water. Shoot open the opposite door upon entering and morph before touching the ceiling to bounce into the open door. Entrance condition: {
"comeInJumping": {
"speedBooster": true,
"minTiles": 5
}
}
Requires: "Morph" "canTrickyJump" "canLateralMidAirMorph" |
|
From: 1
Left Door
To: 2
Right Door
Notable: true Enter with enough run speed to jump (after the transition) across the full room using one SpringBall Jump. When exiting the first Sandfall, Samus will be rising still. That is the time to Springball jump. Entrance condition: {
"comeInRunning": {
"minTiles": 10,
"speedBooster": true
}
}
Requires: "canPlayInSand" "canCrossRoomJumpIntoWater" "canLateralMidAirMorph" "canTrickySpringBallJump" "canTrickyJump" |
|
From: 1
Left Door
To: 4
Junction Below Sand Entrance
Requires a runway of 7 tiles (with no open end) in the adjacent room. Jump into an air ball on room entry in order to get to the first pillar. Aim down after the transition to avoid hitting the overhang near the door. Entrance condition: {
"comeInJumping": {
"speedBooster": false,
"minTiles": 6.4375
}
}
Requires: "canCrossRoomJumpIntoWater"
"canPlayInSand"
"canLateralMidAirMorph"
{
"or": [
"canTrickyJump",
{
"and": [
"canCarefulJump",
{
"enemyDamage": {
"enemy": "Evir",
"type": "contact",
"hits": 1
}
}
]
}
]
}
|
|
From: 2
Right Door
To: 1
Left Door
Notable: true Enter with enough run speed to jump (after the transition) across the full room using one SpringBall Jump. When exiting the first Sandfall, Samus will be rising still. That is the time to Springball jump. Alternatively, an immediate pause can be used to SpringBall jump during the first narrow gap between Sandfalls. Sometimes Samus will land above the sand on the far left end of the room, where it will be necessary to unmorph and jump out. Entrance condition: {
"comeInRunning": {
"minTiles": 10,
"speedBooster": true
}
}
Requires: "canPlayInSand" "canCrossRoomJumpIntoWater" "canLateralMidAirMorph" "canTrickySpringBallJump" "canTrickyJump" |
|
Requires a runway of 7 tiles (with no open end) in the adjacent room. Perform an air ball before hitting the ceiling in order to land on the first pillar. Entrance condition: {
"comeInJumping": {
"speedBooster": false,
"minTiles": 6.4375
}
}
Requires: "canLateralMidAirMorph" "canCrossRoomJumpIntoWater" "canPlayInSand" |
|
From: 1
Left Door
To: 5
Left Pillar Junction
Requires a runway of only approximately 0.5 tiles in the adjacent room. Perform an air ball before hitting the ceiling in order to land on the first pillar. Entrance condition: {
"comeInJumping": {
"speedBooster": "any",
"minTiles": 1
}
}
Requires: "canLateralMidAirMorph" "canCrossRoomJumpIntoWater" "HiJump" "canPlayInSand" |
|
From: 1
Left Door
To: 5
Left Pillar Junction
Notable: true Enter with at least 1 tile of run speed from an air room, with Speedbooster unequipped. Jump from near the end of the runway (though a jump from 1-2 tiles away from the end can still work). Press pause while crossing the narrow first sandfall, then perform a lateral mid-air morph after exiting the sandfall. Equip both Spring Ball and Speed Booster, and perform a mid-air Spring Ball jump at somewhere close to the maximum height. Unequip Spring Ball while descending through the wide second sidefall. Entrance condition: {
"comeInRunning": {
"speedBooster": true,
"minTiles": 1
}
}
Requires: "canCrossRoomJumpIntoWater" "canPlayInSand" "canLateralMidAirMorph" "canTrickySpringBallJump" "canSpringFling" |
|
From: 3
Junction (Get Past Metroids, Left to Right)
To: 2
Right Door
Jump from the left platform and mid air morph to bounce through the lava quickly. This is only useful when morphing before reaching the ceiling. Requires: {
"acidFrames": 50
}
"canBounceBall"
"canLateralMidAirMorph"
"can4HighMidAirMorph"
{
"obstaclesCleared": [
"A"
]
}
|
|
From: 4
Junction (Get Past Metroids, Right to Left)
To: 1
Left Door (locked)
Requires: {
"or": [
{
"and": [
"canDelayedWalljump",
{
"acidFrames": 20
}
]
},
{
"and": [
"HiJump",
"canWalljump",
{
"acidFrames": 20
}
]
},
{
"and": [
"Gravity",
{
"acidFrames": 10
}
]
}
]
}
{
"or": [
{
"obstaclesCleared": [
"A"
]
},
"Ice",
"ScrewAttack",
"canMetroidAvoid",
{
"and": [
"canPseudoScrew",
"canTrickyJump"
]
},
{
"metroidFrames": 420
}
]
}
{
"or": [
"canInsaneJump",
{
"and": [
"canTrickyJump",
"canLateralMidAirMorph"
]
},
{
"and": [
"canTrickyJump",
"canPreciseWalljump",
{
"acidFrames": 16
}
]
},
{
"and": [
"Gravity",
{
"acidFrames": 16
}
]
},
{
"acidFrames": 27
}
]
}
|
|
From: 4
Junction (Get Past Metroids, Right to Left)
To: 1
Left Door (locked)
Notable: true Aim the ceiling Rinka to travel horizontally across the top of the room and use it to damage boost between the two floating platforms. Killing the lower Rinka shortly before killing the higher Rinka will synchronize their respawn timers so that Samus can jump when the lower Rinka reappears in order to get a good angle on the higher Rinka. Jump to the floating platform ahead of the high Rinka, jumping extra high to lead the Metroid out of the way if it is alive. Jump into the Rinka once it reaches the left edge of the platform to reach the next platform. Then use I-frames to pass through the Metroid if it is still alive. Requires: {
"enemyDamage": {
"enemy": "Rinka",
"type": "contact",
"hits": 1
}
}
"canTrickyJump"
"canHorizontalDamageBoost"
"canCameraManip"
{
"or": [
{
"obstaclesCleared": [
"A"
]
},
{
"and": [
"canMetroidAvoid",
"canHitbox"
]
}
]
}
{
"or": [
"canInsaneJump",
{
"enemyDamage": {
"enemy": "Rinka",
"type": "contact",
"hits": 1
}
},
{
"and": [
"canTrickyJump",
"canLateralMidAirMorph"
]
},
{
"and": [
"Gravity",
{
"acidFrames": 16
}
]
},
{
"acidFrames": 27
}
]
}
|
