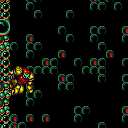
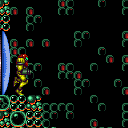
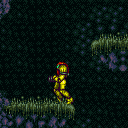
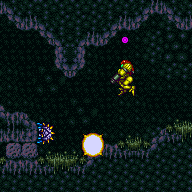
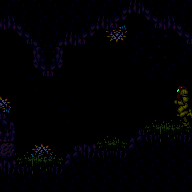
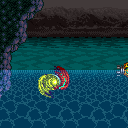
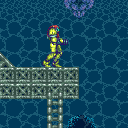
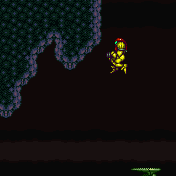
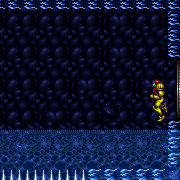
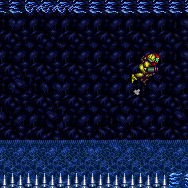
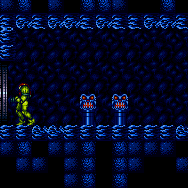
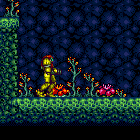
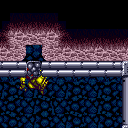
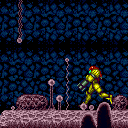
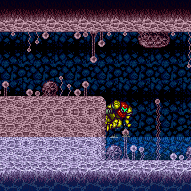
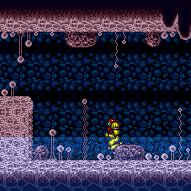
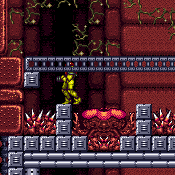
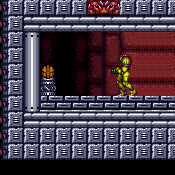
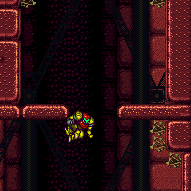
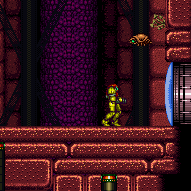
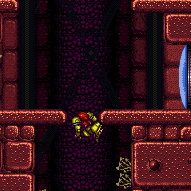
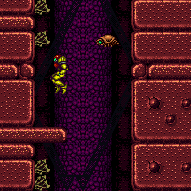
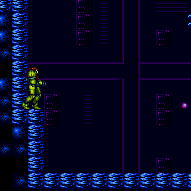
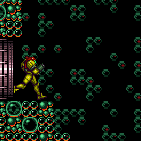
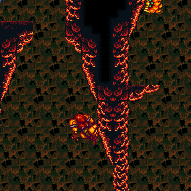
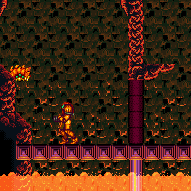
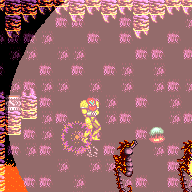
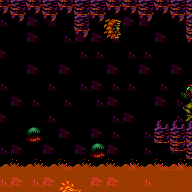
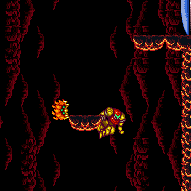
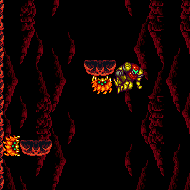
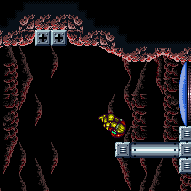
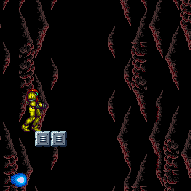
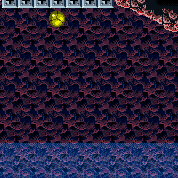
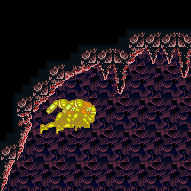
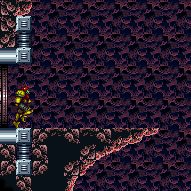
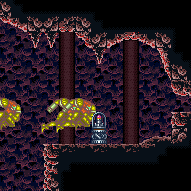
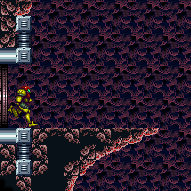
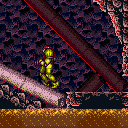
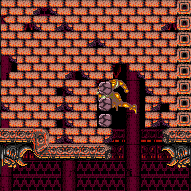
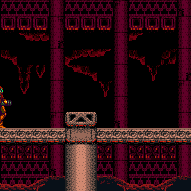
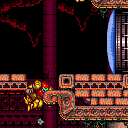
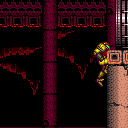
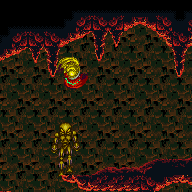
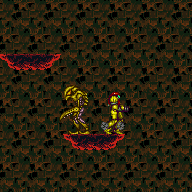
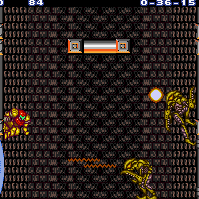
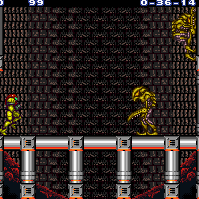
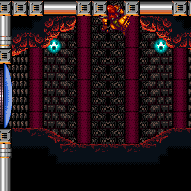
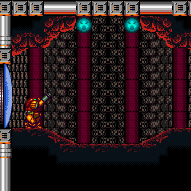
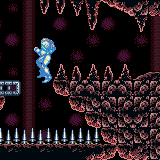
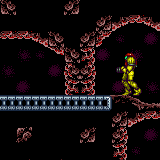
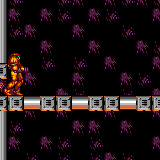
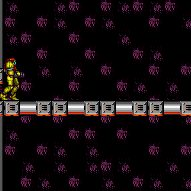
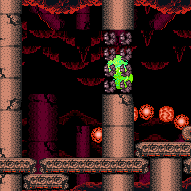
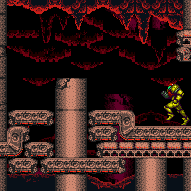
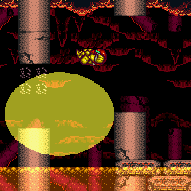
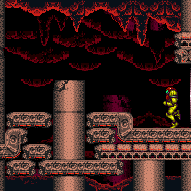
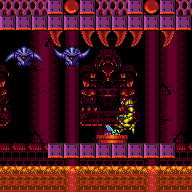
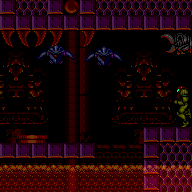
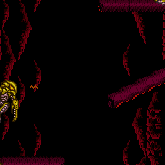
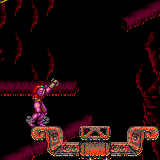
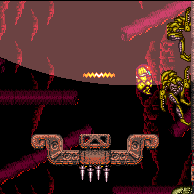
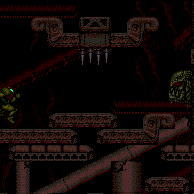
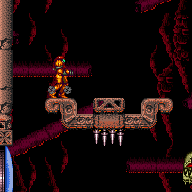
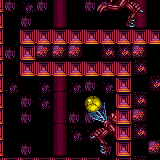
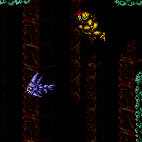
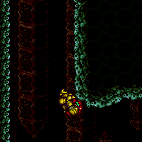
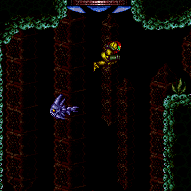
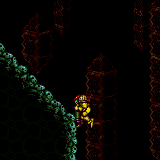
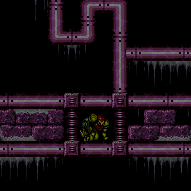
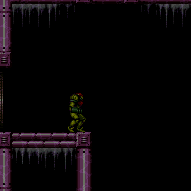
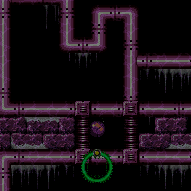
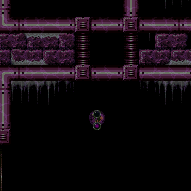
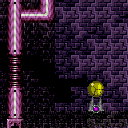
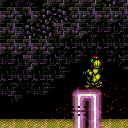
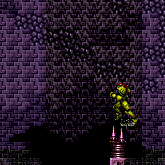
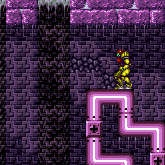
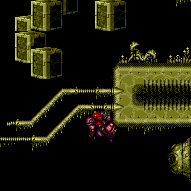
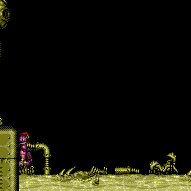
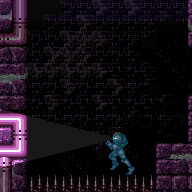
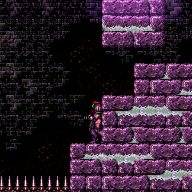
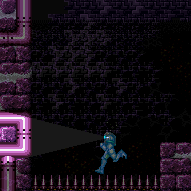
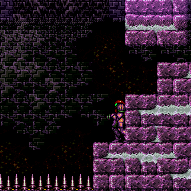
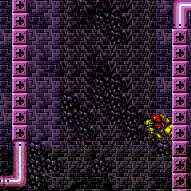
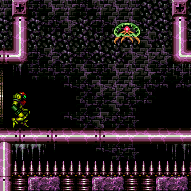
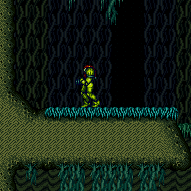
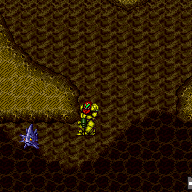
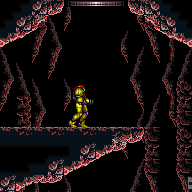
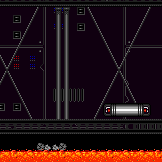
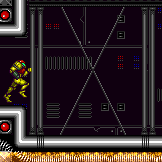
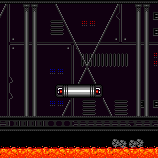
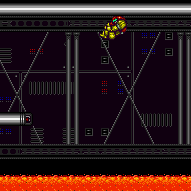
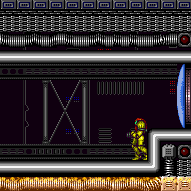
canPreciseWallJump (Medium)
A wall jump that needs to be performed at a fairly precise spot in order to yield the desired result.
Strats ()
From: 4
Top Junction (Right of Spikes)
To: 1
Top Left Door
Requires: "canLongCeilingBombJump"
"canJumpIntoIBJ"
{
"or": [
{
"and": [
"h_useSpringBall",
{
"noBlueSuit": {}
}
]
},
{
"and": [
"canPreciseWallJump",
"canWallJumpInstantMorph"
]
}
]
} |
|
Requires: {
"notable": "Alcatraz Escape"
}
"canPreciseWallJump"
"canWallJumpInstantMorph"
{
"or": [
"HiJump",
"canConsecutiveWallJump"
]
} |
|
Requires: "h_ZebesIsAwake"
{
"cycleFrames": 1860
}
{
"or": [
{
"resetRoom": {
"nodes": [
3,
4,
6,
7
]
}
},
{
"and": [
{
"resetRoom": {
"nodes": [
1
]
}
},
{
"cycleFrames": 420
},
{
"or": [
"ScrewAttack",
"h_useMorphBombs",
{
"and": [
{
"getBlueSpeed": {
"usedTiles": 25,
"steepUpTiles": 3,
"steepDownTiles": 3,
"openEnd": 1
}
},
"canCarefulJump",
"h_blueJump"
]
}
]
}
]
},
{
"and": [
{
"resetRoom": {
"nodes": [
2
]
}
},
{
"cycleFrames": 240
},
"Morph"
]
},
{
"and": [
"Morph",
{
"resetRoom": {
"nodes": [
5
]
}
},
{
"cycleFrames": 420
},
{
"or": [
"h_bombThings",
{
"and": [
"SpaceJump",
"canMidAirMorph",
"canCarefulJump"
]
},
{
"and": [
{
"notable": "Alcatraz Escape"
},
"canPreciseWallJump",
"canConsecutiveWallJump",
"canWallJumpInstantMorph"
]
},
{
"and": [
"canTrickySpringBallJump",
"canTrickyJump"
]
},
{
"and": [
"HiJump",
"canTrickyDashJump",
"canMidAirMorph"
]
}
]
}
]
}
]
}Resets obstacles: R-Mode Farm cycle drops: 11 Geemer (blue) Dev note: A two-way farming strat could be added, e.g. if it is possible to reset the room at both the top-right and the bottom. |
From: 3
Junction (Left side Pit)
To: 2
Right Door
Standing from the rightmost platform, jump to the right of the stalagmite. Perform a midair wiggle to get to the left to the stalagmite, then precisely wall jump off of it. Then perform a frame perfect space jump at the water line to bounce on the water over to the Kamer platform. Requires: {
"notable": "Precise Space Jump Water Escape"
}
"canSpaceJumpWaterBounce"
"canPreciseSpaceJump"
"canPreciseWallJump"
"canInsaneJump"
"canMidairWiggle" |
From: 12
Top Junction
To: 9
Top Hidden Item (Above Trippers)
Jump on the left platforms to get the middle Tripper on screen, luring it to the right. Get on the middle Tripper and use it to jump to the item. This requires a somewhat precise shot and jump, particularly if the top Tripper is in the way. The jump and shot can be easier and done at the apex of a single jump starting with a crouch. Freezing the Trippers can make this much easier. Requires: "canUseEnemies"
{
"or": [
{
"and": [
"canUseFrozenEnemies",
"canPreciseWallJump"
]
},
"canTrickyWallJump",
{
"and": [
"canCameraManip",
"canCarefulJump"
]
}
]
} |
From: 13
Bottom Junction
To: 5
Lower Section - Bottom Right Door
Requires: "Gravity"
"canPreciseWallJump"
"h_shinechargeMaxRunway"
"canShinechargeMovementComplex"
{
"shinespark": {
"frames": 15,
"excessFrames": 0
}
}Exit condition: {
"leaveWithSpark": {}
}Unlocks doors: {"types":["ammo"],"requires":[]} |
|
It's not necessary to jump through the door, the in-room doorsill gives enough running room to make it up. Requires: "canDash"
"canPreciseWallJump"
"canTrickyJump"
{
"or": [
{
"spikeHits": 1
},
"h_backIntoCorner"
]
} |
|
In direct G-mode, the door will not close, and the in-room doorsill gives enough running room to make it up to the invisible ledge. Entrance condition: {
"comeInWithGMode": {
"mode": "direct",
"morphed": false
}
}Requires: "canPreciseWallJump"
"canTrickyJump"
{
"or": [
{
"spikeHits": 1
},
"canMorphTurnaround",
"canMoonwalk",
{
"and": [
"canArtificialMorph",
{
"tech": "canMorphTurnaround"
}
]
}
]
} |
From: 2
Right Door
To: 1
Left Door
Entrance condition: {
"comeInJumping": {
"speedBooster": "any",
"minTiles": 1
}
}Requires: "canTrickyJump" "canPreciseWallJump" |
|
Requires: {
"notable": "Wall Jump to Top Right Door"
}
"canPreciseWallJump" |
|
Use the runway below the bug pipe to gain a shinecharge. Then walljump off the bomb blocks and the bug pipe to approach the door and spark out. Requires: "canPreciseWallJump"
{
"canShineCharge": {
"usedTiles": 17,
"openEnd": 1
}
}
"canShinechargeMovementTricky"
{
"shinespark": {
"frames": 19,
"excessFrames": 0
}
}Exit condition: {
"leaveWithSpark": {}
}Dev note: One tile of runway is considered unusable in order to have space to quickly jump up to the bomb blocks above. It could also be possible to break the bomb blocks, but this doesn't seem very worth considering. |
|
Perform a quick-drop through the Crumble block, and grab the item. During the item message box, buffer the inputs to turn around to the right and jump. Perform a wall jump by briefly releasing and repressing jump (while continuing to hold right) after hitting the respawning crumble block, to clip up through it. Requires: {
"notable": "Mission Impossible"
}
"canQuickDrop"
"HiJump"
"canPreciseWallJump"
{
"obstaclesCleared": [
"A",
"B"
]
}Dev note: This expects that the Sidehoppers are dead. To avoid redundant requirements, they must be killed coming in. |
|
Gravity Suit can use the main runway, while suitless must use the shelf. The entire setup can be done with just the Zeros if you are patient enough (and/or have Gravity). Gravity (only) can also run through just the first thick portion of the speedway to use the the Skulltera and Puyos. Entrance condition: {
"comeInWithRMode": {}
}Requires: {
"or": [
"h_CrystalFlashForReserveEnergy",
{
"and": [
"h_RModeCanRefillReserves",
{
"resourceMissingAtMost": [
{
"type": "PowerBomb",
"count": 0
}
]
},
{
"partialRefill": {
"type": "ReserveEnergy",
"limit": 5
}
}
]
}
]
}
{
"or": [
{
"and": [
"Gravity",
"h_shinechargeMaxRunway"
]
},
{
"and": [
{
"or": [
"SpaceJump",
{
"and": [
"canSuitlessMaridia",
{
"or": [
"canPreciseWallJump",
"canBombJumpWaterEscape",
{
"and": [
"h_useSpringBall",
"canJumpIntoIBJ"
]
},
{
"and": [
"canBePatient",
"canTrickyUseFrozenEnemies",
{
"ammo": {
"type": "Super",
"count": 1
}
}
]
}
]
}
]
}
]
},
{
"canShineCharge": {
"usedTiles": 32,
"openEnd": 1
}
}
]
}
]
}
{
"autoReserveTrigger": {
"maxReserveEnergy": 95
}
}
"canRModeSparkInterrupt"
{
"partialRefill": {
"type": "Energy",
"limit": 25
}
}Clears obstacles: A |
From: 1
Right Door
To: 3
Dry Platform Junction
Requires a precise shinespark end or Gravity to destroy the speedblocks without killing the Skultera Entrance condition: {
"comeInWithRMode": {}
}Requires: "h_RModeCanRefillReserves"
{
"resourceMissingAtMost": [
{
"type": "PowerBomb",
"count": 0
}
]
}
{
"or": [
"Gravity",
{
"and": [
{
"or": [
"canPreciseWallJump",
"SpaceJump",
{
"and": [
"Ice",
{
"ammo": {
"type": "Super",
"count": 1
}
}
]
}
]
},
"canControlShinesparkEnd",
{
"canShineCharge": {
"usedTiles": 31,
"openEnd": 1
}
},
{
"shinespark": {
"frames": 30
}
}
]
}
]
}
{
"canShineCharge": {
"usedTiles": 31,
"openEnd": 1
}
}
"h_RModeKnockbackSpark" |
|
Requires: "canSuitlessMaridia" "canPreciseWallJump" |
From: 3
Dry Platform Junction
To: 3
Dry Platform Junction
Requires: {
"or": [
"SpaceJump",
"canPreciseWallJump",
"canTrickySpringBallJump",
{
"and": [
"h_useSpringBall",
"canIBJ",
{
"tech": "canJumpIntoIBJ"
}
]
}
]
}
{
"canShineCharge": {
"usedTiles": 32,
"openEnd": 1
}
}
{
"or": [
{
"and": [
"h_enemyDrops",
"h_CrystalSparkWithoutLenience"
]
},
"h_CrystalSpark"
]
}Dev note: No lenience, because Power Bombs can be farmed from the Zeros. Only Includes methods to get to 3 quickly. FIXME: With a heated room and the vanilla 5 Energy from small drops, farming would not be possible without Varia, Gravity, or energy free shinesparks. |
|
Use the Solid Blocks next to the Samus Eater to clip up through the Power Bomb Blocks. Carefully jump around the thorns, use HiJump to jump over them, or walk through them using i-frames. Requires: "canCeilingClip"
"canPartialFloorClip"
{
"or": [
{
"and": [
"canCarefulJump",
"HiJump",
"canTwoTileSqueeze",
{
"or": [
"canTrickyJump",
{
"thornHits": 1
}
]
}
]
},
{
"and": [
"canNeutralDamageBoost",
"canUseIFrames",
{
"thornHits": 1
}
]
},
{
"and": [
"canPreciseWallJump",
"canTwoTileSqueeze"
]
}
]
} |
From: 2
Right Door
To: 3
Safe Block in the Middle of the Room
Requires: "HiJump"
"canPreciseWallJump"
"canUseIFrames"
{
"spikeHits": 2
}
{
"or": [
{
"noBlueSuit": {}
},
"canBlueSuitSpikeJump"
]
} |
From: 4
Small Ledge Below Left Door
To: 1
Left Door
Jump up to the left door either by jumping from spikes or with a very precise jump. Cross the room by Jumping atop the spikes. Taking enemy damage can be used to reduce some spike damage. The final jump can either be made by jumping from the bottommost spike stair or from the safe stair. Setup run speed atop the spike stair by holding forward to be pushed backward. The safe stair jump is much harder, but can be made without every pixel of runway. Requires: {
"notable": "Spike Jumps with HiJump"
}
"HiJump"
"canDash"
"canTrickyJump"
{
"or": [
{
"and": [
"canInsaneWallJump",
"canInsaneJump",
"h_backIntoCorner"
]
},
{
"and": [
{
"spikeHits": 1
},
"canHorizontalDamageBoost",
"canPreciseWallJump",
"canUseIFrames"
]
}
]
} |
|
Requires: {
"or": [
"SpaceJump",
{
"and": [
"HiJump",
"canSpeedyJump",
{
"or": [
"canTrickyJump",
"canWallJump"
]
}
]
},
{
"and": [
"HiJump",
"canConsecutiveWallJump",
"canPreciseWallJump"
]
}
]
} |
|
Requires: {
"noBlueSuit": {}
}
"canConsecutiveWallJump"
"h_midAirShootUp"
{
"or": [
"canPreciseWallJump",
"canSpringwall",
"HiJump"
]
}
{
"obstaclesCleared": [
"B"
]
}Dev note: With these tech, it's not hard to get up |
|
Requires: "canDash"
"canPreciseWallJump"
{
"disableEquipment": "SpeedBooster"
}Dev note: With Speed Booster and without canDisableEquipment, the player would use the canTrickyDashJump strat. |
|
Shoot the Skree and shotblock from the door. While avoiding Skree projectiles, jump to the next bubble platform followed by jumping directly up where the shot block used to be. Requires: "canDash"
"canPreciseWallJump"
"canTrickyJump"
{
"heatFrames": 220
} |
From: 2
Left Side - Top Middle Door
To: 1
Left Side - Top Door
Entrance condition: {
"comeInShinecharged": {}
}Requires: {
"shineChargeFrames": 125
}
"HiJump"
"canPreciseWallJump"
"canShinechargeMovementTricky"
{
"shinespark": {
"frames": 18,
"excessFrames": 0
}
}Exit condition: {
"leaveWithSpark": {}
}Unlocks doors: {"types":["super"],"requires":[]}
{"types":["missiles","powerbomb"],"requires":["never"]} |
From: 2
Left Side - Top Middle Door
To: 1
Left Side - Top Door
Entrance condition: {
"comeInShinecharging": {
"length": 2,
"openEnd": 0
}
}Requires: "HiJump"
"canPreciseWallJump"
"canShinechargeMovementTricky"
{
"shineChargeFrames": 160
}Exit condition: {
"leaveShinecharged": {}
}Unlocks doors: {"types":["super"],"requires":[]}
{"types":["missiles","powerbomb"],"requires":["never"]} |
From: 2
Left Side - Top Middle Door
To: 7
Top Right Door
Entrance condition: {
"comeInRunning": {
"speedBooster": "no",
"minTiles": 2.4375
}
}Requires: "canTrickyJump"
"canConsecutiveWallJump"
"canPreciseWallJump"
{
"or": [
"canTrickyWallJump",
"ScrewAttack",
"canWallJumpWithCharge",
{
"and": [
"canWallJumpInstantMorph",
{
"enemyDamage": {
"enemy": "Cacatac",
"type": "spike",
"hits": 1
}
}
]
}
]
} |
|
Requires: "HiJump" "canPreciseWallJump" |
|
Requires: "h_heatProof"
{
"resetRoom": {
"nodes": [
1
]
}
}
{
"or": [
{
"and": [
"HiJump",
"canWallJump",
{
"cycleFrames": 450
}
]
},
{
"and": [
"canPreciseWallJump",
{
"cycleFrames": 600
}
]
},
{
"and": [
"SpaceJump",
{
"cycleFrames": 660
}
]
},
{
"and": [
"h_useSpringBall",
{
"cycleFrames": 650
}
]
},
{
"and": [
"h_useMorphBombs",
{
"cycleFrames": 720
}
]
}
]
}
{
"or": [
{
"and": [
"canDash",
{
"or": [
"Plasma",
"Spazer",
"Wave",
{
"and": [
"Ice",
{
"cycleFrames": 130
}
]
},
{
"and": [
"ScrewAttack",
{
"cycleFrames": 100
}
]
},
{
"and": [
"canPseudoScrew",
{
"cycleFrames": 130
}
]
},
{
"and": [
"canTrickyJump",
{
"cycleFrames": 160
}
]
}
]
}
]
},
{
"and": [
{
"haveBlueSuit": {}
},
{
"cycleFrames": 260
}
]
}
]
}Resets obstacles: R-Mode Farm cycle drops: 2 Sova, 2 Sm. Dessgeega |
|
Requires: {
"or": [
{
"and": [
"canPreciseWallJump",
{
"heatFrames": 150
}
]
},
{
"and": [
"SpaceJump",
{
"heatFrames": 210
}
]
},
{
"and": [
"HiJump",
"canWallJump",
{
"heatFrames": 180
}
]
},
{
"and": [
"HiJump",
"canSpeedyJump",
"canCarefulJump",
{
"heatFrames": 100
}
]
}
]
}
{
"or": [
"canHeroShot",
{
"and": [
{
"heatFrames": 100
},
"h_midAirShootUp"
]
}
]
}
{
"or": [
"canDash",
{
"heatFrames": 20
}
]
} |
From: 4
Bottom Junction (Cleared Runway)
To: 1
Left Door
Kill the enemies, break the shot block, then use the bottom to charge a spark. Quickly climb up before the block respawns, and continue through the left door. Requires: "HiJump"
"canShinechargeMovementComplex"
{
"canShineCharge": {
"usedTiles": 43,
"openEnd": 0
}
}
{
"or": [
"canPreciseWallJump",
"canTrickyJump",
"SpaceJump"
]
}
{
"heatFrames": 540
}
{
"shineChargeFrames": 145
}Exit condition: {
"leaveShinecharged": {}
}Unlocks doors: {"types":["missiles"],"requires":[{"heatFrames":240}]}
{"types":["super"],"requires":[]}
{"types":["powerbomb"],"requires":[{"heatFrames":40}]} |
From: 4
Bottom Junction (Cleared Runway)
To: 1
Left Door
Kill the enemies, then use the bottom to charge a spark. Shoot the shot block from the ground and follow it up so that it breaks, and continue through the left door. Requires: "HiJump"
"canShinechargeMovementComplex"
"canHeroShot"
{
"canShineCharge": {
"usedTiles": 43,
"openEnd": 0
}
}
{
"or": [
"canPreciseWallJump",
"canTrickyJump",
"SpaceJump"
]
}
{
"heatFrames": 310
}
{
"shineChargeFrames": 155
}Exit condition: {
"leaveShinecharged": {}
}Unlocks doors: {"types":["missiles"],"requires":[{"heatFrames":500}]}
{"types":["super"],"requires":[]}
{"types":["powerbomb"],"requires":[{"heatFrames":180}]} |
From: 4
Bottom Junction (Cleared Runway)
To: 1
Left Door
Kill the enemies, break the shotblock, and shinecharge. Quickly climb up before the block respawns. Heat interrupt just before leaving the door. Requires: {
"obstaclesCleared": [
"R-Mode"
]
}
"HiJump"
{
"or": [
"h_heatedCrystalFlashForReserveEnergy",
{
"and": [
"h_heatProof",
"h_RModeCanRefillReserves",
{
"partialRefill": {
"type": "ReserveEnergy",
"limit": 20
}
}
]
}
]
}
{
"canShineCharge": {
"usedTiles": 43,
"openEnd": 0
}
}
{
"or": [
"canPreciseWallJump",
"canInsaneJump",
"SpaceJump"
]
}
{
"or": [
{
"heatFrames": 540
},
{
"and": [
{
"heatFrames": 310
},
"canHeroShot"
]
}
]
}
"h_heatTriggerRModeSparkInterrupt"
{
"heatFrames": 10
}Resets obstacles: R-Mode |
|
Requires: "canShinechargeMovementComplex"
"HiJump"
{
"or": [
"SpaceJump",
{
"and": [
"canPreciseWallJump",
"canTrickyJump"
]
}
]
}
{
"heatFrames": 400
}
{
"canShineCharge": {
"usedTiles": 28,
"gentleUpTiles": 3,
"gentleDownTiles": 3,
"openEnd": 0
}
}
{
"shineChargeFrames": 150
}Exit condition: {
"leaveShinecharged": {}
}Unlocks doors: {"types":["missiles"],"requires":[{"heatFrames":240}]}
{"types":["super"],"requires":[]}
{"types":["powerbomb"],"requires":[{"heatFrames":100}]} |
|
Speedy jump to farm a Fune or Morph over to the Kago. Shinecharge at the bottom left, then jump back up and heat interrupt at the top left door before leaving. Requires: {
"obstaclesCleared": [
"R-Mode"
]
}
"HiJump"
{
"or": [
"SpaceJump",
{
"and": [
"canPreciseWallJump",
"canTrickyJump"
]
}
]
}
{
"or": [
"h_heatedCrystalFlashForReserveEnergy",
{
"and": [
"h_RModeCanRefillReserves",
{
"or": [
{
"and": [
"h_heatProof",
{
"enemyKill": {
"enemies": [
[
"Fune"
],
[
"Fune"
]
]
}
},
{
"resourceMissingAtMost": [
{
"type": "Missile",
"count": 0
}
]
},
{
"partialRefill": {
"type": "ReserveEnergy",
"limit": 20
}
}
]
},
{
"and": [
"Morph",
{
"heatFrames": 560
},
{
"or": [
{
"disableEquipment": "ETank"
},
"h_heatProof"
]
},
{
"partialRefill": {
"type": "ReserveEnergy",
"limit": 100
}
},
{
"heatFrames": 160
}
]
}
]
}
]
}
]
}
{
"heatFrames": 400
}
{
"canShineCharge": {
"usedTiles": 28,
"gentleUpTiles": 3,
"gentleDownTiles": 3,
"openEnd": 0
}
}
"h_heatTriggerRModeSparkInterrupt"
{
"heatFrames": 10
}Resets obstacles: R-Mode |
From: 2
Bottom Left Door
To: 1
Top Left Door
Wall jump up the left wall and then on the moving platform (Kamer) while avoiding the Fune's fireball. The Kamers will temporarily move down if Samus is below them, so it is best to walk under the first Kamer before climbing the wall. Requires: {
"notable": "Walljump Climb Using the Kamer"
}
"HiJump"
"canUseEnemies"
"canPreciseWallJump"
{
"or": [
{
"heatFrames": 360
},
{
"and": [
"canTrickyJump",
{
"heatFrames": 230
}
]
}
]
}
{
"or": [
"canDodgeWhileShooting",
{
"enemyDamage": {
"enemy": "Fune",
"type": "fireball",
"hits": 1
}
},
{
"and": [
"canUseFrozenEnemies",
{
"heatFrames": 70
}
]
},
{
"and": [
{
"ammo": {
"type": "Super",
"count": 1
}
},
{
"heatFrames": 70
}
]
},
{
"and": [
{
"ammo": {
"type": "PowerBomb",
"count": 1
}
},
{
"heatFrames": 90
}
]
}
]
}
{
"or": [
"canDash",
{
"heatFrames": 20
}
]
} |
|
Position Samus into the bottom right corner, using i-frames to run and jump from the crumble blocks, and then wall jump to make it onto the ledge. If using a spike hit to gain i-frames, be sure to be holding forward (left) when landing, in order to get pushed back into the corner. If using the Ripper to gain i-frames, perform a damage boost from a relatively low position, in order to land quickly enough to reach the crumble blocks before i-frames run out. The extra run speed values that work are $2.0, $2.1, $3.0, and $3.1. Values of $2.0 and $3.0 give a lower jump that is only barely high enough, requiring a very precise wall jump to get up. Run speeds $3.0 and $3.1 correspond to jumping as Samus reaches the end of the crumble blocks. Run speeds $2.0 and $2.1 correspond to jumping a little more than a tile before reaching the crumble blocks. With the damage boost method, the Ripper will normally be blocking the path if jumping at speed $2.0 or $2.1; whereas jumping at the end of the crumble blocks (at speeds $3.0 and $3.1) will always works. Requires: {
"notable": "Hijumpless Spike Tricky Dash Jump"
}
{
"or": [
{
"spikeHits": 1
},
{
"and": [
{
"enemyDamage": {
"enemy": "Ripper 2 (green)",
"type": "contact",
"hits": 1
}
},
"canHorizontalDamageBoost",
"canInsaneJump",
{
"heatFrames": 25
}
]
}
]
}
"canUseIFrames"
"canTrickyDashJump"
"canPreciseWallJump"
{
"heatFrames": 260
} |
From: 4
Lava, Left Wall
To: 3
Above Lava Junction
Requires: {
"notable": "HiJumpless Suitless Double Springball Jump"
}
"canSuitlessLavaDive"
"canUseEnemies"
"canDoubleSpringBallJumpMidAir"
"canSpringwall"
"canPreciseWallJump"
{
"heatFrames": 270
}
{
"gravitylessLavaFrames": 240
} |
From: 1
Right Door
To: 1
Right Door
Very quickly cross the room, collecting both items without falling into the lava. A Power Bomb in the middle of the room sets up the Sova drops and adds lag which makes the block item easier to collect with a Flatley jump. Farming the left sova and middle dragon increases the chances of getting enough health drops, but it may still not be possible with poor drop luck. Pause abuse can be useful for reaching the right side drops if the left side's luck was bad. Entrance condition: {
"comeInRunning": {
"speedBooster": "any",
"minTiles": 2
}
}Requires: "canDash"
{
"or": [
"Wave",
"Plasma",
"Spazer",
"canBeVeryPatient"
]
}
{
"enemyKill": {
"enemies": [
[
"Sova",
"Sova",
"Sova",
"Dragon",
"Dragon"
]
],
"explicitWeapons": [
"PowerBomb"
]
}
}
"canMockball"
"canPreciseWallJump"
"canInsaneJump"
"canPauseAbuse"
"canFarmWhileShooting"
"canBePatient"
{
"resourceMissingAtMost": [
{
"type": "Missile",
"count": 0
},
{
"type": "Super",
"count": 0
}
]
}
{
"heatFrames": 392
}
{
"resourceAtMost": [
{
"type": "RegularEnergy",
"count": 1
}
]
}Collects items: 2, 3 Dev note: Not notable because it is safer to collect the items in separate trips. The first OR block is for farming the left sova for more consistency, or resetting to retry the strat multiple times. canBePatient indicates a chance of failure even if everything is performed correctly. |
|
Requires: {
"heatFrames": 70
}
{
"or": [
{
"and": [
{
"or": [
"canPreciseWallJump",
{
"and": [
"HiJump",
"canWallJump"
]
}
]
},
{
"lavaFrames": 30
}
]
},
{
"and": [
"Gravity",
{
"lavaFrames": 20
}
]
}
]
} |
|
Note that the Geemers do much less damage than the Pirates Requires: {
"or": [
{
"enemyDamage": {
"enemy": "Red Space Pirate (standing)",
"type": "contact",
"hits": 3
}
},
{
"and": [
{
"enemyDamage": {
"enemy": "Geemer (grey)",
"type": "contact",
"hits": 3
}
},
{
"or": [
{
"and": [
"canCarefulJump",
"HiJump"
]
},
"canPreciseWallJump",
{
"and": [
"canDodgeWhileShooting",
"SpaceJump"
]
},
"canTrickySpringBallJump",
"canUseIFrames"
]
}
]
}
]
} |
From: 2
Middle Left Door
To: 1
Top Left Door
Entrance condition: {
"comeInShinecharged": {}
}Requires: {
"shineChargeFrames": 125
}
"canShinechargeMovementTricky"
"canPreciseWallJump"Exit condition: {
"leaveShinecharged": {}
}Unlocks doors: {"types":["super"],"requires":[]}
{"types":["missiles","powerbomb"],"requires":["never"]} |
From: 5
Top Right Door
To: 1
Top of the Shaft Left Door
Requires: "canTrickyJump"
{
"or": [
{
"and": [
"HiJump",
{
"heatFrames": 120
}
]
},
{
"and": [
"canPreciseWallJump",
{
"heatFrames": 130
}
]
}
]
}
{
"or": [
"canDash",
{
"heatFrames": 15
}
]
}Unlocks doors: {"types":["missiles"],"requires":[{"heatFrames":30}]}
{"types":["super"],"requires":[]}
{"types":["powerbomb"],"requires":[{"heatFrames":70}]} |
|
Break each of the crumble platforms to group the Sovas at the bottom of the room. Requires: "h_heatProof"
"canDodgeWhileShooting"
{
"or": [
{
"and": [
"canConsecutiveWallJump",
{
"or": [
"canCrumbleJump",
"SpaceJump",
"canPreciseWallJump"
]
},
{
"cycleFrames": 930
}
]
},
{
"and": [
"h_useSpringBall",
{
"cycleFrames": 1200
}
]
},
{
"and": [
"SpaceJump",
{
"cycleFrames": 1320
}
]
},
{
"and": [
"canDoubleBombJump",
"canLongIBJ",
{
"cycleFrames": 2340
}
]
},
{
"and": [
"canJumpIntoIBJ",
"canLongIBJ",
"canBePatient",
{
"cycleFrames": 4640
}
]
}
]
}
{
"or": [
"canCrumbleJump",
{
"cycleFrames": 300
}
]
}
{
"resetRoom": {
"nodes": [
1,
2
]
}
}
{
"or": [
{
"haveBlueSuit": {}
},
"Wave",
"Spazer",
"Plasma",
"Grapple",
{
"cycleFrames": 120
}
]
}
{
"or": [
"canDash",
{
"cycleFrames": 90
}
]
}Resets obstacles: A Farm cycle drops: 6 Sova Dev note: Climb from 2 to 1 if resetting with 2. |
|
Enter with a spin jump, and wall jump up the right side; at the end, walljump off the top-middle crumble platform then off the top-right one. Requires: "canPreciseWallJump"
"canConsecutiveWallJump"
{
"or": [
{
"and": [
"HiJump",
{
"heatFrames": 270
}
]
},
{
"heatFrames": 340
}
]
}
{
"or": [
"canDodgeWhileShooting",
{
"heatFrames": 300
}
]
}
{
"or": [
"canTrickyJump",
{
"heatFrames": 300
}
]
} |
|
If entering from the bottom door, a Sova will be in the way in the top left: either wall jump in place while waiting for it, or wall jump around it using two crumble platforms to the right. Requires: "canConsecutiveWallJump"
{
"or": [
"canDash",
{
"heatFrames": 30
}
]
}
{
"or": [
{
"and": [
"HiJump",
{
"heatFrames": 290
},
{
"or": [
"canCrumbleJump",
{
"heatFrames": 30
}
]
}
]
},
{
"heatFrames": 360
}
]
}
{
"or": [
"ScrewAttack",
{
"haveBlueSuit": {}
},
{
"and": [
"canPreciseWallJump",
"canTrickyJump",
{
"heatFrames": 30
}
]
},
{
"and": [
"canTrickyWallJump",
{
"heatFrames": 80
}
]
},
{
"heatFrames": 330
}
]
}
{
"or": [
"canDodgeWhileShooting",
{
"heatFrames": 300
}
]
} |
|
Requires: {
"obstaclesCleared": [
"A"
]
}
"canPreciseWallJump"
"canTrickyJump"
{
"heatFrames": 210
} |
From: 4
Junction Below Morph Tunnel
To: 2
Middle Right Door
Smoothly jump into the morph tunnel while shooting the first Sova. Unmorph at the end of the tunnel to clear more Sovas as needed. Requires: "canMidAirMorph"
"canTrickyDodgeEnemies"
{
"or": [
"canPreciseWallJump",
"HiJump"
]
}
{
"enemyKill": {
"enemies": [
[
"Sova"
]
],
"explicitWeapons": [
"Wave",
"Spazer",
"Plasma"
]
}
}
"canFarmWhileShooting"
{
"heatFramesWithEnergyDrops": {
"frames": 100,
"drops": [
{
"enemy": "Sova",
"count": 3
}
]
}
}
"canDash"
{
"heatFrames": 120
} |
|
Requires: {
"or": [
{
"resetRoom": {
"nodes": [
2
]
}
},
{
"and": [
{
"resetRoom": {
"nodes": [
1
]
}
},
"canMidAirMorph",
{
"cycleFrames": 330
}
]
}
]
}
"h_heatProof"
{
"or": [
"h_lavaProof",
{
"and": [
"canFarmWhileShooting",
"canPreciseWallJump",
{
"cycleFrames": 15
}
]
},
{
"and": [
"SpaceJump",
{
"cycleFrames": 10
}
]
}
]
}
{
"noBlueSuit": {}
}
"ScrewAttack"
{
"cycleFrames": 125
}Farm cycle drops: 1 Ripper 2 (red) |
|
Requires: {
"or": [
"Grapple",
"canPreciseWallJump"
]
} |
|
Requires: "HiJump"
{
"or": [
"canPreciseWallJump",
"canSpeedyJump"
]
} |
From: 4
Center Platform Junction
To: 3
Junction Left of Green Gate
Run and jump at the very edge of the center platform. Wait for the water level to begin lowering to walljump on the far edge. An airball may be a little easier. Requires: "canDash"
"canTrickyJump"
{
"or": [
"canLateralMidAirMorph",
"canInsaneWallJump",
{
"and": [
"h_speedJump",
"canPreciseWallJump"
]
}
]
} |
From: 1
Left Door
To: 3
Item
Entrance condition: {
"comeInShinecharged": {}
}Requires: {
"shineChargeFrames": 110
}
"canShinechargeMovementComplex"
"canPreciseWallJump"
"canConsecutiveWallJump"
{
"shinespark": {
"frames": 78
}
} |
From: 1
Left Door
To: 3
Item
Entrance condition: {
"comeInShinecharging": {
"length": 9,
"openEnd": 0
}
}Requires: "canShinechargeMovementComplex"
"canPreciseWallJump"
"canConsecutiveWallJump"
{
"shinespark": {
"frames": 78
}
} |
|
A particularly precise springwall. Aim the walljump at the bottom of the second sloped wall fixture, where it looks like you cant jump off of. Optimize pause timing, use an instant morph, and get a max height springball jump. A delayed wall jump helps. Requires: {
"notable": "Springwall"
}
"HiJump"
"h_trickySpringwall"
"canPreciseWallJump"
"can3HighWallMidAirMorph" |
From: 2
Bottom Right Door
To: 3
Acid Chozo Statue
Gain a shinecharge and spark into the wall at the left side of the room to clip into it. From there, X-Ray climb to the top portion of the room (about 0.75 screens). Samus will be visible but off-camera, making the movement tricky. Only certain horizontal positions for the spark will work. There are periodic windows of approximately 4 good pixels followed by 8 bad pixels. Moonwalking back against the ledge below the door will put Samus into a good position. Being centered over this two-tile ledge is another position that works. Entrance condition: {
"comeInShinecharged": {}
}Requires: {
"shineChargeFrames": 35
}
{
"shinespark": {
"frames": 33,
"excessFrames": 0
}
}
"canShinesparkSlopeClip"
"canXRayClimb"
"canOffScreenMovement"
{
"or": [
"canPreciseWallJump",
"SpaceJump",
"HiJump",
"canTrickySpringBallJump"
]
}
{
"heatFrames": 970
} |
From: 2
Bottom Right Door
To: 3
Acid Chozo Statue
Gain a shinecharge and spark into the wall at the left side of the room to clip into it. From there, X-Ray climb to the top portion of the room (about 0.75 screens). Samus will be visible but off-camera, making the movement tricky. Only certain horizontal positions for the spark will work. There are periodic windows of approximately 4 good pixels followed by 8 bad pixels. Moonwalking back against the ledge below the door will put Samus into a good position. Being centered over this two-tile ledge is another position that works. Entrance condition: {
"comeInShinecharging": {
"length": 3,
"openEnd": 1
}
}Requires: {
"shinespark": {
"frames": 33,
"excessFrames": 0
}
}
"canShinesparkSlopeClip"
"canXRayClimb"
"canOffScreenMovement"
{
"or": [
"canPreciseWallJump",
"SpaceJump",
"HiJump",
"canTrickySpringBallJump"
]
}
{
"heatFrames": 970
} |
|
Requires: {
"haveBlueSuit": {}
}
{
"or": [
{
"and": [
"canPreciseWallJump",
{
"heatFrames": 150
}
]
},
{
"and": [
"SpaceJump",
{
"heatFrames": 200
}
]
},
{
"and": [
"HiJump",
"SpaceJump",
{
"heatFrames": 150
}
]
},
{
"and": [
"HiJump",
"canWallJump",
{
"heatFrames": 125
}
]
},
{
"and": [
"HiJump",
"canSpringBallJumpMidAir",
{
"heatFrames": 150
}
]
}
]
} |
|
Requires: "h_usePowerBomb"
{
"or": [
"canTrivialMidAirMorph",
"h_useSpringBall"
]
}
{
"or": [
{
"and": [
"canPreciseWallJump",
{
"heatFrames": 230
}
]
},
{
"and": [
"SpaceJump",
{
"heatFrames": 310
}
]
},
{
"and": [
"HiJump",
"canSpeedyJump",
{
"heatFrames": 320
}
]
},
{
"and": [
"HiJump",
"SpaceJump",
{
"heatFrames": 200
}
]
},
{
"and": [
"HiJump",
"canWallJump",
{
"heatFrames": 200
}
]
},
{
"and": [
"HiJump",
"canSpringBallJumpMidAir",
{
"heatFrames": 340
}
]
}
]
} |
From: 2
Right Door
To: 4
Hidden Right Item
One vertical spark is needed to open up the area directly above. Then, a second horizontal spark is performed where those blocks were cleared. Try to aim for the seam between tiles to break more blocks. And the left side of the opening may be slightly easier. Requires: {
"notable": "Right Item Double Shinespark"
}
{
"or": [
"f_DefeatedGoldenTorizo",
{
"obstaclesCleared": [
"f_DefeatedGoldenTorizo"
]
}
]
}
"canShinechargeMovementComplex"
"canPreciseWallJump"
"canConsecutiveWallJump"
{
"canShineCharge": {
"usedTiles": 28,
"openEnd": 0
}
}
{
"heatFrames": 900
}
{
"shinespark": {
"frames": 12,
"excessFrames": 2
}
} |
|
This is kind of tricky because Screw off a walljump can only break bomb blocks if you change directions before bonking. Requires: "ScrewAttack"
"canPreciseWallJump"
"canMidairWiggle"
{
"heatFrames": 160
}
{
"or": [
"canInsaneJump",
"h_heatProof"
]
} |
From: 7
G-Mode Junction (Bottom of Room)
To: 4
Hidden Right Item
Use the camera scroll blocks below the crumble blocks to overload PLMs and go through the bomb blocks near the right item. A good jumping through them a single time is enough to overload PLMs. This can be done while dodging GT. With a speedy jump, it is possible to overload PLMs and run back to GT before it stands up, get into the safe spot location to get him to jump back, and use the runway again. With shinesparks, diagonally spark into the crumble blocks and hold forward three times, to overload PLMs as much as possible. Note that when GT attacks, it will place stationary invisible projectiles, so it is much more difficult if not getting up quickly. Place a Power Bomb then quickly exit G-mode to quickly clear all of the bomb blocks, otherwise it is possible to get out with a few Bombs or Screw Attack. Requires: "h_heatedGMode"
{
"or": [
{
"or": [
"f_DefeatedGoldenTorizo",
{
"obstaclesCleared": [
"f_DefeatedGoldenTorizo"
]
}
]
},
"canTrickyDodgeEnemies"
]
}
{
"or": [
"SpaceJump",
{
"and": [
"HiJump",
{
"or": [
"canWallJump",
"canSpringBallJumpMidAir",
"canSpeedyJump"
]
}
]
},
{
"and": [
"canSpringBallJumpMidAir",
"canSpeedyJump",
{
"or": [
{
"or": [
"f_DefeatedGoldenTorizo",
{
"obstaclesCleared": [
"f_DefeatedGoldenTorizo"
]
}
]
},
"canInsaneJump"
]
}
]
},
{
"and": [
{
"or": [
"f_DefeatedGoldenTorizo",
{
"obstaclesCleared": [
"f_DefeatedGoldenTorizo"
]
}
]
},
"canTrickyDashJump",
"canWallJump"
]
},
{
"and": [
{
"or": [
"f_DefeatedGoldenTorizo",
{
"obstaclesCleared": [
"f_DefeatedGoldenTorizo"
]
}
]
},
"canPreciseWallJump"
]
},
{
"and": [
{
"or": [
"f_DefeatedGoldenTorizo",
{
"obstaclesCleared": [
"f_DefeatedGoldenTorizo"
]
}
]
},
{
"canShineCharge": {
"usedTiles": 28,
"openEnd": 0
}
},
{
"or": [
{
"and": [
"canSpeedyJump",
{
"shinespark": {
"frames": 7,
"excessFrames": 4
}
}
]
},
{
"shinespark": {
"frames": 30,
"excessFrames": 4
}
}
]
}
]
}
]
}
{
"or": [
{
"and": [
"h_usePowerBomb",
{
"heatFrames": 70
}
]
},
{
"and": [
"h_useMorphBombs",
{
"heatFrames": 250
}
]
},
{
"and": [
"ScrewAttack",
{
"heatFrames": 50
}
]
}
]
} |
|
Requires: {
"obstaclesCleared": [
"A"
]
}
"HiJump"
"canSpeedyJump"
"canPreciseWallJump"
"canCarefulJump"
{
"or": [
"canTrickyJump",
"h_backIntoCorner"
]
}
{
"or": [
"canInsaneJump",
{
"heatFrames": 40
}
]
}
{
"doorUnlockedAtNode": 2
}
{
"heatFrames": 160
}
{
"or": [
"canTrickyJump",
{
"heatFrames": 200
}
]
}Unlocks doors: {"nodeId":2,"types":["missiles"],"requires":[{"heatFrames":50}]}
{"nodeId":2,"types":["super"],"requires":[]}
{"nodeId":2,"types":["powerbomb"],"requires":[{"heatFrames":110}]}Dev note: Without canTrickyJump, this assumes you miss the jump and have to set it up a second time. |
|
Dive into the acid to the left of the first floating platform to quickly sink to the bottom of the room. It is possible to jump directly over the pirate at the bottom of the ramp directly to the gap between platforms. Falling in this way will land between the platforms at the bottom of the room. Requires: {
"notable": "Reverse Acid Dive"
}
{
"obstaclesNotCleared": [
"A"
]
}
"canSuitlessLavaDive"
{
"or": [
"SpaceJump",
"canTrickyJump",
{
"and": [
"canLateralMidAirMorph",
"canCarefulJump"
]
},
{
"and": [
"ScrewAttack",
"canCarefulJump"
]
},
{
"and": [
"h_heatProof",
{
"enemyKill": {
"enemies": [
[
"Yellow Space Pirate (standing)"
]
]
}
},
"canCarefulJump"
]
}
]
}
{
"or": [
{
"and": [
"canDash",
{
"heatFrames": 320
},
{
"acidFrames": 195
}
]
},
{
"and": [
"canPreciseWallJump",
{
"heatFrames": 480
},
{
"acidFrames": 250
}
]
},
{
"and": [
"SpaceJump",
{
"heatFrames": 470
},
{
"acidFrames": 210
}
]
},
{
"and": [
{
"heatFrames": 460
},
{
"acidFrames": 315
}
]
}
]
}Dev note: It is faster to fall all the way to the bottom and then jump onto the platform to the left, than to morph/unmorph to reset fall speed to reach it directly. |
|
Requires: "canDash"
{
"obstaclesCleared": [
"A"
]
}
{
"or": [
"canCarefulJump",
"canPreciseWallJump",
"ScrewAttack",
"canSpringBallJumpMidAir",
"SpaceJump",
{
"enemyDamage": {
"enemy": "Yellow Space Pirate (standing)",
"type": "contact",
"hits": 2
}
}
]
}
{
"heatFrames": 420
} |
|
Requires: "canPreciseWallJump"
"canDash"
{
"or": [
"canTrickyJump",
"ScrewAttack",
{
"enemyDamage": {
"enemy": "Yellow Space Pirate (wall)",
"type": "contact",
"hits": 1
}
}
]
}
{
"heatFrames": 120
} |
|
Requires: {
"or": [
{
"and": [
"canPreciseWallJump",
{
"or": [
"canStationarySpinJump",
{
"heatFrames": 250
}
]
}
]
},
"canSpringBallJumpMidAir",
{
"and": [
"SpaceJump",
{
"heatFrames": 35
}
]
}
]
}
{
"heatFrames": 190
}
{
"or": [
{
"and": [
"h_usePowerBomb",
{
"heatFrames": 50
}
]
},
{
"obstaclesCleared": [
"A"
]
}
]
}Clears obstacles: A Unlocks doors: {"types":["missiles"],"requires":[{"heatFrames":30}]}
{"types":["powerbomb"],"requires":[],"useImplicitRequires":false}Dev note: Destroying the obstacle isn't seen to take extra time for two reasons. 1- It destroys the shot blocks as well which are assumed to be manually destroyed each time since they respawn. 2- Some of the time loss of waiting for the PB is offset by having to setup for the jump up anyway. |
From: 2
Bottom Left Door
To: 2
Bottom Left Door
Requires: {
"or": [
{
"and": [
"canTrickyDodgeEnemies",
{
"resetRoom": {
"nodes": [
1
]
}
},
{
"cycleFrames": 2900
}
]
},
{
"and": [
{
"resetRoom": {
"nodes": [
2
]
}
},
{
"cycleFrames": 1560
}
]
},
{
"and": [
"canTrickyDodgeEnemies",
{
"resetRoom": {
"nodes": [
3
]
}
},
{
"cycleFrames": 2780
}
]
}
]
}
"Morph"
{
"or": [
{
"ammo": {
"type": "PowerBomb",
"count": 1
}
},
"SpringBall",
{
"and": [
"Bombs",
{
"cycleFrames": 60
},
{
"or": [
"canTrickyJump",
{
"and": [
"Ice",
"canDodgeWhileShooting"
]
}
]
}
]
}
]
}
{
"or": [
"SpaceJump",
{
"and": [
"canDash",
"canFarmWhileShooting",
"canHorizontalDamageBoost",
{
"enemyDamage": {
"enemy": "Fireflea",
"type": "contact",
"hits": 2
}
},
{
"or": [
"canPreciseWallJump",
{
"and": [
"HiJump",
"canSpeedyJump"
]
},
{
"and": [
"canJumpIntoIBJ",
{
"cycleFrames": 1000
}
]
}
]
}
]
}
]
}
{
"or": [
"SpaceJump",
"canPreciseWallJump",
{
"and": [
"HiJump",
"canSpeedyJump"
]
}
]
}
{
"or": [
"canDash",
{
"cycleFrames": 500
}
]
}Resets obstacles: A Farm cycle drops: 5 Fireflea |
|
Requires: {
"or": [
{
"and": [
{
"resetRoom": {
"nodes": [
1
]
}
},
"canDodgeWhileShooting",
{
"cycleFrames": 2370
}
]
},
{
"and": [
{
"resetRoom": {
"nodes": [
2
]
}
},
"canMidAirMorph",
{
"or": [
{
"and": [
"canTrickyJump",
{
"cycleFrames": 2000
}
]
},
{
"and": [
{
"or": [
"Grapple",
"SpaceJump"
]
},
{
"cycleFrames": 2200
}
]
}
]
}
]
},
{
"and": [
{
"resetRoom": {
"nodes": [
3
]
}
},
"canDodgeWhileShooting",
{
"cycleFrames": 2250
}
]
}
]
}
"h_usePowerBomb"
"h_usePowerBomb"
{
"or": [
"SpaceJump",
"canPreciseWallJump",
{
"and": [
"HiJump",
"canSpeedyJump"
]
}
]
}
{
"or": [
"canDash",
{
"cycleFrames": 500
}
]
}Clears obstacles: A Farm cycle drops: 2 Fireflea, 5 Fune Dev note: An extra Power Bomb can be used but an extra Fireflea farm is included in that case. |
From: 2
Bottom Left Door
To: 2
Bottom Left Door
Requires: {
"obstaclesCleared": [
"A"
]
}
{
"canShineCharge": {
"usedTiles": 20,
"gentleDownTiles": 2,
"openEnd": 1
}
}
{
"spikeHits": 1
}
{
"or": [
"h_spikeSuitSpikeHitLeniency",
{
"and": [
{
"resourceCapacity": [
{
"type": "PowerBomb",
"count": 1
}
]
},
{
"resetRoom": {
"nodes": [
2
]
}
},
{
"or": [
"SpaceJump",
"HiJump",
"canPreciseWallJump"
]
}
]
}
]
}
"canPatientSpikeSuit"
{
"shinespark": {
"frames": 4,
"excessFrames": 4
}
}Clears obstacles: A |
From: 2
Bottom Left Door
To: 2
Bottom Left Door
Requires: {
"or": [
{
"and": [
"canTrickyDodgeEnemies",
{
"resetRoom": {
"nodes": [
1
]
}
},
{
"cycleFrames": 2480
}
]
},
{
"and": [
{
"resetRoom": {
"nodes": [
2
]
}
},
{
"cycleFrames": 1140
}
]
},
{
"and": [
"canTrickyDodgeEnemies",
{
"resetRoom": {
"nodes": [
3
]
}
},
{
"cycleFrames": 2360
}
]
}
]
}
"Morph"
{
"or": [
{
"ammo": {
"type": "PowerBomb",
"count": 1
}
},
"SpringBall",
{
"and": [
"Bombs",
{
"cycleFrames": 60
},
{
"or": [
"canTrickyJump",
{
"and": [
"Ice",
"canDodgeWhileShooting"
]
}
]
}
]
}
]
}
{
"or": [
"SpaceJump",
"canPreciseWallJump",
{
"and": [
"HiJump",
"canSpeedyJump"
]
}
]
}
{
"or": [
"canDash",
{
"cycleFrames": 500
}
]
}Resets obstacles: A Farm cycle drops: 2 Fireflea |
From: 5
Firefleas Bottom Left Platform Junction
To: 7
Fireflea Statue's Claw Junction
Requires: "canConsecutiveWallJump"
"canPreciseWallJump"
"canCarefulJump"
{
"or": [
"canTrickyJump",
"canResetFallSpeed"
]
} |
From: 4
Junction Below Bomb Blocks
To: 2
Top Right Door
Spin jump off a crumble block with exactly 1 frame of dash speed. That gives just enough height to be able to wall jump out. Requires: {
"notable": "Crumble Tricky Dash Jump"
}
{
"obstaclesCleared": [
"B"
]
}
"canCrumbleJump"
"canTrickyDashJump"
"canPreciseWallJump"
"canInsaneJump"
{
"heatFrames": 180
} |
From: 4
Junction Below Bomb Blocks
To: 2
Top Right Door
This is possible by jumping on the crumble blocks into a mid-air spring ball jump, or by avoiding them. The crumbles can be avoided by starting with either an air ball, a 3 tile high mid-air morph, or a low spring wall. These are generally safer, as bouncing on the crumble blocks with Spring Ball is trivial. Requires: {
"obstaclesCleared": [
"B"
]
}
"canDash"
"canTrickySpringBallJump"
{
"heatFrames": 250
}
{
"or": [
{
"and": [
"can4HighMidAirMorph",
"canSpringFling"
]
},
{
"and": [
"canLateralMidAirMorph",
"canTrickyJump"
]
},
"canCrumbleJump",
{
"and": [
"h_trickySpringwall",
"canPreciseWallJump"
]
}
]
} |
|
Entrance condition: {
"comeInWithGMode": {
"mode": "any",
"morphed": false
}
}Requires: "canDash"
"ScrewAttack"
{
"or": [
"SpaceJump",
"canTrickyGMode",
{
"and": [
"canTrickyJump",
"canPreciseWallJump",
{
"acidFrames": 10
}
]
},
{
"and": [
"canTrickyJump",
{
"acidFrames": 24
}
]
}
]
}
"h_heatedGModeOpenDifferentDoor"Exit condition: {
"leaveNormally": {}
}Unlocks doors: {"types":["missiles"],"requires":[{"heatFrames":50},{"acidFrames":50}]}
{"types":["super"],"requires":[]}
{"types":["powerbomb"],"requires":[{"heatFrames":110},{"acidFrames":110}]} |
|
Break spin to leave some blocks intact in order to avoid damage from Puromis. Avoiding acid damage at the last jump is tricky but possible. Entrance condition: {
"comeInNormally": {}
}Requires: "canDash"
"canTrickyJump"
"ScrewAttack"
{
"heatFrames": 530
}
{
"or": [
"canLateralMidAirMorph",
{
"and": [
"canPreciseWallJump",
{
"heatFrames": 20
},
{
"acidFrames": 10
}
]
},
{
"and": [
{
"heatFrames": 20
},
{
"acidFrames": 24
}
]
}
]
}Unlocks doors: {"types":["missiles"],"requires":[{"heatFrames":50}]}
{"types":["super"],"requires":[]}
{"types":["powerbomb"],"requires":[{"heatFrames":110}]} |
|
Place the PBs next to the pillars in order to only use 2. Avoid acid during the first Power Bomb by walljumping before placing the bomb. Avoiding acid damage at the last jump is tricky but possible. Entrance condition: {
"comeInNormally": {}
}Requires: {
"notable": "Two Power Bombs"
}
"canDash"
"canMidAirMorph"
{
"ammo": {
"type": "PowerBomb",
"count": 2
}
}
"canCarefulJump"
{
"or": [
{
"and": [
"canWallJumpInstantMorph",
{
"heatFrames": 690
}
]
},
{
"and": [
"canWallJump",
{
"heatFrames": 660
},
{
"acidFrames": 36
}
]
},
{
"and": [
"canSuitlessLavaDive",
{
"heatFrames": 840
},
{
"acidFrames": 84
}
]
},
{
"and": [
"Gravity",
{
"heatFrames": 660
},
{
"acidFrames": 24
}
]
}
]
}
{
"or": [
"canInsaneJump",
{
"and": [
"canTrickyJump",
"canLateralMidAirMorph",
{
"heatFrames": 10
},
{
"acidFrames": 10
}
]
},
{
"and": [
"canPreciseWallJump",
{
"heatFrames": 50
},
{
"acidFrames": 32
}
]
},
{
"and": [
"Gravity",
{
"heatFrames": 20
},
{
"acidFrames": 20
}
]
},
{
"and": [
"canSuitlessLavaDive",
{
"heatFrames": 50
},
{
"acidFrames": 50
}
]
}
]
}
{
"or": [
"h_heatResistant",
"canPauseAbuse",
{
"resourceCapacity": [
{
"type": "RegularEnergy",
"count": 149
}
]
}
]
}Unlocks doors: {"types":["missiles"],"requires":[{"heatFrames":30},{"acidFrames":20}]}
{"types":["super"],"requires":[]}
{"types":["powerbomb"],"requires":[{"heatFrames":75},{"acidFrames":58}]}Dev note: With Reserves only, canPauseAbuse is used as a proxy for pause abuse or optimal reserve management and character movement. |
|
Requires: "canDash"
"canTrickyDodgeEnemies"
{
"or": [
"canInsaneJump",
"canPreciseWallJump"
]
}
{
"heatFrames": 310
} |
|
Hit the shot blocks at the top of the room with a Power Bomb or Wave before exiting G-mode to save some heat damage. Kill the pirate while it's in its head turning phase to prevent it from placing any stationary, invisible lasers. Entrance condition: {
"comeInWithGMode": {
"mode": "any",
"morphed": false
}
}Requires: "h_heatedGMode"
{
"or": [
"ScrewAttack",
{
"haveBlueSuit": {}
}
]
}
{
"or": [
"SpaceJump",
{
"and": [
"Charge",
"Plasma",
"canTrickyUseFrozenEnemies",
"HiJump",
{
"or": [
"canWallJump",
"canTrickyDodgeEnemies"
]
}
]
},
{
"and": [
{
"haveBlueSuit": {}
},
{
"or": [
{
"and": [
"HiJump",
"canPreciseWallJump"
]
},
"canSpringwall",
"canLongIBJ"
]
}
]
}
]
}
{
"or": [
"Wave",
"h_usePowerBomb",
{
"heatFrames": 40
}
]
}
{
"or": [
"HiJump",
"canWallJump",
{
"heatFrames": 20
}
]
}
{
"heatFrames": 120
}Clears obstacles: A |
|
It is possible to kill the pirate at the top of the room and use a pause abuse on G-mode exit to collect its drops. This requires getting somewhat lucky, as there is approximately a 70% chance that the pirate will give a large energy drop (small is not enough). To do this, climb the room very quickly, before shots are overloaded - HiJump or wall jumps help, but are not required. It is also possible to wait for the shots to be overloaded and then exit G-mode, pause abuse, and kill the pirate before the pause triggers, but this is generally harder. Entrance condition: {
"comeInWithGMode": {
"mode": "any",
"morphed": false
}
}Requires: {
"or": [
"ScrewAttack",
{
"haveBlueSuit": {}
}
]
}
{
"or": [
"SpaceJump",
{
"and": [
"Charge",
"Plasma",
"canTrickyUseFrozenEnemies",
"HiJump",
{
"or": [
"canWallJump",
"canTrickyDodgeEnemies"
]
}
]
},
{
"and": [
{
"haveBlueSuit": {}
},
{
"or": [
{
"and": [
"HiJump",
"canPreciseWallJump"
]
},
"canSpringwall",
"canLongIBJ"
]
}
]
}
]
}
{
"or": [
"h_heatedGModeOpenDifferentDoor",
{
"and": [
"h_heatedGModePauseAbuse",
"canInsaneJump",
"canComplexGMode"
]
}
]
}Clears obstacles: A |
From: 2
Bottom Left Door
To: 4
Junction Above Bomb Blocks
Requires: {
"haveBlueSuit": {}
}
"HiJump"
"canConsecutiveWallJump"
"canPreciseWallJump"
{
"heatFrames": 185
} |
From: 2
Bottom Left Door
To: 4
Junction Above Bomb Blocks
Use Screw Attack to remove the left wall Pirate and wall jump high enough to place a Power Bomb to destroy the bomb blocks Then wall jump up again to reach the upper region. Requires: "h_usePowerBomb"
"canPreciseWallJump"
"canConsecutiveWallJump"
"canTrivialMidAirMorph"
"HiJump"
"ScrewAttack"
{
"heatFrames": 330
}
{
"or": [
"h_heatResistant",
"canPauseAbuse",
{
"resourceCapacity": [
{
"type": "RegularEnergy",
"count": 149
}
]
}
]
}Clears obstacles: A Dev note: With Reserves only, canPauseAbuse is used as a proxy for pause abuse or optimal reserve management and character movement. |
From: 2
Bottom Left Door
To: 4
Junction Above Bomb Blocks
Deal an exact amount of damage to a wall pirate to freeze it while breaking the bomb blocks with a power bomb without taking damage. Quickly move to the right side and walljump up to the right height to power bomb out the bomb blocks, double hitting the top wall pirate. Wait for the full power bomb effect to end and wall jump once on the right wall and hit top pirate with 1 missile and 1 super. Jump and shoot the top pirate with a charge+ice shot. Hold a charge and walljump up the left wall and freeze the top pirate when it jumps across. Use the pirate to jump to the higher area. Requires: {
"notable": "Low Ice Pirate Freeze"
}
"canTrickyUseFrozenEnemies"
"Charge"
"canPreciseWallJump"
"canWallJumpWithCharge"
"canTrivialMidAirMorph"
"canTrickyDodgeEnemies"
{
"ammo": {
"type": "Missile",
"count": 1
}
}
{
"ammo": {
"type": "Super",
"count": 1
}
}
{
"ammo": {
"type": "PowerBomb",
"count": 1
}
}
{
"heatFrames": 870
}
{
"or": [
"h_heatResistant",
{
"and": [
"canInsaneJump",
"canPauseAbuse"
]
},
{
"resourceCapacity": [
{
"type": "RegularEnergy",
"count": 149
}
]
}
]
}Clears obstacles: A Dev note: With Reserves only, this strat requires much more precise movement and either pause abuse or optimal reserve management. |
From: 2
Bottom Left Door
To: 4
Junction Above Bomb Blocks
Deal an exact amount of damage to a wall pirate to freeze it while breaking the bomb blocks with a power bomb without taking damage. Wait briefly on the left side of the center platform, then jump and shoot 4 missiles at the top pirate. Walljump up the left wall such that the lower pirates are on screen long enough to jump accross to the left. Place a Bomb on the left wall to hit the top pirate when it jumps over, followed by a power bomb. Unmorph precisely below the middle pirate so both top pirates will jump back to the right, and begin charging Ice. Walljump up the left wall with charge held and freeze the top pirate when it jumps over and use it to reach the upper region. Requires: {
"notable": "New Low Ice Pirate Freeze"
}
"canTrickyUseFrozenEnemies"
"Charge"
"canPreciseWallJump"
"canResetFallSpeed"
"canWallJumpWithCharge"
"h_useMorphBombs"
"canWallJumpInstantMorph"
"canTrickyDodgeEnemies"
{
"ammo": {
"type": "Missile",
"count": 4
}
}
{
"ammo": {
"type": "PowerBomb",
"count": 1
}
}
{
"heatFrames": 900
}
{
"or": [
"h_heatResistant",
{
"and": [
"canInsaneJump",
"canPauseAbuse"
]
},
{
"resourceCapacity": [
{
"type": "RegularEnergy",
"count": 149
}
]
}
]
}Clears obstacles: A Dev note: With Reserves only, this strat requires much more precise movement and either pause abuse or optimal reserve management. |
From: 2
Bottom Left Door
To: 4
Junction Above Bomb Blocks
Jump with some run speed to place the power bomb high enough to break the bomb blocks. During the explosion, jump through the left wall pirate and precisely walljump to reach the upper area. Requires: {
"notable": "New Route with HiJump, Speed, and PowerBombs"
}
"HiJump"
"canSpeedyJump"
"canPreciseWallJump"
"canTrickyDodgeEnemies"
"h_usePowerBomb"
"canTrivialMidAirMorph"
"canHitbox"
{
"heatFrames": 360
}
{
"or": [
"h_heatResistant",
"canPauseAbuse",
{
"resourceCapacity": [
{
"type": "RegularEnergy",
"count": 149
}
]
}
]
}Clears obstacles: A Dev note: With Reserves only, canPauseAbuse is used as a proxy for pause abuse or optimal reserve management and character movement. |
From: 2
Bottom Left Door
To: 4
Junction Above Bomb Blocks
Avoid the bottom Pirates and jump high enough to break the bomb blocks with a power bomb. During the explosion, climb the right wall passing through any Pirates and use a movement item to reach the top. Requires: {
"notable": "Power Bombs and a Jump Assist"
}
"canDash"
"canHitbox"
"h_usePowerBomb"
"canTrivialMidAirMorph"
{
"or": [
{
"and": [
"SpaceJump",
"canPreciseWallJump",
{
"heatFrames": 490
}
]
},
{
"and": [
"HiJump",
"canSpeedyJump",
"SpaceJump",
{
"heatFrames": 420
}
]
},
{
"and": [
"canSpringwall",
{
"heatFrames": 490
}
]
},
{
"and": [
"HiJump",
"canPreciseWallJump",
"canInsaneJump",
{
"heatFrames": 470
}
]
},
{
"and": [
"HiJump",
"canSpeedyJump",
"canTrickySpringBallJump",
"canInsaneJump",
{
"heatFrames": 410
}
]
},
{
"and": [
"HiJump",
"SpaceJump",
"canInsaneJump",
{
"heatFrames": 600
}
]
}
]
}
{
"or": [
"h_heatResistant",
"canPauseAbuse",
{
"resourceCapacity": [
{
"type": "RegularEnergy",
"count": 149
}
]
}
]
}Clears obstacles: A Dev note: With Reserves only, canPauseAbuse is used as a proxy for pause abuse or optimal reserve management and character movement. |
From: 6
Bottom Platform Junction With Pirates Killed
To: 4
Junction Above Bomb Blocks
Requires: "HiJump"
"canPreciseWallJump"
"canConsecutiveWallJump"
{
"heatFrames": 180
}
{
"or": [
"canTrickyWallJump",
{
"heatFrames": 300
}
]
}
{
"or": [
{
"obstaclesCleared": [
"A"
]
},
{
"haveBlueSuit": {}
}
]
}Clears obstacles: A |
From: 4
Junction Above Bomb Block
To: 1
Top Left Door
Read the movements of the Kihunters and jump over or roll under them as appropriate. Changing platforms is the hardest part: jumping extra high and morphing works sometimes, other times jump short and roll under. Requires: {
"notable": "Dodge Going Up"
}
"canDash"
"canInsaneJump"
{
"or": [
{
"and": [
"canWallJumpInstantMorph",
"canPreciseWallJump"
]
},
{
"and": [
"canSpeedyJump",
"HiJump",
"canMidAirMorph"
]
}
]
}
{
"heatFrames": 540
}Clears obstacles: A, B |
From: 5
G-Mode Morph Junction (Above Bomb Block)
To: 1
Top Left Door
Dodge the Kihunters then shoot the shot blocks and escape. Requires: "h_heatedGMode"
{
"notable": "Dodge Going Up"
}
"h_navigateHeatRooms"
"canInsaneJump"
{
"or": [
{
"and": [
"canWallJumpInstantMorph",
"canPreciseWallJump"
]
},
{
"and": [
"canSpeedyJump",
"HiJump",
"canMidAirMorph"
]
}
]
}
{
"heatFrames": 220
} |
|
Press pause, wall jump from about halfway down the wall, disable Gravity, then wall jump off the floating platform. Requires: "canPreciseWallJump" "canGravityJump" "canTrickyJump" |
|
Wall jump from a few tiles below the ledge, then wall jump off the floating platform. Requires: "Gravity" "HiJump" "canPreciseWallJump" |
|
Wall jump in the room above, on the right wall of the doorway, immediately before the door transition. To get to the ledge: If the room above has normal physics, hold right in this room. If the room above has water physics, shoot to break spin while holding right in this room. Wall jumping expands Samus' hitbox vertically, making it possible to trigger the door transition with upward momentum. Failing this trick will likely result in a soft lock. Entrance condition: {
"comeInNormally": {},
"comesThroughToilet": "no"
}Requires: {
"notable": "Wall Jump Entry"
}
"canSuitlessMaridia"
"canPreciseWallJump"
"canPrepareForNextRoom"
"canMidairWiggle"
"canCarefulJump"Dev note: Strat starts before entering this transition. FIXME: The midair wiggle is only needed if the room above has water physics. That's not something in the logic for vertical doors currently. Also if the room above is heated, these may require some heat frames to set up. |
From: 4
Top Left Door
To: 5
Platform Junction Near Top Left Door
Wall jump in the room above, on the left wall of the doorway, immediately before the door transition. If entering from an air room above, simply hold right and jump to reach the ledge. If entering from a water room above, release jump (while still holding right) when Samus is about to reach the ledge, to reduce Samus' hitbox vertically by changing her pose from wall jumping to spin jumping. Wall jumping expands Samus' hitbox vertically, making it possible to trigger the door transition with upward momentum. Even though the wall jumping and spin jumping animations look the same, their hitbox is drastically different. Passing through the Toilet centers Samus horizontally in the doorway. Failing this trick will likely result in a soft lock. Entrance condition: {
"comeInNormally": {},
"comesThroughToilet": "yes"
}Requires: {
"notable": "Wall Jump Entry"
}
"canSuitlessMaridia"
"canPreciseWallJump"
"canPrepareForNextRoom"
"canTrickyJump"Dev note: Strat starts before entering this transition. |
|
Requires: "Gravity"
{
"or": [
{
"and": [
"HiJump",
"canWallJump"
]
},
{
"and": [
"canPreciseWallJump",
"canConsecutiveWallJump"
]
},
"SpaceJump",
"canUseFrozenEnemies"
]
} |
From: 6
Middle Junction Near Top Left Pirate
To: 6
Middle Junction Near Top Left Pirate
Requires: "Gravity"
{
"or": [
{
"and": [
{
"resetRoom": {
"nodes": [
3
]
}
},
{
"cycleFrames": 950
}
]
},
{
"and": [
{
"resetRoom": {
"nodes": [
2
]
}
},
{
"cycleFrames": 1260
}
]
},
{
"and": [
{
"resetRoom": {
"nodes": [
4
]
}
},
"canPreciseWallJump",
{
"cycleFrames": 1440
}
]
},
{
"and": [
{
"resetRoom": {
"nodes": [
1
]
}
},
"canConsecutiveWallJump",
{
"cycleFrames": 1600
}
]
}
]
}
{
"or": [
"canWallJump",
{
"cycleFrames": 90
}
]
}
{
"or": [
"ScrewAttack",
{
"and": [
"Plasma",
{
"cycleFrames": 150
}
]
},
{
"and": [
{
"haveBlueSuit": {}
},
{
"or": [
"canWallJump",
"SpaceJump"
]
},
{
"cycleFrames": 300
}
]
}
]
}Resets obstacles: R-Mode Farm cycle drops: 4 Pink Space Pirate (standing) Dev note: FIXME: there are other, slower ways to farm here, e.g. without Gravity. |
From: 6
Middle Junction Near Top Left Pirate
To: 6
Middle Junction Near Top Left Pirate
Requires: "Gravity"
"canConsecutiveWallJump"
{
"or": [
{
"and": [
{
"resetRoom": {
"nodes": [
3
]
}
},
{
"cycleFrames": 1300
}
]
},
{
"and": [
{
"resetRoom": {
"nodes": [
1
]
}
},
{
"cycleFrames": 1540
}
]
},
{
"and": [
{
"resetRoom": {
"nodes": [
4
]
}
},
"canPreciseWallJump",
{
"cycleFrames": 1690
}
]
},
{
"and": [
{
"resetRoom": {
"nodes": [
2
]
}
},
{
"cycleFrames": 1890
}
]
}
]
}
{
"or": [
"Plasma",
"ScrewAttack",
{
"and": [
{
"haveBlueSuit": {}
},
{
"cycleFrames": 400
}
]
},
{
"and": [
"Wave",
{
"cycleFrames": 365
}
]
},
{
"and": [
"Spazer",
{
"cycleFrames": 480
}
]
},
{
"and": [
"Ice",
{
"cycleFrames": 1250
}
]
},
{
"cycleFrames": 1685
}
]
}Resets obstacles: R-Mode Farm cycle drops: 4 Skultera Dev note: Farming Skulteras with Plasma, Screw Attack, or blue suit is included for completeness, though with these it would be better to farm the Pirates. FIXME: there are other, slower ways to farm here, e.g. without Gravity. |
From: 6
Top Right Junction
To: 6
Top Right Junction
From the safe spot above the item, shoot down the wall to break the item block. After hearing it break, spin jump down and collect the item, then walljump back up; or carefully descend and grab it with SpaceJump. Requires: {
"notable": "Shoot Down and Grab Right Item"
}
{
"or": [
"canPreciseWallJump",
{
"and": [
"canTrickyJump",
"SpaceJump"
]
}
]
}Collects items: 3 Dev note: It is minimally easier to shoot the block with a wide beam. A Power Bomb can also be used, but it doesn't seem intuitive at this difficulty. |
From: 2
Bottom Left Door
To: 11
Upper Left Ledge Junction
Wall jump from a high position on either side of the door frame, pass through the Toilet, and down-grab onto the ledge. The Toilet affects Samus' vertical spawn position, making this jump possible. Entrance condition: {
"comeInWithWallJumpBelow": {
"minHeight": 2
},
"comesThroughToilet": "yes"
}Requires: "canCrossRoomJumpIntoWater" "HiJump" "canPreciseWallJump" "canDownGrab" "canTrickyJump" |
|
Requires: "Gravity"
{
"or": [
{
"and": [
"SpaceJump",
{
"or": [
{
"and": [
{
"resetRoom": {
"nodes": [
1
]
}
},
{
"cycleFrames": 1280
}
]
},
{
"and": [
{
"resetRoom": {
"nodes": [
2
]
}
},
{
"cycleFrames": 1065
}
]
},
{
"and": [
{
"resetRoom": {
"nodes": [
3
]
}
},
{
"cycleFrames": 1000
}
]
},
{
"and": [
{
"resetRoom": {
"nodes": [
4
]
}
},
{
"cycleFrames": 1240
}
]
},
{
"and": [
{
"resetRoom": {
"nodes": [
5
]
}
},
{
"cycleFrames": 1000
}
]
},
{
"and": [
{
"resetRoom": {
"nodes": [
6
]
}
},
"Morph",
{
"cycleFrames": 1385
}
]
}
]
}
]
},
{
"and": [
"HiJump",
{
"or": [
{
"and": [
{
"resetRoom": {
"nodes": [
1
]
}
},
{
"cycleFrames": 1235
}
]
},
{
"and": [
{
"resetRoom": {
"nodes": [
2
]
}
},
{
"cycleFrames": 1250
}
]
},
{
"and": [
{
"resetRoom": {
"nodes": [
3
]
}
},
{
"cycleFrames": 1170
}
]
},
{
"and": [
{
"resetRoom": {
"nodes": [
4
]
}
},
"canGravityJump",
{
"cycleFrames": 1510
},
"h_doubleEquipmentScreenCycleFrames",
{
"or": [
"canPreciseWallJump",
"h_doubleEquipmentScreenCycleFrames"
]
}
]
},
{
"and": [
{
"resetRoom": {
"nodes": [
5
]
}
},
"canGravityJump",
{
"cycleFrames": 1000
},
"h_doubleEquipmentScreenCycleFrames",
{
"or": [
"canTrickyJump",
"h_doubleEquipmentScreenCycleFrames"
]
}
]
},
{
"and": [
{
"resetRoom": {
"nodes": [
6
]
}
},
"Morph",
{
"cycleFrames": 1410
}
]
}
]
}
]
},
{
"and": [
"Grapple",
{
"or": [
{
"and": [
{
"resetRoom": {
"nodes": [
1
]
}
},
{
"cycleFrames": 1210
}
]
},
{
"and": [
{
"resetRoom": {
"nodes": [
2
]
}
},
{
"cycleFrames": 1125
},
{
"or": [
"canWallJump",
{
"and": [
"canGravityJump",
{
"cycleFrames": 55
},
"h_doubleEquipmentScreenCycleFrames"
]
},
{
"and": [
"h_crouchJumpDownGrab",
"canTrickyJump",
{
"cycleFrames": 50
}
]
}
]
}
]
},
{
"and": [
{
"resetRoom": {
"nodes": [
3
]
}
},
{
"cycleFrames": 1145
},
{
"or": [
"canWallJump",
{
"and": [
"canGravityJump",
{
"cycleFrames": 80
},
"h_doubleEquipmentScreenCycleFrames"
]
}
]
}
]
},
{
"and": [
{
"resetRoom": {
"nodes": [
4
]
}
},
{
"cycleFrames": 1885
}
]
},
{
"and": [
{
"resetRoom": {
"nodes": [
5
]
}
},
{
"cycleFrames": 1570
}
]
},
{
"and": [
{
"resetRoom": {
"nodes": [
6
]
}
},
"Morph",
{
"cycleFrames": 1400
},
{
"or": [
"canWallJump",
{
"and": [
"canGravityJump",
{
"cycleFrames": 55
},
"h_doubleEquipmentScreenCycleFrames"
]
},
{
"and": [
"h_crouchJumpDownGrab",
"canTrickyJump",
{
"cycleFrames": 50
}
]
}
]
}
]
}
]
}
]
}
]
}Resets obstacles: A, B Farm cycle drops: 3 Powamp Dev note: Other movement options are possible, though slower (e.g. Gravity jump everywhere). The canCrouchJump is not a h_underwaterCrouchJump, because Gravity is required. |
|
Requires: "Gravity"
{
"or": [
"canTrickyWallJump",
{
"and": [
"HiJump",
"canPreciseWallJump"
]
},
{
"and": [
"HiJump",
"canWallJump",
"canSpeedyJump"
]
}
]
} |
From: 1
Middle Left Door
To: 9
Junction Below Top Door
Entrance condition: {
"comeInWithGMode": {
"mode": "any",
"morphed": true
}
}Requires: "h_artificialMorphBombs"
"h_navigateUnderwater"
{
"or": [
{
"and": [
"Gravity",
{
"or": [
"h_artificialMorphLongIBJ",
"h_artificialMorphJumpIntoIBJ"
]
}
]
},
{
"and": [
"canGravityJump",
"h_artificialMorphSpringBall"
]
},
{
"and": [
"HiJump",
"canSpringBallJumpMidAir"
]
},
{
"and": [
"HiJump",
"canConsecutiveWallJump",
"canPreciseWallJump"
]
},
"h_artificialMorphDoubleSpringBallJump",
{
"and": [
"Gravity",
"HiJump",
"h_artificialMorphSpringBallBombJump"
]
}
]
}Dev note: FIXME: Eventually a CF doorlock bypass should be added from this 1 or from 12 with a 1->12 option. |
From: 1
Middle Left Door
To: 11
G-Mode Overloaded PLMs (By Bottom Left Door)
Entrance condition: {
"comeInWithGMode": {
"mode": "any",
"morphed": true
}
}Requires: "h_artificialMorphBombs"
"h_navigateUnderwater"
{
"or": [
"canGravityJump",
{
"and": [
"Gravity",
{
"or": [
"h_artificialMorphLongIBJ",
"h_artificialMorphJumpIntoIBJ"
]
}
]
},
{
"and": [
"HiJump",
"canSpringBallJumpMidAir"
]
},
{
"and": [
"HiJump",
"canConsecutiveWallJump",
"canPreciseWallJump"
]
},
"h_artificialMorphDoubleSpringBallJump",
{
"and": [
"Gravity",
"HiJump",
"h_artificialMorphSpringBallBombJump"
]
}
]
} |
|
Stay out of the water, and by extension the sand, of the room by using the spikes as platforms. Morphing before landing on the spikes helps to be able to control the knockback. The final spike jump (which would be the most difficult) is avoided by doing a crouch jump into spring ball jump into IBJ to reach the left door. Perform the spring ball jump near max height. Place the first bomb between about 4 and 6 frames after the spring ball jump; ideally it should be just above the water line. Press pause between about 5 and 10 frames after placing the bomb, to disable Spring Ball (a 'spring fling', to reset fall speed). Place the second bomb soon after regaining control, while the game is fading back in. A spike hit in the center of the room can avoided by doing another spring ball jump into IBJ (also with a spring fling). Requires: {
"notable": "Bomb Jump Water Escape"
}
"canDash"
"HiJump"
"canPreciseWallJump"
"canUseIFrames"
{
"spikeHits": 1
}
"canNeutralDamageBoost"
"canTrickyJump"
{
"or": [
"canHorizontalDamageBoost",
{
"spikeHits": 1
}
]
}
{
"or": [
"canBePatient",
{
"spikeHits": 1
}
]
}
"h_underwaterMaxHeightSpringBallJump"
"canSpringFling"
"canBombJumpWaterEscape"
"canJumpIntoIBJ"Dev note: The IBJ at the left side of the room can be done without a 'spring fling' but is far more precise: the first bomb must be placed exactly two frames before the spring ball jump, and the spring ball jump should be performed just before max height, during the 4-frame window between 2 and 5 frames before the last possible frame to jump (there are also 1-frame windows at 0 and 8 frames before the last frame). FIXME: This can be possible to do while carrying a blue suit, with much greater difficulty. |
From: 3
Top Right Door
To: 1
Left Door
Stay out of the water, and by extension the sand, of the room by using the spikes as platforms. Landing on spikes aiming down with no other direction pressed can help control the knockback. Requires knowing the position of every spike in the room. The final spike jump is very difficult. Requires: {
"notable": "Spike Platforming with No Equipment"
}
"canDash"
"canPreciseWallJump"
"canInsaneJump"
"canUseIFrames"
{
"spikeHits": 3
}
"canNeutralDamageBoost"
{
"or": [
{
"and": [
"canHorizontalDamageBoost",
{
"noFlashSuit": {}
}
]
},
{
"spikeHits": 1
}
]
} |
|
Wall jump to the first platform then spark while standing, or spark from the right door - one tile lower than the Grapple blocks. Requires: "h_storedSpark"
{
"or": [
{
"shinespark": {
"frames": 121,
"excessFrames": 4
}
},
{
"and": [
"canPreciseWallJump",
{
"shinespark": {
"frames": 110,
"excessFrames": 4
}
}
]
}
]
}Dev note: FIXME: Adding another node at the first platform would allow for cross room strats from the bottom right door. |
From: 4
Platform Below Top Door
To: 4
Platform Below Top Door
Requires: {
"resetRoom": {
"nodes": [
3
]
}
}
"canTrickyJump"
{
"or": [
{
"and": [
"Gravity",
{
"or": [
"ScrewAttack",
{
"haveBlueSuit": {}
}
]
},
{
"cycleFrames": 120
}
]
},
{
"and": [
"Plasma",
{
"cycleFrames": 150
}
]
},
{
"and": [
"canFarmWhileShooting",
"Wave",
"Spazer",
{
"cycleFrames": 160
}
]
},
{
"and": [
"Grapple",
{
"cycleFrames": 160
}
]
}
]
}
{
"or": [
{
"and": [
"Grapple",
"canPrepareForNextRoom",
{
"or": [
"canResetFallSpeed",
"canPreciseWallJump"
]
},
"canFarmWhileShooting",
"h_underwaterCrouchJump"
]
},
"HiJump",
"Gravity",
{
"and": [
"canSpringBallJumpMidAir",
"h_doubleEquipmentScreenCycleFrames",
{
"cycleFrames": 55
}
]
}
]
}Resets obstacles: R-Mode Farm cycle drops: 1 Sciser Dev note: FIXME: for the Grapple case, a water entry above can work as an alternative to wall jump or unmorph. |
|
Gaining speed running left to right, there is a 2-frame window of when to jump (extra run speed $4.0 or $4.1). Starting against the left wall, jump just to the left of the rightmost pipe sticking out of the ground. Requires: "Gravity" "canTrickyDashJump" "canPreciseWallJump" |
|
Requires: "canShinechargeMovementComplex"
"h_spikeXModeShinecharge"
{
"or": [
"h_XModeSpikeHit",
"canStationarySpinJump",
"canTrickyJump"
]
}
"Gravity"
{
"or": [
{
"and": [
"HiJump",
"SpaceJump",
{
"shineChargeFrames": 130
}
]
},
{
"and": [
"HiJump",
"canPreciseWallJump",
{
"shineChargeFrames": 160
}
]
},
{
"and": [
"SpaceJump",
"canPreciseWallJump",
{
"shineChargeFrames": 160
}
]
}
]
}Exit condition: {
"leaveShinecharged": {}
}Dev note: Two spike hits are expected per attempt (with any additional leniency hits being multiplied by this amount). |
|
Requires: "h_spikeXModeShinecharge"
"canShinechargeMovementTricky"
"canTrickyJump"
"Gravity"
{
"or": [
{
"and": [
"HiJump",
"canTrickyDashJump"
]
},
{
"and": [
"canFastWallJumpClimb",
"canPreciseWallJump"
]
},
{
"and": [
"SpaceJump",
"canInsaneJump",
{
"shinespark": {
"frames": 3
}
}
]
}
]
}
{
"shinespark": {
"frames": 5
}
}Exit condition: {
"leaveWithSpark": {}
}Dev note: Two spike hits are expected per attempt (with any additional leniency hits being multiplied by this amount). |
From: 3
Junction Left of Morph Tunnel
To: 1
Left Door
Requires: "Gravity"
{
"or": [
{
"and": [
"canPreciseWallJump",
"canConsecutiveWallJump"
]
},
{
"and": [
"HiJump",
"canWallJump"
]
}
]
} |
From: 3
Junction Left of Morph Tunnel
To: 1
Left Door
Requires: "canSuitlessMaridia"
"HiJump"
"canPreciseWallJump"
{
"or": [
"canTrickyJump",
"canMidairWiggle"
]
}
{
"or": [
"canConsecutiveWallJump",
"canTrickyWallJump"
]
} |
From: 2
Bottom Left Door
To: 4
Top Right Door
Requires a runway of 1 tile in the adjacent room. There is just enough room to wall jump after breaking the water. Entrance condition: {
"comeInJumping": {
"speedBooster": "no",
"minTiles": 1
}
}Requires: "canPreciseWallJump" "canTrickyJump" "canCrossRoomJumpIntoWater" |
From: 1
Top Sand Entrance
To: 7
Below Morph Tunnel Junction
HiJump with a good jump from the sand can reach the Solid Rock Maze region. Use the sandfall if Samus gets stuck in the sand. Perform several wall jumps to climb up to the water level, then precise wall jumps to break free. Requires: {
"notable": "Suitless Wall Jump Break Free"
}
"canSuitlessMaridia"
"canPlayInSand"
"HiJump"
"canConsecutiveWallJump"
"canPreciseWallJump" |
|
Requires: {
"or": [
{
"and": [
"h_fourTileJumpMorph",
"h_complexToCarryFlashSuit"
]
},
{
"and": [
"canPreciseWallJump",
"canWallJumpInstantMorph"
]
}
]
} |
From: 7
Below Morph Tunnel Junction
To: 1
Top Sand Entrance
Requires: "canSuitlessMaridia"
"HiJump"
{
"or": [
"canPreciseWallJump",
"canSpaceJumpWaterBounce"
]
} |
From: 7
Below Morph Tunnel Junction
To: 5
Morph Tunnel Junction
Requires: "canSuitlessMaridia"
"canMidAirMorph"
{
"or": [
{
"and": [
"HiJump",
"canPreciseWallJump",
"canWallJumpInstantMorph"
]
},
{
"and": [
"HiJump",
"canSpaceJumpWaterEscape"
]
},
{
"and": [
"canPreciseWallJump",
"canSpaceJumpWaterBounce"
]
}
]
} |
From: 3
Junction Left of Morph Tunnel
To: 1
Left Door
Requires: "canTrickyJump"
{
"or": [
"canPreciseWallJump",
"canTrickySpringBallJump"
]
} |
|
It's possible to climb up with just ice by freezing the wall space pirates (who can be frozen and killed without Plasma). Clearing the gray door lock would require killing the frozen pirate after using it to climb. To do this most easily, freeze the Pirate as high as possible on the left wall. Bait the pirate to jump across the room early so that it stays high on the wall, or bring it on camera by jumping below the platform if the wall pirate gets too low. After reaching the top, it can help to reset the camera by moving to the right on the center platform and then back left. Requires: "canTrickyUseFrozenEnemies"
"canDodgeWhileShooting"
"canPreciseWallJump"
{
"or": [
{
"obstaclesCleared": [
"B"
]
},
"canTrickyDodgeEnemies"
]
}
"canCameraManip" |
|
Either kill the wall Pirate or lead it to jump across the room; dodge the standing Pirate if it is still alive. Requires: "HiJump"
"canPreciseWallJump"
{
"or": [
"canDodgeWhileShooting",
{
"obstaclesCleared": [
"B"
]
}
]
} |
|
Requires: "canPreciseWallJump" |
|
Do a wall jump from the right side of the door frame, three tiles below the door transition. Turn back around to the right before the transition, while maintaining spin. Entrance condition: {
"comeInWithWallJumpBelow": {
"minHeight": 3
},
"comesThroughToilet": "no"
}Requires: "canCrossRoomJumpIntoWater" "canPreciseWallJump" Dev note: This strat requires a door frame with a three-tile-high surface usable for wall jumping (not including the door transition tiles). Many door frames only have a two-tile-high surface. |
From: 2
Bottom Door
To: 4
Water Level Junction
Do a low spin jump and press against the right side of the door frame. Wall jump as low as possible, jumping as soon as possible after moving away from the wall. Immediately turn back to the right and try to press against the door frame again before the transition, while maintaining spin. After the transition, typically a momentum-conserving turnaround is needed to avoid bonking. Entrance condition: {
"comeInWithWallJumpBelow": {
"minHeight": 2
},
"comesThroughToilet": "no"
}Requires: "canCrossRoomJumpIntoWater"
{
"or": [
"canInsaneWallJump",
{
"and": [
"canPreciseWallJump",
"canMomentumConservingTurnaround"
]
}
]
}Dev note: This strat is for cases where the door frame below has only a two-tile-high surface available for wall-jumping. If a third tile is available, the jump can be done more easily. |
|
Requires: "Gravity"
{
"or": [
"HiJump",
"canPreciseWallJump",
"canPlayInSand"
]
}
{
"or": [
"canTrickyJump",
{
"enemyDamage": {
"enemy": "Evir",
"type": "particle",
"hits": 1
}
}
]
} |
|
Requires: "canDash"
{
"or": [
{
"and": [
"Gravity",
{
"acidFrames": 10
}
]
},
{
"and": [
{
"or": [
"canPreciseWallJump",
"HiJump"
]
},
{
"acidFrames": 20
}
]
}
]
}
{
"or": [
{
"obstaclesCleared": [
"A",
"B"
]
},
"Ice",
"ScrewAttack",
{
"and": [
"canPseudoScrew",
{
"or": [
"canTrickyJump",
"canWallJumpWithCharge",
"HiJump",
"Gravity"
]
}
]
},
"canMetroidAvoid",
{
"metroidFrames": 150
}
]
} |
|
Requires: {
"haveBlueSuit": {}
}
{
"or": [
{
"and": [
"Gravity",
{
"acidFrames": 30
}
]
},
{
"and": [
"canPreciseWallJump",
{
"acidFrames": 60
}
]
},
{
"and": [
"HiJump",
{
"acidFrames": 130
}
]
},
{
"acidFrames": 140
}
]
} |
|
Requires: {
"or": [
{
"and": [
"canTrickyWallJump",
{
"acidFrames": 20
}
]
},
{
"and": [
"HiJump",
"canWallJump",
{
"acidFrames": 50
}
]
},
{
"and": [
"HiJump",
"canPreciseWallJump",
{
"acidFrames": 20
}
]
},
{
"and": [
"Gravity",
{
"acidFrames": 10
}
]
}
]
}
{
"or": [
{
"obstaclesCleared": [
"A",
"B"
]
},
"Ice",
"ScrewAttack",
"canMetroidAvoid",
{
"and": [
"canPseudoScrew",
"canTrickyJump"
]
},
{
"metroidFrames": 420
}
]
}
{
"or": [
"canInsaneJump",
{
"and": [
"canTrickyJump",
"canLateralMidAirMorph"
]
},
{
"and": [
"canTrickyJump",
"canPreciseWallJump",
{
"acidFrames": 16
}
]
},
{
"and": [
"Gravity",
{
"acidFrames": 16
}
]
},
{
"acidFrames": 27
}
]
}Dev note: 1) Jump from the acid to the floating platform. 2) Deal with the Metroid. 3) Jump from the platform to the ledge, potentially falling in acid. |
From: 2
Right Door
To: 1
Left Door
Requires: {
"obstaclesCleared": [
"A",
"B"
]
}
{
"canShineCharge": {
"usedTiles": 23,
"openEnd": 0
}
}
"canShinechargeMovementComplex"
{
"shinespark": {
"frames": 7,
"excessFrames": 2
}
}
{
"or": [
"canInsaneJump",
{
"and": [
"canTrickyJump",
"canLateralMidAirMorph"
]
},
{
"and": [
"canTrickyJump",
"canPreciseWallJump",
{
"acidFrames": 16
}
]
},
{
"and": [
"Gravity",
{
"acidFrames": 16
}
]
},
{
"acidFrames": 27
}
]
}Dev note: This strat only makes sense without canSpeedyJump. |
|
Requires: "h_speedJump"
"canCarefulJump"
{
"or": [
"canPreciseWallJump",
"canTrickyJump"
]
}
{
"or": [
{
"obstaclesCleared": [
"A",
"B"
]
},
"Ice",
"canMetroidAvoid",
{
"metroidFrames": 200
}
]
}
{
"or": [
"canTrickyJump",
{
"acidFrames": 27
},
{
"and": [
{
"acidFrames": 16
},
"canPreciseWallJump"
]
},
{
"and": [
{
"acidFrames": 16
},
"Gravity"
]
}
]
} |
|
While on the first platform, perform a long jump to the left then diagonally spark low into the side of the next platform. This will put Samus into a position where the Metroid will swoop underneath her. Requires: "canMetroidAvoid"
"h_storedSpark"
"canDash"
{
"shinespark": {
"frames": 8,
"excessFrames": 1
}
}
{
"or": [
"canInsaneJump",
{
"and": [
"canTrickyJump",
"canLateralMidAirMorph"
]
},
{
"and": [
"canTrickyJump",
"canPreciseWallJump",
{
"acidFrames": 16
}
]
},
{
"and": [
"Gravity",
{
"acidFrames": 16
}
]
},
{
"acidFrames": 27
}
]
}Dev note: This is only useful with a flash suit without Speed Booster. |
|
Requires: {
"obstaclesCleared": [
"A",
"B"
]
}
"h_storedSpark"
"canDash"
{
"shinespark": {
"frames": 4,
"excessFrames": 2
}
}
{
"or": [
"canInsaneJump",
{
"and": [
"canTrickyJump",
"canLateralMidAirMorph"
]
},
{
"and": [
"canTrickyJump",
"canPreciseWallJump",
{
"acidFrames": 16
}
]
},
{
"and": [
"Gravity",
{
"acidFrames": 16
}
]
},
{
"acidFrames": 27
}
]
} |
