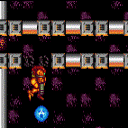
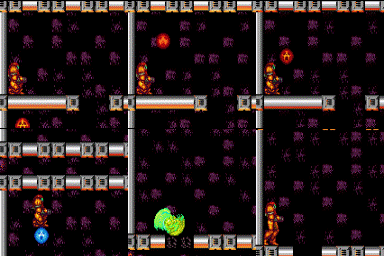
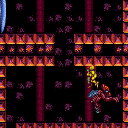
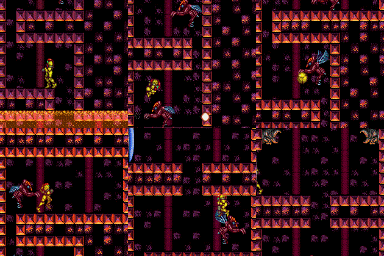
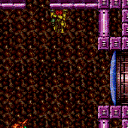
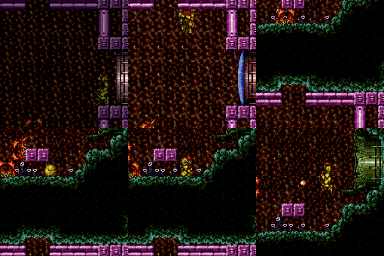
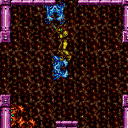
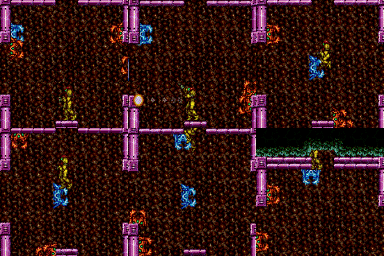
canMidAirMorph (Basic)
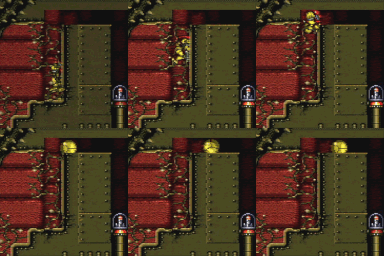
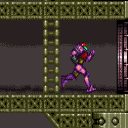
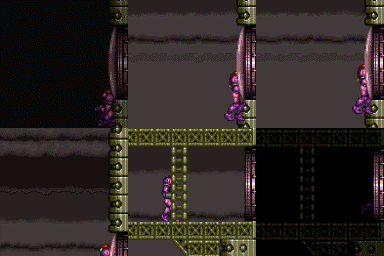
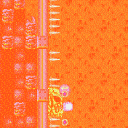
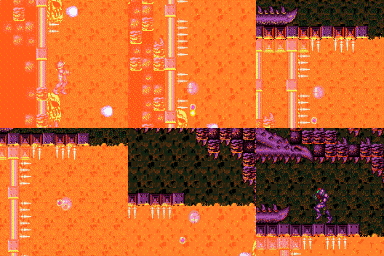
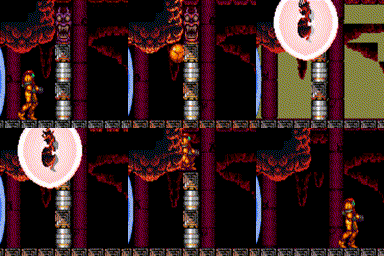
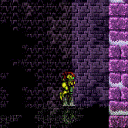
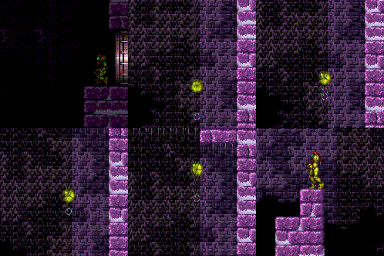
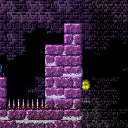
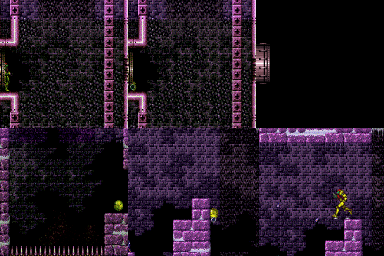
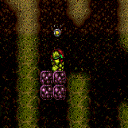
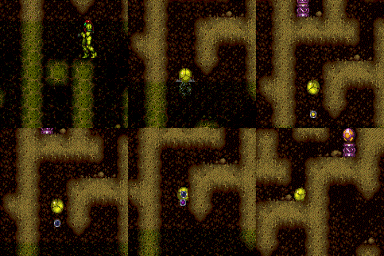
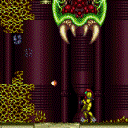
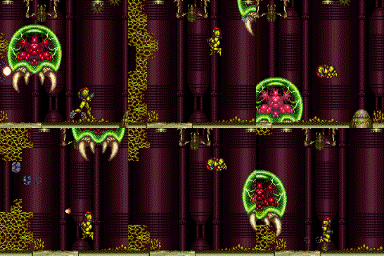
The ability to enter Morph Ball while in the air. There can be an expectation to Morph quickly as well, usually following a jump from the ground. Out of water physics this means jumping and morphing in a 4 tile high space. In water physics this means jumping and morphing in a 3 tile high space (Samus takes up 3 tiles when standing).
Strats ()
|
From: 4
Lower Section - Top Right Door
To: 8
Bridge Right Door (Same Connection as Lower Section - Bottom Right Door)
Notable: true Entrance condition: {
"comeInWithGMode": {
"mode": "direct",
"morphed": false
}
}
Requires: "canSkipDoorLock"
{
  "or": [
    "canArtificialMorph",
    "canWalljump",
    "SpaceJump",
    {
      "and": [
        "h_canIBJ",
        {
          "or": [
            "Gravity",
            "h_canJumpIntoIBJ",
            "h_canBombHorizontally"
          ]
        }
      ]
    },
    {
      "and": [
        "HiJump",
        "canSpringBallJumpMidAir"
      ]
    },
    "canPreciseGrapple"
  ]
}
"canXRayClimb"
|
|
From: 4
Lower Section - Top Right Door
To: 8
Bridge Right Door (Same Connection as Lower Section - Bottom Right Door)
Notable: true Enter with G-mode direct, back up to between 1 and 6 pixels from the door transition, and activate X-ray to get very deep stuck in the door. Climb up 1 screen, and perform a turnaround buffered spin-jump away from the door to trigger the transition, bypassing any lock on the door. Entrance condition: {
"comeInWithGMode": {
"mode": "direct",
"morphed": false
}
}
Requires: {
"or": [
"canArtificialMorph",
"canWalljump",
"SpaceJump",
{
"and": [
"h_canIBJ",
{
"or": [
"Gravity",
"h_canJumpIntoIBJ",
"h_canBombHorizontally"
]
}
]
},
{
"and": [
"HiJump",
"canSpringBallJumpMidAir"
]
},
"canPreciseGrapple"
]
}
"canXRayClimb"
Bypasses door shell: true |
|
From: 4
Lower Section - Top Right Door
To: 12
Top Junction
Climb up 2 screens. Entrance condition: {
"comeInWithGMode": {
"mode": "direct",
"morphed": false
}
}
Requires: {
"or": [
"canArtificialMorph",
"canWalljump",
"SpaceJump",
{
"and": [
"h_canIBJ",
{
"or": [
"Gravity",
"h_canJumpIntoIBJ",
"h_canBombHorizontally"
]
}
]
},
{
"and": [
"HiJump",
"canSpringBallJumpMidAir"
]
},
"canPreciseGrapple"
]
}
"canXRayClimb"
|
|
From: 5
Lower Section - Bottom Right Door
To: 4
Lower Section - Top Right Door
Jump into an IBJ while avoiding the Ripper, or start an IBJ from the platform to the left and boost horizontally at the top. Requires: {
"or": [
"h_canJumpIntoIBJ",
{
"and": [
"h_canIBJ",
"canBombHorizontally",
"canResetFallSpeed"
]
}
]
}
|
|
From: 1
Bottom Left Door
To: 3
Hidden Ceiling Item
An alternate strat to canBombAboveIBJ. Shoot the block, jump into an IBJ, then do a quick double bomb jump to make it in time. Requires: "h_canJumpIntoIBJ" "h_canDoubleBombJump" |
|
From: 1
Bottom Left Door
To: 3
Hidden Ceiling Item
Reveal the item and then setup to jump into an IBJ. As Samus starts falling, unmorph to extend Samus' hitbox high enough to reach the item after bouncing on the bomb. Requires: "canCrouchJump" "canMidAirMorph" "canJumpIntoIBJ" "canUnmorphBombBoost" |
|
Use both Geemers to climb the tall shaft by repeatedly freezing them. Note that one moves locally when on camera and the other moves globally. Requires: {
"or": [
"h_canUsePowerBombs",
{
"and": [
{
"obstaclesCleared": [
"B"
]
},
"Morph"
]
},
{
"obstaclesCleared": [
"C"
]
}
]
}
{
"or": [
{
"obstaclesCleared": [
"A"
]
},
"ScrewAttack",
{
"and": [
"h_canUseMorphBombs",
"canMidAirMorph"
]
}
]
}
"canTrickyUseFrozenEnemies"
"canTrickyJump"
"canCameraManip"
Clears obstacles: A, B |
|
From: 4
Right Item
To: 2
Top Left Door
Use both Geemers to climb the tall shaft by repeatedly freezing them. Note that one moves locally when on camera and the other moves globally. Once Samus is close to the top Bomb Block, freeze one Geemer low and jump as high as possible before placing a power bomb. Continue climbing with the Geemer that survives. Requires: {
"or": [
"h_canUsePowerBombs",
{
"and": [
{
"obstaclesCleared": [
"B"
]
},
"Morph"
]
},
{
"obstaclesCleared": [
"C"
]
}
]
}
"h_canUsePowerBombs"
"canMidAirMorph"
"canTrickyUseFrozenEnemies"
"canTrickyJump"
"canBePatient"
"canCameraManip"
Clears obstacles: A, B |
|
From: 9
Left Side - Bottom Door
To: 4
Left Side - Middle Doorway (Behind the Power Bomb Blocks)
Go into the morph tunnel below the Charge Beam location and Crystal Flash to force a standup and jump through. Samus is now unable to use X-Ray. Overload PLMs using the camera scroll blocks on the path upward, then go through the bomb blocks. Go up to the Sidehopper pit and go up through the crumble blocks and through to the next room. Entrance condition: {
"comeInWithGMode": {
"mode": "any",
"morphed": false
}
}
Requires: "h_canCrystalFlash" "canMidAirMorph" |
|
From: 15
G-Mode Morph Junction (Middle Right)
To: 4
Left Side - Middle Doorway (Behind the Power Bomb Blocks)
Overload PLMs by moving through the camera scroll blocks in front of the passageway leading to the exit of Spore Spawn Supers, or in front of the bomb block at the top left door. Safely kill the enemies, then mid-air morph and go through the crumble blocks. Requires: "canMidAirMorph" Clears obstacles: C |
|
Requires: "canSuitlessMaridia"
{
"or": [
"canBombJumpWaterEscape",
{
"and": [
"h_canUseSpringBall",
"h_canJumpIntoIBJ"
]
}
]
}
|
|
Requires: "h_IBJFromSpikes" |
|
Jump into IBJ to avoid breaking the ledges. Place a Power Bomb on the ascent to break the block and continue the IBJ through it. It is possible to do without a Power Bomb with canBombAboveIBJ. Requires: "h_canJumpIntoIBJ"
{
"or": [
"canBombAboveIBJ",
{
"ammo": {
"type": "PowerBomb",
"count": 1
}
}
]
}
{
"obstaclesCleared": [
"B"
]
}
|
|
From: 9
Junction (Top Rippers)
To: 9
Junction (Top Rippers)
To kill the Rippers with a single Power Bomb without breaking the ledge, place the bomb just above the second Ripper. Requires: "h_canUsePowerBombs"
"canCarefulJump"
{
"or": [
"canWalljump",
"canSpringBallJumpMidAir",
"SpaceJump",
{
"and": [
"HiJump",
"canTrickyDashJump"
]
},
{
"and": [
"h_canJumpIntoIBJ",
{
"or": [
"canStaggeredIBJ",
"canDoubleBombJump"
]
}
]
}
]
}
Clears obstacles: B |
|
From: 9
Junction (Top Rippers)
To: 9
Junction (Top Rippers)
Kill the Rippers with Supers. Requires: {
"ammo": {
"type": "Super",
"count": 4
}
}
{
"or": [
"canWalljump",
"SpaceJump",
"h_canJumpIntoIBJ",
{
"and": [
"canSpringBallJumpMidAir",
{
"or": [
"HiJump",
"canTrickyJump"
]
}
]
}
]
}
Clears obstacles: B |
|
Requires: {
"or": [
{
"and": [
"h_canJumpIntoIBJ",
{
"heatFrames": 450
}
]
},
{
"and": [
"h_canDoubleBombJump",
{
"heatFrames": 300
}
]
}
]
}
|
|
Requires: "h_HeatedIBJFromSpikes"
{
"heatFrames": 1100
}
|
|
Requires: "h_HeatedIBJFromSpikes"
{
"heatFrames": 1100
}
|
|
Jump from below the respawning shot block into a Crystal Flash. Use Grappling Beam as the Crystal Flash finishes to be placed next to the door. Do not aim down as the Crystal Flash finishes. Requires: "h_heatProof" "h_canJumpIntoCrystalFlashClip" "Grapple" |
|
Use a Crystal Flash to clip through the ceiling, where there is one solid tile with 2 empty tiles above it. Use Grapple as the Crystal Flash is ending to be forced above the solid tile. Requires: "h_heatProof" "h_canJumpIntoCrystalFlashClip" "Grapple" |
|
From: 4
Lava, Left Wall
To: 3
Above Lava Junction
Notable: true Begin on top of the lower left Namihe Jump into a double IBJ with such timing that Samus passes above the fired flame and such a way that there is no horizontal speed. A forward jump with run not held will work. Begin diagonal bomb jumping once past the start of the 2nd spike group from the top. Requires: "h_heatProof"
"Gravity"
{
"or": [
"h_lavaProof",
"canSuitlessLavaDive"
]
}
"h_canJumpIntoIBJ"
"h_canDoubleBombJump"
"h_canDiagonalBombJump"
"h_canStaggeredIBJ"
"canInsaneJump"
{
"heatFrames": 1560
}
{
"lavaFrames": 1520
}
|
|
From: 5
Lava, Center Namihe
To: 3
Above Lava Junction
Align with the above platform and scroll the camera left by walking into the left side of the bottom-most tiles. Freeze both left side Namihes and begin bomb jumping Requires: "Gravity"
{
"or": [
"h_lavaProof",
"canSuitlessLavaDive"
]
}
"h_canJumpIntoIBJ"
"h_canDoubleBombJump"
"Plasma"
"Ice"
"canCameraManip"
{
"heatFrames": 1040
}
{
"lavaFrames": 1020
}
|
|
Requires: "h_canJumpIntoIBJ"
{
"heatFrames": 1650
}
|
|
From: 3
Bottom Right Door
To: 5
Junction Above Morph Tunnel
Reaching the Morph hole can be tricky with SpeedBooster but no HiJump. Entrance condition: {
"comeInShinecharged": {
"framesRequired": 70
}
}
Requires: "canMidAirMorph"
"canShinechargeMovementComplex"
{
"heatFrames": 210
}
{
"shinespark": {
"frames": 23,
"excessFrames": 3
}
}
|
|
Requires: "Morph"
{
"or": [
"HiJump",
{
"and": [
"SpaceJump",
{
"heatFrames": 40
}
]
},
"canWalljump",
"canSpringBallJumpMidAir",
{
"and": [
"h_canIBJ",
{
"heatFrames": 900
}
]
},
{
"and": [
"h_canJumpIntoIBJ",
{
"heatFrames": 240
}
]
},
{
"and": [
"h_canJumpIntoIBJ",
"h_canDoubleBombJump",
{
"heatFrames": 120
}
]
},
{
"and": [
"h_canDoubleBombJump",
{
"heatFrames": 300
}
]
}
]
}
{
"or": [
"h_heatProof",
{
"and": [
"Wave",
"Plasma"
]
},
"h_canUsePowerBombs"
]
}
{
"heatFrames": 260
}
|
|
Requires: "Morph"
{
"or": [
"HiJump",
{
"and": [
"SpaceJump",
{
"heatFrames": 40
}
]
},
"canWalljump",
"canSpringBallJumpMidAir",
{
"and": [
"h_canJumpIntoIBJ",
{
"heatFrames": 240
}
]
},
{
"and": [
"h_canJumpIntoIBJ",
"h_canDoubleBombJump",
{
"heatFrames": 120
}
]
},
{
"and": [
"h_canDoubleBombJump",
{
"heatFrames": 300
}
]
}
]
}
{
"heatFrames": 260
}
{
"enemyDamage": {
"enemy": "Sova",
"type": "contact",
"hits": 1
}
}
|
|
Jump into an IBJ from the moving platform (Kamer). Although it is possible to do it without jumping, by starting next to the Gamet farm, it is harder and more obscure. Requires: "h_canJumpIntoIBJ" |
|
Requires: "h_canJumpIntoIBJ" |
|
From: 5
Bottom Junction Right of Morph Tunnel
To: 4
Junction Above Acid Plug, Without Acid
Menu to Grappling Beam before the crystal flash ends and mash shoot while holding down. Requires: "h_heatProof" "h_canBombThings" "h_canJumpIntoCrystalFlashClip" "HiJump" "Grapple" |
|
Kill the pirates to free up the full runway for a speedy jump, or to start an IBJ. If the wall pirate jumps over a Samus who is not crouched, it will climb offscreen on its own. But may still need to be killed after. Requires: "h_canNavigateHeatRooms"
{
"or": [
{
"and": [
{
"enemyKill": {
"enemies": [
[
"Yellow Space Pirate (standing)"
],
[
"Yellow Space Pirate (wall)"
]
],
"explicitWeapons": [
"Charge"
]
}
},
{
"heatFrames": 2100
}
]
},
{
"and": [
{
"enemyKill": {
"enemies": [
[
"Yellow Space Pirate (standing)"
],
[
"Yellow Space Pirate (wall)"
]
],
"explicitWeapons": [
"Charge+Plasma"
]
}
},
{
"heatFrames": 240
}
]
},
{
"and": [
{
"enemyKill": {
"enemies": [
[
"Yellow Space Pirate (standing)"
],
[
"Yellow Space Pirate (wall)"
]
],
"explicitWeapons": [
"Charge+Ice+Wave+Spazer"
]
}
},
{
"heatFrames": 660
}
]
},
{
"and": [
{
"enemyKill": {
"enemies": [
[
"Yellow Space Pirate (standing)"
],
[
"Yellow Space Pirate (wall)"
]
],
"explicitWeapons": [
"Missile",
"Super"
]
}
},
{
"heatFrames": 330
}
]
}
]
}
{
"or": [
{
"and": [
"canTrickyDashJump",
{
"heatFrames": 180
}
]
},
{
"and": [
"h_canIBJ",
{
"heatFrames": 1320
}
]
},
{
"and": [
"h_canJumpIntoIBJ",
{
"heatFrames": 540
}
]
}
]
}
|
|
The shot block may respawn while bomb jumping and can be cleared by weaving a Power Bomb into the IBJ, or with a bomb placed overhead while bomb jumping. The Power Bomb can be placed one tile higher than the doors to also clear the Power Bomb Blocks above at the same time. Requires: "h_canNavigateHeatRooms"
"h_canIBJ"
{
"or": [
{
"and": [
{
"or": [
"h_canBombAboveIBJ",
"h_canUsePowerBombs"
]
},
{
"heatFrames": 1000
}
]
},
{
"and": [
"h_canDoubleBombJump",
{
"heatFrames": 510
}
]
},
{
"and": [
"h_canJumpIntoIBJ",
{
"heatFrames": 480
}
]
},
{
"and": [
"h_canDoubleBombJump",
"h_canJumpIntoIBJ",
{
"heatFrames": 300
}
]
}
]
}
{
"or": [
{
"and": [
"h_canUsePowerBombs",
{
"heatFrames": 50
}
]
},
{
"obstaclesCleared": [
"A"
]
}
]
}
Clears obstacles: A |
|
From: 1
Left Door
To: 2
Top Door
Notable: true Stand next to the Crumble Blocks and jump into a Crystal Flash Clip to briefly clip into the ceiling above those blocks. Hold down exiting the Crystal Flash to shrink Samus' hitbox and on the next frame press forward to move above the Crumble blocks. Holding down and mashing forward sometimes works, or X-Ray can be used at the end of the Crystal Flash to more easily time the inputs. Requires: "h_heatProof" "h_canJumpIntoCrystalFlashClip" "canTrickyJump" |
|
From: 7
Junction By Lower Alcoons (Left of Spike Pits)
To: 1
Left Door
Requires: "h_canNavigateHeatRooms"
"h_canIBJ"
{
"or": [
{
"and": [
"canBombHorizontally",
{
"heatFrames": 840
}
]
},
{
"and": [
"h_canJumpIntoIBJ",
"canDoubleBombJump",
{
"heatFrames": 290
}
]
},
{
"and": [
"h_canJumpIntoIBJ",
{
"heatFrames": 480
}
]
}
]
}
|
|
From: 7
Junction By Lower Alcoons (Left of Spike Pits)
To: 6
Junction By Left Door (Right of Pit)
Requires: "h_canNavigateHeatRooms"
"h_canIBJ"
{
"or": [
{
"and": [
"canBombHorizontally",
{
"heatFrames": 820
}
]
},
{
"and": [
"h_canJumpIntoIBJ",
"canDoubleBombJump",
{
"heatFrames": 270
}
]
},
{
"and": [
"h_canJumpIntoIBJ",
{
"heatFrames": 460
}
]
}
]
}
|
|
Requires: {
"obstaclesCleared": [
"B"
]
}
{
"heatFrames": 160
}
{
"or": [
"h_canCrouchJumpDownGrab",
"canWalljump",
"canSpringBallJumpMidAir",
"HiJump",
{
"and": [
"SpaceJump",
{
"heatFrames": 20
}
]
},
{
"and": [
"h_canSpringBallBombJump",
{
"heatFrames": 50
}
]
},
{
"and": [
"h_canJumpIntoIBJ",
{
"heatFrames": 60
}
]
}
]
}
|
|
From: 4
Junction Below Bomb Blocks
To: 2
Top Right Door
Jump and mid-air morph off a crumble block to begin the IBJ. Use double bomb jumps to make it up quickly before the shot block respawns. Requires: {
"obstaclesCleared": [
"A"
]
}
"canCrumbleJump"
"h_canJumpIntoIBJ"
"canDoubleBombJump"
{
"heatFrames": 360
}
|
|
From: 4
Junction Below Bomb Blocks
To: 2
Top Right Door
Shoot the block before starting or in mid-air, then use spring ball to bounce on the crumb blocks and start an IBJ. The shot block respawns quickly so it's pretty unforgiving on the IBJ executions. Conservatively placing bombs for the IBJ will not make it up in time, unless the block is broken while IBJing. Requires: {
"obstaclesCleared": [
"A"
]
}
"h_canJumpIntoIBJ"
"h_canUseSpringBall"
{
"or": [
"canTrickyJump",
"canDoubleBombJump",
"canBombAboveIBJ",
{
"ammo": {
"type": "PowerBomb",
"count": 1
}
}
]
}
{
"heatFrames": 500
}
|
|
From: 6
Bottom Right Corner Junction
To: 4
Junction Below Bomb Blocks
Menu to Grappling Beam before the crystal flash ends and mash shoot while holding down to be forced on top of the solid block. Requires: "h_heatProof"
"h_canJumpIntoCrystalFlashClip"
"Grapple"
{
"or": [
{
"obstaclesCleared": [
"D"
]
},
{
"obstaclesCleared": [
"F"
]
},
{
"enemyDamage": {
"enemy": "Multiviola",
"type": "contact",
"hits": 2
}
}
]
}
Clears obstacles: A, D |
|
From: 9
Junction Below Crumble Blocks, Set Up to Clip
To: 2
Top Right Door
Notable: true Ice Clip through the crumble blocks using a Multiviola from the bottom of the room and then Crumble Jump to clip through the bomb blocks. The ice clip can be setup by standing in a corner and firing forward when the Multiviola hits Samus, if it is moving downwards towards Samus. The Crumble Jump is done by aiming down (not immediately) after jumping, then changing Samus' hitbox once above the crumble blocks, and jumping again. Requires: "h_heatProof"
"canPreciseCeilingClip"
"canTrickyUseFrozenEnemies"
"canPartialFloorClip"
"canTrickyJump"
"canCrumbleJump"
{
"enemyDamage": {
"enemy": "Multiviola",
"type": "contact",
"hits": 1
}
}
{
"or": [
"h_canCrouchJumpDownGrab",
"canWalljump",
"canSpringBallJumpMidAir",
"HiJump",
"SpaceJump",
"h_canJumpIntoIBJ"
]
}
|
|
From: 9
Junction Below Crumble Blocks, Set Up to Clip
To: 2
Top Right Door
Notable: true Freeze the Multiviola on the left side, just below the solid block. XRay standup and jump to clip up, then jump again to get on top of the bomb blocks. Requires: "h_heatProof"
"h_canXRayCeilingClip"
"canTrickyUseFrozenEnemies"
{
"or": [
"h_canCrouchJumpDownGrab",
"canWalljump",
"canSpringBallJumpMidAir",
"HiJump",
"SpaceJump",
"h_canJumpIntoIBJ"
]
}
|
|
From: 5
Junction Below Top Pirate
To: 1
Top Left Door
Requires: "h_canNavigateHeatRooms"
"HiJump"
"canTrickyJump"
"canMidAirMorph"
{
"heatFrames": 240
}
|
|
From: 5
Junction Below Top Pirate
To: 3
Top Right Door
Requires: "h_canNavigateHeatRooms"
"HiJump"
"canMidAirMorph"
"canTrickyJump"
{
"heatFrames": 160
}
|
|
From: 4
Junction Above Bomb Block
To: 1
Top Left Door
Notable: true Read the movements of the Kihunters and jump over or roll under them as appropriate. Changing platforms is the hardest part: jumping extra high and morphing works sometimes, other times jump short and roll under. Requires: "h_canNavigateHeatRooms"
"canTrickyJump"
{
"or": [
{
"and": [
"canWallJumpInstantMorph",
"canPreciseWalljump"
]
},
{
"and": [
"SpeedBooster",
"HiJump",
"canMidAirMorph"
]
}
]
}
{
"heatFrames": 540
}
Clears obstacles: A |
|
From: 4
Junction Above Bomb Block
To: 1
Top Left Door
Requires: "h_canNavigateHeatRooms"
{
"or": [
"h_canCrouchJumpDownGrab",
"canWalljump",
"HiJump",
{
"and": [
"canSpringBallJumpMidAir",
{
"heatFrames": 300
},
{
"enemyDamage": {
"enemy": "Kihunter (red)",
"type": "contact",
"hits": 1
}
}
]
},
{
"and": [
"h_canJumpIntoIBJ",
{
"heatFrames": 300
}
]
},
"SpaceJump"
]
}
{
"heatFrames": 570
}
{
"enemyDamage": {
"enemy": "Kihunter (red)",
"type": "contact",
"hits": 3
}
}
Clears obstacles: A |
|
From: 5
Top Right Item (locked)
To: 1
Top Left Door
Menu to Grappling Beam before the crystal flash ends and mash shoot while holding down. Requires: "h_canJumpIntoCrystalFlashClip"
"Grapple"
{
"obstaclesNotCleared": [
"B"
]
}
|
|
From: 5
Top Right Item (locked)
To: 1
Top Left Door
Fall through the Crumble blocks in order to damage down using either the spikes or repeated Shinesparks. Touching the Chozo statue will lock the camera in a less useful position. Menu to Grappling Beam before the crystal flash ends and mash shoot while holding down. Requires: {
"obstaclesCleared": [
"B"
]
}
"h_ShinesparksCostEnergy"
"h_canJumpIntoCrystalFlashClip"
"Grapple"
"canOffScreenMovement"
{
"canShineCharge": {
"usedTiles": 25,
"openEnd": 1
}
}
|
|
From: 1
Right Door
To: 2
Item (locked)
In the spike pit, near the left wall, jump into an IBJ to climb out. Requires: "h_IBJFromThorns"
{
"not": "f_DefeatedPhantoon"
}
|
|
From: 2
Bottom Left Door
To: 1
Top Left Doorway
Notable: true Requires a runway of at least 4 tiles (with no open end) in the adjacent room. Use a Cross Room Jump into Water followed by a delayed Momentum Conserving Turnaround to reach the Morph tunnel above. Climbing the Left side of the center hole will run into an unavoidable Scisor that can be passed through by Morphing. Crossing to the right from the left door requires slightly more runway and takes a more precise turnaround. Samus must also stay near a side of the center hole to reach the Morph tunnels. Entrance condition: {
"comeInJumping": {
"speedBooster": false,
"minTiles": 3.4375
}
}
Requires: "canMidAirMorph"
"canCrossRoomJumpIntoWater"
"canMomentumConservingTurnaround"
"canKago"
{
"enemyDamage": {
"enemy": "Sciser",
"type": "contact",
"hits": 1
}
}
|
|
From: 2
Bottom Left Door
To: 1
Top Left Doorway
Notable: true Use a super to knock off a crab and freeze it mid-air. Then get on that crab, possibly using a door ledge Freeze a second crab on the edge of the hole above. Requires: "canMidAirMorph"
"canSuitlessMaridia"
{
"ammo": {
"type": "Super",
"count": 1
}
}
"canTrickyUseFrozenEnemies"
|
|
Freeze a crab on the edge of the hole in the ceiling. Then get on top of it with Gravity and a wall jump, jump assist, or second frozen crab on the ground, or a suitless Spring Ball jump with HiJump. Requires: "canMidAirMorph"
"canUseFrozenEnemies"
{
"or": [
{
"and": [
"Gravity",
{
"or": [
"HiJump",
"canWalljump",
"canSpringBallJumpMidAir",
"canTrickyUseFrozenEnemies"
]
}
]
},
{
"and": [
"HiJump",
"canSpringBallJumpMidAir",
"canSuitlessMaridia"
]
}
]
}
|
|
Jump the first frame after running to gain just enough spinjump height. Requires: "canMidAirMorph" "Gravity" "canWalljump" "canTrickyDashJump" |
|
Stand on a frozen crab, then freeze a second one on the edge of the hole above. Use a crouch jump and/or down grab to get onto the crab above. Requires: "canMidAirMorph"
"canSuitlessMaridia"
"canTrickyUseFrozenEnemies"
"HiJump"
{
"or": [
"canCrouchJump",
"canDownGrab"
]
}
|
|
Once out of the water, jump into an IBJ. With a miss, if you haven't moved horizontally, simply fall straight down to land safely back on Mama Turtle. Requires: "h_canJumpIntoIBJ" Clears obstacles: B |
|
From: 1
Bottom Left Door
To: 2
Right Door
Find the crumble blocks and crystal flash mid-air, just below them. They are on the far right of the ceiling of the bottom right pathway. Hold down as the CF ends to break the non-respawning crumble blocks. This is for the much harder version, without Gravity and Bombs. Requires: "h_canJumpIntoCrystalFlashClip"
"canSuitlessMaridia"
{
"or": [
"HiJump",
"canSpringBallJumpMidAir",
{
"and": [
"h_canCrouchJumpDownGrab",
"canCarefulJump"
]
},
"canUseFrozenEnemies"
]
}
|
|
From: 2
Right Door
To: 1
Bottom Left Door
Find the crumble blocks and crystal flash mid-air, just below them. They are on the far left of the ceiling of the middle left pathway. Hold down as the CF ends to break the non-respawning crumble blocks. This is for the much harder version, without Gravity and Bombs. Requires: "h_canJumpIntoCrystalFlashClip"
"canSuitlessMaridia"
{
"or": [
{
"and": [
"h_canCrouchJumpDownGrab",
"canTrickyJump"
]
},
"HiJump",
"Gravity",
"canSpringBallJumpMidAir"
]
}
|
|
Requires: "Gravity"
{
"or": [
"canSandIBJ",
{
"and": [
"h_canUseSpringBall",
"h_canJumpIntoIBJ"
]
}
]
}
|
|
Requires a runway of one tile in the adjacent room. Entrance condition: {
"comeInJumping": {
"speedBooster": false,
"minTiles": 1
}
}
Requires: "h_canJumpIntoIBJ"
"canTrickyJump"
"canCrossRoomJumpIntoWater"
"canMomentumConservingTurnaround"
{
"enemyDamage": {
"enemy": "Mochtroid",
"type": "contact",
"hits": 2
}
}
|
|
Notable: true Stay out of the water, and by extension the sand, of Colosseum by using the spikes as platforms. Morphing before landing on the spikes helps to be able to control the knockback. The final spike jump (which would be the most difficult) is avoided by doing a crouch jump into spring ball jump into IBJ to reach the left door. Perform the spring ball jump near max height. Place the first bomb between about 4 and 6 frames after the spring ball jump; ideally it should be just above the water line. Press pause between about 5 and 10 frames after placing the bomb, to disable Spring Ball (a 'spring fling', to reset fall speed). Place the second bomb soon after regaining control, while the game is fading back in. Requires: "HiJump"
"canPreciseWalljump"
"canIframeSpikeJump"
{
"spikeHits": 2
}
"canNeutralDamageBoost"
{
"or": [
"canHorizontalDamageBoost",
{
"spikeHits": 1
}
]
}
"h_canMaxHeightSpringBallJump"
{
"or": [
"canSpringFling",
"canInsaneJump"
]
}
"canBombJumpWaterEscape"
"h_canJumpIntoIBJ"
|
|
Requires: "Gravity"
{
"or": [
"SpaceJump",
"canWalljump",
"h_IBJFromSpikes",
{
"and": [
"h_canIBJ",
"h_canHBJ"
]
},
"h_canDiagonalBombJump"
]
}
|
|
From: 2
Right Door
To: 4
Top Right Ledge Junction
Notable: true Requires a runway of at least 1 tiles in the adjacent room, although it is easier with more. Start the IBJ as far left as possible. The furthest right is just right of the waterfall. Turning around, carefully, is one way to lose forward momentum and begin the IBJ. At the top of the IBJ bomb to the left and unmorph to reset fall speed. Entrance condition: {
"comeInJumping": {
"speedBooster": false,
"minTiles": 1
}
}
Requires: "h_canJumpIntoIBJ" "h_canBombHorizontally" "h_canResetFallSpeed" "canCrossRoomJumpIntoWater" "canTrickyJump" |
|
From: 2
Right Door
To: 4
Top Right Ledge Junction
Notable: true Use the bomb boost as Samus is going through the doorway, then spring ball after breaking the water, then ibj or use an unmorph bomb boost. Entrance condition: {
"comeInWithBombBoost": {}
}
Requires: "h_canSpringBallBombJump"
"canCrossRoomJumpIntoWater"
{
"or": [
"h_canJumpIntoIBJ",
"canUnmorphBombBoost"
]
}
|
|
Requires: "Gravity"
"h_canIBJ"
{
"or": [
"h_canBombHorizontally",
"h_IBJFromSpikes"
]
}
|
|
Requires: "Gravity"
{
"or": [
"SpaceJump",
"canWalljump",
"canSpringBallJumpMidAir",
"h_canDiagonalBombJump",
"h_IBJFromSpikes"
]
}
|
|
From: 5
Bottom Middle Junction
To: 6
East Cactus Alley Junction (Right of Morph Tunnel)
Requires: "canSuitlessMaridia"
"HiJump"
{
"spikeHits": 1
}
{
"or": [
"canWalljump",
"canSpaceJumpWaterEscape",
"canSpringBallJumpMidAir",
{
"and": [
"h_canJumpIntoIBJ",
"h_canUseSpringBall"
]
},
{
"and": [
"h_canIBJ",
"canBombJumpWaterEscape"
]
},
{
"spikeHits": 1
}
]
}
|
|
From: 5
Bottom Middle Junction
To: 6
East Cactus Alley Junction (Right of Morph Tunnel)
This can be done by turning off Gravity and HiJump to jump over both spike pits. Requires: "canSuitlessMaridia"
"canSpringBallJumpMidAir"
{
"spikeHits": 1
}
{
"or": [
"canTrickySpringBallJump",
{
"and": [
"canWalljump",
"canSpaceJumpWaterBounce"
]
},
{
"and": [
"h_canJumpIntoIBJ",
"h_canUseSpringBall"
]
},
{
"and": [
"h_canIBJ",
"canBombJumpWaterEscape"
]
},
{
"spikeHits": 1
}
]
}
|
|
It's possible to get out of the sand suitless and without HiJump after falling from the chute, by hugging the left side and moving quickly. Requires: "canSuitlessMaridia"
"canPlayInSand"
{
"or": [
{
"and": [
"h_canMaxHeightSpringBallJump",
{
"or": [
"canWalljump",
"can4HighMidAirMorph",
"h_canJumpIntoIBJ"
]
}
]
}
]
}
|
|
Requires: "Gravity"
"Morph"
"canPlayInSand"
{
"or": [
"canWalljump",
"canGravityJump",
"HiJump",
"canSpringBallJumpMidAir",
"canSandIBJ",
{
"and": [
"h_canUseSpringBall",
"h_canJumpIntoIBJ"
]
}
]
}
|
|
Only requires a runway of approximately 1 tile in the adjacent room. Take two Mochtroid hits or kill it using a Power Bomb or 5 Bombs. Entrance condition: {
"comeInJumping": {
"minTiles": 1,
"speedBooster": "any"
}
}
Requires: "h_canJumpIntoIBJ"
{
"or": [
{
"ammo": {
"type": "PowerBomb",
"count": 1
}
},
{
"and": [
"h_canCeilingBombJump",
{
"enemyDamage": {
"enemy": "Mochtroid",
"type": "contact",
"hits": 1
}
}
]
},
{
"and": [
"h_canDoubleBombJump",
{
"enemyDamage": {
"enemy": "Mochtroid",
"type": "contact",
"hits": 2
}
}
]
}
]
}
"canCrossRoomJumpIntoWater"
"canMomentumConservingTurnaround"
"canTrickyJump"
|
|
From: 2
Bottom Left Door
To: 4
Top Right Door
Requires a runway of 1 tile in the adjacent room. Use a spring ball jump after breaking the water, then ibj. Take two Mochtroid hits or use a double bomb jump. Entrance condition: {
"comeInJumping": {
"speedBooster": false,
"minTiles": 1
}
}
Requires: "canTrickySpringBallJump"
"h_canJumpIntoIBJ"
{
"or": [
"h_canDoubleBombJump",
{
"enemyDamage": {
"enemy": "Mochtroid",
"type": "contact",
"hits": 2
}
}
]
}
"canCrossRoomJumpIntoWater"
|
|
Land on the solid ground to the right and space jump or Springball over the sand. Requires: "Gravity"
{
"or": [
"SpaceJump",
{
"and": [
"h_canUseSpringBall",
"h_canJumpIntoIBJ"
]
}
]
}
|
|
From: 7
Below Morph Tunnel Junction
To: 5
Morph Tunnel Junction
Notable: true Jump off of the crumble blocks consecutively while placing a bomb on the water line and convert that into an IBJ to climb the West Sand Hole maze. Requires: "canSuitlessMaridia" "h_canJumpIntoIBJ" "canBombJumpWaterEscape" "canCrumbleJump" |
|
Let the wall pirate jump to the otherside of the room. Shooting the standing pirate (with anything) will prevent it from attacking. Requires: "h_canJumpIntoIBJ" |
|
From: 3
Junction Below Right Door
To: 2
Right Door
Place a PB up against the crumble blocks, then jump and midair morph into that same position at the end of the explosion while holding CF inputs. Immediately after the CF, hold down to break the crumble blocks. Requires: "h_canJumpIntoCrystalFlashClip" "canSuitlessMaridia" |
|
Springball can keep Samus out of the sand. Place the first bomb right after Samus begins falling back towards the sand. Requires: "Gravity" "Grapple" "h_canUseSpringBall" "h_canJumpIntoIBJ" |
|
From: 5
Junction Above Grapple Block
To: 2
East Leg Right Door
Notable: true Wait the water tide to reach its peak, then crouch jump into a spring ball jump into an IBJ. Perform the spring ball jump near max height. Place the first bomb between about 4 and 6 frames after the spring ball jump; ideally it should be just above the water line. Press pause between about 5 and 10 frames after placing the bomb, to disable Spring Ball (a 'spring fling', to reset fall speed). Place the second bomb soon after regaining control, while the game is fading back in. When close to the top, perform a spring ball jump to reach the ledge; release jump as soon as Samus is high enough to clear the ledge, in order to avoid taking a Menu hit. Requires: "HiJump" "h_canMaxHeightSpringBallJump" "canSpringFling" "canBombJumpWaterEscape" "canDoubleBombJump" "h_canJumpIntoIBJ" |
|
Notable: true Requires: {
"obstaclesNotCleared": [
"A"
]
}
"canMidAirMorph"
"HiJump"
"canTrickyJump"
"canBabyMetroidAvoid"
|
|
Jump over the Baby Metroid to avoid getting grabbed. Use Wave plus a Wide Beam to clear much of the seaweed with each shot. The classic counter clockwise skip ends with a mid air morph into the transition. Requires: {
"obstaclesNotCleared": [
"A"
]
}
"Wave"
{
"or": [
"Spazer",
"Plasma"
]
}
"canMidAirMorph"
"HiJump"
"SpeedBooster"
"canTrickyJump"
"canBabyMetroidAvoid"
|
|
Clear the Pirates near the door. Jump into a Crystal Flash clip where the ceiling is a single tile thick. Switch to Grappling Beam before the Crystal Flash ends and mash shoot while holding down. Requires: "h_canJumpIntoCrystalFlashClip" "HiJump" "Grapple" |
|
From: 3
Bottom of Shaft
To: 1
Left Door
Notable: true Requires: "canSuitlessLavaDive"
"h_canJumpIntoIBJ"
"canDoubleBombJump"
{
"or": [
{
"and": [
"Gravity",
{
"acidFrames": 150
}
]
},
{
"acidFrames": 450
}
]
}
|
|
Requires: {
"or": [
"HiJump",
"SpaceJump",
"canWalljump",
"h_canCrouchJumpDownGrab",
"h_canJumpIntoIBJ",
"canSpringBallJumpMidAir"
]
}
{
"or": [
"canCarefulJump",
"ScrewAttack",
{
"enemyDamage": {
"enemy": "Tourian Space Pirate (all)",
"type": "contact",
"hits": 1
}
}
]
}
Clears obstacles: A |
