canTrickyDashJump (Expert)
Using Speed Booster and jumping with a precise runway length in order to jump higher than with a slightly shorter or longer run. This works because of the extreme non-linearity of the speed to jump height ratio, when Speed Booster is active.
Dependencies: canCarefulJump, canTrickyJump
Strats ()
|
Notable: true 
Enter the room with a very specific run speed to jump from the door, and land a speedball perfectly in the tunnel to break the Bomb block. Entrance condition: {
"comeInShinecharging": {
"length": 0,
"openEnd": 0
}
}
Requires: "canInsaneJump" "canSpeedball" "canTrickyDashJump" "canSlowShortCharge" |
|
From: 4
Middle Right Door
To: 6
Main Junction
Notable: true
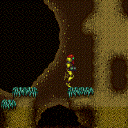
Enter the room with a very specific run speed to jump from the door, squeeze by the ceiling, and land a speedball perfectly in the tunnel to break the Bomb block. Entrance condition: {
"comeInShinecharging": {
"length": 1,
"openEnd": 0
}
}
Requires: "canSpeedball" "canTrickyDashJump" "canSlowShortCharge" "canInsaneJump" |
|
From: 1
Top Left Door
To: 6
Top Junction with Temporary Blue (Right of Morph Tunnel)
Use Springball on the spikes to cross the room with a Speedball. It helps to not be at full run speed when bouncing through the spike pit, but is still possible with very tight jumps. Then bounce into the Morph tunnel and use Springball to bounce all of the way through. Unmorphing before the Morph tunnel to better control the bounce can help. Entrance condition: {
"comeInShinecharging": {
"length": 3,
"openEnd": 1
}
}
Requires: "canSpeedball"
"canTemporaryBlue"
"canCarefulJump"
"canSpringBallBounce"
{
"or": [
"canTrickyDashJump",
"canChainTemporaryBlue"
]
}
{
"spikeHits": 1
}
|
|
Notable: true .png)
.gif)
This strat is fairly precise. All jumps should be as small as possible. Using at least one-tap short charge, jump off the ledge and descend as much as possible while keeping space jump active. Once approaching the wall, be sure to jump again to continue through all of the bomb blocks. If HiJump is available, it is much easier to use the blue space jump strat from the ground. Requires: "canBlueSpaceJump"
"canTrickyDashJump"
{
"canShineCharge": {
"usedTiles": 22,
"openEnd": 2
}
}
Clears obstacles: A |
|
Requires: "canTrickyDashJump" "HiJump" "canTrickySpringBallJump" |
|
The wall above can be used to align to a good starting position for the running jump. Requires: "HiJump" "Morph" "canTrickyDashJump" |
|
From: 2
Upper Right Section - Top Right Door
To: 2
Upper Right Section - Top Right Door
Requires: "HiJump" "canTrickyDashJump" "canWalljump" "canShinechargeMovementComplex" Exit condition: {
"leaveShinecharged": {
"framesRemaining": 55
}
}
|
|
From: 2
Upper Right Section - Top Right Door
To: 2
Upper Right Section - Top Right Door
Requires: "HiJump" "canTrickyDashJump" "canShinechargeMovementComplex" Exit condition: {
"leaveShinecharged": {
"framesRemaining": 20
}
}
|
|
From: 2
Upper Right Section - Top Right Door
To: 2
Upper Right Section - Top Right Door
Requires: "canTrickyDashJump"
"canWalljump"
"canShinechargeMovementComplex"
{
"shinespark": {
"frames": 20
}
}
Exit condition: {
"leaveWithSpark": {}
}
|
|
From: 16
G-Mode Morph Overloaded PLMs Junction (By Left Door)
To: 14
Morph Maze Junction (Below Super Block)
Requires: {
"or": [
{
"and": [
"SpaceJump",
"Morph"
]
},
"h_canArtificialMorphIBJ",
{
"and": [
"canTrickyDashJump",
"canSpringBallJumpMidAir",
"HiJump"
]
}
]
}
|
|
From: 17
G-Mode Morph Junction Direct (By Left Door)
To: 10
Left Morph Maze Item
Notable: true 
To overload the PLMs, place a PB precisely to the right of the bottom of the second overhang above the door to the Moat. This is at the max jump height without HiJump. Placing the PB higher or lower will not overload the PLMs without many PBs. Requires: {
"itemNotCollectedAtNode": 10
}
"h_canUsePowerBombs"
{
"or": [
"h_canFly",
{
"and": [
"canTrickyDashJump",
"canTrickySpringBallJump",
"HiJump"
]
}
]
}
Clears obstacles: B |
|
From: 5
Above Power Bomb Blocks - Bottom Left Door
To: 4
Above Power Bomb Blocks - Middle Left Door
Entrance condition: {
"comeInShinecharging": {
"length": 12,
"openEnd": 0
}
}
Requires: "canTrickyDashJump" "canShinechargeMovementComplex" Exit condition: {
"leaveShinecharged": {
"framesRemaining": 40
}
}
|
|
From: 6
Above Power Bomb Blocks - Bottom Right Door
To: 4
Above Power Bomb Blocks - Middle Left Door
Entrance condition: {
"comeInShinecharged": {
"framesRequired": 140
}
}
Requires: "canTrickyDashJump" "canShinechargeMovementComplex" Exit condition: {
"leaveShinecharged": {
"framesRemaining": "auto"
}
}
|
|
From: 6
Above Power Bomb Blocks - Bottom Right Door
To: 4
Above Power Bomb Blocks - Middle Left Door
Entrance condition: {
"comeInShinecharged": {
"framesRequired": 130
}
}
Requires: "canTrickyDashJump" "canShinechargeMovementComplex" Exit condition: {
"leaveShinecharged": {
"framesRemaining": "auto"
}
}
|
|
From: 10
Right Etecoon Shaft - Bottom Left Door
To: 14
Right Etecoon Shaft - Wall Jump Climb Checkpoint Junction
Run a precise distance, to hit a peak of the speed vs height graph. With Samus' back against the closed door, jump about a tile before hitting the right wall. Requires: "canTrickyDashJump" "canTrickySpringBallJump" |
|
From: 1
Left Door
To: 1
Left Door
Notable: true 
Build run speed and jump into the left wall, turning around without changing Samus' pixel position. This strat involves shooting a Super diagonally from the correct height while flush against the left wall. Its acceleration will cause it to clip into the blue gate off-screen. Requires: {
"obstaclesCleared": [
"A"
]
}
"canTrickyDashJump"
"canOffScreenSuperShot"
Clears obstacles: B |
|
Jump into the room and onto the Grapple block. Requires a runway of only 2 tiles in the adjacent room. Entrance condition: {
"comeInJumping": {
"speedBooster": true,
"minTiles": 1.4375
}
}
Requires: "canPrepareForNextRoom" "HiJump" "canTrickyDashJump" "canDisableEquipment" |
|
Jump into the room and onto the Grapple block. Entrance condition: {
"comeInJumping": {
"speedBooster": true,
"minTiles": 25
}
}
Requires: "canPrepareForNextRoom" "canTrickyDashJump" |
|
Jump at the very end of the runway in-room. Requires a runway in the adjacent room of at least 7 tiles. Entrance condition: {
"comeInRunning": {
"speedBooster": true,
"minTiles": 7
}
}
Requires: "canTrickySpringBallJump" "canTrickyDashJump" |
|
Carefully kill the Cacatac, then it is possible to get up with just Speed Booster. With Samus's back against the door, jump just before hitting the right wall. This is not easier with the door open. Requires: "canTrickyDashJump"
{
"obstaclesNotCleared": [
"B"
]
}
|
|
From: 2
Middle Left Door
To: 5
Top Right Door (Through Morph Tunnel)
Entrance condition: {
"comeInWithGMode": {
"mode": "indirect",
"morphed": true
}
}
Requires: {
"or": [
"h_canArtificialMorphIBJ",
{
"and": [
"h_canArtificialMorphSpringBallBombJump",
"h_additionalBomb"
]
},
{
"and": [
"h_canArtificialMorphSpringBall",
"HiJump"
]
},
{
"and": [
"Morph",
{
  "or": [
    "HiJump",
    "canWalljump",
    "h_canFly",
    "canSpringBallJumpMidAir",
    {
      "and": [
        "canTrickyDashJump",
        "h_canCrouchJumpDownGrab"
      ]
    }
  ]
}
]
}
]
}
|
|
Entrance condition: {
"comeInWithGMode": {
"mode": "any",
"morphed": false
}
}
Requires: {
"or": [
"HiJump",
"canWalljump",
"h_canFly",
"canSpringBallJumpMidAir",
{
"and": [
"canTrickyDashJump",
"h_canCrouchJumpDownGrab"
]
}
]
}
Exit condition: {
"leaveWithGMode": {
"morphed": false
}
}
|
|
From: 9
Junction (Top Rippers)
To: 9
Junction (Top Rippers)
To kill the Rippers with a single Power Bomb without breaking the ledge, place the bomb just above the second Ripper. Requires: "h_canUsePowerBombs"
"canCarefulJump"
{
"or": [
"canWalljump",
"canSpringBallJumpMidAir",
"SpaceJump",
{
"and": [
"HiJump",
"canTrickyDashJump"
]
},
{
"and": [
"h_canJumpIntoIBJ",
{
"or": [
"canStaggeredIBJ",
"canDoubleBombJump"
]
}
]
}
]
}
Clears obstacles: B |
|
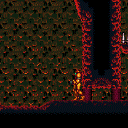
Run along the bottom of the pit to build speed for a speedy jump. Only run 7.5 tiles left to right. If done optimally, no wall jump is required. Requires: "canTrickyDashJump" |
|
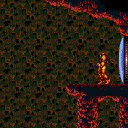
From: 4
Bottom Junction (Cleared Runway)
To: 1
Left Door
Notable: true .png)
.gif)
This is a precise strat which requires maximum run speed. Perform a spin jump right next to the left wall. Shoot the block as Samus is about to leap through it, and land next to the door. A down grab makes this a little easier. Requires: "canTrickyDashJump"
{
"heatFrames": 150
}
|
|
From: 4
Bottom Junction (Cleared Runway)
To: 2
Right Door
Notable: true .png)
.gif)
This is a precise strat which requires maximum run speed. Jump when passing under the floating platform and barely avoid hitting the rightmost wall. Wall jump on the horizontal spire near to the door. Requires: "canTrickyDashJump"
"canWalljump"
{
"heatFrames": 150
}
|
|
Run under the second moving platform from the right to trigger it to move down. Then run back to the left wall, run again to the right, and jump when on the center of the mound just to the right below the platform. Requires: "canTrickyDashJump"
{
"heatFrames": 450
}
|
|
Run under the furthest right moving platform to trigger it to move down. Then run back to the left wall, run again to the right, and jump when on the center of the mound just to the left below the platform. Shoot straight up to open the gate on the way up. Requires: "canTrickyDashJump"
{
"heatFrames": 380
}
|
|
Starting from the left wall, run to the right and when on the center of the mound just to the right of the second moving platform from the right. Wall jump off of the platform as it moves down. Requires: "canTrickyDashJump"
"canWalljump"
{
"heatFrames": 300
}
|
|
From: 3
Right Door
To: 3
Right Door
Notable: true 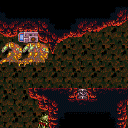
Charge a spark along the bottom of Double Chamber and use it to spark through the right side door. Requires opening the door and shutter first. Requires: "HiJump"
"Morph"
{
"or": [
{
"obstaclesCleared": [
"A"
]
},
{
"heatFrames": 240
}
]
}
{
"or": [
{
"and": [
"canTrickyDashJump",
"canWalljump"
]
},
"SpaceJump"
]
}
{
"canShineCharge": {
"usedTiles": 28,
"gentleUpTiles": 3,
"gentleDownTiles": 3,
"openEnd": 0
}
}
{
"heatFrames": 780
}
{
"shinespark": {
"frames": 57
}
}
Exit condition: {
"leaveWithSpark": {}
}
Clears obstacles: A |
|
From: 3
Right Door
To: 3
Right Door
Notable: true
Charge a spark along the bottom of Double Chamber and use it to spark through the right side door. Requires opening the door and shutter first. Requires: "HiJump"
{
"or": [
"SpaceJump",
"Grapple"
]
}
{
"or": [
{
"obstaclesCleared": [
"A"
]
},
"Wave",
{
"and": [
"h_canHeatedBlueGateGlitch",
{
"heatFrames": 60
}
]
}
]
}
{
"or": [
{
"and": [
"canTrickyDashJump",
"canWalljump"
]
},
"SpaceJump"
]
}
{
"canShineCharge": {
"usedTiles": 28,
"gentleUpTiles": 3,
"gentleDownTiles": 3,
"openEnd": 0
}
}
{
"heatFrames": 780
}
{
"shinespark": {
"frames": 57
}
}
Exit condition: {
"leaveWithSpark": {}
}
Clears obstacles: A |
|
Notable: true 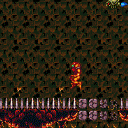
Position Samus into the bottom right corner, using invulnerability frames run then jump while on the crumble blocks. It is possible to use a damage boost on the Ripper to save energy and position Samus into the corner. Requires: "canIframeSpikeJump"
{
"spikeHits": 1
}
"SpeedBooster"
"canTrickyDashJump"
{
"heatFrames": 300
}
|
|
From: 3
Bottom Right Door
To: 1
Top Left Door
Kill the Gamets with SpeedBooster and then jump directly up to the top left door. Entrance condition: {
"comeInShinecharging": {
"length": 10,
"openEnd": 0,
"gentleDownTiles": 4
}
}
Requires: "HiJump" "canShinechargeMovementComplex" "canTrickyDashJump" Exit condition: {
"leaveShinecharged": {
"framesRemaining": 20
}
}
|
|
In-room Speedy Jump up with HiJump and Leave while Shinecharged (Very Hard)
Post Crocomire Farming Room
From: 5
Main Junction
To: 1
Top Left Door
Shortcharge to the right and then jump from below the floating platform to reach the top left door. Requires: "HiJump"
"canShinechargeMovementComplex"
{
"or": [
"canWalljump",
"canTrickyDashJump"
]
}
{
"or": [
{
"canShineCharge": {
"usedTiles": 18,
"openEnd": 1,
"gentleUpTiles": 4,
"gentleDownTiles": 2
}
},
{
"and": [
{
"doorUnlockedAtNode": 3
},
{
"canShineCharge": {
"usedTiles": 19,
"openEnd": 1,
"gentleUpTiles": 4,
"gentleDownTiles": 2
}
}
]
}
]
}
Exit condition: {
"leaveShinecharged": {
"framesRemaining": 10
}
}
|
|
From: 5
Main Junction
To: 1
Top Left Door
Notable: true 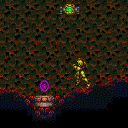

Doesn't require opening the bottom right door. Just using the available space and jumping late enough. It does require killing the Gamets and leaving the drops there so they don't kill your momentum. Requires: "canTrickyDashJump" "canWalljump" |
|
From: 1
Left Door
To: 3
Item
Walljump or build run speed using the full runway to jump high enough for the shinespark. Entrance condition: {
"comeInShinecharged": {
"framesRequired": 80
}
}
Requires: {
"or": [
{
"and": [
"canWalljump",
{
"shinespark": {
"frames": 20
}
}
]
},
"canTrickyDashJump"
]
}
"HiJump"
"canShinechargeMovement"
"canMidairShinespark"
{
"shinespark": {
"frames": 60
}
}
|
|
Walljump or build run speed using the full runway to jump high enough for the shinespark. Entrance condition: {
"comeInShinecharging": {
"length": 9,
"openEnd": 0
}
}
Requires: {
"or": [
{
"and": [
"canWalljump",
{
"shinespark": {
"frames": 20
}
}
]
},
"canTrickyDashJump"
]
}
"HiJump"
"canShinechargeMovement"
"canMidairShinespark"
{
"shinespark": {
"frames": 60
}
}
|
|
From: 5
Small Platforms Junction
To: 3
Item
Requires: "HiJump" "canTrickyDashJump" "canTrickySpringBallJump" |
|
From: 2
Middle Right Door
To: 3
Top Right Door
Notable: true Run through the doorway with enough momentum to break the bomb blocks with Screw. Entrance condition: {
"comeInRunning": {
"minTiles": 2,
"speedBooster": true
}
}
Requires: "h_canNavigateHeatRooms"
"ScrewAttack"
"HiJump"
"canTrickyDashJump"
{
  "heatFrames": 150
}
Clears obstacles: A |
|
From: 2
Middle Right Door
To: 5
Junction Above Bottom Blocks with Top Blocks Broken
Notable: true Run in the adjacent room and jump through the door, to place a Bomb to break the obstacle. Entrance condition: {
"comeInJumping": {
"minTiles": 2,
"speedBooster": true
}
}
Requires: "h_canNavigateHeatRooms"
"HiJump"
"canTrickyDashJump"
"h_canUseMorphBombs"
{
"heatFrames": 200
}
Clears obstacles: A |
|
From: 3
Bottom Platform Junction
To: 1
Left Door
Notable: true 
Clear the runway by killing the pirate. Then Gravity jump after building as much run speed as possible. Requires: "h_canNavigateHeatRooms"
"HiJump"
"canTrickyDashJump"
"canGravityJump"
{
"enemyKill": {
"enemies": [
[
"Yellow Space Pirate (standing)"
]
],
"explicitWeapons": [
"ScrewAttack",
"Super",
"Charge+Plasma"
]
}
}
{
"heatFrames": 390
}
{
"acidFrames": 390
}
|
|
Kill the pirates to free up the full runway for a speedy jump, or to start an IBJ. If the wall pirate jumps over a Samus who is not crouched, it will climb offscreen on its own. But may still need to be killed after. Requires: "h_canNavigateHeatRooms"
{
"or": [
{
"and": [
{
"enemyKill": {
"enemies": [
[
"Yellow Space Pirate (standing)"
],
[
"Yellow Space Pirate (wall)"
]
],
"explicitWeapons": [
"Charge"
]
}
},
{
"heatFrames": 2100
}
]
},
{
"and": [
{
"enemyKill": {
"enemies": [
[
"Yellow Space Pirate (standing)"
],
[
"Yellow Space Pirate (wall)"
]
],
"explicitWeapons": [
"Charge+Plasma"
]
}
},
{
"heatFrames": 240
}
]
},
{
"and": [
{
"enemyKill": {
"enemies": [
[
"Yellow Space Pirate (standing)"
],
[
"Yellow Space Pirate (wall)"
]
],
"explicitWeapons": [
"Charge+Ice+Wave+Spazer"
]
}
},
{
"heatFrames": 660
}
]
},
{
"and": [
{
"enemyKill": {
"enemies": [
[
"Yellow Space Pirate (standing)"
],
[
"Yellow Space Pirate (wall)"
]
],
"explicitWeapons": [
"Missile",
"Super"
]
}
},
{
"heatFrames": 330
}
]
}
]
}
{
"or": [
{
"and": [
"canTrickyDashJump",
{
"heatFrames": 180
}
]
},
{
"and": [
"h_canIBJ",
{
"heatFrames": 1320
}
]
},
{
"and": [
"h_canJumpIntoIBJ",
{
"heatFrames": 540
}
]
}
]
}
|
|
From: 7
Junction By Lower Alcoons (Left of Spike Pits)
To: 1
Left Door
Jump from the bottom of the slope with about 6 tiles of run speed. Requires: "canTrickyDashJump"
"h_canNavigateHeatRooms"
{
"heatFrames": 200
}
|
|
From: 7
Junction By Lower Alcoons (Left of Spike Pits)
To: 6
Junction By Left Door (Right of Pit)
Jump from the bottom of the slope with about 6 tiles of run speed. Requires: "canTrickyDashJump"
"h_canNavigateHeatRooms"
{
"heatFrames": 180
}
|
|
From: 4
Junction Below Bomb Blocks
To: 2
Top Right Door
Notable: true 
Spinjump off a crumble block with just a tiny amount of run speed. That gives just enough height to be able to walljump out. Requires: {
"obstaclesCleared": [
"A"
]
}
"canCrumbleJump"
"canTrickyDashJump"
"canPreciseWalljump"
"canInsaneJump"
{
"heatFrames": 180
}
|
|
Requires a very precise runway length in the previous room of 15 tiles with no open end. Jump while under or to the right of the Bull. Samus's speed no longer changes once hitting the water, so the jump is very forgiving, while the runway length is not. Entrance condition: {
"comeInRunning": {
"speedBooster": true,
"minTiles": 14.4375
}
}
Requires: "canTrickyDashJump" |
|
It doesn't work from flush against the door. Start moving about half a tile away from it. Requires: "canSuitlessMaridia" "canTrickyDashJump" "canWalljump" |
|
It is possible to do in-room by opening the right door and starting close to the door transition. Requires: "HiJump" "canTrickyDashJump" |
|
Jump the first frame after running to gain just enough spinjump height. Requires: "canMidAirMorph" "Gravity" "canWalljump" "canTrickyDashJump" |
|
From: 1
Bottom Left Door
To: 5
Platform Junction Near Top Left Door
Requires running a very precise distance of 7 tiles in the adjacent room, to hit a peak of the speed vs height graph. Entrance condition: {
"comeInJumping": {
"speedBooster": true,
"minTiles": 7
}
}
Requires: "canTrickyDashJump" "canCrossRoomJumpIntoWater" "canMomentumConservingTurnaround" |
|
From: 2
Bottom Right Door
To: 4
Top Door
Notable: true 

Requires a runway of at least 18 tiles in the adjacent room. Ride up the right wall just above the doorway, then turnaround before and after hitting the platform following the doorway slope. Continue up the rest of the way to reach the door. Entrance condition: {
"comeInJumping": {
"speedBooster": true,
"minTiles": 18
}
}
Requires: {
"obstaclesCleared": [
"f_MaridiaTubeBroken"
]
}
"canCrossRoomJumpIntoWater"
"canMomentumConservingTurnaround"
"canTrickyDashJump"
"canInsaneJump"
|
|
Run from right with Speedbooster in the room below, and jump during a spike in the speed-to-jumpHeight chart. Jump against the left side of the door frame to cancel horizontal momentum before passing through the transition. Stay to the right of the fish as you go up. Entrance condition: {
"comeInWithPlatformBelow": {
"minHeight": 9,
"maxHeight": 9,
"maxLeftPosition": 7,
"minRightPosition": 21
},
"comesThroughToilet": "any"
}
Requires: "canCrossRoomJumpIntoWater" "canTrickyDashJump" |
|
Run with 7 tiles (no openend) of speed to jump (after the transition) to reach the far left ledge. Either kill or Kago through the Fish enemy. Entrance condition: {
"comeInRunning": {
"minTiles": 6.4375,
"speedBooster": true
}
}
Requires: "canCrossRoomJumpIntoWater"
"canTrickyDashJump"
"canDodgeWhileShooting"
{
"or": [
{
"ammo": {
"type": "Super",
"count": 1
}
},
{
"and": [
"Charge",
"Plasma"
]
},
{
"and": [
"Plasma",
"canHitbox"
]
},
{
"and": [
"canKago",
"canLateralMidAirMorph",
{
"enemyDamage": {
"enemy": "Skultera",
"type": "contact",
"hits": 1
}
}
]
}
]
}
|
|
From: 2
Bottom Right Door
To: 3
Middle Right Door
Bring 4 full tiles of run speed from the adjacent room in order to jump (after the transition) up to the far left ledge. Either kill the Fish enemy, or jump from the bottom of the slope to pass underneath it. Entrance condition: {
"comeInRunning": {
"minTiles": 4,
"speedBooster": true
}
}
Requires: "HiJump" "canCrossRoomJumpIntoWater" "canTrickyDashJump" |
|
From: 2
Bottom Left Door
To: 11
Upper Left Ledge Junction
Run and jump up through the door using HiJump and SpeedBooster in the room below using at least 1 tile of runway. Entrance condition: {
"comeInWithPlatformBelow": {
"maxHeight": 6,
"maxLeftPosition": 2.5,
"minRightPosition": -2.5
},
"comesThroughToilet": "any"
}
Requires: "canCrossRoomJumpIntoWater" "HiJump" "canTrickyDashJump" "canDownGrab" |
|
From: 3
Bottom Right Door
To: 7
Lower Hills Junction
Run left-to-right in the room below using SpeedBooster over a specific distance, and jump up through the door. Hold left through the transition to avoid hitting the crab. Entrance condition: {
"comeInWithPlatformBelow": {
"minHeight": 9,
"maxHeight": 9,
"maxLeftPosition": -6,
"minRightPosition": 2
},
"comesThroughToilet": "any"
}
Requires: "canCrossRoomJumpIntoWater" "canTrickyDashJump" |
|
From: 3
Bottom Right Door
To: 7
Lower Hills Junction
Run right-to-left in the room below using SpeedBooster over a very precise distance, jump, immediately turn back right, and break spin before reaching the transition. Entrance condition: {
"comeInWithPlatformBelow": {
"minHeight": 8,
"maxHeight": 8,
"maxLeftPosition": -2,
"minRightPosition": 6
},
"comesThroughToilet": "any"
}
Requires: "canCrossRoomJumpIntoWater" "canTrickyDashJump" |
|
From: 3
Bottom Right Door
To: 10
Upper Right Ledge Junction
Run and jump up through the door using SpeedBooster in the room below, jumping during a spike in the speed-to-jumpHeight chart. Immediately after jumping, break spin and turn left to allow you to run longer and to avoid hitting the crab. Entrance condition: {
"comeInWithPlatformBelow": {
"maxHeight": 10,
"maxLeftPosition": -38.5,
"minRightPosition": -2
},
"comesThroughToilet": "any"
}
Requires: "canCrossRoomJumpIntoWater" "canTrickyDashJump" |
|
From: 4
Top Right Door
To: 1
Top Left Door
Notable: true .png)
.gif)
Requires running a very precise distance of 8 tiles in the adjacent room. Morph just before hitting the first ceiling grapple block, then bounce on both grapple block platforms. Entrance condition: {
"comeInJumping": {
"speedBooster": true,
"minTiles": 8
}
}
Requires: "canInsaneJump" "canTrickyDashJump" "canSpringBallBounce" "canCrossRoomJumpIntoWater" |
|
From: 4
Top Right Door
To: 9
Spawn At Junction Below Top Door
Notable: true .png)
.gif)
Requires running a very precise distance of 8 tiles in the adjacent room. Morph just before hitting the first ceiling grapple block, then bounce on the first grapple block platform. Entrance condition: {
"comeInJumping": {
"speedBooster": true,
"minTiles": 8
}
}
Requires: "canInsaneJump" "canTrickyDashJump" "canSpringBallBounce" "canCrossRoomJumpIntoWater" |
|
From: 4
Top Right Door
To: 9
Spawn At Junction Below Top Door
Notable: true .png)
.gif)
Requires running a very precise distance of 7 tiles with no open end in the adjacent room, as this is a peak in jump speed. Morph just before hitting the first ceiling grapple block, then turn on HiJump before bouncing on the first grapple block platform. Entrance condition: {
"comeInJumping": {
"speedBooster": true,
"minTiles": 6.4375
}
}
Requires: "HiJump" "canInsaneJump" "canTrickyDashJump" "canSpringBallBounce" "canCrossRoomJumpIntoWater" |
|
From: 7
Lower Hills Junction
To: 10
Upper Right Ledge Junction
The run and jump is done from the middle peak in the floor. Not the one closest to the bottom right door. Run from the left edge to just right of the peak, jump and wall jump on the overhang. It may be worthwhile to kill the Powamps and crabs first. Requires: "Gravity" "HiJump" "canTrickyDashJump" "canWalljump" Clears obstacles: A, B |
|
Jump the first frame after running to gain just enough spinjump height. Requires: "Gravity" "canWalljump" "canTrickyDashJump" |
|
Run right-to-left to gain a shinecharge on the upper right ledge. Use a gravity jump, Space Jump, or HiJump to approach the door above and spark out. Requires: "Gravity"
{
"or": [
"SpaceJump",
"canGravityJump",
{
"and": [
"HiJump",
{
"or": [
"canWalljump",
"canTrickyDashJump"
]
}
]
}
]
}
{
"canShineCharge": {
"usedTiles": 20,
"gentleUpTiles": 3,
"gentleDownTiles": 1,
"steepUpTiles": 1,
"openEnd": 0
}
}
"canShinechargeMovementComplex"
"canMidairShinespark"
{
"shinespark": {
"frames": 8
}
}
Exit condition: {
"leaveWithSpark": {}
}
|
|
From: 10
Upper Right Ledge Junction
To: 4
Top Right Door
Run from the left edge to just after the second downward slope. No wall jump needed. Requires: "Gravity" "HiJump" "canTrickyDashJump" |
|
From: 11
Upper Left Ledge Junction
To: 5
Top Door
Notable: true 
Run right-to-left to gain a shinecharge on the ledge near the top-left door, and Space Jump to the top center door with shinecharge frames remaining. This is a very short runway, making it an exceptionally difficult short-charge. Requires: "Gravity"
"SpaceJump"
"canTrickyDashJump"
{
"canShineCharge": {
"usedTiles": 11,
"steepUpTiles": 5,
"openEnd": 2
}
}
"canShinechargeMovementComplex"
Exit condition: {
"leaveShinecharged": {
"framesRemaining": 15
}
}
|
|
From: 2
Bottom Door
To: 3
Bottom Right Ledge
Run left-to-right in the room below using SpeedBooster over a specific distance, and jump up through the door. Entrance condition: {
"comeInWithPlatformBelow": {
"minHeight": 8,
"maxHeight": 9,
"maxLeftPosition": -6,
"minRightPosition": 2
},
"comesThroughToilet": "any"
}
Requires: "canCrossRoomJumpIntoWater" "canTrickyDashJump" |
|
From: 2
Bottom Door
To: 3
Bottom Right Ledge
Run right-to-left in the room below using SpeedBooster over a very precise distance, jump, immediately turn back right, and break spin before reaching the transition. Entrance condition: {
"comeInWithPlatformBelow": {
"minHeight": 8,
"maxHeight": 9,
"maxLeftPosition": -2,
"minRightPosition": 6
},
"comesThroughToilet": "any"
}
Requires: "canCrossRoomJumpIntoWater" "canTrickyDashJump" |
|
Requires running a very precise distance of 7 tiles with no open end in the adjacent room, to hit a peak of the speed vs height graph. Entrance condition: {
"comeInJumping": {
"speedBooster": true,
"minTiles": 6.4375
}
}
Requires: "canTrickyDashJump" "canCrossRoomJumpIntoWater" "canMomentumConservingTurnaround" "canDownGrab" |
|
Requires running a very precise distance equivalent to a runway of 7 tiles with no open end in the adjacent room, to hit a peak in the speed / height relationship. The spring ball jump is used after landing near the top, to get to the platform below the door. Entrance condition: {
"comeInJumping": {
"speedBooster": true,
"minTiles": 6.4375
}
}
Requires: "canTrickyDashJump" "canSpringBallJumpMidAir" "canCrossRoomJumpIntoWater" "canMomentumConservingTurnaround" |
|
Requires running a very precise distance of 12 tiles in the adjacent room. Entrance condition: {
"comeInJumping": {
"speedBooster": true,
"minTiles": 12
}
}
Requires: "canCrossRoomJumpIntoWater"
"canMomentumConservingTurnaround"
"canTrickyDashJump"
"canDownGrab"
{
"or": [
"canCrouchJump",
"Gravity",
"HiJump",
"canSpringBallJumpMidAir",
{
"and": [
"canTrickyUseFrozenEnemies",
{
"ammo": {
"type": "Super",
"count": 1
}
}
]
}
]
}
|
|
From: 1
Left Door (locked)
To: 2
Right Door (locked)
Entrance condition: {
"comeInJumping": {
"speedBooster": true,
"minTiles": 0.4375
}
}
Requires: "canCrossRoomJumpIntoWater" "canTrickyDashJump" |
|
From: 3
Draygon (locked)
To: 2
Right Door (locked)
There is a very precise speed where the HiJumpless speedjump is doable. Starting against the left wall, jump just to the left of the rightmost pipe sticking out of the ground. Requires: "Gravity" "canTrickyDashJump" "canPreciseWalljump" |
|
Requires: "Gravity"
"HiJump"
"SpeedBooster"
{
"or": [
"canWalljump",
"canTrickyDashJump"
]
}
|
|
From: 2
Right Door
To: 4
Top Right Ledge Junction
Requires a runway of 7 tiles with no open end in the adjacent room, to hit a peak of the speed vs height graph. Entrance condition: {
"comeInJumping": {
"speedBooster": true,
"minTiles": 6.4375
}
}
Requires: "canCrossRoomJumpIntoWater" "canTrickyDashJump" |
|
From: 2
Bottom Right Door
To: 1
Top Left Door
Requires a runway of at least 7 tiles (with no open end) in the adjacent room. A momentum conserving turnaround is easier than a midair wiggle. Entrance condition: {
"comeInJumping": {
"speedBooster": true,
"minTiles": 6.4375
}
}
Requires: "canCrossRoomJumpIntoWater"
"canTrickyDashJump"
{
"or": [
"canMomentumConservingTurnaround",
"canMidairWiggle"
]
}
|
|
Requires: {
"or": [
"HiJump",
"SpaceJump",
"canTrickyDashJump",
"canTrickyUseFrozenEnemies",
"canPreciseWalljump"
]
}
|
|
From: 3
Junction Left of Morph Tunnel
To: 1
Left Door
Notable: true 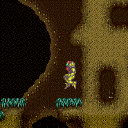
Charge a spark below towards the right then run back and jump up and spark out of the left door. Requires: "canShinechargeMovementComplex"
"canTrickyDashJump"
{
"canShineCharge": {
"usedTiles": 22,
"openEnd": 2
}
}
{
"shinespark": {
"frames": 15
}
}
Exit condition: {
"leaveWithSpark": {}
}
|
|
From: 2
Bottom Door
To: 1
Left Door
Using SpeedBooster in the room below, start running at a precise position to be able to jump during a spike in the speed-to-jumpHeight chart. Break spin before the transition to expand Samus' hitbox and trigger the transition early, retaining more speed and also making it easier to avoid bonking. Hold left through the transition to initiate a turn-around while entering the room. Land on the small platform at the top of the room. Entrance condition: {
"comeInWithPlatformBelow": {
"minHeight": 9,
"maxHeight": 10,
"maxLeftPosition": -33.5,
"minRightPosition": -7
},
"comesThroughToilet": "any"
}
Requires: "canCrossRoomJumpIntoWater" "SpeedBooster" "canTrickyDashJump" "canInsaneJump" |
|
From: 2
Bottom Door
To: 1
Left Door
Shortcharge from right to left while finishing in the plants to the right of the raised plateau, then tricky dash jump up to the left door. Requires: "Gravity"
"canShinechargeMovementComplex"
"canTrickyDashJump"
{
"canShineCharge": {
"usedTiles": 20,
"gentleUpTiles": 2,
"gentleDownTiles": 4,
"steepUpTiles": 1,
"steepDownTiles": 2,
"openEnd": 1
}
}
Exit condition: {
"leaveShinecharged": {
"framesRemaining": 15
}
}
|
|
From: 2
Bottom Door
To: 4
Water Level Junction
Run left-to-right in the room below using SpeedBooster over a specific distance, and jump up through the door. Entrance condition: {
"comeInWithPlatformBelow": {
"minHeight": 9,
"maxHeight": 9,
"maxLeftPosition": -6,
"minRightPosition": 2
},
"comesThroughToilet": "no"
}
Requires: "canCrossRoomJumpIntoWater" "canTrickyDashJump" |
|
From: 1
Left Door
To: 2
Right Door
Notable: true 
Stand at an effective distance of between about 20 and 21 tiles from the door. Run through the door, and jump any time after the transition, holding jump through the entire room to make it to the other side. Samus will go over the Evirs, so there is no need for blue speed. Entrance condition: {
"comeInRunning": {
"minTiles": 19.3625,
"maxTiles": 21.25,
"speedBooster": true
}
}
Requires: "canPlayInSand" "canCrossRoomJumpIntoWater" "canTrickyDashJump" |
|
From: 2
Right Door
To: 1
Left Door
Notable: true
Stand at an effective distance of about 20 tiles from the door. Run through the door, and jump any time after the transition, holding jump through the entire room to make it to the other side. Samus will go over the Evirs, so there is no need for blue speed. Entrance condition: {
"comeInRunning": {
"minTiles": 19.3625,
"maxTiles": 20.3,
"speedBooster": true
}
}
Requires: "canPlayInSand" "canCrossRoomJumpIntoWater" "canTrickyDashJump" |