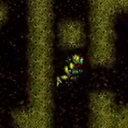
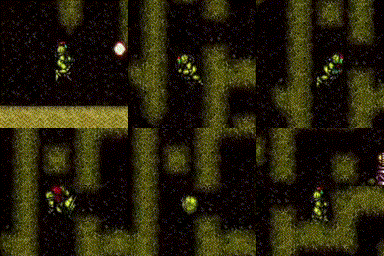
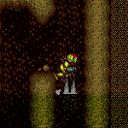
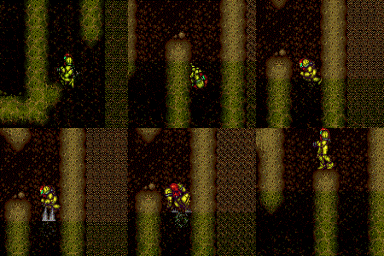
canConsecutiveWalljump (Medium)
Strats ()
|
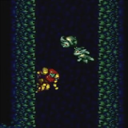
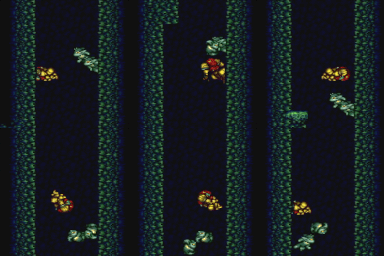
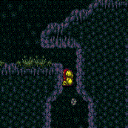
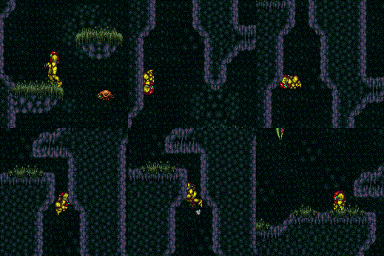
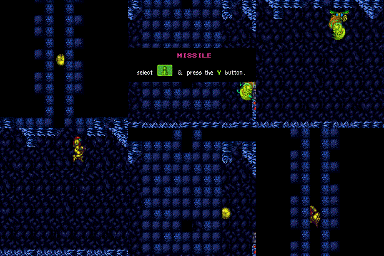
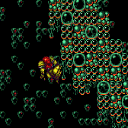
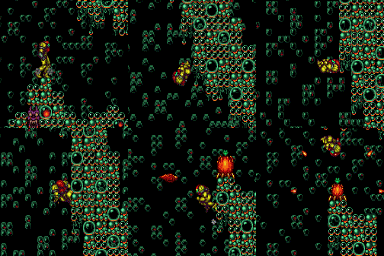
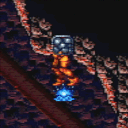
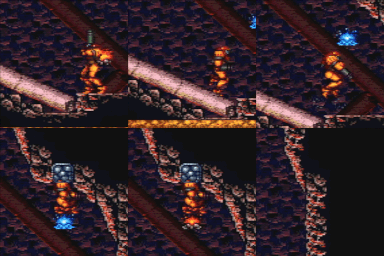
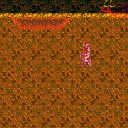
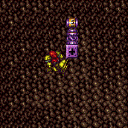
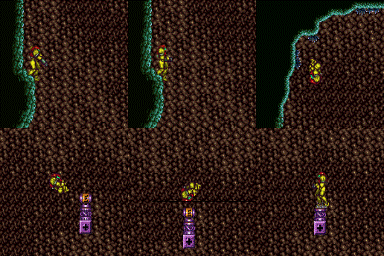
Notable: true Wall jump up 9 times, placing a PB at the top. Only works in direct g-mode with the item still uncollected. Entrance condition: {
"comeInWithGMode": {
"mode": "direct",
"morphed": false
}
}
Requires: {
"itemNotCollectedAtNode": 3
}
"canConsecutiveWalljump"
"Morph"
{
"or": [
"canRiskPermanentLossOfAccess",
"canXRayClimb"
]
}
{
"ammo": {
"type": "PowerBomb",
"count": 9
}
}
"canBeVeryPatient"
{
"or": [
"canUseFrozenEnemies",
"canTrickyJump",
{
"and": [
"ScrewAttack",
"SpaceJump"
]
},
{
"and": [
"canCarefulJump",
{
"or": [
"ScrewAttack",
"SpeedBooster"
]
}
]
},
{
"enemyKill": {
"enemies": [
[
"Boyon",
"Boyon",
"Boyon",
"Boyon"
]
]
}
},
{
"enemyDamage": {
"enemy": "Boyon",
"hits": 1,
"type": "contact"
}
}
]
}
|
|
Requires: "canDelayedWalljump"
{
"or": [
"HiJump",
"canConsecutiveWalljump"
]
}
|
|
Notable: true Requires: "canPreciseWalljump"
"canWallJumpInstantMorph"
{
"or": [
"HiJump",
"canConsecutiveWalljump"
]
}
|
|
From: 13
Bottom Junction
To: 5
Lower Section - Bottom Right Door
It may be best to have shorter, later jumps to prevent bonking the ceiling or hitting the Ripper. Requires: {
"or": [
"canCarefulJump",
"canConsecutiveWalljump"
]
}
|
|
From: 2
Top Left Door
To: 2
Top Left Door
Falling down the shaft and breaking the crumble block does not require Morph. Requires: "h_ZebesIsAwake"
{
"or": [
"h_canDestroyBombWalls",
{
"obstaclesCleared": [
"A"
]
}
]
}
{
"or": [
"canConsecutiveWalljump",
"h_canFly"
]
}
Exit condition: {
"leaveWithGModeSetup": {}
}
|
|
Base strat when entering the room from below. Requires: {
"or": [
"h_canUsePowerBombs",
{
"obstaclesCleared": [
"C"
]
}
]
}
{
"or": [
"canConsecutiveWalljump",
"h_canFly"
]
}
{
"or": [
"h_canUsePowerBombs",
"ScrewAttack"
]
}
Clears obstacles: A, B, C |
|
From: 4
Right Item
To: 2
Top Left Door
Notable: true The Crumble Block does not respawn, so it's possible to grab the items and go back up without breaking the Power Bomb blocks. Requires: "Morph"
{
"or": [
"canConsecutiveWalljump",
"h_canFly"
]
}
{
"obstaclesCleared": [
"A",
"B"
]
}
|
|
From: 4
Right Item
To: 2
Top Left Door
After overloading the PLMs by touching the item, go through the crumble and bomb blocks to the top door. Requires: {
"obstaclesCleared": [
"D"
]
}
"canRiskPermanentLossOfAccess"
"h_canArtificialMorphMovement"
{
  "or": [
    "canConsecutiveWalljump",
    "SpaceJump"
  ]
}
|
|
Placing the bomb against the bomb block at the top of the shaft can be somewhat tricky. Requires: {
"or": [
"h_canUsePowerBombs",
{
"obstaclesCleared": [
"C"
]
}
]
}
"h_canUseMorphBombs"
{
"or": [
"h_canFly",
{
"and": [
"canConsecutiveWalljump",
"canWallJumpInstantMorph"
]
}
]
}
Clears obstacles: A, B, C |
|
From: 5
G-Mode Morph Junction (Bottom)
To: 2
Top Left Door
Overload PLMs by repeatidly bombing the Power Bomb blocks or the side of the crumble block, then enter through the crumble block. Requires: "h_canArtificialMorphIBJ"
{
"or": [
"canConsecutiveWalljump",
"SpaceJump",
"canOffScreenMovement"
]
}
|
|
From: 6
G-Mode Morph Junction Direct (Bottom)
To: 2
Top Left Door
Overload PLMs with a single Power Bomb by hitting the item at the right end of the room. This can be done with a single precisely placed Power Bomb. There should be 4 empty tiles between Samus and the left of the blocks when the bomb is placed. Requires: {
"itemNotCollectedAtNode": 4
}
"canRiskPermanentLossOfAccess"
"h_canArtificialMorphPowerBomb"
"h_canArtificialMorphMovement"
{
  "or": [
    "canConsecutiveWalljump",
    "SpaceJump"
  ]
}
|
|
From: 14
Right Etecoon Shaft - Wall Jump Climb Checkpoint Junction
To: 9
Right Etecoon Shaft - Top Left Door
Not quite the full climb, but close enough. Requires: "canConsecutiveWalljump" |
|
There are camera scroll blocks just below the speed blocks, so it is easy to overload PLMs by wall jumping or space jumping into them. Entrance condition: {
"comeInWithGMode": {
"mode": "any",
"morphed": false
}
}
Requires: {
"or": [
"canConsecutiveWalljump",
"SpaceJump"
]
}
|
|
There are camera scroll blocks just below the speed blocks, so it is easy to overload PLMs by wall jumping or space jumping into them. Entrance condition: {
"comeInWithGMode": {
"mode": "any",
"morphed": false
}
}
Requires: {
"or": [
"canConsecutiveWalljump",
"SpaceJump"
]
}
|
|
From: 2
Bottom Left Door
To: 1
Top Left Door
Climb the shaft and overload PLMs with the camera scroll blocks which are against the crumble blocks. Entrance condition: {
"comeInWithGMode": {
"mode": "any",
"morphed": false
}
}
Requires: {
"or": [
"canConsecutiveWalljump",
"SpaceJump"
]
}
|
|
Without any suits or tanks, Samus will need to move the Beetom part way up the room, shake it off, and go back and farm multiple times. While the Beetom is near the top section, by the Rippers, shake the Beetom off, and re-grab it and ascend the shaft. Either use frozen Rippers as platforms, while shooting diagonally to prevent freezing the Beetom, or kill the Rippers before ascending. Be careful not to apply too many inputs after grabbing the Beetom in order to get to the top before it is shaken off. Requires: {
"obstaclesNotCleared": [
"A"
]
}
"HiJump"
{
"or": [
"canUseFrozenEnemies",
{
"and": [
"SpaceJump",
{
"obstaclesCleared": [
"B"
]
}
]
},
{
"and": [
"canConsecutiveWalljump",
{
"obstaclesCleared": [
"B"
]
}
]
}
]
}
{
"enemyDamage": {
"enemy": "Beetom",
"type": "contact",
"hits": 9
}
}
Exit condition: {
"leaveWithGModeSetup": {
"knockback": false
}
}
|
|
Requires: {
"or": [
"SpaceJump",
{
"and": [
"HiJump",
"SpeedBooster"
]
},
{
"and": [
"HiJump",
"canConsecutiveWalljump"
]
}
]
}
|
|
Kill the Rippers then wall jump up. Requires: "canConsecutiveWalljump"
{
"or": [
"canPreciseWalljump",
"canSpringwall",
"HiJump"
]
}
{
"obstaclesCleared": [
"B"
]
}
|
|
From: 9
Junction (Top Rippers)
To: 9
Junction (Top Rippers)
Kill the Rippers with Screw Attack. Break spin before landing to prevent breaking the platform. Requires: "ScrewAttack"
{
"or": [
"SpaceJump",
"canConsecutiveWalljump",
{
"and": [
"canWalljump",
"HiJump"
]
}
]
}
Clears obstacles: B |
|
From: 9
Main Junction
To: 7
Top Right Door
Notable: true Requires: "canDelayedWalljump" "canConsecutiveWalljump" |
|
Wall jump up the left wall, perform a delayed wall jump on the Fune to reach the door. Requires: "canDelayedWalljump"
"canConsecutiveWalljump"
"canTrickyJump"
"canUseEnemies"
{
"or": [
{
"heatFrames": 190
},
{
"and": [
"canPrepareForNextRoom",
{
"heatFrames": 120
}
]
}
]
}
|
|
From: 2
Bottom Left Door
To: 1
Top Left Door
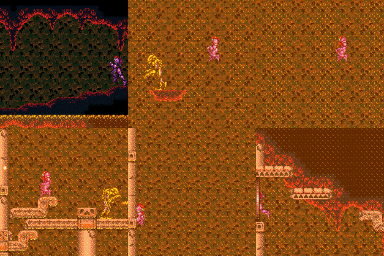
Notable: true Wall jump up the left wall and then on the moving platform (Kamer) while avoiding the Fune's fireball. The Kamers will temporarily move down if Samus is below them, so it is best to walk under the first Kamer before climbing the wall. It is possible to freeze or kill the Fune with a Super or Power Bomb to make things easier. Requires: "canPreciseWalljump"
"canConsecutiveWalljump"
"canUseEnemies"
{
"or": [
{
"heatFrames": 560
},
{
"and": [
"canCarefulJump",
{
"heatFrames": 360
}
]
},
{
"and": [
"canTrickyJump",
{
"heatFrames": 240
}
]
},
{
"and": [
{
"or": [
"canUseFrozenEnemies",
{
"ammo": {
"type": "Super",
"count": 1
}
}
]
},
{
"heatFrames": 432
}
]
},
{
"and": [
{
"ammo": {
"type": "PowerBomb",
"count": 1
}
},
{
"heatFrames": 456
}
]
}
]
}
|
|
Climb up the left, freeze the top-left Sova, and use it as a platform to reach the door. Requires: "canUseFrozenEnemies"
"canConsecutiveWalljump"
{
"heatFrames": 800
}
|
|
Walljump up the right, then setup a walljump on the top-right crumble platform directly from the right wall. Requires: "HiJump"
"canConsecutiveWalljump"
{
"heatFrames": 500
}
|
|
From: 2
Bottom Right Door
To: 1
Top Right Door
Walljump up the right, then walljump off the top-middle crumble platform then off the top-right one. Requires: "canPreciseWalljump"
"canConsecutiveWalljump"
{
"heatFrames": 500
}
|
|
From: 2
Bottom Right Door
To: 1
Top Right Door
Walljump up the right then do one crumble jump on the top middle platform. Requires: "canCrumbleJump"
"canConsecutiveWalljump"
{
"heatFrames": 600
}
|
|
Walljump up the right, then use SpaceJump at the top. Requires: "SpaceJump"
"canConsecutiveWalljump"
{
"heatFrames": 500
}
|
|
Walljump up the right then SpringBall bounce on top of the highest Crumble Block platform to reach the door. Requires: "h_canUseSpringBall"
"canConsecutiveWalljump"
{
"heatFrames": 500
}
|
|
Requires: "canConsecutiveWalljump"
{
"heatFrames": 550
}
|
|
Requires: {
"or": [
"canConsecutiveWalljump",
"h_canFly"
]
}
|
|
Takes three walljumps, and must shinespark at the apex. Entrance condition: {
"comeInShinecharged": {
"framesRequired": 110
}
}
Requires: "canPreciseWalljump"
"canConsecutiveWalljump"
"canShinechargeMovement"
"canMidairShinespark"
{
"shinespark": {
"frames": 78
}
}
|
|
Takes three walljumps, and must shinespark at the apex. Entrance condition: {
"comeInShinecharging": {
"length": 9,
"openEnd": 0
}
}
Requires: "canPreciseWalljump"
"canConsecutiveWalljump"
"canShinechargeMovement"
"canMidairShinespark"
{
"shinespark": {
"frames": 78
}
}
|
|
From: 5
Small Platforms Junction
To: 3
Item
Notable: true Freeze the Mella at a precise location in order to jump through the crumble block, then wall jump up the long channel and mid air morph to get out. The Mella pixel positioning window is larger and higher with Morph and an X-Ray Stand Up. Requires: "Morph"
"h_canNonTrivialCeilingClip"
"canTrickyUseFrozenEnemies"
{
"or": [
"canConsecutiveWalljump",
{
"and": [
"HiJump",
"canWalljump"
]
}
]
}
|
|
Requires: {
"or": [
"canConsecutiveWalljump",
"h_canFly"
]
}
|
|
From: 5
Golden Torizo (locked)
To: 4
Hidden Right Item
Notable: true One vertical spark is needed to open up the area directly above. Then, a second horizontal spark is performed where those blocks were cleared. Try to aim for the seam between tiles to break more blocks. And the left side of the opening may be slightly easier. Requires: "h_canNavigateHeatRooms"
{
"obstaclesCleared": [
"f_DefeatedGoldenTorizo"
]
}
"canShinechargeMovementComplex"
"canPreciseWalljump"
"canConsecutiveWalljump"
{
"canShineCharge": {
"usedTiles": 28,
"openEnd": 0
}
}
{
"heatFrames": 900
}
{
"shinespark": {
"frames": 11
}
}
|
|
From: 5
Golden Torizo (locked)
To: 4
Hidden Right Item
Walljump up to reach the left ledge below the bomb blocks then perform an instant morph to place a bomb. Walljump up a second time and again instant morph off that left ledge to enter the 1 tile hole created by the bomb. Requires: "h_canNavigateHeatRooms"
"h_canUseMorphBombs"
"can3HighWallMidAirMorph"
"canConsecutiveWalljump"
{
"heatFrames": 1100
}
|
|
Requires: "h_canNavigateHeatRooms"
{
"obstaclesCleared": [
"A"
]
}
{
"or": [
{
"and": [
"canConsecutiveWalljump",
{
"heatFrames": 300
}
]
},
{
"and": [
"canConsecutiveWalljump",
"HiJump",
{
"heatFrames": 240
}
]
},
{
"and": [
"SpaceJump",
{
"heatFrames": 600
}
]
},
{
"and": [
"SpaceJump",
"HiJump",
{
"heatFrames": 390
}
]
}
]
}
|
|
From: 5
Below Left Door Junction
To: 1
Left Door
Notable: true Requires: "h_canNavigateHeatRooms"
"Gravity"
{
"or": [
{
"and": [
"HiJump",
"canConsecutiveWalljump",
{
"heatFrames": 150
},
{
"acidFrames": 150
}
]
},
{
"and": [
"canConsecutiveWalljump",
{
"heatFrames": 210
},
{
"acidFrames": 210
}
]
}
]
}
|
|
From: 5
Below Left Door Junction
To: 1
Left Door
Notable: true Requires: "h_canNavigateHeatRooms"
"canConsecutiveWalljump"
{
"or": [
{
"and": [
"HiJump",
{
"heatFrames": 280
},
{
"acidFrames": 280
}
]
},
{
"and": [
{
"heatFrames": 400
},
{
"acidFrames": 400
}
]
}
]
}
|
|
From: 5
Firefleas Bottom Left Platform Junction
To: 7
Fireflea Statue's Claw Junction
Requires: "canConsecutiveWalljump"
"canPreciseWalljump"
"canCarefulJump"
{
"or": [
"canTrickyJump",
"canResetFallSpeed"
]
}
|
|
From: 2
Bottom Left Door
To: 4
Junction Above Bomb Blocks
Use ScrewAttack to remove the left wall pirate and walljump high enough to place a power bomb to destroy the bomb blocks Then walljump up again to reach the upper region. Requires: "h_canNavigateHeatRooms"
"h_canUsePowerBombs"
"canPreciseWalljump"
"canConsecutiveWalljump"
"HiJump"
"ScrewAttack"
{
"heatFrames": 330
}
{
"or": [
"h_heatResistant",
"canPauseAbuse",
{
"resourceCapacity": [
{
"type": "RegularEnergy",
"count": 149
}
]
}
]
}
Clears obstacles: A |
|
From: 2
Bottom Left Door
To: 4
Junction Above Bomb Blocks
Requires: "h_canNavigateHeatRooms"
"SpaceJump"
"ScrewAttack"
{
"or": [
{
"and": [
"canConsecutiveWalljump",
{
"heatFrames": 240
}
]
},
{
"and": [
"HiJump",
{
"heatFrames": 240
}
]
},
{
"heatFrames": 360
}
]
}
|
|
From: 6
Bottom Platform Junction With Pirates Killed
To: 4
Junction Above Bomb Blocks
Requires: "h_canNavigateHeatRooms"
"SpaceJump"
{
"or": [
{
"and": [
"canConsecutiveWalljump",
{
"heatFrames": 260
}
]
},
{
"heatFrames": 360
}
]
}
{
"or": [
"ScrewAttack",
{
"and": [
"h_canUsePowerBombs",
{
"or": [
{
"and": [
"canWalljump",
{
"heatFrames": 120
}
]
},
{
"heatFrames": 200
}
]
}
]
},
{
"and": [
"h_canUseMorphBombs",
{
"or": [
{
"and": [
"canConsecutiveWalljump",
{
"heatFrames": 520
}
]
},
{
"heatFrames": 800
}
]
}
]
},
{
"obstaclesCleared": [
"A"
]
}
]
}
Clears obstacles: A |
|
From: 6
Bottom Platform Junction With Pirates Killed
To: 4
Junction Above Bomb Blocks
Notable: true Break the bomb blocks in The Worst Room In The Game with extremely precise walljumps. Either with a fully delayed max height jump from the wall, or with an instant turnaround after jumping from the lower layer of bomb blocks. Requires: "h_heatProof" "HiJump" "ScrewAttack" "canInsaneWalljump" "canInsaneJump" "canConsecutiveWalljump" "canMidairWiggle" Clears obstacles: A |
|
From: 6
Bottom Platform Junction With Pirates Killed
To: 4
Junction Above Bomb Blocks
Requires: "h_canNavigateHeatRooms"
"HiJump"
"canPreciseWalljump"
"canConsecutiveWalljump"
{
"heatFrames": 300
}
{
"or": [
{
"and": [
"h_canUsePowerBombs",
{
"heatFrames": 200
}
]
},
{
"and": [
"canDelayedWalljump",
"canWallJumpInstantMorph",
"h_canUseMorphBombs",
{
"heatFrames": 520
}
]
},
{
"obstaclesCleared": [
"A"
]
}
]
}
Clears obstacles: A |
|
From: 6
Bottom Platform Junction With Pirates Killed
To: 4
Junction Above Bomb Blocks
Requires: "canInsaneWalljump"
"canConsecutiveWalljump"
"h_heatProof"
{
"or": [
"h_canUsePowerBombs",
{
"obstaclesCleared": [
"A"
]
}
]
}
Clears obstacles: A |
|
From: 6
Bottom Platform Junction With Pirates Killed
To: 4
Junction Above Bomb Blocks
Requires: "h_canNavigateHeatRooms"
"canSpringwall"
"canConsecutiveWalljump"
{
"heatFrames": 300
}
{
"or": [
{
"and": [
"h_canUsePowerBombs",
{
"heatFrames": 180
}
]
},
{
"and": [
"h_canUseMorphBombs",
{
"heatFrames": 800
}
]
},
{
"obstaclesCleared": [
"A"
]
}
]
}
Clears obstacles: A |
|
Requires: "canUseEnemies"
{
"or": [
{
"and": [
"canWalljump",
{
"heatFrames": 390
}
]
},
{
"and": [
"canConsecutiveWalljump",
"canCarefulJump",
{
"heatFrames": 330
}
]
},
{
"and": [
"HiJump",
{
"heatFrames": 490
}
]
},
{
"and": [
"h_canCrouchJumpDownGrab",
{
"heatFrames": 610
}
]
}
]
}
|
|
From: 1
Right Door
To: 2
Item (locked)
Run from the adjacent room and jump at the end of the platform. From the top right platform, jump to the left and wall jump just above the spikes and climb the left wall. Entrance condition: {
"comeInRunning": {
"speedBooster": true,
"minTiles": 3
}
}
Requires: "canCarefulJump"
"canConsecutiveWalljump"
{
"not": "f_DefeatedPhantoon"
}
|
|
Notable: true Perform a running stationary spinjump from a precise spot, then a CWJ with slightly more speed off the wall one tile further out. This makes it possible to just barely walljump off the grapple block. Requires: "HiJump" "canInsaneJump" "canStationarySpinJump" "canConsecutiveWalljump" "canInsaneWalljump" "canCWJ" Clears obstacles: B |
|
From: 1
Top Left Door
To: 1
Top Left Door
Follow the crab from the bottom right door to the top left door. This takes approximately 90 seconds. It is also possible to knock the crab off of the middle peak with a super and follow it to the left which may save time. Requires: "Gravity"
"canBePatient"
{
"or": [
"SpaceJump",
{
"and": [
{
"ammo": {
"type": "Super",
"count": 1
}
},
{
"or": [
"HiJump",
"canSpringBallJumpMidAir",
"canGravityJump",
"canConsecutiveWalljump",
"SpeedBooster"
]
}
]
}
]
}
Exit condition: {
"leaveWithGModeSetup": {}
}
|
|
From: 1
Top Left Door
To: 1
Top Left Door
Follow the crab from the bottom right door to the top left door. This takes approximately 90 seconds. It is also possible to knock the crab off of the middle peak with a super and follow it to the left which may save time. Requires: "h_canFrozenEnemyRunway"
"Gravity"
"canBePatient"
{
  "or": [
    "SpaceJump",
    {
      "and": [
        {
          "ammo": {
            "type": "Super",
            "count": 1
          }
        },
        {
          "or": [
            "HiJump",
            "canSpringBallJumpMidAir",
            "canGravityJump",
            "canConsecutiveWalljump",
            "SpeedBooster"
          ]
        }
      ]
    }
  ]
}
Exit condition: {
"leaveWithRunway": {
"length": 4,
"openEnd": 0
}
}
|
|
From: 1
Middle Left Door
To: 9
Junction Below Top Door
Bomb the Power Bomb blocks below to overload PLMs, then go up through the crumble blocks to escape. Entrance condition: {
"comeInWithGMode": {
"mode": "any",
"morphed": true
}
}
Requires: "h_canArtificialMorphBombs"
"h_canNavigateUnderwater"
{
"or": [
{
"and": [
"Gravity",
"h_canArtificialMorphIBJ"
]
},
{
"and": [
"HiJump",
"canSpringBallJumpMidAir"
]
},
{
"and": [
"HiJump",
"canConsecutiveWalljump",
"canPreciseWalljump"
]
}
]
}
|
|
From: 1
Middle Left Door
To: 11
G-Mode Overloaded PLMs Junction (By Bottom Left Door)
Bomb the PB blocks below to overload PLMs, then go up through the crumble blocks to escape. Entrance condition: {
"comeInWithGMode": {
"mode": "any",
"morphed": true
}
}
Requires: "h_canArtificialMorphBombs"
"h_canNavigateUnderwater"
{
"or": [
{
"and": [
"Gravity",
"h_canArtificialMorphIBJ"
]
},
{
"and": [
"HiJump",
"canSpringBallJumpMidAir"
]
},
{
"and": [
"HiJump",
"canConsecutiveWalljump",
"canPreciseWalljump"
]
}
]
}
|
|
Requires: "canSuitlessMaridia"
"HiJump"
"canConsecutiveWalljump"
{
"or": [
{
"obstaclesCleared": [
"A"
]
},
"h_canUsePowerBombs"
]
}
Clears obstacles: A |
|
Requires: "Gravity"
{
"or": [
"SpaceJump",
"Grapple",
"canConsecutiveWalljump"
]
}
|
|
From: 11
G-Mode Overloaded PLMs Junction (By Bottom Left Door)
To: 1
Middle Left Door
After PLMs are overloaded, climb to the top left door and fall through the Bomb Blocks. Requires: {
"or": [
"canSnailClimb",
{
"and": [
"Gravity",
{
"or": [
"SpaceJump",
"canConsecutiveWalljump"
]
}
]
}
]
}
|
|
While that one walljump near the end is a bit precise, it does not require a delayed walljump. Requires: "Gravity"
{
"or": [
{
"and": [
"HiJump",
"canWalljump"
]
},
{
"and": [
"canPreciseWalljump",
"canConsecutiveWalljump"
]
},
{
"and": [
"Grapple",
"canCarefulJump"
]
}
]
}
|
|
Requires: "Gravity"
"canWalljump"
{
"or": [
"HiJump",
"canConsecutiveWalljump",
"Grapple"
]
}
|
|
From: 1
Left Door
To: 3
Top Door
Notable: true Requires: "canSuitlessMaridia" "HiJump" "canConsecutiveWalljump" |
|
Requires: {
"or": [
{
"and": [
"Gravity",
{
"or": [
"SpaceJump",
{
"and": [
"canPreciseWalljump",
"canConsecutiveWalljump"
]
},
{
"and": [
"HiJump",
"canWalljump"
]
}
]
}
]
},
{
"and": [
"canSpaceJumpWaterBounce",
"canWalljump"
]
}
]
}
{
"resetRoom": {
"nodes": [
1
],
"mustStayPut": false
}
}
{
"refill": [
"Super"
]
}
|
|
From: 3
Junction Left of Morph Tunnel
To: 1
Left Door
Requires: "Gravity"
{
"or": [
{
"and": [
"canPreciseWalljump",
"canConsecutiveWalljump"
]
},
{
"and": [
"HiJump",
"canWalljump"
]
}
]
}
|
|
From: 3
Junction Left of Morph Tunnel
To: 1
Left Door
Requires: "canSuitlessMaridia"
"HiJump"
"canPreciseWalljump"
{
"or": [
"canConsecutiveWalljump",
"canDelayedWalljump"
]
}
|
|
From: 1
Top Sand Entrance
To: 4
Right Item
Notable: true Walljump up and instant morph with exact timing and positioning so as to enter the Power Bomb location through the maze's exit. Requires: "canSuitlessMaridia" "canConsecutiveWalljump" "canPlayInSand" "HiJump" "canInsaneWalljump" "can3HighWallMidAirMorph" |
|
Requires: "Gravity"
{
"or": [
"SpaceJump",
{
"and": [
"HiJump",
{
"or": [
"canSpringBallJumpMidAir",
"canWalljump"
]
}
]
},
"canConsecutiveWalljump"
]
}
|
|
Requires: "Gravity"
{
"or": [
"SpaceJump",
"Grapple",
"canConsecutiveWalljump"
]
}
{
"or": [
"canDodgeWhileShooting",
"ScrewAttack",
"Wave",
"Spazer",
"Plasma",
"Grapple"
]
}
{
"resetRoom": {
"nodes": [
1,
2,
4
],
"mustStayPut": false
}
}
{
"refill": [
"Energy",
"Missile",
"Super"
]
}
|
|
From: 1
Top Sand Entrance
To: 7
Below Morph Tunnel Junction
HiJump with a good jump from the sand can reach the Solid Rock Maze region. Use the sandfall if Samus gets stuck in the sand. Requires: "canSuitlessMaridia" "canPlayInSand" "HiJump" "canConsecutiveWalljump" "canSpaceJumpWaterBounce" |
|
From: 1
Top Sand Entrance
To: 7
Below Morph Tunnel Junction
Notable: true HiJump with a good jump from the sand can reach the Solid Rock Maze region. Use the sandfall if Samus gets stuck in the sand. Perform several wall jumps to climb up to the water level, then precise wall jumps to break free. Requires: "canSuitlessMaridia" "canPlayInSand" "HiJump" "canConsecutiveWalljump" "canPreciseWalljump" |
|
Requires: {
"or": [
"canConsecutiveWalljump",
{
"and": [
"HiJump",
"canWalljump"
]
},
"SpaceJump"
]
}
{
"enemyKill": {
"enemies": [
[
"Ripper",
"Ripper",
"Ripper"
]
]
}
}
|
|
Lead the wallpirate into jumping across the room and dodge the standing pirate. Requires: "canInsaneWalljump" "canConsecutiveWalljump" |
|
From: 3
Central Junction with all Standing Pirates Killed
To: 1
Top Left Door (locked)
This is the same size of ledge as writg. Requires: "canInsaneWalljump" "canConsecutiveWalljump" |
|
Requires: {
"or": [
"canConsecutiveWalljump",
"h_canFly"
]
}
|
|
Requires: {
"or": [
"canConsecutiveWalljump",
"h_canFly"
]
}
{
"enemyDamage": {
"enemy": "Choot",
"type": "contact",
"hits": 1
}
}
|
|
Shoot the Choot either before landing or from the safety of the ledge edge. If bomb jumping, there is a timing for rolling under the Choot. Requires: {
"or": [
"canConsecutiveWalljump",
"h_canFly"
]
}
{
"or": [
"canTrickyJump",
{
"and": [
"canCarefulJump",
{
"enemyKill": {
"enemies": [
[
"Choot"
]
],
"explicitWeapons": [
"Missile",
"Super"
]
}
}
]
}
]
}
|
|
To avoid damage, the Choot can be killed and then Samus can climb back up again. Requires: {
"or": [
"canConsecutiveWalljump",
"h_canFly"
]
}
{
"or": [
{
"enemyKill": {
"enemies": [
[
"Choot"
]
],
"explicitWeapons": [
"Wave",
"Spazer",
"PowerBomb"
]
}
},
{
"and": [
"canBeVeryPatient",
{
"enemyKill": {
"enemies": [
[
"Choot"
]
]
}
}
]
}
]
}
|
|
Requires: {
"or": [
"canConsecutiveWalljump",
"SpaceJump"
]
}
{
"or": [
{
"enemyKill": {
"enemies": [
[
"Choot"
]
],
"explicitWeapons": [
"ScrewAttack"
]
}
},
{
"and": [
{
"or": [
"SpaceJump",
{
"and": [
"canConsecutiveWalljump",
"canWalljumpWithCharge"
]
}
]
},
{
"enemyKill": {
"enemies": [
[
"Choot"
]
],
"explicitWeapons": [
"PseudoScrew"
]
}
}
]
}
]
}
|
|
Requires: "canSuitlessMaridia"
{
"or": [
{
"and": [
"HiJump",
{
"or": [
"canDownGrab",
"canSpringBallJumpMidAir",
"canConsecutiveWalljump"
]
}
]
},
"h_canMaxHeightSpringBallJump"
]
}
|
|
From: 4
West Leg Sand
To: 2
East Leg Right Door
Notable: true Use the grapple block to initiate a Grapple Jump to climb up to the higher level and above the water line. Aiming the Grapple Jump to line up with the one tile hole is difficult and Samus is moving at high speeds. Escaping the water is also difficult as Samus must be standing at the water line when jumping for the next part of the grapple jump. It may be easier to jump out of the water by turning HiJump off. A Grapple Jump can be a spin jump by running briefly before jumping and that can be used to begin Walljumping or Space Jumping. Requires: "canSuitlessMaridia"
"canTrickyGrappleJump"
"canMidairWiggle"
{
"or": [
{
"enemyDamage": {
"enemy": "Menu",
"type": "contact",
"hits": 1
}
},
"SpaceJump",
{
"and": [
"canConsecutiveWalljump",
{
"or": [
"ScrewAttack",
"canStaggeredWalljump"
]
}
]
}
]
}
|
|
The swarm of Menus will attack Samus at the top of the room. Tank them, carefully dodge them, or kill them with Screw or Pseudo Screw. Requires: "Gravity"
"canConsecutiveWalljump"
{
"or": [
"ScrewAttack",
"canStaggeredWalljump",
"canWalljumpWithCharge",
{
"enemyDamage": {
"enemy": "Menu",
"type": "contact",
"hits": 1
}
}
]
}
|
|
From: 3
Bottom of Shaft
To: 1
Left Door
Use Pseudo Screw to avoid Space Pirate attacks while climbing the central shaft. The Screw Attack effect is not active when Samus is preparing to Walljump. Requires: {
"or": [
{
"and": [
"canConsecutiveWalljump",
"canWalljumpWithCharge"
]
},
{
"and": [
"SpaceJump",
"HiJump",
"canPseudoScrew"
]
}
]
}
|
|
From: 3
Bottom of Shaft
To: 1
Left Door
Use Screw Attack to avoid Space Pirate attacks while climbing the central shaft. The Screw Attack effect is not active when Samus is preparing to Walljump. Requires: "ScrewAttack"
{
"or": [
"canConsecutiveWalljump",
{
"and": [
"SpaceJump",
"HiJump"
]
}
]
}
|
|
From: 3
Bottom of Shaft
To: 1
Left Door
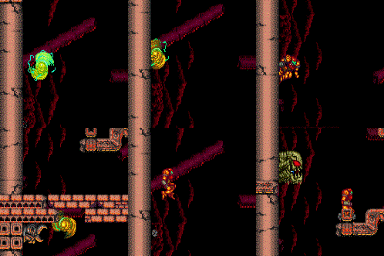
Notable: true Navigate Leodox Room in reverse by killing or distracting the right side pirates and manipulating or dodging the left side pirates during the shaft climb. The acid starts rising when Samus is at the bottom of the long climb. The right-side pirates can be killed while going down to prevent having to dodge their lasers during the climb. Alternatively, jump and force the pirates to shoot just before starting to climb. Requires: {
"or": [
"canCarefulJump",
"ScrewAttack",
"HiJump"
]
}
{
"or": [
"canConsecutiveWalljump",
{
"and": [
"SpaceJump",
{
"or": [
"HiJump",
{
"and": [
"canCarefulJump",
{
"acidFrames": 20
},
{
"enemyDamage": {
"enemy": "Tourian Space Pirate (all)",
"type": "contact",
"hits": 1
}
}
]
},
{
"acidFrames": 100
}
]
}
]
}
]
}
|
