canHorizontalShinespark (Medium)
The ability to shinespark horizontally from the ground. This can be achieved by starting without horizontal momentum and pressing jump and then forward while still holding jump (or repressing jump). These inputs can be done in rapid succession or with a short delay. Shinesparking in water can be done the same way, but requires a slightly longer delay between the jump and forward presses, and it is particularly important to ensure Samus has no horizontal momentum.
Dependencies: canShinespark
Strats ()
|
From: 1
Top Left Door
To: 4
Top Junction (Right of Spikes)
Entrance condition: {
"comeInShinecharging": {
"length": 3,
"openEnd": 1
}
}
Requires: "canHorizontalShinespark"
{
"or": [
{
"shinespark": {
"frames": 56,
"excessFrames": 6
}
},
{
"and": [
"canShinechargeMovement",
"canMidairShinespark",
{
"shinespark": {
"frames": 41,
"excessFrames": 4
}
}
]
}
]
}
|
|
Entrance condition: {
"comeInShinecharging": {
"length": 30,
"openEnd": 1,
"steepUpTiles": 9
}
}
Requires: "canHorizontalShinespark"
{
"shinespark": {
"frames": 125,
"excessFrames": 33
}
}
Clears obstacles: A |
|
Requires: "canHorizontalShinespark"
{
"canShineCharge": {
"usedTiles": 19,
"steepUpTiles": 2,
"steepDownTiles": 1,
"openEnd": 2
}
}
{
"shinespark": {
"frames": 125,
"excessFrames": 33
}
}
Clears obstacles: A |
|
From: 1
Left Door
To: 4
Middle Junction (Left of Morph Tunnel)
It is possible to return to the farm after sparking to regain Energy. Requires: "canHorizontalShinespark"
{
"obstaclesCleared": [
"B"
]
}
{
"or": [
{
"canShineCharge": {
"usedTiles": 14,
"openEnd": 0,
"steepUpTiles": 1,
"steepDownTiles": 1
}
},
{
"and": [
{
"canShineCharge": {
"usedTiles": 15,
"openEnd": 0,
"steepUpTiles": 1,
"steepDownTiles": 1
}
},
{
"doorUnlockedAtNode": 1
}
]
}
]
}
{
"shinespark": {
"frames": 54
}
}
Clears obstacles: A |
|
Shinespark from the end of the entry runway, just past the down slope. Samus will crash into the last set of blocks preventing access to the opposite door. Entrance condition: {
"comeInShinecharged": {
"framesRequired": 37
}
}
Requires: "canShinechargeMovement"
"canHorizontalShinespark"
{
"shinespark": {
"frames": 70
}
}
{
"or": [
"Morph",
"canTunnelCrawl",
"canTurnaroundAimCancel",
{
"and": [
"canTwoTileSqueeze",
"canXRayTurnaround"
]
}
]
}
|
|
Enter the room while building a shinespark and use it on the lowest part of the ramp to cross the room and reach a raised ledge on the right side wall. From there, use SpaceJump to escape the water. Carry the shinespark to the bottom of the ramp by delaying the first Choot with two Power Beam shots, killing it, or bounceballing through it. The Choot can be shot diagonally from the middle platform, and again by running off that platform and aiming down to float above it. Entrance condition: {
"comeInShinecharging": {
"length": 6,
"openEnd": 1,
"steepDownTiles": 1
}
}
Requires: "canShinechargeMovementComplex"
"canCarefulJump"
{
"or": [
{
"and": [
"canMidairShinespark",
"canDodgeWhileShooting"
]
},
{
"and": [
{
"enemyDamage": {
"enemy": "Choot",
"type": "contact",
"hits": 1
}
},
"canNeutralDamageBoost",
"canBounceBall"
]
},
{
"and": [
"canMockball",
{
"or": [
"canPseudoScrew",
"ScrewAttack",
"Plasma",
"Wave",
{
"ammo": {
"type": "Missile",
"count": 1
}
},
{
"ammo": {
"type": "Super",
"count": 1
}
}
]
}
]
}
]
}
"canHorizontalShinespark"
{
"shinespark": {
"frames": 123,
"excessFrames": 5
}
}
"canSpaceJumpWaterBounce"
{
"or": [
{
"and": [
"HiJump",
"canSpaceJumpWaterEscape"
]
},
{
"and": [
"canTrickyJump",
"canDownGrab"
]
},
"canWalljump"
]
}
|
|
Horizontally shinespark from the grassy patch on the ledge near the door, then jump across the platforms. Entrance condition: {
"comeInShinecharged": {
"framesRequired": 10
}
}
Requires: "canHorizontalShinespark"
{
"shinespark": {
"frames": 35
}
}
|
|
From: 1
Lower Section - Bottom Left Door
To: 5
Lower Section - Bottom Right Door
Entrance condition: {
"comeInShinecharging": {
"length": 23,
"openEnd": 1,
"steepUpTiles": 1,
"steepDownTiles": 6
}
}
Requires: "canHorizontalShinespark"
{
"or": [
{
"shinespark": {
"frames": 131,
"excessFrames": 35
}
},
{
"and": [
"canShinechargeMovement",
"canMidairShinespark",
{
"shinespark": {
"frames": 106,
"excessFrames": 35
}
}
]
}
]
}
|
|
From: 13
Bottom Junction
To: 5
Lower Section - Bottom Right Door
Requires: "canHorizontalShinespark"
{
"or": [
{
"canShineCharge": {
"usedTiles": 23,
"openEnd": 1,
"steepUpTiles": 6,
"steepDownTiles": 1
}
},
{
"and": [
{
"canShineCharge": {
"usedTiles": 24,
"openEnd": 1,
"steepUpTiles": 6,
"steepDownTiles": 1
}
},
{
"doorUnlockedAtNode": 1
}
]
}
]
}
{
"or": [
{
"shinespark": {
"frames": 131
}
},
{
"and": [
"canShinechargeMovement",
"canMidairShinespark",
{
"shinespark": {
"frames": 106
}
}
]
}
]
}
|
|
From: 3
Left Side - Top Middle Door (Main Entrance)
To: 10
Top Item (Above Hopper Pit)
Entrance condition: {
"comeInShinecharging": {
"length": 24,
"openEnd": 1
}
}
Requires: "canHorizontalShinespark"
{
"shinespark": {
"frames": 38,
"excessFrames": 7
}
}
|
|
From: 13
Central Junction
To: 10
Top Item (Above Hopper Pit)
Requires: {
"or": [
{
"and": [
{
"canShineCharge": {
"usedTiles": 16,
"openEnd": 1
}
},
{
"shinespark": {
"frames": 24,
"excessFrames": 4
}
}
]
},
{
"and": [
"canHorizontalShinespark",
{
"canShineCharge": {
"usedTiles": 24,
"openEnd": 1
}
},
{
"shinespark": {
"frames": 38,
"excessFrames": 7
}
}
]
},
{
"and": [
"canHorizontalShinespark",
{
"doorUnlockedAtNode": 3
},
{
"canShineCharge": {
"usedTiles": 25,
"openEnd": 1
}
},
{
"shinespark": {
"frames": 38,
"excessFrames": 7
}
}
]
}
]
}
|
|
Pink Hoppers Shinespark into the Wall to Ride the Elevator, Come in Shinecharged (Very Hard)
Pink Brinstar Hopper Room
From: 2
Right Door
To: 3
Top Junction
Notable: true 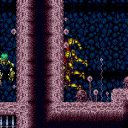
Shinesparking horizontally into the wall will trigger the elevator as Samus's echos hit it. Entrance condition: {
"comeInShinecharged": {
"framesRequired": 45
}
}
Requires: "canHorizontalShinespark"
{
"shinespark": {
"frames": 1,
"excessFrames": 1
}
}
Clears obstacles: B |
|
Pink Hoppers Shinespark into the Wall to Ride the Elevator, Come in Shinecharging (Very Hard)
Pink Brinstar Hopper Room
From: 2
Right Door
To: 3
Top Junction
Notable: true
Shinesparking horizontally into the wall will trigger the elevator as Samus's echos hit it. Entrance condition: {
"comeInShinecharging": {
"length": 5,
"openEnd": 1
}
}
Requires: "canHorizontalShinespark"
{
"shinespark": {
"frames": 1,
"excessFrames": 1
}
}
Clears obstacles: B |
|
Pink Hoppers Shinespark into the Wall to Ride the Elevator, Come in Shinesparking (Very Hard)
Pink Brinstar Hopper Room
From: 2
Right Door
To: 3
Top Junction
Notable: true
Shinesparking horizontally into the wall will trigger the elevator as Samus's echos hit it. Entrance condition: {
"comeInWithSpark": {}
}
Requires: "canHorizontalShinespark"
{
"shinespark": {
"frames": 15,
"excessFrames": 6
}
}
Clears obstacles: B |
|
Entrance condition: {
"comeInShinecharged": {
"framesRequired": 40
}
}
Requires: "canHorizontalShinespark"
{
"shinespark": {
"frames": 155,
"excessFrames": 10
}
}
Clears obstacles: A |
|
Run from left to right on the dry platform to gain a shinecharge. Then fall off and spark to the left to break the speed blocks. Requires: {
"canShineCharge": {
"usedTiles": 32,
"openEnd": 1
}
}
"canShinechargeMovement"
"canHorizontalShinespark"
{
"shinespark": {
"frames": 72,
"excessFrames": 10
}
}
|
|
From: 1
Left Door
To: 2
Right Door
Entrance condition: {
"comeInShinecharging": {
"length": 6,
"openEnd": 1
}
}
Requires: "canHorizontalShinespark"
{
"or": [
{
"shinespark": {
"frames": 142,
"excessFrames": 60
}
},
{
"and": [
"canShinechargeMovement",
"canMidairShinespark",
{
"shinespark": {
"frames": 134,
"excessFrames": 60
}
}
]
}
]
}
|
|
From: 2
Right Door
To: 1
Left Door
Entrance condition: {
"comeInShinecharging": {
"length": 4,
"openEnd": 1
}
}
Requires: "canHorizontalShinespark"
{
"shinespark": {
"frames": 143,
"excessFrames": 6
}
}
|
|
Entrance condition: {
"comeInShinecharging": {
"length": 5,
"openEnd": 0,
"gentleUpTiles": 2
}
}
Requires: "canShinechargeMovementTricky"
"canHorizontalShinespark"
{
"heatFrames": 225
}
{
"shinespark": {
"frames": 53,
"excessFrames": 0
}
}
{
"heatFrames": 105
}
|
|
From: 1
Left Door
To: 5
Bottom Right Junction
Entrance condition: {
"comeInShinecharged": {
"framesRequired": 100
}
}
Requires: "canShinechargeMovement"
"canHorizontalShinespark"
{
"heatFrames": 155
}
{
"shinespark": {
"frames": 54,
"excessFrames": 15
}
}
{
"heatFrames": 105
}
|
|
From: 2
Right Door
To: 3
Bottom Left Junction
Entrance condition: {
"comeInShinecharged": {
"framesRequired": 105
}
}
Requires: "canShinechargeMovement"
"canHorizontalShinespark"
{
"heatFrames": 195
}
{
"shinespark": {
"frames": 58,
"excessFrames": 0
}
}
{
"heatFrames": 105
}
|
|
Entrance condition: {
"comeInShinecharging": {
"length": 5,
"openEnd": 0
}
}
Requires: "canHorizontalShinespark"
{
"heatFrames": 140
}
{
"shinespark": {
"frames": 45,
"excessFrames": 14
}
}
|
|
Align with the right side of a wall or door then turn around and shinespark in order to avoid colliding with a slope. Requires: {
"obstaclesCleared": [
"A"
]
}
"canShinechargeMovementComplex"
"canHorizontalShinespark"
{
"canShineCharge": {
"usedTiles": 33,
"openEnd": 2
}
}
{
"heatFrames": 335
}
{
"shinespark": {
"frames": 221
}
}
|
|
Entrance condition: {
"comeInShinecharging": {
"length": 3,
"openEnd": 0
}
}
Requires: {
"or": [
{
"and": [
"canHorizontalShinespark",
{
"shinespark": {
"frames": 76,
"excessFrames": 4
}
},
{
"heatFrames": 210
}
]
},
{
"and": [
"canShinechargeMovement",
"canMidairShinespark",
{
"shinespark": {
"frames": 67,
"excessFrames": 4
}
},
{
"heatFrames": 300
}
]
}
]
}
|
|
From: 2
Right Door
To: 3
Item
Notable: true 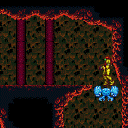

Enter from the right door and spin jump onto the first ledge while barely landing on the ledge in order to prevent getting the Geruta on camera. Walk against the left wall and jump to trigger the Geruta. It should now be moving leftwards. Stand on the next platform against the right wall and shoot the Geruta to get it one shot away from being frozen. After a few swoops, it will come down; either freeze it or tank a hit. Then go up and stand on the corner and freeze it when it is in position. The Geruta will be stuck below and keep swooping, so if Energy permits, Samus will have several attempts. With full heat protection, Samus can quickly shinecharge left to right then run and spark midair to the left to save Energy. Entrance condition: {
"comeInNormally": {}
}
Requires: "h_canTrickyFrozenEnemyRunway"
"canCarefulJump"
"canHorizontalShinespark"
{
"canShineCharge": {
"usedTiles": 17,
"openEnd": 1
}
}
{
"heatFrames": 1050
}
{
"or": [
{
"shinespark": {
"frames": 55,
"excessFrames": 15
}
},
{
"and": [
"h_heatProof",
"canMidairShinespark",
{
"shinespark": {
"frames": 32,
"excessFrames": 15
}
}
]
}
]
}
|
|
Requires: "canHorizontalShinespark"
{
"canShineCharge": {
"usedTiles": 15,
"openEnd": 2
}
}
{
"shinespark": {
"frames": 50
}
}
{
"heatFrames": 600
}
|
|
Watch out for the Geruda. Running left before jumping to bring it on camera will make it swoop left. Entrance condition: {
"comeInShinecharging": {
"length": 4,
"openEnd": 0
}
}
Requires: "canHorizontalShinespark"
{
"shinespark": {
"frames": 70,
"excessFrames": 12
}
}
"canShinechargeMovementComplex"
{
"heatFrames": 330
}
|
|
Watch out for the Geruda. Running left before jumping to bring it on camera will make it swoop left. Entrance condition: {
"comeInShinecharged": {
"framesRequired": 110
}
}
Requires: "canHorizontalShinespark"
{
"shinespark": {
"frames": 70,
"excessFrames": 12
}
}
"canShinechargeMovementComplex"
{
"heatFrames": 330
}
|
|
From: 3
Bottom Door
To: 2
Far Left Door
Notable: true 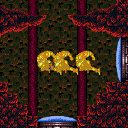
Spark left through the speed blocks through Croc Speedway. Then run to the right and back to get speed to go through the rest. The shinespark expects to kill the crumble bridge pirate, to be safe. Entrance condition: {
"comeInShinecharged": {
"framesRequired": 35
},
"comesThroughToilet": "any"
}
Requires: "canShinechargeMovement"
"canHorizontalShinespark"
{
"shinespark": {
"frames": 86,
"excessFrames": 10
}
}
{
"heatFrames": 700
}
Clears obstacles: A |
|
From: 4
Bottom Right Door
To: 2
Far Left Door
Notable: true
Spark left through the speed blocks through Croc Speedway. Then run to the right and back to get speed to go through the rest. The shinespark expects to kill the crumble bridge pirate, to be safe. Entrance condition: {
"comeInShinecharging": {
"length": 1,
"openEnd": 1
}
}
Requires: "canShinechargeMovement"
"canHorizontalShinespark"
{
"shinespark": {
"frames": 84,
"excessFrames": 10
}
}
{
"heatFrames": 760
}
Clears obstacles: A |
|
Entrance condition: {
"comeInShinecharged": {
"framesRequired": 60
}
}
Requires: "canHorizontalShinespark"
{
"shinespark": {
"frames": 20
}
}
{
"heatFrames": 175
}
|
|
From: 1
Left Door
To: 3
Junction Left of Green Gate
Entrance condition: {
"comeInShinecharging": {
"length": 3,
"openEnd": 1
}
}
Requires: "canHorizontalShinespark"
{
"shinespark": {
"frames": 54,
"excessFrames": 1
}
}
|
|
Entrance condition: {
"comeInShinecharged": {
"framesRequired": 45
}
}
Requires: "canHorizontalShinespark"
{
"shinespark": {
"frames": 29,
"excessFrames": 5
}
}
|
|
Entrance condition: {
"comeInShinecharged": {
"framesRequired": 45
}
}
Requires: "canHorizontalShinespark"
{
"shinespark": {
"frames": 29,
"excessFrames": 5
}
}
|
|
From: 2
Right Vertical Door
To: 4
Right Junction with Speed Blocks Broken
Spark from the ground, left of the Power Bomb blocks. Entrance condition: {
"comeInShinecharged": {
"framesRequired": 80
},
"comesThroughToilet": "any"
}
Requires: "canHorizontalShinespark"
{
"shinespark": {
"frames": 115
}
}
Clears obstacles: B |
|
From: 2
Right Vertical Door
To: 4
Right Junction with Speed Blocks Broken
Spark from the ground, left of the Power Bomb blocks. Entrance condition: {
"comeInShinecharged": {
"framesRequired": 80
},
"comesThroughToilet": "any"
}
Requires: "canHorizontalShinespark"
{
"shinespark": {
"frames": 115,
"excessFrames": 85
}
}
{
"or": [
"canTrickyJump",
{
"and": [
{
"or": [
"canWalljump",
"HiJump"
]
},
{
"acidFrames": 25
}
]
},
{
"and": [
"Gravity",
{
"acidFrames": 20
}
]
}
]
}
Clears obstacles: B |
|
From: 5
Small Platforms Junction
To: 4
Right Junction with Speed Blocks Broken
Notable: true 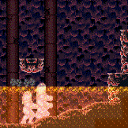
Gravity makes it possible to charge a spark in the acid in order to break the speed blocks. Requires: "Gravity"
"canShinechargeMovement"
"canHorizontalShinespark"
{
"canShineCharge": {
"usedTiles": 33,
"openEnd": 2
}
}
{
"acidFrames": 140
}
{
"shinespark": {
"frames": 35
}
}
Clears obstacles: B |
|
From: 4
Junction Right of Power Bomb Blocks
To: 4
Junction Right of Power Bomb Blocks
Use I-Frames from the first Dessgeega to run through the remaining enemies and store a shinespark. 1-tap Shortcharge, then run back towards the Hoppers and try to hit all three at once by shinesparking horizontally as the ceiling hopper jumps down. Requires: {
"canShineCharge": {
"usedTiles": 25,
"openEnd": 1,
"steepUpTiles": 4
}
}
{
"enemyDamage": {
"enemy": "Dessgeega",
"type": "contact",
"hits": 1
}
}
"canHitbox"
"canShinechargeMovementComplex"
"canHorizontalShinespark"
{
"shinespark": {
"frames": 40
}
}
{
"heatFrames": 330
}
Clears obstacles: D |
|
Entrance condition: {
"comeInShinecharged": {
"framesRequired": 15
},
"comesThroughToilet": "any"
}
Requires: "h_canNavigateUnderwater"
"canHorizontalShinespark"
{
"shinespark": {
"frames": 90
}
}
|
|
From: 1
Top Left Door
To: 9
Spawn At Junction Below Top Door
Notable: true .png)
.gif)
Crouch on the lowest stair, then shinespark horizontally to bonk at the top corner of the grapple block. Down grab to get onto it. Entrance condition: {
"comeInShinecharged": {
"framesRequired": 110
}
}
Requires: "canSuitlessMaridia"
"h_canCrouchJumpDownGrab"
"canHorizontalShinespark"
{
"shinespark": {
"frames": 56,
"excessFrames": 0
}
}
|
|
Entrance condition: {
"comeInShinecharged": {
"framesRequired": 90
},
"comesThroughToilet": "any"
}
Requires: "canSuitlessMaridia"
"canHorizontalShinespark"
{
"shinespark": {
"frames": 61,
"excessFrames": 10
}
}
|
|
Entrance condition: {
"comeInRunning": {
"speedBooster": true,
"minTiles": 0.4375
}
}
Requires: "canSuitlessMaridia"
"canShinechargeMovementComplex"
"canWaterShineCharge"
"canHorizontalShinespark"
{
"canShineCharge": {
"usedTiles": 33,
"openEnd": 2
}
}
{
"shinespark": {
"frames": 139,
"excessFrames": 66
}
}
|
|
Entrance condition: {
"comeInShinecharged": {
"framesRequired": 35
},
"comesThroughToilet": "any"
}
Requires: "Gravity"
"canHorizontalShinespark"
{
"shinespark": {
"frames": 78,
"excessFrames": 16
}
}
|
|
Entrance condition: {
"comeInShinecharged": {
"framesRequired": 55
},
"comesThroughToilet": "any"
}
Requires: "canSuitlessMaridia"
"canHorizontalShinespark"
{
"shinespark": {
"frames": 99,
"excessFrames": 29
}
}
|
|
Entrance condition: {
"comeInShinecharged": {
"framesRequired": 60
}
}
Requires: "canSuitlessMaridia"
"canHorizontalShinespark"
{
"shinespark": {
"frames": 159,
"excessFrames": 43
}
}
Clears obstacles: A |
|
Entrance condition: {
"comeInShinecharged": {
"framesRequired": 80
}
}
Requires: "Gravity"
"canHorizontalShinespark"
{
"shinespark": {
"frames": 115,
"excessFrames": 12
}
}
Clears obstacles: A |
|
Coming in with zero momentum, all it takes is one non-HiJump full height jump forward, then activate. Entrance condition: {
"comeInShinecharged": {
"framesRequired": 160
}
}
Requires: "canSuitlessMaridia"
"canHorizontalShinespark"
{
"shinespark": {
"frames": 147,
"excessFrames": 15
}
}
Clears obstacles: A |
|
From: 2
Right Door
To: 1
Bottom Left Door
Notable: true 
Quickly move next to the first set of speed blocks at the left end of the hole. Shoot a Wave shot, then just before it goes off screen, horizontally spark to the left to get through all the shot and speed blocks. A spin jump may be used to move horizontally into place much quicker. Entrance condition: {
"comeInShinecharged": {
"framesRequired": 120
}
}
Requires: "canSuitlessMaridia"
"canCarefulJump"
"Wave"
"canShinechargeMovementComplex"
"canHorizontalShinespark"
{
"shinespark": {
"frames": 75,
"excessFrames": 8
}
}
|
|
From: 2
Right Door
To: 1
Bottom Left Door
Notable: true
Quickly move next to the first set of speed blocks at the left end of the hole. Shoot a Wave shot, then just before it goes off screen, horizontally spark to the left to get through all the shot and speed blocks. A spin jump may be used to move horizontally into place much quicker. Entrance condition: {
"comeInShinecharging": {
"length": 2,
"openEnd": 1
}
}
Requires: "canWaterShineCharge"
"Wave"
"canShinechargeMovementComplex"
"canHorizontalShinespark"
{
"shinespark": {
"frames": 75,
"excessFrames": 8
}
}
|
|
From: 3
Bottom Right Door
To: 2
Bottom Left Door
Notable: true 
Quickly shoot out the 3 shot blocks then horizontal spark breaking the speed blocks. Wait for the Oums to roll on their own to a place where they can be climbed. Do not stand on the Oums when they begin to attack. Entrance condition: {
"comeInShinecharged": {
"framesRequired": 100
}
}
Requires: "Morph"
"canSuitlessMaridia"
"canUseEnemies"
"canHorizontalShinespark"
{
"shinespark": {
"frames": 91,
"excessFrames": 4
}
}
|
|
Halfie Climb Enter with Shinespark from the Bottom Right (Conserve Health) (Very Hard)
Halfie Climb Room
From: 3
Bottom Right Door
To: 2
Bottom Left Door
Notable: true
Quickly shoot out the 3 shot blocks then horizontal spark breaking the speed blocks. Jump forward to save some health before Shinesparking Wait for the Oums to roll on their own to a place where they can be climbed. Do not stand on the Oums when they begin to attack. Entrance condition: {
"comeInShinecharged": {
"framesRequired": 125
}
}
Requires: "Morph"
"canSuitlessMaridia"
"canUseEnemies"
"canHorizontalShinespark"
"canShinechargeMovementComplex"
{
"shinespark": {
"frames": 70,
"excessFrames": 4
}
}
|
|
Entrance condition: {
"comeInShinecharging": {
"length": 3,
"openEnd": 0
}
}
Requires: "Gravity"
"canHorizontalShinespark"
{
"shinespark": {
"frames": 76,
"excessFrames": 4
}
}
|
|
Entrance condition: {
"comeInShinecharging": {
"length": 3,
"openEnd": 0
}
}
Requires: "Gravity"
"canHorizontalShinespark"
{
"shinespark": {
"frames": 76,
"excessFrames": 4
}
}
|