canHorizontalDamageBoost (Hard)
Using the knockback from taking enemy damage to give Samus a large movement boost by holding the jump and backwards buttons. By changing the timing of the directional input, the way that Samus is knocked back can be changed and has situational uses. Holding forward will knock Samus backwards and down. Holding jump but delaying the back button delays the horizontal damage boost to gain some neutral boost first. Very quickly releasing back and pressing forward will give a forward boost.
Dependencies: canNeutralDamageBoost, canUseEnemies
Strats ()
|
Use a Waver to damage boost across part of the room, then pass through any remaining enemies while IFrames are active. Killing the first waver and damage boosting with the second may be easier. Entrance condition: {
"comeInShinecharged": {
"framesRequired": 140
}
}
Requires: "canShinechargeMovementTricky"
"canHorizontalDamageBoost"
"canTrickyJump"
"canHitbox"
{
"enemyDamage": {
"enemy": "Waver",
"type": "contact",
"hits": 1
}
}
Exit condition: {
"leaveShinecharged": {
"framesRemaining": "auto"
}
}
|
|
Jump into the Choot to damage boost across part of the room, then pass through any remaining enemies while IFrames are active. Entrance condition: {
"comeInShinecharged": {
"framesRequired": 150
}
}
Requires: "canShinechargeMovementTricky"
"canHorizontalDamageBoost"
"canTrickyJump"
"canHitbox"
{
"enemyDamage": {
"enemy": "Choot",
"type": "contact",
"hits": 1
}
}
Exit condition: {
"leaveShinecharged": {
"framesRemaining": "auto"
}
}
|
|
From: 3
Junction (Left side Pit)
To: 1
Left Door
Notable: true 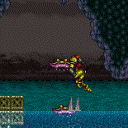
Find the Choot that is closest to the surface of the water, crouch jump under it and damage boost onto the dry platform to the left. Requires: "canSuitlessMaridia"
"canHorizontalDamageBoost"
"canCrouchJump"
{
"enemyDamage": {
"enemy": "Choot",
"hits": 1,
"type": "contact"
}
}
|
|
From: 1
Left Door
To: 2
Right Door
Notable: true 
Spawn a Zeb then run and do a very small spin jump to clip into the first gate before the Zeb reaches you. Do a damage boost off of the Zeb while inside the first gate to get enough speed to clip into the next gate. It is also possible to clip into the gates by aiming down while in the spin jump. Requires: {
"obstaclesNotCleared": [
"A"
]
}
"canCrouchGateClip"
"canCameraManip"
"canHorizontalDamageBoost"
{
"enemyDamage": {
"enemy": "Zeb",
"hits": 2,
"type": "contact"
}
}
Clears obstacles: A |
|
From: 13
Central Junction
To: 10
Top Item (Above Hopper Pit)
Lead an enemy through parts of the room as a way to reach the Mission Impossible missile location. The respawning Zeb can be used by carfeully keeping it on camera and staying high enough that it does not attack. Wait for it to respawn before attempting to guide it. Or a Reo can be brought up to this section of room, but sometimes gets stuck on the way. Requires: {
"or": [
"canTrickyUseFrozenEnemies",
{
"and": [
"canTrickyJump",
"canHorizontalDamageBoost",
{
"enemyDamage": {
"enemy": "Zeb",
"type": "contact",
"hits": 1
}
}
]
}
]
}
"canCameraManip"
|
|
Requires: {
"or": [
{
"enemyDamage": {
"enemy": "Boyon",
"type": "contact",
"hits": 2
}
},
{
"and": [
"canCarefulJump",
{
"enemyDamage": {
"enemy": "Boyon",
"type": "contact",
"hits": 1
}
}
]
},
{
"and": [
"canHorizontalDamageBoost",
{
"enemyDamage": {
"enemy": "Boyon",
"type": "contact",
"hits": 1
}
}
]
}
]
}
|
|
Requires: {
"obstaclesCleared": [
"B"
]
}
"canHorizontalDamageBoost"
{
"thornHits": 1
}
|
|
Notable: true 
If you wait long enough, a Waver will arrive. After it turns around to go back to the right, damage boost off of it, then follow it. Continue to hit it to get i-frames to avoid taking damage from any spikes. The amount of Waver hits can be reduced by running ahead on the spikes and taking damage from a second Waver instead of following the first Waver. Requires: "canHorizontalDamageBoost"
{
"enemyDamage": {
"enemy": "Waver",
"type": "contact",
"hits": 2
}
}
{
"or": [
{
"and": [
"canIframeSpikeJump",
"canTrickyJump"
]
},
{
"enemyDamage": {
"enemy": "Waver",
"type": "contact",
"hits": 3
}
}
]
}
|
|
Notable: true 
A precise strat that involves crossing both gaps by dboosting off Wavers. The Wavers are also used for iframes to avoid taking damage from any spikes. Requires: "canHorizontalDamageBoost"
"canTrickyJump"
{
"enemyDamage": {
"enemy": "Waver",
"type": "contact",
"hits": 6
}
}
|
|
From: 2
Right Door
To: 3
Safe Block in the Middle of the Room
Damage boost off of the Fireflea or a Waver in order to get onto the upper spikes. It is possible to quickly get into position to use the Waver or to wait for it to return. It is also possible (but not required in this strat) to perform a second damage boost off of the Wavers to avoid some spike damage. Requires: "canTrickyJump"
{
"enemyDamage": {
"enemy": "Waver",
"type": "contact",
"hits": 1
}
}
"canHorizontalDamageBoost"
{
"or": [
"canIframeSpikeJump",
{
"spikeHits": 1
}
]
}
|
|
Requires: {
"or": [
{
"heatFrames": 230
},
{
"and": [
"canHorizontalDamageBoost",
{
"heatFrames": 160
},
{
"enemyDamage": {
"enemy": "Skree",
"type": "contact",
"hits": 1
}
}
]
}
]
}
|
|
From: 1
Left Side - Top Door
To: 7
Top Right Door
Notable: true 

Damage Boost off a Waver to cross the gap. Requires: "canHorizontalDamageBoost"
{
"enemyDamage": {
"enemy": "Waver",
"hits": 1,
"type": "contact"
}
}
|
|
From: 7
Top Right Door
To: 1
Left Side - Top Door
Notable: true
Damage Boost off a Waver to cross the gap. Requires: "canHorizontalDamageBoost"
{
"enemyDamage": {
"enemy": "Waver",
"hits": 1,
"type": "contact"
}
}
|
|
Notable: true 
Store the shinespark on the last possible pixels of runway. Quickly drop to the nearby namihe and damage boost using its flame. Hold the damage boost until just before being below the above platform and spark upwards Entrance condition: {
"comeInShinecharging": {
"length": 4,
"openEnd": 1
}
}
Requires: "Gravity"
{
"or": [
"h_lavaProof",
"canSuitlessLavaDive"
]
}
"canShinechargeMovementTricky"
"canHorizontalDamageBoost"
{
"shinespark": {
"frames": 33
}
}
{
"heatFrames": 320
}
{
"lavaFrames": 155
}
{
"enemyDamage": {
"enemy": "Namihe",
"type": "fireball",
"hits": 1
}
}
|
|
From: 1
Left Door
To: 2
Right Door
Notable: true 
While crossing the Spiky Lava, land on frozen Yapping Maws to reduce the number of spike hits needed. Damage boost towards then freeze the Leftmost enemy as it extends. Morph and unmorph while above the middle Yapping Maw to land on it just above the lava line. Ignore the rightmost Yapping Maw. Delay the damage boost from the spikes slightly in order to rise above the lava before moving. Requires: "canResetFallSpeed"
"canTrickyUseFrozenEnemies"
"canTrickyJump"
{
"or": [
"canHorizontalDamageBoost",
{
"and": [
{
"spikeHits": 2
},
{
"lavaFrames": 30
},
{
"heatFrames": 240
}
]
}
]
}
"canIframeSpikeJump"
{
"spikeHits": 2
}
{
"lavaFrames": 15
}
{
"heatFrames": 580
}
|
|
From: 1
Left Door
To: 2
Right Door
Notable: true 
Damage boosts can be used to save energy - delay the damage boost from the spikes slightly in order to rise above the lava before moving. Requires: {
"heatFrames": 520
}
{
"lavaFrames": 80
}
{
"spikeHits": 3
}
"canIframeSpikeJump"
"canHorizontalDamageBoost"
|
|
Speedbooster significantly reduces your jump speed in lava and should be turned off. Requires: "Gravity"
"canDisableEquipment"
{
"heatFrames": 350
}
{
"lavaFrames": 100
}
{
"spikeHits": 2
}
{
"or": [
"canIframeSpikeJump",
{
"and": [
{
"spikeHits": 2
},
{
"heatFrames": 50
}
]
},
"canHorizontalDamageBoost"
]
}
|
|
From: 2
Right Door
To: 1
Left Door
Notable: true
While crossing the Spiky Lava, land on frozen Yapping Maws to reduce the number of spike hits needed. Morph and unmorph while above the rightmost Yapping Maw to land on it just above the lava line. Ignore the second Yapping Maw. Freeze the Leftmost enemy as it extends. Delay the damage boost from the spikes slightly in order to rise above the lava before moving. Requires: "canResetFallSpeed"
"canTrickyUseFrozenEnemies"
"canTrickyJump"
{
"or": [
"canHorizontalDamageBoost",
{
"and": [
{
"spikeHits": 1
},
{
"lavaFrames": 20
},
{
"heatFrames": 240
}
]
}
]
}
"canIframeSpikeJump"
{
"spikeHits": 2
}
{
"lavaFrames": 15
}
{
"heatFrames": 580
}
|
|
From: 2
Right Door
To: 1
Left Door
Notable: true
Damage boosts can be used to save energy - delay the damage boost from the spikes slightly in order to rise above the lava before moving. Requires: {
"heatFrames": 520
}
{
"lavaFrames": 80
}
{
"spikeHits": 3
}
"canIframeSpikeJump"
"canHorizontalDamageBoost"
|
|
Speedbooster significantly reduces your jump speed in lava and should be turned off. Requires: "Gravity"
"canDisableEquipment"
{
"heatFrames": 350
}
{
"lavaFrames": 100
}
{
"spikeHits": 2
}
{
"or": [
"canIframeSpikeJump",
{
"and": [
{
"spikeHits": 2
},
{
"heatFrames": 50
}
]
},
"canHorizontalDamageBoost"
]
}
|
|
Notable: true Crouch jump and let the Sova move into Samus from the right, to get a upward boost, then hold left to boost horizontally to the ledge. Then crouch jump from the slope on the left, and morph into a neutral damage boost. Requires: "Morph"
"canCrouchJump"
"canTrickyJump"
"canNeutralDamageBoost"
"canHorizontalDamageBoost"
{
"enemyDamage": {
"enemy": "Sova",
"type": "contact",
"hits": 2
}
}
|
|
Unmorph with the right timing to damage boost using the Boyon who is closest to the Morph tunnel in order to avoid taking any lava damage. Requires: "canHorizontalDamageBoost"
"Morph"
"canCarefulJump"
{
"enemyDamage": {
"enemy": "Boyon",
"type": "contact",
"hits": 1
}
}
{
"heatFrames": 220
}
|
|
From: 1
Left Door
To: 3
Junction Left of Green Gate
Notable: true 
1- Stand near the farm point, on the edge of where you make Gamets spawn. 2- Wait for the water position to be high. 3- Move to make the Gamets spawn. Moonwalk is useful here. 4- Quickly climb up to the last ledge before the door. 5- Run, jump, dboost off a Gamet. 6- Dboost a second time off the Gamet to cross the second moat. Requires: "h_canNavigateUnderwater"
"canTrickyJump"
"canHorizontalDamageBoost"
{
"enemyDamage": {
"enemy": "Gamet",
"type": "contact",
"hits": 2
}
}
|
|
From: 1
Left Door
To: 4
Center Platform Junction
1- Stand near the farm point, on the edge of where you make Gamets spawn. 2- Wait for the water position to be high. 3- Move to make the Gamets spawn. Moonwalk is useful here. 4- Quickly climb up to the last ledge before the door. 5- Run, jump, dboost off a Gamet. Requires: "h_canNavigateUnderwater"
"canHorizontalDamageBoost"
"canCarefulJump"
{
"enemyDamage": {
"enemy": "Gamet",
"type": "contact",
"hits": 1
}
}
|
|
From: 5
Main Junction
To: 1
Top Left Door
Notable: true 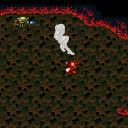
Use the moving platform (Kamer) to elevate the Gamets. Requires: "canTrickyJump"
{
"or": [
"h_canCrouchJumpDownGrab",
"canWalljump"
]
}
"canHorizontalDamageBoost"
{
"enemyDamage": {
"enemy": "Gamet",
"type": "contact",
"hits": 1
}
}
|
|
From: 2
Bottom Right Door
To: 5
Bottom Junction Right of Morph Tunnel
Wait for the first Holtz to attack then either use the Magdollite for IFrames, or avoid the projectiles and continue dodging bats. Requires: "h_canNavigateHeatRooms"
{
"or": [
"canTrickyJump",
{
"and": [
"canHorizontalDamageBoost",
"canCarefulJump",
{
"enemyDamage": {
"enemy": "Magdollite",
"type": "flame",
"hits": 1
}
}
]
}
]
}
{
"heatFrames": 330
}
|
|
From: 5
Bottom Junction Right of Morph Tunnel
To: 2
Bottom Right Door
Wait for the Magdollite to attack then either use it for IFrames, or jump over the swooping Holtzes. Requires: "h_canNavigateHeatRooms"
{
"or": [
"canTrickyJump",
{
"and": [
"canHorizontalDamageBoost",
"canCarefulJump",
{
"enemyDamage": {
"enemy": "Magdollite",
"type": "flame",
"hits": 1
}
}
]
}
]
}
{
"heatFrames": 375
}
|
|
From: 5
Firefleas Bottom Left Platform Junction
To: 7
Fireflea Statue's Claw Junction
This can only be attempted once. Requires: "canStaggeredWalljump"
"canCarefulJump"
"canHorizontalDamageBoost"
{
"enemyDamage": {
"enemy": "Fireflea",
"type": "contact",
"hits": 1
}
}
|
|
From: 5
Firefleas Bottom Left Platform Junction
To: 7
Fireflea Statue's Claw Junction
Set up to Damage boost off the highest Fireflea at the apex of your jump, next to the Ridley claw. It's precise, and can only be attempted once. Morphing can make the boost a little easier. Requires: "HiJump"
"canHorizontalDamageBoost"
"canTrickyJump"
"canCrouchJump"
{
"enemyDamage": {
"enemy": "Fireflea",
"hits": 1,
"type": "contact"
}
}
|
|
From: 4
Junction Above Bomb Block
To: 1
Top Left Door
Jump over the first Kihunter and attempt to either use IFrames to pass through the top Kihunter, or dodge it if possible. Requires: "h_canNavigateHeatRooms"
{
"or": [
"canWalljump",
"HiJump"
]
}
"canTrickyJump"
{
"or": [
{
"and": [
"canHorizontalDamageBoost",
"canHitbox",
{
"enemyDamage": {
"enemy": "Kihunter (red)",
"type": "contact",
"hits": 1
}
}
]
},
{
"enemyDamage": {
"enemy": "Kihunter (red)",
"type": "contact",
"hits": 2
}
}
]
}
Clears obstacles: A |
|
From: 5
Junction Below Shot Block
To: 7
Junction Left of Morph Tunnel
Notable: true 
Break the Power Bomb statue leaving 1 row of blocks. Partially clip beneath the Power Bomb blocks and the sold tiles beneath. Wait for a Dessgeega to jump over head and jump into it. The left ceiling Dessgeega works better. Aim down after jumping in order to fully boost over the solid statue. Damage boost to the right and use I-Frames to run through all of the enemies. Requires: {
"obstaclesNotCleared": [
"A"
]
}
"h_canUsePowerBombs"
"canTrickyJump"
"canPartialFloorClip"
"canCeilingClip"
"canHorizontalDamageBoost"
"canHitbox"
{
"enemyDamage": {
"enemy": "Dessgeega",
"type": "contact",
"hits": 1
}
}
{
"heatFrames": 225
}
|
|
From: 5
Junction Below Shot Block
To: 7
Junction Left of Morph Tunnel
Notable: true 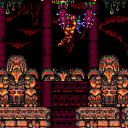
Break the Power Bomb statue leaving 1 row of blocks. Partially clip beneath the Power Bomb blocks and the sold tiles beneath. Wait for a Dessgeega to jump over head and jump into it. The left ceiling Dessgeega works better. Damage boost to the right and use I-Frames to run through all of the enemies. Requires: {
"obstaclesNotCleared": [
"A"
]
}
"h_canUsePowerBombs"
"HiJump"
"canPartialFloorClip"
"canCeilingClip"
"canHorizontalDamageBoost"
"canHitbox"
{
"enemyDamage": {
"enemy": "Dessgeega",
"type": "contact",
"hits": 1
}
}
{
"heatFrames": 225
}
|
|
From: 5
Junction Below Shot Block
To: 8
Junction Below Top Right Door
Notable: true
Break the Power Bomb statue leaving 1 row of blocks. Partially clip beneath the Power Bomb blocks and the sold tiles beneath. Wait for a Dessgeega to jump over head and jump into it. The left ceiling Dessgeega works better. Aim down after jumping in order to fully boost over the solid statue. Damage boost to the right and use I-Frames to run through all of the enemies. Begin shortcharging while running through the Dessgeegas for a speedball. It may help to end the damage boost early, but then it becomes more difficult to stutter for the shortcharge. Requires: {
"obstaclesNotCleared": [
"A"
]
}
"h_canUsePowerBombs"
"canPartialFloorClip"
"canCeilingClip"
"canTrickyJump"
"canHorizontalDamageBoost"
"canHitbox"
"canSpeedball"
{
"canShineCharge": {
"usedTiles": 16,
"openEnd": 1
}
}
{
"enemyDamage": {
"enemy": "Dessgeega",
"type": "contact",
"hits": 1
}
}
{
"heatFrames": 390
}
{
"or": [
"h_canUseSpringBall",
{
"hibashiHits": 1
}
]
}
|
|
From: 5
Junction Below Shot Block
To: 8
Junction Below Top Right Door
Notable: true
Break the Power Bomb statue leaving 1 row of blocks. Partially clip beneath the Power Bomb blocks and the sold tiles beneath. Wait for a Dessgeega to jump over head and jump into it. The left ceiling Dessgeega works better. Damage boost to the right and use I-Frames to run through all of the enemies. Begin shortcharging while running through the Dessgeegas for a speedball. It may help to end the damage boost early, but then it becomes more difficult to stutter for the shortcharge. Requires: {
"obstaclesNotCleared": [
"A"
]
}
"h_canUsePowerBombs"
"HiJump"
"canPartialFloorClip"
"canCeilingClip"
"canHorizontalDamageBoost"
"canHitbox"
"canSpeedball"
{
"canShineCharge": {
"usedTiles": 16,
"openEnd": 1
}
}
{
"enemyDamage": {
"enemy": "Dessgeega",
"type": "contact",
"hits": 1
}
}
{
"heatFrames": 390
}
{
"or": [
"h_canUseSpringBall",
{
"hibashiHits": 1
}
]
}
|
|
Requires: {
"or": [
"f_DefeatedPhantoon",
"SpaceJump",
{
"and": [
{
"thornHits": 1
},
{
"or": [
"HiJump",
"canWalljump",
"canIframeSpikeJump",
"Grapple",
"canHorizontalDamageBoost",
{
"thornHits": 1
}
]
}
]
}
]
}
|
|
Enter on the left side of the door in order to land on the fish, then Damage Boost to reach the ledge on the right. Entrance condition: {
"comeInNormally": {},
"comesThroughToilet": "no"
}
Requires: "Gravity"
"canHorizontalDamageBoost"
"canPrepareForNextRoom"
{
"enemyDamage": {
"enemy": "Skultera",
"hits": 1,
"type": "contact"
}
}
|
|
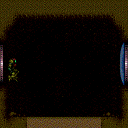
From: 1
Left Door
To: 3
Top Right Door
Notable: true .png)
.gif)
Use the spikes, which are not in the water, to jump from platform to platform as a way to cross the Colosseum. Requires knowing the position of every spike in the room, and hitting the spikes while morphed can help. The first jump is particularly tough. A SpringBallJump from the sand with HiJump, or Grapple can be used to get past it. Requires: "canWalljump"
"Morph"
"canCarefulJump"
"canIframeSpikeJump"
{
"or": [
"Grapple",
{
"and": [
"canSuitlessMaridia",
"canPlayInSand",
"HiJump",
"canNeutralDamageBoost",
"canTrickySpringBallJump",
{
"spikeHits": 2
}
]
}
]
}
{
"spikeHits": 1
}
{
"or": [
{
"spikeHits": 1
},
"canHorizontalDamageBoost"
]
}
|
|
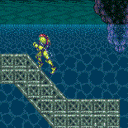
From: 1
Left Door
To: 3
Top Right Door
Notable: true .png)
.gif)
Use the spikes, which are not in the water, to jump from platform to platform as a way to cross the Colosseum. Requires knowing the position of every spike in the room, and hitting the spikes while morphed can help. The first jump is particularly tough. A springball rolling jump can be used to get past it. Entrance condition: {
"comeInRunning": {
"minTiles": 2,
"speedBooster": "any"
}
}
Requires: "canWalljump"
"Morph"
"canCarefulJump"
"canIframeSpikeJump"
"h_canUseSpringBall"
"canMockball"
{
"spikeHits": 3
}
{
"or": [
{
"spikeHits": 1
},
"canHorizontalDamageBoost"
]
}
|
|
From: 1
Left Door
To: 3
Top Right Door
Notable: true 
Land on each set of spikes as a way to jump to the next safe platform. The first jump can be done with a very precise damage boost to bounce forward off the spike, or using morph. Requires: "canWalljump"
"canInsaneJump"
"canHorizontalDamageBoost"
"canIframeSpikeJump"
{
"spikeHits": 3
}
{
"or": [
"Morph",
{
"spikeHits": 2
}
]
}
|
|
Notable: true Stay out of the water, and by extension the sand, of Colosseum by using the spikes as platforms. Morphing before landing on the spikes helps to be able to control the knockback. The final spike jump (which would be the most difficult) is avoided by doing a crouch jump into spring ball jump into IBJ to reach the left door. Perform the spring ball jump near max height. Place the first bomb between about 4 and 6 frames after the spring ball jump; ideally it should be just above the water line. Press pause between about 5 and 10 frames after placing the bomb, to disable Spring Ball (a 'spring fling', to reset fall speed). Place the second bomb soon after regaining control, while the game is fading back in. Requires: "HiJump"
"canPreciseWalljump"
"canIframeSpikeJump"
{
"spikeHits": 2
}
"canNeutralDamageBoost"
{
"or": [
"canHorizontalDamageBoost",
{
"spikeHits": 1
}
]
}
"h_canMaxHeightSpringBallJump"
{
"or": [
"canSpringFling",
"canInsaneJump"
]
}
"canBombJumpWaterEscape"
"h_canJumpIntoIBJ"
|
|
From: 3
Top Right Door
To: 1
Left Door
Notable: true
Stay out of the water, and by extension the sand, of Colosseum by using the spikes as platforms. Landing on spikes aiming down with no other direction pressed can help control the knockback. Requires knowing the position of every spike in the room. The final spike jump is very difficult. Requires: "canPreciseWalljump"
"canInsaneJump"
"canIframeSpikeJump"
{
"spikeHits": 3
}
"canNeutralDamageBoost"
{
"or": [
"canHorizontalDamageBoost",
{
"spikeHits": 1
}
]
}
|
|
From: 5
Bottom Middle Junction
To: 6
East Cactus Alley Junction (Right of Morph Tunnel)
Jump into the ceiling Cacatac and damage boost onto the platform between spike pits. Use IFrames to cross the second set of spikes. Requires: "Gravity"
"canHorizontalDamageBoost"
"canIframeSpikeJump"
{
"enemyDamage": {
"enemy": "Cacatac",
"hits": 1,
"type": "contact"
}
}
|
|
Damage boost up to the higher ledge using a Cacatac spike. Spikes only exist on camera so follow a vertically fired spike up to the correct height. Requires: "Gravity"
"canHorizontalDamageBoost"
"canCameraManip"
{
"enemyDamage": {
"enemy": "Cacatac",
"hits": 1,
"type": "spike"
}
}
|
|
From: 1
Left Door
To: 3
Right Door
Notable: true 
From the doorframe, wait for the Zoa to rise out of the water, then use it to damage boost into the open opposite door. Requires: "canSuitlessMaridia"
"canTrickyJump"
"canHorizontalDamageBoost"
{
  "enemyDamage": {
    "enemy": "Zoa",
    "type": "contact",
    "hits": 1
  }
}
|
|
From: 3
Right Door
To: 1
Left Door
Notable: true
From the doorframe, wait for the Zoa to rise out of the water, then use it to damage boost into the open opposite door. Requires: "canTrickyJump"
"canHorizontalDamageBoost"
{
"enemyDamage": {
"enemy": "Zoa",
"type": "contact",
"hits": 1
}
}
|
|
Requires: "Gravity"
"canTrickyJump"
"canHorizontalDamageBoost"
{
"enemyDamage": {
"enemy": "Evir",
"type": "particle",
"hits": 1
}
}
|
|
Wait for the left hopper to move right so it does not follow Samus as IFrames run out. A damage boost using the top hopper also moves through the room fast enough to be safe. Requires: {
"enemyDamage": {
"enemy": "Blue Sidehopper",
"type": "contact",
"hits": 1
}
}
{
"or": [
"canHorizontalDamageBoost",
"canTrickyJump",
"canHitbox",
{
"enemyDamage": {
"enemy": "Blue Sidehopper",
"type": "contact",
"hits": 1
}
}
]
}
|
|
From: 3
Junction (Get Past Metroids, Left to Right)
To: 2
Right Door
Notable: true Aim the leftmost Rinka to travel horizontally across the top of the room and use it to damage boost between the two floating platforms. Killing the Rinka will normalize it's respawn timer, which may help in setting up the correct angle. Let the Rinka stay far enough ahead of Samus that she can jump the full distance to the first platform without hitting it. And then once it has reached the right edge of the platform, use it to damage boost. Requires: {
"enemyDamage": {
"enemy": "Rinka",
"type": "contact",
"hits": 1
}
}
"canTrickyJump"
"canHorizontalDamageBoost"
"canCameraManip"
{
"or": [
{
"obstaclesCleared": [
"A"
]
},
"canMetroidAvoid"
]
}
|
|
From: 4
Junction (Get Past Metroids, Right to Left)
To: 1
Left Door (locked)
Notable: true Aim the ceiling Rinka to travel horizontally across the top of the room and use it to damage boost between the two floating platforms. Killing the lower Rinka shortly before killing the higher Rinka will synchronize their respawn timers so that Samus can jump when the lower Rinka reappears in order to get a good angle on the higher Rinka. Jump to the floating platform ahead of the high Rinka, jumping extra high to lead the Metroid out of the way if it is alive. Jump into the Rinka once it reaches the left edge of the platform to reach the next platform. Then use I-frames to pass through the Metroid if it is still alive. Requires: {
"enemyDamage": {
"enemy": "Rinka",
"type": "contact",
"hits": 1
}
}
"canTrickyJump"
"canHorizontalDamageBoost"
"canCameraManip"
{
"or": [
{
"obstaclesCleared": [
"A"
]
},
{
"and": [
"canMetroidAvoid",
"canHitbox"
]
}
]
}
{
"or": [
"canInsaneJump",
{
"enemyDamage": {
"enemy": "Rinka",
"type": "contact",
"hits": 1
}
},
{
"and": [
"canTrickyJump",
"canLateralMidAirMorph"
]
},
{
"and": [
"Gravity",
{
"acidFrames": 16
}
]
},
{
"acidFrames": 27
}
]
}
|