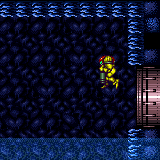
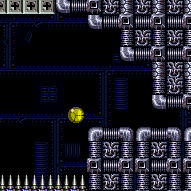
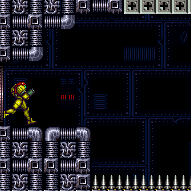
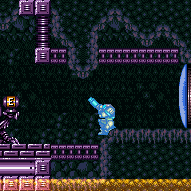
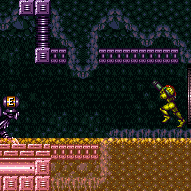
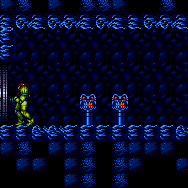
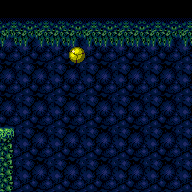
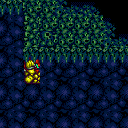
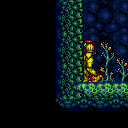
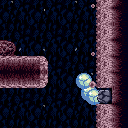
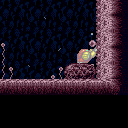
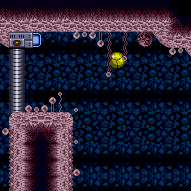
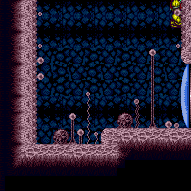
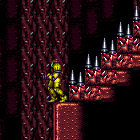
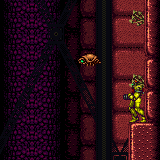
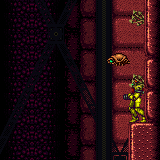
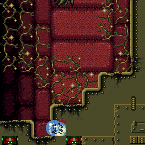
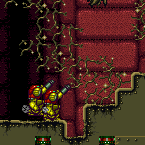
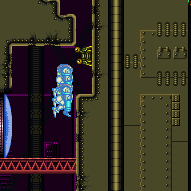
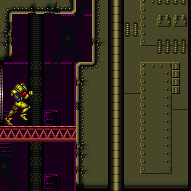
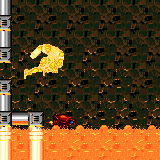
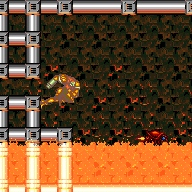
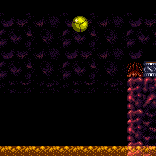
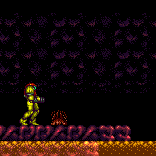
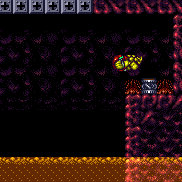
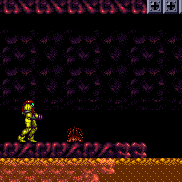
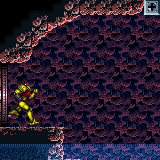
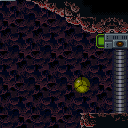
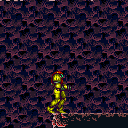
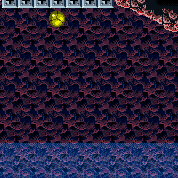
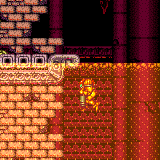
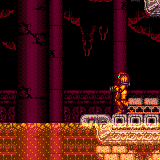
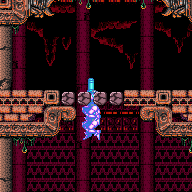
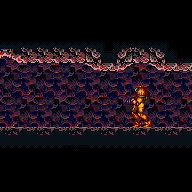
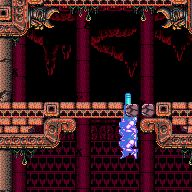
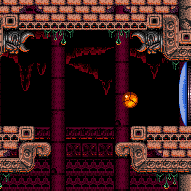
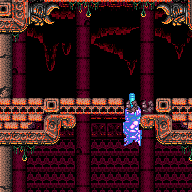
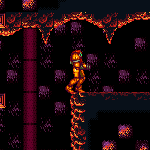
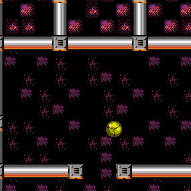
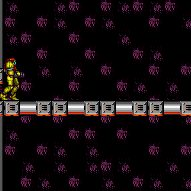
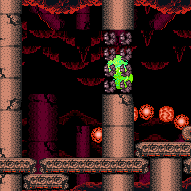
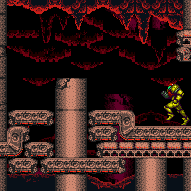
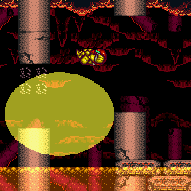
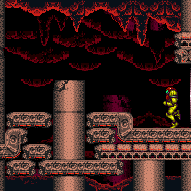
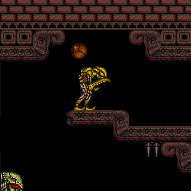
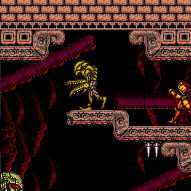
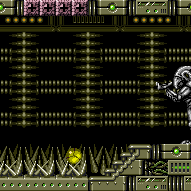
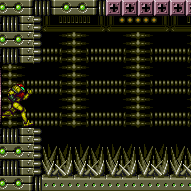
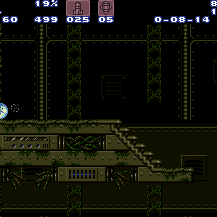
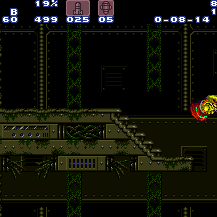
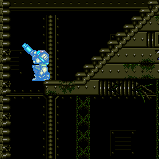
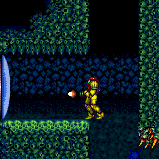
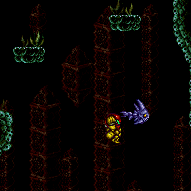
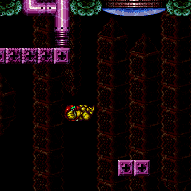
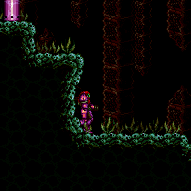
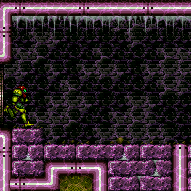
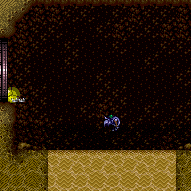
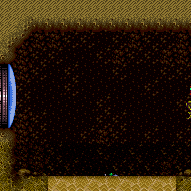
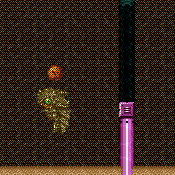
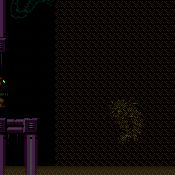
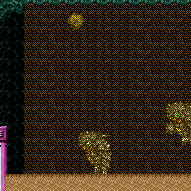
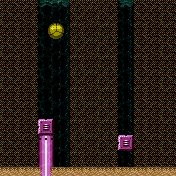
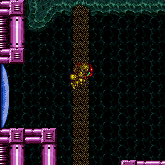
canLateralMidAirMorph (Hard)
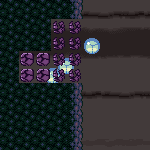
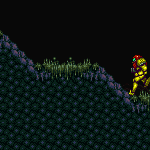
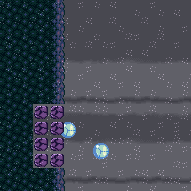
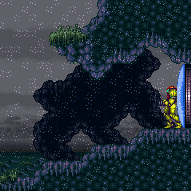
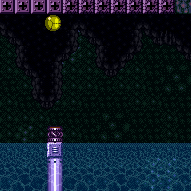
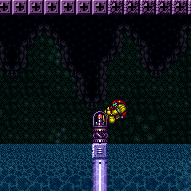
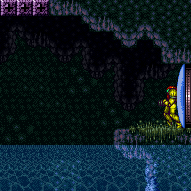
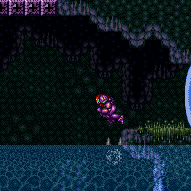
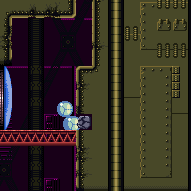
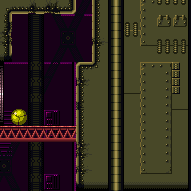
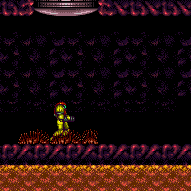
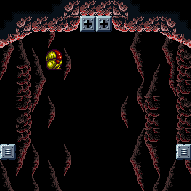
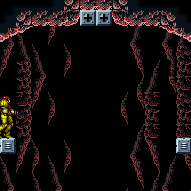
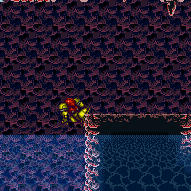
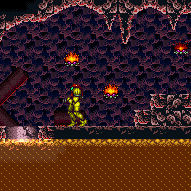
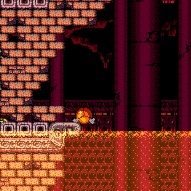
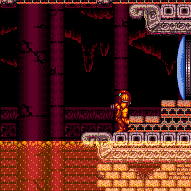
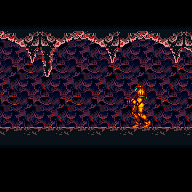
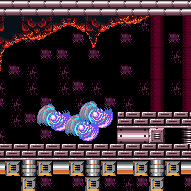
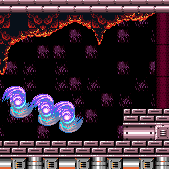
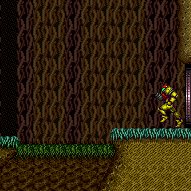
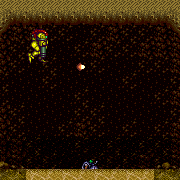
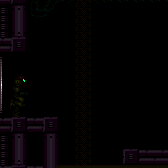
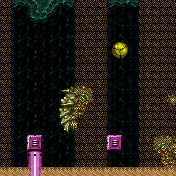
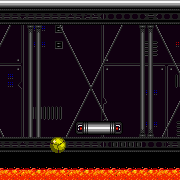
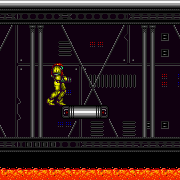
Performing the same input as a mockball, but in mid-air, in order to maintain forward momentum while morphing in mid-air.
Dependencies: canDash, canMidAirMorph, canTrivialMidAirMorph
Strats ()
From: 1
Top Left Door
To: 4
Top Junction (Right of Spikes)
Run and jump into an airball, pressing pause just as Samus hits the ceiling, in order to unequip Spring Ball to reset fall speed. Entrance condition: {
"comeInRunning": {
"speedBooster": "yes",
"minTiles": 28
}
}Requires: "h_speedJump" "canTrickyJump" "canLateralMidAirMorph" "canSpringFling" Dev note: This can be done with 26 tiles of other-room runway, but it would probably require a higher movement tech. |
From: 1
Top Left Door
To: 6
Right of Morph Tunnel with Temporary Blue
Entrance condition: {
"comeInWithBlueSpringBallBounce": {
"movementType": "controlled",
"minExtraRunSpeed": "$5.8"
}
}Requires: "canTrickyJump" "canLateralMidAirMorph" "canSpringFling" "canTemporaryBlue" |
|
Requires: {
"canShineCharge": {
"usedTiles": 23,
"openEnd": 2
}
}
"canShinechargeMovementTricky"
{
"or": [
"canHorizontalDamageBoost",
"canLateralMidAirMorph"
]
}
{
"enemyDamage": {
"enemy": "Boyon",
"type": "contact",
"hits": 1
}
}
{
"or": [
{
"shinespark": {
"frames": 121,
"excessFrames": 6
}
},
{
"and": [
"canSpeedyJump",
{
"shinespark": {
"frames": 118,
"excessFrames": 6
}
}
]
},
{
"and": [
"HiJump",
{
"shinespark": {
"frames": 117,
"excessFrames": 6
}
}
]
},
{
"and": [
"HiJump",
"canSpeedyJump",
{
"shinespark": {
"frames": 113,
"excessFrames": 6
}
}
]
}
]
} |
|
Use the runway near the Power Bomb room door to jump to the left, morphing as Samus begins descending, to bounce through the Bomb blocks. Any time while bouncing, hold an angle button and unmorph to gain temporary blue; then chain it to reach the door with temporary blue. The jump can be set up by using the full runway with a one-tap shortcharge, with the tap being at the top of the lowest slope. Requires: {
"notable": "Big Jump with Blue Speed"
}
{
"notable": "Big Jump Leave With Temporary Blue"
}
"canTrickyJump"
"Morph"
"canLateralMidAirMorph"
{
"getBlueSpeed": {
"usedTiles": 30,
"openEnd": 2
}
}
"h_blueJump"
"canLongChainTemporaryBlue"Exit condition: {
"leaveWithTemporaryBlue": {}
}Unlocks doors: {"types":["ammo"],"requires":[]} |
|
Use the runway near the top right door to jump towards the top left bomb blocks and break them using the blue speed from SpeedBooster. This can be done using the full runway, with a one-tap shortcharge, where the tap is at the top of the lowest slope, and the jump is at the top of the last slope. Alternatively, a controlled release of the jump button works in place of the shortcharge, where the bottom of the thick dark line in the background at the top of the room works as a visual cue. While midair, morph once Samus begins descending to bounce through all of the Bomb blocks. Requires: {
"notable": "Big Jump with Blue Speed"
}
"canTrickyJump"
"Morph"
"canLateralMidAirMorph"
{
"getBlueSpeed": {
"usedTiles": 30,
"openEnd": 2
}
}
"h_blueJump"Clears obstacles: A |
|
From the right door, run and jump while on the dirt mound directly right of the ship. Then SpringBall Jump to reach the Bomb blocks leading to the top left door. Requires: "HiJump" "h_getBlueSpeedMaxRunway" "h_blueJump" "canLateralMidAirMorph" "canTrickySpringBallJump" |
From: 2
Right Door
To: 4
Middle Junction (Left of Morph Tunnel)
Entrance condition: {
"comeInShinecharging": {
"length": 4,
"openEnd": 0
}
}Requires: "canTemporaryBlue"
"canLateralMidAirMorph"
{
"or": [
"canChainTemporaryBlue",
"can4HighMidAirMorph"
]
}Dev note: There are 6 unusable tiles in this runway. |
From: 2
Right Door
To: 4
Middle Junction (Left of Morph Tunnel)
Entrance condition: {
"comeInShinecharging": {
"length": 5,
"openEnd": 0
}
}Requires: "canTemporaryBlue"
"canLateralMidAirMorph"
{
"acidFrames": 200
}Dev note: There are 5 unusable tiles in this runway. |
From: 1
Left Door
To: 2
Right Door
Enter with enough speed to jump over all the water, morphing mid-air and then unmorphing into temporary blue. Entrance condition: {
"comeInGettingBlueSpeed": {
"length": 2,
"openEnd": 0,
"steepDownTiles": 1,
"minExtraRunSpeed": "$4.0"
}
}Requires: "canTrickyJump" "canLateralMidAirMorph" "canChainTemporaryBlue" Exit condition: {
"leaveWithTemporaryBlue": {}
}Unlocks doors: {"types":["ammo"],"requires":[]} |
|
Entrance condition: {
"comeInRunning": {
"speedBooster": "yes",
"minTiles": 11
}
}Requires: "h_speedJump" "canInsaneJump" "canLateralMidAirMorph" "canMomentumConservingMorph" |
|
Entrance condition: {
"comeInRunning": {
"speedBooster": "yes",
"minTiles": 18
}
}Requires: "h_speedJump" "canTrickyJump" "canLateralMidAirMorph" |
|
Execution of this strat is non-trivial, and failing will lead to falling into the pit. Depending on item loadout, that could be a softlock. Requires: "canDash"
"canDisableEquipment"
"canCarefulJump"
{
"or": [
{
"doorUnlockedAtNode": 2
},
"canTrickyJump",
"canLateralMidAirMorph",
"h_speedJump"
]
}Collects items: 3 Dev note: Could use a failure definition? |
|
Requires: "Gravity"
{
"or": [
{
"and": [
"canTrickySpringBallJump",
{
"or": [
"canLateralMidAirMorph",
"canTrickyJump"
]
}
]
},
{
"and": [
"HiJump",
"canWallJump",
{
"or": [
"canDash",
"canTrickyJump"
]
}
]
},
{
"and": [
"HiJump",
"canSpringBallJumpMidAir"
]
},
{
"and": [
"HiJump",
"canSpeedyJump"
]
}
]
}
{
"obstaclesNotCleared": [
"A",
"B",
"C"
]
} |
|
Entrance condition: {
"comeInJumping": {
"speedBooster": "any",
"minTiles": 2
}
}Requires: "canCarefulJump" "canLateralMidAirMorph" Dev note: This is a lenient version of the strat, with an extra tile of runway. |
From: 2
Right Door
To: 1
Left Door
Entrance condition: {
"comeInJumping": {
"speedBooster": "any",
"minTiles": 1
}
}Requires: "canTrickyJump" "canLateralMidAirMorph" |
|
Requires: "canSpeedyJump" "canLateralMidAirMorph" "canCarefulJump" |
|
Requires: "canTrickyJump"
{
"or": [
"canLateralMidAirMorph",
{
"and": [
"canMomentumConservingTurnaround",
"canInsaneJump"
]
}
]
}Exit condition: {
"leaveWithSidePlatform": {
"height": 2,
"runway": {
"length": 10,
"openEnd": 0
},
"obstruction": [
2,
0
]
}
}Dev note: Max extra run speed $2.5. |
|
Entrance condition: {
"comeInRunning": {
"speedBooster": "yes",
"minTiles": 17
}
}Requires: "h_speedJump" "canTrickyJump" "canLateralMidAirMorph" |
|
Requires: "h_speedJump" "canTrickyJump" "canLateralMidAirMorph" "can4HighMidAirMorph" |
From: 13
Central Junction
To: 7
Right Side - Door Behind Super Block
Break the bomb blocks by jumping into them with speed. These is more easily done at low run speed. It is most lenient if Samus is still moving up while entering the tunnel. Requires: {
"notable": "Off Screen Super Block"
}
{
"notable": "Break Raised Bomb Blocks with Blue Speed"
}
{
"getBlueSpeed": {
"usedTiles": 20,
"openEnd": 2
}
}
"canSlowShortCharge"
"canSpeedball"
"canLateralMidAirMorph"
"canTrickyJump"
"canOffScreenSuperShot"Clears obstacles: F |
From: 13
Central Junction
To: 7
Right Side - Door Behind Super Block
Perform a precise mockball or speedball into the morph tunnel. Then spring ball bounce through the door. Requires: {
"obstaclesCleared": [
"F"
]
}
"canTrickyJump"
"canLateralMidAirMorph"
"canTrickySpringBallBounce"Exit condition: {
"leaveWithSpringBallBounce": {
"remoteRunway": {
"length": 20,
"openEnd": 2
},
"landingRunway": {
"length": 3,
"openEnd": 1
},
"maxExtraRunSpeed": "$2.8",
"movementType": "controlled"
}
}Unlocks doors: {"types":["ammo"],"requires":[]}Dev note: Higher run speeds are possible but more difficult. |
From: 13
Central Junction
To: 7
Right Side - Door Behind Super Block
Stop with temporary blue in front of the bomb blocks then jump and bounce all the way through the morph tunnel. On the other side, unmorph and chain temporary blue through the door. Requires: {
"obstaclesCleared": [
"F"
]
}
{
"canShineCharge": {
"usedTiles": 22,
"openEnd": 2
}
}
"canChainTemporaryBlue"
"canTrickyJump"
"canLateralMidAirMorph"
"canTrickySpringBallBounce"Exit condition: {
"leaveWithTemporaryBlue": {}
}Unlocks doors: {"types":["ammo"],"requires":[]} |
From: 13
Central Junction
To: 7
Right Side - Door Behind Super Block
Stop with Temporary Blue in front of the bomb blocks then jump and bounce into the morph tunnel to clear them. Requires: {
"notable": "Off Screen Super Block"
}
{
"notable": "Break Raised Bomb Blocks with Blue Speed"
}
{
"canShineCharge": {
"usedTiles": 22,
"openEnd": 2
}
}
"canTemporaryBlue"
"canTrickyJump"
"canLateralMidAirMorph"
"canOffScreenSuperShot"Clears obstacles: F |
From: 2
Right Door
To: 3
Top Junction
X-Ray climb until Samus is a little over halfway off screen; the position is not precise. Face right, then do a turnaround buffer spin jump into a Spring Ball jump to reach the ledge. The pause input can be pressed at the same time as the turnaround. It helps to do an airball to gain horizontal speed. The jump input after pausing should not be buffered, in order to allow a little time for the spring fling horizontal speed to take effect. Entrance condition: {
"comeInWithDoorStuckSetup": {}
}Requires: "canXRayClimb" "canTrickyJump" "canLateralMidAirMorph" "canTrickySpringBallJump" "canSpringFling" |
From: 4
Small Ledge Below Left Door
To: 1
Left Door
Spring Ball jump from the safe spot on the spikey stairs. Moving over far enough left before the peak of the jump is the trickiest part of the jump. There are multiple things which can help get further left: Perform a lateral morph to maintain Samus' horizontal momentum. Morphing and pausing quickly, then delay the Spring Ball jump until after getting a horizontal boost from equipping Spring Ball. Start with a short run and spin jump to move over more before morphing. It is possible to unequip Spring Ball to get a small Spring Fling, but it can be tricky to get any use out of it and it only helps a small amount. Requires: {
"notable": "Tricky Spring Ball Jump"
}
"canTrickyJump"
"canTrickySpringBallJump"
{
"or": [
"canLateralMidAirMorph",
"can4HighMidAirMorph"
]
} |
From: 7
Junction (Bottom of Room)
To: 6
Junction (Above Bottom Rippers)
Requires: "canTrickySpringBallJump"
{
"or": [
"canConsecutiveWallJump",
"HiJump",
{
"and": [
"canTrickyJump",
"canLateralMidAirMorph",
"canResetFallSpeed",
{
"or": [
{
"ammo": {
"type": "PowerBomb",
"count": 1
}
},
{
"ammo": {
"type": "Super",
"count": 1
}
},
{
"enemyDamage": {
"enemy": "Ripper",
"type": "contact",
"hits": 1
}
},
"canTrickyDodgeEnemies"
]
}
]
},
"canSpringFling"
]
}
{
"or": [
"canTrickyJump",
"canLateralMidAirMorph",
"canSpringwall"
]
} |
|
Requires: {
"obstaclesCleared": [
"A"
]
}
"canLateralMidAirMorph"
"canTrickyJump" |
|
A very low horizontal speed is needed to drop down and break the block without hitting the corner to the left or the block above the bomb block. Or with Temporary Blue, Samus can bounce into the bomb block. Requires: {
"notable": "Speedball"
}
"Morph"
{
"obstaclesCleared": [
"C"
]
}
{
"obstaclesNotCleared": [
"D"
]
}
{
"or": [
{
"and": [
{
"getBlueSpeed": {
"usedTiles": 17,
"openEnd": 0
}
},
"canSlowShortCharge",
"canSpeedball"
]
},
{
"and": [
{
"canShineCharge": {
"usedTiles": 30,
"openEnd": 1
}
},
"canTemporaryBlue",
"canLateralMidAirMorph"
]
}
]
}Clears obstacles: B |
From: 2
Bottom Left Door
To: 3
Right Vertical Door
Entrance condition: {
"comeInShinecharging": {
"length": 3,
"openEnd": 0
}
}Requires: "canTemporaryBlue" "canLateralMidAirMorph" Clears obstacles: A Dev note: The runway has 1 unusable tile, to allow space to perform the blue bounce. |
From: 2
Bottom Left Door
To: 3
Right Vertical Door
Entrance condition: {
"comeInWithTemporaryBlue": {}
}Requires: "canChainTemporaryBlue" "canLateralMidAirMorph" Clears obstacles: A |
|
Requires: "canLateralMidAirMorph"
{
"or": [
"canTrickyJump",
{
"doorUnlockedAtNode": 1
}
]
}
{
"or": [
"canCameraManip",
{
"enemyDamage": {
"enemy": "Cacatac",
"type": "contact",
"hits": 1
}
}
]
} |
|
Exit G-mode then air ball into the lava to take fewer heat frames. Kill the Gerutas beforehand to make it easier to escape. Entrance condition: {
"comeInWithGMode": {
"mode": "any",
"morphed": false
}
}Requires: "h_heatedGMode"
{
"or": [
{
"and": [
"canLateralMidAirMorph",
{
"heatFrames": 60
},
{
"lavaFrames": 20
}
]
},
{
"and": [
"Morph",
{
"lavaFrames": 80
},
{
"heatFrames": 20
}
]
}
]
}Dev note: The option without canLateralMidAirMorph is for conserving a blue suit. |
|
Cross the room and go through the morph tunnel. Without any morph movement items, carefully air ball over the Sova and use it to damage boost into the tunnel or wait for the global Sova. It is possible to kill a Sova on the door and pause abuse to grab its Energy drop on G-mode exit. Entrance condition: {
"comeInWithGMode": {
"mode": "any",
"morphed": false
}
}Requires: "Morph"
{
"or": [
"h_bombThings",
"h_useSpringBall",
{
"and": [
"canNeutralDamageBoost",
{
"enemyDamage": {
"enemy": "Sova",
"type": "contact",
"hits": 1
}
},
{
"or": [
{
"and": [
"canTrickyJump",
"canLateralMidAirMorph"
]
},
"canBePatient",
{
"ammo": {
"type": "Super",
"count": 1
}
}
]
}
]
}
]
}
{
"or": [
"h_heatedGModePauseAbuse",
"h_heatedGModeOpenDifferentDoor"
]
} |
|
Either race the nearby Sova to the morph tunnel or wait for it to come back through the morph tunnel and use a Super to knock it off behind Samus. Alternatively, it is possible to wait for the global Sova to come around. Build speed on the lower platform and jump towards the morph tunnel while performing a Midair Morph to reach the Sova in time. Guiding the local Sova around through the shot block again can be faster, but is not expected. Requires: "canNeutralDamageBoost"
"Morph"
{
"enemyDamage": {
"enemy": "Sova",
"type": "contact",
"hits": 1
}
}
{
"or": [
{
"and": [
"canTrickyJump",
"canLateralMidAirMorph",
"canCameraManip",
{
"heatFrames": 340
}
]
},
{
"and": [
{
"ammo": {
"type": "Super",
"count": 1
}
},
{
"heatFrames": 875
}
]
},
{
"heatFrames": 2700
}
]
}Dev note: The global Sova is moving while the player reaches this node and this heatFrame count reflects that. |
From: 2
Bottom Left Door
To: 1
Top Left Door
Entrance condition: {
"comeInGettingBlueSpeed": {
"length": 0,
"openEnd": 1,
"minExtraRunSpeed": "$2.0"
}
}Requires: "HiJump"
"canSpeedyJump"
"canLateralMidAirMorph"
"canInsaneJump"
"canPauseRemorphTemporaryBlue"
"canXRayTurnaround"
{
"heatFrames": 360
}Exit condition: {
"leaveWithTemporaryBlue": {}
}Unlocks doors: {"types":["super","powerbomb"],"requires":[]}
{"types":["missiles"],"requires":[{"heatFrames":50}]} |
Blue Cross-Room Jump, Leave With Temporary Blue (Speedy Jump, Spring Ball Jump)
(Extreme+)
Double Chamber
From: 2
Bottom Left Door
To: 1
Top Left Door
Entrance condition: {
"comeInGettingBlueSpeed": {
"length": 0,
"openEnd": 1,
"minExtraRunSpeed": "$2.0"
}
}Requires: "canSpeedyJump"
"canLateralMidAirMorph"
"canTrickySpringBallJump"
"canInsaneJump"
"canPauseRemorphTemporaryBlue"
"canXRayTurnaround"
{
"heatFrames": 440
}Exit condition: {
"leaveWithTemporaryBlue": {}
}Unlocks doors: {"types":["super","powerbomb"],"requires":[]}
{"types":["missiles"],"requires":[{"heatFrames":50}]} |
From: 2
Bottom Left Door
To: 1
Top Left Door
Spin jump into the room with at least 1 tile of run speed. Perform a lateral mid-air morph into a spring ball jump. Press against the left side of the first moving platform to gain enough height to get on top of it. Entrance condition: {
"comeInJumping": {
"speedBooster": "any",
"minTiles": 1
}
}Requires: "canPrepareForNextRoom"
"canLateralMidAirMorph"
"canTrickySpringBallJump"
"canTrickyJump"
{
"heatFrames": 160
} |
|
Spin jump into the room with at least 2 tiles of run speed. Perform a lateral mid-air morph into a spring ball jump. Land on the second moving platform. Entrance condition: {
"comeInJumping": {
"speedBooster": "any",
"minTiles": 2
}
}Requires: "canPrepareForNextRoom"
"canLateralMidAirMorph"
"canTrickySpringBallJump"
"canTrickyJump"
{
"heatFrames": 280
}
{
"or": [
{
"noFlashSuit": {}
},
"canComplexCarryFlashSuit",
"Ice",
"Wave",
"Spazer",
"Plasma",
{
"heatFrames": 300
}
]
}Clears obstacles: A |
From: 2
Far Left Door
To: 4
Bottom Right Door
Use Morph (and either Spring Ball, Bombs, or Power Bombs) to navigate the space above the first set of Speed blocks. Either kill or carefully jump over the Pirates; their hitbox is much smaller when they are not looking around. Then use a flash suit to shinespark through the second set of Speed blocks. Requires: "canTrickyJump"
{
"heatFrames": 855
}
{
"or": [
{
"and": [
"canLateralMidAirMorph",
"canTrickyDodgeEnemies",
{
"heatFrames": 120
}
]
},
{
"enemyKill": {
"enemies": [
[
"Red Space Pirate (standing)"
],
[
"Red Space Pirate (standing)"
]
],
"explicitWeapons": [
"Missile",
"Super",
"ScrewAttack"
]
}
},
"h_PlasmaHitbox"
]
}
{
"or": [
"h_useSpringBall",
{
"and": [
"h_bombThings",
{
"heatFrames": 120
}
]
}
]
}
{
"useFlashSuit": {}
}
{
"or": [
{
"and": [
"h_heatProof",
{
"shinespark": {
"frames": 55,
"excessFrames": 16
}
}
]
},
{
"shinespark": {
"frames": 55,
"excessFrames": 5
}
}
]
}
{
"heatFrames": 105
}Dev note: This strat is only useful with heat protection; otherwise it would be better to spark from left of the bridge. |
From: 2
Far Left Door
To: 8
G-Mode, Bottom Right (Started at Left)
Carefully dodge or kill the enemies in the first half of the room. With Morph, go over the first set of Speed Blocks, then kill the first Red Pirate or air ball over it. It is also possible to kill or jump over the second pirate, but be careful to prevent it from shooting invisible lasers. Entrance condition: {
"comeInWithGMode": {
"mode": "any",
"morphed": false
}
}Requires: "canDash"
{
"or": [
"canTrickyDodgeEnemies",
"h_usePowerBomb",
"ScrewAttack",
"h_hasBeamUpgrade",
{
"ammo": {
"type": "Missile",
"count": 2
}
},
{
"ammo": {
"type": "Super",
"count": 2
}
},
{
"enemyDamage": {
"enemy": "Red Space Pirate (standing)",
"type": "contact",
"hits": 1
}
}
]
}
{
"or": [
"canTrickyJump",
{
"enemyDamage": {
"enemy": "Multiviola",
"type": "contact",
"hits": 1
}
}
]
}
"Morph"
{
"or": [
"h_usePowerBomb",
{
"and": [
{
"or": [
"h_useSpringBall",
"h_useMorphBombs"
]
},
{
"or": [
"canLateralMidAirMorph",
"h_hasBeamUpgrade",
{
"enemyKill": {
"enemies": [
[
"Red Space Pirate (standing)"
]
],
"explicitWeapons": [
"Missile",
"Super",
"ScrewAttack"
]
}
},
{
"enemyDamage": {
"enemy": "Red Space Pirate (standing)",
"type": "contact",
"hits": 1
}
}
]
}
]
}
]
}
{
"heatFrames": 0
} |
|
Requires: "h_useSpringBall"
{
"or": [
{
"and": [
{
"or": [
"HiJump",
"canCarefulJump"
]
},
{
"heatFrames": 185
}
]
},
{
"and": [
"canTrickyJump",
{
"heatFrames": 170
}
]
},
{
"and": [
"canLateralMidAirMorph",
{
"heatFrames": 120
}
]
}
]
} |
From: 3
Bottom Left Door
To: 3
Bottom Left Door
Requires: "canDash"
{
"resetRoom": {
"nodes": [
3
]
}
}
"h_usePowerBomb"
"canTrickyJump"
"canLateralMidAirMorph"
{
"cycleFrames": 450
}Clears obstacles: D Resets obstacles: A, B, C Farm cycle drops: 4 Mella, 3 Sm. Dessgeega |
From: 1
Left Door
To: 2
Right Door
Entrance condition: {
"comeInShinecharged": {}
}Requires: {
"shineChargeFrames": 145
}
"canLateralMidAirMorph"
"canTrickyJump"
"canShinechargeMovementTricky"
{
"heatFrames": 190
}
{
"shinespark": {
"frames": 21,
"excessFrames": 0
}
}Exit condition: {
"leaveWithSpark": {}
}Unlocks doors: {"types":["super"],"requires":[]}
{"types":["missiles","powerbomb"],"requires":["never"]} |
From: 1
Left Door
To: 2
Right Door
Entrance condition: {
"comeInShinecharging": {
"length": 3,
"openEnd": 0
}
}Requires: "canLateralMidAirMorph"
"canTrickyJump"
"canShinechargeMovementTricky"
{
"heatFrames": 235
}
{
"shinespark": {
"frames": 22,
"excessFrames": 0
}
}Exit condition: {
"leaveWithSpark": {
"position": "bottom"
}
}Unlocks doors: {"types":["super"],"requires":[]}
{"types":["missiles","powerbomb"],"requires":["never"]} |
|
Getting across the lava while artificially morphed requires an HBJ or Spring Fling. For the Spring Fling, jump immediately before the pause triggers. With Morph, Samus can air ball across. Entrance condition: {
"comeInWithGMode": {
"mode": "any",
"morphed": true
}
}Requires: {
"or": [
{
"and": [
"Morph",
{
"or": [
"SpaceJump",
"canTrivialUseFrozenEnemies"
]
}
]
},
{
"and": [
"canLateralMidAirMorph",
"canTrickyJump"
]
},
{
"and": [
"h_artificialMorphSpringFling",
"canTrickyJump"
]
},
"h_artificialMorphHBJ",
{
"and": [
"Gravity",
"h_artificialMorphIBJ",
"h_artificialMorphBombHorizontally",
{
"lavaFrames": 160
}
]
},
{
"and": [
"Gravity",
"h_artificialMorphSpringBall",
{
"lavaFrames": 40
}
]
},
{
"and": [
"Gravity",
"Morph",
{
"lavaFrames": 24
}
]
}
]
}
"h_heatedGModeOpenDifferentDoor" |
|
A well-executed lateral mid-air morph can get into the passage without taking a hit. Otherwise, the Boyon can be used to push Samus into the passage. Requires: "canLateralMidAirMorph"
{
"or": [
"canTrickyJump",
{
"and": [
"canNeutralDamageBoost",
{
"enemyDamage": {
"enemy": "Boyon",
"type": "contact",
"hits": 1
}
}
]
}
]
}
{
"heatFrames": 240
}Dev note: It's possible to get into the passage by a non-mockball mid-air morph, it just needs to be fairly late. Due to its risk and not really being easier, it's not included here |
|
Requires: {
"or": [
"f_DefeatedCrocomire",
{
"obstaclesCleared": [
"f_DefeatedCrocomire"
]
}
]
}
"canLateralMidAirMorph"
"can4HighMidAirMorph"
"canTrickySpringBallJump"
{
"acidFrames": 25
} |
|
Requires: {
"or": [
"f_DefeatedCrocomire",
{
"obstaclesCleared": [
"f_DefeatedCrocomire"
]
}
]
}
"canLateralMidAirMorph"
"canWallJump"
{
"acidFrames": 35
} |
|
With a precise enough jump and a quick airball, it's possible to avoid acid damage without a shinespark or wall jump. Requires: {
"or": [
"f_DefeatedCrocomire",
{
"obstaclesCleared": [
"f_DefeatedCrocomire"
]
}
]
}
"h_speedJump"
"canInsaneJump"
"canLateralMidAirMorph" |
|
With SpeedBooster equipped, run from the top left platform and jump into an airball to reach the top right platform. It helps but is not required to moonwalk against the wall to maximize the available runway. Requires: "canSpeedyJump" "canTrickyJump" "canLateralMidAirMorph" |
From: 1
Left Door
To: 4
Center Platform Junction
Requires: "canSpeedyJump"
"canTrickyJump"
{
"or": [
"canWallJump",
"canLateralMidAirMorph"
]
} |
From: 1
Left Door
To: 4
Center Platform Junction
Entrance condition: {
"comeInRunning": {
"speedBooster": "any",
"minTiles": 2
}
}Requires: "canTrickyJump"
{
"or": [
"canWallJump",
"canLateralMidAirMorph"
]
} |
From: 1
Left Door
To: 4
Center Platform Junction
Entrance condition: {
"comeInRunning": {
"speedBooster": "any",
"minTiles": 4
}
}Requires: "canCarefulJump"
{
"or": [
"canTrickyJump",
"canWallJump",
"canLateralMidAirMorph"
]
} |
From: 3
Junction Left of Green Gate
To: 4
Center Platform Junction
Requires: {
"or": [
"Grapple",
"SpaceJump",
"canResetFallSpeed",
{
"and": [
"canTrickyJump",
"canLateralMidAirMorph"
]
},
{
"and": [
"Gravity",
"canTrickyWallJump"
]
}
]
}Resets obstacles: B |
From: 4
Center Platform Junction
To: 3
Junction Left of Green Gate
Requires: "canCarefulJump" "canLateralMidAirMorph" "canSpringFling" "h_speedJump" |
From: 4
Center Platform Junction
To: 3
Junction Left of Green Gate
Run and jump at the very edge of the center platform. Wait for the water level to begin lowering to walljump on the far edge. An airball may be a little easier. Requires: "canDash"
"canTrickyJump"
{
"or": [
"canLateralMidAirMorph",
"canInsaneWallJump",
{
"and": [
"h_speedJump",
"canPreciseWallJump"
]
}
]
} |
|
Requires: "canSpeedyJump"
{
"obstaclesCleared": [
"B"
]
}
{
"or": [
"HiJump",
{
"and": [
"canLateralMidAirMorph",
"canTrickySpringBallJump"
]
}
]
} |
|
Beginning with Speed Booster unequipped, run and jump over the acid into an airball. Once Samus begins falling, equip Spring Ball and Speed Booster to safely land on the other side near the statue. Requires: "canSpringFling"
"canDisableEquipment"
"canSpeedyJump"
"canTrickyJump"
"canLateralMidAirMorph"
{
"heatFrames": 210
} |
|
There is a hole in the left side wall that Samus can fit into by shrinking her hitbox. Once in the wall, stand up if crouched then turnaround into a buffered spinjump to jump out of the acid. Requires: {
"tech": "canPartialFloorClip"
}
"canSuitlessLavaDive"
{
"or": [
{
"and": [
"canLateralMidAirMorph",
"canDownBack",
"canTrickyJump",
{
"acidFrames": 110
},
{
"heatFrames": 285
}
]
},
{
"and": [
"canDash",
"canTrickyJump",
{
"acidFrames": 140
},
{
"heatFrames": 300
}
]
},
{
"and": [
{
"acidFrames": 230
},
{
"heatFrames": 390
}
]
}
]
} |
From: 2
Middle Right Door
To: 3
Top Right Door
Jump into the room with blue speed and a specific amount of horizontal momentum, morphing through the transition. Unmorph to clear Samus' horizontal momentum while retaining blue, to break the right-most bomb blocks above and reach the top of the room. It can help to pause buffer the morph: time a pause to hit just after Samus jumps and aims down, then hold down during the unpause black screen to buffer the morph. Entrance condition: {
"comeInGettingBlueSpeed": {
"length": 0,
"openEnd": 1,
"minExtraRunSpeed": "$6.0",
"maxExtraRunSpeed": "$6.1"
}
}Requires: "h_blueJump"
"canTrickyDashJump"
"canInsaneJump"
"canLateralMidAirMorph"
{
"heatFrames": 120
}Clears obstacles: A Dev note: Higher run speeds could also work, but with greater difficulty. |
From: 2
Middle Right Door
To: 3
Top Right Door
Jump into the room with blue speed. Morph and unmorph to clear Samus' horizontal momentum while retaining blue, to break the right-most bomb blocks above and reach the top of the room. Entrance condition: {
"comeInGettingBlueSpeed": {
"length": 0,
"openEnd": 1,
"minExtraRunSpeed": "$2.5",
"maxExtraRunSpeed": "$2.F"
}
}Requires: "h_blueJump"
"HiJump"
"canLateralMidAirMorph"
"canTrickyJump"
{
"heatFrames": 150
}Clears obstacles: A Dev note: Higher run speeds can also work, but with greater difficulty. |
|
It may help to disable HiJump first and then re-equip it with the springball jump. Doing this, the springball jump may be buffered. Requires: {
"obstaclesCleared": [
"A"
]
}
"HiJump"
{
"doorUnlockedAtNode": 2
}
"canTrickySpringBallJump"
{
"or": [
"canLateralMidAirMorph",
"canSpringFling"
]
}
{
"heatFrames": 120
}Unlocks doors: {"nodeId":2,"types":["missiles"],"requires":[{"heatFrames":50}]}
{"nodeId":2,"types":["super"],"requires":[]}
{"nodeId":2,"types":["powerbomb"],"requires":[{"heatFrames":110}]} |
From: 2
Middle Right Door
To: 5
Junction Above Bottom Blocks
Jump into the room with blue speed, morphing and unmorphing to clear Samus' horizontal momentum while retaining blue. Use the blue to break the right-most bomb blocks above, then fall down. Entrance condition: {
"comeInGettingBlueSpeed": {
"length": 0,
"openEnd": 1,
"minExtraRunSpeed": "$1.D",
"maxExtraRunSpeed": "$2.F"
}
}Requires: "h_blueJump"
"HiJump"
"canLateralMidAirMorph"
"canTrickyJump"
{
"heatFrames": 155
}Clears obstacles: A |
|
Dive into the acid to the left of the first floating platform to quickly sink to the bottom of the room. It is possible to jump directly over the pirate at the bottom of the ramp directly to the gap between platforms. Falling in this way will land between the platforms at the bottom of the room. Requires: {
"notable": "Reverse Acid Dive"
}
{
"obstaclesNotCleared": [
"A"
]
}
"canSuitlessLavaDive"
{
"or": [
"SpaceJump",
"canTrickyJump",
{
"and": [
"canLateralMidAirMorph",
"canCarefulJump"
]
},
{
"and": [
"ScrewAttack",
"canCarefulJump"
]
},
{
"and": [
"h_heatProof",
{
"enemyKill": {
"enemies": [
[
"Yellow Space Pirate (standing)"
]
]
}
},
"canCarefulJump"
]
}
]
}
{
"or": [
{
"and": [
"canDash",
{
"heatFrames": 320
},
{
"acidFrames": 195
}
]
},
{
"and": [
"canPreciseWallJump",
{
"heatFrames": 480
},
{
"acidFrames": 250
}
]
},
{
"and": [
"SpaceJump",
{
"heatFrames": 470
},
{
"acidFrames": 210
}
]
},
{
"and": [
{
"heatFrames": 460
},
{
"acidFrames": 315
}
]
}
]
}Dev note: It is faster to fall all the way to the bottom and then jump onto the platform to the left, than to morph/unmorph to reset fall speed to reach it directly. |
|
Requires: "canDash"
{
"obstaclesCleared": [
"A"
]
}
"HiJump"
{
"or": [
"canSpeedyJump",
{
"heatFrames": 90
}
]
}
{
"heatFrames": 270
}
{
"or": [
"canCarefulJump",
"canLateralMidAirMorph",
"ScrewAttack",
{
"and": [
{
"enemyKill": {
"enemies": [
[
"Yellow Space Pirate (standing)"
]
],
"explicitWeapons": [
"Charge+Ice+Wave+Spazer"
]
}
},
{
"heatFrames": 240
}
]
},
{
"and": [
{
"enemyKill": {
"enemies": [
[
"Yellow Space Pirate (standing)"
]
],
"explicitWeapons": [
"Missile",
"Charge+Plasma"
]
}
},
{
"heatFrames": 120
}
]
},
{
"and": [
{
"enemyKill": {
"enemies": [
[
"Yellow Space Pirate (standing)"
]
],
"explicitWeapons": [
"Super"
]
}
},
{
"heatFrames": 60
}
]
}
]
} |
From: 1
Left Door
To: 5
Spring Ball Maze Junction (Past the Bomb Blocks)
Spacejump through the room and break the bomb blocks in the Morph tunnel with Speedbooster. It is very helpful for the final jump to be close to the missile platform, to be as close to the tunnel as possible when Morphing. Entrance condition: {
"comeInBlueSpinning": {
"minExtraRunSpeed": "$6.E",
"unusableTiles": 0
}
}Requires: {
"notable": "Air Speedball"
}
"canPreciseSpaceJump"
"canInsaneJump"
"canLateralMidAirMorph"
"canSpeedball"
"canMomentumConservingMorph"
{
"heatFrames": 110
}Dev note: This is possible with less extra speed but where you jump changes with your speed and room entry. |
Come In Getting Blue Speed, Space Jump Through Morph Tunnel
(Extreme)
Lower Norfair Spring Ball Maze
From: 1
Left Door
To: 5
Spring Ball Maze Junction (Past the Bomb Blocks)
Spacejump through the room and break the bomb blocks in the Morph tunnel with Speedbooster. It is very helpful for the final jump to be close to the missile platform, to be as close to the tunnel as possible when Morphing. Entrance condition: {
"comeInGettingBlueSpeed": {
"length": 5,
"openEnd": 1,
"minExtraRunSpeed": "$5.B"
}
}Requires: {
"notable": "Air Speedball"
}
"canPreciseSpaceJump"
"canInsaneJump"
"canLateralMidAirMorph"
"canSpeedball"
"canMomentumConservingMorph"
{
"heatFrames": 110
} |
From: 6
Junction By Left Door (Right of Pit)
To: 5
Spring Ball Maze Junction (Past the Bomb Blocks)
Jump and Morph with a speedball to enter the morph tunnel and then use SpringBall to break the bomb blocks. Requires: {
"notable": "Air Speedball"
}
{
"getBlueSpeed": {
"usedTiles": 26,
"gentleDownTiles": 2,
"openEnd": 1
}
}
"canSpeedball"
"canLateralMidAirMorph"
"h_useSpringBall"
{
"heatFrames": 160
}Clears obstacles: B |
From: 4
Junction Below Bomb Blocks
To: 2
Top Right Door
This is possible by jumping on the crumble blocks into a mid-air spring ball jump, or by avoiding them. The crumbles can be avoided by starting with either an air ball, a 3 tile high mid-air morph, or a low spring wall. These are generally safer, as bouncing on the crumble blocks with Spring Ball is trivial. Requires: {
"obstaclesCleared": [
"B"
]
}
"canDash"
"canTrickySpringBallJump"
{
"heatFrames": 250
}
{
"or": [
{
"and": [
"can4HighMidAirMorph",
"canSpringFling"
]
},
{
"and": [
"canLateralMidAirMorph",
"canTrickyJump"
]
},
"canCrumbleJump",
{
"and": [
"h_trickySpringwall",
"canPreciseWallJump"
]
}
]
} |
|
Break spin to leave some blocks intact in order to avoid damage from Puromis. Avoiding acid damage at the last jump is tricky but possible. Entrance condition: {
"comeInNormally": {}
}Requires: "canDash"
"canTrickyJump"
"ScrewAttack"
{
"heatFrames": 530
}
{
"or": [
"canLateralMidAirMorph",
{
"and": [
"canPreciseWallJump",
{
"heatFrames": 20
},
{
"acidFrames": 10
}
]
},
{
"and": [
{
"heatFrames": 20
},
{
"acidFrames": 24
}
]
}
]
}Unlocks doors: {"types":["missiles"],"requires":[{"heatFrames":50}]}
{"types":["super"],"requires":[]}
{"types":["powerbomb"],"requires":[{"heatFrames":110}]} |
|
Place the PBs next to the pillars in order to only use 2. Avoid acid during the first Power Bomb by walljumping before placing the bomb. Avoiding acid damage at the last jump is tricky but possible. Entrance condition: {
"comeInNormally": {}
}Requires: {
"notable": "Two Power Bombs"
}
"canDash"
"canMidAirMorph"
{
"ammo": {
"type": "PowerBomb",
"count": 2
}
}
"canCarefulJump"
{
"or": [
{
"and": [
"canWallJumpInstantMorph",
{
"heatFrames": 690
}
]
},
{
"and": [
"canWallJump",
{
"heatFrames": 660
},
{
"acidFrames": 36
}
]
},
{
"and": [
"canSuitlessLavaDive",
{
"heatFrames": 840
},
{
"acidFrames": 84
}
]
},
{
"and": [
"Gravity",
{
"heatFrames": 660
},
{
"acidFrames": 24
}
]
}
]
}
{
"or": [
"canInsaneJump",
{
"and": [
"canTrickyJump",
"canLateralMidAirMorph",
{
"heatFrames": 10
},
{
"acidFrames": 10
}
]
},
{
"and": [
"canPreciseWallJump",
{
"heatFrames": 50
},
{
"acidFrames": 32
}
]
},
{
"and": [
"Gravity",
{
"heatFrames": 20
},
{
"acidFrames": 20
}
]
},
{
"and": [
"canSuitlessLavaDive",
{
"heatFrames": 50
},
{
"acidFrames": 50
}
]
}
]
}
{
"or": [
"h_heatResistant",
"canPauseAbuse",
{
"resourceCapacity": [
{
"type": "RegularEnergy",
"count": 149
}
]
}
]
}Unlocks doors: {"types":["missiles"],"requires":[{"heatFrames":30},{"acidFrames":20}]}
{"types":["super"],"requires":[]}
{"types":["powerbomb"],"requires":[{"heatFrames":75},{"acidFrames":58}]}Dev note: With Reserves only, canPauseAbuse is used as a proxy for pause abuse or optimal reserve management and character movement. |
From: 3
Top Right Door
To: 2
Bottom Left Door
Get to the bomb blocks while morphed, use a Power Bomb, then exit G-mode and drop to the bottom of the room. It is possible to go through the top pirate while it is being hit by a Power Bomb explosion, otherwise it is possible to jump over it with Morph or Spring Ball. With Bombs, it is possible but tricky to IBJ over the pirate or Bomb it many times to kill it without it placing any of its stationary, invisible lasers. Note that the pirate will not turn towards Samus and place a laser if it is moving its head back and forth. Entrance condition: {
"comeInWithGMode": {
"mode": "any",
"morphed": true
}
}Requires: "h_heatedGMode"
"h_artificialMorphPowerBomb"
{
"or": [
{
"and": [
"h_artificialMorphPowerBomb",
"canHitbox"
]
},
"canLateralMidAirMorph",
"h_artificialMorphSpringBall",
{
"and": [
"canTrickyGMode",
"h_artificialMorphIBJ"
]
},
{
"and": [
"Morph",
{
"or": [
"Charge",
{
"ammo": {
"type": "Super",
"count": 3
}
},
{
"ammo": {
"type": "Missile",
"count": 9
}
},
{
"enemyDamage": {
"enemy": "Yellow Space Pirate (standing)",
"type": "contact",
"hits": 1
}
}
]
}
]
},
{
"and": [
"h_artificialMorphBombs",
{
"enemyDamage": {
"enemy": "Yellow Space Pirate (standing)",
"type": "contact",
"hits": 1
}
}
]
}
]
}
{
"heatFrames": 160
}Clears obstacles: A |
From: 4
Junction Above Bomb Blocks
To: 2
Bottom Left Door
Starting from approximately the center of the floating platform, run and jump to the left, and perform a lateral mid-air morph to hit the spike from below (landing on the Namihe) and enter X-mode. Hold an angle button to turn around to the right while retaining dash speed. Arm pump a tile or two to the right, so that the Namihe is no longer below Samus. Gain a shinecharge and continue holding down while exiting X-mode to obtain temporary blue, and use it to break the bomb blocks below while falling through them. Requires: {
"notable": "X-Mode Temporary Blue"
}
"canLateralMidAirMorph"
"canXMode"
"h_XModeSpikeHit"
"h_shinechargeMaxRunway"
"canTemporaryBlue"
{
"heatFrames": 290
} |
From: 4
Junction Above Bomb Blocks
To: 4
Junction Above Bomb Blocks
Farm Pirates for energy on the way down. Jump-morph toward the Namihe below the spike and enter Spike X-Mode to shinecharge. Use the Namihe's fireball to interrupt. Requires: {
"obstaclesCleared": [
"R-Mode"
]
}
{
"notable": "X-Mode Temporary Blue"
}
"h_heatProof"
{
"enemyKill": {
"enemies": [
[
"Yellow Space Pirate (standing)"
],
[
"Yellow Space Pirate (standing)"
],
[
"Yellow Space Pirate (standing)"
]
]
}
}
{
"partialRefill": {
"type": "ReserveEnergy",
"limit": 20
}
}
"canLateralMidAirMorph"
"canXMode"
"h_XModeSpikeHit"
"h_shinechargeMaxRunway"
{
"autoReserveTrigger": {
"maxReserveEnergy": 95
}
}
"canRModeSparkInterrupt"Resets obstacles: R-Mode |
|
Requires: "canSpeedyJump"
{
"heatFrames": 240
}
"canTrickyJump"
"canLateralMidAirMorph"Exit condition: {
"leaveWithSidePlatform": {
"height": 3,
"runway": {
"length": 8,
"openEnd": 0
},
"obstruction": [
3,
0
]
}
}Dev note: Max extra run speed $1.D. This strat is included for completeness, though it apparently doesn't have any applications. |
From: 2
Middle Left Door
To: 6
Bowling Chozo Statue
Start with Spring Ball disabled. Jump over the spikes and mid-air morph. Spring fling on the way down, Spring Ball bounce through the spikes, then spring fling again to reach the statue taking only one spike hit. Entrance condition: {
"comeInRunning": {
"speedBooster": "yes",
"minTiles": 12
}
}Requires: "h_speedJump"
"canTrickyJump"
"canSpringFling"
"h_unpauseKeepMomentum"
"canLateralMidAirMorph"
"canUseIFrames"
{
"spikeHits": 1
} |
|
Fling Samus from the first set of grapple blocks to the second set without falling. This requires precise timing but is made easier by morphing and unmorphing to reset Samus' fall speed. Requires: "canPreciseGrapple"
"canLateralMidAirMorph"
"canResetFallSpeed"
{
"or": [
"canInsaneJump",
{
"thornHits": 5
}
]
}
"h_complexToCarryFlashSuit"Dev note: The 5 thornHits are for lenience since it is difficult to get this first try. |
|
Shinecharging up the stairs gives a longer effective runway than shinecharging down them. A frozen Atomic (or Covern) can be used for more runway. Requires: {
"or": [
{
"canShineCharge": {
"usedTiles": 11,
"steepUpTiles": 3,
"openEnd": 2
}
},
{
"and": [
"h_frozenEnemyRunway",
{
"or": [
"f_DefeatedPhantoon",
{
"and": [
"SpaceJump",
"h_trickyFrozenEnemyRunway"
]
}
]
},
{
"canShineCharge": {
"usedTiles": 13,
"steepUpTiles": 3,
"openEnd": 1
}
}
]
}
]
}
"canTemporaryBlue"
"canLateralMidAirMorph"
Clears obstacles: C Dev note: There is 1/2 a unusable tile in this runway. |
|
Entrance condition: {
"comeInShinecharging": {
"length": 11,
"openEnd": 1,
"steepDownTiles": 7
}
}Requires: "canTemporaryBlue" "canLateralMidAirMorph" Clears obstacles: C Dev note: There is 1 unusable tile in this runway. |
From: 2
Bottom Right Door
To: 3
Middle Right Door
Run with enough speed to jump (after the transition) to reach the far left ledge. Either kill or Kago through the Fish enemy. At slightly higher run speeds, Samus can jump from the bottom of the slope and avoid the fish. Entrance condition: {
"comeInRunning": {
"speedBooster": "yes",
"minTiles": 7
}
}Requires: "HiJump"
"canSpeedyJump"
"canCrossRoomJumpIntoWater"
"canTrickyJump"
"canDodgeWhileShooting"
{
"or": [
{
"ammo": {
"type": "Super",
"count": 1
}
},
{
"and": [
"Charge",
"Plasma"
]
},
{
"and": [
"Plasma",
"canHitbox"
]
},
{
"and": [
"canKago",
"canLateralMidAirMorph",
{
"or": [
{
"enemyDamage": {
"enemy": "Skultera",
"type": "contact",
"hits": 1
}
},
"h_pauseAbuseMinimalReserveRefill"
]
}
]
}
]
} |
From: 11
Upper Left Ledge Junction
To: 9
Platform Below Top Door
This is most easily done with a late jump at the bottom of the slope. It is a bit less precise with an air ball or turning gravity suit back on and wall jumping on the platform at the end. An alternate method is to airball simultaneously with the gravity jump pause. Requires: "canGravityJump"
{
"or": [
"canTrickyJump",
{
"and": [
"can4HighMidAirMorph",
"canCarefulJump",
"canLateralMidAirMorph"
]
}
]
} |
|
Requires: "Gravity"
"canLateralMidAirMorph"
"canCarefulJump"
{
"or": [
"canTrickyJump",
"canSpringBallBounce"
]
} |
|
Needs near max horizontal speed coming from about 40 runway tiles in the adjacent room. Jump after the transition. Running longer on the short runway is more difficult at maximum speed, but will increase the success of the jump. A crisp momentum conserving morph can also make up for a jump that is buffered through the door. Entrance condition: {
"comeInRunning": {
"speedBooster": "yes",
"minTiles": 40
}
}Requires: "h_speedJump" "canInsaneJump" "canLateralMidAirMorph" "canCrossRoomJumpIntoWater" "canMomentumConservingMorph" Collects items: 5 |
From: 1
Left Door
To: 5
Item
Needs a runway of 7 tiles with no open end in the adjacent room, to get enough height. This is a peak of height with speed booster, no hjb, while underwater. Jump before the transition with SpeedBooster off and then SpeedBooster back on after reaching the ceiling and Morphing. Entrance condition: {
"comeInJumping": {
"speedBooster": "yes",
"minTiles": 6.4375
}
}Requires: "canLateralMidAirMorph"
{
"disableEquipment": "SpeedBooster"
}
"canCrossRoomJumpIntoWater"
"canSpringBallBounce"
{
"or": [
{
"enemyDamage": {
"enemy": "Puyo",
"type": "contact",
"hits": 1
}
},
"canInsaneJump",
{
"and": [
"Plasma",
"canTrickyJump"
]
},
"h_pauseAbuseMinimalReserveRefill"
]
}Collects items: 5 |
|
Requires: "canSuitlessMaridia"
{
"or": [
{
"and": [
"canTrickySpringBallJump",
{
"or": [
"h_underwaterCrouchJump",
"canLateralMidAirMorph"
]
}
]
},
{
"and": [
"HiJump",
"h_useSpringBall"
]
},
{
"and": [
"HiJump",
"canMidAirMorph"
]
}
]
}Collects items: 5 |
|
Jump through the door in the previous room, and perform an air ball soon after entering. With a last-frame jump through the door, there is a wide timing window to do the air ball. With an earlier jump through the door, the airball must be done more precisely: in this case buffer aim-down through the transition and morph immediately on entry, in order to conserve momentum while contacting the overhang. Entrance condition: {
"comeInJumping": {
"speedBooster": "any",
"minTiles": 1
}
}Requires: "canCrossRoomJumpIntoWater"
"canLateralMidAirMorph"
{
"or": [
"canTrickyJump",
"canMomentumConservingMorph"
]
}Clears obstacles: door_1 Dev note: There is a 4-frame window for the jump that can work; jumping in the later part of that window is better as it gives a bigger window for the morph. In water physics, an airball has higher base speed ($1.8) than spin jump ($1.6) or aim down ($1.4), which is the other reason why doing it early helps, in addition to how it helps clear the overhang. Doing a ceiling mockball at the top of the room can also work, but it is more difficult, and the frame-perfect jump is required in that case. |
From: 2
Right Door
To: 4
Top Right Ledge Junction
There is just enough distance for a MidAir Spring Ball jump to reach without HiJump, with either a crouch jump or air ball. To do this, pause and morph early in order to get a spring fling from equipping Spring Ball. Requires: "Gravity"
"canSpringBallJumpMidAir"
{
"or": [
"HiJump",
{
"and": [
"h_maxHeightSpringBallJump",
"canSpringFling"
]
},
{
"and": [
"canTrickyJump",
"canLateralMidAirMorph",
"canTrickySpringBallJump",
"canSpringFling",
"h_complexToCarryFlashSuit"
]
}
]
}Dev note: The h_maxHeightSpringBallJump is not a h_underwaterMaxHeightSpringBallJump, because Gravity is required. |
From: 3
Middle Right Door
To: 4
Top Right Door
Run into the room, pressing pause immediately when entering. Jump into a mid-air spring ball jump to reach the ledge above. Perform the spring ball jump while still moving forward, in order to get a boost in jump height. Entrance condition: {
"comeInRunning": {
"speedBooster": "yes",
"minTiles": 5.4375
}
}Requires: "HiJump"
"canSpeedyJump"
"canTrickyJump"
"canLateralMidAirMorph"
"canTrickySpringBallJump"
{
"or": [
"canSpringFling",
"canInsaneJump",
"can4HighMidAirMorph"
]
}Dev note: This assumes extra run speed of $1.B entering the room, at least $2.6 when jumping (a 2-frame window in the worst case). |
From: 3
Middle Right Door
To: 4
Top Right Door
Run into the room, pressing pause immediately when entering. Jump into a mid-air spring ball jump to reach the ledge above. Perform the spring ball jump while still moving forward, in order to get a boost in jump height. Entrance condition: {
"comeInRunning": {
"speedBooster": "yes",
"minTiles": 43
}
}Requires: "canSpeedyJump" "canTrickyJump" "canLateralMidAirMorph" "canTrickySpringBallJump" Dev note: This assumes max run speed (extra run speed of $7.0). |
From: 3
Middle Right Door
To: 4
Top Right Door
Run into the room, pressing pause immediately when entering. Jump into a mid-air spring ball jump to reach the ledge above. Perform the spring ball jump while still moving forward, in order to get a boost in jump height. Entrance condition: {
"comeInRunning": {
"speedBooster": "yes",
"minTiles": 34
}
}Requires: "canTrickyDashJump" "canLateralMidAirMorph" "canTrickySpringBallJump" Dev note: An extra run speed of at least $6.0 or $6.1 is needed. |
|
Build up run speed and jump into the transition to cross this room without touching the water. Shoot open the opposite door upon entering and morph before touching the ceiling to bounce into the open door. Entrance condition: {
"comeInJumping": {
"speedBooster": "any",
"minTiles": 6
}
}Requires: {
"notable": "Cross Room Jump Morph"
}
"Morph"
"canTrickyJump"
"canLateralMidAirMorph"
{
"doorUnlockedAtNode": 3
}Unlocks doors: {"types":["super"],"requires":[]}
{"types":["missiles","powerbomb"],"requires":["never"]} |
|
Build up run speed and jump into the transition to cross this room without touching the water. Shoot open the opposite door upon entering and morph before touching the ceiling to bounce into the open door. Entrance condition: {
"comeInJumping": {
"speedBooster": "yes",
"minTiles": 5
}
}Requires: {
"notable": "Cross Room Jump Morph"
}
"Morph"
"canSpeedyJump"
"canTrickyJump"
"canLateralMidAirMorph"
{
"doorUnlockedAtNode": 3
}Unlocks doors: {"types":["super"],"requires":[]}
{"types":["missiles","powerbomb"],"requires":["never"]} |
|
Build up run speed and jump into the transition to cross this room without touching the water. Shoot open the opposite door upon entering and morph before touching the ceiling to bounce into the open door. Entrance condition: {
"comeInJumping": {
"speedBooster": "any",
"minTiles": 6
}
}Requires: {
"notable": "Cross Room Jump Morph"
}
"Morph"
"canTrickyJump"
"canLateralMidAirMorph"
{
"doorUnlockedAtNode": 1
}Unlocks doors: {"types":["super"],"requires":[]}
{"types":["missiles","powerbomb"],"requires":["never"]} |
|
Build up run speed and jump into the transition to cross this room without touching the water. Shoot open the opposite door upon entering and morph before touching the ceiling to bounce into the open door. Entrance condition: {
"comeInJumping": {
"speedBooster": "yes",
"minTiles": 5
}
}Requires: {
"notable": "Cross Room Jump Morph"
}
"Morph"
"canSpeedyJump"
"canTrickyJump"
"canLateralMidAirMorph"
{
"doorUnlockedAtNode": 1
}Unlocks doors: {"types":["super"],"requires":[]}
{"types":["missiles","powerbomb"],"requires":["never"]} |
|
Enter with enough run speed to jump (after the transition) across the full room using one Spring Ball Jump. When exiting the first Sandfall, Samus will be rising still. That is the time to Spring Ball jump. Entrance condition: {
"comeInRunning": {
"speedBooster": "yes",
"minTiles": 10
}
}Requires: {
"notable": "Cross-Room Spring Ball Jump"
}
"canPlayInSand"
"canCrossRoomJumpIntoWater"
"h_speedJump"
"canLateralMidAirMorph"
"canTrickySpringBallJump"
"canTrickyJump" |
From: 1
Left Door
To: 4
Junction Below Sand Entrance
Requires a runway of 7 tiles (with no open end) in the adjacent room. Jump into an air ball on room entry in order to get to the first pillar. Aim down after the transition to avoid hitting the overhang near the door. Entrance condition: {
"comeInJumping": {
"speedBooster": "no",
"minTiles": 6.4375
}
}Requires: "canCrossRoomJumpIntoWater"
"canPlayInSand"
"canLateralMidAirMorph"
{
"or": [
"canTrickyJump",
{
"and": [
"canCarefulJump",
{
"enemyDamage": {
"enemy": "Evir",
"type": "contact",
"hits": 1
}
}
]
}
]
}Dev note: It is assumed that getting to the second pillar is free relative to getting to the right door. |
|
Enter with enough run speed to jump (after the transition) across the full room using one Spring Ball Jump. When exiting the first Sandfall, Samus will be rising still. That is the time to Spring Ball jump. Alternatively, an immediate pause can be used to Spring Ball jump during the first narrow gap between Sandfalls. Sometimes Samus will land above the sand on the far left end of the room, where it will be necessary to unmorph and jump out. Entrance condition: {
"comeInRunning": {
"speedBooster": "yes",
"minTiles": 10
}
}Requires: {
"notable": "Cross-Room Spring Ball Jump"
}
"canPlayInSand"
"canCrossRoomJumpIntoWater"
"h_speedJump"
"canLateralMidAirMorph"
"canTrickySpringBallJump"
"canTrickyJump" |
|
Run into the room using exactly 20 tiles of runway (with an open end) in the other room, or up to 11 pixels more or 1 pixel less (getting extra run speed $4.5 or $4.6). Jump toward the end of the runway, quickly aim down, and then morph when close to the ceiling. Land on the last pillar, turning around to the left (while still morphed) to instantly cancel Samus' horizontal speed if needed. Entrance condition: {
"comeInRunning": {
"speedBooster": "yes",
"minTiles": 19.9375,
"maxTiles": 20.6875
}
}Requires: {
"notable": "Tricky Speedy Airball (Left to Right)"
}
"canSuitlessMaridia"
"canTrickyDashJump"
"canLateralMidAirMorph"Dev note: The reason to hold the aim-down pose is because its lower base horizontal speed makes it easier to avoid bonking the overhang when entering with speed $4.6 (the larger of the two speeds that work); an alternative that can also work is to jump on the earlier part of the runway and do a quicker morph. Speeds above $4.6 cause Samus to bonk the ceiling, losing all vertical speed, or the overhang, losing all horizontal speed; there is a significant amount of vertical speed to lose, even though it may not appear that way because of how the sandfalls push Samus down. It is technically possible to make it across with a speed of $4.4, but it requires a last-frame jump and a tight morph, and it would be easier in that case to just spin jump across and not morph. Speeds in the range from $4.0 - $4.3 give a spike in jump speed, resulting in an early ceiling bonk. |
|
Run into the room using between 7 tiles of runway, and jump at some point after the transition, to reach the center of the room. Enter with extra run speed or $2.0 or $2.1. Extra run speeds $2.2 and $2.3 can also work, with a momentum conserving morph. Entrance condition: {
"comeInRunning": {
"speedBooster": "yes",
"minTiles": 6.4375
}
}Requires: "canTrickyDashJump" "canLateralMidAirMorph" "canTrickyDodgeEnemies" |
From: 1
Left Door
To: 5
Left Pillar Junction
Gain momentum in the room to the left, then jump in this room in order to land on the first pillar. Ensure that Speed Booster is disabled. Requires a runway of only approximately 0.5 tiles in the adjacent room. Perform an air ball before hitting the ceiling in order to land on the first pillar. Entrance condition: {
"comeInRunning": {
"speedBooster": "no",
"minTiles": 1
}
}Requires: "canLateralMidAirMorph" "canCrossRoomJumpIntoWater" "HiJump" "canPlayInSand" |
From: 1
Left Door
To: 5
Left Pillar Junction
Space Jump into the room with max run speed without Speed Booster, then quickly airball after the transition. Entrance condition: {
"comeInSpaceJumping": {
"speedBooster": "no",
"minTiles": 6.4375
}
}Requires: "canLateralMidAirMorph" "canTrickyJump" |
|
Enter with at least 1 tile of run speed from an air room, with Speed Booster unequipped. Jump from near the end of the runway (though a jump from 1-2 tiles away from the end can still work). Press pause while crossing the narrow first sandfall, then perform a lateral mid-air morph after exiting the sandfall. Equip both Spring Ball and Speed Booster, and perform a mid-air Spring Ball jump at somewhere close to the maximum height. Unequip Spring Ball while descending through the wide second sidefall. Entrance condition: {
"comeInRunning": {
"speedBooster": "no",
"minTiles": 1
}
}Requires: {
"notable": "Spring Fling with Momentum"
}
"canCrossRoomJumpIntoWater"
"canPlayInSand"
"canLateralMidAirMorph"
"canTrickySpringBallJump"
"canSpringFling"
"h_unpauseKeepMomentum" |
From: 2
Right Door
To: 5
Left Pillar Junction
Run into the room with an exact amount of speed, by using 7.5 tiles of runway or up to 4 pixels more (getting extra run speed exactly $2.3). After entering the room, jump from the last tile or two of runway, perform a lateral mid-air morph, and land on the pillar just past the last Evir. Entrance condition: {
"comeInRunning": {
"speedBooster": "yes",
"minTiles": 7.5,
"maxTiles": 7.75
}
}Requires: {
"notable": "Tricky Speedy Airball (Right to Left)"
}
"canSuitlessMaridia"
"canTrickyDashJump"
"canInsaneJump"
"canLateralMidAirMorph"
"canPlayInSand"Dev note: A speed of $2.2 can also work but it requires a last-frame jump and a tight lateral mid-air morph. |
|
Jump from the left platform and mid air morph to bounce through the lava quickly. This is only useful when morphing before reaching the ceiling. Requires: {
"acidFrames": 45
}
"canBounceBall"
"canLateralMidAirMorph"
"can4HighMidAirMorph"
{
"or": [
{
"obstaclesCleared": [
"A",
"B"
]
},
{
"and": [
"canTrickyDodgeEnemies",
"canMetroidAvoid",
{
"acidFrames": 5
}
]
}
]
}Dev note: Freezing a Metroid while exiting the acid is difficult but manageable. |
|
Requires: {
"or": [
{
"and": [
"canTrickyWallJump",
{
"acidFrames": 20
}
]
},
{
"and": [
"HiJump",
"canWallJump",
{
"acidFrames": 50
}
]
},
{
"and": [
"HiJump",
"canPreciseWallJump",
{
"acidFrames": 20
}
]
},
{
"and": [
"Gravity",
{
"acidFrames": 10
}
]
}
]
}
{
"or": [
{
"obstaclesCleared": [
"A",
"B"
]
},
"Ice",
"ScrewAttack",
"canMetroidAvoid",
{
"and": [
"canPseudoScrew",
"canTrickyJump"
]
},
{
"metroidFrames": 420
}
]
}
{
"or": [
"canInsaneJump",
{
"and": [
"canTrickyJump",
"canLateralMidAirMorph"
]
},
{
"and": [
"canTrickyJump",
"canPreciseWallJump",
{
"acidFrames": 16
}
]
},
{
"and": [
"Gravity",
{
"acidFrames": 16
}
]
},
{
"acidFrames": 27
}
]
}Dev note: 1) Jump from the acid to the floating platform. 2) Deal with the Metroid. 3) Jump from the platform to the ledge, potentially falling in acid. |
|
Aim the ceiling Rinka to travel horizontally across the top of the room and use it to damage boost between the two floating platforms. Killing the lower Rinka shortly before killing the higher Rinka will synchronize their respawn timers so that Samus can jump when the lower Rinka reappears in order to get a good angle on the higher Rinka. Jump to the floating platform ahead of the high Rinka, jumping extra high to lead the Metroid out of the way if it is alive. Jump into the Rinka once it reaches the left edge of the platform to reach the next platform. Then use i-frames to pass through the Metroid if it is still alive. Requires: {
"notable": "Rinka Damage Boost"
}
{
"enemyDamage": {
"enemy": "Rinka",
"type": "contact",
"hits": 1
}
}
"canDash"
"canTrickyJump"
"canHorizontalDamageBoost"
"canCameraManip"
{
"or": [
{
"obstaclesCleared": [
"A",
"B"
]
},
{
"and": [
"canMetroidAvoid",
"canUseIFrames"
]
}
]
}
{
"or": [
"canInsaneJump",
{
"enemyDamage": {
"enemy": "Rinka",
"type": "contact",
"hits": 1
}
},
{
"and": [
"canTrickyJump",
"canLateralMidAirMorph"
]
},
{
"and": [
"Gravity",
{
"acidFrames": 16
}
]
},
{
"acidFrames": 27
}
]
} |
From: 2
Right Door
To: 1
Left Door
Requires: {
"obstaclesCleared": [
"A",
"B"
]
}
{
"canShineCharge": {
"usedTiles": 23,
"openEnd": 0
}
}
"canShinechargeMovementComplex"
{
"shinespark": {
"frames": 7,
"excessFrames": 2
}
}
{
"or": [
"canInsaneJump",
{
"and": [
"canTrickyJump",
"canLateralMidAirMorph"
]
},
{
"and": [
"canTrickyJump",
"canPreciseWallJump",
{
"acidFrames": 16
}
]
},
{
"and": [
"Gravity",
{
"acidFrames": 16
}
]
},
{
"acidFrames": 27
}
]
}Dev note: This strat only makes sense without canSpeedyJump. |
|
While on the first platform, perform a long jump to the left then diagonally spark low into the side of the next platform. This will put Samus into a position where the Metroid will swoop underneath her. Requires: "canMetroidAvoid"
"h_storedSpark"
"canDash"
{
"shinespark": {
"frames": 8,
"excessFrames": 1
}
}
{
"or": [
"canInsaneJump",
{
"and": [
"canTrickyJump",
"canLateralMidAirMorph"
]
},
{
"and": [
"canTrickyJump",
"canPreciseWallJump",
{
"acidFrames": 16
}
]
},
{
"and": [
"Gravity",
{
"acidFrames": 16
}
]
},
{
"acidFrames": 27
}
]
}Dev note: This is only useful with a flash suit without Speed Booster. |
|
Requires: {
"obstaclesCleared": [
"A",
"B"
]
}
"h_storedSpark"
"canDash"
{
"shinespark": {
"frames": 4,
"excessFrames": 2
}
}
{
"or": [
"canInsaneJump",
{
"and": [
"canTrickyJump",
"canLateralMidAirMorph"
]
},
{
"and": [
"canTrickyJump",
"canPreciseWallJump",
{
"acidFrames": 16
}
]
},
{
"and": [
"Gravity",
{
"acidFrames": 16
}
]
},
{
"acidFrames": 27
}
]
} |
