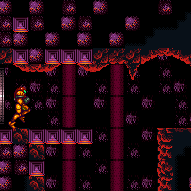
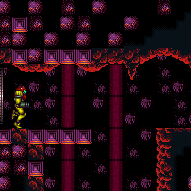
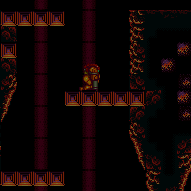
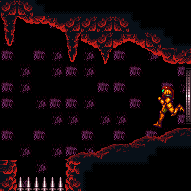
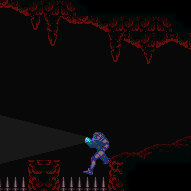
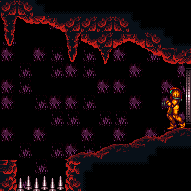
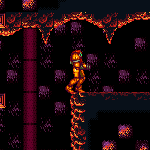
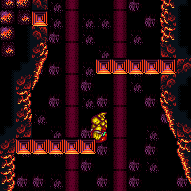
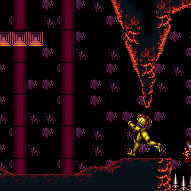
Lower Norfair Spring Ball Maze
Room ID: 146
|
Exit condition: {
"leaveWithRunway": {
"length": 6,
"openEnd": 1
}
} |
|
Requires: "h_heatProof"
{
"resetRoom": {
"nodes": [
1
]
}
}
{
"or": [
"canDash",
{
"cycleFrames": 160
}
]
}
{
"or": [
{
"and": [
"Plasma",
{
"cycleFrames": 245
},
{
"or": [
"Wave",
"Charge"
]
}
]
},
{
"and": [
{
"haveBlueSuit": {}
},
{
"cycleFrames": 245
}
]
},
{
"and": [
{
"or": [
"Plasma",
"Wave",
"ScrewAttack",
"Spazer",
"canPseudoScrew"
]
},
{
"cycleFrames": 285
}
]
},
{
"and": [
"canDodgeWhileShooting",
{
"cycleFrames": 420
}
]
}
]
}Clears obstacles: A Resets obstacles: B, C Farm cycle drops: 1 Alcoon |
|
Requires: {
"or": [
{
"and": [
"Plasma",
{
"heatFrames": 245
},
{
"or": [
"Wave",
"Charge"
]
}
]
},
{
"and": [
{
"haveBlueSuit": {}
},
{
"heatFrames": 245
}
]
},
{
"and": [
{
"or": [
"Plasma",
"Wave",
"ScrewAttack",
"Spazer",
"canPseudoScrew"
]
},
{
"heatFrames": 285
}
]
},
{
"and": [
"canDodgeWhileShooting",
{
"heatFrames": 420
}
]
}
]
}
{
"or": [
"canDash",
{
"heatFrames": 160
}
]
}
{
"resourceAvailable": [
{
"type": "Energy",
"count": 50
}
]
}
{
"partialRefill": {
"type": "PowerBomb",
"limit": 1
}
}Clears obstacles: A |
|
Requires: "h_heatedCrystalFlash" |
From: 1
Left Door
To: 1
Left Door
Wait at least 35 seconds for the Alcoon to jump back down before returning to the door, or kill it with a Power Bomb or SBA. Stand close to the transition and use X-Ray then hold left to leave the room before the door closes. Entrance condition: {
"comeInWithGMode": {
"mode": "direct",
"morphed": false
}
}Requires: "canRemoteAcquire" "h_heatedDirectGModeLeaveSameDoor" Collects items: 4 |
From: 1
Left Door
To: 2
Right Vertical Door
Overload PLMs using the camera scroll blocks just right of the downward passageway by the left door. Blindly traverse the maze until the end, where Samus will be stuck at the far right next to the shot block. Exit G-mode just one tile to the left, Morph, use a Bomb or Power Bomb to destroy the shot block and escape through the door. Entrance condition: {
"comeInWithGMode": {
"mode": "any",
"morphed": false
}
}Requires: "canOffScreenMovement"
"h_bombThings"
"h_heatedGModeOffCameraDoor"
{
"heatFrames": 200
} |
From: 1
Left Door
To: 2
Right Vertical Door
Be careful not to overload PLMs with the camera scroll blocks just right of the downward passageway by the left door; use the item to finish overloading PLMs. Blindly traverse the maze until the end, where Samus will be stuck at the far right next to the shot block. Exit G-mode just one tile to the left, Morph, use a Bomb or Power Bomb to destroy the shot block and escape through the door. Entrance condition: {
"comeInWithGMode": {
"mode": "direct",
"morphed": false
}
}Requires: "canRemoteAcquire"
"canOffScreenMovement"
"h_bombThings"
"h_heatedGModeOffCameraDoor"
{
  "heatFrames": 200
}Collects items: 4 |
|
Entrance condition: {
"comeInWithGMode": {
"mode": "any",
"morphed": false
}
}Requires: "h_heatedGModeOpenDifferentDoor" |
|
Entrance condition: {
"comeInWithGMode": {
"mode": "any",
"morphed": false
}
}Requires: "h_heatedGMode"
{
"heatFrames": 0
} |
From: 1
Left Door
To: 5
Spring Ball Maze Junction (Past the Bomb Blocks)


Spacejump through the room and break the bomb blocks in the Morph tunnel with Speedbooster. It is very helpful for the final jump to be close to the missile platform, to be as close to the tunnel as possible when Morphing. Entrance condition: {
"comeInBlueSpinning": {
"minExtraRunSpeed": "$6.E",
"unusableTiles": 0
}
}Requires: {
"notable": "Air Speedball"
}
"canPreciseSpaceJump"
"canInsaneJump"
"canLateralMidAirMorph"
"canSpeedball"
"canMomentumConservingMorph"
{
"heatFrames": 110
}Dev note: This is possible with less extra speed but where you jump changes with your speed and room entry. |
Come In Getting Blue Speed, Space Jump Through Morph Tunnel
(Extreme)
Lower Norfair Spring Ball Maze
From: 1
Left Door
To: 5
Spring Ball Maze Junction (Past the Bomb Blocks)
Spacejump through the room and break the bomb blocks in the Morph tunnel with Speedbooster. It is very helpful for the final jump to be close to the missile platform, to be as close to the tunnel as possible when Morphing. Entrance condition: {
"comeInGettingBlueSpeed": {
"length": 5,
"openEnd": 1,
"minExtraRunSpeed": "$5.B"
}
}Requires: {
"notable": "Air Speedball"
}
"canPreciseSpaceJump"
"canInsaneJump"
"canLateralMidAirMorph"
"canSpeedball"
"canMomentumConservingMorph"
{
"heatFrames": 110
} |
From: 1
Left Door
To: 6
Junction By Left Door (Right of Pit)
Requires: {
"or": [
{
"and": [
"canDash",
{
"heatFrames": 50
}
]
},
{
"heatFrames": 100
}
]
} |
From: 1
Left Door
To: 6
Junction By Left Door (Right of Pit)
Entrance condition: {
"comeInRunning": {
"speedBooster": "any",
"minTiles": 3
}
}Requires: {
"heatFrames": 35
} |
From: 1
Left Door
To: 7
Junction By Lower Alcoons (Left of Spike Pits)


Clear the Alcoon in the runway, then shinecharge and jump down to be interrupted by the lower left Alcoon. Entrance condition: {
"comeInWithRMode": {}
}Requires: {
"heatFrames": 60
}
{
"or": [
{
"and": [
"canDodgeWhileShooting",
{
"enemyKill": {
"enemies": [
[
"Alcoon"
]
],
"explicitWeapons": [
"Missile",
"Super",
"Charge+Plasma"
]
}
},
{
"heatFrames": 120
}
]
},
{
"and": [
{
"enemyKill": {
"enemies": [
[
"Alcoon"
]
],
"explicitWeapons": [
"Missile",
"Super",
"Wave",
"Ice+Spazer",
"Plasma",
"ScrewAttack",
"PseudoScrew",
"PowerBomb"
]
}
},
{
"heatFrames": 180
}
]
},
{
"and": [
{
"heatFrames": 200
},
{
"or": [
"canDodgeWhileShooting",
"Morph"
]
}
]
},
{
"and": [
{
"heatFrames": 160
},
{
"enemyDamage": {
"enemy": "Alcoon",
"type": "fireball",
"hits": 1
}
}
]
}
]
}
{
"or": [
"h_heatedCrystalFlashForReserveEnergy",
{
"and": [
"h_heatProof",
"h_RModeCanRefillReserves",
{
"or": [
{
"and": [
{
"resourceMissingAtMost": [
{
"type": "PowerBomb",
"count": 0
}
]
},
{
"partialRefill": {
"type": "ReserveEnergy",
"limit": 20
}
}
]
},
{
"and": [
{
"resourceMissingAtMost": [
{
"type": "PowerBomb",
"count": 3
}
]
},
{
"partialRefill": {
"type": "ReserveEnergy",
"limit": 5
}
}
]
}
]
}
]
}
]
}
{
"canShineCharge": {
"usedTiles": 27,
"gentleUpTiles": 2,
"openEnd": 0
}
}
{
"or": [
"canDownBack",
"canTrickyJump"
]
}
{
"heatFrames": 120
}
{
"autoReserveTrigger": {
"maxReserveEnergy": 95
}
}
"canRModeSparkInterrupt"Clears obstacles: A |
From: 1
Left Door
To: 7
Junction By Lower Alcoons (Left of Spike Pits)
Crystal Flash near the edge - just before Samus goes off-screen - to clear the runway Alcoon. Shinecharge to the left, then weave down and into the Alcoon to interrupt. Entrance condition: {
"comeInWithGMode": {
"mode": "direct",
"morphed": false
}
}Requires: {
"or": [
"canWallJump",
"HiJump",
"canSpringBallJumpMidAir",
"SpaceJump",
{
"and": [
"canIBJ",
"canBombHorizontally",
"canJumpIntoIBJ"
]
},
{
"and": [
"canUseFrozenEnemies",
"canInsaneJump"
]
}
]
}
"h_CrystalFlashForReserveEnergy"
{
"canShineCharge": {
"usedTiles": 27,
"gentleUpTiles": 2,
"openEnd": 0
}
}
{
"or": [
"canDownBack",
"canTrickyJump"
]
}
{
"or": [
{
"and": [
{
"disableEquipment": "ETank"
},
{
"autoReserveTrigger": {}
},
"canRModeSparkInterrupt",
{
"enemyDamage": {
"enemy": "Alcoon",
"type": "contact",
"hits": 1
}
}
]
},
{
"and": [
"canReserveTriggerBufferXRay",
{
"autoReserveTrigger": {
"implicitHeatFrames": "no"
}
},
"canRModePauseAbuseSparkInterrupt",
{
"heatFrames": 30
}
]
}
]
}Clears obstacles: A |
From: 1
Left Door
To: 7
Junction By Lower Alcoons (Left of Spike Pits)
Requires: {
"heatFrames": 160
}
{
"or": [
"canDash",
{
"heatFrames": 10
}
]
} |
From: 1
Left Door
To: 7
Junction By Lower Alcoons (Left of Spike Pits)

Requires: {
"or": [
"canDownBack",
"canTrickyJump"
]
}
{
"heatFrames": 110
}
{
"or": [
"canDash",
{
"heatFrames": 10
}
]
} |
From: 2
Right Vertical Door
To: 2
Right Vertical Door
Entrance condition: {
"comeInWithSpark": {},
"comesThroughToilet": "any"
}Requires: {
"shinespark": {
"frames": 5,
"excessFrames": 5
}
}
{
"heatFrames": 120
}Dev note: This strat is not useful in-room, but can satisfy a strat in the room before with an exit shinespark. |
From: 2
Right Vertical Door
To: 2
Right Vertical Door
Requires: "h_heatedCrystalFlash" |
From: 2
Right Vertical Door
To: 5
Spring Ball Maze Junction (Past the Bomb Blocks)
Perform the Crystal Flash all the way against the left wall of the accessible tunnel, then jump through the ceiling. Requires: {
"notable": "Crystal Flash Clip"
}
{
"heatFrames": 100
}
"h_heatedCrystalFlash"
"canCeilingClip"
{
"or": [
"canTrivialMidAirMorph",
"h_useSpringBall"
]
}
{
"heatFrames": 175
}Clears obstacles: B Dev note: After the CF, a midair morph can be avoided with a single bomb, but midair morph is expected for this level. The heat frames are based on reaching the entrance of the last morph tunnel. FIXME: in the room diagram, draw node 5 using a smaller box to more precisely indicate this location. |
From: 2
Right Vertical Door
To: 7
Junction By Lower Alcoons (Left of Spike Pits)
Crystal Flash against the left edge of the tunnel, then jump through the ceiling. You cannot use Power Bombs or X-Ray after the Crystal Flash clip. Kill the Alcoon to clear the runway then drop into the lower left Alcoon to interrupt. Entrance condition: {
"comeInWithRMode": {},
"comesThroughToilet": "no"
}Requires: {
"notable": "Crystal Flash Clip"
}
{
"heatFrames": 100
}
"h_heatedCrystalFlashForReserveEnergy"
"canCeilingClip"
"canTrivialMidAirMorph"
{
"heatFrames": 240
}
{
"or": [
{
"enemyKill": {
"enemies": [
[
"Alcoon"
]
],
"explicitWeapons": [
"Missile",
"Super",
"Charge+Plasma",
"Wave+Plasma"
]
}
},
{
"heatFrames": 200
}
]
}
{
"canShineCharge": {
"usedTiles": 27,
"gentleUpTiles": 2,
"openEnd": 0
}
}
{
"or": [
"canDownBack",
"canTrickyJump"
]
}
{
"heatFrames": 120
}
{
"autoReserveTrigger": {
"maxReserveEnergy": 95
}
}
"canRModeSparkInterrupt"Clears obstacles: A, B |
From: 3
Bottom Horizontal Door
To: 1
Left Door
Entrance condition: {
"comeInWithGrappleTeleport": {
"blockPositions": [
[
5,
3
],
[
7,
2
]
]
}
}Requires: {
"heatFrames": 50
} |
From: 3
Bottom Horizontal Door
To: 1
Left Door
Entrance condition: {
"comeInWithGrappleTeleport": {
"blockPositions": [
[
3,
12
],
[
3,
13
]
]
}
}Requires: {
"or": [
"h_heatedGrappleTeleportWallEscape",
{
"and": [
{
"doorUnlockedAtNode": 1
},
{
"heatFrames": 20
}
]
}
]
}
{
"or": [
"canOffScreenMovement",
{
"heatFrames": 100
}
]
}Unlocks doors: {"types":["ammo"],"requires":[]} |
From: 3
Bottom Horizontal Door
To: 1
Left Door
Entrance condition: {
"comeInWithGrappleTeleport": {
"blockPositions": [
[
3,
12
],
[
3,
13
]
]
}
}Bypasses door shell: true |
From: 3
Bottom Horizontal Door
To: 1
Left Door
Entrance condition: {
"comeInWithGrappleTeleport": {
"blockPositions": [
[
3,
12
]
]
}
}Exit condition: {
"leaveWithGrappleTeleport": {
"blockPositions": [
[
3,
12
]
]
}
}Bypasses door shell: true |
From: 3
Bottom Horizontal Door
To: 1
Left Door
Entrance condition: {
"comeInWithGrappleTeleport": {
"blockPositions": [
[
3,
13
]
]
}
}Exit condition: {
"leaveWithGrappleTeleport": {
"blockPositions": [
[
3,
13
]
]
}
}Bypasses door shell: true |
|
It is possible to climb up with a tricky dash jump and no wall jump. Either kill the Alcoon before it spawns any stationary, invisible fireballs, or let the right alcoons shoot enough to overload projectiles. Entrance condition: {
"comeInWithGMode": {
"mode": "any",
"morphed": false
}
}Requires: {
"or": [
"canWallJump",
"HiJump",
"canSpringBallJumpMidAir",
"SpaceJump",
"canUseFrozenEnemies",
{
"and": [
"canTrickyDashJump",
"canTrickyDodgeEnemies"
]
}
]
}
"h_heatedGModeOpenDifferentDoor" |
From: 3
Bottom Horizontal Door
To: 1
Left Door
Entrance condition: {
"comeInWithGMode": {
"mode": "any",
"morphed": true
}
}Requires: {
"or": [
{
"and": [
"h_artificialMorphSpringBall",
"h_artificialMorphSpringBallBombJump"
]
},
{
"and": [
"h_artificialMorphIBJ",
"h_artificialMorphBombHorizontally"
]
}
]
}
"h_heatedGModeOpenDifferentDoor" |
From: 3
Bottom Horizontal Door
To: 2
Right Vertical Door
PLMs will be overloaded using the camera scroll blocks while climbing the room. Blindly traverse the maze until the end, where Samus will be stuck at the far right next to the shot block. Exit G-mode just one tile to the left, Morph, use a Bomb or Power Bomb to destroy the shot block and escape through the door. Note that it is possible to climb up with a tricky dash jump and no wall jump. Either kill the Alcoon before it spawns and stationary, invisible lasers, or let the right alcoons shoot enough to overload projectiles. Entrance condition: {
"comeInWithGMode": {
"mode": "any",
"morphed": false
}
}Requires: "canOffScreenMovement"
{
"or": [
"canWallJump",
"HiJump",
"canSpringBallJumpMidAir",
"SpaceJump",
"canUseFrozenEnemies",
"canIBJ",
{
"and": [
"canTrickyDashJump",
"canTrickyDodgeEnemies"
]
}
]
}
"h_bombThings"
"h_heatedGModeOffCameraDoor"
{
"heatFrames": 200
} |
From: 3
Bottom Horizontal Door
To: 2
Right Vertical Door
It is tricky to climb the room without fully overloading PLMs. With Ice and either HiJump or Spring Ball, freeze the left Alcoon to the right of where it jumps out of the ground. With HiJump, spin jump off of it and land directly on the middle stair platform. With Spring Ball, morph on top of the Alcoon, jump to barely land on the lowest platform while avoiding the camera scroll blocks one tile above, then use Spring Ball again to jump to the next platform. Alternatively, with Spring Ball and either HiJump, Bombs, or Power Bombs, jump to barely land on the lowest platform while avoiding the camera scroll blocks one tile above, then use Spring Ball again to jump to the next platform. The first jump can be done with HiJump or a bomb boost into Spring Ball jump. Once up above, unmorph and get onto the edge of the runway leading right, then run through the camera scroll blocks to reach the item. This will finish overloading PLMs. Blindly traverse the maze until the end, where Samus will be stuck at the far right next to the shot block. Exit G-mode just one tile to the left, Morph, use a Bomb or Power Bomb to destroy the shot block and escape through the door. There is a row of camera scroll blocks two-tiles above the bottom left platform, and a column two-tiles away from the right of the gap in front of the left door. Entrance condition: {
"comeInWithGMode": {
"mode": "direct",
"morphed": false
}
}Requires: "canRemoteAcquire"
"canOffScreenMovement"
"canTrickyGMode"
{
"or": [
{
"and": [
"canTrickyUseFrozenEnemies",
"HiJump"
]
},
{
"and": [
"canTrickyUseFrozenEnemies",
"h_useSpringBall"
]
},
{
"and": [
"HiJump",
"h_useSpringBall"
]
},
"canSpringBallBombJump"
]
}
"h_bombThings"
"h_heatedGModeOffCameraDoor"
{
"heatFrames": 200
}Collects items: 4 |
From: 3
Bottom Horizontal Door
To: 3
Bottom Horizontal Door
Exit condition: {
"leaveWithRunway": {
"length": 8,
"openEnd": 1,
"gentleUpTiles": 4
}
} |
From: 3
Bottom Horizontal Door
To: 3
Bottom Horizontal Door
Requires: "h_heatProof"
{
"or": [
{
"and": [
{
"resetRoom": {
"nodes": [
1
]
}
},
{
"or": [
"canWallJump",
"HiJump",
"SpaceJump"
]
},
{
"cycleFrames": 150
}
]
},
{
"resetRoom": {
"nodes": [
3
]
}
}
]
}
{
"or": [
"canDash",
{
"cycleFrames": 120
}
]
}
{
"or": [
{
"and": [
"Plasma",
{
"cycleFrames": 400
}
]
},
{
"and": [
"ScrewAttack",
{
"cycleFrames": 360
}
]
},
{
"and": [
{
"haveBlueSuit": {}
},
{
"cycleFrames": 360
}
]
},
{
"and": [
"canPseudoScrew",
{
"cycleFrames": 440
}
]
},
{
"and": [
"Spazer",
"Wave",
{
"cycleFrames": 560
}
]
},
{
"and": [
"canDodgeWhileShooting",
{
"cycleFrames": 910
}
]
}
]
}Resets obstacles: A, B, C Farm cycle drops: 3 Alcoon |
From: 3
Bottom Horizontal Door
To: 3
Bottom Horizontal Door
Requires: {
"or": [
"canDash",
{
"heatFrames": 120
}
]
}
{
"or": [
{
"and": [
"Plasma",
{
"heatFrames": 400
}
]
},
{
"and": [
"ScrewAttack",
{
"heatFrames": 360
}
]
},
{
"and": [
{
"haveBlueSuit": {}
},
{
"heatFrames": 360
}
]
},
{
"and": [
"canPseudoScrew",
{
"heatFrames": 440
}
]
},
{
"and": [
"Spazer",
"Wave",
{
"heatFrames": 560
}
]
},
{
"and": [
"canDodgeWhileShooting",
{
"heatFrames": 910
}
]
}
]
}
{
"resourceAvailable": [
{
"type": "Energy",
"count": 50
}
]
}
{
"partialRefill": {
"type": "PowerBomb",
"limit": 3
}
} |
From: 3
Bottom Horizontal Door
To: 3
Bottom Horizontal Door
Requires: "h_heatedCrystalFlash" |
From: 3
Bottom Horizontal Door
To: 3
Bottom Horizontal Door
Requires: {
"heatFrames": 20
}Clears obstacles: C |
From: 3
Bottom Horizontal Door
To: 3
Bottom Horizontal Door
Crystal Spark just before the third sloped tile in order to prevent spawning the Alcoon. Entrance condition: {
"comeInShinecharging": {
"length": 4,
"openEnd": 0,
"gentleDownTiles": 2
}
}Requires: {
"or": [
{
"and": [
"h_enemyDrops",
"h_heatedCrystalSparkWithoutLenience"
]
},
"h_heatedCrystalSpark"
]
} |
From: 3
Bottom Horizontal Door
To: 3
Bottom Horizontal Door
Clear the Alcoon then bounce into the spike patch. Requires: "h_spikeXModeShinecharge"
{
"or": [
{
"and": [
{
"enemyKill": {
"enemies": [
[
"Alcoon"
]
],
"explicitWeapons": [
"Plasma",
"Wave+Spazer",
"ScrewAttack",
"Missile",
"Super"
]
}
},
{
"heatFrames": 420
}
]
},
{
"and": [
{
"enemyKill": {
"enemies": [
[
"Alcoon"
]
],
"explicitWeapons": [
"Spazer",
"Wave",
"PseudoScrew",
"PowerBomb"
]
}
},
{
"heatFrames": 530
}
]
},
{
"and": [
{
"enemyKill": {
"enemies": [
[
"Alcoon"
]
],
"explicitWeapons": [
"PowerBeam"
]
}
},
{
"heatFrames": 620
}
]
}
]
}
{
"shineChargeFrames": 90
}Exit condition: {
"leaveShinecharged": {}
}Dev note: Two spike hits are expected per attempt (with any additional leniency hits being multiplied by this amount). |
From: 3
Bottom Horizontal Door
To: 3
Bottom Horizontal Door
Requires: "h_heatProof"
"h_spikeXModeSpikeSuit"
{
"shinespark": {
"frames": 4,
"excessFrames": 4
}
} |
From: 3
Bottom Horizontal Door
To: 3
Bottom Horizontal Door
Requires: "h_heatProof"
"h_spikeXModeSpikeSuit"
{
"shinespark": {
"frames": 18,
"excessFrames": 0
}
}Exit condition: {
"leaveWithSpark": {
"position": "bottom"
}
} |
From: 3
Bottom Horizontal Door
To: 3
Bottom Horizontal Door
Entrance condition: {
"comeInShinecharging": {
"length": 8,
"openEnd": 0
}
}Requires: {
"heatFrames": 300
}
{
"enemyDamage": {
"enemy": "Alcoon",
"type": "contact",
"hits": 1
}
}
{
"spikeHits": 1
}
"h_spikeSuitSpikeHitLeniency"
"canPatientSpikeSuit"
{
"shinespark": {
"frames": 4,
"excessFrames": 4
}
} |
From: 3
Bottom Horizontal Door
To: 3
Bottom Horizontal Door
Entrance condition: {
"comeInShinecharged": {}
}Requires: {
"heatFrames": 320
}
{
"shineChargeFrames": 100
}
{
"enemyDamage": {
"enemy": "Alcoon",
"type": "contact",
"hits": 1
}
}
{
"spikeHits": 1
}
"h_spikeSuitSpikeHitLeniency"
"canPatientSpikeSuit"
{
"shinespark": {
"frames": 4,
"excessFrames": 4
}
} |
From: 3
Bottom Horizontal Door
To: 3
Bottom Horizontal Door
It is tricky to climb the room without fully overloading PLMs. Freeze the left Alcoon to the right of where it jumps out of the ground. With HiJump, spin jump off of it and land directly on the middle stair platform. With Spring Ball, morph on top of the Alcoon, jump to barely land on the lowest platform while avoiding the camera scroll blocks one tile above, then use Spring Ball again to jump to the next platform. Up above, get onto the edge of the runway leading right, then run through the camera scroll blocks to reach the item. Wait at least 35 seconds for the Alcoon to jump back down before returning to the door, or kill it with a Power Bomb or SBA. Stand close to the transition and use X-Ray then hold right to leave the room before the door closes. Note that spending any extra frames in the camera scroll blocks will overload PLMs before reaching the item and prevent remote acquiring it. There is a row of camera scroll blocks two-tiles above the bottom left platform, and a column two-tiles away from the right of the gap in front of the left door. Entrance condition: {
"comeInWithGMode": {
"mode": "direct",
"morphed": false
}
}Requires: "canRemoteAcquire"
"canTrickyGMode"
"canTrickyUseFrozenEnemies"
{
"or": [
"HiJump",
"h_useSpringBall"
]
}
{
"or": [
"canDash",
"Morph"
]
}
"h_heatedDirectGModeLeaveSameDoor"Collects items: 4 |
From: 3
Bottom Horizontal Door
To: 3
Bottom Horizontal Door
It is tricky to climb the room without fully overloading PLMs. With Spring Ball, jump to barely land on the lowest platform while avoiding the camera scroll blocks one tile above, then use Spring Ball again to jump to the next platform. The first jump can be done with HiJump or a bomb boost into Spring Ball jump. Up above, unmorph and get onto the edge of the runway leading right, then run through the camera scroll blocks to reach the item. Wait at least 35 seconds for the Alcoon to jump back down before returning to the door, or kill it with a Power Bomb or SBA. Stand close to the transition and use X-Ray then hold right to leave the room before the door closes. Note that spending any extra frames in the camera scroll blocks will overload PLMs before reaching the item and prevent remote acquiring it. There is a row of camera scroll blocks two-tiles above the bottom left platform, and a column two-tiles away from the right of the gap in front of the left door. Entrance condition: {
"comeInWithGMode": {
"mode": "direct",
"morphed": true
}
}Requires: "canRemoteAcquire"
"canTrickyGMode"
"h_artificialMorphSpringBall"
{
"or": [
"HiJump",
"h_artificialMorphSpringBallBombJump"
]
}
"h_heatedDirectGModeLeaveSameDoor"Collects items: 4 |
|
It is possible to climb up with a tricky dash jump and no wall jump. Either kill the Alcoon before it spawns any stationary, invisible fireballs, or let the right Alcoons shoot enough to overload projectiles. Entrance condition: {
"comeInWithGMode": {
"mode": "any",
"morphed": false
}
}Requires: "h_heatedGMode"
{
"or": [
"canWallJump",
"HiJump",
"canSpringBallJumpMidAir",
"SpaceJump",
"canUseFrozenEnemies",
{
"and": [
"canTrickyDashJump",
"canTrickyDodgeEnemies"
]
}
]
}
{
"heatFrames": 0
} |
|
It is possible to climb up with a tricky dash jump and no wall jump. Either kill the Alcoon before it spawns any stationary, invisible fireballs, or let the right Alcoons shoot enough to overload projectiles. Entrance condition: {
"comeInWithGMode": {
"mode": "any",
"morphed": true
}
}Requires: "h_heatedGMode"
{
"or": [
{
"and": [
"h_artificialMorphSpringBall",
"h_artificialMorphSpringBallBombJump"
]
},
{
"and": [
"h_artificialMorphIBJ",
"h_artificialMorphBombHorizontally"
]
}
]
}
{
"heatFrames": 0
} |
From: 3
Bottom Horizontal Door
To: 7
Junction By Lower Alcoons (Left of Spike Pits)
Get past the spike Alcoons, and climb up - leave the lower left Alcoon alive to use for later. Clear the runway Alcoon and get the shinecharge, then drop into the lower left Alcoon to interrupt. If you Crystal Flash early, stay near the door to ensure you kill only the two spike Alcoons. Entrance condition: {
"comeInWithRMode": {}
}Requires: {
"or": [
{
"and": [
"h_heatedCrystalFlashForReserveEnergy",
{
"heatFrames": 100
}
]
},
{
"and": [
"ScrewAttack",
"canCarefulJump",
{
"heatFrames": 100
}
]
},
{
"and": [
"canDodgeWhileShooting",
{
"or": [
"h_heatProof",
{
"enemyKill": {
"enemies": [
[
"Alcoon"
]
],
"explicitWeapons": [
"Missile",
"Super",
"Wave+Plasma"
]
}
},
{
"and": [
"canPseudoScrew",
{
"heatFrames": 30
}
]
}
]
},
"canCarefulJump",
{
"heatFrames": 100
}
]
},
{
"and": [
{
"enemyKill": {
"enemies": [
[
"Alcoon",
"Alcoon"
]
],
"explicitWeapons": [
"Missile",
"Super",
"Plasma",
"Wave+Spazer"
]
}
},
{
"heatFrames": 200
}
]
},
{
"and": [
"canCarefulJump",
{
"heatFrames": 199
}
]
},
{
"and": [
{
"enemyDamage": {
"enemy": "Alcoon",
"type": "contact",
"hits": 1
}
},
{
"heatFrames": 180
}
]
}
]
}
{
"heatFrames": 160
}
{
"or": [
"canWallJump",
"HiJump",
"canSpringBallJumpMidAir",
"SpaceJump",
{
"and": [
"canSpringBallBombJump",
{
"heatFrames": 60
}
]
},
{
"and": [
"canIBJ",
"canBombHorizontally",
"canJumpIntoIBJ",
{
"heatFrames": 110
},
{
"or": [
"canDoubleBombJump",
{
"heatFrames": 190
}
]
}
]
},
{
"and": [
"canTrickyDashJump",
"canInsaneJump",
{
"heatFrames": 20
}
]
},
{
"and": [
"canUseFrozenEnemies",
"canInsaneJump",
{
"heatFrames": 150
}
]
}
]
}
{
"or": [
{
"and": [
"canDodgeWhileShooting",
{
"enemyKill": {
"enemies": [
[
"Alcoon"
]
],
"explicitWeapons": [
"Missile",
"Super",
"Charge+Plasma"
]
}
},
{
"heatFrames": 120
}
]
},
{
"and": [
{
"enemyKill": {
"enemies": [
[
"Alcoon"
]
],
"explicitWeapons": [
"Wave",
"Ice+Spazer",
"Plasma",
"ScrewAttack",
"PseudoScrew",
"PowerBomb"
]
}
},
{
"heatFrames": 180
}
]
},
{
"heatFrames": 200
}
]
}
{
"or": [
{
"resourceAvailable": [
{
"type": "ReserveEnergy",
"count": 1
}
]
},
{
"and": [
"h_heatProof",
"h_RModeCanRefillReserves",
{
"or": [
{
"and": [
{
"resourceMissingAtMost": [
{
"type": "PowerBomb",
"count": 0
}
]
},
{
"partialRefill": {
"type": "ReserveEnergy",
"limit": 20
}
}
]
},
{
"and": [
{
"resourceMissingAtMost": [
{
"type": "PowerBomb",
"count": 3
}
]
},
{
"partialRefill": {
"type": "ReserveEnergy",
"limit": 5
}
}
]
}
]
}
]
}
]
}
{
"canShineCharge": {
"usedTiles": 27,
"gentleUpTiles": 2,
"openEnd": 0
}
}
{
"or": [
"canDownBack",
"canTrickyJump"
]
}
{
"heatFrames": 120
}
{
"autoReserveTrigger": {
"maxReserveEnergy": 95
}
}
"canRModeSparkInterrupt"Clears obstacles: A |
From: 3
Bottom Horizontal Door
To: 7
Junction By Lower Alcoons (Left of Spike Pits)
Kill the spike Alcoons before climbing to the upper runway. Be sure to jump over the invisible fireball projectiles. Crystal Flash at the top right, just before Samus goes off-screen, to clear the runway Alcoon. Shinecharge to the left, then weave down and into the Alcoon to interrupt. Entrance condition: {
"comeInWithGMode": {
"mode": "direct",
"morphed": false
}
}Requires: {
"or": [
"canWallJump",
"HiJump",
"canSpringBallJumpMidAir",
"SpaceJump",
{
"and": [
"canIBJ",
"canBombHorizontally",
"canJumpIntoIBJ"
]
},
{
"and": [
"canUseFrozenEnemies",
"canInsaneJump"
]
}
]
}
"h_CrystalFlashForReserveEnergy"
{
"canShineCharge": {
"usedTiles": 27,
"gentleUpTiles": 2,
"openEnd": 0
}
}
{
"or": [
"canDownBack",
"canTrickyJump"
]
}
{
"or": [
{
"and": [
{
"disableEquipment": "ETank"
},
{
"autoReserveTrigger": {}
},
"canRModeSparkInterrupt",
{
"enemyDamage": {
"enemy": "Alcoon",
"type": "contact",
"hits": 1
}
}
]
},
{
"and": [
"canReserveTriggerBufferXRay",
{
"autoReserveTrigger": {
"implicitHeatFrames": "no"
}
},
"canRModePauseAbuseSparkInterrupt",
{
"heatFrames": 30
}
]
}
]
}Clears obstacles: A |
From: 3
Bottom Horizontal Door
To: 7
Junction By Lower Alcoons (Left of Spike Pits)
Requires: "canDash"
"ScrewAttack"
{
"or": [
"canCarefulJump",
{
"heatFrames": 55
}
]
}
{
"heatFrames": 85
} |
From: 3
Bottom Horizontal Door
To: 7
Junction By Lower Alcoons (Left of Spike Pits)
Requires: {
"haveBlueSuit": {}
}
{
"heatFrames": 150
} |
From: 3
Bottom Horizontal Door
To: 7
Junction By Lower Alcoons (Left of Spike Pits)


Kill the Alcoon without stopping. Requires: "canDash"
"canDodgeWhileShooting"
{
"or": [
{
"enemyKill": {
"enemies": [
[
"Alcoon"
]
],
"explicitWeapons": [
"Missile",
"Super",
"Wave+Plasma"
]
}
},
{
"and": [
"canPrepareForNextRoom",
"Charge",
"Wave",
"Spazer"
]
},
{
"and": [
"canPseudoScrew",
{
"heatFrames": 30
}
]
}
]
}
{
"or": [
"canTrickyJump",
{
"heatFrames": 10
}
]
}
{
"heatFrames": 85
} |
From: 3
Bottom Horizontal Door
To: 7
Junction By Lower Alcoons (Left of Spike Pits)
Use blue speed to kill the Alcoons without stopping. Entrance condition: {
"comeInGettingBlueSpeed": {
"length": 7,
"openEnd": 1,
"gentleDownTiles": 4,
"minExtraRunSpeed": "$1.8"
}
}Requires: "h_blueJump"
{
"heatFrames": 60
} |
From: 3
Bottom Horizontal Door
To: 7
Junction By Lower Alcoons (Left of Spike Pits)
Requires: {
"enemyKill": {
"enemies": [
[
"Alcoon",
"Alcoon"
]
],
"explicitWeapons": [
"Missile",
"Super",
"Plasma",
"Wave+Spazer"
]
}
}
{
"heatFrames": 200
} |
From: 3
Bottom Horizontal Door
To: 7
Junction By Lower Alcoons (Left of Spike Pits)


Requires: "canDash"
"canCarefulJump"
{
"heatFrames": 200
} |
From: 3
Bottom Horizontal Door
To: 7
Junction By Lower Alcoons (Left of Spike Pits)
Run and aim down mid-air to gap skip under the first Alcoon as it ascends. Then wait to jump over the second one. Requires: "canDash"
"canTrickyJump"
{
"heatFrames": 130
} |
From: 3
Bottom Horizontal Door
To: 7
Junction By Lower Alcoons (Left of Spike Pits)
Run and jump under the first Alcoon as it ascends. Fire a shot to stun the second Alcoon while running and jumping under it as well. Requires: "canDash"
"canInsaneJump"
{
"heatFrames": 105
} |
From: 3
Bottom Horizontal Door
To: 7
Junction By Lower Alcoons (Left of Spike Pits)
Requires: "canDash"
{
"enemyDamage": {
"enemy": "Alcoon",
"type": "contact",
"hits": 1
}
}
{
"heatFrames": 180
} |
From: 3
Bottom Horizontal Door
To: 7
Junction By Lower Alcoons (Left of Spike Pits)
Requires: "h_heatProof" "canDodgeWhileShooting" |
From: 3
Bottom Horizontal Door
To: 7
Junction By Lower Alcoons (Left of Spike Pits)
Get out of the wall if necessary; then do a blind jump over the Alcoon. Entrance condition: {
"comeInWithGrappleTeleport": {
"blockPositions": [
[
2,
18
],
[
2,
19
],
[
2,
28
],
[
2,
29
]
]
}
}Requires: "canOffScreenMovement"
{
"heatFrames": 80
} |
|

Requires: {
"canShineCharge": {
"usedTiles": 27,
"gentleUpTiles": 2,
"openEnd": 0
}
}
{
"obstaclesCleared": [
"A"
]
}
{
"heatFrames": 260
}
"canShinechargeMovement"
{
"shineChargeFrames": 90
}Exit condition: {
"leaveShinecharged": {}
}Unlocks doors: {"types":["missiles"],"requires":[{"heatFrames":240}]}
{"types":["super"],"requires":[]}
{"types":["powerbomb"],"requires":[{"heatFrames":240}]}Dev note: Most of the time 1 can be unlocked on the way to 4. |
From: 4
Item
To: 3
Bottom Horizontal Door

Open the door to be able to spark out. Shinecharge near the missile location, then fall back down and spark out the right door. The door must have been opened prior in order to be able to spark out of it. Requires: {
"canShineCharge": {
"usedTiles": 27,
"gentleUpTiles": 2,
"openEnd": 1
}
}
{
"obstaclesCleared": [
"A",
"C"
]
}
{
"heatFrames": 390
}
"canShinechargeMovement"
{
"shinespark": {
"frames": 35,
"excessFrames": 0
}
}Exit condition: {
"leaveWithSpark": {
"position": "bottom"
}
}Unlocks doors: {"types":["missiles"],"requires":[{"heatFrames":50}]}
{"types":["super"],"requires":[]}
{"types":["powerbomb"],"requires":[{"heatFrames":30}]} |
Leave Shinesparking Through Top of Door - Open Door First
(Very Hard)
Lower Norfair Spring Ball Maze
From: 4
Item
To: 3
Bottom Horizontal Door
Open the door to be able to spark out. Shinecharge near the missile location, then fall back down and run to the right before sparking out the right door. The Alcoons must have been cleared prior in order to be able to spark out. Requires: {
"canShineCharge": {
"usedTiles": 27,
"gentleUpTiles": 2,
"openEnd": 1
}
}
{
"obstaclesCleared": [
"A",
"C"
]
}
{
"heatFrames": 390
}
"canTrickyJump"
"canShinechargeMovementComplex"
{
"shinespark": {
"frames": 30,
"excessFrames": 0
}
}Exit condition: {
"leaveWithSpark": {}
}Unlocks doors: {"types":["missiles"],"requires":[{"heatFrames":50}]}
{"types":["super"],"requires":[]}
{"types":["powerbomb"],"requires":[{"heatFrames":30}]} |
From: 4
Item
To: 3
Bottom Horizontal Door


Shinecharge near the missile location, then fall down and shoot a beam shot through the lower half of the large stalactite. Shinespark to the right before the shot goes off screen, and have it open the door before Samus gets there. Requires: {
"canShineCharge": {
"usedTiles": 27,
"gentleUpTiles": 2,
"openEnd": 1
}
}
{
"obstaclesCleared": [
"A"
]
}
{
"heatFrames": 370
}
"canTrickyJump"
"canShinechargeMovementComplex"
"canHeroShot"
{
"shinespark": {
"frames": 31,
"excessFrames": 0
}
}
{
"doorUnlockedAtNode": 3
}Exit condition: {
"leaveWithSpark": {
"position": "bottom"
}
}Unlocks doors: {"types":["super"],"requires":[]}
{"types":["missiles","powerbomb"],"requires":["never"]} |
|
Requires: "h_heatedCrystalFlash" Clears obstacles: B |
From: 4
Item
To: 5
Spring Ball Maze Junction (Past the Bomb Blocks)
Requires: {
"or": [
{
"and": [
"canTrivialMidAirMorph",
{
"heatFrames": 190
}
]
},
{
"and": [
"h_useSpringBall",
"HiJump",
{
"heatFrames": 190
}
]
},
{
"and": [
"h_useSpringBall",
"canInsaneJump",
{
"heatFrames": 100
}
]
},
{
"and": [
"h_useMorphBombs",
"canInsaneJump",
{
"heatFrames": 160
}
]
}
]
}
{
"or": [
{
"obstaclesCleared": [
"B"
]
},
{
"haveBlueSuit": {}
}
]
} |
From: 4
Item
To: 5
Spring Ball Maze Junction (Past the Bomb Blocks)
Requires: {
"or": [
"canTrivialMidAirMorph",
"h_useSpringBall"
]
}
{
"obstaclesNotCleared": [
"B"
]
}
"h_useMorphBombs"
{
"or": [
{
"and": [
"canInsaneJump",
{
"heatFrames": 245
}
]
},
{
"heatFrames": 330
}
]
}Clears obstacles: B |
From: 4
Item
To: 5
Spring Ball Maze Junction (Past the Bomb Blocks)
Requires: "h_usePowerBomb"
{
"or": [
{
"and": [
"canTrivialMidAirMorph",
{
"heatFrames": 250
}
]
},
{
"and": [
"h_useSpringBall",
"HiJump",
{
"heatFrames": 250
}
]
},
{
"and": [
"h_useSpringBall",
"canInsaneJump",
{
"heatFrames": 170
}
]
}
]
}Clears obstacles: B |
|
Requires: "canDash"
{
"obstaclesCleared": [
"A"
]
}
{
"heatFrames": 150
} |
From: 4
Item
To: 6
Junction By Left Door (Right of Pit)
Requires: {
"haveBlueSuit": {}
}
{
"heatFrames": 210
} |
From: 4
Item
To: 6
Junction By Left Door (Right of Pit)
Jump over the Alcoon's fireball and kill it and run through. Requires: "canDash"
{
"enemyKill": {
"enemies": [
[
"Alcoon"
]
],
"explicitWeapons": [
"Missile",
"Super",
"Plasma",
"ScrewAttack",
"PseudoScrew"
]
}
}
{
"heatFrames": 190
}Clears obstacles: A Dev note: Beams that take more than two shots are generally not quick enough to justify. |
From: 4
Item
To: 6
Junction By Left Door (Right of Pit)
Requires: "canDash"
{
"enemyDamage": {
"enemy": "Alcoon",
"type": "fireball",
"hits": 1
}
}
{
"heatFrames": 170
} |
From: 4
Item
To: 6
Junction By Left Door (Right of Pit)
Requires: "canDash"
{
"or": [
{
"and": [
"canDodgeWhileShooting",
{
"heatFrames": 200
}
]
},
{
"and": [
"Morph",
{
"heatFrames": 200
}
]
},
{
"and": [
{
"enemyDamage": {
"enemy": "Alcoon",
"type": "fireball",
"hits": 1
}
},
{
"heatFrames": 160
}
]
}
]
}Clears obstacles: A |
From: 4
Item
To: 7
Junction By Lower Alcoons (Left of Spike Pits)
Requires: {
"obstaclesCleared": [
"A"
]
}
{
"canShineCharge": {
"usedTiles": 27,
"gentleUpTiles": 2,
"openEnd": 1
}
}
{
"spikeHits": 1
}
"h_spikeSuitSpikeHitLeniency"
"h_heatProof"
"canSpikeSuit"
{
"shinespark": {
"frames": 6,
"excessFrames": 6
}
}Dev note: FIXME: h_heatProof isn't really required, but we don't yet have a good way to express how spike suit leniency impacts heat frames. FIXME: using the bottom-left runway or a neighboring room would also be possible. |
From: 5
Spring Ball Maze Junction (Past the Bomb Blocks)
To: 2
Right Vertical Door
Requires: {
"or": [
{
"and": [
"h_useSpringBall",
{
"heatFrames": 475
}
]
},
{
"and": [
"canTrivialMidAirMorph",
{
"heatFrames": 530
}
]
}
]
}Unlocks doors: {"types":["powerbomb"],"requires":[]} |
From: 5
Spring Ball Maze Junction (Past the Bomb Blocks)
To: 4
Item
Requires: {
"or": [
"canTrivialMidAirMorph",
{
"and": [
"HiJump",
"h_useSpringBall"
]
}
]
}
{
"heatFrames": 70
} |
From: 5
Spring Ball Maze Junction (Past the Bomb Blocks)
To: 5
Spring Ball Maze Junction (Past the Bomb Blocks)
Requires: "h_heatedCrystalFlash" |
From: 6
Junction By Left Door (Right of Pit)
To: 1
Left Door
Requires: {
"or": [
{
"and": [
"canDash",
{
"heatFrames": 45
}
]
},
{
"heatFrames": 110
}
]
}Unlocks doors: {"types":["missiles"],"requires":[{"heatFrames":20}]}Dev note: The heat frames assume coming from the right with full dash speed ($2.0). |
|
Requires: {
"obstaclesCleared": [
"A"
]
}
{
"heatFrames": 130
}
{
"or": [
"canDash",
{
"heatFrames": 70
}
]
} |
|
Run under the Alcoon as it spawns Requires: "canDodgeWhileShooting"
{
"heatFrames": 130
}
{
"or": [
"canDash",
{
"heatFrames": 70
}
]
}Dev note: canDodgeWhileShooting represents the knowledge of how this Alcoon spawns and that you can run under it. |
From: 6
Junction By Left Door (Right of Pit)
To: 4
Item
Kill the Alcoon in one hit as it spawns. Requires: "canDodgeWhileShooting"
{
"enemyKill": {
"enemies": [
[
"Alcoon"
]
],
"explicitWeapons": [
"Missile",
"Super",
"Charge+Plasma"
]
}
}
{
"heatFrames": 130
}
{
"or": [
"canDash",
{
"heatFrames": 70
}
]
}Clears obstacles: A |
From: 6
Junction By Left Door (Right of Pit)
To: 4
Item
Let the Alcoon spawn and then defeat it. Requires: "canDash"
{
"enemyKill": {
"enemies": [
[
"Alcoon"
]
],
"explicitWeapons": [
"Missile",
"Super",
"Wave",
"Ice+Spazer",
"Plasma",
"ScrewAttack",
"PseudoScrew",
"PowerBomb"
]
}
}
{
"heatFrames": 180
}Clears obstacles: A |
From: 6
Junction By Left Door (Right of Pit)
To: 4
Item
Requires: "canDash"
{
"or": [
{
"and": [
"canDodgeWhileShooting",
{
"heatFrames": 200
}
]
},
{
"and": [
"Morph",
{
"heatFrames": 200
}
]
},
{
"and": [
{
"enemyDamage": {
"enemy": "Alcoon",
"type": "fireball",
"hits": 1
}
},
{
"heatFrames": 160
}
]
}
]
}Clears obstacles: A |
From: 6
Junction By Left Door (Right of Pit)
To: 5
Spring Ball Maze Junction (Past the Bomb Blocks)

Jump and Morph with a speedball to enter the morph tunnel and then use SpringBall to break the bomb blocks. Requires: {
"notable": "Air Speedball"
}
{
"getBlueSpeed": {
"usedTiles": 26,
"gentleDownTiles": 2,
"openEnd": 1
}
}
"canSpeedball"
"canLateralMidAirMorph"
"h_useSpringBall"
{
"heatFrames": 160
}Clears obstacles: B |
From: 6
Junction By Left Door (Right of Pit)
To: 6
Junction By Left Door (Right of Pit)
Requires: "h_heatedCrystalFlash" |
From: 6
Junction By Left Door (Right of Pit)
To: 6
Junction By Left Door (Right of Pit)
Requires: {
"obstaclesCleared": [
"A"
]
}
{
"canShineCharge": {
"usedTiles": 27,
"gentleDownTiles": 2,
"openEnd": 1
}
}
{
"or": [
{
"and": [
"h_enemyDrops",
"h_heatedCrystalSparkWithoutLenience"
]
},
"h_heatedCrystalSpark"
]
} |
From: 6
Junction By Left Door (Right of Pit)
To: 7
Junction By Lower Alcoons (Left of Spike Pits)
Requires: {
"heatFrames": 160
}
{
"or": [
"canDash",
{
"heatFrames": 50
}
]
} |
From: 6
Junction By Left Door (Right of Pit)
To: 7
Junction By Lower Alcoons (Left of Spike Pits)
Requires: {
"or": [
"canDownBack",
"canTrickyJump"
]
}
{
"or": [
{
"and": [
"canDash",
{
"heatFrames": 75
}
]
},
{
"heatFrames": 125
}
]
} |
From: 7
Junction By Lower Alcoons (Left of Spike Pits)
To: 1
Left Door


Requires: {
"or": [
{
"and": [
"HiJump",
{
"heatFrames": 140
}
]
},
{
"and": [
"canWallJump",
{
"heatFrames": 170
}
]
},
{
"and": [
"canSpringBallJumpMidAir",
{
"heatFrames": 170
}
]
},
{
"and": [
"SpaceJump",
{
"heatFrames": 180
}
]
}
]
}
{
"or": [
"canDash",
{
"heatFrames": 20
}
]
}Unlocks doors: {"types":["powerbomb"],"requires":[{"heatFrames":60}]} |
From: 7
Junction By Lower Alcoons (Left of Spike Pits)
To: 1
Left Door


Requires: "canSpringBallBombJump"
{
"heatFrames": 240
}Unlocks doors: {"types":["powerbomb"],"requires":[{"heatFrames":60}]} |
From: 7
Junction By Lower Alcoons (Left of Spike Pits)
To: 1
Left Door
Requires: "canIBJ"
{
"or": [
{
"and": [
"canBombHorizontally",
{
"heatFrames": 840
}
]
},
{
"and": [
"canJumpIntoIBJ",
"canDoubleBombJump",
{
"heatFrames": 275
}
]
},
{
"and": [
"canJumpIntoIBJ",
{
"heatFrames": 420
}
]
}
]
}
{
"or": [
"canDash",
{
"heatFrames": 20
}
]
}Unlocks doors: {"types":["powerbomb"],"requires":[{"heatFrames":60}]} |
From: 7
Junction By Lower Alcoons (Left of Spike Pits)
To: 1
Left Door

Requires: "canIBJ"
{
"or": [
{
"enemyKill": {
"enemies": [
[
"Alcoon"
]
],
"explicitWeapons": [
"Missile",
"Super",
"Plasma",
"Wave+Spazer",
"PseudoScrew",
"ScrewAttack"
]
}
},
{
"heatFrames": 270
}
]
}
{
"heatFrames": 910
}Unlocks doors: {"types":["powerbomb"],"requires":[{"heatFrames":60}]} |
From: 7
Junction By Lower Alcoons (Left of Spike Pits)
To: 1
Left Door
Jump from the bottom of the slope with about 6.5 tiles of run speed. Requires: "canTrickyDashJump"
{
"heatFrames": 240
}
{
"or": [
"canInsaneJump",
{
"heatFrames": 480
}
]
}Unlocks doors: {"types":["powerbomb"],"requires":[{"heatFrames":60}]} |
From: 7
Junction By Lower Alcoons (Left of Spike Pits)
To: 1
Left Door
Requires: "canUseFrozenEnemies"
{
"heatFrames": 330
}
{
"or": [
"canDash",
{
"heatFrames": 20
}
]
}Unlocks doors: {"types":["powerbomb"],"requires":[{"heatFrames":60}]} |
From: 7
Junction By Lower Alcoons (Left of Spike Pits)
To: 3
Bottom Horizontal Door
Kill the Alcoon without stopping. Requires: "canDash"
"canDodgeWhileShooting"
{
"or": [
{
"enemyKill": {
"enemies": [
[
"Alcoon"
]
],
"explicitWeapons": [
"Missile",
"Super",
"Wave+Plasma",
"PseudoScrew",
"ScrewAttack",
"Charge+Wave+Spazer",
"Shinespark"
]
}
},
{
"and": [
"Plasma",
"canHitbox"
]
}
]
}
{
"heatFrames": 110
} |
From: 7
Junction By Lower Alcoons (Left of Spike Pits)
To: 3
Bottom Horizontal Door
Requires: {
"enemyKill": {
"enemies": [
[
"Alcoon",
"Alcoon"
]
],
"explicitWeapons": [
"Missile",
"Super",
"Plasma",
"Wave+Spazer"
]
}
}
{
"heatFrames": 240
}Unlocks doors: {"types":["missiles"],"requires":[{"heatFrames":30}]} |
From: 7
Junction By Lower Alcoons (Left of Spike Pits)
To: 3
Bottom Horizontal Door


Jump over the Alcoons one at a time. Requires: "canDash"
"canCarefulJump"
{
"heatFrames": 240
} |
From: 7
Junction By Lower Alcoons (Left of Spike Pits)
To: 3
Bottom Horizontal Door
Requires: {
"haveBlueSuit": {}
}
{
"heatFrames": 130
} |
From: 7
Junction By Lower Alcoons (Left of Spike Pits)
To: 3
Bottom Horizontal Door
Jump under the first Alcoon as it emerges from the spikes; then jump over the second. Alternatively, trigger the first Alcoon to spawn, wait for it to descend, then run and do a big jump over both Alcoons. Requires: "canDash"
"canTrickyJump"
{
"heatFrames": 150
} |
From: 7
Junction By Lower Alcoons (Left of Spike Pits)
To: 3
Bottom Horizontal Door
Run and jump under the first Alcoon as it ascends. Fire a shot to stun the second Alcoon while running and jumping under it as well. Requires: "canDash"
"canInsaneJump"
{
"heatFrames": 120
} |
From: 7
Junction By Lower Alcoons (Left of Spike Pits)
To: 3
Bottom Horizontal Door
Requires: "canDash"
{
"enemyDamage": {
"enemy": "Alcoon",
"type": "contact",
"hits": 1
}
}
{
"heatFrames": 180
}Unlocks doors: {"types":["missiles"],"requires":[{"heatFrames":30}]} |
From: 7
Junction By Lower Alcoons (Left of Spike Pits)
To: 3
Bottom Horizontal Door
Requires: "h_heatProof" "canDodgeWhileShooting" |
From: 7
Junction By Lower Alcoons (Left of Spike Pits)
To: 6
Junction By Left Door (Right of Pit)
Requires: {
"or": [
{
"and": [
"HiJump",
{
"heatFrames": 120
}
]
},
{
"and": [
"canWallJump",
{
"heatFrames": 150
}
]
},
{
"and": [
"canSpringBallJumpMidAir",
{
"heatFrames": 150
}
]
},
{
"and": [
"SpaceJump",
{
"heatFrames": 160
}
]
}
]
}
{
"or": [
"canDash",
{
"heatFrames": 25
}
]
} |
From: 7
Junction By Lower Alcoons (Left of Spike Pits)
To: 6
Junction By Left Door (Right of Pit)
Requires: "canSpringBallBombJump"
{
"heatFrames": 220
} |
From: 7
Junction By Lower Alcoons (Left of Spike Pits)
To: 6
Junction By Left Door (Right of Pit)
Requires: "canIBJ"
{
"or": [
{
"and": [
"canBombHorizontally",
{
"heatFrames": 820
}
]
},
{
"and": [
"canJumpIntoIBJ",
"canDoubleBombJump",
{
"heatFrames": 255
}
]
},
{
"and": [
"canJumpIntoIBJ",
{
"heatFrames": 400
}
]
}
]
}
{
"or": [
"canDash",
{
"heatFrames": 25
}
]
} |
From: 7
Junction By Lower Alcoons (Left of Spike Pits)
To: 6
Junction By Left Door (Right of Pit)
Requires: "canIBJ"
{
"or": [
{
"enemyKill": {
"enemies": [
[
"Alcoon"
]
],
"explicitWeapons": [
"Missile",
"Super",
"Plasma",
"Wave+Spazer",
"PseudoScrew",
"ScrewAttack"
]
}
},
{
"heatFrames": 270
}
]
}
{
"heatFrames": 890
} |
From: 7
Junction By Lower Alcoons (Left of Spike Pits)
To: 6
Junction By Left Door (Right of Pit)
Jump from the bottom of the slope with about 6.5 tiles of run speed. Requires: "canTrickyDashJump"
{
"heatFrames": 220
}
{
"or": [
"canInsaneJump",
{
"heatFrames": 480
}
]
} |
From: 7
Junction By Lower Alcoons (Left of Spike Pits)
To: 6
Junction By Left Door (Right of Pit)
Requires: "h_navigateHeatRooms"
"canUseFrozenEnemies"
{
"heatFrames": 310
}
{
"or": [
"canDash",
{
"heatFrames": 25
}
]
} |
From: 7
Junction By Lower Alcoons (Left of Spike Pits)
To: 7
Junction By Lower Alcoons (Left of Spike Pits)
Requires: {
"canShineCharge": {
"usedTiles": 14,
"gentleUpTiles": 1,
"gentleDownTiles": 1,
"steepUpTiles": 1,
"steepDownTiles": 1,
"openEnd": 0
}
}
"h_heatProof"
"h_spikeXModeBlueSuit"
{
"shinespark": {
"frames": 2
}
} |
From: 7
Junction By Lower Alcoons (Left of Spike Pits)
To: 7
Junction By Lower Alcoons (Left of Spike Pits)
Requires: "h_heatedCrystalFlash" |
From: 7
Junction By Lower Alcoons (Left of Spike Pits)
To: 7
Junction By Lower Alcoons (Left of Spike Pits)
Jump over the Alcoon and shoot open the door, then return. Requires: "canCarefulJump"
{
"heatFrames": 200
}Clears obstacles: C |
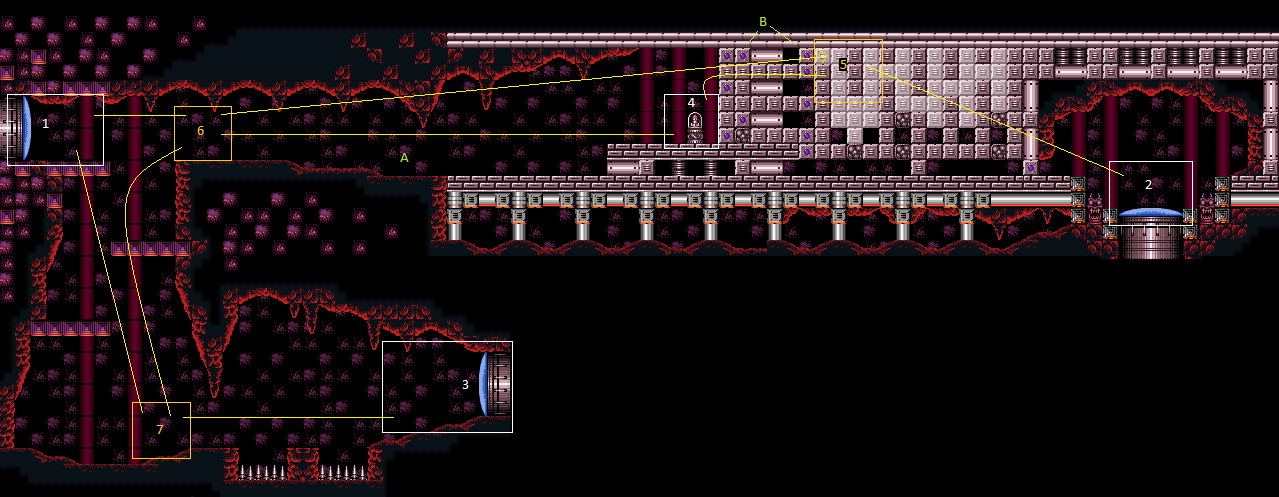
{
"$schema": "../../../schema/m3-room.schema.json",
"id": 146,
"name": "Lower Norfair Spring Ball Maze",
"area": "Norfair",
"subarea": "Lower",
"subsubarea": "East",
"roomAddress": "0x7B510",
"roomEnvironments": [
{
"heated": true
}
],
"mapTileMask": [
[
1,
1,
1,
1,
1
],
[
1,
1,
0,
0,
0
]
],
"nodes": [
{
"id": 1,
"name": "Left Door",
"nodeType": "door",
"nodeSubType": "blue",
"nodeAddress": "0x00199ae",
"doorOrientation": "left",
"doorEnvironments": [
{
"physics": "air"
}
],
"mapTileMask": [
[
2,
1,
1,
1,
1
],
[
1,
1,
0,
0,
0
]
]
},
{
"id": 2,
"name": "Right Vertical Door",
"nodeType": "door",
"nodeSubType": "blue",
"nodeAddress": "0x00199c6",
"doorOrientation": "down",
"doorEnvironments": [
{
"physics": "air"
}
],
"mapTileMask": [
[
1,
1,
1,
1,
2
],
[
1,
1,
0,
0,
0
]
]
},
{
"id": 3,
"name": "Bottom Horizontal Door",
"nodeType": "door",
"nodeSubType": "blue",
"nodeAddress": "0x00199ba",
"doorOrientation": "right",
"doorEnvironments": [
{
"physics": "air"
}
],
"mapTileMask": [
[
1,
1,
1,
1,
1
],
[
1,
2,
0,
0,
0
]
]
},
{
"id": 4,
"name": "Item",
"nodeType": "item",
"nodeSubType": "visible",
"nodeItem": "Missile",
"nodeAddress": "0x78FCA",
"mapTileMask": [
[
1,
1,
2,
1,
1
],
[
1,
1,
0,
0,
0
]
],
"locks": [
{
"name": "Dummy Item Lock",
"lockType": "gameFlag",
"unlockStrats": [
{
"name": "Base (Collect Item)",
"notable": false,
"requires": [],
"flashSuitChecked": true,
"blueSuitChecked": true
}
]
}
]
},
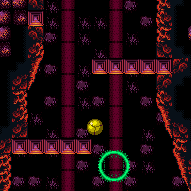
{
"id": 5,
"name": "Spring Ball Maze Junction (Past the Bomb Blocks)",
"nodeType": "junction",
"nodeSubType": "junction",
"mapTileMask": [
[
1,
1,
1,
2,
1
],
[
1,
1,
0,
0,
0
]
],
"note": "This junction is just after the bomb blocks inside the Morph maze."
},
{
"id": 6,
"name": "Junction By Left Door (Right of Pit)",
"nodeType": "junction",
"nodeSubType": "junction",
"mapTileMask": [
[
1,
2,
1,
1,
1
],
[
1,
1,
0,
0,
0
]
]
},
{
"id": 7,
"name": "Junction By Lower Alcoons (Left of Spike Pits)",
"nodeType": "junction",
"nodeSubType": "junction",
"mapTileMask": [
[
1,
1,
1,
1,
1
],
[
2,
1,
0,
0,
0
]
],
"note": [
"Coming from the right, this represents the edge of ledge left of the spike pits.",
"Coming from the left, it represents where you would land after falling from above."
]
}
],
"obstacles": [
{
"id": "A",
"name": "Hotarubi Runway Alcoon",
"obstacleType": "enemies"
},
{
"id": "B",
"name": "Hotarubi Bomb Blocks",
"obstacleType": "inanimate"
},
{
"id": "C",
"name": "Bottom Right Door Opened",
"obstacleType": "inanimate"
}
],
"enemies": [
{
"id": "e1",
"groupName": "Lower Norfair Spring Ball Maze Room Spike Pit Alcoons",
"enemyName": "Alcoon",
"quantity": 2,
"betweenNodes": [
3,
7
]
},
{
"id": "e2",
"groupName": "Lower Norfair Spring Ball Maze Room Bottom Left Alcoon",
"enemyName": "Alcoon",
"quantity": 1,
"homeNodes": [
7
]
},
{
"id": "e3",
"groupName": "Lower Norfair Spring Ball Maze Room Top Alcoon",
"enemyName": "Alcoon",
"quantity": 1,
"betweenNodes": [
4,
6
]
}
],
"strats": [
{
"link": [
1,
1
],
"name": "Base (Unlock Door)",
"requires": [],
"unlocksDoors": [
{
"types": [
"missiles"
],
"requires": [
{
"heatFrames": 50
}
]
},
{
"types": [
"super"
],
"requires": []
},
{
"types": [
"powerbomb"
],
"requires": [
{
"heatFrames": 110
}
]
}
],
"flashSuitChecked": true,
"blueSuitChecked": true
},
{
"link": [
1,
1
],
"name": "Base (Come In Normally)",
"entranceCondition": {
"comeInNormally": {}
},
"requires": [],
"flashSuitChecked": true,
"blueSuitChecked": true
},
{
"link": [
1,
1
],
"name": "Base (Come In With Mockball)",
"entranceCondition": {
"comeInWithMockball": {
"adjacentMinTiles": 0,
"remoteAndLandingMinTiles": [
[
0,
0
]
],
"speedBooster": "any"
}
},
"requires": [
{
"heatFrames": 10
}
],
"flashSuitChecked": true,
"blueSuitChecked": true
},
{
"link": [
2,
2
],
"name": "Base (Unlock Door)",
"requires": [],
"unlocksDoors": [
{
"types": [
"missiles"
],
"requires": [
{
"heatFrames": 50
}
]
},
{
"types": [
"super"
],
"requires": []
},
{
"types": [
"powerbomb"
],
"requires": [
{
"heatFrames": 110
}
]
}
],
"flashSuitChecked": true,
"blueSuitChecked": true
},
{
"link": [
2,
2
],
"name": "Base (Come In Normally)",
"entranceCondition": {
"comeInNormally": {}
},
"requires": [],
"flashSuitChecked": true,
"blueSuitChecked": true
},
{
"link": [
2,
2
],
"name": "Base (Come In With Grapple Jump)",
"entranceCondition": {
"comeInWithGrappleJump": {
"position": "any"
}
},
"requires": [],
"flashSuitChecked": true,
"blueSuitChecked": true
},
{
"link": [
3,
3
],
"name": "Base (Unlock Door)",
"requires": [],
"unlocksDoors": [
{
"types": [
"missiles"
],
"requires": [
{
"heatFrames": 50
}
]
},
{
"types": [
"super"
],
"requires": []
},
{
"types": [
"powerbomb"
],
"requires": [
{
"heatFrames": 110
}
]
}
],
"flashSuitChecked": true,
"blueSuitChecked": true
},
{
"link": [
3,
3
],
"name": "Base (Come In Normally)",
"entranceCondition": {
"comeInNormally": {}
},
"requires": [],
"flashSuitChecked": true,
"blueSuitChecked": true
},
{
"link": [
3,
3
],
"name": "Base (Come In With Mockball)",
"entranceCondition": {
"comeInWithMockball": {
"adjacentMinTiles": 0,
"remoteAndLandingMinTiles": [
[
0,
0
]
],
"speedBooster": "any"
}
},
"requires": [
{
"heatFrames": 10
}
],
"flashSuitChecked": true,
"blueSuitChecked": true
},
{
"name": "Base (Collect Item)",
"notable": false,
"requires": [],
"flashSuitChecked": true,
"blueSuitChecked": true,
"link": [
4,
4
],
"collectsItems": [
4
]
},
{
"id": 1,
"link": [
1,
1
],
"name": "Leave With Runway",
"requires": [],
"exitCondition": {
"leaveWithRunway": {
"length": 6,
"openEnd": 1
}
},
"flashSuitChecked": true,
"blueSuitChecked": true
},
{
"id": 88,
"link": [
1,
1
],
"name": "Single Alcoon Farm",
"requires": [
"h_heatProof",
{
"resetRoom": {
"nodes": [
1
]
}
},
{
"or": [
"canDash",
{
"cycleFrames": 160
}
]
},
{
"or": [
{
"and": [
"Plasma",
{
"cycleFrames": 245
},
{
"or": [
"Wave",
"Charge"
]
}
]
},
{
"and": [
{
"haveBlueSuit": {}
},
{
"cycleFrames": 245
}
]
},
{
"and": [
{
"or": [
"Plasma",
"Wave",
"ScrewAttack",
"Spazer",
"canPseudoScrew"
]
},
{
"cycleFrames": 285
}
]
},
{
"and": [
"canDodgeWhileShooting",
{
"cycleFrames": 420
}
]
}
]
}
],
"clearsObstacles": [
"A"
],
"resetsObstacles": [
"B",
"C"
],
"farmCycleDrops": [
{
"enemy": "Alcoon",
"count": 1
}
],
"flashSuitChecked": true,
"blueSuitChecked": true
},
{
"id": 89,
"link": [
1,
1
],
"name": "Partial Alcoon Farm",
"requires": [
{
"or": [
{
"and": [
"Plasma",
{
"heatFrames": 245
},
{
"or": [
"Wave",
"Charge"
]
}
]
},
{
"and": [
{
"haveBlueSuit": {}
},
{
"heatFrames": 245
}
]
},
{
"and": [
{
"or": [
"Plasma",
"Wave",
"ScrewAttack",
"Spazer",
"canPseudoScrew"
]
},
{
"heatFrames": 285
}
]
},
{
"and": [
"canDodgeWhileShooting",
{
"heatFrames": 420
}
]
}
]
},
{
"or": [
"canDash",
{
"heatFrames": 160
}
]
},
{
"resourceAvailable": [
{
"type": "Energy",
"count": 50
}
]
},
{
"partialRefill": {
"type": "PowerBomb",
"limit": 1
}
}
],
"clearsObstacles": [
"A"
],
"flashSuitChecked": true,
"blueSuitChecked": true
},
{
"id": 2,
"link": [
1,
1
],
"name": "Crystal Flash",
"requires": [
"h_heatedCrystalFlash"
],
"flashSuitChecked": true,
"blueSuitChecked": true
},
{
"id": 75,
"link": [
1,
1
],
"name": "G-Mode, Remote Acquire Item",
"entranceCondition": {
"comeInWithGMode": {
"mode": "direct",
"morphed": false
}
},
"requires": [
"canRemoteAcquire",
"h_heatedDirectGModeLeaveSameDoor"
],
"collectsItems": [
4
],
"flashSuitChecked": true,
"blueSuitChecked": true,
"note": [
"Wait at least 35 seconds for the Alcoon to jump back down before returning to the door, or kill it with a Power Bomb or SBA.",
"Stand close to the transition and use X-Ray then hold left to leave the room before the door closes."
]
},
{
"id": 76,
"link": [
1,
2
],
"name": "G-Mode, Blind Maze Traversal",
"entranceCondition": {
"comeInWithGMode": {
"mode": "any",
"morphed": false
}
},
"requires": [
"canOffScreenMovement",
"h_bombThings",
"h_heatedGModeOffCameraDoor",
{
"heatFrames": 200
}
],
"flashSuitChecked": true,
"blueSuitChecked": true,
"note": [
"Overload PLMs using the camera scroll blocks just right of the downward passageway by the left door.",
"Blindly traverse the maze until the end, where Samus will be stuck at the far right next to the shot block.",
"Exit G-mode just one tile to the left, Morph, use a Bomb or Power Bomb to destroy the shot block and escape through the door."
]
},
{
"id": 77,
"link": [
1,
2
],
"name": "G-Mode, Blind Maze Traversal, Remote Acquire the Item",
"entranceCondition": {
"comeInWithGMode": {
"mode": "direct",
"morphed": false
}
},
"requires": [
"canRemoteAcquire",
"canOffScreenMovement",
"h_bombThings",
"h_heatedGModeOffCameraDoor",
{
"heatFrames": 200
}
],
"collectsItems": [
4
],
"flashSuitChecked": true,
"blueSuitChecked": true,
"note": [
"Be careful not to overload PLMs with the camera scroll blocks just right of the downward passageway by the left door; use the item to finish overloading PLMs.",
"Blindly traverse the maze until the end, where Samus will be stuck at the far right next to the shot block.",
"Exit G-mode just one tile to the left, Morph, use a Bomb or Power Bomb to destroy the shot block and escape through the door."
]
},
{
"id": 78,
"link": [
1,
3
],
"name": "G-Mode",
"entranceCondition": {
"comeInWithGMode": {
"mode": "any",
"morphed": false
}
},
"requires": [
"h_heatedGModeOpenDifferentDoor"
],
"flashSuitChecked": true,
"blueSuitChecked": true
},
{
"id": 79,
"link": [
1,
4
],
"name": "G-Mode",
"entranceCondition": {
"comeInWithGMode": {
"mode": "any",
"morphed": false
}
},
"requires": [
"h_heatedGMode",
{
"heatFrames": 0
}
],
"flashSuitChecked": true,
"blueSuitChecked": true
},
{
"id": 72,
"link": [
1,
5
],
"name": "Come In Blue Spinning, Space Jump Through Morph Tunnel",
"entranceCondition": {
"comeInBlueSpinning": {
"minExtraRunSpeed": "$6.E",
"unusableTiles": 0
}
},
"requires": [
{
"notable": "Air Speedball"
},
"canPreciseSpaceJump",
"canInsaneJump",
"canLateralMidAirMorph",
"canSpeedball",
"canMomentumConservingMorph",
{
"heatFrames": 110
}
],
"flashSuitChecked": true,
"blueSuitChecked": true,
"note": [
"Spacejump through the room and break the bomb blocks in the Morph tunnel with Speedbooster.",
"It is very helpful for the final jump to be close to the missile platform, to be as close to the tunnel as possible when Morphing."
],
"devNote": [
"This is possible with less extra speed but where you jump changes with your speed and room entry."
]
},
{
"id": 73,
"link": [
1,
5
],
"name": "Come In Getting Blue Speed, Space Jump Through Morph Tunnel",
"entranceCondition": {
"comeInGettingBlueSpeed": {
"length": 5,
"openEnd": 1,
"minExtraRunSpeed": "$5.B"
}
},
"requires": [
{
"notable": "Air Speedball"
},
"canPreciseSpaceJump",
"canInsaneJump",
"canLateralMidAirMorph",
"canSpeedball",
"canMomentumConservingMorph",
{
"heatFrames": 110
}
],
"flashSuitChecked": true,
"blueSuitChecked": true,
"note": [
"Spacejump through the room and break the bomb blocks in the Morph tunnel with Speedbooster.",
"It is very helpful for the final jump to be close to the missile platform, to be as close to the tunnel as possible when Morphing."
]
},
{
"id": 3,
"link": [
1,
6
],
"name": "Base",
"requires": [
{
  "or": [
    {
      "and": [
        "canDash",
        {
          "heatFrames": 50
        }
      ]
    },
    {
      "heatFrames": 100
    }
  ]
}
],
"flashSuitChecked": true,
"blueSuitChecked": true
},
{
"id": 4,
"link": [
1,
6
],
"name": "Running Entry",
"entranceCondition": {
"comeInRunning": {
"speedBooster": "any",
"minTiles": 3
}
},
"requires": [
{
  "heatFrames": 35
}
],
"flashSuitChecked": true,
"blueSuitChecked": true
},
{
"id": 93,
"link": [
1,
7
],
"name": "R-Mode Spark Interrupt",
"entranceCondition": {
"comeInWithRMode": {}
},
"requires": [
{
"heatFrames": 60
},
{
"or": [
{
"and": [
"canDodgeWhileShooting",
{
"enemyKill": {
"enemies": [
[
"Alcoon"
]
],
"explicitWeapons": [
"Missile",
"Super",
"Charge+Plasma"
]
}
},
{
"heatFrames": 120
}
]
},
{
"and": [
{
"enemyKill": {
"enemies": [
[
"Alcoon"
]
],
"explicitWeapons": [
"Missile",
"Super",
"Wave",
"Ice+Spazer",
"Plasma",
"ScrewAttack",
"PseudoScrew",
"PowerBomb"
]
}
},
{
"heatFrames": 180
}
]
},
{
"and": [
{
"heatFrames": 200
},
{
"or": [
"canDodgeWhileShooting",
"Morph"
]
}
]
},
{
"and": [
{
"heatFrames": 160
},
{
"enemyDamage": {
"enemy": "Alcoon",
"type": "fireball",
"hits": 1
}
}
]
}
]
},
{
"or": [
"h_heatedCrystalFlashForReserveEnergy",
{
"and": [
"h_heatProof",
"h_RModeCanRefillReserves",
{
"or": [
{
"and": [
{
"resourceMissingAtMost": [
{
"type": "PowerBomb",
"count": 0
}
]
},
{
"partialRefill": {
"type": "ReserveEnergy",
"limit": 20
}
}
]
},
{
"and": [
{
"resourceMissingAtMost": [
{
"type": "PowerBomb",
"count": 3
}
]
},
{
"partialRefill": {
"type": "ReserveEnergy",
"limit": 5
}
}
]
}
]
}
]
}
]
},
{
"canShineCharge": {
"usedTiles": 27,
"gentleUpTiles": 2,
"openEnd": 0
}
},
{
"or": [
"canDownBack",
"canTrickyJump"
]
},
{
"heatFrames": 120
},
{
"autoReserveTrigger": {
"maxReserveEnergy": 95
}
},
"canRModeSparkInterrupt"
],
"clearsObstacles": [
"A"
],
"flashSuitChecked": true,
"blueSuitChecked": true,
"note": [
"Clear the Alcoon in the runway, then shinecharge and jump down to be interrupted by",
"the lower left Alcoon."
]
},
{
"id": 96,
"link": [
1,
7
],
"name": "Direct G-Mode Spark Interrupt",
"entranceCondition": {
"comeInWithGMode": {
"mode": "direct",
"morphed": false
}
},
"requires": [
{
"or": [
"canWallJump",
"HiJump",
"canSpringBallJumpMidAir",
"SpaceJump",
{
"and": [
"canIBJ",
"canBombHorizontally",
"canJumpIntoIBJ"
]
},
{
"and": [
"canUseFrozenEnemies",
"canInsaneJump"
]
}
]
},
"h_CrystalFlashForReserveEnergy",
{
"canShineCharge": {
"usedTiles": 27,
"gentleUpTiles": 2,
"openEnd": 0
}
},
{
"or": [
"canDownBack",
"canTrickyJump"
]
},
{
"or": [
{
"and": [
{
"disableEquipment": "ETank"
},
{
"autoReserveTrigger": {}
},
"canRModeSparkInterrupt",
{
"enemyDamage": {
"enemy": "Alcoon",
"type": "contact",
"hits": 1
}
}
]
},
{
"and": [
"canReserveTriggerBufferXRay",
{
"autoReserveTrigger": {
"implicitHeatFrames": "no"
}
},
"canRModePauseAbuseSparkInterrupt",
{
"heatFrames": 30
}
]
}
]
}
],
"clearsObstacles": [
"A"
],
"flashSuitChecked": true,
"blueSuitChecked": true,
"note": [
"Crystal Flash near the edge - just before Samus goes off-screen - to clear the runway Alcoon.",
"Shinecharge to the left, then weave down and into the Alcoon to interrupt."
]
},
{
"id": 5,
"link": [
1,
7
],
"name": "Base",
"requires": [
{
"heatFrames": 160
},
{
"or": [
"canDash",
{
"heatFrames": 10
}
]
}
],
"flashSuitChecked": true,
"blueSuitChecked": true
},
{
"id": 6,
"link": [
1,
7
],
"name": "Weave",
"requires": [
{
"or": [
"canDownBack",
"canTrickyJump"
]
},
{
"heatFrames": 110
},
{
"or": [
"canDash",
{
"heatFrames": 10
}
]
}
],
"flashSuitChecked": true,
"blueSuitChecked": true
},
{
"id": 8,
"link": [
2,
2
],
"name": "Shinespark",
"entranceCondition": {
"comeInWithSpark": {},
"comesThroughToilet": "any"
},
"requires": [
{
"shinespark": {
"frames": 5,
"excessFrames": 5
}
},
{
"heatFrames": 120
}
],
"flashSuitChecked": true,
"blueSuitChecked": true,
"devNote": "This strat is not useful in-room, but can satisfy a strat in the room before with an exit shinespark."
},
{
"id": 9,
"link": [
2,
2
],
"name": "Crystal Flash",
"requires": [
"h_heatedCrystalFlash"
],
"flashSuitChecked": true,
"blueSuitChecked": true
},
{
"id": 10,
"link": [
2,
5
],
"name": "Crystal Flash Clip",
"requires": [
{
"notable": "Crystal Flash Clip"
},
{
"heatFrames": 100
},
"h_heatedCrystalFlash",
"canCeilingClip",
{
"or": [
"canTrivialMidAirMorph",
"h_useSpringBall"
]
},
{
"heatFrames": 175
}
],
"clearsObstacles": [
"B"
],
"flashSuitChecked": true,
"blueSuitChecked": true,
"note": "Perform the Crystal Flash all the way against the left wall of the accessible tunnel, then jump through the ceiling.",
"devNote": [
"After the CF, a midair morph can be avoided with a single bomb, but midair morph is expected for this level.",
"The heat frames are based on reaching the entrance of the last morph tunnel.",
"FIXME: in the room diagram, draw node 5 using a smaller box to more precisely indicate this location."
]
},
{
"id": 94,
"link": [
2,
7
],
"name": "Crystal Flash Clip, R-Mode Spark Interrupt",
"entranceCondition": {
"comeInWithRMode": {},
"comesThroughToilet": "no"
},
"requires": [
{
"notable": "Crystal Flash Clip"
},
{
"heatFrames": 100
},
"h_heatedCrystalFlashForReserveEnergy",
"canCeilingClip",
"canTrivialMidAirMorph",
{
"heatFrames": 240
},
{
"or": [
{
"enemyKill": {
"enemies": [
[
"Alcoon"
]
],
"explicitWeapons": [
"Missile",
"Super",
"Charge+Plasma",
"Wave+Plasma"
]
}
},
{
"heatFrames": 200
}
]
},
{
"canShineCharge": {
"usedTiles": 27,
"gentleUpTiles": 2,
"openEnd": 0
}
},
{
"or": [
"canDownBack",
"canTrickyJump"
]
},
{
"heatFrames": 120
},
{
"autoReserveTrigger": {
"maxReserveEnergy": 95
}
},
"canRModeSparkInterrupt"
],
"clearsObstacles": [
"A",
"B"
],
"flashSuitChecked": true,
"blueSuitChecked": true,
"note": [
"Crystal Flash against the left edge of the tunnel, then jump through the ceiling.",
"You cannot use Power Bombs or X-Ray after the Crystal Flash clip. Kill the Alcoon to clear the runway",
"then drop into the lower left Alcoon to interrupt."
]
},
{
"id": 11,
"link": [
3,
1
],
"name": "Grapple Teleport",
"entranceCondition": {
"comeInWithGrappleTeleport": {
"blockPositions": [
[
5,
3
],
[
7,
2
]
]
}
},
"requires": [
{
  "heatFrames": 50
}
],
"flashSuitChecked": true,
"blueSuitChecked": true
},
{
"id": 92,
"link": [
3,
1
],
"name": "Grapple Teleport Door Escape",
"entranceCondition": {
"comeInWithGrappleTeleport": {
"blockPositions": [
[
3,
12
],
[
3,
13
]
]
}
},
"requires": [
{
"or": [
"h_heatedGrappleTeleportWallEscape",
{
"and": [
{
"doorUnlockedAtNode": 1
},
{
  "heatFrames": 20
}
]
}
]
},
{
"or": [
"canOffScreenMovement",
{
"heatFrames": 100
}
]
}
],
"unlocksDoors": [
{
"types": [
"ammo"
],
"requires": []
}
],
"flashSuitChecked": true,
"blueSuitChecked": true
},
{
"id": 12,
"link": [
3,
1
],
"name": "Grapple Teleport Door Lock Skip",
"entranceCondition": {
"comeInWithGrappleTeleport": {
"blockPositions": [
[
3,
12
],
[
3,
13
]
]
}
},
"requires": [],
"bypassesDoorShell": "yes",
"flashSuitChecked": true,
"blueSuitChecked": true
},
{
"id": 13,
"link": [
3,
1
],
"name": "Carry Grapple Teleport (Top Position)",
"entranceCondition": {
"comeInWithGrappleTeleport": {
"blockPositions": [
[
3,
12
]
]
}
},
"requires": [],
"exitCondition": {
"leaveWithGrappleTeleport": {
"blockPositions": [
[
3,
12
]
]
}
},
"bypassesDoorShell": "yes",
"flashSuitChecked": true,
"blueSuitChecked": true
},
{
"id": 14,
"link": [
3,
1
],
"name": "Carry Grapple Teleport (Bottom Position)",
"entranceCondition": {
"comeInWithGrappleTeleport": {
"blockPositions": [
[
3,
13
]
]
}
},
"requires": [],
"exitCondition": {
"leaveWithGrappleTeleport": {
"blockPositions": [
[
3,
13
]
]
}
},
"bypassesDoorShell": "yes",
"flashSuitChecked": true,
"blueSuitChecked": true
},
{
"id": 80,
"link": [
3,
1
],
"name": "G-Mode",
"entranceCondition": {
"comeInWithGMode": {
"mode": "any",
"morphed": false
}
},
"requires": [
{
"or": [
"canWallJump",
"HiJump",
"canSpringBallJumpMidAir",
"SpaceJump",
"canUseFrozenEnemies",
{
"and": [
"canTrickyDashJump",
"canTrickyDodgeEnemies"
]
}
]
},
"h_heatedGModeOpenDifferentDoor"
],
"flashSuitChecked": true,
"blueSuitChecked": true,
"note": [
"It is possible to climb up with a tricky dash jump and no wall jump.",
"Either kill the Alcoon before it spawns any stationary, invisible fireballs, or let the right alcoons shoot enough to overload projectiles."
]
},
{
"id": 81,
"link": [
3,
1
],
"name": "G-Mode Morph",
"entranceCondition": {
"comeInWithGMode": {
"mode": "any",
"morphed": true
}
},
"requires": [
{
"or": [
{
"and": [
"h_artificialMorphSpringBall",
"h_artificialMorphSpringBallBombJump"
]
},
{
"and": [
"h_artificialMorphIBJ",
"h_artificialMorphBombHorizontally"
]
}
]
},
"h_heatedGModeOpenDifferentDoor"
],
"flashSuitChecked": true,
"blueSuitChecked": true
},
{
"id": 82,
"link": [
3,
2
],
"name": "G-Mode, Blind Maze Traversal",
"entranceCondition": {
"comeInWithGMode": {
"mode": "any",
"morphed": false
}
},
"requires": [
"canOffScreenMovement",
{
"or": [
"canWallJump",
"HiJump",
"canSpringBallJumpMidAir",
"SpaceJump",
"canUseFrozenEnemies",
"canIBJ",
{
"and": [
"canTrickyDashJump",
"canTrickyDodgeEnemies"
]
}
]
},
"h_bombThings",
"h_heatedGModeOffCameraDoor",
{
"heatFrames": 200
}
],
"flashSuitChecked": true,
"blueSuitChecked": true,
"note": [
"PLMs will be overloaded using the camera scroll blocks while climbing the room.",
"Blindly traverse the maze until the end, where Samus will be stuck at the far right next to the shot block.",
"Exit G-mode just one tile to the left, Morph, use a Bomb or Power Bomb to destroy the shot block and escape through the door.",
"Note that it is possible to climb up with a tricky dash jump and no wall jump.",
"Either kill the Alcoon before it spawns and stationary, invisible lasers, or let the right alcoons shoot enough to overload projectiles."
]
},
{
"id": 83,
"link": [
3,
2
],
"name": "G-Mode, Blind Maze Traversal, Remote Acquire the Item",
"entranceCondition": {
"comeInWithGMode": {
"mode": "direct",
"morphed": false
}
},
"requires": [
"canRemoteAcquire",
"canOffScreenMovement",
"canTrickyGMode",
{
"or": [
{
"and": [
"canTrickyUseFrozenEnemies",
"HiJump"
]
},
{
"and": [
"canTrickyUseFrozenEnemies",
"h_useSpringBall"
]
},
{
"and": [
"HiJump",
"h_useSpringBall"
]
},
"canSpringBallBombJump"
]
},
"h_bombThings",
"h_heatedGModeOffCameraDoor",
{
"heatFrames": 200
}
],
"collectsItems": [
4
],
"flashSuitChecked": true,
"blueSuitChecked": true,
"note": [
"It is tricky to climb the room without fully overloading PLMs.",
"With Ice and either HiJump or Spring Ball, freeze the left Alcoon to the right of where it jumps out of the ground.",
"With HiJump, spin jump off of it and land directly on the middle stair platform.",
"With Spring Ball, morph on top of the Alcoon, jump to barely land on the lowest platform while avoiding",
"the camera scroll blocks one tile above, then use Spring Ball again to jump to the next platform.",
"Alternatively, with Spring Ball and either HiJump, Bombs, or Power Bombs, jump to barely land on the lowest platform while avoiding the camera scroll blocks one tile above,",
"then use Spring Ball again to jump to the next platform. The first jump can be done with HiJump or a bomb boost into Spring Ball jump.",
"Once up above, unmorph and get onto the edge of the runway leading right, then run through the camera scroll blocks to reach the item.",
"This will finish overloading PLMs. Blindly traverse the maze until the end, where Samus will be stuck at the far right next to the shot block.",
"Exit G-mode just one tile to the left, Morph, use a Bomb or Power Bomb to destroy the shot block and escape through the door."
],
"detailNote": "There is a row of camera scroll blocks two-tiles above the bottom left platform, and a column two-tiles away from the right of the gap in front of the left door."
},
{
"id": 15,
"link": [
3,
3
],
"name": "Leave With Runway",
"requires": [],
"exitCondition": {
"leaveWithRunway": {
"length": 8,
"openEnd": 1,
"gentleUpTiles": 4
}
},
"flashSuitChecked": true,
"blueSuitChecked": true
},
{
"id": 90,
"link": [
3,
3
],
"name": "Alcoon Farm",
"requires": [
"h_heatProof",
{
"or": [
{
"and": [
{
"resetRoom": {
"nodes": [
1
]
}
},
{
"or": [
"canWallJump",
"HiJump",
"SpaceJump"
]
},
{
"cycleFrames": 150
}
]
},
{
"resetRoom": {
"nodes": [
3
]
}
}
]
},
{
"or": [
"canDash",
{
"cycleFrames": 120
}
]
},
{
"or": [
{
"and": [
"Plasma",
{
"cycleFrames": 400
}
]
},
{
"and": [
"ScrewAttack",
{
"cycleFrames": 360
}
]
},
{
"and": [
{
"haveBlueSuit": {}
},
{
"cycleFrames": 360
}
]
},
{
"and": [
"canPseudoScrew",
{
"cycleFrames": 440
}
]
},
{
"and": [
"Spazer",
"Wave",
{
"cycleFrames": 560
}
]
},
{
"and": [
"canDodgeWhileShooting",
{
"cycleFrames": 910
}
]
}
]
}
],
"resetsObstacles": [
"A",
"B",
"C"
],
"farmCycleDrops": [
{
"enemy": "Alcoon",
"count": 3
}
],
"flashSuitChecked": true,
"blueSuitChecked": true
},
{
"id": 91,
"link": [
3,
3
],
"name": "Partial Alcoon Farm",
"requires": [
{
"or": [
"canDash",
{
"heatFrames": 120
}
]
},
{
"or": [
{
"and": [
"Plasma",
{
"heatFrames": 400
}
]
},
{
"and": [
"ScrewAttack",
{
"heatFrames": 360
}
]
},
{
"and": [
{
"haveBlueSuit": {}
},
{
"heatFrames": 360
}
]
},
{
"and": [
"canPseudoScrew",
{
"heatFrames": 440
}
]
},
{
"and": [
"Spazer",
"Wave",
{
"heatFrames": 560
}
]
},
{
"and": [
"canDodgeWhileShooting",
{
"heatFrames": 910
}
]
}
]
},
{
"resourceAvailable": [
{
"type": "Energy",
"count": 50
}
]
},
{
"partialRefill": {
"type": "PowerBomb",
"limit": 3
}
}
],
"flashSuitChecked": true,
"blueSuitChecked": true
},
{
"id": 16,
"link": [
3,
3
],
"name": "Crystal Flash",
"requires": [
"h_heatedCrystalFlash"
],
"flashSuitChecked": true,
"blueSuitChecked": true
},
{
"id": 17,
"link": [
3,
3
],
"name": "Open Door",
"requires": [
{
"heatFrames": 20
}
],
"clearsObstacles": [
"C"
],
"flashSuitChecked": true,
"blueSuitChecked": true
},
{
"id": 105,
"link": [
3,
3
],
"name": "Come in Shinecharging, Crystal Spark",
"entranceCondition": {
"comeInShinecharging": {
"length": 4,
"openEnd": 0,
"gentleDownTiles": 2
}
},
"requires": [
{
  "or": [
    {
      "and": [
        "h_enemyDrops",
        "h_heatedCrystalSparkWithoutLenience"
      ]
    },
    "h_heatedCrystalSpark"
  ]
}
],
"flashSuitChecked": true,
"blueSuitChecked": true,
"note": "Crystal Spark just before the third sloped tile in order to prevent spawning the Alcoon."
},
{
"id": 18,
"link": [
3,
3
],
"name": "X-Mode - Leave Shinecharged",
"requires": [
"h_spikeXModeShinecharge",
{
"or": [
{
"and": [
{
"enemyKill": {
"enemies": [
[
"Alcoon"
]
],
"explicitWeapons": [
"Plasma",
"Wave+Spazer",
"ScrewAttack",
"Missile",
"Super"
]
}
},
{
"heatFrames": 420
}
]
},
{
"and": [
{
"enemyKill": {
"enemies": [
[
"Alcoon"
]
],
"explicitWeapons": [
"Spazer",
"Wave",
"PseudoScrew",
"PowerBomb"
]
}
},
{
"heatFrames": 530
}
]
},
{
"and": [
{
"enemyKill": {
"enemies": [
[
"Alcoon"
]
],
"explicitWeapons": [
"PowerBeam"
]
}
},
{
"heatFrames": 620
}
]
}
]
},
{
"shineChargeFrames": 90
}
],
"exitCondition": {
"leaveShinecharged": {}
},
"flashSuitChecked": true,
"blueSuitChecked": true,
"note": "Clear the Alcoon then bounce into the spike patch.",
"devNote": "Two spike hits are expected per attempt (with any additional leniency hits being multiplied by this amount)."
},
{
"id": 107,
"link": [
3,
3
],
"name": "Gain Flash Suit (X-Mode Spikesuit)",
"requires": [
"h_heatProof",
"h_spikeXModeSpikeSuit",
{
"shinespark": {
"frames": 4,
"excessFrames": 4
}
}
],
"flashSuitChecked": true,
"blueSuitChecked": true
},
{
"id": 108,
"link": [
3,
3
],
"name": "Gain Flash Suit (X-Mode Spikesuit) - Leave with Shinespark",
"requires": [
"h_heatProof",
"h_spikeXModeSpikeSuit",
{
"shinespark": {
"frames": 18,
"excessFrames": 0
}
}
],
"exitCondition": {
"leaveWithSpark": {
"position": "bottom"
}
},
"flashSuitChecked": true,
"blueSuitChecked": true
},
{
"id": 109,
"link": [
3,
3
],
"name": "Come in Shinecharging, Gain Flash Suit (Spikesuit)",
"entranceCondition": {
"comeInShinecharging": {
"length": 8,
"openEnd": 0
}
},
"requires": [
{
"heatFrames": 300
},
{
"enemyDamage": {
"enemy": "Alcoon",
"type": "contact",
"hits": 1
}
},
{
"spikeHits": 1
},
"h_spikeSuitSpikeHitLeniency",
"canPatientSpikeSuit",
{
"shinespark": {
"frames": 4,
"excessFrames": 4
}
}
],
"flashSuitChecked": true,
"blueSuitChecked": true
},
{
"id": 110,
"link": [
3,
3
],
"name": "Come in Shinecharged, Gain Flash Suit (Spikesuit)",
"entranceCondition": {
"comeInShinecharged": {}
},
"requires": [
{
"heatFrames": 320
},
{
"shineChargeFrames": 100
},
{
"enemyDamage": {
"enemy": "Alcoon",
"type": "contact",
"hits": 1
}
},
{
"spikeHits": 1
},
"h_spikeSuitSpikeHitLeniency",
"canPatientSpikeSuit",
{
"shinespark": {
"frames": 4,
"excessFrames": 4
}
}
],
"flashSuitChecked": true,
"blueSuitChecked": true
},
{
"id": 84,
"link": [
3,
3
],
"name": "G-Mode, Remote Acquire Item, Frozen Alcoon",
"entranceCondition": {
"comeInWithGMode": {
"mode": "direct",
"morphed": false
}
},
"requires": [
"canRemoteAcquire",
"canTrickyGMode",
"canTrickyUseFrozenEnemies",
{
"or": [
"HiJump",
"h_useSpringBall"
]
},
{
"or": [
"canDash",
"Morph"
]
},
"h_heatedDirectGModeLeaveSameDoor"
],
"collectsItems": [
4
],
"flashSuitChecked": true,
"blueSuitChecked": true,
"note": [
"It is tricky to climb the room without fully overloading PLMs.",
"Freeze the left Alcoon to the right of where it jumps out of the ground.",
"With HiJump, spin jump off of it and land directly on the middle stair platform.",
"With Spring Ball, morph on top of the Alcoon, jump to barely land on the lowest platform while avoiding",
"the camera scroll blocks one tile above, then use Spring Ball again to jump to the next platform.",
"Up above, get onto the edge of the runway leading right, then run through the camera scroll blocks to reach the item.",
"Wait at least 35 seconds for the Alcoon to jump back down before returning to the door, or kill it with a Power Bomb or SBA.",
"Stand close to the transition and use X-Ray then hold right to leave the room before the door closes.",
"Note that spending any extra frames in the camera scroll blocks will overload PLMs before reaching the item and prevent remote acquiring it."
],
"detailNote": "There is a row of camera scroll blocks two-tiles above the bottom left platform, and a column two-tiles away from the right of the gap in front of the left door."
},
{
"id": 85,
"link": [
3,
3
],
"name": "G-Mode Morph, Remote Acquire Item, Spring Ball",
"entranceCondition": {
"comeInWithGMode": {
"mode": "direct",
"morphed": true
}
},
"requires": [
"canRemoteAcquire",
"canTrickyGMode",
"h_artificialMorphSpringBall",
{
"or": [
"HiJump",
"h_artificialMorphSpringBallBombJump"
]
},
"h_heatedDirectGModeLeaveSameDoor"
],
"collectsItems": [
4
],
"flashSuitChecked": true,
"blueSuitChecked": true,
"note": [
"It is tricky to climb the room without fully overloading PLMs.",
"With Spring Ball, jump to barely land on the lowest platform while avoiding the camera scroll blocks one tile above, then use Spring Ball again to jump to the next platform.",
"The first jump can be done with HiJump or a bomb boost into Spring Ball jump.",
"Up above, unmorph and get onto the edge of the runway leading right, then run through the camera scroll blocks to reach the item.",
"Wait at least 35 seconds for the Alcoon to jump back down before returning to the door, or kill it with a Power Bomb or SBA.",
"Stand close to the transition and use X-Ray then hold right to leave the room before the door closes.",
"Note that spending any extra frames in the camera scroll blocks will overload PLMs before reaching the item and prevent remote acquiring it."
],
"detailNote": "There is a row of camera scroll blocks two-tiles above the bottom left platform, and a column two-tiles away from the right of the gap in front of the left door."
},
{
"id": 86,
"link": [
3,
4
],
"name": "G-Mode",
"entranceCondition": {
"comeInWithGMode": {
"mode": "any",
"morphed": false
}
},
"requires": [
"h_heatedGMode",
{
"or": [
"canWallJump",
"HiJump",
"canSpringBallJumpMidAir",
"SpaceJump",
"canUseFrozenEnemies",
{
"and": [
"canTrickyDashJump",
"canTrickyDodgeEnemies"
]
}
]
},
{
"heatFrames": 0
}
],
"flashSuitChecked": true,
"blueSuitChecked": true,
"note": [
"It is possible to climb up with a tricky dash jump and no wall jump.",
"Either kill the Alcoon before it spawns any stationary, invisible fireballs, or let the right Alcoons shoot enough to overload projectiles."
]
},
{
"id": 87,
"link": [
3,
4
],
"name": "G-Mode Morph",
"entranceCondition": {
"comeInWithGMode": {
"mode": "any",
"morphed": true
}
},
"requires": [
"h_heatedGMode",
{
"or": [
{
"and": [
"h_artificialMorphSpringBall",
"h_artificialMorphSpringBallBombJump"
]
},
{
"and": [
"h_artificialMorphIBJ",
"h_artificialMorphBombHorizontally"
]
}
]
},
{
"heatFrames": 0
}
],
"flashSuitChecked": true,
"blueSuitChecked": true,
"note": [
"It is possible to climb up with a tricky dash jump and no wall jump.",
"Either kill the Alcoon before it spawns any stationary, invisible fireballs, or let the right Alcoons shoot enough to overload projectiles."
]
},
{
"id": 95,
"link": [
3,
7
],
"name": "R-Mode Spark Interrupt",
"entranceCondition": {
"comeInWithRMode": {}
},
"requires": [
{
"or": [
{
"and": [
"h_heatedCrystalFlashForReserveEnergy",
{
"heatFrames": 100
}
]
},
{
"and": [
"ScrewAttack",
"canCarefulJump",
{
"heatFrames": 100
}
]
},
{
"and": [
"canDodgeWhileShooting",
{
"or": [
"h_heatProof",
{
"enemyKill": {
"enemies": [
[
"Alcoon"
]
],
"explicitWeapons": [
"Missile",
"Super",
"Wave+Plasma"
]
}
},
{
"and": [
"canPseudoScrew",
{
"heatFrames": 30
}
]
}
]
},
"canCarefulJump",
{
"heatFrames": 100
}
]
},
{
"and": [
{
"enemyKill": {
"enemies": [
[
"Alcoon",
"Alcoon"
]
],
"explicitWeapons": [
"Missile",
"Super",
"Plasma",
"Wave+Spazer"
]
}
},
{
"heatFrames": 200
}
]
},
{
"and": [
"canCarefulJump",
{
"heatFrames": 199
}
]
},
{
"and": [
{
"enemyDamage": {
"enemy": "Alcoon",
"type": "contact",
"hits": 1
}
},
{
"heatFrames": 180
}
]
}
]
},
{
"heatFrames": 160
},
{
"or": [
"canWallJump",
"HiJump",
"canSpringBallJumpMidAir",
"SpaceJump",
{
"and": [
"canSpringBallBombJump",
{
"heatFrames": 60
}
]
},
{
"and": [
"canIBJ",
"canBombHorizontally",
"canJumpIntoIBJ",
{
"heatFrames": 110
},
{
"or": [
"canDoubleBombJump",
{
"heatFrames": 190
}
]
}
]
},
{
"and": [
"canTrickyDashJump",
"canInsaneJump",
{
"heatFrames": 20
}
]
},
{
"and": [
"canUseFrozenEnemies",
"canInsaneJump",
{
"heatFrames": 150
}
]
}
]
},
{
"or": [
{
"and": [
"canDodgeWhileShooting",
{
"enemyKill": {
"enemies": [
[
"Alcoon"
]
],
"explicitWeapons": [
"Missile",
"Super",
"Charge+Plasma"
]
}
},
{
"heatFrames": 120
}
]
},
{
"and": [
{
"enemyKill": {
"enemies": [
[
"Alcoon"
]
],
"explicitWeapons": [
"Wave",
"Ice+Spazer",
"Plasma",
"ScrewAttack",
"PseudoScrew",
"PowerBomb"
]
}
},
{
"heatFrames": 180
}
]
},
{
"heatFrames": 200
}
]
},
{
"or": [
{
"resourceAvailable": [
{
"type": "ReserveEnergy",
"count": 1
}
]
},
{
"and": [
"h_heatProof",
"h_RModeCanRefillReserves",
{
"or": [
{
"and": [
{
"resourceMissingAtMost": [
{
"type": "PowerBomb",
"count": 0
}
]
},
{
"partialRefill": {
"type": "ReserveEnergy",
"limit": 20
}
}
]
},
{
"and": [
{
"resourceMissingAtMost": [
{
"type": "PowerBomb",
"count": 3
}
]
},
{
"partialRefill": {
"type": "ReserveEnergy",
"limit": 5
}
}
]
}
]
}
]
}
]
},
{
"canShineCharge": {
"usedTiles": 27,
"gentleUpTiles": 2,
"openEnd": 0
}
},
{
"or": [
"canDownBack",
"canTrickyJump"
]
},
{
"heatFrames": 120
},
{
"autoReserveTrigger": {
"maxReserveEnergy": 95
}
},
"canRModeSparkInterrupt"
],
"clearsObstacles": [
"A"
],
"flashSuitChecked": true,
"blueSuitChecked": true,
"note": [
"Get past the spike Alcoons, and climb up - leave the lower left Alcoon alive to use for later.",
"Clear the runway Alcoon and get the shinecharge, then drop into the lower left Alcoon to interrupt.",
"If you Crystal Flash early, stay near the door to ensure you kill only the two spike Alcoons."
]
},
{
"id": 97,
"link": [
3,
7
],
"name": "Direct G-Mode Spark Interrupt",
"entranceCondition": {
"comeInWithGMode": {
"mode": "direct",
"morphed": false
}
},
"requires": [
{
"or": [
"canWallJump",
"HiJump",
"canSpringBallJumpMidAir",
"SpaceJump",
{
"and": [
"canIBJ",
"canBombHorizontally",
"canJumpIntoIBJ"
]
},
{
"and": [
"canUseFrozenEnemies",
"canInsaneJump"
]
}
]
},
"h_CrystalFlashForReserveEnergy",
{
"canShineCharge": {
"usedTiles": 27,
"gentleUpTiles": 2,
"openEnd": 0
}
},
{
"or": [
"canDownBack",
"canTrickyJump"
]
},
{
"or": [
{
"and": [
{
"disableEquipment": "ETank"
},
{
"autoReserveTrigger": {}
},
"canRModeSparkInterrupt",
{
"enemyDamage": {
"enemy": "Alcoon",
"type": "contact",
"hits": 1
}
}
]
},
{
"and": [
"canReserveTriggerBufferXRay",
{
"autoReserveTrigger": {
"implicitHeatFrames": "no"
}
},
"canRModePauseAbuseSparkInterrupt",
{
"heatFrames": 30
}
]
}
]
}
],
"clearsObstacles": [
"A"
],
"flashSuitChecked": true,
"blueSuitChecked": true,
"note": [
"Kill the spike Alcoons before climbing to the upper runway. Be sure to jump over the invisible fireball projectiles.",
"Crystal Flash at the top right, just before Samus goes off-screen, to clear the runway Alcoon.",
"Shinecharge to the left, then weave down and into the Alcoon to interrupt."
]
},
{
"id": 19,
"link": [
3,
7
],
"name": "Base",
"requires": [
"canDash",
"ScrewAttack",
{
"or": [
"canCarefulJump",
{
"heatFrames": 55
}
]
},
{
"heatFrames": 85
}
],
"flashSuitChecked": true,
"blueSuitChecked": true
},
{
"id": 98,
"link": [
3,
7
],
"name": "Blue Suit",
"requires": [
{
"haveBlueSuit": {}
},
{
"heatFrames": 150
}
],
"flashSuitChecked": true,
"blueSuitChecked": true
},
{
"id": 20,
"link": [
3,
7
],
"name": "Kill While Running",
"requires": [
"canDash",
"canDodgeWhileShooting",
{
"or": [
{
"enemyKill": {
"enemies": [
[
"Alcoon"
]
],
"explicitWeapons": [
"Missile",
"Super",
"Wave+Plasma"
]
}
},
{
"and": [
"canPrepareForNextRoom",
"Charge",
"Wave",
"Spazer"
]
},
{
"and": [
"canPseudoScrew",
{
"heatFrames": 30
}
]
}
]
},
{
"or": [
"canTrickyJump",
{
"heatFrames": 10
}
]
},
{
"heatFrames": 85
}
],
"flashSuitChecked": true,
"blueSuitChecked": true,
"note": "Kill the Alcoon without stopping."
},
{
"id": 21,
"link": [
3,
7
],
"name": "Blue Speed",
"entranceCondition": {
"comeInGettingBlueSpeed": {
"length": 7,
"openEnd": 1,
"gentleDownTiles": 4,
"minExtraRunSpeed": "$1.8"
}
},
"requires": [
"h_blueJump",
{
"heatFrames": 60
}
],
"flashSuitChecked": true,
"blueSuitChecked": true,
"note": "Use blue speed to kill the Alcoons without stopping."
},
{
"id": 22,
"link": [
3,
7
],
"name": "Stop To Kill",
"requires": [
{
"enemyKill": {
"enemies": [
[
"Alcoon",
"Alcoon"
]
],
"explicitWeapons": [
"Missile",
"Super",
"Plasma",
"Wave+Spazer"
]
}
},
{
"heatFrames": 200
}
],
"flashSuitChecked": true,
"blueSuitChecked": true
},
{
"id": 23,
"link": [
3,
7
],
"name": "Jump Over",
"requires": [
"canDash",
"canCarefulJump",
{
"heatFrames": 200
}
],
"flashSuitChecked": true,
"blueSuitChecked": true
},
{
"id": 99,
"link": [
3,
7
],
"name": "Gap Skip",
"requires": [
"canDash",
"canTrickyJump",
{
"heatFrames": 130
}
],
"flashSuitChecked": true,
"blueSuitChecked": true,
"note": [
"Run and aim down mid-air to gap skip under the first Alcoon as it ascends.",
"Then wait to jump over the second one."
]
},
{
"id": 100,
"link": [
3,
7
],
"name": "Jump Under",
"requires": [
"canDash",
"canInsaneJump",
{
"heatFrames": 105
}
],
"flashSuitChecked": true,
"blueSuitChecked": true,
"note": [
"Run and jump under the first Alcoon as it ascends.",
"Fire a shot to stun the second Alcoon while running and jumping under it as well."
]
},
{
"id": 24,
"link": [
3,
7
],
"name": "Tank the Damage",
"requires": [
"canDash",
{
"enemyDamage": {
"enemy": "Alcoon",
"type": "contact",
"hits": 1
}
},
{
"heatFrames": 180
}
],
"flashSuitChecked": true,
"blueSuitChecked": true
},
{
"id": 25,
"link": [
3,
7
],
"name": "Slow Kill",
"requires": [
"h_heatProof",
"canDodgeWhileShooting"
],
"flashSuitChecked": true,
"blueSuitChecked": true
},
{
"id": 26,
"link": [
3,
7
],
"name": "Grapple Teleport",
"entranceCondition": {
"comeInWithGrappleTeleport": {
"blockPositions": [
[
2,
18
],
[
2,
19
],
[
2,
28
],
[
2,
29
]
]
}
},
"requires": [
"canOffScreenMovement",
{
"heatFrames": 80
}
],
"flashSuitChecked": true,
"blueSuitChecked": true,
"note": "Get out of the wall if necessary; then do a blind jump over the Alcoon."
},
{
"id": 27,
"link": [
4,
1
],
"name": "Leave Shinecharged",
"requires": [
{
"canShineCharge": {
"usedTiles": 27,
"gentleUpTiles": 2,
"openEnd": 0
}
},
{
"obstaclesCleared": [
"A"
]
},
{
"heatFrames": 260
},
"canShinechargeMovement",
{
"shineChargeFrames": 90
}
],
"exitCondition": {
"leaveShinecharged": {}
},
"unlocksDoors": [
{
"types": [
"missiles"
],
"requires": [
{
"heatFrames": 240
}
]
},
{
"types": [
"super"
],
"requires": []
},
{
"types": [
"powerbomb"
],
"requires": [
{
"heatFrames": 240
}
]
}
],
"flashSuitChecked": true,
"blueSuitChecked": true,
"devNote": "Most of the time 1 can be unlocked on the way to 4."
},
{
"id": 28,
"link": [
4,
3
],
"name": "Leave Shinesparking - Open Door First",
"requires": [
{
"canShineCharge": {
"usedTiles": 27,
"gentleUpTiles": 2,
"openEnd": 1
}
},
{
"obstaclesCleared": [
"A",
"C"
]
},
{
"heatFrames": 390
},
"canShinechargeMovement",
{
"shinespark": {
"frames": 35,
"excessFrames": 0
}
}
],
"exitCondition": {
"leaveWithSpark": {
"position": "bottom"
}
},
"unlocksDoors": [
{
"types": [
"missiles"
],
"requires": [
{
"heatFrames": 50
}
]
},
{
"types": [
"super"
],
"requires": []
},
{
"types": [
"powerbomb"
],
"requires": [
{
"heatFrames": 30
}
]
}
],
"flashSuitChecked": true,
"blueSuitChecked": true,
"note": [
"Open the door to be able to spark out.",
"Shinecharge near the missile location, then fall back down and spark out the right door.",
"The door must have been opened prior in order to be able to spark out of it."
]
},
{
"id": 29,
"link": [
4,
3
],
"name": "Leave Shinesparking Through Top of Door - Open Door First",
"requires": [
{
"canShineCharge": {
"usedTiles": 27,
"gentleUpTiles": 2,
"openEnd": 1
}
},
{
"obstaclesCleared": [
"A",
"C"
]
},
{
"heatFrames": 390
},
"canTrickyJump",
"canShinechargeMovementComplex",
{
"shinespark": {
"frames": 30,
"excessFrames": 0
}
}
],
"exitCondition": {
"leaveWithSpark": {}
},
"unlocksDoors": [
{
"types": [
"missiles"
],
"requires": [
{
"heatFrames": 50
}
]
},
{
"types": [
"super"
],
"requires": []
},
{
"types": [
"powerbomb"
],
"requires": [
{
"heatFrames": 30
}
]
}
],
"flashSuitChecked": true,
"blueSuitChecked": true,
"note": [
"Open the door to be able to spark out.",
"Shinecharge near the missile location, then fall back down and run to the right before sparking out the right door.",
"The Alcoons must have been cleared prior in order to be able to spark out."
]
},
{
"id": 30,
"link": [
4,
3
],
"name": "Hero Shot Shinespark through the Right Door",
"requires": [
{
"canShineCharge": {
"usedTiles": 27,
"gentleUpTiles": 2,
"openEnd": 1
}
},
{
"obstaclesCleared": [
"A"
]
},
{
"heatFrames": 370
},
"canTrickyJump",
"canShinechargeMovementComplex",
"canHeroShot",
{
"shinespark": {
"frames": 31,
"excessFrames": 0
}
},
{
"doorUnlockedAtNode": 3
}
],
"exitCondition": {
"leaveWithSpark": {
"position": "bottom"
}
},
"unlocksDoors": [
{
"types": [
"super"
],
"requires": []
},
{
"types": [
"missiles",
"powerbomb"
],
"requires": [
"never"
]
}
],
"flashSuitChecked": true,
"blueSuitChecked": true,
"note": [
"Shinecharge near the missile location, then fall down and shoot a beam shot through the lower half of the large stalactite.",
"Shinespark to the right before the shot goes off screen, and have it open the door before Samus gets there."
]
},
{
"id": 31,
"link": [
4,
4
],
"name": "Crystal Flash",
"requires": [
"h_heatedCrystalFlash"
],
"clearsObstacles": [
"B"
],
"flashSuitChecked": true,
"blueSuitChecked": true
},
{
"id": 32,
"link": [
4,
5
],
"name": "Blocks Broken",
"requires": [
{
"or": [
{
"and": [
"canTrivialMidAirMorph",
{
"heatFrames": 190
}
]
},
{
"and": [
"h_useSpringBall",
"HiJump",
{
"heatFrames": 190
}
]
},
{
"and": [
"h_useSpringBall",
"canInsaneJump",
{
"heatFrames": 100
}
]
},
{
"and": [
"h_useMorphBombs",
"canInsaneJump",
{
"heatFrames": 160
}
]
}
]
},
{
"or": [
{
"obstaclesCleared": [
"B"
]
},
{
"haveBlueSuit": {}
}
]
}
],
"flashSuitChecked": true,
"blueSuitChecked": true
},
{
"id": 33,
"link": [
4,
5
],
"name": "Bombs",
"requires": [
{
"or": [
"canTrivialMidAirMorph",
"h_useSpringBall"
]
},
{
"obstaclesNotCleared": [
"B"
]
},
"h_useMorphBombs",
{
"or": [
{
"and": [
"canInsaneJump",
{
"heatFrames": 245
}
]
},
{
"heatFrames": 330
}
]
}
],
"clearsObstacles": [
"B"
],
"flashSuitChecked": true,
"blueSuitChecked": true
},
{
"id": 34,
"link": [
4,
5
],
"name": "Power Bombs",
"requires": [
"h_usePowerBomb",
{
"or": [
{
"and": [
"canTrivialMidAirMorph",
{
"heatFrames": 250
}
]
},
{
"and": [
"h_useSpringBall",
"HiJump",
{
"heatFrames": 250
}
]
},
{
"and": [
"h_useSpringBall",
"canInsaneJump",
{
"heatFrames": 170
}
]
}
]
}
],
"clearsObstacles": [
"B"
],
"flashSuitChecked": true,
"blueSuitChecked": true
},
{
"id": 35,
"link": [
4,
6
],
"name": "Base",
"requires": [
"canDash",
{
"obstaclesCleared": [
"A"
]
},
{
"heatFrames": 150
}
],
"flashSuitChecked": true,
"blueSuitChecked": true
},
{
"id": 101,
"link": [
4,
6
],
"name": "Blue Suit",
"requires": [
{
"haveBlueSuit": {}
},
{
"heatFrames": 210
}
],
"flashSuitChecked": true,
"blueSuitChecked": true
},
{
"id": 36,
"link": [
4,
6
],
"name": "Quick Kill",
"requires": [
"canDash",
{
"enemyKill": {
"enemies": [
[
"Alcoon"
]
],
"explicitWeapons": [
"Missile",
"Super",
"Plasma",
"ScrewAttack",
"PseudoScrew"
]
}
},
{
"heatFrames": 190
}
],
"clearsObstacles": [
"A"
],
"flashSuitChecked": true,
"blueSuitChecked": true,
"note": "Jump over the Alcoon's fireball and kill it and run through.",
"devNote": "Beams that take more than two shots are generally not quick enough to justify."
},
{
"id": 37,
"link": [
4,
6
],
"name": "Tank Fireball and Run Through",
"requires": [
"canDash",
{
"enemyDamage": {
"enemy": "Alcoon",
"type": "fireball",
"hits": 1
}
},
{
"heatFrames": 170
}
],
"flashSuitChecked": true,
"blueSuitChecked": true
},
{
"id": 38,
"link": [
4,
6
],
"name": "Slow Kill",
"requires": [
"canDash",
{
"or": [
{
"and": [
"canDodgeWhileShooting",
{
"heatFrames": 200
}
]
},
{
"and": [
"Morph",
{
"heatFrames": 200
}
]
},
{
"and": [
{
"enemyDamage": {
"enemy": "Alcoon",
"type": "fireball",
"hits": 1
}
},
{
"heatFrames": 160
}
]
}
]
}
],
"clearsObstacles": [
"A"
],
"flashSuitChecked": true,
"blueSuitChecked": true
},
{
"id": 74,
"link": [
4,
7
],
"name": "Gain Flash Suit (Top Runway, Spikesuit)",
"requires": [
{
"obstaclesCleared": [
"A"
]
},
{
"canShineCharge": {
"usedTiles": 27,
"gentleUpTiles": 2,
"openEnd": 1
}
},
{
"spikeHits": 1
},
"h_spikeSuitSpikeHitLeniency",
"h_heatProof",
"canSpikeSuit",
{
"shinespark": {
"frames": 6,
"excessFrames": 6
}
}
],
"flashSuitChecked": true,
"blueSuitChecked": true,
"devNote": [
"FIXME: h_heatProof isn't really required, but we don't yet have a good way to express how spike suit leniency impacts heat frames.",
"FIXME: using the bottom-left runway or a neighboring room would also be possible."
]
},
{
"id": 39,
"link": [
5,
2
],
"name": "Base",
"requires": [
{
  "or": [
    {
      "and": [
        "h_useSpringBall",
        {
          "heatFrames": 475
        }
      ]
    },
    {
      "and": [
        "canTrivialMidAirMorph",
        {
          "heatFrames": 530
        }
      ]
    }
  ]
}
],
"unlocksDoors": [
{
"types": [
"powerbomb"
],
"requires": []
}
],
"flashSuitChecked": true,
"blueSuitChecked": true
},
{
"id": 40,
"link": [
5,
4
],
"name": "Base",
"requires": [
{
"or": [
"canTrivialMidAirMorph",
{
"and": [
"HiJump",
"h_useSpringBall"
]
}
]
},
{
"heatFrames": 70
}
],
"flashSuitChecked": true,
"blueSuitChecked": true
},
{
"id": 41,
"link": [
5,
5
],
"name": "Crystal Flash",
"requires": [
"h_heatedCrystalFlash"
],
"flashSuitChecked": true,
"blueSuitChecked": true
},
{
"id": 42,
"link": [
6,
1
],
"name": "Base",
"requires": [
{
  "or": [
    {
      "and": [
        "canDash",
        {
          "heatFrames": 45
        }
      ]
    },
    {
      "heatFrames": 110
    }
  ]
}
],
"unlocksDoors": [
{
"types": [
"missiles"
],
"requires": [
{
"heatFrames": 20
}
]
}
],
"flashSuitChecked": true,
"blueSuitChecked": true,
"devNote": [
"The heat frames assume coming from the right with full dash speed ($2.0)."
]
},
{
"id": 43,
"link": [
6,
4
],
"name": "Base",
"requires": [
{
"obstaclesCleared": [
"A"
]
},
{
"heatFrames": 130
},
{
"or": [
"canDash",
{
"heatFrames": 70
}
]
}
],
"flashSuitChecked": true,
"blueSuitChecked": true
},
{
"id": 44,
"link": [
6,
4
],
"name": "Avoid",
"requires": [
"canDodgeWhileShooting",
{
"heatFrames": 130
},
{
"or": [
"canDash",
{
"heatFrames": 70
}
]
}
],
"flashSuitChecked": true,
"blueSuitChecked": true,
"note": "Run under the Alcoon as it spawns",
"devNote": "canDodgeWhileShooting represents the knowledge of how this Alcoon spawns and that you can run under it."
},
{
"id": 45,
"link": [
6,
4
],
"name": "Kill Without Stopping",
"requires": [
"canDodgeWhileShooting",
{
"enemyKill": {
"enemies": [
[
"Alcoon"
]
],
"explicitWeapons": [
"Missile",
"Super",
"Charge+Plasma"
]
}
},
{
"heatFrames": 130
},
{
"or": [
"canDash",
{
"heatFrames": 70
}
]
}
],
"clearsObstacles": [
"A"
],
"flashSuitChecked": true,
"blueSuitChecked": true,
"note": "Kill the Alcoon in one hit as it spawns."
},
{
"id": 46,
"link": [
6,
4
],
"name": "Stop and Kill",
"requires": [
"canDash",
{
"enemyKill": {
"enemies": [
[
"Alcoon"
]
],
"explicitWeapons": [
"Missile",
"Super",
"Wave",
"Ice+Spazer",
"Plasma",
"ScrewAttack",
"PseudoScrew",
"PowerBomb"
]
}
},
{
"heatFrames": 180
}
],
"clearsObstacles": [
"A"
],
"flashSuitChecked": true,
"blueSuitChecked": true,
"note": "Let the Alcoon spawn and then defeat it."
},
{
"id": 47,
"link": [
6,
4
],
"name": "Slow Kill",
"requires": [
"canDash",
{
"or": [
{
"and": [
"canDodgeWhileShooting",
{
"heatFrames": 200
}
]
},
{
"and": [
"Morph",
{
"heatFrames": 200
}
]
},
{
"and": [
{
"enemyDamage": {
"enemy": "Alcoon",
"type": "fireball",
"hits": 1
}
},
{
"heatFrames": 160
}
]
}
]
}
],
"clearsObstacles": [
"A"
],
"flashSuitChecked": true,
"blueSuitChecked": true
},
{
"id": 48,
"link": [
6,
5
],
"name": "Air Speedball",
"requires": [
{
"notable": "Air Speedball"
},
{
"getBlueSpeed": {
"usedTiles": 26,
"gentleDownTiles": 2,
"openEnd": 1
}
},
"canSpeedball",
"canLateralMidAirMorph",
"h_useSpringBall",
{
"heatFrames": 160
}
],
"clearsObstacles": [
"B"
],
"flashSuitChecked": true,
"blueSuitChecked": true,
"note": "Jump and Morph with a speedball to enter the morph tunnel and then use SpringBall to break the bomb blocks."
},
{
"id": 49,
"link": [
6,
6
],
"name": "Crystal Flash",
"requires": [
"h_heatedCrystalFlash"
],
"flashSuitChecked": true,
"blueSuitChecked": true
},
{
"id": 106,
"link": [
6,
6
],
"name": "Crystal Spark",
"requires": [
{
"obstaclesCleared": [
"A"
]
},
{
"canShineCharge": {
"usedTiles": 27,
"gentleDownTiles": 2,
"openEnd": 1
}
},
{
"or": [
{
"and": [
"h_enemyDrops",
"h_heatedCrystalSparkWithoutLenience"
]
},
"h_heatedCrystalSpark"
]
}
],
"flashSuitChecked": true,
"blueSuitChecked": true
},
{
"id": 50,
"link": [
6,
7
],
"name": "Base",
"requires": [
{
"heatFrames": 160
},
{
"or": [
"canDash",
{
"heatFrames": 50
}
]
}
],
"flashSuitChecked": true,
"blueSuitChecked": true
},
{
"id": 51,
"link": [
6,
7
],
"name": "Weave",
"requires": [
{
"or": [
"canDownBack",
"canTrickyJump"
]
},
{
"or": [
{
"and": [
"canDash",
{
"heatFrames": 75
}
]
},
{
"heatFrames": 125
}
]
}
],
"flashSuitChecked": true,
"blueSuitChecked": true
},
{
"id": 52,
"link": [
7,
1
],
"name": "Base",
"requires": [
{
"or": [
{
"and": [
"HiJump",
{
"heatFrames": 140
}
]
},
{
"and": [
"canWallJump",
{
"heatFrames": 170
}
]
},
{
"and": [
"canSpringBallJumpMidAir",
{
"heatFrames": 170
}
]
},
{
"and": [
"SpaceJump",
{
"heatFrames": 180
}
]
}
]
},
{
"or": [
"canDash",
{
"heatFrames": 20
}
]
}
],
"unlocksDoors": [
{
"types": [
"powerbomb"
],
"requires": [
{
"heatFrames": 60
}
]
}
],
"flashSuitChecked": true,
"blueSuitChecked": true
},
{
"id": 53,
"link": [
7,
1
],
"name": "Spring Ball Bomb Jump",
"requires": [
"canSpringBallBombJump",
{
"heatFrames": 240
}
],
"unlocksDoors": [
{
"types": [
"powerbomb"
],
"requires": [
{
"heatFrames": 60
}
]
}
],
"flashSuitChecked": true,
"blueSuitChecked": true
},
{
"id": 54,
"link": [
7,
1
],
"name": "Avoid Spawning Alcoon and IBJ",
"requires": [
"canIBJ",
{
"or": [
{
"and": [
"canBombHorizontally",
{
"heatFrames": 840
}
]
},
{
"and": [
"canJumpIntoIBJ",
"canDoubleBombJump",
{
"heatFrames": 275
}
]
},
{
"and": [
"canJumpIntoIBJ",
{
"heatFrames": 420
}
]
}
]
},
{
"or": [
"canDash",
{
"heatFrames": 20
}
]
}
],
"unlocksDoors": [
{
"types": [
"powerbomb"
],
"requires": [
{
"heatFrames": 60
}
]
}
],
"flashSuitChecked": true,
"blueSuitChecked": true
},
{
"id": 55,
"link": [
7,
1
],
"name": "Kill Alcoon and IBJ",
"requires": [
"canIBJ",
{
"or": [
{
"enemyKill": {
"enemies": [
[
"Alcoon"
]
],
"explicitWeapons": [
"Missile",
"Super",
"Plasma",
"Wave+Spazer",
"PseudoScrew",
"ScrewAttack"
]
}
},
{
"heatFrames": 270
}
]
},
{
"heatFrames": 910
}
],
"unlocksDoors": [
{
"types": [
"powerbomb"
],
"requires": [
{
"heatFrames": 60
}
]
}
],
"flashSuitChecked": true,
"blueSuitChecked": true
},
{
"id": 56,
"link": [
7,
1
],
"name": "Tricky Dash Jump",
"requires": [
"canTrickyDashJump",
{
"heatFrames": 240
},
{
"or": [
"canInsaneJump",
{
"heatFrames": 480
}
]
}
],
"unlocksDoors": [
{
"types": [
"powerbomb"
],
"requires": [
{
"heatFrames": 60
}
]
}
],
"flashSuitChecked": true,
"blueSuitChecked": true,
"note": "Jump from the bottom of the slope with about 6.5 tiles of run speed."
},
{
"id": 57,
"link": [
7,
1
],
"name": "Frozen Alcoon",
"requires": [
"canUseFrozenEnemies",
{
"heatFrames": 330
},
{
"or": [
"canDash",
{
"heatFrames": 20
}
]
}
],
"unlocksDoors": [
{
"types": [
"powerbomb"
],
"requires": [
{
"heatFrames": 60
}
]
}
],
"flashSuitChecked": true,
"blueSuitChecked": true
},
{
"id": 58,
"link": [
7,
3
],
"name": "Kill While Running",
"requires": [
"canDash",
"canDodgeWhileShooting",
{
"or": [
{
"enemyKill": {
"enemies": [
[
"Alcoon"
]
],
"explicitWeapons": [
"Missile",
"Super",
"Wave+Plasma",
"PseudoScrew",
"ScrewAttack",
"Charge+Wave+Spazer",
"Shinespark"
]
}
},
{
"and": [
"Plasma",
"canHitbox"
]
}
]
},
{
"heatFrames": 110
}
],
"flashSuitChecked": true,
"blueSuitChecked": true,
"note": "Kill the Alcoon without stopping."
},
{
"id": 59,
"link": [
7,
3
],
"name": "Stop To Kill",
"requires": [
{
"enemyKill": {
"enemies": [
[
"Alcoon",
"Alcoon"
]
],
"explicitWeapons": [
"Missile",
"Super",
"Plasma",
"Wave+Spazer"
]
}
},
{
"heatFrames": 240
}
],
"unlocksDoors": [
{
"types": [
"missiles"
],
"requires": [
{
"heatFrames": 30
}
]
}
],
"flashSuitChecked": true,
"blueSuitChecked": true
},
{
"id": 60,
"link": [
7,
3
],
"name": "Jump Over",
"requires": [
"canDash",
"canCarefulJump",
{
"heatFrames": 240
}
],
"flashSuitChecked": true,
"blueSuitChecked": true,
"note": [
"Jump over the Alcoons one at a time."
]
},
{
"id": 102,
"link": [
7,
3
],
"name": "Blue Suit",
"requires": [
{
"haveBlueSuit": {}
},
{
"heatFrames": 130
}
],
"flashSuitChecked": true,
"blueSuitChecked": true
},
{
"id": 103,
"link": [
7,
3
],
"name": "Tricky Jump",
"requires": [
"canDash",
"canTrickyJump",
{
"heatFrames": 150
}
],
"flashSuitChecked": true,
"blueSuitChecked": true,
"note": [
"Jump under the first Alcoon as it emerges from the spikes; then jump over the second.",
"Alternatively, trigger the first Alcoon to spawn, wait for it to descend,",
"then run and do a big jump over both Alcoons."
]
},
{
"id": 104,
"link": [
7,
3
],
"name": "Insane Jump Under",
"requires": [
"canDash",
"canInsaneJump",
{
"heatFrames": 120
}
],
"flashSuitChecked": true,
"blueSuitChecked": true,
"note": [
"Run and jump under the first Alcoon as it ascends.",
"Fire a shot to stun the second Alcoon while running and jumping under it as well."
]
},
{
"id": 61,
"link": [
7,
3
],
"name": "Tank the Damage",
"requires": [
"canDash",
{
"enemyDamage": {
"enemy": "Alcoon",
"type": "contact",
"hits": 1
}
},
{
"heatFrames": 180
}
],
"unlocksDoors": [
{
"types": [
"missiles"
],
"requires": [
{
"heatFrames": 30
}
]
}
],
"flashSuitChecked": true,
"blueSuitChecked": true
},
{
"id": 62,
"link": [
7,
3
],
"name": "Slow Kill",
"requires": [
"h_heatProof",
"canDodgeWhileShooting"
],
"flashSuitChecked": true,
"blueSuitChecked": true
},
{
"id": 63,
"link": [
7,
6
],
"name": "Base",
"requires": [
{
"or": [
{
"and": [
"HiJump",
{
"heatFrames": 120
}
]
},
{
"and": [
"canWallJump",
{
"heatFrames": 150
}
]
},
{
"and": [
"canSpringBallJumpMidAir",
{
"heatFrames": 150
}
]
},
{
"and": [
"SpaceJump",
{
"heatFrames": 160
}
]
}
]
},
{
"or": [
"canDash",
{
"heatFrames": 25
}
]
}
],
"flashSuitChecked": true,
"blueSuitChecked": true
},
{
"id": 64,
"link": [
7,
6
],
"name": "Spring Ball Bomb Jump",
"requires": [
"canSpringBallBombJump",
{
"heatFrames": 220
}
],
"flashSuitChecked": true,
"blueSuitChecked": true
},
{
"id": 65,
"link": [
7,
6
],
"name": "Avoid Spawning Alcoon and IBJ",
"requires": [
"canIBJ",
{
"or": [
{
"and": [
"canBombHorizontally",
{
"heatFrames": 820
}
]
},
{
"and": [
"canJumpIntoIBJ",
"canDoubleBombJump",
{
"heatFrames": 255
}
]
},
{
"and": [
"canJumpIntoIBJ",
{
"heatFrames": 400
}
]
}
]
},
{
"or": [
"canDash",
{
"heatFrames": 25
}
]
}
],
"flashSuitChecked": true,
"blueSuitChecked": true
},
{
"id": 66,
"link": [
7,
6
],
"name": "Kill Alcoon and IBJ",
"requires": [
"canIBJ",
{
"or": [
{
"enemyKill": {
"enemies": [
[
"Alcoon"
]
],
"explicitWeapons": [
"Missile",
"Super",
"Plasma",
"Wave+Spazer",
"PseudoScrew",
"ScrewAttack"
]
}
},
{
"heatFrames": 270
}
]
},
{
"heatFrames": 890
}
],
"flashSuitChecked": true,
"blueSuitChecked": true
},
{
"id": 67,
"link": [
7,
6
],
"name": "Tricky Dash Jump",
"requires": [
"canTrickyDashJump",
{
"heatFrames": 220
},
{
"or": [
"canInsaneJump",
{
"heatFrames": 480
}
]
}
],
"flashSuitChecked": true,
"blueSuitChecked": true,
"note": "Jump from the bottom of the slope with about 6.5 tiles of run speed."
},
{
"id": 68,
"link": [
7,
6
],
"name": "Frozen Alcoon",
"requires": [
"h_navigateHeatRooms",
"canUseFrozenEnemies",
{
"heatFrames": 310
},
{
"or": [
"canDash",
{
"heatFrames": 25
}
]
}
],
"flashSuitChecked": true,
"blueSuitChecked": true
},
{
"id": 111,
"link": [
7,
7
],
"name": "Gain Blue Suit (X-Mode)",
"requires": [
{
"canShineCharge": {
"usedTiles": 14,
"gentleUpTiles": 1,
"gentleDownTiles": 1,
"steepUpTiles": 1,
"steepDownTiles": 1,
"openEnd": 0
}
},
"h_heatProof",
"h_spikeXModeBlueSuit",
{
"shinespark": {
"frames": 2
}
}
],
"flashSuitChecked": true,
"blueSuitChecked": true
},
{
"id": 70,
"link": [
7,
7
],
"name": "Crystal Flash",
"requires": [
"h_heatedCrystalFlash"
],
"flashSuitChecked": true,
"blueSuitChecked": true
},
{
"id": 71,
"link": [
7,
7
],
"name": "Open Right Door",
"requires": [
"canCarefulJump",
{
"heatFrames": 200
}
],
"clearsObstacles": [
"C"
],
"flashSuitChecked": true,
"blueSuitChecked": true,
"note": "Jump over the Alcoon and shoot open the door, then return."
}
],
"notables": [
{
"id": 1,
"name": "Crystal Flash Clip",
"note": "Perform the crystal flash all the way against the left wall of the accessible tunnel, then jump through the ceiling."
},
{
"id": 2,
"name": "Air Speedball",
"note": "Jump and Morph with a speedball to enter the morph tunnel and then use SpringBall to break the bomb blocks."
}
],
"nextStratId": 112,
"nextNotableId": 3,
"devNote": [
"FIXME: it could help to add a node at the end of the platform above node 7,",
"to eliminate the duplication in 7->1 and 7->6 strats.",
"FIXME: add useFlashSuit strat to get up from node 7."
]
}