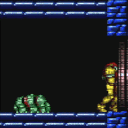
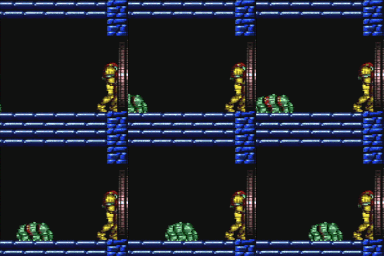
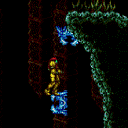
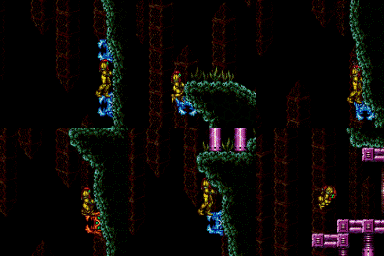
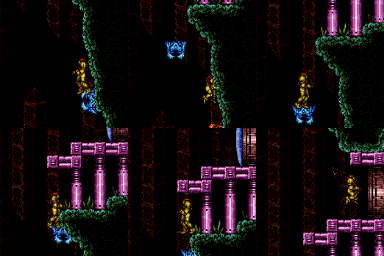
canBeVeryPatient (Insane)
Executing a strat that requires waiting or doing the same thing over and over again for a long time, potentially more than 3 minutes, even with good execution.
Dependencies: canBePatient
Strats ()
|
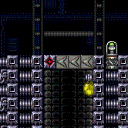
Climb up 7 screens. Entrance condition: {
"comeInWithDoorStuckSetup": {}
}
Requires: "canXRayClimb" "canBeVeryPatient" |
|
Enter with G-mode direct, back up to between 1 and 6 pixels from the door transition, and activate X-ray to get very deep stuck in the door. Climb up 7 screens, and perform a turnaround buffered spin-jump away from the door to trigger the transition, bypassing any lock on the door. Entrance condition: {
"comeInWithGMode": {
"mode": "direct",
"morphed": false
}
}
Requires: "canXRayClimb" "canBeVeryPatient" Bypasses door shell: true |
|
From: 5
Bottom Right Door
To: 3
Top Right Door
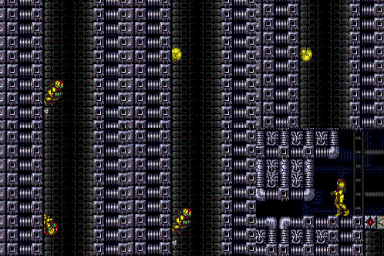
Use an X-Ray climb to position Samus to where she can break the Bomb block with Screw Attack. This is an 8 screen climb. Entrance condition: {
"comeInWithDoorStuckSetup": {}
}
Requires: "ScrewAttack" "Morph" "canBeVeryPatient" "canXRayClimb" |
|
From: 2
Bottom Left Door
To: 1
Top Left Door
Enter with G-mode direct, back up to between 1 and 6 pixels from the door transition, and activate X-ray to get very deep stuck in the door. Climb up 7 screens, and perform a turnaround buffered spin-jump away from the door to trigger the transition, bypassing any lock on the door. Entrance condition: {
"comeInWithGMode": {
"mode": "direct",
"morphed": false
}
}
Requires: "canXRayClimb" "canBeVeryPatient" Bypasses door shell: true |
|
Climb up 7 screens. Entrance condition: {
"comeInWithDoorStuckSetup": {}
}
Requires: "canXRayClimb" "canBeVeryPatient" |
|
From: 2
Bottom Left Door
To: 3
Item
Notable: true Ascend with a long IBJ, then ceiling bomb jump against the speed blocks to overload the PLMs. Falling is very unforgiving. Note that the boyons can be killed with bombs. Entrance condition: {
"comeInWithGMode": {
"mode": "any",
"morphed": true
}
}
Requires: "h_canArtificialMorphCeilingBombJump" "canBeVeryPatient" |
|
Notable: true Wall jump up 9 times, placing a PB at the top. Only works in direct g-mode with the item still uncollected. Entrance condition: {
"comeInWithGMode": {
"mode": "direct",
"morphed": false
}
}
Requires: {
"itemNotCollectedAtNode": 3
}
"canConsecutiveWalljump"
"Morph"
{
"or": [
"canRiskPermanentLossOfAccess",
"canXRayClimb"
]
}
{
"ammo": {
"type": "PowerBomb",
"count": 9
}
}
"canBeVeryPatient"
{
"or": [
"canUseFrozenEnemies",
"canTrickyJump",
{
"and": [
"ScrewAttack",
"SpaceJump"
]
},
{
"and": [
"canCarefulJump",
{
"or": [
"ScrewAttack",
"SpeedBooster"
]
}
]
},
{
"enemyKill": {
"enemies": [
[
"Boyon",
"Boyon",
"Boyon",
"Boyon"
]
]
}
},
{
"enemyDamage": {
"enemy": "Boyon",
"hits": 1,
"type": "contact"
}
}
]
}
|
|
Enter with G-mode direct, back up to between 1 and 6 pixels from the door transition, and activate X-ray to get very deep stuck in the door. Climb up 3 screens, and perform a turnaround buffered spin-jump away from the door to trigger the transition, bypassing any lock on the door. Entrance condition: {
"comeInWithGMode": {
"mode": "direct",
"morphed": false
}
}
Requires: "canXRayClimb" "canBeVeryPatient" Bypasses door shell: true |
|
It takes approximately 3.5 minutes for a global Geemer to reach this location. If using a Super, fire between 19 and 33 seconds after entering the room, then wait approximately 30 more seconds to be hit. Requires: {
"enemyDamage": {
"enemy": "Geemer (blue)",
"type": "contact",
"hits": 1
}
}
"h_ZebesIsAwake"
{
  "or": [
    "canBeVeryPatient",
    {
      "ammo": {
        "type": "Super",
        "count": 1
      }
    }
  ]
}
|
|
From: 5
Alcatraz Door
To: 5
Alcatraz Door
It takes approximately 3.5 minutes for a global Geemer to reach this location, but this can be reduced by using a Super between 19 and 33 seconds after entering the room, to make a Geemer fall and take a shorter path. Requires: "h_ZebesIsAwake"
{
"or": [
"canBeVeryPatient",
{
"ammo": {
"type": "Super",
"count": 1
}
}
]
}
Exit condition: {
"leaveWithGModeSetup": {}
}
|
|
From: 5
Alcatraz Door
To: 8
Central Junction
Notable: true Wait 3 minutes for a global Geemer to waddle over, or shoot a Super 20 to 30 seconds after entering the room to knock it off the ceiling and save a lot of time. Damage down until Samus is one Geemer hit away from running out of energy, and set reserves to manual. Crouch jump at a very precise time and mid-air morph to contact the Geemer at the peak of the jump, pressing pause to be in the fade-out while getting hit and reaching 0 energy. Set reserves to auto, unpause, and hold left. While reserves are auto-refilling, Samus' i-frames will run out, allowing Samus to be hit by the Geemer again and be boosted high enough to reach the ledge. The screen will be black, which can be fixed by pausing and unpausing again. Requires: "h_ZebesIsAwake"
"HiJump"
"Morph"
{
"or": [
"canBeVeryPatient",
{
"ammo": {
"type": "Super",
"count": 1
}
}
]
}
"canCrouchJump"
"canInsaneJump"
"canPauseAbuse"
"canNeutralDamageBoost"
{
"autoReserveTrigger": {
"minReserveEnergy": 85
}
}
{
"enemyDamage": {
"enemy": "Geemer (blue)",
"type": "contact",
"hits": 1
}
}
|
|
From: 5
Alcatraz Door
To: 8
Central Junction
Notable: true Enter with direct G-Mode artificial morph, and perform a Crystal Flash to refill reserve energy. Do this all the way to the left, to prevent the Geemer from being destroyed by the lingering light orb. Wait for a global Geemer to make the long trip along the map, or shoot a Super 20 to 30 seconds after entering the room to knock it off the ceiling and save a lot of time. Either way, after the Geemer comes down into Alcatraz, shoot a Super to knock it off the ledge to make it bypass the light orb. Damage down until one Geemer hit away from running out of energy. If Samus has at least one Energy Tank, it will take longer to damage down, in which case an additional Super can be used to knock the Geemer onto the floating platform, to allow unlimited time for damaging down. A final Super can be used to knock the Geemer off the floating platform. Set reserves to manual, stand next to the bomb blocks, and wait for the Geemer to approach. Just before taking a hit, press pause. During the fade-out, hold forward to land quickly after knockback. At a precise moment just before the pause hits, jump and aim down; the aim-down can be buffered before jumping, e.g. by rolling from forward to down through a diagonal input. Set reserves to auto, then unpause while continuing to hold jump. If successful, the forced stand-up will occur close to the ceiling and while Samus still has upward momentum, allowing Samus to clip through. Entrance condition: {
"comeInWithGMode": {
"mode": "direct",
"morphed": true
}
}
Requires: "h_ZebesIsAwake"
"canBeVeryPatient"
{
"ammo": {
"type": "Super",
"count": 3
}
}
"h_canArtificialMorphCrystalFlash"
"canPauseAbuse"
{
"autoReserveTrigger": {}
}
{
"enemyDamage": {
"enemy": "Geemer (blue)",
"type": "contact",
"hits": 1
}
}
|
|
From: 5
Alcatraz Door
To: 8
Central Junction
Notable: true Wait for a global Geemer to make the long trip along the map, or shoot a Super 20 to 30 seconds after entering the room to knock it off the ceiling and save a lot of time. Freeze it just after it starts climbing the bomb blocks. Spin-jump above it, which will put Samus into a forced crouch where X-Ray cannot be used. Use Grapple to kill a a second Geemer, restoring the ability to use X-Ray. Use X-Ray to stand up, then jump up through the ceiling. Requires: "h_ZebesIsAwake"
"canBePatient"
{
"or": [
"canBeVeryPatient",
{
"ammo": {
"type": "Super",
"count": 1
}
}
]
}
"canPreciseCeilingClip"
"canTrickyUseFrozenEnemies"
"canUseGrapple"
"canXRayStandUp"
|
|
From: 5
Alcatraz Door
To: 8
Central Junction
Notable: true Wait for a global Geemer to make the long trip along the map, or shoot a Super 20 to 30 seconds after entering the room to knock it off the ceiling and save a lot of time. Hold right against the bomb blocks, take damage from the Geemer, jump, aim-down, and shoot the Geemer shortly before landing. Samus should end up standing on the ground with the Geemer frozen on the wall slightly above the ground (overlapping Samus' hitbox). Facing the bomb blocks and pressed against them, jump while holding down (but not crouched) and then press forward at a precise time to break the aim-down pose. If successful, Samus will clip up through the ceiling. This can be attempted several times before the Geemer thaws. Requires: "HiJump"
"h_ZebesIsAwake"
{
"or": [
"canBeVeryPatient",
{
"ammo": {
"type": "Super",
"count": 1
}
}
]
}
"canPreciseCeilingClip"
"canTrickyUseFrozenEnemies"
{
"enemyDamage": {
"enemy": "Geemer (blue)",
"type": "contact",
"hits": 1
}
}
"canInsaneJump"
|
|
From: 5
Alcatraz Door
To: 8
Central Junction
Wait 3 minutes for a global Geemer to waddle over, or shoot a Super 20 to 30 seconds after entering the room to knock it off the ceiling and save a lot of time. Freeze the Geemer as it turns onto the middle slope of the left wall to escape - it helps to freeze the geemer from below. Alternatively, use a Super to knock it off the wall and freeze it mid-air. Requires: "h_ZebesIsAwake"
"Morph"
"canTrickyUseFrozenEnemies"
{
"or": [
"canBeVeryPatient",
{
"ammo": {
"type": "Super",
"count": 1
}
}
]
}
{
"or": [
"canTrickyJump",
{
"and": [
"canCarefulJump",
{
"ammo": {
"type": "Super",
"count": 1
}
}
]
}
]
}
|
|
From: 9
Junction Below Items
To: 1
Top Right Door
Notable: true Shoot out only the lower 2 shot blocks on the side Samus will be climbing. Grab a Beetom and use Morph to pixel align the Beetom with the edge of the wall. While facing right. Xray stand up for height and shoot to freeze. Angle down shot to be safe. Continue refreezing during the next steps. Grab the other Beetom and stand close, but not too close, to the first. Do a small jump, but not too low, and do an angle down shot the frame before Samus lands. This second beetom needs to be exactly 1 pixel below the first. Refreeze the first before testing the positioning. Jump onto your beetom, walk into the wall, and start xray Climbing. Climb up 2.5 screens and then fire upwards to clear shot blocks. Continue climbing and finish by walking away from the crumble blocks. Requires: "canXRayClimb"
"Morph"
"canWallIceClip"
"canBeVeryPatient"
{
"enemyDamage": {
"enemy": "Beetom",
"hits": 25,
"type": "contact"
}
}
{
"or": [
{
"resetRoom": {
"nodes": [
1,
2,
3,
4
],
"nodesToAvoid": [
5
]
}
},
{
"resetRoom": {
"nodes": [
1,
2,
3,
4
],
"nodesToAvoid": [
6
]
}
}
]
}
|
|
Requires: "canUseEnemies" "canBeVeryPatient" |
|
From: 15
G-Mode Morph Junction (By Left Door)
To: 16
G-Mode Morph Overloaded PLMs Junction (By Left Door)
The crumble block is the leftmost flat ceiling tile. Requires: "h_canUseMorphBombs"
"SpaceJump"
{
"or": [
"h_canCeilingBombJump",
"canBeVeryPatient"
]
}
|
|
From: 3
Bottom Left Door
To: 6
Junction (Right of Tunnel)
Notable: true Requires: "canTurnaroundAimCancel"
"canBeVeryPatient"
{
"thornHits": 180
}
|
|
From: 5
Above Power Bomb Blocks - Bottom Left Door
To: 5
Above Power Bomb Blocks - Bottom Left Door
It is possible to save a lot of time by using a Super to knock the clockwise Zeela off the small near the top of the room. Requires: "h_canFrozenEnemyRunway"
{
"or": [
"canBeVeryPatient",
{
"ammo": {
"type": "Super",
"count": 1
}
}
]
}
Exit condition: {
"leaveWithRunway": {
"length": 5,
"openEnd": 1
}
}
|
|
From: 8
Below Power Bomb Blocks - Bottom Left Door
To: 2
Above Power Bomb Blocks - Top Left Door
Enter with G-mode direct, back up to between 1 and 6 pixels from the door transition, and activate X-ray to get very deep stuck in the door. Climb up 6 screens, and perform a turnaround buffered spin-jump away from the door to trigger the transition, bypassing any lock on the door. Entrance condition: {
"comeInWithGMode": {
"mode": "direct",
"morphed": false
}
}
Requires: "canXRayClimb" "canBeVeryPatient" Bypasses door shell: true |
|
From: 8
Below Power Bomb Blocks - Bottom Left Door
To: 4
Above Power Bomb Blocks - Middle Left Door
Enter with G-mode direct, back up to between 1 and 6 pixels from the door transition, and activate X-ray to get very deep stuck in the door. Climb up 5 screens, and perform a turnaround buffered spin-jump away from the door to trigger the transition, bypassing any lock on the door. Entrance condition: {
"comeInWithGMode": {
"mode": "direct",
"morphed": false
}
}
Requires: "canXRayClimb" "canBeVeryPatient" Bypasses door shell: true |
|
From: 13
Below Power Bomb Blocks - Main Junction
To: 14
Right Etecoon Shaft - Wall Jump Climb Checkpoint Junction
Notable: true Break the bomb block at the bottom right of the main shaft. Bring a Zeela down to the bottom of the room. Morph inside the tunnel, take a Zeela hit, then jump, aim down, and shoot to freeze the Zeela as it starts to move up and while Samus is close to landing. Jump and aim down to get on top of the Zeela. If the Zeela is precisely positioned exactly 12 pixels above the ground, you can press up to make Samus stand; Otherwise, if you have X-ray, then the Zeela should be frozen lower, and you can morph and unmorph and use X-ray to force Samus to stand up; in this case there is a 6-pixel window over which it works, with the Zeela being between 4 and 9 pixels above the ground. In either case, after standing up on top of the Zeela, jump and aim down to break the crumble block. Then, before the crumble respawns, morph and use Spring Ball (if available) to jump back up and into the tunnel; without Spring Ball, a quick mid-air morph also works but is more difficult. Requires: "h_canBombThings"
"h_additionalBomb"
{
"enemyDamage": {
"enemy": "Zeela",
"type": "contact",
"hits": 1
}
}
"canTrickyUseFrozenEnemies"
"canTrickyJump"
{
"or": [
"canXRayCeilingClip",
{
"and": [
"canPreciseCeilingClip",
"canInsaneJump",
"canBeVeryPatient"
]
}
]
}
{
"or": [
"h_canUseSpringBall",
{
"and": [
"can4HighMidAirMorph",
"canInsaneJump"
]
}
]
}
{
"or": [
"canBePatient",
{
"obstaclesNotCleared": [
"A"
]
}
]
}
|
|
Wait for the slow global Zeelas. They take almost 4 minutes to get there. Requires: {
"enemyDamage": {
"enemy": "Zeela",
"type": "contact",
"hits": 1
}
}
"canBeVeryPatient"
|
|
Wait for the slow global Zeelas. They take almost 4 minutes to get there. Requires: "canBeVeryPatient" Exit condition: {
"leaveWithGModeSetup": {}
}
|
|
Wait for the slow global Zeelas. They take almost 4 minutes to get there. Requires: "h_canFrozenEnemyRunway" "canBeVeryPatient" Exit condition: {
"leaveWithRunway": {
"length": 2,
"openEnd": 1
}
}
|
|
Requires: "Charge"
{
"or": [
{
"and": [
"Ice",
"Wave"
]
},
{
"and": [
"Ice",
"Spazer"
]
},
{
"and": [
"Spazer",
"Wave"
]
},
{
"and": [
"canBePatient",
{
"or": [
"Ice",
"Wave",
"Spazer"
]
}
]
},
"Plasma",
"canBeVeryPatient"
]
}
Clears obstacles: f_DefeatedSporeSpawn |
|
From: 8
Right Side - Bottom Door
To: 2
Right Side - Top Door
Enter with G-mode direct, back up to between 1 and 6 pixels from the door transition, and activate X-ray to get very deep stuck in the door. Climb up 6 screens, and perform a turnaround buffered spin-jump away from the door to trigger the transition, bypassing any lock on the door. Entrance condition: {
"comeInWithGMode": {
"mode": "direct",
"morphed": false
}
}
Requires: "canXRayClimb" "canBeVeryPatient" Bypasses door shell: true |
|
6 screen X-Ray climb, and global Zeelas are still active even off camera. Entrance condition: {
"comeInWithDoorStuckSetup": {}
}
Requires: "canXRayClimb" "canBeVeryPatient" |
|
From: 2
Bottom Left Door
To: 1
Top Left Door
Enter with G-mode direct, back up to between 1 and 6 pixels from the door transition, and activate X-ray to get very deep stuck in the door. Climb up 8 screens, and perform a turnaround buffered spin-jump away from the door to trigger the transition, bypassing any lock on the door. Entrance condition: {
"comeInWithGMode": {
"mode": "direct",
"morphed": false
}
}
Requires: "canXRayClimb" "canBeVeryPatient" Bypasses door shell: true |
|
Climb up 8 screens. Entrance condition: {
"comeInWithDoorStuckSetup": {}
}
Requires: "canXRayClimb" "canBeVeryPatient" |
|
It takes around 3 minutes to get the Zero to this door. The Zero only moves on camera and the camera scrolls when exiting the morph tunnel. Let the Zero lead through the morph tunnel or wait for the it to get very close to Samus before touching the scroll block at the exit. Requires: "canBeVeryPatient"
"Morph"
{
"or": [
"HiJump",
"canWalljump",
"h_canFly",
"canTrickyUseFrozenEnemies",
"canSpringBallJumpMidAir"
]
}
Exit condition: {
"leaveWithGModeSetup": {}
}
|
|
From: 1
Top Left Door
To: 1
Top Left Door
It takes around 3 minutes to get the Zero to this door. Let the Zero climb the right wall and jump on top of it in Morph Ball form to bounce up to the Cacatac platform. The Zero only moves on camera and the camera scrolls when exiting the morph tunnel. Let the Zero lead through the morph tunnel or wait for the it to get very close to Samus before touching the scroll block at the exit. Requires: "canBeVeryPatient"
"Morph"
"canNeutralDamageBoost"
"canTrickyJump"
"h_canCrouchJumpDownGrab"
{
"enemyDamage": {
"enemy": "Zero",
"type": "contact",
"hits": 1
}
}
Exit condition: {
"leaveWithGModeSetup": {}
}
|
|
From: 1
Top Left Door
To: 1
Top Left Door
Use the frozen Zero as a platform or other means to get up to the top half of the room. This takes about 3 minutes. The Zero only moves on camera and the camera scrolls when exiting the morph tunnel. Let the Zero lead through the morph tunnel or wait for the it to get very close to Samus before touching the scroll block at the exit. Requires: "canBeVeryPatient" "h_canFrozenEnemyRunway" "Morph" Exit condition: {
"leaveWithRunway": {
"length": 6,
"openEnd": 1
}
}
|
|
From: 2
Middle Left Door
To: 2
Middle Left Door
It takes around 4 minutes to get the Zero to this door. The Zero only moves on camera and the camera scrolls when exiting the morph tunnel. Let the Zero lead through the morph tunnel or wait for the it to get very close to Samus before touching the scroll block at the exit. Requires: "canBeVeryPatient"
"Morph"
{
"or": [
"HiJump",
"canWalljump",
"h_canFly",
"canTrickyUseFrozenEnemies",
"canSpringBallJumpMidAir"
]
}
Exit condition: {
"leaveWithGModeSetup": {}
}
|
|
From: 2
Middle Left Door
To: 2
Middle Left Door
It takes around 4 minutes to get the Zero to this door. Let the Zero climb the right wall and jump on top of it in Morph Ball form to bounce up to the Cacatac platform. The Zero only moves on camera and the camera scrolls when exiting the morph tunnel. Let the Zero lead through the morph tunnel or wait for the it to get very close to Samus before touching the scroll block at the exit. Requires: "canBeVeryPatient"
"Morph"
"canNeutralDamageBoost"
"canTrickyJump"
"h_canCrouchJumpDownGrab"
{
"enemyDamage": {
"enemy": "Zero",
"type": "contact",
"hits": 1
}
}
Exit condition: {
"leaveWithGModeSetup": {}
}
|
|
From: 2
Middle Left Door
To: 2
Middle Left Door
Use the frozen Zero as a platform or other means to get up to the top half of the room. This takes about 4 minutes, but fortunately isn't often necessary. The Zero only moves on camera and the camera scrolls when exiting the morph tunnel. Let the Zero lead through the morph tunnel or wait for the it to get very close to Samus before touching the scroll block at the exit. Requires: "canBeVeryPatient" "h_canFrozenEnemyRunway" "Morph" Exit condition: {
"leaveWithRunway": {
"length": 5,
"openEnd": 1
}
}
|
|
From: 1
Left Door
To: 2
Right Door
Notable: true This is a very long ceiling bomb jump. Wait for the Wavers to come and kill them before crossing the room. Requires: "h_canCeilingBombJump" "canLongCeilingBombJump" "canBeVeryPatient" |
|
From: 1
Left Door
To: 2
Right Door
Notable: true This is a very long ceiling bomb jump. Crossing the room with artificial morph is particularly difficult without a good way to kill the Wavers. Entrance condition: {
"comeInWithGMode": {
"mode": "any",
"morphed": true
}
}
Requires: "h_canArtificialMorphCeilingBombJump" "canLongCeilingBombJump" "canBeVeryPatient" "canInsaneJump" |
|
From: 2
Right Door
To: 1
Left Door
Notable: true Requires: "h_canCeilingBombJump" "canLongCeilingBombJump" "canBeVeryPatient" |
|
From: 2
Right Door
To: 1
Left Door
Notable: true This is a very long ceiling bomb jump. Crossing the room with artificial morph is particularly difficult without a good way to kill the Wavers. It is recommended to avoid killing the Firefleas, as the room gets dark fast. Entrance condition: {
"comeInWithGMode": {
"mode": "any",
"morphed": true
}
}
Requires: "h_canArtificialMorphBombHorizontally" "h_canArtificialMorphIBJ" "h_canArtificialMorphCeilingBombJump" "canLongCeilingBombJump" "canBeVeryPatient" "canInsaneJump" |
|
From: 1
Top Left Door
To: 9
Junction (Top Rippers)
Notable: true Freeze the Beetom and use it as a platform to climb the room without wall jumps. This can be done with well-timed Flatley jumps on top of the frozen Beetom, by turning around and spin jumping just as it unfreezes. This can be made easier (at the cost of some additional Beetom hits) with a pause-buffer method: Press pause, and begin a turn-around just before the pause hits; unequip Ice to immediately unfreeze the Beetom; unpause and press jump quickly after control resumes, but without buffering the input. For the top two jumps, it is possible to reduce the risk of damage by freezing the Beetom against the wall: in case of a failure due to an early (e.g. buffered) jump, the Beetom may stay stuck wiggling in the wall, and then it can be refrozen without needing to take damage to reposition it. Requires: "canTrickyUseFrozenEnemies"
"canFlatleyJump"
{
"or": [
{
"enemyDamage": {
"enemy": "Beetom",
"type": "contact",
"hits": 9
}
},
{
"and": [
"canInsaneJump",
{
"enemyDamage": {
"enemy": "Beetom",
"type": "contact",
"hits": 4
}
}
]
},
{
"and": [
"canBeVeryPatient",
{
"enemyDamage": {
"enemy": "Beetom",
"type": "contact",
"hits": 1
}
},
{
"refill": [
"Energy"
]
}
]
}
]
}
|
|
Without canJumpIntoIBJ, Samus will need to kill the Rippers while breaking the bomb blocks then start from the platforms below. Place a Power Bomb on the ascent to break the block and continue the IBJ through it. Requires: "canBeVeryPatient"
"h_canIBJ"
{
"ammo": {
"type": "PowerBomb",
"count": 1
}
}
{
"or": [
{
"obstaclesCleared": [
"B"
]
},
{
"ammo": {
"type": "PowerBomb",
"count": 2
}
}
]
}
|
|
4 supers are required to kill Kraid. Only 1 is needed to get him to stand up, after which they are farmable, even though the drop rate is low. Getting up during Phase 2 can be done by jumping on Kraid's projectile platforms or a well timed crouch jump + down grab. Requires: {
"or": [
{
"ammo": {
"type": "Super",
"count": 5
}
},
{
"and": [
{
"ammo": {
"type": "Super",
"count": 4
}
},
"canDodgeWhileShooting"
]
},
{
"and": [
{
"ammo": {
"type": "Super",
"count": 3
}
},
"canDodgeWhileShooting",
"canBePatient"
]
},
{
"and": [
{
"ammo": {
"type": "Super",
"count": 1
}
},
"canDodgeWhileShooting",
"canBeVeryPatient"
]
}
]
}
{
"or": [
"HiJump",
"canWalljump",
"SpaceJump",
"canSpringBallJumpMidAir",
{
"and": [
"canDodgeWhileShooting",
{
"or": [
"canCarefulJump",
"h_canCrouchJumpDownGrab"
]
}
]
}
]
}
Clears obstacles: f_DefeatedKraid |
|
From: 2
Middle Left Door
To: 2
Middle Left Door
If the Power Bomb blocks are broken and the room cannot be reset, the runway can be extended by waiting for the slow global Sova. Be careful to prevent killing the Sova when breaking the Power Bomb blocks, while still ensuring breaking the ceiling Bomb blocks. Using a Super to knock off the Sova once it is near the gates will save approximately 30 seconds. Requires: "h_canFrozenEnemyRunway"
{
"obstaclesCleared": [
"A",
"B",
"C"
]
}
{
"or": [
"canBeVeryPatient",
{
"and": [
"canBePatient",
{
"ammo": {
"type": "Super",
"count": 1
}
}
]
}
]
}
Exit condition: {
"leaveWithRunway": {
"length": 7,
"openEnd": 1
}
}
|
|
From: 2
Middle Right Door
To: 2
Middle Right Door
Wait 3 minutes for the Sova to get into position, or 100 seconds with Morph by going ahead of them to break the shot blocks as they get there. This can be further reduced to 45 seconds with a Super by knocking a Sova off after it exits the morph tunnel. The other Sovas can be farmed or used as a backup. Requires: "h_canFrozenEnemyRunway"
{
"or": [
{
"and": [
"h_heatProof",
"canBeVeryPatient"
]
},
{
"and": [
"h_heatProof",
"canBePatient",
"Morph"
]
},
{
"and": [
{
"ammo": {
"type": "Super",
"count": 1
}
},
{
"heatFrames": 2600
}
]
}
]
}
Exit condition: {
"leaveWithRunway": {
"length": 4,
"openEnd": 1
}
}
|
|
From: 4
Crocomire (locked)
To: 7
Crocomire (unlocked)
Notable: true This can be a very long fight if Crocomire is stingy with the farming phases. Farming requires careful dodging in order to minimize energy drops. Delay grabbing all of the drops until necessary to reduce the chance of running out of ammo. Requires: "canDodgeWhileShooting"
"canBeVeryPatient"
{
"or": [
{
"ammo": {
"type": "Missile",
"count": 2
}
},
{
"ammo": {
"type": "Super",
"count": 2
}
}
]
}
{
"resourceCapacity": [
{
"type": "Missile",
"count": 5
}
]
}
Clears obstacles: f_DefeatedCrocomire |
|
From: 5
Small Platforms Junction
To: 3
Item
Lure a Mella from the right by breaking the speed blocks or using Morph. Then manipulate it to go high enough to be used as a stepping stone once frozen. Without movement items it may be necessary to continue manipulating it from above, jumping and aiming down to freeze it. Requires: "canUseFrozenEnemies"
"canManipulateMellas"
{
"or": [
{
"and": [
"canBePatient",
"canWalljump"
]
},
"canBeVeryPatient"
]
}
{
"or": [
{
"obstaclesCleared": [
"B"
]
},
"Morph"
]
}
|
|
From: 5
Golden Torizo (locked)
To: 8
Golden Torizo (unlocked)
Notable: true Killing Golden Torizo only with missiles using enemy state manipulation to get missiles to connect. This can be done by rolling under GT, triggering the sit attack, and then shooting missiles during the stand up animation. By pushing GT to the door and rolling into the door during a jump back, the sit can reliably be manipulated. But this setup is subpixel dependant and harder to setup again if GT moves unexpectidly. Use of the safe spot is expected. Keep missiles below 31 to control the fight. This fight takes multiple minutes. (A cheeky Missile can hit GT the moment it becomes active) Requires: "h_heatProof"
"Morph"
{
"resourceCapacity": [
{
"type": "Missile",
"count": 15
}
]
}
{
"or": [
{
"resourceCapacity": [
{
"type": "RegularEnergy",
"count": 199
}
]
},
{
"resourceCapacity": [
{
"type": "ReserveEnergy",
"count": 100
}
]
}
]
}
"canBeVeryPatient"
Clears obstacles: f_DefeatedGoldenTorizo |
|
From: 5
Golden Torizo (locked)
To: 8
Golden Torizo (unlocked)
Notable: true Requires: "h_heatProof" "Charge" "canBeVeryPatient" Clears obstacles: f_DefeatedGoldenTorizo |
|
From: 3
Left Farm Junction
To: 3
Left Farm Junction
Requires: "canPauseAbuse"
"Grapple"
"canBeVeryPatient"
{
"resetRoom": {
"nodes": [
1
],
"mustStayPut": false
}
}
{
"refill": [
"Energy",
"Super",
"PowerBomb"
]
}
|
|
From: 4
Right Farm Junction
To: 4
Right Farm Junction
Requires: "canPauseAbuse"
"Grapple"
"canBeVeryPatient"
{
"resetRoom": {
"nodes": [
1
],
"mustStayPut": false
}
}
{
"refill": [
"Energy",
"Super",
"PowerBomb"
]
}
|
|
From: 3
Metal Pirates Junction
To: 3
Metal Pirates Junction
Uncharged Spazer does half damage. Requires: "h_heatProof"
"canDodgeWhileShooting"
{
"or": [
{
"and": [
"Spazer",
"canBeVeryPatient"
]
},
{
"and": [
"Charge",
"canBeVeryPatient"
]
},
{
"and": [
"Charge",
"Ice",
"canBePatient"
]
}
]
}
Clears obstacles: A |
|
From: 2
Bottom Left Door
To: 1
Top Left Door
Enter with G-mode direct, back up to between 1 and 6 pixels from the door transition, and activate X-ray to get very deep stuck in the door. Climb up 5 screens, and perform a turnaround buffered spin-jump away from the door to trigger the transition, bypassing any lock on the door. Entrance condition: {
"comeInWithGMode": {
"mode": "direct",
"morphed": false
}
}
Requires: "h_heatProof" "canXRayClimb" "canBeVeryPatient" Bypasses door shell: true |
|
From: 2
Middle Left Door
To: 6
Bowling Chozo Statue (locked)
Notable: true Requires: "h_canCeilingBombJump" "canLongCeilingBombJump" "canBeVeryPatient" |
|
Notable: true Climb up about half a screen. If Phantoon is dead, the last part of the climb should be done carefully to avoid triggering collision with the spikes: Do not press forward or turn-around except while X-Ray is active. For each X-ray stand-up, release the turn-around input quickly to make sure that it is not still held after X-Ray deactivates. Once Samus is high enough, unequip X-Ray, jump up (from either standing or crouch) to clip past the spikes, and land, taking a single spike hit. Then use the i-frames from the spike hit to run and jump to the left to make it to the door. Samus is high enough after the top of her arm cannon first becomes visible at the bottom of the screen; or up to 3 additional climbs can be performed after that point. In case of an accidental spike collision, it is possible to recover: Unless Samus climbed higher than needed, she will still be stuck in the wall, will take a single spike hit, and be able to continue climbing. With Grapple it is possible to swing on the Grapple blocks, avoiding all spike damage. Spike damage can also be avoided with Space Jump, by doing a stationary turn-around spin jump, which is very precise. Entrance condition: {
"comeInWithDoorStuckSetup": {}
}
Requires: "canXRayClimb"
{
"or": [
{
"and": [
{
"spikeHits": 3
},
{
"resourceCapacity": [
{
"type": "RegularEnergy",
"count": 199
}
]
}
]
},
{
"and": [
{
"not": "f_DefeatedPhantoon"
},
"canRiskPermanentLossOfAccess"
]
},
{
"and": [
"canOffScreenMovement",
{
"or": [
{
"spikeHits": 1
},
"Grapple",
{
"and": [
"SpaceJump",
"canInsaneJump",
"canBeVeryPatient"
]
}
]
}
]
}
]
}
|
|
From: 2
Item (locked)
To: 1
Right Door
Touch the item while remaining in artificial morph. Ceiling bomb jump back to the right, then use x-ray to cancel g-mode and obtain the item. Requires: "h_canArtificialMorphCeilingBombJump"
"canLongCeilingBombJump"
"canBeVeryPatient"
{
"obstaclesCleared": [
"A"
]
}
|
|
From: 1
Bottom Door
To: 6
Speed Blocked Item
Notable: true This is a long climb, and getting around the fish under the missiles can be tricky or slow. Place bombs against the speed blocks until they are overloaded. Afterwards, freeze a crab on the edge of the speed blocks, such that Samus can jump inside and stand on the crab. Exit G-Mode and rotate to obtain the item, then kill the crab with Wave Beam to fall back down. Entrance condition: {
"comeInWithGMode": {
"mode": "any",
"morphed": true
},
"comesThroughToilet": "any"
}
Requires: "h_canArtificialMorphIBJ"
"Gravity"
"canTrickyUseFrozenEnemies"
"Wave"
{
"or": [
"h_canArtificialMorphJumpIntoIBJ",
{
"and": [
"h_canArtificialMorphSpringBall",
"HiJump"
]
},
{
"and": [
"h_canArtificialMorphSpringBall",
"canGravityJump"
]
},
"canDoubleBombJump",
"canStaggeredIBJ",
"canBeVeryPatient",
{
"enemyKill": {
"enemies": [
[
"Skultera"
]
],
"explicitWeapons": [
"PowerBomb"
]
}
}
]
}
{
"or": [
"h_canArtificialMorphSpringBall",
"h_canArtificialMorphCeilingBombJump",
"canBeVeryPatient"
]
}
|
|
From: 1
Bottom Door
To: 6
Speed Blocked Item
Notable: true This is a long climb, and getting around the fish under the missiles can be tricky or slow. Overloading the PLMs can be done with as few as 2 PBs if they are placed precisely. Place them two ledges above the item - to the left of the morph tunnel item. It is important that they are placed on either of the flat tiles, not the sloped tile on the right. Afterwards, freeze a crab on the edge of the speed blocks, such that Samus can jump inside and stand on the crab. Exit G-Mode and rotate to obtain the item, then kill the crab with Wave Beam to fall back down. Entrance condition: {
"comeInWithGMode": {
"mode": "direct",
"morphed": true
},
"comesThroughToilet": "no"
}
Requires: "h_canArtificialMorphIBJ"
"Gravity"
"canTrickyUseFrozenEnemies"
"Wave"
{
"or": [
"h_canArtificialMorphJumpIntoIBJ",
"canDoubleBombJump",
"canStaggeredIBJ",
"canBeVeryPatient",
{
"enemyKill": {
"enemies": [
[
"Skultera"
]
],
"explicitWeapons": [
"PowerBomb"
]
}
}
]
}
{
"ammo": {
"type": "PowerBomb",
"count": 2
}
}
|
|
From: 1
Bottom Door
To: 6
Speed Blocked Item
Notable: true Place bombs against the speed blocks until they are overloaded. Afterwards, freeze a crab on the edge of the speed blocks, such that Samus can jump inside and stand on the crab. Exit G-Mode and rotate to obtain the item, then kill the crab with Wave Beam to fall back down. Entrance condition: {
"comeInWithGMode": {
"mode": "any",
"morphed": false
},
"comesThroughToilet": "any"
}
Requires: "canTrickyUseFrozenEnemies"
"Wave"
"h_canUseMorphBombs"
{
"or": [
"Gravity",
{
"and": [
"canSuitlessMaridia",
"HiJump"
]
}
]
}
{
"or": [
"h_canUseSpringBall",
"canBeVeryPatient",
{
"and": [
"Gravity",
"h_canCeilingBombJump",
"h_canIBJ"
]
}
]
}
|
|
From: 2
Bottom Right Door
To: 6
Speed Blocked Item
Notable: true This is a long climb, and getting around the fish under the missiles can be tricky or slow. Place bombs against the speed blocks until they are overloaded. Afterwards, freeze a crab on the edge of the speed blocks, such that Samus can jump inside and stand on the crab. Exit G-Mode and rotate to obtain the item, then kill the crab with Wave Beam to fall back down. Entrance condition: {
"comeInWithGMode": {
"mode": "any",
"morphed": true
}
}
Requires: "h_canArtificialMorphIBJ"
"Gravity"
"canTrickyUseFrozenEnemies"
"Wave"
{
"or": [
"h_canArtificialMorphJumpIntoIBJ",
{
"and": [
"h_canArtificialMorphSpringBall",
"HiJump"
]
},
{
"and": [
"h_canArtificialMorphSpringBall",
"canGravityJump"
]
},
"canDoubleBombJump",
"canStaggeredIBJ",
"canBeVeryPatient",
{
"enemyKill": {
"enemies": [
[
"Skultera"
]
],
"explicitWeapons": [
"PowerBomb"
]
}
}
]
}
{
"or": [
"h_canArtificialMorphSpringBall",
"h_canArtificialMorphCeilingBombJump",
"canBeVeryPatient"
]
}
|
|
From: 2
Bottom Right Door
To: 6
Speed Blocked Item
Notable: true This is a long climb, and getting around the fish under the missiles can be tricky or slow. Overloading the PLMs can be done with as few as 2 PBs if they are placed precisely. Place them two ledges above the item - to the left of the morph tunnel item. It is important that they are placed on either of the flat tiles, not the sloped tile on the right. Afterwards, freeze a crab on the edge of the speed blocks, such that Samus can jump inside and stand on the crab. Exit G-Mode and rotate to obtain the item, then kill the crab with Wave Beam to fall back down. Entrance condition: {
"comeInWithGMode": {
"mode": "direct",
"morphed": true
}
}
Requires: "h_canArtificialMorphIBJ"
"Gravity"
"canTrickyUseFrozenEnemies"
"Wave"
{
"or": [
"h_canArtificialMorphJumpIntoIBJ",
"h_canArtificialMorphDoubleBombJump",
"h_canArtificialMorphStaggeredIBJ",
"canBeVeryPatient",
{
"enemyKill": {
"enemies": [
[
"Skultera"
]
],
"explicitWeapons": [
"PowerBomb"
]
}
}
]
}
"h_canArtificialMorphPowerBomb"
"h_canArtificialMorphPowerBomb"
|
|
From: 2
Bottom Right Door
To: 6
Speed Blocked Item
Notable: true Place bombs against the speed blocks until they are overloaded. Afterwards, freeze a crab on the edge of the speed blocks, such that Samus can jump inside and stand on the crab. Exit G-Mode and rotate to obtain the item, then kill the crab with Wave Beam to fall back down. Entrance condition: {
"comeInWithGMode": {
"mode": "any",
"morphed": false
}
}
Requires: "canTrickyUseFrozenEnemies"
"Wave"
"h_canUseMorphBombs"
{
"or": [
"Gravity",
{
"and": [
"canSuitlessMaridia",
"HiJump"
]
}
]
}
{
"or": [
"h_canUseSpringBall",
"canBeVeryPatient",
{
"and": [
"Gravity",
"h_canCeilingBombJump",
"h_canIBJ"
]
}
]
}
|
|
This is a long climb, and getting around the fish under the missiles can be tricky or slow. Entrance condition: {
"comeInWithGMode": {
"mode": "any",
"morphed": true
}
}
Requires: "h_canArtificialMorphIBJ"
"Gravity"
{
"or": [
"h_canArtificialMorphJumpIntoIBJ",
"h_canArtificialMorphDoubleBombJump",
"h_canArtificialMorphStaggeredIBJ",
"canBeVeryPatient"
]
}
|
|
From: 3
Middle Right Door
To: 6
Speed Blocked Item
Notable: true This is a long climb, and getting around the fish under the missiles can be tricky or slow. Place bombs against the speed blocks until they are overloaded. Afterwards, freeze a crab on the edge of the speed blocks, such that Samus can jump inside and stand on the crab. Exit G-Mode and rotate to obtain the item, then kill the crab with Wave Beam to fall back down. Entrance condition: {
"comeInWithGMode": {
"mode": "any",
"morphed": true
}
}
Requires: "h_canArtificialMorphIBJ"
"Gravity"
"canTrickyUseFrozenEnemies"
"Wave"
{
"or": [
"h_canArtificialMorphJumpIntoIBJ",
{
"and": [
"h_canArtificialMorphSpringBall",
"HiJump"
]
},
{
"and": [
"h_canArtificialMorphSpringBall",
"canGravityJump"
]
},
"h_canArtificialMorphDoubleBombJump",
"h_canArtificialMorphStaggeredIBJ",
"canBeVeryPatient",
{
"enemyKill": {
"enemies": [
[
"Skultera"
]
],
"explicitWeapons": [
"PowerBomb"
]
}
}
]
}
{
"or": [
"h_canArtificialMorphSpringBall",
"h_canArtificialMorphCeilingBombJump",
"canBeVeryPatient"
]
}
|
|
From: 3
Middle Right Door
To: 6
Speed Blocked Item
Notable: true This is a long climb, and getting around the fish under the missiles can be tricky or slow. Overloading the PLMs can be done with as few as 2 PBs if they are placed precisely. Place them two ledges above the item - to the left of the morph tunnel item. It is important that they are placed on either of the flat tiles, not the sloped tile on the right. Afterwards, freeze a crab on the edge of the speed blocks, such that Samus can jump inside and stand on the crab. Exit G-Mode and rotate to obtain the item, then kill the crab with Wave Beam to fall back down. Entrance condition: {
"comeInWithGMode": {
"mode": "direct",
"morphed": true
}
}
Requires: "h_canArtificialMorphIBJ"
"Gravity"
"canTrickyUseFrozenEnemies"
"Wave"
{
"or": [
"h_canArtificialMorphJumpIntoIBJ",
"h_canArtificialMorphDoubleBombJump",
"h_canArtificialMorphStaggeredIBJ",
"canBeVeryPatient",
{
"enemyKill": {
"enemies": [
[
"Skultera"
]
],
"explicitWeapons": [
"PowerBomb"
]
}
}
]
}
"h_canArtificialMorphPowerBomb"
"h_canArtificialMorphPowerBomb"
|
|
From: 3
Middle Right Door
To: 6
Speed Blocked Item
Notable: true Place bombs against the speed blocks until they are overloaded. Afterwards, freeze a crab on the edge of the speed blocks, such that Samus can jump inside and stand on the crab. Exit G-Mode and rotate to obtain the item, then kill the crab with Wave Beam to fall back down. Entrance condition: {
"comeInWithGMode": {
"mode": "any",
"morphed": false
}
}
Requires: "canTrickyUseFrozenEnemies"
"Wave"
"h_canUseMorphBombs"
{
"or": [
"Gravity",
{
"and": [
"canSuitlessMaridia",
"HiJump"
]
}
]
}
{
"or": [
"h_canUseSpringBall",
"canBeVeryPatient",
{
"and": [
"Gravity",
"h_canCeilingBombJump",
"h_canIBJ"
]
}
]
}
|
|
From: 3
Middle Right Door
To: 9
Junction Below Speed Blocks
Notable: true Use the slow global crab and Skulteras to get up. The last part, just below the item is the hardest. Get onto the global crab on the right wall. Either freeze the Skultera close to the wall and wall jump between them. or, a harder option without wall jumps is to refreeze the crab again, higher on the wall, while being careful not to clip through it. Freeze the Skultera at the left, near its minimum and jump to it, then the solid ground. Note that the fish will be pushed down slightly over time because of the sloped tiles, but it will be at its minimum by the time the global crab has arrived. Requires: "canSuitlessMaridia"
"canCrazyCrabClimb"
"canBeVeryPatient"
{
"or": [
"canSunkenTileWideWallClimb",
"canTrickyJump"
]
}
|
|
From: 3
Middle Right Door
To: 9
Junction Below Speed Blocks
Notable: true Use the slow global crab and Skulteras to get up. The last part, just below the item is the hardest. Wait for the global crab to be on vertical portion the ledge jutting out on the right or left - any other locations and it will fall on a platform and get stuck. Shoot a super and freeze it mid air. Using the frozen crab on the platform, the mid air crab, and the fish, jump up to the solid ground. Freeze the Skultera at the left, near its minimum and jump to it, then the solid ground. Note that the fish will be pushed down slightly over time because of the sloped tiles, but it will be at its minimum by the time the global crab has arrived. Requires: "canSuitlessMaridia"
"canCrazyCrabClimb"
"canBeVeryPatient"
{
"ammo": {
"type": "Super",
"count": 1
}
}
|
|
From: 4
Top Right Door
To: 6
Speed Blocked Item
Notable: true Place bombs against the speed blocks until they are overloaded. Afterwards, freeze a crab on the edge of the speed blocks, such that Samus can jump inside and stand on the crab. Exit G-Mode and rotate to obtain the item, then kill the crab with Wave Beam to fall back down. Entrance condition: {
"comeInWithGMode": {
"mode": "any",
"morphed": true
}
}
Requires: {
"or": [
"Gravity",
{
"and": [
"canSuitlessMaridia",
"HiJump"
]
}
]
}
"canTrickyUseFrozenEnemies"
"Wave"
"h_canArtificialMorphBombs"
{
"or": [
"h_canArtificialMorphSpringBall",
{
"and": [
"Morph",
"canBeVeryPatient"
]
},
{
"and": [
"Gravity",
"h_canArtificialMorphIBJ",
"h_canArtificialMorphCeilingBombJump"
]
},
{
"and": [
"Gravity",
"h_canArtificialMorphIBJ",
"canBeVeryPatient"
]
}
]
}
|
|
From: 8
Bottom Junction
To: 3
Middle Right Door
Notable: true Wait a long time for the slow global crab. Freeze it when it comes around on the left, one tile above the bottom slope. Freeze the fish, get on the frozen crab, and wall jump between the fish and the wall and the wall. Wall jump towards the fish to gain height faster. Requires: "canSuitlessMaridia"
"canCrazyCrabClimb"
"canSunkenTileWideWallClimb"
"canBeVeryPatient"
"canMidairWiggle"
{
"obstaclesNotCleared": [
"A"
]
}
|
|
From: 9
Junction Below Speed Blocks
To: 4
Top Right Door
Notable: true After the global crab passes and starts climbing up, use a super and freeze it mid air to get to the left platform. Jump and a quick crab will start moving down the right wall. Quickly shoot it and freeze it to get over to the right. Wait a long while for the global crab to return. Let it pass, then use a super to freeze it mid air and get to the next platform. Follow the global crab the rest of the way up to the door while using it and the fish as platforms on the way. For a faster but tighter strat, knock off the first downward moving crab with a super and follow it up while freezing it and performing precise platforming. Requires: "canBeVeryPatient"
"canSuitlessMaridia"
"canCrazyCrabClimb"
{
"ammo": {
"type": "Super",
"count": 2
}
}
{
"obstaclesNotCleared": [
"A"
]
}
|
|
From: 1
Top Left Door
To: 1
Top Left Door
Follow the crab from the bottom right door to the top left door with Gravity or Grapple. It is also possible to knock the crab off of the middle peak with a super and follow it to the left with Ice or HiJump and Spring Ball. Requires: "canBeVeryPatient"
{
"or": [
"canGravityJump",
{
"and": [
"canPreciseGrapple",
{
"or": [
"HiJump",
"Gravity"
]
}
]
},
{
"and": [
{
"ammo": {
"type": "Super",
"count": 1
}
},
{
"or": [
"canTrickyUseFrozenEnemies",
{
"and": [
"HiJump",
"canSpringBallJumpMidAir"
]
}
]
}
]
}
]
}
Exit condition: {
"leaveWithGModeSetup": {}
}
|
|
From: 1
Top Left Door
To: 1
Top Left Door
Follow the crab from the bottom right door to the top left door. It is also possible to knock the crab off of the middle peak with a super and follow it. Requires: "h_canFrozenEnemyRunway"
"Gravity"
"canBeVeryPatient"
{
"or": [
"canGravityJump",
"canPreciseGrapple",
{
"ammo": {
"type": "Super",
"count": 1
}
}
]
}
Exit condition: {
"leaveWithRunway": {
"length": 4,
"openEnd": 0
}
}
|
|
Requires: {
"or": [
{
"and": [
"Gravity",
"SpaceJump"
]
},
{
"and": [
"HiJump",
"canPreciseGrapple",
{
"or": [
"Gravity",
"canSpringBallJumpMidAir"
]
}
]
},
{
"and": [
"HiJump",
"canGravityJump",
"canBeVeryPatient"
]
}
]
}
"canUpwardGModeSetup"
"canTrickyUseFrozenEnemies"
{
"or": [
"Morph",
"canTwoTileSqueeze"
]
}
Exit condition: {
"leaveWithGModeSetup": {}
}
|
|
From: 7
Lower Hills Junction
To: 10
Upper Right Ledge Junction
Notable: true Climbing the right side of Mt. Everest with only two supers and ice. (As used in 14% Icebooster) Requires luring 2 crabs. Use a super to knock off and freeze a crab midair. Be sure to lure a crab to the next section to crab climb further. If Samus has 2 supers, it is easier to bring 3 crabs; the third is from the morph tunnel to the left. Lure 2 crabs to the next section for a slightly easier crab climb. Note: The hardest part of this climb is the pixel precision when jumping around a ledge. Too many pixels: left is a fall, right you clip through the crab, low you miss the jump and fall, high is a bonk or crab clip. Requires: "canSuitlessMaridia"
"canCrazyCrabClimb"
"canTrickyJump"
"canBeVeryPatient"
{
"ammo": {
"type": "Super",
"count": 1
}
}
Clears obstacles: A, B |
|
From: 7
Lower Hills Junction
To: 10
Upper Right Ledge Junction
Notable: true Climbing the right side of Mt. Everest with only two supers and ice. (As used in 14% Icebooster) Requires luring 3 crabs; the third crab is from the morph tunnel to the left. Use a super to knock off and freeze a crab midair. Be sure two crabs make it to the next section in order to crab climb further. Note: The hardest part of this climb is the pixel precision when jumping around a ledge. Too many pixels: left is a fall, right you clip through the crab, low you miss the jump and fall, high is a bonk or crab clip. Requires: "canSuitlessMaridia"
"canCrazyCrabClimb"
"canTrickyJump"
"canBeVeryPatient"
{
"ammo": {
"type": "Super",
"count": 1
}
}
Clears obstacles: A, B |
|
From: 10
Upper Right Ledge Junction
To: 4
Top Right Door
Notable: true Climbing the right side of Mt. Everest with only two supers and ice. (As used in 14% Icebooster) Requires originally luring 3 crabs. Two crabs and one super are needed from this location. Use a super to knock off and freeze a crab midair. Once close to the upper platform, freeze the crab at knee height to stand on it to jump up. Note: The hardest part of this climb is the pixel precision when jumping around a ledge. Too many pixels: left is a fall, right you clip through the crab, low you miss the jump and fall, high is a bonk or crab clip. Requires: "canSuitlessMaridia"
"canCrazyCrabClimb"
"canTrickyJump"
"canBeVeryPatient"
{
"ammo": {
"type": "Super",
"count": 1
}
}
{
"obstaclesCleared": [
"A"
]
}
|
|
IBJ up the climb. This is a lot easier with PBs or Spring Ball to help kill the enemies. With PBs, use one on entry to deal with the Puyos, then IBJ up the right side and use another to kill the middle Choot. Otherwise, Kill the Puyos then the bottom Choot with Bombs, falling off when necessary, then climb the left side of the room. Entrance condition: {
"comeInWithGMode": {
"mode": "any",
"morphed": true
}
}
Requires: "h_canArtificialMorphIBJ"
{
"or": [
"h_canArtificialMorphSpringBall",
{
"and": [
"h_canArtificialMorphPowerBomb",
"h_canArtificialMorphPowerBomb"
]
},
{
"and": [
"h_canArtificialMorphStaggeredIBJ",
"canBeVeryPatient"
]
}
]
}
|
|
From: 1
Left Door
To: 1
Left Door
Requires: "canBeVeryPatient" "canManipulateMellas" Exit condition: {
"leaveWithGModeSetup": {}
}
|
|
To avoid damage, the Choot can be killed and then Samus can climb back up again. Requires: {
"or": [
"canConsecutiveWalljump",
"h_canFly"
]
}
{
"or": [
{
"enemyKill": {
"enemies": [
[
"Choot"
]
],
"explicitWeapons": [
"Wave",
"Spazer",
"PowerBomb"
]
}
},
{
"and": [
"canBeVeryPatient",
{
"enemyKill": {
"enemies": [
[
"Choot"
]
]
}
}
]
}
]
}
|
|
It takes approximately 3 minutes for the Puyos to wake up and get to the doorway. Requires: "canBeVeryPatient"
{
"enemyDamage": {
"enemy": "Puyo",
"type": "contact",
"hits": 1
}
}
|
|
It takes approximately 3 minutes for the Puyos to wake up and get to the doorway. Requires: "canBeVeryPatient" Exit condition: {
"leaveWithGModeSetup": {}
}
|
|
Run from or Roll under the pirate lazers. The Pirates will also not shoot if they come on screen while Samus is crouched. Requires: {
"or": [
"HiJump",
"canWalljump",
"h_canFly"
]
}
{
  "or": [
    {
      "and": [
        "canDodgeWhileShooting",
        "canCameraManip",
        {
          "or": [
            "Plasma",
            {
              "and": [
                "h_hasBeamUpgrade",
                "canBePatient"
              ]
            },
            "canBeVeryPatient"
          ]
        }
      ]
    },
    {
      "and": [
        {
          "or": [
            "canBePatient",
            {
              "enemyDamage": {
                "enemy": "Tourian Space Pirate (all)",
                "type": "contact",
                "hits": 1
              }
            }
          ]
        },
        {
          "or": [
            "Morph",
            "canTurnaroundAimCancel",
            "canXRayTurnaround"
          ]
        }
      ]
    }
  ]
}
|
|
From: 1
Left Door
To: 2
Right Door
Take the bottom path and place many bombs near the speed blocks to overload PLMs and go through them. Entrance condition: {
"comeInWithGMode": {
"mode": "any",
"morphed": true
}
}
Requires: "h_canArtificialMorphIBJ"
{
"or": [
"h_canArtificialMorphCeilingBombJump",
"canBeVeryPatient"
]
}
|
|
Run from or Roll under the pirate lazers. The Pirates will also not shoot if they come on screen while Samus is crouched. Requires: {
"or": [
{
"and": [
"canDodgeWhileShooting",
"canCameraManip",
{
"or": [
"Plasma",
{
"and": [
"h_hasBeamUpgrade",
"canBePatient"
]
},
"canBeVeryPatient"
]
}
]
},
{
"and": [
{
"or": [
"canBePatient",
{
"enemyDamage": {
"enemy": "Tourian Space Pirate (all)",
"type": "contact",
"hits": 1
}
}
]
},
{
"or": [
"Morph",
"canTurnaroundAimCancel",
"canXRayTurnaround"
]
}
]
}
]
}
|
