canCameraManip (Medium)
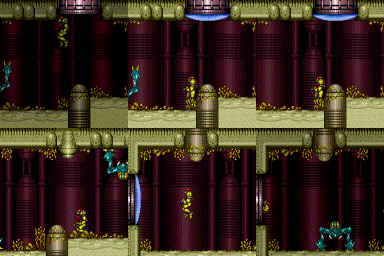
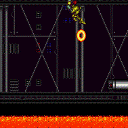
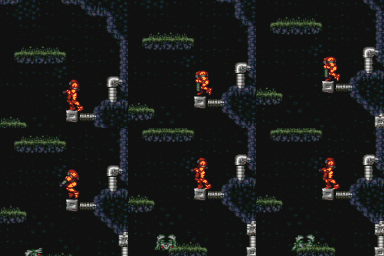
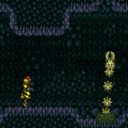
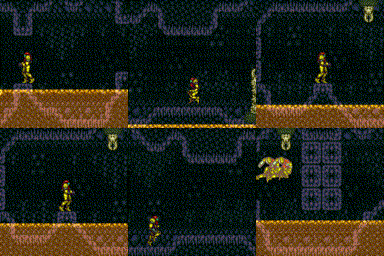
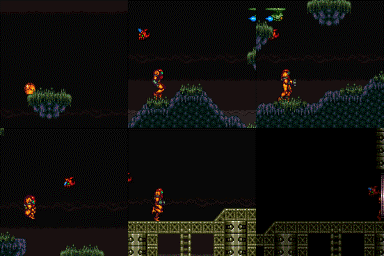
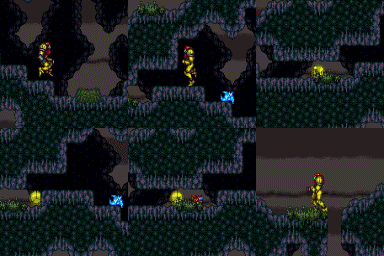
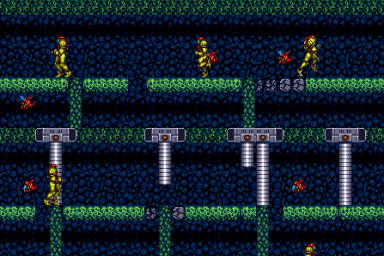
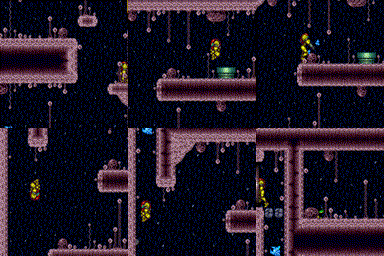
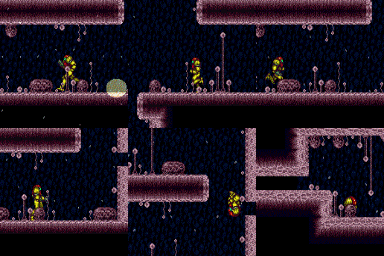
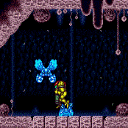
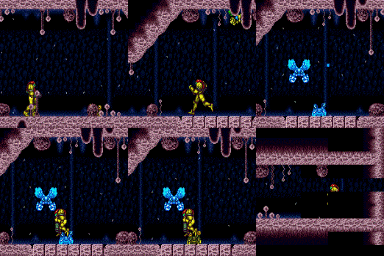
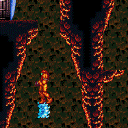
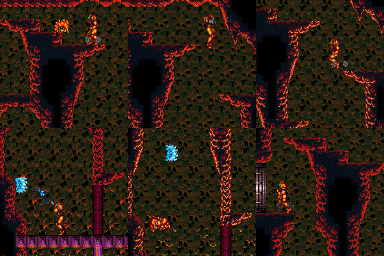
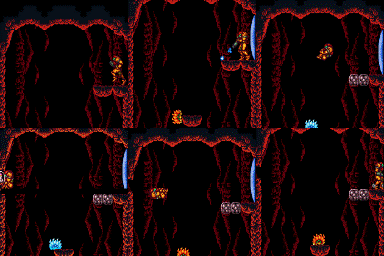
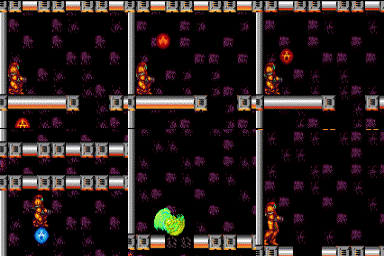
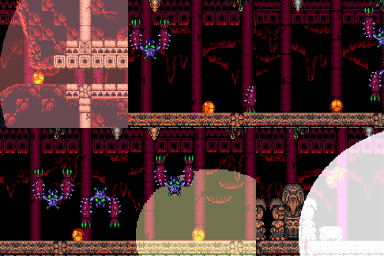
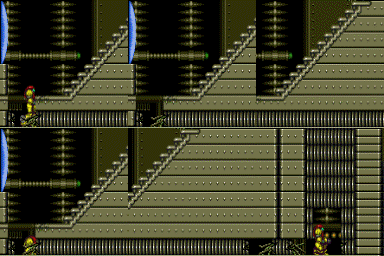
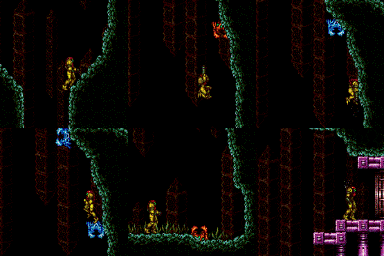
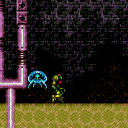
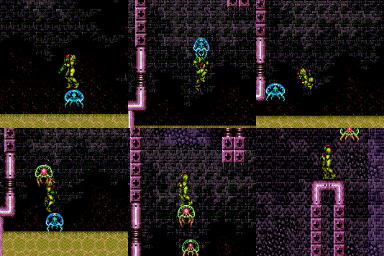
The ability to scroll the camera to bring enemies or projectiles on or off camera. Most enemes become inactive while off camera, and most projectiles cease to exist. This can be done by jumping in place; changing Samus' hitbox with aim down will scroll the camera lower. By running back and forth the camera will scroll horizontally; Moonwalk can be used to camera scroll without travelling as far.
Strats ()
|
Open the Gauntlet Entrance door by shooting a charged Wave shot through the right wall to wrap around to hit the door. Near the top right door, move the right wall a bit off camera. Jump and shoot a charge shot diagonally into the floor just before landing while moving rightwards. Listen for the door opening to ensure it worked. Requires: "canCameraManip"
"canWrapAroundShot"
{
"doorUnlockedAtNode": 1
}
Clears obstacles: C Unlocks doors: {"nodeId":1,"types":["ammo"],"requires":["never"]}
|
|
From: 2
Right Door
To: 2
Right Door
Notable: true Jump towards the yapping maw before it is on screen so it moves up. Quickly move it off camera so it will be `frozen` in place. Shortcharge like normal. If the Yapping Maw is returning to its hole, it will usually not grab Samus. Requires: {
"obstaclesCleared": [
"A"
]
}
"canMidairShinespark"
"canCameraManip"
{
"shinespark": {
"frames": 45
}
}
{
"canShineCharge": {
"usedTiles": 22,
"openEnd": 0,
"startingDownTiles": 2,
"steepDownTiles": 3,
"steepUpTiles": 2
}
}
Exit condition: {
"leaveWithSpark": {
"position": "top"
}
}
|
|
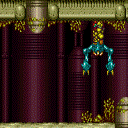
Jump and aim down to lower the camera to see where the crabs are. Alternatively use a Power Bomb to kill them or risk tanking a hit. Requires: {
"or": [
"canCameraManip",
"h_canUsePowerBombs",
{
"enemyDamage": {
"enemy": "Sciser",
"type": "contact",
"hits": 1
}
}
]
}
|
|
West Ocean - G-Mode Setup Lure Zeb from Below (to Top Right Section - Top Right Door) (Extreme)
West Ocean
From: 6
Middle Right Door (By Zeb Farm)
To: 2
Upper Right Section - Top Right Door
Notable: true Start from the Middle Right Door next to the Zeb farm. While standing on the right of the Zeb farm, freeze the Zeb while it is still moving up and facing to the right. Quickly go through the morph tunnel with a Bomb, Power Bomb, or Spring Ball, and get onto the small floating platform just above the Zeb farm. After the Zeb is visible, freeze it and jump on top of it. Use the Zeb as a platform to climb high enough to get it to be aligned with the door. Use the background to see how high the Zeb is - Get the Zeb 2-3 tiles higher than the thinner bright line in the background. Note that if the Zeb is unfrozen and off screen horizontally it will despawn, but if it's off screen vertically it will not. Chase the Zeb towards the doorway, refreezing it as needed. Requires: "canTrickyUseFrozenEnemies"
{
"or": [
"h_canBombThings",
"h_canUseSpringBall",
"h_canUsePowerBombs"
]
}
"canCameraManip"
Exit condition: {
"leaveWithGModeSetup": {}
}
Unlocks doors: {"types":["ammo"],"requires":[]}
|
|
West Ocean - G-Mode Setup Lure Zeb from Below (to Top Right Section - Bottom Right Door) (Extreme)
West Ocean
From: 6
Middle Right Door (By Zeb Farm)
To: 3
Upper Right Section - Bottom Right Door
Notable: true Start from the Middle Right Door next to the Zeb farm. While standing on the right of the Zeb farm, freeze the Zeb while it is still moving up and facing to the right. Quickly go through the morph tunnel with a Bomb, Power Bomb, or Spring Ball, and get onto the small floating platform just above the Zeb farm. After the Zeb is visible, fall off the platform to make the Zeb move horizontally at the right height to hit Samus in the doorway to the right. Note that if the Zeb is unfrozen and off screen horizontally it will despawn, but if it's off screen vertically it will not. Requires: "canTrickyUseFrozenEnemies"
{
"or": [
"h_canBombThings",
"h_canUseSpringBall",
"h_canUsePowerBombs"
]
}
"canCameraManip"
Exit condition: {
"leaveWithGModeSetup": {}
}
Unlocks doors: {"types":["ammo"],"requires":[]}
|
|
From: 6
Middle Right Door (By Zeb Farm)
To: 12
Top Junction
Notable: true Get a Zeb to move left into the morph passage, and reach the end of the tunnel before it. Freeze the bug at the correct height, such that it will move and be able to hit Samus while in the morph tunnel. While in the first two-tile tall region, shoot and refreeze the bug. Then go to the second two-tile region and shoot the block. Return and lure the bug such that it hits Samus and boosts her up and onto the ledge to escape. Be careful not to despawn the enemy by moving it off camera, except while it is frozen. This strat is a one-shot try and failure is a softlock. Requires: "Morph"
"canNeutralDamageBoost"
"canTrickyUseFrozenEnemies"
"canCameraManip"
{
"enemyDamage": {
"enemy": "Zeb",
"hits": 1,
"type": "contact"
}
}
|
|
Crouch and shoot the shot blocks from afar. There is enough time to get past them without Gravity before they respawn. If the shot blocks do not break, roll all the way to the left to reset the camera, then go back. Requires: "Morph" "canCameraManip" |
|
Use both Geemers to climb the tall shaft by repeatedly freezing them. Note that one moves locally when on camera and the other moves globally. Requires: {
"or": [
"h_canUsePowerBombs",
{
"and": [
{
"obstaclesCleared": [
"B"
]
},
"Morph"
]
},
{
"obstaclesCleared": [
"C"
]
}
]
}
{
"or": [
{
"obstaclesCleared": [
"A"
]
},
"ScrewAttack",
{
"and": [
"h_canUseMorphBombs",
"canMidAirMorph"
]
}
]
}
"canTrickyUseFrozenEnemies"
"canTrickyJump"
"canCameraManip"
Clears obstacles: A, B |
|
From: 4
Right Item
To: 2
Top Left Door
Use both Geemers to climb the tall shaft by repeatedly freezing them. Note that one moves locally when on camera and the other moves globally. Once Samus is close to the top Bomb Block, freeze one Geemer low and jump as high as possible before placing a power bomb. Continue climbing with the Geemer that survives. Requires: {
"or": [
"h_canUsePowerBombs",
{
"and": [
{
"obstaclesCleared": [
"B"
]
},
"Morph"
]
},
{
"obstaclesCleared": [
"C"
]
}
]
}
"h_canUsePowerBombs"
"canTrivialMidAirMorph"
"canTrickyUseFrozenEnemies"
"canTrickyJump"
"canBePatient"
"canCameraManip"
Clears obstacles: A, B |
|
From: 1
Left Door
To: 2
Right Door
Notable: true Spawn a Zeb then run and do a very small spin jump to clip into the first gate before the Zeb reaches you. Do a damage boost off of the Zeb while inside the first gate to get enough speed to clip into the next gate. It is also possible to clip into the gates by aiming down while in the spin jump. Requires: {
"obstaclesNotCleared": [
"A"
]
}
"canCrouchGateClip"
"canCameraManip"
"canHorizontalDamageBoost"
{
"enemyDamage": {
"enemy": "Zeb",
"hits": 2,
"type": "contact"
}
}
Clears obstacles: A |
|
From: 12
Above Power Bomb Blocks - Main Junction
To: 13
Below Power Bomb Blocks - Main Junction
Freeze two Zeelas to perform an 'Enemy Stuck Moonfall' in order to clip through the Power Bomb blocks. Position one Zeela upside down on a ceiling, and another below it on the ground. The global Zeela paired with either the lowest Zeela, or the other perimeter Zeela can be used, but freezing them together is the hardest part. Freezing one and then unequipping Ice Beam to dispel the ice effect or manipulating the camera can be used to synchronize them. If the moonfall is initiated immediately after freezing both enemies, it is possible to gain enough speed to automatically clip through the enemy and the floor; in this case, hold an angle button to buffer a pose change. Alternatively, and more easily, when one of the enemies is about to thaw, hold backward in order to move forward and fall off the enemy with a buffered turnaround, which will clip through the floor without needing as much fall speed. From directly on top of the Power Bomb blocks, no pose change is needed. Two Super Missiles can speed up the Zeela setup greatly by knocking them off of the wall. Requires: "canEnemyStuckMoonfall"
"canTrickyUseFrozenEnemies"
{
"or": [
"canDisableEquipment",
"canCameraManip"
]
}
{
"or": [
"canBePatient",
{
"ammo": {
"type": "Super",
"count": 2
}
}
]
}
|
|
From: 13
Central Junction
To: 5
Left Side - Bottom Middle Door (Blocked by Crumble Blocks)
Raise a Zeb to be just below the crumble blocks and blindly freeze it to set up an ice clip to reach the Power Bomb room exit door. Get a bug from the pipe to spawn facing left and freeze it while moving to the ledge below the Hopper room door. While crouched, a spazer or wave beam shot will shoot through the floor in front of Samus. Shoot then immediately jump so that the bug can be frozen at a pixel perfect height, which is higher than where it would typically be frozen (when not needing to preserve a flash suit). Once frozen, wait for the bug to thaw, then blindly follow it to the left without letting it go off camera, which would cause it to despawn. Refreeze it below the crumble blocks, perform a very precise ledge grab onto it, then jump through the crumble block to reach the door, all while carefully avoiding losing the flash suit. Requires: "canStaggeredWalljump"
"canCameraManip"
"canOffScreenMovement"
{
"or": [
"Wave",
"Spazer"
]
}
"canInsaneJump"
"h_canHighPixelIceClip"
|
|
From: 13
Central Junction
To: 5
Left Side - Bottom Middle Door (Blocked by Crumble Blocks)
Notable: true Raise a Zeb to be just below the crumble blocks and blindly freeze it to set up an ice clip to reach the Power Bomb room exit door. Get a bug from the pipe to spawn facing left and freeze it while moving to the ledge below the Hopper room door. While crouched, a spazer or wave beam shot will shoot through the floor in front of Samus. The bug must be frozen at a height between where Samus is crouched and where she is standing. Once frozen, somehow track how long until the freeze effect expires, and when the bug will reach the crumble blocks. If the bug is off camera when not frozen, it will despawn. Refreeze the Zeb below the crumble blocks and ice clip up to reach the door. Requires: "canStaggeredWalljump"
"canCameraManip"
{
"or": [
"Wave",
"Spazer"
]
}
"h_canPreciseIceClip"
|
|
From: 13
Central Junction
To: 7
Right Side - Bottom Middle Door (Behind the Super Block)
Notable: true Break the bomb blocks then shoot a super into the morph tunnel to break the super block off screen. Requires pixel precision, although there are several pixels that work. The camera must be fully scrolled to the right, which may require going far left and back. Requires: "canOffScreenSuperShot" "h_canBombThings" "canCameraManip" Clears obstacles: F |
|
From: 13
Central Junction
To: 10
Top Item (Above Hopper Pit)
Lead an enemy through parts of the room as a way to reach the Mission Impossible missile location. The respawning Zeb can be used by carfeully keeping it on camera and staying high enough that it does not attack. Wait for it to respawn before attempting to guide it. Or a Reo can be brought up to this section of room, but sometimes gets stuck on the way. Requires: {
"or": [
"canTrickyUseFrozenEnemies",
{
"and": [
"canTrickyJump",
"canHorizontalDamageBoost",
{
"enemyDamage": {
"enemy": "Zeb",
"type": "contact",
"hits": 1
}
}
]
}
]
}
"canCameraManip"
|
|
From: 15
G-Mode Morph Junction (Middle Right)
To: 4
Left Side - Middle Doorway (Behind the Power Bomb Blocks)
Carefully dodge the Reos to the left of the door leading to the Pink Hopper Room and lure them and the Sidehoppers close to each other. Place a Power Bomb to kill them and both Sidehoppers above. Go down below and lure the third Reo, below the Zeb pipe, off screen to the left. Overload PLMs by moving through the camera scroll blocks in front of the passageway leading to the exit of Spore Spawn Supers. Either carefully jump out of this morph tunnel or use a Power Bomb boost Spring Ball jump to get up to the ledge. Get into the Sidehopper pit and jump up and into the tunnel and go through the crumble blocks to the door to the left. Requires: "canEnterGMode"
"h_canArtificialMorphSpringBall"
"canCameraManip"
"h_canArtificialMorphPowerBomb"
{
"or": [
"HiJump",
"h_canArtificialMorphSpringBallBombJump",
"canTrickyJump"
]
}
Clears obstacles: C |
|
G-mode Morph Overload PLMs with Power Bombs and Spring Ball, Break Power Bomb Blocks (Extreme)
Big Pink
From: 15
G-Mode Morph Junction (Middle Right)
To: 4
Left Side - Middle Doorway (Behind the Power Bomb Blocks)
Carefully dodge the Reos to the left of the door leading to the Pink Hopper Room and lure them and the Sidehoppers close to each other. Place a Power Bomb to kill them and both Sidehoppers above. Go down below and lure the third Reo, below the Zeb pipe, off screen to the left. Overload PLMs by moving through the camera scroll blocks in front of the passageway leading to the exit of Spore Spawn Supers. Either carefully jump out of this morph tunnel or use a Power Bomb boost Spring Ball jump to get up to the ledge. Get into the Sidehopper pit and jump up and into the tunnel and go through the crumble blocks to the door to the left. Use a Power Bomb then quickly exit G-Mode before it explodes to also break the blocks. Requires: "canEnterGMode"
"h_canArtificialMorphSpringBall"
"canCameraManip"
"h_canArtificialMorphPowerBomb"
"h_canArtificialMorphPowerBomb"
{
"or": [
"HiJump",
"h_canArtificialMorphSpringBallBombJump",
"canTrickyJump"
]
}
Clears obstacles: B, C |
|
From: 3
Right Door
To: 2
Bottom Left Door
Notable: true Use a Reo (Bee) and a Zeela to perform an 'Enemy Stuck Moonfall', clipping Samus through the Speed blocks. Break the Bomb blocks to bring enemies over to the Speed blocks. Have a Reo wait off camera while the Zeela walks onto the Speed blocks, then freeze the Bee just above Samus' head. Try to freeze both enemies near the same time and start the moonfall as quickly as possible. Requires: "canTrickyUseFrozenEnemies"
"canEnemyStuckMoonfall"
"canBePatient"
"canCameraManip"
{
"obstaclesCleared": [
"A"
]
}
|
|
Requires: "canLateralMidAirMorph"
"canTrickyJump"
{
"or": [
"canCameraManip",
{
"enemyDamage": {
"enemy": "Cacatac",
"hits": 1,
"type": "contact"
}
}
]
}
|
|
From: 1
Left Side - Top Door
To: 7
Top Right Door
Kill King Cac by scrolling the camera, before attempting the jump. Requires: {
"doorUnlockedAtNode": 1
}
{
"or": [
"canTrickyJump",
{
"and": [
"SpeedBooster",
"canCarefulJump"
]
}
]
}
"canCameraManip"
|
|
King Cac can be killed by scrolling the camera before jumping across. Requires: "canWalljump"
"canCarefulJump"
{
"or": [
"canCameraManip",
"canStaggeredWalljump",
{
"and": [
"canNeutralDamageBoost",
{
"enemyDamage": {
"enemy": "Cacatac",
"type": "contact",
"hits": 1
}
}
]
}
]
}
|
|
From: 6
Middle Right Door
To: 10
G-Mode Morph Junction (Above the Power Bomb Blocks)
Lower the camera to watch the Wavers and to help avoid them. With Bombs alone, it may be helpful to kill the top Waver; this can be done by placing Bombs in a vertical line and then moving out of the way as it approaches. Entrance condition: {
"comeInWithGMode": {
"mode": "any",
"morphed": true
}
}
Requires: "h_canArtificialMorphMovement"
{
"or": [
{
"and": [
"canTrickyJump",
"canCameraManip"
]
},
"h_canArtificialMorphPowerBomb",
{
"enemyDamage": {
"enemy": "Waver",
"type": "contact",
"hits": 1
}
}
]
}
|
|
From: 7
Top Right Door
To: 10
G-Mode Morph Junction (Above the Power Bomb Blocks)
Lower the camera to watch the Wavers and to help avoid them. With Bombs alone, it may be helpful to kill the top Waver; this can be done by placing Bombs in a vertical line and then moving out of the way as it approaches. Entrance condition: {
"comeInWithGMode": {
"mode": "any",
"morphed": true
}
}
Requires: "h_canArtificialMorphMovement"
{
"or": [
{
"and": [
"canTrickyJump",
"canCameraManip"
]
},
"h_canArtificialMorphPowerBomb",
{
"enemyDamage": {
"enemy": "Waver",
"type": "contact",
"hits": 1
}
}
]
}
|
|
From: 3
Bottom Left Junction
To: 1
Left Door
Notable: true Guide the morph tunnel Sova on top of the shot blocks by keeping it on camera. Move the camera away once it is on top of the shot blocks. It will not move while off camera. Stand directly below the OffCamera Sova and fire up and jump to break the shot blocks. Either lower its health while guiding it, or as it begins to fall, there is time. As it falls, shoot again to freeze it at the right height. As a backup, the same Sova can be frozen on the left wall, dropped from the shot blocks again, or frozen on the right wall. Requires: "canTrickyUseFrozenEnemies"
"canTrickyJump"
"canCameraManip"
{
"heatFrames": 1100
}
|
|
From: 5
Lava, Center Namihe
To: 3
Above Lava Junction
Align with the above platform and scroll the camera left by walking into the left side of the bottom-most tiles. Freeze both left side Namihes and begin bomb jumping Requires: "Gravity"
{
"or": [
"h_lavaProof",
"canSuitlessLavaDive"
]
}
"canJumpIntoIBJ"
"canDoubleBombJump"
"Plasma"
"Ice"
"canCameraManip"
{
"heatFrames": 1040
}
{
"lavaFrames": 1020
}
|
|
Notable: true Use the bottommost right side namihe to generate a flame and walk with it to the bottommost left namihe head Use a turnaround animation as Samus is hit by the flame to cancel out knockback frames. While invulnerability frames are active, walljump up the spikes either 2 or 3 times and jump accross to catch the middle wall and climb from there. Requires: "canSuitlessLavaDive"
"canIframeSpikeJump"
"canStaggeredWalljump"
"canFastWalljumpClimb"
"canUseEnemies"
"canCameraManip"
{
"heatFrames": 600
}
{
"lavaFrames": 500
}
{
"enemyDamage": {
"enemy": "Namihe",
"type": "fireball",
"hits": 1
}
}
|
|
Notable: true Jump and aim down to lower the camera so the middle platform Sova starts moving. Then freeze it by aiming down, shoot the shot block, and use the Sova as a stable platform. Requires: "canTrickyUseFrozenEnemies"
"canCarefulJump"
"canCameraManip"
{
"heatFrames": 350
}
Clears obstacles: A |
|
Jump and aim down to lower the camera so the middle platform Sova starts moving. Then shoot the shot block and walljump off the left side of the middle platform to reach the item. Requires: "canPreciseWalljump"
"canTrickyJump"
"canCameraManip"
{
"heatFrames": 300
}
Clears obstacles: A |
|
From: 5
Small Platforms Junction
To: 1
Left Door
Lure a Mella from the right by breaking the speed blocks or using Morph. Then manipulate it to go high enough to be used in the left doorway. Raise the Mella up to just below the door's ledge then climb up to the door. Then the Mella will start moving upward, which means it comes at you partially blind. Getting it to reach the door, and not just short of the door is the hardest part. If it drops below the camera it will be necessary to go back down and raise it some more. Requires: "canManipulateMellas"
"canCameraManip"
"canBePatient"
"canTrickyJump"
{
"or": [
"SpaceJump",
{
"and": [
"HiJump",
"canSpringBallJumpMidAir"
]
},
{
"and": [
"canTrickyUseFrozenEnemies",
{
"and": [
"HiJump",
"canWalljump",
"canSpringBallJumpMidAir"
]
}
]
},
{
"and": [
"HiJump",
"SpeedBooster",
"canWalljump"
]
}
]
}
{
"or": [
{
"obstaclesCleared": [
"B"
]
},
"Morph"
]
}
Exit condition: {
"leaveWithGModeSetup": {}
}
Unlocks doors: {"types":["ammo"],"requires":[]}
|
|
From: 6
Bottom Right Corner Junction
To: 9
Junction Below Crumble Blocks, Set Up to Clip
Notable: true Guide the bottom-right MultiViola to the upper section of the room. Lure the Dessgeegas away to avoid killing the multiviola. Remove all enemies and possibly also the row of bomb blocks with a power bomb before attempting to guide the Multiviola. It will need to bounce each room segment multiple times before lining up to go through each shot block. Ice can be used to more safely get around the Multiviola as it is bouncing. However, opening the left side door will change the bounce locations and make the strat no longer possible. Instead the enemy can be allowed to go off camera and then Samus can prepare to run away as it comes back. Waiting in the next room segment is a safe way to wait for the Multiviola to bounce and still be able to break shot blocks. Requires: "h_heatProof"
"canTrickyUseFrozenEnemies"
{
"or": [
"canCameraManip",
"canDodgeWhileShooting"
]
}
{
"obstaclesNotCleared": [
"E"
]
}
{
"enemyDamage": {
"enemy": "Multiviola",
"type": "contact",
"hits": 5
}
}
{
"or": [
{
"enemyKill": {
"enemies": [
[
"Dessgeega"
],
[
"Dessgeega"
],
[
"Dessgeega"
]
],
"explicitWeapons": [
"Plasma",
"ScrewAttack",
"Charge+Ice+Wave",
"Ice+Wave+Spazer",
"Missile",
"Super"
]
}
},
{
"obstaclesCleared": [
"C"
]
}
]
}
{
"or": [
{
"enemyKill": {
"enemies": [
[
"Dessgeega",
"Dessgeega"
]
],
"explicitWeapons": [
"Plasma",
"ScrewAttack",
"Charge+Ice+Wave",
"Ice+Wave+Spazer",
"Missile",
"Super"
]
}
},
{
"obstaclesCleared": [
"F"
]
}
]
}
Clears obstacles: C, D, F |
|
From: 7
Junction Left of Morph Tunnel
To: 4
Junction Right of Power Bomb Blocks
Notable: true Roll under the Dessgeegas until all three move off camera and stop chasing Samus. Roll directly from the Morph tunnel, past the first Dessgeega. Stop and let it jump left of Samus, then move it off camera on the next jump. Back away from the Left ground hopper then roll under it. Lastly, manipulate the ceiling hopper off camera if it has followed Samus this far. Requires: "Morph"
"canCameraManip"
{
"heatFrames": 210
}
|
|
From: 3
Bottom Left Door
To: 4
Bottom Chozo Item
Notable: true Break the shot blocks with Power Beam by first rolling into the morph tunnel to unlock camera scroll for this room. The blocks can now be cleared from the left side by shooting and quickly scrolling the camera to the right a small amount. A shot from crouch will reach the bottom block by following the shot as a ball, or wave beam works from the stairs. Screw Attack is still needed to clear the bomb blocks. Requires: "ScrewAttack" "Morph" "canCameraManip" |
|
Near the bottom left door, there are three pathways upwards: one directly above the door and two to the right. Between the right pathways, is a crab moving to the right. Shooting a super against the wall will make it fall off and move left. Climb the crab up the left wall. Watch out for the crab above that is heading into the morph tunnel. Jump to the right platform before the upward crab goes into the tunnel. Lure the crab out of the hole by running to the right of the hill then back left or use moonwalk to scroll the camera. Near the end is particularly tricky. When the crab is on the underside of the metal blocks, freeze it and use it as a stepping platform. To do this, crouch jump and while moving upwards, hold left against the crab to get extra vertical movement. Down grabbing at the top is helpful. Requires: "canSuitlessMaridia"
"canTrickyJump"
"canTrickyUseFrozenEnemies"
{
"or": [
{
"and": [
"canCrazyCrabClimb",
"h_canCrouchJumpDownGrab"
]
},
"HiJump",
"canSpringBallJumpMidAir"
]
}
"canCameraManip"
{
"ammo": {
"type": "Super",
"count": 1
}
}
|
|
From: 7
Lower Hills Junction
To: 10
Upper Right Ledge Junction
Notable: true Climb the bottom right wall of Mt. Everest with Ice and HiJump while also luring a crab to the next platform to be used to ascend the next wall. The trickiest part of the climb is getting past the final overhang. This can be done with an underwater wall jump if the crab is low, a precise crouch jump and down grab if it is higher, or a flatley jump off of the crab if it is higher still. Two crabs makes it significantly easier to lure one to the top - simply let one go ahead of Samus. For a faster setup, one crab may be used by perform the final jump as it is unfreezing so it starts moving upward. Then go to the lower ground a bit to the right, jump and aim down to lower the camera to lure the crab. Note: The hardest part of this climb is the pixel precision when jumping around a ledge. Too many pixels: left is a fall, right you clip through the crab, low you miss the jump and fall, high is a bonk or crab clip. Requires: "canSuitlessMaridia"
"canCrazyCrabClimb"
"HiJump"
"canTrickyJump"
"canCameraManip"
{
"or": [
"canUnderwaterWalljump",
"h_canCrouchJumpDownGrab",
"canFlatleyJump",
"canInsaneJump"
]
}
Clears obstacles: A, B |
|
From: 7
Lower Hills Junction
To: 10
Upper Right Ledge Junction
Notable: true Use the crab near the bottom right door. Only one spring ball jump is needed, it is to get up onto the flat platform. After the spring ball jump, if the crab did not follow, go to the lower ground a bit to the right, jump and aim down to lower the camera to lure the crab. Note: The hardest part of this climb is the pixel precision when jumping around a ledge. Too many pixels: left is a fall, right you clip through the crab, low you miss the jump and fall, high is a bonk or crab clip. Requires: "canSuitlessMaridia" "canCrazyCrabClimb" "canTrickySpringBallJump" "canTrickyJump" "canCameraManip" Clears obstacles: A, B |
|
From: 10
Upper Right Ledge Junction
To: 4
Top Right Door
Notable: true Requires having already lured a crab to this location, likely from above the bottom right door. Freeze the crab very high before going to the ledge on the right, delay jumping so it thaws and moves up a bit while on screen, jump aim down to lower the camera and lure it more. Alternatively, using moonwalk and a flatley jump at the top can prevent needing the crab again. Note: The hardest part of this climb is the pixel precision when jumping around a ledge. Too many pixels: left is a fall, right you clip through the crab, low you miss the jump and fall, high is a bonk or crab clip. Requires: "canSuitlessMaridia"
"canCrazyCrabClimb"
"HiJump"
"canTrickyJump"
"canCameraManip"
{
"obstaclesCleared": [
"B"
]
}
|
|
From: 10
Upper Right Ledge Junction
To: 4
Top Right Door
Notable: true Requires having already lured a crab to this location, likely from above the bottom right door. Freeze the crab high before going to the ledge on the right, delay spring ball jumping so it thaws and moves up while on screen, jump aim down to lower the camera and lure it more. Freeze the crab again to use as a platform, approximately knee high. Jump on it and then jump to the platform above. Note: The hardest part of this climb is the pixel precision when jumping around a ledge. Too many pixels: left is a fall, right you clip through the crab, low you miss the jump and fall, high is a bonk or crab clip. Requires: "canSuitlessMaridia"
"canCrazyCrabClimb"
"canTrickySpringBallJump"
"canTrickyJump"
"canCameraManip"
{
"obstaclesCleared": [
"B"
]
}
|
|
From: 1
Left Door
To: 3
Top Right Door
Notable: true Climb a mochtroid with ice using the wall to help guide them. Mochtroid damage is pretty hard to avoid, but it is possible. Requires: "canSuitlessMaridia"
"canMochtroidIceClimb"
"canPlayInSand"
"canCameraManip"
"canTrickyJump"
{
"or": [
"canInsaneJump",
{
"enemyDamage": {
"enemy": "Mochtroid",
"type": "contact",
"hits": 2
}
}
]
}
|
|
Climb a mochtroid with ice using the wall to help guide them. It is very easy to take damage if not preemptive with freezes. Mochtroid movement and freeze timing gets harder at the waterline. Requires: "h_canNavigateUnderwater"
"canMochtroidIceClimb"
"canPlayInSand"
"canCameraManip"
{
"or": [
"Gravity",
"HiJump"
]
}
"canTrickyJump"
{
"or": [
"canInsaneJump",
{
"enemyDamage": {
"enemy": "Mochtroid",
"type": "contact",
"hits": 2
}
}
]
}
|
|
From: 3
Top Right Door
To: 1
Left Door
Notable: true Jump out of the sand to lure down mochtroids to freeze. It's recommended to bring a Mochtroid into the middle section of the room. Mochtroid damage is pretty hard to avoid, but can be. Requires: "canSuitlessMaridia"
"canTrickyJump"
"canPlayInSand"
"canMochtroidIceClimb"
"canCameraManip"
{
"or": [
"canInsaneJump",
{
"enemyDamage": {
"enemy": "Mochtroid",
"type": "contact",
"hits": 2
}
}
]
}
|
|
Jump out of the sand to lure down mochtroids to freeze. It's recommended to bring a Mochtroid into the middle section of the room. Mochtroid damage is pretty hard to avoid, but can be. Mochtroid movement and freeze timing gets harder at the waterline. Requires: "h_canNavigateUnderwater"
{
"or": [
"Gravity",
"HiJump"
]
}
"canTrickyJump"
"canPlayInSand"
"canMochtroidIceClimb"
"canCameraManip"
{
"or": [
"canInsaneJump",
{
"enemyDamage": {
"enemy": "Mochtroid",
"type": "contact",
"hits": 2
}
}
]
}
|
|
Damage boost up to the higher ledge using a Cacatac spike. Spikes only exist on camera so follow a vertically fired spike up to the correct height. Requires: "Gravity"
"canHorizontalDamageBoost"
"canCameraManip"
{
"enemyDamage": {
"enemy": "Cacatac",
"hits": 1,
"type": "spike"
}
}
|
|
Using the bottom of the room, shortcharge to use the echoes created by shinesparking to kill all of the Standing Pirates. Either lead the pirate to the left wall or take a hit to gain iframes to use the full runway to charge a spark To lead a pirate, have it shoot in the direction you want it to go. Then jump overhead and crouch on the other side. Or, jump and aim down while on the sloped tiles just above to lower the camera and wait for the pirate to move to the correct spot. Turn around and diagonal spark the ceiling to kill the lowest pirate, and later the middle pirates. Building a spark towards the left allows for enough run speed to jump to the middle level. Then vertical shinespark out which kills the top pirate. Requires: {
"or": [
"Morph",
"canCarefulJump",
"canCameraManip"
]
}
"canShinechargeMovementComplex"
{
"canShineCharge": {
"usedTiles": 21,
"openEnd": 0
}
}
{
"shinespark": {
"frames": 30,
"excessFrames": 7
}
}
"canUseSpeedEchoes"
{
"or": [
"canCameraManip",
{
"and": [
{
"canShineCharge": {
"usedTiles": 19,
"openEnd": 0
}
},
{
"shinespark": {
"frames": 2,
"excessFrames": 2
}
}
]
},
{
"and": [
{
"canShineCharge": {
"usedTiles": 21,
"openEnd": 0
}
},
{
"shinespark": {
"frames": 3,
"excessFrames": 3
}
},
{
"enemyDamage": {
"enemy": "Pink Space Pirate (standing)",
"type": "laser",
"hits": 1
}
}
]
}
]
}
Clears obstacles: A |
|
From: 3
Central Junction with all Standing Pirates Killed
To: 1
Top Left Door
It's possible to climb up with just ice by freezing the wall space pirates (who can be frozen and killed without Plasma). Clearing the gray door lock would require killing the frozen pirate after using it to climb. To do this most easily, freeze the Pirate as high as possible on the left wall. Bait the pirate to jump across the room early so that it stays high on the wall, or bring it on camera by jumping below the platform if the wall pirate gets too low. After reaching the top, it can help to reset the camera by moving to the right on the center platform and then back left. Requires: "canTrickyUseFrozenEnemies" "canPreciseWalljump" "canCameraManip" |
|
From: 4
Junction Below Sand Entrance
To: 1
Left Door
Notable: true If entering from the sandfall above, come in at the far left of the transition, with either a spin-jump or i-frames, to avoid the Evir shot; land on the right side of the pillar to the left, being careful to not bring left Evir on camera. If coming from the right side of the room, then moonwalk on the center pillar to scroll the camera as far right as possible, to avoid getting hit by an Evir shot; alternatively, jump slightly to the left and freeze the Evir, then return back to the center pillar before jumping across the sand. Freeze the right Evir and jump onto it. Quickly move left and fire an angle-down shot to freeze the left Evir before it descends too far. Jump onto the left Evir, back up to the right side of it to maximize space to build momentum, and jump to the left onto the sand and then onto the ledge. If Samus does not quite get enough height to make it onto the ledge, then break spin, turn around to the right, land on the sand again, and do a turnaround spin-jump to the left. If the Evirs descend too far, it is possible to use a Power Bomb to bring them back up again, but caution is needed to avoid killing the first Evir, and it is difficult to avoid getting shot. Requires: "canSuitlessMaridia"
"canTrickyJump"
"canTrickyUseFrozenEnemies"
"canPlayInSand"
{
"or": [
"canCameraManip",
{
"and": [
{
"ammo": {
"type": "PowerBomb",
"count": 1
}
},
{
"enemyDamage": {
"enemy": "Evir",
"type": "particle",
"hits": 2
}
}
]
}
]
}
|
|
Notable: true Enter through the far left side of the door. Wait for the top hopper to move right to start running. Run under the right Hopper and jump over the left Hopper to avoid all damage. Jump when Samus reaches the leftmost lump in the ground to avoid the left hopper. It helps to keep the camera scrolled to the right. Entrance condition: {
"comeInNormally": {},
"comesThroughToilet": "no"
}
Requires: "canTrickyJump"
{
"or": [
"canPrepareForNextRoom",
{
"and": [
"canCameraManip",
"canMoonwalk",
"canInsaneJump"
]
}
]
}
Unlocks doors: {"types":["super"],"requires":[]}
{"types":["missiles","powerbomb"],"requires":[{"enemyDamage":{"enemy":"Blue Sidehopper","type":"contact","hits":1}}]}
|
|
Notable: true Try to scroll the camera to the right to keep the left Hopper off-camera for longer. Wait for the top hopper to move right to start running. Run under the right Hopper and jump over the left Hopper to avoid all damage. Jump when Samus reaches the leftmost lump in the ground to avoid the left hopper. Entrance condition: {
"comeInNormally": {},
"comesThroughToilet": "any"
}
Requires: "canCameraManip" "canMoonwalk" "canInsaneJump" Unlocks doors: {"types":["super"],"requires":[]}
{"types":["missiles","powerbomb"],"requires":[{"enemyDamage":{"enemy":"Blue Sidehopper","type":"contact","hits":1}}]}
|
|
Entrance condition: {
"comeInNormally": {},
"comesThroughToilet": "no"
}
Requires: {
"or": [
"ScrewAttack",
"canTrickyJump",
{
"and": [
"canDodgeWhileShooting",
"canCameraManip",
{
"enemyKill": {
"enemies": [
[
"Blue Sidehopper",
"Blue Sidehopper"
]
]
}
}
]
}
]
}
Exit condition: {
"leaveWithGModeSetup": {}
}
Unlocks doors: {"types":["super"],"requires":[]}
{"types":["missiles","powerbomb"],"requires":[{"enemyDamage":{"enemy":"Blue Sidehopper","type":"contact","hits":1}}]}
|
|
Kill the top hopper quickly; the left hopper is more random. To be safe, plan to retreat right while attacking. It also helps to attempt to move the hopper off camera between attacks. Requires: "canDodgeWhileShooting"
"canTrickyJump"
"canCameraManip"
{
"enemyKill": {
"enemies": [
[
"Blue Sidehopper",
"Blue Sidehopper"
]
]
}
}
Unlocks doors: {"types":["ammo"],"requires":[]}
|
|
From: 1
Top Right Door
To: 2
Left Door
Kill the top hopper quickly; the left hopper is more random. To be safe, plan to retreat right while attacking. It also helps to attempt to move the hopper off camera between attacks. Requires: "canDodgeWhileShooting"
"canTrickyJump"
"canCameraManip"
{
"enemyKill": {
"enemies": [
[
"Blue Sidehopper",
"Blue Sidehopper"
]
]
}
}
Exit condition: {
"leaveWithRunway": {
"length": 1,
"openEnd": 1
}
}
Unlocks doors: {"types":["ammo"],"requires":[]}
|
|
Enter the room in ball mode and let the hoppers jump against the wall a couple of times. Between hops, unmorph and shoot the lower hopper. Roll under the top hopper until it goes off camera to the left. Requires: "Morph"
"canPrepareForNextRoom"
{
"enemyKill": {
"enemies": [
[
"Blue Sidehopper"
]
]
}
}
"canCameraManip"
Unlocks doors: {"nodeId":1,"types":["ammo"],"requires":[]}
|
|
From: 3
Junction (Get Past Metroids, Left to Right)
To: 2
Right Door
Bomb Jump between the two floating platforms. Requires: {
"or": [
{
"obstaclesCleared": [
"A"
]
},
{
"and": [
"canCameraManip",
"canMetroidAvoid"
]
}
]
}
{
"or": [
{
"and": [
"canHBJ",
"canResetFallSpeed"
]
},
{
"and": [
{
"obstaclesCleared": [
"A"
]
},
"canDiagonalBombJump"
]
},
"canCeilingBombJump"
]
}
|
|
From: 3
Junction (Get Past Metroids, Left to Right)
To: 2
Right Door
Freeze the middle Metroid as soon as it comes on screen to use as a platform to cross over the acid. If no Metroids are alive, the far left Rinka can be used instead, at a high angle. The left Rinka can also just be used to setup an angle with the Rinka near the left edge of the pool. Requires: "canTrickyUseFrozenEnemies"
"canTrickyJump"
"canCameraManip"
{
"or": [
"canInsaneJump",
{
"and": [
{
"not": "f_KilledMetroidRoom1"
},
{
"obstaclesNotCleared": [
"A"
]
},
"canRiskPermanentLossOfAccess"
]
}
]
}
|
|
From: 3
Junction (Get Past Metroids, Left to Right)
To: 2
Right Door
Notable: true Aim the leftmost Rinka to travel horizontally across the top of the room and use it to damage boost between the two floating platforms. Killing the Rinka will normalize it's respawn timer, which may help in setting up the correct angle. Let the Rinka stay far enough ahead of Samus that she can jump the full distance to the first platform without hitting it. And then once it has reached the right edge of the platform, use it to damage boost. Requires: {
"enemyDamage": {
"enemy": "Rinka",
"type": "contact",
"hits": 1
}
}
"canTrickyJump"
"canHorizontalDamageBoost"
"canCameraManip"
{
"or": [
{
"obstaclesCleared": [
"A"
]
},
"canMetroidAvoid"
]
}
|
|
From: 4
Junction (Get Past Metroids, Right to Left)
To: 1
Left Door
Use the lower Rinka as a platform to setup the angle for the top Rinka. Then use the frozen Rinka to cross the acid. Requires: "canTrickyUseFrozenEnemies" "canTrickyJump" "canCameraManip" |
|
From: 4
Junction (Get Past Metroids, Right to Left)
To: 1
Left Door
Notable: true Aim the ceiling Rinka to travel horizontally across the top of the room and use it to damage boost between the two floating platforms. Killing the lower Rinka shortly before killing the higher Rinka will synchronize their respawn timers so that Samus can jump when the lower Rinka reappears in order to get a good angle on the higher Rinka. Jump to the floating platform ahead of the high Rinka, jumping extra high to lead the Metroid out of the way if it is alive. Jump into the Rinka once it reaches the left edge of the platform to reach the next platform. Then use I-frames to pass through the Metroid if it is still alive. Requires: {
"enemyDamage": {
"enemy": "Rinka",
"type": "contact",
"hits": 1
}
}
"canTrickyJump"
"canHorizontalDamageBoost"
"canCameraManip"
{
"or": [
{
"obstaclesCleared": [
"A"
]
},
{
"and": [
"canMetroidAvoid",
"canHitbox"
]
}
]
}
{
"or": [
"canInsaneJump",
{
"enemyDamage": {
"enemy": "Rinka",
"type": "contact",
"hits": 1
}
},
{
"and": [
"canTrickyJump",
"canLateralMidAirMorph"
]
},
{
"and": [
"Gravity",
{
"acidFrames": 16
}
]
},
{
"acidFrames": 27
}
]
}
|
|
An easy way is once Samus is on the top platform, jump and aim down to lower the camera, then place 3 PBs. Requires: {
"enemyKill": {
"enemies": [
[
"Metroid",
"Metroid"
]
],
"explicitWeapons": [
"PowerBomb"
]
}
}
{
"or": [
"canMetroidAvoid",
"canCameraManip"
]
}
Clears obstacles: A |
|
Run from or Roll under the pirate lazers. The Pirates will also not shoot if they come on screen while Samus is crouched. Requires: {
"or": [
"HiJump",
"canWalljump",
"h_canFly"
]
}
{
  "or": [
    {
      "and": [
        "canDodgeWhileShooting",
        "canCameraManip",
        {
          "or": [
            "Plasma",
            {
              "and": [
                "h_hasBeamUpgrade",
                "canBePatient"
              ]
            },
            "canBeVeryPatient"
          ]
        }
      ]
    },
    {
      "and": [
        {
          "or": [
            "canBePatient",
            {
              "enemyDamage": {
                "enemy": "Tourian Space Pirate (all)",
                "type": "contact",
                "hits": 1
              }
            }
          ]
        },
        {
          "or": [
            "Morph",
            "canTurnaroundAimCancel",
            "canXRayTurnaround"
          ]
        }
      ]
    }
  ]
}
|
|
Run from or Roll under the pirate lazers. The Pirates will also not shoot if they come on screen while Samus is crouched. Requires: {
"or": [
{
"and": [
"canDodgeWhileShooting",
"canCameraManip",
{
"or": [
"Plasma",
{
"and": [
"h_hasBeamUpgrade",
"canBePatient"
]
},
"canBeVeryPatient"
]
}
]
},
{
"and": [
{
"or": [
"canBePatient",
{
"enemyDamage": {
"enemy": "Tourian Space Pirate (all)",
"type": "contact",
"hits": 1
}
}
]
},
{
"or": [
"Morph",
"canTurnaroundAimCancel",
"canXRayTurnaround"
]
}
]
}
]
}
|
|
Requires: {
"canShineCharge": {
"usedTiles": 33,
"openEnd": 2
}
}
{
"or": [
{
"enemyDamage": {
"enemy": "Tourian Space Pirate (all)",
"type": "contact",
"hits": 1
}
},
{
"and": [
"Plasma",
"canHitbox"
]
},
"Morph",
"ScrewAttack",
{
"and": [
"canDodgeWhileShooting",
"canCameraManip",
{
"or": [
"h_hasBeamUpgrade",
"canBePatient"
]
}
]
}
]
}
Exit condition: {
"leaveShinecharged": {
"framesRemaining": 120
}
}
|
.png)
.gif)
