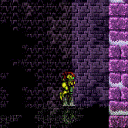
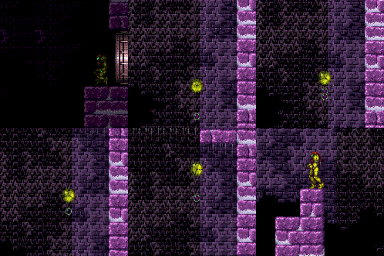
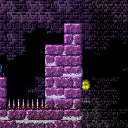
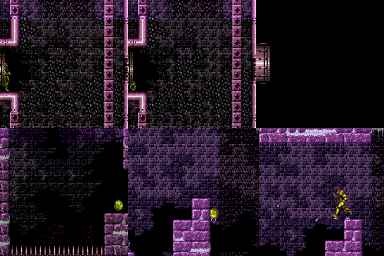
canBombHorizontally (Medium)
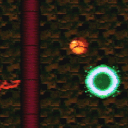
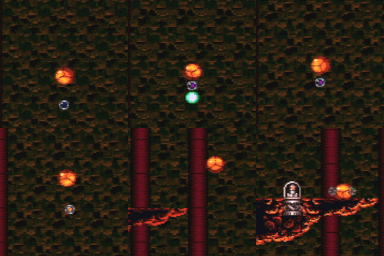
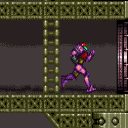
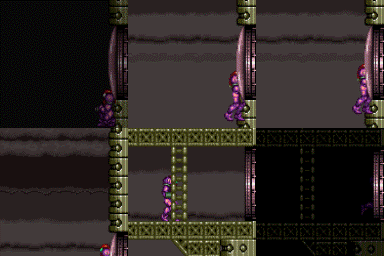
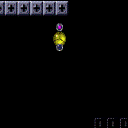
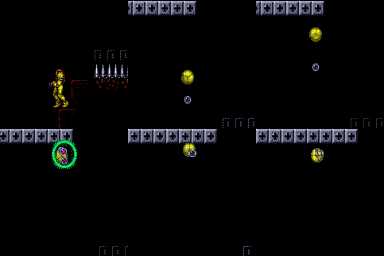
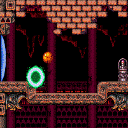
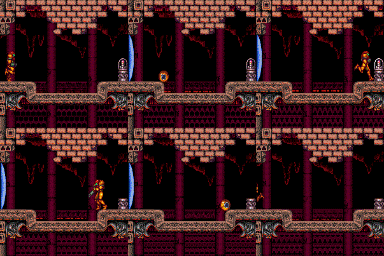
Place a single bomb then move Samus to the side to be boosted horizontally from the explosion. This is typically used as a way to cross gaps or to reposition at the end of an IBJ. Press forward while in the air to carry the momentum farther. Since it only uses one bomb, it can be executed with a Power Bomb or a bomb. It is not assumed by this tech, but it is possible to move forward just before the explosion in order to gain more horizontal momentum.
Strats ()
|
Entrance condition: {
"comeInWithGMode": {
"mode": "any",
"morphed": true
}
}
Requires: {
"or": [
"h_canArtificialMorphDiagonalBombJump",
"h_canArtificialMorphCeilingBombJump",
{
"and": [
"h_canArtificialMorphSpringBall",
{
"spikeHits": 3
},
{
"or": [
"h_canArtificialMorphBombHorizontally",
{
"spikeHits": 1
}
]
}
]
},
{
"and": [
"h_canArtificialMorphIBJ",
{
"spikeHits": 10
},
{
"or": [
"h_canArtificialMorphBombHorizontally",
{
"spikeHits": 2
}
]
}
]
}
]
}
|
|
From: 1
Top Left Door
To: 5
Bottom Junction (Right of Boyons)
Place the PBs exactly two tiles left of the Morph tunnel. Be sure not to touch the item if this strat will be needed again in the future. Entrance condition: {
"comeInWithGMode": {
"mode": "direct",
"morphed": true
}
}
Requires: {
"itemNotCollectedAtNode": 3
}
"canRiskPermanentLossOfAccess"
"h_canArtificialMorphPowerBomb"
"h_canArtificialMorphPowerBomb"
{
"or": [
{
"and": [
"h_canArtificialMorphSpringBall",
{
"spikeHits": 3
},
{
"or": [
"h_canArtificialMorphBombHorizontally",
{
"spikeHits": 1
}
]
}
]
},
{
"and": [
"Morph",
{
"or": [
"SpaceJump",
{
"and": [
{
"spikeHits": 1
},
{
"or": [
"canIframeSpikeJump",
{
"spikeHits": 1
}
]
}
]
}
]
}
]
}
]
}
|
|
From: 1
Top Left Door
To: 5
Bottom Junction (Right of Boyons)
Entrance condition: {
"comeInWithGMode": {
"mode": "any",
"morphed": true
}
}
Requires: "h_canArtificialMorphBombs"
{
"or": [
{
"and": [
"h_canArtificialMorphSpringBall",
{
"spikeHits": 3
},
{
"or": [
"h_canArtificialMorphBombHorizontally",
{
"spikeHits": 1
}
]
}
]
},
{
"and": [
"Morph",
{
"or": [
"SpaceJump",
{
"and": [
{
"spikeHits": 1
},
{
"or": [
"canIframeSpikeJump",
{
"spikeHits": 1
}
]
}
]
}
]
}
]
},
{
"and": [
"h_canArtificialMorphIBJ",
{
"spikeHits": 10
},
{
"or": [
"h_canArtificialMorphBombHorizontally",
{
"spikeHits": 2
}
]
}
]
},
"h_canArtificialMorphDiagonalBombJump",
"h_canArtificialMorphCeilingBombJump"
]
}
|
|
From: 1
Top Left Door
To: 5
Alcatraz Door
There are scroll PLMs one tile to the left of the bomb blocks which can be used to overload PLMs. The bomb blocks then become air and can be passed through. Use Bombs, SpringBall, or a Geemer damage boost to get across the gap without unmorphing. To survive a Geemer hit, you will need Varia or Gravity or to come in with more than 4 energy (e.g. by coming in with indirect G-mode after leaving with G-mode immobile). Entrance condition: {
"comeInWithGMode": {
"mode": "any",
"morphed": true
}
}
Requires: {
"or": [
"h_canArtificialMorphMovement",
"h_canArtificialMorphBombHorizontally",
{
"and": [
"canNeutralDamageBoost",
"h_ZebesIsAwake",
{
"enemyDamage": {
"enemy": "Geemer (blue)",
"type": "contact",
"hits": 1
}
}
]
}
]
}
|
|
From: 4
Top Right Door
To: 2
Middle Left Door
A single Power Bomb, placed precisely and as early as possible, can get you over the Geemers and onto the ledge above Alcatraz without taking a hit. Alternatively Bombs or SpringBall can be used. Go down to the Save door by just falling and moving back and forth in the right places. Once you start going down you will be off-screen. Entrance condition: {
"comeInWithGMode": {
"mode": "any",
"morphed": true
}
}
Requires: "canOffScreenMovement"
{
"or": [
"h_canArtificialMorphMovement",
"h_canArtificialMorphBombHorizontally"
]
}
|
|
From: 2
Right Door (locked)
To: 3
Item (locked)
Without Morph, the pirates will not spawn. Use Power Bomb horizontal boosts to move toward the left side of the room in artificial morph. Roll off the third blue platform from the right door and lay a Power Bomb against the left wall to get into range of the bomb blocks. Unmorph and use X-ray to cancel G-mode. It may be best to do this before the PB explodes, in case PLMs are already overloaded. Entrance condition: {
"comeInWithGMode": {
"mode": "any",
"morphed": true
}
}
Requires: "h_canArtificialMorphBombHorizontally"
"h_canArtificialMorphPowerBomb"
"h_canArtificialMorphPowerBomb"
"h_canArtificialMorphPowerBomb"
{
"or": [
"h_canArtificialMorphPowerBomb",
"canTrickyJump"
]
}
Clears obstacles: A |
|
From: 4
Middle Junction (Left of Morph Tunnel)
To: 1
Left Door
After destroying a single bomb block, Samus can spin jump into its spot to quickly escape the acid. To avoid the acid completely, morph quickly at the right height and place a bomb. Requires: {
"or": [
"canCarefulJump",
{
"acidFrames": 35
}
]
}
"h_canUseMorphBombs"
{
"or": [
"canTrickyJump",
{
"and": [
"canCarefulJump",
"h_canBombHorizontally",
{
"acidFrames": 35
}
]
},
{
"acidFrames": 100
}
]
}
{
"or": [
{
"and": [
"canTrickyJump",
"canStaggeredWalljump"
]
},
{
"and": [
"canCarefulJump",
{
"acidFrames": 35
}
]
},
{
"acidFrames": 100
}
]
}
Clears obstacles: A, B |
|
From: 4
Lower Section - Top Right Door
To: 8
Bridge Right Door (Same Connection as Lower Section - Bottom Right Door)
Notable: true Entrance condition: {
"comeInWithGMode": {
"mode": "direct",
"morphed": false
}
}
Requires: "canSkipDoorLock"
{
  "or": [
    "canArtificialMorph",
    "canWalljump",
    "SpaceJump",
    {
      "and": [
        "h_canIBJ",
        {
          "or": [
            "Gravity",
            "h_canJumpIntoIBJ",
            "h_canBombHorizontally"
          ]
        }
      ]
    },
    {
      "and": [
        "HiJump",
        "canSpringBallJumpMidAir"
      ]
    },
    "canPreciseGrapple"
  ]
}
"canXRayClimb"
|
|
From: 4
Lower Section - Top Right Door
To: 8
Bridge Right Door (Same Connection as Lower Section - Bottom Right Door)
Notable: true Enter with G-mode direct, back up to between 1 and 6 pixels from the door transition, and activate X-ray to get very deep stuck in the door. Climb up 1 screen, and perform a turnaround buffered spin-jump away from the door to trigger the transition, bypassing any lock on the door. Entrance condition: {
"comeInWithGMode": {
"mode": "direct",
"morphed": false
}
}
Requires: {
"or": [
"canArtificialMorph",
"canWalljump",
"SpaceJump",
{
"and": [
"h_canIBJ",
{
"or": [
"Gravity",
"h_canJumpIntoIBJ",
"h_canBombHorizontally"
]
}
]
},
{
"and": [
"HiJump",
"canSpringBallJumpMidAir"
]
},
"canPreciseGrapple"
]
}
"canXRayClimb"
Bypasses door shell: true |
|
From: 4
Lower Section - Top Right Door
To: 12
Top Junction
Climb up 2 screens. Entrance condition: {
"comeInWithGMode": {
"mode": "direct",
"morphed": false
}
}
Requires: {
"or": [
"canArtificialMorph",
"canWalljump",
"SpaceJump",
{
"and": [
"h_canIBJ",
{
"or": [
"Gravity",
"h_canJumpIntoIBJ",
"h_canBombHorizontally"
]
}
]
},
{
"and": [
"HiJump",
"canSpringBallJumpMidAir"
]
},
"canPreciseGrapple"
]
}
"canXRayClimb"
|
|
From: 5
Lower Section - Bottom Right Door
To: 4
Lower Section - Top Right Door
Jump into an IBJ while avoiding the Ripper, or start an IBJ from the platform to the left and boost horizontally at the top. Requires: {
"or": [
"h_canJumpIntoIBJ",
{
"and": [
"h_canIBJ",
"canBombHorizontally",
"canResetFallSpeed"
]
}
]
}
|
|
From: 6
Middle Right Door (By Zeb Farm)
To: 12
Top Junction
Unmorph and cancel g-mode, shoot the shot block, then x-ray standup, partial floor clip, and down grab to the ledge. Wiggle to escape. Entrance condition: {
"comeInWithGMode": {
"mode": "any",
"morphed": true
}
}
Requires: "canXRayStandUp"
"canPartialFloorClip"
"canDownGrab"
{
"or": [
"h_canArtificialMorphSpringBall",
{
"and": [
"h_canArtificialMorphBombs",
{
"or": [
"canTrickyJump",
{
"enemyDamage": {
"enemy": "Zeb",
"hits": 1,
"type": "contact"
}
}
]
}
]
},
{
"and": [
"h_canArtificialMorphBombHorizontally",
{
"or": [
{
"and": [
"canTrickyJump",
"h_canArtificialMorphPowerBomb"
]
},
{
"and": [
"canNeutralDamageBoost",
{
"enemyDamage": {
"enemy": "Zeb",
"hits": 3,
"type": "contact"
}
}
]
}
]
}
]
}
]
}
|
|
From: 2
Right Door
To: 1
Left Door
Starting an IBJ from spring ball with no other items is not very precise, it just takes a bit of an odd timing. Entrance condition: {
"comeInWithGMode": {
"mode": "any",
"morphed": true
}
}
Requires: "h_canArtificialMorphJumpIntoIBJ" "h_canArtificialMorphBombHorizontally" |
|
From: 1
Top Right Door
To: 4
Top Left Junction
Use 1-3 Power Bombs to kill the Sidehoppers. Entrance condition: {
"comeInWithGMode": {
"mode": "any",
"morphed": true
}
}
Requires: "h_canArtificialMorphPowerBomb"
{
"or": [
{
"and": [
"h_canArtificialMorphPowerBomb",
{
"or": [
"h_canArtificialMorphBombHorizontally",
"h_canArtificialMorphSpringBall"
]
}
]
},
{
"enemyDamage": {
"enemy": "Sidehopper",
"hits": 1,
"type": "contact"
}
}
]
}
Clears obstacles: A |
|
From: 1
Right Door
To: 2
Chozo Item
Traverse the room with a small number of Power Bombs. If the Chozo item is still there, it is best to exit G-Mode before the final Power Bomb goes off to ensure that PLMs aren't overloaded. This strat can be done easily with 7 Power Bombs. Simply kill all of the Boyons before progressing. The final Power Bomb needs to be placed on the second to last floating platform or later to break the wall. Samus can use one Power Bomb and a Boyon hit to get from the door to the second platform, or from the second to fourth platform. Alternatively, when next to the Boyons, place a Power Bomb while the Boyon is low, slightly after the peak of the jump, hitbox through the Boyons. If the Boyons are killed, Samus can horizontally boost far enough to skip a platform. Samus can cross the room with any of the following: 7 PB; 6 PB and a horizontal boost; 5 PB and hitboxing the first Boyons; 5 PB and damage from the first Boyons; 4 PB and damage from the first Boyons and hitboxing the second; 3 PB and hitting both sets of Boyons. Note that if Samus falls into a Samus Eater, she will often be teleported into it when exiting G-Mode. Entrance condition: {
"comeInWithGMode": {
"mode": "any",
"morphed": true
}
}
Requires: "h_canArtificialMorphPowerBomb"
{
"or": [
{
"ammo": {
"type": "PowerBomb",
"count": 6
}
},
{
"and": [
{
"ammo": {
"type": "PowerBomb",
"count": 4
}
},
"h_canArtificialMorphBombHorizontally"
]
},
{
"and": [
{
"ammo": {
"type": "PowerBomb",
"count": 4
}
},
"canTrickyJump",
"canHitbox"
]
},
{
"and": [
{
"ammo": {
"type": "PowerBomb",
"count": 3
}
},
"h_canArtificialMorphBombHorizontally",
{
"enemyDamage": {
"enemy": "Boyon",
"type": "contact",
"hits": 1
}
}
]
},
{
"and": [
{
"ammo": {
"type": "PowerBomb",
"count": 2
}
},
"h_canArtificialMorphBombHorizontally",
{
"enemyDamage": {
"enemy": "Boyon",
"type": "contact",
"hits": 1
}
},
"canTrickyJump",
"canHitbox"
]
},
{
"and": [
{
"ammo": {
"type": "PowerBomb",
"count": 2
}
},
{
"enemyDamage": {
"enemy": "Boyon",
"type": "contact",
"hits": 2
}
}
]
}
]
}
Clears obstacles: A, B |
|
From: 2
Right Door
To: 1
Left Door
Notable: true This is a very long ceiling bomb jump. Crossing the room with artificial morph is particularly difficult without a good way to kill the Wavers. It is recommended to avoid killing the Firefleas, as the room gets dark fast. Entrance condition: {
"comeInWithGMode": {
"mode": "any",
"morphed": true
}
}
Requires: "h_canArtificialMorphBombHorizontally" "h_canArtificialMorphIBJ" "h_canArtificialMorphCeilingBombJump" "canLongCeilingBombJump" "canBeVeryPatient" "canInsaneJump" |
|
From: 2
Right Door
To: 3
Safe Block in the Middle of the Room
Requires: "h_canIBJ"
{
"spikeHits": 1
}
{
"or": [
"canBombHorizontally",
{
"spikeHits": 1
}
]
}
|
|
From: 2
Right Door (locked)
To: 1
Left Door (locked)
Kill all of the enemies with Bombs. Samus will take a Baby Kraid spike hit while rolling through the invisible projectiles. It is not too difficult to IBJ and then bomb horizontally over the cluster of invisible spikes, but there is some risk because they are invisible. They occupy a slightly smaller space than what Baby Kraid was occupying. Entrance condition: {
"comeInWithGMode": {
"mode": "any",
"morphed": true
}
}
Requires: "h_canArtificialMorphBombs"
{
"or": [
{
"and": [
"h_canArtificialMorphIBJ",
"h_canArtificialMorphBombHorizontally",
"canTrickyJump"
]
},
{
"enemyDamage": {
"enemy": "Mini-Kraid",
"type": "spike",
"hits": 1
}
}
]
}
Clears obstacles: A |
|
Notable: true Requires: "h_canNavigateHeatRooms"
"h_canBombHorizontally"
{
"heatFrames": 160
}
|
|
Notable: true Requires: "h_canNavigateHeatRooms"
"h_canBombHorizontally"
{
"heatFrames": 190
}
|
|
Bomb diagonally to get over the Fune. Or land on a fireball to boost up. Requires: "h_canUseMorphBombs"
{
"or": [
{
"and": [
"canBombHorizontally",
{
"or": [
"Ice",
"canCarefulJump"
]
}
]
},
{
"and": [
"canNeutralDamageBoost",
{
"enemyDamage": {
"enemy": "Fune",
"type": "fireball",
"hits": 1
}
}
]
}
]
}
|
|
From: 7
Junction By Lower Alcoons (Left of Spike Pits)
To: 1
Left Door
Requires: "h_canNavigateHeatRooms"
"h_canIBJ"
{
"or": [
{
"and": [
"canBombHorizontally",
{
"heatFrames": 840
}
]
},
{
"and": [
"h_canJumpIntoIBJ",
"canDoubleBombJump",
{
"heatFrames": 290
}
]
},
{
"and": [
"h_canJumpIntoIBJ",
{
"heatFrames": 480
}
]
}
]
}
|
|
From: 7
Junction By Lower Alcoons (Left of Spike Pits)
To: 6
Junction By Left Door (Right of Pit)
Requires: "h_canNavigateHeatRooms"
"h_canIBJ"
{
"or": [
{
"and": [
"canBombHorizontally",
{
"heatFrames": 820
}
]
},
{
"and": [
"h_canJumpIntoIBJ",
"canDoubleBombJump",
{
"heatFrames": 270
}
]
},
{
"and": [
"h_canJumpIntoIBJ",
{
"heatFrames": 460
}
]
}
]
}
|
|
From: 1
Top Left Doorway
To: 4
Top Right Doorway
To save a bomb, it is possible but difficult to roll from the doorway onto the platform with Gravity turned off. This requires backing up slightly after entering the room then quickly rolling before the crabs. It is a bit tighter in direct G-Mode. Entrance condition: {
"comeInWithGMode": {
"mode": "any",
"morphed": true
}
}
Requires: {
"or": [
"Morph",
"h_canArtificialMorphSpringBall",
{
"and": [
"Gravity",
"h_canArtificialMorphIBJ"
]
},
{
"and": [
"Gravity",
"h_canArtificialMorphBombHorizontally",
{
"or": [
"h_canArtificialMorphBombThings",
"canTrickyJump",
{
"enemyDamage": {
"enemy": "Sciser",
"type": "contact",
"hits": 1
}
}
]
}
]
}
]
}
Exit condition: {
"leaveWithGMode": {
"morphed": true
}
}
|
|
From: 4
Top Right Doorway
To: 1
Top Left Doorway
To save a bomb, it is possible to roll from the doorway onto the platform with Gravity turned off. Entrance condition: {
"comeInWithGMode": {
"mode": "any",
"morphed": true
}
}
Requires: {
"or": [
"Morph",
"h_canArtificialMorphSpringBall",
{
"and": [
"Gravity",
"h_canArtificialMorphIBJ"
]
},
{
"and": [
"Gravity",
"h_canArtificialMorphBombHorizontally"
]
}
]
}
Exit condition: {
"leaveWithGMode": {
"morphed": true
}
}
|
|
From: 1
Left Doorway
To: 3
Top Right Doorway
Entrance condition: {
"comeInWithGMode": {
"mode": "any",
"morphed": true
}
}
Requires: {
"or": [
"Morph",
"h_canArtificialMorphSpringBall",
{
"and": [
"Gravity",
"h_canArtificialMorphIBJ"
]
},
{
"and": [
"Gravity",
"h_canArtificialMorphBombHorizontally",
"h_canArtificialMorphBombThings"
]
},
{
"and": [
{
"not": "f_MaridiaTubeBroken"
},
"canRiskPermanentLossOfAccess"
]
}
]
}
Exit condition: {
"leaveWithGMode": {
"morphed": true
}
}
|
|
From: 3
Top Right Doorway
To: 1
Left Doorway
Entrance condition: {
"comeInWithGMode": {
"mode": "any",
"morphed": true
}
}
Requires: {
"or": [
"Morph",
"h_canArtificialMorphSpringBall",
{
"and": [
"Gravity",
"h_canArtificialMorphIBJ"
]
},
{
"and": [
"Gravity",
"h_canArtificialMorphBombHorizontally",
"h_additionalBomb"
]
},
{
"and": [
{
"not": "f_MaridiaTubeBroken"
},
"canRiskPermanentLossOfAccess"
]
}
]
}
Exit condition: {
"leaveWithGMode": {
"morphed": true
}
}
|
|
From: 2
Bottom Right Door
To: 3
Middle Right Door
Only requires a runway of one tile in the adjacent room. Bomb boost through the doorway, then use spring ball to get to the bottom left ledge. To avoid hitting the Skultera, place the bomb a few pixels from the doorway. One way to setup the positioning of the bomb is to place it, unmorph, rotate, and remorph Entrance condition: {
"comeInWithBombBoost": {}
}
Requires: "canSpringBallBombJump"
"canCrossRoomJumpIntoWater"
{
"or": [
"Gravity",
"HiJump",
"canSpringBallJumpMidAir",
"h_canCrouchJumpDownGrab"
]
}
|
|
Get into position as close to the center of the room as possible while not being too close to any baby turtles. Start an IBJ without hiting any baby turtles otherwhise Mama Turtle will wake up. Entrance condition: {
"comeInWithGMode": {
"mode": "any",
"morphed": true
}
}
Requires: "Gravity" "h_canArtificialMorphIBJ" "h_canArtificialMorphBombHorizontally" Clears obstacles: B |
|
From: 1
Left Door
To: 3
Hidden Right Item
IBJ up a bit, then bomb over Mama Turtle and her babies to prevent her from waking. Then IBJ to the high right ledge before exiting g-mode. Entrance condition: {
"comeInWithGMode": {
"mode": "any",
"morphed": true
}
}
Requires: "Gravity" "h_canArtificialMorphIBJ" "h_canArtificialMorphBombHorizontally" |
|
Entrance condition: {
"comeInWithGMode": {
"mode": "any",
"morphed": true
}
}
Requires: {
"or": [
"Morph",
"h_canArtificialMorphSpringBall",
{
"and": [
"Gravity",
"h_canArtificialMorphIBJ"
]
},
{
"and": [
"Gravity",
"h_canArtificialMorphBombHorizontally"
]
},
{
"and": [
{
"enemyDamage": {
"enemy": "Sciser",
"type": "contact",
"hits": 1
}
},
{
"or": [
"h_EverestMorphTunnelExpanded",
{
"enemyDamage": {
"enemy": "Sciser",
"type": "contact",
"hits": 1
}
}
]
}
]
}
]
}
|
|
Entrance condition: {
"comeInWithGMode": {
"mode": "any",
"morphed": true
},
"comesThroughToilet": "any"
}
Requires: {
"or": [
"Morph",
"h_canArtificialMorphSpringBall",
{
"and": [
"Gravity",
"h_canArtificialMorphIBJ"
]
},
{
"and": [
"Gravity",
"h_canArtificialMorphBombHorizontally"
]
}
]
}
|
|
Use spring ball to cross the room, or use bombs to kill the Zebbos so they stop respawning. One PB can be placed at the first plant on the ground to bomb across the farm while killing the Zebbos. Entrance condition: {
"comeInWithGMode": {
"mode": "any",
"morphed": true
}
}
Requires: {
"or": [
"h_canArtificialMorphSpringBall",
"h_canArtificialMorphBombs",
{
"and": [
"h_canArtificialMorphBombHorizontally",
"h_additionalBomb",
"h_additionalBomb"
]
}
]
}
|
|
Requires: "Morph"
{
"or": [
"HiJump",
"canWalljump",
"SpaceJump",
{
"and": [
"h_canIBJ",
"h_canBombHorizontally"
]
},
"canSpringBallJumpMidAir"
]
}
|
|
Entrance condition: {
"comeInWithGMode": {
"mode": "any",
"morphed": true
}
}
Requires: {
"or": [
"h_canArtificialMorphSpringBall",
{
"and": [
"Gravity",
"h_canArtificialMorphBombHorizontally"
]
}
]
}
{
"or": [
{
"and": [
"h_canArtificialMorphBombThings",
"h_additionalBomb"
]
},
{
"and": [
"Gravity",
"h_canArtificialMorphSpringBall",
{
"enemyDamage": {
"enemy": "Puyo",
"type": "contact",
"hits": 1
}
}
]
},
{
"and": [
"h_canArtificialMorphSpringBall",
{
"enemyDamage": {
"enemy": "Puyo",
"type": "contact",
"hits": 3
}
}
]
},
{
"and": [
"Gravity",
"h_canArtificialMorphPowerBomb",
{
"enemyDamage": {
"enemy": "Puyo",
"type": "contact",
"hits": 2
}
}
]
}
]
}
Exit condition: {
"leaveWithGMode": {
"morphed": true
}
}
|
|
From: 1
Left Door
To: 6
East Cactus Alley Junction (Right of Morph Tunnel)
Hug the right wall after killing the first Cacatac in order to avoid its invisible, stationary projectiles. Entrance condition: {
"comeInWithGMode": {
"mode": "any",
"morphed": true
}
}
Requires: "h_canNavigateUnderwater"
{
"or": [
"h_canArtificialMorphSpringBall",
"h_canArtificialMorphBombHorizontally"
]
}
{
"or": [
{
"and": [
"h_canArtificialMorphBombs",
{
"or": [
"Gravity",
"h_canArtificialMorphSpringBall"
]
}
]
},
"h_canArtificialMorphPowerBomb",
{
"enemyDamage": {
"enemy": "Cacatac",
"hits": 1,
"type": "contact"
}
}
]
}
{
"or": [
"h_canArtificialMorphSpringBall",
{
"and": [
"Gravity",
"h_canArtificialMorphBombThings"
]
}
]
}
|
|
From: 2
Right Door
To: 4
Top Right Ledge Junction
Notable: true Requires a runway of at least 1 tiles in the adjacent room, although it is easier with more. Start the IBJ as far left as possible. The furthest right is just right of the waterfall. Turning around, carefully, is one way to lose forward momentum and begin the IBJ. At the top of the IBJ bomb to the left and unmorph to reset fall speed. Entrance condition: {
"comeInJumping": {
"speedBooster": false,
"minTiles": 1
}
}
Requires: "h_canJumpIntoIBJ" "h_canBombHorizontally" "h_canResetFallSpeed" "canCrossRoomJumpIntoWater" "canTrickyJump" |
|
From: 2
Right Door
To: 4
Top Right Ledge Junction
Notable: true Use the bomb boost as Samus is going through the doorway, then spring ball after breaking the water, then ibj or use an unmorph bomb boost. Entrance condition: {
"comeInWithBombBoost": {}
}
Requires: "h_canSpringBallBombJump"
"canCrossRoomJumpIntoWater"
{
"or": [
"h_canJumpIntoIBJ",
"canUnmorphBombBoost"
]
}
|
|
From: 2
Right Door
To: 4
Top Right Ledge Junction
SpringBall jump just as Samus exits the water to reach the distant ledge. To get enough horizontal distance, either use a Stationary Lateral Mid-Air Morph with a crouch jump for extra height, or spin jump out before morphing. Or SpringBall jump part of the way over and land on a Bomb explosion to cross the rest of the distance. Requires: "canSuitlessMaridia"
"HiJump"
"h_canMaxHeightSpringBallJump"
"canTrickyJump"
{
"or": [
"canStationaryLateralMidAirMorph",
{
"and": [
"canJumpIntoIBJ",
"h_canBombHorizontally"
]
}
]
}
|
|
Requires: "Gravity"
"h_canIBJ"
{
"or": [
"h_canBombHorizontally",
"h_IBJFromSpikes"
]
}
|
|
Only requires a runway of approximately 0.5 tiles in the adjacent room. Bomb boost through the doorway and hold right. Entrance condition: {
"comeInWithBombBoost": {}
}
Requires: "canCrossRoomJumpIntoWater" |
|
Only requires a runway of approximately 0.5 tiles in the adjacent room. Bomb boost through the doorway and hold left. Entrance condition: {
"comeInWithBombBoost": {}
}
Requires: "canCrossRoomJumpIntoWater" |
|
From: 1
Left Door
To: 2
Right Door
Use one bomb to get to the off-screen region. After going a full screen to the right, when Samus is partially visible in the left wall, bomb to the middle platform on the right. Bomb again to the right, note that these small platforms are one tile left of the ones that are on camera. Exit G-Mode and get to the right door. Entrance condition: {
"comeInWithGMode": {
"mode": "any",
"morphed": true
}
}
Requires: "canOffScreenMovement" "h_canArtificialMorphBombHorizontally" "h_canArtificialMorphBombThings" "h_additionalBomb" |
|
From: 2
Right Door
To: 3
Junction Left of Morph Tunnel
Entrance condition: {
"comeInWithGMode": {
"mode": "any",
"morphed": true
}
}
Requires: {
"or": [
"h_canArtificialMorphSpringBall",
{
"and": [
"h_canArtificialMorphBombThings",
"h_additionalBomb",
{
"or": [
"h_canArtificialMorphBombHorizontally",
{
"and": [
"h_additionalBomb",
"Gravity"
]
}
]
}
]
}
]
}
|
|
Entrance condition: {
"comeInWithGMode": {
"mode": "any",
"morphed": true
},
"comesThroughToilet": "any"
}
Requires: "h_canArtificialMorphIBJ"
{
"or": [
"h_canArtificialMorphSpringBallBombJump",
"h_canArtificialMorphBombHorizontally"
]
}
|
|
Requires: {
"or": [
"HiJump",
"canWalljump",
"SpaceJump",
"canSpringBallJumpMidAir",
{
"and": [
"h_canIBJ",
{
"or": [
"canBombHorizontally",
"Gravity"
]
}
]
},
{
"and": [
"h_canSpringBallBombJump",
"h_additionalBomb",
"h_additionalBomb"
]
}
]
}
|
|
Entrance condition: {
"comeInWithGMode": {
"mode": "any",
"morphed": true
},
"comesThroughToilet": "any"
}
Requires: {
"or": [
{
"and": [
"h_canArtificialMorphIBJ",
"h_canArtificialMorphBombHorizontally"
]
},
{
"and": [
"h_canArtificialMorphSpringBallBombJump",
"h_additionalBomb",
"h_additionalBomb",
"h_additionalBomb"
]
}
]
}
|
|
From: 1
Left Door
To: 4
Junction Below Sand Entrance
Bomb boost through the doorway as close to the door transition as possible in order to get as far as possible. Entrance condition: {
"comeInWithBombBoost": {}
}
Requires: "canCrossRoomJumpIntoWater" "canTrickyJump" |
|
From: 2
Right Door
To: 4
Junction Below Sand Entrance
Bomb boost through the doorway. Get the bomb boost while as close to the door transition as possible in order to get to the first pillar. Entrance condition: {
"comeInWithBombBoost": {}
}
Requires: "canCrossRoomJumpIntoWater" |
|
Bomb boost through the doorway. Get the bomb boost while as close to the door transition as possible in order to get to the first pillar. Entrance condition: {
"comeInWithBombBoost": {}
}
Requires: "canCrossRoomJumpIntoWater" |
|
From: 2
Right Door (locked)
To: 2
Right Door (locked)
Kill the Metroids while artificially morphed with just Spring Ball to avoid them. A Metroid (or a Rinka) must be completely on screen while a Power Bomb explodes in order for it to lure the other Metroids. Start the room with a bomb boost spring ball jump or a precise horizontal bomb boost. In general, this seems to be easiest by minimizing Samus's horizontal movement as much as possible and getting the Metroids in sync with each other while circling around her. While moving horizontally, their movement is less predictable and harder to sync. Note that it is necessary to exit G-Mode before exiting the room in order for the Metroids to remain killed. Entrance condition: {
"comeInWithGMode": {
"mode": "any",
"morphed": true
}
}
Requires: "canMetroidAvoid"
"h_canArtificialMorphSpringBall"
"h_canArtificialMorphBombHorizontally"
{
"ammo": {
"type": "PowerBomb",
"count": 3
}
}
Clears obstacles: A |
