canRiskPermanentLossOfAccess (Beyond)
The acceptance that changes to game state can result in a strat becoming impossible. If that strat needed to be executed before the game state change, the game becomes incompletable. And that the "mistake" may not become visible until much later.
Strats ()
|
From: 1
Top Left Door
To: 5
Bottom Junction (Right of Boyons)
Place the PBs exactly two tiles left of the Morph tunnel. Be sure not to touch the item if this strat will be needed again in the future. Entrance condition: {
"comeInWithGMode": {
"mode": "direct",
"morphed": true
}
}
Requires: {
"itemNotCollectedAtNode": 3
}
"canRiskPermanentLossOfAccess"
"h_canArtificialMorphPowerBomb"
"h_canArtificialMorphPowerBomb"
{
"or": [
{
"and": [
"h_canArtificialMorphSpringBall",
{
"spikeHits": 3
},
{
"or": [
"h_canArtificialMorphBombHorizontally",
{
"spikeHits": 1
}
]
}
]
},
{
"and": [
"Morph",
{
"or": [
"SpaceJump",
{
"and": [
{
"spikeHits": 1
},
{
"or": [
"canIframeSpikeJump",
{
"spikeHits": 1
}
]
}
]
}
]
}
]
}
]
}
|
|
Notable: true 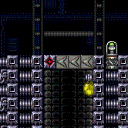
Wall jump up 9 times, placing a PB at the top. Only works in direct g-mode with the item still uncollected. Entrance condition: {
"comeInWithGMode": {
"mode": "direct",
"morphed": false
}
}
Requires: {
"itemNotCollectedAtNode": 3
}
"canConsecutiveWalljump"
"Morph"
{
"or": [
"canRiskPermanentLossOfAccess",
"canXRayClimb"
]
}
{
"ammo": {
"type": "PowerBomb",
"count": 9
}
}
"canBeVeryPatient"
{
"or": [
"canUseFrozenEnemies",
"canTrickyJump",
{
"and": [
"ScrewAttack",
"SpaceJump"
]
},
{
"and": [
"canCarefulJump",
{
"or": [
"ScrewAttack",
"SpeedBooster"
]
}
]
},
{
"enemyKill": {
"enemies": [
[
"Boyon",
"Boyon",
"Boyon",
"Boyon"
]
]
}
},
{
"enemyDamage": {
"enemy": "Boyon",
"hits": 1,
"type": "contact"
}
}
]
}
|
|
From: 4
Top Right Door
To: 5
Alcatraz Door
There are scroll PLMs one tile to the right of the bomb blocks which can be used to overload PLMs, turning the bomb blocks to air. However, if Zebes is awake, two Geemers block the way. With a regular G-mode setup and no suits, a single Geemer hit would kill Samus. The Geemer hits can be avoided with Bombs or SpringBall. Alternatively, a Power Bomb, placed precisely and as early as possible, can be used to jump onto the ledge and go around to the left entrance to Alcatraz (necessary since the Power Bomb blast will render the bomb blocks solid, unable to be turned to air). A Geemer hit can also be tanked by having Varia or Gravity or by coming in with higher energy (e.g. with G-mode immobile). Entrance condition: {
"comeInWithGMode": {
"mode": "any",
"morphed": true
}
}
Requires: {
"or": [
"h_canArtificialMorphMovement",
"h_canArtificialMorphPowerBomb",
{
"enemyDamage": {
"enemy": "Geemer (blue)",
"type": "contact",
"hits": 1
}
},
"h_ZebesNotAwake"
]
}
|
|
From: 10
Left Morph Maze Item
To: 14
Morph Maze Junction (Below Super Block)
Requires: "Morph"
{
"or": [
{
"obstaclesNotCleared": [
"B"
]
},
"canRiskPermanentLossOfAccess"
]
}
|
|
From: 17
G-Mode Morph Junction Direct (By Left Door)
To: 16
G-Mode Morph Overloaded PLMs Junction (By Left Door)
To overload the PLMs, place a PB precisely to the right of the bottom of the second overhang above the door to the Moat. This is at the max jump height without HiJump. Placing the PB higher or lower will not overload the PLMs without many PBs. Requires: {
"itemNotCollectedAtNode": 10
}
"canRiskPermanentLossOfAccess"
{
"or": [
"h_canArtificialMorphIBJ",
"Morph",
{
"and": [
"h_canArtificialMorphSpringBall",
{
"or": [
"HiJump",
"h_canArtificialMorphBombThings"
]
}
]
}
]
}
"h_canArtificialMorphPowerBomb"
|
|
From: 1
Bottom Left Door
To: 5
G-Mode Morph Junction (Bottom)
Notable: true 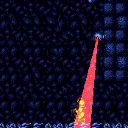
The eye scanners are particularly annoying while in g-mode. They scan Samus with bright flashing lights which remain for a further distance. This is notable so a player can disable having to enter these flashing lights. If disabled, Samus will only require being in g-mode in this room if Zebes is awake. Entrance condition: {
"comeInWithGMode": {
"mode": "any",
"morphed": true
}
}
Requires: {
"or": [
"h_ZebesNotAwake",
"h_canArtificialMorphSpringBall",
"h_canArtificialMorphBombThings",
{
"enemyDamage": {
"enemy": "Geemer (blue)",
"hits": 1,
"type": "contact"
}
}
]
}
|
|
From: 1
Bottom Left Door
To: 6
G-Mode Morph Junction Direct (Bottom)
Notable: true
The eye scanners are particularly annoying while in G-mode. They scan Samus with bright flashing lights which remain for a further distance. This is notable so a player can disable having to enter these flashing lights. If disabled, Samus will only require being in g-mode in this room if Zebes is awake. Entrance condition: {
"comeInWithGMode": {
"mode": "direct",
"morphed": true
}
}
Requires: {
"or": [
"h_ZebesNotAwake",
"h_canArtificialMorphSpringBall",
"h_canArtificialMorphBombThings",
{
"enemyDamage": {
"enemy": "Geemer (blue)",
"hits": 1,
"type": "contact"
}
}
]
}
|
|
From: 4
Right Item
To: 2
Top Left Door
After overloading the PLMs by touching the item, go through the crumble and bomb blocks to the top door. Requires: {
"obstaclesCleared": [
"D"
]
}
"canRiskPermanentLossOfAccess"
"h_canArtificialMorphMovement"
{
"or": [
"canConsecutiveWalljump",
"SpaceJump"
]
}
|
|
From: 6
G-Mode Morph Junction Direct (Bottom)
To: 2
Top Left Door
Overload PLMs with a single Power Bomb by hitting the item at the right end of the room. This can be done with a single precisely placed Power Bomb. There should be 4 empty tiles between Samus and the left of the blocks when the bomb is placed. Requires: {
"itemNotCollectedAtNode": 4
}
"canRiskPermanentLossOfAccess"
"h_canArtificialMorphPowerBomb"
"h_canArtificialMorphMovement"
{
"or": [
"canConsecutiveWalljump",
"SpaceJump"
]
}
|
|
From: 1
Left Door
To: 5
Left Item (locked)
Overload the PLMs by rolling through the camera scroll blocks which are 4 tiles to the right of the stair by the door. Entrance condition: {
"comeInWithGMode": {
"mode": "any",
"morphed": true
}
}
Requires: "h_ZebesNotAwake" Clears obstacles: D |
|
Requires: "h_ZebesNotAwake" Clears obstacles: C |
|
Requires: "h_ZebesNotAwake" Clears obstacles: C |
|
From: 9
Right Etecoon Shaft - Top Left Door
To: 12
Above Power Bomb Blocks - Main Junction
Place bombs against the item Chozo ball to overload PLMs. Then go through the bomb blocks and tunnel. IBJ up the left side, blind, until getting on the top small platform. Place a Power Bomb and exit g-mode before the bomb goes off to break the blocks. Entrance condition: {
"comeInWithGMode": {
"mode": "any",
"morphed": true
}
}
Requires: {
"itemNotCollectedAtNode": 11
}
"canRiskPermanentLossOfAccess"
"h_canArtificialMorphIBJ"
"h_canArtificialMorphPowerBomb"
"canBePatient"
"canOffScreenMovement"
|
|
From: 9
Right Etecoon Shaft - Top Left Door
To: 13
Below Power Bomb Blocks - Main Junction
Place bombs against the item Chozo ball to overload PLMs. Then go through the bomb blocks and tunnel, then exit g-mode. Entrance condition: {
"comeInWithGMode": {
"mode": "any",
"morphed": true
}
}
Requires: {
"itemNotCollectedAtNode": 11
}
"canRiskPermanentLossOfAccess"
"h_canArtificialMorphIBJ"
|
|
From: 10
Right Etecoon Shaft - Bottom Left Door
To: 12
Above Power Bomb Blocks - Main Junction
IBJ up and place bombs against the item Chozo ball to overload PLMs. Then go through the bomb blocks and tunnel. IBJ up again, blind, until getting on the top small platform. Place a Power Bomb and exit g-mode before the bomb goes off to break the blocks. Entrance condition: {
"comeInWithGMode": {
"mode": "any",
"morphed": true
}
}
Requires: {
"itemNotCollectedAtNode": 11
}
"canRiskPermanentLossOfAccess"
"h_canArtificialMorphIBJ"
"h_canArtificialMorphPowerBomb"
"canBePatient"
"canOffScreenMovement"
|
|
From: 10
Right Etecoon Shaft - Bottom Left Door
To: 13
Below Power Bomb Blocks - Main Junction
IBJ up and place bombs against the item Chozo ball to overload PLMs. Then go through the bomb blocks and tunnel, then exit g-mode. Entrance condition: {
"comeInWithGMode": {
"mode": "any",
"morphed": true
}
}
Requires: {
"itemNotCollectedAtNode": 11
}
"canRiskPermanentLossOfAccess"
"h_canArtificialMorphIBJ"
"canBePatient"
|
|
From: 6
Right Side - Top Middle Door
To: 12
Bottom Chozo Item
Carefully roll off of the edge and land on the platform holding the item. Roll through it until PLMs are overloaded, then roll through the bomb blocks and down below. Entrance condition: {
"comeInWithGMode": {
"mode": "direct",
"morphed": true
}
}
Requires: {
"itemNotCollectedAtNode": 11
}
"canRiskPermanentLossOfAccess"
"h_canArtificialMorphMovement"
|
|
From: 8
Right Side - Bottom Door
To: 12
Bottom Chozo Item
Roll through it until PLMs are overloaded, then roll through the bomb blocks and down below. Entrance condition: {
"comeInWithGMode": {
"mode": "direct",
"morphed": true
}
}
Requires: {
"itemNotCollectedAtNode": 11
}
"canRiskPermanentLossOfAccess"
"h_canArtificialMorphSpringBall"
|
|
From: 1
Left Door (locked)
To: 1
Left Door (locked)
The only projectiles that Kraid can hit Samus with through the transition are the spinning talons after he stands up. This requires Kraid to not be defeated and the door to be open during the second phase. Requires: {
"not": "f_DefeatedKraid"
}
"canRiskPermanentLossOfAccess"
{
"or": [
"Charge",
{
"ammo": {
"type": "Missile",
"count": 2
}
},
{
"ammo": {
"type": "Super",
"count": 1
}
}
]
}
Exit condition: {
"leaveWithGModeSetup": {}
}
|
|
From: 2
Right Door (locked)
To: 1
Left Door (locked)
Entrance condition: {
"comeInWithGrappleTeleport": {
"blockPositions": [
[
2,
18
]
]
}
}
Requires: {
"not": "f_DefeatedKraid"
}
"canRiskPermanentLossOfAccess"
Exit condition: {
"leaveWithGrappleTeleport": {
"blockPositions": [
[
2,
18
]
]
}
}
Bypasses door shell: true |
|
From: 2
Right Door (locked)
To: 1
Left Door (locked)
Entrance condition: {
"comeInWithGrappleTeleport": {
"blockPositions": [
[
2,
18
]
]
}
}
Requires: {
"not": "f_DefeatedKraid"
}
"canRiskPermanentLossOfAccess"
Bypasses door shell: true |
|
From: 6
Golden Torizo Arena Junction (Fight Not Started)
To: 4
Hidden Right Item
Springball jump into GT to bounce to the upper level. Requires: "h_canNavigateHeatRooms"
{
"not": "f_DefeatedGoldenTorizo"
}
{
"or": [
"canRiskPermanentLossOfAccess",
"HiJump",
{
"and": [
"canTrickyJump",
"canSpringwall"
]
}
]
}
"canSpringBallJumpMidAir"
"canNeutralDamageBoost"
{
"enemyDamage": {
"enemy": "Golden Torizo",
"type": "contact",
"hits": 1
}
}
{
"ammo": {
"type": "PowerBomb",
"count": 1
}
}
{
"heatFrames": 300
}
|
|
Requires: {
"not": "f_DefeatedPhantoon"
}
"canRiskPermanentLossOfAccess"
Exit condition: {
"leaveWithRunway": {
"length": 10,
"openEnd": 1
}
}
|
|
Requires: {
"not": "f_DefeatedPhantoon"
}
{
"or": [
"Plasma",
"Wave",
{
"and": [
"canRiskPermanentLossOfAccess",
{
"or": [
"Spazer",
"Ice",
"h_canUseMorphBombs",
"canUseSpeedEchoes"
]
}
]
}
]
}
{
"resetRoom": {
"nodes": [
1,
2,
3
],
"mustStayPut": false
}
}
{
"refill": [
"Energy",
"Missile"
]
}
|
|
Requires: {
"not": "f_DefeatedPhantoon"
}
"canRiskPermanentLossOfAccess"
|
|
Requires: {
"not": "f_DefeatedPhantoon"
}
"canRiskPermanentLossOfAccess"
|
|
Use a Covern or Kihunter. A flying Kihunter takes about 25 seconds to get to the door. Requires: {
"or": [
{
"enemyDamage": {
"enemy": "Kihunter (yellow)",
"type": "contact",
"hits": 1
}
},
{
"and": [
{
"enemyDamage": {
"enemy": "Covern",
"type": "contact",
"hits": 1
}
},
{
"not": "f_DefeatedPhantoon"
},
"canRiskPermanentLossOfAccess"
]
}
]
}
|
|
Requires: {
"not": "f_DefeatedPhantoon"
}
"canRiskPermanentLossOfAccess"
|
|
Requires: {
"not": "f_DefeatedPhantoon"
}
"canRiskPermanentLossOfAccess"
|
|
Use a Covern or Kihunter. A flying Kihunter will collide with Samus eventually, which could take up to 30 seconds, based on her positioning. Requires: {
"or": [
{
"enemyDamage": {
"enemy": "Kihunter (yellow)",
"type": "contact",
"hits": 1
}
},
{
"and": [
{
"enemyDamage": {
"enemy": "Covern",
"type": "contact",
"hits": 1
}
},
{
"not": "f_DefeatedPhantoon"
},
"canRiskPermanentLossOfAccess"
]
}
]
}
|
|
Requires: {
"not": "f_DefeatedPhantoon"
}
"canRiskPermanentLossOfAccess"
Exit condition: {
"leaveWithRunway": {
"length": 5,
"openEnd": 0
}
}
|
|
From: 2
Middle Left Door
To: 2
Middle Left Door
Requires: {
"not": "f_DefeatedPhantoon"
}
"canRiskPermanentLossOfAccess"
{
"canShineCharge": {
"usedTiles": 33,
"openEnd": 2
}
}
"canShinechargeMovement"
Exit condition: {
"leaveShinecharged": {
"framesRemaining": 140
}
}
|
|
Notable: true 
Climb up about half a screen. If Phantoon is dead, the last part of the climb should be done carefully to avoid triggering collision with the spikes: Do not press forward or turn-around except while X-Ray is active. For each X-ray stand-up, release the turn-around input quickly to make sure that it is not still held after X-Ray deactivates. Once Samus is high enough, unequip X-Ray, jump up (from either standing or crouch) to clip past the spikes, and land, taking a single spike hit. Then use the i-frames from the spike hit to run and jump to the left to make it to the door. Samus is high enough after the top of her arm cannon first becomes visible at the bottom of the screen; or up to 3 additional climbs can be performed after that point. In case of an accidental spike collision, it is possible to recover: Unless Samus climbed higher than needed, she will still be stuck in the wall, will take a single spike hit, and be able to continue climbing. With Grapple it is possible to swing on the Grapple blocks, avoiding all spike damage. Spike damage can also be avoided with Space Jump, by doing a stationary turn-around spin jump, which is very precise. Entrance condition: {
"comeInWithDoorStuckSetup": {}
}
Requires: "canXRayClimb"
{
"or": [
{
"and": [
{
"spikeHits": 3
},
{
"resourceCapacity": [
{
"type": "RegularEnergy",
"count": 199
}
]
}
]
},
{
"and": [
{
"not": "f_DefeatedPhantoon"
},
"canRiskPermanentLossOfAccess"
]
},
{
"and": [
"canOffScreenMovement",
{
"or": [
{
"spikeHits": 1
},
"Grapple",
{
"and": [
"SpaceJump",
"canInsaneJump",
"canBeVeryPatient"
]
}
]
}
]
}
]
}
|
|
Requires: {
"not": "f_DefeatedPhantoon"
}
"canRiskPermanentLossOfAccess"
|
|
Only works when Phantoon opens his eye while on the far left side. Requires: {
"enemyDamage": {
"enemy": "Phantoon",
"type": "contact",
"hits": 1
}
}
{
  "not": "f_DefeatedPhantoon"
}
"canRiskPermanentLossOfAccess"
|
|
Requires: {
"not": "f_DefeatedPhantoon"
}
"canRiskPermanentLossOfAccess"
Exit condition: {
"leaveWithGModeSetup": {}
}
|
|
Land on the floor, then jump and fire a shot mid-air and activate the shinespark wind-up. Wait until the shot is at a specific position before sparking. Sparking too late will cause the shot to despawn before reaching the door. Sparking too early will cause Samus to bonk the door as it will not yet be open. A beam shot, Missile, or Super can be used. Entrance condition: {
"comeInShinecharged": {
"framesRequired": 70
}
}
Requires: {
"not": "f_DefeatedPhantoon"
}
"canRiskPermanentLossOfAccess"
"canShinechargeMovementTricky"
"canHeroShot"
"canMidairShinespark"
{
"shinespark": {
"frames": 37
}
}
Exit condition: {
"leaveWithSpark": {}
}
|
|
Entrance condition: {
"comeInShinecharging": {
"length": 0,
"openEnd": 1
}
}
Requires: {
"not": "f_DefeatedPhantoon"
}
"canRiskPermanentLossOfAccess"
"canShinechargeMovementComplex"
"canMidairShinespark"
{
"shinespark": {
"frames": 20
}
}
Exit condition: {
"leaveWithSpark": {}
}
|
|
From: 1
Left Door
To: 2
Right Door
Entrance condition: {
"comeInShinecharging": {
"length": 0,
"openEnd": 1
}
}
Requires: {
"not": "f_DefeatedPhantoon"
}
"canRiskPermanentLossOfAccess"
"canShinechargeMovementTricky"
"canMidairShinespark"
{
"shinespark": {
"frames": 8
}
}
Exit condition: {
"leaveWithSpark": {}
}
|
|
Requires: {
"not": "f_DefeatedPhantoon"
}
"canRiskPermanentLossOfAccess"
|
|
Land on the floor, then jump and fire a shot mid-air and activate the shinespark wind-up. Wait until the shot is at a specific position before sparking. Sparking too late will cause the shot to despawn before reaching the door. Sparking too early will cause Samus to bonk the door as it will not yet be open. A beam shot, Missile, or Super can be used. Entrance condition: {
"comeInShinecharged": {
"framesRequired": 70
}
}
Requires: {
"not": "f_DefeatedPhantoon"
}
"canRiskPermanentLossOfAccess"
"canShinechargeMovementTricky"
"canHeroShot"
"canMidairShinespark"
{
"shinespark": {
"frames": 37
}
}
Exit condition: {
"leaveWithSpark": {}
}
|
|
Entrance condition: {
"comeInShinecharging": {
"length": 0,
"openEnd": 1
}
}
Requires: {
"not": "f_DefeatedPhantoon"
}
"canRiskPermanentLossOfAccess"
"canShinechargeMovementComplex"
"canMidairShinespark"
{
"shinespark": {
"frames": 20
}
}
Exit condition: {
"leaveWithSpark": {}
}
|
|
From: 2
Right Door
To: 1
Left Door
Entrance condition: {
"comeInShinecharging": {
"length": 0,
"openEnd": 1
}
}
Requires: {
"not": "f_DefeatedPhantoon"
}
"canRiskPermanentLossOfAccess"
"canShinechargeMovementTricky"
"canMidairShinespark"
{
"shinespark": {
"frames": 8
}
}
Exit condition: {
"leaveWithSpark": {}
}
|
|
Requires: {
"not": "f_DefeatedPhantoon"
}
"canRiskPermanentLossOfAccess"
|
|
Requires: {
"or": [
"Gravity",
{
"and": [
{
"not": "f_DefeatedPhantoon"
},
"canRiskPermanentLossOfAccess"
]
}
]
}
Exit condition: {
"leaveWithRunway": {
"length": 21,
"openEnd": 0,
"steepUpTiles": 3
}
}
|
|
From: 1
Left Door
To: 2
Right Door
Entrance condition: {
"comeInShinecharging": {
"length": 19,
"openEnd": 0,
"steepDownTiles": 3
}
}
Requires: {
"or": [
"Gravity",
{
"and": [
{
"not": "f_DefeatedPhantoon"
},
"canRiskPermanentLossOfAccess"
]
}
]
}
"canShinechargeMovementComplex"
Exit condition: {
"leaveShinecharged": {
"framesRemaining": 100
}
}
|
|
Requires: {
"not": "f_DefeatedPhantoon"
}
"canRiskPermanentLossOfAccess"
|
|
Enter the room with a shinecharge. Run and jump off the ledge. Fire a shot mid-air and activate the shinespark wind-up. Take a hit from the the Bull (if power is on). Wait until the shot is at a specific position before sparking. Sparking too late will cause the shot to despawn before reaching the door. Sparking too early will cause Samus to bonk the door as it will not yet be open. A beam shot, Missile, or Super can be used. Entrance condition: {
"comeInShinecharged": {
"framesRequired": 60
}
}
Requires: "canShinechargeMovementTricky"
"canHeroShot"
{
"or": [
{
"enemyDamage": {
"enemy": "Bull",
"type": "contact",
"hits": 1
}
},
{
"and": [
{
"not": "f_DefeatedPhantoon"
},
"canRiskPermanentLossOfAccess"
]
}
]
}
{
"shinespark": {
"frames": 32
}
}
Exit condition: {
"leaveWithSpark": {}
}
|
|
From: 1
Left Door
To: 1
Left Door
It is possible to kill the trapped Atomics with any beam upgrade besides charge. Kill the atomics while waiting for the Coverns to respawn. Requires: {
"not": "f_DefeatedPhantoon"
}
"canRiskPermanentLossOfAccess"
{
"or": [
"Ice",
"Wave",
"Spazer",
"Plasma"
]
}
{
"resetRoom": {
"nodes": [
1
],
"mustStayPut": false
}
}
{
"refill": [
"Energy",
"Missile",
"Super"
]
}
|
|
From: 1
Right Door
To: 1
Right Door
Requires: {
"or": [
"Gravity",
{
"and": [
{
"not": "f_DefeatedPhantoon"
},
"canRiskPermanentLossOfAccess"
]
}
]
}
Exit condition: {
"leaveWithRunway": {
"length": 8,
"openEnd": 1,
"steepUpTiles": 2
}
}
|
|
From: 1
Right Door
To: 1
Right Door
Requires: "h_canXMode"
"h_XModeThornHit"
"h_XModeThornHit"
"SpaceJump"
"HiJump"
"canShinechargeMovementComplex"
{
"canShineCharge": {
"usedTiles": 33,
"openEnd": 2
}
}
{
"shinespark": {
"frames": 21
}
}
{
"or": [
{
"and": [
"f_DefeatedPhantoon",
"Gravity"
]
},
{
"and": [
{
"not": "f_DefeatedPhantoon"
},
"canRiskPermanentLossOfAccess"
]
}
]
}
Exit condition: {
"leaveWithSpark": {}
}
|
|
From: 1
Right Door
To: 2
Item (locked)
Jump as far as possible before activating the spark, while sparking high enough to crash into the Chozo statue's hand. Entrance condition: {
"comeInShinecharged": {
"framesRequired": 100
}
}
Requires: "canShinechargeMovementComplex"
"canMidairShinespark"
{
"shinespark": {
"frames": 33,
"excessFrames": 7
}
}
{
"not": "f_DefeatedPhantoon"
}
{
"or": [
"canRiskPermanentLossOfAccess",
"canCarefulJump"
]
}
|
|
From: 1
Right Door
To: 2
Item (locked)
Gain a shinecharge while entering the room. Run back to the door, and then run left and jump as far as possible before activating the spark, while sparking high enough to crash into the Chozo statue's hand. Entrance condition: {
"comeInShinecharging": {
"length": 7,
"openEnd": 0,
"steepDownTiles": 2
}
}
Requires: "canShinechargeMovementComplex"
"canMidairShinespark"
{
"shinespark": {
"frames": 33,
"excessFrames": 7
}
}
{
"or": [
"canRiskPermanentLossOfAccess",
"canCarefulJump"
]
}
|
|
From: 1
Right Door
To: 2
Item (locked)
From the top right platform, jump to the left into the thorns, then climb the left wall. Requires: {
"thornHits": 1
}
"canIframeSpikeJump"
"canWalljump"
{
"not": "f_DefeatedPhantoon"
}
{
"or": [
"canRiskPermanentLossOfAccess",
"canCarefulJump",
"Gravity"
]
}
|
|
Requires: {
"not": "f_DefeatedPhantoon"
}
"canRiskPermanentLossOfAccess"
Exit condition: {
"leaveWithRunway": {
"length": 45,
"openEnd": 1
}
}
|
|
From: 2
Right Door
To: 2
Right Door
Requires: {
"not": "f_DefeatedPhantoon"
}
"canRiskPermanentLossOfAccess"
Exit condition: {
"leaveWithRunway": {
"length": 45,
"openEnd": 1
}
}
|
|
Requires: {
"enemyDamage": {
"enemy": "Covern",
"type": "contact",
"hits": 1
}
}
{
  "not": "f_DefeatedPhantoon"
}
"canRiskPermanentLossOfAccess"
|
|
Requires: {
"enemyDamage": {
"enemy": "Covern",
"type": "contact",
"hits": 1
}
}
{
  "not": "f_DefeatedPhantoon"
}
"canRiskPermanentLossOfAccess"
|
|
From: 3
Bottom Left Door
To: 3
Bottom Left Door
Requires: {
"enemyDamage": {
"enemy": "Covern",
"type": "contact",
"hits": 1
}
}
{
  "not": "f_DefeatedPhantoon"
}
"canRiskPermanentLossOfAccess"
|
|
Requires: {
"enemyDamage": {
"enemy": "Covern",
"type": "contact",
"hits": 1
}
}
{
  "not": "f_DefeatedPhantoon"
}
"canRiskPermanentLossOfAccess"
|
|
From: 5
Middle Right Door
To: 5
Middle Right Door
Requires: {
"enemyDamage": {
"enemy": "Covern",
"type": "contact",
"hits": 1
}
}
{
  "not": "f_DefeatedPhantoon"
}
"canRiskPermanentLossOfAccess"
|
|
From: 6
Bottom Right Door
To: 6
Bottom Right Door
Requires: {
"enemyDamage": {
"enemy": "Covern",
"type": "contact",
"hits": 1
}
}
{
  "not": "f_DefeatedPhantoon"
}
"canRiskPermanentLossOfAccess"
|
|
From: 6
Bottom Right Door
To: 6
Bottom Right Door
Requires: {
"or": [
"h_canBombThings",
{
"obstaclesCleared": [
"A"
]
},
{
"and": [
{
"not": "f_DefeatedPhantoon"
},
"canRiskPermanentLossOfAccess"
]
}
]
}
Exit condition: {
"leaveWithGModeSetup": {}
}
|
|
From: 7
Bottom Door
To: 3
Bottom Left Door
In R-Mode, kill the Coverns until there is Energy in Samus's Reserves. Get into the Morph tunnel and go to the far left. Wait for Coverns to damage Samus down until Reserves trigger, forcing a stand up and enabling her to shoot the shot blocks and escape. Entrance condition: {
"comeInWithRMode": {},
"comesThroughToilet": "any"
}
Requires: "Morph"
{
  "not": "f_DefeatedPhantoon"
}
"canRiskPermanentLossOfAccess"
{
"or": [
"canBePatient",
"Plasma"
]
}
Clears obstacles: B |
|
From: 7
Bottom Door
To: 3
Bottom Left Door
Use the Covern to partial ceiling clip so your beam can reach the shot block of the ceiling at the end of the Morph tunnel to the left. It is possible to mid-air morph to get into the morph tunnel with nothing, from the Covern, the ground, or the stairs below. Requires: "Morph"
"canUseFrozenEnemies"
"canCeilingClip"
{
  "not": "f_DefeatedPhantoon"
}
"canRiskPermanentLossOfAccess"
Clears obstacles: B |
|
From: 7
Bottom Door
To: 7
Bottom Door
To shoot the Atomics with Ice or Plasma, crouch near the edge of the glass and shoot forward; angled shots downwards also work but from a tile further back. Requires: {
"not": "f_DefeatedPhantoon"
}
"canRiskPermanentLossOfAccess"
{
"or": [
"Ice",
"Wave",
"Spazer",
"Plasma",
{
"and": [
"h_canUseMorphBombs",
"ScrewAttack"
]
}
]
}
{
"resetRoom": {
"nodes": [
7
],
"mustStayPut": false
}
}
{
"refill": [
"Energy",
"Missile",
"Super"
]
}
|
|
Line up with the far right or left side of doorframe in the room below, to be able to not fall back through after entry, as the door remains open. Be careful not to fall into the door while being hit by the Covern. Requires: {
"enemyDamage": {
"enemy": "Covern",
"type": "contact",
"hits": 1
}
}
{
  "not": "f_DefeatedPhantoon"
}
"canRiskPermanentLossOfAccess"
|
|
Requires: {
"not": "f_DefeatedPhantoon"
}
"canRiskPermanentLossOfAccess"
"canSpeedball"
{
"canShineCharge": {
"usedTiles": 14,
"openEnd": 0,
"steepUpTiles": 3
}
}
Clears obstacles: C |
|
From: 8
Item
To: 3
Bottom Left Door
Requires: {
"not": "f_DefeatedPhantoon"
}
"canRiskPermanentLossOfAccess"
"canTemporaryBlue"
"can4HighMidAirMorph"
"canSpringBallBounce"
{
"canShineCharge": {
"usedTiles": 16,
"openEnd": 0,
"steepUpTiles": 4
}
}
Clears obstacles: C |
|
Requires: {
"enemyDamage": {
"enemy": "Covern",
"type": "contact",
"hits": 1
}
}
{
  "not": "f_DefeatedPhantoon"
}
"canRiskPermanentLossOfAccess"
|
|
Requires: {
"not": "f_DefeatedPhantoon"
}
"canRiskPermanentLossOfAccess"
Exit condition: {
"leaveWithGModeSetup": {}
}
|
|
From: 1
Right Door
To: 1
Right Door
Stand a few pixels away from the bottom of the stairs to easily position the Covern and extend the runway as far as possible. Requires: "h_canFrozenEnemyRunway"
{
  "not": "f_DefeatedPhantoon"
}
"canRiskPermanentLossOfAccess"
Exit condition: {
"leaveWithRunway": {
"length": 7,
"openEnd": 0
}
}
|
|
Requires: {
"enemyDamage": {
"enemy": "Covern",
"type": "contact",
"hits": 1
}
}
{
  "not": "f_DefeatedPhantoon"
}
"canRiskPermanentLossOfAccess"
|
|
Requires: {
"not": "f_DefeatedPhantoon"
}
"canRiskPermanentLossOfAccess"
Exit condition: {
"leaveWithGModeSetup": {}
}
|
|
Stand half way between the ledge and the save station to position the Covern and extend the runway as far as possible. Requires: "h_canFrozenEnemyRunway"
{
  "not": "f_DefeatedPhantoon"
}
"canRiskPermanentLossOfAccess"
Exit condition: {
"leaveWithRunway": {
"length": 6,
"openEnd": 0
}
}
|
|
Requires: {
"not": "f_MaridiaTubeBroken"
}
"canRiskPermanentLossOfAccess"
Exit condition: {
"leaveWithRunway": {
"length": 14,
"openEnd": 0
}
}
|
|
From: 1
Left Doorway
To: 3
Top Right Doorway
Entrance condition: {
"comeInWithGMode": {
"mode": "any",
"morphed": true
}
}
Requires: {
"or": [
"Morph",
"h_canArtificialMorphSpringBall",
{
"and": [
"Gravity",
"h_canArtificialMorphIBJ"
]
},
{
"and": [
"Gravity",
"h_canArtificialMorphBombHorizontally",
"h_canArtificialMorphBombThings"
]
},
{
"and": [
{
"not": "f_MaridiaTubeBroken"
},
"canRiskPermanentLossOfAccess"
]
}
]
}
Exit condition: {
"leaveWithGMode": {
"morphed": true
}
}
|
|
From: 1
Left Doorway
To: 3
Top Right Doorway
Entrance condition: {
"comeInShinecharging": {
"length": 13,
"openEnd": 0
}
}
Requires: {
"not": "f_MaridiaTubeBroken"
}
"canRiskPermanentLossOfAccess"
Exit condition: {
"leaveShinecharged": {
"framesRemaining": 179
}
}
|
|
Entrance condition: {
"comeInWithSpark": {}
}
Requires: {
"or": [
{
"shinespark": {
"frames": 24
}
},
{
"and": [
"Gravity",
{
"shinespark": {
"frames": 21
}
}
]
},
{
"and": [
{
"not": "f_MaridiaTubeBroken"
},
"canRiskPermanentLossOfAccess",
{
"shinespark": {
"frames": 21
}
}
]
}
]
}
Exit condition: {
"leaveWithSpark": {}
}
|
|
From: 1
Left Doorway
To: 3
Top Right Doorway
Entrance condition: {
"comeInWithStoredFallSpeed": {
"fallSpeedInTiles": 1
}
}
Requires: {
"not": "f_MaridiaTubeBroken"
}
"canRiskPermanentLossOfAccess"
Exit condition: {
"leaveWithStoredFallSpeed": {
"fallSpeedInTiles": 1
}
}
|
|
From: 1
Left Doorway
To: 3
Top Right Doorway
Entrance condition: {
"comeInWithStoredFallSpeed": {
"fallSpeedInTiles": 2
}
}
Requires: {
"not": "f_MaridiaTubeBroken"
}
"canRiskPermanentLossOfAccess"
Exit condition: {
"leaveWithStoredFallSpeed": {
"fallSpeedInTiles": 2
}
}
|
|
From: 2
Bottom Right Door
To: 2
Bottom Right Door
Requires: {
"not": "f_MaridiaTubeBroken"
}
"canRiskPermanentLossOfAccess"
Exit condition: {
"leaveWithRunway": {
"length": 5,
"openEnd": 1
}
}
|
|
Glass Tunnel Grapple Teleport into Grapple Jump or Tube Intact (Lower Entrance) (Insane)
Glass Tunnel
From: 2
Bottom Right Door
To: 4
Top Door
Notable: true .png)
.gif)
Swing to the right, shoot open the door above, and grapple jump through it. The grapple beam will need to be retracted while swinging to the right, to avoid bonking on the small platform. Entrance condition: {
"comeInWithGrappleTeleport": {
"blockPositions": [
[
5,
3
]
]
}
}
Requires: {
"doorUnlockedAtNode": 4
}
{
"or": [
{
"and": [
"canMidairWiggle",
"canTrickyGrappleJump",
"canInsaneJump"
]
},
{
"and": [
{
"not": "f_MaridiaTubeBroken"
},
"canRiskPermanentLossOfAccess"
]
}
]
}
|
|
From: 3
Top Right Doorway
To: 1
Left Doorway
Entrance condition: {
"comeInWithGMode": {
"mode": "any",
"morphed": true
}
}
Requires: {
"or": [
"Morph",
"h_canArtificialMorphSpringBall",
{
"and": [
"Gravity",
"h_canArtificialMorphIBJ"
]
},
{
"and": [
"Gravity",
"h_canArtificialMorphBombHorizontally",
"h_additionalBomb"
]
},
{
"and": [
{
"not": "f_MaridiaTubeBroken"
},
"canRiskPermanentLossOfAccess"
]
}
]
}
Exit condition: {
"leaveWithGMode": {
"morphed": true
}
}
|
|
From: 3
Top Right Doorway
To: 1
Left Doorway
Entrance condition: {
"comeInShinecharging": {
"length": 13,
"openEnd": 0
}
}
Requires: {
"not": "f_MaridiaTubeBroken"
}
"canRiskPermanentLossOfAccess"
Exit condition: {
"leaveShinecharged": {
"framesRemaining": 179
}
}
|
|
Entrance condition: {
"comeInWithSpark": {}
}
Requires: {
"or": [
{
"shinespark": {
"frames": 24
}
},
{
"and": [
"Gravity",
{
"shinespark": {
"frames": 21
}
}
]
},
{
"and": [
{
"not": "f_MaridiaTubeBroken"
},
"canRiskPermanentLossOfAccess",
{
"shinespark": {
"frames": 21
}
}
]
}
]
}
Exit condition: {
"leaveWithSpark": {}
}
|
|
From: 3
Top Right Doorway
To: 1
Left Doorway
Entrance condition: {
"comeInWithStoredFallSpeed": {
"fallSpeedInTiles": 1
}
}
Requires: {
"not": "f_MaridiaTubeBroken"
}
"canRiskPermanentLossOfAccess"
Exit condition: {
"leaveWithStoredFallSpeed": {
"fallSpeedInTiles": 1
}
}
|
|
From: 3
Top Right Doorway
To: 1
Left Doorway
Entrance condition: {
"comeInWithStoredFallSpeed": {
"fallSpeedInTiles": 2
}
}
Requires: {
"not": "f_MaridiaTubeBroken"
}
"canRiskPermanentLossOfAccess"
Exit condition: {
"leaveWithStoredFallSpeed": {
"fallSpeedInTiles": 2
}
}
|
|
From: 3
Top Right Doorway
To: 3
Top Right Doorway
Requires: {
"not": "f_MaridiaTubeBroken"
}
"canRiskPermanentLossOfAccess"
Exit condition: {
"leaveWithRunway": {
"length": 14,
"openEnd": 0
}
}
|
|
Glass Tunnel Grapple Teleport into Grapple Jump or Tube Intact (Right Entrance) (Insane)
Glass Tunnel
From: 3
Top Right Doorway
To: 4
Top Door
Notable: true
Swing to the right, shoot open the door above, and grapple jump through it. The grapple beam will need to be retracted while swinging to the right, to avoid bonking on the small platform. Entrance condition: {
"comeInWithGrappleTeleport": {
"blockPositions": [
[
5,
3
]
]
}
}
Requires: {
"doorUnlockedAtNode": 4
}
{
"or": [
{
"and": [
"canMidairWiggle",
"canTrickyGrappleJump",
"canInsaneJump"
]
},
{
"and": [
{
"not": "f_MaridiaTubeBroken"
},
"canRiskPermanentLossOfAccess"
]
}
]
}
|
|
From: 5
Inside Maridia Tube (locked)
To: 4
Top Door
Jump as the first action after breaking the tube to gravity jump to the top of the room. Open the door and go through it during the ascent. This can only be attempted once. Requires: {
"obstaclesCleared": [
"f_MaridiaTubeBroken"
]
}
{
"obstaclesCleared": [
"A"
]
}
"canRiskPermanentLossOfAccess"
"canSuitlessMaridia"
"canTrickyJump"
|
|
Until the tube is broken there is no water in this room. Requires: {
"not": "f_MaridiaTubeBroken"
}
"canRiskPermanentLossOfAccess"
|
|
Requires: {
"not": "f_DefeatedDraygon"
}
"canRiskPermanentLossOfAccess"
{
"enemyDamage": {
"enemy": "Draygon",
"type": "contact",
"hits": 1
}
}
|
|
This takes 1 min 40 sec if Shaktool is done digging. Requires: {
"enemyDamage": {
"enemy": "Shaktool",
"type": "contact",
"hits": 1
}
}
{
"or": [
"canBePatient",
{
"and": [
"canRiskPermanentLossOfAccess",
{
"not": "f_ShaktoolDoneDigging"
}
]
}
]
}
|
|
Requires: {
"not": "f_KilledMetroidRoom1"
}
"canRiskPermanentLossOfAccess"
Exit condition: {
"leaveWithGModeSetup": {
"knockback": false
}
}
|
|
From: 2
Right Door
To: 2
Right Door
Use a frozen Metroid or a Rinka from the left to extend the length of the runway. Luring a Rinka is easiest with Morph - While morphed, barely move the bottom Rinka spawner on camera in order to have it shoot at a usable angle. Without Morph, use the top Rinka spawner and jump just before the Rinka starts moving to get a usable angle. Requires: {
"or": [
"h_canTrickyFrozenEnemyRunway",
{
"and": [
"h_canFrozenEnemyRunway",
{
"not": "f_KilledMetroidRoom1"
},
"canRiskPermanentLossOfAccess"
]
}
]
}
Exit condition: {
"leaveWithRunway": {
"length": 4,
"openEnd": 1
}
}
|
|
From: 3
Junction (Get Past Metroids, Left to Right)
To: 2
Right Door
Freeze the middle Metroid as soon as it comes on screen to use as a platform to cross over the acid. If no Metroids are alive, the far left Rinka can be used instead, at a high angle. The left Rinka can also just be used to setup an angle with the Rinka near the left edge of the pool. Requires: "canTrickyUseFrozenEnemies"
"canTrickyJump"
"canCameraManip"
{
"or": [
"canInsaneJump",
{
"and": [
{
"not": "f_KilledMetroidRoom1"
},
{
"obstaclesNotCleared": [
"A"
]
},
"canRiskPermanentLossOfAccess"
]
}
]
}
|
|
From: 2
Bottom Right Door (locked)
To: 2
Bottom Right Door (locked)
Requires: {
"not": "f_KilledMetroidRoom2"
}
"canRiskPermanentLossOfAccess"
Exit condition: {
"leaveWithGModeSetup": {
"knockback": false
}
}
|