canMockball (Hard)
Maintaining running speed while morphed, by holding jump and down (to crouch) during a lateral jump, then morphing as Samus hits the ground while holding jump and transition from holding down to holding forward. Sometimes referred to as a Machball.
Strats ()
|
Bring temporary blue from the right side door all the way to the missile location using Springball, SpaceJump, or Morph-UnMorphs. Entrance condition: {
"comeInShinecharging": {
"length": 1,
"openEnd": 1
}
}
Requires: "canTemporaryBlue"
"canInsaneJump"
{
"or": [
"canChainTemporaryBlue",
{
"and": [
"canSpeedball",
"canSpringBallBounce",
"canSlowShortCharge"
]
},
{
"and": [
"canBlueSpaceJump",
"canMockball",
"canSlowShortCharge"
]
}
]
}
|
|
From: 1
Left Door
To: 2
Right Door
Notable: true 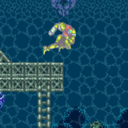
Enter the room while building a shinespark and use it on the lowest part of the ramp to diagonally spark up and out of the water. Unmorphing with the correct timing and positioning for the Shinespark are very precise, and there are no extra frames on the Shinespark timer to work with. Carry the shinespark to the bottom of the ramp either with a bounce ball which takes damage from the Choot, or delay the first Choot with two shots and then use a late mockball. Then shinespark up and use SpaceJump to reach the door. Entrance condition: {
"comeInShinecharging": {
"length": 6,
"openEnd": 1,
"steepDownTiles": 1
}
}
Requires: {
"or": [
{
"and": [
{
"enemyDamage": {
"enemy": "Choot",
"type": "contact",
"hits": 1
}
},
"canNeutralDamageBoost",
"canBounceBall"
]
},
{
"and": [
"canDodgeWhileShooting",
"canMockball"
]
}
]
}
{
"shinespark": {
"frames": 14,
"excessFrames": 5
}
}
"canShinechargeMovementComplex"
"SpaceJump"
"canTrickyJump"
|
|
From: 1
Left Door
To: 2
Right Door
Notable: true 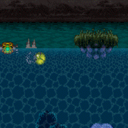
Using an exact runway size of 7 tiles; use extremely precise, controlled springball bounces to cross the ocean. 7 tiles of runspeed can freely be achieved by requipping SpeedBooster after reaching the max normal run speed. Mockball down the submerged ramp and begin SpringBall bouncing either above the water, or under water using the platforms. The final SpringBall bounce must be on the left edge of the rightmost underwater platform. While the bounce is occuring, setup a mid-air SpringBall Jump to escape the water and reach the door. Requires: "canInsaneJump" "SpeedBooster" "canSpringBallBounce" "canDoubleSpringBallJumpMidAir" "canMockball" |
|
From: 1
Left Door
To: 2
Right Door
Notable: true 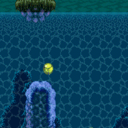
Build up run speed and then use controlled springball bounces to cross the ocean to the far right ledge, and then use SpaceJump to reach the door. Mockball down the submerged ramp and begin SpringBall bouncing under water using the platforms. Disable SpringBall after the final jump once Samus starts falling again as a way to gain extra speed. Requires: "canTrickyJump"
"canSpaceJumpWaterBounce"
"canSpringBallBounce"
"canSpringFling"
"canMockball"
{
"or": [
"canDownGrab",
"canWalljump"
]
}
|
|
Enter the room while building a shinespark and use it on the lowest part of the ramp to cross the room and reach a raised ledge on the right side wall. From there, use SpaceJump to escape the water. Carry the shinespark to the bottom of the ramp by delaying the first Choot with two Power Beam shots, killing it, or bounceballing through it. The Choot can be shot diagonally from the middle platform, and again by running off that platform and aiming down to float above it. Entrance condition: {
"comeInShinecharging": {
"length": 6,
"openEnd": 1,
"steepDownTiles": 1
}
}
Requires: "canShinechargeMovementComplex"
"canCarefulJump"
{
"or": [
{
"and": [
"canMidairShinespark",
"canDodgeWhileShooting"
]
},
{
"and": [
{
"enemyDamage": {
"enemy": "Choot",
"type": "contact",
"hits": 1
}
},
"canNeutralDamageBoost",
"canBounceBall"
]
},
{
"and": [
"canMockball",
{
"or": [
"canPseudoScrew",
"ScrewAttack",
"Plasma",
"Wave",
{
"ammo": {
"type": "Missile",
"count": 1
}
},
{
"ammo": {
"type": "Super",
"count": 1
}
}
]
}
]
}
]
}
"canHorizontalShinespark"
{
"shinespark": {
"frames": 123,
"excessFrames": 5
}
}
"canSpaceJumpWaterBounce"
{
"or": [
{
"and": [
"HiJump",
"canSpaceJumpWaterEscape"
]
},
{
"and": [
"canTrickyJump",
"canDownGrab"
]
},
"canWalljump"
]
}
|
|
Run for 7 tiles for enough speed to springball from the submerged platform up to the platform enemy, above the water. Turning on SpeedBooster midjump, after running 7+ tiles, will automatically hit the run speed requirement. It is not necessary to enter the water to clear the rightmost Choot. Requires: "canTrickyJump" "SpeedBooster" "canSpringBallBounce" "canMockball" "SpaceJump" |
|
From: 6
Middle Right Door (By Zeb Farm)
To: 12
Top Junction
Notable: true 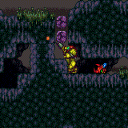
Get a Zeb to move left into the morph passage, and reach the end of the tunnel before it. Must be quick enough to shoot the shot block first. Requires a mockball on the 4 tile floor before the tunnel. This strat is a one-shot try and failure is a softlock. Requires: "canNeutralDamageBoost"
"canMockball"
{
"enemyDamage": {
"enemy": "Zeb",
"hits": 1,
"type": "contact"
}
}
|
|
From: 6
Middle Right Door (By Zeb Farm)
To: 12
Top Junction
Notable: true 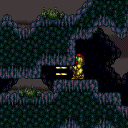

Get a Zeb to move left into the morph passage, and reach the end of the tunnel before it. Shoot the block with Wave or while crouching with Spazer before luring the bug. Quickly lure the bug then use a mockball on the 4 tile floor before the tunnel. This strat is a one-shot try and failure is a softlock. Requires: {
"or": [
"Wave",
"Spazer"
]
}
"canNeutralDamageBoost"
"canMockball"
{
  "enemyDamage": {
    "enemy": "Zeb",
    "hits": 1,
    "type": "contact"
  }
}
|
|
From: 1
Left Door
To: 6
Junction (Left of Morph Tunnel)
This strat assumes you don't know you're entering the room beforehand. Otherwise, it's possible to kill the first two Sidehoppers without taking damage. It's possible to take out obstacle A alongside the third Sidehopper, but there's a risk of taking an additional hit (negated by mockball). Requires: {
"enemyDamage": {
"enemy": "Sidehopper",
"type": "contact",
"hits": 1
}
}
{
"or": [
"canMockball",
{
"enemyDamage": {
"enemy": "Sidehopper",
"type": "contact",
"hits": 1
}
}
]
}
{
"enemyKill": {
"enemies": [
[
"Sidehopper",
"Sidehopper"
],
[
"Sidehopper"
]
],
"explicitWeapons": [
"PowerBomb"
]
}
}
Clears obstacles: A, C |
|
Notable: true 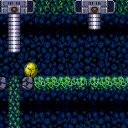
Mockball to roll over the crumble blocks without falling down, and under the gate before it closes. Requires: {
"obstaclesNotCleared": [
"A"
]
}
"canMockball"
Clears obstacles: A |
|
The only way the Wavers will get to the door is if the right crumble blocks are all broken. This assumes that Samus comes from the left with Speed, a mockball, or a crouch gate clip. After the crumbles are broken, shoot the ceiling block and wait by the door for the Waver to come. Note that if Samus takes more than 35 seconds after entering the room, before shooting the ceiling, the Waver will not come down. Requires: {
"obstaclesNotCleared": [
"A"
]
}
{
"or": [
"SpeedBooster",
"canMockball",
{
"and": [
"canCrouchGateClip",
{
"or": [
"canXRayTurnaround",
"canMoonwalk"
]
}
]
}
]
}
Exit condition: {
"leaveWithGModeSetup": {}
}
|
|
Stand to the right of the Zeb farm and freeze the Zeb as it starts moving horizontally. get onto the platform above the Zeb and wait for the Zeb to thaw and make it close to the right edge of the screen. Use a mockball to get to the right side of the room, ending it as quickly as possible at the end to prevent the Zeb going off screen. Freeze the Zeb adjacent to the right runway in order to extend it by a short distance. Requires: {
"obstaclesNotCleared": [
"A"
]
}
"h_canTrickyFrozenEnemyRunway"
"canMockball"
"canTrickyJump"
Exit condition: {
"leaveWithRunway": {
"length": 3,
"openEnd": 0
}
}
|
|
From: 15
Right Etecoon Shaft - Upper Morph Tunnel Entrance Junction
To: 9
Right Etecoon Shaft - Top Left Door
The Mockball is setup at 11. Requires: "canMockball" |
|
From: 13
Central Junction
To: 1
Left Side - Top Door
Notable: true 
Shinecharge towards the top right door. Then turn around for a fast mockball after jumping the bug pipe. Requires: {
"obstaclesCleared": [
"A"
]
}
{
"canShineCharge": {
"usedTiles": 17,
"openEnd": 0
}
}
"canShinechargeMovementComplex"
"canMockball"
{
"shinespark": {
"frames": 10
}
}
Exit condition: {
"leaveWithSpark": {}
}
|
|
Use Springball as a movement item to reach the Kraid Mouth ledge by jumping from the elevator runway, or by jumping from below. Requires: {
"or": [
"h_canSpringBallBombJump",
"canSpringBallJumpMidAir",
{
"and": [
"canMockball",
"h_canUseSpringBall"
]
}
]
}
|
|
Use the full runway of the top-right door to jump to the ledge below the Cacatac and mockball on it. Either full jump from the left side of this platform, or do a small hop followed by a big jump to cross the gap. Disabling Springball once past the Grapple Blocks makes this much easier. Requires: "canCarefulJump"
"canSpringBallBounce"
"canMockball"
{
"or": [
{
"doorUnlockedAtNode": 7
},
"canTrickyJump"
]
}
|
|
Upon room entry, jump and mockball on top of the first pillar. Entrance condition: {
"comeInRunning": {
"minTiles": 3,
"speedBooster": "any"
}
}
Requires: "canCarefulJump"
"canMockball"
{
"heatFrames": 180
}
|
|
Requires: "canMockball"
{
"heatFrames": 100
}
|
|
Fire a shot on the way up to clear the shot block. Perform a mockball but unmorph after exiting the Morph hole and Kill the Geruta while falling, if possible. Fire a shot to open the door, then jump forward and Shinespark out. Entrance condition: {
"comeInShinecharging": {
"length": 3,
"openEnd": 0
}
}
Requires: "canShinechargeMovementTricky"
"canMidairShinespark"
"canMockball"
{
"or": [
{
"enemyKill": {
"enemies": [
[
"Geruta"
]
],
"explicitWeapons": [
"Missile",
"Super",
"Wave",
"Spazer",
"Plasma"
]
}
},
{
"enemyDamage": {
"enemy": "Geruta",
"type": "contact",
"hits": 1
}
}
]
}
{
"heatFrames": 200
}
{
"shinespark": {
"frames": 16,
"excessFrames": 0
}
}
Exit condition: {
"leaveWithSpark": {}
}
|
|
Requires: "Morph"
{
"heatFrames": 225
}
{
"or": [
{
"heatFrames": 10
},
"canMockball",
{
"obstaclesCleared": [
"A"
]
}
]
}
Clears obstacles: A |
|
From: 2
Middle Left Door
To: 5
Middle Junction (Ledge Right of Morph Tunnel)
Requires: "Morph"
{
"heatFrames": 165
}
{
"or": [
{
"heatFrames": 10
},
"canMockball",
{
"obstaclesCleared": [
"A"
]
}
]
}
Clears obstacles: A |
|
Jump to the first long platform then use a the full platform to jump and mockball through the lava. Entrance condition: {
"comeInRunning": {
"minTiles": 0,
"speedBooster": "any"
}
}
Requires: "Gravity"
"canTrickyJump"
"canMockball"
{
"enemyDamage": {
"enemy": "Dragon",
"type": "contact",
"hits": 1
}
}
{
"heatFrames": 480
}
{
"lavaFrames": 240
}
|
|
Requires: "Gravity"
"Morph"
{
"or": [
{
"and": [
"canMockball",
"canCarefulJump",
{
"lavaFrames": 60
}
]
},
{
"lavaFrames": 100
}
]
}
{
"or": [
{
"lavaFrames": 150
},
{
"and": [
"SpaceJump",
{
"lavaFrames": 60
}
]
}
]
}
|
|
Requires: "canSuitlessLavaDive"
"Morph"
{
"or": [
{
"and": [
"canCarefulJump",
"canMockball",
{
"lavaFrames": 180
}
]
},
{
"lavaFrames": 220
}
]
}
{
"or": [
{
"and": [
"canSpaceJumpWaterBounce",
{
"lavaFrames": 120
}
]
},
{
"lavaFrames": 150
}
]
}
|
|
Requires: "Morph"
{
"or": [
"canMockball",
{
"heatFrames": 25
}
]
}
{
"heatFrames": 480
}
|
|
Requires: "Morph"
{
"or": [
"canMockball",
{
"heatFrames": 25
}
]
}
{
"heatFrames": 440
}
Exit condition: {
"leaveWithRunway": {
"length": 8,
"openEnd": 1
}
}
|
|
Requires: "Morph"
"SpaceJump"
{
"or": [
"canMockball",
{
"heatFrames": 25
}
]
}
{
"heatFrames": 440
}
|
|
Entrance condition: {
"comeInRunning": {
"minTiles": 11,
"speedBooster": "any"
}
}
Requires: "canMockball" |
|
Requires: "canMockball" |
|
With a fast mockball, it is possible to roll under all of the enemies. Requires: "canMockball" "canCarefulJump" |
|
From: 1
Left Door
To: 3
Junction Left of Green Gate
With enough run speed, jump over the first moat and MockBall into a regular springball jump over the second moat. Entrance condition: {
"comeInRunning": {
"minTiles": 4,
"speedBooster": "any"
}
}
Requires: "canCarefulJump" "canMockball" "canSpringBallBounce" |
|
From: 1
Left Door
To: 3
Junction Left of Green Gate
With enough run speed, jump over the first moat and MockBall into a regular springball jump over the second moat. Entrance condition: {
"comeInRunning": {
"minTiles": 2,
"speedBooster": "any"
}
}
Requires: "canTrickyJump" "canMockball" "canSpringBallBounce" |
|
From: 2
Right Door
To: 4
Junction Above Bomb Block
Run into the acid to quickly jump over the first pillar. Build speed and jump over the second pillar to mockball through the tunnel without taking much acid damage. Entrance condition: {
"comeInRunning": {
"minTiles": 3,
"speedBooster": "any"
}
}
Requires: "h_canNavigateHeatRooms"
"canMockball"
"HiJump"
"SpeedBooster"
"canCarefulJump"
"canWalljump"
{
"or": [
"canInsaneWalljump",
{
"acidFrames": 30
}
]
}
{
"heatFrames": 310
}
{
"acidFrames": 5
}
|
|
From: 2
Right Door
To: 4
Junction Above Bomb Block
Run into the acid to quickly jump over the first pillar. Build speed and jump over the second pillar to mockball through the tunnel without taking much acid damage. Requires: "h_canNavigateHeatRooms"
"canMockball"
"HiJump"
"SpeedBooster"
"canCarefulJump"
"Gravity"
{
"heatFrames": 310
}
{
"acidFrames": 25
}
|
|
From: 7
Junction Left of Morph Tunnel
To: 4
Junction Right of Power Bomb Blocks
Let the right hopper jump twice towards Samus. At the start of the second jump, jump above where the ground Dessgeega can jump but below where the ceiling enemy can reach. Mockball below the third hopper. Requires: "Morph"
{
"or": [
"canTrickyJump",
{
"and": [
"h_canUsePowerBombs",
"canCarefulJump",
"canHitbox"
]
}
]
}
"canMockball"
{
"heatFrames": 210
}
|
|
Requires: "SpeedBooster"
"canShinechargeMovementTricky"
"canMockball"
{
"obstaclesCleared": [
"A"
]
}
{
"shinespark": {
"frames": 3
}
}
Exit condition: {
"leaveWithSpark": {}
}
|
|
From: 4
Bottom Chozo Item (locked)
To: 3
Bottom Left Door
Use Temporary Blue to bounce into the Morph Tunnel with temp blue then continue to the bomb block using SpringBall. Just left of center of the pit is a good place to bounce for entering the tunnel. Requires either a tight shortcharge or clearing the power bomb blocks to open up more runway. Requires: {
"obstaclesNotCleared": [
"B"
]
}
"h_canUseSpringBall"
"canTemporaryBlue"
"canCarefulJump"
{
"or": [
{
"and": [
"f_DefeatedPhantoon",
{
"canShineCharge": {
"usedTiles": 16,
"openEnd": 0
}
}
]
},
{
"and": [
{
"obstaclesCleared": [
"A"
]
},
{
"canShineCharge": {
"usedTiles": 33,
"openEnd": 2
}
},
{
"or": [
"f_DefeatedPhantoon",
"canMockball"
]
}
]
}
]
}
|
|
From: 1
Left Door
To: 3
Top Right Door
Notable: true .png)
.gif)
Use the spikes, which are not in the water, to jump from platform to platform as a way to cross the Colosseum. Requires knowing the position of every spike in the room, and hitting the spikes while morphed can help. The first jump is particularly tough. A springball rolling jump can be used to get past it. Entrance condition: {
"comeInRunning": {
"minTiles": 2,
"speedBooster": "any"
}
}
Requires: "canWalljump"
"Morph"
"canCarefulJump"
"canIframeSpikeJump"
"h_canUseSpringBall"
"canMockball"
{
"spikeHits": 3
}
{
"or": [
{
"spikeHits": 1
},
"canHorizontalDamageBoost"
]
}
|
|
Requires: "canMetroidAvoid"
{
"or": [
"canTrickyJump",
"canMockball"
]
}
|
|
Requires: "canMetroidAvoid"
{
"or": [
"canTrickyJump",
"canMockball"
]
}
|