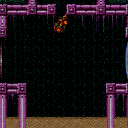
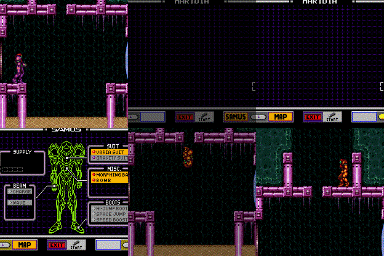
canGravityJump (Medium)
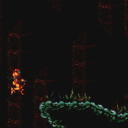
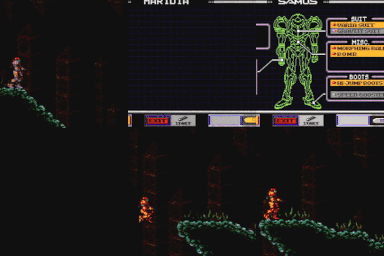
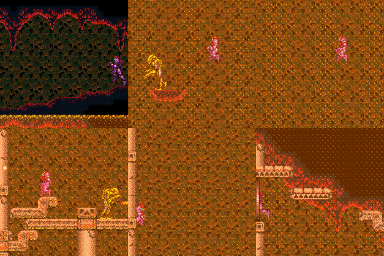
Turning off Gravity Suit right after the start of an underwater jump to achieve a much higher jump. Can be performed in water, lava, or acid.
Dependencies: canDisableEquipment
Strats ()
|
Requires: "f_TourianOpen"
"Gravity"
{
"or": [
"HiJump",
"h_canFly",
"canSpringBallJumpMidAir",
"canWalljump",
"canGravityJump"
]
}
|
|
Requires: "Gravity"
{
"or": [
"canWalljump",
"canGravityJump",
{
"and": [
"canSpringBallJumpMidAir",
"HiJump"
]
}
]
}
|
|
Requires: "canGravityJump"
"canSuitlessMaridia"
{
"obstaclesNotCleared": [
"A"
]
}
|
|
From: 5
Lava, Center Namihe
To: 3
Above Lava Junction
Gravity jump from below the Lowest-Right Namihe. A crouch jump or walljump can help exit the lava in one jump, but are not required. Requires: "canSuitlessLavaDive"
"canGravityJump"
"HiJump"
{
"heatFrames": 155
}
{
"gravitylessLavaFrames": 125
}
{
"lavaFrames": 20
}
|
|
From: 5
Lava, Center Namihe
To: 3
Above Lava Junction
Gravity jump from below the Lowest-Right Namihe. Walljump using the right side wall to reach the top of the lava, avoiding the Namihe fireball. Turning Gravity Suit back on can reduce lava damage, but may make the walljumps more difficult. Requires: "canSuitlessLavaDive"
"canGravityJump"
"canStaggeredWalljump"
{
"heatFrames": 290
}
{
"gravitylessLavaFrames": 230
}
{
"lavaFrames": 20
}
|
|
Requires: "Gravity"
{
"or": [
"canWalljump",
"HiJump",
"canSpringBallJumpMidAir",
"h_canFly",
"canUseFrozenEnemies",
"canGravityJump"
]
}
|
|
From: 4
Center Platform Junction
To: 3
Junction Left of Green Gate
Requires: "Gravity"
{
"or": [
"canWalljump",
"canGravityJump",
"h_canFly",
{
"and": [
"HiJump",
"SpeedBooster"
]
}
]
}
|
|
Requires: "h_canNavigateHeatRooms"
"canSuitlessLavaDive"
"Gravity"
{
"or": [
"HiJump",
"canWalljump",
"canSpringBallJumpMidAir",
"canGravityJump",
{
"and": [
"h_canIBJ",
{
"acidFrames": 1050
},
{
"heatFrames": 1050
}
]
}
]
}
{
"acidFrames": 100
}
{
"heatFrames": 255
}
|
|
From: 3
Bottom Platform Junction
To: 1
Left Door
Notable: true Clear the runway by killing the pirate. Then Gravity jump after building as much run speed as possible. Requires: "h_canNavigateHeatRooms"
"HiJump"
"canTrickyDashJump"
"canGravityJump"
{
"enemyKill": {
"enemies": [
[
"Yellow Space Pirate (standing)"
]
],
"explicitWeapons": [
"ScrewAttack",
"Super",
"Charge+Plasma"
]
}
}
{
"heatFrames": 390
}
{
"acidFrames": 390
}
|
|
From: 5
Below Left Door Junction
To: 1
Left Door
Notable: true Perform a gravity jump followed by a springball jump to reach the left side door. The gravity jump timing is very precise. Requires: "h_canNavigateHeatRooms"
"HiJump"
"canTrickyJump"
"canGravityJump"
"h_canCrouchJumpDownGrab"
"canSpringBallJumpMidAir"
{
"heatFrames": 600
}
{
"acidFrames": 600
}
|
|
Requires: "Morph" "canGravityJump" |
|
From: 2
Bottom Left Door
To: 5
G-Mode Morph Junction (Top Half)
Entrance condition: {
"comeInWithGMode": {
"mode": "any",
"morphed": false
}
}
Requires: "Morph"
"h_canNavigateUnderwater"
{
"or": [
"canGravityJump",
{
"and": [
"Gravity",
"HiJump",
{
"or": [
"canSpringBallJumpMidAir",
"canWalljump"
]
}
]
},
{
"and": [
"canTrickyUseFrozenEnemies",
"HiJump",
"h_canCrouchJumpDownGrab"
]
},
{
"and": [
{
"ammo": {
"type": "Super",
"count": 1
}
},
"canTrickyUseFrozenEnemies",
"canOffScreenMovement"
]
},
{
"and": [
"canTrickyJump",
"canSpringBallJumpMidAir",
"canTrickyUseFrozenEnemies",
"canOffScreenMovement"
]
}
]
}
|
|
From: 2
Bottom Left Door
To: 5
G-Mode Morph Junction (Top Half)
The shaft will be clear of crabs on room entry. Quickly gravity jump before the bottom crab enters the shaft and exit the left morph tunnel to be safe. This is a bit tighter when entering in G-Mode Immobile. Entrance condition: {
"comeInWithGMode": {
"mode": "any",
"morphed": true
}
}
Requires: "canGravityJump" "h_canArtificialMorphSpringBall" |
|
From: 3
Bottom Right Door
To: 5
G-Mode Morph Junction (Top Half)
Entrance condition: {
"comeInWithGMode": {
"mode": "any",
"morphed": false
}
}
Requires: "Morph"
"h_canNavigateUnderwater"
{
"or": [
"canGravityJump",
{
"and": [
"Gravity",
"HiJump",
{
"or": [
"canSpringBallJumpMidAir",
"canWalljump"
]
}
]
},
{
"and": [
"canTrickyUseFrozenEnemies",
"HiJump",
"h_canCrouchJumpDownGrab"
]
},
{
"and": [
{
"ammo": {
"type": "Super",
"count": 1
}
},
"canTrickyUseFrozenEnemies",
"canOffScreenMovement"
]
},
{
"and": [
"canTrickyJump",
"canSpringBallJumpMidAir",
"canTrickyUseFrozenEnemies",
"canOffScreenMovement"
]
}
]
}
|
|
From: 3
Bottom Right Door
To: 5
G-Mode Morph Junction (Top Half)
The shaft will be clear of crabs on room entry. Quickly gravity jump before the bottom crab enters the shaft and exit the left morph tunnel to be safe. The same strategy works when entering in G-Mode Immobile. Move to the center platform and gravity jump shortly after getting hit. Entrance condition: {
"comeInWithGMode": {
"mode": "any",
"morphed": true
}
}
Requires: "canGravityJump" "h_canArtificialMorphSpringBall" |
|
Requires: "Gravity"
{
"or": [
"canWalljump",
"h_canFly",
{
"and": [
"HiJump",
"SpeedBooster"
]
},
"canSpringBallJumpMidAir",
"canGravityJump"
]
}
|
|
Requires: "Gravity"
{
"or": [
"HiJump",
"canWalljump",
"h_canFly",
"canCarefulJump",
"canSpringBallJumpMidAir",
"canGravityJump",
{
"enemyDamage": {
"enemy": "Pink Space Pirate (standing)",
"type": "contact",
"hits": 1
}
},
{
"enemyKill": {
"enemies": [
[
"Pink Space Pirate (standing)"
]
],
"explicitWeapons": [
"Plasma",
"ScrewAttack"
]
}
}
]
}
|
|
Requires: "Gravity"
{
"or": [
"canWalljump",
"h_canFly",
"canUseFrozenEnemies",
"canGravityJump"
]
}
|
|
From: 6
Middle Junction Near Top Left Pirate
To: 7
Spawn At Junction Near Top Right Door
Requires: "Gravity"
{
"or": [
"HiJump",
"canWalljump",
"h_canFly",
"canGravityJump",
"canCarefulJump",
"canSpringBallJumpMidAir",
{
"enemyDamage": {
"enemy": "Pink Space Pirate (standing)",
"type": "contact",
"hits": 1
}
},
{
"enemyKill": {
"enemies": [
[
"Pink Space Pirate (standing)"
]
],
"explicitWeapons": [
"Plasma",
"ScrewAttack"
]
}
}
]
}
|
|
From: 1
Bottom Door
To: 1
Bottom Door
Freeze the bottom Skulltera and a Sciser above the door, to set up a moonfall between them, and aim down. After gaining enough speed, press forward to fall down and clip past the door shell below. Falling with too much speed can cause Samus to go out of bounds. Gravity Suit is needed in order to gain enough fall speed before the enemies thaw. Requires: "Gravity"
{
"or": [
"canWalljump",
"canGravityJump",
"h_canFly",
"HiJump",
"canSpringBallJumpMidAir"
]
}
"canEnemyStuckMoonfall"
"canTrickyUseFrozenEnemies"
Bypasses door shell: true |
|
From: 1
Bottom Door
To: 6
Speed Blocked Item
Notable: true This is a long climb, and getting around the fish under the missiles can be tricky or slow. Place bombs against the speed blocks until they are overloaded. Afterwards, freeze a crab on the edge of the speed blocks, such that Samus can jump inside and stand on the crab. Exit G-Mode and rotate to obtain the item, then kill the crab with Wave Beam to fall back down. Entrance condition: {
"comeInWithGMode": {
"mode": "any",
"morphed": true
},
"comesThroughToilet": "any"
}
Requires: "h_canArtificialMorphIBJ"
"Gravity"
"canTrickyUseFrozenEnemies"
"Wave"
{
"or": [
"h_canArtificialMorphJumpIntoIBJ",
{
"and": [
"h_canArtificialMorphSpringBall",
"HiJump"
]
},
{
"and": [
"h_canArtificialMorphSpringBall",
"canGravityJump"
]
},
"canDoubleBombJump",
"canStaggeredIBJ",
"canBeVeryPatient",
{
"enemyKill": {
"enemies": [
[
"Skultera"
]
],
"explicitWeapons": [
"PowerBomb"
]
}
}
]
}
{
"or": [
"h_canArtificialMorphSpringBall",
"h_canArtificialMorphCeilingBombJump",
"canBeVeryPatient"
]
}
|
|
From: 2
Bottom Right Door
To: 6
Speed Blocked Item
Notable: true This is a long climb, and getting around the fish under the missiles can be tricky or slow. Place bombs against the speed blocks until they are overloaded. Afterwards, freeze a crab on the edge of the speed blocks, such that Samus can jump inside and stand on the crab. Exit G-Mode and rotate to obtain the item, then kill the crab with Wave Beam to fall back down. Entrance condition: {
"comeInWithGMode": {
"mode": "any",
"morphed": true
}
}
Requires: "h_canArtificialMorphIBJ"
"Gravity"
"canTrickyUseFrozenEnemies"
"Wave"
{
"or": [
"h_canArtificialMorphJumpIntoIBJ",
{
"and": [
"h_canArtificialMorphSpringBall",
"HiJump"
]
},
{
"and": [
"h_canArtificialMorphSpringBall",
"canGravityJump"
]
},
"canDoubleBombJump",
"canStaggeredIBJ",
"canBeVeryPatient",
{
"enemyKill": {
"enemies": [
[
"Skultera"
]
],
"explicitWeapons": [
"PowerBomb"
]
}
}
]
}
{
"or": [
"h_canArtificialMorphSpringBall",
"h_canArtificialMorphCeilingBombJump",
"canBeVeryPatient"
]
}
|
|
From: 3
Middle Right Door
To: 6
Speed Blocked Item
Notable: true This is a long climb, and getting around the fish under the missiles can be tricky or slow. Place bombs against the speed blocks until they are overloaded. Afterwards, freeze a crab on the edge of the speed blocks, such that Samus can jump inside and stand on the crab. Exit G-Mode and rotate to obtain the item, then kill the crab with Wave Beam to fall back down. Entrance condition: {
"comeInWithGMode": {
"mode": "any",
"morphed": true
}
}
Requires: "h_canArtificialMorphIBJ"
"Gravity"
"canTrickyUseFrozenEnemies"
"Wave"
{
"or": [
"h_canArtificialMorphJumpIntoIBJ",
{
"and": [
"h_canArtificialMorphSpringBall",
"HiJump"
]
},
{
"and": [
"h_canArtificialMorphSpringBall",
"canGravityJump"
]
},
"h_canArtificialMorphDoubleBombJump",
"h_canArtificialMorphStaggeredIBJ",
"canBeVeryPatient",
{
"enemyKill": {
"enemies": [
[
"Skultera"
]
],
"explicitWeapons": [
"PowerBomb"
]
}
}
]
}
{
"or": [
"h_canArtificialMorphSpringBall",
"h_canArtificialMorphCeilingBombJump",
"canBeVeryPatient"
]
}
|
|
Requires: "Gravity"
{
"or": [
"HiJump",
"canWalljump",
"h_canFly",
"canUseFrozenEnemies",
"canSpringBallJumpMidAir",
"canGravityJump"
]
}
|
|
Requires: "Gravity"
{
"or": [
"HiJump",
"canWalljump",
"h_canFly",
"canSpringBallJumpMidAir",
"canGravityJump"
]
}
|
|
Requires: "Gravity"
{
"or": [
"HiJump",
"canWalljump",
"h_canFly",
"canSpringBallJumpMidAir",
"h_canCrouchJumpDownGrab",
"canGravityJump"
]
}
|
|
From: 1
Top Left Door
To: 1
Top Left Door
Follow the crab from the bottom right door to the top left door. This takes approximately 90 seconds. It is also possible to knock the crab off of the middle peak with a super and follow it to the left which may save time. Requires: "Gravity"
"canBePatient"
{
"or": [
"SpaceJump",
{
"and": [
{
"ammo": {
"type": "Super",
"count": 1
}
},
{
"or": [
"HiJump",
"canSpringBallJumpMidAir",
"canGravityJump",
"canConsecutiveWalljump",
"SpeedBooster"
]
}
]
}
]
}
Exit condition: {
"leaveWithGModeSetup": {}
}
|
|
From: 1
Top Left Door
To: 1
Top Left Door
Follow the crab from the bottom right door to the top left door with Gravity or Grapple. It is also possible to knock the crab off of the middle peak with a super and follow it to the left with Ice or HiJump and Spring Ball. Requires: "canBeVeryPatient"
{
"or": [
"canGravityJump",
{
"and": [
"canPreciseGrapple",
{
"or": [
"HiJump",
"Gravity"
]
}
]
},
{
"and": [
{
"ammo": {
"type": "Super",
"count": 1
}
},
{
"or": [
"canTrickyUseFrozenEnemies",
{
"and": [
"HiJump",
"canSpringBallJumpMidAir"
]
}
]
}
]
}
]
}
Exit condition: {
"leaveWithGModeSetup": {}
}
|
|
From: 1
Top Left Door
To: 1
Top Left Door
Follow the crab from the bottom right door to the top left door. This takes approximately 90 seconds. It is also possible to knock the crab off of the middle peak with a super and follow it to the left which may save time. Requires: "h_canFrozenEnemyRunway"
"Gravity"
"canBePatient"
{
  "or": [
    "SpaceJump",
    {
      "and": [
        {
          "ammo": {
            "type": "Super",
            "count": 1
          }
        },
        {
          "or": [
            "HiJump",
            "canSpringBallJumpMidAir",
            "canGravityJump",
            "canConsecutiveWalljump",
            "SpeedBooster"
          ]
        }
      ]
    }
  ]
}
Exit condition: {
"leaveWithRunway": {
"length": 4,
"openEnd": 0
}
}
|
|
From: 1
Top Left Door
To: 1
Top Left Door
Follow the crab from the bottom right door to the top left door. It is also possible to knock the crab off of the middle peak with a super and follow it. Requires: "h_canFrozenEnemyRunway"
"Gravity"
"canBeVeryPatient"
{
"or": [
"canGravityJump",
"canPreciseGrapple",
{
"ammo": {
"type": "Super",
"count": 1
}
}
]
}
Exit condition: {
"leaveWithRunway": {
"length": 4,
"openEnd": 0
}
}
|
|
Requires: "canGravityJump" |
|
From: 2
Bottom Left Door
To: 12
G-Mode Junction (In Morph Tunnel)
Entrance condition: {
"comeInWithGMode": {
"mode": "any",
"morphed": true
},
"comesThroughToilet": "any"
}
Requires: "Gravity"
{
"or": [
"h_canArtificialMorphIBJ",
{
"and": [
"h_canArtificialMorphSpringBall",
{
"or": [
"canGravityJump",
"HiJump"
]
}
]
},
{
"and": [
"h_canArtificialMorphSpringBallBombJump",
"h_additionalBomb"
]
}
]
}
|
|
Requires: "canGravityJump" |
|
From: 4
Top Right Door
To: 4
Top Right Door
Follow the crab from the bottom right door to the top right door. Depending on the item setup, this takes 30-50 seconds. Requires: {
"or": [
{
"and": [
"Gravity",
"SpaceJump"
]
},
"canGravityJump",
{
"and": [
"Grapple",
{
"or": [
"HiJump",
"Gravity"
]
}
]
},
"h_canDoubleSpringBallJumpWithHiJump"
]
}
Exit condition: {
"leaveWithGModeSetup": {}
}
|
|
Follow the crab from the bottom right door to the top right door. Depending on the item setup, this takes 30-50 seconds. Keep a half-tile gap between the crab and the runway in order to extend it as much as possible. Requires: "h_canFrozenEnemyRunway"
"Gravity"
{
"or": [
"SpaceJump",
"canGravityJump",
"Grapple"
]
}
Exit condition: {
"leaveWithRunway": {
"length": 6,
"openEnd": 0
}
}
|
|
Entrance condition: {
"comeInWithGMode": {
"mode": "any",
"morphed": true
}
}
Requires: "Gravity"
{
"or": [
"Morph",
{
"and": [
"h_canArtificialMorphSpringBall",
{
"or": [
"canGravityJump",
"HiJump"
]
}
]
},
"h_canArtificialMorphIBJ",
"h_canArtificialMorphSpringBallBombJump"
]
}
|
|
Requires: {
"or": [
{
"and": [
"Gravity",
"SpaceJump"
]
},
{
"and": [
"HiJump",
"canPreciseGrapple",
{
"or": [
"Gravity",
"canSpringBallJumpMidAir"
]
}
]
},
{
"and": [
"HiJump",
"canGravityJump",
"canBeVeryPatient"
]
}
]
}
"canUpwardGModeSetup"
"canTrickyUseFrozenEnemies"
{
"or": [
"Morph",
"canTwoTileSqueeze"
]
}
Exit condition: {
"leaveWithGModeSetup": {}
}
|
|
Requires: "canGravityJump" Clears obstacles: A, B |
|
From: 8
Higher Hill Junction
To: 9
Spawn At Junction Below Top Door
Barely works without HiJump with a late gravity jump. Requires: "canGravityJump"
{
"or": [
"HiJump",
"canTrickyJump"
]
}
|
|
Requires: "canGravityJump" |
|
Requires: "canGravityJump" |
|
Run right-to-left to gain a shinecharge on the upper right ledge. Use a gravity jump, Space Jump, or HiJump to approach the door above and spark out. Requires: "Gravity"
{
"or": [
"SpaceJump",
"canGravityJump",
{
"and": [
"HiJump",
{
"or": [
"canWalljump",
"canTrickyDashJump"
]
}
]
}
]
}
{
"canShineCharge": {
"usedTiles": 20,
"gentleUpTiles": 3,
"gentleDownTiles": 1,
"steepUpTiles": 1,
"openEnd": 0
}
}
"canShinechargeMovementComplex"
"canMidairShinespark"
{
"shinespark": {
"frames": 8
}
}
Exit condition: {
"leaveWithSpark": {}
}
|
|
From: 11
Upper Left Ledge Junction
To: 9
Spawn At Junction Below Top Door
Running does not help. This is most easily done with a late jump at the bottom of the slope. It is a bit less precise with an air ball or turning gravity suit back on and wall jumping on the platform at the end. Requires: "canGravityJump"
{
"or": [
"canTrickyJump",
{
"and": [
"canLateralMidAirMorph",
"canCarefulJump"
]
}
]
}
|
|
Requires: "Gravity"
{
"or": [
"canWalljump",
"h_canFly",
{
"and": [
"HiJump",
"canSpringBallJumpMidAir"
]
},
{
"and": [
"HiJump",
"canGravityJump"
]
}
]
}
|
|
Pause for the Gravity Jump as late as possible and then repause as soon as possible for the SpringBall Jump. Requires: "canTrickySpringBallJump" "canGravityJump" "canTrickyJump" |
|
From: 3
Draygon (locked)
To: 2
Right Door (locked)
Notable: true Charge a shinespark in the bottom of Draygon's room, then Gravity jump up in order to shinespark out of the right door. Requires: "canGravityJump"
"canShinechargeMovementComplex"
"canMidairShinespark"
{
"canShineCharge": {
"usedTiles": 20,
"openEnd": 1
}
}
{
"shinespark": {
"frames": 14
}
}
Exit condition: {
"leaveWithSpark": {}
}
|
|
Requires: "Gravity" "canGravityJump" |
|
Requires: "Gravity"
"Morph"
"canPlayInSand"
{
"or": [
"canWalljump",
"canGravityJump",
"HiJump",
"canSpringBallJumpMidAir",
"canSandIBJ",
{
"and": [
"h_canUseSpringBall",
"h_canJumpIntoIBJ"
]
}
]
}
|
|
Requires: "canGravityJump" "HiJump" "SpeedBooster" "canCarefulJump" |
|
Requires: "Gravity"
{
"or": [
"h_canFly",
"canWalljump",
"canGravityJump",
{
"and": [
"HiJump",
{
"or": [
"canSpringBallJumpMidAir",
"SpeedBooster"
]
}
]
}
]
}
|
|
Requires: "Gravity"
{
"or": [
"canGravityJump",
"h_canFly",
"canSpringBallJumpMidAir",
"HiJump"
]
}
|
|
Requires: "Gravity"
{
"or": [
"h_canCrouchJumpDownGrab",
"canUseFrozenEnemies",
"canGravityJump",
"canWalljump",
"HiJump",
"canSpringBallJumpMidAir",
"h_canFly",
"h_canSpringBallBombJump"
]
}
|
|
Gravity with a good jump from the sand can reach the Solid Rock Maze region. Requires: "Gravity"
"canPlayInSand"
{
"or": [
"HiJump",
"canSpringBallJumpMidAir",
"canWalljump",
"h_canIBJ",
"canGravityJump"
]
}
|
|
Gain a shinecharge by running right-to-left on the underwater runway on the right side of the room. Use HiJump or a Spring Ball jump to quickly exit the water to the left and spark up. Requires: "Gravity"
"SpeedBooster"
{
"or": [
"HiJump",
"canTrickySpringBallJump",
"canWalljump",
{
"and": [
"canGravityJump",
"canShinechargeMovementTricky"
]
}
]
}
{
"enemyKill": {
"enemies": [
[
"Owtch",
"Owtch"
]
]
}
}
"canShinechargeMovementComplex"
{
"canShineCharge": {
"usedTiles": 16,
"openEnd": 2,
"gentleDownTiles": 2,
"gentleUpTiles": 2,
"steepDownTiles": 1,
"steepUpTiles": 1,
"startingDownTiles": 1
}
}
{
"shinespark": {
"frames": 43,
"excessFrames": 3
}
}
|
|
Requires: "Gravity"
{
"or": [
"HiJump",
"canWalljump",
"h_canFly",
"SpeedBooster",
"h_canCrouchJumpDownGrab",
"canSpringBallJumpMidAir",
"canGravityJump"
]
}
|
|
Requires: "Gravity"
{
"or": [
"Ice",
"ScrewAttack",
{
"enemyKill": {
"enemies": [
[
"Evir"
]
],
"explicitWeapons": [
"Plasma",
"Super",
"PowerBombPeriphery"
]
}
},
{
"enemyDamage": {
"enemy": "Evir",
"type": "particle",
"hits": 1
}
}
]
}
{
"and": [
"canPlayInSand",
{
"or": [
"canWalljump",
"HiJump",
"canUseFrozenEnemies",
"canGravityJump",
{
"and": [
"canTrickyJump",
"can4HighMidAirMorph",
"canTrickySpringBallJump"
]
}
]
}
]
}
|
|
From: 4
West Leg Sand
To: 5
Junction Above Grapple Block
Notable: true Gets above the grapple block by doing a well-positioned and well-timed Gravity jump following a good jump off the sand. It is also possible to do this off of a wall jump on the side immediately followed by a gravity jump. Break spin before touching the sand, and then spinjump to get a good jump off of the sand. Breaking spin after jumping from the sand will remove horizontal momentum, or a stationary spinjump can help. Requires: "Grapple"
"canGravityJump"
"canPlayInSand"
"canCarefulJump"
{
"or": [
"canStationarySpinJump",
"canTrickyJump"
]
}
|
|
It may be necessary to turn off Gravity Suit in order have more time to jump and morph underwater. Requires: "Morph"
"Gravity"
{
"or": [
"canWalljump",
"HiJump",
"h_canIBJ",
"canGravityJump",
"h_canSpringBallBombJump",
"canSpringBallJumpMidAir",
"SpaceJump",
{
"and": [
"canUnmorphBombBoost",
"canTrickyJump"
]
}
]
}
|
