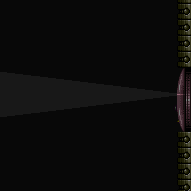
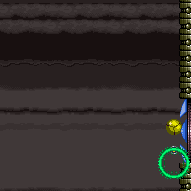
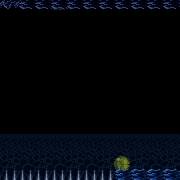
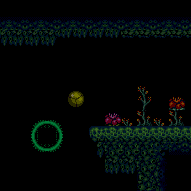
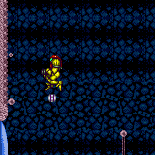
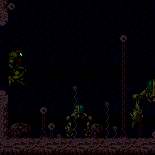
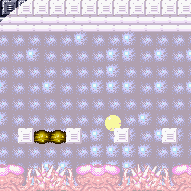
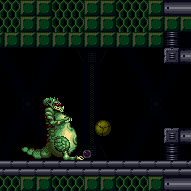
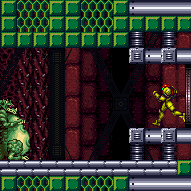
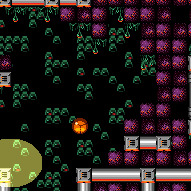
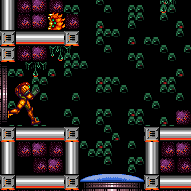
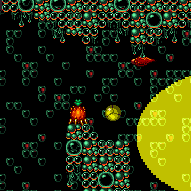
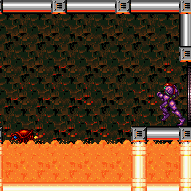
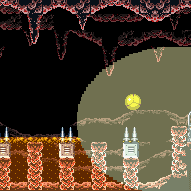
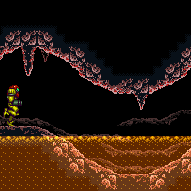
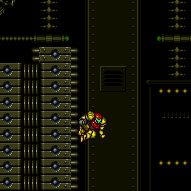
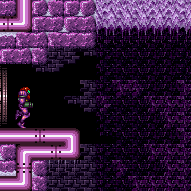
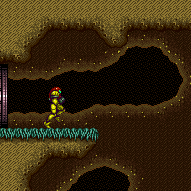
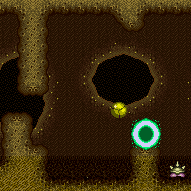
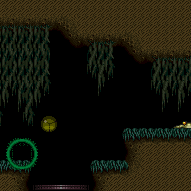
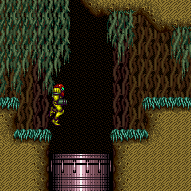
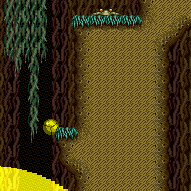
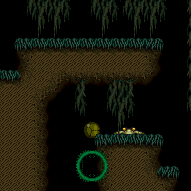
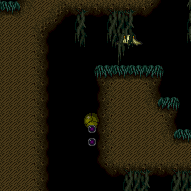
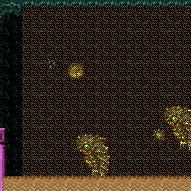
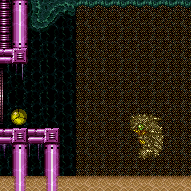
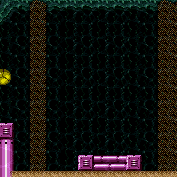
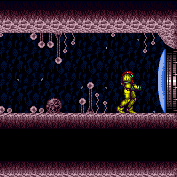
canBombHorizontally (Medium)
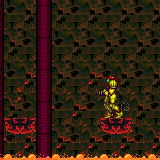
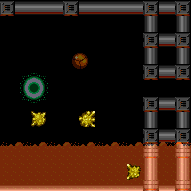
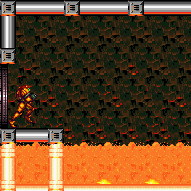
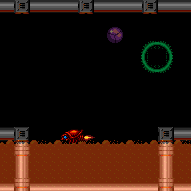
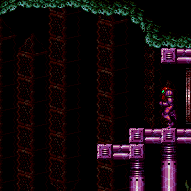
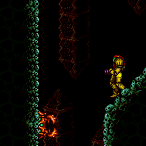
Place a single bomb then move Samus to the side to be boosted horizontally from the explosion. This is typically used as a way to cross gaps or to reposition at the end of an IBJ. Press forward while in the air to carry the momentum farther. Since it only uses one bomb, it can be executed with a Power Bomb or a bomb. It is not assumed by this tech, but it is possible to move forward just before the explosion in order to gain more horizontal momentum.
Strats ()
|
It is possible to cross the spike pit with spring flings and two spike hits. Pause then jump just before the fade out ends and turn Spring Ball off in order to get more horizontal distance at the start and avoid one spike hit. Turn Spring Ball off and on again while jumping on the spikes to get across to avoid another. Entrance condition: {
"comeInWithGMode": {
"mode": "any",
"morphed": true
}
}Requires: {
"or": [
"h_artificialMorphLongCeilingBombJump",
{
"and": [
"h_artificialMorphSpringBall",
{
"spikeHits": 4
}
]
},
{
"and": [
"h_artificialMorphSpringBall",
"h_artificialMorphBombHorizontally",
{
"spikeHits": 3
}
]
},
{
"and": [
"h_artificialMorphSpringFling",
"canTrickyJump",
{
"spikeHits": 2
}
]
},
{
"and": [
"h_artificialMorphIBJ",
{
"spikeHits": 10
},
{
"or": [
"h_artificialMorphBombHorizontally",
{
"spikeHits": 2
}
]
}
]
}
]
}Dev note: This is a softlock unless the item is Morph. The IBJ strat has 2 extra spike hits added as a leniency. |
From: 1
Top Left Door
To: 5
Bottom Junction (Right of Boyons)
Roll through the item to overload PLMs, then go down through the speed blocks and exit G-mode to collect the item. Note that if the item has already been collected, Samus can overload PLMs with Grapple. With Morph and Grapple, quickly grapple to then release grapple on the grapple blocks a few times until they stop working. Be careful not to fall into the spikes. Entrance condition: {
"comeInWithGMode": {
"mode": "direct",
"morphed": true
}
}Requires: "canRemoteAcquire"
{
"or": [
{
"and": [
{
"itemNotCollectedAtNode": 3
},
"canRiskPermanentLossOfAccess"
]
},
{
"and": [
"Morph",
"Grapple",
{
"or": [
"canTrickyJump",
{
"spikeHits": 1
}
]
}
]
}
]
}
{
"or": [
{
"and": [
"h_artificialMorphSpringBall",
{
"spikeHits": 4
}
]
},
{
"and": [
"h_artificialMorphSpringBall",
"h_artificialMorphBombHorizontally",
{
"spikeHits": 3
}
]
},
{
"and": [
"h_artificialMorphSpringFling",
"canTrickyJump",
{
"spikeHits": 2
}
]
},
{
"and": [
"Morph",
{
"or": [
"SpaceJump",
{
"and": [
{
"spikeHits": 1
},
{
"or": [
"canUseIFrames",
{
"spikeHits": 1
}
]
}
]
}
]
}
]
}
]
}Collects items: 3 Dev note: FIXME: It is possible to cross with spike hits, but it would require a CF and reserve trigger below. |
From: 1
Top Left Door
To: 5
Bottom Junction (Right of Boyons)
Place the PBs exactly two tiles left of the Morph tunnel. Be sure not to touch the item if this strat will be needed again in the future. It is possible to cross the spike pit with spring flings and two spike hits. Pause then jump just before the fade out ends and turn Spring Ball off in order to get more horizontal distance at the start and avoid one spike hit. Turn Spring Ball off and on again while jumping on the spikes to get across to avoid another. Entrance condition: {
"comeInWithGMode": {
"mode": "direct",
"morphed": true
}
}Requires: "canPowerBombItemOverloadPLMs"
{
"itemNotCollectedAtNode": 3
}
"canRiskPermanentLossOfAccess"
"h_artificialMorphPowerBomb"
"h_artificialMorphPowerBomb"
{
"or": [
{
"and": [
"h_artificialMorphSpringBall",
{
"spikeHits": 4
}
]
},
{
"and": [
"h_artificialMorphSpringBall",
"h_artificialMorphBombHorizontally",
{
"spikeHits": 3
}
]
},
{
"and": [
"h_artificialMorphSpringFling",
"canTrickyJump",
{
"spikeHits": 2
}
]
},
{
"and": [
"Morph",
{
"or": [
"SpaceJump",
{
"and": [
{
"spikeHits": 1
},
{
"or": [
"canUseIFrames",
{
"spikeHits": 1
}
]
}
]
}
]
}
]
}
]
} |
From: 1
Top Left Door
To: 5
Bottom Junction (Right of Boyons)
It is possible to cross the spike pit with spring flings and two spike hits. Pause then jump just before the fade out ends and turn Spring Ball off in order to get more horizontal distance at the start and avoid one spike hit. Turn Spring Ball off and on again while jumping on the spikes to get across to avoid another. Entrance condition: {
"comeInWithGMode": {
"mode": "any",
"morphed": true
}
}Requires: "h_artificialMorphBombs"
{
"or": [
{
"and": [
"h_artificialMorphSpringBall",
{
"spikeHits": 4
}
]
},
{
"and": [
"h_artificialMorphSpringBall",
"h_artificialMorphBombHorizontally",
{
"spikeHits": 3
}
]
},
{
"and": [
"h_artificialMorphSpringFling",
"canTrickyJump",
{
"spikeHits": 2
}
]
},
{
"and": [
"Morph",
{
"or": [
"SpaceJump",
{
"and": [
{
"spikeHits": 1
},
{
"or": [
"canUseIFrames",
{
"spikeHits": 1
}
]
}
]
}
]
}
]
},
{
"and": [
"h_artificialMorphIBJ",
{
"spikeHits": 10
},
{
"or": [
"h_artificialMorphBombHorizontally",
{
"spikeHits": 2
}
]
}
]
},
"h_artificialMorphLongCeilingBombJump"
]
}Dev note: The IBJ from spikes has 2 extra spike hits added as a leniency. |
|
Entrance condition: {
"comeInWithGMode": {
"mode": "any",
"morphed": false
}
}Requires: "h_artificialMorphPowerBomb"
{
"or": [
"h_artificialMorphMovement",
"h_artificialMorphBombHorizontally"
]
}Clears obstacles: A |
From: 1
Top Left Door
To: 5
Alcatraz Door
There are scroll PLMs one tile to the left of the bomb blocks which can be used to overload PLMs. The bomb blocks then become air and can be passed through. Use Bombs, Spring Ball, or a Geemer damage boost to get across the gap without unmorphing. To survive a Geemer hit, you will need Varia or Gravity or to come in with more than 4 energy (e.g. by coming in with indirect G-mode after leaving with G-mode immobile). Entrance condition: {
"comeInWithGMode": {
"mode": "any",
"morphed": true
}
}Requires: {
"or": [
"h_artificialMorphMovement",
"h_artificialMorphBombHorizontally",
{
"and": [
"canTrickyGMode",
"h_stationaryNeutralDamageBoost",
"h_ZebesIsAwake",
{
"enemyDamage": {
"enemy": "Geemer (blue)",
"type": "contact",
"hits": 1
}
}
]
}
]
} |
From: 4
Top Right Door
To: 2
Middle Left Door
A single Power Bomb, placed precisely and as early as possible, can get you over the Geemers and onto the ledge above Alcatraz without taking a hit. Alternatively Bombs or Spring Ball can be used. Go down to the Save door by just falling and moving back and forth in the right places. Once you start going down you will be off-screen. Entrance condition: {
"comeInWithGMode": {
"mode": "any",
"morphed": true
}
}Requires: "canOffScreenMovement"
{
"or": [
"h_artificialMorphMovement",
"h_artificialMorphBombHorizontally"
]
} |
|
Without Morph, the pirates will not spawn. Use Power Bomb horizontal boosts to move toward the left side of the room in artificial morph. Roll off the third blue platform from the right door and lay a Power Bomb against the left wall to get into range of the bomb blocks. Unmorph and use X-ray to cancel G-mode. It may be best to do this before the PB explodes, in case PLMs are already overloaded. Entrance condition: {
"comeInWithGMode": {
"mode": "any",
"morphed": true
}
}Requires: "h_artificialMorphBombHorizontally"
"h_artificialMorphPowerBomb"
"h_artificialMorphPowerBomb"
"h_artificialMorphPowerBomb"
{
"or": [
"h_artificialMorphPowerBomb",
"canTrickyJump"
]
}Clears obstacles: A |
From: 4
Middle Junction (Left of Morph Tunnel)
To: 1
Left Door
After destroying a single bomb block, Samus can spin jump into its spot to quickly escape the acid. To avoid the acid completely, morph quickly at the right height and place a bomb. Requires: "canDash"
{
"or": [
"canCarefulJump",
{
"acidFrames": 35
}
]
}
"h_useMorphBombs"
{
"or": [
"canTrickyJump",
{
"and": [
"canCarefulJump",
"canBombHorizontally",
{
"acidFrames": 35
}
]
},
{
"acidFrames": 100
}
]
}
{
"or": [
{
"and": [
"canTrickyJump",
"canTrickyWallJump"
]
},
{
"and": [
"canCarefulJump",
{
"acidFrames": 35
}
]
},
{
"acidFrames": 100
}
]
}
"h_complexToCarryFlashSuit"Clears obstacles: A, B |
|
Entrance condition: {
"comeInWithGMode": {
"mode": "any",
"morphed": true
}
}Requires: {
"haveBlueSuit": {}
}
{
"or": [
{
"disableEquipment": "Gravity"
},
"h_artificialMorphBombHorizontally",
"h_artificialMorphSpringBall"
]
} |
From: 4
Lower Section - Top Right Door
To: 4
Lower Section - Top Right Door
Entrance condition: {
"comeInWithGMode": {
"mode": "direct",
"morphed": false
}
}Requires: {
"or": [
"SpaceJump",
"canWallJump",
{
"and": [
"canLongIBJ",
"Gravity"
]
},
{
"and": [
"HiJump",
"canJumpIntoIBJ"
]
},
{
"and": [
"canLongIBJ",
"canBombHorizontally",
"canResetFallSpeed"
]
},
{
"and": [
"canJumpIntoIBJ",
"canLongIBJ",
"canTrickyJump"
]
},
{
"and": [
"HiJump",
{
"or": [
"canSpeedyJump",
"canSpringBallJumpMidAir"
]
}
]
},
{
"and": [
"canTrickyJump",
"canPreciseGrapple"
]
},
{
"and": [
"Gravity",
"canMidairShinespark",
"h_shinechargeMaxRunway",
{
"shinespark": {
"frames": 35,
"excessFrames": 10
}
}
]
}
]
}Exit condition: {
"leaveWithGMode": {
"morphed": false
}
} |
From: 4
Lower Section - Top Right Door
To: 8
Bridge Right Door (Leads to Bottom Right Door)
Climb up 1 screen. Entrance condition: {
"comeInWithGMode": {
"mode": "direct",
"morphed": false
}
}Requires: "canComplexGMode"
"canGModeXRayClimb"
{
"notable": "Get Inside the Bridge"
}
"canSkipDoorLock"
{
"or": [
"canArtificialMorph",
"canWallJump",
"SpaceJump",
{
"and": [
"canLongIBJ",
"Gravity"
]
},
{
"and": [
"HiJump",
"canJumpIntoIBJ"
]
},
{
"and": [
"canLongIBJ",
"canBombHorizontally",
"canResetFallSpeed"
]
},
{
"and": [
"canJumpIntoIBJ",
"canLongIBJ",
"canTrickyJump"
]
},
{
"and": [
"HiJump",
{
"or": [
"canSpeedyJump",
"canSpringBallJumpMidAir"
]
}
]
},
{
"and": [
"canTrickyJump",
"canPreciseGrapple"
]
},
{
"and": [
"Gravity",
"canMidairShinespark",
"h_shinechargeMaxRunway",
{
"shinespark": {
"frames": 35,
"excessFrames": 10
}
}
]
}
]
}
"canXRayClimb" |
From: 4
Lower Section - Top Right Door
To: 8
Bridge Right Door (Leads to Bottom Right Door)
Enter with G-mode direct, back up to between 1 and 6 pixels from the door transition, and activate X-ray to get very deep stuck in the door. Climb up 1 screen, and perform a turnaround buffered spin-jump away from the door to trigger the transition, bypassing any lock on the door. Entrance condition: {
"comeInWithGMode": {
"mode": "direct",
"morphed": false
}
}Requires: "canComplexGMode"
"canGModeXRayClimb"
{
"notable": "Get Inside the Bridge"
}
{
"or": [
"canArtificialMorph",
"canWallJump",
"SpaceJump",
{
"and": [
"canLongIBJ",
"Gravity"
]
},
{
"and": [
"HiJump",
"canJumpIntoIBJ"
]
},
{
"and": [
"canLongIBJ",
"canBombHorizontally",
"canResetFallSpeed"
]
},
{
"and": [
"canJumpIntoIBJ",
"canLongIBJ",
"canTrickyJump"
]
},
{
"and": [
"HiJump",
{
"or": [
"canSpeedyJump",
"canSpringBallJumpMidAir"
]
}
]
},
{
"and": [
"canTrickyJump",
"canPreciseGrapple"
]
},
{
"and": [
"Gravity",
"canMidairShinespark",
"h_shinechargeMaxRunway",
{
"shinespark": {
"frames": 35,
"excessFrames": 10
}
}
]
}
]
}
"canXRayClimb"Bypasses door shell: true |
From: 4
Lower Section - Top Right Door
To: 12
Top Junction
Entrance condition: {
"comeInWithGMode": {
"mode": "direct",
"morphed": false
}
}Requires: "canGModeXRayClimb"
{
"or": [
"canArtificialMorph",
"canWallJump",
"SpaceJump",
{
"and": [
"canLongIBJ",
"Gravity"
]
},
{
"and": [
"HiJump",
"canJumpIntoIBJ"
]
},
{
"and": [
"canLongIBJ",
"canBombHorizontally",
"canResetFallSpeed"
]
},
{
"and": [
"canJumpIntoIBJ",
"canLongIBJ",
"canTrickyJump"
]
},
{
"and": [
"HiJump",
{
"or": [
"canSpeedyJump",
"canSpringBallJumpMidAir"
]
}
]
},
{
"and": [
"canTrickyJump",
"canPreciseGrapple"
]
},
{
"and": [
"Gravity",
"canMidairShinespark",
"h_shinechargeMaxRunway",
{
"shinespark": {
"frames": 35,
"excessFrames": 10
}
}
]
}
]
}
"canLongXRayClimb"Clears obstacles: R-Mode |
From: 5
Lower Section - Bottom Right Door
To: 4
Lower Section - Top Right Door
Jump into an IBJ while avoiding the Ripper, or start an IBJ from the platform to the left and boost horizontally at the top. Requires: {
"or": [
{
"and": [
"HiJump",
"canJumpIntoIBJ"
]
},
{
"and": [
"canLongIBJ",
"canBombHorizontally",
"canResetFallSpeed"
]
},
{
"and": [
"canJumpIntoIBJ",
"canLongIBJ",
"canTrickyJump"
]
}
]
} |
From: 6
Middle Right Door (By Zeb Farm)
To: 12
Top Junction
It is possible to bomb boost from the door runway over the Zeb and onto the first step. Without doing this, the Zeb will likely touch Samus, as it will start moving if Samus goes down a single step. At the left end of the tunnel, roll against the lower left corner, exit G-mode, and X-Ray standup, shoot the block, partial floor clip, then jump and down grab to the ledge. Wiggle to escape. A failed jump will result in a forced crouch, which is likely a soft lock. Entrance condition: {
"comeInWithGMode": {
"mode": "any",
"morphed": true
}
}Requires: "canComplexGMode"
"canXRayStandUp"
"canPartialFloorClip"
"canDownGrab"
{
"or": [
"h_artificialMorphSpringBall",
{
"and": [
"h_artificialMorphBombHorizontally",
"h_additionalBomb"
]
}
]
} |
From: 2
Right Door
To: 1
Left Door
Starting an IBJ from spring ball with no other items is not very precise, it just takes a bit of an odd timing. Entrance condition: {
"comeInWithGMode": {
"mode": "any",
"morphed": true
}
}Requires: "h_artificialMorphJumpIntoIBJ" "h_artificialMorphBombHorizontally" |
From: 4
Bottom Right Door
To: 3
Bottom Left Door
Entrance condition: {
"comeInWithGMode": {
"mode": "any",
"morphed": true
}
}Requires: {
"or": [
{
"and": [
{
"tech": "canBombHorizontally"
},
{
"ammo": {
"type": "PowerBomb",
"count": 6
}
},
{
"or": [
"canComplexGMode",
{
"ammo": {
"type": "PowerBomb",
"count": 2
}
}
]
}
]
},
{
"and": [
"h_artificialMorphSpringBall",
{
"ammo": {
"type": "PowerBomb",
"count": 3
}
},
{
"or": [
"canComplexGMode",
{
"ammo": {
"type": "PowerBomb",
"count": 1
}
}
]
}
]
},
{
"and": [
"h_artificialMorphBombs",
"canTrickyGMode"
]
}
]
}Clears obstacles: A Dev note: G-mode isnt helpful here with real Morph. |
From: 9
Right Etecoon Shaft - Top Left Door
To: 15
Right Etecoon Shaft - Upper Tunnel Entrance
Requires: {
"or": [
"canMidAirMorph",
"h_useSpringBall",
{
"and": [
"canTrivialMidAirMorph",
{
"or": [
"SpaceJump",
"canConsecutiveWallJump"
]
}
]
},
{
"and": [
"canIBJ",
"canBombHorizontally"
]
}
]
}Dev note: Doable with just a very long IBJ, but if bombing horizontally is too hard, that will be too. |
|
Kill or Spring Ball over the first bug. Once on the pipe, bomb boost horizontally to the left then Spring Ball jump up to the door. With Bombs alone, IBJ far enough to the left to avoid spawning the bug; if it spawns, roll under it or let it swoop down and then roll to the left and it will eventually swoop back up over Samus. Entrance condition: {
"comeInWithGMode": {
"mode": "any",
"morphed": true
}
}Requires: {
"or": [
{
"and": [
"h_artificialMorphIBJ",
"canTrickyDodgeEnemies",
"h_artificialMorphBombHorizontally"
]
},
{
"and": [
"h_artificialMorphIBJ",
"h_artificialMorphPowerBomb"
]
},
"h_artificialMorphSpringBallBombJump"
]
} |
From: 1
Top Right Door
To: 4
Top Left Junction
Use 1-3 Power Bombs to kill the Sidehoppers. Entrance condition: {
"comeInWithGMode": {
"mode": "any",
"morphed": true
}
}Requires: "canTrickyDodgeEnemies"
"h_artificialMorphPowerBomb"
{
"or": [
{
"and": [
"h_artificialMorphPowerBomb",
{
"or": [
"h_artificialMorphBombHorizontally",
"h_artificialMorphSpringBall"
]
}
]
},
{
"enemyDamage": {
"enemy": "Sidehopper",
"type": "contact",
"hits": 1
}
}
]
}Clears obstacles: A |
From: 1
Left Door
To: 1
Left Door
Bounce on the Power Bomb, then quickly kill the remaining Sidehopper with a strong beam, ammo, or pseudo-screw. If Samus has a weak beam, use the bomb to boost to the right to get the Sidehopper to jump to the right, then morph under it while killing it. Entrance condition: {
"comeInJumping": {
"speedBooster": "any",
"minTiles": 0.4375
}
}Requires: "canPrepareForNextRoom"
{
"tech": "canJumpIntoIBJ"
}
"canResetFallSpeed"
"h_usePowerBomb"
"canHitbox"
{
"or": [
"canPseudoScrew",
"Plasma",
{
"ammo": {
"type": "Missile",
"count": 2
}
},
{
"ammo": {
"type": "Super",
"count": 1
}
},
{
"and": [
"Ice",
"Wave"
]
},
{
"and": [
"Ice",
"Spazer"
]
},
{
"and": [
"Wave",
"Spazer"
]
},
{
"and": [
"canTrickyJump",
{
"tech": "canBombHorizontally"
}
]
}
]
}Dev note: This is significantly easier than a typical canUnmorphBombBoost, so it is instead modeled with canJumpIntoIBJ and canResetFallSpeed. |
From: 1
Right Door
To: 2
Chozo Item
Traverse the room with a small number of Power Bombs. If the Chozo item is still there, it is best to exit G-Mode before the final Power Bomb goes off to ensure that PLMs aren't overloaded. This strat can be done easily with 7 Power Bombs. Simply kill all of the Boyons before progressing. The final Power Bomb needs to be placed on the second to last floating platform or later to break the wall. Samus can use one Power Bomb and a Boyon hit to get from the door to the second platform, or from the second to fourth platform. Alternatively, when next to the Boyons, place a Power Bomb while the Boyon is low, slightly after the peak of the jump, hitbox through the Boyons. If the Boyons are killed, Samus can horizontally boost far enough to skip a platform. Samus can cross the room with any of the following: 7 PB; 6 PB and a horizontal boost; 5 PB and hitboxing the first Boyons; 5 PB and damage from the first Boyons; 4 PB and damage from the first Boyons and hitboxing the second; 3 PB and hitting both sets of Boyons. Note that if Samus falls into a Samus Eater, she will often be teleported into it when exiting G-Mode. Entrance condition: {
"comeInWithGMode": {
"mode": "any",
"morphed": true
}
}Requires: "h_artificialMorphPowerBomb"
{
"or": [
{
"ammo": {
"type": "PowerBomb",
"count": 6
}
},
{
"and": [
{
"ammo": {
"type": "PowerBomb",
"count": 4
}
},
"h_artificialMorphBombHorizontally"
]
},
{
"and": [
{
"ammo": {
"type": "PowerBomb",
"count": 4
}
},
"canInsaneJump",
"canHitbox"
]
},
{
"and": [
{
"ammo": {
"type": "PowerBomb",
"count": 3
}
},
"h_artificialMorphBombHorizontally",
{
"enemyDamage": {
"enemy": "Boyon",
"type": "contact",
"hits": 1
}
}
]
},
{
"and": [
{
"ammo": {
"type": "PowerBomb",
"count": 2
}
},
"h_artificialMorphBombHorizontally",
{
"enemyDamage": {
"enemy": "Boyon",
"type": "contact",
"hits": 1
}
},
"canInsaneJump",
"canHitbox"
]
},
{
"and": [
{
"ammo": {
"type": "PowerBomb",
"count": 2
}
},
{
"enemyDamage": {
"enemy": "Boyon",
"type": "contact",
"hits": 2
}
}
]
}
]
}Clears obstacles: A, B |
From: 2
Right Door
To: 1
Left Door
This is a very long ceiling bomb jump. Crossing the room with artificial morph is particularly difficult without a good way to kill the Wavers. It is recommended to avoid killing the Firefleas, as the room gets dark fast. Entrance condition: {
"comeInWithGMode": {
"mode": "any",
"morphed": true
}
}Requires: {
"notable": "Long Ceiling Bomb Jump"
}
"h_artificialMorphBombHorizontally"
"h_artificialMorphIBJ"
"h_artificialMorphLongCeilingBombJump"
"canBeVeryPatient"
"canTrickyGMode" |
|
Requires: "canLongIBJ"
{
"or": [
{
"spikeHits": 2
},
{
"and": [
"canBombHorizontally",
{
"spikeHits": 1
}
]
},
{
"and": [
"canHorizontalDamageBoost",
{
"enemyDamage": {
"enemy": "Fireflea",
"type": "contact",
"hits": 1
}
}
]
}
]
}
{
"or": [
{
"noBlueSuit": {}
},
"canBlueSuitSpikeJump"
]
} |
|
Kill all of the enemies with Bombs. Samus will take a Baby Kraid spike hit while rolling through the invisible projectiles. It is not too difficult to IBJ and then bomb horizontally over the cluster of invisible spikes, but there is some risk because they are invisible. They occupy a slightly smaller space than what Baby Kraid was occupying. Entrance condition: {
"comeInWithGMode": {
"mode": "any",
"morphed": true
}
}Requires: "h_artificialMorphBombs"
{
"or": [
{
"and": [
"h_artificialMorphIBJ",
"h_artificialMorphBombHorizontally",
"canTrickyDodgeEnemies"
]
},
{
"enemyDamage": {
"enemy": "Mini-Kraid",
"type": "spike",
"hits": 1
}
}
]
}Clears obstacles: A, door_2 |
From: 4
Left Side - Bottom Door
To: 4
Left Side - Bottom Door
The blocks are breakable with 4 Power Bombs. Horizontally bomb over the vertical door then up two ledges before placing a Power Bomb that can reach the blocks above. Entrance condition: {
"comeInWithGMode": {
"mode": "any",
"morphed": true
}
}Requires: "h_artificialMorphBombHorizontally"
{
"ammo": {
"type": "PowerBomb",
"count": 3
}
}Clears obstacles: A Dev note: FIXME: It is possible to enter 5 in indirect, and shoot the door at 4 if it has ever been locked, or 5 if its still locked to overload PLMs and go through the bomb maze. |
From: 7
Top Right Door
To: 10
G-Mode Morph, Above the Power Bomb Blocks
Wait for the Waver to pass or quickly use a Power Bomb to boost over the gap towards the Cacatac. Use a second Power Bomb to jump over it and down below; hold left as soon as Samus starts moving upward, in order to avoid the invisible Cacatac spikes. Entrance condition: {
"comeInWithGMode": {
"mode": "any",
"morphed": true
}
}Requires: {
"tech": "canBombHorizontally"
}
"h_artificialMorphPowerBomb"
"h_additionalBomb"
"canTrickyDodgeEnemies" |
From: 1
Top Left Door
To: 3
Right Door
Overload PLMs by bombing the gate or crumble blocks, then go through the crumble blocks below and get to the door. IBJ past the Ripper or kill it. The Kago bugs will not spawn until Samus exits G-mode, so it is fine to kill it or IBJ from on top of it. Entrance condition: {
"comeInWithGMode": {
"mode": "any",
"morphed": true
}
}Requires: {
"or": [
"h_artificialMorphLongIBJ",
"h_artificialMorphJumpIntoIBJ"
]
}
"h_artificialMorphBombHorizontally"
{
"or": [
"h_artificialMorphPowerBomb",
{
"and": [
"Morph",
{
"ammo": {
"type": "Missile",
"count": 2
}
}
]
},
{
"and": [
"Morph",
{
"ammo": {
"type": "Super",
"count": 1
}
}
]
},
{
"and": [
"h_artificialMorphDoubleBombJump",
"h_artificialMorphStaggeredIBJ"
]
}
]
}
"h_heatedGModeOpenDifferentDoor" |
From: 1
Top Left Door
To: 3
Right Door
Bomb boost onto the crumble blocks in the middle of the spike pit, then on the right side, move the Ripper off camera and IBJ. If the camera gets shifted so that the Ripper stays on camera, shift it back to the right by IBJng up a bit on the left side of the 4 crumbles then move to the right as Samus falls. Entrance condition: {
"comeInWithGMode": {
"mode": "indirect",
"morphed": true
}
}Requires: "h_artificialMorphIBJ" "h_artificialMorphBombHorizontally" "canCameraManip" "canTrickyJump" "h_heatedGModeOpenDifferentDoor" |
From: 1
Top Left Door
To: 4
Item
Overload PLMs by bombing the gate or crumble blocks, then go through the crumble blocks below and get to the item. IBJ past the Ripper or kill it. The Kago bugs will not spawn until Samus exits G-mode, so it is fine to kill it or IBJ from on top of it. Entrance condition: {
"comeInWithGMode": {
"mode": "direct",
"morphed": true
}
}Requires: {
"or": [
"h_artificialMorphLongIBJ",
"h_artificialMorphJumpIntoIBJ"
]
}
"h_artificialMorphBombHorizontally"
{
"or": [
"h_artificialMorphPowerBomb",
{
"and": [
"Morph",
{
"ammo": {
"type": "Missile",
"count": 2
}
}
]
},
{
"and": [
"Morph",
{
"ammo": {
"type": "Super",
"count": 1
}
}
]
},
{
"and": [
"h_artificialMorphDoubleBombJump",
"h_artificialMorphStaggeredIBJ"
]
}
]
}
{
"heatFrames": 0
} |
From: 2
Bottom Left Door
To: 3
Right Door
Overload PLMs by bombing the gate or crumble blocks, then go through the crumble blocks below and get to the door. IBJ past the Ripper or kill it. The Kago bugs will not spawn until Samus exits G-mode, so it is fine to kill it or IBJ from on top of it. Entrance condition: {
"comeInWithGMode": {
"mode": "any",
"morphed": true
}
}Requires: {
"or": [
"h_artificialMorphLongIBJ",
"h_artificialMorphJumpIntoIBJ"
]
}
"h_artificialMorphBombHorizontally"
{
"or": [
"h_artificialMorphPowerBomb",
{
"and": [
"Morph",
{
"ammo": {
"type": "Missile",
"count": 2
}
}
]
},
{
"and": [
"Morph",
{
"ammo": {
"type": "Super",
"count": 1
}
}
]
},
{
"and": [
"h_artificialMorphDoubleBombJump",
"h_artificialMorphStaggeredIBJ"
]
}
]
}
"h_heatedGModeOpenDifferentDoor" |
From: 2
Bottom Left Door
To: 3
Right Door
Bomb boost onto the crumble blocks in the middle of the spike pit, then on the right side, move the Ripper off camera and IBJ. If the camera gets shifted so that the Ripper stays on camera, shift it back to the right by IBJng up a bit on the left side of the 4 crumbles then move to the right as Samus falls. Entrance condition: {
"comeInWithGMode": {
"mode": "indirect",
"morphed": true
}
}Requires: "h_artificialMorphIBJ" "h_artificialMorphBombHorizontally" "canCameraManip" "canTrickyJump" "h_heatedGModeOpenDifferentDoor" |
From: 2
Bottom Left Door
To: 4
Item
Overload PLMs by bombing the gate or crumble blocks, then go through the crumble blocks below and get to the item. IBJ past the Ripper or kill it. The Kago bugs will not spawn until Samus exits G-mode, so it is fine to kill it or IBJ from on top of it. Entrance condition: {
"comeInWithGMode": {
"mode": "direct",
"morphed": true
}
}Requires: {
"or": [
"h_artificialMorphLongIBJ",
"h_artificialMorphJumpIntoIBJ"
]
}
"h_artificialMorphBombHorizontally"
{
"or": [
"h_artificialMorphPowerBomb",
{
"and": [
"Morph",
{
"ammo": {
"type": "Missile",
"count": 2
}
}
]
},
{
"and": [
"Morph",
{
"ammo": {
"type": "Super",
"count": 1
}
}
]
},
{
"and": [
"h_artificialMorphDoubleBombJump",
"h_artificialMorphStaggeredIBJ"
]
}
]
}
{
"heatFrames": 0
} |
|
Bomb horizontally on room entry to jump over the Ripper and land on the crumble blocks, or use a Power Bomb to kill the Ripper. Avoid touching all 6 crumbles, so Samus can use the item to overload PLMs and go through one of the crumbles to get to the left side of the room. If the item has already been obtained, Samus can shoot or Bomb the gate many times to overload PLMs. Entrance condition: {
"comeInWithGMode": {
"mode": "direct",
"morphed": true
}
}Requires: "canRemoteAcquire"
{
  "or": [
    "h_artificialMorphCeilingBombJump",
    {
      "and": [
        "h_artificialMorphBombHorizontally",
        "h_artificialMorphIBJ",
        "h_artificialMorphPowerBomb"
      ]
    },
    {
      "and": [
        "h_artificialMorphBombHorizontally",
        "canTrickyDodgeEnemies",
        "h_artificialMorphDoubleBombJump",
        "h_artificialMorphStaggeredIBJ"
      ]
    }
  ]
}
"h_heatedGModeOpenDifferentDoor"Collects items: 4 |
From: 3
Right Door
To: 1
Top Left Door
Bomb horizontally on room entry to jump over the Ripper and land on the crumble blocks, or use a Power Bomb to kill the Ripper. Entrance condition: {
"comeInWithGMode": {
"mode": "indirect",
"morphed": true
}
}Requires: {
"or": [
"h_artificialMorphCeilingBombJump",
{
"and": [
"h_artificialMorphBombHorizontally",
"h_artificialMorphIBJ",
"h_artificialMorphPowerBomb"
]
},
{
"and": [
"h_artificialMorphBombHorizontally",
"canTrickyDodgeEnemies",
"h_artificialMorphDoubleBombJump",
"h_artificialMorphStaggeredIBJ"
]
}
]
}
"h_heatedGModeOpenDifferentDoor" |
From: 3
Right Door
To: 2
Bottom Left Door
Bomb horizontally on room entry to jump over the Ripper and land on the crumble blocks, or use a Power Bomb to kill the Ripper. Avoid touching all 6 crumbles, so Samus can use the item to overload PLMs and go through one of the crumbles to get to the left side of the room. If the item has already been obtained, Samus can shoot or Bomb the gate many times to overload PLMs. Entrance condition: {
"comeInWithGMode": {
"mode": "direct",
"morphed": true
}
}Requires: "canRemoteAcquire"
{
  "or": [
    "h_artificialMorphCeilingBombJump",
    {
      "and": [
        "h_artificialMorphBombHorizontally",
        "h_artificialMorphIBJ",
        "h_artificialMorphPowerBomb"
      ]
    },
    {
      "and": [
        "h_artificialMorphBombHorizontally",
        "canTrickyDodgeEnemies",
        "h_artificialMorphDoubleBombJump",
        "h_artificialMorphStaggeredIBJ"
      ]
    }
  ]
}
"h_heatedGModeOpenDifferentDoor"Collects items: 4 |
From: 3
Right Door
To: 2
Bottom Left Door
Bomb horizontally on room entry to jump over the Ripper and land on the crumble blocks, or use a Power Bomb to kill the Ripper. Entrance condition: {
"comeInWithGMode": {
"mode": "indirect",
"morphed": true
}
}Requires: {
"or": [
"h_artificialMorphCeilingBombJump",
{
"and": [
"h_artificialMorphBombHorizontally",
"h_artificialMorphIBJ",
"h_artificialMorphPowerBomb"
]
},
{
"and": [
"h_artificialMorphBombHorizontally",
"canTrickyDodgeEnemies",
"h_artificialMorphDoubleBombJump",
"h_artificialMorphStaggeredIBJ"
]
}
]
}
"h_heatedGModeOpenDifferentDoor" |
From: 3
Right Door
To: 3
Right Door
Bomb horizontally on room entry to jump over the Ripper and land on the crumble blocks, or use a Power Bomb to kill the Ripper. Entrance condition: {
"comeInWithGMode": {
"mode": "direct",
"morphed": true
}
}Requires: "canRemoteAcquire"
{
"or": [
"h_artificialMorphLongCeilingBombJump",
{
"and": [
"h_artificialMorphBombHorizontally",
"h_artificialMorphIBJ",
"h_artificialMorphPowerBomb"
]
},
{
"and": [
"h_artificialMorphBombHorizontally",
"canTrickyDodgeEnemies",
"h_artificialMorphDoubleBombJump",
"h_artificialMorphStaggeredIBJ"
]
}
]
}
"h_heatedDirectGModeLeaveSameDoor"Collects items: 4 |
|
Entrance condition: {
"comeInWithGMode": {
"mode": "direct",
"morphed": false
}
}Requires: "canRemoteAcquire"
{
"or": [
"SpaceJump",
{
"and": [
"canPreciseGrapple",
"canUseEnemies"
]
},
"canSpringBallJumpMidAir",
"canInsaneWallJump",
{
"and": [
"HiJump",
"canWallJump"
]
},
{
"and": [
"HiJump",
"canSpeedyJump"
]
},
{
"and": [
"canStaggeredIBJ",
"canDoubleBombJump",
"canBombHorizontally"
]
},
{
"and": [
"h_IBJFromSpikes",
"h_IBJFromSpikes"
]
},
{
"and": [
"h_IBJFromSpikes",
"canCameraManip",
"canMoonwalk"
]
}
]
}
"h_heatedDirectGModeLeaveSameDoor"Collects items: 4 |
From: 3
Right Door
To: 3
Right Door
Jump onto the crumble blocks to make them solid, then use them as a platform to cross the room. Entrance condition: {
"comeInWithGMode": {
"mode": "direct",
"morphed": false
}
}Requires: "canRemoteAcquire"
{
"or": [
"ScrewAttack",
"h_usePowerBomb",
{
"ammo": {
"type": "Missile",
"count": 2
}
},
{
"ammo": {
"type": "Super",
"count": 1
}
}
]
}
"canIBJ"
"canBombHorizontally"
"h_heatedDirectGModeLeaveSameDoor"Collects items: 4 |
|
Jump onto the crumble blocks to make them solid, then use them as a platform to cross the room. With Grapple, a running jump then single Grapple swing can be used before PLMs are overloaded, alternatively jump on the crumble blocks and Grapple the Ripper. Entrance condition: {
"comeInWithGMode": {
"mode": "any",
"morphed": false
}
}Requires: {
"or": [
"SpaceJump",
{
"and": [
"canStaggeredIBJ",
"canDoubleBombJump",
"canBombHorizontally"
]
},
{
"and": [
"canDash",
{
"or": [
"canTrickySpringBallJump",
"canInsaneWallJump",
{
"and": [
"HiJump",
"canWallJump"
]
},
{
"and": [
"HiJump",
"canSpeedyJump"
]
},
"h_IBJFromSpikes"
]
}
]
},
{
"and": [
"canPreciseGrapple",
{
"or": [
"canDash",
"canUseEnemies",
"canInsaneJump"
]
}
]
}
]
}
{
"heatFrames": 0
}Dev note: FIXME: some more of these options may be possible with a blue suit, with greater difficulty. |
|
Bomb horizontally on room entry to jump over the Ripper and land on the crumble blocks, or use a Power Bomb to kill the Ripper. Entrance condition: {
"comeInWithGMode": {
"mode": "any",
"morphed": true
}
}Requires: {
"or": [
"h_artificialMorphCeilingBombJump",
{
"and": [
"h_artificialMorphBombHorizontally",
"h_artificialMorphIBJ",
"h_artificialMorphPowerBomb"
]
},
{
"and": [
"h_artificialMorphBombHorizontally",
"canTrickyDodgeEnemies",
"h_artificialMorphDoubleBombJump",
"h_artificialMorphStaggeredIBJ"
]
}
]
}
{
"heatFrames": 0
} |
|
Bomb horizontally on room entry to jump over the Ripper and land on the crumble blocks, or use a Power Bomb to kill the Ripper. In indirect G-mode, stand where the gate will spawn and exit G-mode to open the gate. In direct G-mode, overload PLMs by shooting the gate then position Samus a few pixels away from the gate to where upward diagonal shots go through it. Crouch then shoot diagonally and quickly exit G-mode (3-7 frames later) to open the gate on G-mode exit. Entrance condition: {
"comeInWithGMode": {
"mode": "any",
"morphed": true
}
}Requires: "canComplexGMode"
"h_heatedGMode"
{
"or": [
"h_artificialMorphCeilingBombJump",
{
"and": [
"h_artificialMorphBombHorizontally",
"h_artificialMorphIBJ",
"h_artificialMorphPowerBomb"
]
},
{
"and": [
"h_artificialMorphBombHorizontally",
"canTrickyDodgeEnemies",
"h_artificialMorphDoubleBombJump",
"h_artificialMorphStaggeredIBJ"
]
}
]
}
{
"heatFrames": 35
}Clears obstacles: A Dev note: Artificial morph strats can be useful, for instance, in indirect G-mode without heat protection, where Samus needs to collect the item. The canComplexGMode is only used here to describe opening the gate in direct G-mode without gate glitching. However, the indirect variant still requires canHeatedGMode or Varia - with Varia, indirect strats can instead be used to go to the top left door and return. |
|
Jump onto the crumble blocks to make them solid, then use them as a platform to cross the room. Entrance condition: {
"comeInWithGMode": {
"mode": "any",
"morphed": false
}
}Requires: {
"or": [
{
"and": [
"ScrewAttack",
{
"noBlueSuit": {}
}
]
},
"h_usePowerBomb",
{
"ammo": {
"type": "Missile",
"count": 2
}
},
{
"ammo": {
"type": "Super",
"count": 1
}
}
]
}
"canIBJ"
"canBombHorizontally"
{
"heatFrames": 0
} |
|
Jump onto the crumble blocks to make them solid, then use them as a platform to cross the room. In indirect G-mode, stand where the gate will spawn and exit G-mode to open the gate. In direct G-mode, overload PLMs by shooting the gate then position Samus a few pixels away from the gate to where upward diagonal shots go through it. Crouch then shoot diagonally and quickly exit G-mode (3-7 frames later) to open the gate on G-mode exit. Entrance condition: {
"comeInWithGMode": {
"mode": "any",
"morphed": false
}
}Requires: "canComplexGMode"
"h_heatedGMode"
{
"or": [
{
"and": [
"ScrewAttack",
{
"noBlueSuit": {}
}
]
},
"h_usePowerBomb",
{
"ammo": {
"type": "Missile",
"count": 2
}
},
{
"ammo": {
"type": "Super",
"count": 1
}
}
]
}
"canIBJ"
"canBombHorizontally"
{
"heatFrames": 35
}Clears obstacles: A Dev note: The canComplexGMode is only used here to describe opening the gate in direct G-mode without gate glitching. However, the indirect variant still requires canHeatedGMode or Varia - with Varia, indirect strats can instead be used to go to the top left door and return. |
|
Jump onto the crumble blocks to make them solid, then use them as a platform to cross the room. With Grapple, a running jump then single Grapple swing can be used before PLMs are overloaded, alternatively jump on the crumble blocks and Grapple the Ripper. In indirect G-mode, stand where the gate will spawn and exit G-mode to open the gate. In direct G-mode, overload PLMs by shooting the gate then position Samus a few pixels away from the gate to where upward diagonal shots go through it. Crouch then shoot diagonally and quickly exit G-mode (3-7 frames later) to open the gate on G-mode exit. Entrance condition: {
"comeInWithGMode": {
"mode": "any",
"morphed": false
}
}Requires: "canComplexGMode"
"h_heatedGMode"
{
"or": [
"SpaceJump",
{
"and": [
"canStaggeredIBJ",
"canDoubleBombJump",
"canBombHorizontally"
]
},
{
"and": [
"canDash",
{
"or": [
"canTrickySpringBallJump",
"canInsaneWallJump",
{
"and": [
"HiJump",
"canWallJump"
]
},
{
"and": [
"HiJump",
"canSpeedyJump"
]
},
"h_IBJFromSpikes"
]
}
]
},
{
"and": [
"canPreciseGrapple",
{
"or": [
"canDash",
"canUseEnemies",
"canInsaneJump"
]
}
]
}
]
}
{
"heatFrames": 35
}Clears obstacles: A Dev note: The canComplexGMode is only used here to describe opening the gate in direct G-mode without gate glitching. However, the indirect variant still requires canHeatedGMode or Varia - with Varia, indirect strats can instead be used to go to the top left door and return. FIXME: some more of these options may be possible with a blue suit, with greater difficulty. |
From: 3
Right Door
To: 6
G-Mode, Remote Acquire Junction (Bottom Right)
Bomb horizontally on room entry to jump over the Ripper and land on the crumble blocks, or use a Power Bomb to kill the Ripper. Avoid touching all 6 crumbles, so Samus can use the item to overload PLMs and go through one of the crumbles to get to the left side of the room. If the item has already been obtained, Samus can shoot or Bomb the gate many times to overload PLMs. Entrance condition: {
"comeInWithGMode": {
"mode": "direct",
"morphed": true
}
}Requires: "canRemoteAcquire"
{
  "or": [
    "h_artificialMorphCeilingBombJump",
    {
      "and": [
        "h_artificialMorphBombHorizontally",
        "h_artificialMorphIBJ",
        "h_artificialMorphPowerBomb"
      ]
    },
    {
      "and": [
        "h_artificialMorphBombHorizontally",
        "canTrickyDodgeEnemies",
        "h_artificialMorphDoubleBombJump",
        "h_artificialMorphStaggeredIBJ"
      ]
    }
  ]
}
{
  "heatFrames": 0
}Dev note: This is only useful if the item is Morph, because with Morph, another strat would have been used. |
From: 3
Right Door
To: 6
G-Mode, Remote Acquire Junction (Bottom Right)
Jump onto the crumble blocks to make them solid, then use them as a platform to get to the item. Avoid touching all 6 crumbles, so Samus can use the item to overload PLMs and go through one of the crumbles to get to the left side of the room. If the item has already been obtained, Samus can shoot the gate many times to overload PLMs. Entrance condition: {
"comeInWithGMode": {
"mode": "direct",
"morphed": false
}
}Requires: "canRemoteAcquire"
{
  "or": [
    {
      "and": [
        "ScrewAttack",
        {
          "noBlueSuit": {}
        }
      ]
    },
    "h_usePowerBomb",
    {
      "ammo": {
        "type": "Missile",
        "count": 2
      }
    },
    {
      "ammo": {
        "type": "Super",
        "count": 1
      }
    }
  ]
}
"canIBJ"
"canBombHorizontally"
{
  "heatFrames": 0
} |
From: 3
Right Door
To: 6
G-Mode, Remote Acquire Junction (Bottom Right)
Jump onto the crumble blocks to make them solid, then use them as a platform to get to the item. With Grapple, a running jump then single Grapple swing can be used before PLMs are overloaded, alternatively jump on the crumble blocks and Grapple the Ripper. Avoid touching all 6 crumbles, so Samus can use the item to overload PLMs and go through one of the crumbles to get to the left side of the room. If the item has already been obtained, Samus can shoot the gate many times to overload PLMs. Entrance condition: {
"comeInWithGMode": {
"mode": "direct",
"morphed": false
}
}Requires: "canRemoteAcquire"
{
"or": [
"SpaceJump",
"canCeilingBombJump",
{
"and": [
"canBombHorizontally",
"canIBJ",
"h_usePowerBomb"
]
},
{
"and": [
"canStaggeredIBJ",
"canDoubleBombJump",
"canBombHorizontally"
]
},
{
"and": [
"canPreciseGrapple",
"canUseEnemies"
]
},
{
"and": [
"canDash",
{
"or": [
"canTrickySpringBallJump",
"canInsaneWallJump",
{
"and": [
"HiJump",
"canWallJump"
]
},
{
"and": [
"HiJump",
"canSpeedyJump"
]
},
"h_IBJFromSpikes"
]
}
]
}
]
}
{
"heatFrames": 0
} |
From: 3
Right Door
To: 7
G-Mode Junction (Bottom Right)
Jump onto the crumble blocks to make them solid, then use them as a platform to cross the room. With Grapple, a running jump then single Grapple swing can be used before PLMs are overloaded, alternatively jump on the crumble blocks and Grapple the Ripper. Entrance condition: {
"comeInWithGMode": {
"mode": "indirect",
"morphed": false
}
}Requires: "Morph"
{
"or": [
"SpaceJump",
"canCeilingBombJump",
{
"and": [
"canStaggeredIBJ",
"canDoubleBombJump",
"canBombHorizontally"
]
},
{
"and": [
"canBombHorizontally",
"canIBJ",
"h_usePowerBomb"
]
},
{
"and": [
"canDash",
{
"or": [
"canTrickySpringBallJump",
"canInsaneWallJump",
{
"and": [
"HiJump",
"canWallJump"
]
},
{
"and": [
"HiJump",
"canSpeedyJump"
]
},
"h_IBJFromSpikes"
]
}
]
},
{
"and": [
"canPreciseGrapple",
{
"or": [
"canDash",
"canUseEnemies",
"canInsaneJump"
]
}
]
}
]
}
{
"heatFrames": 0
}Dev note: With Grapple, Morph isn't needed, but there's no reason to go there without Morph. |
From: 3
Right Door
To: 7
G-Mode Junction (Bottom Right)
Jump onto the crumble blocks to make them solid, then use them as a platform to cross the room. Entrance condition: {
"comeInWithGMode": {
"mode": "indirect",
"morphed": false
}
}Requires: {
"or": [
{
"and": [
"ScrewAttack",
{
"noBlueSuit": {}
}
]
},
"h_usePowerBomb",
{
"ammo": {
"type": "Missile",
"count": 2
}
},
{
"ammo": {
"type": "Super",
"count": 1
}
}
]
}
"canIBJ"
"canBombHorizontally"
{
"heatFrames": 0
} |
From: 1
Top Left Door
To: 2
Middle Left Door
Entrance condition: {
"comeInWithGMode": {
"mode": "indirect",
"morphed": true
}
}Requires: {
"or": [
"h_artificialMorphMovement",
"h_artificialMorphBombHorizontally"
]
}
"h_heatedGModeOffCameraDoor"Dev note: It is possible to open the gate as it closes, but isn't expected since this is off camera. To do that would require resetting the room. |
From: 4
Top Right Door
To: 2
Middle Left Door
Entrance condition: {
"comeInWithGMode": {
"mode": "indirect",
"morphed": true
}
}Requires: {
"or": [
"h_artificialMorphMovement",
"h_artificialMorphBombHorizontally"
]
}
"h_heatedGModeOffCameraDoor"Dev note: It is possible to open the gate as it closes, but isn't expected since this is off camera. To do that would require resetting the room. |
From: 1
Left Shaft - Top Left Door
To: 5
Far Right Door
It is important avoid touching the invisible fireballs the Alcoons place. It is possible to bomb from the edge of the top door runway into the hidden morph tunnel, but if Samus is not at the edge, she will bonk and fall. After entering the morph tunnel, roll through the two camera scroll blocks a few times to overload PLMs. They are at the entrance and two tiles in the tunnel. Exit G-mode and go through the room to the far right door. Entrance condition: {
"comeInWithGMode": {
"mode": "any",
"morphed": true
}
}Requires: "canTrickyDodgeEnemies"
{
"or": [
"h_artificialMorphBombHorizontally",
"h_artificialMorphJumpIntoIBJ",
{
"and": [
"h_artificialMorphIBJ",
"h_artificialMorphPowerBomb"
]
},
{
"and": [
"h_artificialMorphSpringBall",
"HiJump"
]
},
"h_artificialMorphSpringBallBombJump"
]
}
"h_heatedGModeOffCameraDoor" |
From: 1
Left Shaft - Top Left Door
To: 5
Far Right Door
It is important avoid touching the invisible fireballs the Alcoons place. It is possible to kill them without any beam upgrades or ammo by jumping and shooting horizontally near the floor surface. Stay near the far wall when shooting to prevent getting too close and triggering their jump. After entering the morph tunnel, roll through the two camera scroll blocks a few times to overload PLMs. They are at the entrance and two tiles in the tunnel. Exit G-mode and go through the room to the far right door. Entrance condition: {
"comeInWithGMode": {
"mode": "any",
"morphed": false
}
}Requires: "Morph"
{
"or": [
{
"and": [
"canBombHorizontally",
"canTrickyJump"
]
},
"HiJump",
"canWallJump",
"SpaceJump",
"canSpringBallJumpMidAir",
"canIBJ",
"canTrickyUseFrozenEnemies"
]
}
"h_heatedGModeOffCameraDoor"Dev note: It is possible to go from 5->1 with a bomb spread, but it requires difficult off-screen movement to escape the room. |
From: 2
Left Shaft - Bottom Right Door
To: 5
Far Right Door
It is important avoid touching the invisible fireballs the Alcoons place. It is possible to kill them without any beam upgrades or ammo by jumping and shooting horizontally near the floor surface. Stay near the far wall when shooting to prevent getting too close and triggering their jump. After entering the morph tunnel, roll through the two camera scroll blocks a few times to overload PLMs. They are at the entrance and two tiles in the tunnel. Exit G-mode and go through the room to the far right door. Entrance condition: {
"comeInWithGMode": {
"mode": "any",
"morphed": false
}
}Requires: "Morph"
{
"or": [
"HiJump",
"canWallJump",
"SpaceJump",
"canSpringBallJumpMidAir",
"canIBJ",
{
"and": [
"h_crouchJumpDownGrab",
"canBombHorizontally"
]
},
{
"and": [
"h_crouchJumpDownGrab",
"canTrickyUseFrozenEnemies"
]
}
]
}
"h_heatedGModeOffCameraDoor"Dev note: Frozen Alcoon platforms and Artificial morph IBJ are not included, as Samus can crouch jump and down grab; they can be considered if G-mode + flash suits are added, though they are still likely not useful. |
From: 3
Left Shaft - Middle Right Door
To: 5
Far Right Door
It is important avoid touching the invisible fireballs the Alcoons place. It is possible to kill them without any beam upgrades or ammo by jumping and shooting horizontally near the floor surface. Stay near the far wall when shooting to prevent getting too close and triggering their jump. After entering the morph tunnel, roll through the two camera scroll blocks a few times to overload PLMs. They are at the entrance and two tiles in the tunnel. Exit G-mode and go through the room to the far right door. Entrance condition: {
"comeInWithGMode": {
"mode": "any",
"morphed": false
}
}Requires: "Morph"
{
"or": [
"HiJump",
"canWallJump",
"SpaceJump",
"canSpringBallJumpMidAir",
"canIBJ",
{
"and": [
"h_crouchJumpDownGrab",
"canBombHorizontally"
]
},
{
"and": [
"h_crouchJumpDownGrab",
"canTrickyUseFrozenEnemies"
]
}
]
}
"h_heatedGModeOffCameraDoor"Dev note: Frozen Alcoon platforms and Artificial morph IBJ are not included, as Samus can crouch jump and down grab; they can be considered if G-mode + flash suits are added, though they are still likely not useful. |
From: 4
Left Shaft - Top Right Door
To: 5
Far Right Door
It is important avoid touching the invisible fireballs the Alcoons place. It is possible to kill them without any beam upgrades or ammo by jumping and shooting horizontally near the floor surface. Stay near the far wall when shooting to prevent getting too close and triggering their jump. After entering the morph tunnel, roll through the two camera scroll blocks a few times to overload PLMs. They are at the entrance and two tiles in the tunnel. Exit G-mode and go through the room to the far right door. Entrance condition: {
"comeInWithGMode": {
"mode": "any",
"morphed": false
}
}Requires: "Morph"
{
"or": [
"HiJump",
"canWallJump",
"SpaceJump",
"canSpringBallJumpMidAir",
"canIBJ",
{
"and": [
"h_crouchJumpDownGrab",
"canBombHorizontally"
]
},
{
"and": [
"h_crouchJumpDownGrab",
"canTrickyUseFrozenEnemies"
]
}
]
}
"h_heatedGModeOffCameraDoor"Dev note: Frozen Alcoon platforms and Artificial morph IBJ are not included, as Samus can crouch jump and down grab; they can be considered if G-mode + flash suits are added, though they are still likely not useful. |
|
With a blue suit, the IBJ must start from the lava, since the blue suit destroys the bomb block platforms. The blue suit can be used to kill the Dragons. Requires: {
"haveBlueSuit": {}
}
"canJumpIntoIBJ"
"canBombHorizontally"
"canBombJumpWaterEscape"
"canInsaneJump"
"canDoubleBombJump"
{
"heatFrames": 1260
}
{
"lavaFrames": 120
} |
|
Requires: "canDash"
"canJumpIntoIBJ"
"canBombHorizontally"
{
"heatFrames": 810
}
{
"or": [
"canDoubleBombJump",
{
"and": [
"canJumpIntoIBJ",
{
"heatFrames": 330
}
]
}
]
} |
|
Getting across the lava while artificially morphed requires an HBJ or Spring Fling. For the Spring Fling, jump immediately before the pause triggers. With Morph, Samus can air ball across. Entrance condition: {
"comeInWithGMode": {
"mode": "any",
"morphed": true
}
}Requires: {
"or": [
{
"and": [
"Morph",
{
"or": [
"SpaceJump",
"canTrivialUseFrozenEnemies"
]
}
]
},
{
"and": [
"canLateralMidAirMorph",
"canTrickyJump"
]
},
{
"and": [
"h_artificialMorphSpringFling",
"canTrickyJump"
]
},
"h_artificialMorphHBJ",
{
"and": [
"Gravity",
"h_artificialMorphIBJ",
"h_artificialMorphBombHorizontally",
{
"lavaFrames": 160
}
]
},
{
"and": [
"Gravity",
"h_artificialMorphSpringBall",
{
"lavaFrames": 40
}
]
},
{
"and": [
"Gravity",
"Morph",
{
"lavaFrames": 24
}
]
}
]
}
"h_heatedGModeOpenDifferentDoor" |
|
Getting across the lava while artificially morphed requires an HBJ or Bomb boosting out and freezing a Boyon below. Entrance condition: {
"comeInWithGMode": {
"mode": "any",
"morphed": true
}
}Requires: {
"or": [
{
"and": [
"h_artificialMorphMovement",
"h_lavaProof"
]
},
{
"and": [
"Morph",
"canTrickyUseFrozenEnemies"
]
},
{
"and": [
"h_artificialMorphIBJ",
"h_artificialMorphBombHorizontally",
"canTrickyUseFrozenEnemies"
]
},
{
"and": [
"canInsaneJump",
{
"or": [
"h_artificialMorphHBJ",
"h_artificialMorphDiagonalBombJump"
]
}
]
}
]
}
"h_heatedGModeOpenDifferentDoor"Dev note: FIXME: It is also possible with a rolling speed bomb boost down back. |
|
Spring Fling or IBJ across the right pit and damage boost or lava dive in the second; to Spring Fling, jump immediately before the pause triggers. Entrance condition: {
"comeInWithGMode": {
"mode": "any",
"morphed": true
}
}Requires: {
"or": [
"Morph",
{
"and": [
"h_artificialMorphSpringFling",
"canTrickyJump"
]
},
{
"and": [
"h_artificialMorphIBJ",
"h_artificialMorphBombHorizontally"
]
},
{
"and": [
"Gravity",
"h_artificialMorphSpringBall",
{
"lavaFrames": 20
}
]
},
{
"and": [
"h_artificialMorphSpringBall",
{
"lavaFrames": 50
}
]
}
]
}
{
"or": [
{
"and": [
{
"notable": "Impressive Damage Boost"
},
"canHorizontalDamageBoost",
"canTrickyJump",
{
"enemyDamage": {
"enemy": "Boyon",
"type": "contact",
"hits": 1
}
}
]
},
{
"lavaFrames": 90
},
{
"and": [
"Gravity",
{
"lavaFrames": 35
}
]
}
]
}
"h_heatedGModeOpenDifferentDoor" |
From: 1
Left Door
To: 1
Left Door
Wait for the acid to lower then quickly roll part way forward to trigger the Metarees and return. Then go again without any difficulty. With Power Bombs alone is particularly challenging. Use a Power Bomb to kill the Gamets to prevent them from respawning. Place a bomb at the edge of the runway then hold forward with precise timing to get a boost to skip the first and land on the next safe platform. As quickly as possible place another and let it boost horizontally to the next platform, then another to get to the item. With high movement precision, it is recommended to start a bit away from the edge (fully on the runway), giving a 3-frame window, or to start on the last pixel of the runway, giving a 4 frame window plus an extra non-consecutive frame. With slightly less precision, it may be worth starting as close to the edge as possible without falling off, as there are typically 4 non-consecutive frames that work (consisting of approximately alternating frames in a 6-frame window). Rolling into the bomb with momentum is not recommended and gives only a 2-frame window. Entrance condition: {
"comeInWithGMode": {
"mode": "direct",
"morphed": true
}
}Requires: "canRemoteAcquire"
"canTrickyGMode"
"h_artificialMorphBombHorizontally"
{
"ammo": {
"type": "PowerBomb",
"count": 6
}
}Collects items: 2 Dev note: The requirements here are to get the item and return, as the item cannot be used during the return. It appears that there is virtually no risk in overloading PLMs - the left runway isn't close enough, and even placing two on each pillar will not overload PLMs. FIXME: Getting extra horizontal distance from the bomb needs a tech. |
From: 1
Left Door
To: 6
G-Mode Morph Junction (At Speed Blocks)
Bomb boost horizontally at the top of an IBJ and land in the acid, then roll to the right and bomb out to safety. To save some Energy, it is possible to IBJ or double IBJ out of the acid onto the first solid platform. Entrance condition: {
"comeInWithGMode": {
"mode": "any",
"morphed": true
}
}Requires: "Gravity"
"h_artificialMorphIBJ"
"h_artificialMorphBombHorizontally"
"canSuitlessLavaDive"
{
"or": [
{
"acidFrames": 280
},
{
"and": [
"canTrickyJump",
{
"acidFrames": 220
}
]
},
{
"and": [
"canInsaneJump",
"h_artificialMorphDoubleBombJump",
{
"acidFrames": 175
}
]
}
]
} |
From: 2
Right Vertical Door
To: 6
G-Mode Morph Junction (At Speed Blocks)
A single horizontal Power Bomb boost can get Samus on top of the blocks and kill most of the Mellas. The blocks will break after exiting G-mode. Entrance condition: {
"comeInWithGMode": {
"mode": "any",
"morphed": true
},
"comesThroughToilet": "any"
}Requires: {
"tech": "canBombHorizontally"
}
"h_artificialMorphPowerBomb"Clears obstacles: A Dev note: Obstacle A will not be cleared until exiting G-mode, but no G-mode strat will use that obstacle, so it should be fine clearing it now. |
From: 2
Right Vertical Door
To: 7
Direct G-Mode Morph Junction (At Speed Blocks)
A single horizontal Power Bomb boost can get Samus on top of the blocks and kill most of the Mellas. The blocks will break after exiting G-mode. Entrance condition: {
"comeInWithGMode": {
"mode": "direct",
"morphed": true
},
"comesThroughToilet": "any"
}Requires: {
"tech": "canBombHorizontally"
}
"h_artificialMorphPowerBomb"Clears obstacles: A Dev note: Obstacle A will not be cleared until exiting G-mode, but no G-mode strat will use that obstacle, so it should be fine clearing it now. |
From: 6
G-Mode Morph Junction (At Speed Blocks)
To: 1
Left Door
Cross the solid platforms then horizontally boost into the acid and begin an IBJ. With more limited Energy, it is possible to IBJ high into the room and boost horizontally to fall into the acid a bit further to the left. Requires: "canGMode"
"Gravity"
"h_artificialMorphLongIBJ"
"h_artificialMorphBombHorizontally"
"canSuitlessLavaDive"
{
"acidFrames": 150
}Dev note: A Direct G-mode variant that collects the item is not included, because there is no way to stay artificially morphed and gain Energy. |
|
Requires: {
"notable": "Horizontal Bomb Jump"
}
"canBombHorizontally"
{
"heatFrames": 160
} |
|
Requires: {
"notable": "Horizontal Bomb Jump"
}
"canBombHorizontally"
{
"heatFrames": 190
} |
G-Mode Morph Blind Top to Bottom - Power Bomb the Bottom Fune (Top Left Door)
(Extreme+)
Lower Norfair Fireflea Room
From: 1
Top Left Door
To: 2
Bottom Left Door
Traversing the room without getting hit requires fairly tricky off-screen movement. Note that Samus moves freely through the off-screen Funes, but will take damage from the Boulders. The Boulders will behave normally and start to roll as Samus is in front of them, except for the top Boulder. Roll off the first ledge and immediately roll to the right all the way to the right wall. Use Spring Ball or a horizontal bomb boost to get over the next Boulder. Quickly roll off the left edge and back to the right in order to avoid the third Boulder. Roll to the right wall then the left wall and place a Power Bomb, exit G-Mode, and jump repeatedly to fix the camera. Entrance condition: {
"comeInWithGMode": {
"mode": "any",
"morphed": true
}
}Requires: {
"notable": "G-Mode Morph Blind Top to Bottom"
}
"canOffScreenMovement"
"canTrickyJump"
{
"or": [
"h_artificialMorphSpringBall",
"h_artificialMorphBombHorizontally",
{
"enemyDamage": {
"enemy": "Boulder",
"type": "contact",
"hits": 1
}
},
{
"haveBlueSuit": {}
}
]
}
"h_artificialMorphPowerBomb"Clears obstacles: A |
From: 1
Top Left Door
To: 3
Top Right Door
With Supers or PBs, kill Funes except for the topmost. If you have neither, use Morph and bombs or springball to get over the secret Fune and farm a fireflea. Shinespark can get you back out of the fireflea pit if you can't jump out. Entrance condition: {
"comeInWithRMode": {}
}Requires: "canTrickyJump"
{
"or": [
"Morph",
{
"enemyKill": {
"enemies": [
[
"Boulder"
]
]
}
},
{
"and": [
{
"disableEquipment": "ScrewAttack"
},
"canPseudoScrew"
]
}
]
}
{
"or": [
{
"and": [
{
"enemyKill": {
"enemies": [
[
"Fune"
]
]
}
},
"h_RModeCanRefillReserves",
{
"partialRefill": {
"type": "ReserveEnergy",
"limit": 20
}
},
{
"resourceMissingAtMost": [
{
"type": "Missile",
"count": 0
}
]
}
]
},
{
"and": [
"Morph",
{
"or": [
"h_useSpringBall",
{
"and": [
"h_useMorphBombs",
"canBombHorizontally"
]
}
]
},
"h_RModeCanRefillReserves",
{
"partialRefill": {
"type": "ReserveEnergy",
"limit": 20
}
},
{
"resourceMissingAtMost": [
{
"type": "PowerBomb",
"count": 0
}
]
},
{
"canShineCharge": {
"usedTiles": 17,
"gentleUpTiles": 6,
"steepUpTiles": 1,
"openEnd": 1
}
},
{
"shinespark": {
"frames": 9,
"excessFrames": 4
}
}
]
}
]
}
{
"canShineCharge": {
"usedTiles": 21,
"gentleUpTiles": 3,
"gentleDownTiles": 3,
"openEnd": 1
}
}
{
"autoReserveTrigger": {
"maxReserveEnergy": 95
}
}
"canRModeSparkInterrupt"Dev note: FIXME: Notable strat 'Morph Over The Fune' for getting over the secret fune (and then R-Jump to get out) isn't included. |
|
Place a bomb just a bit left of the Fune and have it boost Samus horizontally to get over the Fune. The bomb can be placed at a similar time to when the Fune shoots a fireball. Alternatively, it is possible to land on a fireball to be boosted up. Requires: "h_useMorphBombs"
{
"or": [
{
"and": [
"canBombHorizontally",
{
"or": [
"Ice",
"canCarefulJump"
]
}
]
},
{
"and": [
"h_midAirMorphDamageBoost",
{
"enemyDamage": {
"enemy": "Fune",
"type": "fireball",
"hits": 1
}
}
]
}
]
} |
G-Mode Morph Blind Top to Bottom - Power Bomb the Bottom Fune (Top Right Door)
(Extreme+)
Lower Norfair Fireflea Room
From: 3
Top Right Door
To: 2
Bottom Left Door
Traversing the room without getting hit requires fairly tricky off-screen movement. Note that Samus moves freely through the off-screen Funes, but will take damage from the Boulders. The Boulders will behave normally and start to roll as Samus is in front of them, except for the top Boulder. Roll off the first ledge and immediately roll to the right all the way to the right wall. Use Spring Ball or a horizontal bomb boost to get over the next Boulder. Quickly roll off the left edge and back to the right in order to avoid the third Boulder. Roll to the right wall then the left wall and place a Power Bomb, exit G-Mode, and jump repeatedly to fix the camera. Entrance condition: {
"comeInWithGMode": {
"mode": "any",
"morphed": true
}
}Requires: {
"notable": "G-Mode Morph Blind Top to Bottom"
}
"canOffScreenMovement"
"canTrickyJump"
{
"or": [
"h_artificialMorphSpringBall",
"h_artificialMorphBombHorizontally",
{
"enemyDamage": {
"enemy": "Boulder",
"type": "contact",
"hits": 1
}
}
]
}
"h_artificialMorphPowerBomb"Clears obstacles: A |
From: 3
Top Right Door
To: 3
Top Right Door
With Supers or PBs, kill Funes except for the topmost. If you have neither, use Morph and bombs or springball to get over the secret Fune and farm a fireflea. Shinespark can get you back out of the fireflea pit if you can't jump out. Entrance condition: {
"comeInWithRMode": {}
}Requires: "canTrickyJump"
{
"or": [
"Morph",
{
"enemyKill": {
"enemies": [
[
"Boulder"
]
]
}
},
{
"and": [
{
"disableEquipment": "ScrewAttack"
},
"canPseudoScrew"
]
}
]
}
{
"or": [
{
"and": [
{
"enemyKill": {
"enemies": [
[
"Fune"
]
]
}
},
"h_RModeCanRefillReserves",
{
"partialRefill": {
"type": "ReserveEnergy",
"limit": 20
}
},
{
"resourceMissingAtMost": [
{
"type": "Missile",
"count": 0
}
]
}
]
},
{
"and": [
"Morph",
{
"or": [
"h_useSpringBall",
{
"and": [
"h_useMorphBombs",
"canBombHorizontally"
]
}
]
},
"h_RModeCanRefillReserves",
{
"partialRefill": {
"type": "ReserveEnergy",
"limit": 20
}
},
{
"resourceMissingAtMost": [
{
"type": "PowerBomb",
"count": 0
}
]
},
{
"canShineCharge": {
"usedTiles": 17,
"gentleUpTiles": 6,
"steepUpTiles": 1,
"openEnd": 1
}
},
{
"shinespark": {
"frames": 9,
"excessFrames": 4
}
}
]
}
]
}
{
"canShineCharge": {
"usedTiles": 21,
"gentleUpTiles": 3,
"gentleDownTiles": 3,
"openEnd": 1
}
}
{
"autoReserveTrigger": {
"maxReserveEnergy": 95
}
}
"canRModeSparkInterrupt"Dev note: FIXME: Notable strat 'Morph Over The Fune' for getting over the secret fune (and then R-Jump to get out) isn't included. |
From: 1
Left Door
To: 7
Junction By Lower Alcoons (Left of Spike Pits)
Crystal Flash near the edge - just before Samus goes off-screen - to clear the runway Alcoon. Shinecharge to the left, then weave down and into the Alcoon to interrupt. Entrance condition: {
"comeInWithGMode": {
"mode": "direct",
"morphed": false
}
}Requires: {
"or": [
"canWallJump",
"HiJump",
"canSpringBallJumpMidAir",
"SpaceJump",
{
"and": [
"canIBJ",
"canBombHorizontally",
"canJumpIntoIBJ"
]
},
{
"and": [
"canUseFrozenEnemies",
"canInsaneJump"
]
}
]
}
"h_CrystalFlashForReserveEnergy"
{
"canShineCharge": {
"usedTiles": 27,
"gentleUpTiles": 2,
"openEnd": 0
}
}
{
"or": [
"canDownBack",
"canTrickyJump"
]
}
{
"or": [
{
"and": [
{
"disableEquipment": "ETank"
},
{
"autoReserveTrigger": {}
},
"canRModeSparkInterrupt",
{
"enemyDamage": {
"enemy": "Alcoon",
"type": "contact",
"hits": 1
}
}
]
},
{
"and": [
"canReserveTriggerBufferXRay",
{
"autoReserveTrigger": {
"implicitHeatFrames": "no"
}
},
"canRModePauseAbuseSparkInterrupt",
{
"heatFrames": 30
}
]
}
]
}Clears obstacles: A |
From: 3
Bottom Horizontal Door
To: 1
Left Door
Entrance condition: {
"comeInWithGMode": {
"mode": "any",
"morphed": true
}
}Requires: {
"or": [
{
"and": [
"h_artificialMorphSpringBall",
"h_artificialMorphSpringBallBombJump"
]
},
{
"and": [
"h_artificialMorphIBJ",
"h_artificialMorphBombHorizontally"
]
}
]
}
"h_heatedGModeOpenDifferentDoor" |
|
It is possible to climb up with a tricky dash jump and no wall jump. Either kill the Alcoon before it spawns any stationary, invisible fireballs, or let the right Alcoons shoot enough to overload projectiles. Entrance condition: {
"comeInWithGMode": {
"mode": "any",
"morphed": true
}
}Requires: "h_heatedGMode"
{
"or": [
{
"and": [
"h_artificialMorphSpringBall",
"h_artificialMorphSpringBallBombJump"
]
},
{
"and": [
"h_artificialMorphIBJ",
"h_artificialMorphBombHorizontally"
]
}
]
}
{
"heatFrames": 0
} |
From: 3
Bottom Horizontal Door
To: 7
Junction By Lower Alcoons (Left of Spike Pits)
Kill the spike Alcoons before climbing to the upper runway. Be sure to jump over the invisible fireball projectiles. Crystal Flash at the top right, just before Samus goes off-screen, to clear the runway Alcoon. Shinecharge to the left, then weave down and into the Alcoon to interrupt. Entrance condition: {
"comeInWithGMode": {
"mode": "direct",
"morphed": false
}
}Requires: {
"or": [
"canWallJump",
"HiJump",
"canSpringBallJumpMidAir",
"SpaceJump",
{
"and": [
"canIBJ",
"canBombHorizontally",
"canJumpIntoIBJ"
]
},
{
"and": [
"canUseFrozenEnemies",
"canInsaneJump"
]
}
]
}
"h_CrystalFlashForReserveEnergy"
{
"canShineCharge": {
"usedTiles": 27,
"gentleUpTiles": 2,
"openEnd": 0
}
}
{
"or": [
"canDownBack",
"canTrickyJump"
]
}
{
"or": [
{
"and": [
{
"disableEquipment": "ETank"
},
{
"autoReserveTrigger": {}
},
"canRModeSparkInterrupt",
{
"enemyDamage": {
"enemy": "Alcoon",
"type": "contact",
"hits": 1
}
}
]
},
{
"and": [
"canReserveTriggerBufferXRay",
{
"autoReserveTrigger": {
"implicitHeatFrames": "no"
}
},
"canRModePauseAbuseSparkInterrupt",
{
"heatFrames": 30
}
]
}
]
}Clears obstacles: A |
From: 3
Bottom Horizontal Door
To: 7
Junction By Lower Alcoons (Left of Spike Pits)
Get past the spike Alcoons, and climb up - leave the lower left Alcoon alive to use for later. Clear the runway Alcoon and get the shinecharge, then drop into the lower left Alcoon to interrupt. If you Crystal Flash early, stay near the door to ensure you kill only the two spike Alcoons. Entrance condition: {
"comeInWithRMode": {}
}Requires: {
"or": [
{
"and": [
"h_heatedCrystalFlashForReserveEnergy",
{
"heatFrames": 100
}
]
},
{
"and": [
"ScrewAttack",
"canCarefulJump",
{
"heatFrames": 100
}
]
},
{
"and": [
"canDodgeWhileShooting",
{
"or": [
"h_heatProof",
{
"enemyKill": {
"enemies": [
[
"Alcoon"
]
],
"explicitWeapons": [
"Missile",
"Super",
"Wave+Plasma"
]
}
},
{
"and": [
"canPseudoScrew",
{
"heatFrames": 30
}
]
}
]
},
"canCarefulJump",
{
"heatFrames": 100
}
]
},
{
"and": [
{
"enemyKill": {
"enemies": [
[
"Alcoon",
"Alcoon"
]
],
"explicitWeapons": [
"Missile",
"Super",
"Plasma",
"Wave+Spazer"
]
}
},
{
"heatFrames": 200
}
]
},
{
"and": [
"canCarefulJump",
{
"heatFrames": 199
}
]
},
{
"and": [
{
"enemyDamage": {
"enemy": "Alcoon",
"type": "contact",
"hits": 1
}
},
{
"heatFrames": 180
}
]
}
]
}
{
"heatFrames": 160
}
{
"or": [
"canWallJump",
"HiJump",
"canSpringBallJumpMidAir",
"SpaceJump",
{
"and": [
"canSpringBallBombJump",
{
"heatFrames": 60
}
]
},
{
"and": [
"canIBJ",
"canBombHorizontally",
"canJumpIntoIBJ",
{
"heatFrames": 110
},
{
"or": [
"canDoubleBombJump",
{
"heatFrames": 190
}
]
}
]
},
{
"and": [
"canTrickyDashJump",
"canInsaneJump",
{
"heatFrames": 20
}
]
},
{
"and": [
"canUseFrozenEnemies",
"canInsaneJump",
{
"heatFrames": 150
}
]
}
]
}
{
"or": [
{
"and": [
"canDodgeWhileShooting",
{
"enemyKill": {
"enemies": [
[
"Alcoon"
]
],
"explicitWeapons": [
"Missile",
"Super",
"Charge+Plasma"
]
}
},
{
"heatFrames": 120
}
]
},
{
"and": [
{
"enemyKill": {
"enemies": [
[
"Alcoon"
]
],
"explicitWeapons": [
"Wave",
"Ice+Spazer",
"Plasma",
"ScrewAttack",
"PseudoScrew",
"PowerBomb"
]
}
},
{
"heatFrames": 180
}
]
},
{
"heatFrames": 200
}
]
}
{
"or": [
{
"resourceAvailable": [
{
"type": "ReserveEnergy",
"count": 1
}
]
},
{
"and": [
"h_heatProof",
"h_RModeCanRefillReserves",
{
"or": [
{
"and": [
{
"resourceMissingAtMost": [
{
"type": "PowerBomb",
"count": 0
}
]
},
{
"partialRefill": {
"type": "ReserveEnergy",
"limit": 20
}
}
]
},
{
"and": [
{
"resourceMissingAtMost": [
{
"type": "PowerBomb",
"count": 3
}
]
},
{
"partialRefill": {
"type": "ReserveEnergy",
"limit": 5
}
}
]
}
]
}
]
}
]
}
{
"canShineCharge": {
"usedTiles": 27,
"gentleUpTiles": 2,
"openEnd": 0
}
}
{
"or": [
"canDownBack",
"canTrickyJump"
]
}
{
"heatFrames": 120
}
{
"autoReserveTrigger": {
"maxReserveEnergy": 95
}
}
"canRModeSparkInterrupt"Clears obstacles: A |
From: 7
Junction By Lower Alcoons (Left of Spike Pits)
To: 1
Left Door
Requires: "canIBJ"
{
"or": [
{
"and": [
"canBombHorizontally",
{
"heatFrames": 840
}
]
},
{
"and": [
"canJumpIntoIBJ",
"canDoubleBombJump",
{
"heatFrames": 275
}
]
},
{
"and": [
"canJumpIntoIBJ",
{
"heatFrames": 420
}
]
}
]
}
{
"or": [
"canDash",
{
"heatFrames": 20
}
]
}Unlocks doors: {"types":["powerbomb"],"requires":[{"heatFrames":60}]} |
From: 7
Junction By Lower Alcoons (Left of Spike Pits)
To: 6
Junction By Left Door (Right of Pit)
Requires: "canIBJ"
{
"or": [
{
"and": [
"canBombHorizontally",
{
"heatFrames": 820
}
]
},
{
"and": [
"canJumpIntoIBJ",
"canDoubleBombJump",
{
"heatFrames": 255
}
]
},
{
"and": [
"canJumpIntoIBJ",
{
"heatFrames": 400
}
]
}
]
}
{
"or": [
"canDash",
{
"heatFrames": 25
}
]
} |
From: 2
Right Door
To: 5
G-Mode Morph Junction (Above Bomb Block)
Avoiding the acid completely requires precise movement. With Spring Ball and Bombs, jump into IBJ to delay while waiting for the acid. With just Spring Ball, perform a well-timed pause to trigger immediately after Samus jumps to get enough horizontal momentum to cross the second Hibashi and land in the alcove. A quick pause with a second spring fling on the descent can help a bit. With just Bombs, this is possible with well-timed, first-try double IBJs. Entrance condition: {
"comeInWithGMode": {
"mode": "any",
"morphed": true
}
}Requires: "canInsaneJump"
{
"or": [
"h_artificialMorphJumpIntoIBJ",
{
"and": [
"canTrickyGMode",
"h_artificialMorphSpringFling"
]
},
{
"and": [
"canTrickyGMode",
"h_artificialMorphDoubleBombJump",
"h_artificialMorphBombHorizontally"
]
}
]
}
{
"heatFrames": 0
}Dev note: FIXME: Could add strats that take acid damage and are more lenient. |
|
Use a mid-air horizontal bomb boost to reach the first platform. Jump across to the last platform. Wait until the water is low, let the platform sink slightly, then jump and horizontal bomb boost to the item. If HiJump is available, then it is possible to simply spin jump from the underwater platform to the first moving platform. If HiJump cannot be disabled, then the bomb boost from the last platform is more difficult: in this case Samus must jump, lay the bomb on the way down, then jump again to a precise height and morph to get the boost. Requires: "f_DefeatedPhantoon" "canJumpIntoIBJ" "canBombHorizontally" "canTrickyJump" "h_complexToCarryFlashSuit" |
|
Use a mid-air horizontal Power Bomb boost to reach the first platform. Jump across to the last platform. Wait until the water is low, let the platform sink slightly, then jump and horizontal Power Bomb boost to the item. If HiJump is available, then it is possible to simply spin jump from the underwater platform to the first moving platform, saving a Power Bomb. If HiJump cannot be disabled, then the Power Bomb boost from the last platform is more difficult: in this case Samus must jump, lay the Power Bomb on the way down, then jump again to a precise height and morph to get the boost. Requires: "f_DefeatedPhantoon"
"canMidAirMorph"
{
"tech": "canJumpIntoIBJ"
}
{
"tech": "canBombHorizontally"
}
"canInsaneJump"
{
"or": [
{
"and": [
"HiJump",
{
"ammo": {
"type": "PowerBomb",
"count": 1
}
}
]
},
{
"ammo": {
"type": "PowerBomb",
"count": 2
}
}
]
}
"h_complexToCarryFlashSuit" |
From: 1
Right Door
To: 2
Item
Requires: {
"thornHits": 1
}
"HiJump"
"canSpringBallJumpMidAir"
{
"not": "f_DefeatedPhantoon"
}
{
"or": [
"canRiskPermanentLossOfAccess",
{
"and": [
"canDash",
"canCarefulJump",
{
"disableEquipment": "HiJump"
}
]
},
{
"and": [
"canJumpIntoIBJ",
"canBombHorizontally",
"canTrickyJump"
]
},
"Gravity",
"canSpringFling"
]
} |
|
Requires: {
"thornHits": 1
}
{
"or": [
{
"and": [
"canUseIFrames",
"canDash"
]
},
{
"and": [
{
"tech": "canHorizontalDamageBoost"
},
"h_complexToCarryFlashSuit"
]
},
{
"thornHits": 1
}
]
}
"canWallJump"
{
"not": "f_DefeatedPhantoon"
}
{
"or": [
"canRiskPermanentLossOfAccess",
{
"and": [
"canDash",
"canCarefulJump",
{
"disableEquipment": "HiJump"
}
]
},
{
"and": [
"Gravity",
"canDash"
]
},
{
"and": [
"canJumpIntoIBJ",
"canBombHorizontally",
"canTrickyJump"
]
},
{
"and": [
"Gravity",
"canSpringBallJumpMidAir"
]
},
"canSpringFling",
{
"and": [
"HiJump",
"Gravity",
"canInsaneJump"
]
}
]
}Dev note: The canCarefulJump and Gravity are here, as with either of those, there is access across with or without f_DefeatedPhantoon. |
|
Jump, place a bomb mid-air, then jump with controlled height to precisely mid-air morph and get a horizontal boost. Requires: "canJumpIntoIBJ" "canBombHorizontally" "canInsaneJump" "canInsaneMidAirMorph" "canResetFallSpeed" |
From: 1
Top Left Doorway
To: 4
Top Right Doorway
To save a bomb, it is possible to roll from the doorway onto the platform with movement similar to a Gravity jump - hold forward just before the pause to disable gravity. Entrance condition: {
"comeInWithGMode": {
"mode": "any",
"morphed": true
}
}Requires: {
"or": [
"Morph",
"h_artificialMorphSpringBall",
{
"and": [
"Gravity",
{
"or": [
"h_artificialMorphLongIBJ",
"h_artificialMorphJumpIntoIBJ"
]
}
]
},
{
"and": [
"Gravity",
"h_artificialMorphBombHorizontally",
{
"or": [
"h_additionalBomb",
"canTrickyGMode",
{
"and": [
"canTrickyDodgeEnemies",
"canGravityJump"
]
}
]
}
]
}
]
}Exit condition: {
"leaveWithGMode": {
"morphed": true
}
}Dev note: It is possible to cross with a single Power Bomb, but it requires a last pixel jump with a frame perfect forward press. A crab hit could bounce Samus onto the middle platform, but the gravity jump is better. If Samus has a blue suit and cant pause, then she also cant boost from the crab. |
From: 4
Top Right Doorway
To: 1
Top Left Doorway
To save a bomb, it is possible to roll from the doorway onto the platform with similar to a Gravity jump - hold forward just before the pause to disable gravity. Entrance condition: {
"comeInWithGMode": {
"mode": "any",
"morphed": true
}
}Requires: {
"or": [
"Morph",
"h_artificialMorphSpringBall",
{
"and": [
"Gravity",
"h_artificialMorphIBJ"
]
},
{
"and": [
"Gravity",
"h_artificialMorphBombHorizontally",
{
"or": [
"h_additionalBomb",
"canTrickyGMode",
{
"and": [
"canTrickyJump",
"canGravityJump"
]
}
]
}
]
}
]
}Exit condition: {
"leaveWithGMode": {
"morphed": true
}
}Dev note: It is possible to cross with a single Power Bomb, but it requires a last pixel jump with a frame perfect forward press. A crab hit could bounce Samus onto the middle platform, but the gravity jump is better. If Samus has a blue suit and cant pause, then she also cant boost from the crab. |
|
Requires: "Gravity"
{
"or": [
"canWallJump",
"SpaceJump",
"canLongIBJ",
{
"and": [
"canJumpIntoIBJ",
"canBombHorizontally"
]
},
"h_maxHeightSpringBallJump",
{
"and": [
"HiJump",
"canSpringBallJumpMidAir"
]
}
]
}Dev note: The h_maxHeightSpringBallJump is not a h_underwaterMaxHeightSpringBallJump, because Gravity is required. |
From: 1
Bottom Left Door
To: 5
Platform Junction Near Top Left Door
Kill the first fish with bombs then dodge or kill the second one. Entrance condition: {
"comeInWithGMode": {
"mode": "any",
"morphed": true
}
}Requires: "Gravity"
{
"or": [
"h_artificialMorphLongIBJ",
{
"and": [
"h_artificialMorphJumpIntoIBJ",
"h_artificialMorphBombHorizontally"
]
}
]
} |
From: 2
Bottom Right Door
To: 3
Middle Right Door
Only requires a runway of one tile in the adjacent room. Bomb boost through the doorway, then use spring ball to get to the bottom left ledge. To avoid hitting the Skultera, place the bomb a few pixels from the doorway. One way to setup the positioning of the bomb is to place it, unmorph, rotate, and remorph Entrance condition: {
"comeInWithBombBoost": {}
}Requires: {
"tech": "canSpringBallBombJump"
}
"h_useSpringBall"
"canCrossRoomJumpIntoWater"
{
"or": [
"Gravity",
"HiJump",
"canSpringBallJumpMidAir",
"h_underwaterCrouchJumpDownGrab"
]
} |
|
Get into position as close to the center of the room as possible while not being too close to any baby turtles. Start an IBJ without hiting any baby turtles otherwhise Mama Turtle will wake up. Entrance condition: {
"comeInWithGMode": {
"mode": "any",
"morphed": true
}
}Requires: "Gravity" "h_artificialMorphLongIBJ" "h_artificialMorphBombHorizontally" Clears obstacles: B |
From: 1
Left Door
To: 6
Top Right Junction
IBJ up a bit, then bomb over Mama Turtle and her babies to prevent her from waking. Then IBJ to the high right ledge before exiting g-mode. Entrance condition: {
"comeInWithGMode": {
"mode": "any",
"morphed": true
}
}Requires: "Gravity" "h_artificialMorphLongIBJ" "h_artificialMorphBombHorizontally" |
|
Entrance condition: {
"comeInWithGMode": {
"mode": "any",
"morphed": true
}
}Requires: {
"or": [
"Morph",
"h_artificialMorphSpringBall",
{
"and": [
"Gravity",
"h_artificialMorphIBJ"
]
},
{
"and": [
"Gravity",
"h_artificialMorphBombHorizontally",
"h_artificialMorphBombThings"
]
},
{
"and": [
{
"not": "f_MaridiaTubeBroken"
},
"canRiskPermanentLossOfAccess"
]
}
]
}Exit condition: {
"leaveWithGMode": {
"morphed": true
}
}Dev note: Bomb jumping across the broken tube uses a second bomb to climb up to the tube. FIXME: Moving before the bomb explodes gives enough momentum to only need one power bomb. |
|
Entrance condition: {
"comeInWithGMode": {
"mode": "any",
"morphed": true
}
}Requires: {
"or": [
"Morph",
"h_artificialMorphSpringBall",
{
"and": [
"Gravity",
"h_artificialMorphIBJ"
]
},
{
"and": [
"Gravity",
"h_artificialMorphBombHorizontally",
"h_additionalBomb"
]
},
{
"and": [
{
"not": "f_MaridiaTubeBroken"
},
"canRiskPermanentLossOfAccess"
]
}
]
}Exit condition: {
"leaveWithGMode": {
"morphed": true
}
}Dev note: Bomb jumping across the broken tube uses a second bomb to climb up to the tube. FIXME: Moving before the bomb explodes gives enough momentum to only need one power bomb. |
|
It is possible to place a Power Bomb on the ledge above to kill the crab before going down and into the tunnel. Entrance condition: {
"comeInWithGMode": {
"mode": "any",
"morphed": true
}
}Requires: "canCameraManip"
{
"or": [
"Morph",
"h_artificialMorphSpringBall",
{
"and": [
"canComplexGMode",
"h_artificialMorphPowerBomb"
]
},
{
"and": [
"Gravity",
"h_artificialMorphLongIBJ"
]
},
{
"and": [
"Gravity",
"h_artificialMorphBombHorizontally"
]
},
{
"and": [
{
"enemyDamage": {
"enemy": "Sciser",
"type": "contact",
"hits": 1
}
},
{
"or": [
"h_EverestMorphTunnelExpanded",
{
"enemyDamage": {
"enemy": "Sciser",
"type": "contact",
"hits": 1
}
}
]
}
]
}
]
} |
|
Entrance condition: {
"comeInWithGMode": {
"mode": "any",
"morphed": true
}
}Requires: "Gravity"
{
"or": [
{
"and": [
"h_artificialMorphSpringBall",
{
"or": [
"canGravityJump",
"HiJump"
]
}
]
},
"h_artificialMorphLongIBJ",
{
"and": [
"h_artificialMorphIBJ",
"h_artificialMorphBombHorizontally"
]
},
"h_artificialMorphSpringBallBombJump"
]
} |
|
Entrance condition: {
"comeInWithGMode": {
"mode": "any",
"morphed": true
},
"comesThroughToilet": "any"
}Requires: {
"or": [
"Morph",
"h_artificialMorphSpringBall",
{
"and": [
"Gravity",
"h_artificialMorphLongIBJ"
]
},
{
"and": [
"Gravity",
"h_artificialMorphBombHorizontally"
]
}
]
} |
|
Requires: "h_navigateUnderwater"
{
"or": [
"h_useSpringBall",
"canMidAirMorph",
{
"and": [
"Gravity",
"canBombHorizontally"
]
},
{
"and": [
"Gravity",
"canLongIBJ",
"canJumpIntoIBJ"
]
},
{
"and": [
"Gravity",
"canTrivialMidAirMorph",
{
"or": [
"SpaceJump",
"canUseFrozenEnemies"
]
}
]
},
{
"and": [
"canTrivialMidAirMorph",
"canDisableEquipment"
]
}
]
}Dev note: It's possible to get in without a mid-air morph by rolling off from above, but that requires disabling Gravity and/or crab hits and the crab not killed. That's a lot of work to avoid something simple and barely reasonable at that level anyways. |
From: 8
Higher Hill Junction
To: 11
Upper Left Ledge Junction
From a crouch jump, perform a double Spring Ball jump, using a precisely timed bomb boost to propel Samus upward just long enough to get the second mid-air Spring Ball jump. In order to cover the horizontal distance, it is necessary to do at least one of the following: 1) begin with a stationary lateral mid-air morph, 2) move slightly left before the bomb boost to get boosted horizontally, 3) perform a spring fling by pausing near the peak of the second mid-air Spring Ball jump to unequip Spring Ball. Requires: "canUnderwaterBombIntoSpringBallJump"
{
"or": [
"canStationaryLateralMidAirMorph",
"canSpringFling",
"canBombHorizontally"
]
} |
|
Use spring ball to cross the room, or use bombs to kill the Zebbos so they stop respawning. One PB can be placed at the first plant on the ground to bomb across the farm while killing the Zebbos. Entrance condition: {
"comeInWithGMode": {
"mode": "any",
"morphed": true
}
}Requires: {
"or": [
"h_artificialMorphSpringBall",
"h_artificialMorphBombs",
{
"and": [
"h_artificialMorphBombHorizontally",
"h_additionalBomb",
"h_additionalBomb"
]
}
]
} |
|
Entrance condition: {
"comeInWithGMode": {
"mode": "any",
"morphed": true
},
"comesThroughToilet": "any"
}Requires: "Gravity"
{
"or": [
"h_artificialMorphLongIBJ",
{
"and": [
"h_artificialMorphIBJ",
"h_artificialMorphBombHorizontally"
]
},
{
"and": [
"h_artificialMorphSpringBall",
"HiJump"
]
}
]
} |
|
Requires: {
"or": [
"HiJump",
"canWallJump",
"SpaceJump",
{
"and": [
"canIBJ",
"canBombHorizontally"
]
},
"canSpringBallJumpMidAir"
]
}
{
"or": [
"canMidAirMorph",
"h_useSpringBall",
"h_bombThings"
]
} |
|
Entrance condition: {
"comeInWithGMode": {
"mode": "any",
"morphed": true
}
}Requires: {
"or": [
"h_artificialMorphSpringBall",
{
"and": [
"Gravity",
"h_artificialMorphBombHorizontally"
]
},
{
"haveBlueSuit": {}
}
]
}
{
"or": [
{
"and": [
"h_artificialMorphBombThings",
"h_additionalBomb"
]
},
{
"haveBlueSuit": {}
},
{
"and": [
"Gravity",
"h_artificialMorphSpringBall",
{
"or": [
"canTrickyDodgeEnemies",
{
"enemyDamage": {
"enemy": "Puyo",
"type": "contact",
"hits": 1
}
}
]
}
]
},
{
"and": [
"h_artificialMorphSpringBall",
{
"enemyDamage": {
"enemy": "Puyo",
"type": "contact",
"hits": 2
}
}
]
},
{
"and": [
"Gravity",
"h_artificialMorphPowerBomb",
{
"enemyDamage": {
"enemy": "Puyo",
"type": "contact",
"hits": 2
}
}
]
}
]
}Exit condition: {
"leaveWithGMode": {
"morphed": true
}
} |
|
Requires: "Gravity"
{
"or": [
"canMidAirMorph",
"h_useSpringBall",
{
"and": [
"canIBJ",
"canBombHorizontally"
]
}
]
}Collects items: 5 |
|
Hug the right wall after killing the first Cacatac in order to avoid its invisible, stationary projectiles. Entrance condition: {
"comeInWithGMode": {
"mode": "any",
"morphed": true
}
}Requires: "h_navigateUnderwater"
{
"or": [
"h_artificialMorphSpringBall",
"h_artificialMorphBombHorizontally"
]
}
{
"or": [
{
"and": [
"h_artificialMorphBombs",
{
"or": [
"Gravity",
"h_artificialMorphSpringBall"
]
}
]
},
"h_artificialMorphPowerBomb",
{
"enemyDamage": {
"enemy": "Cacatac",
"type": "contact",
"hits": 1
}
}
]
}
{
"or": [
"h_artificialMorphSpringBall",
{
"and": [
"Gravity",
"h_artificialMorphBombThings"
]
}
]
} |
From: 2
Right Door
To: 4
Top Right Ledge Junction
Requires a runway of at least 1 tiles in the adjacent room, although it is easier with more. Start the IBJ as far left as possible. The furthest right is just right of the waterfall. Turning around, carefully, is one way to lose forward momentum and begin the IBJ. At the top of the IBJ bomb to the left and unmorph to reset fall speed. Entrance condition: {
"comeInJumping": {
"speedBooster": "no",
"minTiles": 1
}
}Requires: {
"notable": "Cross Room Jump with IBJ"
}
"canJumpIntoIBJ"
"canBombHorizontally"
"canResetFallSpeed"
"canCrossRoomJumpIntoWater"
"canTrickyJump" |
From: 2
Right Door
To: 4
Top Right Ledge Junction
Use the bomb boost as Samus is going through the doorway, then spring ball after breaking the water, then IBJ or use an unmorph bomb boost. Entrance condition: {
"comeInWithBombBoost": {}
}Requires: "canSpringBallBombJump"
"canCrossRoomJumpIntoWater"
"canInsaneJump"
{
"or": [
"canJumpIntoIBJ",
"canUnmorphBombBoost"
]
}Dev note: This strat requires a minimum of 2 bombs or Power Bombs. This strat requires fairly high precision in order to jump out of the water, particularly if using a Power Bomb and down grab. It is also not particularly useful, as a normal Spring Ball jump is easier and can be done with a single tile runway. It seems like the only real uses of this strat would then be to prevent a pause (maintain a blue suit without speedbooster), or a cross room artificial morph with no doorcap in the previous room (cross room + g-mode strats haven't been added to logic yet). |
From: 2
Right Door
To: 4
Top Right Ledge Junction
Spring Ball jump just as Samus exits the water to reach the distant ledge. To get enough horizontal distance, either use a Stationary Lateral Mid-Air Morph with a crouch jump for extra height, or spin jump out before morphing. Or Spring Ball jump part of the way over and land on a Bomb explosion to cross the rest of the distance. Requires: "canSuitlessMaridia"
"HiJump"
"h_underwaterMaxHeightSpringBallJump"
{
"or": [
"canStationaryLateralMidAirMorph",
{
"and": [
{
"tech": "canJumpIntoIBJ"
},
"canBombHorizontally"
]
}
]
}Dev note: The canCrouchJump is not required but makes the strat easier The canStationaryLateralMidAirMorph is not strictly required but better describes the difficulty. |
From: 2
Right Door
To: 4
Top Right Ledge Junction
Entrance condition: {
"comeInWithGrappleSwing": {
"blocks": [
{
"position": [
7,
3
],
"environment": "water",
"note": "Pants Room"
}
]
}
}Requires: "canTrickyGrappleJump"
{
"or": [
"SpaceJump",
{
"and": [
"canJumpIntoIBJ",
"canBombHorizontally"
]
}
]
} |
|
Requires: "Gravity"
{
"or": [
"canLongIBJ",
{
"and": [
"HiJump",
"canJumpIntoIBJ"
]
}
]
}
{
"or": [
"canBombHorizontally",
"h_IBJFromSpikes"
]
} |
|
Only requires a runway of approximately 0.5 tiles in the adjacent room. Bomb boost through the doorway and hold right. Entrance condition: {
"comeInWithBombBoost": {}
}Requires: "canCrossRoomJumpIntoWater" |
|
Only requires a runway of approximately 0.5 tiles in the adjacent room. Bomb boost through the doorway and hold left. Entrance condition: {
"comeInWithBombBoost": {}
}Requires: "canCrossRoomJumpIntoWater" |
From: 1
Left Door
To: 2
Right Door
Use one bomb to get to the off-screen region. After going a full screen to the right, when Samus is partially visible in the left wall, bomb to the middle platform on the right. Bomb again to the right, note that these small platforms are one tile left of the ones that are on camera. Exit G-Mode and get to the right door. Entrance condition: {
"comeInWithGMode": {
"mode": "any",
"morphed": true
}
}Requires: "canOffScreenMovement" "h_artificialMorphBombHorizontally" "h_artificialMorphBombThings" "h_additionalBomb" |
From: 2
Right Door
To: 3
Junction Left of Morph Tunnel
Entrance condition: {
"comeInWithGMode": {
"mode": "any",
"morphed": true
}
}Requires: {
"or": [
"h_artificialMorphSpringBall",
{
"and": [
"h_artificialMorphPowerBomb",
"h_additionalBomb",
{
"or": [
"h_artificialMorphBombHorizontally",
{
"and": [
"h_additionalBomb",
"Gravity"
]
}
]
}
]
},
{
"and": [
"h_artificialMorphBombs",
{
"or": [
"h_artificialMorphBombHorizontally",
"Gravity"
]
},
{
"or": [
"canInsaneJump",
{
"enemyDamage": {
"enemy": "Menu",
"type": "contact",
"hits": 1
}
}
]
}
]
}
]
} |
From: 1
Top Left Door
To: 1
Top Left Door
On entry, the pirate will place a stationary, invisible laser. Cross the chasm while trying to avoid allowing it to place more lasers, with a bomb boost or spring fling. Move to the top of the platform only while the pirate is turning its head. Just before it is about to rotate its head again, Crystal Flash in a spot that is free of lasers in order to be able to gain some Reserve Energy before getting hit. Entrance condition: {
"comeInWithGMode": {
"mode": "direct",
"morphed": true
}
}Requires: "h_artificialMorphRModeCrystalFlashInterrupt"
"canComplexGMode"
{
"ammo": {
"type": "Missile",
"count": 10
}
}
{
"or": [
"h_artificialMorphSpringFling",
{
"and": [
"h_artificialMorphBombHorizontally",
"h_additionalBomb"
]
}
]
}Clears obstacles: door_1 |
|
Entrance condition: {
"comeInWithGMode": {
"mode": "any",
"morphed": true
},
"comesThroughToilet": "any"
}Requires: "h_artificialMorphLongIBJ"
{
"or": [
"h_artificialMorphSpringBallBombJump",
"h_artificialMorphBombHorizontally",
"Gravity"
]
} |
|
Requires: {
"or": [
"HiJump",
"canWallJump",
"SpaceJump",
"canSpringBallJumpMidAir",
{
"and": [
"canIBJ",
"canBombHorizontally"
]
},
{
"and": [
"canLongIBJ",
"Gravity"
]
},
{
"and": [
"canSpringBallBombJump",
"h_additionalBomb",
"h_additionalBomb"
]
}
]
} |
|
Entrance condition: {
"comeInWithGMode": {
"mode": "any",
"morphed": true
},
"comesThroughToilet": "any"
}Requires: {
"or": [
{
"and": [
"h_artificialMorphIBJ",
"h_artificialMorphBombHorizontally"
]
},
{
"and": [
"h_artificialMorphLongIBJ",
"Gravity"
]
},
{
"and": [
"h_artificialMorphSpringBallBombJump",
"h_additionalBomb",
"h_additionalBomb",
"h_additionalBomb"
]
},
{
"and": [
"h_artificialMorphSpringBallBombJump",
{
"notable": "Left Shaft Precise Crouch Jump Down Grab"
}
]
}
]
} |
|
Requires: "Gravity"
{
"or": [
"canWallJump",
"HiJump",
"canSpringBallJumpMidAir",
"SpaceJump",
"canLongIBJ",
{
"and": [
"canIBJ",
"canBombHorizontally"
]
}
]
} |
|
Entrance condition: {
"comeInWithGMode": {
"mode": "any",
"morphed": true
}
}Requires: {
"or": [
{
"and": [
"Gravity",
{
"or": [
"h_artificialMorphLongIBJ",
{
"and": [
"h_artificialMorphIBJ",
"h_artificialMorphBombHorizontally"
]
}
]
}
]
},
{
"and": [
"h_artificialMorphDoubleSpringBallJump",
"canDownGrab"
]
},
{
"and": [
"canGravityJump",
"h_artificialMorphSpringBallBombJump"
]
}
]
} |
From: 2
Bottom Right Door
To: 1
Left Vertical Door
Start the dash as close to the door transition as possible to help avoid getting hit by the first Owtch. Store the shine charge while high up on the left slope. Spark up while on the right side of the platform. To avoid the Owtch on the platform, it may help to jump on the left side of the platform then jump again and spark midair above the right side. Entrance condition: {
"comeInRunning": {
"speedBooster": "yes",
"minTiles": 0.4375
}
}Requires: "canWaterShineCharge"
"canShinechargeMovementComplex"
{
"or": [
{
"shinespark": {
"frames": 90,
"excessFrames": 50
}
},
{
"and": [
{
"shinespark": {
"frames": 90,
"excessFrames": 59
}
},
{
"or": [
"canWallJump",
"HiJump",
"canSpringBallJumpMidAir",
"SpaceJump",
{
"and": [
"canIBJ",
"canBombHorizontally"
]
},
{
"and": [
"h_crouchJumpDownGrab",
{
"notable": "Left Shaft Precise Crouch Jump Down Grab"
}
]
}
]
}
]
}
]
} |
|
Entrance condition: {
"comeInWithGMode": {
"mode": "any",
"morphed": true
}
}Requires: {
"or": [
"Gravity",
{
"and": [
"canSuitlessMaridia",
"HiJump",
"h_artificialMorphSpringBall"
]
}
]
}
{
"or": [
"h_artificialMorphLongIBJ",
{
"and": [
"Gravity",
"h_artificialMorphIBJ",
"h_artificialMorphBombHorizontally"
]
},
{
"and": [
"canGravityJump",
"h_artificialMorphSpringBallBombJump",
{
"or": [
"h_additionalBomb",
{
"tech": "canDoubleSpringBallJumpMidAir"
}
]
},
{
"or": [
{
"and": [
"h_additionalBomb",
"h_additionalBomb"
]
},
{
"notable": "Left Shaft Precise Crouch Jump Down Grab"
}
]
}
]
}
]
} |
|
Entrance condition: {
"comeInWithGMode": {
"mode": "any",
"morphed": true
}
}Requires: {
"or": [
"h_artificialMorphLongIBJ",
{
"and": [
"Gravity",
"h_artificialMorphIBJ",
"h_artificialMorphBombHorizontally"
]
},
{
"and": [
"canGravityJump",
"h_artificialMorphSpringBallBombJump",
{
"or": [
"h_additionalBomb",
{
"tech": "canDoubleSpringBallJumpMidAir"
}
]
},
{
"or": [
{
"and": [
"h_additionalBomb",
"h_additionalBomb"
]
},
{
"notable": "Left Shaft Precise Crouch Jump Down Grab"
}
]
}
]
}
]
} |
|
IBJ from below or bomb horizontally, then use Spring Ball with HiJump to jump around the overhang while avoiding the upper Choot. Entrance condition: {
"comeInWithGMode": {
"mode": "any",
"morphed": true
}
}Requires: {
"or": [
"h_artificialMorphLongIBJ",
{
"and": [
"HiJump",
"h_artificialMorphSpringBallBombJump",
{
"tech": "canBombHorizontally"
},
"canTrickyJump"
]
}
]
} |
From: 4
Top Right Door
To: 5
Top Junction
Bomb horizontally, then use spring ball to jump around the overhang. Either quickly kill the Choot or land on the left pixel to avoid a hit. Using a Power Bomb will kill the Choot just before it swings left another time and will make the landing area a bit larger. Requires: "HiJump"
"canSpringBallBombJump"
{
"tech": "canBombHorizontally"
}
"canTrickyJump" |
From: 1
Left Door
To: 4
Junction Below Sand Entrance
Bomb boost through the doorway as close to the door transition as possible in order to get as far as possible. Entrance condition: {
"comeInWithBombBoost": {}
}Requires: "canCrossRoomJumpIntoWater" "canTrickyJump" Dev note: It is assumed that getting to the second pillar is free relative to getting to the right door. |
From: 2
Right Door
To: 4
Junction Below Sand Entrance
Bomb boost through the doorway. With a good enough boost, it's possible to go over the first Evir, landing on the second pillar. Entrance condition: {
"comeInWithBombBoost": {}
}Requires: "canCrossRoomJumpIntoWater" |
|
Bomb boost through the doorway. Get the bomb boost while as close to the door transition as possible in order to get to the first pillar. Entrance condition: {
"comeInWithBombBoost": {}
}Requires: "canCrossRoomJumpIntoWater" |
|
Requires: {
"or": [
"canDash",
"canWallJump",
"SpaceJump",
"canSpringFling",
{
"and": [
"canMidAirMorph",
"h_useSpringBall",
"canResetFallSpeed",
{
"or": [
{
"disableEquipment": "HiJump"
},
"canInsaneJump"
]
}
]
},
"canBombHorizontally",
"canTrickyUseFrozenEnemies",
{
"acidFrames": 20
}
]
} |
|
Requires: {
"or": [
"canDash",
{
"and": [
"canCarefulJump",
{
"disableEquipment": "HiJump"
}
]
},
{
"and": [
{
"or": [
"canIBJ",
{
"tech": "canJumpIntoIBJ"
}
]
},
"canBombHorizontally"
]
},
"canSpringFling",
{
"and": [
"canMidAirMorph",
"h_useSpringBall",
"canInsaneJump",
"canResetFallSpeed"
]
},
"SpaceJump",
{
"and": [
"HiJump",
{
"acidFrames": 20
}
]
}
]
} |
