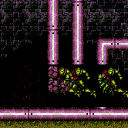
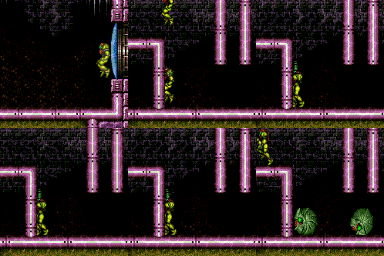
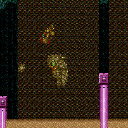
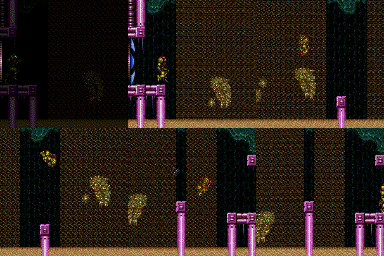
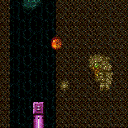
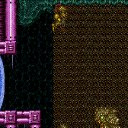
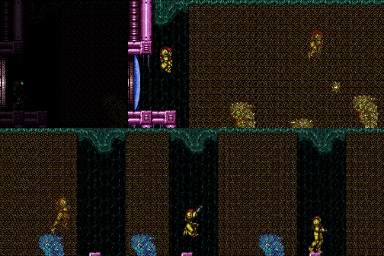
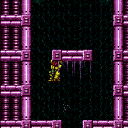
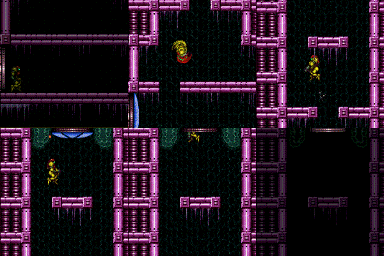
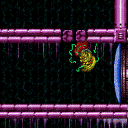
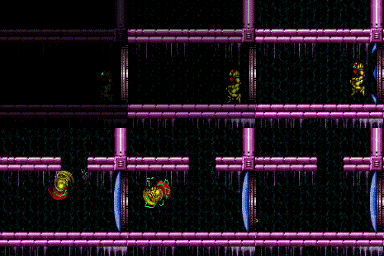
canCrossRoomJumpIntoWater (Hard)
Using the momentum from jumping through a doorway from normal to water physics.
Dependencies: canSuitlessMaridia
Strats ()
|
From: 2
Bottom Left Door
To: 1
Top Left Doorway
Notable: true Only requires a runway of 6 tiles (with no open end) in the adjacent room. Perform an air ball while against the ceiling to make it up and through the morph tunnel. Use a Cross Room Jump into Water followed by a delayed Momentum Conserving Turnaround to reach the Morph tunnel above. Crossing to the right from the left door requires a more precise turnaround or morph timing which slides along the ceiling. Samus must also stay near a side of the center hole to reach the Morph tunnels. Entrance condition: {
"comeInJumping": {
"speedBooster": false,
"minTiles": 5.4375
}
}
Requires: "canCrossRoomJumpIntoWater" "canLateralMidAirMorph" "canMomentumConservingTurnaround" |
|
From: 2
Bottom Left Door
To: 1
Top Left Doorway
Notable: true Requires a runway of at least 4 tiles (with no open end) in the adjacent room. Use a Cross Room Jump into Water followed by a delayed Momentum Conserving Turnaround to reach the Morph tunnel above. Climbing the Left side of the center hole will run into an unavoidable Scisor that can be passed through by Morphing. Crossing to the right from the left door requires slightly more runway and takes a more precise turnaround. Samus must also stay near a side of the center hole to reach the Morph tunnels. Entrance condition: {
"comeInJumping": {
"speedBooster": false,
"minTiles": 3.4375
}
}
Requires: "canMidAirMorph"
"canCrossRoomJumpIntoWater"
"canMomentumConservingTurnaround"
"canKago"
{
"enemyDamage": {
"enemy": "Sciser",
"type": "contact",
"hits": 1
}
}
|
|
Notable: true Requires a runway of at least 4 tiles (with no open end) in the adjacent room. Use a Cross Room Jump into Water followed by a delayed Momentum Conserving Turnaround to reach the Morph tunnel above. Climbing the Left side of the center hole will run into an unavoidable Scisor. Samus must also stay near a side of the center hole to reach the Morph tunnels. Entrance condition: {
"comeInJumping": {
"speedBooster": false,
"minTiles": 3.4375
}
}
Requires: "canMidAirMorph" "canCrossRoomJumpIntoWater" "canMomentumConservingTurnaround" |
|
From: 1
Bottom Left Door
To: 4
Top Left Door
Requires a runway of at least 4 tiles in the adjacent room. Entrance condition: {
"comeInJumping": {
"speedBooster": true,
"minTiles": 4
}
}
Requires: "HiJump" "canCrossRoomJumpIntoWater" "canMomentumConservingTurnaround" |
|
From: 1
Bottom Left Door
To: 4
Top Left Door
Requires a runway of at least 18 tiles in the adjacent room. Entrance condition: {
"comeInJumping": {
"speedBooster": true,
"minTiles": 18
}
}
Requires: "canCrossRoomJumpIntoWater" "canTrickyJump" |
|
From: 1
Bottom Left Door
To: 4
Top Left Door
Requires a runway of at least 22 tiles in the adjacent room. Entrance condition: {
"comeInJumping": {
"speedBooster": true,
"minTiles": 22
}
}
Requires: "canCrossRoomJumpIntoWater" |
|
From: 1
Bottom Left Door
To: 5
Platform Junction Near Top Left Door
Requires 3 tiles of run speed (with no open end) to make it past the overhang above the door. Cross Room jump and aim towards the left side where the fish is. Shooting at it from below can deal damage sooner to get a faster freeze. Hug the frozen fish to gain the extra height needed to climb on top. Entrance condition: {
"comeInJumping": {
"speedBooster": true,
"minTiles": 2.4375
}
}
Requires: "HiJump"
"canCrossRoomJumpIntoWater"
"canMomentumConservingTurnaround"
"canTrickyUseFrozenEnemies"
"canInsaneJump"
"canDownGrab"
{
"or": [
"Wave",
"Spazer",
"Plasma"
]
}
|
|
From: 1
Bottom Left Door
To: 5
Platform Junction Near Top Left Door
Requires a runway of at least 4 tiles in the adjacent room. Entrance condition: {
"comeInJumping": {
"speedBooster": "any",
"minTiles": 4
}
}
Requires: "HiJump" "canCrossRoomJumpIntoWater" "canMomentumConservingTurnaround" |
|
From: 1
Bottom Left Door
To: 5
Platform Junction Near Top Left Door
Requires a runway of at least 3 tiles in the adjacent room. Entrance condition: {
"comeInJumping": {
"speedBooster": true,
"minTiles": 3
}
}
Requires: "HiJump" "canCrossRoomJumpIntoWater" "canMomentumConservingTurnaround" "canTrickyJump" |
|
From: 1
Bottom Left Door
To: 5
Platform Junction Near Top Left Door
Requires 3 tiles of run speed (with no open end) to make it past the overhang above the door. Entrance condition: {
"comeInJumping": {
"speedBooster": true,
"minTiles": 2.4375
}
}
Requires: "HiJump" "canCrossRoomJumpIntoWater" "canMomentumConservingTurnaround" "canTrickySpringBallJump" "canInsaneJump" |
|
From: 1
Bottom Left Door
To: 5
Platform Junction Near Top Left Door
Requires a runway of at least 12 tiles (with no open end) in the adjacent room. Entrance condition: {
"comeInJumping": {
"speedBooster": true,
"minTiles": 11.4375
}
}
Requires: "SpeedBooster" "canCrossRoomJumpIntoWater" |
|
From: 1
Bottom Left Door
To: 5
Platform Junction Near Top Left Door
Requires a runway of at least 10 tiles in the adjacent room. Entrance condition: {
"comeInJumping": {
"speedBooster": true,
"minTiles": 10
}
}
Requires: "SpeedBooster" "canCrossRoomJumpIntoWater" "canSpringBallJumpMidAir" "canTrickyJump" |
|
From: 1
Bottom Left Door
To: 5
Platform Junction Near Top Left Door
Requires running a very precise distance of 7 tiles in the adjacent room, to hit a peak of the speed vs height graph. Entrance condition: {
"comeInJumping": {
"speedBooster": true,
"minTiles": 7
}
}
Requires: "canTrickyDashJump" "canCrossRoomJumpIntoWater" "canMomentumConservingTurnaround" |
|
Only requires a runway of 7 tiles in the adjacent room, but an extra tile makes for an easier jump. Entrance condition: {
"comeInJumping": {
"speedBooster": true,
"minTiles": 7.4375
}
}
Requires: {
"or": [
"f_MaridiaTubeBroken",
{
"obstaclesCleared": [
"f_MaridiaTubeBroken"
]
}
]
}
"canCrossRoomJumpIntoWater"
|
|
Only requires a runway of 1 tile in the adjacent room. This strat is slightly easier on the right side at low run speeds, but the same otherwise. Entrance condition: {
"comeInJumping": {
"speedBooster": false,
"minTiles": 0.4375
}
}
Requires: {
"or": [
"f_MaridiaTubeBroken",
{
"obstaclesCleared": [
"f_MaridiaTubeBroken"
]
}
]
}
"canCrossRoomJumpIntoWater"
"canTrickyJump"
|
|
Assumes a runway of at least 21 tiles in the adjacent room. End Samus' momentum where no platforms are over head. Shoot the door while rising to pass through. Entrance condition: {
"comeInJumping": {
"speedBooster": true,
"minTiles": 21
}
}
Requires: {
"or": [
"f_MaridiaTubeBroken",
{
"obstaclesCleared": [
"f_MaridiaTubeBroken"
]
}
]
}
"canCrossRoomJumpIntoWater"
"canMidairWiggle"
"canTrickyJump"
Unlocks doors: {"types":["super"],"requires":[]}
{"types":["missiles","powerbomb"],"requires":["never"]}
|
|
From: 2
Bottom Right Door
To: 4
Top Door
Notable: true Requires a runway of at least 18 tiles in the adjacent room. Ride up the right wall just above the doorway, then turnaround before and after hitting the platform following the doorway slope. Continue up the rest of the way to reach the door. Entrance condition: {
"comeInJumping": {
"speedBooster": true,
"minTiles": 18
}
}
Requires: {
"or": [
"f_MaridiaTubeBroken",
{
"obstaclesCleared": [
"f_MaridiaTubeBroken"
]
}
]
}
"canCrossRoomJumpIntoWater"
"canMomentumConservingTurnaround"
"canTrickyDashJump"
"canInsaneJump"
Unlocks doors: {"types":["super"],"requires":[]}
{"types":["missiles","powerbomb"],"requires":["never"]}
|
|
Only requires a runway of 7 tiles in the adjacent room, but an extra tile makes for an easier jump. Entrance condition: {
"comeInJumping": {
"speedBooster": true,
"minTiles": 7.4375
}
}
Requires: {
"or": [
"f_MaridiaTubeBroken",
{
"obstaclesCleared": [
"f_MaridiaTubeBroken"
]
}
]
}
"canCrossRoomJumpIntoWater"
|
|
Only requires a runway of one tile in the adjacent room. This strat is slightly easier on the right side at low run speeds, but the same otherwise. Entrance condition: {
"comeInJumping": {
"speedBooster": false,
"minTiles": 0.4375
}
}
Requires: {
"or": [
"f_MaridiaTubeBroken",
{
"obstaclesCleared": [
"f_MaridiaTubeBroken"
]
}
]
}
"canCrossRoomJumpIntoWater"
"canTrickyJump"
|
|
From: 1
Bottom Door
To: 3
Middle Right Door
Crouch jump up through the left side of the door transition. Angle up and shoot the fish twice on the way up, then aim down and shoot three more times as needed until it is frozen. Land on the fish, wait until it is flashing, then jump and freeze it again further to left as needed, until you can spin jump to the left to reach the platforms. Entrance condition: {
"comeInWithPlatformBelow": {
"maxHeight": 7,
"maxLeftPosition": 2,
"minRightPosition": -2
},
"comesThroughToilet": "any"
}
Requires: "canCrossRoomJumpIntoWater"
"canCrouchJump"
"canTrickyUseFrozenEnemies"
{
"or": [
"Wave",
"Spazer",
"Plasma"
]
}
|
|
Crouch jump up through the door with HiJump equipped, aligning with the left side of the door frame. Stay to the right of the fish as you go up. Entrance condition: {
"comeInWithPlatformBelow": {
"maxHeight": 8.5,
"maxLeftPosition": -1,
"minRightPosition": -1
},
"comesThroughToilet": "any"
}
Requires: "canCrossRoomJumpIntoWater" "canCrouchJump" "HiJump" |
|
Run and jump up through the door using HiJump and SpeedBooster in the room below using at least 1 tile of runway. Stay to the right of the fish as you go up. Entrance condition: {
"comeInWithPlatformBelow": {
"maxHeight": 9,
"maxLeftPosition": 2,
"minRightPosition": -2
},
"comesThroughToilet": "any"
}
Requires: "canCrossRoomJumpIntoWater" "SpeedBooster" "HiJump" |
|
From: 1
Bottom Door
To: 3
Middle Right Door
Jump straight up through the door with HiJump equipped, aligning with the left side of the door frame. Stay to the right of the fish as you go up. Entrance condition: {
"comeInWithPlatformBelow": {
"maxHeight": 8,
"maxLeftPosition": -1,
"minRightPosition": -1.5
},
"comesThroughToilet": "any"
}
Requires: "canCrossRoomJumpIntoWater" "HiJump" |
|
From: 1
Bottom Door
To: 3
Middle Right Door
Jump straight up through the door with HiJump equipped, passing through the Toilet. Stay to the right of the fish as you go up. Entrance condition: {
"comeInWithPlatformBelow": {
"maxHeight": 8.5,
"maxLeftPosition": -1,
"minRightPosition": -1
},
"comesThroughToilet": "yes"
}
Requires: "canCrossRoomJumpIntoWater" "HiJump" |
|
From: 1
Bottom Door
To: 3
Middle Right Door
Run and spin jump to the left through the transition with as much horiziontal speed as possible, without bonking the door frame. Hold left through the transition to avoid the fish and land on the platform to the left. With limited runway, this may require a very precise jump. Then reach the platform above either using a crouch-jump down-grab or by freezing the fish. Entrance condition: {
"comeInWithPlatformBelow": {
"maxHeight": 6,
"maxLeftPosition": -0.5,
"minRightPosition": 2.5
},
"comesThroughToilet": "yes"
}
Requires: "canCrossRoomJumpIntoWater"
"canInsaneJump"
{
"or": [
"h_canCrouchJumpDownGrab",
"canUseFrozenEnemies"
]
}
|
|
Spin jump against the left side of the door frame, then use Space Jump to jump straight up through the door. Stay to the right of the fish as you go up. Entrance condition: {
"comeInWithSpaceJumpBelow": {},
"comesThroughToilet": "any"
}
Requires: "canCrossRoomJumpIntoWater" |
|
From: 1
Bottom Door
To: 3
Middle Right Door
Run from left with Speedbooster in the room below and jump up through the door. Perform a snap turnaround to the left to cancel horizontal momentum before passing through the transition. This is done by turning around and then canceling spin, e.g. by shooting. Stay to the right of the fish as you go up. Entrance condition: {
"comeInWithPlatformBelow": {
"minHeight": 9,
"maxHeight": 10,
"maxLeftPosition": -38.5,
"minRightPosition": -7
},
"comesThroughToilet": "any"
}
Requires: "canCrossRoomJumpIntoWater" "SpeedBooster" "canMidairWiggle" |
|
From: 1
Bottom Door
To: 3
Middle Right Door
Run from right with Speedbooster in the room below, and jump against the left side of the door frame to cancel horizontal momentum before passing through the transition. Stay to the right of the fish as you go up. Entrance condition: {
"comeInWithPlatformBelow": {
"minHeight": 9,
"maxHeight": 10,
"maxLeftPosition": 7,
"minRightPosition": 39
},
"comesThroughToilet": "any"
}
Requires: "canCrossRoomJumpIntoWater" "SpeedBooster" |
|
Spin jump to the left through the transition. Bonking the left side of the door frame works but is not required. Hold left through the transition to avoid the fish and land on the platform to the left. Then reach the platform above either using a crouch-jump down-grab or by freezing the fish. Entrance condition: {
"comeInWithPlatformBelow": {
"maxHeight": 6,
"maxLeftPosition": 2,
"minRightPosition": -2
},
"comesThroughToilet": "no"
}
Requires: "canCrossRoomJumpIntoWater"
{
"or": [
"h_canCrouchJumpDownGrab",
"canUseFrozenEnemies"
]
}
|
|
Standing on the platform in the room below, crouch jump and perform a spring ball jump mid-air just before reaching the transition. Entrance condition: {
"comeInWithPlatformBelow": {
"maxHeight": 10,
"maxLeftPosition": -1,
"minRightPosition": -1
},
"comesThroughToilet": "any"
}
Requires: "canCrossRoomJumpIntoWater" "canCrouchJump" "canTrickySpringBallJump" |
|
Run from right with Speedbooster in the room below, and jump during a spike in the speed-to-jumpHeight chart. Jump against the left side of the door frame to cancel horizontal momentum before passing through the transition. Stay to the right of the fish as you go up. Entrance condition: {
"comeInWithPlatformBelow": {
"minHeight": 9,
"maxHeight": 9,
"maxLeftPosition": 7,
"minRightPosition": 21
},
"comesThroughToilet": "any"
}
Requires: "canCrossRoomJumpIntoWater" "canTrickyDashJump" |
|
From: 1
Bottom Door
To: 3
Middle Right Door
Run and spin jump to the left through the transition with as much horiziontal speed as possible, without bonking the door frame. Hold left through the transition to avoid the fish and land on the platform to the left. Then reach the platform above either using a crouch-jump down-grab or by freezing the fish. Entrance condition: {
"comeInWithPlatformBelow": {
"maxHeight": 6,
"maxLeftPosition": -0.5,
"minRightPosition": 4.5
},
"comesThroughToilet": "yes"
}
Requires: "canCrossRoomJumpIntoWater"
"canTrickyJump"
{
"or": [
"h_canCrouchJumpDownGrab",
"canUseFrozenEnemies"
]
}
|
|
Wall jump relatively low off the right side of the door frame of the room below. Stay to the right of the fish as you go up. Entrance condition: {
"comeInWithWallJumpBelow": {
"minHeight": 2
},
"comesThroughToilet": "any"
}
Requires: "canCrossRoomJumpIntoWater" "canMidairWiggle" |
|
From: 2
Bottom Right Door
To: 3
Middle Right Door
Only requires a runway of one tile in the adjacent room. Bomb boost through the doorway, then use spring ball to get to the bottom left ledge. To avoid hitting the Skultera, place the bomb a few pixels from the doorway. One way to setup the positioning of the bomb is to place it, unmorph, rotate, and remorph Entrance condition: {
"comeInWithBombBoost": {}
}
Requires: {
"tech": "canSpringBallBombJump"
}
"h_canUseSpringBall"
"canCrossRoomJumpIntoWater"
{
"or": [
"Gravity",
"HiJump",
"canSpringBallJumpMidAir",
"h_canCrouchJumpDownGrab"
]
}
|
|
From: 2
Bottom Right Door
To: 3
Middle Right Door
Run with enough speed to jump (after the transition) to reach the far left ledge. Either kill or Kago through the Fish enemy. At slightly higher run speeds, Samus can jump from the bottom of the slope and avoid the fish. Entrance condition: {
"comeInRunning": {
"minTiles": 7,
"speedBooster": true
}
}
Requires: "HiJump"
"canCrossRoomJumpIntoWater"
"canTrickyJump"
"canDodgeWhileShooting"
{
"or": [
{
"ammo": {
"type": "Super",
"count": 1
}
},
{
"and": [
"Charge",
"Plasma"
]
},
{
"and": [
"Plasma",
"canHitbox"
]
},
{
"and": [
"canKago",
"canLateralMidAirMorph",
{
"enemyDamage": {
"enemy": "Skultera",
"type": "contact",
"hits": 1
}
}
]
}
]
}
|
|
From: 2
Bottom Right Door
To: 3
Middle Right Door
Run with enough speed to jump (after the transition) to reach the far left ledge. Entrance condition: {
"comeInRunning": {
"minTiles": 12.4375,
"speedBooster": true
}
}
Requires: "canCrossRoomJumpIntoWater" "canCarefulJump" |
|
Run with 7 tiles (no openend) of speed to jump (after the transition) to reach the far left ledge. Either kill or Kago through the Fish enemy. Entrance condition: {
"comeInRunning": {
"minTiles": 6.4375,
"speedBooster": true
}
}
Requires: "canCrossRoomJumpIntoWater"
"canTrickyDashJump"
"canDodgeWhileShooting"
{
"or": [
{
"ammo": {
"type": "Super",
"count": 1
}
},
{
"and": [
"Charge",
"Plasma"
]
},
{
"and": [
"Plasma",
"canHitbox"
]
},
{
"and": [
"canKago",
"canLateralMidAirMorph",
{
"enemyDamage": {
"enemy": "Skultera",
"type": "contact",
"hits": 1
}
}
]
}
]
}
|
|
From: 2
Bottom Right Door
To: 3
Middle Right Door
Bring 4 full tiles of run speed from the adjacent room in order to jump (after the transition) up to the far left ledge. Either kill the Fish enemy, or jump from the bottom of the slope to pass underneath it. Entrance condition: {
"comeInRunning": {
"minTiles": 4,
"speedBooster": true
}
}
Requires: "HiJump" "canCrossRoomJumpIntoWater" "canTrickyDashJump" |
|
From: 2
Bottom Left Door
To: 5
Top Door
Notable: true Run and jump up through the door using SpeedBooster in the room below. Bonk the door frame as you pass through the transition, to cancel your horizontal momentum. You need a vertical speed of exactly 7.8800 when passing through the transition, which requires the jump to be frame perfect. After the transition, as you reach the wall, begin holding right. Begin holding angle up at any time before approaching the door (and you can continue holding it until the end of the strat). As you approach the door (an 8-frame window), while holding angle up, release right for exactly one frame. This will put Samus into a pose aiming diagonally up and to the right. Immediately fire a shot to open the door (within the same 8-frame window); if successful, you will just barely clear the grapple block and pass through the door. Several things can cause you to bonk the grapple block: 1) entering the room with too much vertical speed, 2) not pressing against the wall as you come up, 3) releasing right for more than one frame, 4) releasing right too early. As an alternative to releasing right for one frame, you can instead press shot for one frame: if successful, Samus' pose will change to aiming diagonally without a shot being fired; if shot is pressed for more than one frame, then a shot will be fired horizontally, and the cooldown will prevent you from firing diagonally in time. Entrance condition: {
"comeInWithPlatformBelow": {
"minHeight": 9,
"maxHeight": 9,
"maxLeftPosition": -38.5,
"minRightPosition": -2
},
"comesThroughToilet": "no"
}
Requires: "canCrossRoomJumpIntoWater" "SpeedBooster" "HiJump" "canInsaneJump" |
|
From: 2
Bottom Left Door
To: 8
Higher Hill Junction
Standing on the platform in the room below, crouch jump and perform a spring ball jump mid-air just before reaching the transition. Entrance condition: {
"comeInWithPlatformBelow": {
"minHeight": 10,
"maxHeight": 10,
"maxLeftPosition": 2,
"minRightPosition": -2
},
"comesThroughToilet": "any"
}
Requires: "canCrossRoomJumpIntoWater" "canCrouchJump" "canSpringBallJumpMidAir" |
|
From: 2
Bottom Left Door
To: 8
Higher Hill Junction
Space Jump up through the door of the room below with HiJump equipped. Entrance condition: {
"comeInWithSpaceJumpBelow": {},
"comesThroughToilet": "any"
}
Requires: "canCrossRoomJumpIntoWater" "HiJump" |
|
From: 2
Bottom Left Door
To: 8
Higher Hill Junction
Run and jump up through the door using HiJump and SpeedBooster in the room below using at least 1 tile of runway. Entrance condition: {
"comeInWithPlatformBelow": {
"minHeight": 8,
"maxHeight": 9,
"maxLeftPosition": 2,
"minRightPosition": -2
},
"comesThroughToilet": "any"
}
Requires: "canCrossRoomJumpIntoWater" "HiJump" "SpeedBooster" |
|
From: 2
Bottom Left Door
To: 8
Higher Hill Junction
Standing on a platform in the room below, jump straight up through the door with HiJump equipped. Entrance condition: {
"comeInWithPlatformBelow": {
"minHeight": 6,
"maxHeight": 7,
"maxLeftPosition": 2,
"minRightPosition": -2
},
"comesThroughToilet": "any"
}
Requires: "canCrossRoomJumpIntoWater" "HiJump" |
|
Run and jump up through the door using SpeedBooster in the room below. Bonk the door frame or turn back left soon enough to cancel rightward momentum before passing through the transition. Entrance condition: {
"comeInWithPlatformBelow": {
"maxHeight": 10,
"maxLeftPosition": -38.5,
"minRightPosition": -7
},
"comesThroughToilet": "any"
}
Requires: "canCrossRoomJumpIntoWater" "SpeedBooster" |
|
From: 2
Bottom Left Door
To: 8
Higher Hill Junction
Standing on the platform in the room below, perform a spring ball jump mid-air just before reaching the transition. Entrance condition: {
"comeInWithPlatformBelow": {
"maxHeight": 9,
"maxLeftPosition": 2,
"minRightPosition": -2
},
"comesThroughToilet": "any"
}
Requires: "canCrossRoomJumpIntoWater" "canSpringBallJumpMidAir" |
|
Wall jump relatively high off either side of the door frame in the room below. Entrance condition: {
"comeInWithWallJumpBelow": {
"minHeight": 2
},
"comesThroughToilet": "any"
}
Requires: {
"or": [
"canTrickyJump",
"canTrickySpringBallJump",
"HiJump"
]
}
"canCrossRoomJumpIntoWater"
|
|
From: 2
Bottom Left Door
To: 9
Spawn At Junction Below Top Door
Run and jump using SpeedBooster in the room below, with HiJump equipped. Bonk the door frame before passing through the transition, to cancel your horizontal momentum. After the transition, as you reach the wall, begin holding right. Land on the small platform below the top door. Entrance condition: {
"comeInWithPlatformBelow": {
"minHeight": 9,
"maxHeight": 10,
"maxLeftPosition": -38.5,
"minRightPosition": -2
},
"comesThroughToilet": "any"
}
Requires: "canCrossRoomJumpIntoWater" "SpeedBooster" "HiJump" |
|
From: 2
Bottom Left Door
To: 11
Upper Left Ledge Junction
Wall jump from a high position on either side of the door frame, pass through the Toilet, and down-grab onto the ledge. The Toilet affects Samus' vertical spawn position, making this jump possible. Entrance condition: {
"comeInWithWallJumpBelow": {
"minHeight": 2
},
"comesThroughToilet": "yes"
}
Requires: "canCrossRoomJumpIntoWater" "HiJump" "canPreciseWalljump" "canDownGrab" "canTrickyJump" |
|
From: 2
Bottom Left Door
To: 11
Upper Left Ledge Junction
Run and jump up through the door using SpeedBooster in the room below. Turn to the left immediately after jumping, to allow running further and to cancel the rightward momentum before passing through the transition. Entrance condition: {
"comeInWithPlatformBelow": {
"maxHeight": 10,
"maxLeftPosition": -38.5,
"minRightPosition": 0
},
"comesThroughToilet": "any"
}
Requires: "canCrossRoomJumpIntoWater" "SpeedBooster" |
|
From: 2
Bottom Left Door
To: 11
Upper Left Ledge Junction
Run and jump up through the door using HiJump and SpeedBooster in the room below using at least 1 tile of runway. Entrance condition: {
"comeInWithPlatformBelow": {
"maxHeight": 6,
"maxLeftPosition": 2.5,
"minRightPosition": -2.5
},
"comesThroughToilet": "any"
}
Requires: "canCrossRoomJumpIntoWater" "HiJump" "canTrickyDashJump" "canDownGrab" |
|
Run and jump up through the door using SpeedBooster in the room below, with HiJump equipped. Immediately after jumping, break spin and turn left to avoid hitting the crab (alternatively, you can wiggle after the transition). It helps to use a little less than the full runway. Make it all the way up to the top right door. Entrance condition: {
"comeInWithPlatformBelow": {
"maxHeight": 10,
"maxLeftPosition": -38.5,
"minRightPosition": -2
},
"comesThroughToilet": "any"
}
Requires: "canCrossRoomJumpIntoWater" "SpeedBooster" "HiJump" "canTrickyJump" |
|
From: 3
Bottom Right Door
To: 7
Lower Hills Junction
Standing on a platform in the room below, jump straight up through the door, with HiJump equipped. Entrance condition: {
"comeInWithPlatformBelow": {
"maxHeight": 10,
"maxLeftPosition": 2,
"minRightPosition": -2
},
"comesThroughToilet": "any"
}
Requires: "canCrossRoomJumpIntoWater" "HiJump" |
|
From: 3
Bottom Right Door
To: 7
Lower Hills Junction
Space Jump up through the door of the room below. Entrance condition: {
"comeInWithSpaceJumpBelow": {},
"comesThroughToilet": "any"
}
Requires: "canCrossRoomJumpIntoWater" |
|
From: 3
Bottom Right Door
To: 7
Lower Hills Junction
Run left-to-right in the room below using SpeedBooster, and jump up through the door. Hold left through the transition to avoid hitting the crab. Entrance condition: {
"comeInWithPlatformBelow": {
"minHeight": 9,
"maxHeight": 10,
"maxLeftPosition": -38.5,
"minRightPosition": -7
},
"comesThroughToilet": "any"
}
Requires: "canCrossRoomJumpIntoWater" "SpeedBooster" |
|
From: 3
Bottom Right Door
To: 7
Lower Hills Junction
Standing on the platform in the room below, perform a spring ball jump mid-air just before reaching the transition. Entrance condition: {
"comeInWithPlatformBelow": {
"maxHeight": 10,
"maxLeftPosition": 2,
"minRightPosition": -2
},
"comesThroughToilet": "any"
}
Requires: "canCrossRoomJumpIntoWater" "canSpringBallJumpMidAir" |
|
From: 3
Bottom Right Door
To: 7
Lower Hills Junction
Standing on a platform in the room below, jump straight up through the door. Entrance condition: {
"comeInWithPlatformBelow": {
"maxHeight": 7,
"maxLeftPosition": 2,
"minRightPosition": -2
},
"comesThroughToilet": "any"
}
Requires: "canCrossRoomJumpIntoWater" |
|
From: 3
Bottom Right Door
To: 7
Lower Hills Junction
Run left-to-right in the room below using SpeedBooster over a specific distance, and jump up through the door. Hold left through the transition to avoid hitting the crab. Entrance condition: {
"comeInWithPlatformBelow": {
"minHeight": 9,
"maxHeight": 9,
"maxLeftPosition": -6,
"minRightPosition": 2
},
"comesThroughToilet": "any"
}
Requires: "canCrossRoomJumpIntoWater" "canTrickyDashJump" |
|
From: 3
Bottom Right Door
To: 7
Lower Hills Junction
Run right-to-left in the room below using SpeedBooster over a very precise distance, jump, immediately turn back right, and break spin before reaching the transition. Entrance condition: {
"comeInWithPlatformBelow": {
"minHeight": 8,
"maxHeight": 8,
"maxLeftPosition": -2,
"minRightPosition": 6
},
"comesThroughToilet": "any"
}
Requires: "canCrossRoomJumpIntoWater" "canTrickyDashJump" |
|
Wall jump off either side of the door frame in the room below. Entrance condition: {
"comeInWithWallJumpBelow": {
"minHeight": 2
},
"comesThroughToilet": "any"
}
Requires: "canCrossRoomJumpIntoWater" |
|
From: 3
Bottom Right Door
To: 10
Upper Right Ledge Junction
Run and jump up through the door using HiJump and SpeedBooster in the room below and Springball Jump at the top of the jump. Entrance condition: {
"comeInWithPlatformBelow": {
"maxHeight": 6,
"maxLeftPosition": 2.5,
"minRightPosition": -2.5
},
"comesThroughToilet": "any"
}
Requires: "canCrossRoomJumpIntoWater" "HiJump" "SpeedBooster" "canTrickySpringBallJump" |
|
From: 3
Bottom Right Door
To: 10
Upper Right Ledge Junction
Run and jump up through the door using HiJump and SpeedBooster in the room below and Springball Jump at the peak of the jump. Entrance condition: {
"comeInWithPlatformBelow": {
"maxHeight": 7,
"maxLeftPosition": 2.5,
"minRightPosition": -2.5
},
"comesThroughToilet": "any"
}
Requires: "canCrossRoomJumpIntoWater" "HiJump" "SpeedBooster" "canTrickySpringBallJump" "canTrickyJump" |
|
From: 3
Bottom Right Door
To: 10
Upper Right Ledge Junction
Run and jump up through the door using SpeedBooster in the room below, jumping during a spike in the speed-to-jumpHeight chart. Immediately after jumping, break spin and turn left to allow you to run longer and to avoid hitting the crab. Entrance condition: {
"comeInWithPlatformBelow": {
"maxHeight": 10,
"maxLeftPosition": -38.5,
"minRightPosition": -2
},
"comesThroughToilet": "any"
}
Requires: "canCrossRoomJumpIntoWater" "canTrickyDashJump" |
|
From: 3
Bottom Right Door
To: 10
Upper Right Ledge Junction
Wall jump off either side of the door frame in the room below and Springball Jump at the height of the jump. Entrance condition: {
"comeInWithWallJumpBelow": {
"minHeight": 2
},
"comesThroughToilet": "any"
}
Requires: "canCrossRoomJumpIntoWater" "HiJump" "canTrickySpringBallJump" "canTrickyJump" |
|
From: 4
Top Right Door
To: 1
Top Left Door
Notable: true Requires running a very precise distance of 8 tiles in the adjacent room. Morph just before hitting the first ceiling grapple block, then bounce on both grapple block platforms. Entrance condition: {
"comeInJumping": {
"speedBooster": true,
"minTiles": 8
}
}
Requires: "canInsaneJump" "canTrickyDashJump" "canSpringBallBounce" "canCrossRoomJumpIntoWater" |
|
From: 4
Top Right Door
To: 9
Spawn At Junction Below Top Door
Notable: true Requires running a very precise distance of 8 tiles in the adjacent room. Morph just before hitting the first ceiling grapple block, then bounce on the first grapple block platform. Entrance condition: {
"comeInJumping": {
"speedBooster": true,
"minTiles": 8
}
}
Requires: "canInsaneJump" "canTrickyDashJump" "canSpringBallBounce" "canCrossRoomJumpIntoWater" |
|
From: 4
Top Right Door
To: 9
Spawn At Junction Below Top Door
Notable: true Requires running a very precise distance of 7 tiles with no open end in the adjacent room, as this is a peak in jump speed. Morph just before hitting the first ceiling grapple block, then turn on HiJump before bouncing on the first grapple block platform. Entrance condition: {
"comeInJumping": {
"speedBooster": true,
"minTiles": 6.4375
}
}
Requires: "HiJump" "canInsaneJump" "canTrickyDashJump" "canSpringBallBounce" "canCrossRoomJumpIntoWater" |
|
From: 2
Bottom Door
To: 3
Bottom Right Ledge
Standing on the platform in the room below, crouch jump up through the door transition, then down-grab onto the platform. Entrance condition: {
"comeInWithPlatformBelow": {
"minHeight": 7,
"maxHeight": 7,
"maxLeftPosition": 1,
"minRightPosition": -1.5
},
"comesThroughToilet": "any"
}
Requires: "canCrossRoomJumpIntoWater" "h_canCrouchJumpDownGrab" |
|
Standing on the platform in the room below, jump up through the door. Entrance condition: {
"comeInWithPlatformBelow": {
"minHeight": 8,
"maxHeight": 9,
"maxLeftPosition": 1,
"minRightPosition": 0
},
"comesThroughToilet": "any"
}
Requires: "canCrossRoomJumpIntoWater" "HiJump" |
|
From: 2
Bottom Door
To: 3
Bottom Right Ledge
Standing on the platform in the room below, jump up through the door. Either a crouch jump or a down grab (or both) must be used to make it onto the ledge. Entrance condition: {
"comeInWithPlatformBelow": {
"minHeight": 10,
"maxHeight": 10,
"maxLeftPosition": 1,
"minRightPosition": 0
},
"comesThroughToilet": "any"
}
Requires: "canCrossRoomJumpIntoWater"
"HiJump"
{
"or": [
"canCrouchJump",
"canDownGrab"
]
}
|
|
Space Jump up through the door of the room below. Entrance condition: {
"comeInWithSpaceJumpBelow": {},
"comesThroughToilet": "any"
}
Requires: "canCrossRoomJumpIntoWater" |
|
Using SpeedBooster in the room below, run left-to-right and jump, pressing against the right side of the door frame through the transition. Entrance condition: {
"comeInWithPlatformBelow": {
"minHeight": 9,
"maxHeight": 10,
"maxLeftPosition": -34.5,
"minRightPosition": -7
},
"comesThroughToilet": "any"
}
Requires: "canCrossRoomJumpIntoWater" "SpeedBooster" |
|
From: 2
Bottom Door
To: 3
Bottom Right Ledge
Standing on the platform in the room below, perform a spring ball jump mid-air just before reaching the transition. Entrance condition: {
"comeInWithPlatformBelow": {
"maxHeight": 10,
"maxLeftPosition": 2,
"minRightPosition": -2
},
"comesThroughToilet": "any"
}
Requires: "canCrossRoomJumpIntoWater" "canTrickySpringBallJump" |
|
Standing on the platform in the room below, jump up through the door. Entrance condition: {
"comeInWithPlatformBelow": {
"minHeight": 6,
"maxHeight": 6,
"maxLeftPosition": 1,
"minRightPosition": 0
},
"comesThroughToilet": "any"
}
Requires: "canCrossRoomJumpIntoWater" |
|
From: 2
Bottom Door
To: 3
Bottom Right Ledge
Run left-to-right in the room below using SpeedBooster over a specific distance, and jump up through the door. Entrance condition: {
"comeInWithPlatformBelow": {
"minHeight": 8,
"maxHeight": 9,
"maxLeftPosition": -6,
"minRightPosition": 2
},
"comesThroughToilet": "any"
}
Requires: "canCrossRoomJumpIntoWater" "canTrickyDashJump" |
|
From: 2
Bottom Door
To: 3
Bottom Right Ledge
Run right-to-left in the room below using SpeedBooster over a very precise distance, jump, immediately turn back right, and break spin before reaching the transition. Entrance condition: {
"comeInWithPlatformBelow": {
"minHeight": 8,
"maxHeight": 9,
"maxLeftPosition": -2,
"minRightPosition": 6
},
"comesThroughToilet": "any"
}
Requires: "canCrossRoomJumpIntoWater" "canTrickyDashJump" |
|
Wall jump up through the door of the room below, using either side of the door frame. Entrance condition: {
"comeInWithWallJumpBelow": {
"minHeight": 2
},
"comesThroughToilet": "any"
}
Requires: "canCrossRoomJumpIntoWater" |
|
Entrance condition: {
"comeInShinechargedJumping": {
"framesRequired": 22
}
}
Requires: "canMidAirMorph"
"canCrossRoomJumpIntoWater"
"canShinechargeMovement"
"canMidairShinespark"
{
"shinespark": {
"frames": 55
}
}
|
|
Needs near max horizontal speed coming from about 40 runway tiles in the adjacent room. Jump after the transition. Running a longer on the short runway is more difficult at maximum speed, but will increase the success of the jump. A crisp momentum conserving morph can also make up for a jump that is buffered through the door. Entrance condition: {
"comeInRunning": {
"speedBooster": true,
"minTiles": 40
}
}
Requires: "canInsaneJump" "canLateralMidAirMorph" "canCrossRoomJumpIntoWater" "canMomentumConservingMorph" |
|
From: 1
Left Door
To: 5
Item
Needs a runway of 7 tiles with no open end in the adjacent room, to get enough height. This is a peak of height with speed booster, no hjb, while underwater. Jump before the transition with SpeedBooster off and then SpeedBooster back on after reaching the ceiling and Morphing. Entrance condition: {
"comeInJumping": {
"speedBooster": true,
"minTiles": 6.4375
}
}
Requires: "canLateralMidAirMorph"
"canDisableEquipment"
"canCrossRoomJumpIntoWater"
"canSpringBallBounce"
{
"or": [
{
"enemyDamage": {
"enemy": "Puyo",
"type": "contact",
"hits": 1
}
},
"canInsaneJump",
{
"and": [
"Plasma",
"canTrickyJump"
]
}
]
}
|
|
From: 4
Right Door
To: 6
Junction Right of Morph Passage
Entrance condition: {
"comeInShinechargedJumping": {
"framesRequired": 20
}
}
Requires: "Morph"
"canCrossRoomJumpIntoWater"
"canShinechargeMovement"
"canMidairShinespark"
{
"shinespark": {
"frames": 46,
"excessFrames": 3
}
}
|
|
From: 4
Right Door
To: 6
Junction Right of Morph Passage
Requires running 7 tiles with no open end in the adjacent room, as this is a peak in jump speed. Run with Speedbooster off, and turn it on after entering the room. Entrance condition: {
"comeInJumping": {
"speedBooster": true,
"minTiles": 6.4375
}
}
Requires: "canDisableEquipment" "canCrossRoomJumpIntoWater" |
|
Requires a runway of one tile in the adjacent room. Entrance condition: {
"comeInJumping": {
"speedBooster": "any",
"minTiles": 1
}
}
Requires: "HiJump" "canTrickyJump" "canCrossRoomJumpIntoWater" "canMomentumConservingTurnaround" "canDownGrab" |
|
Requires a runway of one tile in the adjacent room. Entrance condition: {
"comeInJumping": {
"speedBooster": false,
"minTiles": 1
}
}
Requires: "canJumpIntoIBJ"
"canTrickyJump"
"canCrossRoomJumpIntoWater"
"canMomentumConservingTurnaround"
{
"enemyDamage": {
"enemy": "Mochtroid",
"type": "contact",
"hits": 2
}
}
|
|
Requires running a very precise distance of 7 tiles with no open end in the adjacent room, to hit a peak of the speed vs height graph. Entrance condition: {
"comeInJumping": {
"speedBooster": true,
"minTiles": 6.4375
}
}
Requires: "canTrickyDashJump" "canCrossRoomJumpIntoWater" "canMomentumConservingTurnaround" "canDownGrab" |
|
From: 2
Bottom Right Door
To: 3
Top Right Door
Requires a runway of one tile in the adjacent room. Entrance condition: {
"comeInJumping": {
"speedBooster": false,
"minTiles": 1
}
}
Requires: "canTrickySpringBallJump" "canCrossRoomJumpIntoWater" "canMomentumConservingTurnaround" |
|
Only requires a runway of approximately 1 tile in the adjacent room. Entrance condition: {
"comeInJumping": {
"speedBooster": "any",
"minTiles": 1
}
}
Requires: "HiJump" "canTrickyJump" "canCrossRoomJumpIntoWater" "canMomentumConservingTurnaround" |
|
Requires around 19 tiles in the adjacent room. Entrance condition: {
"comeInJumping": {
"speedBooster": true,
"minTiles": 19
}
}
Requires: "canCrossRoomJumpIntoWater"
"canMomentumConservingTurnaround"
{
"or": [
"canCrouchJump",
"Gravity",
"HiJump",
"canSpringBallJumpMidAir",
{
"and": [
"canTrickyUseFrozenEnemies",
{
"ammo": {
"type": "Super",
"count": 1
}
}
]
}
]
}
|
|
Requires running a very precise distance equivalent to a runway of 7 tiles with no open end in the adjacent room, to hit a peak in the speed / height relationship. The spring ball jump is used after landing near the top, to get to the platform below the door. Entrance condition: {
"comeInJumping": {
"speedBooster": true,
"minTiles": 6.4375
}
}
Requires: "canTrickyDashJump" "canSpringBallJumpMidAir" "canCrossRoomJumpIntoWater" "canMomentumConservingTurnaround" |
|
Requires running a very precise distance of 12 tiles in the adjacent room. Entrance condition: {
"comeInJumping": {
"speedBooster": true,
"minTiles": 12
}
}
Requires: "canCrossRoomJumpIntoWater"
"canMomentumConservingTurnaround"
"canTrickyDashJump"
"canDownGrab"
{
"or": [
"canCrouchJump",
"Gravity",
"HiJump",
"canSpringBallJumpMidAir",
{
"and": [
"canTrickyUseFrozenEnemies",
{
"ammo": {
"type": "Super",
"count": 1
}
}
]
}
]
}
|
|
Requires a runway of at least 2 tiles in the adjacent room. Jump as late as possible to avoid the ledge hanging over the door. Entrance condition: {
"comeInJumping": {
"speedBooster": "any",
"minTiles": 2
}
}
Requires: "canCrossRoomJumpIntoWater" "canTrickyJump" Clears obstacles: door_1 |
|
Requires a runway of at least 3 tiles (with no open end) in the adjacent room. Entrance condition: {
"comeInJumping": {
"speedBooster": "any",
"minTiles": 2.4375
}
}
Requires: "canCrossRoomJumpIntoWater" Clears obstacles: door_1 |
|
Requires a runway of at least 2 tiles (with no open end) in the adjacent room. Jump as late as possible to avoid the ledge hanging over the door. Entrance condition: {
"comeInJumping": {
"speedBooster": false,
"minTiles": 1.4375
}
}
Requires: "canCrossRoomJumpIntoWater" "canTrickyJump" Clears obstacles: door_1 |
|
Requires an air ball and a runway of only 1 tile in the adjacent room. Aim to morph on contact with the ceiling to slide accross it for extra distance. Entrance condition: {
"comeInJumping": {
"speedBooster": "any",
"minTiles": 1
}
}
Requires: "canCrossRoomJumpIntoWater" "canLateralMidAirMorph" "canTrickyJump" Clears obstacles: door_1 |
|
Entrance condition: {
"comeInJumping": {
"speedBooster": true,
"minTiles": 0.4375
}
}
Requires: "canCrossRoomJumpIntoWater" "canTrickyDashJump" Clears obstacles: door_1 |
|
From: 2
Right Door
To: 4
Top Right Ledge Junction
Requires a runway of at least 1 tile in the adjacent room, although it is easier with more. Entrance condition: {
"comeInJumping": {
"speedBooster": false,
"minTiles": 1
}
}
Requires: {
"or": [
"canWalljump",
"canTrickySpringBallJump",
"SpaceJump"
]
}
"canCrossRoomJumpIntoWater"
|
|
From: 2
Right Door
To: 4
Top Right Ledge Junction
Requires a runway of at least 1 tile in the adjacent room, although it is easier with more. Entrance condition: {
"comeInJumping": {
"speedBooster": "any",
"minTiles": 1
}
}
Requires: "HiJump"
{
"or": [
"canWalljump",
"canTrickyJump",
"SpeedBooster"
]
}
"canCrossRoomJumpIntoWater"
|
|
From: 2
Right Door
To: 4
Top Right Ledge Junction
This assumes a runway of at least 2 tiles in the adjacent room, although it is easier with more. Entrance condition: {
"comeInJumping": {
"speedBooster": "any",
"minTiles": 2
}
}
Requires: "HiJump" "canCrossRoomJumpIntoWater" |
|
From: 2
Right Door
To: 4
Top Right Ledge Junction
Requires a runway of at least 17 tiles in the adjacent room. Entrance condition: {
"comeInJumping": {
"speedBooster": true,
"minTiles": 17
}
}
Requires: "canCrossRoomJumpIntoWater" "canTrickyJump" |
|
From: 2
Right Door
To: 4
Top Right Ledge Junction
Assumes a runway of at least 18 tiles in the adjacent room. Entrance condition: {
"comeInJumping": {
"speedBooster": true,
"minTiles": 18
}
}
Requires: "canCrossRoomJumpIntoWater" |
|
From: 2
Right Door
To: 4
Top Right Ledge Junction
Requires a runway of 7 tiles with no open end in the adjacent room, to hit a peak of the speed vs height graph. Entrance condition: {
"comeInJumping": {
"speedBooster": true,
"minTiles": 6.4375
}
}
Requires: "canCrossRoomJumpIntoWater" "canTrickyDashJump" |
|
From: 2
Right Door
To: 4
Top Right Ledge Junction
Notable: true Requires a runway of at least 1 tiles in the adjacent room, although it is easier with more. Start the IBJ as far left as possible. The furthest right is just right of the waterfall. Turning around, carefully, is one way to lose forward momentum and begin the IBJ. At the top of the IBJ bomb to the left and unmorph to reset fall speed. Entrance condition: {
"comeInJumping": {
"speedBooster": false,
"minTiles": 1
}
}
Requires: "canJumpIntoIBJ" "canBombHorizontally" "canResetFallSpeed" "canCrossRoomJumpIntoWater" "canTrickyJump" |
|
From: 2
Right Door
To: 4
Top Right Ledge Junction
Notable: true Use the bomb boost as Samus is going through the doorway, then spring ball after breaking the water, then ibj or use an unmorph bomb boost. Entrance condition: {
"comeInWithBombBoost": {}
}
Requires: "canSpringBallBombJump"
"canCrossRoomJumpIntoWater"
{
"or": [
"canJumpIntoIBJ",
"canUnmorphBombBoost"
]
}
|
|
Requires a runway of 1 tile in the adjacent room. Use Space Jump or a wall jump after getting out of the water. Entrance condition: {
"comeInJumping": {
"speedBooster": "any",
"minTiles": 1
}
}
Requires: "canCrossRoomJumpIntoWater"
"canTrickyJump"
{
"or": [
"canWalljump",
"SpaceJump"
]
}
|
|
Assumes a runway of at least 4 tiles in the adjacent room. Use Space Jump or a wall jump after getting out of the water. Entrance condition: {
"comeInJumping": {
"speedBooster": "any",
"minTiles": 4
}
}
Requires: "canCrossRoomJumpIntoWater"
{
"or": [
"canWalljump",
"SpaceJump"
]
}
|
|
From: 1
Top Left Door
To: 4
Top Right Door
Requires a runway of 4 tile in the adjacent room. Entrance condition: {
"comeInJumping": {
"speedBooster": true,
"minTiles": 4
}
}
Requires: "canCrossRoomJumpIntoWater" "canTrickyJump" "HiJump" |
|
From: 1
Top Left Door
To: 4
Top Right Door
Assumes a runway of 8 tiles in the adjacent room. Entrance condition: {
"comeInJumping": {
"speedBooster": true,
"minTiles": 8
}
}
Requires: "canCrossRoomJumpIntoWater" "HiJump" |
|
Only requires a runway of approximately 1 tile in the adjacent room. Take two Mochtroid hits or kill it using a Power Bomb or 5 Bombs. Entrance condition: {
"comeInJumping": {
"minTiles": 1,
"speedBooster": "any"
}
}
Requires: "canJumpIntoIBJ"
{
"or": [
{
"ammo": {
"type": "PowerBomb",
"count": 1
}
},
{
"and": [
"canCeilingBombJump",
{
"enemyDamage": {
"enemy": "Mochtroid",
"type": "contact",
"hits": 1
}
}
]
},
{
"and": [
"canDoubleBombJump",
{
"enemyDamage": {
"enemy": "Mochtroid",
"type": "contact",
"hits": 2
}
}
]
}
]
}
"canCrossRoomJumpIntoWater"
"canMomentumConservingTurnaround"
"canTrickyJump"
|
|
From: 1
Top Left Door
To: 4
Top Right Door
Requires a runway of approximately 21 tile in the adjacent room. Entrance condition: {
"comeInJumping": {
"speedBooster": true,
"minTiles": 21
}
}
Requires: "canCrossRoomJumpIntoWater" |
|
Only requires a runway of 1 tile in the adjacent room. Entrance condition: {
"comeInJumping": {
"speedBooster": "any",
"minTiles": 1
}
}
Requires: "canCrossRoomJumpIntoWater" |
|
From: 2
Bottom Left Door
To: 4
Top Right Door
Requires a runway of 38 tiles in the adjacent room. Entrance condition: {
"comeInJumping": {
"speedBooster": true,
"minTiles": 38
}
}
Requires: "canTrickyJump" "canCrossRoomJumpIntoWater" |
|
From: 2
Bottom Left Door
To: 4
Top Right Door
Requires a runway of 8 tiles in the adjacent room. Entrance condition: {
"comeInJumping": {
"speedBooster": true,
"minTiles": 8
}
}
Requires: "HiJump" "canDownGrab" "canTrickyJump" "canCrossRoomJumpIntoWater" |
|
From: 2
Bottom Left Door
To: 4
Top Right Door
Assumes a runway of 9 tiles in the adjacent room. Entrance condition: {
"comeInJumping": {
"speedBooster": true,
"minTiles": 9
}
}
Requires: "HiJump" "canCrossRoomJumpIntoWater" |
|
From: 2
Bottom Left Door
To: 4
Top Right Door
Requires a runway of 1 tile in the adjacent room. Use a spring ball jump after breaking the water, then ibj. Take two Mochtroid hits or use a double bomb jump. Entrance condition: {
"comeInJumping": {
"speedBooster": false,
"minTiles": 1
}
}
Requires: "canTrickySpringBallJump"
"canJumpIntoIBJ"
{
"or": [
"canDoubleBombJump",
{
"enemyDamage": {
"enemy": "Mochtroid",
"type": "contact",
"hits": 2
}
}
]
}
"canCrossRoomJumpIntoWater"
|
|
From: 2
Bottom Left Door
To: 4
Top Right Door
Requires a runway of 1 tile in the adjacent room. Entrance condition: {
"comeInJumping": {
"speedBooster": "any",
"minTiles": 1
}
}
Requires: "HiJump" "canMomentumConservingTurnaround" "canTrickySpringBallJump" "canCrossRoomJumpIntoWater" |
|
From: 2
Bottom Left Door
To: 4
Top Right Door
Requires a runway of 1 tile in the adjacent room. There is just enough room to wall jump after breaking the water. Entrance condition: {
"comeInJumping": {
"speedBooster": false,
"minTiles": 1
}
}
Requires: "canPreciseWalljump" "canTrickyJump" "canCrossRoomJumpIntoWater" |
|
From: 3
Bottom Right Door
To: 2
Bottom Left Door
Notable: true Jump into the room and shoot out at least the bottom shotblock. Jumping into the top of the door frame at low speeds lines up the shot well. Speedball through and unmorph on top of the first set of speedblocks. Reposition with a Chain Temporary Blue closer to the remaining speed blocks. Jump into the rest of the Speed Blocks clearing a path for the Oums. Wait for the Oums to roll on their own to a place where they can be climbed. Do not stand on the Oums when they begin to attack. Entrance condition: {
"comeInSpeedballing": {
"runway": {
"length": 0,
"openEnd": 0
}
}
}
Requires: "canSpeedball" "canCrossRoomJumpIntoWater" "canUseEnemies" "canChainTemporaryBlue" "canSlowShortCharge" |
|
From: 2
Bottom Left Door
To: 1
Top Left Door
Only requires a runway of approximately 0.5 tiles in the adjacent room. SpringBall jump once on the way up, then use a Bomb to buy just enough time for a second SpringBall jump. Entrance condition: {
"comeInJumping": {
"minTiles": 1,
"speedBooster": false
}
}
Requires: "canCrossRoomJumpIntoWater" "canUnderwaterBombIntoSpringBallJump" "canDoubleSpringBallJumpMidAir" |
|
From: 2
Bottom Left Door
To: 1
Top Left Door
Requires a runway of 1 tile in the adjacent room. A momentum conserving turnaround is easier than a midair wiggle. Entrance condition: {
"comeInJumping": {
"speedBooster": "any",
"minTiles": 0.4375
}
}
Requires: "HiJump"
"canCrossRoomJumpIntoWater"
{
"or": [
"canMomentumConservingTurnaround",
"canMidairWiggle"
]
}
|
|
From: 2
Bottom Left Door
To: 1
Top Left Door
Requires a runway of at least 7 tiles (with no open end) in the adjacent room. A momentum conserving turnaround is easier than a midair wiggle. Entrance condition: {
"comeInJumping": {
"speedBooster": true,
"minTiles": 6.4375
}
}
Requires: "canCrossRoomJumpIntoWater"
"canTrickyDashJump"
{
"or": [
"canMomentumConservingTurnaround",
"canMidairWiggle"
]
}
|
|
From: 2
Bottom Left Door
To: 1
Top Left Door
The lenient version requires a runway of at about 10 tiles in the adjacent room. A momentum conserving turnaround is easier than climbing the right side of the room. Entrance condition: {
"comeInJumping": {
"speedBooster": true,
"minTiles": 10
}
}
Requires: "canCrossRoomJumpIntoWater"
{
"or": [
"canMomentumConservingTurnaround",
"canMidairWiggle"
]
}
|
|
From: 1
Bottom Left Door
To: 2
Top Right Door
The lenient version requires a runway of at least 5 tiles (with no open end) in the adjacent room. This is easier without Speed Booster and requires disabling HiJump. Entrance condition: {
"comeInJumping": {
"speedBooster": false,
"minTiles": 4.4375
}
}
Requires: "canCrossRoomJumpIntoWater" "canDisableEquipment" |
|
Gain speed from a remote runway in the previous room, and Space Jump through the bottom of the doorway. Entrance condition: {
"comeInSpaceJumping": {
"speedBooster": "any",
"minTiles": 5
}
}
Requires: "canCrossRoomJumpIntoWater" |
|
From: 1
Bottom Left Door
To: 2
Top Right Door
Entrance condition: {
"comeInWithSpringBallBounce": {
"remoteAndLandingMinTiles": [
[
3.5625,
1
]
],
"movementType": "controlled"
}
}
Requires: "canCrossRoomJumpIntoWater" |
|
From: 1
Bottom Left Door
To: 2
Top Right Door
Entrance condition: {
"comeInWithSpringBallBounce": {
"remoteAndLandingMinTiles": [
[
2.5625,
1
]
],
"movementType": "uncontrolled"
}
}
Requires: "canCrossRoomJumpIntoWater" "canTrickyJump" |
|
From: 1
Bottom Left Door
To: 2
Top Right Door
Unmorph just before hitting the overhang, to conserve momentum to make it on top. Entrance condition: {
"comeInWithSpringBallBounce": {
"remoteAndLandingMinTiles": [
[
2.5625,
1
]
],
"movementType": "controlled"
}
}
Requires: "canCrossRoomJumpIntoWater" "canMomentumConservingMorph" |
|
From: 1
Bottom Left Door
To: 2
Top Right Door
Unmorph just before hitting the overhang, to conserve momentum to make it on top. Entrance condition: {
"comeInWithSpringBallBounce": {
"remoteAndLandingMinTiles": [
[
1.5625,
1
]
],
"movementType": "uncontrolled"
}
}
Requires: "canCrossRoomJumpIntoWater" "canTrickyJump" "canMomentumConservingMorph" |
|
From: 1
Bottom Left Door
To: 2
Top Right Door
Requires a runway of at least 2 tiles (with no open end) in the adjacent room. This is typically easier without Speed Booster depending on the exact runway length and requires disabling HiJump. Entrance condition: {
"comeInJumping": {
"speedBooster": false,
"minTiles": 1.4375
}
}
Requires: "canCrossRoomJumpIntoWater" "canMomentumConservingTurnaround" "canTrickyJump" "canDisableEquipment" |
|
From: 1
Bottom Left Door
To: 2
Top Right Door
Gain speed from a remote runway in the previous room, and Space Jump through the bottom of the doorway. Entrance condition: {
"comeInSpaceJumping": {
"speedBooster": "any",
"minTiles": 2
}
}
Requires: "canCrossRoomJumpIntoWater" "canMomentumConservingTurnaround" "canTrickyJump" |
|
From: 1
Bottom Left Door
To: 2
Top Right Door
It is possible to jump to the top door using a runway of just one tile with Speed Booster and no HiJump. Requires a last-frame jump and down press that is late but not immediately before the turnaround. With a second-to-last-frame jump it is still possible but more precise. Entrance condition: {
"comeInJumping": {
"speedBooster": true,
"minTiles": 1
}
}
Requires: "canCrossRoomJumpIntoWater" "canMomentumConservingTurnaround" "canTrickyDashJump" "canDisableEquipment" |
|
Only requires a runway of approximately 0.5 tiles in the adjacent room. Bomb boost through the doorway and hold right. Entrance condition: {
"comeInWithBombBoost": {}
}
Requires: "canCrossRoomJumpIntoWater" |
|
Only requires a runway of approximately 0.5 tiles in the adjacent room. Bomb boost through the doorway and hold left. Entrance condition: {
"comeInWithBombBoost": {}
}
Requires: "canCrossRoomJumpIntoWater" |
|
From: 2
Bottom Door
To: 1
Left Door
Using SpeedBooster in the room below and the full length of the runway (starting with Samus hanging over the edge as far as possible), run and jump precisely to make it through without bonking the door frame. Break spin before the transition to expand Samus' hitbox and trigger the transition earlier, retaining more speed and also making it easier to avoid bonking. Hold left through the transition to initiate a turn-around while entering the room. Land on the small platform at the top of the room. Entrance condition: {
"comeInWithPlatformBelow": {
"minHeight": 9,
"maxHeight": 9,
"maxLeftPosition": -38.5,
"minRightPosition": -7
},
"comesThroughToilet": "any"
}
Requires: "canCrossRoomJumpIntoWater" "SpeedBooster" "canTrickyJump" "canInsaneJump" |
|
From: 2
Bottom Door
To: 1
Left Door
Using SpeedBooster in the room below, start running at a precise position to be able to jump during a spike in the speed-to-jumpHeight chart. Break spin before the transition to expand Samus' hitbox and trigger the transition early, retaining more speed and also making it easier to avoid bonking. Hold left through the transition to initiate a turn-around while entering the room. Land on the small platform at the top of the room. Entrance condition: {
"comeInWithPlatformBelow": {
"minHeight": 9,
"maxHeight": 10,
"maxLeftPosition": -33.5,
"minRightPosition": -7
},
"comesThroughToilet": "any"
}
Requires: "canCrossRoomJumpIntoWater" "SpeedBooster" "canTrickyDashJump" "canInsaneJump" |
|
From: 2
Bottom Door
To: 4
Water Level Junction
Standing on the platform in the room below, crouch jump up and press right against the door frame through the transition. Entrance condition: {
"comeInWithPlatformBelow": {
"minHeight": 10,
"maxHeight": 10,
"maxLeftPosition": 1,
"minRightPosition": 2
},
"comesThroughToilet": "no"
}
Requires: "canCrossRoomJumpIntoWater" "HiJump" "canCrouchJump" |
|
From: 2
Bottom Door
To: 4
Water Level Junction
Run and spin jump from the platform in the room below, gaining horizontal speed but without bonking the door frame. Perform a momentum-conserving turn-around to make it around the corner of the ledge above. With limited runway for gaining horizontal speed, the timing of the jump and turn-around may be very precise. Entrance condition: {
"comeInWithPlatformBelow": {
"minHeight": 8.5,
"maxHeight": 9,
"maxLeftPosition": -1.5,
"minRightPosition": 1.5
},
"comesThroughToilet": "yes"
}
Requires: "canCrossRoomJumpIntoWater" "HiJump" "canMomentumConservingTurnaround" "canInsaneJump" |
|
From: 2
Bottom Door
To: 4
Water Level Junction
Run left-to-right and spin jump from the platform in the room below, passing through the transition without bonking the door. Entrance condition: {
"comeInWithPlatformBelow": {
"minHeight": 7,
"maxHeight": 7,
"maxLeftPosition": -2.5,
"minRightPosition": 0.5
},
"comesThroughToilet": "no"
}
Requires: "canCrossRoomJumpIntoWater" "HiJump" |
|
From: 2
Bottom Door
To: 4
Water Level Junction
Run left-to-right and spin jump from the platform in the room below, passing through the transition without bonking the door. Pass through the Toilet, and then perform a momentum conserving turnaround to make it onto the ledge. Entrance condition: {
"comeInWithPlatformBelow": {
"minHeight": 7,
"maxHeight": 7,
"maxLeftPosition": -2.5,
"minRightPosition": 0.5
},
"comesThroughToilet": "yes"
}
Requires: "canCrossRoomJumpIntoWater" "HiJump" "canMomentumConservingTurnaround" |
|
From: 2
Bottom Door
To: 4
Water Level Junction
Run left-to-right and spin jump from the platform in the room below, passing through the transition without bonking the door. Entrance condition: {
"comeInWithPlatformBelow": {
"minHeight": 7,
"maxHeight": 7,
"maxLeftPosition": -5.5,
"minRightPosition": -1.5
},
"comesThroughToilet": "any"
}
Requires: "canCrossRoomJumpIntoWater" "HiJump" |
|
From: 2
Bottom Door
To: 4
Water Level Junction
Gain a small amount of speed (<1 tile is enough) and jump through the transition, pressing right against the door frame. Entrance condition: {
"comeInWithPlatformBelow": {
"minHeight": 10,
"maxHeight": 10,
"maxLeftPosition": 2,
"minRightPosition": -2
},
"comesThroughToilet": "no"
}
Requires: "canCrossRoomJumpIntoWater" "HiJump" "SpeedBooster" |
|
From: 2
Bottom Door
To: 4
Water Level Junction
Gain a few tiles of run speed and jump through the transition, without bonking against the door frame. Perform a momentum-conserving turn-around to make it around the corner of the ledge above. Entrance condition: {
"comeInWithPlatformBelow": {
"minHeight": 10,
"maxHeight": 10,
"maxLeftPosition": -4,
"minRightPosition": 0
},
"comesThroughToilet": "yes"
}
Requires: "canCrossRoomJumpIntoWater" "HiJump" "SpeedBooster" "canMomentumConservingTurnaround" |
|
From: 2
Bottom Door
To: 4
Water Level Junction
Spin jump from the platform in the room below, pressing right against the door frame through the transition. Entrance condition: {
"comeInWithPlatformBelow": {
"minHeight": 8,
"maxHeight": 9,
"maxLeftPosition": 1,
"minRightPosition": 2
},
"comesThroughToilet": "no"
}
Requires: "canCrossRoomJumpIntoWater" "HiJump" |
|
From: 2
Bottom Door
To: 4
Water Level Junction
Run and spin jump from the platform in the room below, gaining horizontal speed but without bonking the door frame. Perform a momentum-conserving turn-around to make it around the corner of the ledge above. Entrance condition: {
"comeInWithPlatformBelow": {
"minHeight": 8,
"maxHeight": 9,
"maxLeftPosition": -3,
"minRightPosition": 0
},
"comesThroughToilet": "yes"
}
Requires: "canCrossRoomJumpIntoWater" "HiJump" "canMomentumConservingTurnaround" |
|
From: 2
Bottom Door
To: 4
Water Level Junction
Spin jump from the platform in the room below, pressing right against the door frame through the transition. Perform a momentum-conserving turn-around to make it around the corner of the ledge above. Entrance condition: {
"comeInWithPlatformBelow": {
"minHeight": 7,
"maxHeight": 7,
"maxLeftPosition": 1,
"minRightPosition": 2
},
"comesThroughToilet": "no"
}
Requires: "canCrossRoomJumpIntoWater" "HiJump" "canMomentumConservingTurnaround" |
|
From: 2
Bottom Door
To: 4
Water Level Junction
Do a wall jump from the right side of the door frame, three tiles below the door transition. Turn back around to the right before the transition, while maintaining spin. Entrance condition: {
"comeInWithWallJumpBelow": {
"minHeight": 3
},
"comesThroughToilet": "no"
}
Requires: "canCrossRoomJumpIntoWater" "canPreciseWalljump" |
|
From: 2
Bottom Door
To: 4
Water Level Junction
Do a low spin jump and press against the right side of the door frame. Wall jump as low as possible, jumping as soon as possible after moving away from the wall. Immediately turn back to the right and try to press against the door frame again before the transition, while maintaining spin. After the transition, typically a momentum-conserving turnaround is needed to avoid bonking. Entrance condition: {
"comeInWithWallJumpBelow": {
"minHeight": 2
},
"comesThroughToilet": "no"
}
Requires: "canCrossRoomJumpIntoWater"
{
"or": [
"canInsaneWalljump",
{
"and": [
"canPreciseWalljump",
"canMomentumConservingTurnaround"
]
}
]
}
|
|
From: 2
Bottom Door
To: 4
Water Level Junction
Gain run speed to the right and jump through the door without bonking the door frame. After the transition, continue holding right while remaining in spin jump. This strat could also be performed without passing through the Toilet, but a precise down-grab would be needed to get onto the ledge at the end; in this case it would be easier to perform a standing jump instead. Entrance condition: {
"comeInWithPlatformBelow": {
"minHeight": 6,
"maxHeight": 6,
"maxLeftPosition": -2.5,
"minRightPosition": -0.5
},
"comesThroughToilet": "yes"
}
Requires: "canCrossRoomJumpIntoWater" "canTrickyJump" |
|
From: 2
Bottom Door
To: 4
Water Level Junction
Use Space Jump to enter with rightward momentum and moderate vertical speed. This can be done by using Space Jump at an appropriate height and pressing against the right side of the door frame while entering the transition. Entrance condition: {
"comeInWithSpaceJumpBelow": {},
"comesThroughToilet": "no"
}
Requires: "canCrossRoomJumpIntoWater" |
|
From: 2
Bottom Door
To: 4
Water Level Junction
Using SpeedBooster in the room below, run and jump, pressing against the right side of the door frame through the transition without breaking spin. It may be necessary to use less runway than is available, to avoid getting too much vertical speed. Entrance condition: {
"comeInWithPlatformBelow": {
"minHeight": 9,
"maxHeight": 10,
"maxLeftPosition": -34.5,
"minRightPosition": -7
},
"comesThroughToilet": "no"
}
Requires: "canCrossRoomJumpIntoWater" "SpeedBooster" "canTrickyJump" |
|
From: 2
Bottom Door
To: 4
Water Level Junction
Using SpeedBooster in the room below, run and jump through the door without bonking the door frame or breaking spin. Perform a mid-air wiggle to make into onto either ledge. Entrance condition: {
"comeInWithPlatformBelow": {
"minHeight": 9,
"maxHeight": 10,
"maxLeftPosition": -34.5,
"minRightPosition": -7
},
"comesThroughToilet": "yes"
}
Requires: "canCrossRoomJumpIntoWater" "SpeedBooster" "canInsaneJump" "canMidairWiggle" |
|
From: 2
Bottom Door
To: 4
Water Level Junction
Standing on the platform in the room below, jump up (crouch jump makes it easier) and press right against the door frame through the transition. After the transition, perform a spring ball jump mid-air to reach the ledge. Entrance condition: {
"comeInWithPlatformBelow": {
"minHeight": 7,
"maxHeight": 7,
"maxLeftPosition": 1,
"minRightPosition": 1
},
"comesThroughToilet": "no"
}
Requires: "canCrossRoomJumpIntoWater"
"canTrickySpringBallJump"
{
"or": [
"canCrouchJump",
"canTrickyJump"
]
}
|
|
From: 2
Bottom Door
To: 4
Water Level Junction
Standing on the platform in the room below, perform a spring ball jump mid-air a few tiles below the transition. Hold right through the transition, and do not bonk the door frame. Entrance condition: {
"comeInWithPlatformBelow": {
"minHeight": 9,
"maxHeight": 10,
"maxLeftPosition": 1,
"minRightPosition": 1
},
"comesThroughToilet": "no"
}
Requires: "canCrossRoomJumpIntoWater" "canTrickySpringBallJump" "can4HighMidAirMorph" |
|
From: 2
Bottom Door
To: 4
Water Level Junction
Standing on the platform in the room below, jump up and press right against the door frame through the transition. Entrance condition: {
"comeInWithPlatformBelow": {
"minHeight": 6,
"maxHeight": 6,
"maxLeftPosition": 1,
"minRightPosition": 2
},
"comesThroughToilet": "no"
}
Requires: "canCrossRoomJumpIntoWater" |
|
From: 2
Bottom Door
To: 4
Water Level Junction
Run left-to-right in the room below using SpeedBooster over a specific distance, and jump up through the door. Entrance condition: {
"comeInWithPlatformBelow": {
"minHeight": 9,
"maxHeight": 9,
"maxLeftPosition": -6,
"minRightPosition": 2
},
"comesThroughToilet": "no"
}
Requires: "canCrossRoomJumpIntoWater" "canTrickyDashJump" |
|
From: 2
Bottom Door
To: 4
Water Level Junction
Standing on the platform in the room below, perform a spring ball jump mid-air a few tiles below the transition. It is necessary to morph very quickly after jumping in order to spring ball jump as low as necessary. Hold right through the transition, and do not bonk the door frame. Entrance condition: {
"comeInWithPlatformBelow": {
"minHeight": 8,
"maxHeight": 8,
"maxLeftPosition": 1,
"minRightPosition": 1
},
"comesThroughToilet": "no"
}
Requires: "canCrossRoomJumpIntoWater" "can4HighMidAirMorph" "canTrickySpringBallJump" "canInsaneJump" |
|
From: 1
Left Door
To: 3
Junction Below Right Door
Quickly shoot to break the shot block and then do a momentumConservingTurnaround to ascend into the little region. Another movement item will be needed to get closer to the crumble blocks. Entrance condition: {
"comeInJumping": {
"speedBooster": false,
"minTiles": 2
}
}
Requires: "canTrickyJump"
"canCrossRoomJumpIntoWater"
"canMomentumConservingTurnaround"
{
"or": [
"canUseFrozenEnemies",
"canSpringBallJumpMidAir",
"HiJump"
]
}
|
|
From: 1
Left Door
To: 2
Right Door
Notable: true Stand at an effective distance of between about 20 and 21 tiles from the door. Run through the door, and jump any time after the transition, holding jump through the entire room to make it to the other side. Samus will go over the Evirs, so there is no need for blue speed. Entrance condition: {
"comeInRunning": {
"minTiles": 19.3625,
"maxTiles": 21.25,
"speedBooster": true
}
}
Requires: "canPlayInSand" "canCrossRoomJumpIntoWater" "canTrickyDashJump" |
|
From: 1
Left Door
To: 2
Right Door
Notable: true Enter with enough run speed to jump (after the transition) across the full room using one SpringBall Jump. When exiting the first Sandfall, Samus will be rising still. That is the time to Springball jump. Entrance condition: {
"comeInRunning": {
"minTiles": 10,
"speedBooster": true
}
}
Requires: "canPlayInSand" "canCrossRoomJumpIntoWater" "canLateralMidAirMorph" "canTrickySpringBallJump" "canTrickyJump" |
|
From: 1
Left Door
To: 4
Junction Below Sand Entrance
Requires a runway of 7 tiles (with no open end) in the adjacent room. Jump into an air ball on room entry in order to get to the first pillar. Aim down after the transition to avoid hitting the overhang near the door. Entrance condition: {
"comeInJumping": {
"speedBooster": false,
"minTiles": 6.4375
}
}
Requires: "canCrossRoomJumpIntoWater"
"canPlayInSand"
"canLateralMidAirMorph"
{
"or": [
"canTrickyJump",
{
"and": [
"canCarefulJump",
{
"enemyDamage": {
"enemy": "Evir",
"type": "contact",
"hits": 1
}
}
]
}
]
}
|
|
From: 1
Left Door
To: 4
Junction Below Sand Entrance
Bomb boost through the doorway as close to the door transition as possible in order to get as far as possible. Entrance condition: {
"comeInWithBombBoost": {}
}
Requires: "canCrossRoomJumpIntoWater" "canTrickyJump" |
|
From: 1
Left Door
To: 4
Junction Below Sand Entrance
Notable: true Requires a runway of 7 tiles (with no open end) in the adjacent room. Requires two precise inputs of jumping through the doorway and aiming down before hitting the ceiling. Damage boost off of the right Evir in order to land on the first pillar. With Ice, instead freeze the Evir to land on it and avoid the damage. When entering the room with a bad jump, it is possible to perform a midair wiggle to get back to the door platform. Entrance condition: {
"comeInJumping": {
"speedBooster": false,
"minTiles": 6.4375
}
}
Requires: "canCrossRoomJumpIntoWater"
"canPlayInSand"
"canInsaneJump"
{
"or": [
"canTrickyUseFrozenEnemies",
{
"and": [
"canNeutralDamageBoost",
{
"enemyDamage": {
"enemy": "Evir",
"type": "contact",
"hits": 1
}
}
]
}
]
}
|
|
Gain momentum in the room to the left, then jump at the edge of the runway in this room in order to jump off of the sand and land on the first pillar. Requires a runway of 7 tiles (with no open end) in the adjacent room, and killing the second Evir with a quick super or two plasma hits (note that the particle despawns as the Evir dies). Entrance condition: {
"comeInJumping": {
"speedBooster": false,
"minTiles": 6.4375
}
}
Requires: "canCrossRoomJumpIntoWater"
"canPlayInSand"
"canTrickyJump"
{
"enemyKill": {
"enemies": [
[
"Evir"
]
],
"explicitWeapons": [
"Plasma",
"Super"
]
}
}
|
|
From: 1
Left Door
To: 4
Junction Below Sand Entrance
By entering the room with run speed, it is possible to jump over the pair of Evirs. Entrance condition: {
"comeInRunning": {
"speedBooster": "any",
"minTiles": 3.4375
}
}
Requires: "canCrossRoomJumpIntoWater" "HiJump" "canCarefulJump" |
|
From: 1
Left Door
To: 4
Junction Below Sand Entrance
By entering the room with run speed, it is possible to jump over the pair of Evirs. Entrance condition: {
"comeInRunning": {
"speedBooster": true,
"minTiles": 3
}
}
Requires: "canCrossRoomJumpIntoWater" "HiJump" "canCarefulJump" |
|
From: 2
Right Door
To: 1
Left Door
Notable: true Stand at an effective distance of about 20 tiles from the door. Run through the door, and jump any time after the transition, holding jump through the entire room to make it to the other side. Samus will go over the Evirs, so there is no need for blue speed. Entrance condition: {
"comeInRunning": {
"minTiles": 19.3625,
"maxTiles": 20.3,
"speedBooster": true
}
}
Requires: "canPlayInSand" "canCrossRoomJumpIntoWater" "canTrickyDashJump" |
|
From: 2
Right Door
To: 1
Left Door
Notable: true Enter with enough run speed to jump (after the transition) across the full room using one SpringBall Jump. When exiting the first Sandfall, Samus will be rising still. That is the time to Springball jump. Alternatively, an immediate pause can be used to SpringBall jump during the first narrow gap between Sandfalls. Sometimes Samus will land above the sand on the far left end of the room, where it will be necessary to unmorph and jump out. Entrance condition: {
"comeInRunning": {
"minTiles": 10,
"speedBooster": true
}
}
Requires: "canPlayInSand" "canCrossRoomJumpIntoWater" "canLateralMidAirMorph" "canTrickySpringBallJump" "canTrickyJump" |
|
From: 2
Right Door
To: 4
Junction Below Sand Entrance
Bomb boost through the doorway. Get the bomb boost while as close to the door transition as possible in order to get to the first pillar. Entrance condition: {
"comeInWithBombBoost": {}
}
Requires: "canCrossRoomJumpIntoWater" |
|
Gain momentum in the room to the right, then jump immediately on entry in order to land on the first pillar. Jumping too late will likely put Samus into the pit. Requires a small runway of only one tile or less in the adjacent room. Jumping before the door transition will set Samus straight into an Evir projectile, knocking her into the sand. Entrance condition: {
"comeInRunning": {
"speedBooster": false,
"minTiles": 0.4375
}
}
Requires: "canCrossRoomJumpIntoWater" "canPlayInSand" "canTrickyJump" "canTrickyUseFrozenEnemies" |
|
Oasis Cross Room Jump with Screw Attack and Speed through the Top Door (From the Left) (Insane)
Oasis
From: 1
Left Door
To: 3
Top Door
Notable: true Use Screw Attack to break the bomb block by entering from a non-water room with a spin jump, and make it all the way through the top door. This uses exactly 14 tiles (with no open end) - more rises too fast to do the trick, less does not have the height needed to reach the door. Use angle to break spin, then a momentumConservingTurnaround as early as possible, right as you pass the above tile horizontally. Using the background for positioning may help. The second momentumConservingTurnaround is as late as possible, just before touching the above platform. A third momentumConservingTurnaround is used on the door as it is opening. Entrance condition: {
"comeInJumping": {
"speedBooster": true,
"minTiles": 13.4375
}
}
Requires: "canInsaneJump" "canCrossRoomJumpIntoWater" "ScrewAttack" "canMomentumConservingTurnaround" |
|
From: 1
Left Door
To: 4
Junction Below Top Door
Notable: true Use Screw Attack to break the bomb block by entering from a non-water room with a spin jump, and make it to the top. It helps to enter as low as possible and with as much horizontal speed as possible and with HiJump turned off. Entrance condition: {
"comeInJumping": {
"speedBooster": true,
"minTiles": 13
}
}
Requires: "canInsaneJump" "canCrossRoomJumpIntoWater" "ScrewAttack" "canMomentumConservingTurnaround" |
|
From: 1
Left Door
To: 6
Junction Above Bomb Blocks
Notable: true Use Screw Attack to break the bomb block by entering from a non-water room with a spin jump. It helps to enter as low as possible and with as much horizontal speed as possible and with HiJump turned off. Even if executed correctly, the trick can fail with 50% probability due to collision oscillation. Entrance condition: {
"comeInJumping": {
"speedBooster": "any",
"minTiles": 4.4375
}
}
Requires: "canTrickyJump" "canCrossRoomJumpIntoWater" "ScrewAttack" |
|
From: 1
Left Door
To: 6
Junction Above Bomb Blocks
Notable: true Use Screw Attack to break the bomb block by entering from a non-water room with a spin jump. It helps to enter as low as possible and with as much horizontal speed as possible and with HiJump turned off. Even if executed correctly, the trick can fail with 50% probability due to collision oscillation. Entrance condition: {
"comeInJumping": {
"speedBooster": true,
"minTiles": 3
}
}
Requires: "canTrickyJump" "canCrossRoomJumpIntoWater" "ScrewAttack" |
|
Oasis Cross Room Jump with Screw Attack and Speed through the Top Door (From the Right) (Insane)
Oasis
From: 2
Right Door
To: 3
Top Door
Notable: true Use Screw Attack to break the bomb block by entering from a non-water room with a spin jump, and make it all the way through the top door. This uses exactly 14 tiles (with no open end) - more rises too fast to do the trick, less does not have the height needed to reach the door. Use angle to break spin, then a momentumConservingTurnaround as early as possible, right as you pass the above tile horizontally. Using the background for positioning may help. The second momentumConservingTurnaround is as late as possible, just before touching the above platform. A third momentumConservingTurnaround is used on the door as it is opening. Entrance condition: {
"comeInJumping": {
"speedBooster": true,
"minTiles": 13.4375
}
}
Requires: "canInsaneJump" "canCrossRoomJumpIntoWater" "ScrewAttack" "canMomentumConservingTurnaround" |
|
From: 2
Right Door
To: 4
Junction Below Top Door
Notable: true Use Screw Attack to break the bomb block by entering from a non-water room with a spin jump, and make it to the top. It helps to enter as low as possible and with as much horizontal speed as possible and with HiJump turned off. Entrance condition: {
"comeInJumping": {
"speedBooster": true,
"minTiles": 13
}
}
Requires: "canInsaneJump" "canCrossRoomJumpIntoWater" "ScrewAttack" "canMomentumConservingTurnaround" |
|
From: 2
Right Door
To: 6
Junction Above Bomb Blocks
Notable: true Use Screw Attack to break the bomb block by entering from a non-water room with a spin jump. It helps to enter as low as possible and with as much horizontal speed as possible and with HiJump turned off. Even if executed correctly, the trick can fail with 50% probability due to collision oscillation. Entrance condition: {
"comeInJumping": {
"speedBooster": "any",
"minTiles": 4
}
}
Requires: "canTrickyJump" "canCrossRoomJumpIntoWater" "ScrewAttack" |
|
From: 2
Right Door
To: 6
Junction Above Bomb Blocks
Notable: true Use Screw Attack to break the bomb block by entering from a non-water room with a spin jump. It helps to enter as low as possible and with as much horizontal speed as possible and with HiJump turned off. Even if executed correctly, the trick can fail with 50% probability due to collision oscillation. Entrance condition: {
"comeInJumping": {
"speedBooster": true,
"minTiles": 3
}
}
Requires: "canTrickyJump" "canCrossRoomJumpIntoWater" "ScrewAttack" |
|
Gain momentum in the room to the left, then jump in this room in order to land on the first pillar. Ensure that Speed Booster is disabled. Perform an air ball before hitting the ceiling in order to land on the first pillar. Requires a runway of 6 tiles in the adjacent room. Entrance condition: {
"comeInRunning": {
"speedBooster": false,
"minTiles": 6
}
}
Requires: "canLateralMidAirMorph" "canCrossRoomJumpIntoWater" "canPlayInSand" |
|
From: 1
Left Door
To: 5
Left Pillar Junction
Gain momentum in the room to the left, then jump in this room in order to land on the first pillar. Ensure that Speed Booster is disabled. Requires a runway of only approximately 0.5 tiles in the adjacent room. Perform an air ball before hitting the ceiling in order to land on the first pillar. Entrance condition: {
"comeInRunning": {
"speedBooster": false,
"minTiles": 1
}
}
Requires: "canLateralMidAirMorph" "canCrossRoomJumpIntoWater" "HiJump" "canPlayInSand" |
|
Bomb boost through the doorway. Get the bomb boost while as close to the door transition as possible in order to get to the first pillar. Entrance condition: {
"comeInWithBombBoost": {}
}
Requires: "canCrossRoomJumpIntoWater" |
|
Gain momentum in the room to the left, then jump at the edge of the runway in order to land on the first pillar. Requires a runway of at least 2 tiles (with no open end) in the adjacent room. Shrinking Samus' hitbox before landing makes the jump a little easier. Entrance condition: {
"comeInRunning": {
"speedBooster": "any",
"minTiles": 1.4375
}
}
Requires: "HiJump" "canCrossRoomJumpIntoWater" "canTrickyJump" "canPlayInSand" |
|
Gain momentum in the room to the left, then jump in this room in order to land on the first pillar. Ensure that Speed Booster is disabled. With a short runway of 5 tiles in the adjacent room, it is required to jump as late as possible at the edge of the runway in this room. With any longer of a runway, the jump is much less precise. Entrance condition: {
"comeInRunning": {
"speedBooster": false,
"minTiles": 5
}
}
Requires: "canCrossRoomJumpIntoWater" "canPlayInSand" "canCarefulJump" |
|
From: 1
Left Door
To: 5
Left Pillar Junction
Gain momentum in the room to the left, then jump in this room in order to land on the first pillar. Ensure that Speed Booster is disabled. Perform an air ball before hitting the ceiling in order to land on the first pillar. Requires a runway of 5 tiles in the adjacent room. Entrance condition: {
"comeInRunning": {
"speedBooster": false,
"minTiles": 5
}
}
Requires: "canLateralMidAirMorph" "canCrossRoomJumpIntoWater" "canPlayInSand" "canTrickyJump" |
|
Gain momentum in the room to the left, then jump in this room in order to land on the first pillar. Ensure that Speed Booster is disabled. With a short runway of 5 tiles (with no open end) in the adjacent room, it is required to jump as late as possible at the edge of the runway in this room. With any longer of a runway, the jump is much less precise. Shrinking Samus' hitbox before landing makes the jump a little easier. Entrance condition: {
"comeInRunning": {
"speedBooster": false,
"minTiles": 4
}
}
Requires: "canCrossRoomJumpIntoWater" "canPlayInSand" "canTrickyJump" |
|
From: 1
Left Door
To: 5
Left Pillar Junction
Notable: true Enter with at least 1 tile of run speed from an air room, with Speedbooster unequipped. Jump from near the end of the runway (though a jump from 1-2 tiles away from the end can still work). Press pause while crossing the narrow first sandfall, then perform a lateral mid-air morph after exiting the sandfall. Equip both Spring Ball and Speed Booster, and perform a mid-air Spring Ball jump at somewhere close to the maximum height. Unequip Spring Ball while descending through the wide second sidefall. Entrance condition: {
"comeInRunning": {
"speedBooster": true,
"minTiles": 1
}
}
Requires: "canCrossRoomJumpIntoWater" "canPlayInSand" "canLateralMidAirMorph" "canTrickySpringBallJump" "canSpringFling" |


.png)
.gif)
.png)
.gif)
.png)
.gif)
