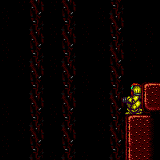
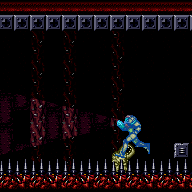
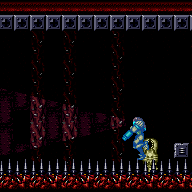
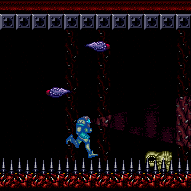
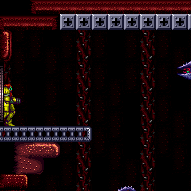
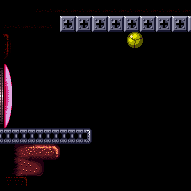
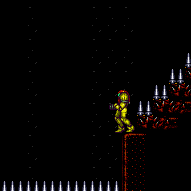
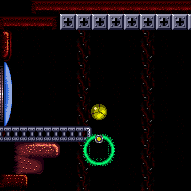
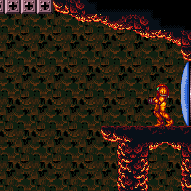
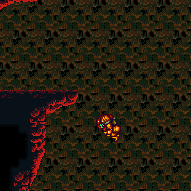
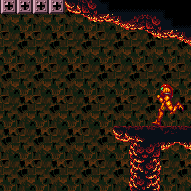
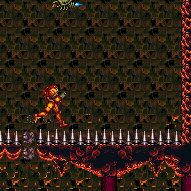
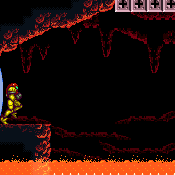
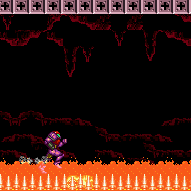
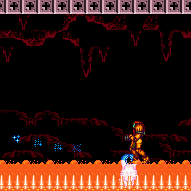
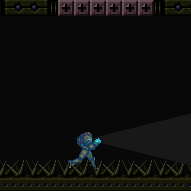
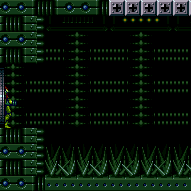
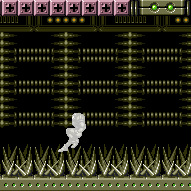
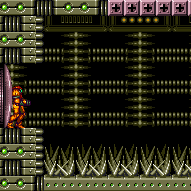
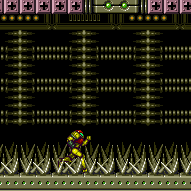
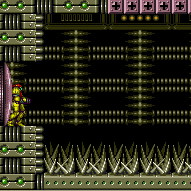
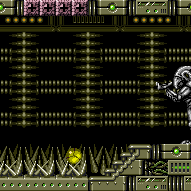
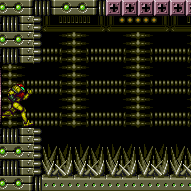
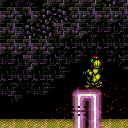
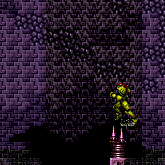
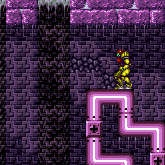
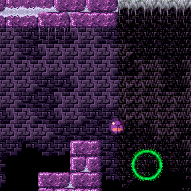
canUseIFrames (Hard)
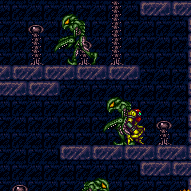
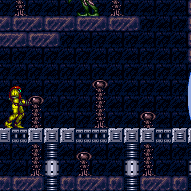
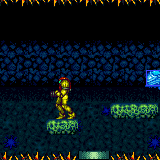
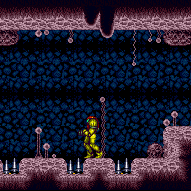
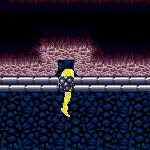
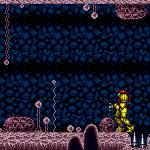
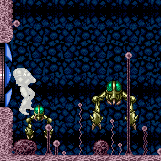
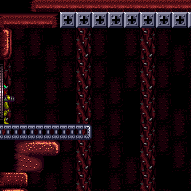
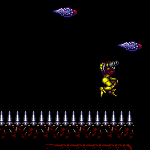
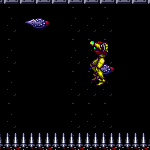
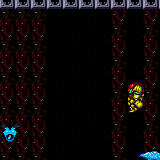
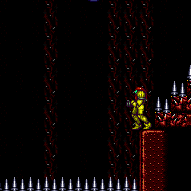
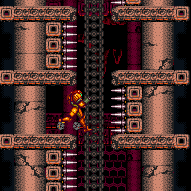
Take damage to gain invulnerability frames so that Samus can run through enemies and on spike floors or wall jump from a spike wall. Enemies and their projectiles provide 95 i-frames, while spikes and thorns provide 60.
Dependencies: canCarefulJump
Dev note: Spikes seem to have collision oscillation which can make them have 59-60 frames, thorns seem to always have 59.
Strats ()
From: 1
Left Door
To: 1
Left Door
Activate Bomb Torizo, and farm his eggs for energy. They can be farmed freely. Waste all but 5 Missiles to prevent the laser attack. Standing in the correct position will ensure he will be trapped against the wall. Quickly use a jump to perform a very narrow shinecharge, then get interrupted by any Bomb Torizo attack. Entrance condition: {
"comeInWithRMode": {}
}Requires: {
"not": "f_DefeatedBombTorizo"
}
{
"not": "f_ZebesSetAblaze"
}
"canRiskPermanentLossOfAccess"
"h_activateBombTorizo"
"canUseIFrames"
{
"or": [
"canDodgeWhileShooting",
{
"resourceAtMost": [
{
"type": "Missile",
"count": 5
}
]
}
]
}
{
"refill": [
"Energy"
]
}
{
"canShineCharge": {
"usedTiles": 13,
"openEnd": 0
}
}
{
"autoReserveTrigger": {
"maxReserveEnergy": 95
}
}
"canRModeSparkInterrupt"Collects items: 2 Dev note: May need an alternative helper in place of h_activateBombTorizo, due to R-Mode entrance condition. |
From: 1
Top Left Door
To: 4
Top Junction (Right of Spikes)
Requires: "canUseIFrames" "h_pauseAbuseMinimalReserveRefill" |
From: 1
Top Left Door
To: 4
Top Junction (Right of Spikes)
Requires: {
"spikeHits": 1
}
{
"or": [
"canUseIFrames",
{
"spikeHits": 1
}
]
} |
From: 1
Top Left Door
To: 5
Bottom Junction (Right of Boyons)
Roll through the item to overload PLMs, then go down through the speed blocks and exit G-mode to collect the item. Note that if the item has already been collected, Samus can overload PLMs with Grapple. With Morph and Grapple, quickly grapple to then release grapple on the grapple blocks a few times until they stop working. Be careful not to fall into the spikes. Entrance condition: {
"comeInWithGMode": {
"mode": "direct",
"morphed": true
}
}Requires: "canRemoteAcquire"
{
"or": [
{
"and": [
{
"itemNotCollectedAtNode": 3
},
"canRiskPermanentLossOfAccess"
]
},
{
"and": [
"Morph",
"Grapple",
{
"or": [
"canTrickyJump",
{
"spikeHits": 1
}
]
}
]
}
]
}
{
"or": [
{
"and": [
"h_artificialMorphSpringBall",
{
"spikeHits": 4
}
]
},
{
"and": [
"h_artificialMorphSpringBall",
"h_artificialMorphBombHorizontally",
{
"spikeHits": 3
}
]
},
{
"and": [
"h_artificialMorphSpringFling",
"canTrickyJump",
{
"spikeHits": 2
}
]
},
{
"and": [
"Morph",
{
"or": [
"SpaceJump",
{
"and": [
{
"spikeHits": 1
},
{
"or": [
"canUseIFrames",
{
"spikeHits": 1
}
]
}
]
}
]
}
]
}
]
}Collects items: 3 Dev note: FIXME: It is possible to cross with spike hits, but it would require a CF and reserve trigger below. |
From: 1
Top Left Door
To: 5
Bottom Junction (Right of Boyons)
Place the PBs exactly two tiles left of the Morph tunnel. Be sure not to touch the item if this strat will be needed again in the future. It is possible to cross the spike pit with spring flings and two spike hits. Pause then jump just before the fade out ends and turn Spring Ball off in order to get more horizontal distance at the start and avoid one spike hit. Turn Spring Ball off and on again while jumping on the spikes to get across to avoid another. Entrance condition: {
"comeInWithGMode": {
"mode": "direct",
"morphed": true
}
}Requires: "canPowerBombItemOverloadPLMs"
{
"itemNotCollectedAtNode": 3
}
"canRiskPermanentLossOfAccess"
"h_artificialMorphPowerBomb"
"h_artificialMorphPowerBomb"
{
"or": [
{
"and": [
"h_artificialMorphSpringBall",
{
"spikeHits": 4
}
]
},
{
"and": [
"h_artificialMorphSpringBall",
"h_artificialMorphBombHorizontally",
{
"spikeHits": 3
}
]
},
{
"and": [
"h_artificialMorphSpringFling",
"canTrickyJump",
{
"spikeHits": 2
}
]
},
{
"and": [
"Morph",
{
"or": [
"SpaceJump",
{
"and": [
{
"spikeHits": 1
},
{
"or": [
"canUseIFrames",
{
"spikeHits": 1
}
]
}
]
}
]
}
]
}
]
} |
From: 1
Top Left Door
To: 5
Bottom Junction (Right of Boyons)
It is possible to cross the spike pit with spring flings and two spike hits. Pause then jump just before the fade out ends and turn Spring Ball off in order to get more horizontal distance at the start and avoid one spike hit. Turn Spring Ball off and on again while jumping on the spikes to get across to avoid another. Entrance condition: {
"comeInWithGMode": {
"mode": "any",
"morphed": true
}
}Requires: "h_artificialMorphBombs"
{
"or": [
{
"and": [
"h_artificialMorphSpringBall",
{
"spikeHits": 4
}
]
},
{
"and": [
"h_artificialMorphSpringBall",
"h_artificialMorphBombHorizontally",
{
"spikeHits": 3
}
]
},
{
"and": [
"h_artificialMorphSpringFling",
"canTrickyJump",
{
"spikeHits": 2
}
]
},
{
"and": [
"Morph",
{
"or": [
"SpaceJump",
{
"and": [
{
"spikeHits": 1
},
{
"or": [
"canUseIFrames",
{
"spikeHits": 1
}
]
}
]
}
]
}
]
},
{
"and": [
"h_artificialMorphIBJ",
{
"spikeHits": 10
},
{
"or": [
"h_artificialMorphBombHorizontally",
{
"spikeHits": 2
}
]
}
]
},
"h_artificialMorphLongCeilingBombJump"
]
}Dev note: The IBJ from spikes has 2 extra spike hits added as a leniency. |
From: 1
Top Left Door
To: 5
Bottom Junction (Right of Boyons)
Quickly grapple to then release grapple on the grapple blocks a few times until they stop working. Be careful not to fall into the spikes. Entrance condition: {
"comeInWithGMode": {
"mode": "any",
"morphed": false
}
}Requires: "Morph"
"Grapple"
{
"or": [
"canTrickyJump",
{
"spikeHits": 1
}
]
}
{
"or": [
"SpaceJump",
{
"and": [
{
"spikeHits": 1
},
{
"or": [
"canUseIFrames",
{
"spikeHits": 1
}
]
}
]
}
]
}Dev note: FIXME: Grapple will quickly overload PLMS. It is barely possible to cross the gap using short grapples, canResetFallSpeed, and ending with a swing. |
From: 4
Top Junction (Right of Spikes)
To: 1
Top Left Door
Requires: "canUseIFrames" "h_pauseAbuseMinimalReserveRefill" |
From: 4
Top Junction (Right of Spikes)
To: 1
Top Left Door
Requires: {
"spikeHits": 1
}
{
"or": [
"canUseIFrames",
{
"spikeHits": 1
}
]
} |
|
Farm four of the pirates for drops. If you have full power bombs and can do so without using one you can also kill two Beetoms for guaranteed two small energy drops. Keep the bottom pirate alive: stun it with a Power Beam shot or i-frame past it. Once you have the reserves, perform a 1-screen shortcharge between the bottom doors, then hop back up to the bottom pirate's ledge and get shot at. Entrance condition: {
"comeInWithRMode": {}
}Requires: "Morph"
"canUseIFrames"
{
"or": [
"h_CrystalFlashForReserveEnergy",
{
"and": [
"h_RModeCanRefillReserves",
{
"or": [
{
"and": [
{
"enemyKill": {
"enemies": [
[
"Green Space Pirate (standing)",
"Green Space Pirate (standing)"
],
[
"Green Space Pirate (standing)",
"Green Space Pirate (standing)"
]
],
"excludedWeapons": [
"Missile"
]
}
},
{
"resourceMissingAtMost": [
{
"type": "Missile",
"count": 0
}
]
},
{
"partialRefill": {
"type": "ReserveEnergy",
"limit": 20
}
}
]
},
{
"and": [
{
"enemyKill": {
"enemies": [
[
"Beetom",
"Beetom"
]
],
"excludedWeapons": [
"PowerBomb"
]
}
},
{
"resourceMissingAtMost": [
{
"type": "PowerBomb",
"count": 0
}
]
},
{
"partialRefill": {
"type": "ReserveEnergy",
"limit": 10
}
}
]
}
]
}
]
}
]
}
{
"or": [
{
"canShineCharge": {
"usedTiles": 12,
"openEnd": 0
}
},
{
"and": [
{
"or": [
{
"doorUnlockedAtNode": 3
},
{
"doorUnlockedAtNode": 4
}
]
},
{
"canShineCharge": {
"usedTiles": 13,
"openEnd": 0
}
}
]
},
{
"and": [
{
"doorUnlockedAtNode": 3
},
{
"doorUnlockedAtNode": 4
},
{
"canShineCharge": {
"usedTiles": 14,
"openEnd": 0
}
}
]
}
]
}
{
"autoReserveTrigger": {
"maxReserveEnergy": 95
}
}
"canRModeSparkInterrupt"Unlocks doors: {"nodeId":3,"types":["ammo"],"requires":[]}
{"nodeId":4,"types":["ammo"],"requires":[]} |
From: 2
Middle Right Door
To: 4
Bottom Right Door
Farm four of the pirates for drops, leaving the bottom pirate alive. Stun it with a Power Beam shot or i-frame past it. Perform a 1-screen shortcharge between the bottom doors, then hop back up to the bottom pirate's ledge and get shot at. Entrance condition: {
"comeInWithRMode": {}
}Requires: "canUseIFrames"
{
"or": [
"h_CrystalFlashForReserveEnergy",
{
"and": [
"h_RModeCanRefillReserves",
{
"enemyKill": {
"enemies": [
[
"Green Space Pirate (standing)",
"Green Space Pirate (standing)"
],
[
"Green Space Pirate (standing)",
"Green Space Pirate (standing)"
]
],
"excludedWeapons": [
"Missile"
]
}
},
{
"resourceMissingAtMost": [
{
"type": "Missile",
"count": 0
}
]
},
{
"partialRefill": {
"type": "ReserveEnergy",
"limit": 20
}
}
]
}
]
}
{
"or": [
{
"canShineCharge": {
"usedTiles": 12,
"openEnd": 0
}
},
{
"and": [
{
"or": [
{
"doorUnlockedAtNode": 3
},
{
"doorUnlockedAtNode": 4
}
]
},
{
"canShineCharge": {
"usedTiles": 13,
"openEnd": 0
}
}
]
},
{
"and": [
{
"doorUnlockedAtNode": 3
},
{
"doorUnlockedAtNode": 4
},
{
"canShineCharge": {
"usedTiles": 14,
"openEnd": 0
}
}
]
}
]
}
{
"autoReserveTrigger": {
"maxReserveEnergy": 95
}
}
"canRModeSparkInterrupt"Unlocks doors: {"nodeId":3,"types":["ammo"],"requires":[]}
{"nodeId":4,"types":["ammo"],"requires":[]} |
From: 2
Middle Right Door
To: 4
Bottom Right Door
Requires: "canUseIFrames"
{
"enemyDamage": {
"enemy": "Green Space Pirate (standing)",
"type": "contact",
"hits": 3
}
} |
From: 3
Bottom Left Door
To: 4
Bottom Right Door
Stun the bottom pirate with a Power Beam shot, or i-frame past it. Farm the four pirates above for drops, then get back through the bottom pirate. Stun it with a Power Beam shot or i-frame past it a second time. Perform a 1-screen shortcharge between the bottom doors, then hop back up to the bottom pirate's ledge and get shot at. Entrance condition: {
"comeInWithRMode": {}
}Requires: "canUseIFrames"
{
"or": [
"h_CrystalFlashForReserveEnergy",
{
"and": [
{
"enemyDamage": {
"enemy": "Green Space Pirate (standing)",
"type": "contact",
"hits": 1
}
},
"h_RModeCanRefillReserves",
{
"enemyKill": {
"enemies": [
[
"Green Space Pirate (standing)",
"Green Space Pirate (standing)"
],
[
"Green Space Pirate (standing)",
"Green Space Pirate (standing)"
]
],
"excludedWeapons": [
"Missile"
]
}
},
{
"resourceMissingAtMost": [
{
"type": "Missile",
"count": 0
}
]
},
{
"partialRefill": {
"type": "ReserveEnergy",
"limit": 20
}
}
]
}
]
}
{
"or": [
{
"canShineCharge": {
"usedTiles": 12,
"openEnd": 0
}
},
{
"and": [
{
"or": [
{
"doorUnlockedAtNode": 3
},
{
"doorUnlockedAtNode": 4
}
]
},
{
"canShineCharge": {
"usedTiles": 13,
"openEnd": 0
}
}
]
},
{
"and": [
{
"doorUnlockedAtNode": 3
},
{
"doorUnlockedAtNode": 4
},
{
"canShineCharge": {
"usedTiles": 14,
"openEnd": 0
}
}
]
}
]
}
{
"autoReserveTrigger": {
"maxReserveEnergy": 95
}
}
"canRModeSparkInterrupt"Unlocks doors: {"nodeId":3,"types":["ammo"],"requires":[]}
{"nodeId":4,"types":["ammo"],"requires":[]} |
From: 4
Bottom Right Door
To: 2
Middle Right Door
Requires: "canDash"
"canUseIFrames"
"canTrickyJump"
{
"enemyDamage": {
"enemy": "Green Space Pirate (standing)",
"type": "contact",
"hits": 3
}
}Dev note: A shinespark could be used to kill the bottom two pirates. |
From: 4
Bottom Right Door
To: 4
Bottom Right Door
Stun the bottom pirate with a Power Beam shot, or i-frame past it. Farm the four pirates above for drops, then get back through the bottom pirate. Stun it with a Power Beam shot or i-frame past it a second time. Perform a 1-screen shortcharge between the bottom doors, then hop back up to the bottom pirate's ledge and get shot at. Entrance condition: {
"comeInWithRMode": {}
}Requires: "canUseIFrames"
{
"or": [
"h_CrystalFlashForReserveEnergy",
{
"and": [
{
"enemyDamage": {
"enemy": "Green Space Pirate (standing)",
"type": "contact",
"hits": 1
}
},
"h_RModeCanRefillReserves",
{
"enemyKill": {
"enemies": [
[
"Green Space Pirate (standing)",
"Green Space Pirate (standing)"
],
[
"Green Space Pirate (standing)",
"Green Space Pirate (standing)"
]
],
"excludedWeapons": [
"Missile"
]
}
},
{
"resourceMissingAtMost": [
{
"type": "Missile",
"count": 0
}
]
},
{
"partialRefill": {
"type": "ReserveEnergy",
"limit": 20
}
}
]
}
]
}
{
"or": [
{
"canShineCharge": {
"usedTiles": 12,
"openEnd": 0
}
},
{
"and": [
{
"or": [
{
"doorUnlockedAtNode": 3
},
{
"doorUnlockedAtNode": 4
}
]
},
{
"canShineCharge": {
"usedTiles": 13,
"openEnd": 0
}
}
]
},
{
"and": [
{
"doorUnlockedAtNode": 3
},
{
"doorUnlockedAtNode": 4
},
{
"canShineCharge": {
"usedTiles": 14,
"openEnd": 0
}
}
]
}
]
}
{
"autoReserveTrigger": {
"maxReserveEnergy": 95
}
}
"canRModeSparkInterrupt"Unlocks doors: {"nodeId":3,"types":["ammo"],"requires":[]}
{"nodeId":4,"types":["ammo"],"requires":[]} |
|
Overload PLMs by placing Bombs at the far right, against the bottom of the crumble block, at the right of the low underwater ceiling. It is okay to kill the fast crab, and leave another crab alive, off camera. After PLMs are overloaded, lure a crab and take a hit when it is near the bottom right corner then another at the top of Samus' jump at the crumble block to boost to the right. This requires carefully timing the first hit and jump so that Samus can get hit at the peak of her jump. Entrance condition: {
"comeInWithGMode": {
"mode": "any",
"morphed": true
}
}Requires: "canComplexGMode"
"h_artificialMorphSpringBall"
"h_artificialMorphBombs"
"canUseIFrames"
"canNeutralDamageBoost"
{
"enemyDamage": {
"enemy": "Sciser",
"type": "contact",
"hits": 2
}
} |
From: 1
Left Door
To: 2
Right Door
Use a Waver to damage boost across part of the room, then pass through any remaining enemies while i-frames are active. Killing the first waver and damage boosting with the second may be easier. Entrance condition: {
"comeInShinecharged": {}
}Requires: {
"shineChargeFrames": 140
}
"canShinechargeMovementTricky"
"canHorizontalDamageBoost"
"canTrickyJump"
"canUseIFrames"
{
"enemyDamage": {
"enemy": "Waver",
"type": "contact",
"hits": 1
}
}Exit condition: {
"leaveShinecharged": {}
}Unlocks doors: {"types":["super"],"requires":[]}
{"types":["missiles","powerbomb"],"requires":["never"]} |
|
Jump into the Choot to damage boost across part of the room, then pass through any remaining enemies while i-frames are active. Entrance condition: {
"comeInShinecharged": {}
}Requires: {
"shineChargeFrames": 150
}
"canShinechargeMovementTricky"
"canHorizontalDamageBoost"
"canTrickyJump"
"canUseIFrames"
{
"enemyDamage": {
"enemy": "Choot",
"type": "contact",
"hits": 1
}
}Exit condition: {
"leaveShinecharged": {}
}Unlocks doors: {"types":["super"],"requires":[]}
{"types":["missiles","powerbomb"],"requires":["never"]} |
From: 2
Right Door
To: 2
Right Door
Run and jump to the left, turning around right before landing on the spikes. Continue holding right, gaining speed to jump out through the door. Requires: "Gravity"
{
"spikeHits": 1
}
"canUseIFrames"
{
"or": [
{
"spikeHits": 2
},
"canInsaneJump"
]
}Exit condition: {
"leaveWithSidePlatform": {
"height": 3,
"runway": {
"length": 16,
"openEnd": 0
},
"obstruction": [
1,
0
]
}
}Dev note: Max extra run speed $3.3 with spin, or $3.4 with a quick aim-down. This would not be logically valid for gaining blue speed, so we have to be sure it can't be used that way. |
From: 1
Bottom Left Door
To: 6
G-Mode Morph Junction Direct (Bottom)
Regain mobility with the first Geemer then roll through the second to avoid a second hit. Entrance condition: {
"comeInWithGMode": {
"mode": "direct",
"morphed": true,
"mobility": "immobile"
}
}Requires: "h_ZebesIsAwake" "canUseIFrames" |
From: 4
Bottom Right Door
To: 2
Top Right Door
Freeze a Zebbo inside the wall above the right side of the spikeway, close to the ceiling thorns. Face right, equip X-Ray, move at least a few pixels away from the wall, and jump straight up into the ceiling thorns. If successful, Samus will be knocked back into the wall and end up standing inside it. Use X-Ray immediately to prevent additional thorn hits. If Samus is high enough to be touching the thorns, then i-frames will continue to be refreshed once per second. While X-Ray climbing, be careful to only release X-Ray soon after i-frames are refreshed. Crouch before pressing X-Ray again. Requires: {
"notable": "Wall Ice Clip X-Ray Climb"
}
"canWallIceClip"
{
"thornHits": 1
}
"canXRayClimb"
"canUseIFrames"
"canNeutralDamageBoost"Dev note: Standing at least 3 pixels away from the wall ensures that knockback pushes Samus fully up against the ceiling; there is also no problem with standing further right, even hanging off the ledge: as long as Samus is still in range to take damage from the thorns above, they will be able to knock Samus into the wall. It is possible to freeze the Zeebo lower, but if Samus is too low, it will be necessary to take 3 thorn hits. It is also possible to get stuck inside the wall by taking knockback from a floor thorn, or by using a frozen Beetom as a platform. However those methods are not any easier, more damage will be taken, and the climb will be longer. If Samus begins climbing at a level below the ceiling thorns, then as Samus approaches the thorns, X-Ray will need to only be released while turning to the right, in order to prevent the thorn hits from knocking Samus out of the wall. |
From: 1
Top Right Door
To: 1
Top Right Door
Stand to the right of the center spike Run to the left, and continue running left while getting knocked back right by the spike. The spike i-frames allow shortcharging while running through the left two spike blocks. After gaining a shinecharge, turn back right, run, and jump through the door. Requires: {
"obstaclesCleared": [
"A"
]
}
{
"obstaclesNotCleared": [
"B"
]
}
{
"canShineCharge": {
"usedTiles": 23,
"openEnd": 0
}
}
{
"spikeHits": 1
}
"canUseIFrames"
"canShinechargeMovementComplex"
{
"shineChargeFrames": 118
}Exit condition: {
"leaveShinecharged": {}
}Dev note: Spikes cannot be used as openEnds. |
From: 3
Item
To: 4
Top Left Junction
Gain a shinecharge by running right-to-left, either using the short runway (with unbroken Super block) or an extended runway by taking a spike hit. Then spin jump, hit the ceiling, aim down, break the Super block, and turn around to quick drop through the crumble block. During the item message box, buffer the inputs to turn around to the right and jump. Once under the crumble block (the left part of it), press up while still holding jump, to immediately activate the spark and make it up in time. Requires: {
"notable": "Mission Impossible Shinespark"
}
{
"or": [
{
"canShineCharge": {
"usedTiles": 16,
"openEnd": 0
}
},
{
"and": [
{
"canShineCharge": {
"usedTiles": 23,
"openEnd": 0
}
},
{
"spikeHits": 1
},
"canUseIFrames"
]
}
]
}
"canShinechargeMovementComplex"
"canQuickDrop"
{
"or": [
{
"shinespark": {
"frames": 19,
"excessFrames": 7
}
},
{
"and": [
{
"shinespark": {
"frames": 19,
"excessFrames": 15
}
},
"canCrumbleJump"
]
}
]
}
{
"obstaclesCleared": [
"A",
"B"
]
}Dev note: This expects that the Sidehoppers are dead. To avoid redundant requirements, they must be killed coming in. |
From: 4
Top Left Junction
To: 4
Top Left Junction
Kill both Sidehoppers for energy, or else Crystal Flash (kill both Sidehoppers anyway so you have the runway free). Use the spikes for pause-abuse interrupt. Requires: {
"obstaclesCleared": [
"R-Mode"
]
}
{
"obstaclesCleared": [
"A"
]
}
{
"or": [
"h_CrystalFlashForReserveEnergy",
{
"and": [
"h_RModeCanRefillReserves",
{
"resourceMissingAtMost": [
{
"type": "Missile",
"count": 0
}
]
},
{
"resourceMissingAtMost": [
{
"type": "Super",
"count": 0
}
]
},
{
"or": [
{
"and": [
"canBeLucky",
{
"partialRefill": {
"type": "ReserveEnergy",
"limit": 5
}
}
]
},
{
"and": [
"canBeVeryLucky",
{
"partialRefill": {
"type": "ReserveEnergy",
"limit": 20
}
}
]
}
]
}
]
}
]
}
{
"or": [
{
"canShineCharge": {
"usedTiles": 16,
"openEnd": 0
}
},
{
"and": [
{
"spikeHits": 1
},
"canUseIFrames",
{
"canShineCharge": {
"usedTiles": 23,
"openEnd": 0
}
}
]
}
]
}
{
"autoReserveTrigger": {}
}
"canRModePauseAbuseSparkInterrupt"Resets obstacles: R-Mode |
From: 1
Left Door
To: 1
Left Door
Requires: {
"enemyDamage": {
"enemy": "Sidehopper",
"type": "contact",
"hits": 1
}
}
"canUseIFrames"Exit condition: {
"leaveWithRunway": {
"length": 1,
"openEnd": 1
}
}Dev note: This is worst-case scenario. A strat that comes in and leaves with a single hit could be added. |
From: 1
Left Door
To: 1
Left Door
Use damage from the small sidehopper to align against the left wall. Jump straight up and shoot with the correct timing. This strat involves shooting a Super diagonally from the correct height while flush against the left wall. Its acceleration will cause it to clip into the blue gate off-screen. Requires: {
"notable": "Reverse Gate Glitch"
}
{
"obstaclesNotCleared": [
"A"
]
}
{
"enemyDamage": {
"enemy": "Sidehopper",
"type": "contact",
"hits": 1
}
}
"canTrickyJump"
"canNeutralDamageBoost"
"canUseIFrames"
"HiJump"
"canOffScreenSuperShot"
{
"or": [
{
"noFlashSuit": {}
},
"h_useSpringBall"
]
}Clears obstacles: B |
From: 1
Right Door
To: 2
Chozo Item
Traverse the room while rolling on the thorns and avoiding the Samus Eaters. Roll from the first platform onto the thorns under the first set of Boyons. When just past the first Boyons, turn right and wait on the safe spot for a second to overload PLMs. Move right to touch the thorns and use that to damage boost leftwards onto the next thorns and roll into the third Samus Eater. Place a Power Bomb and then quickly unmorph and jump onto the block above and exit G-Mode before the Power Bomb explodes to break the wall. Note that if Samus is teleported into the Samus Eater when exiting G-Mode, then PLMs weren't properly overloaded before entering it. PLMs can be overloaded by waiting on their petals before entering them. Also note that there are much easier strats with more Energy or more Power Bombs. Entrance condition: {
"comeInWithGMode": {
"mode": "any",
"morphed": true
}
}Requires: "canUseIFrames"
"canNeutralDamageBoost"
"canTrickyGMode"
{
"thornHits": 2
}
"h_artificialMorphPowerBomb"Clears obstacles: B |
From: 1
Right Door
To: 2
Chozo Item
Traverse the room while rolling on the thorns and avoiding the Samus Eaters. Roll from the first platform onto the thorns under the first set of Boyons. When just past the first Boyons, turn right to damage boost up and hit the block and fall back on the thorns. While still facing right wait for the thorns to hit again; use the boost to get onto the next set of thorns and roll across them into the third Samus Eater before using a Power Bomb. Use the Power Bomb to boost up into the thorns. Hit the thorns again to get next to the Chozo statue. Place another Power Bomb and exit G-Mode before it goes off to break the wall. Note that if Samus is teleported into the Samus Eater when exiting G-Mode, then PLMs weren't properly overloaded before entering it. PLMs can be overloaded by waiting on their petals before entering them. Taking 2 thorn hits while under the first Boyons is important for this reason. Entrance condition: {
"comeInWithGMode": {
"mode": "any",
"morphed": true
}
}Requires: "canComplexGMode"
"canUseIFrames"
"canNeutralDamageBoost"
"canInsaneJump"
{
"thornHits": 5
}
"h_artificialMorphPowerBomb"
"h_additionalBomb"Clears obstacles: B |
|
Open the door in advance, then lure the Sidehoopers to left wall. This is much easier with Morph ball. Take a hit, then start running with the i-frames. Requires: {
"obstaclesNotCleared": [
"B"
]
}
"canUseIFrames"
{
"enemyDamage": {
"enemy": "Sidehopper",
"type": "contact",
"hits": 1
}
}
{
"or": [
"Morph",
{
"enemyDamage": {
"enemy": "Sidehopper",
"type": "contact",
"hits": 3
}
}
]
}Exit condition: {
"leaveWithRunway": {
"length": 29,
"openEnd": 0
}
} |
|
Use the Solid Blocks next to the Samus Eater to clip up through the Power Bomb Blocks. Carefully jump around the thorns, use HiJump to jump over them, or walk through them using i-frames. Requires: "canCeilingClip"
"canPartialFloorClip"
{
"or": [
{
"and": [
"canCarefulJump",
"HiJump",
"canTwoTileSqueeze",
{
"or": [
"canTrickyJump",
{
"thornHits": 1
}
]
}
]
},
{
"and": [
"canNeutralDamageBoost",
"canUseIFrames",
{
"thornHits": 1
}
]
},
{
"and": [
"canPreciseWalljump",
"canTwoTileSqueeze"
]
}
]
} |
From: 1
Left Door
To: 2
Right Door
If you wait long enough, a Waver will arrive. After it turns around to go back to the right, damage boost off of it, then follow it. Continue to hit it to get i-frames to avoid taking damage from any spikes. The amount of Waver hits can be reduced by running ahead on the spikes and taking damage from a second Waver instead of following the first Waver. Requires: {
"notable": "Damage Boost (Left to Right)"
}
"canHorizontalDamageBoost"
{
"enemyDamage": {
"enemy": "Waver",
"type": "contact",
"hits": 2
}
}
{
"or": [
{
"and": [
"canUseIFrames",
"canTrickyJump"
]
},
{
"enemyDamage": {
"enemy": "Waver",
"type": "contact",
"hits": 3
}
}
]
} |
|
Requires: {
"spikeHits": 4
}
{
"or": [
"canUseIFrames",
{
"spikeHits": 3
}
]
} |
|
Use a Fireflea (or two) to quickly boost to the left, to be able to catch the Waver and boost off it on its first cycle, to cross the first gap. Take one or two more hits from the Wavers for i-frames; take the last hit close to the ground while holding forward. Then gain speed using Speed Booster to jump across the second gap. If the jump is slightly short, a wall jump can be used to get up. Using the second Waver cycle leads to a bad pattern at the end, where the path of the speedy jump will be blocked by a Waver, which can still be avoided but only with great difficulty. Requires: "canHorizontalDamageBoost"
"canTrickyJump"
"canUseIFrames"
"h_speedDash"
{
"or": [
"canInsaneJump",
{
"and": [
"canTrickyDodgeEnemies",
{
"enemyDamage": {
"enemy": "Fireflea",
"type": "contact",
"hits": 1
}
}
]
},
{
"enemyDamage": {
"enemy": "Fireflea",
"type": "contact",
"hits": 2
}
}
]
}
{
"or": [
{
"and": [
"canInsaneJump",
{
"enemyDamage": {
"enemy": "Waver",
"type": "contact",
"hits": 2
}
}
]
},
{
"enemyDamage": {
"enemy": "Waver",
"type": "contact",
"hits": 3
}
}
]
}
{
"or": [
"canWalljump",
"canTrickyDodgeEnemies"
]
}Dev note: FIXME: Patiently waiting for a different Waver cycle could be another way to avoid Fireflea damage. FIXME: gaining a shinecharge on the spikes (and hero shot sparking out the left door) is possible though extremely precise. |
From: 2
Right Door
To: 1
Left Door
A precise strat that involves crossing both gaps by damage boosting off Wavers. The Wavers are also used for i-frames to avoid taking damage from any spikes. It generally best to use a Fireflea (or two) to quickly boost to the left, in order to boost off the Waver during its first cycle. Waiting for the Waver to return is possible and does not take long, but it gives a different pattern at the left side of the room, making the final damage boost significantly more difficult. Requires: {
"notable": "Full Room Damage Boosts (Right to Left)"
}
"canHorizontalDamageBoost"
"canTrickyJump"
"canUseIFrames"
{
"or": [
{
"enemyDamage": {
"enemy": "Fireflea",
"type": "contact",
"hits": 2
}
},
{
"and": [
"canTrickyDodgeEnemies",
{
"enemyDamage": {
"enemy": "Fireflea",
"type": "contact",
"hits": 1
}
}
]
},
"canInsaneJump"
]
}
{
"enemyDamage": {
"enemy": "Waver",
"type": "contact",
"hits": 6
}
} |
|
Cross the gaps by freezing multiple enemies or by refreezing a Waver while standing on it. Be careful running on frozen enemies. Freeze the final Waver high and walljump up, or wait for the second Waver to come back. Requires: "canTrickyUseFrozenEnemies"
"canTrickyDodgeEnemies"
{
"spikeHits": 3
}
{
"or": [
"canUseIFrames",
{
"spikeHits": 3
}
]
} |
From: 2
Right Door
To: 3
Safe Block in the Middle of the Room
Damage boost off of the Fireflea or a Waver in order to get onto the upper spikes. It is possible to quickly get into position to use the Waver or to wait for it to return. Requires: "canTrickyJump"
{
"enemyDamage": {
"enemy": "Waver",
"type": "contact",
"hits": 1
}
}
"canHorizontalDamageBoost"
{
"or": [
"canUseIFrames",
{
"spikeHits": 1
}
]
} |
From: 2
Right Door
To: 3
Safe Block in the Middle of the Room
Requires: "HiJump"
"canPreciseWalljump"
"canUseIFrames"
{
"spikeHits": 2
} |
From: 2
Right Door
To: 4
Small Ledge Below Left Door
Damage boost off a Waver to get onto the upper spikes, then continue taking hits from the Waver to gain i-frames and avoid any spike hits. It is possible to quickly get into position to use the Waver or to wait for it to return. There are several possible ways to ensure Samus lands on the safe platform: 1) align with the right-most vine of the group of 3 vines in the background; 2) position so that one tile of the doorway ledge is visible on camera; or 3) take an extra Waver hit, to have i-frames while descending the spike stairs. Requires: "canHorizontalDamageBoost"
"canTrickyJump"
"canUseIFrames"
{
"or": [
{
"enemyDamage": {
"enemy": "Waver",
"type": "contact",
"hits": 5
}
},
{
"and": [
"canTrickyDodgeEnemies",
{
"enemyDamage": {
"enemy": "Waver",
"type": "contact",
"hits": 3
}
}
]
},
{
"and": [
"canInsaneJump",
{
"enemyDamage": {
"enemy": "Waver",
"type": "contact",
"hits": 2
}
}
]
}
]
}Dev note: FIXME: account for the possibility of farming the Waver (or all 3) at the end, compensating for some of the damage. |
From: 3
Safe Block in the Middle of the Room
To: 1
Left Door
Use the spikes in the center of the room to gain a shinecharge with X-Mode. Then arm pump until Samus reaches the middle Yapping Maw. Exit X-mode, gain run speed, and use Space Jump to reach the door. Requires: {
"obstaclesCleared": [
"A"
]
}
"SpaceJump"
"h_spikeXModeShinecharge"
"canUseIFrames"
"canShinechargeMovementTricky"
{
"shineChargeFrames": 160
}Exit condition: {
"leaveShinecharged": {}
}Unlocks doors: {"types":["ammo"],"requires":[],"useImplicitRequires":false}Dev note: Unlocking the door is free since obstacle A being cleared implies it was already unlocked earlier if needed. |
From: 3
Safe Block in the Middle of the Room
To: 1
Left Door
Use the spikes in the center of the room to gain a shinecharge with X-Mode. Then arm pump until Samus reaches the middle Yapping Maw. Exit X-mode, gain run speed, and jump toward the door and shinespark out. Requires: {
"obstaclesCleared": [
"A"
]
}
"h_spikeXModeShinecharge"
"canUseIFrames"
{
"shinespark": {
"frames": 20
}
}Exit condition: {
"leaveWithSpark": {}
}Unlocks doors: {"types":["ammo"],"requires":[],"useImplicitRequires":false}Dev note: Unlocking the door is free since obstacle A being cleared implies it was already unlocked earlier if needed. |
From: 3
Safe Block in the Middle of the Room
To: 4
Small Ledge Below Left Door
Requires: "canUseIFrames"
{
"or": [
{
"and": [
"canInsaneJump",
{
"spikeHits": 2
}
]
},
{
"spikeHits": 3
}
]
} |
From: 4
Small Ledge Below Left Door
To: 1
Left Door
Requires: "HiJump"
"canSpringBallJumpMidAir"
{
"or": [
"canTrickySpringBallJump",
{
"and": [
"canUseIFrames",
{
"spikeHits": 1
}
]
}
]
} |
|
Requires: "h_IBJFromSpikes" "canLongIBJ" |
From: 4
Small Ledge Below Left Door
To: 1
Left Door
Jump up to the left door either by jumping from spikes or with a very precise jump. Cross the room by Jumping atop the spikes. Taking enemy damage can be used to reduce some spike damage. The final jump can either be made by jumping from the bottommost spike stair or from the safe stair. Setup run speed atop the spike stair by holding forward to be pushed backward. The safe stair jump is much harder, but can be made without every pixel of runway. Requires: {
"notable": "Spike Jumps with HiJump"
}
"HiJump"
"canTrickyJump"
{
"or": [
{
"and": [
"canInsaneWalljump",
"canInsaneJump",
"h_backIntoCorner"
]
},
{
"and": [
{
"spikeHits": 1
},
"canHorizontalDamageBoost",
"canPreciseWalljump",
"canUseIFrames"
]
}
]
} |
|
Requires: {
"resetRoom": {
"nodes": [
1
]
}
}
{
"enemyDamage": {
"enemy": "Green Space Pirate (standing)",
"type": "contact",
"hits": 1
}
}
{
"enemyDamage": {
"enemy": "Mini-Kraid",
"type": "spike",
"hits": 1
}
}
"canUseIFrames"
"h_getBlueSpeedMaxRunway"
{
"cycleFrames": 720
}Clears obstacles: A Farm cycle drops: 3 Green Space Pirate (standing), 1 Mini-Kraid |
|
Gain i-frames by taking damage then run left to create enough space to run back to the right with speedbooster. Requires: "h_getBlueSpeedMaxRunway"
"canUseIFrames"
{
"enemyDamage": {
"enemy": "Mini-Kraid",
"type": "spike",
"hits": 1
}
}Clears obstacles: A |
|
Entrance condition: {
"comeInWithGMode": {
"mode": "direct",
"morphed": false
}
}Requires: "Morph"
{
"or": [
"SpaceJump",
"canPreciseGrapple",
{
"and": [
"HiJump",
"canSpringBallJumpMidAir"
]
},
{
"and": [
"HiJump",
"canWalljump",
"canTrickyJump"
]
},
{
"and": [
"canWalljump",
"canUseIFrames",
{
"spikeHits": 1
}
]
},
"h_IBJFromSpikes"
]
}
"h_heatedGModeOpenDifferentDoor" |
|
Overload PLMs by shooting the gate, then go through the crumble blocks below and get to the item. Entrance condition: {
"comeInWithGMode": {
"mode": "direct",
"morphed": false
}
}Requires: "Morph"
{
"or": [
"SpaceJump",
"canPreciseGrapple",
{
"and": [
"HiJump",
"canSpringBallJumpMidAir"
]
},
"canInsaneWalljump",
{
"and": [
"HiJump",
"canUseIFrames",
{
"enemyDamage": {
"enemy": "Ripper 2 (green)",
"type": "contact",
"hits": 1
}
},
{
"or": [
"canWalljump",
"canSpeedyJump"
]
}
]
},
"h_IBJFromSpikes"
]
}
{
"heatFrames": 0
} |
From: 2
Bottom Left Door
To: 3
Right Door
Overload PLMs by shooting the gate, then go through the crumble blocks below and get to the door. The gate can be shot while precisely positioned from below without requiring any items. The positioning is precise and off camera; while facing left, position Samus front foot barely on the flat part after the slope. Entrance condition: {
"comeInWithGMode": {
"mode": "direct",
"morphed": false
}
}Requires: "Morph"
{
"or": [
"SpaceJump",
"canPreciseGrapple",
{
"and": [
"HiJump",
"canSpringBallJumpMidAir"
]
},
{
"and": [
"HiJump",
"canWalljump",
"canTrickyJump"
]
},
{
"and": [
"canWalljump",
"canUseIFrames",
{
"spikeHits": 1
}
]
},
"h_IBJFromSpikes"
]
}
"h_heatedGModeOpenDifferentDoor" |
|
Overload PLMs by shooting the gate, then go through the crumble blocks below and get to the item. The gate can be shot while precisely positioned from below without requiring any items. The positioning is precise and off camera; while facing left, position Samus front foot barely on the flat part after the slope. Entrance condition: {
"comeInWithGMode": {
"mode": "direct",
"morphed": false
}
}Requires: "Morph"
{
"or": [
"SpaceJump",
"canPreciseGrapple",
{
"and": [
"HiJump",
"canSpringBallJumpMidAir"
]
},
"canInsaneWalljump",
{
"and": [
"HiJump",
"canUseIFrames",
{
"enemyDamage": {
"enemy": "Ripper 2 (green)",
"type": "contact",
"hits": 1
}
},
{
"or": [
"canWalljump",
"canSpeedyJump"
]
}
]
},
"h_IBJFromSpikes"
]
}
{
"heatFrames": 0
} |
|
Entrance condition: {
"comeInWithGMode": {
"mode": "direct",
"morphed": false
}
}Requires: "canRemoteAcquire"
{
"or": [
"SpaceJump",
"canPreciseGrapple",
"canSpringBallJumpMidAir",
"canInsaneWalljump",
{
"and": [
"HiJump",
"canWalljump"
]
},
{
"and": [
"HiJump",
"canSpeedyJump"
]
},
{
"and": [
"canStaggeredIBJ",
"canDoubleBombJump",
"canBombHorizontally"
]
},
{
"and": [
"h_IBJFromSpikes",
"h_IBJFromSpikes"
]
},
{
"and": [
"h_IBJFromSpikes",
"canCameraManip",
"canMoonwalk"
]
}
]
}
"h_heatedDirectGModeLeaveSameDoor"Collects items: 4 |
|
Jump onto the crumble blocks to make them solid, then use them as a platform to cross the room. With Grapple, a running jump then single Grapple swing can be used before PLMs are overloaded, alternatively jump on the crumble blocks and Grapple the Ripper. Entrance condition: {
"comeInWithGMode": {
"mode": "any",
"morphed": false
}
}Requires: {
"or": [
"SpaceJump",
"canPreciseGrapple",
"canSpringBallJumpMidAir",
"canInsaneWalljump",
{
"and": [
"HiJump",
"canWalljump"
]
},
{
"and": [
"HiJump",
"canSpeedyJump"
]
},
{
"and": [
"canStaggeredIBJ",
"canDoubleBombJump",
"canBombHorizontally"
]
},
"h_IBJFromSpikes"
]
}
{
"heatFrames": 0
} |
|
Jump onto the crumble blocks to make them solid, then use them as a platform to cross the room. With Grapple, a running jump then single Grapple swing can be used before PLMs are overloaded, alternatively jump on the crumble blocks and Grapple the Ripper. In indirect G-mode, stand where the gate will spawn and exit G-mode to open the gate. In direct G-mode, overload PLMs by shooting the gate then position Samus a few pixels away from the gate to where upward diagonal shots go through it. Crouch then shoot diagonally and quickly exit G-mode (3-7 frames later) to open the gate on G-mode exit. Entrance condition: {
"comeInWithGMode": {
"mode": "any",
"morphed": false
}
}Requires: "canComplexGMode"
"h_heatedGMode"
{
"or": [
"SpaceJump",
"canPreciseGrapple",
"canSpringBallJumpMidAir",
"canInsaneWalljump",
{
"and": [
"HiJump",
"canWalljump"
]
},
{
"and": [
"HiJump",
"canSpeedyJump"
]
},
{
"and": [
"canStaggeredIBJ",
"canDoubleBombJump",
"canBombHorizontally"
]
},
"h_IBJFromSpikes"
]
}
{
"heatFrames": 35
}Clears obstacles: A Dev note: The canComplexGMode is only used here to describe opening the gate in direct G-mode without gate glitching. However, the indirect variant still requires canHeatedGMode or Varia - with Varia, indirect strats can instead be used to go to the top left door and return. |
|
Requires: "canUseIFrames"
{
"or": [
{
"spikeHits": 1
},
{
"and": [
"canTrickyJump",
{
"enemyDamage": {
"enemy": "Ripper 2 (green)",
"type": "contact",
"hits": 1
}
},
{
"heatFrames": 20
}
]
}
]
}
"canSpeedyJump"
"HiJump"
{
"heatFrames": 200
} |
|
Requires: "canUseIFrames"
{
"or": [
{
"spikeHits": 1
},
{
"and": [
"canTrickyJump",
{
"enemyDamage": {
"enemy": "Ripper 2 (green)",
"type": "contact",
"hits": 1
}
},
{
"heatFrames": 20
}
]
}
]
}
"canWalljump"
"HiJump"
{
"heatFrames": 230
} |
|
Jump into the spike pit, hitting the Ripper to avoid spike damage. Climb the left wall while avoiding falling onto the spikes or through the crumble blocks. The ledge is the same size of that in writg. Requires: {
"notable": "HiJumpless Wall Jump"
}
"h_heatProof"
"canInsaneWalljump"
"canHorizontalDamageBoost"
{
"or": [
"canUseIFrames",
"canCrumbleJump"
]
}
{
"enemyDamage": {
"enemy": "Ripper 2 (green)",
"type": "contact",
"hits": 1
}
} |
|
Position Samus into the bottom right corner, using i-frames to run and jump from the crumble blocks, and then wall jump to make it onto the ledge. If using a spike hit to gain i-frames, be sure to be holding forward (left) when landing, in order to get pushed back into the corner. If using the Ripper to gain i-frames, perform a damage boost from a relatively low position, in order to land quickly enough to reach the crumble blocks before i-frames run out. The extra run speed values that work are $2.0, $2.1, $3.0, and $3.1. Values of $2.0 and $3.0 give a lower jump that is only barely high enough, requiring a very precise wall jump to get up. Run speeds $3.0 and $3.1 correspond to jumping as Samus reaches the end of the crumble blocks. Run speeds $2.0 and $2.1 correspond to jumping a little more than a tile before reaching the crumble blocks. With the damage boost method, the Ripper will normally be blocking the path if jumping at speed $2.0 or $2.1; whereas jumping at the end of the crumble blocks (at speeds $3.0 and $3.1) will always works. Requires: {
"notable": "Hijumpless Spike Tricky Dash Jump"
}
{
"or": [
{
"spikeHits": 1
},
{
"and": [
{
"enemyDamage": {
"enemy": "Ripper 2 (green)",
"type": "contact",
"hits": 1
}
},
"canHorizontalDamageBoost",
"canInsaneJump",
{
"heatFrames": 25
}
]
}
]
}
"canUseIFrames"
"canTrickyDashJump"
"canPreciseWalljump"
{
"heatFrames": 260
} |
|
Requires: "h_heatedIBJFromSpikes"
{
"heatFrames": 1100
}Dev note: FIXME: Refine these heat frames. |
|
Requires: "canUseIFrames"
{
"or": [
{
"spikeHits": 1
},
{
"and": [
"canTrickyJump",
{
"enemyDamage": {
"enemy": "Ripper 2 (green)",
"type": "contact",
"hits": 1
}
},
{
"heatFrames": 20
}
]
}
]
}
"canSpringBallJumpMidAir"
{
"heatFrames": 240
} |
From: 3
Right Door
To: 6
G-Mode, Remote Acquire Junction (Bottom Right)
Jump onto the crumble blocks to make them solid, then use them as a platform to get to the item. With Grapple, a running jump then single Grapple swing can be used before PLMs are overloaded, alternatively jump on the crumble blocks and Grapple the Ripper. Avoid touching all 6 crumbles, so Samus can use the item to overload PLMs and go through one of the crumbles to get to the left side of the room. If the item has already been obtained, Samus can shoot the gate many times to overload PLMs. Entrance condition: {
"comeInWithGMode": {
"mode": "direct",
"morphed": false
}
}Requires: "canRemoteAcquire"
{
"or": [
"SpaceJump",
"canSpringBallJumpMidAir",
"canPreciseGrapple",
"canInsaneWalljump",
{
"and": [
"HiJump",
"canWalljump"
]
},
{
"and": [
"HiJump",
"canSpeedyJump"
]
},
{
"and": [
"canStaggeredIBJ",
"canDoubleBombJump",
"canBombHorizontally"
]
},
"h_IBJFromSpikes",
"canCeilingBombJump",
{
"and": [
"canBombHorizontally",
"canIBJ",
"h_usePowerBomb"
]
}
]
}
{
"heatFrames": 0
} |
From: 3
Right Door
To: 7
G-Mode Junction (Bottom Right)
Jump onto the crumble blocks to make them solid, then use them as a platform to cross the room. With Grapple, a running jump then single Grapple swing can be used before PLMs are overloaded, alternatively jump on the crumble blocks and Grapple the Ripper. Entrance condition: {
"comeInWithGMode": {
"mode": "indirect",
"morphed": false
}
}Requires: "Morph"
{
"or": [
"SpaceJump",
"canSpringBallJumpMidAir",
"canPreciseGrapple",
"canInsaneWalljump",
{
"and": [
"HiJump",
"canWalljump"
]
},
{
"and": [
"HiJump",
"canSpeedyJump"
]
},
{
"and": [
"canStaggeredIBJ",
"canDoubleBombJump",
"canBombHorizontally"
]
},
"h_IBJFromSpikes",
"canCeilingBombJump",
{
"and": [
"canBombHorizontally",
"canIBJ",
"h_usePowerBomb"
]
}
]
}
{
"heatFrames": 0
}Dev note: With Grapple, Morph isn't needed, but there's no reason to go there without Morph. |
|
Requires: "canUseIFrames"
{
"or": [
{
"spikeHits": 1
},
{
"and": [
"canTrickyJump",
{
"enemyDamage": {
"enemy": "Ripper 2 (green)",
"type": "contact",
"hits": 1
}
}
]
}
]
}
"HiJump"
"canSpeedyJump"
{
"heatFrames": 250
}Collects items: 4 |
|
Requires: "h_heatedIBJFromSpikes"
{
"heatFrames": 1100
}Dev note: FIXME: refine these heat frames. |
|
Requires: "canUseIFrames"
{
"or": [
{
"spikeHits": 1
},
{
"and": [
"canTrickyJump",
{
"enemyDamage": {
"enemy": "Ripper 2 (green)",
"type": "contact",
"hits": 1
}
},
{
"heatFrames": 10
}
]
}
]
}
"canSpringBallJumpMidAir"
{
"heatFrames": 260
} |
|
A short hop from the ledge can bounce on the crumbles and into the spikes. Just be careful of being pushed back onto the crumble blocks by the spikes. Requires: "h_spikeXModeShinecharge"
"canTrickyJump"
"canUseIFrames"
"canMidairShinespark"
{
"heatFrames": 480
}
{
"shinespark": {
"frames": 11,
"excessFrames": 4
}
}Dev note: Two spike hits are expected per attempt (with any additional leniency hits being multiplied by this amount). |
From: 4
Lava, Left Wall
To: 3
Above Lava Junction
Enter the bottom-left Namihe by kagoing inside of it. Wait for a second hit to gain i-frames and then very quickly walljump up the spikes and across to the right side wall. Requires: {
"notable": "HiJumpless Nahime Morph Kago"
}
"canSuitlessLavaDive"
"canInsaneWalljump"
"canInsaneJump"
"canUseIFrames"
"canTrickyWalljump"
"canFastWalljumpClimb"
"canUseEnemies"
"canKago"
{
"heatFrames": 510
}
{
"gravitylessLavaFrames": 480
}
{
"enemyDamage": {
"enemy": "Namihe",
"type": "kago",
"hits": 2
}
} |
|
Use the bottom-most right-side Namihe to generate a flame and walk with it to the bottom-most left Namihe head. Use a turnaround animation as Samus is hit by the flame to cancel out knockback frames. While invulnerability frames are active, walljump up the spikes either 2 or 3 times and jump accross to catch the middle wall and climb from there. Requires: {
"notable": "HiJumpless Dive"
}
"canSuitlessLavaDive"
"canUseIFrames"
"canTrickyWalljump"
"canFastWalljumpClimb"
"canUseEnemies"
"canCameraManip"
{
"heatFrames": 600
}
{
"gravitylessLavaFrames": 500
}
{
"enemyDamage": {
"enemy": "Namihe",
"type": "fireball",
"hits": 1
}
} |
From: 5
Lava, Center Namihe
To: 3
Above Lava Junction
Use the bottom-most right-side Namihe to generate a flame and walk with it to the bottommost left Namihe head. Pause and use a turnaround animation as Samus is hit by the flame to cancel out knockback frames. Manually refill energy from reserves. While invulnerability frames are active, wall jump up the spikes either 2 or 3 times and jump accross to catch the middle wall and climb from there. Requires: {
"notable": "HiJumpless Dive"
}
"canSuitlessLavaDive"
"canUseIFrames"
"canTrickyWalljump"
"canFastWalljumpClimb"
"canUseEnemies"
"canCameraManip"
{
"heatFrames": 175
}
{
"gravitylessLavaFrames": 175
}
"h_pauseAbuseMinimalReserveRefill"
{
"heatFrames": 375
}
{
"gravitylessLavaFrames": 300
} |
From: 1
Left Door
To: 2
Right Door
While crossing the Spiky Lava, land on frozen Yapping Maws to reduce the number of spike hits needed. Damage boost towards then freeze the Leftmost enemy as it extends. Morph and unmorph while above the middle Yapping Maw to land on it just above the lava line. Ignore the rightmost Yapping Maw. Delay the damage boost from the spikes slightly in order to rise above the lava before moving. Requires: {
"notable": "Frozen Maw Platforms"
}
"canResetFallSpeed"
"canTrickyUseFrozenEnemies"
"canTrickyJump"
{
"or": [
{
"and": [
{
"notable": "Suitless Damage Boosts"
},
"canHorizontalDamageBoost"
]
},
{
"and": [
{
"spikeHits": 2
},
{
"lavaFrames": 30
},
{
"heatFrames": 240
}
]
}
]
}
"canUseIFrames"
{
"spikeHits": 2
}
{
"lavaFrames": 35
}
{
"heatFrames": 520
}
"h_complexToCarryFlashSuit" |
|
Entrance condition: {
"comeInWithGMode": {
"mode": "any",
"morphed": false
}
}Requires: {
"or": [
{
"and": [
{
"lavaFrames": 150
},
{
"spikeHits": 7
}
]
},
{
"and": [
{
"notable": "Suitless Damage Boosts"
},
{
"lavaFrames": 80
},
{
"spikeHits": 3
},
"canUseIFrames",
"canHorizontalDamageBoost"
]
},
{
"and": [
"Gravity",
{
"disableEquipment": "SpeedBooster"
},
{
"lavaFrames": 100
},
{
"spikeHits": 2
},
{
"or": [
"canUseIFrames",
"canHorizontalDamageBoost"
]
}
]
},
{
"and": [
{
"notable": "Frozen Maw Platforms"
},
"canResetFallSpeed",
"canTrickyUseFrozenEnemies",
"canTrickyJump",
"canHorizontalDamageBoost",
"canUseIFrames",
{
"spikeHits": 2
},
{
"lavaFrames": 15
}
]
}
]
}
"h_heatedGModeOpenDifferentDoor"Dev note: FIXME: Grapple could maybe be used to skip some damage by partially swinging across the room. |
From: 1
Left Door
To: 2
Right Door
Damage boosts can be used to save energy - delay the damage boost from the spikes slightly in order to rise above the lava before moving. Requires: {
"notable": "Suitless Damage Boosts"
}
{
"heatFrames": 460
}
{
"lavaFrames": 60
}
{
"spikeHits": 3
}
"canUseIFrames"
"canHorizontalDamageBoost" |
|
Requires: "Gravity"
{
"disableEquipment": "SpeedBooster"
}
{
"heatFrames": 330
}
{
"lavaFrames": 90
}
{
"spikeHits": 2
}
{
"or": [
"canUseIFrames",
{
"and": [
{
"spikeHits": 2
},
{
"heatFrames": 50
}
]
}
]
}
{
"or": [
"canHorizontalDamageBoost",
{
"and": [
{
"heatFrames": 20
},
{
"lavaFrames": 20
}
]
}
]
} |
From: 2
Right Door
To: 1
Left Door
While crossing the Spiky Lava, land on frozen Yapping Maws to reduce the number of spike hits needed. Morph and unmorph while above the rightmost Yapping Maw to land on it just above the lava line. Ignore the second Yapping Maw. Freeze the Leftmost enemy as it extends. Delay the damage boost from the spikes slightly in order to rise above the lava before moving. Requires: {
"notable": "Frozen Maw Platforms"
}
"canResetFallSpeed"
"canTrickyUseFrozenEnemies"
"canTrickyJump"
{
"or": [
{
"and": [
{
"notable": "Suitless Damage Boosts"
},
"canHorizontalDamageBoost"
]
},
{
"and": [
{
"spikeHits": 1
},
{
"lavaFrames": 20
},
{
"heatFrames": 240
}
]
}
]
}
"canUseIFrames"
{
"spikeHits": 2
}
{
"lavaFrames": 35
}
{
"heatFrames": 520
}
"h_complexToCarryFlashSuit" |
|
Entrance condition: {
"comeInWithGMode": {
"mode": "any",
"morphed": false
}
}Requires: {
"or": [
{
"and": [
{
"lavaFrames": 150
},
{
"spikeHits": 7
}
]
},
{
"and": [
{
"notable": "Suitless Damage Boosts"
},
{
"lavaFrames": 80
},
{
"spikeHits": 3
},
"canUseIFrames",
"canHorizontalDamageBoost"
]
},
{
"and": [
"Gravity",
{
"disableEquipment": "SpeedBooster"
},
{
"lavaFrames": 100
},
{
"spikeHits": 2
},
{
"or": [
"canUseIFrames",
"canHorizontalDamageBoost"
]
}
]
},
{
"and": [
{
"notable": "Frozen Maw Platforms"
},
"canResetFallSpeed",
"canTrickyUseFrozenEnemies",
"canTrickyJump",
"canHorizontalDamageBoost",
"canUseIFrames",
{
"spikeHits": 2
},
{
"lavaFrames": 15
}
]
}
]
}
"h_heatedGModeOpenDifferentDoor"Dev note: FIXME: Grapple could maybe be used to skip some damage by partially swinging across the room. |
From: 2
Right Door
To: 1
Left Door
Damage boosts can be used to save energy - delay the damage boost from the spikes slightly in order to rise above the lava before moving. Requires: {
"notable": "Suitless Damage Boosts"
}
{
"heatFrames": 460
}
{
"lavaFrames": 60
}
{
"spikeHits": 3
}
"canUseIFrames"
"canHorizontalDamageBoost" |
|
Requires: "Gravity"
{
"disableEquipment": "SpeedBooster"
}
{
"heatFrames": 330
}
{
"lavaFrames": 90
}
{
"spikeHits": 2
}
{
"or": [
"canUseIFrames",
{
"and": [
{
"spikeHits": 2
},
{
"heatFrames": 50
}
]
}
]
}
{
"or": [
"canHorizontalDamageBoost",
{
"and": [
{
"heatFrames": 20
},
{
"lavaFrames": 20
}
]
}
]
} |
From: 2
Right Door
To: 1
Left Door
Lure the Geruta to the left door. This may require many jumps to get it to swoop up onto the ledge and not get stuck. To safely pass the Geruta without a hit, jump left below it, to get it to swoop left before going up. Requires: "canComplexGMode"
"h_heatProof"
"canBePatient"
"canCameraManip"
{
"or": [
"canInsaneJump",
"Ice",
"h_lavaProof",
{
"enemyDamage": {
"enemy": "Geruta",
"type": "contact",
"hits": 1
}
},
{
"and": [
"canUseIFrames",
{
"enemyDamage": {
"enemy": "Dragon",
"type": "fireball",
"hits": 1
}
},
{
"lavaFrames": 55
}
]
}
]
}
{
"or": [
"canTrickyDodgeEnemies",
"SpaceJump",
"Charge",
"Ice",
"Plasma",
{
"ammo": {
"type": "Missile",
"count": 2
}
},
{
"ammo": {
"type": "Super",
"count": 2
}
},
{
"enemyDamage": {
"enemy": "Dragon",
"type": "fireball",
"hits": 5
}
},
{
"and": [
"h_lavaProof",
"ScrewAttack"
]
}
]
}
{
"or": [
"SpaceJump",
{
"and": [
"HiJump",
"canSpeedyJump",
"canWalljump"
]
},
{
"and": [
"canBeVeryPatient",
"HiJump",
"Grapple"
]
}
]
}
{
"or": [
{
"ammo": {
"type": "Super",
"count": 1
}
},
{
"obstaclesCleared": [
"A"
]
}
]
}Exit condition: {
"leaveWithGModeSetup": {}
}Collects items: 3 Unlocks doors: {"types":["ammo"],"requires":[]}Dev note: It's possible to avoid the item, but the Geruta will get stuck on it and usually require many swoops to get past it. |
From: 2
Bottom Right Door
To: 5
Bottom Junction Right of Morph Tunnel
Wait for the first Holtz to attack then either use the Magdollite for i-frames, or avoid the projectiles and continue dodging bats. Requires: "h_navigateHeatRooms"
{
"or": [
"canTrickyJump",
{
"and": [
"canHorizontalDamageBoost",
"canUseIFrames",
{
"enemyDamage": {
"enemy": "Magdollite",
"type": "flame",
"hits": 1
}
}
]
}
]
}
{
"heatFrames": 290
} |
From: 5
Bottom Junction Right of Morph Tunnel
To: 2
Bottom Right Door
Requires: {
"or": [
{
"and": [
"canTrickyJump",
{
"heatFrames": 820
}
]
},
{
"and": [
"ScrewAttack",
{
"heatFrames": 660
}
]
},
{
"and": [
"canHorizontalDamageBoost",
"canUseIFrames",
{
"enemyDamage": {
"enemy": "Magdollite",
"type": "flame",
"hits": 1
}
},
{
"heatFrames": 660
}
]
}
]
}Exit condition: {
"leaveWithGModeSetup": {}
}Unlocks doors: {"types":["ammo"],"requires":[]} |
From: 5
Bottom Junction Right of Morph Tunnel
To: 2
Bottom Right Door
Requires: {
"enemyDamage": {
"enemy": "Magdollite",
"type": "flame",
"hits": 1
}
}
"canHorizontalDamageBoost"
"canUseIFrames"
{
"heatFrames": 290
} |
From: 1
Left Door
To: 5
Golden Torizo
At any point during the fight, use a Crystal Flash. Then damage down enough to survive one hit. Run into and through GT, turn around, and start down the runway. Get shinecharged, come back and interrupt using whatever attack pattern is ongoing. Then finish the fight. Blue suit will give invulnerability but otherwise does not help to defeat Golden Torizo. Entrance condition: {
"comeInWithRMode": {}
}Requires: "h_heatProof"
{
"not": "f_DefeatedGoldenTorizo"
}
"canRiskPermanentLossOfAccess"
{
"notable": "Crystal Flash During Fight"
}
"h_heatedCrystalFlashForReserveEnergy"
{
"enemyDamage": {
"enemy": "Golden Torizo",
"type": "contact",
"hits": 1
}
}
"canUseIFrames"
{
"canShineCharge": {
"usedTiles": 28,
"openEnd": 0
}
}
{
"autoReserveTrigger": {
"maxReserveEnergy": 95
}
}
"canRModeSparkInterrupt"Clears obstacles: f_DefeatedGoldenTorizo Sets flags: f_DefeatedGoldenTorizo |
From: 1
Left Door
To: 5
Golden Torizo
Manipulate into the GT Safe Spot and farm for energy. Keep your Missiles below 30 to force the attack pattern that has drops. Taking damage to get ready for the interrupt may require leaving the safe spot. Leave enough to survive one hit from GT. Push GT back into the corner, run into and through to get your shinecharge. Come back and interrupt using whatever attack pattern is happening. After you gain blue suit, you'll need to use any standard kill strategy. Blue suit will not help with defeating GT except for invulnerability. Entrance condition: {
"comeInWithRMode": {}
}Requires: {
"not": "f_DefeatedGoldenTorizo"
}
"canRiskPermanentLossOfAccess"
{
"heatFrames": 200
}
{
"notable": "Safe Spot Kill"
}
{
"or": [
"h_heatProof",
{
"resourceMaxCapacity": [
{
"type": "Missile",
"count": 30
}
]
}
]
}
{
"refill": [
"Energy"
]
}
{
"enemyDamage": {
"enemy": "Golden Torizo",
"type": "contact",
"hits": 1
}
}
"canUseIFrames"
{
"canShineCharge": {
"usedTiles": 28,
"openEnd": 0
}
}
{
"autoReserveTrigger": {
"maxReserveEnergy": 95
}
}
"canRModeSparkInterrupt" |
From: 2
Right Door
To: 5
Golden Torizo
At any point during the fight, use a Crystal Flash. Then damage down enough to survive one hit. Run into and through GT, turn around, and start down the runway. Get shinecharged, come back and interrupt using whatever attack pattern is ongoing. Then finish the fight. Blue suit will give invulnerability but otherwise does not help to defeat Golden Torizo. Entrance condition: {
"comeInWithRMode": {}
}Requires: "h_heatProof"
{
"not": "f_DefeatedGoldenTorizo"
}
"canRiskPermanentLossOfAccess"
{
"notable": "Crystal Flash During Fight"
}
"h_heatedCrystalFlashForReserveEnergy"
{
"enemyDamage": {
"enemy": "Golden Torizo",
"type": "contact",
"hits": 1
}
}
"canUseIFrames"
{
"canShineCharge": {
"usedTiles": 28,
"openEnd": 0
}
}
{
"autoReserveTrigger": {
"maxReserveEnergy": 95
}
}
"canRModeSparkInterrupt"Clears obstacles: f_DefeatedGoldenTorizo, door_2 Sets flags: f_DefeatedGoldenTorizo Dev note: FIXME: Evaluate heated fight options. |
From: 2
Right Door
To: 5
Golden Torizo
Manipulate into the GT Safe Spot and farm for energy. Keep your Missiles below 30 to force the attack pattern that has drops. Taking damage to get ready for the interrupt may require leaving the safe spot. Leave enough to survive one hit from GT. Push GT back into the corner, run into and through to get your shinecharge. Come back and interrupt using whatever attack pattern is happening. After you gain blue suit, you'll need to use any standard kill strategy. Blue suit will not help with defeating GT except for invulnerability. Entrance condition: {
"comeInWithRMode": {}
}Requires: {
"not": "f_DefeatedGoldenTorizo"
}
"canRiskPermanentLossOfAccess"
{
"heatFrames": 50
}
{
"notable": "Safe Spot Kill"
}
{
"or": [
"h_heatProof",
{
"resourceMaxCapacity": [
{
"type": "Missile",
"count": 30
}
]
}
]
}
{
"refill": [
"Energy"
]
}
{
"enemyDamage": {
"enemy": "Golden Torizo",
"type": "contact",
"hits": 1
}
}
"canUseIFrames"
{
"canShineCharge": {
"usedTiles": 28,
"openEnd": 0
}
}
{
"autoReserveTrigger": {
"maxReserveEnergy": 95
}
}
"canRModeSparkInterrupt"Clears obstacles: door_2 |
|
Roll under the top Fune fireball then roll off the edge to avoid the first Boulder. Kill a Fune or use the Boulder for i-frames to get through the tricky section. It is also possible to Kago the Fune to save health compared to taking a Boulder hit. Requires: "Morph"
{
"or": [
"canTrickyJump",
{
"ammo": {
"type": "PowerBomb",
"count": 1
}
},
{
"ammo": {
"type": "Super",
"count": 1
}
},
{
"enemyDamage": {
"enemy": "Boulder",
"type": "contact",
"hits": 1
}
},
{
"and": [
{
"enemyDamage": {
"enemy": "Fune",
"type": "kago",
"hits": 1
}
},
"canKago",
"canUseIFrames"
]
},
{
"and": [
"Ice",
"canCarefulJump"
]
}
]
} |
From: 4
Firefleas Item
To: 5
Firefleas Bottom Left Platform Junction
Requires: {
"enemyDamage": {
"enemy": "Fireflea",
"type": "contact",
"hits": 1
}
}
"canUseEnemies"
"canUseIFrames" |
From: 5
Firefleas Bottom Left Platform Junction
To: 4
Firefleas Item
Requires: {
"enemyDamage": {
"enemy": "Fireflea",
"type": "contact",
"hits": 1
}
}
"canUseEnemies"
"canUseIFrames" |
|
Taking damage off a Dessgeega at the far right, coming in from the top, allows you to charge a blue suit and get through to the door. Requires: {
"or": [
{
"obstaclesCleared": [
"F"
]
},
{
"and": [
"canUseIFrames",
{
"enemyDamage": {
"enemy": "Dessgeega",
"type": "contact",
"hits": 1
}
}
]
}
]
}
{
"getBlueSpeed": {
"usedTiles": 23,
"openEnd": 2
}
}
{
"heatFrames": 200
}Clears obstacles: C, E Unlocks doors: {"types":["missiles"],"requires":[{"heatFrames":30}]} |
From: 4
Junction Above Bomb Block
To: 1
Top Left Door
Jump over the first Kihunter and attempt to either use i-frames to pass through the top Kihunter, or dodge it if possible. Requires: "h_navigateHeatRooms"
{
"or": [
"canWalljump",
"HiJump"
]
}
"canTrickyJump"
{
"or": [
{
"and": [
"canInsaneJump",
"canUseIFrames",
{
"enemyDamage": {
"enemy": "Kihunter (red)",
"type": "contact",
"hits": 1
}
}
]
},
{
"and": [
{
"enemyDamage": {
"enemy": "Kihunter (red)",
"type": "contact",
"hits": 2
}
},
{
"heatFrames": 30
}
]
}
]
}
{
"heatFrames": 470
}Clears obstacles: A |
From: 4
Junction Above Bomb Block
To: 1
Top Left Door
Requires: "h_navigateHeatRooms"
{
"or": [
{
"and": [
"canUseIFrames",
"h_crouchJumpDownGrab"
]
},
{
"and": [
"canUseIFrames",
"canWalljump"
]
},
{
"and": [
"canUseIFrames",
"SpaceJump"
]
},
"HiJump",
{
"and": [
"canSpringBallJumpMidAir",
{
"heatFrames": 300
},
{
"enemyDamage": {
"enemy": "Kihunter (red)",
"type": "contact",
"hits": 1
}
}
]
},
{
"and": [
"canJumpIntoIBJ",
"canTrickyJump",
{
"heatFrames": 300
}
]
}
]
}
{
"or": [
"canTrickyJump",
{
"and": [
{
"enemyDamage": {
"enemy": "Kihunter (red)",
"type": "contact",
"hits": 1
}
},
{
"heatFrames": 60
}
]
}
]
}
{
"heatFrames": 570
}
{
"enemyDamage": {
"enemy": "Kihunter (red)",
"type": "contact",
"hits": 3
}
}Clears obstacles: A |
From: 4
Junction Right of Power Bomb Blocks
To: 4
Junction Right of Power Bomb Blocks
Use i-frames from the first Dessgeega to run through the remaining enemies and store a shinespark. 1-tap Shortcharge, then run back towards the Hoppers and try to hit all three at once by shinesparking horizontally as the ceiling hopper jumps down. Requires: {
"canShineCharge": {
"usedTiles": 25,
"steepUpTiles": 4,
"openEnd": 1
}
}
{
"enemyDamage": {
"enemy": "Dessgeega",
"type": "contact",
"hits": 1
}
}
"canUseIFrames"
"canShinechargeMovementComplex"
"canHorizontalShinespark"
{
"shinespark": {
"frames": 40
}
}
{
"heatFrames": 330
}Clears obstacles: D |
|
Requires: "canKago"
"canUseIFrames"
"canResetFallSpeed"
{
"enemyDamage": {
"enemy": "Kzan",
"type": "contact",
"hits": 1
}
}
{
"heatFrames": 180
}Dev note: Useful when enemy damage can be reduced while still taking full heat damage. |
From: 5
Junction Below Shot Block
To: 7
Junction Left of Morph Tunnel
Break the Power Bomb statue leaving 1 row of blocks. Partially clip beneath the Power Bomb blocks and the sold tiles beneath. Wait for a Dessgeega to jump over head and jump into it. The left ceiling Dessgeega works better. Aim down after jumping in order to fully boost over the solid statue. Damage boost to the right and use i-frames to run through all of the enemies. Requires: {
"notable": "HiJumpless Statue Clip Damage Boost"
}
{
"obstaclesNotCleared": [
"A"
]
}
"h_usePowerBomb"
"canTrickyJump"
"canPartialFloorClip"
"canCeilingClip"
"canHorizontalDamageBoost"
"canUseIFrames"
{
"enemyDamage": {
"enemy": "Dessgeega",
"type": "contact",
"hits": 1
}
}
{
"heatFrames": 225
} |
From: 5
Junction Below Shot Block
To: 7
Junction Left of Morph Tunnel
Break the Power Bomb statue leaving 1 row of blocks. Partially clip beneath the Power Bomb blocks and the sold tiles beneath. Wait for a Dessgeega to jump over head and jump into it. The left ceiling Dessgeega works better. Damage boost to the right and use i-frames to run through all of the enemies. Requires: {
"notable": "Statue Clip Damage Boost"
}
{
"obstaclesNotCleared": [
"A"
]
}
"h_usePowerBomb"
"HiJump"
"canPartialFloorClip"
"canCeilingClip"
"canHorizontalDamageBoost"
"canUseIFrames"
{
"enemyDamage": {
"enemy": "Dessgeega",
"type": "contact",
"hits": 1
}
}
{
"heatFrames": 225
} |
From: 5
Junction Below Shot Block
To: 8
Junction Below Top Right Door
Break the Power Bomb statue leaving 1 row of blocks. Partially clip beneath the Power Bomb blocks and the sold tiles beneath. Wait for a Dessgeega to jump over head and jump into it. The left ceiling Dessgeega works better. Aim down after jumping in order to fully boost over the solid statue. Damage boost to the right and use i-frames to run through all of the enemies. Begin shortcharging while running through the Dessgeegas for a speedball. It may help to end the damage boost early, but then it becomes more difficult to stutter for the shortcharge. Requires: {
"notable": "HiJumpless Statue Clip Damage Boost"
}
{
"obstaclesNotCleared": [
"A"
]
}
"h_usePowerBomb"
"canPartialFloorClip"
"canCeilingClip"
"canTrickyJump"
"canHorizontalDamageBoost"
"canUseIFrames"
{
"getBlueSpeed": {
"usedTiles": 16,
"openEnd": 1
}
}
"canSpeedball"
{
"enemyDamage": {
"enemy": "Dessgeega",
"type": "contact",
"hits": 1
}
}
{
"heatFrames": 390
}
{
"or": [
"h_useSpringBall",
{
"hibashiHits": 1
}
]
} |
From: 5
Junction Below Shot Block
To: 8
Junction Below Top Right Door
Break the Power Bomb statue leaving 1 row of blocks. Partially clip beneath the Power Bomb blocks and the sold tiles beneath. Wait for a Dessgeega to jump over head and jump into it. The left ceiling Dessgeega works better. Damage boost to the right and use i-frames to run through all of the enemies. Begin shortcharging while running through the Dessgeegas for a speedball. It may help to end the damage boost early, but then it becomes more difficult to stutter for the shortcharge. Requires: {
"notable": "Statue Clip Damage Boost"
}
{
"obstaclesNotCleared": [
"A"
]
}
"h_usePowerBomb"
"HiJump"
"canPartialFloorClip"
"canCeilingClip"
"canHorizontalDamageBoost"
"canUseIFrames"
{
"getBlueSpeed": {
"usedTiles": 16,
"openEnd": 1
}
}
"canSpeedball"
{
"enemyDamage": {
"enemy": "Dessgeega",
"type": "contact",
"hits": 1
}
}
{
"heatFrames": 390
}
{
"or": [
"h_useSpringBall",
{
"hibashiHits": 1
}
]
} |
From: 7
Junction Left of Morph Tunnel
To: 7
Junction Left of Morph Tunnel
Use i-frames from the first Dessgeega to run through the remaining enemies and store a shinespark. It helps to run towards the first hopper to take damage and then not stutter. Mid-air spark to kill all three at once. Requires: {
"canShineCharge": {
"usedTiles": 17,
"openEnd": 1
}
}
{
"enemyDamage": {
"enemy": "Dessgeega",
"type": "contact",
"hits": 1
}
}
"canUseIFrames"
"canMidairShinespark"
"canShinechargeMovementComplex"
{
"shinespark": {
"frames": 40
}
}
{
"heatFrames": 310
}Clears obstacles: D |
From: 2
Middle Left Door
To: 2
Middle Left Door
Requires: "h_spikeXModeShinecharge"
{
"or": [
"can4HighMidAirMorph",
"h_XModeSpikeHit"
]
}
"canUseIFrames"
{
"shineChargeFrames": 65
}Exit condition: {
"leaveShinecharged": {}
}Dev note: At least two spike hits are expected per attempt (with any additional leniency hits being multiplied by this amount). |
|
Requires: "canTrickyJump"
"canUseIFrames"
{
"or": [
"canHorizontalDamageBoost",
"canInsaneJump"
]
}
{
"spikeHits": 2
} |
|
Requires: "canUseIFrames"
"h_speedDash"
{
"spikeHits": 2
} |
|
Requires: "canUseIFrames"
{
"spikeHits": 3
} |
From: 2
Middle Left Door
To: 6
Bowling Chozo Statue
Jump into the room and morph along the ceiling to maximize distance. Unmorph while entering the spikes to minimize knockback Then build up speed and airball again to cross the spikes. Entrance condition: {
"comeInRunning": {
"speedBooster": true,
"minTiles": 28
}
}Requires: "canInsaneJump"
"canMomentumConservingMorph"
"canUseIFrames"
{
"spikeHits": 1
} |
From: 2
Middle Left Door
To: 6
Bowling Chozo Statue
Start with Spring Ball disabled. Jump over the spikes and mid-air morph. Spring fling on the way down, Spring Ball bounce through the spikes, then spring fling again to reach the statue taking only one spike hit. Entrance condition: {
"comeInRunning": {
"speedBooster": true,
"minTiles": 12
}
}Requires: "canTrickyJump"
"canSpringFling"
"canLateralMidAirMorph"
"canUseIFrames"
{
"spikeHits": 1
} |
From: 2
Middle Left Door
To: 6
Bowling Chozo Statue
Enter the room with a mockball or bounce. Time a pause to unequip Spring Ball soon after bouncing after the spike hit. Pause again to re-equip Spring Ball on the way down. Entrance condition: {
"comeInWithSpringBallBounce": {
"speedBooster": true,
"movementType": "any",
"remoteAndLandingMinTiles": [
[
14,
1
]
]
}
}Requires: "canTrickyJump"
"canSpringFling"
"canLateralMidAirMorph"
"canUseIFrames"
{
"spikeHits": 1
}Dev note: This can be done with 13 tiles of run speed, with greater difficulty. |
From: 2
Middle Left Door
To: 6
Bowling Chozo Statue
Jump into the room and morph along the ceiling to maximize distance. Unmorph while entering the spikes to minimize knockback Then build up speed and airball again to cross the spikes. With only a short runway available, high precision is required. Entrance condition: {
"comeInRunning": {
"speedBooster": true,
"minTiles": 25
}
}Requires: "canInsaneJump"
"canMomentumConservingMorph"
"canInsaneMidAirMorph"
"canUseIFrames"
{
"spikeHits": 1
} |
|
Ride the statue, which will not take Samus down, and will instead drop her off in the spike pit somewhat near the door. Entrance condition: {
"comeInWithGMode": {
"mode": "any",
"morphed": false
}
}Requires: "canComplexGMode"
"f_DefeatedPhantoon"
"Morph"
{
"or": [
"SpaceJump",
{
"and": [
"canUseIFrames",
{
"spikeHits": 2
},
{
"or": [
"canHorizontalDamageBoost",
"canInsaneJump",
"h_speedDash",
{
"spikeHits": 1
}
]
}
]
}
]
} |
From: 2
Middle Left Door
To: 7
Bowling In G-Mode
Crystal Flash then pause abuse to cross the spikeway with minimal Energy loss. Ride the statue, which will not take Samus down, and will instead drop her off in the spike pit somewhat near the door. Entrance condition: {
"comeInWithGMode": {
"mode": "any",
"morphed": false
}
}Requires: "canComplexGMode"
"f_DefeatedPhantoon"
"h_CrystalFlash"
{
"or": [
"SpaceJump",
{
"and": [
"canUseIFrames",
"h_pauseAbuseMinimalReserveRefill",
"h_pauseAbuseMinimalReserveRefill",
"h_pauseAbuseMinimalReserveRefill"
]
},
{
"and": [
"canUseIFrames",
"h_speedDash",
"h_pauseAbuseMinimalReserveRefill",
"h_pauseAbuseMinimalReserveRefill"
]
}
]
} |
|
Climb up about half a screen. If Phantoon is dead, the last part of the climb should be done carefully to avoid triggering collision with the spikes: Do not press forward or turn-around except while X-Ray is active. For each X-ray stand-up, release the turn-around input quickly to make sure that it is not still held after X-Ray deactivates; alternatively, hold both angle up and angle down to prevent Samus from touching the spikes (though this no longer gives protection if climbing so high that the bottom of Samus' hitbox reaches the spikes). Once Samus is high enough, unequip X-Ray, jump up (from either standing or crouch) to clip past the spikes, and land, taking a single spike hit. Then use the i-frames from the spike hit to run and jump to the left to make it to the door. Samus is high enough after the top of her arm cannon first becomes visible at the bottom of the screen; or up to 3 additional climbs can be performed after that point. In case of an accidental spike collision, it is possible to recover: Unless Samus climbed higher than needed, she will still be stuck in the wall, will take a single spike hit, and be able to continue climbing. With Grapple it is possible to swing on the Grapple blocks, avoiding all spike damage. Spike damage can also be avoided with Space Jump, by doing a stationary turn-around spin jump, which is very precise. Entrance condition: {
"comeInWithDoorStuckSetup": {}
}Requires: {
"notable": "X-Ray Climb"
}
"canXRayClimb"
{
"or": [
{
"and": [
{
"spikeHits": 3
},
{
"resourceCapacity": [
{
"type": "RegularEnergy",
"count": 199
}
]
}
]
},
{
"and": [
{
"not": "f_DefeatedPhantoon"
},
"canRiskPermanentLossOfAccess"
]
},
{
"and": [
"canOffScreenMovement",
{
"or": [
{
"and": [
{
"spikeHits": 1
},
"canUseIFrames"
]
},
"Grapple",
{
"and": [
"SpaceJump",
"canInsaneJump",
"canBeVeryPatient"
]
}
]
}
]
}
]
}Exit condition: {
"leaveNormally": {}
}Unlocks doors: {"types":["ammo"],"requires":[]}Dev note: FIXME: The canBeVeryPatient is for difficulty placement, as the damageless Space Jump version would likely require many attempts. The resourceCapacity requirement is to ensure that reserve energy management will not be needed for the lower-difficulty version of the strat; this could be refined since suits can affect spike damage, but we don't yet have a good way to represent that cleanly, given that randomizers are likely to modify suit damage protection. The leaveNormally is because the camera will be broken and we don't want to require unreasonable things without being able to reset it. |
From: 1
Right Door
To: 2
Item
Requires: "h_IBJFromThorns"
"canLongIBJ"
{
"not": "f_DefeatedPhantoon"
}Dev note: The h_IBJFromThorns requires canCarefulJump. There is no loss of access, because with that it is possible to get across with or without f_DefeatedPhantoon. |
|
Requires: {
"thornHits": 1
}
{
"or": [
"canUseIFrames",
{
"thornHits": 1
}
]
}
"canWalljump"
{
"not": "f_DefeatedPhantoon"
}
{
"or": [
"canRiskPermanentLossOfAccess",
"canCarefulJump",
"Gravity"
]
}Dev note: The canCarefulJump and Gravity are here, as with either of those, there is access across with or without f_DefeatedPhantoon. |
|
Requires: {
"or": [
"f_DefeatedPhantoon",
"SpaceJump",
{
"and": [
{
"thornHits": 1
},
{
"or": [
"HiJump",
"canWalljump",
"canUseIFrames",
"Grapple",
"canHorizontalDamageBoost",
{
"thornHits": 1
}
]
}
]
}
]
} |
From: 3
Bottom Left Door
To: 8
Item
Freeze an Atomic near the bottom of the stairs above the bomb block, so that it is barely off-camera when Samus drops down. Below, prepare a second Atomic to be frozen. As it approaches, jump up to cause the upper Atomic to come on-camera and descend. Take a hit from the lower Atomic, and freeze it about 1.5 tiles above the floor; use the i-frames to jump on top of the lower Atomic and freeze the upper Atomic while it is inside Samus' head. Immediately moonfall to the left. If successful, Samus will clip two tiles into the floor. Turn to the right, and perform a turnaround spin jump to the left to break the bomb block using Screw Attack. If Samus clips through the Atomics but does not clip into the floor, it means the bottom Atomic was frozen too low. If Samus clips only one tile into the floor, it means the bottom Atomic was frozen too high. Requires: {
"notable": "Atomic Ice Moonfall Screw Clip"
}
"f_DefeatedPhantoon"
{
"enemyDamage": {
"enemy": "Atomic",
"type": "contact",
"hits": 1
}
}
"canUseIFrames"
"canTrickyUseFrozenEnemies"
"canEnemyStuckMoonfall"
"ScrewAttack"
"Morph"Clears obstacles: C |
From: 3
Top Right Door
To: 3
Top Right Door
Use the full runway by dealing with the Boyon: kill it, freeze it, or use i-frames. Requires: {
"or": [
"Ice",
{
"enemyKill": {
"enemies": [
[
"Boyon"
]
]
}
},
{
"and": [
"canUseIFrames",
{
"enemyDamage": {
"enemy": "Boyon",
"type": "contact",
"hits": 1
}
}
]
}
]
}Exit condition: {
"leaveWithRunway": {
"length": 8,
"openEnd": 1
}
}Dev note: Killing the Boyon with Bombs takes several contact hits, but it's assumed Samus can farm at the nearby Zebbos. FIXME: Using a frozen Boyon to extend the runway is not reliable, as it can only be frozen 2 pixels higher than the ground, preventing multi-stutter shortcharges. This could, however, be used for non-shinecharge strats. |
From: 7
Platform Below Top Right Door
To: 6
Middle Junction Near Top Left Pirate
Tank the pirate then quickly crouch jump and down grab or use HiJump to get to the ledge. Requires: "canSuitlessMaridia"
"canUseIFrames"
{
"enemyDamage": {
"enemy": "Pink Space Pirate (standing)",
"type": "contact",
"hits": 1
}
}
{
"or": [
"HiJump",
"h_underwaterCrouchJumpDownGrab",
{
"and": [
"canTrickyJump",
"canTrickySpringBallJump"
]
}
]
} |
From: 1
Left Door
To: 3
Top Right Door
Use the spikes, which are not in the water, to jump from platform to platform as a way to cross the room. Requires knowing the position of every spike in the room, and hitting the spikes while morphed can help. The first jump is particularly tough. A Spring Ball jump from the sand with HiJump, or Grapple can be used to get past it. Requires: {
"notable": "Spike Platforming with Move Assist (Left to Right)"
}
"canWalljump"
"Morph"
"canUseIFrames"
{
"or": [
"Grapple",
{
"and": [
"canSuitlessMaridia",
"canPlayInSand",
"HiJump",
"canNeutralDamageBoost",
"canTrickySpringBallJump",
"canTrickyJump",
{
"spikeHits": 2
}
]
}
]
}
{
"spikeHits": 1
}
{
"or": [
{
"spikeHits": 1
},
"canHorizontalDamageBoost"
]
} |
From: 1
Left Door
To: 3
Top Right Door
Land on each set of spikes as a way to jump to the next safe platform. The first jump can be done with a very precise damage boost to bounce forward off the spike, or using morph. Requires: {
"notable": "Spike Platforming with No Equipment"
}
"canWalljump"
"canInsaneJump"
"canHorizontalDamageBoost"
"canUseIFrames"
{
  "spikeHits": 3
}
{
"or": [
"Morph",
{
"spikeHits": 2
}
]
}
"h_extremelyTrickyToCarryFlashSuit"Dev note: Positioning on the spikes is harder to control without morph. |
From: 1
Left Door
To: 3
Top Right Door
Use the spikes, which are not in the water, to jump from platform to platform as a way to cross the room. Requires knowing the position of every spike in the room, and hitting the spikes while morphed can help. The first jump is particularly tough. A springball rolling jump can be used to get past it. Entrance condition: {
"comeInRunning": {
"speedBooster": "any",
"minTiles": 2
}
}Requires: {
"notable": "Spike Platforming with SpringBall (Left to Right)"
}
"canWalljump"
"Morph"
"canUseIFrames"
"h_useSpringBall"
"canMockball"
{
"spikeHits": 3
}
{
"or": [
{
"spikeHits": 1
},
"canHorizontalDamageBoost"
]
} |
|
Stay out of the water, and by extension the sand, of the room by using the spikes as platforms. Morphing before landing on the spikes helps to be able to control the knockback. The final spike jump (which would be the most difficult) is avoided by doing a crouch jump into spring ball jump into IBJ to reach the left door. Perform the spring ball jump near max height. Place the first bomb between about 4 and 6 frames after the spring ball jump; ideally it should be just above the water line. Press pause between about 5 and 10 frames after placing the bomb, to disable Spring Ball (a 'spring fling', to reset fall speed). Place the second bomb soon after regaining control, while the game is fading back in. A spike hit in the center of the room can avoided by doing another spring ball jump into IBJ (also with a spring fling). Requires: {
"notable": "Bomb Jump Water Escape"
}
"HiJump"
"canPreciseWalljump"
"canUseIFrames"
{
"spikeHits": 1
}
"canNeutralDamageBoost"
{
"or": [
"canHorizontalDamageBoost",
{
"spikeHits": 1
}
]
}
"h_underwaterMaxHeightSpringBallJump"
{
"or": [
"canSpringFling",
{
"and": [
{
"spikeHits": 1
},
"canInsaneJump"
]
}
]
}
"canBombJumpWaterEscape"
"canJumpIntoIBJ"Dev note: The IBJ at the left side of the room can be done without a 'spring fling' but is far more precise: the first bomb must be placed exactly two frames before the spring ball jump, and the spring ball jump should be performed just before max height, during the 4-frame window between 2 and 5 frames before the last possible frame to jump (there are also 1-frame windows at 0 and 8 frames before the last frame). |
From: 3
Top Right Door
To: 1
Left Door
Stay out of the water, and by extension the sand, of the room by using the spikes as platforms. Landing on spikes aiming down with no other direction pressed can help control the knockback. Requires knowing the position of every spike in the room. The final spike jump is very difficult. Requires: {
"notable": "Spike Platforming with No Equipment"
}
"canPreciseWalljump"
"canInsaneJump"
"canUseIFrames"
{
"spikeHits": 3
}
"canNeutralDamageBoost"
{
"or": [
{
"and": [
"canHorizontalDamageBoost",
{
"noFlashSuit": {}
}
]
},
{
"spikeHits": 1
}
]
} |
|
Requires: "Gravity"
{
"or": [
"SpaceJump",
"canWalljump",
"h_IBJFromSpikes"
]
} |
From: 2
Right Door
To: 4
Top Right Ledge Junction
Take a spike hit and pause just after getting hit. Quickly crouch and jump just before the fade out ends. With a precise Gravity jump, it is possible to not need a crouch jump or down grab. Requires: "canGravityJump"
"HiJump"
{
"spikeHits": 1
}
"canUseIFrames"
"canTrickyJump"
{
"or": [
"canInsaneJump",
"canCrouchJump",
"canDownGrab"
]
}
{
"or": [
"canInsaneJump",
{
"spikeHits": 1
}
]
}Dev note: The canCrouchJump is not a h_underwaterCrouchJump, because Gravity is required. |
|
Requires: "Gravity"
{
"or": [
"canLongIBJ",
{
"and": [
"HiJump",
"canJumpIntoIBJ"
]
}
]
}
{
"or": [
"canBombHorizontally",
"h_IBJFromSpikes"
]
} |
|
Requires: "Gravity"
{
"or": [
"SpaceJump",
"canWalljump",
"canSpringBallJumpMidAir",
"canDiagonalBombJump",
"h_IBJFromSpikes"
]
} |
From: 5
Bottom Middle Junction
To: 6
Junction Right of Morph Tunnel
Jump into the ceiling Cacatac and damage boost onto the platform between spike pits. Use i-frames to cross the second set of spikes. With greater difficulty, a Cacatac spike projectile can be used instead. Requires: "Gravity"
"canHorizontalDamageBoost"
"canUseIFrames"
{
"or": [
{
"enemyDamage": {
"enemy": "Cacatac",
"type": "contact",
"hits": 1
}
},
{
"and": [
"canTrickyDodgeEnemies",
{
"enemyDamage": {
"enemy": "Cacatac",
"type": "spike",
"hits": 1
}
}
]
}
]
} |
|
Kill most of the pirates: leave the standing pirate on the ledge above the runway. Shinecharge and jump into its beam path to interrupt. Entrance condition: {
"comeInWithRMode": {}
}Requires: {
"or": [
{
"and": [
"h_CrystalFlashForReserveEnergy",
{
"or": [
{
"and": [
"canUseIFrames",
{
"or": [
{
"enemyDamage": {
"enemy": "Pink Space Pirate (standing)",
"type": "laser",
"hits": 1
}
},
"h_pauseAbuseMinimalReserveRefill"
]
}
]
},
"ScrewAttack",
"Plasma",
{
"getBlueSpeed": {
"usedTiles": 19,
"openEnd": 0
}
}
]
}
]
},
{
"and": [
{
"or": [
"ScrewAttack",
"Plasma",
{
"and": [
"canUseSpeedEchoes",
{
"getBlueSpeed": {
"usedTiles": 19,
"openEnd": 0
}
}
]
}
]
},
"h_RModeCanRefillReserves",
{
"partialRefill": {
"type": "ReserveEnergy",
"limit": 20
}
}
]
}
]
}
{
"canShineCharge": {
"usedTiles": 21,
"openEnd": 0
}
}
{
"autoReserveTrigger": {
"maxReserveEnergy": 95
}
}
"canRModeSparkInterrupt"Clears obstacles: A, door_1 |
|
Take a hit from the pirate to gain i-frames for running through the pirate to use for a longer runway. Requires: "HiJump"
"canSpeedyJump"
"canWalljump"
"canUseIFrames"
{
"enemyDamage": {
"enemy": "Pink Space Pirate (standing)",
"type": "laser",
"hits": 1
}
} |
|
Using the bottom of the room, shortcharge to use the echoes created by shinesparking to kill all of the Standing Pirates. Either lead the pirate to the left wall or take a hit to gain i-frames to use the full runway to charge a spark To lead a pirate, have it shoot in the direction you want it to go. Then jump overhead and crouch on the other side. Or, jump and aim down while on the sloped tiles just above to lower the camera and wait for the pirate to move to the correct spot. Turn around and diagonal spark the ceiling to kill the lowest pirate, and later the middle pirates. Building a spark towards the left allows for enough run speed to jump to the middle level. Then vertical shinespark out which kills the top pirate. Requires: {
"or": [
"Morph",
"canCarefulJump",
"canCameraManip"
]
}
"canShinechargeMovementComplex"
{
"canShineCharge": {
"usedTiles": 21,
"openEnd": 0
}
}
{
"shinespark": {
"frames": 30,
"excessFrames": 7
}
}
"canUseSpeedEchoes"
{
"or": [
"canCameraManip",
{
"and": [
{
"getBlueSpeed": {
"usedTiles": 19,
"openEnd": 0
}
},
{
"canShineCharge": {
"usedTiles": 21,
"openEnd": 0
}
},
{
"shinespark": {
"frames": 2,
"excessFrames": 2
}
}
]
},
{
"and": [
{
"canShineCharge": {
"usedTiles": 21,
"openEnd": 0
}
},
{
"shinespark": {
"frames": 3,
"excessFrames": 3
}
},
"canUseIFrames",
{
"enemyDamage": {
"enemy": "Pink Space Pirate (standing)",
"type": "laser",
"hits": 1
}
}
]
}
]
}Clears obstacles: A Dev note: Killing the top pirate naturally puts you at 1 |
|
Pseudo screw the left pirate, or clear the left side with shinesparks, then IBJ out Requires: {
"or": [
"canLongIBJ",
{
"and": [
"HiJump",
"canJumpIntoIBJ"
]
}
]
}
{
"or": [
{
"and": [
"canShinechargeMovement",
"canUseSpeedEchoes",
{
"getBlueSpeed": {
"usedTiles": 19,
"openEnd": 0
}
},
{
"canShineCharge": {
"usedTiles": 21,
"openEnd": 0
}
},
{
"shinespark": {
"frames": 1,
"excessFrames": 1
}
}
]
},
{
"and": [
"canShinechargeMovement",
"canUseSpeedEchoes",
{
"enemyDamage": {
"enemy": "Pink Space Pirate (standing)",
"type": "contact",
"hits": 1
}
},
"canUseIFrames",
{
"canShineCharge": {
"usedTiles": 21,
"openEnd": 0
}
},
{
"shinespark": {
"frames": 2,
"excessFrames": 2
}
}
]
},
{
"and": [
"canPseudoScrew",
{
"or": [
{
"enemyDamage": {
"enemy": "Pink Space Pirate (standing)",
"type": "contact",
"hits": 1
}
},
"h_pauseAbuseMinimalReserveRefill",
{
"and": [
{
"notable": "Damage-Avoiding Pseudo-Screw"
},
"canInsaneJump"
]
}
]
}
]
}
]
}Dev note: If you can kill them without being hurt, you can take path 2->3->1. |
|
Aim the ceiling Rinka to travel horizontally across the top of the room and use it to damage boost between the two floating platforms. Killing the lower Rinka shortly before killing the higher Rinka will synchronize their respawn timers so that Samus can jump when the lower Rinka reappears in order to get a good angle on the higher Rinka. Jump to the floating platform ahead of the high Rinka, jumping extra high to lead the Metroid out of the way if it is alive. Jump into the Rinka once it reaches the left edge of the platform to reach the next platform. Then use i-frames to pass through the Metroid if it is still alive. Requires: {
"notable": "Rinka Damage Boost"
}
{
"enemyDamage": {
"enemy": "Rinka",
"type": "contact",
"hits": 1
}
}
"canTrickyJump"
"canHorizontalDamageBoost"
"canCameraManip"
{
"or": [
{
"or": [
"f_KilledMetroidRoom1",
{
"obstaclesCleared": [
"f_KilledMetroidRoom1"
]
}
]
},
{
"and": [
"canMetroidAvoid",
"canUseIFrames"
]
}
]
}
{
"or": [
"canInsaneJump",
{
"enemyDamage": {
"enemy": "Rinka",
"type": "contact",
"hits": 1
}
},
{
"and": [
"canTrickyJump",
"canLateralMidAirMorph"
]
},
{
"and": [
"Gravity",
{
"acidFrames": 16
}
]
},
{
"acidFrames": 27
}
]
} |
|
Carefully dodge the Rinkas, or take a hit, while carefully avoiding falling off, then use the i-frames to use the runway. Requires: {
"or": [
"canTrickyJump",
{
"and": [
"canUseIFrames",
{
"enemyDamage": {
"enemy": "Rinka",
"type": "contact",
"hits": 1
}
}
]
}
]
}Exit condition: {
"leaveWithRunway": {
"length": 5,
"openEnd": 0
}
} |
|
Carefully dodge the Rinkas, or take a hit, while carefully avoiding falling off, then use the i-frames to use the runway. Requires: {
"or": [
"canTrickyJump",
{
"and": [
"canUseIFrames",
{
"enemyDamage": {
"enemy": "Rinka",
"type": "contact",
"hits": 1
}
}
]
}
]
}
"i_MotherBrainBarrier1Clear"Exit condition: {
"leaveWithRunway": {
"length": 6,
"openEnd": 0
}
} |
|
Carefully dodge the Rinkas, or take a hit, while carefully avoiding falling off, then use the i-frames to use the runway. Requires: {
"or": [
"canTrickyJump",
{
"and": [
"canUseIFrames",
{
"enemyDamage": {
"enemy": "Rinka",
"type": "contact",
"hits": 1
}
}
]
}
]
}
"i_MotherBrainBarrier1Clear"
"i_MotherBrainBarrier2Clear"Exit condition: {
"leaveWithRunway": {
"length": 7,
"openEnd": 0
}
} |
|
Carefully dodge the Rinkas, or take a hit, while carefully avoiding falling off, then use the i-frames to use the runway. Requires: {
"or": [
"canTrickyJump",
{
"and": [
"canUseIFrames",
{
"enemyDamage": {
"enemy": "Rinka",
"type": "contact",
"hits": 1
}
}
]
}
]
}
"i_MotherBrainBarrier1Clear"
"i_MotherBrainBarrier2Clear"
"i_MotherBrainBarrier3Clear"Exit condition: {
"leaveWithRunway": {
"length": 8,
"openEnd": 0
}
} |
|
Carefully dodge the Rinkas, or take a hit, while carefully avoiding falling off, then use the i-frames to use the runway. Requires: {
"or": [
"canTrickyJump",
{
"and": [
"canUseIFrames",
{
"enemyDamage": {
"enemy": "Rinka",
"type": "contact",
"hits": 1
}
}
]
}
]
}
"i_MotherBrainBarrier1Clear"
"i_MotherBrainBarrier2Clear"
"i_MotherBrainBarrier3Clear"
"i_MotherBrainBarrier4Clear"Exit condition: {
"leaveWithRunway": {
"length": 9,
"openEnd": 1
}
} |
|
Glitch through the Mother Brain Zebetites by using a frozen Rinka and i-frames. Freeze the Rinka at its spawn location, then spin jump or down-back onto it after acquiring i-frames to clip inside of the Zebetite, then jump through. I-frames can be acquired from a Rinka hit, a turret shot, or from the Zebetite itself. Note that Zebetites cause i-frames but deal no damage. If Screw Attack is equipped, then a down-back must be used, since spin jumping will cancel i-frames. With Ice+Wave, Samus can freeze the Rinka from above with an angle-down shot; Otherwise Samus must go below, press against the wall, and freeze it with an upward shot. With Ice+Plasma, Samus must be crouched when firing the shot. Requires: {
"notable": "Ice Zebetite Skip"
}
"canUseIFrames"
"canTrickyUseFrozenEnemies"
"Morph"
{
"or": [
{
"and": [
"Wave",
{
"enemyDamage": {
"enemy": "Rinka",
"type": "contact",
"hits": 1
}
}
]
},
"canTrickyJump"
]
}
{
"or": [
{
"disableEquipment": "ScrewAttack"
},
"canDownBack"
]
}
{
"or": [
"canTrickyDodgeEnemies",
{
"enemyDamage": {
"enemy": "Mother Brain 1",
"type": "turret",
"hits": 1
}
}
]
}
"h_complexToCarryFlashSuit"
"i_MotherBrainBarrier1Clear"
"i_MotherBrainBarrier2Clear"
"i_MotherBrainBarrier3Clear"
"i_MotherBrainBarrier4Clear"Dev note: This technically requires f_KilledZebetites1 to not be set, but there is minimal risk of loss of access, because there is no reason to kill any Zebs without being able to kill them all. It is also possible to Ice Zeb skip through the second Zeb with a morph/unmorph/remorph on a frozen Rinka; this is known as a Remorph Zebetite Skip or a Spring Ball Zebetite Skip. Technically this strat involves `canWallIceClip` but we don't include that requirement, since the positioning of the Rinka is freely normalized, which makes the trick easier than this tech would normally imply. FIXME: It is possible to Ice Zeb Skip out, but it is much harder and would only be useful if getting here with canRiskPermanentLossOfAccess. |
From: 2
Right Door
To: 3
Mother Brain
Shinespark diagonally into the lower Rinka Spawner while holding down, spamming jump, then pressing forward, in order to glitch through the first Mother Brain Zebetites during Samus' i-frames. The remaining Zebetites will not spawn. Entrance condition: {
"comeInShinecharged": {}
}Requires: {
"shineChargeFrames": 100
}
{
"notable": "Speed Zebetite Skip"
}
"canUseIFrames"
"Morph"
{
"shinespark": {
"frames": 4
}
}
{
"enemyDamage": {
"enemy": "Rinka",
"type": "contact",
"hits": 1
}
}
"i_MotherBrainBarrier1Clear"
"i_MotherBrainBarrier2Clear"
"i_MotherBrainBarrier3Clear"
"i_MotherBrainBarrier4Clear"Dev note: This technically requires f_KilledZebetites1 to not be set, but there is no loss of access, because there is no reason to kill any Zebs without being able to kill them all. |
From: 2
Right Door
To: 3
Mother Brain
Shinespark diagonally into the lower Rinka Spawner while holding down, spamming jump, then pressing forward, in order to glitch through the first Mother Brain Zebetites during Samus' i-frames. The remaining Zebetites will not spawn. Entrance condition: {
"comeInShinecharging": {
"length": 4,
"openEnd": 1
}
}Requires: {
"notable": "Speed Zebetite Skip"
}
"canUseIFrames"
"Morph"
{
"shinespark": {
"frames": 4
}
}
{
"enemyDamage": {
"enemy": "Rinka",
"type": "contact",
"hits": 1
}
}
"i_MotherBrainBarrier1Clear"
"i_MotherBrainBarrier2Clear"
"i_MotherBrainBarrier3Clear"
"i_MotherBrainBarrier4Clear"Dev note: This technically requires f_KilledZebetites1 to not be set, but there is no loss of access, because there is no reason to kill any Zebs without being able to kill them all. |
From: 2
Right Door
To: 3
Mother Brain
Shinespark diagonally into the lower Rinka Spawner while holding down, spamming jump, then pressing forward, in order to glitch through the first Mother Brain Zebetites during Samus' i-frames. The remaining Zebetites will not spawn. Requires: {
"notable": "Speed Zebetite Skip"
}
"canUseIFrames"
{
"useFlashSuit": {}
}
"Morph"
{
"shinespark": {
"frames": 4
}
}
{
"enemyDamage": {
"enemy": "Rinka",
"type": "contact",
"hits": 1
}
}
"i_MotherBrainBarrier1Clear"
"i_MotherBrainBarrier2Clear"
"i_MotherBrainBarrier3Clear"
"i_MotherBrainBarrier4Clear"Dev note: This technically requires f_KilledZebetites1 to not be set, but there is no loss of access, because there is no reason to kill any Zebs without being able to kill them all. |
|
Safely kill the first pirate, then walk through the rest while taking damage or by using Plasma Beam. It is possible to get through the lower three pirates with a single hit while using i-frames to prevent a second hit. Either go below the pirates and use the camera to manipulate them to be closer together, or arm-pump or horizontal damage boost to get through them fast enough. Requires: {
"or": [
"HiJump",
"canWalljump",
"SpaceJump",
"canIBJ",
"canSpringBallJumpMidAir"
]
}
{
"or": [
{
"enemyDamage": {
"enemy": "Tourian Space Pirate (all)",
"type": "contact",
"hits": 3
}
},
{
"and": [
"Plasma",
"canHitbox"
]
},
{
"and": [
"canUseIFrames",
{
"enemyDamage": {
"enemy": "Tourian Space Pirate (all)",
"type": "contact",
"hits": 2
}
},
{
"or": [
"canCameraManip",
"canHorizontalDamageBoost"
]
},
"canTrickyJump"
]
}
]
} |
|
Run through the pirates while taking damage or by using Plasma Beam. It is possible to get through the lower three pirates with a single hit while using i-frames to prevent a second hit. Either wait above until the pirates are a bit closer together and then run through, or arm-pump or horizontal damage boost to get through them fast enough. Requires: {
"or": [
{
"enemyDamage": {
"enemy": "Tourian Space Pirate (all)",
"type": "contact",
"hits": 4
}
},
{
"and": [
"Plasma",
"canHitbox"
]
},
{
"and": [
"canUseIFrames",
{
"enemyDamage": {
"enemy": "Tourian Space Pirate (all)",
"type": "contact",
"hits": 3
}
},
{
"or": [
"canCameraManip",
"canHorizontalDamageBoost"
]
}
]
}
]
} |
|
Wait for the left hopper to move right so it does not follow Samus as i-frames run out. A damage boost using the top hopper also moves through the room fast enough to be safe. Requires: {
"or": [
{
"enemyDamage": {
"enemy": "Blue Sidehopper",
"type": "contact",
"hits": 1
}
},
"h_pauseAbuseMinimalReserveRefill"
]
}
{
"or": [
{
"and": [
"canTrickyJump",
"canUseIFrames"
]
},
{
"enemyDamage": {
"enemy": "Blue Sidehopper",
"type": "contact",
"hits": 1
}
}
]
}Unlocks doors: {"types":["super"],"requires":[]}
{"types":["missiles","powerbomb"],"requires":[{"enemyDamage":{"enemy":"Blue Sidehopper","type":"contact","hits":1}}]} |
From: 2
Left Door
To: 2
Left Door
Requires: {
"or": [
{
"obstaclesCleared": [
"A"
]
},
{
"and": [
{
"enemyDamage": {
"enemy": "Blue Sidehopper",
"type": "contact",
"hits": 2
}
},
"canUseIFrames"
]
}
]
}Exit condition: {
"leaveWithSidePlatform": {
"height": 2,
"runway": {
"length": 12,
"openEnd": 0
},
"obstruction": [
1,
0
]
}
}Unlocks doors: {"types":["super"],"requires":[]}
{"types":["missiles","powerbomb"],"requires":["never"]}Dev note: Max extra run speed $2.B. |
From: 2
Left Door
To: 2
Left Door
Requires: {
"enemyDamage": {
"enemy": "Blue Sidehopper",
"type": "contact",
"hits": 1
}
}
"canUseIFrames"
"canTrickyDodgeEnemies"Exit condition: {
"leaveWithSidePlatform": {
"height": 2,
"runway": {
"length": 10,
"openEnd": 0
},
"obstruction": [
1,
0
]
}
}Unlocks doors: {"types":["super"],"requires":[]}
{"types":["missiles","powerbomb"],"requires":["never"]}Dev note: Max extra run speed $2.4. |


