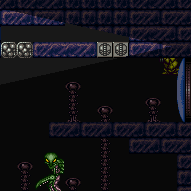
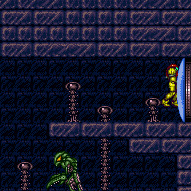
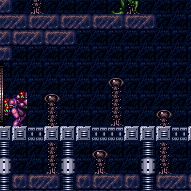
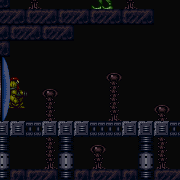
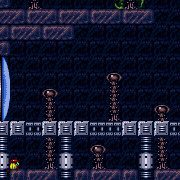
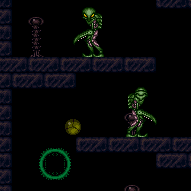
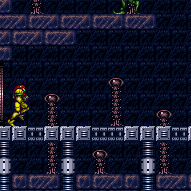
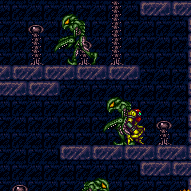
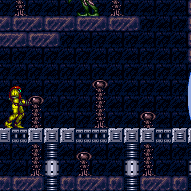
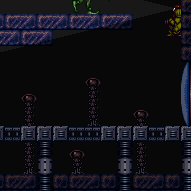
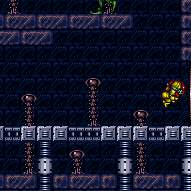
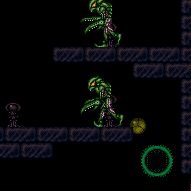
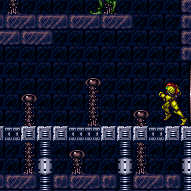
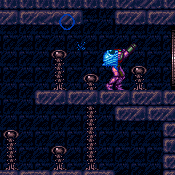
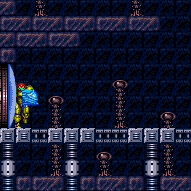
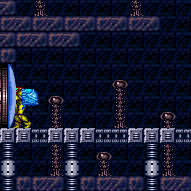
Green Pirates Shaft
Room ID: 21

|
Exit condition: {
"leaveWithRunway": {
"length": 5,
"openEnd": 1
}
} |
|
Create a runway by destroying all but the bottom row of shot blocks. Exit condition: {
"leaveWithMockball": {
"remoteRunway": {
"length": 5,
"openEnd": 1
},
"landingRunway": {
"length": 2,
"openEnd": 1
}
}
} |
|
Create a runway by destroying all but the bottom row of shot blocks. Exit condition: {
"leaveSpaceJumping": {
"remoteRunway": {
"length": 5,
"openEnd": 1
}
}
} |
|
Requires: "h_CrystalFlash" |
From: 1
Top Right Door
To: 1
Top Right Door
Entrance condition: {
"comeInShinecharging": {
"length": 3,
"openEnd": 0
},
"comesInHeated": "no"
}Requires: "h_CrystalSpark" |
|
Farm four of the pirates for drops. If you have full power bombs and can do so without using one you can also kill two Beetoms for guaranteed two small energy drops. Keep the bottom pirate alive: stun it with a Power Beam shot or i-frame past it. Once you have the reserves, perform a 1-screen shortcharge between the bottom doors, then hop back up to the bottom pirate's ledge and get shot at. Entrance condition: {
"comeInWithRMode": {}
}Requires: "Morph"
"canUseIFrames"
{
"or": [
"h_CrystalFlashForReserveEnergy",
{
"and": [
"h_RModeCanRefillReserves",
{
"or": [
{
"and": [
{
"enemyKill": {
"enemies": [
[
"Green Space Pirate (standing)",
"Green Space Pirate (standing)"
],
[
"Green Space Pirate (standing)",
"Green Space Pirate (standing)"
]
],
"excludedWeapons": [
"Missile"
]
}
},
{
"resourceMissingAtMost": [
{
"type": "Missile",
"count": 0
}
]
},
{
"partialRefill": {
"type": "ReserveEnergy",
"limit": 20
}
}
]
},
{
"and": [
{
"enemyKill": {
"enemies": [
[
"Beetom",
"Beetom"
]
],
"excludedWeapons": [
"PowerBomb"
]
}
},
{
"resourceMissingAtMost": [
{
"type": "PowerBomb",
"count": 0
}
]
},
{
"partialRefill": {
"type": "ReserveEnergy",
"limit": 10
}
}
]
}
]
}
]
}
]
}
{
"or": [
{
"canShineCharge": {
"usedTiles": 12,
"openEnd": 0
}
},
{
"and": [
{
"or": [
{
"doorUnlockedAtNode": 3
},
{
"doorUnlockedAtNode": 4
}
]
},
{
"canShineCharge": {
"usedTiles": 13,
"openEnd": 0
}
}
]
},
{
"and": [
{
"doorUnlockedAtNode": 3
},
{
"doorUnlockedAtNode": 4
},
{
"canShineCharge": {
"usedTiles": 14,
"openEnd": 0
}
}
]
}
]
}
{
"autoReserveTrigger": {
"maxReserveEnergy": 95
}
}
"canRModeSparkInterrupt"Unlocks doors: {"nodeId":3,"types":["ammo"],"requires":[]}
{"nodeId":4,"types":["ammo"],"requires":[]} |
|
|
From: 2
Middle Right Door
To: 1
Top Right Door
In Red Brinstar Firefleas, instead of simply grappling and moonwalking into the transition, perform a setup like in the Moat: Angle-up, jump, bonk the ceiling, then use Grapple just before landing and moonwalk back as it attaches. This will put Samus into a lower position after the transition. Samus will be stuck inside the wall. Perform a Crystal Flash, then morph and roll out. Entrance condition: {
"comeInWithGrappleTeleport": {
"blockPositions": [
[
5,
3
]
]
}
}Requires: "canInsaneJump" "h_CrystalFlash" |
From: 2
Middle Right Door
To: 1
Top Right Door
After teleporting, press down while still grappling, to move Samus up and right by retracting the grapple. Release Grapple, angle-down, and shoot the blocks to the left and right of Samus. Morph and roll to the right, and Samus will fall and be able to stand; if Morph is unavailable, instead wiggle to the right using turnaround aim cancels. Entrance condition: {
"comeInWithGrappleTeleport": {
"blockPositions": [
[
7,
2
]
]
}
}Requires: {
"or": [
"Morph",
"canTurnaroundAimCancel"
]
}
"canOffScreenMovement" |
|
Exit condition: {
"leaveWithRunway": {
"length": 9,
"openEnd": 1
}
} |
|
Requires: {
"resetRoom": {
"nodes": [
2,
3,
4
]
}
}
{
"cycleFrames": 850
}
{
"or": [
{
  "haveBlueSuit": {}
},
"ScrewAttack",
"Wave",
"Spazer",
"Plasma",
{
"and": [
"canPseudoScrew",
{
"cycleFrames": 230
}
]
},
{
"and": [
"Ice",
{
"cycleFrames": 240
}
]
},
{
"and": [
"Charge",
"canDodgeWhileShooting",
{
"cycleFrames": 500
}
]
}
]
}Resets obstacles: A Farm cycle drops: 5 Green Space Pirate (standing) Dev note: A two-way farm strat could be added for if the room can be reset at both the top and bottom. |
|
Jump to lay a Power Bomb above ground height, to both break the Power Bomb blocks and kill the Beetoms. The top two Space Pirates will also be killed. Requires: {
"cycleFrames": 650
}
{
"resetRoom": {
"nodes": [
2
]
}
}
"h_usePowerBomb"
{
"or": [
"canMidAirMorph",
"h_useSpringBall"
]
}Clears obstacles: A Farm cycle drops: 2 Beetom, 2 Green Space Pirate (standing) |
From: 2
Middle Right Door
To: 2
Middle Right Door
Requires: {
"or": [
{
"and": [
{
"resetRoom": {
"nodes": [
2
]
}
},
{
"cycleFrames": 1150
}
]
},
{
"and": [
{
"resetRoom": {
"nodes": [
3,
4
]
}
},
{
"cycleFrames": 1400
}
]
}
]
}
{
"or": [
{
"haveBlueSuit": {}
},
"ScrewAttack",
"Wave",
"Spazer",
"Plasma",
{
"and": [
"Charge",
"canDodgeWhileShooting",
{
"cycleFrames": 500
}
]
},
{
"and": [
"Ice",
{
"cycleFrames": 240
}
]
}
]
}
"h_usePowerBomb"
{
"or": [
"canMidAirMorph",
"h_useSpringBall"
]
}Resets obstacles: A Farm cycle drops: 5 Green Space Pirate (standing), 2 Beetom Dev note: This strat mainly exists as a way to farm Beetoms in case the room cannot be reset at node 2; in this case, the Pirates along the way come almost for free, and it also works at node 2. |
|
Requires: "h_CrystalFlash" |
From: 2
Middle Right Door
To: 2
Middle Right Door
Lay a Power Bomb on the floor to destroy the Power Bomb blocks. Go up and to either the left or right ledge with the Beetoms, and lay another Power Bomb. Both Beetoms should latch onto Samus. Do a small jump straight up to avoid being bounced by the Power Bomb explosion. Stand and collect two Power Bomb drops, one from each Beetom, then remorph in time to press the Crystal Flash inputs. Requires: {
"resetRoom": {
"nodes": [
2
]
}
}
{
"enemyDamage": {
"enemy": "Beetom",
"type": "contact",
"hits": 2
}
}
"h_10PowerBombCrystalFlash"Clears obstacles: A Dev note: The resetRoom requirement is in case you need to farm a bit to get above health-bomb energy. With a blue suit, this strat has to be done a little differently but still works. |
From: 2
Middle Right Door
To: 2
Middle Right Door
Entrance condition: {
"comeInShinecharging": {
"length": 8,
"openEnd": 0
},
"comesInHeated": "no"
}Requires: "h_CrystalSpark" |
From: 2
Middle Right Door
To: 2
Middle Right Door
Requires: {
"noBlueSuit": {}
}
"h_usePowerBomb"
{
"or": [
{
"enemyDamage": {
"enemy": "Beetom",
"type": "contact",
"hits": 2
}
},
{
"and": [
"Ice",
{
"enemyDamage": {
"enemy": "Beetom",
"type": "contact",
"hits": 1
}
}
]
}
]
}Exit condition: {
"leaveWithGModeSetup": {
"knockback": false
}
} |
From: 2
Middle Right Door
To: 4
Bottom Right Door
Farm four of the pirates for drops, leaving the bottom pirate alive. Stun it with a Power Beam shot or i-frame past it. Perform a 1-screen shortcharge between the bottom doors, then hop back up to the bottom pirate's ledge and get shot at. Entrance condition: {
"comeInWithRMode": {}
}Requires: "canUseIFrames"
{
"or": [
"h_CrystalFlashForReserveEnergy",
{
"and": [
"h_RModeCanRefillReserves",
{
"enemyKill": {
"enemies": [
[
"Green Space Pirate (standing)",
"Green Space Pirate (standing)"
],
[
"Green Space Pirate (standing)",
"Green Space Pirate (standing)"
]
],
"excludedWeapons": [
"Missile"
]
}
},
{
"resourceMissingAtMost": [
{
"type": "Missile",
"count": 0
}
]
},
{
"partialRefill": {
"type": "ReserveEnergy",
"limit": 20
}
}
]
}
]
}
{
"or": [
{
"canShineCharge": {
"usedTiles": 12,
"openEnd": 0
}
},
{
"and": [
{
"or": [
{
"doorUnlockedAtNode": 3
},
{
"doorUnlockedAtNode": 4
}
]
},
{
"canShineCharge": {
"usedTiles": 13,
"openEnd": 0
}
}
]
},
{
"and": [
{
"doorUnlockedAtNode": 3
},
{
"doorUnlockedAtNode": 4
},
{
"canShineCharge": {
"usedTiles": 14,
"openEnd": 0
}
}
]
}
]
}
{
"autoReserveTrigger": {
"maxReserveEnergy": 95
}
}
"canRModeSparkInterrupt"Unlocks doors: {"nodeId":3,"types":["ammo"],"requires":[]}
{"nodeId":4,"types":["ammo"],"requires":[]} |
|
Requires: {
"haveBlueSuit": {}
} |
|
Requires: {
"enemyDamage": {
"enemy": "Green Space Pirate (standing)",
"type": "contact",
"hits": 5
}
} |
From: 2
Middle Right Door
To: 4
Bottom Right Door
Requires: "canUseIFrames"
{
"enemyDamage": {
"enemy": "Green Space Pirate (standing)",
"type": "contact",
"hits": 3
}
} |
|
Requires: {
"enemyKill": {
"enemies": [
[
"Green Space Pirate (standing)",
"Green Space Pirate (standing)",
"Green Space Pirate (standing)"
],
[
"Green Space Pirate (standing)",
"Green Space Pirate (standing)"
]
]
}
} |
From: 2
Middle Right Door
To: 4
Bottom Right Door
Requires: {
"enemyDamage": {
"enemy": "Green Space Pirate (standing)",
"type": "contact",
"hits": 2
}
}
{
"useFlashSuit": {}
}
{
"shinespark": {
"frames": 1,
"excessFrames": 1
}
}
"canUseSpeedEchoes" |
|
Requires: "h_usePowerBomb" |
|
Climb until the camera fully shows Samus on the bottom of the screen. Shoot up to clear the shot blocks and resume climbing until you can walk out to the left. Fix the camera by shooting the floor shot block and jumping down. Entrance condition: {
"comeInWithDoorStuckSetup": {}
}Requires: "canXRayClimb" |
From: 2
Middle Right Door
To: 9
Junction Below Items
Crystal Flash then damage down on the Pirates to Reserve trigger to exit G-Mode. To prevent freeing the Beetoms, the Power Bomb needs to be placed on the left platform just below the door. To prevent extra hits after the trigger, kill the Pirate when Samus is low on Energy, then finish damaging down using its invisible lasers. Entrance condition: {
"comeInWithGMode": {
"mode": "any",
"morphed": true
}
}Requires: "canComplexGMode"
"h_artificialMorphCrystalFlash"
{
"autoReserveTrigger": {}
}
{
"or": [
{
"enemyKill": {
"enemies": [
[
"Green Space Pirate (standing)"
]
]
}
},
{
"enemyDamage": {
"enemy": "Green Space Pirate (standing)",
"type": "laser",
"hits": 3
}
}
]
}Clears obstacles: A Dev note: FIXME: Using a Power Bomb could also be used to exit G-mode. All G-mode CF strats need to be thoroughly checked and maybe make a tech for understanding it. |
From: 2
Middle Right Door
To: 10
G-Mode Morph Junction (Middle Right Door)
Entrance condition: {
"comeInWithGMode": {
"mode": "any",
"morphed": true
}
} |
From: 3
Bottom Left Door
To: 1
Top Right Door
Entrance condition: {
"comeInWithGrappleTeleport": {
"blockPositions": [
[
12,
12
],
[
12,
13
]
]
}
}Bypasses door shell: true |
From: 3
Bottom Left Door
To: 1
Top Right Door
Entrance condition: {
"comeInWithGrappleTeleport": {
"blockPositions": [
[
12,
12
]
]
}
}Exit condition: {
"leaveWithGrappleTeleport": {
"blockPositions": [
[
12,
12
]
]
}
}Bypasses door shell: true |
From: 3
Bottom Left Door
To: 1
Top Right Door
Entrance condition: {
"comeInWithGrappleTeleport": {
"blockPositions": [
[
12,
13
]
]
}
}Exit condition: {
"leaveWithGrappleTeleport": {
"blockPositions": [
[
12,
13
]
]
}
}Bypasses door shell: true |
|
Exit condition: {
"leaveWithRunway": {
"length": 13,
"openEnd": 0
}
} |
From: 3
Bottom Left Door
To: 3
Bottom Left Door
Requires: {
"doorUnlockedAtNode": 4
}Exit condition: {
"leaveWithRunway": {
"length": 14,
"openEnd": 0
}
}Unlocks doors: {"nodeId":4,"types":["ammo"],"requires":[]} |
From: 3
Bottom Left Door
To: 3
Bottom Left Door
Entrance condition: {
"comeInShinecharging": {
"length": 12,
"openEnd": 0
},
"comesInHeated": "no"
}Requires: "h_CrystalSpark" |
From: 3
Bottom Left Door
To: 4
Bottom Right Door
Stun the bottom pirate with a Power Beam shot, or i-frame past it. Farm the four pirates above for drops, then get back through the bottom pirate. Stun it with a Power Beam shot or i-frame past it a second time. Perform a 1-screen shortcharge between the bottom doors, then hop back up to the bottom pirate's ledge and get shot at. Entrance condition: {
"comeInWithRMode": {}
}Requires: "canUseIFrames"
{
"or": [
"h_CrystalFlashForReserveEnergy",
{
"and": [
{
"enemyDamage": {
"enemy": "Green Space Pirate (standing)",
"type": "contact",
"hits": 1
}
},
"h_RModeCanRefillReserves",
{
"enemyKill": {
"enemies": [
[
"Green Space Pirate (standing)",
"Green Space Pirate (standing)"
],
[
"Green Space Pirate (standing)",
"Green Space Pirate (standing)"
]
],
"excludedWeapons": [
"Missile"
]
}
},
{
"resourceMissingAtMost": [
{
"type": "Missile",
"count": 0
}
]
},
{
"partialRefill": {
"type": "ReserveEnergy",
"limit": 20
}
}
]
}
]
}
{
"or": [
{
"canShineCharge": {
"usedTiles": 12,
"openEnd": 0
}
},
{
"and": [
{
"or": [
{
"doorUnlockedAtNode": 3
},
{
"doorUnlockedAtNode": 4
}
]
},
{
"canShineCharge": {
"usedTiles": 13,
"openEnd": 0
}
}
]
},
{
"and": [
{
"doorUnlockedAtNode": 3
},
{
"doorUnlockedAtNode": 4
},
{
"canShineCharge": {
"usedTiles": 14,
"openEnd": 0
}
}
]
}
]
}
{
"autoReserveTrigger": {
"maxReserveEnergy": 95
}
}
"canRModeSparkInterrupt"Unlocks doors: {"nodeId":3,"types":["ammo"],"requires":[]}
{"nodeId":4,"types":["ammo"],"requires":[]} |
|
|
From: 3
Bottom Left Door
To: 4
Bottom Right Door
Entrance condition: {
"comeInShinecharging": {
"length": 13,
"openEnd": 0
}
}Requires: {
"shineChargeFrames": 20
}Exit condition: {
"leaveShinecharged": {}
}Unlocks doors: {"types":["super"],"requires":[]}
{"types":["missiles","powerbomb"],"requires":["never"]} |
From: 3
Bottom Left Door
To: 4
Bottom Right Door
Entrance condition: {
"comeInShinecharged": {}
}Requires: {
"shineChargeFrames": 10
}
{
"shinespark": {
"frames": 21,
"excessFrames": 0
}
}Exit condition: {
"leaveWithSpark": {}
}Unlocks doors: {"types":["super"],"requires":[]}
{"types":["missiles","powerbomb"],"requires":["never"]} |
|
Entrance condition: {
"comeInShinecharged": {}
}Requires: {
"shineChargeFrames": 55
}Exit condition: {
"leaveShinecharged": {}
}Unlocks doors: {"types":["super"],"requires":[]}
{"types":["missiles","powerbomb"],"requires":["never"]} |
From: 3
Bottom Left Door
To: 4
Bottom Right Door
Entrance condition: {
"comeInShinecharging": {
"length": 12,
"openEnd": 0
}
}Exit condition: {
"leaveWithTemporaryBlue": {}
}Unlocks doors: {"types":["ammo"],"requires":[]} |
From: 3
Bottom Left Door
To: 4
Bottom Right Door
Entrance condition: {
"comeInWithStoredFallSpeed": {
"fallSpeedInTiles": 1
}
}Exit condition: {
"leaveWithStoredFallSpeed": {
"fallSpeedInTiles": 1
}
}Unlocks doors: {"types":["missiles","super"],"requires":[]}
{"types":["powerbomb"],"requires":["never"]} |
From: 3
Bottom Left Door
To: 4
Bottom Right Door
Entrance condition: {
"comeInWithStoredFallSpeed": {
"fallSpeedInTiles": 2
}
}Exit condition: {
"leaveWithStoredFallSpeed": {
"fallSpeedInTiles": 2
}
}Unlocks doors: {"types":["missiles","super"],"requires":[]}
{"types":["powerbomb"],"requires":["never"]} |
|
X-Ray climb about 2.5 screen lengths, until the camera shows Samus' helmet on the bottom of the screen. Shoot up to clear the shot blocks and resume climbing until you can walk out to the right. Fix the camera by shooting the floor shot block and jumping down. The pirate will attack while climbing past it. Entrance condition: {
"comeInWithDoorStuckSetup": {}
}Requires: "canLongXRayClimb"
{
"or": [
{
"enemyDamage": {
"enemy": "Green Space Pirate (standing)",
"type": "laser",
"hits": 1
}
},
{
"enemyKill": {
"enemies": [
[
"Green Space Pirate (standing)"
]
],
"explicitWeapons": [
"Charge",
"Ice",
"Wave",
"Spazer",
"Plasma",
"Missile",
"Super"
]
}
}
]
}
"canBePatient"Dev note: With a blue suit, Samus' i-frames still last a normal amount of time. |
From: 3
Bottom Left Door
To: 10
G-Mode Morph Junction (Middle Right Door)
With Spring Ball, it is possible to save a Power Bomb by placing it on the descent of the first jump by the bottom corner of the overhang, then bouncing on it on the ascent of the second. It is also possible but tighter to get high enough from bouncing on a Power Bomb with a single jump, similar to jumping into an IBJ. This doesn't save anything if breaking the Power Bomb blocks above. With an extra Power Bomb to spare, simply Spring Ball Bomb Jump. Entrance condition: {
"comeInWithGMode": {
"mode": "any",
"morphed": true
}
}Requires: {
"or": [
"h_artificialMorphIBJ",
{
"and": [
"h_artificialMorphSpringBall",
"h_artificialMorphPowerBomb",
"h_additionalBomb",
{
"or": [
"HiJump",
"h_artificialMorphSpringBallBombJump",
{
"tech": "canJumpIntoIBJ"
}
]
}
]
},
{
"and": [
"h_artificialMorphSpringBall",
"HiJump",
{
  "enemyDamage": {
    "enemy": "Green Space Pirate (standing)",
    "type": "contact",
    "hits": 5
  }
}
]
}
]
} |
From: 3
Bottom Left Door
To: 10
G-Mode Morph Junction (Middle Right Door)
Use Spring Ball to climb the room. Without HiJump, Spring Ball Bomb Jump to get to the first ledge. Entrance condition: {
"comeInWithGMode": {
"mode": "any",
"morphed": true
}
}Requires: "h_blueSuitGMode"
"h_artificialMorphSpringBall"
{
"or": [
"HiJump",
"h_artificialMorphSpringBallBombJump"
]
} |
From: 4
Bottom Right Door
To: 1
Top Right Door
In Red Brinstar Firefleas, instead of simply grappling and moonwalking into the transition, perform a setup like in the Moat: Angle-up, jump, bonk the ceiling, then use Grapple just before landing and moonwalk back as it attaches. This will put Samus into a lower position after the transition. Samus will be stuck inside the wall. Perform a Crystal Flash, then morph and roll out. Entrance condition: {
"comeInWithGrappleTeleport": {
"blockPositions": [
[
5,
3
]
]
}
}Requires: "canInsaneJump" "h_CrystalFlash" |
From: 4
Bottom Right Door
To: 1
Top Right Door
After teleporting, press down while still grappling, to move Samus up and right by retracting the grapple. Release Grapple, angle-down, and shoot the blocks to the left and right of Samus. Morph and roll to the right; then Samus will be able to unmorph and stand. Entrance condition: {
"comeInWithGrappleTeleport": {
"blockPositions": [
[
7,
2
]
]
}
}Requires: "Morph" "canOffScreenMovement" |
|
Requires: {
"haveBlueSuit": {}
} |
From: 4
Bottom Right Door
To: 2
Middle Right Door
Requires: {
"enemyDamage": {
"enemy": "Green Space Pirate (standing)",
"type": "contact",
"hits": 5
}
} |
From: 4
Bottom Right Door
To: 2
Middle Right Door
Requires: "canDash"
"canUseIFrames"
"canTrickyJump"
{
"enemyDamage": {
"enemy": "Green Space Pirate (standing)",
"type": "contact",
"hits": 3
}
}Dev note: A shinespark could be used to kill the bottom two pirates. |
|
Requires: {
"enemyKill": {
"enemies": [
[
"Green Space Pirate (standing)",
"Green Space Pirate (standing)",
"Green Space Pirate (standing)"
],
[
"Green Space Pirate (standing)",
"Green Space Pirate (standing)"
]
]
}
} |
From: 4
Bottom Right Door
To: 2
Middle Right Door
Enter with G-mode direct and kill the bottom Pirate. Back up to between 1 and 6 pixels from the door transition, and activate X-ray to get very deep stuck in the door. Climb up 2 screens, and perform a turnaround buffered spin-jump away from the door to trigger the transition, bypassing any lock on the door. Entrance condition: {
"comeInWithGMode": {
"mode": "direct",
"morphed": false
}
}Requires: "canGModeXRayClimb"
"canLongXRayClimb"
{
"or": [
{
"enemyKill": {
"enemies": [
[
"Green Space Pirate (standing)"
]
]
}
},
"h_blueSuitGMode"
]
}Bypasses door shell: true |
From: 4
Bottom Right Door
To: 2
Middle Right Door
Enter with G-mode direct and kill the bottom Pirate with Bombs or a Power Bomb. Back up to between 1 and 6 pixels from the door transition, and activate X-ray to get very deep stuck in the door. Climb up 2 screens, and perform a turnaround buffered spin-jump away from the door to trigger the transition, bypassing any lock on the door. Entrance condition: {
"comeInWithGMode": {
"mode": "direct",
"morphed": true
}
}Requires: "canGModeXRayClimb"
"canLongXRayClimb"
{
"or": [
"h_artificialMorphPowerBomb",
"h_artificialMorphIBJ"
]
}Bypasses door shell: true |
From: 4
Bottom Right Door
To: 2
Middle Right Door
Requires: {
"enemyDamage": {
"enemy": "Green Space Pirate (standing)",
"type": "contact",
"hits": 2
}
}
{
"useFlashSuit": {}
}
{
"shinespark": {
"frames": 1,
"excessFrames": 1
}
}
"canUseSpeedEchoes" |
From: 4
Bottom Right Door
To: 2
Middle Right Door
It is possible to damage once to get through the first two pirates, then shinespark to kill the three above. Diagonal shinespark into the corner on the floor below the pirate above. This requires fairly precise positioning of the pirates. It is possible to shoot them to slow them down and prevent them from shooting. Move up while the pirate is moving it's head so it doesn't turn around. Requires: {
"enemyDamage": {
"enemy": "Green Space Pirate (standing)",
"type": "contact",
"hits": 1
}
}
{
"useFlashSuit": {}
}
{
"shinespark": {
"frames": 1,
"excessFrames": 1
}
}
"canInsaneJump"
"canUseSpeedEchoes" |
|
|
From: 4
Bottom Right Door
To: 3
Bottom Left Door
Entrance condition: {
"comeInShinecharging": {
"length": 13,
"openEnd": 0
}
}Requires: {
"shineChargeFrames": 20
}Exit condition: {
"leaveShinecharged": {}
}Unlocks doors: {"types":["super"],"requires":[]}
{"types":["missiles","powerbomb"],"requires":["never"]} |
From: 4
Bottom Right Door
To: 3
Bottom Left Door
Entrance condition: {
"comeInShinecharged": {}
}Requires: {
"shineChargeFrames": 10
}
{
"shinespark": {
"frames": 21,
"excessFrames": 0
}
}Exit condition: {
"leaveWithSpark": {}
}Unlocks doors: {"types":["super"],"requires":[]}
{"types":["missiles","powerbomb"],"requires":["never"]} |
|
Entrance condition: {
"comeInShinecharged": {}
}Requires: {
"shineChargeFrames": 55
}Exit condition: {
"leaveShinecharged": {}
}Unlocks doors: {"types":["super"],"requires":[]}
{"types":["missiles","powerbomb"],"requires":["never"]} |
From: 4
Bottom Right Door
To: 3
Bottom Left Door
Entrance condition: {
"comeInShinecharging": {
"length": 12,
"openEnd": 0
}
}Exit condition: {
"leaveWithTemporaryBlue": {}
}Unlocks doors: {"types":["ammo"],"requires":[]} |
From: 4
Bottom Right Door
To: 3
Bottom Left Door
Entrance condition: {
"comeInWithStoredFallSpeed": {
"fallSpeedInTiles": 1
}
}Exit condition: {
"leaveWithStoredFallSpeed": {
"fallSpeedInTiles": 1
}
}Unlocks doors: {"types":["missiles","super"],"requires":[]}
{"types":["powerbomb"],"requires":["never"]} |
From: 4
Bottom Right Door
To: 3
Bottom Left Door
Entrance condition: {
"comeInWithStoredFallSpeed": {
"fallSpeedInTiles": 2
}
}Exit condition: {
"leaveWithStoredFallSpeed": {
"fallSpeedInTiles": 2
}
}Unlocks doors: {"types":["missiles","super"],"requires":[]}
{"types":["powerbomb"],"requires":["never"]} |
From: 4
Bottom Right Door
To: 4
Bottom Right Door
Stun the bottom pirate with a Power Beam shot, or i-frame past it. Farm the four pirates above for drops, then get back through the bottom pirate. Stun it with a Power Beam shot or i-frame past it a second time. Perform a 1-screen shortcharge between the bottom doors, then hop back up to the bottom pirate's ledge and get shot at. Entrance condition: {
"comeInWithRMode": {}
}Requires: "canUseIFrames"
{
"or": [
"h_CrystalFlashForReserveEnergy",
{
"and": [
{
"enemyDamage": {
"enemy": "Green Space Pirate (standing)",
"type": "contact",
"hits": 1
}
},
"h_RModeCanRefillReserves",
{
"enemyKill": {
"enemies": [
[
"Green Space Pirate (standing)",
"Green Space Pirate (standing)"
],
[
"Green Space Pirate (standing)",
"Green Space Pirate (standing)"
]
],
"excludedWeapons": [
"Missile"
]
}
},
{
"resourceMissingAtMost": [
{
"type": "Missile",
"count": 0
}
]
},
{
"partialRefill": {
"type": "ReserveEnergy",
"limit": 20
}
}
]
}
]
}
{
"or": [
{
"canShineCharge": {
"usedTiles": 12,
"openEnd": 0
}
},
{
"and": [
{
"or": [
{
"doorUnlockedAtNode": 3
},
{
"doorUnlockedAtNode": 4
}
]
},
{
"canShineCharge": {
"usedTiles": 13,
"openEnd": 0
}
}
]
},
{
"and": [
{
"doorUnlockedAtNode": 3
},
{
"doorUnlockedAtNode": 4
},
{
"canShineCharge": {
"usedTiles": 14,
"openEnd": 0
}
}
]
}
]
}
{
"autoReserveTrigger": {
"maxReserveEnergy": 95
}
}
"canRModeSparkInterrupt"Unlocks doors: {"nodeId":3,"types":["ammo"],"requires":[]}
{"nodeId":4,"types":["ammo"],"requires":[]} |
|
Exit condition: {
"leaveWithRunway": {
"length": 13,
"openEnd": 0
}
} |
From: 4
Bottom Right Door
To: 4
Bottom Right Door
Requires: {
"doorUnlockedAtNode": 3
}Exit condition: {
"leaveWithRunway": {
"length": 14,
"openEnd": 0
}
}Unlocks doors: {"nodeId":3,"types":["ammo"],"requires":[]} |
From: 4
Bottom Right Door
To: 4
Bottom Right Door
Entrance condition: {
"comeInShinecharging": {
"length": 12,
"openEnd": 0
},
"comesInHeated": "no"
}Requires: "h_CrystalSpark" |
From: 4
Bottom Right Door
To: 4
Bottom Right Door
Requires: {
"or": [
{
"canShineCharge": {
"usedTiles": 12,
"openEnd": 0
}
},
{
"and": [
{
"or": [
{
"doorUnlockedAtNode": 3
},
{
"doorUnlockedAtNode": 4
}
]
},
{
"canShineCharge": {
"usedTiles": 13,
"openEnd": 0
}
}
]
},
{
"and": [
{
"doorUnlockedAtNode": 3
},
{
"doorUnlockedAtNode": 4
},
{
"canShineCharge": {
"usedTiles": 14,
"openEnd": 0
}
}
]
}
]
}
"h_CrystalSpark"Unlocks doors: {"nodeId":3,"types":["ammo"],"requires":[]} |
|
X-Ray climb about 2.5 screen lengths, until the camera shows Samus' helmet on the bottom of the screen. Shoot up to clear the shot blocks and resume climbing until you can walk out to the left. Fix the camera by shooting the floor shot block and jumping down. The bottom pirate will attack while climbing past it. Entrance condition: {
"comeInWithDoorStuckSetup": {}
}Requires: "canLongXRayClimb"
{
"or": [
{
"enemyDamage": {
"enemy": "Green Space Pirate (standing)",
"type": "laser",
"hits": 1
}
},
{
"enemyKill": {
"enemies": [
[
"Green Space Pirate (standing)"
]
],
"explicitWeapons": [
"Charge",
"Ice",
"Wave",
"Spazer",
"Plasma",
"Missile",
"Super"
]
}
}
]
}
"canBePatient" |
From: 4
Bottom Right Door
To: 10
G-Mode Morph Junction (Middle Right Door)
With Spring Ball, it is possible to save a Power Bomb by placing it on the descent of the first jump by the bottom corner of the overhang, then bouncing on it on the ascent of the second. It is also possible but tighter to get high enough from bouncing on a Power Bomb with a single jump, similar to jumping into an IBJ. This doesn't save anything if breaking the Power Bomb blocks above. With an extra Power Bomb to spare, simply Spring Ball Bomb Jump. Entrance condition: {
"comeInWithGMode": {
"mode": "any",
"morphed": true
}
}Requires: {
"or": [
"h_artificialMorphIBJ",
{
"and": [
"h_artificialMorphSpringBall",
"h_artificialMorphPowerBomb",
"h_additionalBomb",
{
"or": [
"HiJump",
"h_artificialMorphSpringBallBombJump",
{
"tech": "canJumpIntoIBJ"
}
]
}
]
},
{
"and": [
"h_artificialMorphSpringBall",
"HiJump",
{
"enemyDamage": {
"enemy": "Green Space Pirate (standing)",
"type": "contact",
"hits": 5
}
}
]
}
]
} |
From: 4
Bottom Right Door
To: 10
G-Mode Morph Junction (Middle Right Door)
Use Spring Ball to climb the room. Without HiJump, Spring Ball Bomb Jump to get to the first ledge. Entrance condition: {
"comeInWithGMode": {
"mode": "any",
"morphed": true
}
}Requires: "h_blueSuitGMode"
"h_artificialMorphSpringBall"
{
"or": [
"HiJump",
"h_artificialMorphSpringBallBombJump"
]
} |
|
|
|
|
|
|
|
|
|
|
|
Shoot out only the lower 2 shot blocks on the side Samus will be climbing. Grab a Beetom and use Morph or a tunnel crawl to pixel align the Beetom 1 pixel deep into the wall (2 or 3 pixels can also work). If morphed, use X-Ray stand up. Shoot to the right (horizontally or diagonally down) to freeze the Beetom. Continue refreezing during the next steps. Grab the other Beetom and stand close, but not too close, to the first. Do a small jump, but not too low, and do an aim-up shot the frame before Samus lands. This second Beetom needs to be exactly 1 pixel below the first. Refreeze the first before testing the positioning. Jump onto the second Beetom, and run into the wall to clip into it (walking can also work if the Beetom is not too deep). X-Ray climb up 2.5 screens and then fire upwards to clear shot blocks. Continue climbing and finish by walking away from the crumble blocks. For freezing the second Beetom, only certain jump heights will work. Otherwise the Beetom will skip over the correct position and may be frozen too low (2 pixels below the other Beetom). From a standing position, holding jump for 5, 8, 9, or 12 frames will work; with a crouch jump, holding jump for 5, 6, or 10 frames will work. It is recommended to use a crouch jump, aiming for a 5 or 6 frame jump. Requires: {
"noBlueSuit": {}
}
{
"notable": "Beetom X-Ray Climb"
}
{
"enemyDamage": {
"enemy": "Beetom",
"type": "contact",
"hits": 6
}
}
{
"or": [
"Morph",
{
"and": [
"canTunnelCrawl",
{
"enemyDamage": {
"enemy": "Beetom",
"type": "contact",
"hits": 3
}
}
]
}
]
}
"canWallIceClip"
"canLongXRayClimb"
"canBeVeryPatient"Resets obstacles: A Dev note: 2 hits are assumed to position the two Beetoms (plus 3 more if tunnel crawling), then 1 hit for each failed clip attempt, with 4 failed attempts. With Ice, Samus would be able to slowly farm the Green Pirates. One could descend through 8 visiting one of 5 or 6 and X-Ray climb back up to the top door using the non visited node. |
|
Requires: {
"or": [
"Morph",
{
"obstaclesCleared": [
"A"
]
}
]
} |
From: 9
Junction Below Items
To: 2
Middle Right Door
Bring a Beetom down from above and freeze it in position to extend the runway. Keep a half-tile gap between the Beetom and the runway in order to extend it as much as possible. Requires: {
"noBlueSuit": {}
}
"h_frozenEnemyRunway"
{
"or": [
"Morph",
{
"obstaclesCleared": [
"A"
]
}
]
}
{
"enemyDamage": {
"enemy": "Beetom",
"type": "contact",
"hits": 4
}
}Exit condition: {
"leaveWithRunway": {
"length": 11,
"openEnd": 0
}
}Unlocks doors: {"types":["ammo"],"requires":[]} |
From: 9
Junction Below Items
To: 2
Middle Right Door
Bring a Beetom down from above and freeze it in position to extend the runway. Shoot it again then quickly go back up and grab the second Beetom. Keep a half-tile gap between the Beetoms and the runway in order to extend it as much as possible. This is possible without breaking the Power Bomb blocks, by having both Beetoms attach to Samus, roll through the crumble blocks, then shake off the Beetoms to separate them. Requires: {
"noBlueSuit": {}
}
"h_trickyFrozenEnemyRunway"
{
"enemyDamage": {
"enemy": "Beetom",
"type": "contact",
"hits": 9
}
}
{
"or": [
{
"obstaclesCleared": [
"A"
]
},
{
"and": [
"Morph",
"canEscapeEnemyGrab",
{
"enemyDamage": {
"enemy": "Beetom",
"type": "contact",
"hits": 3
}
}
]
}
]
}Exit condition: {
"leaveWithRunway": {
"length": 12,
"openEnd": 1
}
}Unlocks doors: {"types":["ammo"],"requires":[]} |
|
Pick up a Beetom and bring it up to the centered platform below the crumble blocks. Freeze it at about head height where Samus can move around inside its sprite, and use it to Moondance. Refreeze the Beetom regularly to keep it in place. Once the clip begins, hold down to shrink Samus' hitbox so that she can fall through the Solid tile next to the power bomb block. The shot block needs to be cleared in advance. Requires: {
"noBlueSuit": {}
}
{
"notable": "Beetom Moondance"
}
"canMoondance"
"canCount"
"canTrickyUseFrozenEnemies"
{
"enemyDamage": {
"enemy": "Beetom",
"type": "contact",
"hits": 4
}
} |
From: 9
Junction Below Items
To: 2
Middle Right Door
Position both Beetoms above the shot block for an 'Enemy Stuck Moonfall' to clip through the floor below, bypassing the morph tunnel. 1) Attach a Beetom and freeze it off of Samus while standing on the shot block. 2) Attach the other Beetom and freeze it off of Samus while standing on the first Beetom. 3) Let the bottom Beetom unfreeze and then refreeze it once it touches the ground. 4) Destroy the shot block and refresh Ice on both Beetoms. 5) Moonfall between the Beetoms until Samus clips downward, while holding a button to automatically change animation pose (Angle-aim or Up) This can be done with a blue suit, by being careful not to move while a Beetom is attached. Requires: {
"noBlueSuit": {}
}
{
"notable": "Beetom Stuck Moonfall"
}
"canEnemyStuckMoonfall"
"canTrickyUseFrozenEnemies"
{
"enemyDamage": {
"enemy": "Beetom",
"type": "contact",
"hits": 2
}
} |
From: 9
Junction Below Items
To: 2
Middle Right Door
Requires: {
"noBlueSuit": {}
}
{
"or": [
"Morph",
{
"obstaclesCleared": [
"A"
]
}
]
}
{
"enemyDamage": {
"enemy": "Beetom",
"type": "contact",
"hits": 4
}
}Exit condition: {
"leaveWithGModeSetup": {
"knockback": false
}
}Unlocks doors: {"types":["ammo"],"requires":[]} |
From: 9
Junction Below Items
To: 2
Middle Right Door
Requires: {
"noBlueSuit": {}
}
{
"or": [
"Morph",
{
"obstaclesCleared": [
"A"
]
}
]
}
"canMoondance"
"canCount"
"canTrickyUseFrozenEnemies"
{
"enemyDamage": {
"enemy": "Beetom",
"type": "contact",
"hits": 4
}
}Exit condition: {
"leaveWithStoredFallSpeed": {
"fallSpeedInTiles": 1
}
}Unlocks doors: {"types":["ammo"],"requires":[]} |
From: 9
Junction Below Items
To: 2
Middle Right Door
Requires: {
"noBlueSuit": {}
}
{
"or": [
"Morph",
{
"obstaclesCleared": [
"A"
]
}
]
}
"canExtendedMoondance"
"canTrickyUseFrozenEnemies"
{
"enemyDamage": {
"enemy": "Beetom",
"type": "contact",
"hits": 4
}
}
"h_extendedMoondanceBeetomLeniency"Exit condition: {
"leaveWithStoredFallSpeed": {
"fallSpeedInTiles": 2
}
}Unlocks doors: {"types":["ammo"],"requires":[]} |
From: 9
Junction Below Items
To: 3
Bottom Left Door
It is possible to shake the Beetom off near the right door while facing left, then lure it down to the bottom without taking more hits (or to kill the Pirates with Bombs). Requires: {
"noBlueSuit": {}
}
{
"or": [
"Morph",
{
"obstaclesCleared": [
"A"
]
}
]
}
{
"or": [
{
"and": [
{
  "enemyKill": {
    "enemies": [
      [
        "Green Space Pirate (standing)",
        "Green Space Pirate (standing)",
        "Green Space Pirate (standing)"
      ],
      [
        "Green Space Pirate (standing)",
        "Green Space Pirate (standing)"
      ]
    ]
  }
},
{
"or": [
{
"enemyDamage": {
"enemy": "Beetom",
"type": "contact",
"hits": 8
}
},
{
"and": [
"canTrickyDodgeEnemies",
"canEscapeEnemyGrab",
{
"enemyDamage": {
"enemy": "Beetom",
"type": "contact",
"hits": 5
}
}
]
}
]
}
]
},
{
"and": [
{
"enemyDamage": {
"enemy": "Beetom",
"type": "contact",
"hits": 5
}
},
{
"enemyDamage": {
"enemy": "Green Space Pirate (standing)",
"type": "contact",
"hits": 3
}
}
]
}
]
}Exit condition: {
"leaveWithGModeSetup": {
"knockback": false
}
}Unlocks doors: {"types":["ammo"],"requires":[]}Dev note: FIXME: If starting the room at the bottom, the way it is written requires killing the pirates twice. If starting from the top of the room, it's going to take more hits and wiggling the Beetom off above if the only way to kill the pirates is with Power Bombs. |
From: 9
Junction Below Items
To: 3
Bottom Left Door
Requires: {
"noBlueSuit": {}
}
{
"or": [
"Morph",
{
"obstaclesCleared": [
"A"
]
}
]
}
"canMoondance"
"canCount"
"canTrickyUseFrozenEnemies"
{
"enemyDamage": {
"enemy": "Beetom",
"type": "contact",
"hits": 10
}
}Exit condition: {
"leaveWithStoredFallSpeed": {
"fallSpeedInTiles": 1
}
}Unlocks doors: {"types":["ammo"],"requires":[]} |
From: 9
Junction Below Items
To: 3
Bottom Left Door
Requires: {
"noBlueSuit": {}
}
{
"or": [
"Morph",
{
"obstaclesCleared": [
"A"
]
}
]
}
"canExtendedMoondance"
"canTrickyUseFrozenEnemies"
{
"enemyDamage": {
"enemy": "Beetom",
"type": "contact",
"hits": 10
}
}
"h_extendedMoondanceBeetomLeniency"Exit condition: {
"leaveWithStoredFallSpeed": {
"fallSpeedInTiles": 2
}
}Unlocks doors: {"types":["ammo"],"requires":[]} |
From: 9
Junction Below Items
To: 4
Bottom Right Door
It is possible to shake the Beetom off near the right door while facing left, then lure it down to the bottom without taking more hits (or to kill the Pirates with Bombs). Requires: {
"noBlueSuit": {}
}
{
"or": [
"Morph",
{
"obstaclesCleared": [
"A"
]
}
]
}
{
"or": [
{
"and": [
{
"enemyKill": {
"enemies": [
[
"Green Space Pirate (standing)",
"Green Space Pirate (standing)",
"Green Space Pirate (standing)"
],
[
"Green Space Pirate (standing)",
"Green Space Pirate (standing)"
]
]
}
},
{
"or": [
{
"enemyDamage": {
"enemy": "Beetom",
"type": "contact",
"hits": 8
}
},
{
"and": [
"canTrickyDodgeEnemies",
"canEscapeEnemyGrab",
{
"enemyDamage": {
"enemy": "Beetom",
"type": "contact",
"hits": 5
}
}
]
}
]
}
]
},
{
"and": [
{
"enemyDamage": {
"enemy": "Beetom",
"type": "contact",
"hits": 5
}
},
{
"enemyDamage": {
"enemy": "Green Space Pirate (standing)",
"type": "contact",
"hits": 3
}
}
]
}
]
}Exit condition: {
"leaveWithGModeSetup": {
"knockback": false
}
}Unlocks doors: {"types":["ammo"],"requires":[]}Dev note: FIXME: If starting the room at the bottom, the way it is written requires killing the pirates twice. If starting from the top of the room, it's going to take more hits and wiggling the Beetom off above if the only way to kill the pirates is with Power Bombs. |
From: 9
Junction Below Items
To: 4
Bottom Right Door
Requires: {
"noBlueSuit": {}
}
{
"or": [
"Morph",
{
"obstaclesCleared": [
"A"
]
}
]
}
"canMoondance"
"canCount"
"canTrickyUseFrozenEnemies"
{
"enemyDamage": {
"enemy": "Beetom",
"type": "contact",
"hits": 10
}
}Exit condition: {
"leaveWithStoredFallSpeed": {
"fallSpeedInTiles": 1
}
}Unlocks doors: {"types":["ammo"],"requires":[]} |
From: 9
Junction Below Items
To: 4
Bottom Right Door
Requires: {
"noBlueSuit": {}
}
{
"or": [
"Morph",
{
"obstaclesCleared": [
"A"
]
}
]
}
"canExtendedMoondance"
"canTrickyUseFrozenEnemies"
{
"enemyDamage": {
"enemy": "Beetom",
"type": "contact",
"hits": 10
}
}
"h_extendedMoondanceBeetomLeniency"Exit condition: {
"leaveWithStoredFallSpeed": {
"fallSpeedInTiles": 2
}
}Unlocks doors: {"types":["ammo"],"requires":[]} |
From: 10
G-Mode Morph Junction (Middle Right Door)
To: 2
Middle Right Door
Requires: "canGMode" |
From: 10
G-Mode Morph Junction (Middle Right Door)
To: 4
Bottom Right Door
Requires: "canGMode" "h_artificialMorphBombThings" "h_additionalBomb" |
From: 10
G-Mode Morph Junction (Middle Right Door)
To: 9
Junction Below Items
Place a Power Bomb and exit G-Mode. To prevent freeing the Beetoms, the Power Bomb needs to be placed on the left platform just below the door. Requires: "canGMode" "h_artificialMorphPowerBomb" Clears obstacles: A |
From: 10
G-Mode Morph Junction (Middle Right Door)
To: 9
Junction Below Items
Place bombs against the bottom of the crumble blocks to overload PLMs. Requires: "canGMode"
"h_artificialMorphBombs"
{
"or": [
{
"and": [
"h_artificialMorphSpringBall",
{
"or": [
"canBePatient",
"HiJump"
]
}
]
},
"h_artificialMorphCeilingBombJump"
]
} |
{
"$schema": "../../../schema/m3-room.schema.json",
"id": 21,
"name": "Green Pirates Shaft",
"area": "Crateria",
"subarea": "West",
"roomAddress": "0x799BD",
"roomEnvironments": [
{
"heated": false
}
],
"mapTileMask": [
[
1
],
[
1
],
[
1
],
[
1
],
[
1
],
[
1
],
[
1
]
],
"nodes": [
{
"id": 1,
"name": "Top Right Door",
"nodeType": "door",
"nodeSubType": "blue",
"nodeAddress": "0x0018c5e",
"doorOrientation": "right",
"doorEnvironments": [
{
"physics": "air"
}
],
"mapTileMask": [
[
2
],
[
1
],
[
1
],
[
1
],
[
1
],
[
1
],
[
1
]
]
},
{
"id": 2,
"name": "Middle Right Door",
"nodeType": "door",
"nodeSubType": "blue",
"nodeAddress": "0x0018c3a",
"doorOrientation": "right",
"doorEnvironments": [
{
"physics": "air"
}
],
"mapTileMask": [
[
1
],
[
1
],
[
1
],
[
1
],
[
2
],
[
2
],
[
1
]
]
},
{
"id": 3,
"name": "Bottom Left Door",
"nodeType": "door",
"nodeSubType": "blue",
"nodeAddress": "0x0018c46",
"doorOrientation": "left",
"doorEnvironments": [
{
"physics": "air"
}
],
"mapTileMask": [
[
1
],
[
1
],
[
1
],
[
1
],
[
1
],
[
1
],
[
2
]
]
},
{
"id": 4,
"name": "Bottom Right Door",
"nodeType": "door",
"nodeSubType": "red",
"nodeAddress": "0x0018c52",
"doorOrientation": "right",
"doorEnvironments": [
{
"physics": "air"
}
],
"mapTileMask": [
[
1
],
[
1
],
[
1
],
[
1
],
[
1
],
[
1
],
[
2
]
]
},
{
"id": 5,
"name": "Left Item",
"nodeType": "item",
"nodeSubType": "visible",
"nodeItem": "Missile",
"nodeAddress": "0x7846A",
"mapTileMask": [
[
1
],
[
2
],
[
1
],
[
1
],
[
1
],
[
1
],
[
1
]
],
"locks": [
{
"name": "Dummy Item Lock",
"lockType": "gameFlag",
"unlockStrats": [
{
"name": "Base (Collect Item)",
"notable": false,
"requires": [],
"flashSuitChecked": true,
"blueSuitChecked": true
}
]
}
]
},
{
"id": 6,
"name": "Right Item",
"nodeType": "item",
"nodeSubType": "visible",
"nodeItem": "Missile",
"nodeAddress": "0x78464",
"mapTileMask": [
[
1
],
[
2
],
[
1
],
[
1
],
[
1
],
[
1
],
[
1
]
],
"locks": [
{
"name": "Dummy Item Lock",
"lockType": "gameFlag",
"unlockStrats": [
{
"name": "Base (Collect Item)",
"notable": false,
"requires": [],
"flashSuitChecked": true,
"blueSuitChecked": true
}
]
}
]
},
{
"id": 8,
"name": "Junction Between Items",
"nodeType": "junction",
"nodeSubType": "junction",
"mapTileMask": [
[
1
],
[
2
],
[
1
],
[
1
],
[
1
],
[
1
],
[
1
]
]
},
{
"id": 9,
"name": "Junction Below Items",
"nodeType": "junction",
"nodeSubType": "junction",
"mapTileMask": [
[
1
],
[
1
],
[
2
],
[
2
],
[
1
],
[
1
],
[
1
]
]
},
{
"id": 10,
"name": "G-Mode Morph Junction (Middle Right Door)",
"nodeType": "junction",
"nodeSubType": "g-mode",
"mapTileMask": [
[
1
],
[
1
],
[
1
],
[
1
],
[
2
],
[
2
],
[
1
]
],
"note": "Represents being at the middle right door with G-Mode Morph (artificial morph)"
}
],
"obstacles": [
{
"id": "A",
"name": "Power Bomb Blocks",
"obstacleType": "inanimate",
"devNote": "This obstacle only needs to be tracked for morphless strats, because with Morph, Samus can fall through the crumble blocks."
}
],
"enemies": [
{
"id": "e1",
"groupName": "Green Pirates Shaft Pirates",
"enemyName": "Green Space Pirate (standing)",
"quantity": 5,
"homeNodes": [
2,
4
],
"note": "They're really between 2 and 4, but they are the actual obstacle between the two, so access to either + ability to kill them is enough to get their drops."
},
{
"id": "e2",
"groupName": "Green Pirates Beetoms",
"enemyName": "Beetom",
"quantity": 2,
"homeNodes": [
9
]
}
],
"strats": [
{
"link": [
1,
1
],
"name": "Base (Unlock Door)",
"requires": [],
"unlocksDoors": [
{
"types": [
"ammo"
],
"requires": []
}
],
"flashSuitChecked": true,
"blueSuitChecked": true
},
{
"link": [
1,
1
],
"name": "Base (Come In Normally)",
"entranceCondition": {
"comeInNormally": {}
},
"requires": [],
"flashSuitChecked": true,
"blueSuitChecked": true
},
{
"link": [
1,
1
],
"name": "Base (Come In With Mockball)",
"entranceCondition": {
"comeInWithMockball": {
"adjacentMinTiles": 0,
"remoteAndLandingMinTiles": [
[
0,
0
]
],
"speedBooster": "any"
}
},
"requires": [],
"flashSuitChecked": true,
"blueSuitChecked": true
},
{
"link": [
2,
2
],
"name": "Base (Unlock Door)",
"requires": [],
"unlocksDoors": [
{
"types": [
"ammo"
],
"requires": []
}
],
"flashSuitChecked": true,
"blueSuitChecked": true
},
{
"link": [
2,
2
],
"name": "Base (Come In Normally)",
"entranceCondition": {
"comeInNormally": {}
},
"requires": [],
"flashSuitChecked": true,
"blueSuitChecked": true
},
{
"link": [
2,
2
],
"name": "Base (Come In With Mockball)",
"entranceCondition": {
"comeInWithMockball": {
"adjacentMinTiles": 0,
"remoteAndLandingMinTiles": [
[
0,
0
]
],
"speedBooster": "any"
}
},
"requires": [],
"flashSuitChecked": true,
"blueSuitChecked": true
},
{
"link": [
3,
3
],
"name": "Base (Unlock Door)",
"requires": [],
"unlocksDoors": [
{
"types": [
"ammo"
],
"requires": []
}
],
"flashSuitChecked": true,
"blueSuitChecked": true
},
{
"link": [
3,
3
],
"name": "Base (Come In Normally)",
"entranceCondition": {
"comeInNormally": {}
},
"requires": [],
"flashSuitChecked": true,
"blueSuitChecked": true
},
{
"link": [
3,
3
],
"name": "Base (Come In With Mockball)",
"entranceCondition": {
"comeInWithMockball": {
"adjacentMinTiles": 0,
"remoteAndLandingMinTiles": [
[
0,
0
]
],
"speedBooster": "any"
}
},
"requires": [],
"flashSuitChecked": true,
"blueSuitChecked": true
},
{
"link": [
4,
4
],
"name": "Base (Unlock Door)",
"requires": [],
"unlocksDoors": [
{
"types": [
"ammo"
],
"requires": []
}
],
"flashSuitChecked": true,
"blueSuitChecked": true
},
{
"link": [
4,
4
],
"name": "Base (Come In Normally)",
"entranceCondition": {
"comeInNormally": {}
},
"requires": [],
"flashSuitChecked": true,
"blueSuitChecked": true
},
{
"link": [
4,
4
],
"name": "Base (Come In With Mockball)",
"entranceCondition": {
"comeInWithMockball": {
"adjacentMinTiles": 0,
"remoteAndLandingMinTiles": [
[
0,
0
]
],
"speedBooster": "any"
}
},
"requires": [],
"flashSuitChecked": true,
"blueSuitChecked": true
},
{
"name": "Base (Collect Item)",
"notable": false,
"requires": [],
"flashSuitChecked": true,
"blueSuitChecked": true,
"link": [
5,
5
],
"collectsItems": [
5
]
},
{
"name": "Base (Collect Item)",
"notable": false,
"requires": [],
"flashSuitChecked": true,
"blueSuitChecked": true,
"link": [
6,
6
],
"collectsItems": [
6
]
},
{
"id": 1,
"link": [
1,
1
],
"name": "Leave with Runway",
"requires": [],
"exitCondition": {
"leaveWithRunway": {
"length": 5,
"openEnd": 1
}
},
"flashSuitChecked": true,
"blueSuitChecked": true
},
{
"id": 2,
"link": [
1,
1
],
"name": "Leave With Mockball",
"requires": [],
"exitCondition": {
"leaveWithMockball": {
"remoteRunway": {
"length": 5,
"openEnd": 1
},
"landingRunway": {
"length": 2,
"openEnd": 1
}
}
},
"flashSuitChecked": true,
"blueSuitChecked": true,
"note": "Create a runway by destroying all but the bottom row of shot blocks."
},
{
"id": 3,
"link": [
1,
1
],
"name": "Leave Space Jumping",
"requires": [],
"exitCondition": {
"leaveSpaceJumping": {
"remoteRunway": {
"length": 5,
"openEnd": 1
}
}
},
"flashSuitChecked": true,
"blueSuitChecked": true,
"note": "Create a runway by destroying all but the bottom row of shot blocks."
},
{
"id": 4,
"link": [
1,
1
],
"name": "Crystal Flash",
"requires": [
"h_CrystalFlash"
],
"flashSuitChecked": true,
"blueSuitChecked": true
},
{
"id": 81,
"link": [
1,
1
],
"name": "Come in Shinecharging, Crystal Spark",
"entranceCondition": {
"comeInShinecharging": {
"length": 3,
"openEnd": 0
},
"comesInHeated": "no"
},
"requires": [
"h_CrystalSpark"
],
"flashSuitChecked": true,
"blueSuitChecked": true
},
{
"id": 88,
"link": [
1,
4
],
"name": "R-Mode Spark Interrupt",
"entranceCondition": {
"comeInWithRMode": {}
},
"requires": [
"Morph",
"canUseIFrames",
{
"or": [
"h_CrystalFlashForReserveEnergy",
{
"and": [
"h_RModeCanRefillReserves",
{
"or": [
{
"and": [
{
"enemyKill": {
"enemies": [
[
"Green Space Pirate (standing)",
"Green Space Pirate (standing)"
],
[
"Green Space Pirate (standing)",
"Green Space Pirate (standing)"
]
],
"excludedWeapons": [
"Missile"
]
}
},
{
"resourceMissingAtMost": [
{
"type": "Missile",
"count": 0
}
]
},
{
"partialRefill": {
"type": "ReserveEnergy",
"limit": 20
}
}
]
},
{
"and": [
{
"enemyKill": {
"enemies": [
[
"Beetom",
"Beetom"
]
],
"excludedWeapons": [
"PowerBomb"
]
}
},
{
"resourceMissingAtMost": [
{
"type": "PowerBomb",
"count": 0
}
]
},
{
"partialRefill": {
"type": "ReserveEnergy",
"limit": 10
}
}
]
}
]
}
]
}
]
},
{
"or": [
{
"canShineCharge": {
"usedTiles": 12,
"openEnd": 0
}
},
{
"and": [
{
"or": [
{
"doorUnlockedAtNode": 3
},
{
  "doorUnlockedAtNode": 4
}
]
},
{
"canShineCharge": {
"usedTiles": 13,
"openEnd": 0
}
}
]
},
{
"and": [
{
"doorUnlockedAtNode": 3
},
{
"doorUnlockedAtNode": 4
},
{
"canShineCharge": {
"usedTiles": 14,
"openEnd": 0
}
}
]
}
]
},
{
"autoReserveTrigger": {
"maxReserveEnergy": 95
}
},
"canRModeSparkInterrupt"
],
"unlocksDoors": [
{
"nodeId": 3,
"types": [
"ammo"
],
"requires": []
},
{
"nodeId": 4,
"types": [
"ammo"
],
"requires": []
}
],
"flashSuitChecked": true,
"blueSuitChecked": true,
"note": [
"Farm four of the pirates for drops. If you have full power bombs and can do so without using one",
"you can also kill two Beetoms for guaranteed two small energy drops.",
"Keep the bottom pirate alive: stun it with a Power Beam shot or i-frame past it.",
"Once you have the reserves, perform a 1-screen shortcharge between the bottom doors, then hop",
"back up to the bottom pirate's ledge and get shot at."
]
},
{
"id": 5,
"link": [
1,
8
],
"name": "Base",
"requires": [],
"flashSuitChecked": true,
"blueSuitChecked": true
},
{
"id": 6,
"link": [
2,
1
],
"name": "Grapple Teleport (from Red Brinstar Firefleas)",
"entranceCondition": {
"comeInWithGrappleTeleport": {
"blockPositions": [
[
5,
3
]
]
}
},
"requires": [
"canInsaneJump",
"h_CrystalFlash"
],
"flashSuitChecked": true,
"blueSuitChecked": true,
"note": [
"In Red Brinstar Firefleas, instead of simply grappling and moonwalking into the transition, perform a setup like in the Moat:",
"Angle-up, jump, bonk the ceiling, then use Grapple just before landing and moonwalk back as it attaches.",
"This will put Samus into a lower position after the transition.",
"Samus will be stuck inside the wall.",
"Perform a Crystal Flash, then morph and roll out."
]
},
{
"id": 7,
"link": [
2,
1
],
"name": "Grapple Teleport (from Moat)",
"entranceCondition": {
"comeInWithGrappleTeleport": {
"blockPositions": [
[
7,
2
]
]
}
},
"requires": [
{
"or": [
"Morph",
"canTurnaroundAimCancel"
]
},
"canOffScreenMovement"
],
"flashSuitChecked": true,
"blueSuitChecked": true,
"note": [
"After teleporting, press down while still grappling, to move Samus up and right by retracting the grapple.",
"Release Grapple, angle-down, and shoot the blocks to the left and right of Samus.",
"Morph and roll to the right, and Samus will fall and be able to stand;",
"if Morph is unavailable, instead wiggle to the right using turnaround aim cancels."
]
},
{
"id": 8,
"link": [
2,
2
],
"name": "Leave with Runway",
"requires": [],
"exitCondition": {
"leaveWithRunway": {
"length": 9,
"openEnd": 1
}
},
"flashSuitChecked": true,
"blueSuitChecked": true
},
{
"id": 9,
"link": [
2,
2
],
"name": "Pirate Farm",
"requires": [
{
"resetRoom": {
"nodes": [
2,
3,
4
]
}
},
{
"cycleFrames": 850
},
{
"or": [
{
"haveBlueSuit": {}
},
"ScrewAttack",
"Wave",
"Spazer",
"Plasma",
{
"and": [
"canPseudoScrew",
{
"cycleFrames": 230
}
]
},
{
"and": [
"Ice",
{
"cycleFrames": 240
}
]
},
{
"and": [
"Charge",
"canDodgeWhileShooting",
{
"cycleFrames": 500
}
]
}
]
}
],
"resetsObstacles": [
"A"
],
"farmCycleDrops": [
{
"enemy": "Green Space Pirate (standing)",
"count": 5
}
],
"flashSuitChecked": true,
"blueSuitChecked": true,
"devNote": [
"A two-way farm strat could be added for if the room can be reset at both the top and bottom."
]
},
{
"id": 77,
"link": [
2,
2
],
"name": "Beetom Farm",
"requires": [
{
"cycleFrames": 650
},
{
"resetRoom": {
"nodes": [
2
]
}
},
"h_usePowerBomb",
{
"or": [
"canMidAirMorph",
"h_useSpringBall"
]
}
],
"clearsObstacles": [
"A"
],
"farmCycleDrops": [
{
"enemy": "Beetom",
"count": 2
},
{
"enemy": "Green Space Pirate (standing)",
"count": 2
}
],
"flashSuitChecked": true,
"blueSuitChecked": true,
"note": [
"Jump to lay a Power Bomb above ground height, to both break the Power Bomb blocks and kill the Beetoms.",
"The top two Space Pirates will also be killed."
]
},
{
"id": 80,
"link": [
2,
2
],
"name": "Pirates and Beetom Farm",
"requires": [
{
"or": [
{
"and": [
{
"resetRoom": {
"nodes": [
2
]
}
},
{
"cycleFrames": 1150
}
]
},
{
"and": [
{
"resetRoom": {
"nodes": [
3,
4
]
}
},
{
"cycleFrames": 1400
}
]
}
]
},
{
"or": [
{
"haveBlueSuit": {}
},
"ScrewAttack",
"Wave",
"Spazer",
"Plasma",
{
"and": [
"Charge",
"canDodgeWhileShooting",
{
"cycleFrames": 500
}
]
},
{
"and": [
"Ice",
{
"cycleFrames": 240
}
]
}
]
},
"h_usePowerBomb",
{
"or": [
"canMidAirMorph",
"h_useSpringBall"
]
}
],
"resetsObstacles": [
"A"
],
"farmCycleDrops": [
{
"enemy": "Green Space Pirate (standing)",
"count": 5
},
{
"enemy": "Beetom",
"count": 2
}
],
"flashSuitChecked": true,
"blueSuitChecked": true,
"devNote": [
"This strat mainly exists as a way to farm Beetoms in case the room cannot be reset at node 2;",
"in this case, the Pirates along the way come almost for free, and it also works at node 2."
]
},
{
"id": 10,
"link": [
2,
2
],
"name": "Crystal Flash",
"requires": [
"h_CrystalFlash"
],
"flashSuitChecked": true,
"blueSuitChecked": true
},
{
"id": 11,
"link": [
2,
2
],
"name": "10 Power Bomb Crystal Flash",
"requires": [
{
"resetRoom": {
"nodes": [
2
]
}
},
{
"enemyDamage": {
"enemy": "Beetom",
"type": "contact",
"hits": 2
}
},
"h_10PowerBombCrystalFlash"
],
"clearsObstacles": [
"A"
],
"flashSuitChecked": true,
"blueSuitChecked": true,
"note": [
"Lay a Power Bomb on the floor to destroy the Power Bomb blocks.",
"Go up and to either the left or right ledge with the Beetoms, and lay another Power Bomb.",
"Both Beetoms should latch onto Samus.",
"Do a small jump straight up to avoid being bounced by the Power Bomb explosion.",
"Stand and collect two Power Bomb drops, one from each Beetom, then remorph in time to press the Crystal Flash inputs."
],
"devNote": [
"The resetRoom requirement is in case you need to farm a bit to get above health-bomb energy.",
"With a blue suit, this strat has to be done a little differently but still works."
]
},
{
"id": 82,
"link": [
2,
2
],
"name": "Come in Shinecharging, Crystal Spark",
"entranceCondition": {
"comeInShinecharging": {
"length": 8,
"openEnd": 0
},
"comesInHeated": "no"
},
"requires": [
"h_CrystalSpark"
],
"flashSuitChecked": true,
"blueSuitChecked": true
},
{
"id": 12,
"link": [
2,
2
],
"name": "G-Mode Setup - Get Hit By Beetom",
"requires": [
{
"noBlueSuit": {}
},
"h_usePowerBomb",
{
"or": [
{
"enemyDamage": {
"enemy": "Beetom",
"type": "contact",
"hits": 2
}
},
{
"and": [
"Ice",
{
"enemyDamage": {
"enemy": "Beetom",
"type": "contact",
"hits": 1
}
}
]
}
]
}
],
"exitCondition": {
"leaveWithGModeSetup": {
"knockback": false
}
},
"flashSuitChecked": true,
"blueSuitChecked": true
},
{
"id": 89,
"link": [
2,
4
],
"name": "R-Mode Spark Interrupt",
"entranceCondition": {
"comeInWithRMode": {}
},
"requires": [
"canUseIFrames",
{
"or": [
"h_CrystalFlashForReserveEnergy",
{
"and": [
"h_RModeCanRefillReserves",
{
"enemyKill": {
"enemies": [
[
"Green Space Pirate (standing)",
"Green Space Pirate (standing)"
],
[
"Green Space Pirate (standing)",
"Green Space Pirate (standing)"
]
],
"excludedWeapons": [
"Missile"
]
}
},
{
"resourceMissingAtMost": [
{
"type": "Missile",
"count": 0
}
]
},
{
"partialRefill": {
"type": "ReserveEnergy",
"limit": 20
}
}
]
}
]
},
{
"or": [
{
"canShineCharge": {
"usedTiles": 12,
"openEnd": 0
}
},
{
"and": [
{
"or": [
{
"doorUnlockedAtNode": 3
},
{
"doorUnlockedAtNode": 4
}
]
},
{
"canShineCharge": {
"usedTiles": 13,
"openEnd": 0
}
}
]
},
{
"and": [
{
"doorUnlockedAtNode": 3
},
{
"doorUnlockedAtNode": 4
},
{
"canShineCharge": {
"usedTiles": 14,
"openEnd": 0
}
}
]
}
]
},
{
"autoReserveTrigger": {
"maxReserveEnergy": 95
}
},
"canRModeSparkInterrupt"
],
"unlocksDoors": [
{
"nodeId": 3,
"types": [
"ammo"
],
"requires": []
},
{
"nodeId": 4,
"types": [
"ammo"
],
"requires": []
}
],
"flashSuitChecked": true,
"blueSuitChecked": true,
"note": [
"Farm four of the pirates for drops, leaving the bottom pirate alive.",
"Stun it with a Power Beam shot or i-frame past it.",
"Perform a 1-screen shortcharge between the bottom doors, then hop",
"back up to the bottom pirate's ledge and get shot at."
]
},
{
"id": 83,
"link": [
2,
4
],
"name": "Blue Suit",
"requires": [
{
"haveBlueSuit": {}
}
],
"flashSuitChecked": true,
"blueSuitChecked": true
},
{
"id": 78,
"link": [
2,
4
],
"name": "Tank the Damage",
"requires": [
{
"enemyDamage": {
"enemy": "Green Space Pirate (standing)",
"type": "contact",
"hits": 5
}
}
],
"flashSuitChecked": true,
"blueSuitChecked": true
},
{
"id": 13,
"link": [
2,
4
],
"name": "Tank the Damage (Use I-Frames to Reduce Damage)",
"requires": [
"canUseIFrames",
{
"enemyDamage": {
"enemy": "Green Space Pirate (standing)",
"type": "contact",
"hits": 3
}
}
],
"flashSuitChecked": true,
"blueSuitChecked": true
},
{
"id": 14,
"link": [
2,
4
],
"name": "Kill the Pirates",
"requires": [
{
"enemyKill": {
"enemies": [
[
"Green Space Pirate (standing)",
"Green Space Pirate (standing)",
"Green Space Pirate (standing)"
],
[
"Green Space Pirate (standing)",
"Green Space Pirate (standing)"
]
]
}
}
],
"flashSuitChecked": true,
"blueSuitChecked": true
},
{
"id": 15,
"link": [
2,
4
],
"name": "Tank the Damage Twice, Then Use Flash Suit",
"requires": [
{
"enemyDamage": {
"enemy": "Green Space Pirate (standing)",
"type": "contact",
"hits": 2
}
},
{
"useFlashSuit": {}
},
{
"shinespark": {
"frames": 1,
"excessFrames": 1
}
},
"canUseSpeedEchoes"
],
"flashSuitChecked": true,
"blueSuitChecked": true
},
{
"id": 16,
"link": [
2,
9
],
"name": "Base",
"requires": [
"h_usePowerBomb"
],
"flashSuitChecked": true,
"blueSuitChecked": true
},
{
"id": 17,
"link": [
2,
9
],
"name": "X-Ray Climb",
"entranceCondition": {
"comeInWithDoorStuckSetup": {}
},
"requires": [
"canXRayClimb"
],
"flashSuitChecked": true,
"blueSuitChecked": true,
"note": [
"Climb until the camera fully shows Samus on the bottom of the screen.",
"Shoot up to clear the shot blocks and resume climbing until you can walk out to the left.",
"Fix the camera by shooting the floor shot block and jumping down."
]
},
{
"id": 18,
"link": [
2,
9
],
"name": "G-Mode Morph Crystal Flash, Reserve Trigger, Up to the Beetoms",
"entranceCondition": {
"comeInWithGMode": {
"mode": "any",
"morphed": true
}
},
"requires": [
"canComplexGMode",
"h_artificialMorphCrystalFlash",
{
"autoReserveTrigger": {}
},
{
"or": [
{
"enemyKill": {
"enemies": [
[
"Green Space Pirate (standing)"
]
]
}
},
{
"enemyDamage": {
"enemy": "Green Space Pirate (standing)",
"type": "laser",
"hits": 3
}
}
]
}
],
"clearsObstacles": [
"A"
],
"flashSuitChecked": true,
"blueSuitChecked": true,
"note": [
"Crystal Flash then damage down on the Pirates to Reserve trigger to exit G-Mode.",
"To prevent freeing the Beetoms, the Power Bomb needs to be placed on the left platform just below the door.",
"To prevent extra hits after the trigger, kill the Pirate when Samus is low on Energy, then finish damaging down using its invisible lasers."
],
"devNote": "FIXME: Using a Power Bomb could also be used to exit G-mode. All G-mode CF strats need to be thoroughly checked and maybe make a tech for understanding it."
},
{
"id": 19,
"link": [
2,
10
],
"name": "G-Mode Morph",
"entranceCondition": {
"comeInWithGMode": {
"mode": "any",
"morphed": true
}
},
"requires": [],
"flashSuitChecked": true,
"blueSuitChecked": true
},
{
"id": 20,
"link": [
3,
1
],
"name": "Grapple Teleport Door Lock Skip",
"entranceCondition": {
"comeInWithGrappleTeleport": {
"blockPositions": [
[
12,
12
],
[
12,
13
]
]
}
},
"requires": [],
"bypassesDoorShell": "yes",
"flashSuitChecked": true,
"blueSuitChecked": true
},
{
"id": 21,
"link": [
3,
1
],
"name": "Carry Grapple Teleport (Top Position)",
"entranceCondition": {
"comeInWithGrappleTeleport": {
"blockPositions": [
[
12,
12
]
]
}
},
"requires": [],
"exitCondition": {
"leaveWithGrappleTeleport": {
"blockPositions": [
[
12,
12
]
]
}
},
"bypassesDoorShell": "yes",
"flashSuitChecked": true,
"blueSuitChecked": true
},
{
"id": 22,
"link": [
3,
1
],
"name": "Carry Grapple Teleport (Bottom Position)",
"entranceCondition": {
"comeInWithGrappleTeleport": {
"blockPositions": [
[
12,
13
]
]
}
},
"requires": [],
"exitCondition": {
"leaveWithGrappleTeleport": {
"blockPositions": [
[
12,
13
]
]
}
},
"bypassesDoorShell": "yes",
"flashSuitChecked": true,
"blueSuitChecked": true
},
{
"id": 23,
"link": [
3,
3
],
"name": "Leave with Runway",
"requires": [],
"exitCondition": {
"leaveWithRunway": {
"length": 13,
"openEnd": 0
}
},
"flashSuitChecked": true,
"blueSuitChecked": true
},
{
"id": 24,
"link": [
3,
3
],
"name": "Leave with Runway, Open Both Doors",
"requires": [
{
"doorUnlockedAtNode": 4
}
],
"exitCondition": {
"leaveWithRunway": {
"length": 14,
"openEnd": 0
}
},
"unlocksDoors": [
{
"nodeId": 4,
"types": [
"ammo"
],
"requires": []
}
],
"flashSuitChecked": true,
"blueSuitChecked": true
},
{
"id": 84,
"link": [
3,
3
],
"name": "Come in Shinecharging, Crystal Spark",
"entranceCondition": {
"comeInShinecharging": {
"length": 12,
"openEnd": 0
},
"comesInHeated": "no"
},
"requires": [
"h_CrystalSpark"
],
"flashSuitChecked": true,
"blueSuitChecked": true
},
{
"id": 90,
"link": [
3,
4
],
"name": "R-Mode Spark Interrupt",
"entranceCondition": {
"comeInWithRMode": {}
},
"requires": [
"canUseIFrames",
{
"or": [
"h_CrystalFlashForReserveEnergy",
{
"and": [
{
"enemyDamage": {
"enemy": "Green Space Pirate (standing)",
"type": "contact",
"hits": 1
}
},
"h_RModeCanRefillReserves",
{
"enemyKill": {
"enemies": [
[
"Green Space Pirate (standing)",
"Green Space Pirate (standing)"
],
[
"Green Space Pirate (standing)",
"Green Space Pirate (standing)"
]
],
"excludedWeapons": [
"Missile"
]
}
},
{
"resourceMissingAtMost": [
{
"type": "Missile",
"count": 0
}
]
},
{
"partialRefill": {
"type": "ReserveEnergy",
"limit": 20
}
}
]
}
]
},
{
"or": [
{
"canShineCharge": {
"usedTiles": 12,
"openEnd": 0
}
},
{
"and": [
{
"or": [
{
"doorUnlockedAtNode": 3
},
{
"doorUnlockedAtNode": 4
}
]
},
{
"canShineCharge": {
"usedTiles": 13,
"openEnd": 0
}
}
]
},
{
"and": [
{
"doorUnlockedAtNode": 3
},
{
"doorUnlockedAtNode": 4
},
{
"canShineCharge": {
"usedTiles": 14,
"openEnd": 0
}
}
]
}
]
},
{
"autoReserveTrigger": {
"maxReserveEnergy": 95
}
},
"canRModeSparkInterrupt"
],
"unlocksDoors": [
{
"nodeId": 3,
"types": [
"ammo"
],
"requires": []
},
{
"nodeId": 4,
"types": [
"ammo"
],
"requires": []
}
],
"flashSuitChecked": true,
"blueSuitChecked": true,
"note": [
"Stun the bottom pirate with a Power Beam shot, or i-frame past it.",
"Farm the four pirates above for drops, then get back through the bottom pirate.",
"Stun it with a Power Beam shot or i-frame past it a second time.",
"Perform a 1-screen shortcharge between the bottom doors, then hop",
"back up to the bottom pirate's ledge and get shot at."
]
},
{
"id": 25,
"link": [
3,
4
],
"name": "Base",
"requires": [],
"flashSuitChecked": true,
"blueSuitChecked": true
},
{
"id": 26,
"link": [
3,
4
],
"name": "Come in Shinecharging, Leave Shinecharged",
"entranceCondition": {
"comeInShinecharging": {
"length": 13,
"openEnd": 0
}
},
"requires": [
{
  "shineChargeFrames": 20
}
],
"exitCondition": {
"leaveShinecharged": {}
},
"unlocksDoors": [
{
"types": [
"super"
],
"requires": []
},
{
"types": [
"missiles",
"powerbomb"
],
"requires": [
"never"
]
}
],
"flashSuitChecked": true,
"blueSuitChecked": true
},
{
"id": 27,
"link": [
3,
4
],
"name": "Come In Shinecharged, Leave With Spark",
"entranceCondition": {
"comeInShinecharged": {}
},
"requires": [
{
"shineChargeFrames": 10
},
{
"shinespark": {
"frames": 21,
"excessFrames": 0
}
}
],
"exitCondition": {
"leaveWithSpark": {}
},
"unlocksDoors": [
{
"types": [
"super"
],
"requires": []
},
{
"types": [
"missiles",
"powerbomb"
],
"requires": [
"never"
]
}
],
"flashSuitChecked": true,
"blueSuitChecked": true
},
{
"id": 28,
"link": [
3,
4
],
"name": "Carry Shinecharge",
"entranceCondition": {
"comeInShinecharged": {}
},
"requires": [
{
  "shineChargeFrames": 55
}
],
"exitCondition": {
"leaveShinecharged": {}
},
"unlocksDoors": [
{
"types": [
"super"
],
"requires": []
},
{
"types": [
"missiles",
"powerbomb"
],
"requires": [
"never"
]
}
],
"flashSuitChecked": true,
"blueSuitChecked": true
},
{
"id": 29,
"link": [
3,
4
],
"name": "Come in Shinecharging, Leave With Temporary Blue",
"entranceCondition": {
"comeInShinecharging": {
"length": 12,
"openEnd": 0
}
},
"requires": [],
"exitCondition": {
"leaveWithTemporaryBlue": {}
},
"unlocksDoors": [
{
"types": [
"ammo"
],
"requires": []
}
],
"flashSuitChecked": true,
"blueSuitChecked": true
},
{
"id": 30,
"link": [
3,
4
],
"name": "Transition with Stored Fall Speed",
"entranceCondition": {
"comeInWithStoredFallSpeed": {
"fallSpeedInTiles": 1
}
},
"requires": [],
"exitCondition": {
"leaveWithStoredFallSpeed": {
"fallSpeedInTiles": 1
}
},
"unlocksDoors": [
{
"types": [
"missiles",
"super"
],
"requires": []
},
{
"types": [
"powerbomb"
],
"requires": [
"never"
]
}
],
"flashSuitChecked": true,
"blueSuitChecked": true
},
{
"id": 31,
"link": [
3,
4
],
"name": "Transition with Stored Fall Speed (more speed)",
"entranceCondition": {
"comeInWithStoredFallSpeed": {
"fallSpeedInTiles": 2
}
},
"requires": [],
"exitCondition": {
"leaveWithStoredFallSpeed": {
"fallSpeedInTiles": 2
}
},
"unlocksDoors": [
{
"types": [
"missiles",
"super"
],
"requires": []
},
{
"types": [
"powerbomb"
],
"requires": [
"never"
]
}
],
"flashSuitChecked": true,
"blueSuitChecked": true
},
{
"id": 32,
"link": [
3,
9
],
"name": "X-Ray Climb",
"entranceCondition": {
"comeInWithDoorStuckSetup": {}
},
"requires": [
"canLongXRayClimb",
{
"or": [
{
"enemyDamage": {
"enemy": "Green Space Pirate (standing)",
"type": "laser",
"hits": 1
}
},
{
"enemyKill": {
"enemies": [
[
"Green Space Pirate (standing)"
]
],
"explicitWeapons": [
"Charge",
"Ice",
"Wave",
"Spazer",
"Plasma",
"Missile",
"Super"
]
}
}
]
},
"canBePatient"
],
"flashSuitChecked": true,
"blueSuitChecked": true,
"note": [
"X-Ray climb about 2.5 screen lengths, until the camera shows Samus' helmet on the bottom of the screen.",
"Shoot up to clear the shot blocks and resume climbing until you can walk out to the right.",
"Fix the camera by shooting the floor shot block and jumping down.",
"The pirate will attack while climbing past it."
],
"devNote": [
"With a blue suit, Samus' i-frames still last a normal amount of time."
]
},
{
"id": 33,
"link": [
3,
10
],
"name": "G-Mode Morph Pirate Kill",
"entranceCondition": {
"comeInWithGMode": {
"mode": "any",
"morphed": true
}
},
"requires": [
{
  "or": [
    "h_artificialMorphIBJ",
    {
      "and": [
        "h_artificialMorphSpringBall",
        "h_artificialMorphPowerBomb",
        "h_additionalBomb",
        {
          "or": [
            "HiJump",
            "h_artificialMorphSpringBallBombJump",
            {
              "tech": "canJumpIntoIBJ"
            }
          ]
        }
      ]
    },
    {
      "and": [
        "h_artificialMorphSpringBall",
        "HiJump",
        {
          "enemyDamage": {
            "enemy": "Green Space Pirate (standing)",
            "type": "contact",
            "hits": 5
          }
        }
      ]
    }
  ]
}
],
"flashSuitChecked": true,
"blueSuitChecked": true,
"note": [
"With Spring Ball, it is possible to save a Power Bomb by placing it on the descent of the first jump by the bottom corner of the overhang,",
"then bouncing on it on the ascent of the second.",
"It is also possible but tighter to get high enough from bouncing on a Power Bomb with a single jump, similar to jumping into an IBJ.",
"This doesn't save anything if breaking the Power Bomb blocks above.",
"With an extra Power Bomb to spare, simply Spring Ball Bomb Jump."
]
},
{
"id": 92,
"link": [
3,
10
],
"name": "G-Mode Morph with Blue Suit",
"entranceCondition": {
"comeInWithGMode": {
"mode": "any",
"morphed": true
}
},
"requires": [
"h_blueSuitGMode",
"h_artificialMorphSpringBall",
{
"or": [
"HiJump",
"h_artificialMorphSpringBallBombJump"
]
}
],
"flashSuitChecked": true,
"blueSuitChecked": true,
"note": "Use Spring Ball to climb the room. Without HiJump, Spring Ball Bomb Jump to get to the first ledge."
},
{
"id": 34,
"link": [
4,
1
],
"name": "Grapple Teleport (from Red Brinstar Firefleas)",
"entranceCondition": {
"comeInWithGrappleTeleport": {
"blockPositions": [
[
5,
3
]
]
}
},
"requires": [
"canInsaneJump",
"h_CrystalFlash"
],
"flashSuitChecked": true,
"blueSuitChecked": true,
"note": [
"In Red Brinstar Firefleas, instead of simply grappling and moonwalking into the transition, perform a setup like in the Moat:",
"Angle-up, jump, bonk the ceiling, then use Grapple just before landing and moonwalk back as it attaches.",
"This will put Samus into a lower position after the transition.",
"Samus will be stuck inside the wall.",
"Perform a Crystal Flash, then morph and roll out."
]
},
{
"id": 35,
"link": [
4,
1
],
"name": "Grapple Teleport (from Moat)",
"entranceCondition": {
"comeInWithGrappleTeleport": {
"blockPositions": [
[
7,
2
]
]
}
},
"requires": [
"Morph",
"canOffScreenMovement"
],
"flashSuitChecked": true,
"blueSuitChecked": true,
"note": [
"After teleporting, press down while still grappling, to move Samus up and right by retracting the grapple.",
"Release Grapple, angle-down, and shoot the blocks to the left and right of Samus.",
"Morph and roll to the right; then Samus will be able to unmorph and stand."
]
},
{
"id": 85,
"link": [
4,
2
],
"name": "Blue Suit",
"requires": [
{
  "haveBlueSuit": {}
}
],
"flashSuitChecked": true,
"blueSuitChecked": true
},
{
"id": 36,
"link": [
4,
2
],
"name": "Tank the Damage (Get Hit by Each Pirate)",
"requires": [
{
  "enemyDamage": {
    "enemy": "Green Space Pirate (standing)",
    "type": "contact",
    "hits": 5
  }
}
],
"flashSuitChecked": true,
"blueSuitChecked": true
},
{
"id": 37,
"link": [
4,
2
],
"name": "Tank the Damage (Use I-Frames to Reduce Damage)",
"requires": [
"canDash",
"canUseIFrames",
"canTrickyJump",
{
"enemyDamage": {
"enemy": "Green Space Pirate (standing)",
"type": "contact",
"hits": 3
}
}
],
"flashSuitChecked": true,
"blueSuitChecked": true,
"note": "FIXME: This could use a ledge grab tech to avoid the 4th pirate hit.",
"devNote": "A shinespark could be used to kill the bottom two pirates."
},
{
"id": 38,
"link": [
4,
2
],
"name": "Kill the Pirates",
"requires": [
{
  "enemyKill": {
    "enemies": [
      [
        "Green Space Pirate (standing)",
        "Green Space Pirate (standing)",
        "Green Space Pirate (standing)"
      ],
      [
        "Green Space Pirate (standing)",
        "Green Space Pirate (standing)"
      ]
    ]
  }
}
],
"flashSuitChecked": true,
"blueSuitChecked": true
},
{
"id": 39,
"link": [
4,
2
],
"name": "Very Deep Stuck X-Ray Climb",
"entranceCondition": {
"comeInWithGMode": {
"mode": "direct",
"morphed": false
}
},
"requires": [
"canGModeXRayClimb",
"canLongXRayClimb",
{
"or": [
{
"enemyKill": {
"enemies": [
[
"Green Space Pirate (standing)"
]
]
}
},
"h_blueSuitGMode"
]
}
],
"bypassesDoorShell": "yes",
"flashSuitChecked": true,
"blueSuitChecked": true,
"note": [
"Enter with G-mode direct and kill the bottom Pirate.",
"Back up to between 1 and 6 pixels from the door transition, and activate X-ray to get very deep stuck in the door.",
"Climb up 2 screens, and perform a turnaround buffered spin-jump away from the door to trigger the transition, bypassing any lock on the door."
]
},
{
"id": 79,
"link": [
4,
2
],
"name": "Very Deep Stuck X-Ray Climb, Morphed Pirate Kill",
"entranceCondition": {
"comeInWithGMode": {
"mode": "direct",
"morphed": true
}
},
"requires": [
"canGModeXRayClimb",
"canLongXRayClimb",
{
"or": [
"h_artificialMorphPowerBomb",
"h_artificialMorphIBJ"
]
}
],
"bypassesDoorShell": "yes",
"flashSuitChecked": true,
"blueSuitChecked": true,
"note": [
"Enter with G-mode direct and kill the bottom Pirate with Bombs or a Power Bomb.",
"Back up to between 1 and 6 pixels from the door transition, and activate X-ray to get very deep stuck in the door.",
"Climb up 2 screens, and perform a turnaround buffered spin-jump away from the door to trigger the transition, bypassing any lock on the door."
]
},
{
"id": 40,
"link": [
4,
2
],
"name": "Tank the Damage Twice, Then Use Flash Suit",
"requires": [
{
"enemyDamage": {
"enemy": "Green Space Pirate (standing)",
"type": "contact",
"hits": 2
}
},
{
"useFlashSuit": {}
},
{
"shinespark": {
"frames": 1,
"excessFrames": 1
}
},
"canUseSpeedEchoes"
],
"flashSuitChecked": true,
"blueSuitChecked": true
},
{
"id": 41,
"link": [
4,
2
],
"name": "Tank the Damage Once, Then Use Flash Suit",
"requires": [
{
"enemyDamage": {
"enemy": "Green Space Pirate (standing)",
"type": "contact",
"hits": 1
}
},
{
"useFlashSuit": {}
},
{
"shinespark": {
"frames": 1,
"excessFrames": 1
}
},
"canInsaneJump",
"canUseSpeedEchoes"
],
"flashSuitChecked": true,
"blueSuitChecked": true,
"note": [
"It is possible to damage once to get through the first two pirates, then shinespark to kill the three above.",
"Diagonal shinespark into the corner on the floor below the pirate above. This requires fairly precise positioning of the pirates.",
"It is possible to shoot them to slow them down and prevent them from shooting. Move up while the pirate is moving it's head so it doesn't turn around."
]
},
{
"id": 42,
"link": [
4,
3
],
"name": "Base",
"requires": [],
"flashSuitChecked": true,
"blueSuitChecked": true
},
{
"id": 43,
"link": [
4,
3
],
"name": "Come in Shinecharging, Leave Shinecharged",
"entranceCondition": {
"comeInShinecharging": {
"length": 13,
"openEnd": 0
}
},
"requires": [
{
  "shineChargeFrames": 20
}
],
"exitCondition": {
"leaveShinecharged": {}
},
"unlocksDoors": [
{
"types": [
"super"
],
"requires": []
},
{
"types": [
"missiles",
"powerbomb"
],
"requires": [
"never"
]
}
],
"flashSuitChecked": true,
"blueSuitChecked": true
},
{
"id": 44,
"link": [
4,
3
],
"name": "Come In Shinecharged, Leave With Spark",
"entranceCondition": {
"comeInShinecharged": {}
},
"requires": [
{
"shineChargeFrames": 10
},
{
"shinespark": {
"frames": 21,
"excessFrames": 0
}
}
],
"exitCondition": {
"leaveWithSpark": {}
},
"unlocksDoors": [
{
"types": [
"super"
],
"requires": []
},
{
"types": [
"missiles",
"powerbomb"
],
"requires": [
"never"
]
}
],
"flashSuitChecked": true,
"blueSuitChecked": true
},
{
"id": 45,
"link": [
4,
3
],
"name": "Carry Shinecharge",
"entranceCondition": {
"comeInShinecharged": {}
},
"requires": [
{
  "shineChargeFrames": 55
}
],
"exitCondition": {
"leaveShinecharged": {}
},
"unlocksDoors": [
{
"types": [
"super"
],
"requires": []
},
{
"types": [
"missiles",
"powerbomb"
],
"requires": [
"never"
]
}
],
"flashSuitChecked": true,
"blueSuitChecked": true
},
{
"id": 46,
"link": [
4,
3
],
"name": "Come in Shinecharging, Leave With Temporary Blue",
"entranceCondition": {
"comeInShinecharging": {
"length": 12,
"openEnd": 0
}
},
"requires": [],
"exitCondition": {
"leaveWithTemporaryBlue": {}
},
"unlocksDoors": [
{
"types": [
"ammo"
],
"requires": []
}
],
"flashSuitChecked": true,
"blueSuitChecked": true
},
{
"id": 47,
"link": [
4,
3
],
"name": "Transition with Stored Fall Speed",
"entranceCondition": {
"comeInWithStoredFallSpeed": {
"fallSpeedInTiles": 1
}
},
"requires": [],
"exitCondition": {
"leaveWithStoredFallSpeed": {
"fallSpeedInTiles": 1
}
},
"unlocksDoors": [
{
"types": [
"missiles",
"super"
],
"requires": []
},
{
"types": [
"powerbomb"
],
"requires": [
"never"
]
}
],
"flashSuitChecked": true,
"blueSuitChecked": true
},
{
"id": 48,
"link": [
4,
3
],
"name": "Transition with Stored Fall Speed (more speed)",
"entranceCondition": {
"comeInWithStoredFallSpeed": {
"fallSpeedInTiles": 2
}
},
"requires": [],
"exitCondition": {
"leaveWithStoredFallSpeed": {
"fallSpeedInTiles": 2
}
},
"unlocksDoors": [
{
"types": [
"missiles",
"super"
],
"requires": []
},
{
"types": [
"powerbomb"
],
"requires": [
"never"
]
}
],
"flashSuitChecked": true,
"blueSuitChecked": true
},
{
"id": 91,
"link": [
4,
4
],
"name": "R-Mode Spark Interrupt",
"entranceCondition": {
"comeInWithRMode": {}
},
"requires": [
"canUseIFrames",
{
"or": [
"h_CrystalFlashForReserveEnergy",
{
"and": [
{
"enemyDamage": {
"enemy": "Green Space Pirate (standing)",
"type": "contact",
"hits": 1
}
},
"h_RModeCanRefillReserves",
{
"enemyKill": {
"enemies": [
[
"Green Space Pirate (standing)",
"Green Space Pirate (standing)"
],
[
"Green Space Pirate (standing)",
"Green Space Pirate (standing)"
]
],
"excludedWeapons": [
"Missile"
]
}
},
{
"resourceMissingAtMost": [
{
"type": "Missile",
"count": 0
}
]
},
{
"partialRefill": {
"type": "ReserveEnergy",
"limit": 20
}
}
]
}
]
},
{
"or": [
{
"canShineCharge": {
"usedTiles": 12,
"openEnd": 0
}
},
{
"and": [
{
"or": [
{
  "doorUnlockedAtNode": 3
},
{
"doorUnlockedAtNode": 4
}
]
},
{
"canShineCharge": {
"usedTiles": 13,
"openEnd": 0
}
}
]
},
{
"and": [
{
"doorUnlockedAtNode": 3
},
{
"doorUnlockedAtNode": 4
},
{
"canShineCharge": {
"usedTiles": 14,
"openEnd": 0
}
}
]
}
]
},
{
"autoReserveTrigger": {
"maxReserveEnergy": 95
}
},
"canRModeSparkInterrupt"
],
"unlocksDoors": [
{
"nodeId": 3,
"types": [
"ammo"
],
"requires": []
},
{
"nodeId": 4,
"types": [
"ammo"
],
"requires": []
}
],
"flashSuitChecked": true,
"blueSuitChecked": true,
"note": [
"Stun the bottom pirate with a Power Beam shot, or i-frame past it.",
"Farm the four pirates above for drops, then get back through the bottom pirate.",
"Stun it with a Power Beam shot or i-frame past it a second time.",
"Perform a 1-screen shortcharge between the bottom doors, then hop",
"back up to the bottom pirate's ledge and get shot at."
]
},
{
"id": 49,
"link": [
4,
4
],
"name": "Leave with Runway",
"requires": [],
"exitCondition": {
"leaveWithRunway": {
"length": 13,
"openEnd": 0
}
},
"flashSuitChecked": true,
"blueSuitChecked": true
},
{
"id": 50,
"link": [
4,
4
],
"name": "Leave with Runway, Open Both Doors",
"requires": [
{
"doorUnlockedAtNode": 3
}
],
"exitCondition": {
"leaveWithRunway": {
"length": 14,
"openEnd": 0
}
},
"unlocksDoors": [
{
"nodeId": 3,
"types": [
"ammo"
],
"requires": []
}
],
"flashSuitChecked": true,
"blueSuitChecked": true
},
{
"id": 86,
"link": [
4,
4
],
"name": "Come in Shinecharging, Crystal Spark",
"entranceCondition": {
"comeInShinecharging": {
"length": 12,
"openEnd": 0
},
"comesInHeated": "no"
},
"requires": [
"h_CrystalSpark"
],
"flashSuitChecked": true,
"blueSuitChecked": true
},
{
"id": 87,
"link": [
4,
4
],
"name": "In-Room Crystal Spark",
"requires": [
{
"or": [
{
"canShineCharge": {
"usedTiles": 12,
"openEnd": 0
}
},
{
"and": [
{
"or": [
{
"doorUnlockedAtNode": 3
},
{
"doorUnlockedAtNode": 4
}
]
},
{
"canShineCharge": {
"usedTiles": 13,
"openEnd": 0
}
}
]
},
{
"and": [
{
"doorUnlockedAtNode": 3
},
{
"doorUnlockedAtNode": 4
},
{
"canShineCharge": {
"usedTiles": 14,
"openEnd": 0
}
}
]
}
]
},
"h_CrystalSpark"
],
"unlocksDoors": [
{
"nodeId": 3,
"types": [
"ammo"
],
"requires": []
}
],
"flashSuitChecked": true,
"blueSuitChecked": true
},
{
"id": 51,
"link": [
4,
9
],
"name": "X-Ray Climb",
"entranceCondition": {
"comeInWithDoorStuckSetup": {}
},
"requires": [
"canLongXRayClimb",
{
"or": [
{
"enemyDamage": {
"enemy": "Green Space Pirate (standing)",
"type": "laser",
"hits": 1
}
},
{
"enemyKill": {
"enemies": [
[
"Green Space Pirate (standing)"
]
],
"explicitWeapons": [
"Charge",
"Ice",
"Wave",
"Spazer",
"Plasma",
"Missile",
"Super"
]
}
}
]
},
"canBePatient"
],
"flashSuitChecked": true,
"blueSuitChecked": true,
"note": [
"X-Ray climb about 2.5 screen lengths, until the camera shows Samus' helmet on the bottom of the screen.",
"Shoot up to clear the shot blocks and resume climbing until you can walk out to the left.",
"Fix the camera by shooting the floor shot block and jumping down.",
"The bottom pirate will attack while climbing past it."
]
},
{
"id": 52,
"link": [
4,
10
],
"name": "G-Mode Morph Pirate Kill",
"entranceCondition": {
"comeInWithGMode": {
"mode": "any",
"morphed": true
}
},
"requires": [
{
  "or": [
    "h_artificialMorphIBJ",
    {
      "and": [
        "h_artificialMorphSpringBall",
        "h_artificialMorphPowerBomb",
        "h_additionalBomb",
        {
          "or": [
            "HiJump",
            "h_artificialMorphSpringBallBombJump",
            {
              "tech": "canJumpIntoIBJ"
            }
          ]
        }
      ]
    },
    {
      "and": [
        "h_artificialMorphSpringBall",
        "HiJump",
        {
          "enemyDamage": {
            "enemy": "Green Space Pirate (standing)",
            "type": "contact",
            "hits": 5
          }
        }
      ]
    }
  ]
}
],
"flashSuitChecked": true,
"blueSuitChecked": true,
"note": [
"With Spring Ball, it is possible to save a Power Bomb by placing it on the descent of the first jump by the bottom corner of the overhang,",
"then bouncing on it on the ascent of the second.",
"It is also possible but tighter to get high enough from bouncing on a Power Bomb with a single jump, similar to jumping into an IBJ.",
"This doesn't save anything if breaking the Power Bomb blocks above.",
"With an extra Power Bomb to spare, simply Spring Ball Bomb Jump."
]
},
{
"id": 93,
"link": [
4,
10
],
"name": "G-Mode Morph with Blue Suit",
"entranceCondition": {
"comeInWithGMode": {
"mode": "any",
"morphed": true
}
},
"requires": [
"h_blueSuitGMode",
"h_artificialMorphSpringBall",
{
"or": [
"HiJump",
"h_artificialMorphSpringBallBombJump"
]
}
],
"flashSuitChecked": true,
"blueSuitChecked": true,
"note": "Use Spring Ball to climb the room. Without HiJump, Spring Ball Bomb Jump to get to the first ledge."
},
{
"id": 53,
"link": [
5,
8
],
"name": "Base",
"requires": [],
"flashSuitChecked": true,
"blueSuitChecked": true
},
{
"id": 54,
"link": [
6,
8
],
"name": "Base",
"requires": [],
"flashSuitChecked": true,
"blueSuitChecked": true
},
{
"id": 55,
"link": [
8,
5
],
"name": "Base",
"requires": [],
"flashSuitChecked": true,
"blueSuitChecked": true
},
{
"id": 56,
"link": [
8,
6
],
"name": "Base",
"requires": [],
"flashSuitChecked": true,
"blueSuitChecked": true
},
{
"id": 57,
"link": [
8,
9
],
"name": "Base",
"requires": [],
"flashSuitChecked": true,
"blueSuitChecked": true
},
{
"id": 58,
"link": [
9,
1
],
"name": "Beetom X-Ray Climb",
"requires": [
{
"noBlueSuit": {}
},
{
"notable": "Beetom X-Ray Climb"
},
{
"enemyDamage": {
"enemy": "Beetom",
"type": "contact",
"hits": 6
}
},
{
"or": [
"Morph",
{
"and": [
"canTunnelCrawl",
{
"enemyDamage": {
"enemy": "Beetom",
"type": "contact",
"hits": 3
}
}
]
}
]
},
"canWallIceClip",
"canLongXRayClimb",
"canBeVeryPatient"
],
"resetsObstacles": [
"A"
],
"flashSuitChecked": true,
"blueSuitChecked": true,
"note": [
"Shoot out only the lower 2 shot blocks on the side Samus will be climbing.",
"Grab a Beetom and use Morph or a tunnel crawl to pixel align the Beetom 1 pixel deep into the wall (2 or 3 pixels can also work).",
"If morphed, use X-Ray stand up.",
"Shoot to the right (horizontally or diagonally down) to freeze the Beetom.",
"Continue refreezing during the next steps.",
"Grab the other Beetom and stand close, but not too close, to the first.",
"Do a small jump, but not too low, and do an aim-up shot the frame before Samus lands.",
"This second Beetom needs to be exactly 1 pixel below the first.",
"Refreeze the first before testing the positioning.",
"Jump onto the second Beetom, and run into the wall to clip into it (walking can also work if the Beetom is not too deep).",
"X-Ray climb up 2.5 screens and then fire upwards to clear shot blocks.",
"Continue climbing and finish by walking away from the crumble blocks."
],
"detailNote": [
"For freezing the second Beetom, only certain jump heights will work.",
"Otherwise the Beetom will skip over the correct position and may be frozen too low (2 pixels below the other Beetom).",
"From a standing position, holding jump for 5, 8, 9, or 12 frames will work;",
"with a crouch jump, holding jump for 5, 6, or 10 frames will work.",
"It is recommended to use a crouch jump, aiming for a 5 or 6 frame jump."
],
"devNote": [
"2 hits are assumed to position the two Beetoms (plus 3 more if tunnel crawling),",
"then 1 hit for each failed clip attempt, with 4 failed attempts.",
"With Ice, Samus would be able to slowly farm the Green Pirates.",
"One could descend through 8 visiting one of 5 or 6 and X-Ray climb back up to the top door using the non visited node."
]
},
{
"id": 59,
"link": [
9,
2
],
"name": "Base",
"requires": [
{
  "or": [
    "Morph",
    {
      "obstaclesCleared": [
        "A"
      ]
    }
  ]
}
],
"flashSuitChecked": true,
"blueSuitChecked": true
},
{
"id": 60,
"link": [
9,
2
],
"name": "Leave With Runway - Single Frozen Beetom",
"requires": [
{
"noBlueSuit": {}
},
"h_frozenEnemyRunway",
{
"or": [
"Morph",
{
"obstaclesCleared": [
"A"
]
}
]
},
{
"enemyDamage": {
"enemy": "Beetom",
"type": "contact",
"hits": 4
}
}
],
"exitCondition": {
"leaveWithRunway": {
"length": 11,
"openEnd": 0
}
},
"unlocksDoors": [
{
"types": [
"ammo"
],
"requires": []
}
],
"flashSuitChecked": true,
"blueSuitChecked": true,
"note": [
"Bring a Beetom down from above and freeze it in position to extend the runway.",
"Keep a half-tile gap between the Beetom and the runway in order to extend it as much as possible."
]
},
{
"id": 61,
"link": [
9,
2
],
"name": "Leave With Runway - Double Frozen Beetom",
"requires": [
{
"noBlueSuit": {}
},
"h_trickyFrozenEnemyRunway",
{
"enemyDamage": {
"enemy": "Beetom",
"type": "contact",
"hits": 9
}
},
{
"or": [
{
"obstaclesCleared": [
"A"
]
},
{
"and": [
"Morph",
"canEscapeEnemyGrab",
{
"enemyDamage": {
"enemy": "Beetom",
"type": "contact",
"hits": 3
}
}
]
}
]
}
],
"exitCondition": {
"leaveWithRunway": {
"length": 12,
"openEnd": 1
}
},
"unlocksDoors": [
{
"types": [
"ammo"
],
"requires": []
}
],
"flashSuitChecked": true,
"blueSuitChecked": true,
"note": [
"Bring a Beetom down from above and freeze it in position to extend the runway.",
"Shoot it again then quickly go back up and grab the second Beetom.",
"Keep a half-tile gap between the Beetoms and the runway in order to extend it as much as possible.",
"This is possible without breaking the Power Bomb blocks, by having both Beetoms attach to Samus,",
"roll through the crumble blocks, then shake off the Beetoms to separate them."
]
},
{
"id": 62,
"link": [
9,
2
],
"name": "Beetom Moondance",
"requires": [
{
"noBlueSuit": {}
},
{
"notable": "Beetom Moondance"
},
"canMoondance",
"canCount",
"canTrickyUseFrozenEnemies",
{
"enemyDamage": {
"enemy": "Beetom",
"type": "contact",
"hits": 4
}
}
],
"flashSuitChecked": true,
"blueSuitChecked": true,
"note": [
"Pick up a Beetom and bring it up to the centered platform below the crumble blocks.",
"Freeze it at about head height where Samus can move around inside its sprite, and use it to Moondance.",
"Refreeze the Beetom regularly to keep it in place.",
"Once the clip begins, hold down to shrink Samus' hitbox so that she can fall through the Solid tile next to the power bomb block.",
"The shot block needs to be cleared in advance."
]
},
{
"id": 63,
"link": [
9,
2
],
"name": "Beetom Stuck Moonfall",
"requires": [
{
"noBlueSuit": {}
},
{
"notable": "Beetom Stuck Moonfall"
},
"canEnemyStuckMoonfall",
"canTrickyUseFrozenEnemies",
{
"enemyDamage": {
"enemy": "Beetom",
"type": "contact",
"hits": 2
}
}
],
"flashSuitChecked": true,
"blueSuitChecked": true,
"note": [
"Position both Beetoms above the shot block for an 'Enemy Stuck Moonfall' to clip through the floor below, bypassing the morph tunnel.",
"1) Attach a Beetom and freeze it off of Samus while standing on the shot block.",
"2) Attach the other Beetom and freeze it off of Samus while standing on the first Beetom.",
"3) Let the bottom Beetom unfreeze and then refreeze it once it touches the ground.",
"4) Destroy the shot block and refresh Ice on both Beetoms.",
"5) Moonfall between the Beetoms until Samus clips downward, while holding a button to automatically change animation pose (Angle-aim or Up)"
],
"detailNote": [
"This can be done with a blue suit, by being careful not to move while a Beetom is attached."
]
},
{
"id": 64,
"link": [
9,
2
],
"name": "G-Mode Setup - Get Hit By Beetom",
"requires": [
{
"noBlueSuit": {}
},
{
"or": [
"Morph",
{
"obstaclesCleared": [
"A"
]
}
]
},
{
"enemyDamage": {
"enemy": "Beetom",
"type": "contact",
"hits": 4
}
}
],
"exitCondition": {
"leaveWithGModeSetup": {
"knockback": false
}
},
"unlocksDoors": [
{
"types": [
"ammo"
],
"requires": []
}
],
"flashSuitChecked": true,
"blueSuitChecked": true
},
{
"id": 65,
"link": [
9,
2
],
"name": "Leave with Moondance",
"requires": [
{
"noBlueSuit": {}
},
{
"or": [
"Morph",
{
"obstaclesCleared": [
"A"
]
}
]
},
"canMoondance",
"canCount",
"canTrickyUseFrozenEnemies",
{
"enemyDamage": {
"enemy": "Beetom",
"type": "contact",
"hits": 4
}
}
],
"exitCondition": {
"leaveWithStoredFallSpeed": {
"fallSpeedInTiles": 1
}
},
"unlocksDoors": [
{
"types": [
"ammo"
],
"requires": []
}
],
"flashSuitChecked": true,
"blueSuitChecked": true
},
{
"id": 66,
"link": [
9,
2
],
"name": "Leave with Extended Moondance",
"requires": [
{
"noBlueSuit": {}
},
{
"or": [
"Morph",
{
"obstaclesCleared": [
"A"
]
}
]
},
"canExtendedMoondance",
"canTrickyUseFrozenEnemies",
{
"enemyDamage": {
"enemy": "Beetom",
"type": "contact",
"hits": 4
}
},
"h_extendedMoondanceBeetomLeniency"
],
"exitCondition": {
"leaveWithStoredFallSpeed": {
"fallSpeedInTiles": 2
}
},
"unlocksDoors": [
{
"types": [
"ammo"
],
"requires": []
}
],
"flashSuitChecked": true,
"blueSuitChecked": true
},
{
"id": 67,
"link": [
9,
3
],
"name": "G-Mode Setup - Get Hit By Beetom",
"requires": [
{
"noBlueSuit": {}
},
{
"or": [
"Morph",
{
"obstaclesCleared": [
"A"
]
}
]
},
{
"or": [
{
"and": [
{
"enemyKill": {
"enemies": [
[
"Green Space Pirate (standing)",
"Green Space Pirate (standing)",
"Green Space Pirate (standing)"
],
[
"Green Space Pirate (standing)",
"Green Space Pirate (standing)"
]
]
}
},
{
"or": [
{
"enemyDamage": {
"enemy": "Beetom",
"type": "contact",
"hits": 8
}
},
{
"and": [
"canTrickyDodgeEnemies",
"canEscapeEnemyGrab",
{
"enemyDamage": {
"enemy": "Beetom",
"type": "contact",
"hits": 5
}
}
]
}
]
}
]
},
{
"and": [
{
"enemyDamage": {
"enemy": "Beetom",
"type": "contact",
"hits": 5
}
},
{
"enemyDamage": {
"enemy": "Green Space Pirate (standing)",
"type": "contact",
"hits": 3
}
}
]
}
]
}
],
"exitCondition": {
"leaveWithGModeSetup": {
"knockback": false
}
},
"unlocksDoors": [
{
"types": [
"ammo"
],
"requires": []
}
],
"flashSuitChecked": true,
"blueSuitChecked": true,
"note": "It is possible to shake the Beetom off near the right door while facing left, then lure it down to the bottom without taking more hits (or to kill the Pirates with Bombs).",
"devNote": [
"FIXME: If starting the room at the bottom, the way it is written requires killing the pirates twice.",
"If starting from the top of the room, it's going to take more hits and wiggling the Beetom off above if the only way to kill the pirates is with Power Bombs."
]
},
{
"id": 68,
"link": [
9,
3
],
"name": "Leave with Moondance",
"requires": [
{
"noBlueSuit": {}
},
{
"or": [
"Morph",
{
"obstaclesCleared": [
"A"
]
}
]
},
"canMoondance",
"canCount",
"canTrickyUseFrozenEnemies",
{
"enemyDamage": {
"enemy": "Beetom",
"type": "contact",
"hits": 10
}
}
],
"exitCondition": {
"leaveWithStoredFallSpeed": {
"fallSpeedInTiles": 1
}
},
"unlocksDoors": [
{
"types": [
"ammo"
],
"requires": []
}
],
"flashSuitChecked": true,
"blueSuitChecked": true
},
{
"id": 69,
"link": [
9,
3
],
"name": "Leave with Extended Moondance",
"requires": [
{
"noBlueSuit": {}
},
{
"or": [
"Morph",
{
"obstaclesCleared": [
"A"
]
}
]
},
"canExtendedMoondance",
"canTrickyUseFrozenEnemies",
{
"enemyDamage": {
"enemy": "Beetom",
"type": "contact",
"hits": 10
}
},
"h_extendedMoondanceBeetomLeniency"
],
"exitCondition": {
"leaveWithStoredFallSpeed": {
"fallSpeedInTiles": 2
}
},
"unlocksDoors": [
{
"types": [
"ammo"
],
"requires": []
}
],
"flashSuitChecked": true,
"blueSuitChecked": true,
"note": "Carefully Moondance where the floor is supported by more tiles."
},
{
"id": 70,
"link": [
9,
4
],
"name": "G-Mode Setup - Get Hit By Beetom",
"requires": [
{
"noBlueSuit": {}
},
{
"or": [
"Morph",
{
"obstaclesCleared": [
"A"
]
}
]
},
{
"or": [
{
"and": [
{
"enemyKill": {
"enemies": [
[
"Green Space Pirate (standing)",
"Green Space Pirate (standing)",
"Green Space Pirate (standing)"
],
[
"Green Space Pirate (standing)",
"Green Space Pirate (standing)"
]
]
}
},
{
"or": [
{
"enemyDamage": {
"enemy": "Beetom",
"type": "contact",
"hits": 8
}
},
{
"and": [
"canTrickyDodgeEnemies",
"canEscapeEnemyGrab",
{
"enemyDamage": {
"enemy": "Beetom",
"type": "contact",
"hits": 5
}
}
]
}
]
}
]
},
{
"and": [
{
"enemyDamage": {
"enemy": "Beetom",
"type": "contact",
"hits": 5
}
},
{
"enemyDamage": {
"enemy": "Green Space Pirate (standing)",
"type": "contact",
"hits": 3
}
}
]
}
]
}
],
"exitCondition": {
"leaveWithGModeSetup": {
"knockback": false
}
},
"unlocksDoors": [
{
"types": [
"ammo"
],
"requires": []
}
],
"flashSuitChecked": true,
"blueSuitChecked": true,
"note": "It is possible to shake the Beetom off near the right door while facing left, then lure it down to the bottom without taking more hits (or to kill the Pirates with Bombs).",
"devNote": [
"FIXME: If starting the room at the bottom, the way it is written requires killing the pirates twice.",
"If starting from the top of the room, it's going to take more hits and wiggling the Beetom off above if the only way to kill the pirates is with Power Bombs."
]
},
{
"id": 71,
"link": [
9,
4
],
"name": "Leave with Moondance",
"requires": [
{
"noBlueSuit": {}
},
{
"or": [
"Morph",
{
"obstaclesCleared": [
"A"
]
}
]
},
"canMoondance",
"canCount",
"canTrickyUseFrozenEnemies",
{
"enemyDamage": {
"enemy": "Beetom",
"type": "contact",
"hits": 10
}
}
],
"exitCondition": {
"leaveWithStoredFallSpeed": {
"fallSpeedInTiles": 1
}
},
"unlocksDoors": [
{
"types": [
"ammo"
],
"requires": []
}
],
"flashSuitChecked": true,
"blueSuitChecked": true
},
{
"id": 72,
"link": [
9,
4
],
"name": "Leave with Extended Moondance",
"requires": [
{
"noBlueSuit": {}
},
{
"or": [
"Morph",
{
"obstaclesCleared": [
"A"
]
}
]
},
"canExtendedMoondance",
"canTrickyUseFrozenEnemies",
{
"enemyDamage": {
"enemy": "Beetom",
"type": "contact",
"hits": 10
}
},
"h_extendedMoondanceBeetomLeniency"
],
"exitCondition": {
"leaveWithStoredFallSpeed": {
"fallSpeedInTiles": 2
}
},
"unlocksDoors": [
{
"types": [
"ammo"
],
"requires": []
}
],
"flashSuitChecked": true,
"blueSuitChecked": true,
"note": "Carefully Moondance where the floor is supported by more tiles."
},
{
"id": 73,
"link": [
10,
2
],
"name": "Exit G-Mode",
"requires": [
"canGMode"
],
"flashSuitChecked": true,
"blueSuitChecked": true
},
{
"id": 74,
"link": [
10,
4
],
"name": "G-Mode Morph Pirate Kill",
"requires": [
"canGMode",
"h_artificialMorphBombThings",
"h_additionalBomb"
],
"flashSuitChecked": true,
"blueSuitChecked": true
},
{
"id": 75,
"link": [
10,
9
],
"name": "G-Mode Morph - Power Bomb to the Beetoms",
"requires": [
"canGMode",
"h_artificialMorphPowerBomb"
],
"clearsObstacles": [
"A"
],
"flashSuitChecked": true,
"blueSuitChecked": true,
"note": "Place a Power Bomb and exit G-Mode. To prevent freeing the Beetoms, the Power Bomb needs to be placed on the left platform just below the door."
},
{
"id": 76,
"link": [
10,
9
],
"name": "G-Mode Morph - Overload PLMs to the Beetoms",
"requires": [
"canGMode",
"h_artificialMorphBombs",
{
"or": [
{
"and": [
"h_artificialMorphSpringBall",
{
"or": [
"canBePatient",
"HiJump"
]
}
]
},
"h_artificialMorphCeilingBombJump"
]
}
],
"flashSuitChecked": true,
"blueSuitChecked": true,
"note": "Place bombs against the bottom of the crumble blocks to overload PLMs."
}
],
"notables": [
{
"id": 1,
"name": "Beetom X-Ray Climb",
"note": [
"Shoot out only the lower 2 shot blocks on the side Samus will be climbing.",
"Grab a Beetom and use Morph to pixel align the Beetom with the edge of the wall. While facing right.",
"Xray stand up for height and shoot to freeze. Angle down shot to be safe. Continue refreezing during the next steps.",
"Grab the other Beetom and stand close, but not too close, to the first.",
"Do a small jump, but not too low, and do an angle down shot the frame before Samus lands.",
"This second beetom needs to be exactly 1 pixel below the first. Refreeze the first before testing the positioning.",
"Jump onto your beetom, walk into the wall, and start xray Climbing.",
"Climb up 2.5 screens and then fire upwards to clear shot blocks. Continue climbing and finish by walking away from the crumble blocks."
]
},
{
"id": 2,
"name": "Beetom Moondance",
"note": [
"Pick up a Beetom and bring it up to the centered platform below the crumble blocks.",
"Freeze it at about head height where Samus can move around inside its sprite, and use it to Moondance.",
"Refreeze the Beetom regularly to keep it in place.",
"Once the clip begins, hold down to shrink Samus' hitbox so that she can fall through the Solid tile next to the power bomb block.",
"The shot block needs to be cleared in advance."
]
},
{
"id": 3,
"name": "Beetom Stuck Moonfall",
"note": [
"Position both Beetoms above the shot block for an 'Enemy Stuck Moonfall' to clip through the floor below, bypassing the morph tunnel.",
"1) Attach a Beetom and freeze it off of Samus while standing on the shot block.",
"2) Attach the other Beetom and freeze it off of Samus while standing on the first Beetom.",
"3) Let the bottom Beetom unfreeze and then refreeze it once it touches the ground.",
"4) Destroy the shot block and refresh Ice on both Beetoms.",
"5) Moonfall between the Beetoms until Samus clips downward, while holding a button to automatically change animation pose (Angle-aim or Up)"
]
}
],
"nextStratId": 94,
"nextNotableId": 4,
"devNote": [
"FIXME: There are possible strats to reach the items with X-ray climbs and grapple teleports without a way out.",
"These could still be useful to add, in case a randomizer allows keeping items after a reset.",
"This would require adding an obstacle to represent the crumbles being broken."
]
}


