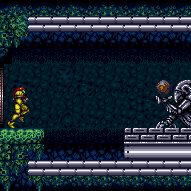
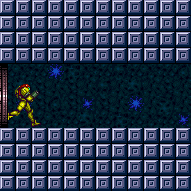
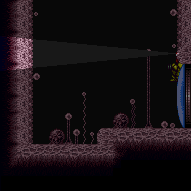
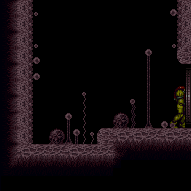
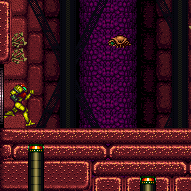
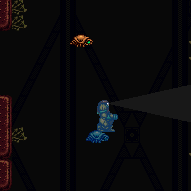
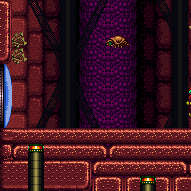
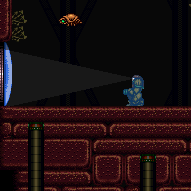
canOffScreenMovement (Extreme)
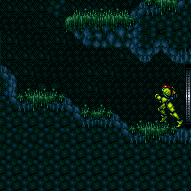
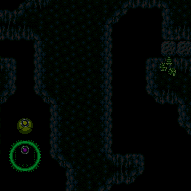
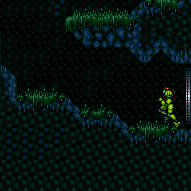
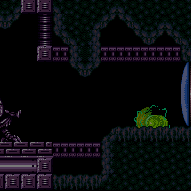
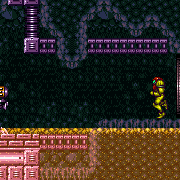
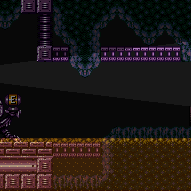
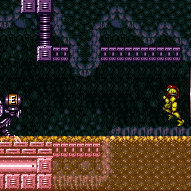
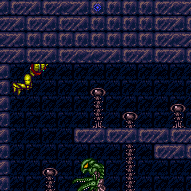
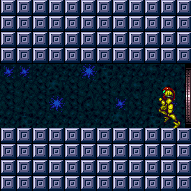
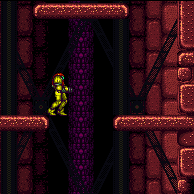
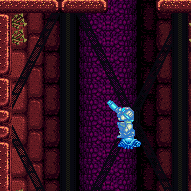
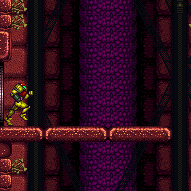
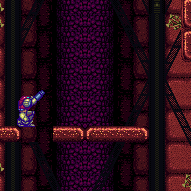
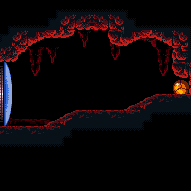
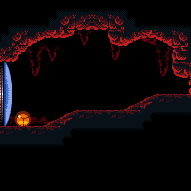
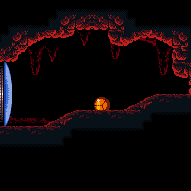
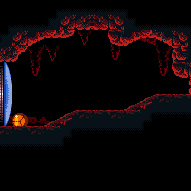
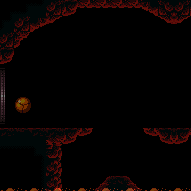
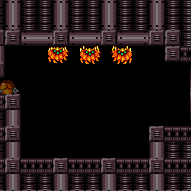
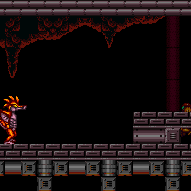
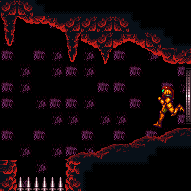
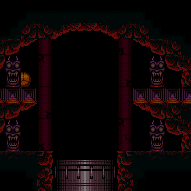
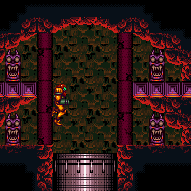
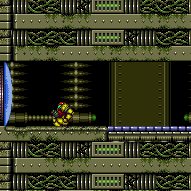
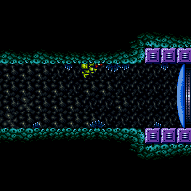
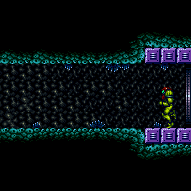
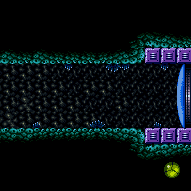
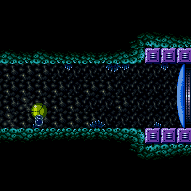
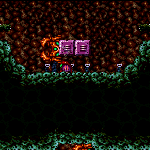
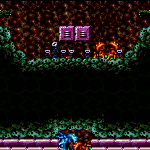
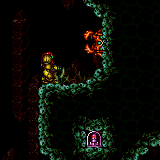
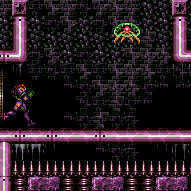
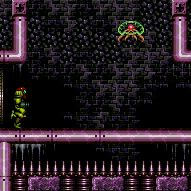
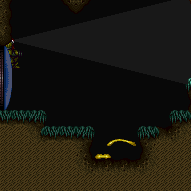
The ability to perform non-trivial movement while Samus is off-camera. This does not include movement where visual feedback is unimportant, such as simply falling down or holding a single direction.
Strats ()
|
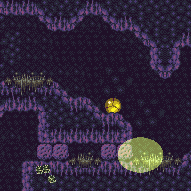
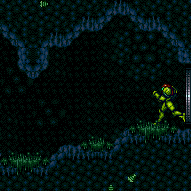
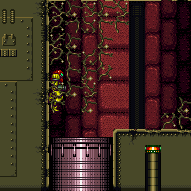
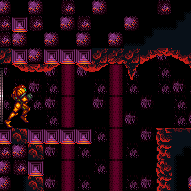
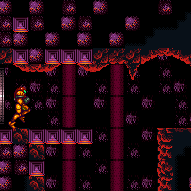
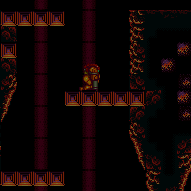
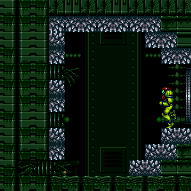
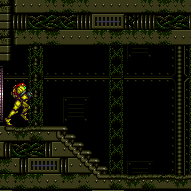
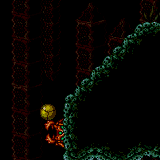
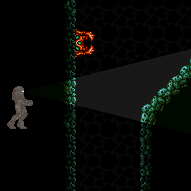
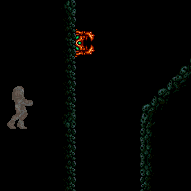
Overload PLMs using the scroll blocks next to the bomb wall After passing through, you need to go from the bottom to the top of Climb and into the bomb blocks while still in G-mode Morph. Samus will not be visible at all; the only available feedback is audio and position on the map. Entrance condition: {
"comeInWithGMode": {
"mode": "any",
"morphed": true
}
}Requires: {
"notable": "G-Mode Morph Blind Climb to the Top"
}
{
"or": [
"canTrickyGMode",
"Morph"
]
}
"h_artificialMorphMovement"
"canOffScreenMovement"
{
  "or": [
    "h_ClimbWithoutLava",
    {
      "and": [
        "h_lavaProof",
        {
          "or": [
            "h_artificialMorphSpringBall",
            "Morph",
            "Gravity"
          ]
        }
      ]
    }
  ]
}
Clears obstacles: B |
|
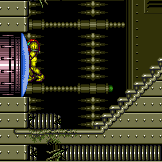
Overload PLMs using the scroll blocks next to the bomb wall Navigate to the lower right bomb blocks while still morphed. Samus will be off-camera and not visible, requiring blind movement. Enemies will not hurt Samus since they are non-global and also off-camera. Entrance condition: {
"comeInWithGMode": {
"mode": "any",
"morphed": true
}
}Requires: "h_artificialMorphMovement"
"canOffScreenMovement"
{
"or": [
"h_ClimbWithoutLava",
{
"and": [
"h_lavaProof",
{
"or": [
"h_artificialMorphSpringBall",
"Morph",
"Gravity"
]
}
]
}
]
}Clears obstacles: B |
From: 1
Top Left Door
To: 2
Middle Left Door
There are scroll PLMs one tile to the left of the Terminator bomb blocks which can be used to overload PLMs. The bomb blocks then become air and can be passed through. Go down to the Save door by falling and moving back and forth in the right places. Once you start going down you will be off-screen. Entrance condition: {
"comeInWithGMode": {
"mode": "any",
"morphed": true
}
}Requires: "canOffScreenMovement" |
From: 4
Top Right Door
To: 2
Middle Left Door
A single Power Bomb, placed precisely and as early as possible, can get you over the Geemers and onto the ledge above Alcatraz without taking a hit. Alternatively Bombs or Spring Ball can be used. Go down to the Save door by just falling and moving back and forth in the right places. Once you start going down you will be off-screen. Entrance condition: {
"comeInWithGMode": {
"mode": "any",
"morphed": true
}
}Requires: "canOffScreenMovement"
{
"or": [
"h_artificialMorphMovement",
"h_artificialMorphBombHorizontally"
]
} |
From: 5
Alcatraz Door
To: 1
Top Left Door
There are scroll PLMs next to the bomb blocks and on the ledge below the Alcatraz exit, which will overload PLMs when going through them. Samus will need to briefly navigate off-screen while to the right of Alcatraz before coming back left. Note that the global Geemer may still be in this area if traversing the room quickly, and can hit Samus off-screen. Entrance condition: {
"comeInWithGMode": {
"mode": "any",
"morphed": true
}
}Requires: "h_artificialMorphMovement"
{
"or": [
"canTrickyDodgeEnemies",
"canOffScreenMovement",
{
"and": [
"h_artificialMorphSpringBall",
{
"haveBlueSuit": {}
}
]
},
{
"enemyDamage": {
"enemy": "Geemer (blue)",
"type": "contact",
"hits": 1
}
},
"h_ZebesNotAwake"
]
} |
From: 5
Alcatraz Door
To: 2
Middle Left Door
There are scroll PLMs next to the bomb blocks and on the ledge below the Alcatraz exit, which will overload PLMs when going through them. Samus will need to briefly navigate off-screen while to the right of Alcatraz before coming back left. Note that the global Geemer may still be in this area if traversing the room quickly, and can hit Samus off-screen. Again traverse off-screen while going down the left shaft and through the morph tunnel. Entrance condition: {
"comeInWithGMode": {
"mode": "any",
"morphed": true
}
}Requires: "canOffScreenMovement" "h_artificialMorphMovement" |
From: 5
Alcatraz Door
To: 8
Central Junction
There are scroll PLMs next to the bomb blocks and on the ledge below the Alcatraz exit, which will overload PLMs when going through them. Samus will need to briefly navigate off-screen while to the right of Alcatraz before coming back left. Note that the global Geemer may still be in this area if traversing the room quickly, and can hit Samus off-screen. Entrance condition: {
"comeInWithGMode": {
"mode": "any",
"morphed": true
}
}Requires: "h_artificialMorphMovement"
{
"or": [
"canTrickyDodgeEnemies",
"canOffScreenMovement",
{
"and": [
"h_artificialMorphSpringBall",
{
"haveBlueSuit": {}
}
]
},
{
"enemyDamage": {
"enemy": "Geemer (blue)",
"type": "contact",
"hits": 1
}
},
"h_ZebesNotAwake"
]
} |
From: 2
Right Door
To: 1
Left Door
Roll through the item to overload PLMs then quickly fall into the morph tunnel, unmorph at the correct spot and jump out before the acid touches Samus. With a careful, blind, Space Jump with Screw Attack, move through the bomb walls while avoiding the spikes. Entrance condition: {
"comeInWithGMode": {
"mode": "direct",
"morphed": true
}
}Requires: "canComplexGMode"
"canRemoteAcquire"
{
"itemNotCollectedAtNode": 3
}
"canRiskPermanentLossOfAccess"
"h_artificialMorphMovement"
"canInsaneJump"
"canOffScreenMovement"
"SpaceJump"
"ScrewAttack"Exit condition: {
"leaveNormally": {}
}Collects items: 3 Unlocks doors: {"types":["ammo"],"requires":[]}Dev note: This strat leaves the room, as it would be unreasonable and may not be possible to do anything at 1 with the broken camera movement. With a blue suit, there is no need to overload PLMs, so the camera will not be broken and the requirements could be relaxed; but it is covered by a 2->4 strat. |
From: 2
Right Door
To: 4
Middle Junction (Left of Morph Tunnel)
Enter with artificial morph, and use a blue suit to fall into the morph tunnel, unmorph at the correct spot and quickly jump out before the acid touches Samus. Exit G-mode to fix the camera. Entrance condition: {
"comeInWithGMode": {
"mode": "any",
"morphed": true
}
}Requires: "h_blueSuitGMode" "canOffScreenMovement" |
From: 2
Right Door
To: 4
Middle Junction (Left of Morph Tunnel)
Roll through the item to overload PLMs then fall into the morph tunnel, unmorph at the correct spot and quickly jump out before the acid touches Samus. Exit G-mode and roll back into the tunnel to fix the camera and return avoiding the acid again. Entrance condition: {
"comeInWithGMode": {
"mode": "direct",
"morphed": true
}
}Requires: "canComplexGMode"
"canRemoteAcquire"
{
"itemNotCollectedAtNode": 3
}
"canRiskPermanentLossOfAccess"
"Morph"
"canInsaneJump"
"canOffScreenMovement"Collects items: 3 Dev note: Acid damage wasn't considered, as Samus needs to be in direct G-mode FIXME: This could be done with a CF after overloading PLMs with the item. |
From: 2
Middle Right Door
To: 1
Top Right Door
After teleporting, press down while still grappling, to move Samus up and right by retracting the grapple. Release Grapple, angle-down, and shoot the blocks to the left and right of Samus. Morph and roll to the right, and Samus will fall and be able to stand; if Morph is unavailable, instead wiggle to the right using turnaround aim cancels. Entrance condition: {
"comeInWithGrappleTeleport": {
"blockPositions": [
[
7,
2
]
]
}
}Requires: {
"or": [
"Morph",
"canTurnaroundAimCancel"
]
}
"canOffScreenMovement" |
From: 4
Bottom Right Door
To: 1
Top Right Door
After teleporting, press down while still grappling, to move Samus up and right by retracting the grapple. Release Grapple, angle-down, and shoot the blocks to the left and right of Samus. Morph and roll to the right; then Samus will be able to unmorph and stand. Entrance condition: {
"comeInWithGrappleTeleport": {
"blockPositions": [
[
7,
2
]
]
}
}Requires: "Morph" "canOffScreenMovement" |
From: 5
G-Mode Morph Junction (Bottom)
To: 2
Top Left Door
Overload PLMs by repeatidly bombing the Power Bomb blocks or the side of the crumble block, then enter through the crumble block. If Samus is then going to IBJ up the shaft, and she has Morph, it is worth exiting G-mode first to allow the camera to follow her. Requires: "canGMode"
"h_artificialMorphIBJ"
{
"or": [
"canConsecutiveWallJump",
"SpaceJump",
{
"and": [
"h_artificialMorphLongIBJ",
"canOffScreenMovement"
]
},
{
"and": [
{
"blueSuitShinecharge": {}
},
{
"or": [
{
"shinespark": {
"frames": 32,
"excessFrames": 3
}
},
{
"and": [
"HiJump",
{
"shinespark": {
"frames": 29,
"excessFrames": 3
}
}
]
}
]
}
]
}
]
}
{
"or": [
"h_ZebesIsAwake",
{
"notable": "G-Mode Flashing Lights"
}
]
}Dev note: The off screen movement is just during an artificial morphed IBJ - the IBJ is long and Samus is covered for most of it. |
|
Blindly grab the item before PLMs are overloaded, then return and exit G-mode to remotely acquire the item. Starting a completely blind IBJ can be somewhat tricky, even if for such a short distance. Entrance condition: {
"comeInWithGMode": {
"mode": "direct",
"morphed": true
}
}Requires: "canRemoteAcquire"
{
"or": [
"h_artificialMorphSpringBall",
{
"and": [
"h_artificialMorphIBJ",
"canOffScreenMovement"
]
}
]
}Collects items: 3 |
From: 1
Left Door
To: 1
Left Door
Entrance condition: {
"comeInWithGMode": {
"mode": "any",
"morphed": true
}
}Requires: "canComplexGMode" "h_artificialMorphIBJ" "canOffScreenMovement" Collects items: 4 |
From: 1
Left Door
To: 4
Top Left Item
Climbing the room and remaining at the top has a very high risk of getting hit by a Waver. Quickly move to the right and exit G-mode to fix the camera. It is possible to kill the Wavers off-screen with one or two Power Bombs or a blue suit; Screw Attack is also relatively safe. Without any of those, it is best to roll to the right without unmorphing, and requires a bit of luck. Entrance condition: {
"comeInWithGMode": {
"mode": "any",
"morphed": true
}
}Requires: "canOffScreenMovement"
"canComplexGMode"
"h_artificialMorphIBJ"
{
"or": [
"ScrewAttack",
"h_artificialMorphPowerBomb",
"canBeLucky",
{
"haveBlueSuit": {}
},
{
"enemyDamage": {
"enemy": "Waver",
"type": "contact",
"hits": 1
}
}
]
} |
From: 1
Left Door
To: 4
Top Left Item
Climbing the room and remaining at the top has a very high risk of getting hit by a Waver. Quickly move to the right and exit G-mode to fix the camera. It is possible to kill the Wavers off-screen with one or two Power Bombs or a blue suit; Screw Attack is also relatively safe. With Morph alone, it is possible to cross but requires some luck. Entrance condition: {
"comeInWithGMode": {
"mode": "any",
"morphed": false
}
}Requires: "canOffScreenMovement"
"canComplexGMode"
{
"or": [
"canWallJump",
"SpaceJump",
{
"and": [
"HiJump",
"canTrickyUseFrozenEnemies"
]
},
{
"and": [
"HiJump",
"canSpringBallJumpMidAir"
]
},
{
"and": [
{
"blueSuitShinecharge": {}
},
{
"or": [
{
"shinespark": {
"frames": 13,
"excessFrames": 4
}
},
{
"and": [
"HiJump",
{
"shinespark": {
"frames": 9,
"excessFrames": 4
}
}
]
}
]
}
]
}
]
}
{
"or": [
"ScrewAttack",
"h_usePowerBomb",
{
"and": [
"canBeLucky",
"Morph"
]
},
{
"haveBlueSuit": {}
},
{
"enemyDamage": {
"enemy": "Waver",
"type": "contact",
"hits": 1
}
}
]
} |
From: 1
Top Left Door
To: 7
Junction (Zebbo Farms)
Roll through the item to mostly overload PLMs before falling into the pit and fully overloading them with the camera scroll blocks. Fully overloading the PLMs before touching the camera scroll blocks will prevent the camera from following Samus after exiting G-mode. While falling, carefully avoid touching the thorns on the right, then roll through the spikeway. After the camera stops scrolling, move another 2-3 tiles then exit G-Mode. Make small jumps to reset the camera then quickly kill the Beetom as it jumps at Samus, or precisely jump underneath it. Entrance condition: {
"comeInWithGMode": {
"mode": "direct",
"morphed": true
}
}Requires: {
"itemNotCollectedAtNode": 5
}
"canRiskPermanentLossOfAccess"
"canOffScreenMovement"
"canComplexGMode"
{
"or": [
"canTrickyGMode",
"h_artificialMorphPowerBomb",
"ScrewAttack",
"Ice",
{
"ammo": {
"type": "Missile",
"count": 1
}
},
{
"ammo": {
"type": "Super",
"count": 1
}
},
{
"enemyDamage": {
"enemy": "Beetom",
"type": "contact",
"hits": 3
}
}
]
}Clears obstacles: B Collects items: 5 |
From: 1
Top Left Door
To: 7
Junction (Zebbo Farms)
Fall into the pit while being careful to only touch one of the crumble blocks. Bounce up through the camera scroll blocks to overload PLMs with Spring Ball, Bombs, or Power Bombs. This can be done with as few as 2 Power Bombs by placing the bomb, moving slightly, then as it boosts Samus horizontally, hold backwards to avoid landing on another crumble block. Otherwise it takes 6 Power Bombs. Move horizontally to fall through the crumble blocks that haven't been touched. Carefully fall to not touch the spikes on the right, then roll through the spikeway. After the camera stops scrolling, move another 2-3 tiles then exit G-Mode. Make small jumps to reset the camera then quickly kill the Beetom as it jumps at Samus, or precisely jump underneath it. Entrance condition: {
"comeInWithGMode": {
"mode": "any",
"morphed": true
}
}Requires: "canOffScreenMovement"
{
"or": [
"h_artificialMorphBombs",
"h_artificialMorphSpringBall",
{
"ammo": {
"type": "PowerBomb",
"count": 2
}
}
]
}
{
"or": [
"h_artificialMorphPowerBomb",
"ScrewAttack",
"canTrickyGMode",
{
"and": [
"canComplexGMode",
{
"or": [
"Ice",
{
"ammo": {
"type": "Missile",
"count": 1
}
},
{
"ammo": {
"type": "Super",
"count": 1
}
}
]
}
]
},
{
"enemyDamage": {
"enemy": "Beetom",
"type": "contact",
"hits": 3
}
}
]
}Clears obstacles: B Dev note: FIXME: With only 2 Power Bombs, this would force the item pickup in direct G-mode. |
From: 2
Top Right Door
To: 7
Junction (Zebbo Farms)
Carefully Bomb boost across the pit and roll through the item to mostly overload PLMs before falling into the pit and fully overloading them with the camera scroll blocks. Fully overloading the PLMs before touching the camera scroll blocks will prevent the camera from following Samus after exiting G-mode. While falling, carefully avoid touching the thorns on the right, then roll through the spikeway. After the camera stops scrolling, move another 2-3 tiles then exit G-Mode. Make small jumps to reset the camera then quickly kill the Beetom as it jumps at Samus, or precisely jump underneath it. Entrance condition: {
"comeInWithGMode": {
"mode": "direct",
"morphed": true
}
}Requires: {
"itemNotCollectedAtNode": 5
}
"canRiskPermanentLossOfAccess"
"canOffScreenMovement"
"h_artificialMorphPowerBomb"
"canComplexGMode"
{
"or": [
"canTrickyGMode",
"h_artificialMorphPowerBomb",
"ScrewAttack",
"Ice",
{
"ammo": {
"type": "Missile",
"count": 1
}
},
{
"ammo": {
"type": "Super",
"count": 1
}
},
{
"enemyDamage": {
"enemy": "Beetom",
"type": "contact",
"hits": 3
}
}
]
}Clears obstacles: B Collects items: 5 Dev note: With more movement items, Samus can use the camera scroll blocks above the crumble blocks to overload PLMs. |
From: 2
Top Right Door
To: 7
Junction (Zebbo Farms)
Fall into the pit while being careful to only touch one of the crumble blocks. Bounce up through the camera scroll blocks to overload PLMs with Spring Ball, Bombs, or Power Bombs. This can be done with as few as 2 Power Bombs by placing the bomb, moving slightly, then as it boosts Samus horizontally, hold backwards to avoid landing on another crumble block. Otherwise it takes 6 Power Bombs. Move horizontally to fall through the crumble blocks that haven't been touched. Carefully fall to not touch the spikes on the right, then roll through the spikeway. After the camera stops scrolling, move another 2-3 tiles then exit G-Mode. Make small jumps to reset the camera then quickly kill the Beetom as it jumps at Samus, or precisely jump underneath it. Entrance condition: {
"comeInWithGMode": {
"mode": "any",
"morphed": true
}
}Requires: "canOffScreenMovement"
{
"or": [
"h_artificialMorphBombs",
"h_artificialMorphSpringBall",
{
"ammo": {
"type": "PowerBomb",
"count": 2
}
}
]
}
{
"or": [
"h_artificialMorphPowerBomb",
"ScrewAttack",
"canTrickyGMode",
{
"and": [
"canComplexGMode",
{
"or": [
"Ice",
{
"ammo": {
"type": "Missile",
"count": 1
}
},
{
"ammo": {
"type": "Super",
"count": 1
}
}
]
}
]
},
{
"enemyDamage": {
"enemy": "Beetom",
"type": "contact",
"hits": 3
}
}
]
}Clears obstacles: B |
From: 7
Below Power Bomb Blocks - Top Right Door
To: 9
Right Etecoon Shaft - Top Left Door
Roll through the camera scroll blocks in front of the bomb block, then go through the morph tunnel and IBJ to the top. Samus can boost to the left when she is high enough. A visual cue is when she is vertically near the top half of the door on the correct screen. Entrance condition: {
"comeInWithGMode": {
"mode": "any",
"morphed": true
}
}Requires: "h_artificialMorphLongIBJ" "canOffScreenMovement" "canBeVeryPatient" |
From: 7
Below Power Bomb Blocks - Top Right Door
To: 10
Right Etecoon Shaft - Bottom Left Door
Roll through the camera scroll blocks in front of the bomb block, then go through the morph tunnel and exit g-mode. Entrance condition: {
"comeInWithGMode": {
"mode": "any",
"morphed": true
}
}Requires: "h_artificialMorphMovement" "canOffScreenMovement" Dev note: Staying in the room and doing more will require canOffScreenMovement. FIXME: Find a way to prevent needing to do things that are too unreasonable to do, even with canOffScreenMovement. |
From: 7
Below Power Bomb Blocks - Top Right Door
To: 11
Right Etecoon Shaft - Item
Roll through the camera scroll blocks in front of the bomb block, then go through the morph tunnel and IBJ to the top. Samus can boost to the right when she is high enough. A visual cue is when she is vertically at the top of the door on the correct screen. Entrance condition: {
"comeInWithGMode": {
"mode": "any",
"morphed": true
}
}Requires: "h_artificialMorphLongIBJ" "canOffScreenMovement" "canBeVeryPatient" Dev note: This is only useful if the item is Morph |
From: 8
Below Power Bomb Blocks - Bottom Left Door
To: 9
Right Etecoon Shaft - Top Left Door
Roll through the camera scroll blocks in front of the bomb block, then go through the morph tunnel and IBJ to the top. Samus can boost to the left when she is high enough. A visual cue is when she is vertically near the top half of the door on the correct screen. Entrance condition: {
"comeInWithGMode": {
"mode": "any",
"morphed": true
}
}Requires: "h_artificialMorphLongIBJ" "canOffScreenMovement" "canBeVeryPatient" |
From: 8
Below Power Bomb Blocks - Bottom Left Door
To: 10
Right Etecoon Shaft - Bottom Left Door
Roll through the camera scroll blocks in front of the bomb block, then go through the morph tunnel and exit g-mode. Entrance condition: {
"comeInWithGMode": {
"mode": "any",
"morphed": true
}
}Requires: "h_artificialMorphMovement" "canOffScreenMovement" Dev note: Staying in the room and doing more will require canOffScreenMovement. FIXME: Find a way to prevent needing to do things that are too unreasonable to do, even with canOffScreenMovement. |
From: 8
Below Power Bomb Blocks - Bottom Left Door
To: 11
Right Etecoon Shaft - Item
Roll through the camera scroll blocks in front of the bomb block, then go through the morph tunnel and IBJ to the top. Samus can boost to the right when she is high enough. A visual cue is when she is vertically at the top of the door on the correct screen. Entrance condition: {
"comeInWithGMode": {
"mode": "any",
"morphed": true
}
}Requires: "h_artificialMorphLongIBJ" "canOffScreenMovement" "canBeVeryPatient" Dev note: This is only useful if the item is Morph |
From: 9
Right Etecoon Shaft - Top Left Door
To: 12
Above Power Bomb Blocks - Main Junction
Place bombs against the item Chozo ball to overload PLMs. Then go through the bomb blocks and tunnel. IBJ up the left side, blind, until getting on the top small platform. Place a Power Bomb and exit g-mode before the bomb goes off to break the blocks. Entrance condition: {
"comeInWithGMode": {
"mode": "any",
"morphed": true
}
}Requires: {
"itemNotCollectedAtNode": 11
}
"canRiskPermanentLossOfAccess"
"h_artificialMorphLongIBJ"
"h_artificialMorphPowerBomb"
"canBePatient"
"canOffScreenMovement"
"canTrickyGMode"Clears obstacles: A |
From: 9
Right Etecoon Shaft - Top Left Door
To: 12
Above Power Bomb Blocks - Main Junction
Fall down to the Morph tunnel and roll through the bomb block. Roll through the camera scroll blocks in the tunnel a few times to overload PLMs before continuing and touching the crumble block. Carefully climb the shaft with an IBJ. Note that the camera moves to the left once getting high enough, making this harder. Land on the top block, place a Power Bomb, then quickly exit G-mode before it explodes to break the blocks above. Entrance condition: {
"comeInWithGMode": {
"mode": "any",
"morphed": true
}
}Requires: "h_blueSuitGMode" "h_artificialMorphLongIBJ" "h_artificialMorphPowerBomb" "canBePatient" "canOffScreenMovement" "canTrickyGMode" Clears obstacles: A |
From: 10
Right Etecoon Shaft - Bottom Left Door
To: 12
Above Power Bomb Blocks - Main Junction
IBJ up and place bombs against the item Chozo ball to overload PLMs. Then go through the bomb blocks and tunnel. IBJ up again, blind, until getting on the top small platform. Place a Power Bomb and exit g-mode before the bomb goes off to break the blocks. Entrance condition: {
"comeInWithGMode": {
"mode": "any",
"morphed": true
}
}Requires: {
"itemNotCollectedAtNode": 11
}
"canRiskPermanentLossOfAccess"
"h_artificialMorphLongIBJ"
"h_artificialMorphPowerBomb"
"canBePatient"
"canOffScreenMovement"
"canTrickyGMode"Clears obstacles: A |
From: 10
Right Etecoon Shaft - Bottom Left Door
To: 12
Above Power Bomb Blocks - Main Junction
IBJ up and roll through the bomb block; be sure not to bomb it or it will remain solid. Roll through the camera scroll blocks in the tunnel a few times to overload PLMs before continuing and touching the crumble block. Carefully climb the shaft with an IBJ. Note that the camera moves to the left once getting high enough, making this harder. Land on the top block, place a Power Bomb, then quickly exit G-mode before it explodes to break the blocks above. Entrance condition: {
"comeInWithGMode": {
"mode": "any",
"morphed": true
}
}Requires: "h_blueSuitGMode" "h_artificialMorphLongIBJ" "h_artificialMorphPowerBomb" "canBePatient" "canOffScreenMovement" "canTrickyGMode" Clears obstacles: A |
From: 13
Central Junction
To: 5
Left Side - Door Blocked by Crumble Blocks
Raise a Zeb to be just below the crumble blocks and blindly freeze it to set up an ice clip to reach the Power Bomb room exit door. Get a bug from the pipe to spawn facing left and freeze it while moving to the ledge below the Wave Gate Room door. While crouched, a spazer or wave beam shot will shoot through the floor in front of Samus. Shoot then immediately jump so that the bug can be frozen at a pixel perfect height, which is higher than where it would typically be frozen (when not needing to preserve a flash suit). Once frozen, wait for the bug to thaw, then blindly follow it to the left without letting it go off camera, which would cause it to despawn. Refreeze it below the crumble blocks, perform a very precise ledge grab onto it, then jump through the crumble block to reach the door, all while carefully avoiding losing the flash suit. Requires: {
"notable": "Blind Zeb Ice Clip (Preserve Flash Suit)"
}
"canTrickyWallJump"
"canCameraManip"
"canOffScreenMovement"
{
"or": [
"Wave",
"Spazer"
]
}
"canInsaneJump"
"h_highPixelIceClip" |
From: 2
Bottom Right Door
To: 1
Top Right Door
Enter the room in a pose that allows Samus to stand. After teleporting, retract Grapple by pressing up. Then hold right to release Grapple while standing. Samus should get pushed up onto the floor. Run to the right and reach the door, taking just one hit from a Hopper. Entrance condition: {
"comeInWithGrappleTeleport": {
"blockPositions": [
[
3,
12
],
[
3,
13
]
]
}
}Requires: "canOffScreenMovement"
{
"enemyDamage": {
"enemy": "Sidehopper",
"type": "contact",
"hits": 1
}
}Dev note: This doesn't require `canGrappleTeleportWallEscape` tech, because the lower floor height makes it easier. |
From: 1
Left Door
To: 1
Left Door
Kill the hoppers. Use Spike X-Mode to gain shine charge, then use manual reserve and pause abuse on the spikes to interrupt the shinespark. Requires: {
"obstaclesCleared": [
"R-Mode"
]
}
{
"obstaclesCleared": [
"A"
]
}
{
"or": [
{
"and": [
"h_CrystalFlashForReserveEnergy",
"h_usePowerBomb",
"canOffScreenMovement"
]
},
{
"and": [
"h_RModeCanRefillReserves",
{
"resourceMissingAtMost": [
{
"type": "Missile",
"count": 0
}
]
},
{
"resourceMissingAtMost": [
{
"type": "Super",
"count": 0
}
]
},
{
"or": [
{
"and": [
"canBeLucky",
{
"partialRefill": {
"type": "ReserveEnergy",
"limit": 5
}
}
]
},
{
"and": [
"canBeVeryLucky",
{
"partialRefill": {
"type": "ReserveEnergy",
"limit": 20
}
}
]
}
]
}
]
}
]
}
"h_destroyBombWalls"
"h_spikeXModeShinecharge"
"canBeVeryPatient"
"canPauseAbuse"
{
"autoReserveTrigger": {}
}
"canRModeSparkInterrupt"Resets obstacles: R-Mode, C |
From: 2
Right Door
To: 3
Top Junction
Enter with G-Mode and use X-Ray to get stuck 9 pixels inside the door. X-Ray climb to a relatively specific height: after just one pixel of Samus' feet are visible while crouching facing left, perform between 20 and 22 more X-Ray stand-ups (any of these work). Use X-ray to face left, then run and jump to barely make it onto the ledge. Entrance condition: {
"comeInWithGMode": {
"mode": "direct",
"morphed": false
}
}Requires: "canTrickyGMode" "canGModeXRayClimb" "canOffScreenMovement" "canInsaneJump" "canCount" Clears obstacles: R-Mode Dev note: 9 pixels stuck in the door is X position $1E4. The correct Y positions for the jump are $C1, $BC, and $BB FIXME: Some of the X position to the left ($1E2, $1E3) could also work; maybe investigate which vertical positions work for them? |
From: 2
Right Door
To: 3
Top Junction
Get stuck 3 pixels inside the door, and X-ray climb to a precise height: after just one pixel of Samus' feet are visible while crouching facing left, perform exactly 7 more X-Ray stand-ups. Use X-ray to face left, then run and jump to barely make it onto the ledge. Entrance condition: {
"comeInWithDoorStuckSetup": {}
}Requires: "HiJump" "canXRayClimb" "canOffScreenMovement" "canInsaneJump" Dev note: 3 pixels stuck in the door is X position $1DE. |
From: 5
Top Right Door (Through Morph Tunnel)
To: 6
Elevator
Entrance condition: {
"comeInWithGMode": {
"mode": "indirect",
"morphed": true
}
}Requires: {
"or": [
"h_artificialMorphMovement",
"h_artificialMorphBombThings"
]
}
"canOffScreenMovement"Exit condition: {
"leaveWithGMode": {
"morphed": false
}
} |
From: 7
G-Mode Morph Indirect (In Morph Tunnel)
To: 5
Top Right Door (Through Morph Tunnel)
Exit G-Mode while under the gate to open it without a Super. The camera will not scroll through the morph tunnel, but Samus will still be visible; position where Samus appears to be standing on air one tile to the right of the ledge. It is possible to test the location, as there is a block on the ceiling one tile left of the gate. With Morph, Samus can then fix the camera by going through the morph tunnel. Requires: "canGMode" "canOffScreenMovement" Clears obstacles: A |
From: 3
Bottom Left Door
To: 10
Temporary Blue Junction (Top Left Door)
Entrance condition: {
"comeInShinecharging": {
"length": 11,
"openEnd": 0
}
}Requires: "HiJump" "canTrickyUseFrozenEnemies" "canLongChainTemporaryBlue" "canXRayTurnaround" "canOffScreenMovement" Dev note: FIXME: This might also be possible with Spring Ball instead of HiJump, but if so it seems really bad. |
From: 4
Bottom Right Door
To: 10
Temporary Blue Junction (Top Left Door)
Entrance condition: {
"comeInShinecharging": {
"length": 11,
"openEnd": 0
}
}Requires: "HiJump" "canTrickyUseFrozenEnemies" "canLongChainTemporaryBlue" "canXRayTurnaround" "canOffScreenMovement" Dev note: FIXME: This might also be possible with Spring Ball instead of HiJump, but if so it seems really bad. |
From: 10
Temporary Blue Junction (Top Left Door)
To: 3
Bottom Left Door
Requires: "h_getBlueSpeedMaxRunway" "canLongChainTemporaryBlue" "canXRayTurnaround" "canOffScreenMovement" Exit condition: {
"leaveWithTemporaryBlue": {}
}Unlocks doors: {"types":["ammo"],"requires":[]}Dev note: FIXME: The h_getBlueSpeedMaxRunway is to satisfy tests for now. We should add a proper way to represent that the blue state carries over from the previous strat. |
From: 10
Temporary Blue Junction (Top Left Door)
To: 4
Bottom Right Door
Requires: "h_getBlueSpeedMaxRunway" "canLongChainTemporaryBlue" "canXRayTurnaround" "canOffScreenMovement" Exit condition: {
"leaveWithTemporaryBlue": {}
}Unlocks doors: {"types":["ammo"],"requires":[]}Dev note: FIXME: The h_getBlueSpeedMaxRunway is to satisfy tests for now. We should add a proper way to represent that the blue state carries over from the previous strat. |
From: 3
Right Vertical Door
To: 2
Bottom Left Door
Wiggle back and forth in the camera scroll block to overload PLMs; it is the right-most tile within the morph tunnel. Be careful because of the global off screen Zeela on the left that can hit Samus. Typically, it is very risky to cross the room before the Zeela, wait at least 10-12 seconds after room entry before crossing for a safe window. Go to the left, unmorph and exit G-Mode then quickly run back and forth to fix the camera or go through the door. Entrance condition: {
"comeInWithGMode": {
"mode": "any",
"morphed": true
},
"comesThroughToilet": "any"
}Requires: "canOffScreenMovement" |
|
Entrance condition: {
"comeInWithGrappleTeleport": {
"blockPositions": [
[
3,
12
],
[
3,
13
]
]
}
}Requires: {
"or": [
"h_heatedGrappleTeleportWallEscape",
{
"and": [
{
"doorUnlockedAtNode": 2
},
{
"heatFrames": 20
}
]
}
]
}
"canOffScreenMovement"Clears obstacles: A Unlocks doors: {"types":["ammo"],"requires":[]} |
|
Destroy the shot block by standing on top of it, jumping, aiming down, and shooting at the moment that you land. This requires precision because the beam projectile will immediately despawn while off-camera. Less precise alternatives include using a bomb, Power Bomb, or Grapple, if available. With the shot block destroyed, fall down through the opening and jump back up, and the camera will be fixed. Requires: {
"obstaclesCleared": [
"A"
]
}
"canOffScreenMovement"
{
"heatFrames": 160
}Resets obstacles: A |
|
When off-camera, the Gamets still spawn but cannot be destroyed with beams or other projectiles. Requires: {
"obstaclesCleared": [
"A"
]
}
"canOffScreenMovement"
{
"or": [
"ScrewAttack",
"h_useMorphBombs",
"Grapple",
{
"haveBlueSuit": {}
}
]
}
{
"simpleHeatFrames": 40
}
{
"heatFrames": 100
}
{
"simpleCycleFrames": 40
}
{
"cycleFrames": 100
}Farm cycle drops: 5 Gamet |
From: 5
Bottom Right Junction
To: 2
Right Door
Wait for the global Sova to begin climbing the wall below the door. Have Reserves set to manual and couch jump up above the Sova as it turns the lip of the ledge. Before touching the Sova, pause, so that Samus will recieve a small damage boost followed by pause screen appearing. Set Reserves back to auto which will end Samus' i-frames enabling a second damage boost. Without Morphball, this requires a blind damage boost. Requires: {
"notable": "Sova Boost"
}
{
"obstaclesNotCleared": [
"R-Mode"
]
}
"canCrouchJump"
"canInsaneJump"
{
"or": [
"canMidAirMorph",
"canOffScreenMovement"
]
}
"canCameraManip"
"canReserveDoubleDamageBoost"
{
"heatFrames": 830
}
{
"autoReserveTrigger": {
"minReserveEnergy": 85
}
}
{
"enemyDamage": {
"enemy": "Sova",
"type": "contact",
"hits": 1
}
}
{
"heatFrames": 90
} |
From: 2
Middle Left Door
To: 1
Top Left Door
Entrance condition: {
"comeInWithGMode": {
"mode": "indirect",
"morphed": true
}
}Requires: "canOffScreenMovement" "h_heatedGModeOffCameraDoor" |
From: 2
Middle Left Door
To: 4
Top Right Door
Entrance condition: {
"comeInWithGMode": {
"mode": "indirect",
"morphed": true
}
}Requires: "canOffScreenMovement" "h_heatedGModeOffCameraDoor" |
From: 2
Top Right Door
To: 1
Top Door
After teleporting, briefly press down to extend Grapple, then press up to retract it again. Release Grapple to fall onto the platform below the door. Entrance condition: {
"comeInWithGrappleTeleport": {
"blockPositions": [
[
5,
3
]
]
}
}Requires: {
"heatFrames": 100
}
{
"or": [
"canOffScreenMovement",
{
"heatFrames": 80
}
]
}
{
"doorUnlockedAtNode": 1
}Unlocks doors: {"types":["powerbomb"],"requires":[{"heatFrames":110}]}
{"types":["missiles","super"],"requires":["never"]} |
From: 3
Bottom Right Door
To: 1
Top Door
After teleporting, briefly press down to extend Grapple, then press up to retract it again. Release Grapple to fall onto the platform below the door. Entrance condition: {
"comeInWithGrappleTeleport": {
"blockPositions": [
[
5,
3
]
]
}
}Requires: {
"heatFrames": 100
}
"canOffScreenMovement"
{
"doorUnlockedAtNode": 1
}Unlocks doors: {"types":["powerbomb"],"requires":[{"heatFrames":110}]}
{"types":["missiles","super"],"requires":["never"]} |
From: 2
Left Shaft - Bottom Right Door
To: 1
Left Shaft - Top Left Door
Entrance condition: {
"comeInWithGrappleTeleport": {
"blockPositions": [
[
3,
12
]
]
}
}Requires: {
"or": [
"h_heatedGrappleTeleportWallEscape",
{
"and": [
{
"doorUnlockedAtNode": 1
},
{
"heatFrames": 20
}
]
}
]
}
"canOffScreenMovement"
{
"enemyDamage": {
"enemy": "Multiviola",
"type": "contact",
"hits": 1
}
}Unlocks doors: {"types":["ammo"],"requires":[]} |
From: 3
Left Shaft - Middle Right Door
To: 1
Left Shaft - Top Left Door
Entrance condition: {
"comeInWithGrappleTeleport": {
"blockPositions": [
[
3,
12
]
]
}
}Requires: {
"or": [
"h_heatedGrappleTeleportWallEscape",
{
"and": [
{
"doorUnlockedAtNode": 1
},
{
"heatFrames": 20
}
]
}
]
}
"canOffScreenMovement"
{
"enemyDamage": {
"enemy": "Multiviola",
"type": "contact",
"hits": 1
}
}Unlocks doors: {"types":["ammo"],"requires":[]} |
From: 5
Far Right Door
To: 1
Left Shaft - Top Left Door
Entrance condition: {
"comeInWithGrappleTeleport": {
"blockPositions": [
[
3,
12
]
]
}
}Requires: {
"or": [
"h_heatedGrappleTeleportWallEscape",
{
"and": [
{
"doorUnlockedAtNode": 1
},
{
"heatFrames": 20
}
]
}
]
}
"canOffScreenMovement"
{
"enemyDamage": {
"enemy": "Multiviola",
"type": "contact",
"hits": 1
}
}Unlocks doors: {"types":["ammo"],"requires":[]} |
|
Enter the morph tunnel then exit G-mode. Shooting the shot block off screen can be done by jumping and shooting up or with Grapple or a Power Bomb. Getting positioned under the shot block can be done by walking into the camera scroll block and then walking against the right wall, jump to the left and walk a little more (about one more tile). This will also give some visibility of Samus. Without heat damage, it is recommended to jump up past the shot block and wait for it to respawn; with the block intact, Samus can't accidentally touch the lava. Entrance condition: {
"comeInWithGMode": {
"mode": "any",
"morphed": true
}
}Requires: "h_heatedGMode"
"canComplexGMode"
"canOffScreenMovement"
{
"or": [
"h_artificialMorphMovement",
{
"ammo": {
"type": "PowerBomb",
"count": 3
}
}
]
}
{
"or": [
"canInsaneJump",
{
"and": [
"canTrickyJump",
"h_heatProof"
]
},
{
"and": [
"h_heatProof",
"h_lavaProof",
{
"or": [
"Gravity",
"HiJump"
]
}
]
}
]
}
{
"heatFrames": 1000
}
{
"or": [
"canTrickyGMode",
{
"heatFrames": 500
}
]
}Exit condition: {
"leaveNormally": {}
}Unlocks doors: {"types":["missiles"],"requires":[{"heatFrames":20}]}
{"types":["super"],"requires":[]}
{"types":["powerbomb"],"requires":[{"heatFrames":60}]}Dev note: These heat frames are not very tight, as the room is difficult to do consistently. |
From: 8
G-Mode, Bottom Right (Started at Left)
To: 1
Top of the Shaft Left Door
The speed block platform above the bottom door will not be usable, so Samus must blindly wall jump up the first ledge or use some assist. There is some visibility on the left side of the screen, which is useful in determining which ledge she is on. The Cacatacs will not be able to damage Samus off screen. Requires: "canOffScreenMovement"
{
"or": [
"canWallJump",
"HiJump",
"canSpringBallJumpMidAir",
"SpaceJump"
]
}
"h_heatedGModeOffCameraDoor"Exit condition: {
"leaveNormally": {}
}Unlocks doors: {"types":["missiles"],"requires":[{"heatFrames":50}]}
{"types":["super"],"requires":[]}
{"types":["powerbomb"],"requires":[{"heatFrames":110}]}Dev note: Requires leaving the room, as Samus is off camera and shouldn't be expected to do more in-room. FIXME: It is possible to X-Ray climb from inside the speed blocks. Count shots to determine Samus' position. |
From: 8
G-Mode, Bottom Right (Started at Left)
To: 5
Top Right Door
The speed block platform above the bottom door will not be usable, so Samus must blindly wall jump up the first ledge or use some assist. There is some visibility on the left side of the screen, which is useful in determining which ledge she is on. The Cacatacs will not be able to damage Samus off screen. Requires: "canOffScreenMovement"
{
"or": [
"canWallJump",
"HiJump",
"canSpringBallJumpMidAir",
"SpaceJump"
]
}
"h_heatedGModeOffCameraDoor"Exit condition: {
"leaveNormally": {}
}Unlocks doors: {"types":["missiles"],"requires":[{"heatFrames":50}]}
{"types":["super"],"requires":[]}
{"types":["powerbomb"],"requires":[{"heatFrames":110}]}Dev note: Requires leaving the room, as Samus is off camera and shouldn't be expected to do more in-room. |
From: 2
Bottom Right Door
To: 1
Top Right Door
After the teleport, immediately press down to extend Grapple to avoid bonking on the ceiling overhang; note that buffering the down input through the transition will not work. Then swing over to the door. Crumble jump in case the swing does not make it all the way to the door. Samus will be visible but off-camera; swinging back and forth to fix the camera is possible, at the cost of additional heat damage. Entrance condition: {
"comeInWithGrappleTeleport": {
"blockPositions": [
[
5,
3
]
]
}
}Requires: {
"heatFrames": 120
}
{
"or": [
"canOffScreenMovement",
{
"heatFrames": 180
}
]
} |
From: 1
Left Door
To: 3
Top Right Item
After teleporting, hold left and release Grapple to remain in a standing pose (and not be force crouched). X-ray climb a specific distance, performing exactly 15 X-Ray stand-ups. Then morph and roll out to the right. If Bombs, Power Bombs, or Screw Attack are available, this can allow more lenience in how far to climb. Entrance condition: {
"comeInWithGrappleTeleport": {
"blockPositions": [
[
12,
13
]
]
}
}Requires: "canXRayClimb" "Morph" "canOffScreenMovement" |
From: 1
Top Right Door
To: 2
Middle Right Door
Entrance condition: {
"comeInShinecharging": {
"length": 0,
"openEnd": 1
}
}Requires: "canShinechargeMovementTricky"
"canTrivialMidAirMorph"
{
"or": [
"canUsePowerBombLag",
{
"and": [
"canInsaneJump",
"canOffScreenMovement"
]
}
]
}
{
"heatFrames": 200
}
{
"shinespark": {
"frames": 17,
"excessFrames": 0
}
}Exit condition: {
"leaveWithSpark": {}
}Unlocks doors: {"types":["super"],"requires":[]}
{"types":["missiles","powerbomb"],"requires":["never"]}Dev note: Technically Samus isn't moving off-camera but is close to the edge; 'canOffScreenMovement' is for the difficulty of timing the unmorph, given limited visibility of the end of the passage and the Sova. If a Power Bomb is available, then lag from the explosion can make the movement much easier. |
From: 2
Middle Right Door
To: 1
Top Right Door
Kill the Sovas or wait at around 25 seconds for them to get out of the way before going down and passing them while climbing to the top door. It is possible to wait 2.5 minutes for the Sovas to return on camera to be sure Samus won't touch them. Entrance condition: {
"comeInWithGMode": {
"mode": "any",
"morphed": true
}
}Requires: "h_artificialMorphMovement" "canOffScreenMovement" "h_heatedGModeOffCameraDoor" Dev note: The single tile ledge at this door doesn't seem to make it any slower to exit. It is probably possible to farm the Sovas at this door, but it would be difficult and isn't expected. |
From: 3
Bottom Right Door
To: 2
Middle Right Door
Jump into the second ceiling Samus Eater in Hellway. After teleporting and passing through the transition, X-Ray climb to reach the space above, to the right of the morph tunnel. Samus will be off-camera, so it may not be easy to tell when the climb is done. Entrance condition: {
"comeInWithSamusEaterTeleport": {
"floorPositions": [],
"ceilingPositions": [
[
10,
3
]
]
}
}Requires: "h_heatProof" "canXRayClimb" "canOffScreenMovement" Dev note: Other Samus Eaters can also probably work. |
|
Enter the room with a super sink, in order to clip down to the bottom part of the room. Blindly traverse to the right door. It is recommended to open the door using Grapple if possible, since it can reach the door from a distance even while off-camera whereas beams cannot. Entrance condition: {
"comeInWithSuperSink": {}
}Requires: "canOffScreenMovement"
{
"heatFrames": 360
}
{
"acidFrames": 345
}
{
"enemyDamage": {
"enemy": "Magdollite",
"type": "contact",
"hits": 1
}
}Exit condition: {
"leaveNormally": {}
}Unlocks doors: {"types":["missiles"],"requires":[{"acidFrames":75},{"heatFrames":75}]}
{"types":["super"],"requires":[{"acidFrames":25},{"heatFrames":25}]}
{"types":["powerbomb"],"requires":[{"acidFrames":90},{"heatFrames":90}]}Dev note: FIXME: With better off-camera movement, this can be done with significantly less damage (and with Gravity the Magdollite hit can also be avoided); but after the supersink setup it's not clear if it's reasonable to assume any more than this. FIXME: If the acid is already drained, then the requirements here could be reduced (though in that case there's not as much reason to do this strat). |
From: 1
Top Right Door
To: 3
Acid Chozo Statue
Grapple teleporting here will spawn Samus inside the wall behind the Acid Chozo statue. To escape, perform a Crystal Flash to stand up, then morph and roll out to the right. Samus will be visible but off-camera, making the movement tricky. Entrance condition: {
"comeInWithGrappleTeleport": {
"blockPositions": [
[
5,
3
]
]
}
}Requires: {
"heatFrames": 220
}
"h_CrystalFlash"
{
"heatFrames": 20
}
"canOffScreenMovement" |
From: 1
Top Right Door
To: 3
Acid Chozo Statue
After teleporting, press down to retract Grapple. Samus will be inside the Power Bomb blocks behind the Acid Chozo statue hand. Use a Power Bomb, wait to begin falling, then hold right to roll out under the hand. Samus will be visible but off-camera, making the movement tricky. Holding right too early after laying the Power Bomb will cause Samus to get stuck inside the Chozo hand; in this case, Samus can get out by unmorphing, remorphing, and rolling to the right on top of the hand. Entrance condition: {
"comeInWithGrappleTeleport": {
"blockPositions": [
[
7,
2
]
]
}
}Requires: "h_usePowerBomb"
{
"heatFrames": 220
}
"canOffScreenMovement" |
From: 2
Bottom Right Door
To: 1
Top Right Door
Gain a shinecharge and spark into the wall at the left side of the room to clip into it. From there, X-Ray climb to the top portion of the room (about 0.75 screens). Samus will be visible but off-camera, making the movement tricky. Only certain horizontal positions for the spark will work. There are periodic windows of approximately 4 good pixels followed by 8 bad pixels. Moonwalking back against the ledge below the door will put Samus into a good position. Being centered over this two-tile ledge is another position that works. Entrance condition: {
"comeInShinecharged": {}
}Requires: {
"shineChargeFrames": 35
}
{
  "shinespark": {
    "frames": 33,
    "excessFrames": 0
  }
}
"canShinesparkSlopeClip"
"canXRayClimb"
"canOffScreenMovement"
{
  "heatFrames": 1020
} |
From: 2
Bottom Right Door
To: 1
Top Right Door
Gain a shinecharge and spark into the wall at the left side of the room to clip into it. From there, X-Ray climb to the top portion of the room (about 0.75 screens). Samus will be visible but off-camera, making the movement tricky. Only certain horizontal positions for the spark will work. There are periodic windows of approximately 4 good pixels followed by 8 bad pixels. Moonwalking back against the ledge below the door will put Samus into a good position. Being centered over this two-tile ledge is another position that works. Entrance condition: {
"comeInShinecharging": {
"length": 3,
"openEnd": 1
}
}Requires: {
"shinespark": {
"frames": 33,
"excessFrames": 0
}
}
"canShinesparkSlopeClip"
"canXRayClimb"
"canOffScreenMovement"
{
"heatFrames": 1020
} |
From: 2
Bottom Right Door
To: 3
Acid Chozo Statue
Grapple teleporting here will spawn Samus inside the wall behind the Acid Chozo statue. To escape, perform a Crystal Flash to stand up, then morph and roll out to the right. Samus will be visible but off-camera, making the movement tricky. Entrance condition: {
"comeInWithGrappleTeleport": {
"blockPositions": [
[
5,
3
]
]
}
}Requires: {
"heatFrames": 220
}
"h_CrystalFlash"
{
"heatFrames": 20
}
"canOffScreenMovement" |
From: 2
Bottom Right Door
To: 3
Acid Chozo Statue
After teleporting, press down to retract Grapple. Samus will be inside the Power Bomb blocks behind the Acid Chozo statue hand. Use a Power Bomb, wait to begin falling, then hold right to roll out under the hand. Samus will be visible but off-camera, making the movement tricky. Holding right too early after laying the Power Bomb will cause Samus to get stuck inside the Chozo hand; in this case, Samus can get out by unmorphing, remorphing, and rolling to the right on top of the hand. Entrance condition: {
"comeInWithGrappleTeleport": {
"blockPositions": [
[
7,
2
]
]
}
}Requires: "h_usePowerBomb"
{
"heatFrames": 220
}
"canOffScreenMovement" |
From: 2
Bottom Right Door
To: 3
Acid Chozo Statue
Gain a shinecharge and spark into the wall at the left side of the room to clip into it. From there, X-Ray climb to the top portion of the room (about 0.75 screens). Samus will be visible but off-camera, making the movement tricky. Only certain horizontal positions for the spark will work. There are periodic windows of approximately 4 good pixels followed by 8 bad pixels. Moonwalking back against the ledge below the door will put Samus into a good position. Being centered over this two-tile ledge is another position that works. Entrance condition: {
"comeInShinecharged": {}
}Requires: {
"shineChargeFrames": 35
}
{
  "shinespark": {
    "frames": 33,
    "excessFrames": 0
  }
}
"canShinesparkSlopeClip"
"canXRayClimb"
"canOffScreenMovement"
{
  "or": [
    "canPreciseWallJump",
    "SpaceJump",
    "HiJump",
    "canTrickySpringBallJump"
  ]
}
{
  "heatFrames": 970
} |
From: 2
Bottom Right Door
To: 3
Acid Chozo Statue
Gain a shinecharge and spark into the wall at the left side of the room to clip into it. From there, X-Ray climb to the top portion of the room (about 0.75 screens). Samus will be visible but off-camera, making the movement tricky. Only certain horizontal positions for the spark will work. There are periodic windows of approximately 4 good pixels followed by 8 bad pixels. Moonwalking back against the ledge below the door will put Samus into a good position. Being centered over this two-tile ledge is another position that works. Entrance condition: {
"comeInShinecharging": {
"length": 3,
"openEnd": 1
}
}Requires: {
"shinespark": {
"frames": 33,
"excessFrames": 0
}
}
"canShinesparkSlopeClip"
"canXRayClimb"
"canOffScreenMovement"
{
"or": [
"canPreciseWallJump",
"SpaceJump",
"HiJump",
"canTrickySpringBallJump"
]
}
{
"heatFrames": 970
} |
From: 5
Bottom Junction Right of Morph Tunnel
To: 1
Top Right Door
Jump, press against the wall, and use a flash suit or blue suit to spark into it, clipping inside of it. From there, X-Ray climb to the top portion of the room (about 0.75 screens). Samus will be visible but off-camera, making the movement tricky. Requires: "h_storedSpark"
{
"shinespark": {
"frames": 1,
"excessFrames": 1
}
}
"canShinesparkSlopeClip"
"canXRayClimb"
"canOffScreenMovement"
{
"heatFrames": 1020
} |
|
Entrance condition: {
"comeInWithGrappleTeleport": {
"blockPositions": [
[
3,
12
]
]
}
}Requires: {
"or": [
"h_heatedGrappleTeleportWallEscape",
{
"and": [
{
"doorUnlockedAtNode": 1
},
{
"heatFrames": 20
}
]
}
]
}
"canOffScreenMovement"Clears obstacles: door_2 Unlocks doors: {"types":["ammo"],"requires":[]} |
From: 2
Middle Right Door
To: 3
Top Right Door
After teleporting, Samus should be standing inside the wall. Retract Grapple by pressing up, which will pull Samus down and right. Hold right, and release Grapple while still holding right. Perform a turn-around spin jump (to the left). Then morph and roll out to the right. Entrance condition: {
"comeInWithGrappleTeleport": {
"blockPositions": [
[
3,
12
]
]
}
}Requires: "h_heatedGrappleTeleportWallEscape"
"canOffScreenMovement"
{
"heatFrames": 60
}
{
"or": [
"canDash",
{
"heatFrames": 30
}
]
} |
|
The camera will not follow Samus so beams and missiles despawn instantly and the Pirates are inactive. The Grapple Beam still fully extends and Power Bombs turn the Pirates active. Entrance condition: {
"comeInWithGrappleTeleport": {
"blockPositions": [
[
5,
3
],
[
7,
2
]
]
}
}Requires: "canOffScreenMovement"
{
"heatFrames": 125
} |
G-Mode Morph Blind Top to Bottom - Power Bomb the Bottom Fune (Top Left Door)
(Extreme+)
Lower Norfair Fireflea Room
From: 1
Top Left Door
To: 2
Bottom Left Door
Traversing the room without getting hit requires fairly tricky off-screen movement. Note that Samus moves freely through the off-screen Funes, but will take damage from the Boulders. The Boulders will behave normally and start to roll as Samus is in front of them, except for the top Boulder. Roll off the first ledge and immediately roll to the right all the way to the right wall. Use Spring Ball or a horizontal bomb boost to get over the next Boulder. Quickly roll off the left edge and back to the right in order to avoid the third Boulder. Roll to the right wall then the left wall and place a Power Bomb, exit G-Mode, and jump repeatedly to fix the camera. Entrance condition: {
"comeInWithGMode": {
"mode": "any",
"morphed": true
}
}Requires: {
"notable": "G-Mode Morph Blind Top to Bottom"
}
"canOffScreenMovement"
"canTrickyJump"
{
"or": [
"h_artificialMorphSpringBall",
"h_artificialMorphBombHorizontally",
{
"enemyDamage": {
"enemy": "Boulder",
"type": "contact",
"hits": 1
}
},
{
"haveBlueSuit": {}
}
]
}
"h_artificialMorphPowerBomb"Clears obstacles: A |
G-Mode Morph Blind Top to Bottom - Jump over the Bottom Fune (Top Left Door)
(Extreme+)
Lower Norfair Fireflea Room
From: 1
Top Left Door
To: 6
Junction Behind Fune
Traversing the room without getting hit requires fairly tricky off-screen movement. Note that Samus moves freely through the off-screen Funes, but will take damage from the Boulders. The Boulders will behave normally and start to roll as Samus is in front of them, except for the top Boulder. Roll off the first ledge and immediately roll to the right all the way to the right wall. Use Spring Ball or a horizontal bomb boost to get over the next Boulder. Quickly roll off the left edge and back to the right in order to avoid the third Boulder. Roll to the right wall then the left wall and use Spring Ball to jump over the Fune, exit G-Mode, and jump repeatedly to fix the camera. Entrance condition: {
"comeInWithGMode": {
"mode": "any",
"morphed": true
}
}Requires: {
"notable": "G-Mode Morph Blind Top to Bottom"
}
"canOffScreenMovement"
"canTrickyJump"
"h_artificialMorphSpringBall"Dev note: This is only useful if the item is Morph or a way to kill the Fune. |
G-Mode Morph Blind Top to Bottom - Power Bomb the Bottom Fune (Top Right Door)
(Extreme+)
Lower Norfair Fireflea Room
From: 3
Top Right Door
To: 2
Bottom Left Door
Traversing the room without getting hit requires fairly tricky off-screen movement. Note that Samus moves freely through the off-screen Funes, but will take damage from the Boulders. The Boulders will behave normally and start to roll as Samus is in front of them, except for the top Boulder. Roll off the first ledge and immediately roll to the right all the way to the right wall. Use Spring Ball or a horizontal bomb boost to get over the next Boulder. Quickly roll off the left edge and back to the right in order to avoid the third Boulder. Roll to the right wall then the left wall and place a Power Bomb, exit G-Mode, and jump repeatedly to fix the camera. Entrance condition: {
"comeInWithGMode": {
"mode": "any",
"morphed": true
}
}Requires: {
"notable": "G-Mode Morph Blind Top to Bottom"
}
"canOffScreenMovement"
"canTrickyJump"
{
"or": [
"h_artificialMorphSpringBall",
"h_artificialMorphBombHorizontally",
{
"enemyDamage": {
"enemy": "Boulder",
"type": "contact",
"hits": 1
}
}
]
}
"h_artificialMorphPowerBomb"Clears obstacles: A |
G-Mode Morph Blind Top to Bottom - Jump over the Bottom Fune (Top Left Door)
(Extreme+)
Lower Norfair Fireflea Room
From: 3
Top Right Door
To: 6
Junction Behind Fune
Traversing the room without getting hit requires fairly tricky off-screen movement. Note that Samus moves freely through the off-screen Funes, but will take damage from the Boulders. The Boulders will behave normally and start to roll as Samus is in front of them, except for the top Boulder. Roll off the first ledge and immediately roll to the right all the way to the right wall. Use Spring Ball or a horizontal bomb boost to get over the next Boulder. Quickly roll off the left edge and back to the right in order to avoid the third Boulder. Roll to the right wall then the left wall and use Spring Ball to jump over the Fune, exit G-Mode, and jump repeatedly to fix the camera. Entrance condition: {
"comeInWithGMode": {
"mode": "any",
"morphed": true
}
}Requires: {
"notable": "G-Mode Morph Blind Top to Bottom"
}
"canOffScreenMovement"
"canTrickyJump"
"h_artificialMorphSpringBall"Dev note: This is only useful if the item is Morph or a way to kill the Fune. |
From: 1
Left Door
To: 2
Right Vertical Door
Overload PLMs using the camera scroll blocks just right of the downward passageway by the left door. Blindly traverse the maze until the end, where Samus will be stuck at the far right next to the shot block. Exit G-mode just one tile to the left, Morph, use a Bomb or Power Bomb to destroy the shot block and escape through the door. Entrance condition: {
"comeInWithGMode": {
"mode": "any",
"morphed": false
}
}Requires: "canOffScreenMovement"
"h_bombThings"
"h_heatedGModeOffCameraDoor"
{
"heatFrames": 200
} |
From: 1
Left Door
To: 2
Right Vertical Door
Be careful not to overload PLMs with the camera scroll blocks just right of the downward passageway by the left door; use the item to finish overloading PLMs. Blindly traverse the maze until the end, where Samus will be stuck at the far right next to the shot block. Exit G-mode just one tile to the left, Morph, use a Bomb or Power Bomb to destroy the shot block and escape through the door. Entrance condition: {
"comeInWithGMode": {
"mode": "direct",
"morphed": false
}
}Requires: "canRemoteAcquire"
"canOffScreenMovement"
"h_bombThings"
"h_heatedGModeOffCameraDoor"
{
  "heatFrames": 200
}Collects items: 4 |
From: 3
Bottom Horizontal Door
To: 1
Left Door
Entrance condition: {
"comeInWithGrappleTeleport": {
"blockPositions": [
[
3,
12
],
[
3,
13
]
]
}
}Requires: {
"or": [
"h_heatedGrappleTeleportWallEscape",
{
"and": [
{
"doorUnlockedAtNode": 1
},
{
"heatFrames": 20
}
]
}
]
}
{
"or": [
"canOffScreenMovement",
{
"heatFrames": 100
}
]
}Unlocks doors: {"types":["ammo"],"requires":[]} |
From: 3
Bottom Horizontal Door
To: 2
Right Vertical Door
PLMs will be overloaded using the camera scroll blocks while climbing the room. Blindly traverse the maze until the end, where Samus will be stuck at the far right next to the shot block. Exit G-mode just one tile to the left, Morph, use a Bomb or Power Bomb to destroy the shot block and escape through the door. Note that it is possible to climb up with a tricky dash jump and no wall jump. Either kill the Alcoon before it spawns and stationary, invisible lasers, or let the right alcoons shoot enough to overload projectiles. Entrance condition: {
"comeInWithGMode": {
"mode": "any",
"morphed": false
}
}Requires: "canOffScreenMovement"
{
"or": [
"canWallJump",
"HiJump",
"canSpringBallJumpMidAir",
"SpaceJump",
"canUseFrozenEnemies",
"canIBJ",
{
"and": [
"canTrickyDashJump",
"canTrickyDodgeEnemies"
]
}
]
}
"h_bombThings"
"h_heatedGModeOffCameraDoor"
{
"heatFrames": 200
} |
From: 3
Bottom Horizontal Door
To: 2
Right Vertical Door
It is tricky to climb the room without fully overloading PLMs. With Ice and either HiJump or Spring Ball, freeze the left Alcoon to the right of where it jumps out of the ground. With HiJump, spin jump off of it and land directly on the middle stair platform. With Spring Ball, morph on top of the Alcoon, jump to barely land on the lowest platform while avoiding the camera scroll blocks one tile above, then use Spring Ball again to jump to the next platform. Alternatively, with Spring Ball and either HiJump, Bombs, or Power Bombs, jump to barely land on the lowest platform while avoiding the camera scroll blocks one tile above, then use Spring Ball again to jump to the next platform. The first jump can be done with HiJump or a bomb boost into Spring Ball jump. Once up above, unmorph and get onto the edge of the runway leading right, then run through the camera scroll blocks to reach the item. This will finish overloading PLMs. Blindly traverse the maze until the end, where Samus will be stuck at the far right next to the shot block. Exit G-mode just one tile to the left, Morph, use a Bomb or Power Bomb to destroy the shot block and escape through the door. There is a row of camera scroll blocks two-tiles above the bottom left platform, and a column two-tiles away from the right of the gap in front of the left door. Entrance condition: {
"comeInWithGMode": {
"mode": "direct",
"morphed": false
}
}Requires: "canRemoteAcquire"
"canOffScreenMovement"
"canTrickyGMode"
{
"or": [
{
"and": [
"canTrickyUseFrozenEnemies",
"HiJump"
]
},
{
"and": [
"canTrickyUseFrozenEnemies",
"h_useSpringBall"
]
},
{
"and": [
"HiJump",
"h_useSpringBall"
]
},
"canSpringBallBombJump"
]
}
"h_bombThings"
"h_heatedGModeOffCameraDoor"
{
"heatFrames": 200
}Collects items: 4 |
From: 3
Bottom Horizontal Door
To: 7
Junction By Lower Alcoons (Left of Spike Pits)
Get out of the wall if necessary; then do a blind jump over the Alcoon. Entrance condition: {
"comeInWithGrappleTeleport": {
"blockPositions": [
[
2,
18
],
[
2,
19
],
[
2,
28
],
[
2,
29
]
]
}
}Requires: "canOffScreenMovement"
{
"heatFrames": 80
} |
|
Shinecharge either right to left or left to right before horizontally sparking across the room. Use the raised step to the left or the lowered step to the right to be able to find the end of the runway. Entrance condition: {
"comeInWithGMode": {
"mode": "any",
"morphed": false
}
}Requires: "canOffScreenMovement"
"canHorizontalMidairShinespark"
{
"canShineCharge": {
"usedTiles": 24.5,
"openEnd": 1
}
}
{
"shinespark": {
"frames": 75,
"excessFrames": 5
}
}
"h_heatedGModeOffCameraDoor" |
|
Overload PLMs by rolling through the camera scroll block just right of the bomb blocks, then roll through the morph tunnel and use a bomb boost or Spring Ball to escape the tunnel and get to the door. Without a way to boost out of the tunnel, exit G-mode and use a two-turn X-Ray climb, then ceiling clip by jumping out of the tunnel. Note that the Kihunter is global, and will hit Samus. Without any way to know where the Kihunter will be, a contact hit is expected without Screw Attack or blue suit. Entrance condition: {
"comeInWithGMode": {
"mode": "any",
"morphed": true
},
"comesThroughToilet": "any"
}Requires: "h_artificialMorphMovement"
"canOffScreenMovement"
{
"or": [
"h_artificialMorphBombThings",
"h_artificialMorphSpringBall",
{
"and": [
"canXRayClimb",
"canCeilingClip",
{
"heatFrames": 450
},
{
"or": [
"canTrickyGMode",
{
"heatFrames": 200
}
]
}
]
}
]
}
{
"or": [
"ScrewAttack",
{
"haveBlueSuit": {}
},
{
"enemyDamage": {
"enemy": "Kihunter (red)",
"type": "contact",
"hits": 1
}
}
]
}
"h_heatedGModeOffCameraDoor"Exit condition: {
"leaveNormally": {}
}Unlocks doors: {"types":["missiles"],"requires":[{"heatFrames":50}]}
{"types":["super"],"requires":[]}
{"types":["powerbomb"],"requires":[{"heatFrames":110}]}Dev note: It is also possible, but not expected, to kill the Kihunter by the door and use its drop to get out of the room. Because this is blind and there doesn't appear to be a way to fix the camera, it is not expected to climb higher in the room. FIXME: These door unlock heat frames could be lowered, but it depends on if the Kihunter is alive, and if Samus had to exit G-mode to get out of the tunnel. FIXME: It is possible to pause abuse a drop from the Kihunter. |
From: 3
Middle Right Door
To: 1
Top Left Door
Entrance condition: {
"comeInWithGrappleTeleport": {
"blockPositions": [
[
3,
12
],
[
3,
13
]
]
}
}Requires: {
"or": [
"h_heatedGrappleTeleportWallEscape",
{
"and": [
{
"doorUnlockedAtNode": 1
},
{
"heatFrames": 20
}
]
}
]
}
{
"or": [
"canOffScreenMovement",
{
"heatFrames": 100
}
]
}Unlocks doors: {"types":["ammo"],"requires":[]} |
From: 3
Middle Right Door
To: 5
Top Junction Between Doors
The grapple teleport skips past the Kihunters. With good semi-blind movement, this makes it possible to reach the top with minimal heat damage. Entrance condition: {
"comeInWithGrappleTeleport": {
"blockPositions": [
[
2,
18
],
[
2,
19
],
[
2,
29
]
]
}
}Requires: {
"notable": "Grapple Teleport Semi-Blind Movement"
}
"canOffScreenMovement"
{
"heatFrames": 330
}
{
"or": [
"canDash",
{
"heatFrames": 20
}
]
} |
From: 4
Junction Right of Power Bomb Blocks
To: 8
Junction Below Top Right Door
Requires: {
"obstaclesCleared": [
"D"
]
}
"h_heatProof"
{
"or": [
{
"and": [
{
"getBlueSpeed": {
"usedTiles": 20,
"openEnd": 1
}
},
"canSpeedball"
]
},
{
"and": [
"h_additionalBomb",
"h_bombThings"
]
}
]
}
{
"canShineCharge": {
"usedTiles": 25,
"steepDownTiles": 4,
"openEnd": 1
}
}
"canShinechargeMovementTricky"
"canOffScreenMovement"
"h_spikeSuitSpikeHitLeniency"
{
"spikeHits": 1
}
"canTrickySpikeSuit"
{
"shinespark": {
"frames": 4,
"excessFrames": 4
}
} |
From: 9
G-Mode Morph, Left of Morph Tunnel (Off-Camera)
To: 1
Bottom Left Door
Exit G-mode while on the item pedestal, while off-camera, then return to the right through the Dessgeega that can't damage Samus off-screen. Use a Power Bomb and fall down the spiky shaft and get to the door. Avoiding a spike hit is possible but tricky. Requires: "h_heatedGMode"
"canOffScreenMovement"
"h_usePowerBomb"
{
"or": [
"canTrickyGMode",
{
"spikeHits": 1
}
]
}
{
"heatFrames": 550
}Collects items: 3 Dev note: FIXME: Strats could be added on remote acquire strats that use the item for the escape, such as Morph, explosives, or an E-Tank. |
From: 9
G-Mode Morph, Left of Morph Tunnel (Off-Camera)
To: 1
Bottom Left Door
With a way to move while morphed, use a Power Bomb while on the Power Bomb blocks and quickly exit G-mode. Otherwise, do so to the right of the Power Bomb blocks, quickly exit G-mode, and jump up and over to fall through the blocks. Fall down the spiky shaft and get to the door. Avoiding a spike hit is possible but tricky. Requires: "h_heatedGMode"
"canOffScreenMovement"
"h_artificialMorphPowerBomb"
{
"or": [
"h_artificialMorphMovement",
{
"heatFrames": 100
}
]
}
{
"or": [
"canTrickyGMode",
{
"spikeHits": 1
}
]
}
{
"heatFrames": 350
} |
From: 9
G-Mode Morph, Left of Morph Tunnel (Off-Camera)
To: 2
Top Right Door
Use Speedbooster to break the bomb block near the item to collect it and then again to speedball back to the door. Requires: "canGMode"
"h_heatProof"
"canOffScreenMovement"
{
"getBlueSpeed": {
"usedTiles": 20,
"steepDownTiles": 4,
"openEnd": 1
}
}
"canChainTemporaryBlue"
"canTrickyJump"
"canSpeedball"
{
"or": [
"canInsaneJump",
"h_useSpringBall",
{
"ammo": {
"type": "PowerBomb",
"count": 1
}
},
{
"hibashiHits": 1
},
{
"obstaclesCleared": [
"E"
]
}
]
}Clears obstacles: B Collects items: 3 |
From: 9
G-Mode Morph, Left of Morph Tunnel (Off-Camera)
To: 2
Top Right Door
Exit G-mode while on the item pedestal, while off-camera, then return to the right through the Dessgeegas that can't damage Samus off-screen. It is possible to use a Power Bomb and quickly exiting G-mode to have the bomb block broken on exit, but this will also partially break the Power Bomb blocks and could make exit traversal less straightforward. Requires: "h_heatedGMode"
"Morph"
{
"or": [
{
"and": [
"h_useMorphBombs",
{
"heatFrames": 1000
}
]
},
{
"and": [
{
"heatFrames": 850
},
{
"ammo": {
"type": "PowerBomb",
"count": 3
}
}
]
},
{
"and": [
{
"haveBlueSuit": {}
},
{
"heatFrames": 850
}
]
}
]
}
{
"or": [
"canOffScreenMovement",
{
"heatFrames": 200
}
]
}
{
"or": [
{
"and": [
"canInsaneJump",
{
"heatFrames": 60
}
]
},
{
"obstaclesCleared": [
"E"
]
},
"h_useSpringBall",
{
"hibashiHits": 1
},
{
"ammo": {
"type": "PowerBomb",
"count": 1
}
}
]
}Collects items: 3 Dev note: FIXME: The Hibashi doesn't need a 4th PB in the power bomb case. |
From: 9
G-Mode Morph, Left of Morph Tunnel (Off-Camera)
To: 7
Junction Left of Morph Tunnel
Exit G-mode while on the item pedestal, while off-camera, then return to the right through the Dessgeegas that can't damage Samus off-screen. It is possible to use a Power Bomb and quickly exiting G-mode to have the bomb block broken on exit, but this will also partially break the Power Bomb blocks and could make exit traversal less straightforward. Requires: "h_heatedGMode"
"Morph"
{
"or": [
{
"and": [
"h_useMorphBombs",
{
"heatFrames": 800
}
]
},
{
"and": [
{
"heatFrames": 700
},
{
"ammo": {
"type": "PowerBomb",
"count": 2
}
}
]
},
{
"and": [
{
"heatFrames": 700
},
{
"haveBlueSuit": {}
}
]
}
]
}
{
"or": [
"canOffScreenMovement",
{
"heatFrames": 200
}
]
}Collects items: 3 |
|
Entrance condition: {
"comeInWithGrappleTeleport": {
"blockPositions": [
[
3,
12
],
[
3,
13
]
]
}
}Requires: {
"or": [
"canGrappleTeleportWallEscape",
{
"doorUnlockedAtNode": 1
}
]
}
"canOffScreenMovement"Unlocks doors: {"types":["ammo"],"requires":[]} |
|
Use the camera scroll blocks just right of the bomb blocks, in order to overload PLMs and go through them. Dodge the enemies while getting to the door. Entrance condition: {
"comeInWithGMode": {
"mode": "any",
"morphed": true
}
}Requires: "canOffScreenMovement" |
From: 2
Middle Left Door
To: 2
Middle Left Door
Crystal Flash, enter X-Mode on the spikes and shinecharge. Use the spikes to pause abuse and interrupt shinespark. Entrance condition: {
"comeInWithRMode": {}
}Requires: "f_DefeatedPhantoon"
"canBeVeryLucky"
"h_CrystalFlashForReserveEnergy"
"h_usePowerBomb"
"canOffScreenMovement"
"canXMode"
{
"spikeHits": 1
}
"h_XModeSpikeHit"
"h_shinechargeMaxRunway"
{
"autoReserveTrigger": {}
}
{
"spikeHits": 2
}
"canRModePauseAbuseSparkInterrupt"Dev note: canBeVeryLucky added for difficulty placement. |
From: 2
Middle Left Door
To: 6
Bowling Chozo Statue
Crystal Flash and use another Power Bomb, then enter X-Mode on the spikes. Arm pump towards the statue and shinecharge once Samus appears to move into the border between the second and third spike Exit X-Mode, then jump back toward the spikes to pause abuse and interrupt shinespark, using a damage boost back toward the statue to get off of them. Entrance condition: {
"comeInWithRMode": {}
}Requires: "f_DefeatedPhantoon"
"canBeVeryLucky"
"h_CrystalFlashForReserveEnergy"
"h_usePowerBomb"
"canOffScreenMovement"
"canXMode"
"h_XModeSpikeHit"
"h_shinechargeMaxRunway"
{
"autoReserveTrigger": {}
}
"canHorizontalDamageBoost"
"canRModePauseAbuseSparkInterrupt"Dev note: canBeVeryLucky added for difficulty placement. |
|
Climb up about half a screen. If Phantoon is dead, the last part of the climb should be done carefully to avoid triggering collision with the spikes: Do not press forward or turn-around except while X-Ray is active. For each X-ray stand-up, release the turn-around input quickly to make sure that it is not still held after X-Ray deactivates; alternatively, hold both angle up and angle down to prevent Samus from touching the spikes (though this no longer gives protection if climbing so high that the bottom of Samus' hitbox reaches the spikes). Once Samus is high enough, unequip X-Ray, jump up (from either standing or crouch) to clip past the spikes, and land, taking a single spike hit. Then use the i-frames from the spike hit to run and jump to the left to make it to the door. Samus is high enough after the top of her arm cannon first becomes visible at the bottom of the screen; or up to 3 additional climbs can be performed after that point. In case of an accidental spike collision, it is possible to recover: Unless Samus climbed higher than needed, she will still be stuck in the wall, will take a single spike hit, and be able to continue climbing. With Grapple it is possible to swing on the Grapple blocks, avoiding all spike damage. Spike damage can also be avoided with Space Jump, by doing a stationary turn-around spin jump, which is very precise. With a blue suit, Samus will instantly lose i-frames, making the spikes very dangerous. Entrance condition: {
"comeInWithDoorStuckSetup": {}
}Requires: {
"notable": "X-Ray Climb"
}
"canXRayClimb"
{
"or": [
{
"and": [
{
"spikeHits": 3
},
{
"resourceCapacity": [
{
"type": "RegularEnergy",
"count": 199
}
]
}
]
},
{
"and": [
{
"not": "f_DefeatedPhantoon"
},
"canRiskPermanentLossOfAccess"
]
},
{
"and": [
"canOffScreenMovement",
{
"or": [
{
"and": [
"canDash",
{
"spikeHits": 1
},
"canUseIFrames"
]
},
{
"and": [
"canBlueSuitSpikeJump",
{
"spikeHits": 2
}
]
},
{
"and": [
"canBlueSuitSpikeJump",
"canWallJump",
"canBeVeryPatient",
{
"spikeHits": 1
}
]
},
"Grapple",
{
"and": [
"SpaceJump",
"canInsaneJump",
"canBeVeryPatient"
]
}
]
}
]
}
]
}Exit condition: {
"leaveNormally": {}
}Unlocks doors: {"types":["ammo"],"requires":[]}Dev note: FIXME: The canBeVeryPatient is for difficulty placement, as the damageless Space Jump version would likely require many attempts. The resourceCapacity requirement is to ensure that reserve energy management will not be needed for the lower-difficulty version of the strat; this could be refined since suits can affect spike damage, but we don't yet have a good way to represent that cleanly, given that randomizers are likely to modify suit damage protection. The leaveNormally is because the camera will be broken and we don't want to require unreasonable things without being able to reset it. |
|
The shot blocks must be broken using Bombs or Power Bombs because Beams will instantly despawn. Use X-Ray or a Crystal Flash to stand up, followed by a Partial Floor clip to jump through the Crumble blocks. Requires: {
"obstaclesCleared": [
"A",
"B"
]
}
"h_bombThings"
"canOffScreenMovement"
{
"or": [
{
"and": [
"canXRayStandUp",
"canPartialFloorClip",
"h_additionalBomb"
]
},
{
"and": [
{
"or": [
{
"and": [
{
"canShineCharge": {
"usedTiles": 35,
"openEnd": 1
}
},
"h_ShinesparksCostEnergy",
{
"shinespark": {
"frames": 0,
"excessFrames": 0
}
}
]
},
"f_DefeatedPhantoon"
]
},
"h_CrystalFlash"
]
}
]
}Dev note: FIXME: This can be done with a blue suit as well, but it still requires one Power Bomb, and falling in the spikes is extra deadly. |
From: 5
Top Right Item
To: 1
Top Left Door
Fall through the Crumble blocks in order to damage down using either the spikes or repeated Shinesparks. Touching the Chozo statue will lock the camera in a less useful position. Menu to Grappling Beam before the crystal flash ends and mash shoot while holding down. Requires: {
"obstaclesCleared": [
"B"
]
}
"h_ShinesparksCostEnergy"
"h_jumpIntoCrystalFlashClip"
"Grapple"
"canOffScreenMovement"
{
"canShineCharge": {
"usedTiles": 25,
"openEnd": 1
}
}
{
"shinespark": {
"frames": 0,
"excessFrames": 0
}
}Exit condition: {
"leaveNormally": {}
}Unlocks doors: {"types":["ammo"],"requires":[]}Dev note: FIXME: If power is on, spikes or worker robots can damage Samus, but multiples of 60 may not put Samus into Crystal Flash range, and visiting the robots will lock the camera making the jump-into-CF much harder. |
|
Requires: {
"obstaclesCleared": [
"A"
]
}
{
"or": [
{
"obstaclesNotCleared": [
"B"
]
},
"canOffScreenMovement"
]
} |
|
Requires: "h_usePowerBomb"
{
"or": [
{
"obstaclesNotCleared": [
"B"
]
},
"canOffScreenMovement"
]
}Clears obstacles: A |
|
After teleporting, Samus should be standing inside the wall. Retract Grapple by pressing up, which will pull Samus down and right. Turn around to the left, then hold right, and release Grapple while still holding right. Perform a turn-around spin jump (to the left). Then morph and roll out to the right. Alternatively, X-Ray climb up about 1 tile until Samus can walk out to the right. Entrance condition: {
"comeInWithGrappleTeleport": {
"blockPositions": [
[
3,
12
],
[
3,
13
]
]
}
}Requires: "canGrappleTeleportWallEscape" "canOffScreenMovement" |
|
Use the camera scroll blocks just right of the bomb blocks, in order to overload PLMs and go through them. Exit G-mode and travel to the item and back while off screen. Entrance condition: {
"comeInWithGMode": {
"mode": "any",
"morphed": true
}
}Requires: {
"or": [
{
"and": [
"canOffScreenMovement",
"canTrickyGMode"
]
},
{
"and": [
{
"not": "f_DefeatedPhantoon"
},
"canRiskPermanentLossOfAccess"
]
}
]
}Dev note: This is only useful if the item is Morph. If Samus already has Morph, she can fix the camera, using another strat. |
|
Moonfall twice, on the right or left side of the shot blocks. This will put Samus inside of shotblocks, which can be cleared by shooting. If on the left side, perform two more moonfalls. The camera will be misaligned after the door transition. Entrance condition: {
"comeInWithStoredFallSpeed": {
"fallSpeedInTiles": 2
}
}Requires: "canMoonfall" "canOffScreenMovement" |
From: 3
Bottom Left Door
To: 8
Item
Use the camera scroll blocks just right of the bomb blocks, in order to overload PLMs and go through them. Exit g-mode and travel to the item and back while off screen. Entrance condition: {
"comeInWithGMode": {
"mode": "any",
"morphed": true
}
}Requires: {
"or": [
"h_artificialMorphIBJ",
"h_artificialMorphSpringBallBombJump",
{
"and": [
"h_artificialMorphSpringBall",
"HiJump"
]
}
]
}
{
"or": [
{
"and": [
"canOffScreenMovement",
"canTrickyGMode"
]
},
{
"and": [
{
"not": "f_DefeatedPhantoon"
},
"canRiskPermanentLossOfAccess"
]
}
]
}Dev note: This is only useful if the item is Morph. If Samus already has Morph, she can fix the camera, using another strat. |
|
Use the camera scroll blocks just right of the bomb blocks, in order to overload PLMs and go through them. Exit g-mode and travel to the item and back while off screen. Entrance condition: {
"comeInWithGMode": {
"mode": "any",
"morphed": true
}
}Requires: {
"or": [
{
"and": [
"canOffScreenMovement",
"canTrickyGMode"
]
},
{
"and": [
{
"not": "f_DefeatedPhantoon"
},
"canRiskPermanentLossOfAccess"
]
}
]
}Dev note: This is only useful if the item is Morph. If Samus already has Morph, she can fix the camera, using another strat. |
From: 5
Middle Right Door
To: 8
Item
Use the camera scroll blocks just right of the bomb blocks, in order to overload PLMs and go through them. Exit g-mode and travel to the item and back while off screen. Entrance condition: {
"comeInWithGMode": {
"mode": "any",
"morphed": true
}
}Requires: {
"or": [
{
"and": [
"canOffScreenMovement",
"canTrickyGMode"
]
},
{
"and": [
{
"not": "f_DefeatedPhantoon"
},
"canRiskPermanentLossOfAccess"
]
}
]
}Dev note: This is only useful if the item is Morph. If Samus already has Morph, she can fix the camera, using another strat. |
From: 6
Bottom Right Door
To: 8
Item
Roll through the bomb blocks then exit g-mode and travel to the item and back while off screen. If a Spring Ball bomb jump off of a Power Bomb is the only way up, first overload PLMs using the camera scroll block in front of the bottom bomb block or the top block will remain solid. Entrance condition: {
"comeInWithGMode": {
"mode": "any",
"morphed": true
}
}Requires: "h_blueSuitGMode"
{
"or": [
"h_artificialMorphIBJ",
"h_artificialMorphSpringBallBombJump",
{
"and": [
"h_artificialMorphSpringBall",
"HiJump"
]
}
]
}
{
"or": [
{
"and": [
"canOffScreenMovement",
"canTrickyGMode"
]
},
{
"and": [
{
"not": "f_DefeatedPhantoon"
},
"canRiskPermanentLossOfAccess"
]
}
]
}Clears obstacles: A Dev note: This is only useful if the item is Morph. |
From: 1
Bottom Left Door
To: 3
Top Right Door
The gate will not spawn in indirect G-mode and is freely passable. It is possible to exit G-Mode while under the gate to open it without a Super. A normalized method to do this, is to jump into the right-most pit before the gate, Samus will barely be visible behind the bottom right door. Jump and land on the corner and face left, moonwalk to the right with no beams equipped and stop moving immediately as the 11th shot fired is heard. To fix the camera afterwards, go to the left end of the room and fall back to the bottom of the room. Alternatively, get into the left-most pit, jump slightly to the right, move over one tile, then jump. If the camera is not fixed, move to the right a bit more and jump again. Entrance condition: {
"comeInWithGMode": {
"mode": "indirect",
"morphed": false
}
}Requires: {
"or": [
"canWallJump",
"SpaceJump",
"canLongIBJ",
"canJumpIntoIBJ",
{
"and": [
"HiJump",
"canSpringBallJumpMidAir"
]
}
]
}
"canOffScreenMovement"Clears obstacles: A |
From: 1
Bottom Left Door
To: 3
Top Right Door
The gate will not spawn in indirect G-mode and is freely passable. It is possible to exit G-Mode while under the gate to open it without a Super. A normalized method to do this, is to jump into the right-most pit before the gate, Samus will barely be visible behind the bottom right door. Jump and land on the corner and face left, moonwalk to the right with no beams equipped and stop moving immediately as the 11th shot fired is heard. To fix the camera afterwards, go to the left end of the room and fall back to the bottom of the room. Alternatively, get into the left-most pit, jump slightly to the right, move over one tile, then jump. If the camera is not fixed, move to the right a bit more and jump again. Entrance condition: {
"comeInWithGMode": {
"mode": "indirect",
"morphed": true
}
}Requires: "canOffScreenMovement"
{
"or": [
"h_artificialMorphLongIBJ",
"h_artificialMorphJumpIntoIBJ"
]
}Clears obstacles: A |
|
Entrance condition: {
"comeInWithGMode": {
"mode": "any",
"morphed": true
}
}Requires: "canOffScreenMovement"
{
"or": [
"h_artificialMorphLongIBJ",
"h_artificialMorphJumpIntoIBJ"
]
}Dev note: After exiting G-mode, jump just above the vertical shaft in order to fix the camera. |
From: 2
Bottom Right Door
To: 3
Top Right Door
The gate will not spawn in indirect G-mode and is freely passable. It is possible to exit G-Mode while under the gate to open it without a Super. A normalized method to do this, is to jump into the right-most pit before the gate, Samus will barely be visible behind the bottom right door. Jump and land on the corner and face left, moonwalk to the right with no beams equipped and stop moving immediately as the 11th shot fired is heard. To fix the camera afterwards, go to the left end of the room and fall back to the bottom of the room. Alternatively, get into the left-most pit, jump slightly to the right, move over one tile, then jump. If the camera is not fixed, move to the right a bit more and jump again. Entrance condition: {
"comeInWithGMode": {
"mode": "indirect",
"morphed": false
}
}Requires: {
"or": [
"canWallJump",
"SpaceJump",
"canLongIBJ",
"canJumpIntoIBJ",
{
"and": [
"HiJump",
"canSpringBallJumpMidAir"
]
}
]
}
"canOffScreenMovement"Clears obstacles: A |
From: 2
Bottom Right Door
To: 3
Top Right Door
The gate will not spawn in indirect G-mode and is freely passable. It is possible to exit G-Mode while under the gate to open it without a Super. A normalized method to do this, is to jump into the right-most pit before the gate, Samus will barely be visible behind the bottom right door. Jump and land on the corner and face left, moonwalk to the right with no beams equipped and stop moving immediately as the 11th shot fired is heard. To fix the camera afterwards, go to the left end of the room and fall back to the bottom of the room. Alternatively, get into the left-most pit, jump slightly to the right, move over one tile, then jump. If the camera is not fixed, move to the right a bit more and jump again. Entrance condition: {
"comeInWithGMode": {
"mode": "indirect",
"morphed": true
}
}Requires: "canOffScreenMovement"
{
"or": [
"h_artificialMorphLongIBJ",
"h_artificialMorphJumpIntoIBJ"
]
}Clears obstacles: A |
|
Entrance condition: {
"comeInWithGMode": {
"mode": "any",
"morphed": true
}
}Requires: "canOffScreenMovement"
{
"or": [
"h_artificialMorphLongIBJ",
"h_artificialMorphJumpIntoIBJ"
]
}Dev note: After exiting G-mode, jump just above the vertical shaft in order to fix the camera. |
|
Freeze a crab at a very precise position in order to clip through the center Morph tunnel without a way to see. Use a frozen crab on the opposite wall in order to better time the crab being used for clipping and as a way to climb on top of it. Ice Beam on its own has a high chance of hitting a wall instead of the crab; straight vertical shots can help. Gravity has a 2 pixel clip window while Suitless there is only 1 pixel up higher which requires a precise down grab to get onto the crab. Requires: {
"notable": "Ice Clip"
}
"h_navigateUnderwater"
"canOffScreenMovement"
{
"or": [
{
"and": [
"Gravity",
"h_preciseIceClip"
]
},
{
"and": [
"HiJump",
"h_highPixelIceClip",
"canBeVeryPatient",
{
"or": [
"HiJump",
"Gravity"
]
},
"h_trickyToCarryFlashSuit"
]
}
]
}Dev note: FIXME: It is possible to crab climb with nothing but ice and walljumps. |
|
Entrance condition: {
"comeInWithGMode": {
"mode": "any",
"morphed": false
}
}Requires: "Morph"
"h_navigateUnderwater"
{
"or": [
"canGravityJump",
{
"and": [
"Gravity",
"HiJump",
{
"or": [
"canSpringBallJumpMidAir",
"canWallJump"
]
}
]
},
{
"and": [
"canTrickyUseFrozenEnemies",
"HiJump",
"h_underwaterCrouchJumpDownGrab"
]
},
{
"and": [
{
"ammo": {
"type": "Super",
"count": 1
}
},
"canTrickyUseFrozenEnemies",
"canOffScreenMovement"
]
},
{
"and": [
"canTrickyJump",
"canSpringBallJumpMidAir",
"canTrickyUseFrozenEnemies",
"canOffScreenMovement"
]
}
]
} |
|
Entrance condition: {
"comeInWithGMode": {
"mode": "any",
"morphed": false
}
}Requires: "Morph"
"h_navigateUnderwater"
{
"or": [
"canGravityJump",
{
"and": [
"Gravity",
"HiJump",
{
"or": [
"canSpringBallJumpMidAir",
"canWallJump"
]
}
]
},
{
"and": [
"canTrickyUseFrozenEnemies",
"HiJump",
"h_underwaterCrouchJumpDownGrab"
]
},
{
"and": [
{
"ammo": {
"type": "Super",
"count": 1
}
},
"canTrickyUseFrozenEnemies",
"canOffScreenMovement"
]
},
{
"and": [
"canTrickyJump",
"canSpringBallJumpMidAir",
"canTrickyUseFrozenEnemies",
"canOffScreenMovement"
]
}
]
} |
From: 9
Junction Below Speed Blocks
To: 4
Top Right Door
Using the slow global crab to ascend the top section of the room requires the speed blocks to not be broken. Jump with either Springball or HiJump onto the global crab while it is climbing the section above the Speed locked item. Have Reserves set to manual and return them to auto after taking a deadly crab hit in order to gain two damage boosts. If the Speed blocks are broken, the global crab will not be able to reach this part of the room. If Morph is unavailable, then a down-grab must be done blind: buffer the down input through the reserve refill, then press forward immediately after taking damage. Requires: "canSuitlessMaridia"
{
"obstaclesNotCleared": [
"A"
]
}
{
"obstaclesNotCleared": [
"R-Mode"
]
}
"h_underwaterCrouchJump"
"canInsaneJump"
{
"or": [
"h_underwaterMaxHeightSpringBallJump",
"HiJump"
]
}
{
"or": [
"h_midAirMorphReserveDoubleDamageBoost",
{
"and": [
"canReserveDoubleDamageBoost",
"canOffScreenMovement",
"h_trickyToCarryFlashSuit"
]
}
]
}
{
"autoReserveTrigger": {
"minReserveEnergy": 85
}
}
{
"enemyDamage": {
"enemy": "Sciser",
"type": "contact",
"hits": 1
}
} |
From: 2
Bottom Left Door
To: 7
Lower Hills Junction
Jump with either Springball or HiJump onto a Sciser while it is climbing the right-most mountain. Have Reserves set to manual and return them to auto after taking a deadly crab hit in order to gain two damage boosts. This gains barely enough height to reach the ledge above. If Morph is unavailable, then a down-grab must be done blind: buffer the down input through the reserve refill, then press forward immediately after taking damage. Requires: "h_navigateUnderwater"
"h_underwaterCrouchJump"
"canInsaneJump"
{
"or": [
"h_underwaterMaxHeightSpringBallJump",
"HiJump"
]
}
{
"or": [
"h_midAirMorphReserveDoubleDamageBoost",
{
"and": [
"canReserveDoubleDamageBoost",
"canOffScreenMovement",
"h_trickyToCarryFlashSuit"
]
}
]
}
{
"autoReserveTrigger": {
"minReserveEnergy": 85
}
}
{
"enemyDamage": {
"enemy": "Sciser",
"type": "contact",
"hits": 1
}
} |
From: 6
Left Morph Passage Doorway
To: 6
Left Morph Passage Doorway
Requires: {
"or": [
"Morph",
"canOffScreenMovement"
]
}
{
"enemyDamage": {
"enemy": "Sciser",
"type": "contact",
"hits": 1
}
}Dev note: The tunnel does not need to be expanded for Samus to get into the morph tunnel without getting stuck, regardless of if she has Morph or is artificial morphing. Timing the artificial morph turnaround without being able to see Samus or the crab requires canOffScreenMovement. FIXME: This should not be needed if the tunnel is expanded and Samus is leaving without being morphed, but there currently isnt a way to represent that. |
From: 1
Left Door
To: 2
Left Sand Pit
Reach the sand while luring a Puyo just off camera to where moonwalking on the partially submerged platform can lure the Puyo. Crouch in the sand and press forward when near the transition to stand up and touch the transition on the first frame of standing. Requires: "h_navigateUnderwater"
{
"noBlueSuit": {}
}
"canPlayInSand"
"canMoonwalk"
"canCameraManip"
"canDownwardGModeSetup"
"canOffScreenMovement"
"canTrickyGMode"Exit condition: {
"leaveWithGModeSetup": {}
} |
From: 1
Left Door
To: 3
Right Sand Pit
Reach the sand while luring a Puyo just off camera to where moonwalking on the partially submerged platform can lure the Puyo. Quickly move to the right section before the Puyo hits Samus. Crouch in the sand and press forward when near the transition to stand up and touch the transition on the first frame of standing. Requires: "h_navigateUnderwater"
{
"noBlueSuit": {}
}
"canPlayInSand"
"canMoonwalk"
"canCameraManip"
"canDownwardGModeSetup"
"canOffScreenMovement"
"canTrickyGMode"Exit condition: {
"leaveWithGModeSetup": {}
} |
From: 1
Left Door
To: 1
Left Door
Farm the door Mochtroid and the one in the water. Jump over the sand pit and freeze the third Mochtroid. Climb using this Mochtroid up to the spike, then bounce off the Mochtroid and enter X-Mode. Arm-pump to move Samus off the spike tile (watch the Mochtroid). Shinecharge, release X-Ray, and start moving left as Samus falls back toward the sand. While falling, disable Ice Beam to force the Mochtroid to unfreeze and get grabbed by it while jumping out of the sand. Shinespark windup just before the Mochtroid drain hits to interrurpt. If Samus must land back in the sand, be sure to be moving horizontally to land on top of the sand rather than sinking into it. Entrance condition: {
"comeInWithRMode": {}
}Requires: "canTrickyUseFrozenEnemies"
{
"or": [
{
"enemyKill": {
"enemies": [
[
"Mochtroid",
"Mochtroid"
]
],
"excludedWeapons": [
"PowerBeam",
"Ice",
"Bombs"
]
}
},
"canInsaneJump"
]
}
"canPlayInSand"
{
"or": [
{
"and": [
"h_CrystalFlashForReserveEnergy",
"h_usePowerBomb",
"canOffScreenMovement"
]
},
{
"and": [
"h_RModeCanRefillReserves",
{
"partialRefill": {
"type": "ReserveEnergy",
"limit": 40
}
}
]
}
]
}
"canBeVeryPatient"
"canXMode"
"h_XModeSpikeHit"
"h_shinechargeMaxRunway"
{
"disableEquipment": "Ice"
}
{
"autoReserveTrigger": {
"maxReserveEnergy": 63
}
}
"canRModeSparkInterrupt"
{
"or": [
"Grapple",
{
"and": [
"Gravity",
"canWallJump"
]
}
]
} |
From: 2
Bottom Right Door
To: 2
Bottom Right Door
Farm the door Mochtroid and the one in the water. Lure one of the next pair of Mochtroids toward the spike and freeze it. Climb using this Mochtroid up to the spike, then bounce off the Mochtroid and enter X-Mode. Arm-pump to move Samus off the spike tile (watch the Mochtroid). Shinecharge, release X-Ray, and start moving toward the Mochtroid as Samus falls back toward the sand. While falling, disable Ice Beam to force the Mochtroid to unfreeze and get grabbed by it while jumping out of the sand. Shinespark windup just before the Mochtroid drain hits to interrurpt. If Samus must land back in the sand, be sure to be moving horizontally to land on top of the sand rather than sinking into it. Entrance condition: {
"comeInWithRMode": {}
}Requires: "canTrickyUseFrozenEnemies"
"canPlayInSand"
{
"or": [
{
"and": [
"h_CrystalFlashForReserveEnergy",
"h_usePowerBomb",
"canOffScreenMovement"
]
},
{
"and": [
"h_RModeCanRefillReserves",
{
"partialRefill": {
"type": "ReserveEnergy",
"limit": 40
}
}
]
}
]
}
"canBeVeryPatient"
"canXMode"
"h_XModeSpikeHit"
"h_shinechargeMaxRunway"
{
"disableEquipment": "Ice"
}
{
"autoReserveTrigger": {
"maxReserveEnergy": 63
}
}
"canRModeSparkInterrupt"
{
"or": [
"Grapple",
{
"and": [
"Gravity",
"canWallJump"
]
}
]
} |
From: 3
Top Right Door
To: 3
Top Right Door
Farm the door Mochtroid and the one in the water. Lure one of the next pair of Mochtroids toward the spike and freeze it. Climb using this Mochtroid up to the spike, then bounce off the Mochtroid and enter X-Mode. Arm-pump to move Samus off the spike tile (watch the Mochtroid). Shinecharge, release X-Ray, and start moving toward the Mochtroid as Samus falls back toward the sand. While falling, disable Ice Beam to force the Mochtroid to unfreeze and get grabbed by it while jumping out of the sand. Shinespark windup just before the Mochtroid drain hits to interrurpt. If Samus must land back in the sand, be sure to be moving horizontally to land on top of the sand rather than sinking into it. Entrance condition: {
"comeInWithRMode": {}
}Requires: "canTrickyUseFrozenEnemies"
"canPlayInSand"
{
"or": [
{
"and": [
"h_CrystalFlashForReserveEnergy",
"h_usePowerBomb",
"canOffScreenMovement"
]
},
{
"and": [
"h_RModeCanRefillReserves",
{
"partialRefill": {
"type": "ReserveEnergy",
"limit": 40
}
}
]
}
]
}
"canBeVeryPatient"
"canXMode"
"h_XModeSpikeHit"
"h_shinechargeMaxRunway"
{
"disableEquipment": "Ice"
}
{
"autoReserveTrigger": {
"maxReserveEnergy": 63
}
}
"canRModeSparkInterrupt"
{
"or": [
"Grapple",
{
"and": [
"Gravity",
"canWallJump"
]
}
]
} |
From: 1
Left Door
To: 1
Left Door
Crystal Flash after entering. Shinecharge on the ground and jump to the top left broken turret and gain a flash suit. Continue to damage down ready to interrupt. Wall/Space jump into the corner above the turret. Pause and set reserves to manual. At this point, visibility will be completely obscured. Hold left, and re-pause as soon as able. When the energy counter hits 0, immediately press Right+Jump to damage boost, then release jump early to begin shinespark windup. Set reserves to auto then pause and unpause again - visibility will return to normal. If Draygon is alive, the Shinespark windup may be interrupt by the goop phase grab instead of through triggering Reserves. Entrance condition: {
"comeInWithRMode": {}
}Requires: {
"or": [
{
"and": [
{
"or": [
"f_DefeatedDraygon",
{
"obstaclesCleared": [
"f_DefeatedDraygon"
]
}
]
},
{
"or": [
"canWallJump",
"SpaceJump",
"h_breakOneDraygonTurret"
]
}
]
},
"h_breakThreeDraygonTurrets"
]
}
"Gravity"
"h_CrystalFlashForReserveEnergy"
{
"canShineCharge": {
"usedTiles": 22,
"openEnd": 0
}
}
"canOffScreenMovement"
"canHorizontalDamageBoost"
{
"autoReserveTrigger": {}
}
"canRModePauseAbuseSparkInterrupt"Clears obstacles: door_1 |
From: 2
Right Door
To: 1
Left Door
Crystal Flash after entering. Damage down until ready to interrupt. Shinecharge, and start jumping toward the turret. As you jump, pause and set reserves to manual. At this point, visibility will be completely obscured. Re pause as soon as possible while jumping up into the turret. When the energy counter changes to 00, immediately press Right+Jump to damage boost, then release jump early to begin shinespark windup. Set reserves to auto, then as soon as possible, pause and unpause again - visibility will return to normal. Using the turret to gain a flash suit (spikesuit) can help reduce the amount of blind execution, or when using the top turret. If Draygon is alive, the Shinespark windup may be interrupt by the goop phase grab instead of through triggering Reserves. Entrance condition: {
"comeInWithRMode": {}
}Requires: {
"or": [
{
"and": [
{
"or": [
"f_DefeatedDraygon",
{
"obstaclesCleared": [
"f_DefeatedDraygon"
]
}
]
},
{
"or": [
"canWallJump",
"SpaceJump",
"h_breakOneDraygonTurret"
]
}
]
},
"h_breakThreeDraygonTurrets"
]
}
"Gravity"
"h_CrystalFlashForReserveEnergy"
{
"canShineCharge": {
"usedTiles": 22,
"openEnd": 0
}
}
"canOffScreenMovement"
"canHorizontalDamageBoost"
{
"autoReserveTrigger": {}
}
"canRModePauseAbuseSparkInterrupt"Clears obstacles: door_2 |
From: 2
Right Door
To: 2
Right Door
Crystal Flash at the door, and enter X-Mode on the spikes and shinecharge. Pause abuse on the spikes to interrupt. Let the damage push Samus into the wall to avoid multiple spike hits after gaining blue suit. Requires: {
"obstaclesCleared": [
"R-Mode"
]
}
"Gravity"
"h_CrystalFlashForReserveEnergy"
"h_usePowerBomb"
"canOffScreenMovement"
"canBeVeryPatient"
"canXMode"
"h_XModeSpikeHit"
"h_shinechargeMaxRunway"
{
"autoReserveTrigger": {}
}
"canRModePauseAbuseSparkInterrupt"
{
"spikeHits": 1
}Resets obstacles: R-Mode |
From: 4
Top Right Ledge Junction
To: 4
Top Right Ledge Junction
Farm the Cacatac, jump to the left dry platform, and jump into the spike pit to enter X-Mode and shinecharge. Use the other Cacatac to interrupt. Requires: {
"obstaclesCleared": [
"R-Mode"
]
}
{
"or": [
{
"and": [
"h_CrystalFlashForReserveEnergy",
"h_usePowerBomb",
"canOffScreenMovement"
]
},
{
"and": [
"h_RModeCanRefillReserves",
{
"or": [
{
"resourceMissingAtMost": [
{
"type": "Super",
"count": 0
}
]
},
{
"and": [
{
"resourceMissingAtMost": [
{
"type": "Super",
"count": 4
}
]
},
"Gravity"
]
}
]
},
{
"partialRefill": {
"type": "ReserveEnergy",
"limit": 40
}
}
]
}
]
}
"canBeVeryPatient"
"canXMode"
"h_XModeSpikeHit"
"h_shinechargeMaxRunway"
{
"autoReserveTrigger": {}
}
"canRModeSparkInterrupt"Resets obstacles: R-Mode |
From: 5
G-Mode Morph, In Morph Tunnel
To: 3
Bottom Right Door
Roll through the camera scroll blocks in the morph tunnel to overload PLMs then the speed blocks can be walked through. Note that the Oums are still active and dangerous off screen. The right shot block wall can be broken with a wide beam, otherwise it is important to crouch to shoot the bottom block. Requires: "canGMode"
"canOffScreenMovement"
{
"or": [
"Gravity",
"HiJump",
"canSunkenTileWideWallClimb"
]
} |
From: 5
G-Mode Morph, In Morph Tunnel
To: 3
Bottom Right Door
Roll through the camera scroll blocks in the morph tunnel to overload PLMs then the speed blocks can be walked through. Perform a blind foosball - use the screen movement to be able to tell when Samus is in the morph tunnel and when she makes the jump. Note that the Oums are still active and dangerous off screen. The right shot block wall can be broken with a wide beam, otherwise it is important to crouch to shoot the bottom block. Requires: "canGMode" "canOffScreenMovement" "canInsaneJump" "h_artificialMorphSpringBall" |
From: 5
G-Mode Morph, In Morph Tunnel
To: 4
Top Right Door
Requires: "canGMode" "Gravity" "h_artificialMorphLongIBJ" "canOffScreenMovement" |
|
Climb up 2.5 screens. Stop when about half of Samus (or less) is visible at the top of the screen. Turn-around a couple times to move to the right, to get close to falling out. Then perform a buffered spin-jump while turning around to the right, to make it onto the platform. The Choot will be safely off-camera and will not hit Samus while passing through it. Entrance condition: {
"comeInWithGMode": {
"mode": "direct",
"morphed": false
}
}Requires: "canComplexGMode" "canGModeXRayClimb" "canLongXRayClimb" "canBePatient" "canOffScreenMovement" |
From: 1
Bottom Left Door
To: 2
Top Right Door
Climb up 2.5 screens. Stop when about half of Samus (or less) is visible at the top of the screen. Turn-around a couple times to move to the right, to get close to falling out. Then perform a buffered spin-jump while turning around to the right, to make it onto the platform. The Choot will be safely off-camera and will not hit Samus while passing through it. Entrance condition: {
"comeInShinecharged": {}
}Requires: {
"shineChargeFrames": 1
}
"canShinesparkDeepStuck"
{
"shinespark": {
"frames": 1,
"excessFrames": 1
}
}
"canLongXRayClimb"
"canBePatient"
"canOffScreenMovement" |
From: 1
Left Door
To: 2
Right Door
Use one bomb to get to the off-screen region. After going a full screen to the right, when Samus is partially visible in the left wall, bomb to the middle platform on the right. Bomb again to the right, note that these small platforms are one tile left of the ones that are on camera. Exit G-Mode and get to the right door. Entrance condition: {
"comeInWithGMode": {
"mode": "any",
"morphed": true
}
}Requires: "canOffScreenMovement" "h_artificialMorphBombHorizontally" "h_artificialMorphBombThings" "h_additionalBomb" |
|
With Bombs alone, this is much more difficult. After going off screen, roll to the left until Samus is back on screen. Once Samus is obstructed by the first block, boost horizontally onto where the right edge of where the other on-screen platform is. Then peform an IBJ which is completely blind at the top. Boost onto the left or right platform then exit G-mode and fix the camera if necessary. Entrance condition: {
"comeInWithGMode": {
"mode": "any",
"morphed": true
}
}Requires: "canOffScreenMovement"
"h_artificialMorphIBJ"
{
"or": [
"h_artificialMorphSpringBall",
"h_artificialMorphPowerBomb",
"canInsaneJump",
{
"enemyDamage": {
"enemy": "Menu",
"type": "contact",
"hits": 1
}
}
]
}
{
"or": [
"h_artificialMorphSpringBall",
"Gravity",
"canTrickyGMode"
]
}Dev note: This strat is only useful for avoiding a wall jump. A simpler variant exits G-Mode after the morph tunnel. |
|
Immediately after teleporting, press down to retract Grapple to avoid getting stuck inside the wall (in case the top door is blue, causing it to open with Grapple on entry). Entrance condition: {
"comeInWithGrappleTeleport": {
"blockPositions": [
[
7,
2
]
]
}
}Requires: "canOffScreenMovement" |
|
This climb is from the left side of the left room, the room with the breakable grapple block. Climb up 3 screens. The camera will not move up to Samus while on the left wall. Carefully jump over the pit without falling in. It helps to step down and use the two-tile long runway. Entrance condition: {
"comeInWithDoorStuckSetup": {}
}Requires: "canLongXRayClimb"
"canBePatient"
"canOffScreenMovement"
{
"or": [
"canTrickyJump",
"canWallJump",
"SpaceJump"
]
} |
