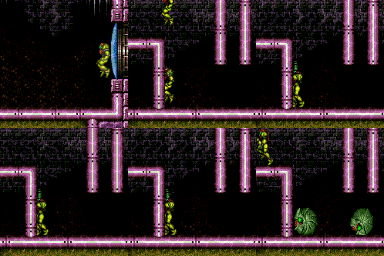
canSpeedball (Very Hard)
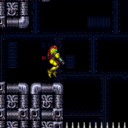
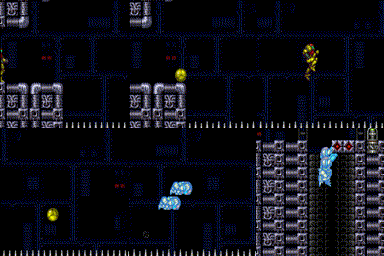
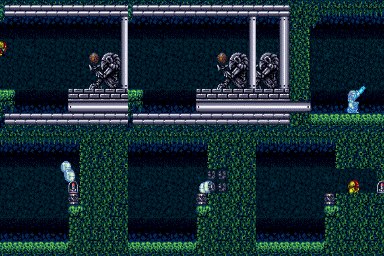
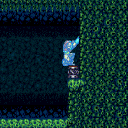
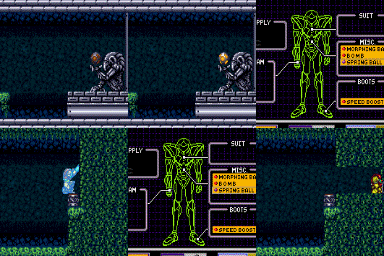
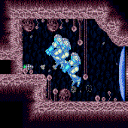
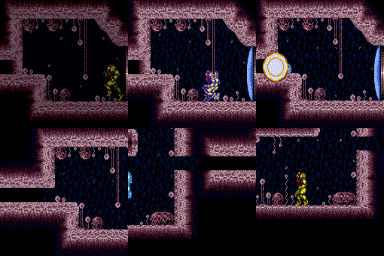
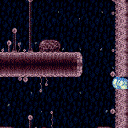
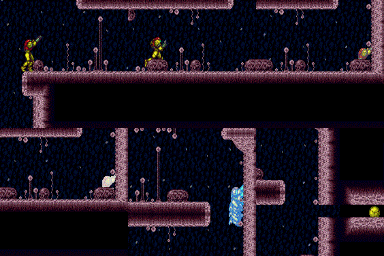
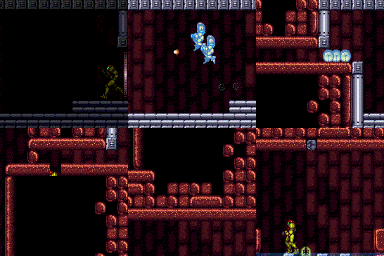
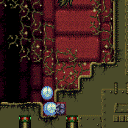
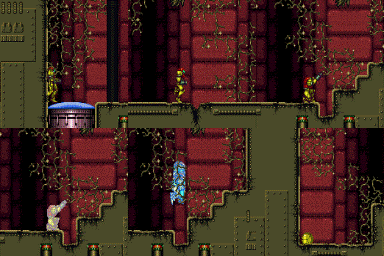
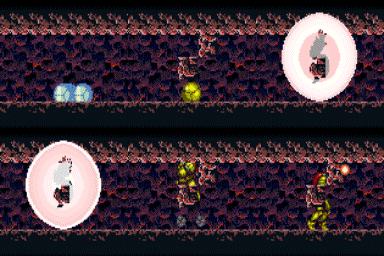
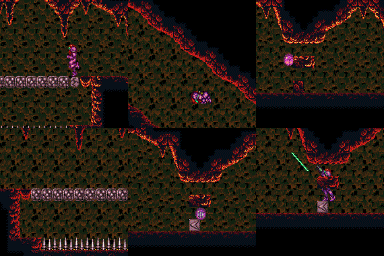
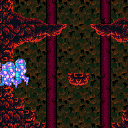
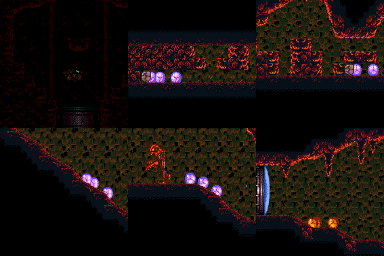
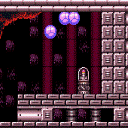
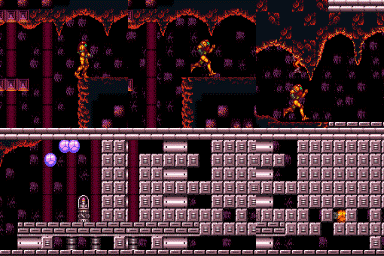
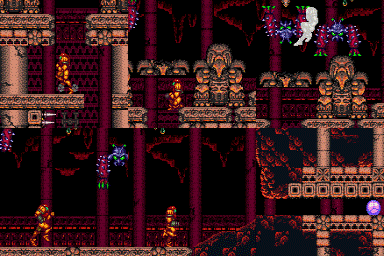
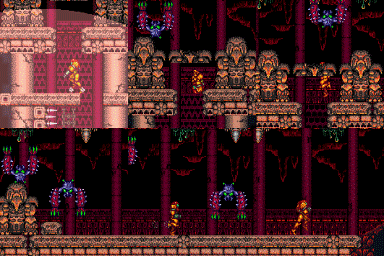
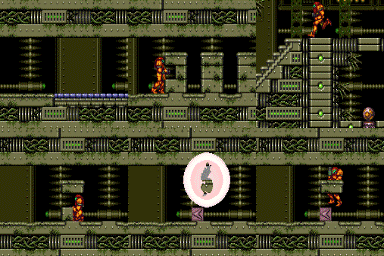
Maintain the SpeedBooster effect while rolling as a Morph Ball in order to destroy bomb blocks in Morph tunnels. A Speedball involves performing a Mockball at faster speeds and additionally it will help to be able to perform short jumps to reduce the amount of space needed. A Speedball can also be used with SpringBall as a way to jump with temporary blue state while maintaining Samus' momentum.
Dependencies: canMockball, canCarefulJump, canMidAirMorph, canTrivialMidAirMorph
Strats ()
|
Notable: true Enter the room with a very specific run speed to jump from the door, and land a speedball perfectly in the tunnel to break the Bomb block. Entrance condition: {
"comeInShinecharging": {
"length": 0,
"openEnd": 0
}
}
Requires: "canInsaneJump" "canSpeedball" "canTrickyDashJump" "canSlowShortCharge" |
|
From: 4
Middle Right Door
To: 6
Main Junction
Notable: true Enter the room with a very specific run speed to jump from the door, squeeze by the ceiling, and land a speedball perfectly in the tunnel to break the Bomb block. Entrance condition: {
"comeInShinecharging": {
"length": 1,
"openEnd": 0
}
}
Requires: "canSpeedball" "canTrickyDashJump" "canSlowShortCharge" "canInsaneJump" |
|
From: 1
Top Left Door
To: 6
Top Junction with Temporary Blue (Right of Morph Tunnel)
Notable: true Using only the short runway and spike pit, use one or more SpeedKeeps to Speedball towards the Super Missile item location. This requires either a very short shortcharge, or a second SpeedKeep in the spikes which also resets Samus' run speed with a crouch jump before spike I-Frames expire. Requires: "canSpeedKeep"
"canSlowShortCharge"
{
"doorUnlockedAtNode": 1
}
{
"or": [
{
"and": [
"canChainTemporaryBlue",
{
"canShineCharge": {
"usedTiles": 13,
"openEnd": 1
}
},
{
"spikeHits": 1
}
]
},
{
"and": [
{
"canShineCharge": {
"usedTiles": 14,
"openEnd": 1
}
},
{
"spikeHits": 2
}
]
},
{
"and": [
"canChainTemporaryBlue",
{
"spikeHits": 3
}
]
}
]
}
"canSpeedball"
|
|
From: 1
Top Left Door
To: 6
Top Junction with Temporary Blue (Right of Morph Tunnel)
Entrance condition: {
"comeInShinecharging": {
"length": 4,
"openEnd": 1
}
}
Requires: "canSpeedball" "canBlueSpaceJump" |
|
From: 1
Top Left Door
To: 6
Top Junction with Temporary Blue (Right of Morph Tunnel)
Bounce into the spikes and use a SpeedKeep to run on spikes to setup for a speedball towards the item. A DamageBoost SpeedKeep could be used instead of a Spike SpeedKeep with enough runspeed. Entrance condition: {
"comeInRunning": {
"speedBooster": true,
"minTiles": 4
}
}
Requires: "canSpeedKeep"
"canCarefulJump"
{
"canShineCharge": {
"usedTiles": 21,
"openEnd": 2
}
}
{
"spikeHits": 1
}
{
"or": [
{
"spikeHits": 1
},
"canChainTemporaryBlue"
]
}
"canSpeedball"
|
|
From: 1
Top Left Door
To: 6
Top Junction with Temporary Blue (Right of Morph Tunnel)
Bounce into the spikes and use a SpeedKeep to run on spikes to setup for a speedball towards the item. Bouncing on the platform near the door saves a spike hit. Or a DamageBoost SpeedKeep could be used instead of a Spike SpeedKeep with enough runspeed. Entrance condition: {
"comeInRunning": {
"speedBooster": true,
"minTiles": 12
}
}
Requires: "canSpeedKeep"
"canCarefulJump"
"canSlowShortCharge"
"can4HighMidAirMorph"
{
"spikeHits": 1
}
"canSpeedball"
|
|
From: 1
Top Left Door
To: 6
Top Junction with Temporary Blue (Right of Morph Tunnel)
Bounce into the spikes and use a SpeedKeep to run on spikes to setup for a speedball towards the item. Bouncing on the platform near the door saves a spike hit. Entrance condition: {
"comeInWithTemporaryBlue": {}
}
Requires: "canChainTemporaryBlue"
"can4HighMidAirMorph"
"canSpeedKeep"
{
"spikeHits": 1
}
"canSpeedball"
|
|
From: 1
Top Left Door
To: 6
Top Junction with Temporary Blue (Right of Morph Tunnel)
Use Springball on the spikes to cross the room with a Speedball. It helps to not be at full run speed when bouncing through the spike pit, but is still possible with very tight jumps. Then bounce into the Morph tunnel and use Springball to bounce all of the way through. Unmorphing before the Morph tunnel to better control the bounce can help. Entrance condition: {
"comeInShinecharging": {
"length": 3,
"openEnd": 1
}
}
Requires: "canSpeedball"
"canTemporaryBlue"
"canCarefulJump"
"canSpringBallBounce"
{
"or": [
"canTrickyDashJump",
"canChainTemporaryBlue"
]
}
{
"spikeHits": 1
}
|
|
Entrance condition: {
"comeInSpeedballing": {
"runway": {
"length": 3,
"openEnd": 0
}
}
}
|
|
Bring temporary blue from the right side door all the way to the missile location using Springball, SpaceJump, or Morph-UnMorphs. Entrance condition: {
"comeInShinecharging": {
"length": 1,
"openEnd": 1
}
}
Requires: "canTemporaryBlue"
"canInsaneJump"
{
"or": [
"canLongChainTemporaryBlue",
{
"and": [
"canSpeedball",
"canSpringBallBounce",
"canSlowShortCharge"
]
},
{
"and": [
"canBlueSpaceJump",
"canMockball",
"canSlowShortCharge"
]
}
]
}
|
|
From: 2
Right Door
To: 4
Middle Junction (Left of Morph Tunnel)
Entrance condition: {
"comeInShinecharging": {
"length": 1,
"openEnd": 0
}
}
Requires: "canSpeedball"
"canCarefulJump"
"canSlowShortCharge"
{
"acidFrames": 60
}
|
|
From: 1
Left Door
To: 2
Right Door
Entrance condition: {
"comeInGettingBlueSpeed": {
"length": 6,
"openEnd": 1,
"steepUpTiles": 1,
"steepDownTiles": 1,
"minExtraRunSpeed": "$1.2",
"maxExtraRunSpeed": "$2.8"
}
}
Requires: "canSlowShortCharge" "canSpeedball" "canSpringBallBounce" "canTrickyJump" Clears obstacles: A |
|
From: 2
Right Door
To: 1
Left Door
Entrance condition: {
"comeInGettingBlueSpeed": {
"length": 6,
"openEnd": 1,
"steepUpTiles": 1,
"steepDownTiles": 1,
"minExtraRunSpeed": "$2.2",
"maxExtraRunSpeed": "$2.8"
}
}
Requires: "canSpeedball" "canSpringBallBounce" "canTrickyJump" Clears obstacles: A |
|
From: 4
Lower Section - Top Right Door
To: 4
Lower Section - Top Right Door
Requires: {
"canShineCharge": {
"usedTiles": 20,
"openEnd": 1,
"steepDownTiles": 4,
"steepUpTiles": 1
}
}
"canSpeedball"
"canSpringBallBounce"
"canTrickyJump"
"HiJump"
"canSpringBallJumpMidAir"
"canChainTemporaryBlue"
Exit condition: {
"leaveWithTemporaryBlue": {}
}
|
|
From: 5
Lower Section - Bottom Right Door
To: 5
Lower Section - Bottom Right Door
Requires: {
"canShineCharge": {
"usedTiles": 20,
"openEnd": 1,
"steepDownTiles": 4,
"steepUpTiles": 1
}
}
"canSpeedball"
"canSpringBallBounce"
"canTrickyJump"
"canChainTemporaryBlue"
Exit condition: {
"leaveWithTemporaryBlue": {}
}
|
|
Entrance condition: {
"comeInGettingBlueSpeed": {
"length": 2,
"openEnd": 0
}
}
Requires: "canSpeedball" Clears obstacles: A |
|
From: 5
Left Item
To: 6
Junction (Left of Morph Tunnel)
It's a short charge into a speedball to break the Bomb Blocks. The Power Bomb Blocks need to be destroyed to have enough running room. Requires: {
"obstaclesCleared": [
"B"
]
}
{
"getBlueSpeed": {
"usedTiles": 21,
"openEnd": 1
}
}
"canSpeedball"
Clears obstacles: A |
|
From: 2
Right Door
To: 1
Left Door
Entrance condition: {
"comeInShinecharging": {
"length": 11,
"openEnd": 0
}
}
Requires: "canSpeedball" Clears obstacles: A |
|
Run on the upper platform to perform the speedball. Requires: "canSlowShortCharge"
{
"canShineCharge": {
"usedTiles": 14,
"openEnd": 1
}
}
"canSpeedball"
Clears obstacles: A |
|
From: 2
Right Door
To: 1
Left Door
Use a frozen Zeela to extend the upper platform to help set up the speedball. Requires: "h_canFrozenEnemyRunway"
"canSlowShortCharge"
{
"canShineCharge": {
"usedTiles": 15,
"openEnd": 1
}
}
"canSpeedball"
Clears obstacles: A |
|
From: 1
Left Door
To: 4
Right Hidden Item
Notable: true Speedball through the morph tunnel and use it to break the bomb blocks in front of the hidden Missile location. This can be done using Spring Ball, or by unmorphing and using temporary blue to bounce through the bomb blocks. Entrance condition: {
"comeInBlueSpinning": {
"unusableTiles": 4
}
}
Requires: "canSpeedball"
"canTrickyJump"
{
"or": [
"canTemporaryBlue",
"h_canUseSpringBall"
]
}
|
|
From: 1
Left Door
To: 4
Right Hidden Item
Notable: true Speedball through the morph tunnel and use it to break the bomb blocks in front of the hidden Missile location. This can be done using Spring Ball, or by unmorphing and using temporary blue to bounce through the bomb blocks. Entrance condition: {
"comeInBlueSpinning": {
"unusableTiles": 0
}
}
Requires: "canSpeedball"
"canTrickyJump"
"canSlowShortCharge"
{
"or": [
"canTemporaryBlue",
"h_canUseSpringBall"
]
}
|
|
From: 1
Left Door
To: 4
Right Hidden Item
Notable: true Gain temporary blue at the end of the runway. Then spring ball bounce through the tunnel. Press pause while exiting the tunnel. If Samus bounced far enough right, disable spring ball (a 'spring fling') to make it directly onto the item pedestal, chaining temporary blue from there. Otherwise, unpause without disabling spring ball, and chain temporary blue by landing on the ground. Entrance condition: {
"comeInShinecharging": {
"length": 3,
"openEnd": 0
}
}
Requires: "canSpeedball" "canTrickyJump" "canChainTemporaryBlue" "canSpringBallBounce" "canSpringFling" |
|
Entrance condition: {
"comeInSpeedballing": {
"runway": {
"length": 6,
"openEnd": 0
}
}
}
|
|
From: 2
Right Side - Top Door
To: 1
Left Side - Top Door
Jump over the bug pipe while blue and roll into the morph tunnel to break the bomb block. Shortcharge too much and the jump will not be able to reach the morph tunnel. Entrance condition: {
"comeInShinecharging": {
"length": 16,
"openEnd": 1
}
}
Requires: "canSpeedball" Clears obstacles: A |
|
From: 7
Right Side - Bottom Middle Door (Behind the Super Block)
To: 13
Central Junction
Notable: true Quickly jump and precisely shoot the super block and in the same motion take out the bomb blocks with a speedball. Entrance condition: {
"comeInShinecharging": {
"length": 5,
"openEnd": 0
}
}
Requires: "canSpeedball"
"canTrickyJump"
"canSlowShortCharge"
{
"ammo": {
"type": "Super",
"count": 1
}
}
Clears obstacles: F |
|
Jump over the bug pipe while blue and roll into the morph tunnel to break the bomb block. Shortcharge too much and the jump will not be able to reach the morph tunnel. But you can airball and bounce into the tunnel. Requires: "canSpeedball"
{
"or": [
{
"canShineCharge": {
"usedTiles": 16,
"openEnd": 1
}
},
{
"and": [
{
"doorUnlockedAtNode": 2
},
{
"canShineCharge": {
"usedTiles": 17,
"openEnd": 1
}
}
]
}
]
}
Clears obstacles: A Unlocks doors: {"nodeId":2,"types":["ammo"],"requires":[]}
|
|
From: 13
Central Junction
To: 7
Right Side - Bottom Middle Door (Behind the Super Block)
Notable: true Requires: "canSpeedball"
"canLateralMidAirMorph"
"canSlowShortCharge"
"canTrickyJump"
{
"canShineCharge": {
"usedTiles": 20,
"openEnd": 2
}
}
"canOffScreenSuperShot"
Clears obstacles: F |
|
From: 1
Right Door
To: 2
Item
Roll through the whole room, breaking the speedblocks. The fish enemies will die but some puyos will remain. Entrance condition: {
"comeInShinecharging": {
"length": 0,
"openEnd": 1
}
}
Requires: "canSpeedball" Clears obstacles: A |
|
Notable: true Jump from the Spazer Room door with speed to break the bomb blocks. Time a precise shot during the jump to clear the shot block. Note: Spazer can trivially break the shot block by shooting forward before jumping. Entrance condition: {
"comeInShinecharging": {
"length": 3,
"openEnd": 1
}
}
Requires: "canSpeedball" "canTrickyJump" |
|
Shoot forward with spazer to break the shot block, then jump into the morph tunnel while staying blue to break a bomb block. Entrance condition: {
"comeInShinecharging": {
"length": 3,
"openEnd": 1
}
}
Requires: "Spazer" "canSpeedball" "canCarefulJump" |
|
The Kihunters can be killed by retreating to the morph tunnel if needed. Entrance condition: {
"comeInShinecharging": {
"length": 3,
"openEnd": 1
}
}
Requires: "canSpeedball" "canSlowShortCharge" Clears obstacles: B, C |
|
From: 5
Kihunter Junction
To: 3
Top Right Door
Notable: true A very low horizontal speed is needed to drop down and break the block without hitting the corner to the left or the block above the bomb block. Or with Temporary Blue, Samus can bounce into the bomb block. Requires: "Morph"
{
"obstaclesCleared": [
"C"
]
}
{
"obstaclesNotCleared": [
"D"
]
}
{
"or": [
{
"and": [
"canSlowShortCharge",
"canSpeedball",
{
"canShineCharge": {
"usedTiles": 17,
"openEnd": 0
}
}
]
},
{
"and": [
"canTemporaryBlue",
"canLateralMidAirMorph",
{
"canShineCharge": {
"usedTiles": 32,
"openEnd": 1
}
}
]
}
]
}
Clears obstacles: B |
|
From: 2
Bottom Left Door
To: 3
Right Vertical Door
Entrance condition: {
"comeInSpeedballing": {
"runway": {
"length": 4,
"openEnd": 0
}
}
}
|
|
From: 1
Left Door
To: 1
Left Door
Notable: true Use SpeedBooster to construct a structure for Moondancing that has 1 chest height block and 1 head height block to the right of it and no other Speed blocks. Crystal Flash below the lower block, exactly pixel aligned with its right side, to standup and then begin Moondancing. After Samus sinks through the floor tiles, use Grapple to return to a standing position and count an additional 145 moonfalls. Then use Grapple to return to a crouch and wiggle right and Turn-Around Aim Cancel to escape to the right. Finally, use SpeedBooster if needed to break the remaining Speed blocks and reach the door. Requires: "h_canCrystalFlash" "canTrickyJump" "canTurnaroundAimCancel" "canTemporaryBlue" "canExtendedMoondance" "canSpeedball" Exit condition: {
"leaveWithStoredFallSpeed": {
"fallSpeedInTiles": 2
}
}
|
|
From: 1
Left Door
To: 1
Left Door
Notable: true Use SpeedBooster to construct a structure for Moondancing that has 1 chest height block and 1 head height block to the right of it and no other Speed blocks. Crystal Flash below the lower block, exactly pixel aligned with its right side, to standup and then begin Moondancing. After Samus sinks through the bottom tile, it is possible to use Grapple to return to a crouch and wiggle right and then Turn-Around Aim Cancel to escape to the right. Without Grapple, count to 174 Moonfalls and delicately Moonfall so as to remain crouched and then wiggle to the right. Finally, use SpeedBooster if needed to break the remaining Speed blocks and reach the door. Requires: "h_canCrystalFlash" "canTrickyJump" "canTurnaroundAimCancel" "canTemporaryBlue" "canMoondance" "canSpeedball" Exit condition: {
"leaveWithStoredFallSpeed": {
"fallSpeedInTiles": 1
}
}
|
|
From: 1
Left Door
To: 2
Right Door
Notable: true Use SpeedBooster to construct a structure for Moondancing that has 1 chest height block and 1 head height block to the right of it and no other Speed blocks. Crystal Flash below the lower block, exactly pixel aligned with its right side, to standup and then begin Moondancing. After Samus sinks through the floor tiles, use Grapple to return to a standing position and count an additional 145 moonfalls. Then use Grapple to return to a crouch and wiggle right and Turn-Around Aim Cancel to escape to the right. Finally, use SpeedBooster if needed to break the remaining Speed blocks and reach the door. Requires: "h_canCrystalFlash" "canTrickyJump" "canTurnaroundAimCancel" "canTemporaryBlue" "canExtendedMoondance" "canSpeedball" Exit condition: {
"leaveWithStoredFallSpeed": {
"fallSpeedInTiles": 2
}
}
Unlocks doors: {"types":["ammo"],"requires":[]}
|
|
From: 1
Left Door
To: 2
Right Door
Notable: true Use SpeedBooster to construct a structure for Moondancing that has 1 chest height block and 1 head height block to the right of it and no other Speed blocks. Crystal Flash below the lower block, exactly pixel aligned with its right side, to standup and then begin Moondancing. After Samus sinks through the bottom tile, it is possible to use Grapple to return to a crouch and wiggle right and then Turn-Around Aim Cancel to escape to the right. Without Grapple, count to 174 Moonfalls and delicately Moonfall so as to remain crouched and then wiggle to the right. Finally, use SpeedBooster if needed to break the remaining Speed blocks and reach the door. Requires: "h_canCrystalFlash" "canTrickyJump" "canTurnaroundAimCancel" "canTemporaryBlue" "canMoondance" "canSpeedball" Exit condition: {
"leaveWithStoredFallSpeed": {
"fallSpeedInTiles": 1
}
}
Unlocks doors: {"types":["ammo"],"requires":[]}
|
|
Entrance condition: {
"comeInSpeedballing": {
"runway": {
"length": 3,
"openEnd": 1
}
}
}
Requires: "canSpeedball"
"canSlowShortCharge"
{
"heatFrames": 360
}
|
|
From: 2
Far Left Door
To: 2
Far Left Door
Notable: true Use SpeedBooster to construct a structure for Moondancing that has 1 chest height block and 1 head height block to the right of it and no other Speed blocks. Crystal Flash below the lower block, exactly pixel aligned with its right side, to standup and then begin Moondancing. After Samus sinks through the floor tiles, use Grapple to return to a standing position and count an additional 145 moonfalls. Then use Grapple to return to a crouch and wiggle right and Turn-Around Aim Cancel to escape to the right. Finally, use SpeedBooster if needed to break the remaining Speed blocks and reach the door. Requires: "h_heatProof" "SpeedBooster" "h_canCrystalFlash" "canTrickyJump" "canTurnaroundAimCancel" "canTemporaryBlue" "canExtendedMoondance" "canSpeedball" Exit condition: {
"leaveWithStoredFallSpeed": {
"fallSpeedInTiles": 2
}
}
|
|
From: 2
Far Left Door
To: 2
Far Left Door
Notable: true Use SpeedBooster to construct a structure for Moondancing that has 1 chest height block and 1 head height block to the right of it and no other Speed blocks. Crystal Flash below the lower block, exactly pixel aligned with its right side, to standup and then begin Moondancing. After Samus sinks through the bottom tile, it is possible to use Grapple to return to a crouch and wiggle right and then Turn-Around Aim Cancel to escape to the right. Without Grapple, count to 174 Moonfalls and delicately Moonfall so as to remain crouched and then wiggle to the right. Finally, use SpeedBooster if needed to break the remaining Speed blocks and reach the door. Requires: "h_heatProof" "SpeedBooster" "h_canCrystalFlash" "canTrickyJump" "canTurnaroundAimCancel" "canTemporaryBlue" "canMoondance" "canSpeedball" Exit condition: {
"leaveWithStoredFallSpeed": {
"fallSpeedInTiles": 1
}
}
|
|
From: 4
Bottom Right Door
To: 2
Far Left Door
Notable: true Break the Speedway Speed blocks by jumping over the gap with speed and continuing through the room in mockball. Entrance condition: {
"comeInShinecharging": {
"length": 1,
"openEnd": 0
}
}
Requires: "canSpeedball"
{
"heatFrames": 570
}
Clears obstacles: A |
|
From: 6
Junction By Left Door (Right of Pit)
To: 5
Spring Ball Maze Junction (Past the Bomb Blocks)
Notable: true Jump and Morph with a speedball to enter the morph tunnel and then use SpringBall to break the bomb blocks. Requires: "h_canNavigateHeatRooms"
"h_canUseSpringBall"
"canSpeedball"
"canLateralMidAirMorph"
{
"canShineCharge": {
"usedTiles": 26,
"gentleDownTiles": 2,
"openEnd": 1
}
}
{
"heatFrames": 160
}
Clears obstacles: B |
|
From: 4
Junction Right of Power Bomb Blocks
To: 8
Junction Below Top Right Door
Requires: "canSpeedball"
{
"obstaclesCleared": [
"D"
]
}
{
"canShineCharge": {
"usedTiles": 20,
"openEnd": 1
}
}
{
"or": [
"h_canUseSpringBall",
{
"hibashiHits": 1
}
]
}
{
"heatFrames": 300
}
|
|
From: 5
Junction Below Shot Block
To: 8
Junction Below Top Right Door
Notable: true Break the Power Bomb statue leaving 1 row of blocks. Partially clip beneath the Power Bomb blocks and the sold tiles beneath. Wait for a Dessgeega to jump over head and jump into it. The left ceiling Dessgeega works better. Aim down after jumping in order to fully boost over the solid statue. Damage boost to the right and use I-Frames to run through all of the enemies. Begin shortcharging while running through the Dessgeegas for a speedball. It may help to end the damage boost early, but then it becomes more difficult to stutter for the shortcharge. Requires: {
"obstaclesNotCleared": [
"A"
]
}
"h_canUsePowerBombs"
"canPartialFloorClip"
"canCeilingClip"
"canTrickyJump"
"canHorizontalDamageBoost"
"canHitbox"
"canSpeedball"
{
"canShineCharge": {
"usedTiles": 16,
"openEnd": 1
}
}
{
"enemyDamage": {
"enemy": "Dessgeega",
"type": "contact",
"hits": 1
}
}
{
"heatFrames": 390
}
{
"or": [
"h_canUseSpringBall",
{
"hibashiHits": 1
}
]
}
|
|
From: 5
Junction Below Shot Block
To: 8
Junction Below Top Right Door
Notable: true Break the Power Bomb statue leaving 1 row of blocks. Partially clip beneath the Power Bomb blocks and the sold tiles beneath. Wait for a Dessgeega to jump over head and jump into it. The left ceiling Dessgeega works better. Damage boost to the right and use I-Frames to run through all of the enemies. Begin shortcharging while running through the Dessgeegas for a speedball. It may help to end the damage boost early, but then it becomes more difficult to stutter for the shortcharge. Requires: {
"obstaclesNotCleared": [
"A"
]
}
"h_canUsePowerBombs"
"HiJump"
"canPartialFloorClip"
"canCeilingClip"
"canHorizontalDamageBoost"
"canHitbox"
"canSpeedball"
{
"canShineCharge": {
"usedTiles": 16,
"openEnd": 1
}
}
{
"enemyDamage": {
"enemy": "Dessgeega",
"type": "contact",
"hits": 1
}
}
{
"heatFrames": 390
}
{
"or": [
"h_canUseSpringBall",
{
"hibashiHits": 1
}
]
}
|
|
This speedball is harder with Phantoon alive and has a shorter runway because of the robot standing in the way. Requires: "canSpeedball"
{
"canShineCharge": {
"usedTiles": 22,
"openEnd": 0
}
}
Clears obstacles: A |
|
This speedball is easier with Phantoon dead, since you can push the robots all the way left. It's even possible to setup the short hop mockball by bonking the center platform. Requires: "canSpeedball"
"f_DefeatedPhantoon"
{
"canShineCharge": {
"usedTiles": 33,
"openEnd": 2
}
}
Clears obstacles: A |
|
Entrance condition: {
"comeInBlueSpinning": {
"unusableTiles": 1
}
}
Requires: "canSpeedball" "canCarefulJump" "canSlowShortCharge" Clears obstacles: A |
|
From: 1
Top Left Door
To: 1
Top Left Door
Notable: true Use SpeedBooster to construct a structure for Moondancing that has 1 chest height block and 1 head height block to the right of it and no other Speed blocks. Crystal Flash below the lower block, exactly pixel aligned with its right side, to standup and then begin Moondancing. After Samus sinks through the floor tiles, use Grapple to return to a standing position and count an additional 145 moonfalls. Then use Grapple to return to a crouch and wiggle right and Turn-Around Aim Cancel to escape to the right. Finally, shortcharge to break the remaining Speed blocks and reach the door. Requires: "h_canCrystalFlash"
"canTrickyJump"
"canTurnaroundAimCancel"
"canTemporaryBlue"
"canExtendedMoondance"
"canSpeedball"
"Grapple"
{
"canShineCharge": {
"openEnd": 0,
"usedTiles": 16,
"steepDownTiles": 4
}
}
Exit condition: {
"leaveWithStoredFallSpeed": {
"fallSpeedInTiles": 2
}
}
|
|
From: 1
Top Left Door
To: 1
Top Left Door
Notable: true Use SpeedBooster to construct a structure for Moondancing that has 1 chest height block and 1 head height block to the right of it and no other Speed blocks. Crystal Flash below the lower block, exactly pixel aligned with its right side, to standup and then begin Moondancing. After Samus sinks through the bottom tile, it is possible to use Grapple to return to a crouch and wiggle right and then Turn-Around Aim Cancel to escape to the right. Without Grapple, count to 174 Moonfalls and delicately Moonfall so as to remain crouched and then wiggle to the right. Finally, shortcharge to break the remaining Speed blocks and reach the door. Requires: "h_canCrystalFlash"
"canTrickyJump"
"canTurnaroundAimCancel"
"canTemporaryBlue"
"canSpeedball"
"canMoondance"
{
"canShineCharge": {
"openEnd": 0,
"usedTiles": 16,
"steepDownTiles": 4
}
}
Exit condition: {
"leaveWithStoredFallSpeed": {
"fallSpeedInTiles": 1
}
}
|
|
From: 1
Top Left Door
To: 5
Top Right Item
Notable: true Use SpeedBooster to construct a structure for Moondancing that has 1 chest height block and 1 head height block to the right of it and no other Speed blocks. Crystal Flash below the lower block, exactly pixel aligned with its right side, to standup and then begin Moondancing. After Samus sinks through the bottom tile, it is possible to use Grapple to return to a crouch and wiggle right and then Turn-Around Aim Cancel to escape to the right. Without Grapple, count to 174 Moonfalls and delicately Moonfall so as to remain crouched and then wiggle to the right. The Camera will not follow Samus after clipping. Requires: "h_canCrystalFlash"
"canTrickyJump"
"canTurnaroundAimCancel"
"canTemporaryBlue"
"canMoondance"
"canSpeedball"
{
"canShineCharge": {
"openEnd": 0,
"usedTiles": 16,
"steepDownTiles": 4
}
}
Clears obstacles: B |
|
Entrance condition: {
"comeInSpeedballing": {
"runway": {
"length": 13,
"openEnd": 0
}
}
}
Clears obstacles: A |
|
Entrance condition: {
"comeInSpeedballing": {
"runway": {
"length": 3,
"openEnd": 0
}
}
}
Clears obstacles: A |
|
Requires: {
"not": "f_DefeatedPhantoon"
}
"canRiskPermanentLossOfAccess"
"canSpeedball"
{
"canShineCharge": {
"usedTiles": 14,
"openEnd": 0,
"steepUpTiles": 3
}
}
Clears obstacles: C |
|
Enter the room with blue speed, and jump into a speedball. Entrance condition: {
"comeInShinecharging": {
"length": 0,
"openEnd": 1
}
}
Requires: "canWaterShineCharge" "canSpeedball" "canTrickyJump" |
|
From: 3
Bottom Right Door
To: 2
Bottom Left Door
Notable: true Jump into the room and shoot out at least the bottom shotblock. Jumping into the top of the door frame at low speeds lines up the shot well. Speedball through and unmorph on top of the first set of speedblocks. Reposition with a Chain Temporary Blue closer to the remaining speed blocks. Jump into the rest of the Speed Blocks clearing a path for the Oums. Wait for the Oums to roll on their own to a place where they can be climbed. Do not stand on the Oums when they begin to attack. Entrance condition: {
"comeInSpeedballing": {
"runway": {
"length": 0,
"openEnd": 0
}
}
}
Requires: "canSpeedball" "canCrossRoomJumpIntoWater" "canUseEnemies" "canChainTemporaryBlue" "canSlowShortCharge" |
