canResetFallSpeed (Hard)
Using unmorph as a way to reset fall speed.
Strats ()
|
From: 4
Junction (Right side Pit)
To: 2
Right Door
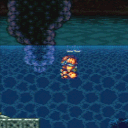
Freeze the Choot when it swings right on its jump. Quickly get on top of it by first getting onto the pillar to the left, or with a SpringBall Jump. Perform a precise spring ball jump to get to the far right ledge, while avoiding hitting the water surface. While on the ledge, stand on the raised ground to the right and jump to the surface, then space jump across the water to the left. Requires: "canSuitlessMaridia"
"canTrickyUseFrozenEnemies"
"canCarefulJump"
"canSpringBallJumpMidAir"
{
"or": [
"canTrickySpringBallJump",
"canResetFallSpeed",
"canStationaryLateralMidAirMorph"
]
}
"canSpaceJumpWaterBounce"
"canWalljump"
|
|
From: 5
Lower Section - Bottom Right Door
To: 4
Lower Section - Top Right Door
Jump into an IBJ while avoiding the Ripper, or start an IBJ from the platform to the left and boost horizontally at the top. Requires: {
"or": [
"h_canJumpIntoIBJ",
{
"and": [
"h_canIBJ",
"canBombHorizontally",
"canResetFallSpeed"
]
}
]
}
|
|
From: 1
Left Door
To: 2
Right Door
Notable: true 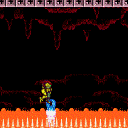
While crossing the Spiky Lava, land on frozen Yapping Maws to reduce the number of spike hits needed. Damage boost towards then freeze the Leftmost enemy as it extends. Morph and unmorph while above the middle Yapping Maw to land on it just above the lava line. Ignore the rightmost Yapping Maw. Delay the damage boost from the spikes slightly in order to rise above the lava before moving. Requires: "canResetFallSpeed"
"canTrickyUseFrozenEnemies"
"canTrickyJump"
{
"or": [
"canHorizontalDamageBoost",
{
"and": [
{
"spikeHits": 2
},
{
"lavaFrames": 30
},
{
"heatFrames": 240
}
]
}
]
}
"canIframeSpikeJump"
{
"spikeHits": 2
}
{
"lavaFrames": 15
}
{
"heatFrames": 580
}
|
|
From: 2
Right Door
To: 1
Left Door
Notable: true
While crossing the Spiky Lava, land on frozen Yapping Maws to reduce the number of spike hits needed. Morph and unmorph while above the rightmost Yapping Maw to land on it just above the lava line. Ignore the second Yapping Maw. Freeze the Leftmost enemy as it extends. Delay the damage boost from the spikes slightly in order to rise above the lava before moving. Requires: "canResetFallSpeed"
"canTrickyUseFrozenEnemies"
"canTrickyJump"
{
"or": [
"canHorizontalDamageBoost",
{
"and": [
{
"spikeHits": 1
},
{
"lavaFrames": 20
},
{
"heatFrames": 240
}
]
}
]
}
"canIframeSpikeJump"
{
"spikeHits": 2
}
{
"lavaFrames": 15
}
{
"heatFrames": 580
}
|
|
Notable: true 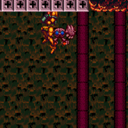
Ride the Geruta left to reach the missile location by freezing it repeatedly. Stay on its left side when it touches the ceiling for the enemy to continue moving forward. It may not be possible to climb back up to the Geruta if Samus falls. When it moves towards the ceiling, reset Samus' fall speed using an unmorph or by taking knockback damage, in order to wait for the Geruta to fall low enough to refreeze. Requires: "canTrickyUseFrozenEnemies"
"canCarefulJump"
{
"or": [
"canResetFallSpeed",
{
"and": [
"canNeutralDamageBoost",
{
"enemyDamage": {
"enemy": "Geruta",
"type": "contact",
"hits": 3
}
}
]
}
]
}
{
"heatFrames": 3000
}
|
|
From: 3
Junction Left of Green Gate
To: 4
Center Platform Junction
Requires: {
"or": [
"Grapple",
"SpaceJump",
"canResetFallSpeed",
{
"and": [
"canTrickyJump",
"canLateralMidAirMorph"
]
},
{
"and": [
"Gravity",
"canStaggeredWalljump"
]
}
]
}
|
|
From: 2
Right Door
To: 3
Bottom Platform Junction
Notable: true 
Dive into the acid to the left of the first floating platform to quickly sink to the bottom of the room. It is possible to jump directly over the pirate at the bottom of the ramp directly to the gap between platforms. Falling in this way will land between platforms at the bottom of the room unless Samus slows or catches herself on the way down. Requires: "h_canNavigateHeatRooms"
"canSuitlessLavaDive"
{
"or": [
"SpaceJump",
"canTrickyJump",
{
"and": [
"canLateralMidAirMorph",
"canCarefulJump"
]
},
{
"and": [
"ScrewAttack",
"canCarefulJump"
]
},
{
"and": [
"h_heatProof",
{
"enemyKill": {
"enemies": [
[
"Yellow Space Pirate (standing)"
]
]
}
},
"canCarefulJump"
]
}
]
}
{
"heatFrames": 140
}
{
"or": [
"canResetFallSpeed",
"canPreciseWalljump",
{
"and": [
{
"heatFrames": 60
},
{
"acidFrames": 60
}
]
}
]
}
{
"heatFrames": 330
}
{
"acidFrames": 330
}
|
|
From: 5
Firefleas Bottom Left Platform Junction
To: 7
Fireflea Statue's Claw Junction
Requires: "canConsecutiveWalljump"
"canPreciseWalljump"
"canCarefulJump"
{
"or": [
"canTrickyJump",
"canResetFallSpeed"
]
}
|
|
From: 1
Left Door
To: 2
Right Door
Notable: true 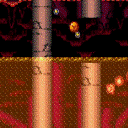
Cross the Pillar Room with Bombs and minimal damage. Some acid damage is expected, but any mistakes greatly increases the time spent in acid. Entrance condition: {
"comeInRunning": {
"minTiles": 1,
"speedBooster": "any"
}
}
Requires: "h_canUseMorphBombs"
"canWallJumpInstantMorph"
"canInsaneJump"
"canResetFallSpeed"
"canUnmorphBombBoost"
"canSuitlessLavaDive"
{
"heatFrames": 1320
}
{
"acidFrames": 128
}
|
|
From: 1
Left Door
To: 2
Right Door
Notable: true
Cross the Pillar Room with Bombs and minimal damage. Acid damage is expected, but any mistakes greatly increases the time spent in acid. Entrance condition: {
"comeInRunning": {
"minTiles": 1,
"speedBooster": "any"
}
}
Requires: "h_canUseMorphBombs"
"Gravity"
"canResetFallSpeed"
"canJumpIntoIBJ"
"canSuitlessLavaDive"
{
"enemyDamage": {
"enemy": "Puromi",
"type": "contact",
"hits": 2
}
}
{
"heatFrames": 1440
}
{
"acidFrames": 725
}
|
|
From: 1
Left Door
To: 2
Right Door
Notable: true 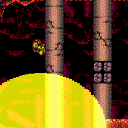
Place the PBs next to the pillars in order to only use 2. Minimize acid by unmorphing high to land back on the jump spot or walljumping before placing the bomb. Requires: "Morph"
"canCarefulJump"
{
"ammo": {
"type": "PowerBomb",
"count": 2
}
}
{
"or": [
{
"and": [
"canCarefulJump",
"canResetFallSpeed",
{
"heatFrames": 660
}
]
},
{
"and": [
"canWalljump",
{
"heatFrames": 660
},
{
"or": [
"canWallJumpInstantMorph",
{
"acidFrames": 30
}
]
}
]
},
{
"and": [
"Gravity",
{
"heatFrames": 660
},
{
"acidFrames": 30
}
]
},
{
"and": [
"canTrickyJump",
"canSuitlessLavaDive",
{
"heatFrames": 720
},
{
"acidFrames": 52
}
]
}
]
}
{
"or": [
"canTrickyJump",
{
"and": [
"Gravity",
{
"heatFrames": 180
},
{
"acidFrames": 56
}
]
},
{
"and": [
"canSuitlessLavaDive",
{
"heatFrames": 240
},
{
"acidFrames": 96
}
]
}
]
}
{
"or": [
"h_heatResistant",
"canPauseAbuse",
{
"resourceCapacity": [
{
"type": "RegularEnergy",
"count": 149
}
]
}
]
}
|
|
From: 2
Right Door
To: 1
Left Door
Notable: true
Cross the Pillar Room with Bombs and minimal damage. Some acid damage is expected, but any mistakes greatly increases the time spent in acid. Entrance condition: {
"comeInRunning": {
"minTiles": 3,
"speedBooster": "any"
}
}
Requires: "h_canUseMorphBombs"
"canWallJumpInstantMorph"
"canInsaneJump"
"canResetFallSpeed"
"canUnmorphBombBoost"
"canHBJ"
"canSuitlessLavaDive"
{
"heatFrames": 1320
}
{
"acidFrames": 128
}
|
|
From: 2
Right Door
To: 1
Left Door
Notable: true
Cross the Pillar Room with Bombs and minimal damage. Acid damage is expected, but any mistakes greatly increases the time spent in acid. Entrance condition: {
"comeInRunning": {
"minTiles": 3,
"speedBooster": "any"
}
}
Requires: "h_canUseMorphBombs"
"Gravity"
"canResetFallSpeed"
"canJumpIntoIBJ"
"canSuitlessLavaDive"
{
"enemyDamage": {
"enemy": "Puromi",
"type": "contact",
"hits": 2
}
}
{
"heatFrames": 1440
}
{
"acidFrames": 725
}
|
|
From: 2
Bottom Left Door
To: 4
Junction Above Bomb Blocks
Notable: true 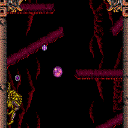
Deal an exact amount of damage to a wall pirate to freeze it while breaking the bomb blocks with a power bomb without taking damage. Wait briefly on the left side of the center platform, then jump and shoot 4 missiles at the top pirate. Walljump up the left wall such that the lower pirates are on screen long enough to jump accross to the left. Place a Bomb on the left wall to hit the top pirate when it jumps over, followed by a power bomb. Unmorph precisely below the middle pirate so both top pirates will jump back to the right, and begin charging Ice. Walljump up the left wall with charge held and freeze the top pirate when it jumps over and use it to reach the upper region. Requires: "h_canNavigateHeatRooms"
"canTrickyUseFrozenEnemies"
"Charge"
"canPreciseWalljump"
"canResetFallSpeed"
"canWalljumpWithCharge"
"h_canUseMorphBombs"
{
"ammo": {
"type": "Missile",
"count": 4
}
}
{
"ammo": {
"type": "PowerBomb",
"count": 1
}
}
{
"heatFrames": 900
}
{
"or": [
"h_heatResistant",
{
"and": [
"canInsaneJump",
"canPauseAbuse"
]
},
{
"resourceCapacity": [
{
"type": "RegularEnergy",
"count": 149
}
]
}
]
}
Clears obstacles: A |
|
Morph Kago through the top Spike platform and use the I-Frames to Kago again through the second. Requires: "canKago"
"Morph"
"canResetFallSpeed"
{
"enemyDamage": {
"enemy": "Kzan",
"type": "contact",
"hits": 1
}
}
{
"heatFrames": 180
}
|
|
From: 4
Top Left Door
To: 5
Platform Junction Near Top Left Door
Notable: true 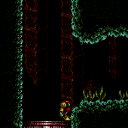
Morph and unmorph before reaching the transition, and then drift to the ledge. Enter the room as far right as possible. Entrance condition: {
"comeInNormally": {},
"comesThroughToilet": "no"
}
Requires: "canSuitlessMaridia" "h_canResetFallSpeed" "canPrepareForNextRoom" |
|
Requires: "canSpringwall" "canResetFallSpeed" |
|
From: 9
Junction Below Top Door
To: 5
Right Door
Requires: "canSuitlessMaridia" "canStationaryLateralMidAirMorph" "canTrickySpringBallJump" "canResetFallSpeed" |
|
From: 2
Right Door
To: 4
Top Right Ledge Junction
Notable: true 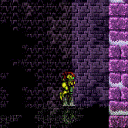
Requires a runway of at least 1 tiles in the adjacent room, although it is easier with more. Start the IBJ as far left as possible. The furthest right is just right of the waterfall. Turning around, carefully, is one way to lose forward momentum and begin the IBJ. At the top of the IBJ bomb to the left and unmorph to reset fall speed. Entrance condition: {
"comeInJumping": {
"speedBooster": false,
"minTiles": 1
}
}
Requires: "h_canJumpIntoIBJ" "h_canBombHorizontally" "h_canResetFallSpeed" "canCrossRoomJumpIntoWater" "canTrickyJump" |
|
From: 5
Bottom Middle Junction
To: 6
East Cactus Alley Junction (Right of Morph Tunnel)
Requires: "Gravity"
{
"or": [
"SpaceJump",
"h_canHBJ",
"h_canResetFallSpeed",
{
"enemyDamage": {
"enemy": "Cacatac",
"hits": 1,
"type": "spike"
}
}
]
}
{
"or": [
"SpaceJump",
"canWalljump",
"HiJump",
"h_canIBJ",
"h_canHBJ",
"h_canSpringBallBombJump",
{
"spikeHits": 1
}
]
}
|
|
From: 1
Top Sand Entrance
To: 7
Below Morph Tunnel Junction
Break the shot block before reaching the sand and then shinespark up. Samus cannot shinespark after unmorphing until she touches the sand and this can be used to shoot upwards without sparking. A diagonal ShineSpark will most likely not have any horizontal movement when performed from the sand. Entrance condition: {
"comeInShinecharged": {
"framesRequired": 150
},
"comesThroughToilet": "any"
}
Requires: "h_canNavigateUnderwater"
"canPlayInSand"
"canShinechargeMovementTricky"
{
"or": [
"canResetFallSpeed",
{
"and": [
"canPrepareForNextRoom",
"h_canUsePowerBombs"
]
}
]
}
{
"shinespark": {
"frames": 24,
"excessFrames": 5
}
}
|
|
From: 5
Top Junction
To: 4
Top Right Door
Notable: true 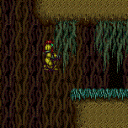
Roll off the above ledge and use both the vertical speed resets from first (un)equipping SpringBall and then by unmorphing in order to reach the door. Pause shortly after rolling off the ledge, after falling for 1 tile. The timing is very precise. A downback helps by shrinking Samus' hitbox. Requires: "canInsaneJump" "h_canSpringFling" "canResetFallSpeed" "canDownBack" |
|
Using movement tricks to reduce fall speed even slightly can avoid touching the sand. A Flatley style turnaround over the grapple block hole reduces fall speed some, but also needs a down back or a tiny jump. Requires: "canSuitlessMaridia"
{
"or": [
{
"and": [
"canFlatleyJump",
{
"or": [
"canTrickyJump",
"canDownBack"
]
}
]
},
"canWalljump",
"h_canResetFallSpeed"
]
}
|
|
From: 3
Junction (Get Past Metroids, Left to Right)
To: 2
Right Door
Bomb Jump between the two floating platforms. Requires: {
"or": [
{
"obstaclesCleared": [
"A"
]
},
{
"and": [
"canCameraManip",
"canMetroidAvoid"
]
}
]
}
{
"or": [
{
"and": [
"h_canHBJ",
"canResetFallSpeed"
]
},
{
"and": [
{
"obstaclesCleared": [
"A"
]
},
"h_canDiagonalBombJump"
]
},
"h_canCeilingBombJump"
]
}
|