canHeroShot (Hard)
The ability to follow a shot to prevent it from despawning before hitting its target. This may include aiming between enemies or waiting for the shot to travel some distance before following it.
Strats ()
|
Fire a Plasma shot while running into the room, jump and activate the shinespark wind-up mid-air. Wait to spark right until just as the Plasma shot goes off screen. Entrance condition: {
"comeInShinecharged": {
"framesRequired": 40
}
}
Requires: "Plasma"
"canHeroShot"
"canShinechargeMovementTricky"
"canMidairShinespark"
{
"shinespark": {
"frames": 37
}
}
Exit condition: {
"leaveWithSpark": {
"position": "bottom"
}
}
|
|
Run into the room, and fire a Plasma shot. Depending on the vertical position needed for the spark, either stop on a dime and activate the shinespark from the ground, or continue running and jump into a midair shinespark. Wait to spark until just as the Plasma shot goes off screen. Entrance condition: {
"comeInShinecharged": {
"framesRequired": 40
}
}
Requires: "Plasma"
"canHeroShot"
"canShinechargeMovementTricky"
{
"shinespark": {
"frames": 28
}
}
Exit condition: {
"leaveWithSpark": {}
}
|
|
Run and jump, fire a shot mid-air, and activate the shinespark wind-up. Wait until the shot is at a specific position before sparking. Sparking too late will cause the shot to despawn before reaching the door. Sparking too early will cause Samus to bonk the door as it will not yet be open. A beam shot, Missile, or Super can be used. Entrance condition: {
"comeInShinecharged": {
"framesRequired": 40
}
}
Requires: "canShinechargeMovementTricky"
"canHeroShot"
{
"shinespark": {
"frames": 38
}
}
Exit condition: {
"leaveWithSpark": {}
}
|
|
Run and jump onto the pedestal. Jump again to the right to bring the door on-camera. Fire a shot mid-air, and activate the shinespark wind-up. Wait until the shot hits the door before sparking. Entrance condition: {
"comeInShinecharged": {
"framesRequired": 140
}
}
Requires: "canShinechargeMovementComplex"
"canHeroShot"
{
"shinespark": {
"frames": 19
}
}
Exit condition: {
"leaveWithSpark": {}
}
|
|
Run, fire a shot mid-air, jump, and activate a mid-air shinespark to the left. Sparking too late will cause the shot to despawn before reaching the door. Sparking too early will cause Samus to bonk the door as it will not yet be open. A beam shot, Missile, or Super can be used. Entrance condition: {
"comeInShinecharged": {
"framesRequired": 25
}
}
Requires: "canShinechargeMovementTricky"
"canHeroShot"
{
"shinespark": {
"frames": 39
}
}
Exit condition: {
"leaveWithSpark": {}
}
|
|
From: 4
Lower Section - Top Right Door
To: 5
Lower Section - Bottom Right Door
While falling out the door, swing out to the left a couple tiles before moving back right, in order to make the camera scroll. Run, jump, fire a shot mid-air, and activate a well-timed mid-air shinespark to make it through the door. Entrance condition: {
"comeInShinecharged": {
"framesRequired": 170
}
}
Requires: "canShinechargeMovementComplex"
"canHeroShot"
{
"shinespark": {
"frames": 22
}
}
Exit condition: {
"leaveWithSpark": {}
}
|
|
Run and jump, fire a shot mid-air, and activate the shinespark wind-up. Wait until the shot is at a specific position before sparking. Sparking too late will cause the shot to despawn before reaching the door. Sparking too early will cause Samus to bonk the door as it will not yet be open. A beam shot, Missile, or Super can be used. Entrance condition: {
"comeInShinecharged": {
"framesRequired": 40
}
}
Requires: "canShinechargeMovementTricky"
"canHeroShot"
{
"shinespark": {
"frames": 38
}
}
Exit condition: {
"leaveWithSpark": {}
}
|
|
From: 1
Top Left Door
To: 5
Top Right Door
Notable: true 

Come in shinecharged from the top left door. With missiles selected, position Samus roughly in the horizontal center of the room. Crouch, aim up, then in very quick succession, shoot a missile upwards then spark up. If done correctly, Samus will pass the Missile, break the bomb block platforms, then be passed by the Missile which will break the shot blocks at the top. Entrance condition: {
"comeInShinecharged": {
"framesRequired": 100
}
}
Requires: "canHeroShot"
{
"shinespark": {
"frames": 77,
"excessFrames": 3
}
}
{
"ammo": {
"type": "Missile",
"count": 1
}
}
|
|
From: 1
Top Left Door
To: 5
Top Right Door
Notable: true
Come in shinecharging from the top left door. With missiles selected, position Samus roughly in the horizontal center of the room. Crouch, aim up, then in very quick succession, shoot a missile upwards then spark up. If done correctly, Samus will pass the Missile, break the bomb block platforms, then be passed by the Missile which will break the shot blocks at the top. Entrance condition: {
"comeInShinecharging": {
"length": 10,
"openEnd": 1
}
}
Requires: "canHeroShot"
{
"shinespark": {
"frames": 77,
"excessFrames": 3
}
}
{
"ammo": {
"type": "Missile",
"count": 1
}
}
|
|
Notable: true 
Wall jump between the Rippers. Either shoot the block, fall, and quickly climb again, or shoot from the bottom and follow Samus's shot up the tower. Requires: "canHeroShot" "canPreciseWalljump" "canStaggeredWalljump" |
|
Run and jump, fire a shot mid-air, and activate the shinespark wind-up. Wait until the shot is at a specific position before sparking. Sparking too late will cause the shot to despawn before reaching the door. Sparking too early will cause Samus to bonk the door as it will not yet be open. A beam shot, Missile, or Super can be used. Entrance condition: {
"comeInShinecharged": {
"framesRequired": 40
}
}
Requires: "canShinechargeMovementTricky"
"canHeroShot"
{
"shinespark": {
"frames": 36
}
}
Exit condition: {
"leaveWithSpark": {}
}
|
|
Run and jump, fire a shot mid-air, and activate the shinespark wind-up. Wait until the shot is at a specific position before sparking. Sparking too late will cause the shot to despawn before reaching the door. Sparking too early will cause Samus to bonk the door as it will not yet be open. A beam shot, Missile, or Super can be used. Entrance condition: {
"comeInShinecharged": {
"framesRequired": 40
}
}
Requires: "canShinechargeMovementTricky"
"canHeroShot"
"canMidairShinespark"
{
"shinespark": {
"frames": 38
}
}
Exit condition: {
"leaveWithSpark": {
"position": "top"
}
}
|
|
Jump over the Waver, fire a shot mid-air, and activate the shinespark wind-up. Wait until the shot is at a specific position before sparking. Sparking too late will cause the shot to despawn before reaching the door. Sparking too early will cause Samus to bonk the door as it will not yet be open. A beam shot, Missile, or Super can be used. Entrance condition: {
"comeInShinecharged": {
"framesRequired": 50
}
}
Requires: "canHeroShot"
"canShinechargeMovementComplex"
{
"shinespark": {
"frames": 35,
"excessFrames": 0
}
}
Exit condition: {
"leaveWithSpark": {}
}
|
|
From: 2
Left Side - Top Middle Door
To: 7
Top Right Door
Entrance condition: {
"comeInShinecharging": {
"length": 2,
"openEnd": 0
}
}
Requires: "HiJump"
"SpaceJump"
"canHeroShot"
"canShinechargeMovementComplex"
{
"shinespark": {
"frames": 31,
"excessFrames": 0
}
}
Exit condition: {
"leaveWithSpark": {}
}
|
|
Run and jump, fire a shot mid-air, and activate the shinespark wind-up. Wait until the shot is at a specific position before sparking. Sparking too late will cause the shot to despawn before reaching the door. Sparking too early will cause Samus to bonk the door as it will not yet be open. A beam shot, Missile, or Super can be used. Entrance condition: {
"comeInShinecharged": {
"framesRequired": 45
}
}
Requires: "canHeroShot"
"canShinechargeMovementTricky"
{
"shinespark": {
"frames": 36,
"excessFrames": 0
}
}
Exit condition: {
"leaveWithSpark": {}
}
|
|
From: 7
Top Right Door
To: 1
Left Side - Top Door
Kill the Cacatac and quickly jump over to its platform. Shoot towards the top-left door to open it, then follow the shot by jumping over the pit before initiating the shinespark. Entrance condition: {
"comeInShinecharging": {
"length": 2.5,
"openEnd": 1
}
}
Requires: "canShinechargeMovementComplex"
"canMidairShinespark"
"canTrickyJump"
"canHeroShot"
{
"shinespark": {
"frames": 25
}
}
{
"or": [
{
"and": [
"Wave",
"Spazer"
]
},
"Plasma",
{
"ammo": {
"type": "Missile",
"count": 2
}
},
{
"ammo": {
"type": "Super",
"count": 2
}
}
]
}
|
|
From: 4
Bottom Junction (Cleared Runway)
To: 1
Left Door
It is possible to shoot upwards from the ground then immediately as the shot is leaving the screen, press up and jump to shinespark without delay. A Charge shot can help, as it slows down the shot. Requires: "canHeroShot"
{
"canShineCharge": {
"usedTiles": 33,
"openEnd": 2
}
}
{
"heatFrames": 250
}
{
"shinespark": {
"frames": 22,
"excessFrames": 3
}
}
|
|
From: 4
Bottom Junction (Cleared Runway)
To: 1
Left Door
Kill the enemies, then use the bottom to charge a spark. Shoot the shot block from the ground and follow it up so that it breaks, and continue through the left door. Requires: "HiJump"
"canShinechargeMovementComplex"
"canHeroShot"
{
"canShineCharge": {
"usedTiles": 33,
"openEnd": 2
}
}
{
"or": [
"canPreciseWalljump",
"canTrickyJump",
"SpaceJump"
]
}
{
"heatFrames": 310
}
Exit condition: {
"leaveShinecharged": {
"framesRemaining": 25
}
}
|
|
Requires: {
"canShineCharge": {
"usedTiles": 28,
"gentleUpTiles": 3,
"gentleDownTiles": 3,
"openEnd": 0
}
}
{
"shinespark": {
"frames": 24,
"excessFrames": 8
}
}
{
"heatFrames": 300
}
{
"or": [
"canHeroShot",
{
"heatFrames": 100
}
]
}
|
|
Shoot from the middle of the second set of crumble blocks from the left. Requires: {
"obstaclesNotCleared": [
"A"
]
}
"SpeedBooster"
"canHeroShot"
{
"heatFrames": 290
}
Exit condition: {
"leaveWithRunway": {
"length": 45,
"openEnd": 1
}
}
Clears obstacles: A |
|
Shoot while climbing the highest ramp for the shot to open the door. Requires: {
"obstaclesNotCleared": [
"A"
]
}
"SpeedBooster"
"canHeroShot"
{
"heatFrames": 290
}
Exit condition: {
"leaveWithRunway": {
"length": 45,
"openEnd": 1
}
}
Clears obstacles: A |
|
From: 1
Top Left Door
To: 3
Top Right Door
Entrance condition: {
"comeInShinecharged": {
"framesRequired": 35
}
}
Requires: "canShinechargeMovementTricky"
"canHeroShot"
{
"heatFrames": 85
}
{
"shinespark": {
"frames": 37,
"excessFrames": 0
}
}
Exit condition: {
"leaveWithSpark": {}
}
|
|
From: 3
Top Right Door
To: 1
Top Left Door
Entrance condition: {
"comeInShinecharged": {
"framesRequired": 35
}
}
Requires: "canShinechargeMovementTricky"
"canHeroShot"
{
"heatFrames": 85
}
{
"shinespark": {
"frames": 37,
"excessFrames": 0
}
}
Exit condition: {
"leaveWithSpark": {}
}
|
|
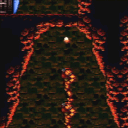
Spring Ball Maze - Hero Shot Shinespark through the Right Door (Very Hard)
Lower Norfair Spring Ball Maze Room
From: 4
Item
To: 3
Bottom Horizontal Door
Shinecharge near the missile location, then fall down and shoot a beam shot through the lower half of the large stalactite. Shinespark to the right before the shot goes off screen, and have it open the door before Samus gets there. Requires: {
"canShineCharge": {
"usedTiles": 27,
"gentleUpTiles": 2,
"openEnd": 1
}
}
{
"obstaclesCleared": [
"A"
]
}
{
"heatFrames": 370
}
"canShinechargeMovementComplex"
"canHeroShot"
{
"shinespark": {
"frames": 31
}
}
{
"doorUnlockedAtNode": 3
}
Exit condition: {
"leaveWithSpark": {
"position": "bottom"
}
}
|
|
Land on the first spike platform, and use it to run and jump far enough through the room to trigger the fourth spike platform to fall. Fire a shot mid-air and activate the shinespark wind-up. Wait until the shot is at a specific position before sparking. Sparking too late will cause the shot to despawn before reaching the door. Sparking too early will cause Samus to bonk the door as it will not yet be open. A beam shot, Missile, or Super can be used. Entrance condition: {
"comeInShinecharged": {
"framesRequired": 85
}
}
Requires: "Gravity"
"canShinechargeMovementTricky"
"canHeroShot"
"canMidairShinespark"
{
"shinespark": {
"frames": 31
}
}
Exit condition: {
"leaveWithSpark": {}
}
|
|
Land on the floor, then jump and fire a shot mid-air and activate the shinespark wind-up. Wait until the shot is at a specific position before sparking. Sparking too late will cause the shot to despawn before reaching the door. Sparking too early will cause Samus to bonk the door as it will not yet be open. A beam shot, Missile, or Super can be used. Entrance condition: {
"comeInShinecharged": {
"framesRequired": 70
}
}
Requires: {
"not": "f_DefeatedPhantoon"
}
"canRiskPermanentLossOfAccess"
"canShinechargeMovementTricky"
"canHeroShot"
"canMidairShinespark"
{
"shinespark": {
"frames": 37
}
}
Exit condition: {
"leaveWithSpark": {}
}
|
|
Wait for the first spike platform to fall, jump onto it, and use it to run and jump far enough through the room to trigger the fourth spike platform to fall. Fire a shot mid-air and activate the shinespark wind-up. Wait until the shot is at a specific position before sparking. Sparking too late will cause the shot to despawn before reaching the door. Sparking too early will cause Samus to bonk the door as it will not yet be open. A beam shot, Missile, or Super can be used. Entrance condition: {
"comeInShinecharged": {
"framesRequired": 115
}
}
Requires: "Gravity"
"canShinechargeMovementTricky"
"canHeroShot"
"canMidairShinespark"
{
"shinespark": {
"frames": 31
}
}
Exit condition: {
"leaveWithSpark": {
"position": "top"
}
}
|
|
Land on the floor, then jump and fire a shot mid-air and activate the shinespark wind-up. Wait until the shot is at a specific position before sparking. Sparking too late will cause the shot to despawn before reaching the door. Sparking too early will cause Samus to bonk the door as it will not yet be open. A beam shot, Missile, or Super can be used. Entrance condition: {
"comeInShinecharged": {
"framesRequired": 70
}
}
Requires: {
"not": "f_DefeatedPhantoon"
}
"canRiskPermanentLossOfAccess"
"canShinechargeMovementTricky"
"canHeroShot"
"canMidairShinespark"
{
"shinespark": {
"frames": 37
}
}
Exit condition: {
"leaveWithSpark": {}
}
|
|
Enter the room with a shinecharge. Run and jump off the ledge. Fire a shot mid-air and activate the shinespark wind-up. Take a hit from the the Bull (if power is on). Wait until the shot is at a specific position before sparking. Sparking too late will cause the shot to despawn before reaching the door. Sparking too early will cause Samus to bonk the door as it will not yet be open. A beam shot, Missile, or Super can be used. Entrance condition: {
"comeInShinecharged": {
"framesRequired": 60
}
}
Requires: "canShinechargeMovementTricky"
"canHeroShot"
{
"or": [
{
"enemyDamage": {
"enemy": "Bull",
"type": "contact",
"hits": 1
}
},
{
"and": [
{
"not": "f_DefeatedPhantoon"
},
"canRiskPermanentLossOfAccess"
]
}
]
}
{
"shinespark": {
"frames": 32
}
}
Exit condition: {
"leaveWithSpark": {}
}
|
|
From: 1
Left Door
To: 2
Right Door
Slide into the hole where the shot block was and sink to the bottom. Shoot the door using a Hero shot and time the shinespark to follow the shot. Entrance condition: {
"comeInShinecharging": {
"length": 1,
"openEnd": 0
}
}
Requires: "canWaterShineCharge"
"canHeroShot"
"canShinechargeMovementTricky"
"canMidairShinespark"
{
"shinespark": {
"frames": 39
}
}
Exit condition: {
"leaveWithSpark": {
"position": "bottom"
}
}
|
|
From: 1
Left Door
To: 2
Right Door
Slide into the hole where the shot block was and sink to the bottom. Shoot the door using a Hero shot and time the shinespark to follow the shot. Either kill the ceiling crab so that Samus can jump forward, or stationary spinjump to avoid using the Shinespark early. Entrance condition: {
"comeInShinecharging": {
"length": 1,
"openEnd": 0
}
}
Requires: "canWaterShineCharge"
"canHeroShot"
"canShinechargeMovementTricky"
"canMidairShinespark"
"HiJump"
{
"or": [
{
"and": [
"Plasma",
"Wave"
]
},
"canStationarySpinJump"
]
}
{
"shinespark": {
"frames": 41
}
}
Exit condition: {
"leaveWithSpark": {}
}
|
|
From: 1
Left Door
To: 2
Right Door
Spinjump through the shotblocks and fire a Plasma + Wave shot on the way down, clearing the crabs. Begin the Shinespark windup while the Beam shot travels towards the door to open it. Entrance condition: {
"comeInShinecharging": {
"length": 0,
"openEnd": 0
}
}
Requires: "canWaterShineCharge"
"canHeroShot"
"canShinechargeMovementTricky"
"canMidairShinespark"
"Plasma"
"Wave"
{
"shinespark": {
"frames": 41
}
}
Exit condition: {
"leaveWithSpark": {}
}
|
|
From: 1
Top Sand Entrance
To: 7
Below Morph Tunnel Junction
Break the shot block before reaching the sand and then shinespark up. A diagonal ShineSpark will most likely not have any horizontal movement when performed from the sand. Entrance condition: {
"comeInShinecharged": {
"framesRequired": 160
},
"comesThroughToilet": "any"
}
Requires: "h_canNavigateUnderwater"
"canPlayInSand"
"canHeroShot"
"canTrickyJump"
"canShinechargeMovementTricky"
{
"shinespark": {
"frames": 25,
"excessFrames": 4
}
}
|