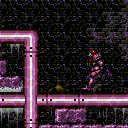
canEnemyExtendRunway (Expert+)
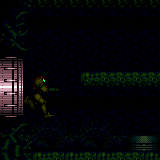
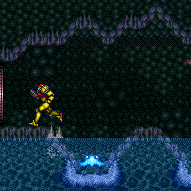
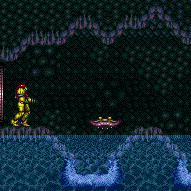
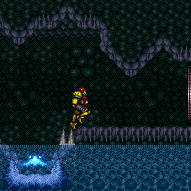
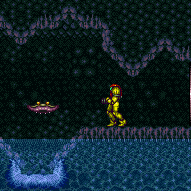
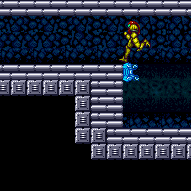
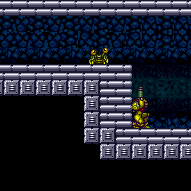
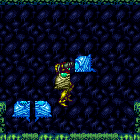
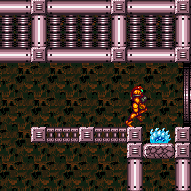
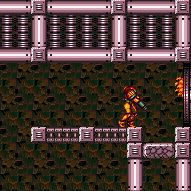
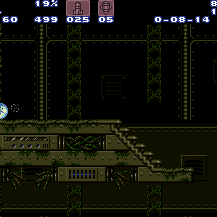
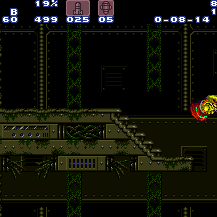
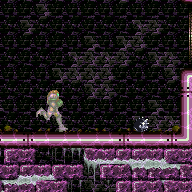
The ability to use an enemy to extend the length of a runway. This is typically set up with a frozen wall-crawler, but can include other frozen enemies or Snails, Trippers, etc. The enemy can be up to 3 pixels higher than the adjacent runway and still have benefits. At 3 pixels above the runway, Samus can run off of the enemy and not lose speed, which is often useful for cross-room speedy jumps and jumps into water. At 2 pixels above, single-stutter shortcharges often fail and multi-stutters are unreliable. At 1 pixel above, multi-stutters are fairly reliable. A pixel-perfect positioning is necessary when using an enemy to bridge a gap, where Samus needs to run onto and off of the frozen enemy. If the enemy is even 1 pixel lower than the runway, it cannot be used.
Dependencies: canUseEnemies
Strats ()
From: 1
Left Door
To: 1
Left Door
Wait for the Alcoon to walk off and reach the bottom of the slope. Dodge it's fireballs with Morph or Screw, or simply freeze it and wait while standing behind it. Keep a half-tile gap between the Alcoon and the runway in order to extend the runway as much as possible. Requires: "h_frozenEnemyRunway" Exit condition: {
"leaveWithRunway": {
"length": 6,
"openEnd": 0
}
} |
From: 3
Bottom Left Horizontal Door
To: 3
Bottom Left Horizontal Door
Requires: "h_frozenEnemyRunway" "h_ZebesIsAwake" Exit condition: {
"leaveWithRunway": {
"length": 6,
"openEnd": 1,
"steepUpTiles": 1
}
} |
From: 6
Bottom Right Door (On the Left Shaft)
To: 6
Bottom Right Door (On the Left Shaft)
Requires: "h_frozenEnemyRunway"
"h_ZebesIsAwake"
{
"or": [
"canBePatient",
{
"ammo": {
"type": "Super",
"count": 1
}
}
]
}Exit condition: {
"leaveWithRunway": {
"length": 5,
"openEnd": 1,
"steepUpTiles": 1
}
} |
From: 9
Junction Below Items
To: 2
Middle Right Door
Bring a Beetom down from above and freeze it in position to extend the runway. Keep a half-tile gap between the Beetom and the runway in order to extend it as much as possible. Requires: {
"noBlueSuit": {}
}
"h_frozenEnemyRunway"
{
"or": [
"Morph",
{
"obstaclesCleared": [
"A"
]
}
]
}
{
"enemyDamage": {
"enemy": "Beetom",
"type": "contact",
"hits": 4
}
}Exit condition: {
"leaveWithRunway": {
"length": 11,
"openEnd": 0
}
}Unlocks doors: {"types":["ammo"],"requires":[]} |
From: 1
Left Door
To: 1
Left Door
Freeze the Choot near the end of its descent or immediately after it jumps in order to be able to run onto and off of it without a problem. Requires: "h_frozenEnemyRunway" "Gravity" Exit condition: {
"leaveWithRunway": {
"length": 12,
"openEnd": 1,
"steepUpTiles": 4,
"steepDownTiles": 2
}
} |
From: 1
Left Door
To: 1
Left Door
Freeze the Choot near the end of its descent or immediately after it jumps in order to be able to run onto and off of it without a problem. Requires: "h_frozenEnemyRunway" Exit condition: {
"leaveWithRunway": {
"length": 7,
"openEnd": 1,
"steepUpTiles": 2,
"steepDownTiles": 1
}
}Dev note: The submerged tiles don't contribute to the runway length. |
From: 2
Right Door
To: 2
Right Door
Freeze the Choot near the end of its descent or immediately after it jumps in order to be able to run onto and off of it without a problem. Requires: "h_frozenEnemyRunway" "Gravity" Exit condition: {
"leaveWithRunway": {
"length": 16,
"openEnd": 1,
"steepUpTiles": 4,
"steepDownTiles": 2
}
} |
From: 2
Right Door
To: 2
Right Door
Freeze the Choot near the end of its descent or immediately after it jumps in order to be able to run onto and off of it without a problem. Requires: "h_frozenEnemyRunway" Exit condition: {
"leaveWithRunway": {
"length": 11,
"openEnd": 1,
"steepUpTiles": 2,
"steepDownTiles": 1
}
}Dev note: The submerged tiles don't contribute to the runway length. |
From: 6
Middle Right Door (By Zeb Farm)
To: 6
Middle Right Door (By Zeb Farm)
Freeze the Zeb from the right while jumping in order to freeze it at the correct height, noting that it will raise 1 more pixel when it thaws. While standing to the left of it, refreeze it again. Keep a half-tile gap between the Zeb and the runway in order to extend the runway as much as possible. Requires: "h_frozenEnemyRunway" Exit condition: {
"leaveWithRunway": {
"length": 5,
"openEnd": 0
}
}Dev note: The Zeb can be used to extend the runway at 2 and 3, but that requires a blind and precise positioning (and is not very useful at 3). |
From: 1
Bottom Left Door
To: 1
Bottom Left Door
Lure the Reo from the right and freeze it in the correct position when it swoops down. Note that using a frozen Geemer may be useful and is easier to setup, particularly if shortcharging out the door. Requires: "h_ZebesIsAwake"
"h_frozenEnemyRunway"
{
"enemyDamage": {
"enemy": "Reo",
"type": "contact",
"hits": 1
}
}Exit condition: {
"leaveWithRunway": {
"length": 6,
"openEnd": 0
}
}Dev note: The Reo can be set up flush with the runway or 3 pixels higher. FIXME: Find and add a description for a normalized setup for this and possibly remove the Reo hit, especially with using the Geemer to extend the runway. |
From: 2
Right Door
To: 1
Left Door
Requires: "h_frozenEnemyRunway"
{
"getBlueSpeed": {
"usedTiles": 15,
"openEnd": 1
}
}
"canSlowShortCharge"
"canSpeedball"Clears obstacles: A |
|
Requires: "h_frozenEnemyRunway"
{
"or": [
"Morph",
"canTwoTileSqueeze",
{
"enemyDamage": {
"enemy": "Zeb",
"type": "contact",
"hits": 1
}
}
]
}Exit condition: {
"leaveWithRunway": {
"length": 3,
"openEnd": 0
}
} |
From: 3
Bottom Left Door
To: 3
Bottom Left Door
Bring a Beetom from the right of the spiky tunnel to the bottom left door. Jump and freeze it at the right height while leaving a half-tile gap between the Beetom and the runway to extend the runway as much as possible. If needing to leave with a multi-stutter short charge, the Beetom will need to be positioned more precisely, which can be done as above, but only on the descent of a jump. Alternatively, bring two Beetoms and stand on one while freezing the other at chest height. Freezing the lower one may be made easier or damageless by scrolling the camera when the Beetom is in the correct position and freezing it with a hero shot from the right. Requires: {
"noBlueSuit": {}
}
"Morph"
"h_frozenEnemyRunway"
{
"enemyDamage": {
"enemy": "Beetom",
"type": "contact",
"hits": 2
}
}Exit condition: {
"leaveWithRunway": {
"length": 8,
"openEnd": 0
}
} |
From: 1
Left Door
To: 1
Left Door
Stand in the pit and freeze the Beetoms by shooting up. Keep them all separated and equally spaced apart to maximize the length of the runway. Freeze the Beetoms that aren't currently in use to avoid them from attaching to Samus and stacking together. Requires: {
"notable": "Frozen Beetom Bridge"
}
"canTrickyJump"
"h_frozenEnemyRunway"
{
"enemyDamage": {
"enemy": "Beetom",
"type": "contact",
"hits": 2
}
}Exit condition: {
"leaveWithRunway": {
"length": 8,
"openEnd": 1
}
} |
From: 1
Left Door
To: 1
Left Door
Let a Beetom attach to Samus, then freeze it by shooting upwards. Keep a half tile gap between the Beetom and ground to have as long of a runway as possible. Requires: "h_frozenEnemyRunway"
{
"enemyDamage": {
"enemy": "Beetom",
"type": "contact",
"hits": 1
}
}Exit condition: {
"leaveWithRunway": {
"length": 5,
"openEnd": 0
}
} |
From: 2
Right Door
To: 2
Right Door
Stand in the pit and freeze the Beetoms by shooting up. Keep them all separated and equally spaced apart to maximize the length of the runway. Freeze the Beetoms that aren't currently in use to avoid them from attaching to Samus and stacking together. Requires: {
"notable": "Frozen Beetom Bridge"
}
"canTrickyJump"
"h_frozenEnemyRunway"
{
"enemyDamage": {
"enemy": "Beetom",
"type": "contact",
"hits": 2
}
}Exit condition: {
"leaveWithRunway": {
"length": 8,
"openEnd": 1
}
} |
From: 2
Right Door
To: 2
Right Door
Let a Beetom attach to Samus, then freeze it by shooting upwards. Keep a half tile gap between the Beetom and ground to have as long of a runway as possible. Requires: "h_frozenEnemyRunway"
{
"enemyDamage": {
"enemy": "Beetom",
"type": "contact",
"hits": 1
}
}Exit condition: {
"leaveWithRunway": {
"length": 5,
"openEnd": 0
}
} |
From: 2
Above Power Bomb Blocks - Top Left Door
To: 2
Above Power Bomb Blocks - Top Left Door
It is possible to save a lot of time by using a Super to knock the clockwise Zeela off the small platform above. Requires: "h_frozenEnemyRunway"
{
"or": [
"canBePatient",
{
"ammo": {
"type": "Super",
"count": 1
}
}
]
}Exit condition: {
"leaveWithRunway": {
"length": 5,
"openEnd": 1
}
} |
From: 3
Above Power Bomb Blocks - Top Right Door
To: 3
Above Power Bomb Blocks - Top Right Door
Requires: "h_frozenEnemyRunway" Exit condition: {
"leaveWithRunway": {
"length": 6,
"openEnd": 1
}
} |
From: 4
Above Power Bomb Blocks - Middle Left Door
To: 4
Above Power Bomb Blocks - Middle Left Door
It is possible to save a lot of time by using a Super to knock the clockwise Zeela off the small platform above. Requires: "h_frozenEnemyRunway"
{
"or": [
"canBePatient",
{
"ammo": {
"type": "Super",
"count": 1
}
}
]
}Exit condition: {
"leaveWithRunway": {
"length": 4,
"openEnd": 1
}
} |
From: 5
Above Power Bomb Blocks - Bottom Left Door
To: 5
Above Power Bomb Blocks - Bottom Left Door
It is possible to save a lot of time by using a Super to knock the clockwise Zeela off the small near the top of the room. Requires: "h_frozenEnemyRunway"
{
"or": [
"canBeVeryPatient",
{
"ammo": {
"type": "Super",
"count": 1
}
}
]
}Exit condition: {
"leaveWithRunway": {
"length": 5,
"openEnd": 1
}
} |
From: 6
Above Power Bomb Blocks - Bottom Right Door
To: 6
Above Power Bomb Blocks - Bottom Right Door
Requires: "h_frozenEnemyRunway" "canBePatient" Exit condition: {
"leaveWithRunway": {
"length": 5,
"openEnd": 1
}
} |
From: 7
Below Power Bomb Blocks - Top Right Door
To: 7
Below Power Bomb Blocks - Top Right Door
If coming from above, let the Zeela below the Power Bomb blocks to circle until it is on the bottom right area, then go up and place the bomb on the bottom central platform to break the blocks without killing the Zeela. Then quickly shoot the shot block to direct it down to the lower section. Requires: "h_frozenEnemyRunway" Exit condition: {
"leaveWithRunway": {
"length": 4,
"openEnd": 1
}
} |
From: 8
Below Power Bomb Blocks - Bottom Left Door
To: 8
Below Power Bomb Blocks - Bottom Left Door
If coming from above, let the Zeela below the Power Bomb blocks to circle until it is on the bottom right area, then go up and place the bomb on the bottom central platform to break the blocks without killing the Zeela. Then quickly shoot the shot block to direct it down to the lower section. Requires: "h_frozenEnemyRunway" "canBePatient" Exit condition: {
"leaveWithRunway": {
"length": 4,
"openEnd": 1
}
} |
From: 8
Below Power Bomb Blocks - Bottom Left Door
To: 9
Right Etecoon Shaft - Top Left Door
Enter with G-Mode. Jump to the top of the shaft. Place a Power Bomb against the ceiling next to the shot block (do not touch the scroll block). Drop back to the bottom of the shaft, roll against the bomb block until Samus passes through. Jump through the crumble block and through the morph tunnel. Once Samus can stand up, do so and use X-Ray to switch to R-Mode: be sure to hold X-Ray until it fully widens. Bomb the block, roll back through the tunnel and stop next to the crumble block. Use a Power Bomb or Five-Bomb Drop to clear the lower bomb block. Wait next to the crumble block until the global Zeela is visible coming down the right wall. Wait until the last possible moment to touch the crumbe block and allow the Zeela through, and immediately roll away to avoid getting hit by it. Lead it back through the Morph tunnel. Jump up to the box with the item. Wait for the Zeela to leave if needed, then Crystal Flash inside. Damage back down using the Zeela. If this needs multiple laps, use a Super to knock it down off the right wall before it can enter the item box. Lead it back through the Morph tunnel and into the Etecoons shaft. Let the Zeela pass going up the left wall and wait until it has moved far enough up before using a Crystal Flash. Use the Zeela to damage back down, shinecharge on the runway, and jump into the Zeela to interrupt. Entrance condition: {
"comeInWithGMode": {
"mode": "direct",
"morphed": false
}
}Requires: "Morph"
"h_usePowerBomb"
"canMidAirMorph"
"h_bombThings"
{
"or": [
"h_usePowerBomb",
{
"and": [
"Charge",
"h_useMorphBombs"
]
}
]
}
"canBeVeryPatient"
"h_CrystalFlashForReserveEnergy"
{
"or": [
{
"disableEquipment": "ETank"
},
{
"resourceAtMost": [
{
"type": "ReserveEnergy",
"count": 5
}
]
}
]
}
{
"or": [
"canConsecutiveWallJump",
"canLongIBJ",
"SpaceJump"
]
}
{
"or": [
{
"disableEquipment": "ETank"
},
{
"ammo": {
"type": "Super",
"count": 3
}
}
]
}
{
"or": [
{
"canShineCharge": {
"usedTiles": 17,
"openEnd": 1
}
},
{
"and": [
"h_frozenEnemyRunway",
{
"ammo": {
"type": "Super",
"count": 1
}
},
{
"canShineCharge": {
"usedTiles": 18,
"openEnd": 1
}
}
]
}
]
}
{
"autoReserveTrigger": {}
}
"canRModeSparkInterrupt"Clears obstacles: A |
From: 13
Below Power Bomb Blocks - Main Junction
To: 9
Right Etecoon Shaft - Top Left Door
Enter R-Mode using any door. Crystal Flash or farm the upper section enemies. Use 'Bottom Ice Clip' strat to regain access to the Etecoons Shaft, then wait on top of the crumble block to get the Zeela to follow you in. Shinecharge on top of the Etecoon Shaft and get hit by the Zeela to interrupt. Requires: {
"obstaclesCleared": [
"R-Mode"
]
}
{
"notable": "Bottom Ice Clip"
}
{
"or": [
"h_CrystalFlashForReserveEnergy",
{
"and": [
{
"obstaclesCleared": [
"A"
]
},
"h_RModeCanRefillReserves",
{
"resourceMissingAtMost": [
{
"type": "Missile",
"count": 0
}
]
},
{
"resourceMissingAtMost": [
{
"type": "Super",
"count": 0
}
]
},
{
"partialRefill": {
"type": "ReserveEnergy",
"limit": 20
}
}
]
}
]
}
"h_bombThings"
"h_additionalBomb"
"canTrickyJump"
"h_XRayMorphIceClip"
{
"or": [
"h_useSpringBall",
{
"and": [
"can4HighMidAirMorph",
"canInsaneJump"
]
}
]
}
"canBeVeryPatient"
{
"or": [
{
"canShineCharge": {
"usedTiles": 17,
"openEnd": 1
}
},
{
"and": [
"h_frozenEnemyRunway",
{
"canShineCharge": {
"usedTiles": 18,
"openEnd": 1
}
}
]
}
]
}
{
"autoReserveTrigger": {}
}
"canRModeSparkInterrupt"Resets obstacles: R-Mode |
|
Wait for the slow global Zeelas. They take almost 4 minutes to get there. Requires: "h_frozenEnemyRunway" "canBeVeryPatient" Exit condition: {
"leaveWithRunway": {
"length": 2,
"openEnd": 1
}
} |
|
Wait for the slow global Zeelas. They take almost 2 minutes to get there. Requires: "h_frozenEnemyRunway" "canBePatient" Exit condition: {
"leaveWithRunway": {
"length": 4,
"openEnd": 1
}
} |
From: 6
Right Side - Top Middle Door
To: 6
Right Side - Top Middle Door
Kill the Reos in the hallway in front of the door, then go down and stand to the right of the Zeb spawner. Freeze the Zeb before it starts going horizontally then go up and wait for it. As the Zeb gets high enough, walk out of the doorway at the right time to get it to move horizontally at the optimal height. This is much easier with Morph - instead be morphed in the hallway and once the Zeb starts moving towards Samus, freeze it. Requires: "h_frozenEnemyRunway"
{
"or": [
"Morph",
"canTrickyEnemyExtendRunway"
]
}Exit condition: {
"leaveWithRunway": {
"length": 3,
"openEnd": 0
}
}Dev note: FIXME: This could be used at 4, or a Reo could be used at 5, but that would be pretty terrible. |
From: 1
Right Door
To: 1
Right Door
Requires: "h_frozenEnemyRunway" Exit condition: {
"leaveWithRunway": {
"length": 3,
"openEnd": 1
}
} |
From: 1
Top Left Door
To: 1
Top Left Door
Use the frozen Zero as a platform or other means to get up to the top half of the room. This takes about 3 minutes. The Zero only moves on camera and the camera scrolls when exiting the morph tunnel. Let the Zero lead through the morph tunnel or wait for the it to get very close to Samus before touching the scroll block at the exit. Requires: "canBeVeryPatient" "h_frozenEnemyRunway" "Morph" Exit condition: {
"leaveWithRunway": {
"length": 6,
"openEnd": 1
}
} |
From: 2
Middle Left Door
To: 2
Middle Left Door
Use the frozen Zero as a platform or other means to get up to the top half of the room. This takes about 4 minutes, but fortunately isn't often necessary. The Zero only moves on camera and the camera scrolls when exiting the morph tunnel. Let the Zero lead through the morph tunnel or wait for the it to get very close to Samus before touching the scroll block at the exit. Requires: "canBeVeryPatient" "h_frozenEnemyRunway" "Morph" Exit condition: {
"leaveWithRunway": {
"length": 5,
"openEnd": 1
}
} |
From: 4
Bottom Right Door
To: 4
Bottom Right Door
Use the frozen caterpillar as a platform or other means to get up to the top half of the room. Requires: "h_frozenEnemyRunway" Exit condition: {
"leaveWithRunway": {
"length": 4,
"openEnd": 1
}
} |
|
Use a Super to knock off a Zeela, then use it as a frozen runway. Requires: "h_frozenEnemyRunway"
{
"ammo": {
"type": "Super",
"count": 1
}
}Exit condition: {
"leaveWithRunway": {
"length": 4,
"openEnd": 1
}
} |
|
Use a Super to knock off a Zeela, then use it as a frozen runway. Requires: "h_frozenEnemyRunway"
{
"ammo": {
"type": "Super",
"count": 1
}
}Exit condition: {
"leaveWithRunway": {
"length": 10,
"openEnd": 1
}
} |
|
Grab the Beetom and freeze it to extend the runway at the top left door; this is easiest with HiJump disabled. It is optimal to leave a half-tile gap in order to extend the runway as much as possible. After freezing the Beetom, it is possible to go down and farm, while returning to refreeze the Beetom. Requires: "h_frozenEnemyRunway" Exit condition: {
"leaveWithRunway": {
"length": 13,
"openEnd": 0
}
} |
|
With Morph: Morph on the small ledge left of the Zeb spawner. After a Zeb starts moving horizontally, quickly unmorph and freeze it. After it thaws, refreeze it once it is in the correct position. Without Morph: Freeze the Zeb as it is rising. When it is close to thawing, walk into the spikes and continue to walk into the wall to prevent a vertical damage boost. Freeze the Zeb after it thaws, noting that it will rise one pixel relative to its first frozen location. Requires: {
"or": [
"Morph",
{
"and": [
"canTrickyEnemyExtendRunway",
"canTrickyJump",
{
"thornHits": 2
}
]
}
]
}
"h_frozenEnemyRunway"Exit condition: {
"leaveWithRunway": {
"length": 7,
"openEnd": 0
}
} |
From: 2
Top Right Door
To: 2
Top Right Door
Stand to the right of the Zeb farm then freeze the Zeb while it is still moving upward. Go to the top door and wait for the Zeb to arrive. Freeze it at the correct height, then drop below it and wait for it to thaw. Freeze it again in the correct horizontal position. Keep a half-tile gap between the Zeb and the runway to extend the runway as much as possible. Requires: "canTrickyJump" "h_frozenEnemyRunway" Exit condition: {
"leaveWithRunway": {
"length": 6,
"openEnd": 0
}
} |
From: 3
Bottom Right Door
To: 3
Bottom Right Door
With Morph: Morph on the small ledge right of the Zeb spawner. After a Zeb starts moving horizontally, quickly unmorph and freeze it. After it thaws, refreeze it once it is in the correct position. Without Morph: Freeze the Zeb as it is rising. When it is close to thawing, walk into the spikes and continue to walk into the wall to prevent a vertical damage boost. Freeze the Zeb after it thaws, noting that it will rise one pixel relative to its first frozen location. Requires: {
"or": [
"Morph",
{
"and": [
"canTrickyEnemyExtendRunway",
"canTrickyJump",
{
"thornHits": 2
}
]
}
]
}
"h_frozenEnemyRunway"Exit condition: {
"leaveWithRunway": {
"length": 5,
"openEnd": 0
}
} |
From: 1
Right Door
To: 1
Right Door
Freeze a single Beetom to extend the runway. Freeze any Beetoms that latch onto Samus to minimize taking damage. Requires: {
"obstaclesNotCleared": [
"A"
]
}
"h_frozenEnemyRunway"
{
  "enemyDamage": {
    "enemy": "Beetom",
    "type": "contact",
    "hits": 1
  }
}
Exit condition: {
"leaveWithRunway": {
"length": 2,
"openEnd": 1
}
} |
From: 1
Left Side - Top Door
To: 1
Left Side - Top Door
Place a Power Bomb on the bottom stair attached to the door in order to prevent killing the Sova, or free a Sova from the Morph maze with Bombs. If coming from below, be sure to lure the Sova to the bottom before placing a Power Bomb near the blocks in order to prevent killing it. Use the frozen Sova to climb to the top left door. Stand on a low frozen Waver to lower the camera enough to get the Sova to move again. Requires: "h_frozenEnemyRunway"
{
"or": [
{
"obstaclesCleared": [
"A"
]
},
"h_bombThings"
]
}
{
"or": [
"canTrickyJump",
"SpaceJump"
]
}Exit condition: {
"leaveWithRunway": {
"length": 5,
"openEnd": 1
}
} |
From: 2
Left Side - Top Middle Door
To: 2
Left Side - Top Middle Door
Place a Power Bomb on the bottom stair attached to the door in order to prevent killing the Sova, or free a Sova from the Morph maze with Bombs. If coming from below, be sure to lure the Sova to the bottom before placing a Power Bomb near the blocks in order to prevent killing it. Requires: "h_frozenEnemyRunway"
{
"or": [
{
"obstaclesCleared": [
"A"
]
},
"h_bombThings"
]
}Exit condition: {
"leaveWithRunway": {
"length": 4,
"openEnd": 1
}
} |
From: 3
Left Side - Bottom Middle Door
To: 3
Left Side - Bottom Middle Door
Be sure to lure the Sova to the bottom before placing a Power Bomb near the blocks in order to prevent killing it. Requires: "h_frozenEnemyRunway" Exit condition: {
"leaveWithRunway": {
"length": 4,
"openEnd": 1
}
}Dev note: This is only useful if the blocks are broken, but if they are not broken the longer runway can be used. |
From: 4
Left Side - Bottom Door
To: 4
Left Side - Bottom Door
Starting from the top of the room will require careful manipulation of the Sovas. If going through the Power Bomb blocks, place the Power Bomb on the lowest stair on the ledge above, go down and lure the Sova up and use a Super to knock it off once it is just above the right side of where the Power Bomb blocks were. If using Bombs, lure the Sova that is just below the Power Bomb blocks, then use a Super to prevent it from going into the Morph tunnel. Starting at the bottom of the room and going up for the item before coming back down can be done, even with a Power Bomb, by first luring the Sova into safety at the bottom of the room. Requires: "h_frozenEnemyRunway"
{
"or": [
{
"resetRoom": {
"nodes": [
4,
5
]
}
},
{
"ammo": {
"type": "Super",
"count": 1
}
}
]
}Exit condition: {
"leaveWithRunway": {
"length": 6,
"openEnd": 1
}
}Dev note: FIXME: It is possible to do this by following the Sova around the room to avoid resetting the room or using a Super. |
From: 7
Top Right Door
To: 7
Top Right Door
Place a Power Bomb on the bottom stair attached to the door in order to prevent killing the Sova, or free a Sova from the Morph maze with Bombs. If coming from below, be sure to lure the Sova to the bottom before placing a Power Bomb near the blocks in order to prevent killing it. Use Space Jump to follow the Sova to the top right door. Freeze it just at the bottom of the small stairs, as Samus can run over the half-tile gap that remains. Requires: "h_frozenEnemyRunway"
"SpaceJump"
"canBePatient"
{
"or": [
{
"obstaclesCleared": [
"A"
]
},
"h_bombThings"
]
}Exit condition: {
"leaveWithRunway": {
"length": 5,
"openEnd": 1
}
} |
From: 2
Top Right Door
To: 2
Top Right Door
Knock a Geemer off with a Super then follow it back to the top. Grey Geemers can only be frozen with Plasma. Requires: "h_frozenEnemyRunway"
"Plasma"
{
"ammo": {
"type": "Super",
"count": 1
}
}Exit condition: {
"leaveWithRunway": {
"length": 6,
"openEnd": 1
}
} |
|
Use a Super to knock off a Sova and follow it to this door. The fastest Sova is just above the shot blocks, which takes 30 seconds. Requires: "h_frozenEnemyRunway"
{
"ammo": {
"type": "Super",
"count": 1
}
}Exit condition: {
"leaveWithRunway": {
"length": 6,
"openEnd": 1,
"gentleUpTiles": 2
}
} |
From: 2
Middle Left Door
To: 2
Middle Left Door
Use a Super to knock off the Sova while it is on the left side of the platform next to this door then quickly freeze it once it crawls into position. Requires: "h_frozenEnemyRunway"
{
"ammo": {
"type": "Super",
"count": 1
}
}Exit condition: {
"leaveWithRunway": {
"length": 5,
"openEnd": 1
}
} |
From: 6
Top Right Door
To: 6
Top Right Door
Use a Super to knock off a Sova and follow it to this door. The fastest Sova is just above the middle left door, while it is on the left side of the platform, which takes 45 seconds. Requires: "h_frozenEnemyRunway"
{
"ammo": {
"type": "Super",
"count": 1
}
}Exit condition: {
"leaveWithRunway": {
"length": 6,
"openEnd": 1
}
} |
From: 2
Bottom Right Door
To: 2
Bottom Right Door
To minimize heat frames, briefly wait for the Sova to be on the top right of the platform before knocking it off to shorten its path to the door. Requires: "h_frozenEnemyRunway"
{
"heatFrames": 360
}
{
"or": [
"canCrumbleJump",
"HiJump",
"canWallJump"
]
}Exit condition: {
"leaveWithRunway": {
"length": 2,
"openEnd": 1
}
}Dev note: There are more alternatives to the single canCrumbleJump, but it is basically assumed at this difficulty. |
From: 2
Middle Left Door
To: 2
Middle Left Door
If the Power Bomb blocks are broken and the room cannot be reset, the runway can be extended by waiting for the slow global Sova. Be careful to prevent killing the Sova when breaking the Power Bomb blocks, while still ensuring breaking the ceiling Bomb blocks. Using a Super to knock off the Sova once it is near the gates will save approximately 30 seconds. Requires: "h_frozenEnemyRunway"
{
"obstaclesCleared": [
"A",
"B",
"C"
]
}
{
"or": [
"canBeVeryPatient",
{
"and": [
"canBePatient",
{
"ammo": {
"type": "Super",
"count": 1
}
}
]
}
]
}Exit condition: {
"leaveWithRunway": {
"length": 7,
"openEnd": 1
}
}Dev note: This strat only takes 60-90 seconds, but could be much longer if Samus has to wait for the Sova to move out of the Power Bomb area. |
From: 1
Top Right Door
To: 1
Top Right Door
Wait 80 seconds for the Sova to get into position, then freeze it to bridge the gap and significantly extend the runway. The other Sovas can be farmed or used as a backup. Requires: "h_frozenEnemyRunway"
"canBePatient"
{
"heatFrames": 4800
}Exit condition: {
"leaveWithRunway": {
"length": 10,
"openEnd": 1
}
}Dev note: Because the Sovas are global, strats could be added that start from the other doors to tighten the total frame count, but it will typically require heatProof either way. |
From: 2
Middle Right Door
To: 2
Middle Right Door
Wait 3 minutes for the Sova to get into position, or 100 seconds with Morph by going ahead of them to break the shot blocks as they get there. This can be further reduced to 45 seconds with a Super by knocking a Sova off after it exits the morph tunnel. The other Sovas can be farmed or used as a backup. Requires: "h_frozenEnemyRunway"
{
"or": [
{
"and": [
"h_heatProof",
"canBeVeryPatient"
]
},
{
"and": [
"h_heatProof",
"canBePatient",
"Morph"
]
},
{
"and": [
{
"ammo": {
"type": "Super",
"count": 1
}
},
{
"heatFrames": 2600
}
]
}
]
}Exit condition: {
"leaveWithRunway": {
"length": 4,
"openEnd": 1
}
}Dev note: Because the Sovas are global, strats could be added that start from the other doors to tighten the total frame count, but it will typically require heatProof either way. |
From: 1
Left Door
To: 1
Left Door
Lure the Gamets up out of the water. It may be helpful to freeze them on the ascent to prevent them from separating and moving horizontally. Positioning is much easier with Morph; simply morph on the runway before they start separating. Freeze a Gamet while there is a half-tile gap between it and the runway in order to extend it as much as possible. Requires: "h_navigateUnderwater"
{
  "or": [
    "h_trickyFrozenEnemyRunway",
    {
      "and": [
        "h_frozenEnemyRunway",
        "Morph"
      ]
    }
  ]
}
Exit condition: {
"leaveWithRunway": {
"length": 6,
"openEnd": 0
}
} |
From: 1
Left Door
To: 2
Right Door
Lure the Geemers up out of the water. It may be helpful to freeze them on the ascent to prevent them from separating and moving horizontally. At the top, position a Gamet flush with the central runway. Positioning is much easier with Morph; simply morph on the runway before they start separating. Freeze the Gamet before it begins moving horizontally, and it will be able to turn to the right. Use it as a frozen platform to cross both bodies of water. Lure the Gamet to the right and freeze it while there is a half-tile gap between it and the runway in order to extend it as much as possible. Requires: "h_navigateUnderwater"
"canTrickyJump"
{
"or": [
"h_trickyFrozenEnemyRunway",
{
"and": [
"h_frozenEnemyRunway",
"Morph"
]
}
]
}
{
"or": [
"canDash",
"canTrickyDodgeEnemies"
]
}
{
"or": [
{
"ammo": {
"type": "Super",
"count": 1
}
},
{
"obstaclesCleared": [
"A"
]
}
]
}Exit condition: {
"leaveWithRunway": {
"length": 9,
"openEnd": 0
}
}Unlocks doors: {"types":["ammo"],"requires":[]} |
From: 1
Top Left Door
To: 1
Top Left Door
Lure the Gamets up; it may be helpful to freeze them on the ascent to prevent them from separating and moving horizontally. Freeze a Gamet at the correct height, and then use it as a platform to reach the door. Positioning is much easier with Morph; simply morph on any of the stairs before they start separating. Finally, freeze a Gamet while there is a half-tile gap between it and the runway in order to extend it as much as possible. Requires: "SpaceJump"
{
"or": [
"h_trickyFrozenEnemyRunway",
{
"and": [
"h_frozenEnemyRunway",
"Morph"
]
}
]
}Exit condition: {
"leaveWithRunway": {
"length": 5,
"openEnd": 0
}
} |
From: 4
Top Right Door
To: 4
Top Right Door
Lure the Gamets up; it may be helpful to freeze them on the ascent to prevent them from separating and moving horizontally. At the top, freeze a Gamet while there is a half-tile gap between it and the runway in order to extend it as much as possible. Positioning is much easier with Morph; simply morph on any of the stairs before they start separating. Freezing one or two Gamets after they separate but before they start moving can help with dodging and avoiding damage. Requires: {
"or": [
"h_trickyFrozenEnemyRunway",
{
"and": [
"h_frozenEnemyRunway",
"Morph"
]
}
]
}Exit condition: {
"leaveWithRunway": {
"length": 5,
"openEnd": 0
}
} |
From: 1
Top Left Door
To: 1
Top Left Door
Requires: "h_frozenEnemyRunway"
{
"ammo": {
"type": "Super",
"count": 1
}
}
{
"or": [
"canConsecutiveWallJump",
"SpaceJump",
"canLongIBJ",
"canBePatient"
]
}Exit condition: {
"leaveWithRunway": {
"length": 11,
"openEnd": 1
}
} |
From: 3
Bottom Right Door
To: 3
Bottom Right Door
Requires: "h_frozenEnemyRunway"
{
"ammo": {
"type": "Super",
"count": 1
}
}Exit condition: {
"leaveWithRunway": {
"length": 5,
"openEnd": 1
}
} |
From: 3
Left Farm Junction
To: 1
Left Door
The Zebbo needs to be 2 pixels higher than where it would be if Samus was standing. One setup is to peform a tiny hop just before the right Zebbo starts moving to the left then freeze it after it starts moving left. Lure the Zebbo to the left and freeze it again to extend the runway while maintaining a half-tile gap between it and the runway to extend the runway as much as possible. With more Energy, it is possible to morph on one of the medium-height pillars to align the Zebbo. Requires: "canDash"
"h_frozenEnemyRunway"
{
"heatFrames": 1000
}Exit condition: {
"leaveWithRunway": {
"length": 3,
"openEnd": 0
}
}Unlocks doors: {"types":["ammo"],"requires":[]} |
From: 4
Right Farm Junction
To: 2
Right Door
The Zebbo needs to be 2 pixels higher than where it would be if Samus was standing. One setup is to peform a tiny hop just before the left Zebbo starts moving to the right then freeze it after it starts moving right. Get onto the runway and freeze the Zebbo again while maintaining a half-tile gap between it and the runway to extend it as much as possible. With more Energy, it is possible to morph on one of the medium-height pillars to align the Zebbo. With less Energy, it is possible to get the Zebbo into position by only freezing it once - after the small hop, jump towards the door and shoot downwards to freeze it in place. Requires: "canDash"
"h_frozenEnemyRunway"
{
"heatFrames": 300
}
{
"or": [
"canInsaneJump",
{
"heatFrames": 300
}
]
}Exit condition: {
"leaveWithRunway": {
"length": 6,
"openEnd": 0
}
}Unlocks doors: {"types":["ammo"],"requires":[]} |
From: 3
Farm Junction Free of Holtzes
To: 1
Left Door
Assumes killing all the Holtzes then farming to full. Morph on the ground near the Zebbo spawner then quickly unmorph and shoot as it starts to move horizontally. While on the runway near the door, freeze the Zebbo again while maintaining a half-tile gap between it and the runway to extend it as much as possible. Gaining Energy from the farm requires some sort of heat reduction. Requires: "canDash"
"h_heatResistant"
"h_frozenEnemyRunway"
"Morph"
{
"heatFrames": 500
}Exit condition: {
"leaveWithRunway": {
"length": 6,
"openEnd": 0
}
}Unlocks doors: {"types":["ammo"],"requires":[]}Dev note: FIXME: Another strat could be added without the farm or heat resistance. |
From: 3
Farm Junction Free of Holtzes
To: 2
Right Door
Assumes killing all the Holtzes then farming to full. Morph on the ground near the Zebbo spawner then quickly unmorph and shoot as it starts to move horizontally. While on the runway near the door, freeze the Zebbo again while maintaining a half-tile gap between it and the runway to extend it as much as possible. Gaining Energy from the farm requires some sort of heat reduction. Requires: "canDash"
"h_heatResistant"
"h_frozenEnemyRunway"
"Morph"
{
"heatFrames": 500
}Exit condition: {
"leaveWithRunway": {
"length": 6,
"openEnd": 0
}
}Unlocks doors: {"types":["ammo"],"requires":[]}Dev note: FIXME: Another strat could be added without the farm or heat resistance. |
|
Freeze the Atomic in position to extend the runway. Maintain a half-tile gap between the Atomic and the runway to extend it as far as possible. One easy method to align the Atomic is to lure the it high then stand under it to freeze it. Requires: {
"obstaclesCleared": [
"A"
]
}
"h_frozenEnemyRunway"
"f_DefeatedPhantoon"Exit condition: {
"leaveWithRunway": {
"length": 4,
"openEnd": 0
}
}Dev note: This should be possible with a frozen Covern, but it is annoying to set up. |
|
One way to position the Atomic is to lure it to the right by standing on the ground, then jump over it and freeze it while standing in the corner on the ground once it is just under 2 tiles away from the ledge. Stand on the ledge and freeze it again once it is in position, maintaining a half-tile gap between the Atomic and the runway to extend it as much as possible. Requires: "h_frozenEnemyRunway" Exit condition: {
"leaveWithRunway": {
"length": 5,
"openEnd": 0
}
}Dev note: This does not require Phantoon to be killed, as the broken workrobot is there otherwise. |
|
Lure an Atomic from the left half of the room. Morph in the corner against the top stair and wait for the Atomic to approach. Quickly unmorph just before and freeze the Atomic just after it hits Samus. Requires: "f_DefeatedPhantoon"
{
"or": [
"h_bombThings",
{
"and": [
"Morph",
{
"obstaclesCleared": [
"A"
]
}
]
}
]
}
"h_frozenEnemyRunway"
{
"or": [
{
"enemyDamage": {
"enemy": "Atomic",
"type": "contact",
"hits": 1
}
},
"h_pauseAbuseMinimalReserveRefill"
]
}Exit condition: {
"leaveWithRunway": {
"length": 4,
"openEnd": 0
}
} |
From: 2
Top Left Door
To: 2
Top Left Door
Position and freeze an Atomic to extend the runway. Maintain a half-tile gap between the runway to extend it as far as possible. Requires: "f_DefeatedPhantoon" "h_frozenEnemyRunway" Exit condition: {
"leaveWithRunway": {
"length": 8,
"openEnd": 0
}
}Dev note: It could be possible to freeze a Covern in its place, but it seems very difficult to position. |
|
Shinecharging up the stairs gives a longer effective runway than shinecharging down them. A frozen Atomic (or Covern) can be used for more runway. Requires: {
"or": [
{
"canShineCharge": {
"usedTiles": 11,
"steepUpTiles": 3,
"openEnd": 2
}
},
{
"and": [
"h_frozenEnemyRunway",
{
"or": [
"f_DefeatedPhantoon",
{
"and": [
"SpaceJump",
"h_trickyFrozenEnemyRunway"
]
}
]
},
{
"canShineCharge": {
"usedTiles": 13,
"steepUpTiles": 3,
"openEnd": 1
}
}
]
}
]
}
"canTemporaryBlue"
"canLateralMidAirMorph"Clears obstacles: C Dev note: There is 1/2 a unusable tile in this runway. |
From: 4
Top Right Door
To: 4
Top Right Door
Lure an Atomic or get a Covern to spawn to slightly extend the runway. Positioning a Covern is a bit tricky. Consecutive wall jump or Space Jump in place above the gap but not quite at the ceiling, or perform full height jumps to sometimes get the Covern to spawn in position. A crouch shot may help freeze the Coven when it is in position. Requires: "h_frozenEnemyRunway"
{
"or": [
"f_DefeatedPhantoon",
"h_trickyFrozenEnemyRunway"
]
}Exit condition: {
"leaveWithRunway": {
"length": 14,
"openEnd": 0,
"steepUpTiles": 7
}
} |
From: 5
Middle Right Door
To: 5
Middle Right Door
Lure an Atomic or get a Covern to spawn to extend the runway. Position the enemy horizontally centered in the hole to extend the runway all the way to the wall. Positioning a Covern is tricky. One way to set this up is with Space Jump. Align Samus left against the tile in the ceiling to align the Covern horizontally, then perform short Space Jumps half way between the desired Covern position and the ceiling until the Covern spawns in the correct position. Requires: "h_frozenEnemyRunway"
{
"or": [
"f_DefeatedPhantoon",
{
"and": [
"SpaceJump",
"h_trickyFrozenEnemyRunway"
]
}
]
}Exit condition: {
"leaveWithRunway": {
"length": 14,
"openEnd": 0,
"steepUpTiles": 6
}
}Dev note: FIXME: There may be other ways to set up the Covern positioning without Space Jump. |
From: 5
Middle Right Door
To: 8
Item
Shinecharging up the stairs gives a longer effective runway than shinecharging down them. Bounce down the stairs to make movement simpler. A frozen Atomic (or Covern) can be used for more runway. Requires: {
"or": [
{
"and": [
"can4HighMidAirMorph",
{
"doorUnlockedAtNode": 5
},
{
"canShineCharge": {
"usedTiles": 11,
"steepUpTiles": 7,
"openEnd": 2
}
}
]
},
{
"and": [
"h_frozenEnemyRunway",
{
"or": [
"f_DefeatedPhantoon",
{
"and": [
"SpaceJump",
"h_trickyFrozenEnemyRunway"
]
}
]
},
"can4HighMidAirMorph",
{
"doorUnlockedAtNode": 5
},
{
"canShineCharge": {
"usedTiles": 13,
"steepUpTiles": 7,
"openEnd": 1
}
}
]
},
{
"canShineCharge": {
"usedTiles": 10,
"steepUpTiles": 7,
"openEnd": 2
}
},
{
"and": [
"h_frozenEnemyRunway",
{
"or": [
"f_DefeatedPhantoon",
{
"and": [
"SpaceJump",
"h_trickyFrozenEnemyRunway"
]
}
]
},
{
"canShineCharge": {
"usedTiles": 12,
"steepUpTiles": 7,
"openEnd": 1
}
}
]
}
]
}
"canChainTemporaryBlue"
"canXRayTurnaround"Clears obstacles: C Dev note: There is 1/2 a unusable tile in this runway. |
From: 1
Right Door
To: 1
Right Door
Stand a few pixels away from the bottom of the stairs to easily position the Covern and extend the runway as far as possible. Requires: "h_frozenEnemyRunway"
{
"not": "f_DefeatedPhantoon"
}
"canRiskPermanentLossOfAccess"Exit condition: {
"leaveWithRunway": {
"length": 7,
"openEnd": 0
}
} |
From: 1
Left Door
To: 1
Left Door
Stand half way between the ledge and the save station to position the Covern and extend the runway as far as possible. Requires: "h_frozenEnemyRunway"
{
"not": "f_DefeatedPhantoon"
}
"canRiskPermanentLossOfAccess"Exit condition: {
"leaveWithRunway": {
"length": 6,
"openEnd": 0
}
} |
From: 4
Farm Junction Left of Gate
To: 4
Farm Junction Left of Gate
Fill up on the respawning Zebbos. Shinecharge under the open gate, then jump into the left Boyon to interrupt. A frozen Zebbo can add to the runway if needed. Requires: {
"obstaclesCleared": [
"R-Mode"
]
}
{
"obstaclesCleared": [
"A"
]
}
{
"refill": [
"Energy"
]
}
{
"or": [
{
"canShineCharge": {
"usedTiles": 15,
"openEnd": 2
}
},
{
"and": [
{
"or": [
{
"and": [
"h_trickyFrozenEnemyRunway",
{
"enemyKill": {
"enemies": [
[
"Boyon"
]
]
}
}
]
},
{
"and": [
"h_frozenEnemyRunway",
"Morph"
]
}
]
},
{
"canShineCharge": {
"usedTiles": 18,
"openEnd": 1
}
}
]
}
]
}
{
"autoReserveTrigger": {
"maxReserveEnergy": 95
}
}
"canRModeSparkInterrupt"Resets obstacles: R-Mode |
|
Requires: "h_frozenEnemyRunway" Exit condition: {
"leaveWithRunway": {
"length": 6,
"openEnd": 1
}
} |
From: 1
Top Left Doorway
To: 1
Top Left Doorway
Requires: "h_frozenEnemyRunway" Exit condition: {
"leaveWithRunway": {
"length": 4,
"openEnd": 1
}
} |
From: 2
Bottom Left Door
To: 2
Bottom Left Door
Requires: "h_frozenEnemyRunway" Exit condition: {
"leaveWithRunway": {
"length": 3,
"openEnd": 1
}
} |
From: 3
Bottom Right Door
To: 3
Bottom Right Door
Requires: "h_frozenEnemyRunway" Exit condition: {
"leaveWithRunway": {
"length": 3,
"openEnd": 1
}
} |
From: 4
Top Right Doorway
To: 4
Top Right Doorway
Requires: "h_frozenEnemyRunway" Exit condition: {
"leaveWithRunway": {
"length": 4,
"openEnd": 1
}
} |
From: 2
Bottom Right Door
To: 2
Bottom Right Door
Requires: "h_frozenEnemyRunway" Exit condition: {
"leaveWithRunway": {
"length": 6,
"openEnd": 1,
"steepUpTiles": 1
}
} |
From: 3
Middle Right Door
To: 3
Middle Right Door
Wait about 25 seconds for the global crab. Position Samus on the first floating platform to shoot the crab as quickly and early as possible. Requires: "h_frozenEnemyRunway" Exit condition: {
"leaveWithRunway": {
"length": 26,
"openEnd": 1,
"gentleUpTiles": 3,
"gentleDownTiles": 3
}
} |
|
Requires: "h_frozenEnemyRunway" Exit condition: {
"leaveWithRunway": {
"length": 16,
"openEnd": 1,
"steepUpTiles": 2
}
} |
From: 1
Top Left Door
To: 1
Top Left Door
Follow the crab from the bottom right door to the top left door. This takes approximately 90 seconds. It is also possible to knock the crab off of the middle peak with a super and follow it to the left which may save time. Requires: "h_frozenEnemyRunway"
"Gravity"
"canBePatient"
{
"or": [
"SpaceJump",
{
"and": [
{
"ammo": {
"type": "Super",
"count": 1
}
},
{
"or": [
"HiJump",
"canSpringBallJumpMidAir",
"canGravityJump",
"canConsecutiveWallJump",
"canSpeedyJump"
]
}
]
}
]
}Exit condition: {
"leaveWithRunway": {
"length": 4,
"openEnd": 0
}
} |
From: 1
Top Left Door
To: 1
Top Left Door
Follow the crab from the bottom right door to the top left door. It is also possible to knock the crab off of the middle peak with a super and follow it. Requires: "h_frozenEnemyRunway"
"Gravity"
"canBeVeryPatient"
{
"or": [
"canGravityJump",
"canPreciseGrapple",
{
"ammo": {
"type": "Super",
"count": 1
}
}
]
}Exit condition: {
"leaveWithRunway": {
"length": 4,
"openEnd": 0
}
}Dev note: These strats take approximately 2 minutes each, but because it is just for a 1.5 tile runway extension, canBeVeryPatient was added. This could be done with many other sets of item combinations, but it would be very tedious for a runway extension. |
|
Follow the crab from the bottom right door to the top right door. Depending on the item setup, this takes 30-50 seconds. Keep a half-tile gap between the crab and the runway in order to extend it as much as possible. Requires: "h_frozenEnemyRunway"
"Gravity"
{
"or": [
"SpaceJump",
"canGravityJump",
"Grapple"
]
}Exit condition: {
"leaveWithRunway": {
"length": 6,
"openEnd": 0
}
}Dev note: This could be done with many other sets of item combinations, but it would be very tedious for a 1.5 tile runway extension. |
|
Requires: "h_frozenEnemyRunway" Exit condition: {
"leaveWithRunway": {
"length": 11,
"openEnd": 0
}
} |
|
Requires: "Gravity"
{
"or": [
{
"canShineCharge": {
"usedTiles": 20,
"openEnd": 2
}
},
{
"and": [
"canEnemyExtendRunway",
{
"canShineCharge": {
"usedTiles": 21,
"openEnd": 2
}
}
]
}
]
}
{
"shineChargeFrames": 90
}Exit condition: {
"leaveShinecharged": {}
}Dev note: It is possible, although not overly useful, to extend the runway here using a snail. |
|
Requires: "Gravity"
"canShinechargeMovement"
{
"or": [
{
"canShineCharge": {
"usedTiles": 20,
"openEnd": 2
}
},
{
"and": [
"canEnemyExtendRunway",
{
"canShineCharge": {
"usedTiles": 21,
"openEnd": 2
}
}
]
}
]
}
{
"or": [
{
"shinespark": {
"frames": 19,
"excessFrames": 4
}
},
{
"and": [
"canMidairShinespark",
{
"shinespark": {
"frames": 13,
"excessFrames": 4
}
}
]
}
]
}Dev note: It is possible, although not overly useful, to extend the runway here using a snail. FIXME: It is possible to use a snail here and in Shaktool's room to extend the runway at the door. This can be useful when short charging, but can not be used to leave running, as running on the snail does not work. |
From: 1
Left Door
To: 1
Left Door
The Zoa needs to be at least 3 pixels higher than when it is frozen at standing height. It may help to freeze one while standing to the left of it before it starts moving horizontally, then move to a specific point on the slope to the right of it to position it vertically. Freeze the Zoa a half-tile away from the runway in order to extend it as much as possible. Requires: "h_frozenEnemyRunway" Exit condition: {
"leaveWithRunway": {
"length": 5,
"openEnd": 0
}
} |
|
Lure the Mochtroid into the pit and freeze it, then wait for it on the ledge and freeze it when it is in position. Requires: "h_frozenEnemyRunway" Exit condition: {
"leaveWithRunway": {
"length": 6,
"openEnd": 1
}
}Dev note: This just assumes 1 extra runway tile, although it is possible to add 1.5 with a decent lure. |
|
Use a frozen Mochtroid to extend the length of the runway. Positioning the Mochtroid can be done by dropping down below then climbing back up with the frozen Mochtroid as a platform. Alternatively, freeze the Mochtroid with an angle-down shot while falling below then quickly climb back up. Requires: "h_navigateUnderwater"
"h_frozenEnemyRunway"
{
"or": [
"canMochtroidIceClimb",
{
"and": [
"Gravity",
{
"or": [
"SpaceJump",
"canWallJump"
]
}
]
}
]
}
{
"enemyDamage": {
"enemy": "Mochtroid",
"type": "contact",
"hits": 2
}
}Exit condition: {
"leaveWithRunway": {
"length": 4,
"openEnd": 1
}
}Dev note: There are many other ways to get into position, but they would require manipulating the Mochtroid as much as canMochtroidIceClimb expects. |
From: 2
Bottom Right Door
To: 2
Bottom Right Door
Use a frozen Mochtroid to extend the length of the runway. Positioning the Mochtroid is easiest by dropping into the sand and freezing it. Maintain a half-tile gap between the Mochtroid and the runway in order to extend it as much as possible. Requires: "h_frozenEnemyRunway"
"Gravity"
"canPlayInSand"
{
"enemyDamage": {
"enemy": "Mochtroid",
"type": "contact",
"hits": 1
}
}Exit condition: {
"leaveWithRunway": {
"length": 6,
"openEnd": 0
}
} |
From: 3
Top Right Door
To: 3
Top Right Door
Use a frozen Mochtroid to extend the length of the runway. Positioning the Mochtroid can be done by dropping down below then climbing back up with the frozen Mochtroid as a platform. Alternatively, freeze the Mochtroid with an angle-down shot while falling below then quickly climb back up. Requires: "h_navigateUnderwater"
"h_frozenEnemyRunway"
{
"or": [
"canMochtroidIceClimb",
{
"and": [
"Gravity",
{
"or": [
"SpaceJump",
"canWallJump"
]
}
]
}
]
}
{
"enemyDamage": {
"enemy": "Mochtroid",
"type": "contact",
"hits": 2
}
}Exit condition: {
"leaveWithRunway": {
"length": 4,
"openEnd": 1
}
}Dev note: There are many other ways to get into position, but they would require manipulating the Mochtroid as much as canMochtroidIceClimb expects. |
|
Freeze a crab to extend the runway while leaving a half-tile gap between the crab and the runway to extend it as much as possible. Requires: "h_frozenEnemyRunway" Exit condition: {
"leaveWithRunway": {
"length": 6,
"openEnd": 0
}
} |
From: 1
Top Left Door
To: 1
Top Left Door
Use a frozen Mochtroid to extend the length of the runway. Positioning the Mochtroid can be done by dropping down below then climbing back up with the frozen Mochtroid as a platform. Alternatively, freeze the Mochtroid with an angle-down shot while falling below then quickly climb back up. Requires: "h_navigateUnderwater"
"h_frozenEnemyRunway"
{
"or": [
"canMochtroidIceClimb",
{
"and": [
"Gravity",
{
"or": [
"SpaceJump",
"canWallJump"
]
}
]
}
]
}
{
"enemyDamage": {
"enemy": "Mochtroid",
"type": "contact",
"hits": 2
}
}Exit condition: {
"leaveWithRunway": {
"length": 3,
"openEnd": 1
}
}Dev note: There are many other ways to get into position, but they would require manipulating the Mochtroid as much as canMochtroidIceClimb expects. |
From: 4
Top Right Door
To: 4
Top Right Door
Use a frozen Mochtroid to extend the length of the runway. Positioning the Mochtroid can be done by dropping down below then climbing back up with the frozen Mochtroid as a platform. Alternatively, freeze the Mochtroid with an angle-down shot while falling below then quickly climb back up. Requires: "h_navigateUnderwater"
"h_frozenEnemyRunway"
{
"or": [
"canMochtroidIceClimb",
{
"and": [
"Gravity",
{
"or": [
"SpaceJump",
"canWallJump"
]
}
]
}
]
}
{
"enemyDamage": {
"enemy": "Mochtroid",
"type": "contact",
"hits": 2
}
}Exit condition: {
"leaveWithRunway": {
"length": 4,
"openEnd": 1
}
}Dev note: There are many other ways to get into position, but they would require manipulating the Mochtroid as much as canMochtroidIceClimb expects. |
|
Freeze the Zoa just a few pixels higher than it would be if Samus was standing next to the farm. Dodge and freeze the other Zoas, or tank a hit then kill them and don't collect their drops. Maintain a half-tile runway between the frozen Zoa and the runway in order to extend it as much as possible. Requires: "h_frozenEnemyRunway"
{
"or": [
"h_trickyFrozenEnemyRunway",
{
"enemyDamage": {
"enemy": "Zoa",
"type": "contact",
"hits": 1
}
}
]
}Exit condition: {
"leaveWithRunway": {
"length": 3,
"openEnd": 0
}
} |
|
Requires: "h_frozenEnemyRunway" Exit condition: {
"leaveWithRunway": {
"length": 13,
"openEnd": 0
}
} |
|
Freeze the Yapping Maw on room entry, and continue to periodically refreeze it throughout. Jump and freeze the Zoa at the correct height, noting that it will rise one more pixel after it thaws. Maintain a half-tile runway between the frozen Zoa and the runway in order to extend it as much as possible. Requires: "h_frozenEnemyRunway" Exit condition: {
"leaveWithRunway": {
"length": 3,
"openEnd": 0
}
} |
|
Stand a bit more than a tile away from the ledge and wait for the Rinka to start moving. Freeze the Rinka at the correct height while maintaining a half-tile gap between the Rinka and the runway to extend it as much as possible. Requires: "h_frozenEnemyRunway" Exit condition: {
"leaveWithRunway": {
"length": 5,
"openEnd": 0
}
} |
From: 2
Right Door
To: 2
Right Door
Use a frozen Metroid or a Rinka from the left to extend the length of the runway. Luring a Rinka is easiest with Morph - While morphed, barely move the bottom Rinka spawner on camera in order to have it shoot at a usable angle. Without Morph, use the top Rinka spawner and jump just before the Rinka starts moving to get a usable angle. Requires: {
"or": [
"h_trickyFrozenEnemyRunway",
{
"and": [
"h_frozenEnemyRunway",
{
"not": "f_KilledMetroidRoom1"
},
"canRiskPermanentLossOfAccess"
]
}
]
}Exit condition: {
"leaveWithRunway": {
"length": 4,
"openEnd": 1
}
} |
