canXRayTurnaround (Very Hard)
Using X-Ray to turn around in place without changing pixel position. Alternating X-Ray turnarounds with regular turnarounds enables movement in either direction even while crouched. This allows Samus to wiggle through two-tile tall passages, but only if the crouch originated from standing or unmorphing (not spinjumping).
Strats ()
|
From: 6
Main Junction
To: 3
Top Right Door
Notable: true 
A long Temporary Blue Chain with x-ray turnarounds to climb up and destroy the bomb blocks blocking the top morph tunnel. Requires: "canChainTemporaryBlue"
"canXRayTurnaround"
"canTrickyJump"
"canBePatient"
{
"canShineCharge": {
"usedTiles": 27.5,
"openEnd": 0
}
}
{
"obstaclesCleared": [
"A"
]
}
|
|
From: 6
Main Junction
To: 4
Middle Right Door
Notable: true
A Temporary Blue Chain with x-ray turnarounds to climb up and destroy the bomb blocks blocking the bottom morph tunnel. Requires: "canChainTemporaryBlue"
"canXRayTurnaround"
"canTrickyJump"
{
"canShineCharge": {
"usedTiles": 27.5,
"openEnd": 0
}
}
{
"obstaclesCleared": [
"A"
]
}
|
|
From: 6
Top Junction with Temporary Blue (Right of Morph Tunnel)
To: 3
Item
Unmorph on the leftmost edge of the Speed blocks and jump across. Landing on the right side Speedblock, and the solid tile, gives enough time to run to the item and fall before the block respawns. Or jump fully over the Speed blocks and turn around using X-Ray after collecting the item. Requires: "canChainTemporaryBlue"
{
"or": [
"canTrickyJump",
"canXRayTurnaround"
]
}
Clears obstacles: B |
|
From: 2
Right Door
To: 4
Middle Junction (Left of Morph Tunnel)
Entrance condition: {
"comeInShinecharging": {
"length": 9,
"openEnd": 0
}
}
Requires: "canXRayTurnaround"
"canChainTemporaryBlue"
{
"acidFrames": 27
}
|
|
Shinespark from the end of the entry runway, just past the down slope. Samus will crash into the last set of blocks preventing access to the opposite door. Entrance condition: {
"comeInShinecharged": {
"framesRequired": 37
}
}
Requires: "canShinechargeMovement"
"canHorizontalShinespark"
{
"shinespark": {
"frames": 70
}
}
{
"or": [
"Morph",
"canTunnelCrawl",
"canTurnaroundAimCancel",
{
"and": [
"canTwoTileSqueeze",
"canXRayTurnaround"
]
}
]
}
|
|
Stand on the farthest pixel into the door possible using moonwalk, X-Ray, or morphball turn around. Run towards the water and jump on the last possible frame. Perform the CWJ off of the item pedestal to cross to the other side. Requires: "canCWJ"
"canDisableEquipment"
{
"doorUnlockedAtNode": 1
}
{
"or": [
"canMoonwalk",
"Morph",
"canXRayTurnaround"
]
}
{
"obstaclesNotCleared": [
"A"
]
}
|
|
It's not even necessary to jump through the door, the in-room doorsill gives enough running room to make it up. Requires: {
"doorUnlockedAtNode": 2
}
"canPreciseWalljump"
"canCarefulJump"
{
  "or": [
    "canTrickyJump",
    "canMoonwalk",
    "canXRayTurnaround",
    "Morph"
  ]
}
|
|
In direct g-mode, the door will not close, and the in-room doorsill gives enough running room to make it up to the invisible ledge. Entrance condition: {
"comeInWithGMode": {
"mode": "direct",
"morphed": false
}
}
Requires: "canPreciseWalljump"
"canCarefulJump"
{
"or": [
"canTrickyJump",
"canMoonwalk",
"canXRayTurnaround",
"Morph"
]
}
|
|
Run then do a very small spin jump to clip into the left side of the first gate. While inside the gate, back up to get the maximum run distance using either Moonwalk or X-Ray Turnaround and repeat for the next gate. It is also possible to clip into the gates by aiming down while in the spin jump. A down-back is also possible for clipping into the first gate, but it is generally harder. Requires: {
"obstaclesNotCleared": [
"A"
]
}
"canCrouchGateClip"
{
"or": [
"canXRayTurnaround",
"canMoonwalk"
]
}
Clears obstacles: A |
|
The only way the Wavers will get to the door is if the right crumble blocks are all broken. This assumes that Samus comes from the left with Speed, a mockball, or a crouch gate clip. After the crumbles are broken, shoot the ceiling block and wait by the door for the Waver to come. Note that if Samus takes more than 35 seconds after entering the room, before shooting the ceiling, the Waver will not come down. Requires: {
"obstaclesNotCleared": [
"A"
]
}
{
"or": [
"SpeedBooster",
"canMockball",
{
"and": [
"canCrouchGateClip",
{
"or": [
"canXRayTurnaround",
"canMoonwalk"
]
}
]
}
]
}
Exit condition: {
"leaveWithGModeSetup": {}
}
|
|
From: 3
Bottom Left Door
To: 6
Junction (Right of Tunnel)
Notable: true 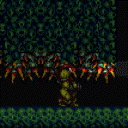
Maintain IFrames by using X-Ray whenever a thorn would deal damage. Move by alternating between X-Ray turnarounds and normal turnarounds. Simply crouch again following any accidental X-Ray Standups. Requires: "canXRayWaitForIFrames"
"canXRayTurnaround"
{
"thornHits": 1
}
|
|
From: 6
Junction (Right of Tunnel)
To: 3
Bottom Left Door
Notable: true
Maintain IFrames by using X-Ray whenever a thorn would deal damage. Move by alternating between X-Ray turnarounds and normal turnarounds. Simply crouch again following any accidental X-Ray Standups. Requires: "canXRayWaitForIFrames"
"canXRayTurnaround"
{
"thornHits": 1
}
|
|
From: 4
Item (Through the Pipe)
To: 5
Junction The Left End of Morph Tube
Notable: true 
It's a long Wiggle, but you can see the item before going in too far. Requires: "canXRayTurnaround" |
|
From: 5
Junction The Left End of Morph Tube
To: 4
Item (Through the Pipe)
Notable: true
It's a long Wiggle, but you can see the item before going in too far. Spin jumping directly into the tube will disable X-Ray, so enter aiming down to standup first. Requires: "canTwoTileSqueeze" "canXRayTurnaround" |
|
Requires: {
"canShineCharge": {
"usedTiles": 24,
"openEnd": 1
}
}
"canChainTemporaryBlue"
"canXRayTurnaround"
Clears obstacles: D |
|
From: 13
Central Junction
To: 1
Left Side - Top Door
Build a ShineCharge on the below platform and bring it up to the morph tunnel by chaining Temporary Blue. Aim to bounce into the tunnel opening and use springball to bounce the rest of the way while blue. Requires: "canChainTemporaryBlue"
"canSpringBallBounce"
{
"or": [
{
"and": [
"canXRayTurnaround",
{
"canShineCharge": {
"usedTiles": 25,
"openEnd": 0
}
}
]
},
{
"canShineCharge": {
"usedTiles": 21,
"openEnd": 0
}
}
]
}
Clears obstacles: A |
|
From: 1
Left Door
To: 1
Left Door
Notable: true 
Jump straight up and shoot with the correct timing. This strat involves shooting a Super diagonally from the correct height while flush against the left wall. Its acceleration will cause it to clip into the blue gate off-screen. Requires: {
"obstaclesCleared": [
"A"
]
}
{
"or": [
"canTrickyJump",
"h_canBackIntoCorner"
]
}
"HiJump"
"canOffScreenSuperShot"
Clears obstacles: B |
|
From: 1
Left Door
To: 1
Left Door
Notable: true
Use a stationary spinjump, or spinjump against the wall and turn around without moving; and shoot with the same correct timing. This strat involves shooting a Super diagonally from the correct height while flush against the left wall. Its acceleration will cause it to clip into the blue gate off-screen. Requires: {
"obstaclesCleared": [
"A"
]
}
{
"or": [
"canTrickyJump",
"h_canBackIntoCorner"
]
}
"canStationarySpinJump"
"SpaceJump"
"canOffScreenSuperShot"
Clears obstacles: B |
|
From: 4
Frozen Hopper Junction
To: 4
Frozen Hopper Junction
Notable: true
This strat involves shooting a Super diagonally from the correct height while flush against the left wall. Its acceleration will cause it to clip into the blue gate off-screen. Jump straight up and shoot with the correct timing. Taking damage can be used to align against the wall. Requires: {
"obstaclesNotCleared": [
"A"
]
}
{
"or": [
"h_canBackIntoCorner",
{
"enemyDamage": {
"enemy": "Sm. Sidehopper",
"type": "contact",
"hits": 1
}
},
"canTrickyJump"
]
}
"HiJump"
"canOffScreenSuperShot"
Clears obstacles: B |
|
From: 4
Frozen Hopper Junction
To: 4
Frozen Hopper Junction
Notable: true
Freeze a small hopper to the side and kill the remaining Side Hoppers. Stand against the left wall (damage knockback will align Samus with the wall) and shoot up to freeze the hopper. Jump up to land on it, aligned with the wall. Alternatively, Jump and shoot down to freeze the hopper as a way to avoid damage. Fire a Super just above the door shell to hit the Gate. This strat involves shooting a Super diagonally from the correct height while flush against the left wall. Its acceleration will cause it to clip into the blue gate off-screen. Requires: {
"obstaclesNotCleared": [
"A"
]
}
"canTrickyUseFrozenEnemies"
"h_canBackIntoCorner"
"canOffScreenSuperShot"
{
"enemyDamage": {
"enemy": "Sm. Sidehopper",
"type": "contact",
"hits": 1
}
}
Clears obstacles: B |
|
From: 4
Small Ledge Below Left Door
To: 1
Left Door
Notable: true 

Jump to the door leading to X-Ray either by jumping from spikes or with a very precise jump. Cross the room by Jumping atop the spikes. Taking enemy damage can be used to reduce some spike damage. The final jump can either be made by jumping from the bottommost spike stair or from the safe stair. Setup run speed atop the spike stair by holding forward to be pushed backward. The safe stair jump is much harder, but can be made without every pixel of runway. Requires: "HiJump"
"canTrickyJump"
{
"or": [
{
"and": [
"canInsaneWalljump",
"canInsaneJump",
"h_canBackIntoCorner"
]
},
{
"and": [
{
"spikeHits": 1
},
"canPreciseWalljump",
"canIframeSpikeJump"
]
}
]
}
|
|
This strat makes it possible to squeeze through Morphless with just 2 supers. Requires: {
"ammo": {
"type": "Super",
"count": 2
}
}
{
"or": [
"canXRayTurnaround",
"canTurnaroundAimCancel"
]
}
|
|
Shoot out the bottom two super blocks and crouch-wiggle through. Requires: {
"ammo": {
"type": "Super",
"count": 2
}
}
"canXRayTurnaround"
|
|
From: 4
Junction (Right Pit)
To: 3
Right Door
Notable: true 
Back up against the wall of the single-tile ledge. Run forward, perform a single arm pump, and jump on the last possible frame. Aim down just before reaching the platform. The arm pump can be performed by pressing shot, or by pressing an angle button (but not releasing it until after the jump). Requires: "h_canBackIntoCorner" "canInsaneJump" "canDownGrab" |
|
From: 2
Right Door
To: 3
Top Door
Requires: "h_canBackIntoCorner"
{
"heatFrames": 100
}
Exit condition: {
"leaveWithPlatformBelow": {
"height": 9,
"leftPosition": -2,
"rightPosition": 6
}
}
|
|
This expects the more controlled Temporary Blue to fall though the blocks, not storing a shinecharge on the first breakable block. Entrance condition: {
"comeInShinecharging": {
"length": 12,
"openEnd": 0
}
}
Requires: "canTemporaryBlue"
"canXRayTurnaround"
{
"heatFrames": 285
}
Clears obstacles: A, B |
|
From: 5
Middle Right Door
To: 8
Item
Shinecharging up the stairs gives a longer effective runway than shinecharging down them. Bounce down the stairs to make movement simpler. A frozen Atomic (or Covern) can be used for more runway. Requires: "canChainTemporaryBlue"
"canXRayTurnaround"
{
"or": [
{
"and": [
"can4HighMidAirMorph",
{
"doorUnlockedAtNode": 5
},
{
"canShineCharge": {
"usedTiles": 11,
"openEnd": 2,
"steepUpTiles": 7
}
}
]
},
{
"and": [
"f_DefeatedPhantoon",
"h_canFrozenEnemyRunway",
"can4HighMidAirMorph",
{
"doorUnlockedAtNode": 5
},
{
"canShineCharge": {
"usedTiles": 13,
"openEnd": 1,
"steepUpTiles": 7
}
}
]
},
{
"canShineCharge": {
"usedTiles": 10,
"openEnd": 2,
"steepUpTiles": 7
}
},
{
"and": [
"f_DefeatedPhantoon",
"h_canFrozenEnemyRunway",
{
"canShineCharge": {
"usedTiles": 12,
"openEnd": 1,
"steepUpTiles": 7
}
}
]
}
]
}
Clears obstacles: C |
|
From: 8
Item
To: 3
Bottom Left Door
Neutral bounce into the Morph tunnel, and SpringBall bounce to continue all the way through. Requires: "Morph"
"canChainTemporaryBlue"
"canXRayTurnaround"
"canSpringBallBounce"
{
"canShineCharge": {
"usedTiles": 16,
"openEnd": 1,
"steepDownTiles": 4
}
}
Clears obstacles: C |
|
From: 8
Item
To: 3
Bottom Left Door
Run towards the conveyor to more easily build the ShineCharge, and for an easier bounce into the morph tunnel. Neutral bounce into the Morph tunnel, and SpringBall bounce to continue all the way through. Requires: "f_DefeatedPhantoon"
"canXRayTurnaround"
"canSpringBallBounce"
{
"or": [
"HiJump",
"canChainTemporaryBlue"
]
}
{
"canShineCharge": {
"usedTiles": 20,
"openEnd": 1,
"steepDownTiles": 4
}
}
Clears obstacles: C |
|
Bring a Shinecharge from the top door to the speed blocks below the Missile item location. Be especially mindfull of the aquatic life during the descent. Line up directly below the speed blocks when jumping up. Entrance condition: {
"comeInShinecharging": {
"length": 14,
"steepDownTiles": 2,
"openEnd": 0
}
}
Requires: "Gravity" "canChainTemporaryBlue" "canXRayTurnaround" |
|
From: 4
Top Right Door
To: 6
Speed Blocked Item
Bring a Shinecharge from the top door to the speed blocks below the Missile item location. Be especially mindfull of the aquatic life during the descent. Line up directly below the speed blocks when jumping up, especially if using a SpringBall jump. Entrance condition: {
"comeInRunning": {
"speedBooster": true,
"minTiles": 1.4375
}
}
Requires: "canChainTemporaryBlue"
"canXRayTurnaround"
"canStutterWaterShineCharge"
{
"or": [
"Gravity",
{
"and": [
"canSuitlessMaridia",
"HiJump"
]
},
{
"and": [
"canSuitlessMaridia",
"canSpringBallJumpMidAir"
]
}
]
}
|
|
From: 6
Junction Between Items
To: 4
Top Left - Right Item
Requires: "canXRayTurnaround" |
|
Run from or Roll under the pirate lazers. The Pirates will also not shoot if they come on screen while Samus is crouched. Requires: {
"or": [
"HiJump",
"canWalljump",
"h_canFly"
]
}
{
  "or": [
    {
      "and": [
        "canDodgeWhileShooting",
        "canCameraManip",
        {
          "or": [
            "Plasma",
            {
              "and": [
                "h_hasBeamUpgrade",
                "canBePatient"
              ]
            },
            "canBeVeryPatient"
          ]
        }
      ]
    },
    {
      "and": [
        {
          "or": [
            "canBePatient",
            {
              "enemyDamage": {
                "enemy": "Tourian Space Pirate (all)",
                "type": "contact",
                "hits": 1
              }
            }
          ]
        },
        {
          "or": [
            "Morph",
            "canTurnaroundAimCancel",
            "canXRayTurnaround"
          ]
        }
      ]
    }
  ]
}
|
|
Run from or Roll under the pirate lazers. The Pirates will also not shoot if they come on screen while Samus is crouched. Requires: {
"or": [
{
"and": [
"canDodgeWhileShooting",
"canCameraManip",
{
"or": [
"Plasma",
{
"and": [
"h_hasBeamUpgrade",
"canBePatient"
]
},
"canBeVeryPatient"
]
}
]
},
{
"and": [
{
"or": [
"canBePatient",
{
"enemyDamage": {
"enemy": "Tourian Space Pirate (all)",
"type": "contact",
"hits": 1
}
}
]
},
{
"or": [
"Morph",
"canTurnaroundAimCancel",
"canXRayTurnaround"
]
}
]
}
]
}
|