canPreciseCeilingClip (Expert)
Setting up an enemy positioning to perform a very precise ceiling clip. The enemy positioning will require a 2-3 pixel precision range, several pixels lower than what is possible with an X-Ray standup.
Dependencies: canUseEnemies, canXRayCeilingClip, canCeilingClip
Strats ()
|
From: 5
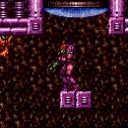
Alcatraz Door
To: 8
Central Junction
Notable: true 
Wait for a global Geemer to make the long trip along the map, or shoot a Super 20 to 30 seconds after entering the room to knock it off the ceiling and save a lot of time. Freeze it just after it starts climbing the bomb blocks. Spin-jump above it, which will put Samus into a forced crouch where X-Ray cannot be used. Use Grapple to kill a a second Geemer, restoring the ability to use X-Ray. Use X-Ray to stand up, then jump up through the ceiling. Requires: "h_ZebesIsAwake"
"canBePatient"
{
"or": [
"canBeVeryPatient",
{
"ammo": {
"type": "Super",
"count": 1
}
}
]
}
"canPreciseCeilingClip"
"canTrickyUseFrozenEnemies"
"canUseGrapple"
"canXRayStandUp"
|
|
From: 5
Alcatraz Door
To: 8
Central Junction
Notable: true 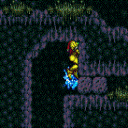
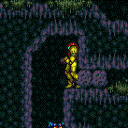
Wait for a global Geemer to make the long trip along the map, or shoot a Super 20 to 30 seconds after entering the room to knock it off the ceiling and save a lot of time. Hold right against the bomb blocks, take damage from the Geemer, jump, aim-down, and shoot the Geemer shortly before landing. Samus should end up standing on the ground with the Geemer frozen on the wall slightly above the ground (overlapping Samus' hitbox). Facing the bomb blocks and pressed against them, jump while holding down (but not crouched) and then press forward at a precise time to break the aim-down pose. If successful, Samus will clip up through the ceiling. This can be attempted several times before the Geemer thaws. Requires: "HiJump"
"h_ZebesIsAwake"
{
"or": [
"canBeVeryPatient",
{
"ammo": {
"type": "Super",
"count": 1
}
}
]
}
"canPreciseCeilingClip"
"canTrickyUseFrozenEnemies"
{
"enemyDamage": {
"enemy": "Geemer (blue)",
"type": "contact",
"hits": 1
}
}
"canInsaneJump"
|
|
Shoot a Super as a Sciser crawls near the top door, then freeze it mid-air and use it to clip up past the door shell. If you don't have Morph and X-Ray, you must shoot the Super while the Sciser is on the slope near the door, not on the door itself. Requires: {
"ammo": {
"type": "Super",
"count": 1
}
}
"canTrickyUseFrozenEnemies"
"h_canNonTrivialCeilingClip"
Bypasses door shell: true |
|
From: 6
Middle Right Door (By Zeb Farm)
To: 12
Top Junction
Notable: true 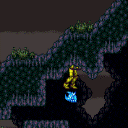
Freeze a bug three tiles to the right of the morph tunnel entrance, directly under the tile where ceiling is higher. Jump onto the bug, crouch, and jump up. The bug must be at a very precise pixel height unless using XRay and Morph. Note that although the ceiling here is 3 tiles thick, only the bottom tile is solid; the other two are slopes pushing Samus up, allowing the trick to be done. Requires: "h_canNonTrivialCeilingClip" "canTrickyUseFrozenEnemies" |
|
From: 3
Bottom Left Door
To: 2
Top Right Door
Notable: true 
Jump and freeze the Beetom at a precise location in order to jump through the crumble blocks. The pixel window is larger and higher with Morph and an X-Ray Stand Up. Two Beetom hits are assumed, but with failed attempts it could take more, possibly requiring leaving the Beetom and going back to the right to farm. Requires: "h_canNonTrivialCeilingClip"
"canTrickyUseFrozenEnemies"
"Morph"
{
"enemyDamage": {
"enemy": "Beetom",
"type": "contact",
"hits": 2
}
}
{
"or": [
"canPreciseCeilingClip",
"canWalljump",
"HiJump",
"SpaceJump",
{
"enemyDamage": {
"enemy": "Beetom",
"type": "contact",
"hits": 2
}
}
]
}
|
|
From: 13
Below Power Bomb Blocks - Main Junction
To: 12
Above Power Bomb Blocks - Main Junction
Freeze the wall crawler at a precise location in order to jump through the Power Bomb Blocks. The pixel window is larger and higher with Morph and an X-Ray Stand Up. Requires: "h_canNonTrivialCeilingClip" "canTrickyUseFrozenEnemies" |
|
From: 13
Below Power Bomb Blocks - Main Junction
To: 14
Right Etecoon Shaft - Wall Jump Climb Checkpoint Junction
Notable: true 
Break the bomb block at the bottom right of the main shaft. Bring a Zeela down to the bottom of the room. Morph inside the tunnel, take a Zeela hit, then jump, aim down, and shoot to freeze the Zeela as it starts to move up and while Samus is close to landing. Jump and aim down to get on top of the Zeela. If the Zeela is precisely positioned exactly 12 pixels above the ground, you can press up to make Samus stand; Otherwise, if you have X-ray, then the Zeela should be frozen lower, and you can morph and unmorph and use X-ray to force Samus to stand up; in this case there is a 6-pixel window over which it works, with the Zeela being between 4 and 9 pixels above the ground. In either case, after standing up on top of the Zeela, jump and aim down to break the crumble block. Then, before the crumble respawns, morph and use Spring Ball (if available) to jump back up and into the tunnel; without Spring Ball, a quick mid-air morph also works but is more difficult. Requires: "h_canBombThings"
"h_additionalBomb"
{
"enemyDamage": {
"enemy": "Zeela",
"type": "contact",
"hits": 1
}
}
"canTrickyUseFrozenEnemies"
"canTrickyJump"
{
"or": [
"canXRayCeilingClip",
{
"and": [
"canPreciseCeilingClip",
"canInsaneJump",
"canBeVeryPatient"
]
}
]
}
{
"or": [
"h_canUseSpringBall",
{
"and": [
"can4HighMidAirMorph",
"canInsaneJump"
]
}
]
}
{
"or": [
"canBePatient",
{
"obstaclesNotCleared": [
"A"
]
}
]
}
|
|
From: 13
Central Junction
To: 5
Left Side - Bottom Middle Door (Blocked by Crumble Blocks)
Notable: true 
Lure the Reo (Bee) to the left to use it as a platform for ice clipping up through the crumbles to the Power Bomb room exit door. Watch the Reo bounce against the left wall until it does a slow hover towards Samus. There is a very small timing of when its right claw is above the small pale spore next to the big red spore, when Samus should jump to be above the Reo. Crouching with Samus' front toe beneath this spore (facing left) will cause the bee to fly with the correct timing after Samus takes knockback damage, with a 3 pixel window. This will cause it to fly left and into the two tile gap below the crumble blocks. Freeze it once to get above it, and then again for the ice clip. Once it is up there, the bee will become stuck and the room will need to be reset. But if the Reo does not fit in the hole, it is possible to just wait near the ledge for another slow hover to try again. With this strat, there is at most a two-frame window in which the Reo can be frozen. One frame (setup dependent) may let Samus crouch jump through the block; the next frame Samus can use Morph and X-Ray to clip through. Requires: "canTrickyUseFrozenEnemies" "canPreciseCeilingClip" "h_canXRayCeilingClip" |
|
From: 13
Central Junction
To: 5
Left Side - Bottom Middle Door (Blocked by Crumble Blocks)
Notable: true 
Lure the Reo (Bee) to the left to use it as a platform for ice clipping up through the crumbles to the Power Bomb room exit door. Watch the Reo bounce against the left wall until it does a slow hover towards Samus. There is a very small timing of when its right claw is above the small pale spore next to the big red spore, when Samus should jump to be above the Reo. Crouching with Samus' front toe beneath this spore (facing left) will cause the bee to fly with the correct timing after Samus takes knockback damage, with a 3 pixel window. This will cause it to fly left and into the two tile gap below the crumble blocks. Freeze it once to get above it, and then again for the ice clip. Once it is up there, the bee will become stuck and the room will need to be reset. But if the Reo does not fit in the hole, it is possible to just wait near the ledge for another slow hover to try again. With this setup, there is a one-frame window in which the Reo can be frozen. Without a precise setup, there is typically no way to clip through without Morph and X-Ray. Requires: "canTrickyUseFrozenEnemies" "canPreciseCeilingClip" |
|
From: 13
Central Junction
To: 5
Left Side - Bottom Middle Door (Blocked by Crumble Blocks)
Notable: true 
Raise a Zeb to be just below the crumble blocks and blindly freeze it to set up an ice clip to reach the Power Bomb room exit door. Get a bug from the pipe to spawn facing left and freeze it while moving to the ledge below the Hopper room door. While crouched, a spazer or wave beam shot will shoot through the floor in front of Samus. The bug must be frozen at a height between where Samus is crouched and where she is standing. Once frozen, somehow track how long until the freeze effect expires, and when the bug will reach the crumble blocks. If the bug is off camera when not frozen, it will despawn. Refreeze the Zeb below the crumble blocks and ice clip up to reach the door. Requires: "canTrickyUseFrozenEnemies"
"canStaggeredWalljump"
"canCameraManip"
{
"or": [
"Wave",
"Spazer"
]
}
"canPreciseCeilingClip"
|
|
From: 3
Right Vertical Door
To: 3
Right Vertical Door
Freeze a Zeela at a precise distance below the door in order to jump up and clip through the door shell. The pixel window is larger and higher with Morph and an X-Ray stand-up. Requires: "canTrickyUseFrozenEnemies" "h_canNonTrivialCeilingClip" Bypasses door shell: true |
|
From: 4
Gamet Farm Junction
To: 3
Top Door
Bring a Gamet from the farm and freeze it at a precise distance below the door in order to crouch-jump up and clip through the door shell. The pixel window is larger and higher with Morph and an X-Ray stand-up, in which case a standing jump is used. Requires: {
"heatFrames": 560
}
"canTrickyUseFrozenEnemies"
"h_canNonTrivialCeilingClip"
Bypasses door shell: true |
|
Freeze the wall crawler at a precise location in order to jump through the Power Bomb Blocks. The pixel window is larger and higher with Morph and an X-Ray Stand Up. Requires: "h_canNonTrivialCeilingClip" "canTrickyUseFrozenEnemies" |
|
From: 2
Right Vertical Door
To: 2
Right Vertical Door
Freeze a Mella at a precise distance below the door in order to crouch-jump up and clip through the door shell. The pixel window is larger and higher with Morph and an X-Ray stand-up, in which case a standing jump is used. Requires: "canManipulateMellas" "canTrickyUseFrozenEnemies" "h_canNonTrivialCeilingClip" Bypasses door shell: true |
|
From: 5
Small Platforms Junction
To: 3
Item
Notable: true 
Freeze the Mella at a precise location in order to jump through the crumble block, then wall jump up the long channel and mid air morph to get out. The Mella pixel positioning window is larger and higher with Morph and an X-Ray Stand Up. Requires: "Morph"
"h_canNonTrivialCeilingClip"
"canTrickyUseFrozenEnemies"
{
"or": [
"canConsecutiveWalljump",
{
"and": [
"HiJump",
"canWalljump"
]
}
]
}
|
|
From: 9
Junction Below Crumble Blocks, Set Up to Clip
To: 2
Top Right Door
Notable: true 
Ice Clip through the crumble blocks using a Multiviola from the bottom of the room and then Crumble Jump to clip through the bomb blocks. The ice clip can be setup by standing in a corner and firing forward when the Multiviola hits Samus, if it is moving downwards towards Samus. The Crumble Jump is done by aiming down (not immediately) after jumping, then changing Samus' hitbox once above the crumble blocks, and jumping again. Requires: "h_heatProof"
"canPreciseCeilingClip"
"canTrickyUseFrozenEnemies"
"canPartialFloorClip"
"canTrickyJump"
"canCrumbleJump"
{
"enemyDamage": {
"enemy": "Multiviola",
"type": "contact",
"hits": 1
}
}
{
"or": [
"h_canCrouchJumpDownGrab",
"canWalljump",
"canSpringBallJumpMidAir",
"HiJump",
"SpaceJump",
"h_canJumpIntoIBJ"
]
}
|
|
From: 9
Junction Below Crumble Blocks, Set Up to Clip
To: 4
Junction Below Bomb Blocks
Notable: true
Ice Clip through the crumble blocks using a Multiviola from the bottom of the room and then Crumble Jump to clip through the bomb blocks. The ice clip can be setup by standing in a corner and firing forward when the Multiviola hits Samus, if it is moving downwards towards Samus. Very quickly jump and morph to place a bomb against the bomb blocks. Or break the crumble blocks and use SpringBall to jump again to place the bomb. Then jump again while the Multiviola is still frozen to clip through. Requires: "h_heatProof"
"canPreciseCeilingClip"
"canTrickyUseFrozenEnemies"
{
"enemyDamage": {
"enemy": "Multiviola",
"type": "contact",
"hits": 1
}
}
{
"obstaclesNotCleared": [
"A"
]
}
"h_canUseMorphBombs"
{
"or": [
"h_canUseSpringBall",
"can4HighMidAirMorph"
]
}
Clears obstacles: B |
|
From: 9
Junction Below Crumble Blocks, Set Up to Clip
To: 4
Junction Below Bomb Blocks
Notable: true
Ice Clip through the crumble blocks using a Multiviola from the bottom of the room and then Crumble Jump to clip through the bomb blocks. The ice clip can be setup by standing in a corner and firing forward when the Multiviola hits Samus, if it is moving downwards towards Samus. Break the bomb blocks with a Power Bomb before bringing the Multiviola up for the clip. Requires: "h_heatProof"
"canPreciseCeilingClip"
"canTrickyUseFrozenEnemies"
{
"enemyDamage": {
"enemy": "Multiviola",
"type": "contact",
"hits": 1
}
}
{
"or": [
"h_canUsePowerBombs",
{
"obstaclesCleared": [
"A"
]
}
]
}
Clears obstacles: A |
|
From: 9
Junction Below Crumble Blocks, Set Up to Clip
To: 4
Junction Below Bomb Blocks
Notable: true
Ice Clip through the crumble blocks using a Multiviola from the bottom of the room and then Crumble Jump to clip through the bomb blocks. The ice clip can be setup by standing in a corner and firing forward when the Multiviola hits Samus, if it is moving downwards towards Samus. Jump and aim down to break the crumble blocks. Then quickly spinjump to break the bomb blocks with Screw Attack. Requires: "h_heatProof"
"canPreciseCeilingClip"
"canTrickyUseFrozenEnemies"
{
"enemyDamage": {
"enemy": "Multiviola",
"type": "contact",
"hits": 1
}
}
"ScrewAttack"
{
"obstaclesNotCleared": [
"A"
]
}
Clears obstacles: B |
|
Freeze an Atomic at a precise distance below the door in order to jump up and clip through the door shell. The pixel window is larger and higher with Morph and an X-Ray stand-up. Requires: "f_DefeatedPhantoon" "canTrickyUseFrozenEnemies" "h_canNonTrivialCeilingClip" Bypasses door shell: true |
|
From: 1
Top Door
To: 1
Top Door
Freeze an Atomic at a precise distance below the door in order to crouch-jump up and clip through the door shell. The pixel window is larger and higher with Morph and an X-Ray stand-up, in which case a standing jump is used. If Phantoon is not defeated, freeze a Covern as high as possible, then jump and down-grab onto it and Samus will stand up. Requires: "canTrickyUseFrozenEnemies" "h_canNonTrivialCeilingClip" Bypasses door shell: true |
|
Notable: true 

Jump on the Snail when it is at a precise location, and then crouch jump through the ceiling and jump again, without moving between jumps. The Snail's positioning is very precise, but it is more lenient with Morph and an X-Ray Turn Around. X-Ray can also be useful for helping position the Snail. Requires: "h_canNonTrivialCeilingClip" "Gravity" |
|
Notable: true
Jump on the Snail when it is at a precise location, and then crouch jump through the ceiling and jump again, without moving between jumps. The Snail's positioning is very precise, but it is more lenient with Morph and an X-Ray Turn Around. X-Ray can also be useful for helping position the Snail. Requires: "h_canNonTrivialCeilingClip" "Gravity" |
|
From: 2
Bottom Right Door
To: 2
Bottom Right Door
Notable: true Crouch and freeze a Mochtroid to clip into the space behind the grapple blocks. Jump and tap grapple while aiming diagonally to be pushed into the wall just the right amount. Samus should be one tile below the grapple blocks and fully in the wall. Too short a tap and the next grapple will not work, too long and Samus will be stuck in the wall. Grapple diagonally again to be pushed into the transition. Requires: {
"or": [
{
"and": [
"Gravity",
"canUseFrozenEnemies",
"canCeilingClip"
]
},
{
"and": [
"canTrickyUseFrozenEnemies",
"h_canNonTrivialCeilingClip"
]
}
]
}
"canGrappleClip"
Bypasses door shell: true |
|
Notable: true 
Shoot the shot block in the middle of the room, to allow a global Sciser (crab) to pass to the top part of the room. Use Ice to climb the Scisers to the top of the room. Shoot a Super as a Sciser crawls near the top door, then freeze it mid-air and use it to clip up past the door shell. If you don't have Morph and X-Ray, you must shoot the Super while the Sciser is on a block next to the door, not on the door itself. Requires: {
"ammo": {
"type": "Super",
"count": 1
}
}
"canTrickyUseFrozenEnemies"
{
"or": [
"h_canXRayCeilingClip",
{
"and": [
"Gravity",
"canPreciseCeilingClip"
]
}
]
}
Bypasses door shell: true |
|
From: 3
Junction Below Right Door
To: 2
Right Door
Notable: true 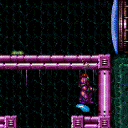
Freeze the puyo at the start of its jump animation, on the right frame. Requires: "Gravity" "canPreciseCeilingClip" "canTrickyUseFrozenEnemies" |
|
From: 3
Junction Below Right Door
To: 2
Right Door
Notable: true 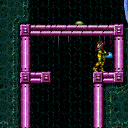
Positioning the Puyo requires it to perform a big jump then start falling with a frame perfect freeze. One possible setup stands on the left tile of the right side and lets the puyo jump up taking a contact hit. Then so long as the puyo isn't on the very edge, it will do a big jump. Clip onto the puyo by doing an aim down jump and switching to a forward diagonal at the right time. Requires: "canSuitlessMaridia"
"h_canNonTrivialCeilingClip"
"canTrickyUseFrozenEnemies"
{
"enemyDamage": {
"enemy": "Puyo",
"type": "contact",
"hits": 8
}
}
|