canInsaneWalljump (Extreme)
A wall jump with extreme precision, in the vicinity of pixel and frame perfect precision. These jumps are typically delayed wall jumps.
Dependencies: canDelayedWalljump, canPreciseWalljump
Strats ()
|
It's a delayed walljump while the water is low, followed by a tight walljump off the bridge. This strat is easily bypassed by jumping through the door, or if the door can be opened. Requires: "canSuitlessMaridia" "canInsaneWalljump" |
|
From: 1
Bottom Left Door
To: 3
Hidden Ceiling Item
Notable: true 
Triple frame perfect dashing stationary spinjump into delayed CWJ and precise hitbox manipulation. Requires: "canCWJ" "canInsaneWalljump" "canStationarySpinJump" |
|
From: 4
Small Ledge Below Left Door
To: 1
Left Door
Notable: true 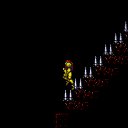

Jump to the door leading to X-Ray either by jumping from spikes or with a very precise jump. Cross the room by Jumping atop the spikes. Taking enemy damage can be used to reduce some spike damage. The final jump can either be made by jumping from the bottommost spike stair or from the safe stair. Setup run speed atop the spike stair by holding forward to be pushed backward. The safe stair jump is much harder, but can be made without every pixel of runway. Requires: "HiJump"
"canTrickyJump"
{
"or": [
{
"and": [
"canInsaneWalljump",
"canInsaneJump",
"h_canBackIntoCorner"
]
},
{
"and": [
{
"spikeHits": 1
},
"canPreciseWalljump",
"canIframeSpikeJump"
]
}
]
}
|
|
From: 9
Main Junction
To: 1
Left Side - Top Door
This is the same size of ledge as writg, so it should be equally possible. Requires: "canInsaneWalljump" |
|
From: 3
Bottom Left Junction
To: 2
Right Door
Notable: true 
Use a very well timed and precise walljump into morph to hit the global Sova so that the damage bonks Samus up to the door ledge. Aim for the lowest part of slope looking wall tile, where it does not look possible to make contact with a walljump, and fully delay the jump. To try again, the Sova loops to the left side wall. Or a Super can knock it off the wall to climb the right side again. Requires: "canInsaneWalljump"
"Morph"
"canNeutralDamageBoost"
{
"enemyDamage": {
"enemy": "Sova",
"hits": 1,
"type": "contact"
}
}
{
"heatFrames": 1050
}
|
|
Notable: true 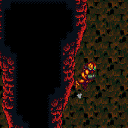
Jump into the spike pit, hitting the Ripper to avoid spike damage. Climb the left wall while avoiding falling onto the spikes or through the crumble blocks. The ledge is the same size of that in writg. Requires: "h_heatProof"
"canInsaneWalljump"
{
"or": [
"canIframeSpikeJump",
"canCrumbleJump"
]
}
{
"enemyDamage": {
"enemy": "Ripper 2 (green)",
"type": "contact",
"hits": 1
}
}
|
|
From: 2
Right Door
To: 3
Above Lava Junction
Notable: true 
BounceBall into the Lava, Unmorphing with good timing to sink faster and drift effeciently towards the bottom right Namihe. Walljump at about eye height (4 pixel window) to gain enough height to reach the center portion of ceiling. While rising, wiggle to shrink Samus' hitbox. Some walljump positions will not need to wiggle, when walljumping far away from the Namihe. Jumping, from the wall, around the next lowest overhang is very precise and taking any extra time to position will increase the amount of lava damage being taken. It may help to disable HiJump for this part. Then Walljump again to exit the Lava and reach the left ledge. Requires: "canSuitlessLavaDive"
"canUseEnemies"
"HiJump"
"canBounceBall"
"canMidairWiggle"
"canInsaneWalljump"
{
"lavaFrames": 392
}
{
"heatFrames": 515
}
|
|
From: 4
Lava, Left Wall
To: 3
Above Lava Junction
Notable: true 
Enter the Bottom-Left Namihe by Kagoing inside of it. Wait for a second hit to gain I-Frames and then very quickly walljump up the spikes and across to the right side wall. Requires: "canSuitlessLavaDive"
"canInsaneWalljump"
"canInsaneJump"
"canIframeSpikeJump"
"canStaggeredWalljump"
"canFastWalljumpClimb"
"canUseEnemies"
"canKago"
{
"heatFrames": 510
}
{
"lavaFrames": 480
}
{
"enemyDamage": {
"enemy": "Namihe",
"type": "kago",
"hits": 2
}
}
|
|
From: 4
Center Platform Junction
To: 3
Junction Left of Green Gate
Run and jump at the very edge of the center platform. Wait for the water level to begin lowering to walljump on the far edge. An airball may be a little easier. Requires: "canTrickyJump"
{
"or": [
"canLateralMidAirMorph",
"canInsaneWalljump",
{
"and": [
"SpeedBooster",
"canPreciseWalljump"
]
}
]
}
|
|
From: 5
Junction Above Bottom Blocks with Top Blocks Broken
To: 3
Top Right Door
Notable: true 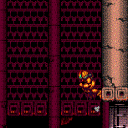
Position yourself in the door way a few pixels from the edge. Dashing stationary spinjump into a delayed CWJ and hopefully catch the upper ledge with a walljump. Requires: "h_heatProof"
"HiJump"
"canCWJ"
"canStationarySpinJump"
"canInsaneJump"
"canInsaneWalljump"
{
"doorUnlockedAtNode": 2
}
|
|
From: 3
Top Right Door
To: 2
Bottom Left Door
Notable: true 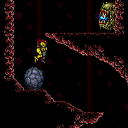
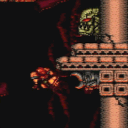
An extremely precise spinjump or walljump can avoid the top Boulder. The spinjump requires dash state and to jump right away. Aiming down shortly after helps by reducing Samus' hitbox. Requires: {
"or": [
"canInsaneWalljump",
"canTrickyJump"
]
}
|
|
From: 5
Junction Below Top Pirate
To: 1
Top Left Door
Requires: "h_canNavigateHeatRooms"
"canWallJumpInstantMorph"
"canTrickyJump"
"canInsaneWalljump"
{
"heatFrames": 290
}
|
|
From: 5
Junction Below Top Pirate
To: 3
Top Right Door
Requires: "h_canNavigateHeatRooms"
"canInsaneWalljump"
"canWallJumpInstantMorph"
"canTrickyJump"
{
"heatFrames": 160
}
|
|
From: 6
Bottom Platform Junction With Pirates Killed
To: 4
Junction Above Bomb Blocks
Notable: true 
Break the bomb blocks in The Worst Room In The Game with extremely precise walljumps. Either with a fully delayed max height jump from the wall, or with an instant turnaround after jumping from the lower layer of bomb blocks. Requires: "h_heatProof" "HiJump" "ScrewAttack" "canInsaneWalljump" "canInsaneJump" "canConsecutiveWalljump" "canMidairWiggle" Clears obstacles: A |
|
From: 6
Bottom Platform Junction With Pirates Killed
To: 4
Junction Above Bomb Blocks
Requires: "canInsaneWalljump"
"canConsecutiveWalljump"
"h_heatProof"
{
"or": [
"h_canUsePowerBombs",
{
"obstaclesCleared": [
"A"
]
}
]
}
Clears obstacles: A |
|
From: 2
Right Door
To: 4
Junction Above Bomb Block
Run into the acid to quickly jump over the first pillar. Build speed and jump over the second pillar to mockball through the tunnel without taking much acid damage. Entrance condition: {
"comeInRunning": {
"minTiles": 3,
"speedBooster": "any"
}
}
Requires: "h_canNavigateHeatRooms"
"canMockball"
"HiJump"
"SpeedBooster"
"canCarefulJump"
"canWalljump"
{
"or": [
"canInsaneWalljump",
{
"acidFrames": 30
}
]
}
{
"heatFrames": 310
}
{
"acidFrames": 5
}
|
|
Notable: true 
Perform a running stationary spinjump from a precise spot, then a CWJ with slightly more speed off the wall one tile further out. This makes it possible to just barely walljump off the grapple block. Requires: "HiJump" "canInsaneJump" "canStationarySpinJump" "canConsecutiveWalljump" "canInsaneWalljump" "canCWJ" Clears obstacles: B |
|
From: 7
Lower Hills Junction
To: 10
Upper Right Ledge Junction
There is a ridiculously precise, but possible, walljump to get up there. With and without HiJump is equally difficult. Requires: "Gravity" "canInsaneWalljump" Clears obstacles: A, B |
|
From: 1
Top Sand Entrance
To: 4
Right Item
Notable: true 
Walljump up and instant morph with exact timing and positioning so as to enter the Power Bomb location through the maze's exit. Requires: "canSuitlessMaridia" "canConsecutiveWalljump" "canPlayInSand" "HiJump" "canInsaneWalljump" "can3HighWallMidAirMorph" |
|
Lead the wallpirate into jumping across the room and dodge the standing pirate. Requires: "canInsaneWalljump" "canConsecutiveWalljump" |
|
From: 3
Central Junction with all Standing Pirates Killed
To: 1
Top Left Door (locked)
This is the same size of ledge as writg. Requires: "canInsaneWalljump" "canConsecutiveWalljump" |
|
From: 2
Bottom Door
To: 4
Water Level Junction
Do a low spin jump and press against the right side of the door frame. Wall jump as low as possible, jumping as soon as possible after moving away from the wall. Immediately turn back to the right and try to press against the door frame again before the transition, while maintaining spin. After the transition, typically a momentum-conserving turnaround is needed to avoid bonking. Entrance condition: {
"comeInWithWallJumpBelow": {
"minHeight": 2
},
"comesThroughToilet": "no"
}
Requires: "canCrossRoomJumpIntoWater"
{
"or": [
"canInsaneWalljump",
{
"and": [
"canPreciseWalljump",
"canMomentumConservingTurnaround"
]
}
]
}
|
|
Notable: true Align with the wall below the door while facing left. Hold dash, turn around, start running and arm pump once. Jump from the rightmost 'X' in the background. Release forward at some point while airborne, but repress it again before the CWJ. Immediately after the CWJ, shoot the Metroid to avoid getting grabbed. Requires: "canCWJ"
"canInsaneWalljump"
{
"or": [
{
"obstaclesCleared": [
"A"
]
},
"canDodgeWhileShooting"
]
}
|